WEEK 8: EMBEDDED PROGRAMMING
INDIVIDUAL ASSIGNMENT:
READ ATTINY44 DATA SHEET AND ARCHITECTURES.
This week the goal of the assignment was to study embedded programming. Embedded Programming is programming of the microcontroller. This is primarily done in embedded C. Embedded C is the lowest level of the programming language. This week to study embedded programming I programmed my hello world board. My Hello world board contains Attiny44 which made by Atmel. Following is the data sheet of it.
READING A DATASHEET ATTINY44
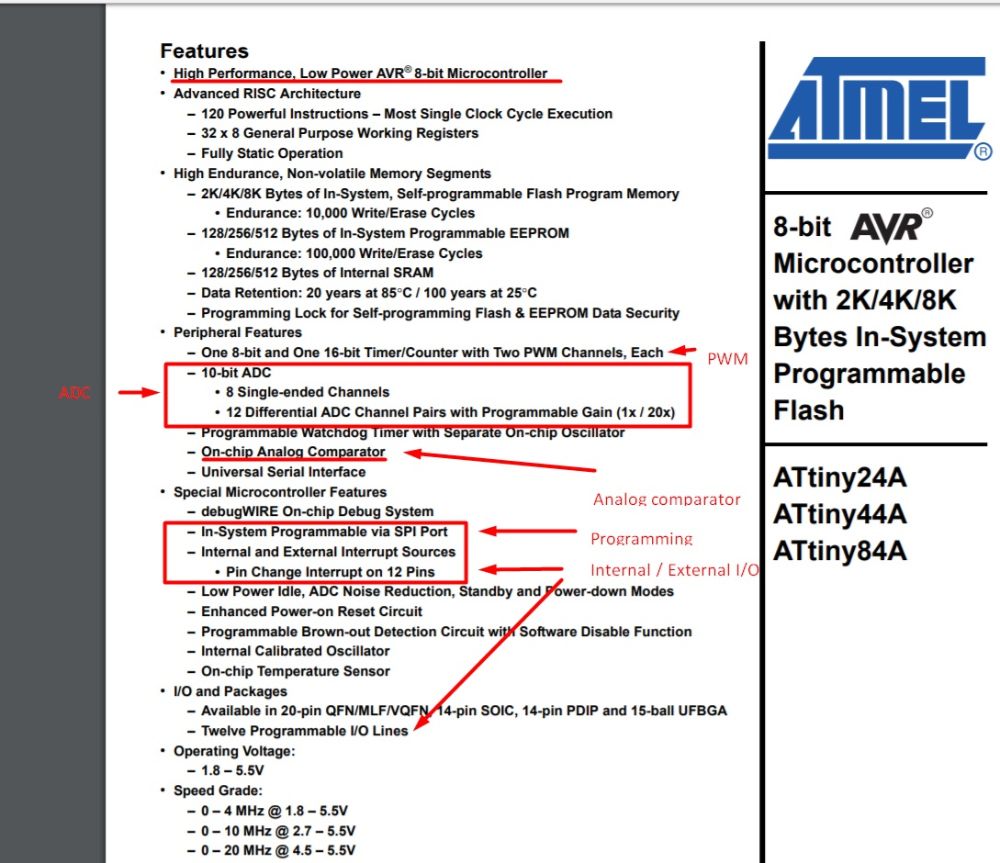
The ATTINY44 is a low power AVR® 8-bit microcontroller based on the RISC architecture.It have 12 GPIO pin's. The Atmel ATtiny24/44/84 provides the following features: 2/4/8K bytes of in-system programmable flash, 128/256/512 bytes EEPROM, 128/256/512 bytes SRAM, 12 general purpose I/O lines, 32 general purpose working registers, an 8-bit Timer/Counter with two PWM channels, a 16-bit Timer/Counter with two PWM channels, internal and external interrupts, an 8-channel 10-bit ADC, programmable gain stage (1x, 20x) for 12 differential ADC channel pairs, a programmable watchdog timer with internal oscillator, internal calibrated oscillator, and three software selectable power saving modes. The best way to know about a microcontroller and Instruction set is reading its Datasheet.we will get all the information from the Datasheet , only problem is that its not beginner friendly.
I started Reading ATtiny44 Datasheet that I got from the Micorchip's website as it was a part of the assignment this week..
SPECIFICATIONS
Name |
Value |
|---|---|
Program Memory Type |
Flash |
Program Memory Size (KB) |
4 |
CPU Speed (MIPS/DMIPS) |
20 |
SRAM Bytes |
256 |
Data EEPROM/HEF (bytes) |
256 |
Digital Communication Peripherals |
1-SPI, 1-I2C |
Capture/Compare/PWM Peripherals |
1 Input Capture, 1 CCP, 4PWM |
Timers |
1 x 8-bit, 1 x 16-bit |
Number of Comparators |
1 |
Temperature Range (C) |
-40 to 85 |
Operating Voltage Range (V) |
1.8 to 5.5 |
Pin Count |
14 |
ARCHITECTURE
The ATTINY44 runs with the RISC Architecture. RISC or reduced instruction set computer is a computer which only uses simple commands that can be divided into several instructions which achieve low-level operation within a single CLK cycle, as its name proposes “Reduced Instruction Set”.
It's performance is optimized with more focus on software. RISC mainly Used in Microcontroller.
The Block Diagram for the ATTINY44, according to the datasheet has four main sections,
The ALU
Timer/RAM/Counter/EEPROM
The Data Registers
and The Programming interface
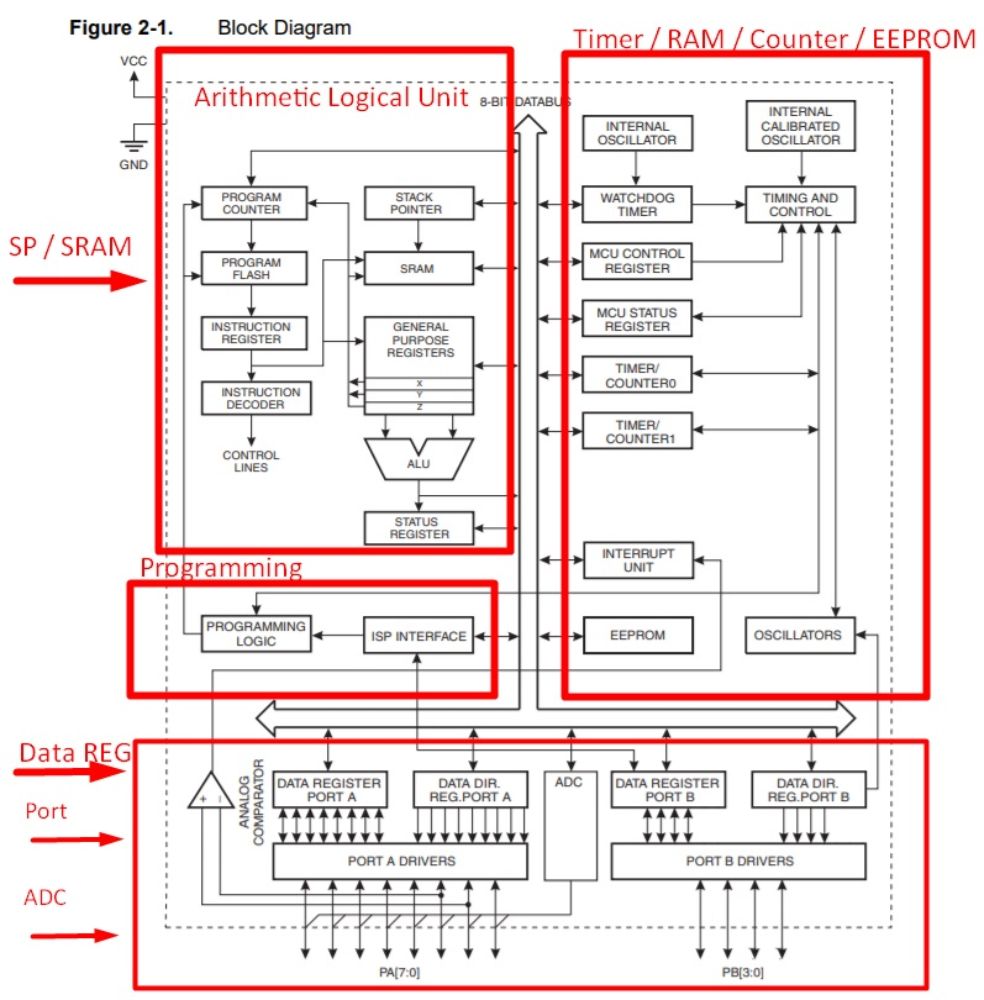
This is the Architecture of Attiny44.
ALU UNIT
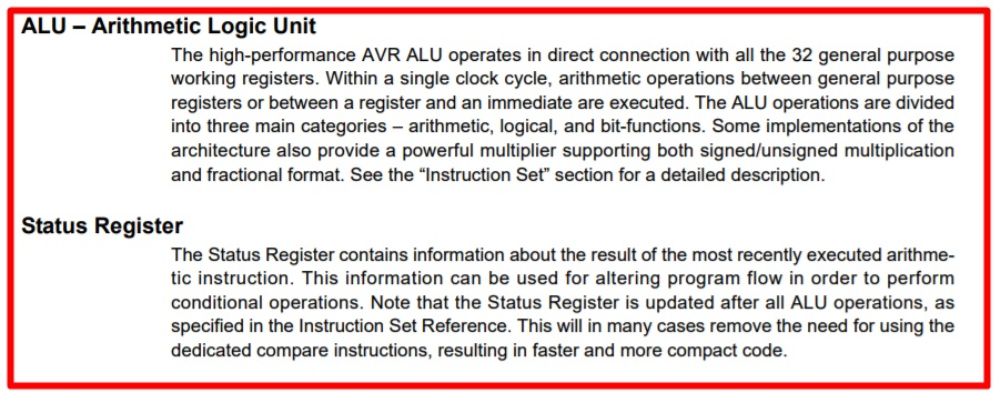
The ALU - Arithmetic Logic Unit - operations are divided in some categories like: arithmetic, logical and bit-functions. Status register contains the most recently executed arithmetic instruction.
TIMER & COUNTER
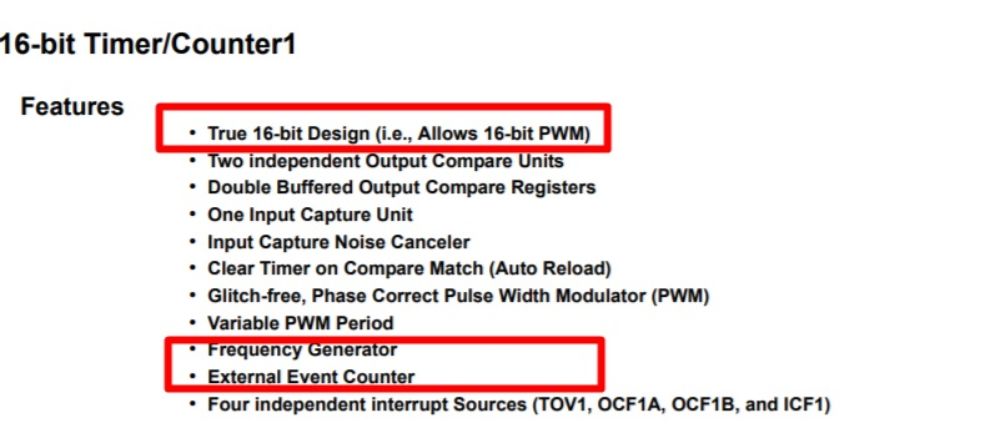
The main features of the timer - counter are above
ADC CHARACTERSTICS

The ADC table characteristic are defined above in the table.
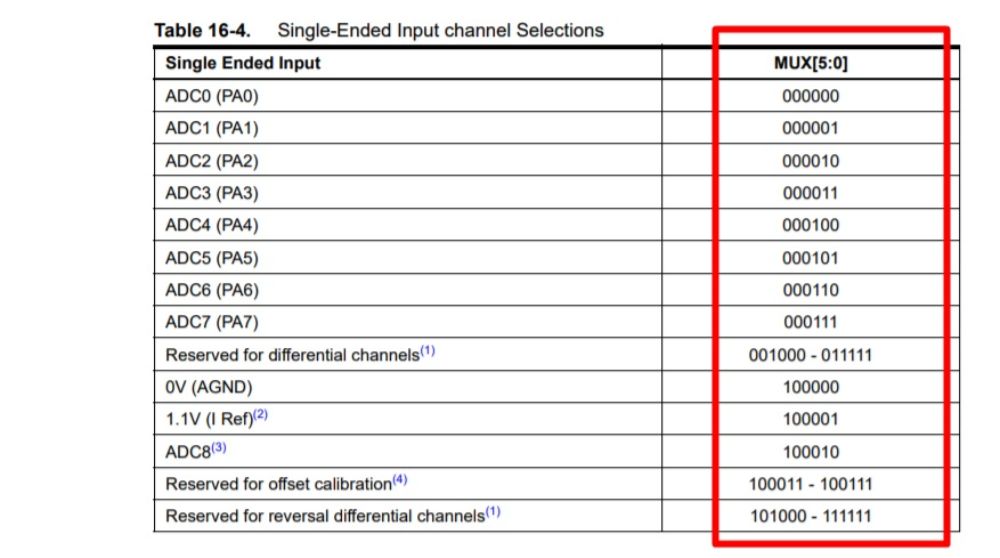
In order to choose an ADC, you need to choose multiplexers according to this table.
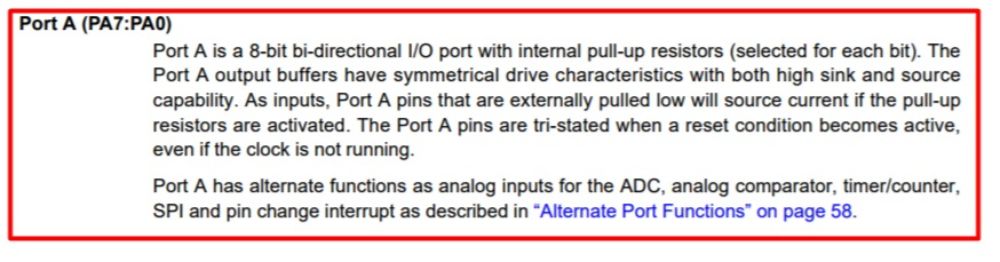
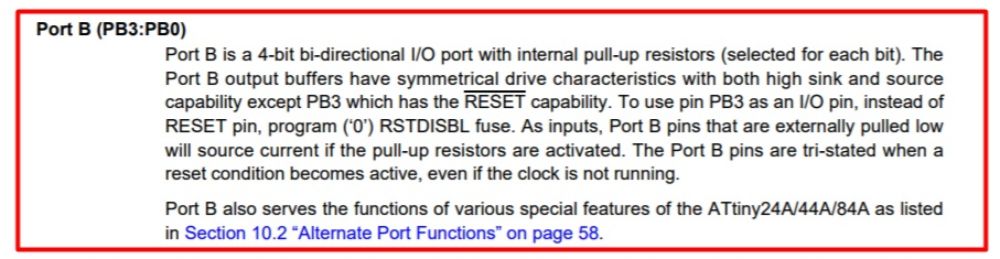
PIN DISCRIPTIONS
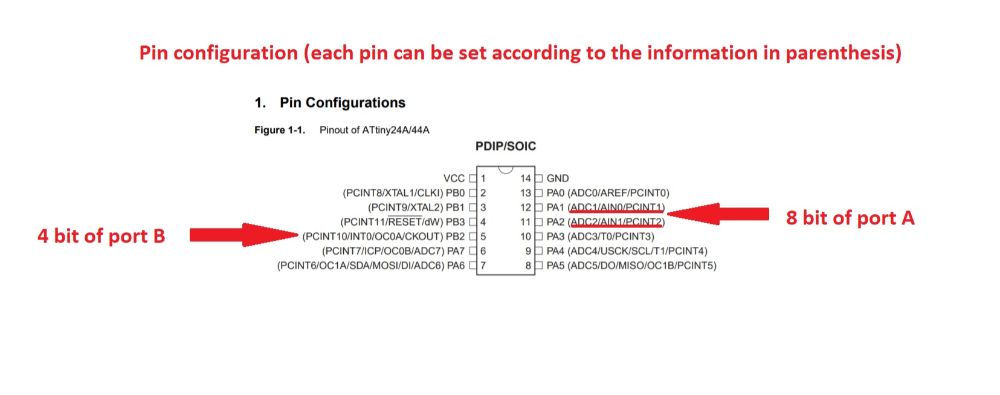
Port A Configuration:
Port B Configuration:
PROGRAMMING USING ARDUINO
The Arduino board is connected to a computer via USB, where it connects with the Arduino development environment (IDE). The user writes the Arduino code in the IDE, then uploads it to the microcontroller which executes the code, interacting with inputs and outputs such as sensors, motors, and lights.
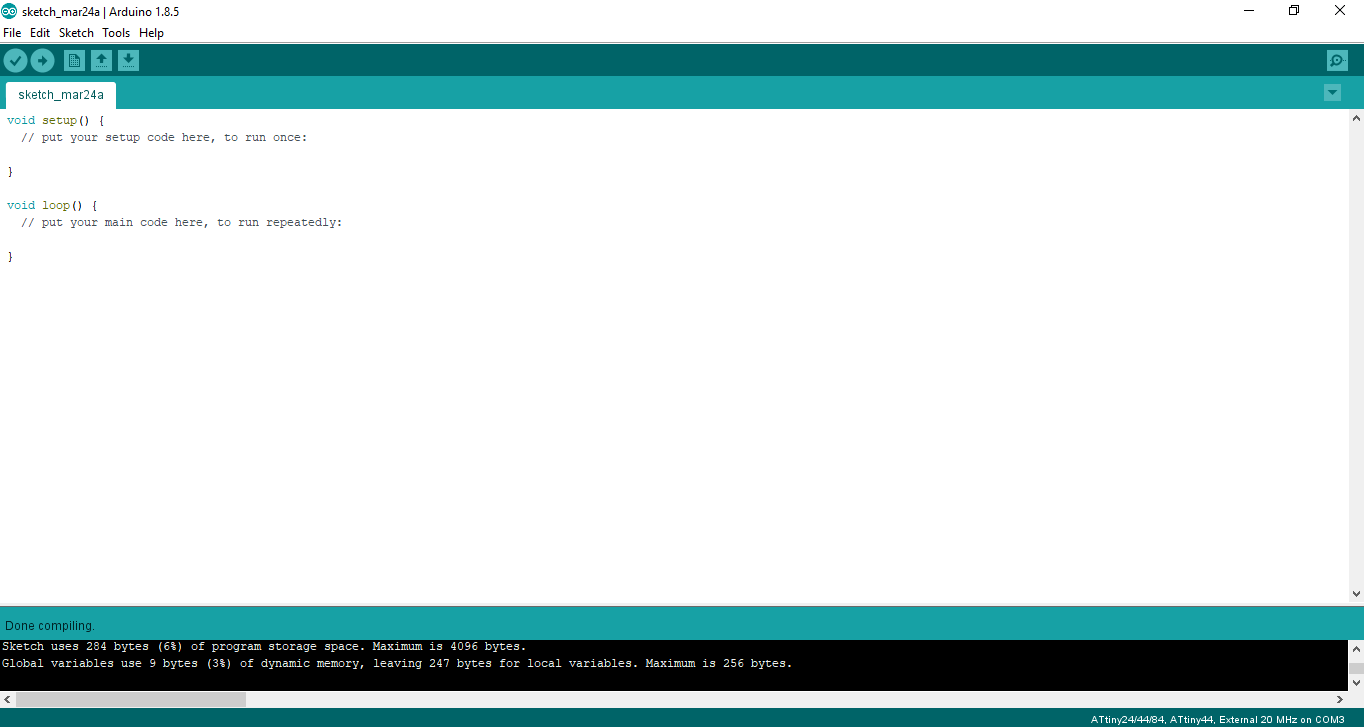
This is the main interface of the arduino when it starts. This is the most basic program i.e it called a blank sketch .
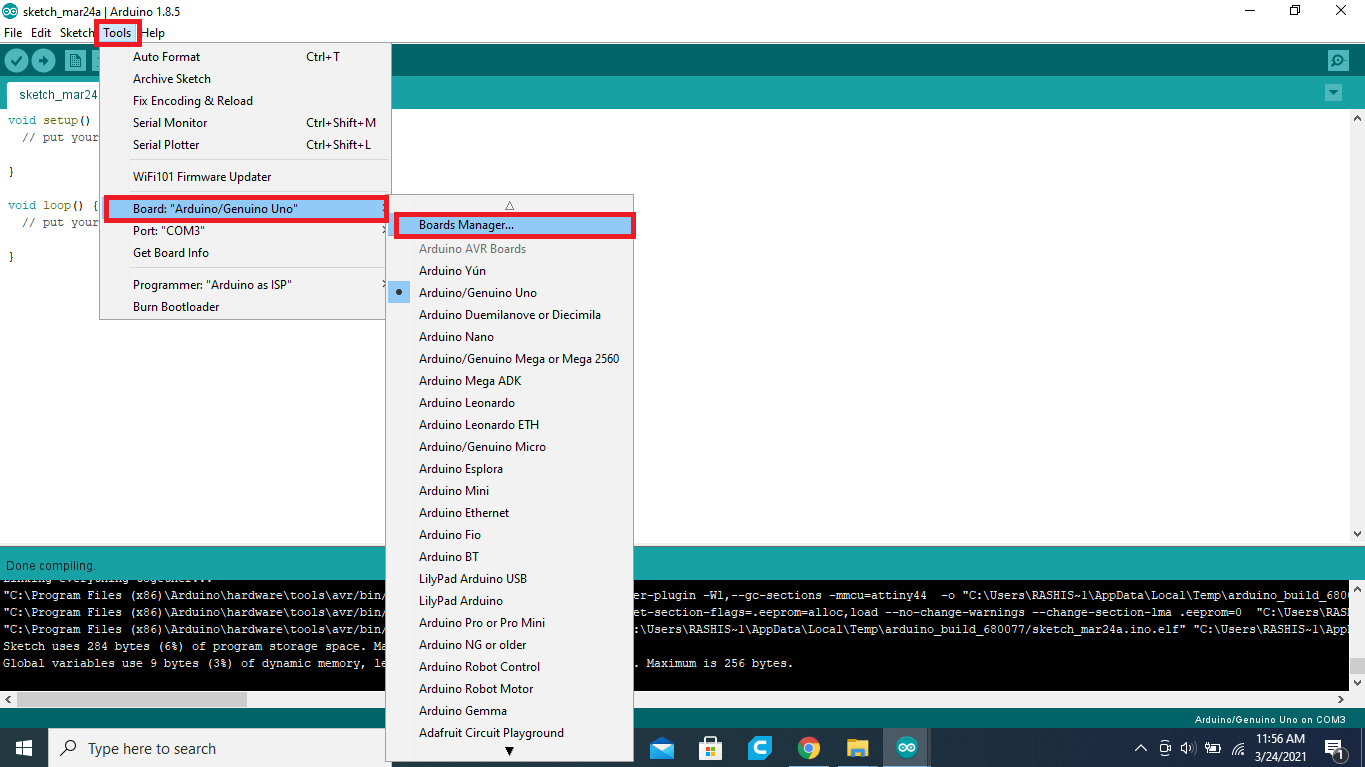
This is the board manager which can be accessed using tools > boards > boards manager can be accessed .In this particular instance, to program Attiny 44 we need to add additional boards and programmers. This can be done using the following process

This is the dialog box which can be used to add additional boards in this case "Attiny by David A.Melle". This allows the user to add various IC's which are supported in the Arduino Environment .
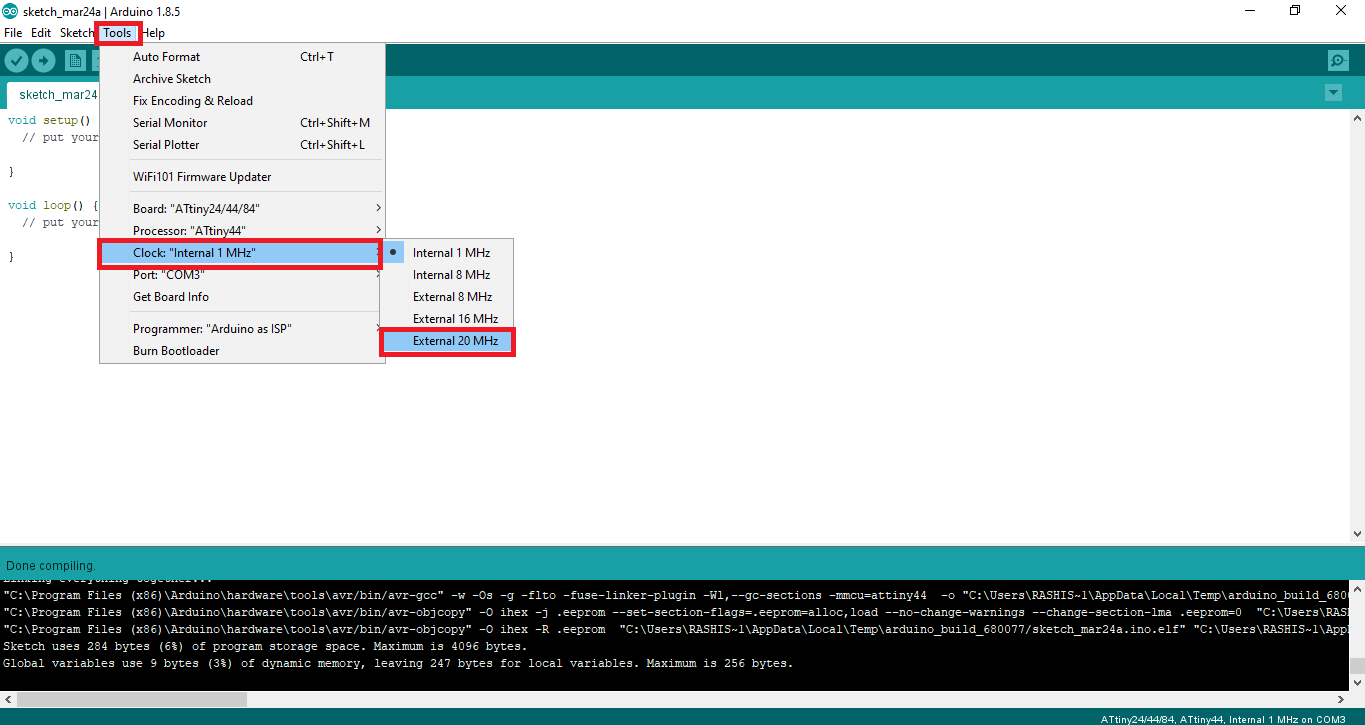
Choose the configuration of the IC which you want to use. Clicking here we can access the various boards and programmer options which are available inside the arduino environment.

These programmers have small differences which can result in errors if chosen incorrectly .
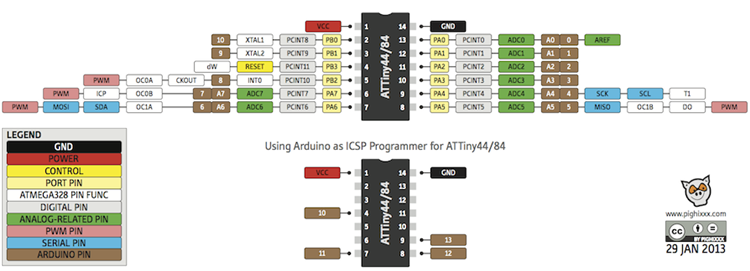
This is the pinout of the Attiny44 mapped with respect to the Arduino IDE.
LED BLINKING PROGRAMMING.
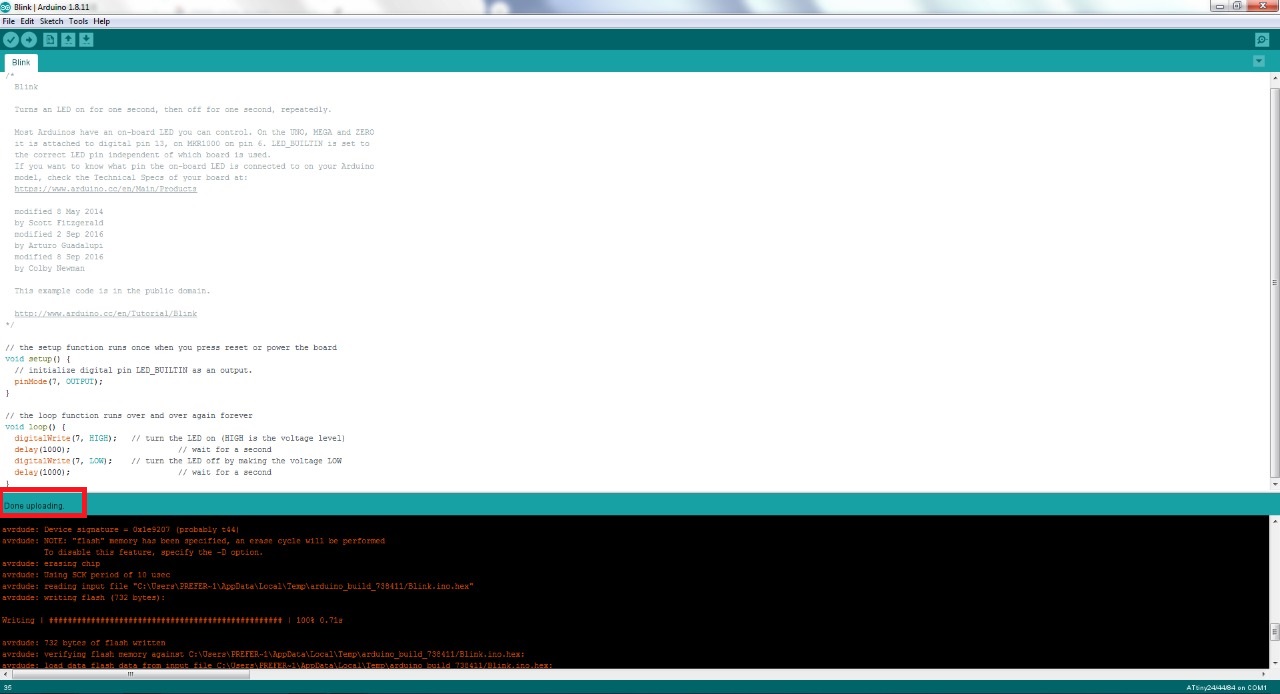
This is the code needed to make the led on the Arduino board blink.
PUSH BUTTON
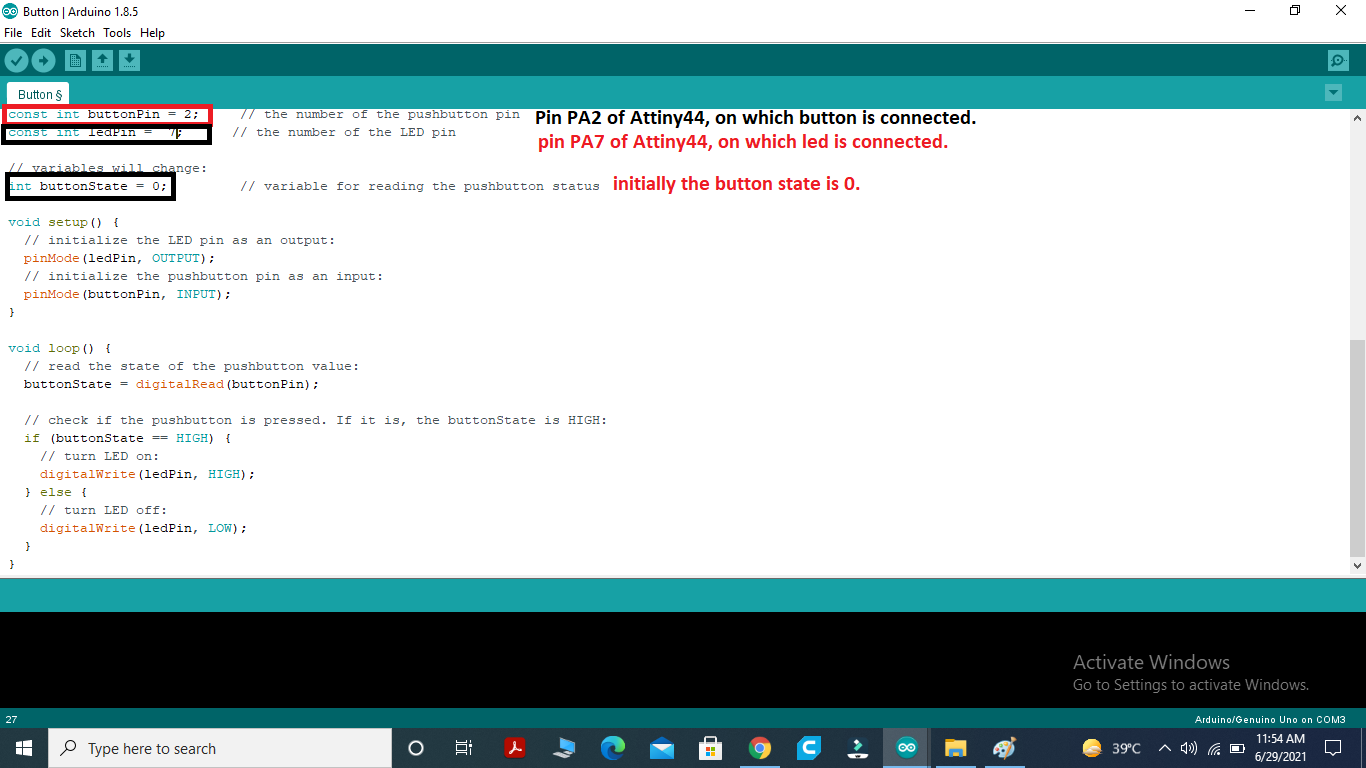
Here pin2 is connected with button and led is conneted with pin 7 of the Attiny44.
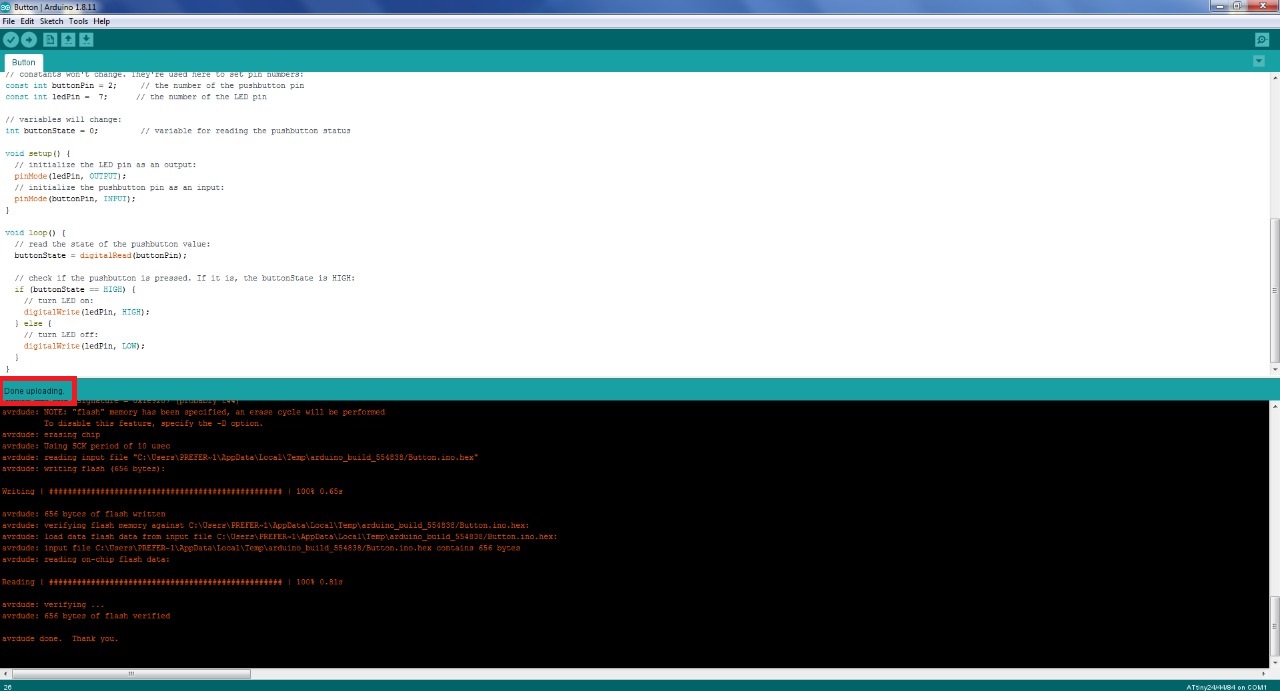
When the push button is pushed/pressed, this is the code that turns the led on and off.
PUSH BUTTON WITH DELAY
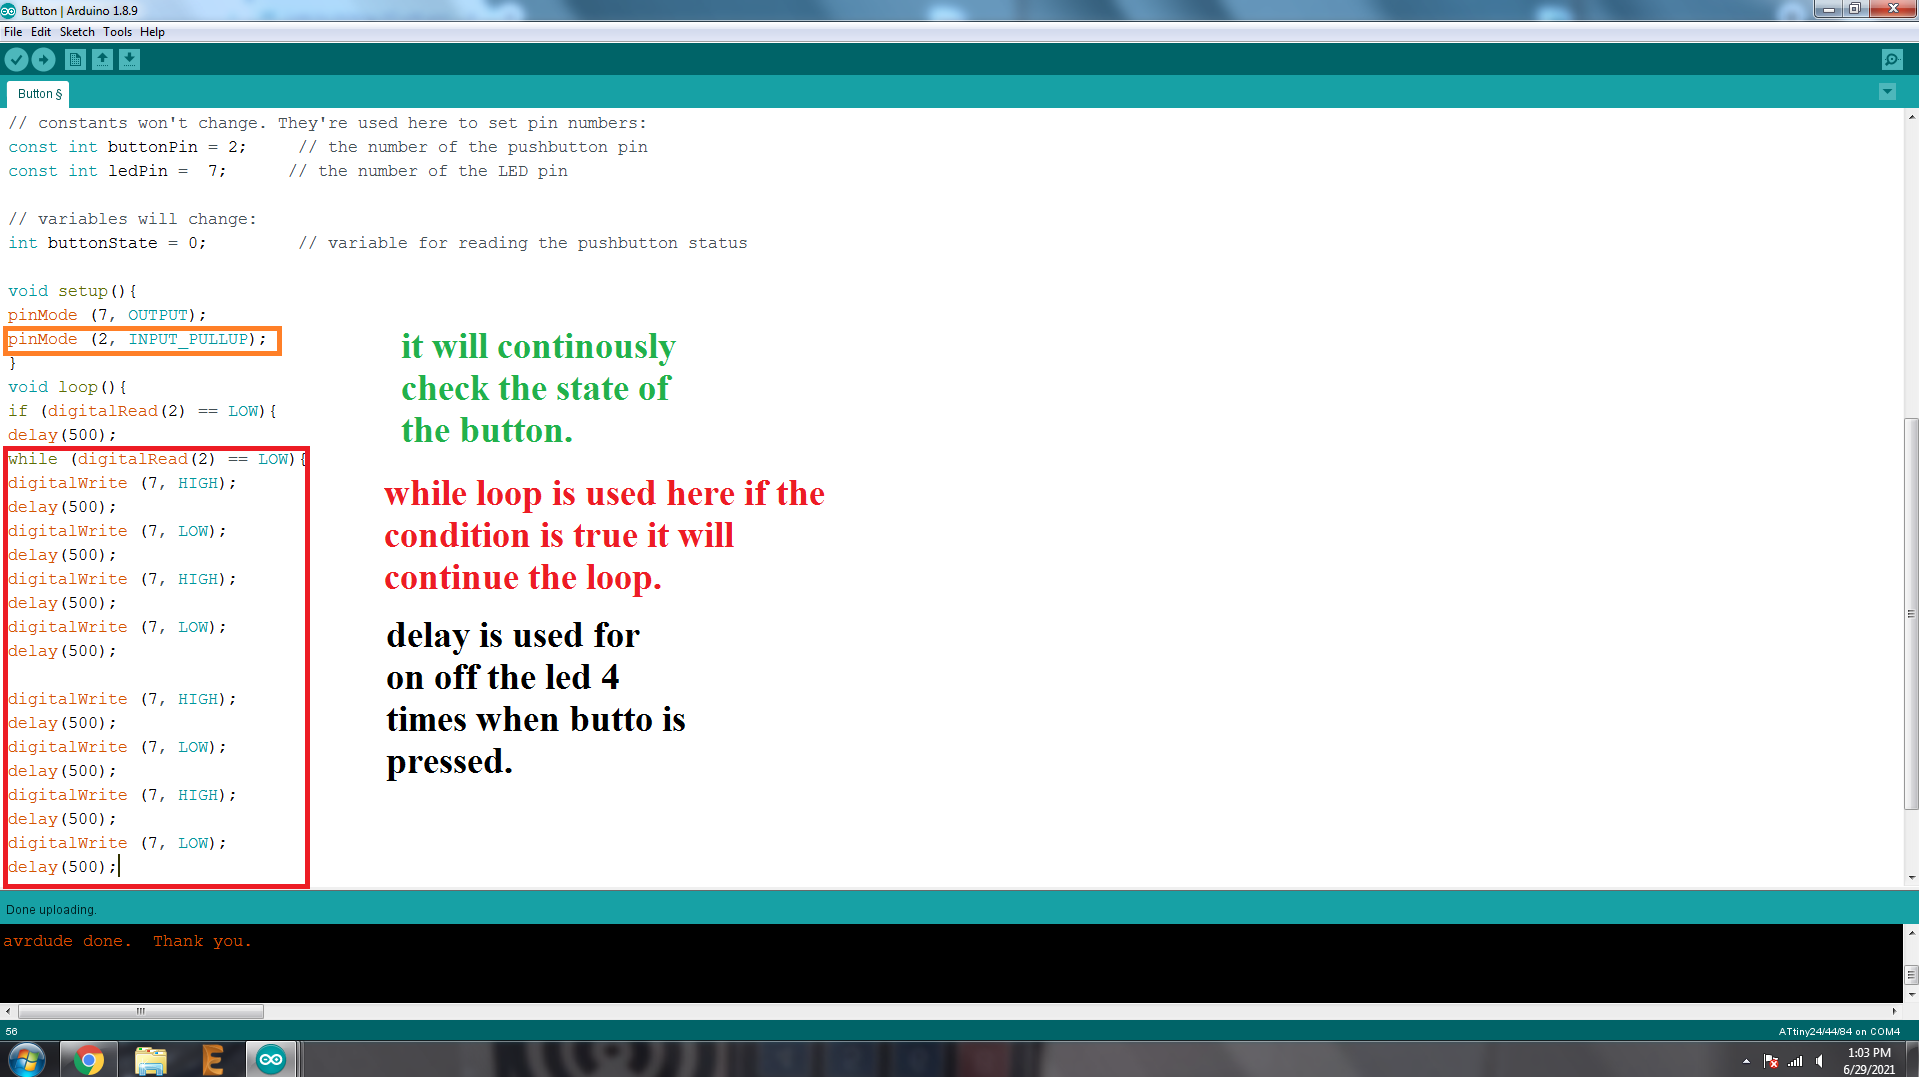
Here, I modified the code where I press the button led on/off 4 times with the delay of 500ms.
PROGRAMMING THE ATTINY44 WITH GCC C
AVR microcontrollers can be programmed using GCC C. I'll be using Atmel Studio as the IDE. Most of Neil's code is written in C, which I have been having a hard time understanding. Hopefully after tinkering with Atmel Studio a bit, I'll be able to write my onw C code.

Atmel Studio is free to download from Atmel's official website. Installation is straightforward but it takes a long time since it is based on visual studio.
USAGE
The Usage is not as straight forward as Arduino. First we have to create a project, we'll select a 'GCC C Executable Project' and for device, we'll select 'ATTINY44'.
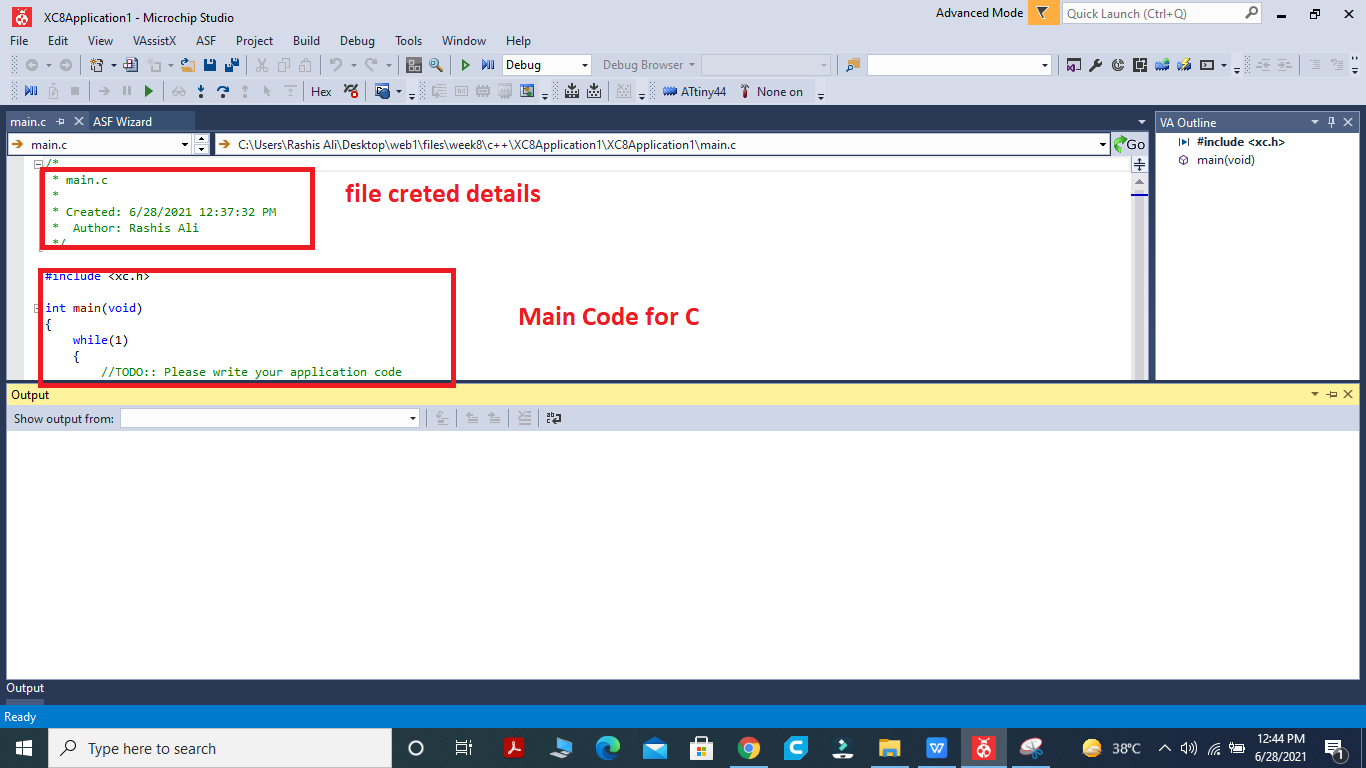
Atmel Studio UI
ADDING SUPPORT FOR THE FABISP:
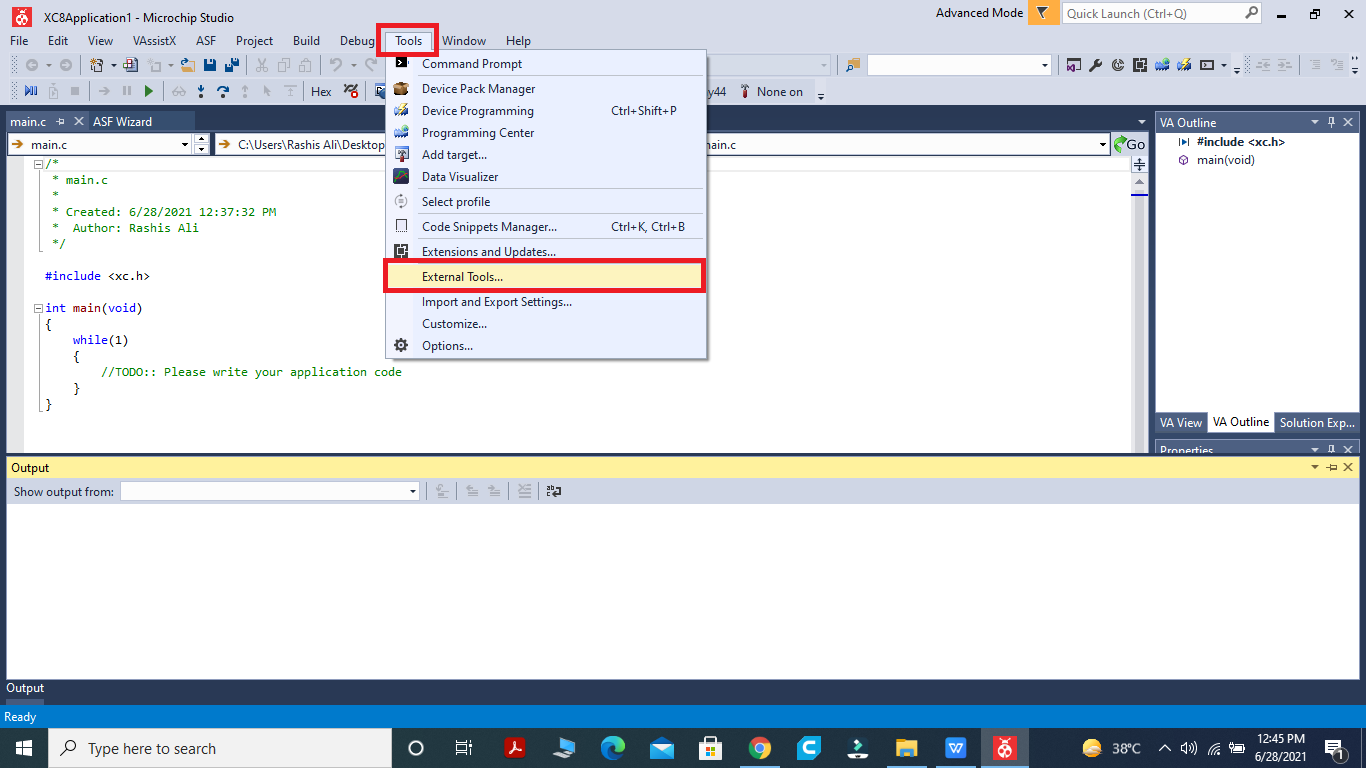
The FABISP needs to be added as an external tool to Atmel Studio if we want to use it to upload our code. Adding External Tool in Atmel Studio.
EXTERNAL TOOL SETTINGS FOR FABISP:
Title: USBTiny ISP.
avrdude.exe
-c usbtiny -p attiny44 -Uflash:w:"$(ProjectDir)Debug\$(TargetName).hex":i
** (avrdude path variable needs to be added)
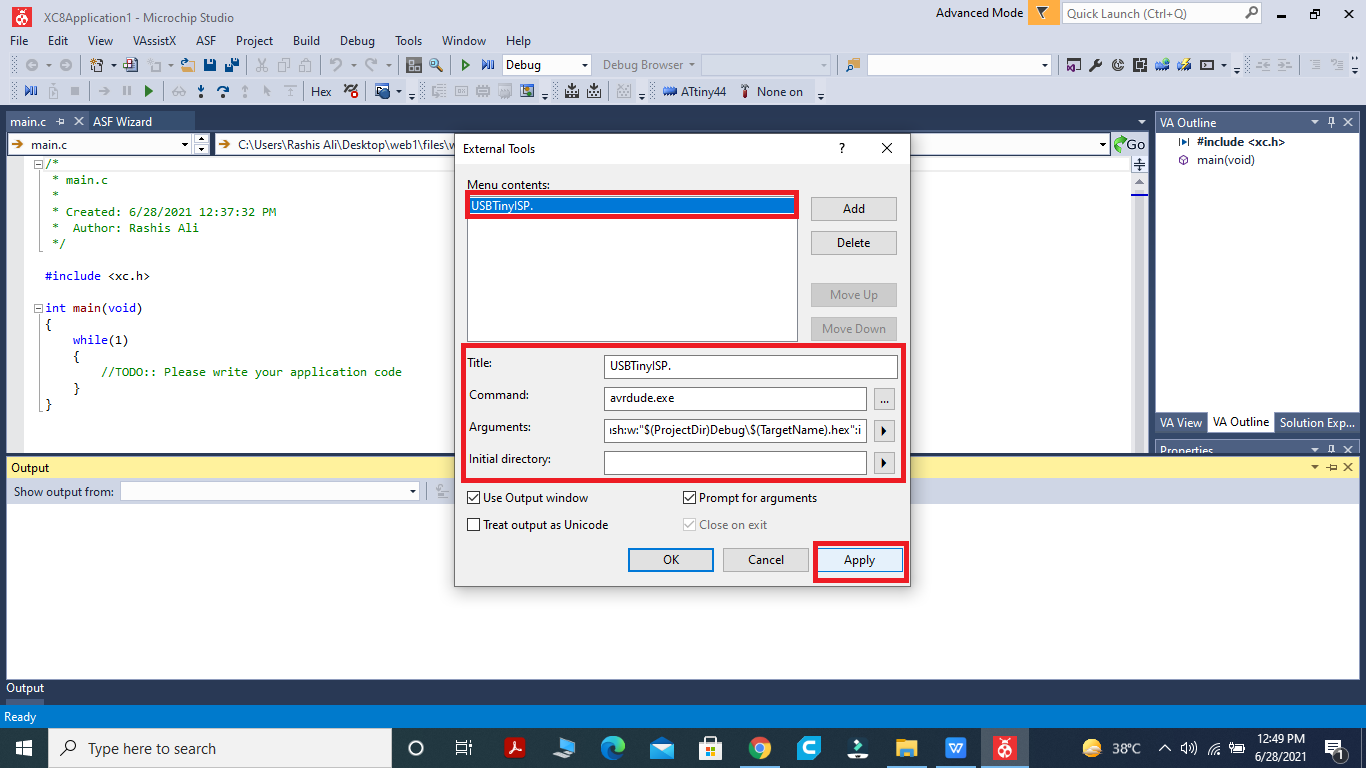
USBTiny ISP Settings for External Tool in Atmel Studio
A main.c tab is appear after setup new project. Main.c tab is used to write code. After writing code click on Build and select Build Solution or press F7.
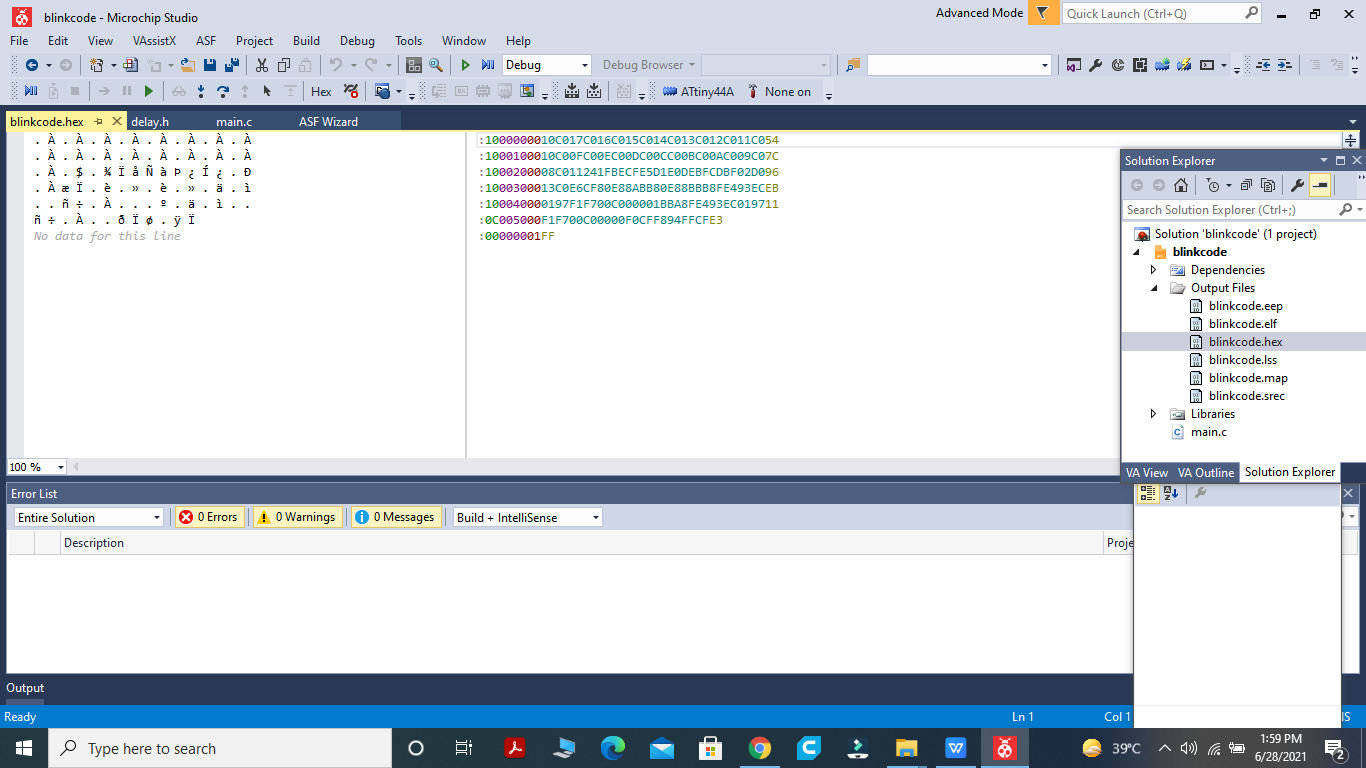
We need .hex file to upload it on board via avrdude. After building solution the .hex file is available at Solution Explorer tab > Output Files.
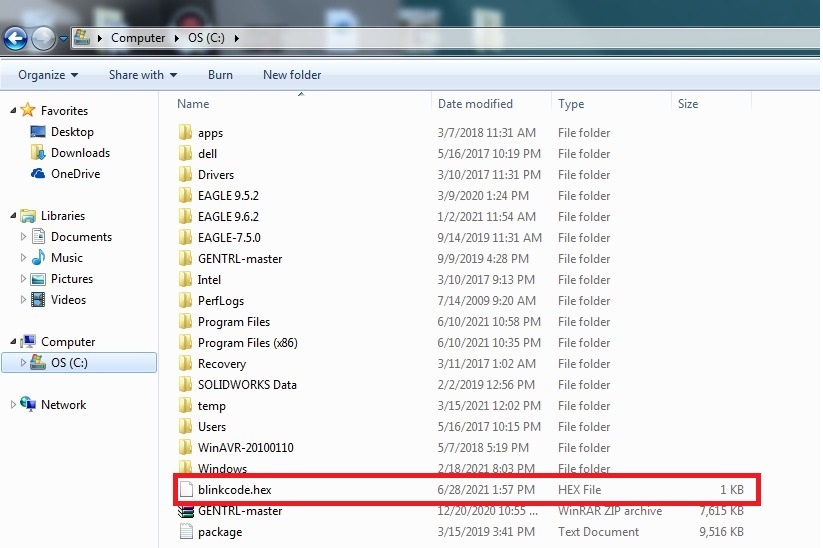
For simplification in command prompt I trace the .hex file and copy it in C-folder.
PROGRAMMING THE BOARD USING AVR DUDE.
After uploading the program using Arduino IDE, now we will do it using "avrdude". First we will download and install avrdude from Here. Once it is installed, now you need to perform folloiwng steps:
Search and open "View Advanced System settings"
Click on "Environment Variables"
From "System Variables", select "Path" and click "Edit"
The window that appears, click "New"
In the new field, write "C:/avrdude-6.3" and click "Ok"
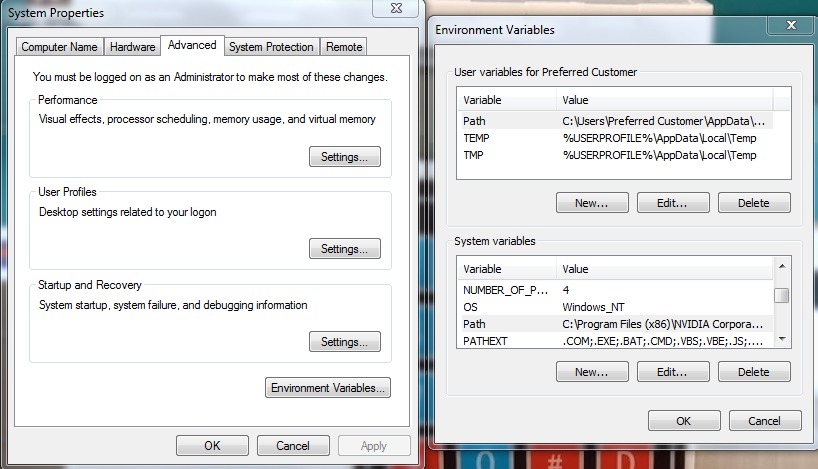
Steps to setup avrdude.
To check whether avrdude is installed successfully or not, go to "Command Prompt" and then to repective drive and write avrdude. If it is installed properly then you will have the following results in your command window:
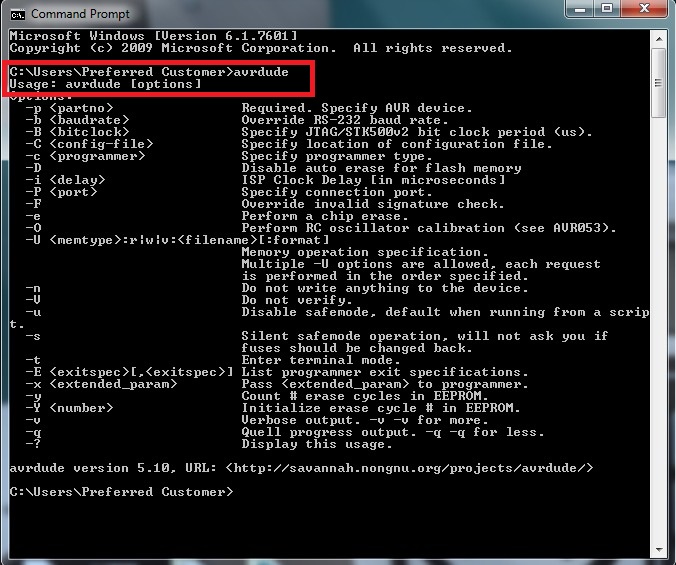
Result of avrdude successful setup
Now we will upload the .hex file that we copied previously from temporary files to the board using avr dude. For that we will first go to the directory where that hex file is copied using the "cd" and the complete directory address of that location. In my case that address is "C:\".
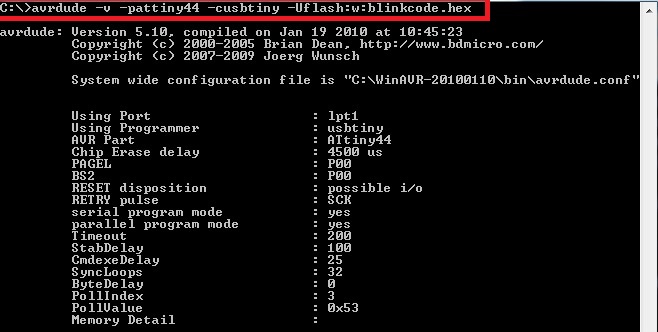
Since I am using ATtiny and my ISP programmer so I have used this (avrdude -v -pattiny44 -cusbtiny -Uflash:w:blinkcode.hex:i) command to upload the .hex file to the controller. You can also use this command if you are using these components as well.
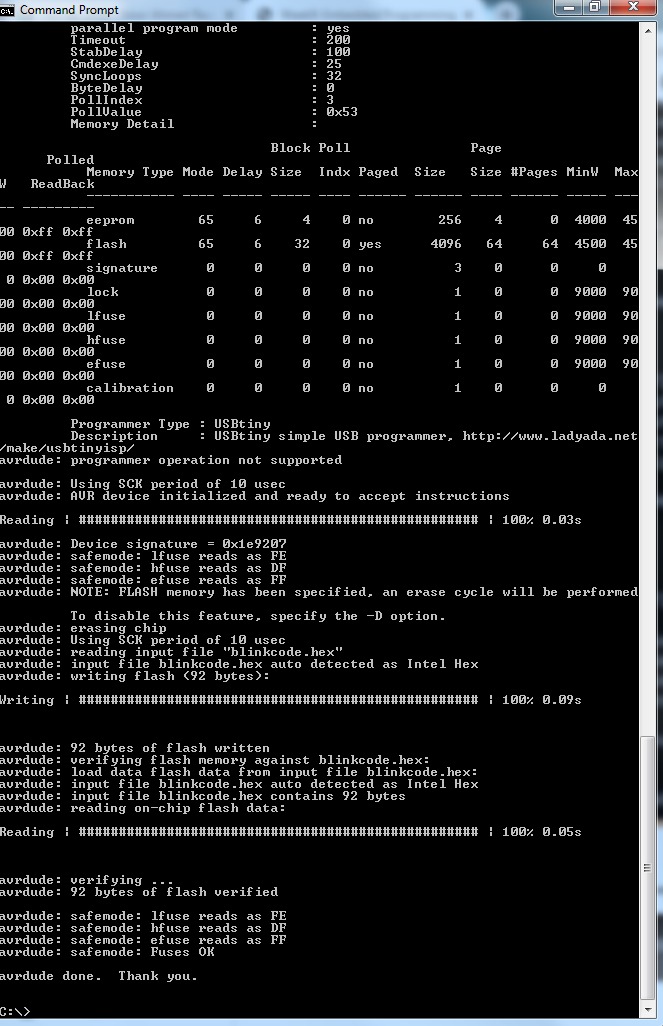
After writing the above mentioned commands you will have the results shown below, which means that you have successfully uploaded the code to your board using avrdude.
led is Blinking.
GROUP ASSIGNMENT:
READING DATA SHEET AND ARCHITECTURES.
WHAT IS THE DIFFERENCE BETWEEN 8051, PIC, AVR and ARM?
Nowadays, Microcontrollers are so cheap and simply obtainable that it is general to use them instead of easy logic circuits like counters for the sole reason of gaining some design flexibility and discount some space. Some machines and robots will even rely on a huge number of microcontrollers, each one enthusiastic to a confident task. Mainly fresh microcontrollers are ‘In System Programmable’ it means that you can be adjusting the program being executed, without removing the Microcontroller from its position. In this article we are discussing about the difference between AVR, ARM, 8051 and PIC Microcontrollers.
WHAT IS A MICROCONTROLLER?
A micro-controller can be comparable to a little stand alone computer; it is an extremely powerful device, which is able of executing a series of pre-programmed tasks and interacting with extra hardware devices.
Being packed in a tiny integrated circuit (IC) whose size and weight is regularly negligible, it is becoming the perfect controller for as robots or any machines required some type of intelligent automation. A single microcontroller can be enough to manage a small mobile robot, an automatic washer machine or a security system.
Several microcontrollers contains a memory to store the program to be executed, and a lot of input/output lines that can be a used to act jointly with other devices, like reading the state of a sensor or controlling a motor.
8051 MICROCONTROLLER?
8051 microcontroller is an 8-bit family of microcontroller is developed by the Intel in the year 1981. This is one of the popular families of microcontroller are being used all across the world.
This microcontroller was moreover referred as “system on a chip” since it has 128 bytes of RAM, 4Kbytes of a ROM, 2 Timers, 1 Serial port, and 4 ports on a single chip.
The CPU can also work for 8bits of data at a time since 8051 is an 8-bit processor. In case the data is bigger than 8 bits, then it has to be broken into parts so that the CPU can process easily. Most manufacturers contain put 4Kbytes of ROM even though the number of ROM can be exceeded up to 64 K bytes.
PIC MICROCONTROLLER?
Peripheral Interface Controller (PIC) is microcontroller developed by a Microchip, PIC microcontroller is fast and simple to implement program when we contrast other microcontrollers like 8051. The ease of programming and simple to interfacing with other peripherals PIC become successful microcontroller.
We know that microcontroller is an integrated chip which is consists of RAM, ROM, CPU, TIMER and COUNTERS. The PIC is a microcontroller which as well consists of RAM, ROM, CPU, timer, counter, ADC (analog to digital converters), DAC (digital to analog converter).
PIC Microcontroller also support the protocols like CAN, SPI, UART for an interfacing with additional peripherals.
PIC mostly used to modify Harvard architecture and also supports RISC (Reduced Instruction Set Computer) by the above requirement RISC and Harvard we can simply that PIC is faster than the 8051 based controllers which is prepared up of Von-Newman architecture.
AVR MICROCONTROLLER?
AVR microcontroller was developed in the year of 1996 by Atmel Corporation. The structural design of AVR was developed by the Alf-Egil Bogen and Vegard Wollan.
AVR derives its name from its developers and stands for Alf-Egil Bogen Vegard Wollan RISC microcontroller, also known as Advanced Virtual RISC.
The AT90S8515 was the initial microcontroller which was based on the AVR architecture, though the first microcontroller to hit the commercial market was AT90S1200 in the year 1997.
ARM PROCESSOR?
An ARM processor is also one of a family of CPUs based on the RISC (reduced instruction set computer) architecture developed by Advanced RISC Machines (ARM).
An ARM makes at 32-bit and 64-bit RISC multi-core processors. RISC processors are designed to perform a smaller number of types of computer instructions so that they can operate at a higher speed, performing extra millions of instructions per second (MIPS).
By stripping out unnecessary instructions and optimizing pathways, RISC processors give outstanding performance at a part of the power demand of CISC (complex instruction set computing) procedure.
ARM processors are widely used in customer electronic devices such as smart phones, tablets, multimedia players and other mobile devices, such as wearables. Because of their reduced to instruction set, they need fewer transistors, which enable a smaller die size of the integrated circuitry (IC).
The ARM processors, smaller size reduced difficulty and lower power expenditure makes them suitable for increasingly miniaturized devices.

Propeller Led Pendulum Clock by Engr. Rashid Ali is licensed under Attribution-ShareAlike 4.0 International![]()
![]()
![]()