FA2022 USB-D11C-serial (Pi4 + Ubuntu + edbg + Xiao)
Raspberry Pi4 + Ubuntu
Set up Ubuntu in Raspberry Pi4
ref. モニター・キーボード不要! Raspberry Pi に Ubuntu を超簡単にインストールして SSH する方法
Download Raspberry Pi Imager
CHOOSE OS -> Other general purpose OS -> Ubuntu -> Ubuntu Server 21.10
Write Operating System Ubuntu Server 21.10 to Storage microSD card
Setting WiFi
Before insert the SD card into Raspberry Pi, unmount SD card and re-mount in your mac/pc.
MacOS
Open SD card in finder
find system-boot/network-config
(from Terminal, /Volumes/system-boot/network-config)
Edit network-config
from
| #wifis:
# wlan0:
# dhcp4: true
# optional: true
# access-points:
# <wifi network name>:
# password: "<wifi password>"
|
| wifis:
wlan0:
dhcp4: true
optional: true
access-points:
"fablabkannai":
password: "marumie"
|
ssh
Insert SD card int to Raspberry Pi4 and Boot Ubuntu
Find IP address by anyway such as LanScan
in Terminal on mac
1
2
3
4
5
6
7
8
9
10
11
12
13
14
15
16
17
18
19
20
21
22
23
24
25
26
27
28
29
30
31
32
33
34
35
36
37
38
39
40
41
42
43
44 | % ssh ubuntu@192.168.0.12
WARNING: Your password has expired.
You must change your password now and login again!
Connection to 192.168.0.12 closed.
% ssh ubuntu@192.168.0.12
ubuntu@ubuntu:~$ pwd
/home/ubuntu
$ sudo apt update
$ sudo apt install libudev-dev
$ sudo apt install make
$ sudo apt install build-essential
$ git clone https://github.com/ataradov/edbg.git
$ ls
edbg
$ cd edbg/
$ ls
Makefile
$ make all
$ ./edbg -h
CMSIS-DAP SWD programmer. Built Dec 11 2021 16:05:43.
Usage: ./edbg [options]
Options:
-h, --help print this help message and exit
-b, --verbose print verbose messages
-e, --erase perform a chip erase before programming
-p, --program program the chip
-v, --verify verify memory
-k, --lock lock the chip (set security bit)
-u, --unlock unlock the chip (forces chip erase in most cases)
-r, --read read the whole content of the chip flash
-f, --file <file> binary file to be programmed or verified; also read output file name
-t, --target <name> specify a target type (use '-t list' for a list of supported target types)
-l, --list list all available debuggers
-s, --serial <number> use a debugger with a specified serial number or index in the list
-c, --clock <freq> interface clock frequency in kHz (default 16000)
-o, --offset <offset> offset for the operation
-z, --size <size> size for the operation
-F, --fuse <options> operations on the fuses (use '-F help' for details)
|
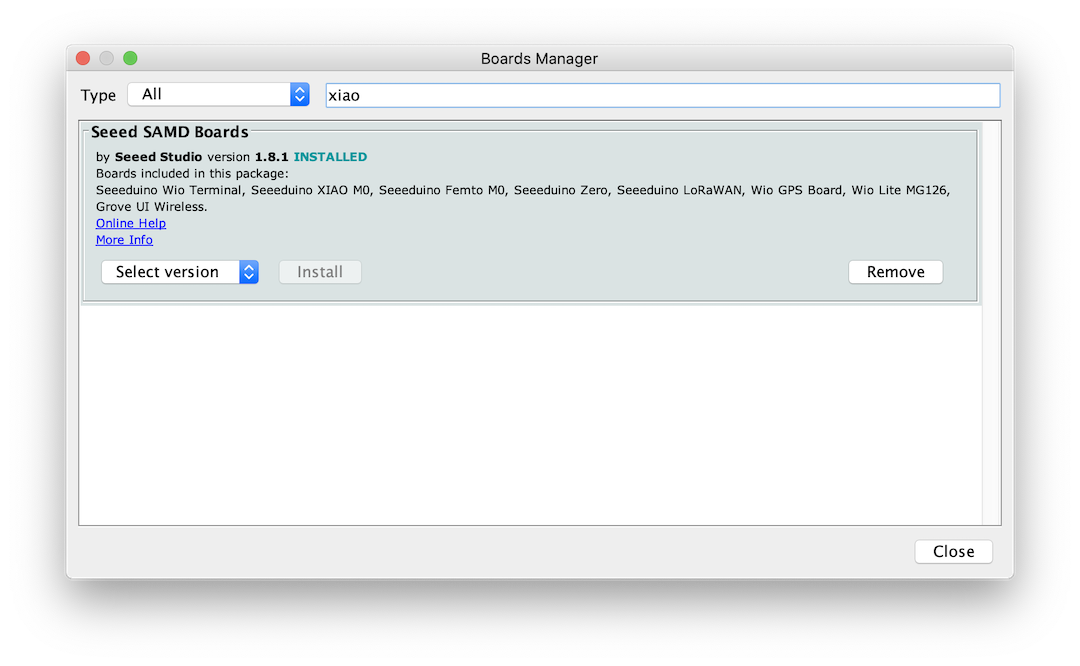
Set up Seeed Xiao as DAPLink
ref. How to use Arduino Boards as DAPLink Device
Install the DAPLink Arduino Libraries (Mac/PC)
-
Seeed_Arduino_DAPLink -> Code -> Download ZIP -> Seeed_Arduino_DAPLink-master .zip
-
Open the Arduino IDE, and click sketch -> Include Library -> Add .ZIP Library, and choose Downloads/Seeed_Arduino_DAPLink-master.zip
Install the Adafruit_TinyUSB_Arduino Library
Note
If you have an error caused Adafruit_TinyUSB_Library when uploading sketch to Xiao, Use Adafruit_TinyUSB_Library Version 0.10.5 .
- Open the Arduino IDE, and click sketch -> Include Library -> Add .ZIP Library, and choose Downloads/Adafruit_TinyUSB_Arduino-master.zip
Setup Xiao in Arduino
Open the sketch
- Unzip Seeed_Arduino_DAPLink-master.zip
- Open Seeed_Arduino_DAPLink-master/examples/simple_daplink/simple_daplink.ino
Upload the sketch to Xiao
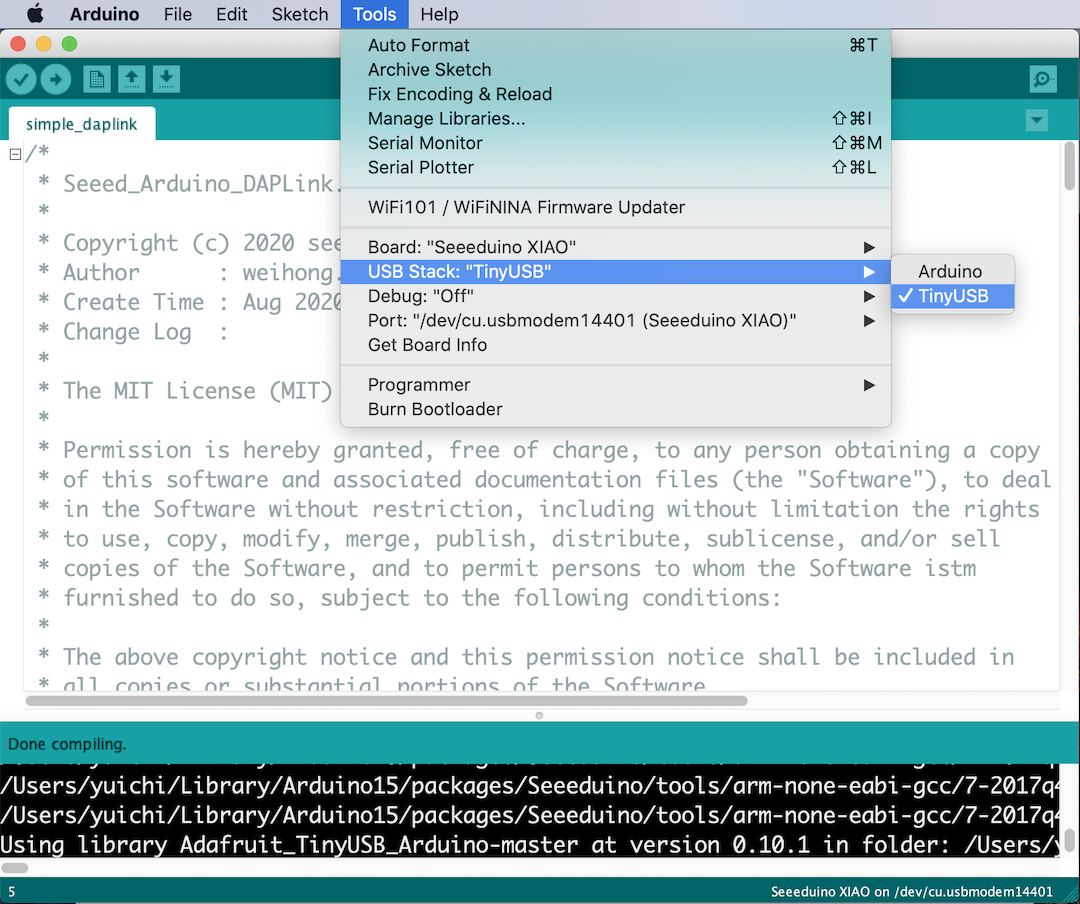
- Upload the sketch to Xiao
- LEDs on Xiao one green -> two blue
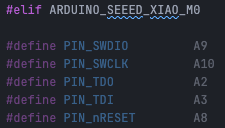
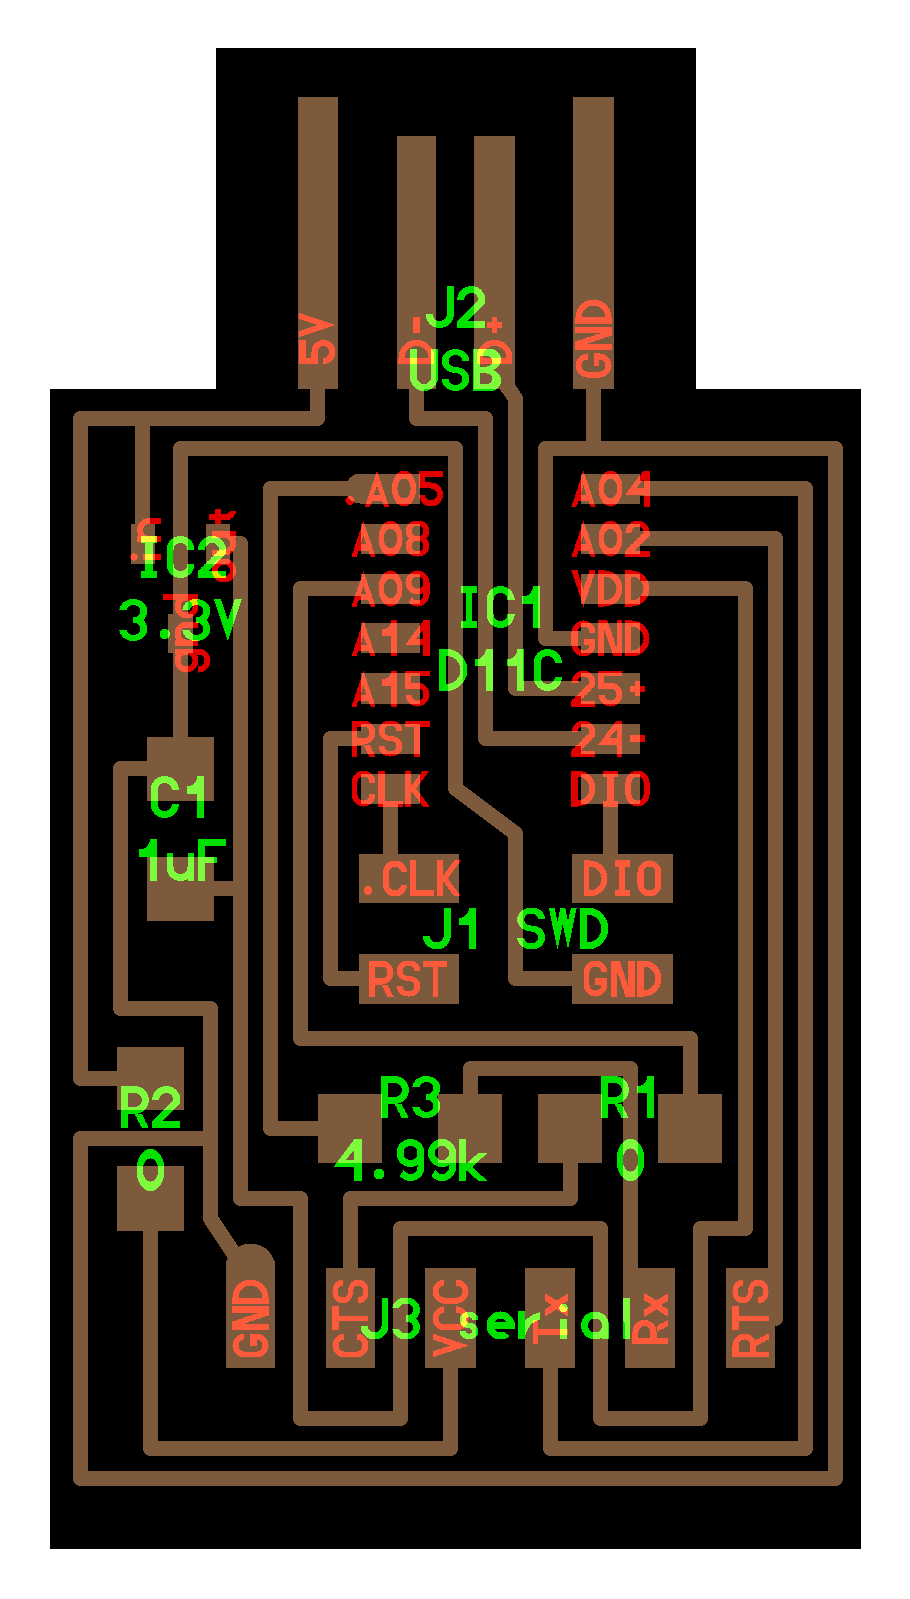
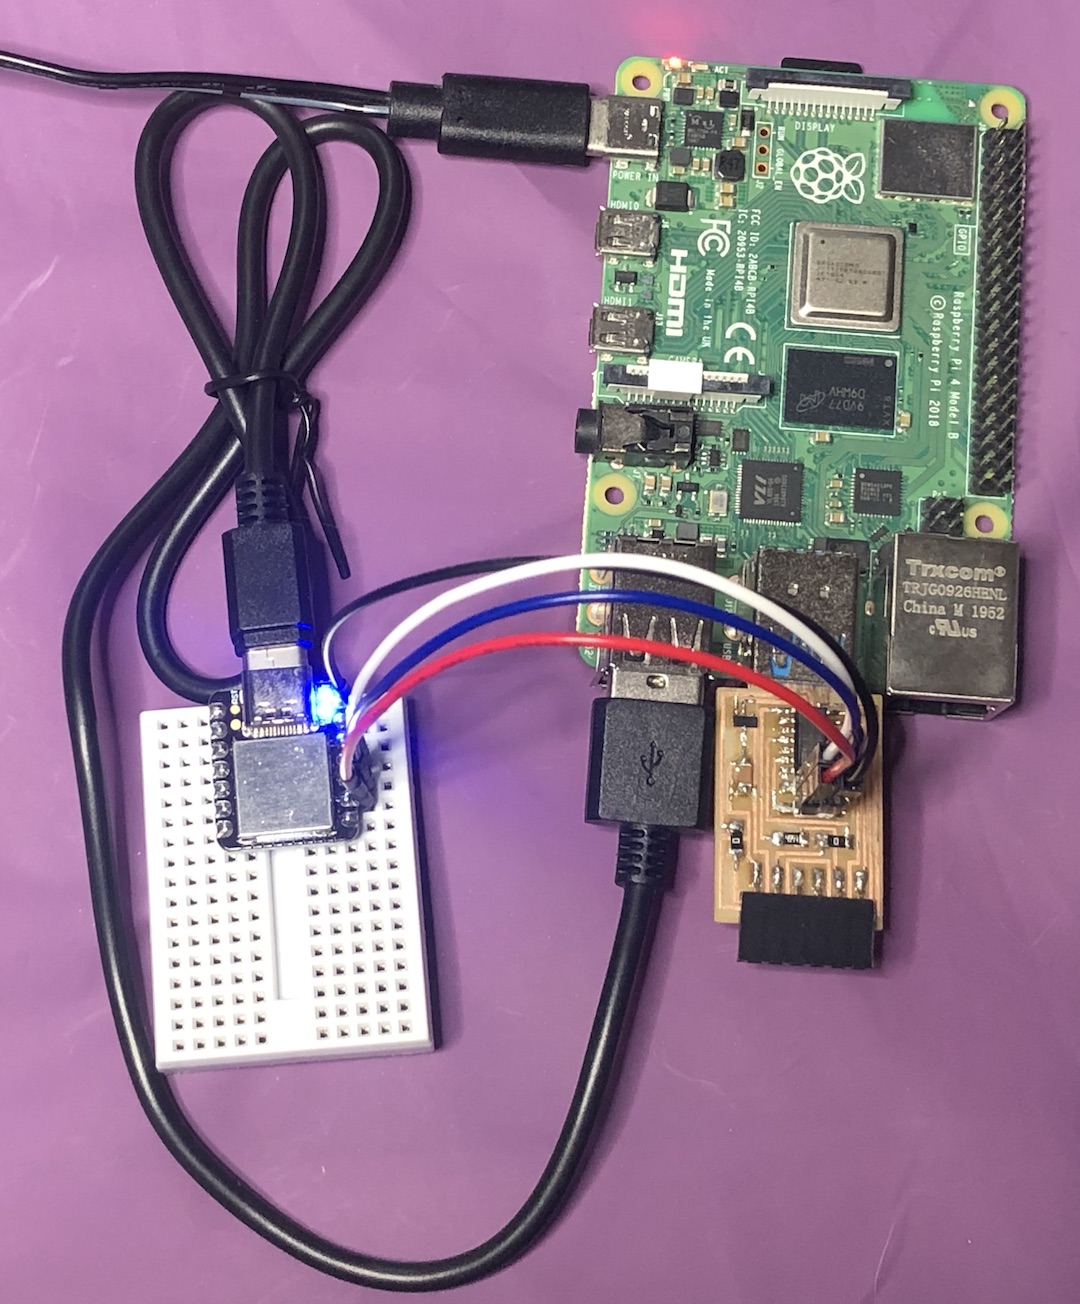
Connection
| Xiao |
USB-D11C-serial |
GND
A10
A9
A8 |
GND
CLK
DIO
RST |
  |
 |
Download and burn bootloader
1
2
3
4
5
6
7
8
9
10
11
12
13
14
15
16
17
18
19
20
21
22
23
24
25
26
27
28
29
30
31
32
33
34
35
36
37
38
39
40
41
42
43
44
45
46
47
48
49
50
51 | $ cd ~
$ git clone https://github.com/mattairtech/ArduinoCore-samd.git
$ ls
ArduinoCore-samd edbg
$ cd ArduinoCore-samd/bootloaders/zero/binaries
$ ls | grep D11C14A
sam_ba_Generic_D11C14A_SAMD11C14A.bin
sam_ba_sdcard_Generic_D11C14A_SAMD11C14A.bin
$ cp sam_ba_Generic_D11C14A_SAMD11C14A.bin ~/edbg/
$ cd ~/edbg
$ ls
edbg
sam_ba_Generic_D11C14A_SAMD11C14A.bin
$ sudo ./edbg -h
CMSIS-DAP SWD programmer. Built Dec 11 2021 16:05:43.
Usage: ./edbg [options]
Options:
-h, --help print this help message and exit
-b, --verbose print verbose messages
-e, --erase perform a chip erase before programming
-p, --program program the chip
-v, --verify verify memory
-k, --lock lock the chip (set security bit)
-u, --unlock unlock the chip (forces chip erase in most cases)
-r, --read read the whole content of the chip flash
-f, --file <file> binary file to be programmed or verified; also read output file name
-t, --target <name> specify a target type (use '-t list' for a list of supported target types)
-l, --list list all available debuggers
-s, --serial <number> use a debugger with a specified serial number or index in the list
-c, --clock <freq> interface clock frequency in kHz (default 16000)
-o, --offset <offset> offset for the operation
-z, --size <size> size for the operation
-F, --fuse <options> operations on the fuses (use '-F help' for details)
$ sudo ./edbg -l
Attached debuggers:
0: 1DFBFE6050575230372E3120FF160724 - Seeed CMSIS-DAP
$ sudo ./edbg -b -t samd11 -epv -f sam_ba_Generic_D11C14A_SAMD11C14A.bin -s 0
Debugger: Seeed Seeed CMSIS-DAP 1 2.0.0 (SJ)
Clock frequency: 16.0 MHz
Target: SAM D11C14A (Rev B)
Erasing... done.
Programming.... done.
Verification.... done.
$ lsusb
Bus 001 Device 037: ID 2886:802f Seeed Technology Co., Ltd. CMSIS-DAP
Bus 001 Device 041: ID 16d0:0557 MCS Generic SAMD11C14A
|
Last update: February 19, 2022