Week 14: Interface and application programming
This week's assignment is to develop an interface that interacts with an input or output of a device made by me. In the previous weeks I developed a motor controller board that I call "Fab Motor Controller" plus a library and firmware that allows me to control the motors via I2C.
So my idea this week is to make an interface to control both motors. I have experience making graphical interfaces in C# and Python that interact with hardware, but this time I wanted to try something different, I wanted to use JavaScript with a framework called Electron that allows you to create desktop applications using HTML, CSS and JS.
To test the GUI functionality I am using a test hardware that consists of a pair of motors, the Fab Motor Controller, the MidTiny (a board based on the ATtiny1614) and a computer where the interface is running.
The communication diagram is as follows.

The I2C communication between the Fab Motor Controller is the same as detailed in the previous week (link here ).
The connection of the MidTiny board with the computer is using a FTDI to USB cable that connects to the FTDI pins of the MidTiny and the USB to the PC.
I already had nodejs installed because I have used it in previous projects, but if you need to install it you can check this link
The next step is to create the project folder, in my case I will call it "joystick".
mkdir joystick && cd joystick
Then initialize nodejs and install the packages "electron" framework for making desktop apps using JS and "serialport" for serial communication.
npm init -y
npm i --save-dev electron serialport
A basic Electron project is composed of 3 files, which are "index.html" the entry point of the GUI, "preload.js" corresponds to the JS file that runs on the client side, "main.js" is the JS file that runs on the server side and of course the "package.json" file has all the project information.
For this application I decided to split all the logic in two parts, the joystick interactivity part that runs on the client side in the "preload.js" file, and the serial communication part that runs on the backend in the "main.js" file. The communication between both processes is given by means of IPC "InterCommunication Process" a functionality available in Electron, then the file "preload.js" send all the joystick information to the backend and "main.js" is in charge of establishing the serial communication and sending the joystick position data. Just to clarify none of these processes communicates directly with the engines, all the engine logic and interpreting the joystick position is done in MidTiny.
* I need to fix the way the html code is displayed
The HTML graphical interface is very simple.
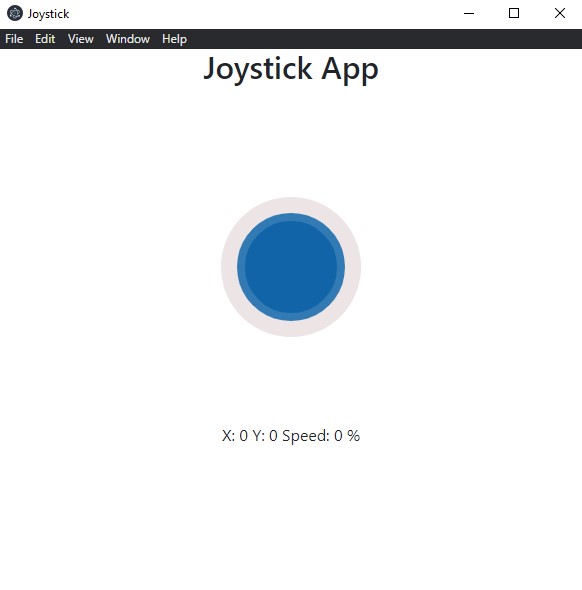
Initially it is composed by title.
<h1 style="text-align:center">Joystick App</h1>
<canvas id="canvas" ></canvas>
and some elements to display joystick information
<p style="text-align: center;">
   X: <span id="x_coordinate"> </span>
   Y: <span id="y_coordinate"> </span>
   Speed: <span id="speed"> </span> %
</p><br>
Default HTML is not very pretty so I simply added a Bootstrap CDN to change the look of the text.
The complete file is this "index.html".
<!--
* index.html
* Contains the html elements to render the application.
*
* Author: Harley Lara
* Create: 12 May 2021
* License: (CC BY-SA 4.0) Attribution-ShareAlike 4.0 International
*
* This work may be reproduced, modified, distributed,
* performed, and displayed for any purpose, but must
* acknowledge this project. Copyright is retained and
* must be preserved. The work is provided as is; no
* warranty is provided, and users accept all liability.
*
-->

<!DOCTYPE html>
<html lang="en">
<head>
   <meta charset="UTF-8">
   <meta http-equiv="X-UA-Compatible" content="IE=edge">
   <meta name="viewport" content="width=device-width, initial-scale=1.0">
   <title>Joystick</title>

   <!-- Bootstrap -->
   <link href="https://cdn.jsdelivr.net/npm/bootstrap@5.0.0/dist/css/bootstrap.min.css" rel="stylesheet" integrity="sha384-wEmeIV1mKuiNpC+IOBjI7aAzPcEZeedi5yW5f2yOq55WWLwNGmvvx4Um1vskeMj0" crossorigin="anonymous">

</head>
<body>
   <h1 style="text-align:center">Joystick App</h1>

   <br>

   <!-- Space for joystick rendering  -->
   <canvas id="canvas" ></canvas>

   <!-- Joystick position -->
   <p style="text-align: center;">
         X: <span id="x_coordinate"> </span>
         Y: <span id="y_coordinate"> </span>
         Speed: <span id="speed"> </span> %
   </p><br>

</body>
</html>
This section contains all the logic of the joystick and its interactivity.
Initially I obtain the html elements with the id "canvas", this with the objective of being able to process it from JS, the function "resize" resizes the canvas if there is some change in the dimensions of the interface.
// Get html element by ID "canvas"
canvas = document.getElementById('canvas');
context = canvas.getContext('2d');
resize();
The next step is to define the events to be listened for and the functions to be executed when the events occur.
//================== Events Listener ==================

// for mouse movements
document.addEventListener('mousedown', startDrawing);
document.addEventListener('mouseup', stopDrawing);
document.addEventListener('mousemove', Draw);

// for touchscreens
document.addEventListener('touchstart', startDrawing);
document.addEventListener('touchend', stopDrawing);
document.addEventListener('touchcancel', stopDrawing);
document.addEventListener('touchmove', Draw);

// for resize
window.addEventListener('resize', resize);
You also need to get the HTML elements to display the current joystick position.
// Get HTML elements by ID to update info
document.getElementById("x_coordinate").innerText = 0;
document.getElementById("y_coordinate").innerText = 0;
document.getElementById("speed").innerText = 0;
Now it's a matter of adding the logic in all the necessary functions
// The background function draws the background circle
// x_origin: Circle x origin
// y_origin: Circle y origin
var x_orig, y_orig;
function background() {
      // Set the origin in the center of the canvas
      x_orig = width / 2;
      y_orig = height / 2;

      // Draw the background circle
      context.beginPath();
      context.arc(x_orig, y_orig, radius + 20, 0, Math.PI * 2, true);
      context.fillStyle = '#ECE5E5';
      context.fill();
}

// The joystick function draws the circle representing the joystick
// and receives as argument the width and height of the canvas where it will be drawn.
function joystick(width, height) {
      context.beginPath();
      context.arc(width, height, radius, 0, Math.PI * 2, true);
      context.fillStyle = '#0061a8'; // main circle color
      context.fill();
      context.strokeStyle = '#2978b5'; // shadow circle color
      context.lineWidth = 8;
      context.stroke();
}

// Coordinates defining the position of the mouse/touch when interacting with the joystick
let coord = { x: 0, y: 0 };
let paint = false;

// The getPosition function gets the position of the mouse/touch and stores it in the x and y coordinate variables
function getPosition(event) {
      e = window.event || e;
      var mouse_x = e.clientX || e.touches[0].clientX;
      var mouse_y = e.clientY || e.touches[0].clientY;
      coord.x = mouse_x - canvas.offsetLeft;
      coord.y = mouse_y - canvas.offsetTop;
}

// This function is called with the mouse/touch event
function startDrawing(event) {
      paint = true;
      getPosition(event);
      if (insideTheCircle()) {
         context.clearRect(0, 0, canvas.width, canvas.height);
         background();
         joystick(coord.x, coord.y);
         Draw();
      }
}

// Check the mouse position within close range of the joystick
function insideTheCircle() {
      var current_radius = Math.sqrt(Math.pow(coord.x - x_orig, 2) + Math.pow(coord.y - y_orig, 2));
      if (radius >= current_radius) return true
      else return false
}

// When the mouse event ends, place the joystick in the center position
function stopDrawing() {
      paint = false;
      context.clearRect(0, 0, canvas.width, canvas.height);
      background();
      joystick(width / 2, height / 2);
      document.getElementById("x_coordinate").innerText = 0;
      document.getElementById("y_coordinate").innerText = 0;
      document.getElementById("speed").innerText = 0;
      sendToBack(0, 0, 0);
}

// Draw the joystick and update el X, Y, and Speed value
function Draw(event) {

      if (paint) {
         context.clearRect(0, 0, canvas.width, canvas.height);
         background();
         var angle_in_degrees,x, y, speed;
         var angle = Math.atan2((coord.y - y_orig), (coord.x - x_orig));

         if (Math.sign(angle) == -1) {
            angle_in_degrees = Math.round(-angle * 180 / Math.PI);
         }
         else {
            angle_in_degrees =Math.round( 360 - angle * 180 / Math.PI);
         }


         if (insideTheCircle()) {
            joystick(coord.x, coord.y);
            x = coord.x;
            y = coord.y;
         }
         else {
            x = radius * Math.cos(angle) + x_orig;
            y = radius * Math.sin(angle) + y_orig;
            joystick(x, y);
         }

         getPosition(event);

         // Calculate speed
         var speed =  Math.round(100 * Math.sqrt(Math.pow(x - x_orig, 2) + Math.pow(y - y_orig, 2)) / radius);

         // Calculate X and Y position
         var x_relative = Math.round(x - x_orig);
         var y_relative = Math.round(y - y_orig)*-1;

         // Updates the HTML elements with the current joystick values.
         document.getElementById("x_coordinate").innerText =  x_relative;
         document.getElementById("y_coordinate").innerText = y_relative ;
         document.getElementById("speed").innerText = speed;

         sendToBack(x_relative,y_relative,speed);


      }
}
The function that is in charge of sending the information to the backend is called "sendToBack" and is called every time there is a change in the joystick position.
// The sendToBack function is responsible for sending the joystick information to the backend.
// x_pos: current position on the x-axis
// y_pos: current position on the y-axis
// speed_data: throttle data (is not being used in the backend, but may be useful for future development)
function sendToBack(x_pos, y_pos, speed_data){
      ipcRenderer.send('asynchronous-message', {x_pos, y_pos, speed_data} )
}
The complete file "preload.js".
const {ipcRenderer} = require('electron')

window.addEventListener('DOMContentLoaded', () => {
      const replaceText = (selector, text) => {
      const element = document.getElementById(selector)
      if (element) element.innerText = text
      }

      for (const type of ['chrome', 'node', 'electron']) {
      replaceText(`${type}-version`, process.versions[type])
      }

      var canvas, context;

      // Get html element by ID "canvas"
      canvas = document.getElementById('canvas');
      context = canvas.getContext('2d');
      resize();

      //================== Events Listener ==================

      // for mouse movements
      document.addEventListener('mousedown', startDrawing);
      document.addEventListener('mouseup', stopDrawing);
      document.addEventListener('mousemove', Draw);

      // for touchscreens
      document.addEventListener('touchstart', startDrawing);
      document.addEventListener('touchend', stopDrawing);
      document.addEventListener('touchcancel', stopDrawing);
      document.addEventListener('touchmove', Draw);

      // for resize
      window.addEventListener('resize', resize);

      // Get HTML elements by ID to update info
      document.getElementById("x_coordinate").innerText = 0;
      document.getElementById("y_coordinate").innerText = 0;
      document.getElementById("speed").innerText = 0;


      // The resize function is used to resize the canvas element each time the window size changes.
      // width: represents the width of the canvas element and is updated each time the window is resized
      // height: represents the height of the canvas and depends on the joystick radius
      // radius: joystick radius
      var width, height, radius;
      function resize() {

         width = window.innerWidth;
         radius = 50;
         height = radius * 6;

         // Update canvas element
         context.canvas.width = width;
         context.canvas.height = height;

         // Call functions
         background();
         joystick(width / 2, height / 2);
      }

      // The background function draws the background circle
      // x_origin: Circle x origin
      // y_origin: Circle y origin
      var x_orig, y_orig;
      function background() {
         // Set the origin in the center of the canvas
         x_orig = width / 2;
         y_orig = height / 2;

         // Draw the background circle
         context.beginPath();
         context.arc(x_orig, y_orig, radius + 20, 0, Math.PI * 2, true);
         context.fillStyle = '#ECE5E5';
         context.fill();
      }

      // The joystick function draws the circle representing the joystick
      // and receives as argument the width and height of the canvas where it will be drawn.
      function joystick(width, height) {
         context.beginPath();
         context.arc(width, height, radius, 0, Math.PI * 2, true);
         context.fillStyle = '#0061a8'; // main circle color
         context.fill();
         context.strokeStyle = '#2978b5'; // shadow circle color
         context.lineWidth = 8;
         context.stroke();
      }

      // Coordinates defining the position of the mouse/touch when interacting with the joystick
      let coord = { x: 0, y: 0 };
      let paint = false;

      // The getPosition function gets the position of the mouse/touch and stores it in the x and y coordinate variables
      function getPosition(event) {
         e = window.event || e;
         var mouse_x = e.clientX || e.touches[0].clientX;
         var mouse_y = e.clientY || e.touches[0].clientY;
         coord.x = mouse_x - canvas.offsetLeft;
         coord.y = mouse_y - canvas.offsetTop;
      }

      // This function is called with the mouse/touch event
      function startDrawing(event) {
         paint = true;
         getPosition(event);
         if (insideTheCircle()) {
            context.clearRect(0, 0, canvas.width, canvas.height);
            background();
            joystick(coord.x, coord.y);
            Draw();
         }
      }

      // Check the mouse position within close range of the joystick
      function insideTheCircle() {
         var current_radius = Math.sqrt(Math.pow(coord.x - x_orig, 2) + Math.pow(coord.y - y_orig, 2));
         if (radius >= current_radius) return true
         else return false
      }

      // When the mouse event ends, place the joystick in the center position
      function stopDrawing() {
         paint = false;
         context.clearRect(0, 0, canvas.width, canvas.height);
         background();
         joystick(width / 2, height / 2);
         document.getElementById("x_coordinate").innerText = 0;
         document.getElementById("y_coordinate").innerText = 0;
         document.getElementById("speed").innerText = 0;
         sendToBack(0, 0, 0);
      }

      // Draw the joystick and update el X, Y, and Speed value
      function Draw(event) {

         if (paint) {
            context.clearRect(0, 0, canvas.width, canvas.height);
            background();
            var angle_in_degrees,x, y, speed;
            var angle = Math.atan2((coord.y - y_orig), (coord.x - x_orig));

            if (Math.sign(angle) == -1) {
                  angle_in_degrees = Math.round(-angle * 180 / Math.PI);
            }
            else {
                  angle_in_degrees =Math.round( 360 - angle * 180 / Math.PI);
            }


            if (insideTheCircle()) {
                  joystick(coord.x, coord.y);
                  x = coord.x;
                  y = coord.y;
            }
            else {
                  x = radius * Math.cos(angle) + x_orig;
                  y = radius * Math.sin(angle) + y_orig;
                  joystick(x, y);
            }

            getPosition(event);

            // Calculate speed
            var speed =  Math.round(100 * Math.sqrt(Math.pow(x - x_orig, 2) + Math.pow(y - y_orig, 2)) / radius);

            // Calculate X and Y position
            var x_relative = Math.round(x - x_orig);
            var y_relative = Math.round(y - y_orig)*-1;

            // Updates the HTML elements with the current joystick values.
            document.getElementById("x_coordinate").innerText =  x_relative;
            document.getElementById("y_coordinate").innerText = y_relative ;
            document.getElementById("speed").innerText = speed;

            sendToBack(x_relative,y_relative,speed);


         }
      }

      // The sendToBack function is responsible for sending the joystick information to the backend.
      // x_pos: current position on the x-axis
      // y_pos: current position on the y-axis
      // speed_data: throttle data (is not being used in the backend, but may be useful for future development)
      function sendToBack(x_pos, y_pos, speed_data){
         ipcRenderer.send('asynchronous-message', {x_pos, y_pos, speed_data} )
      }
})
The file "main.js" contains all the part of receiving the information from the joystick and establish the serial communication, of course it could have been developed all in one file but you have to choose the type of information that is exposed on the client side and in this case I didn't want to expose all the logic and serial communication on the client side.
The "main.js" file looks like this.
/*
* main.js
* It receives the joystick position information from the frontend,
* establishes serial communication and sends the data through the serial port.
*
* Author: Harley Lara
* Create: 12 May 2021
* License: (CC BY-SA 4.0) Attribution-ShareAlike 4.0 International
*
* This work may be reproduced, modified, distributed,
* performed, and displayed for any purpose, but must
* acknowledge this project. Copyright is retained and
* must be preserved. The work is provided as is; no
* warranty is provided, and users accept all liability.
*
*/

// Electron
const { spawn } = require('child_process');
const { app, BrowserWindow, ipcMain } = require('electron');
const { write } = require('fs');
const path = require('path')

// Serial port
const serialport = require("serialport");
const ReadLine = serialport.parsers.Readline;

var x, y, speed;

// InterProcessCommunication - To receive data from the frontend
ipcMain.on('asynchronous-message', (event, arg) => {
   //console.log( arg );
   speed = arg.speed_data;
   x = arg.x_pos;
   y = arg.y_pos;
   port.write((x.toString() + '\n'));
   port.write((y.toString() + '\n'));
   //port.write((speed.toString() + '\r\n'));
});

function createWindow () {
   const win = new BrowserWindow({
   width: 600,
   height: 600,
   webPreferences: {
      //nodeIntegration: true,
      preload: path.join(__dirname, 'preload.js')
   }
   })

   win.loadFile('index.html')
}

app.whenReady().then(() => {
   createWindow()

   app.on('activate', () => {
   if (BrowserWindow.getAllWindows().length === 0) {
      createWindow()
   }
   })
})

app.on('window-all-closed', () => {
   if (process.platform !== 'darwin') {
   app.quit()
   }
})

// ====================================
// ========== Serial Port =============

const port = new serialport("COM15", {
   baudRate: 115200,
   autoOpen: true
});

const parser = port.pipe(new ReadLine({
   delimeter: "\r\n"
}));

port.on('open', () => {
   setTimeout(function () {
   console.log('Serial port open');
   }, 2000);
});

/* For debugging
parser.on('data', function (data) {
   console.log('from arduino:', data);
});
*/
This section contains the program that is loaded into the MidTiny microcontroller, which receives the information from the interface via serial communication.
To communicate with the Fab Motor Controller I am using the arduino library I developed called FabMotorController which is in charge of establishing the I2C communication with the controller and controlling the motor outputs.
#include

// Creates a object
FabMotorController MotorControl;
The next thing was to define some variables that I will need to calculate the motor speeds based on the joystick position received by serial.
// Input variables
int inputX; // from -100 to 100
int inputY; // from -100 to 100

// Output variables
int outSpeed1;
int outSpeed2;

// Config variables
int maxSpeed = 70;

// Temp variables
int preSpeed1; // from -100 to 100
int preSpeed2; // from -100 to 100
int thldSpeed; // from -100 to 100
int scale; // from 0 to 1
int piv = 5; // Defines the switching point between turning with both wheels and turning using only one wheel
The setup is as simple as this
void setup(){
   Serial.begin(115200);
   // Initializes I2C communication with the Fab Motor Controller
   MotorControl.begin(0x04);
}
And in the loop you must first check if there is data in the serial.
while (Serial.available() > 0)
Read serial information
// Read data from serial
inputX = Serial.parseInt();
inputY = Serial.parseInt();
Because the graphical interface sends joystick feedback ranging from -50 to 50 it is necessary to adjust it a little.
// map input data from [-50:50] to [-100:100]
inputX = map(inputX, -50, 50, -100, 100);
inputY = map(inputY, -50, 50, -100, 100);
The next step is to detect the Y position to know if the motors should go forward or backward.
if (inputY >= 0){
   // Forward
   preSpeed2 = (inputX>=0)? 100 : (100 + inputX);
   preSpeed1 = (inputX>=0)? (100 - inputX) : 100;
   } else{
   // Reverse
   preSpeed2 = (inputX>=0)? (100 - inputX) : 100;
   preSpeed1 = (inputX>=0)? 100 : (100 + inputX);
}
All information is processed to adjust motor speeds.
// Scale output
preSpeed2 = preSpeed2 * inputY/100;
preSpeed1 = preSpeed1 * inputY/100;

// Pivot point
thldSpeed = inputX;
scale = (abs(inputY)>piv)? 0 : (1 - abs(inputY)/piv);

// Calculate final mix of Drive and Pivot
outSpeed2 = (1-scale)*preSpeed2 + scale*( thldSpeed);
outSpeed1 = (1-scale)*preSpeed1 + scale*(-thldSpeed);
And finally the action is sent to the motors.
MotorControl.run(1, outSpeed1);
MotorControl.run(2, outSpeed2);
The complete code of "motor_control_serial_joystick.ino".
/*
* motor_control_serial_joystick.ino
* The following program receives information from a joystick via serial
* and makes the logic to control the motors based on the position X Y of the joystick,
* the communication with the motor controller is via I2C
* and to simplify the process uses the FabMotorController library.
*
* Author: Harley Lara
* Create: 12 May 2021
* License: (CC BY-SA 4.0) Attribution-ShareAlike 4.0 International
*
* This work may be reproduced, modified, distributed,
* performed, and displayed for any purpose, but must
* acknowledge this project. Copyright is retained and
* must be preserved. The work is provided as is; no
* warranty is provided, and users accept all liability.
*
*/

#include

// Creates a object
FabMotorController MotorControl;

// Input variables
int inputX; // from -100 to 100
int inputY; // from -100 to 100

// Output variables
int outSpeed1;
int outSpeed2;

// Config variables
int maxSpeed = 70;

// Temp variables
int preSpeed1; // from -100 to 100
int preSpeed2; // from -100 to 100
int thldSpeed; // from -100 to 100
int scale; // from 0 to 1
int piv = 5; // Defines the switching point between turning with both wheels and turning using only one wheel

void setup(){
   Serial.begin(115200);
   // Initializes I2C communication with the Fab Motor Controller
   MotorControl.begin(0x04);
}

void loop() {
   while (Serial.available() > 0){

   // Read data from serial
   inputX = Serial.parseInt();
   inputY = Serial.parseInt();

   // map input data from [-50:50] to [-100:100]
   inputX = map(inputX, -50, 50, -100, 100);
   inputY = map(inputY, -50, 50, -100, 100);

   if (inputY >= 0){
      // Forward
      preSpeed2 = (inputX>=0)? 100 : (100 + inputX);
      preSpeed1 = (inputX>=0)? (100 - inputX) : 100;
   } else{
      // Reverse
      preSpeed2 = (inputX>=0)? (100 - inputX) : 100;
      preSpeed1 = (inputX>=0)? 100 : (100 + inputX);
   }

   // Scale output
   preSpeed2 = preSpeed2 * inputY/100;
   preSpeed1 = preSpeed1 * inputY/100;

   // Pivot point
   thldSpeed = inputX;
   scale = (abs(inputY)>piv)? 0 : (1 - abs(inputY)/piv);

   // Calculate final mix of Drive and Pivot
   outSpeed2 = (1-scale)*preSpeed2 + scale*( thldSpeed);
   outSpeed1 = (1-scale)*preSpeed1 + scale*(-thldSpeed);

   MotorControl.run(1, outSpeed1);
   MotorControl.run(2, outSpeed2);
   }

}
This video demonstrates how the interface works and how it interacts with the hardware.
The group assignment consists of comparing different tools to develop interfaces that communicate with my board (MidTiny), in this case the tools that I will use are Python Tkinter, Processing and C#, all the interfaces perform the same function which is to turn on and off an LED on the board, also all the interfaces communicate with the board by means of serial communication.
Comparing the applications based on the number of lines of code does not seem to me a very fair measure so I will use as a parameter of comparison the disk space used by each one.
The Python Tkinter program is the following:
/*
* super_button.py
* The following program shows a basic interface consisting of a button
* that sends the "H" character via serial communication to the defined port.
*
* Author: Harley Lara
* Create: 25 May 2021
* License: (CC BY-SA 4.0) Attribution-ShareAlike 4.0 International
*
* This work may be reproduced, modified, distributed,
* performed, and displayed for any purpose, but must
* acknowledge this project. Copyright is retained and
* must be preserved. The work is provided as is; no
* warranty is provided, and users accept all liability.
*
*/

import tkinter as tk
import serial

class App(tk.Frame):

      led_status = False

      def __init__(self, master=None, title="App Title", geometry="300x300"):
         super().__init__(master)
         self.master.title(title)
         self.master.geometry(geometry)
         self.pack()

         # Serial Connection
         self.serialport = serial.Serial(
            'COM15', baudrate=9600, timeout=.1)  # open serial port
         print(self.serialport.name)

         # Create GUI components
         self._createWidgets()

      def _createWidgets(self):
         self.tkButton1 = tk.Button(
            self,
            text="Turn ON",
            height=50,
            width=50,
            bg='white',
            command=self._sendData)
         self.tkButton1.pack()

         self.tkLabel = tk.Label(self)
         self.tkLabel["text"] = "This a label"
         self.tkLabel.pack()

      def _sendData(self):
         self.serialport.write("H".encode())
         print("[SEND] 'H'")
         if (self.led_status == False):
            self.tkButton1.configure(bg="green", text="Turn OFF")
            self.led_status = True
         else:
            self.tkButton1.configure(bg="white", text="Turn ON")
            self.led_status = False


def main():
      root = tk.Tk()
      app = App(master=root, title="Super button", geometry="300x300")
      app.mainloop()


if __name__ == "__main__":
      main()
Advantages: Tkinter is a module that is installed by default with python and does not need to download any external module.
Disadvantages: PySerial module is not installed by default with python so you need to install it additionally as "pip install pyserial".
The used space of the python file "super_button.py" is 1.98 KB and the size on disk is 4 KB.
The next tool is processing the code is as follows:
/*
* super_button.pde
* The following program shows a basic interface consisting of a window
* in which pressing any area of it sends the character "H" via serial
* communication to the defined port.
*
* Author: Harley Lara
* Create: 25 May 2021
* License: (CC BY-SA 4.0) Attribution-ShareAlike 4.0 International
*
* This work may be reproduced, modified, distributed,
* performed, and displayed for any purpose, but must
* acknowledge this project. Copyright is retained and
* must be preserved. The work is provided as is; no
* warranty is provided, and users accept all liability.
*
*/

import processing.serial.*;

Serial serialPort;

boolean led_status = false;

void setup(){
  size(300, 300);
  background(127);
  serialPort = new Serial(this, "COM15", 9600);
}

void draw(){
  if (mousePressed == true) {
    serialPort.write('H');
    println("[SEND] H");

    if (led_status == true){
       background(127);
      led_status = false;
    }
    else{
      background(0, 255, 0);
      led_status = true;
    }
  }

  delay(100);
}
Advantages: With the default installation processing you have all the necessary tools to realize the interface, it is not necessary to download the serial communication library since it is integrated.
Disadvantages: Creating objects as buttons requires an extra coding effort since it is necessary to constantly capture the position of the mouse pointer and compare it if it is over the object that we consider a button and after that, to know if the mouse pressed event occurs within that area.
The used space of the Processing file "super_button.pde" is 489 bytes and the size on disk is 0 KB.
The last tool to compare is C# using .NET Core, the code is as follows:
/*
* Form1.cs
* The following program shows a basic interface consisting of a button
* that sends the "H" character via serial communication to the defined port.
*
* Author: Harley Lara
* Create: 25 May 2021
* License: (CC BY-SA 4.0) Attribution-ShareAlike 4.0 International
*
* This work may be reproduced, modified, distributed,
* performed, and displayed for any purpose, but must
* acknowledge this project. Copyright is retained and
* must be preserved. The work is provided as is; no
* warranty is provided, and users accept all liability.
*
*/

using System;
using System.Collections.Generic;
using System.ComponentModel;
using System.Data;
using System.Drawing;
using System.Linq;
using System.Text;
using System.Threading.Tasks;
using System.Windows.Forms;
using System.IO.Ports;

namespace SuperButton
{
    public partial class Form1 : Form
    {
        static SerialPort _serialPort;
        bool led_status = false;
        public Form1()
        {
            InitializeComponent();
            _serialPort = new SerialPort();
            _serialPort.PortName = "COM15";
            _serialPort.BaudRate = 9600;
            _serialPort.Open();
        }

        private void btnLED_Click(object sender, EventArgs e)
        {
            _serialPort.Write("H");
            if (led_status == true)
            {
                btnLED.BackColor = SystemColors.Control;
                btnLED.Text = "Turn ON";
                led_status = false;
            }
            else
            {
                btnLED.BackColor = Color.Green;
                btnLED.Text = "Turn OFF";
                led_status = true;
            }

        }
    }
}
Advantages: The interface can be created more easily using the basic drag and drop component tools, also the component attributes can be edited in a properties panel, and all this without writing a line of code, although of course it can be done that way.
Disadvantage: It is necessary to install the package for serial communication, by default in .NET Core the dependency "using System.IO.Ports;" is missing, but it can be installed using NuGet packages manager.
The used space of the project (it is not a single file but several files that form the final result) is 1.2 MB and the size on disk is 1.27 MB.
Group assignment page