Assignment
-
Group assignment:
- review the safety data sheets (SDS) for each of your molding and casting materials
- compare test casts with each of them
-
Individual assignment:
- Design a mold around the stock and tooling that you’ll be using
- Mill the mold (rough cut + finish cut)
- Cast it
Group Assignment
Safety Data Sheets (SDS)
Compare test cast
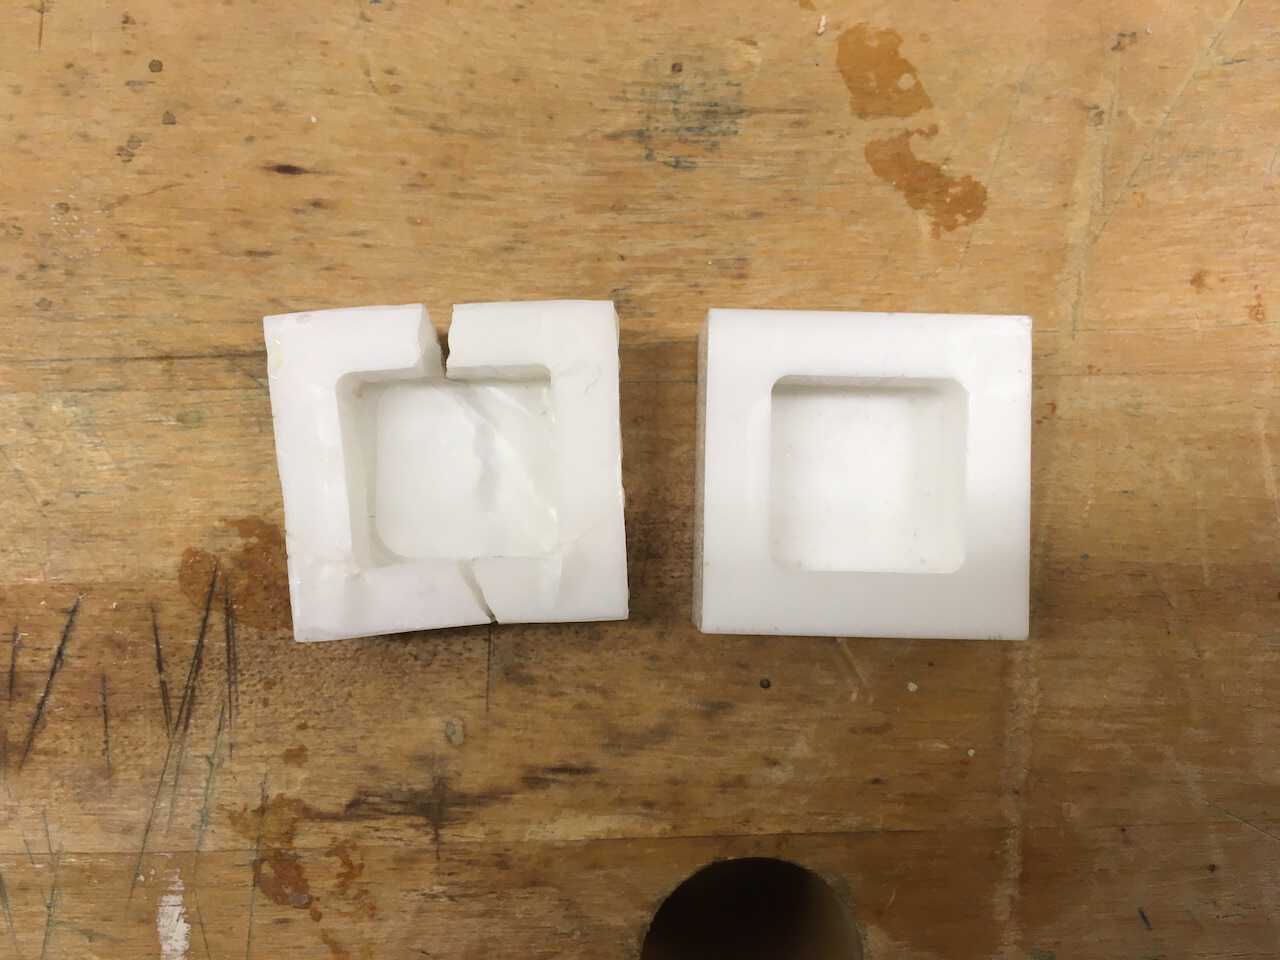
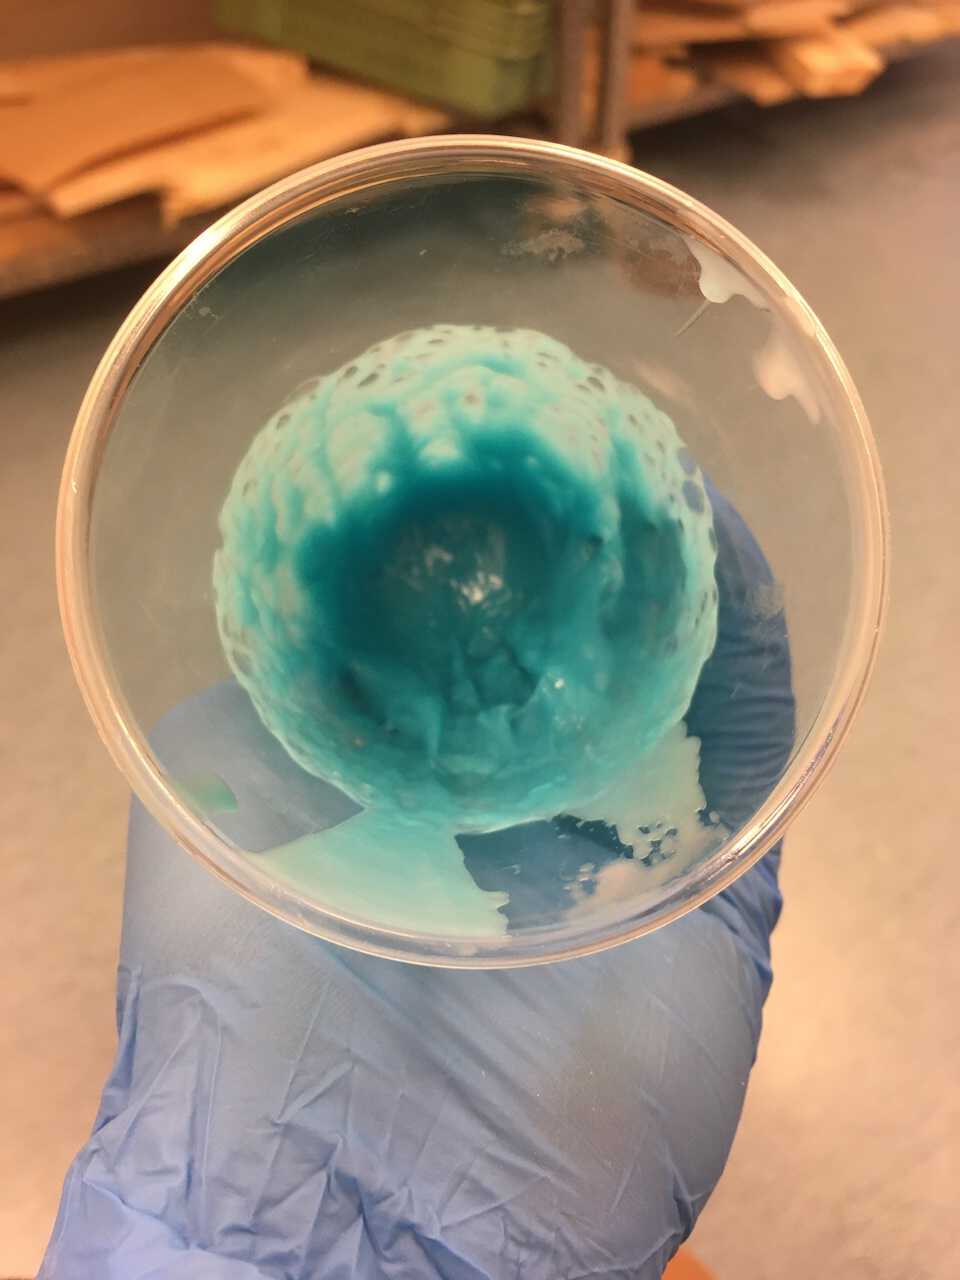
The left cube was cracked because of the wrong ratio of A and B volume. The right one is more hard and strong. So the ratio, depends on every material, by volume or weight is critical and it directly affects the casting results.
The broken cube was soft but not entirely flexible.
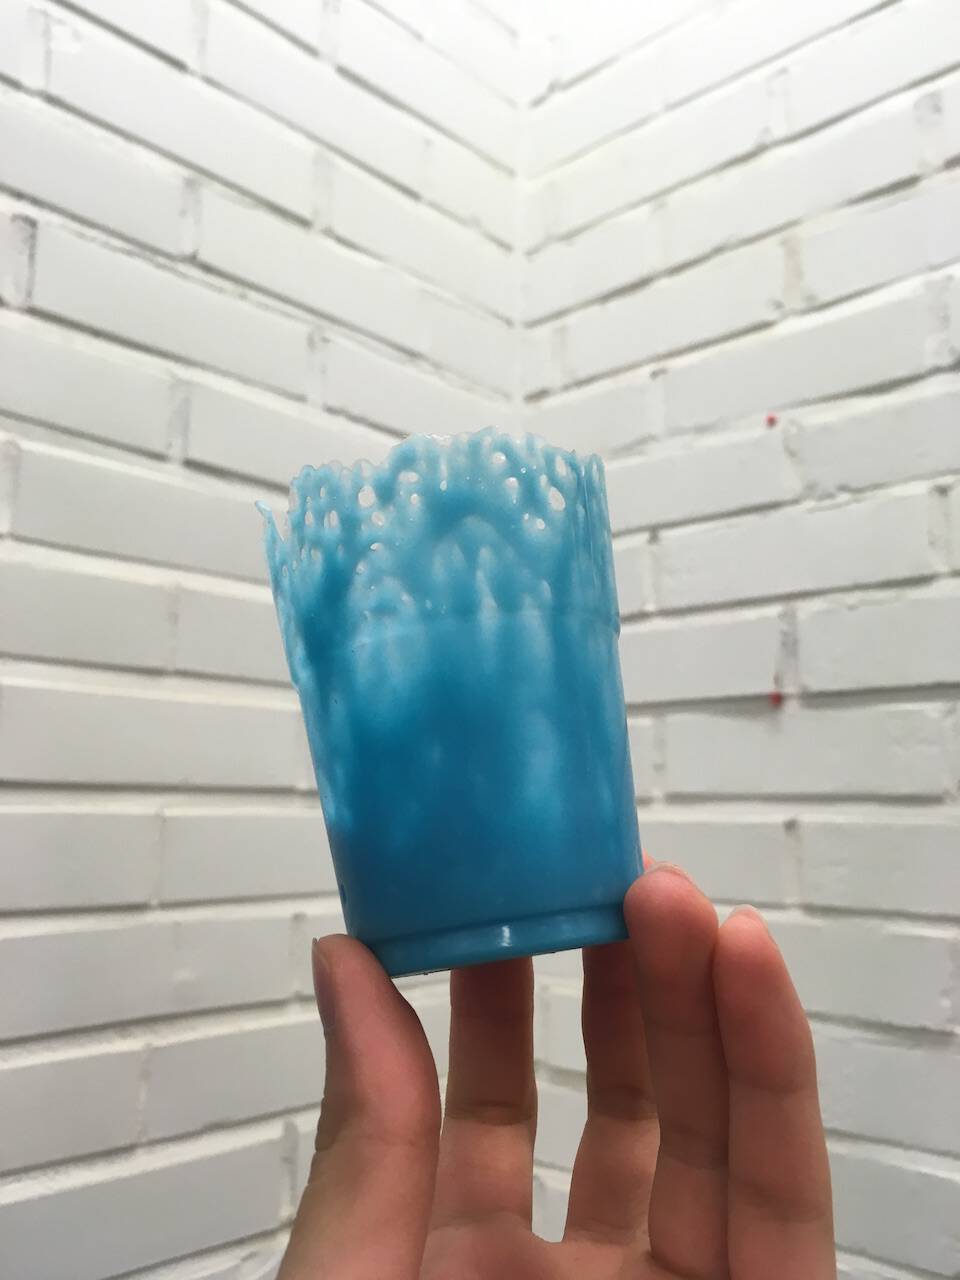
Compare test cast
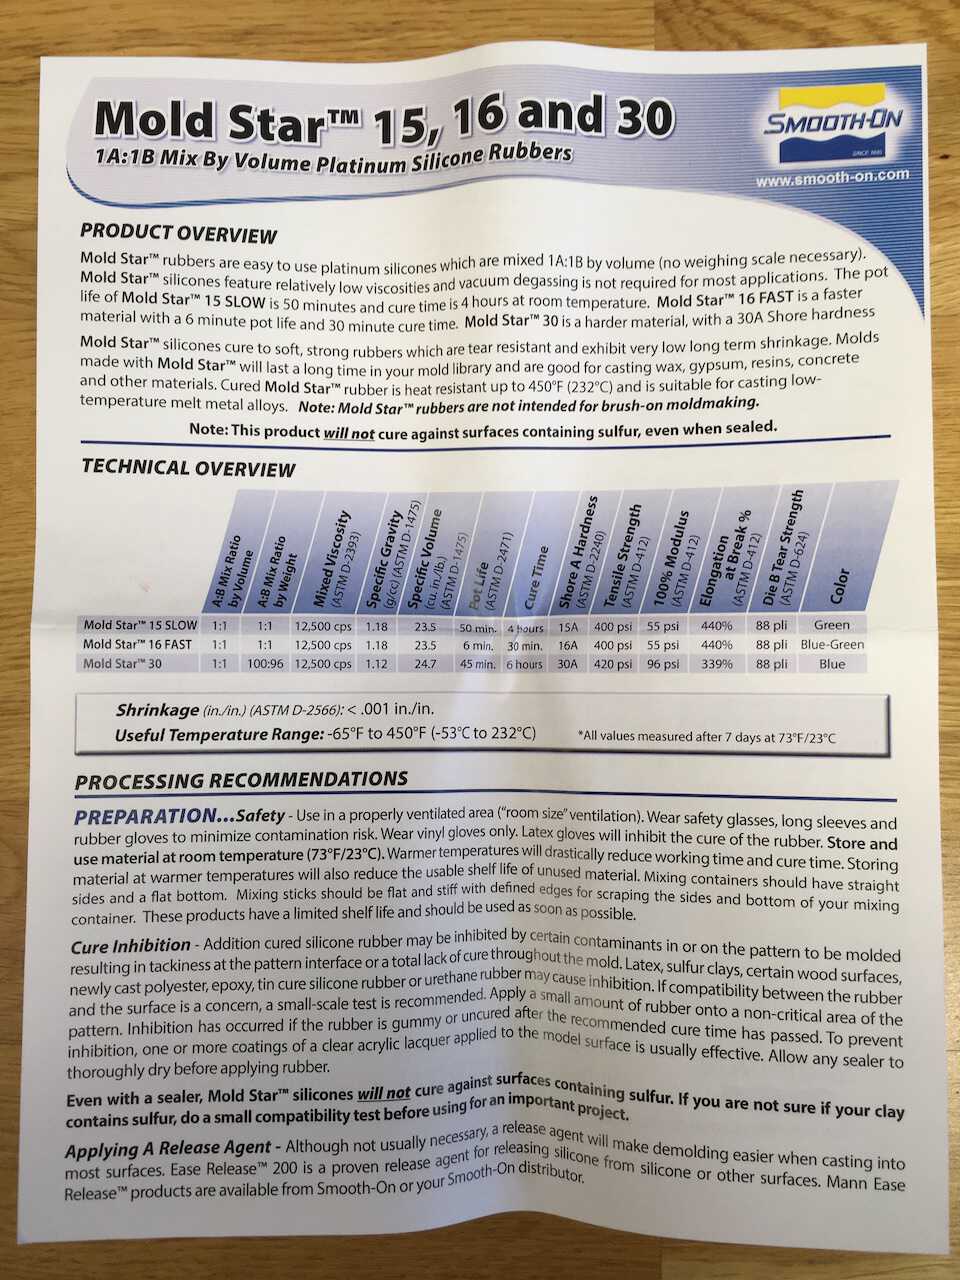
This week I have tried different products of Smooth-On, there are Mold Star 16 Fast, Dragon Skin 10 Fast, and 10 Slow.
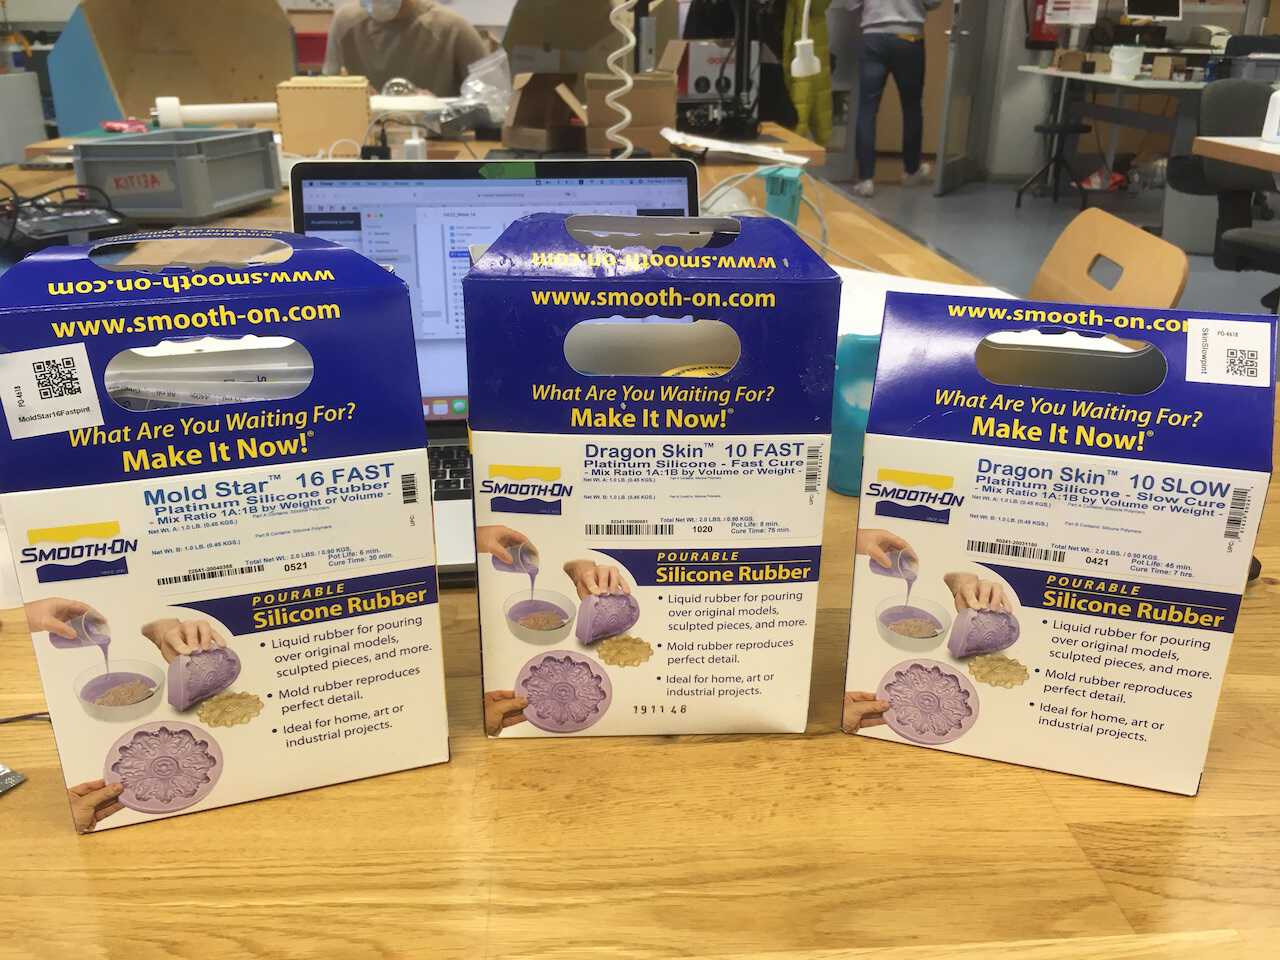
| Product | Color | Mix Ratio | Pot Life | Cure Time |
|---|---|---|---|---|
| Mold Star 16 Fast | Blue | 1A:1B by Volume or Weight | 6 min | 30 min |
| Dragon Skin 10 Fast | White | 1A:1B by Volume or Weight | 8 min | 75 min |
| Dragon Skin 10 Slow | White | 1A:1B by Volume or Weight | 45 min | 7 hrs |
Individual assignment
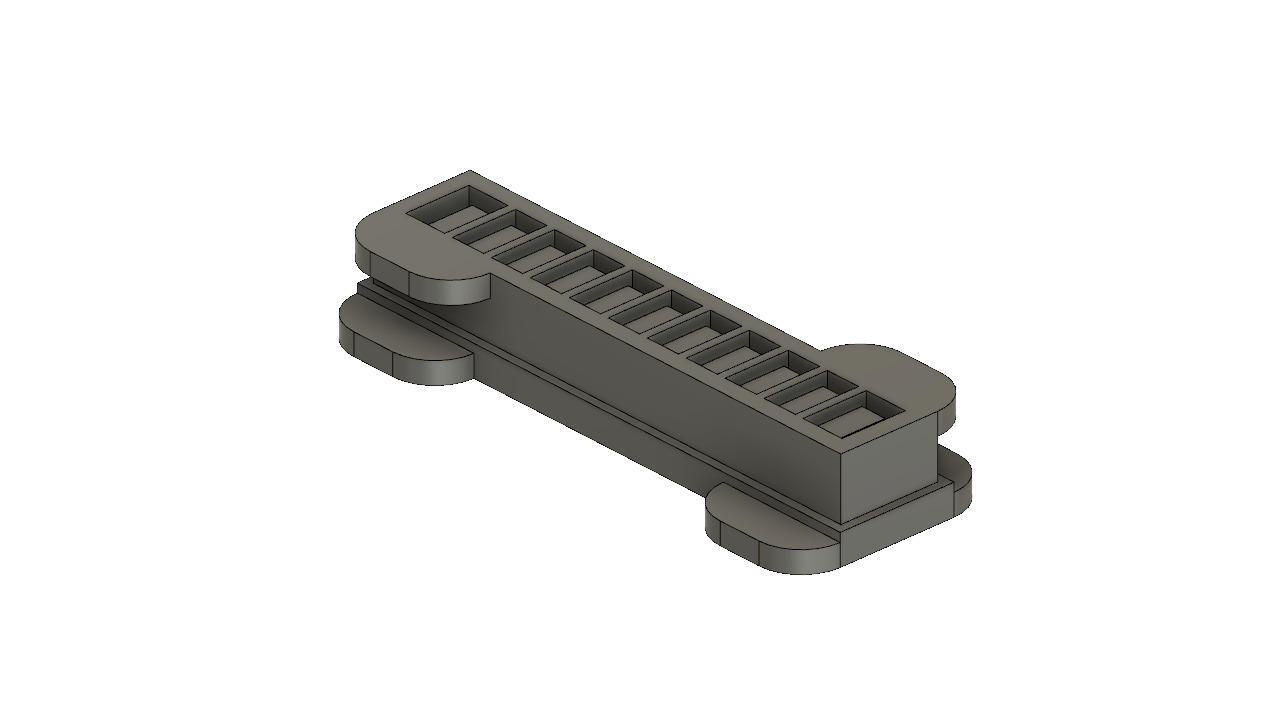
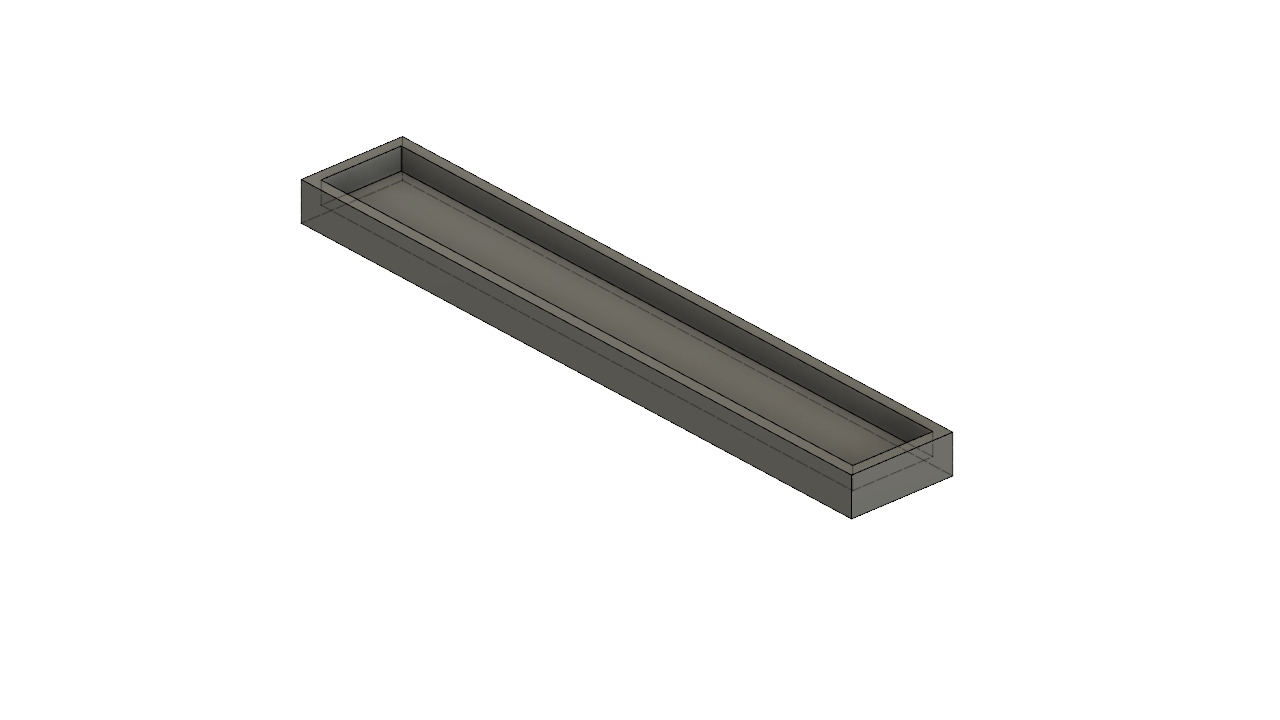
Design a mold
According to the need for my final project, I decided to build inflatable silicone. I found documentation from Avner Peled, he did some research on Soft Robot. From the soft robotic toolkits website, I downloaded the 3D model and did a slight modification in Fusion 360 to fit it into my material. The assembly instruction could be found here.
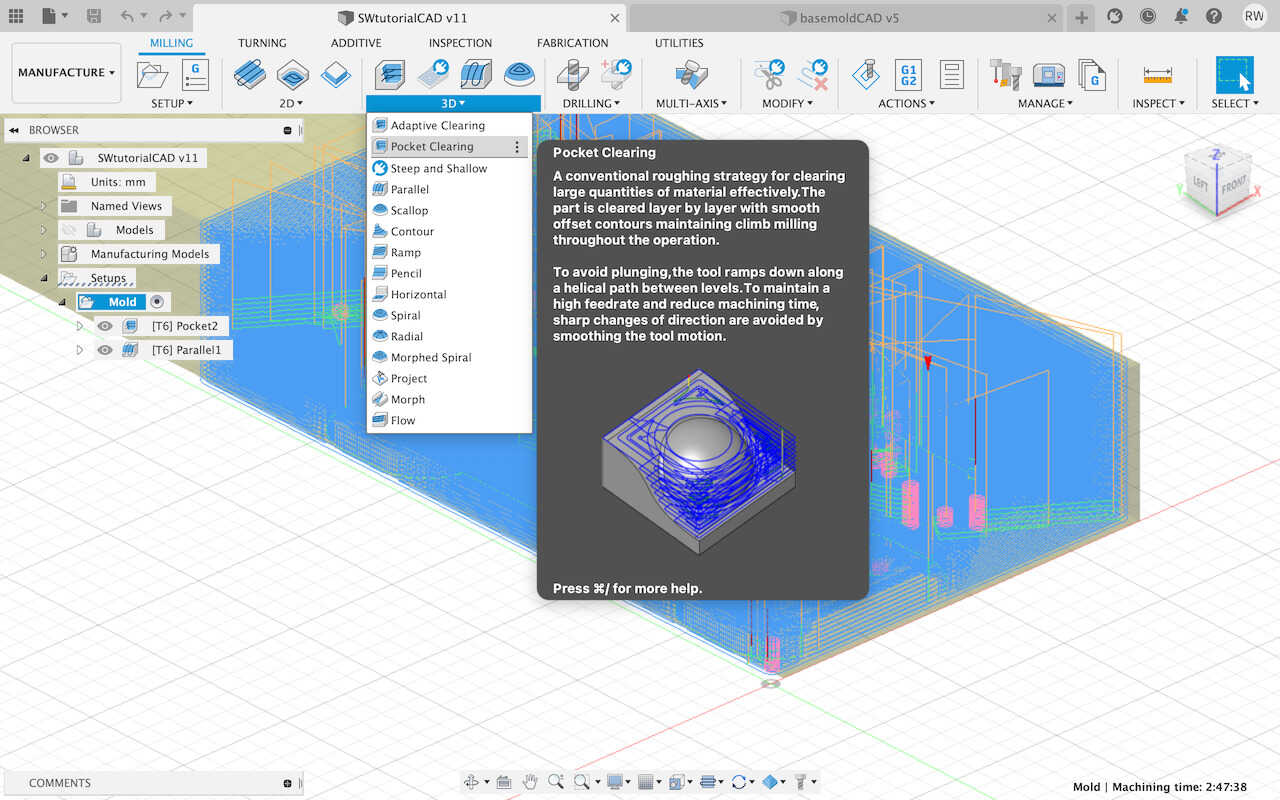
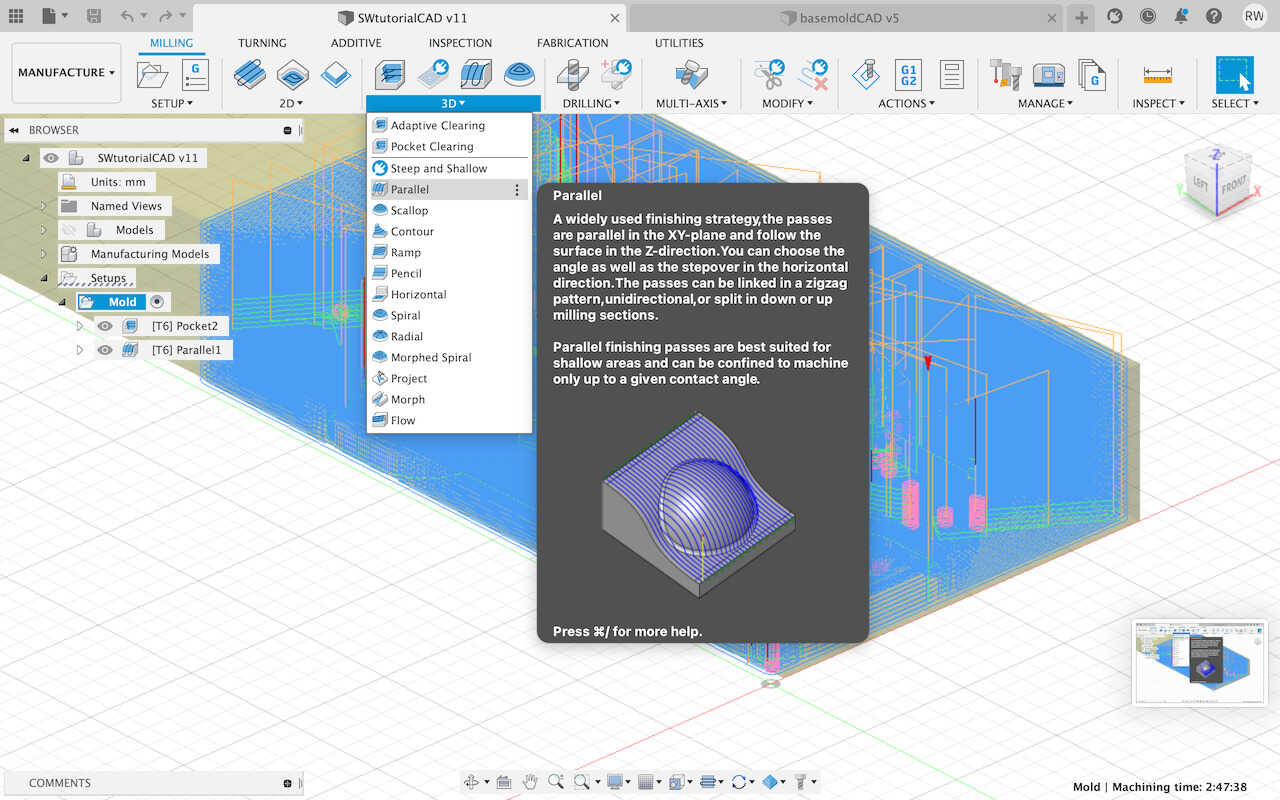
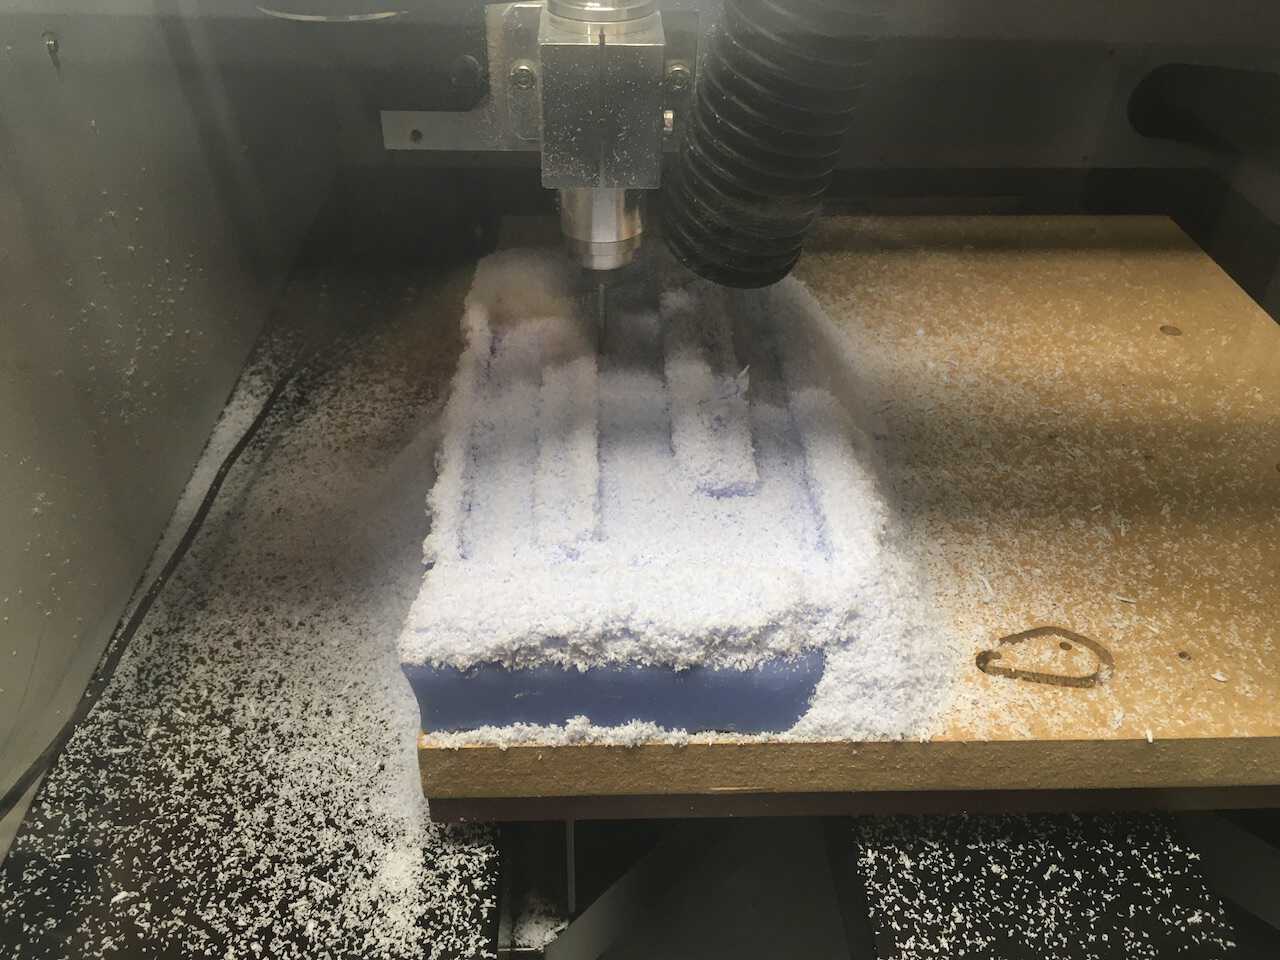
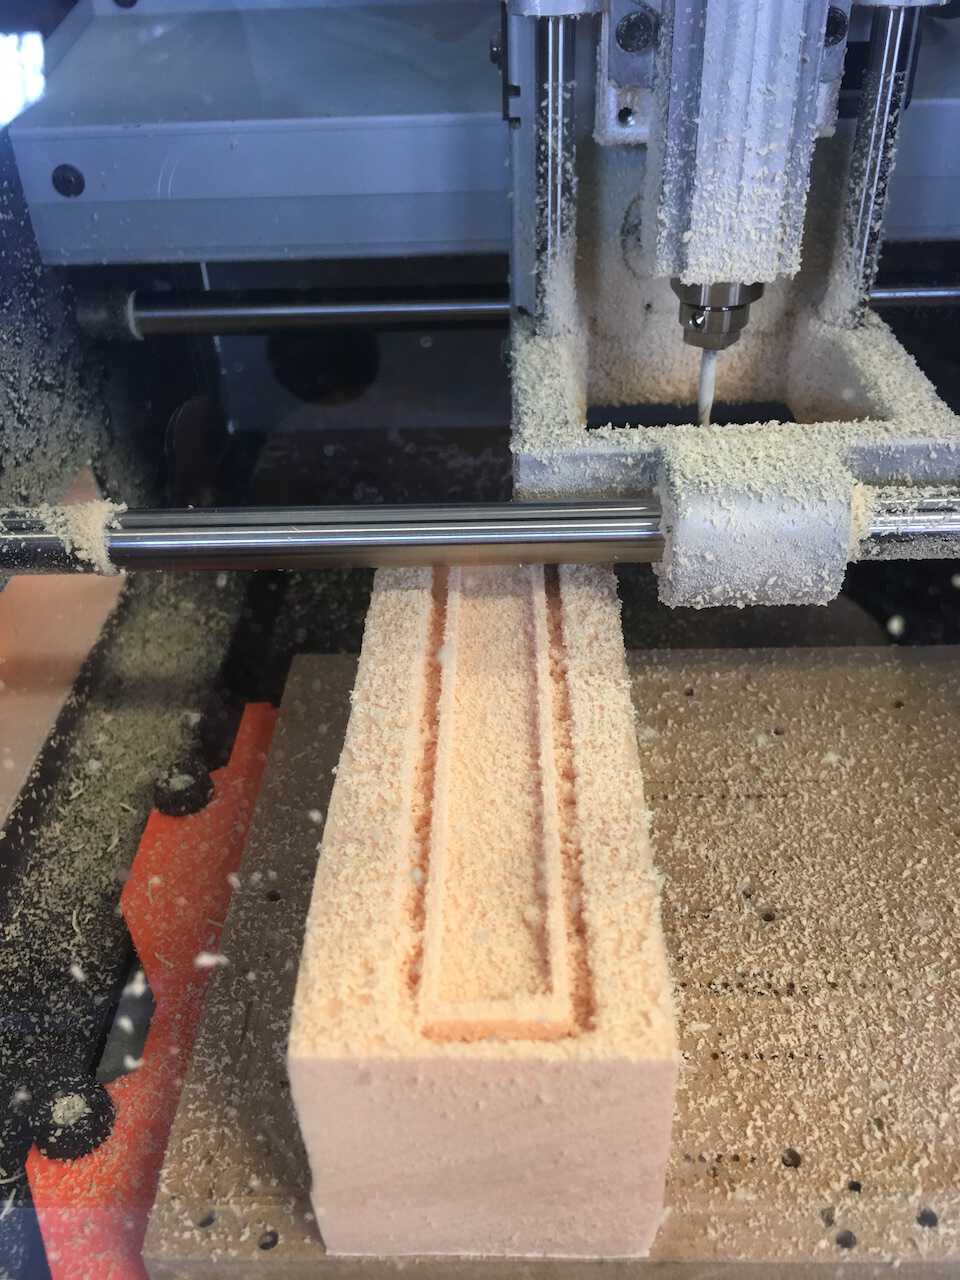
Mill the mold (roughing and finishing)
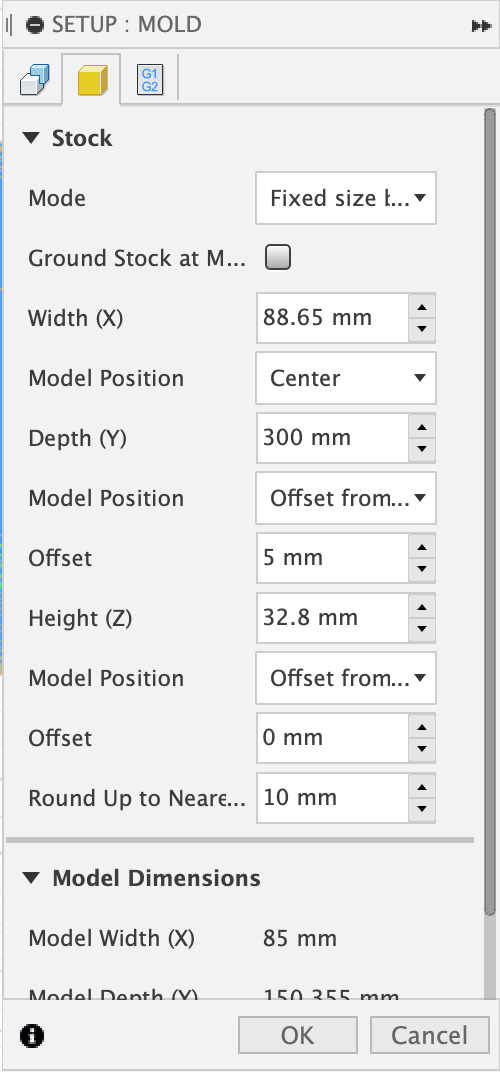
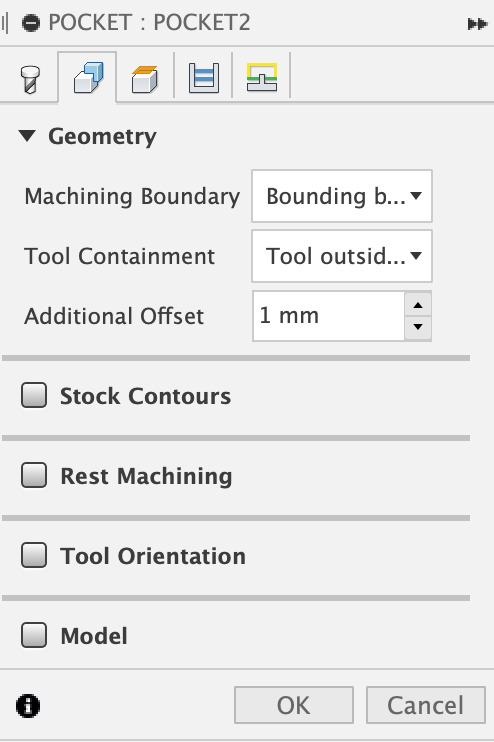
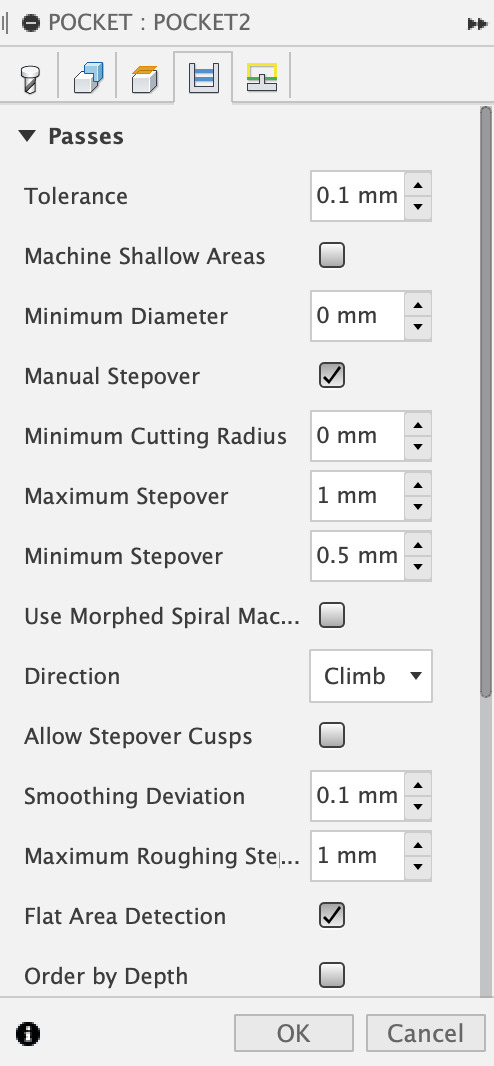
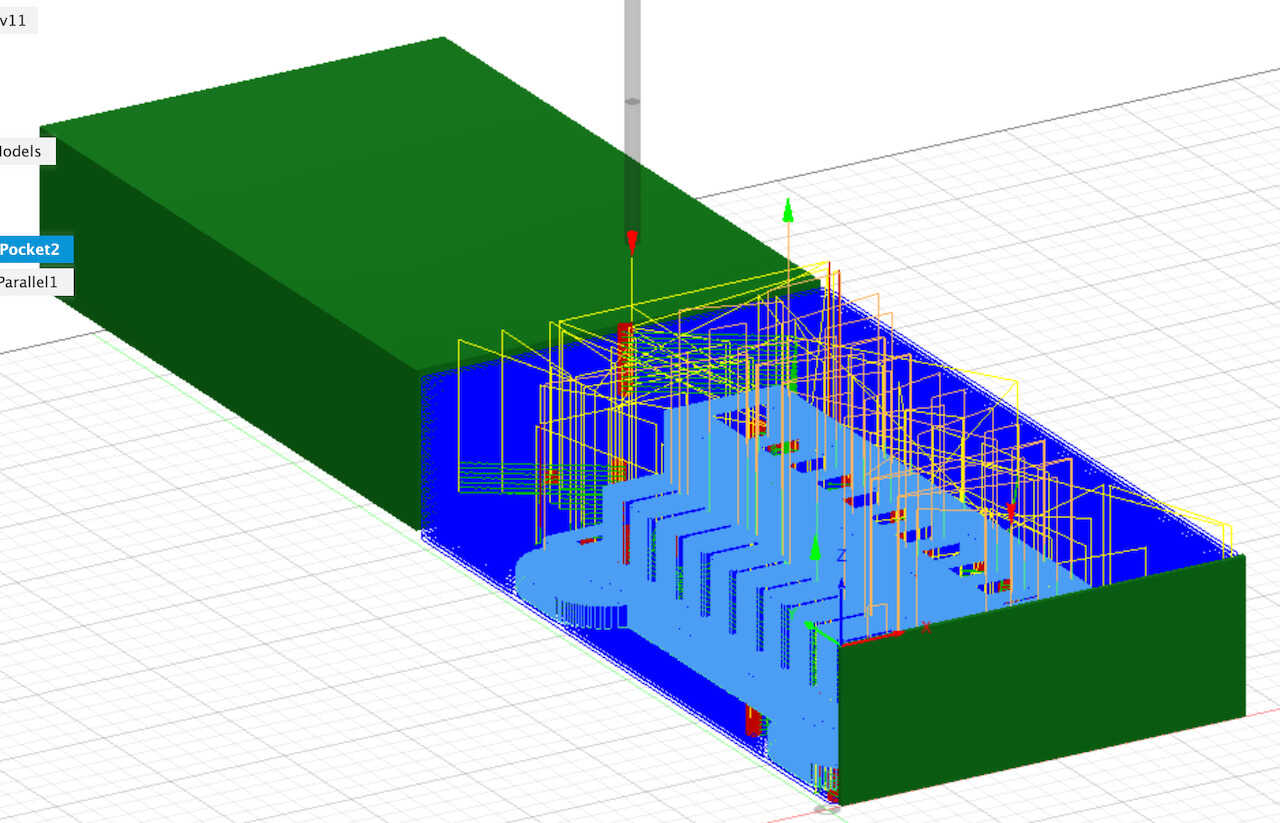
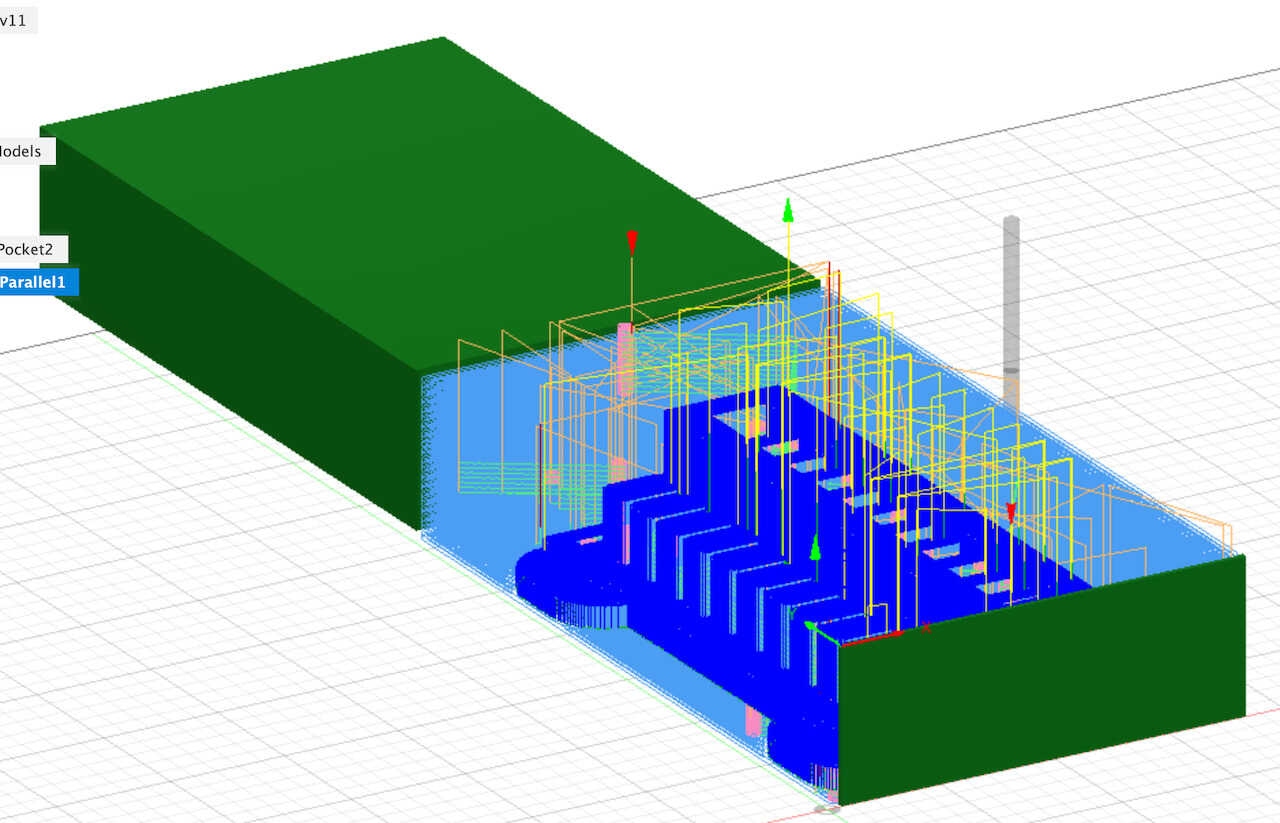
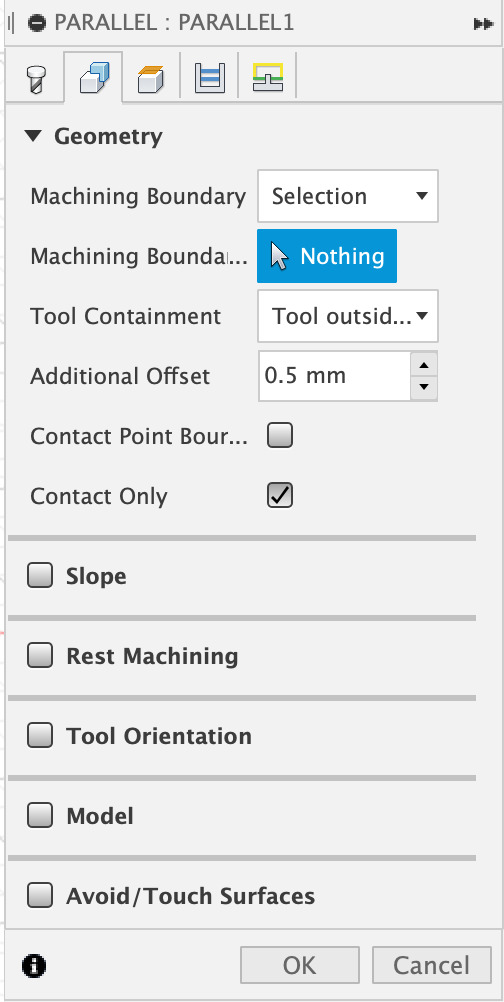
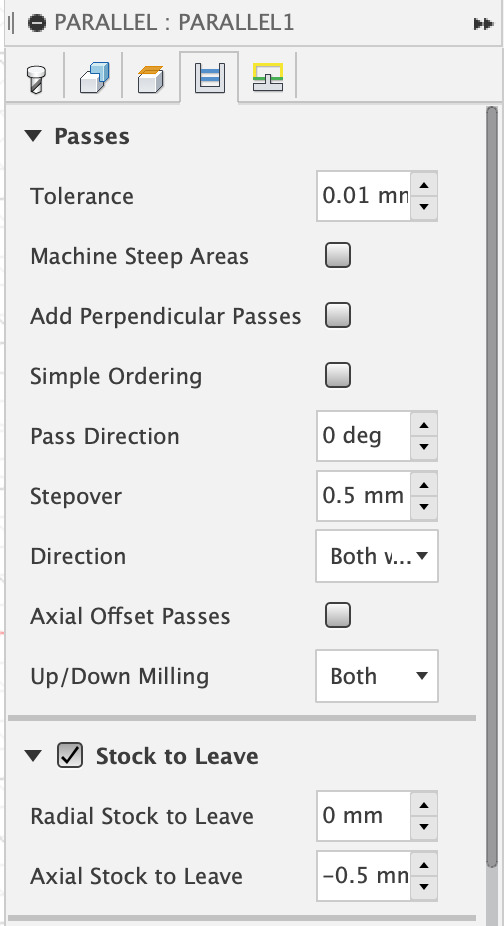
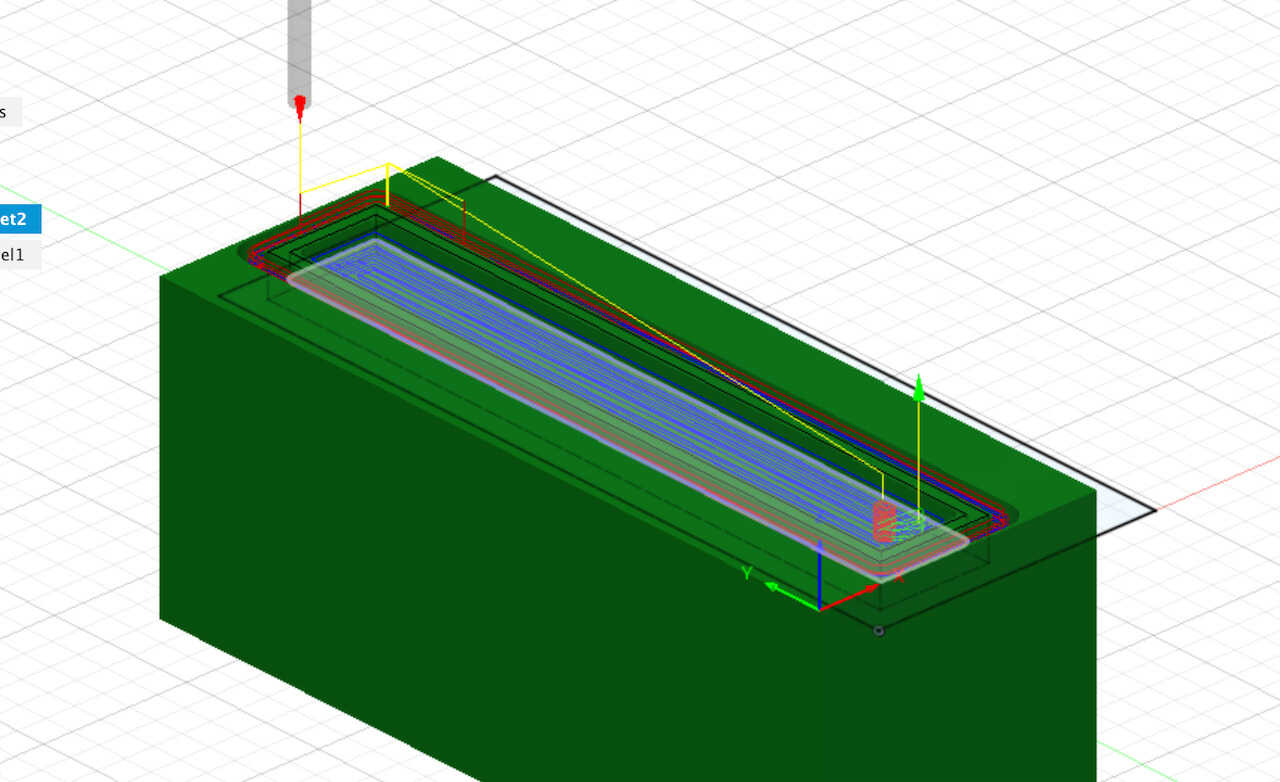
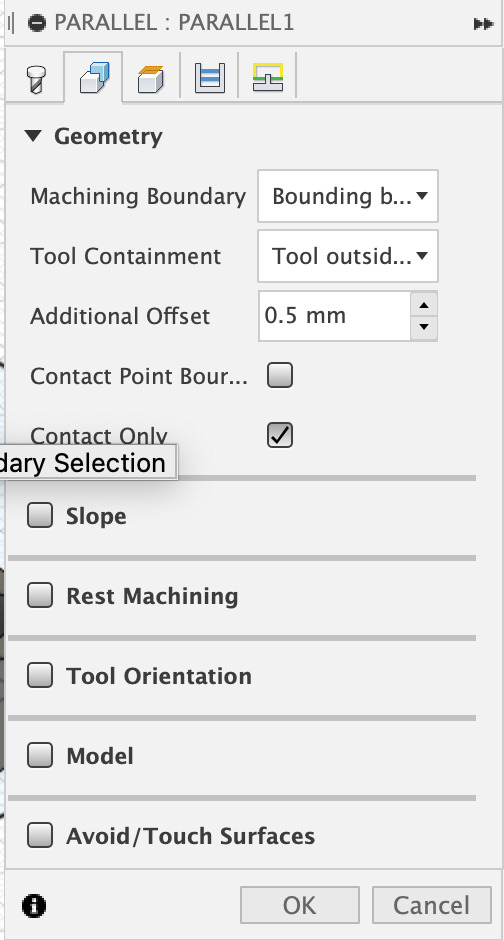
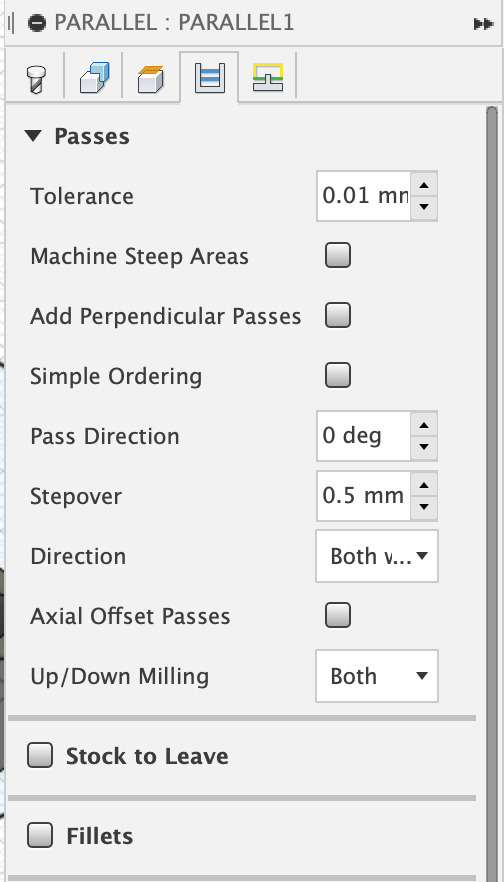
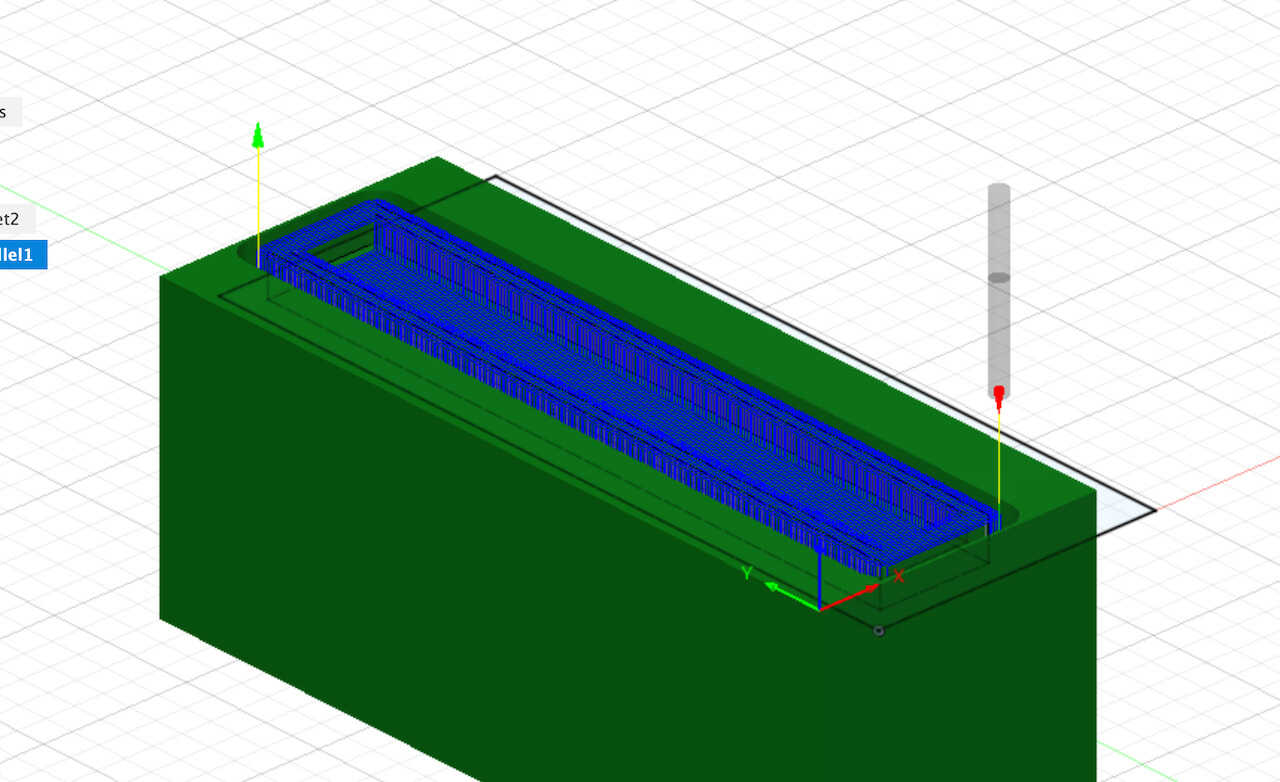
In order to mill a mold, there are several ways. FreeCAD, Fusion 360, and VCarve all provide the function to create the toolpath for a CNC machine. I chose Fusion to establish my toolpath. The principles are similar to the previous works: Week 07: Electronics Design and Week 08: Computer-Controlled Machining. After creating a model in Fusion, we need to set up the size of our material. But this time we need the Pocket clearing to rough and Parallel to finish my mold.
Important settings for Setup:
Important settings for Pocket clearing (Rough):
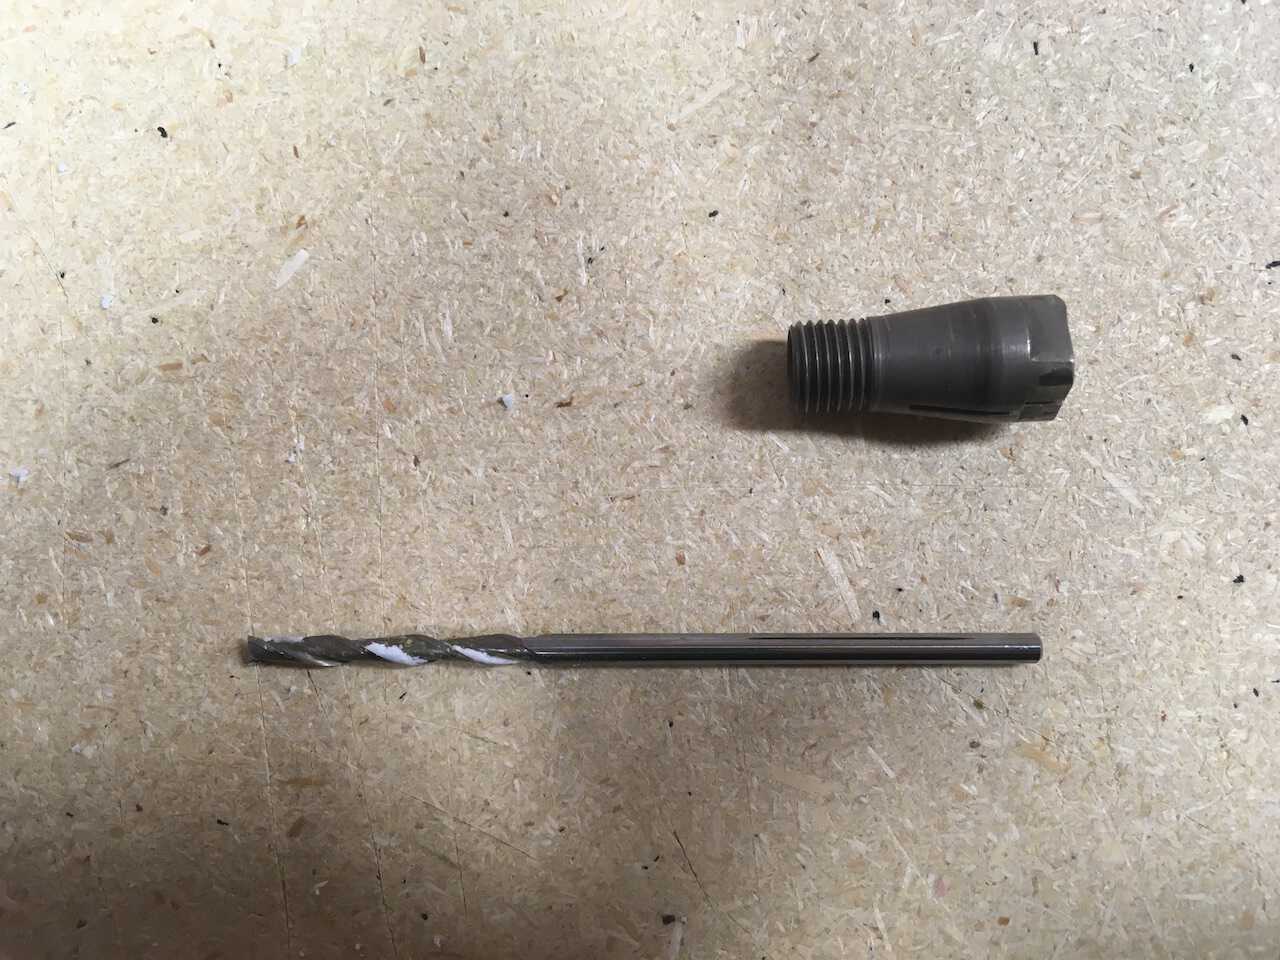
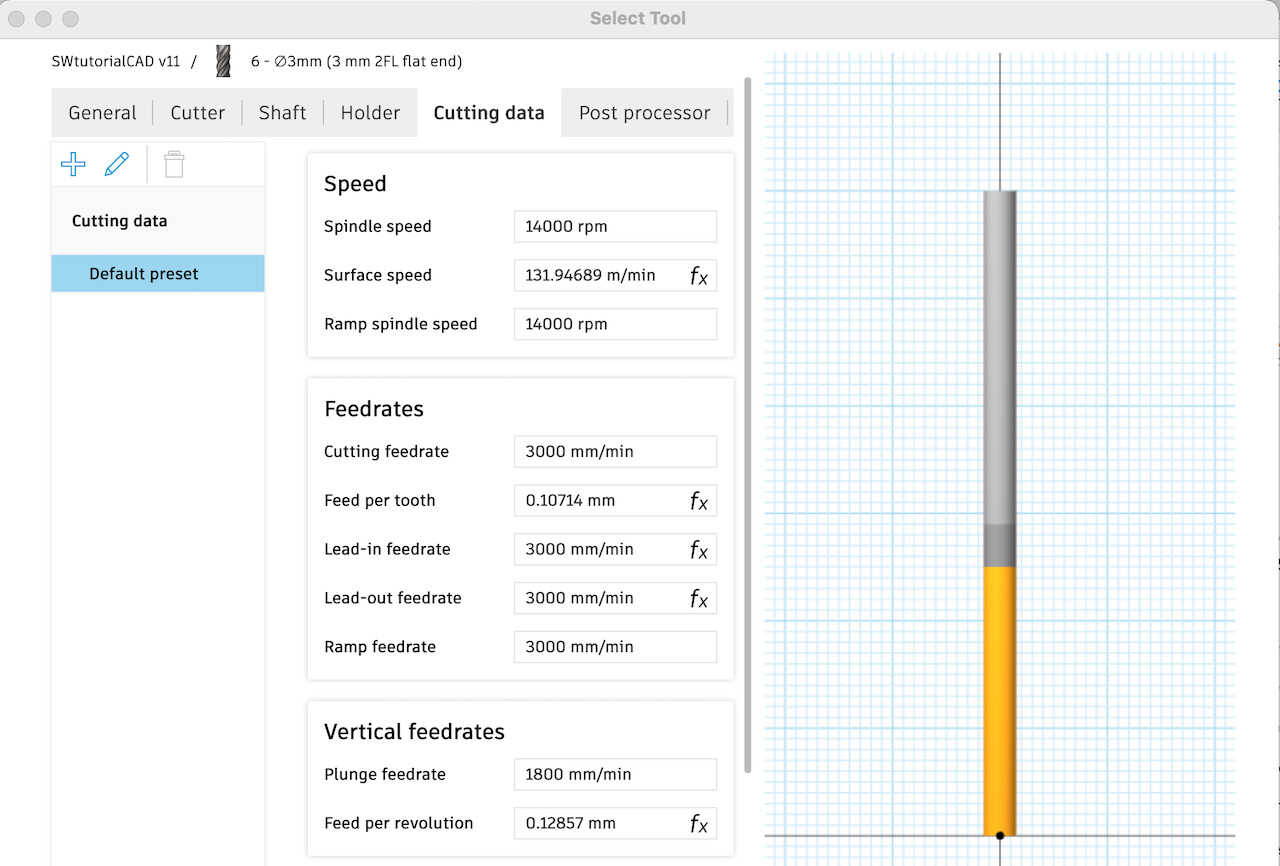
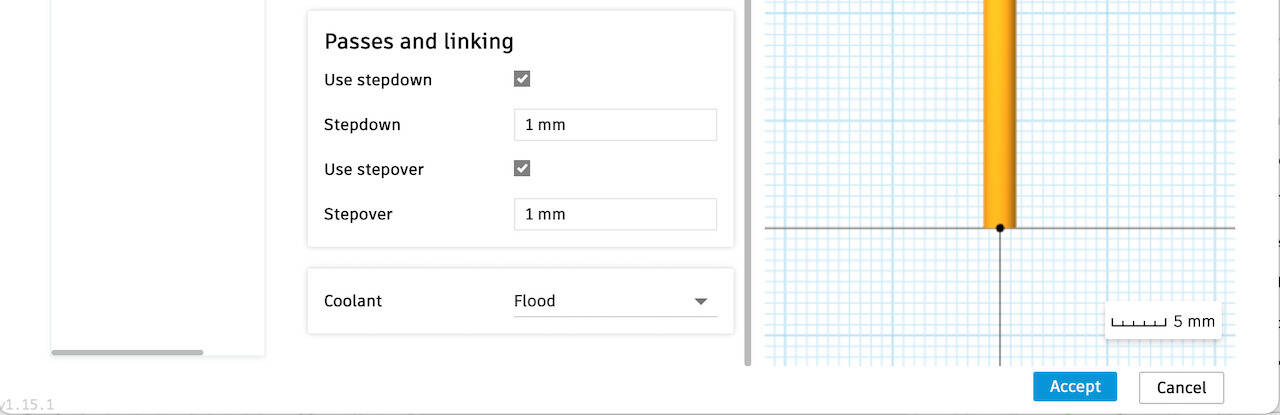
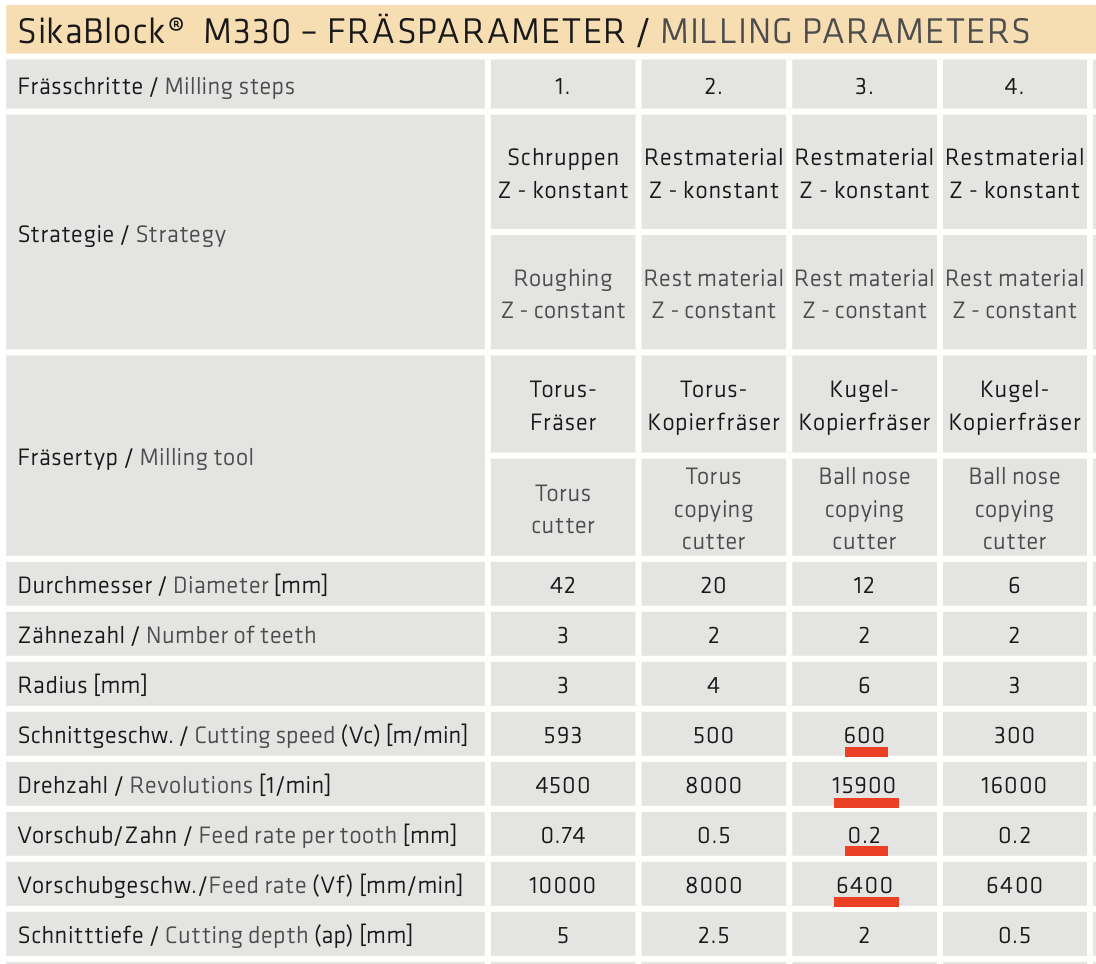
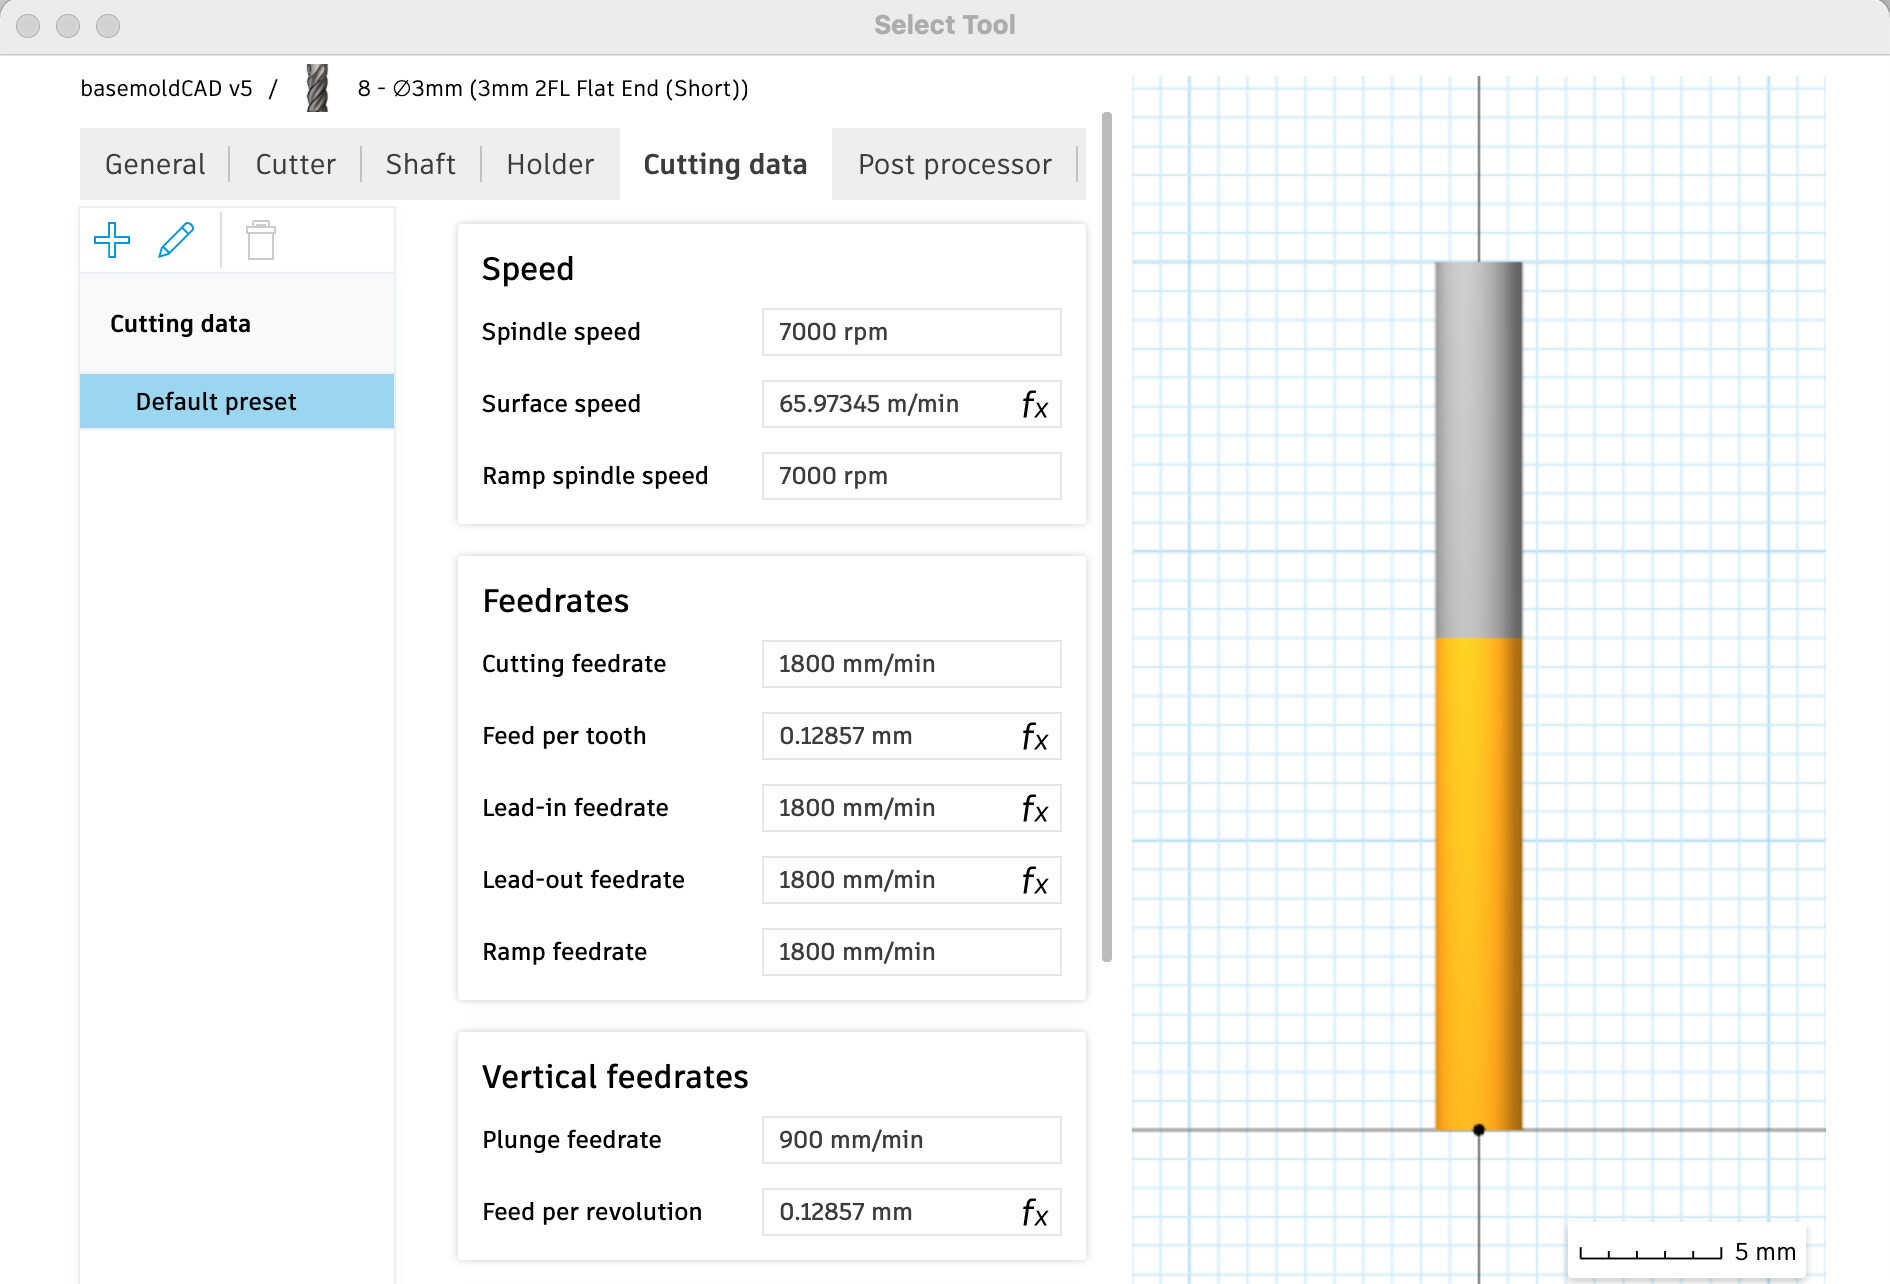
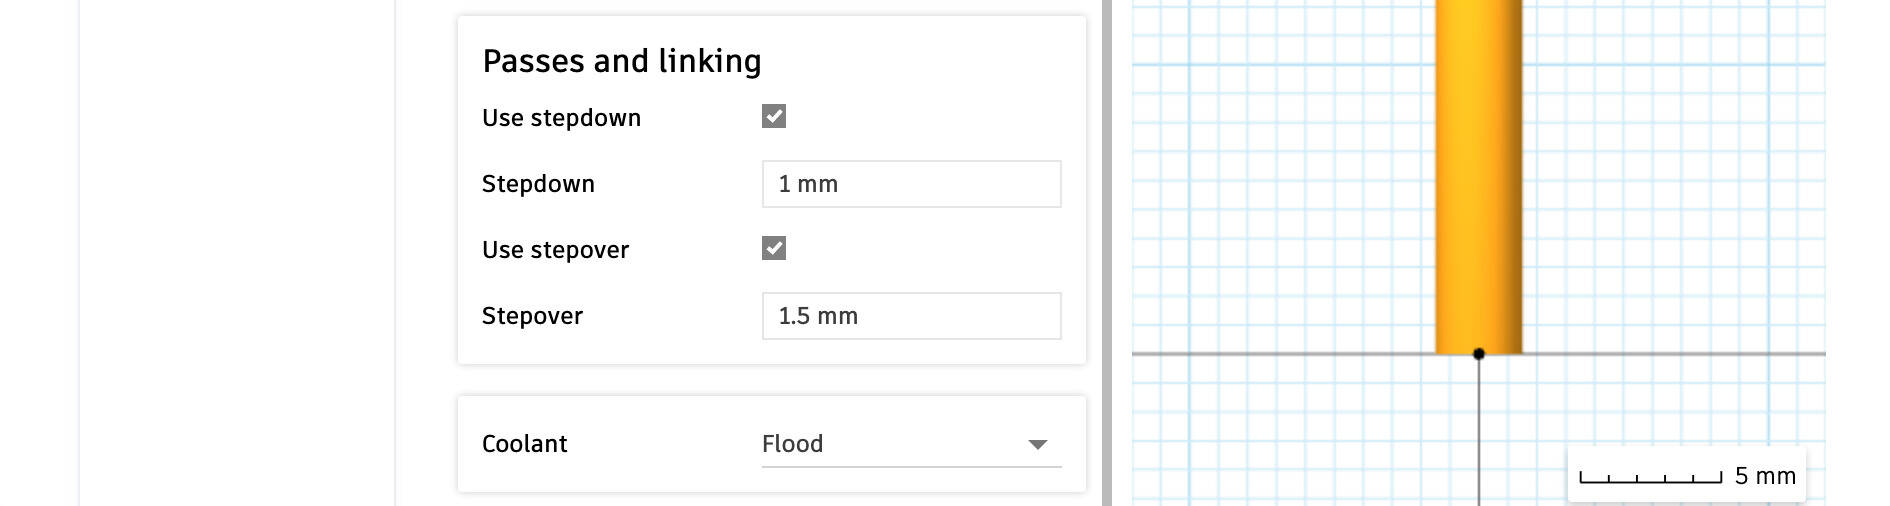
Roughing is to speed up the whole milling procedure by quick and rough milling, thus we use higher stepover to realize it in a shorter time. For example, I used a 3mm bit and the most suitable stepover could be 1.0-1.5mm. In the case of a roughing, Flat End bit is quite sufficient. I used a 3 mm 2 flute flat end bit for my mold.
The speed and feedrate setting was always a problem for me, it more relies on personal experiences, machines, and materials. I found a tutorial that explains more detail about speed and feed. If I have time I might need to see more tutorials about it.
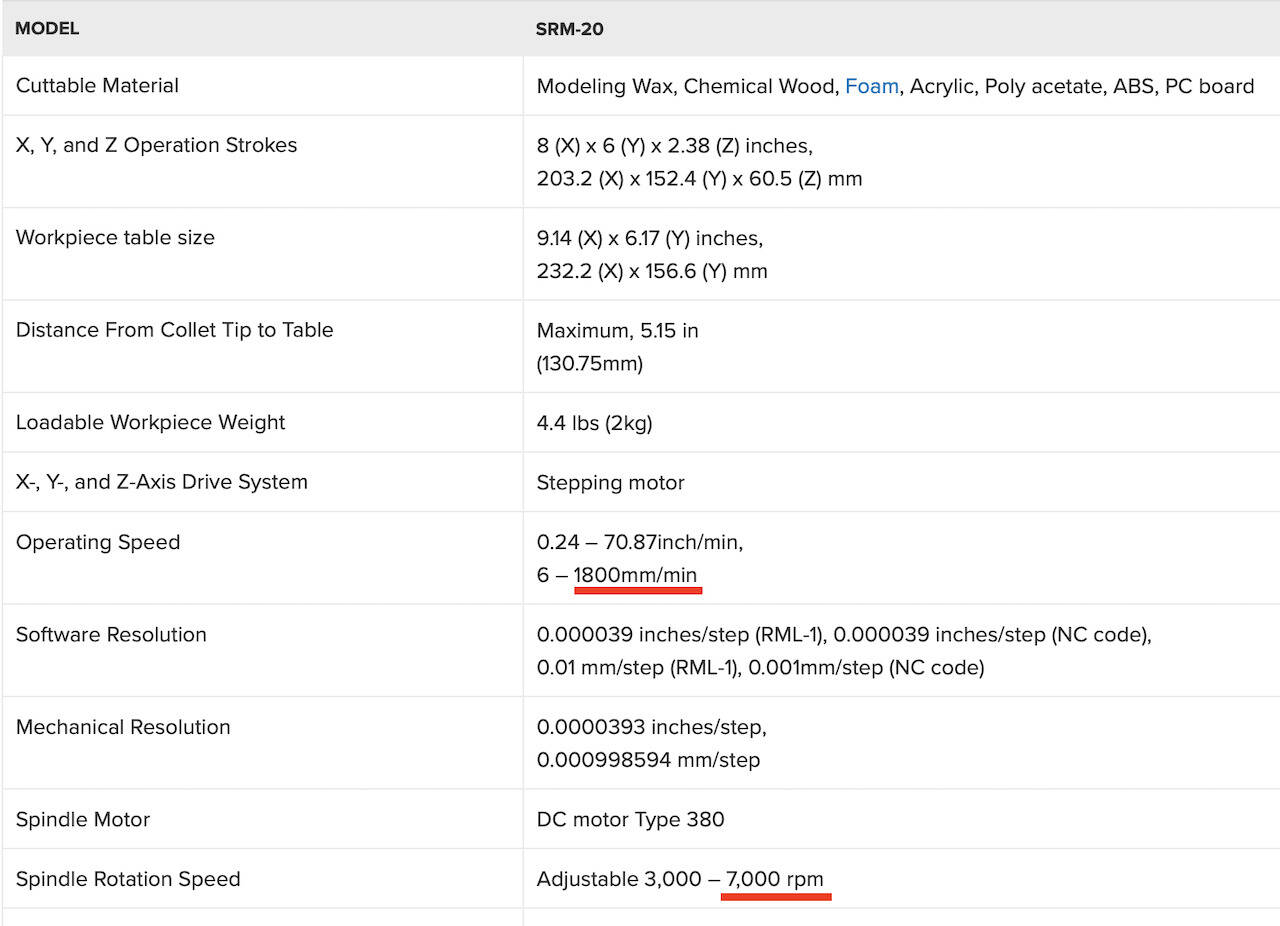
The material, wax block, and Sikablock, are softer than MDF and plywood. So we could set the spindle speed close to maximum according to the machine. Set the feedrate according to the materials, vertical feedrate could be half of feedrate.
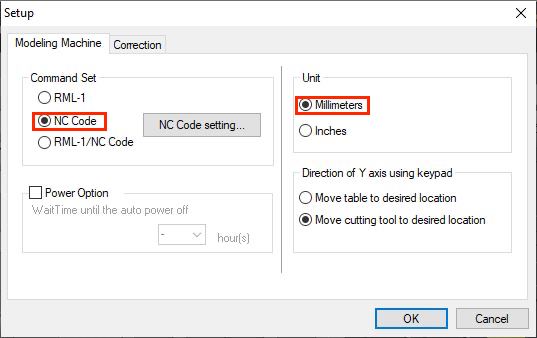
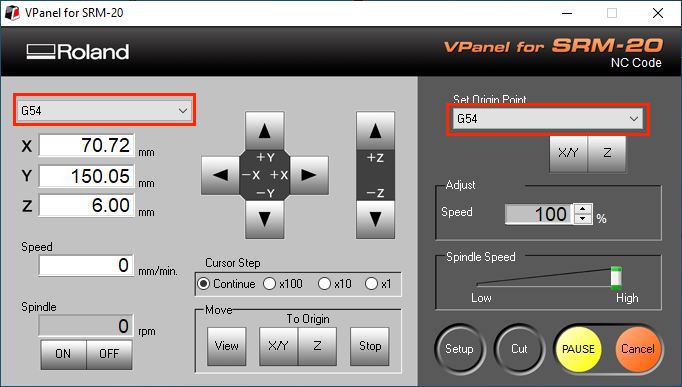
In my case, I used both MDX-40 and SRM-20 for a different part of my mold.
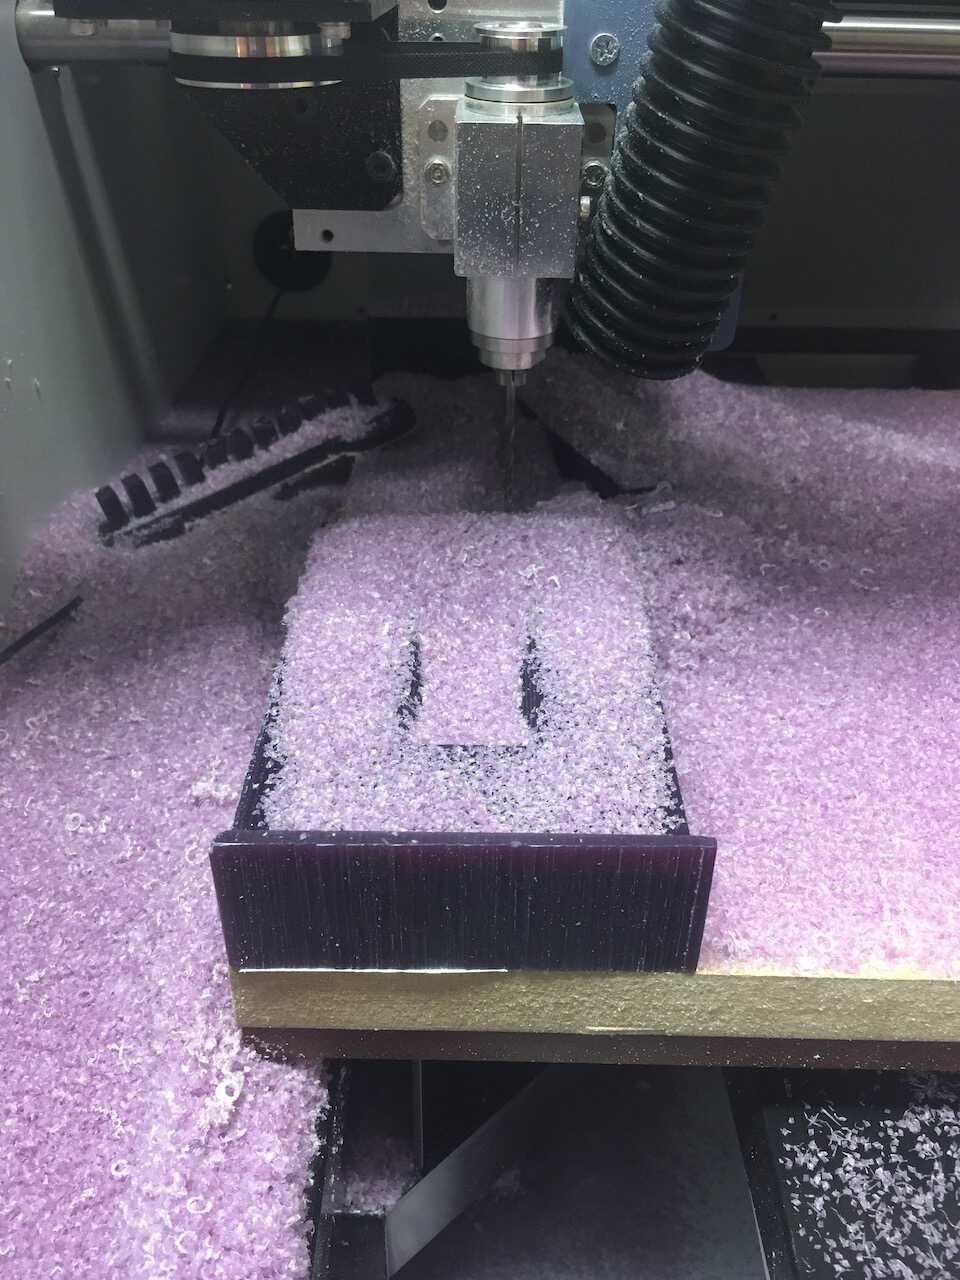
Roughing in MDX-40 with a Wax block:

Roughing in SRM-20 with Sikablock M330:
Important settings for Parallel (Finish):
Finishing is to sand the surface of mold by gradual and detailed milling, thus lower stepover is necessary to have a fine surface. Usually, to finish some detail mold, we would need a ball end bit to smooth the surface cleanly. But in my case, the mold was mainly combined with a flat surface; therefore, 3mm flat end bit is quite enough, further in the continuous milling from roughing to finishing I don’t need to change the bit in the middle of milling.
Finishing in MDX-40 with a Wax block:
Finishing in SRM-20 with Sikablock M330:
Settings in MDX-40 and SRM-20
MDX-40


SRM-20
!Start (Left MDX-40+Waxblock/Right SRM-20 Sikablock)
Roughing
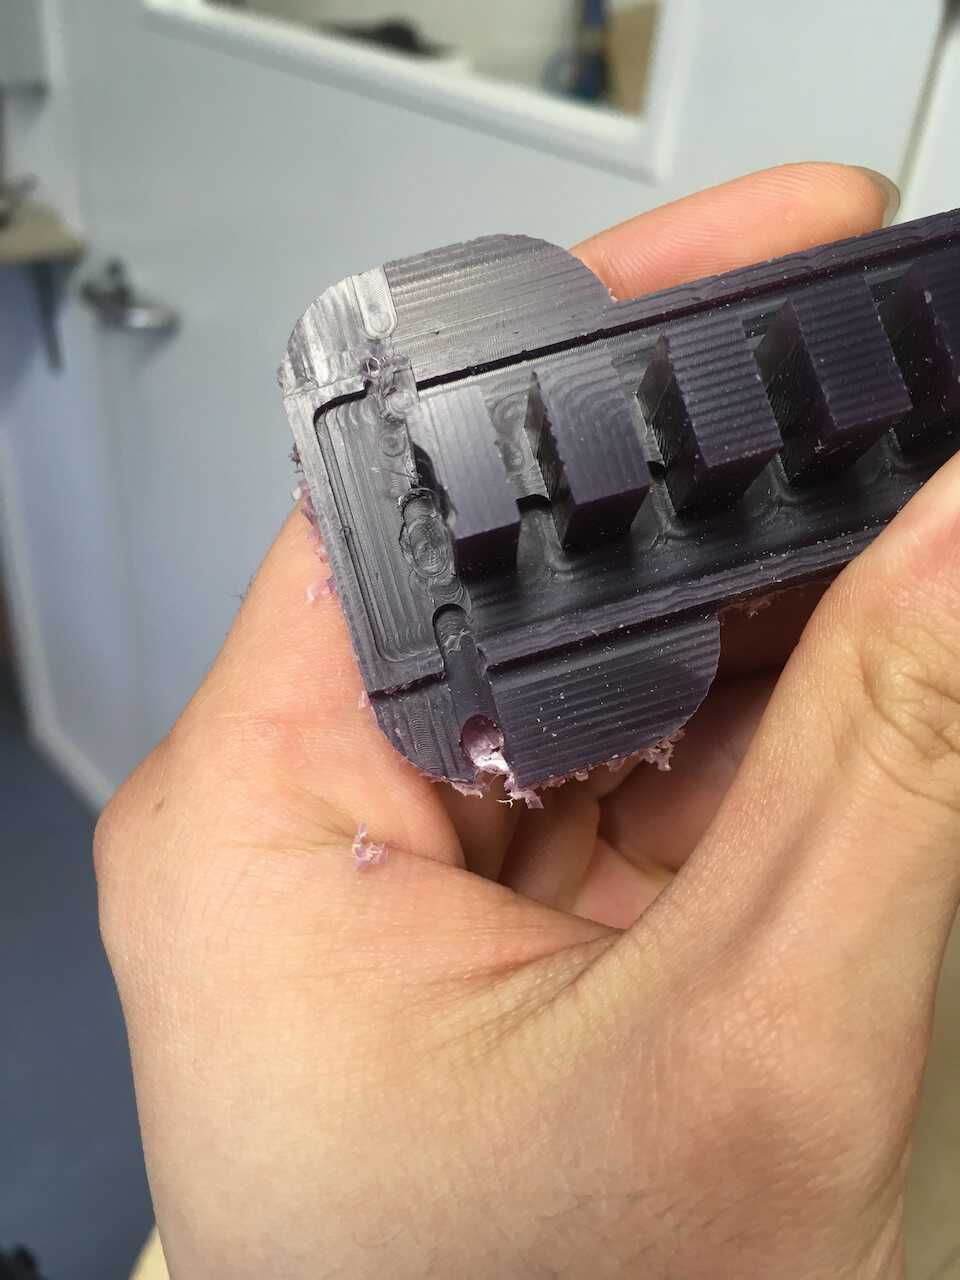
Finishing
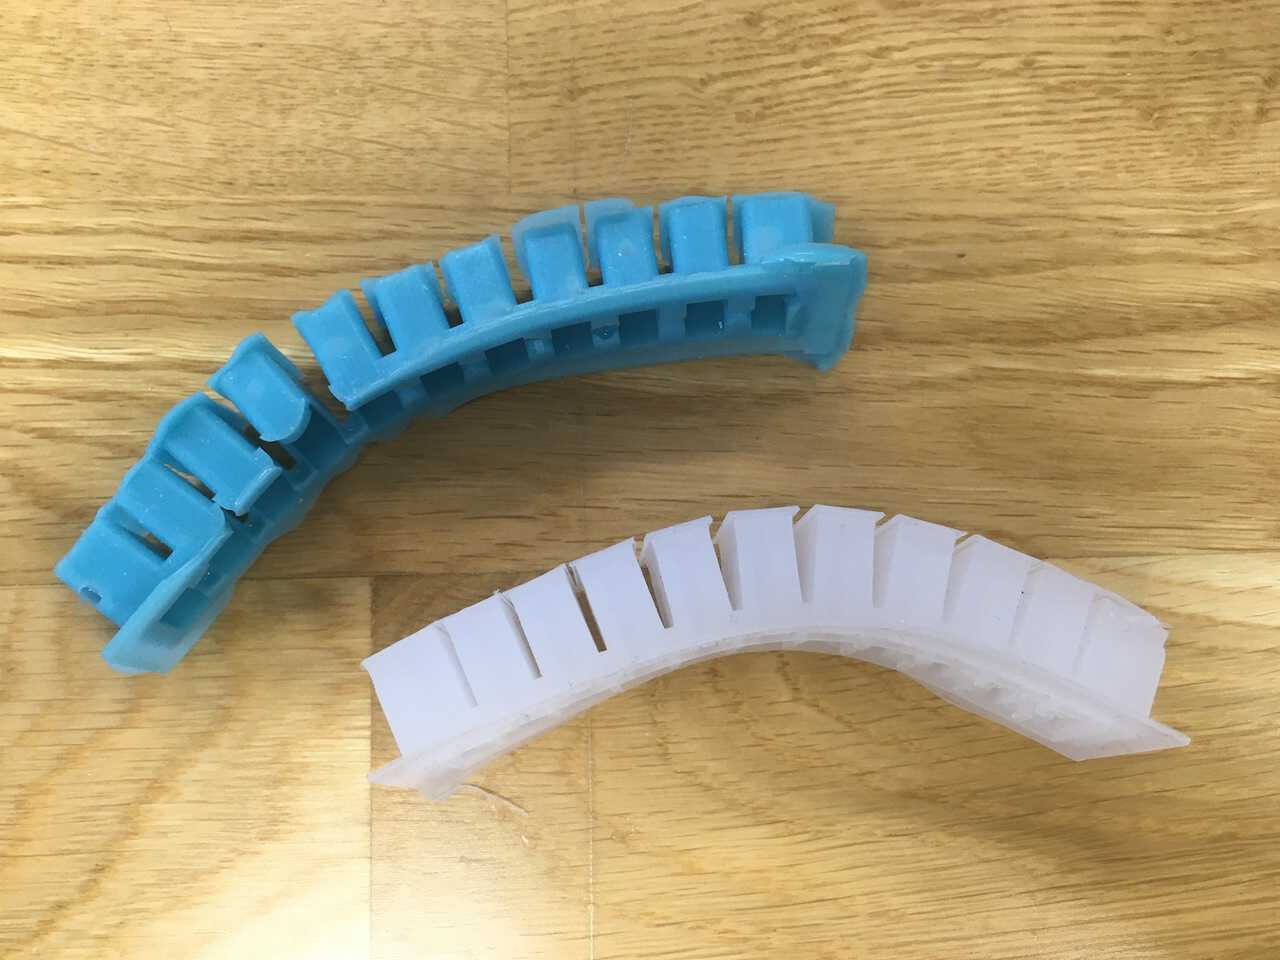
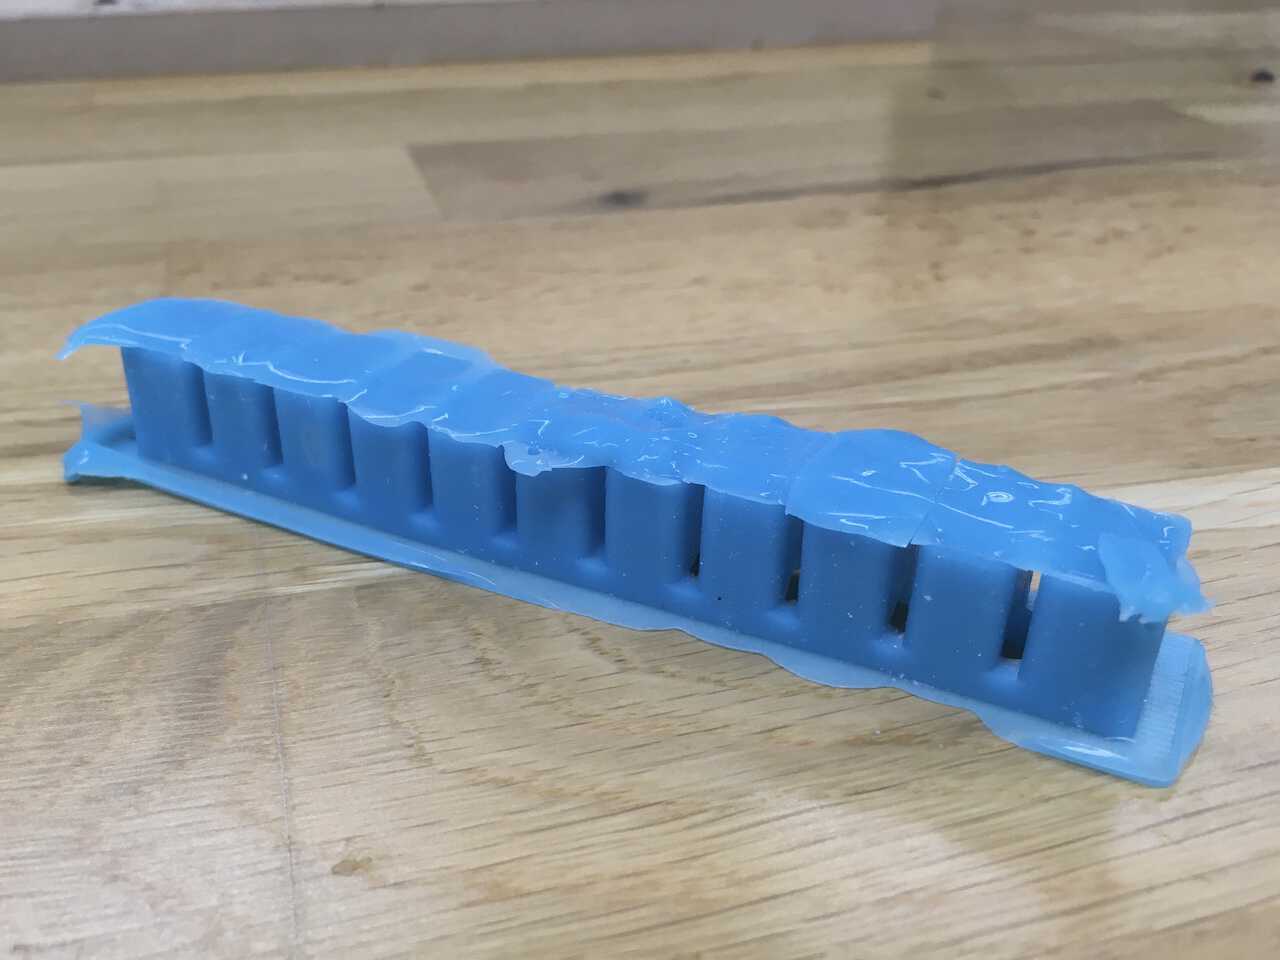
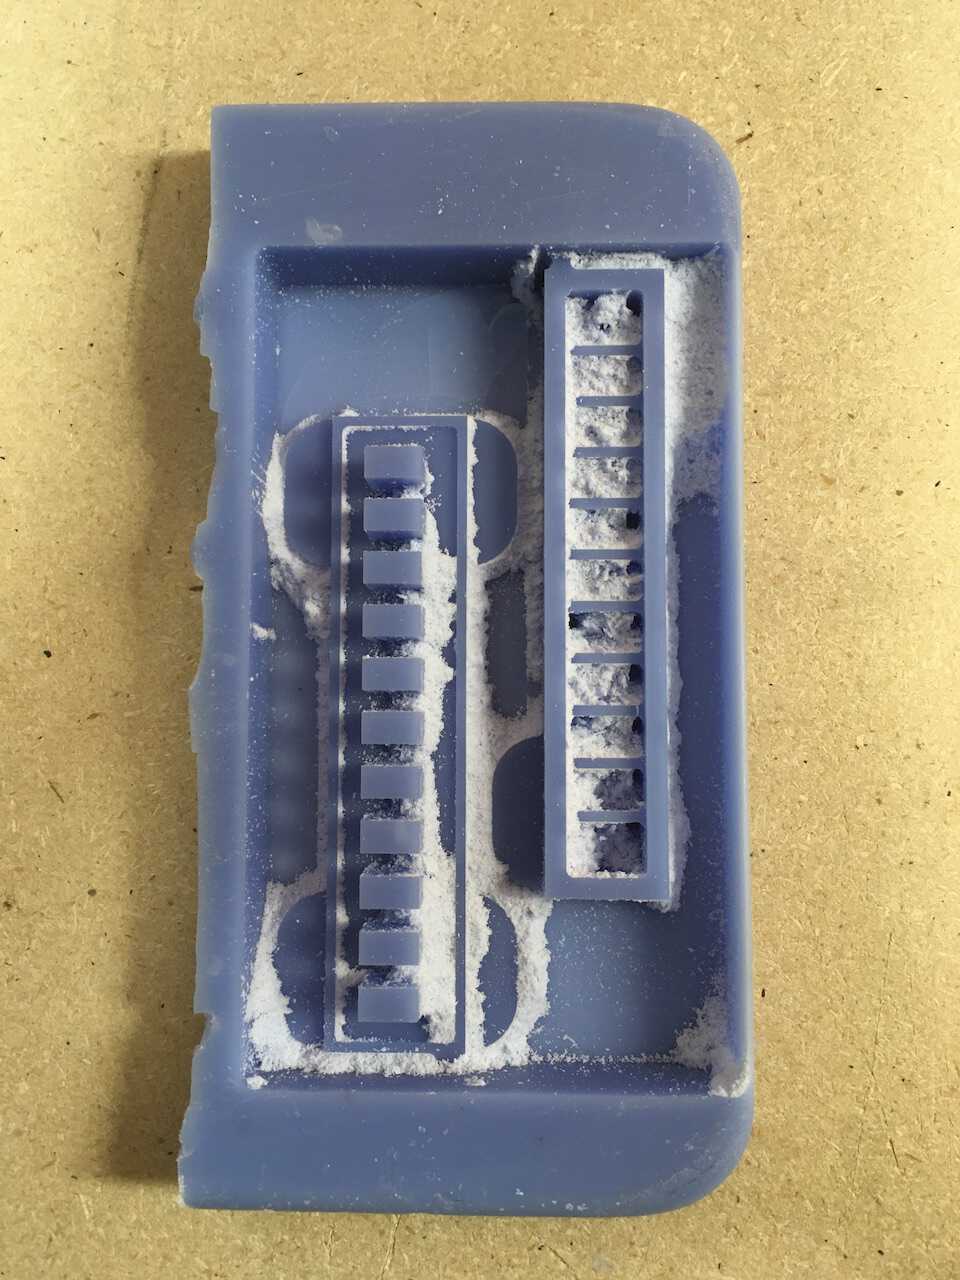
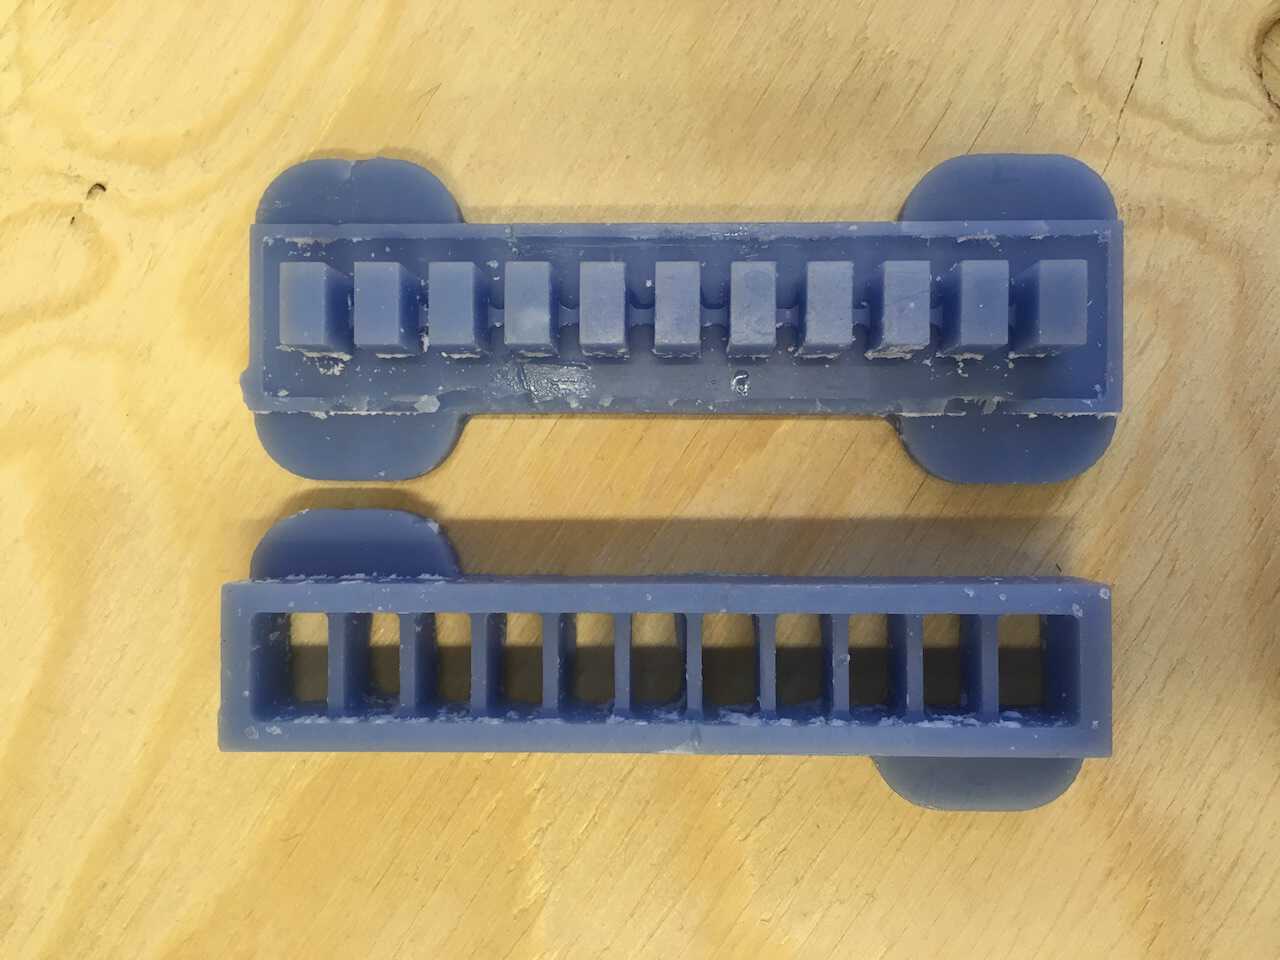
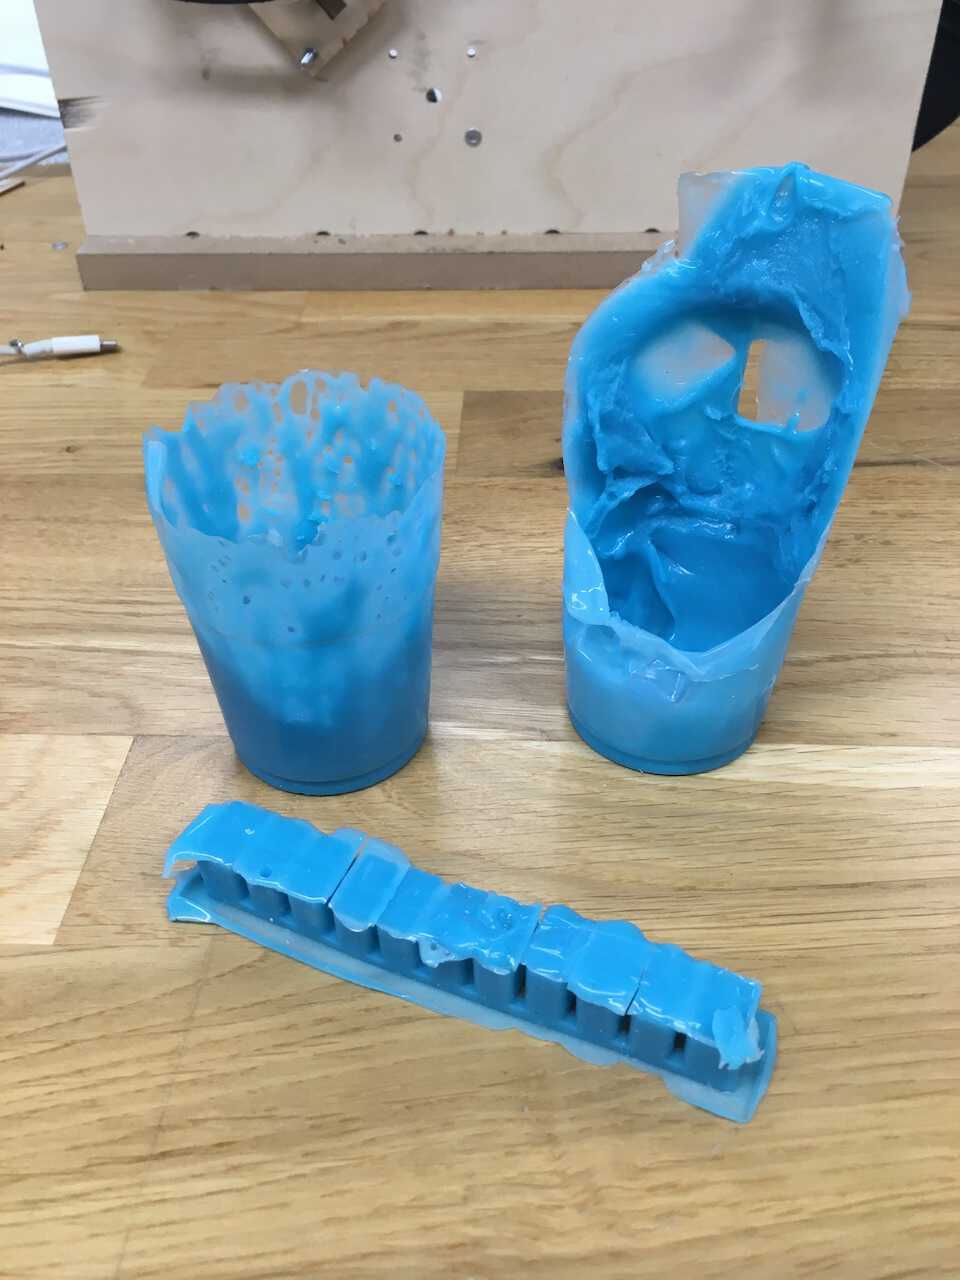
Molds done
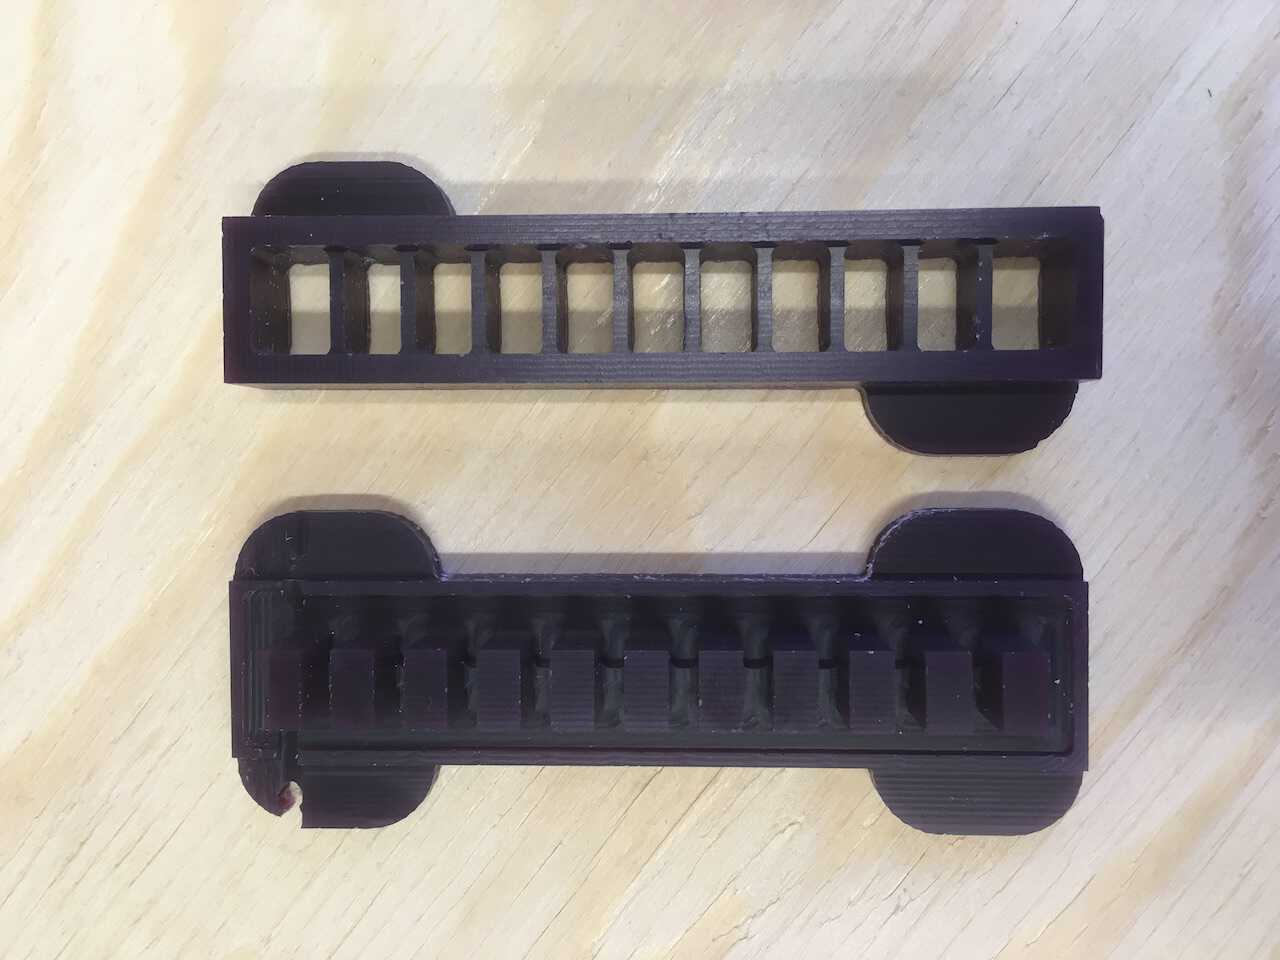

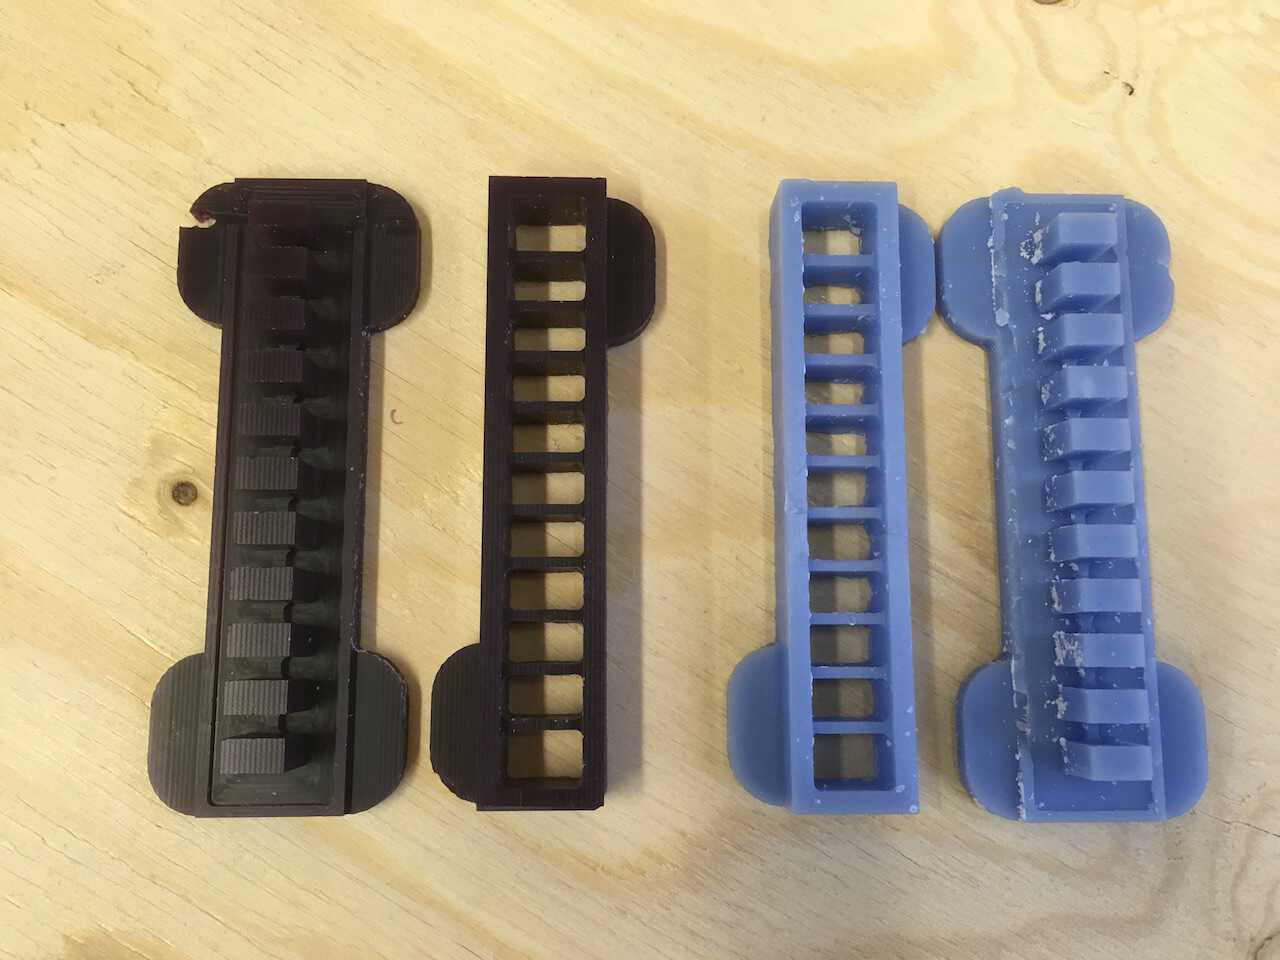
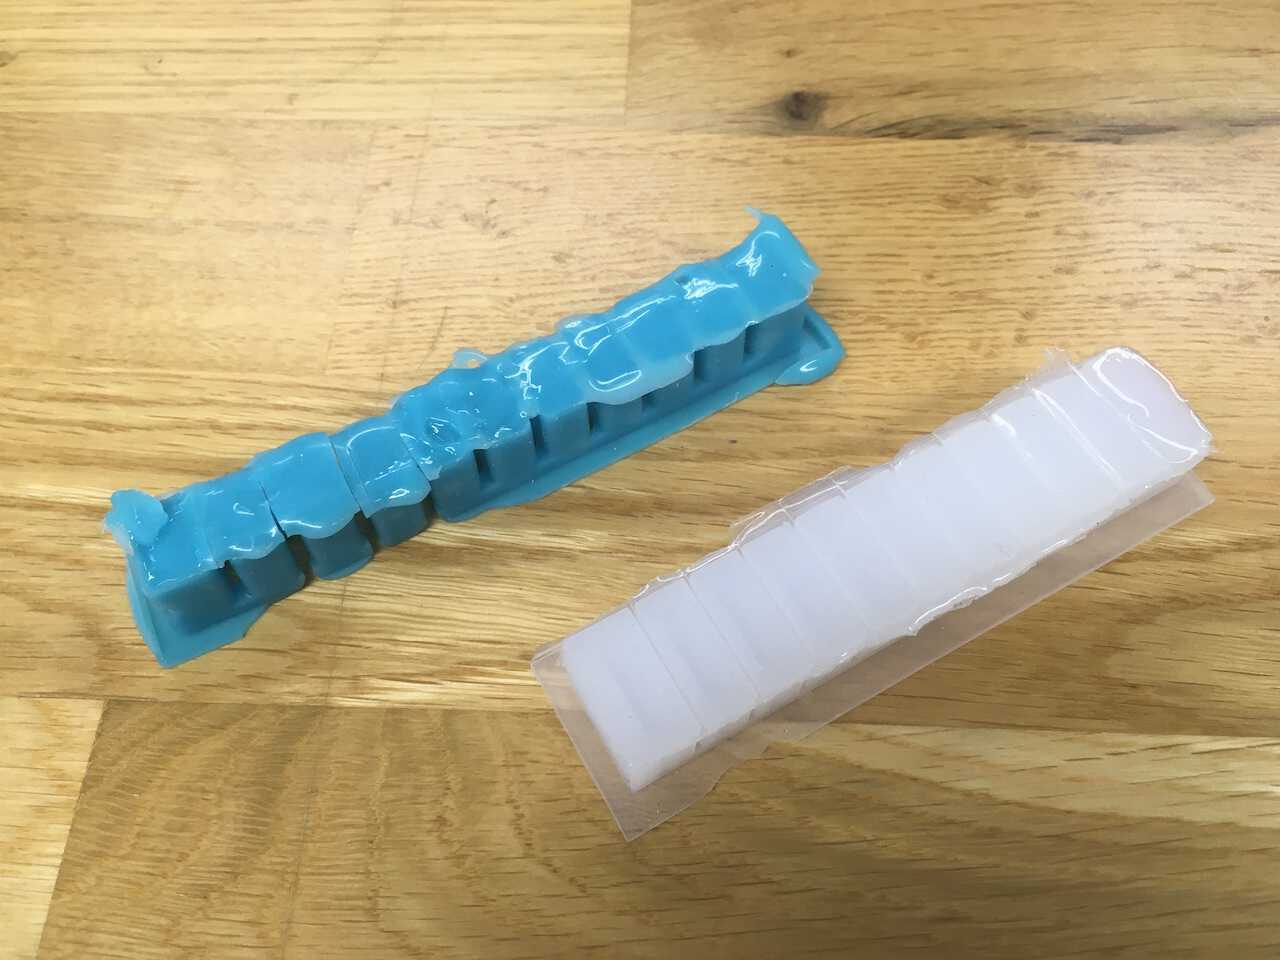
Casting in the mold
Before starting the casting, it is mandatory to read Safety Data Sheets (SDS) to know how to work with Mold Star. Wearing gloves is always necessary during the mixing procedure.
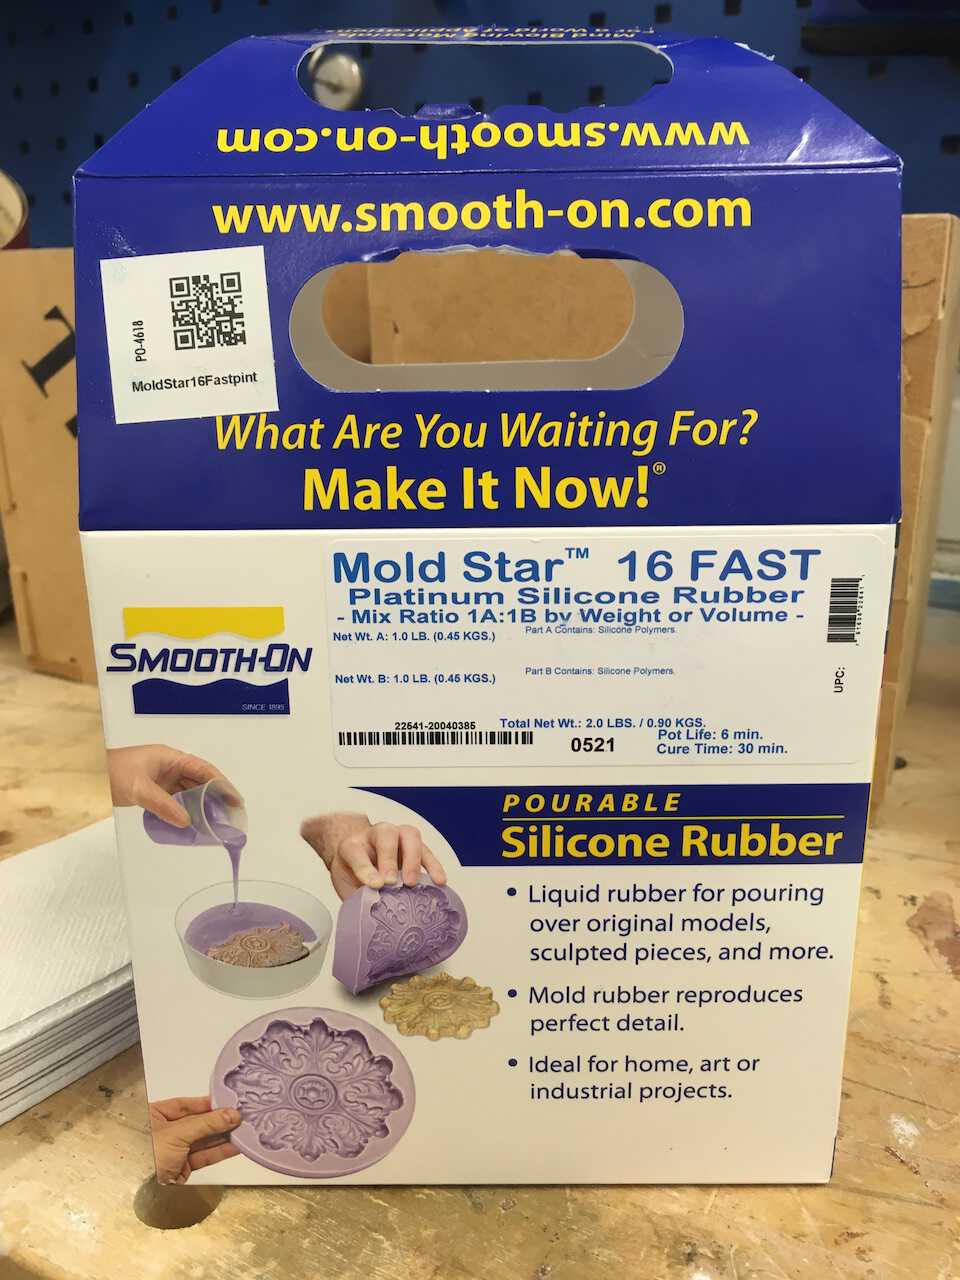
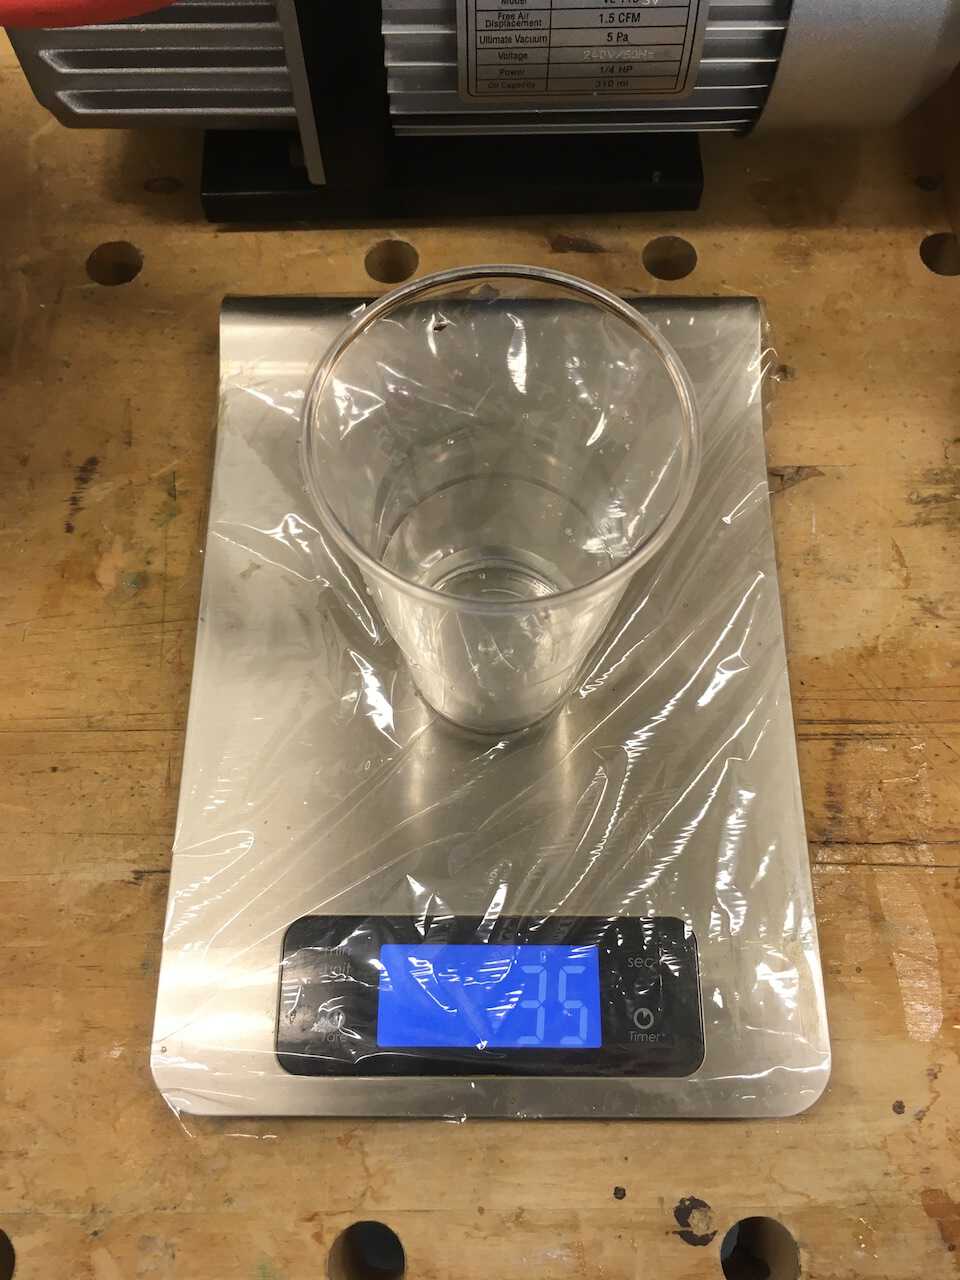
Measure the weight of water that filled up my mold to know how much silicone I need. According to the instruction on SDS to mix A and B bottle 1:1 by weight. Shake it properly before you mix it!!

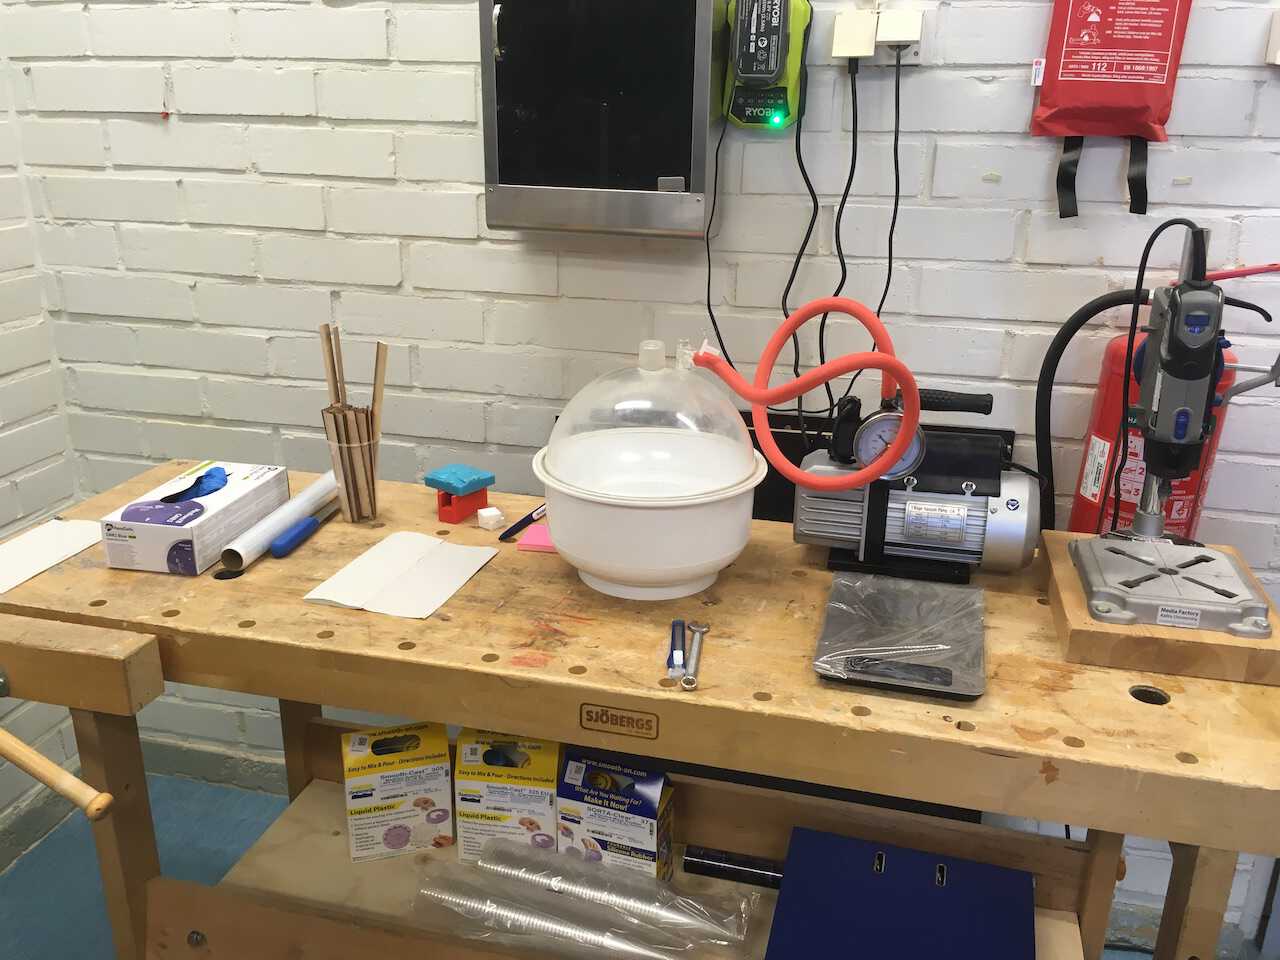
Use the vacuum to squeeze out the bubble from the mixture.
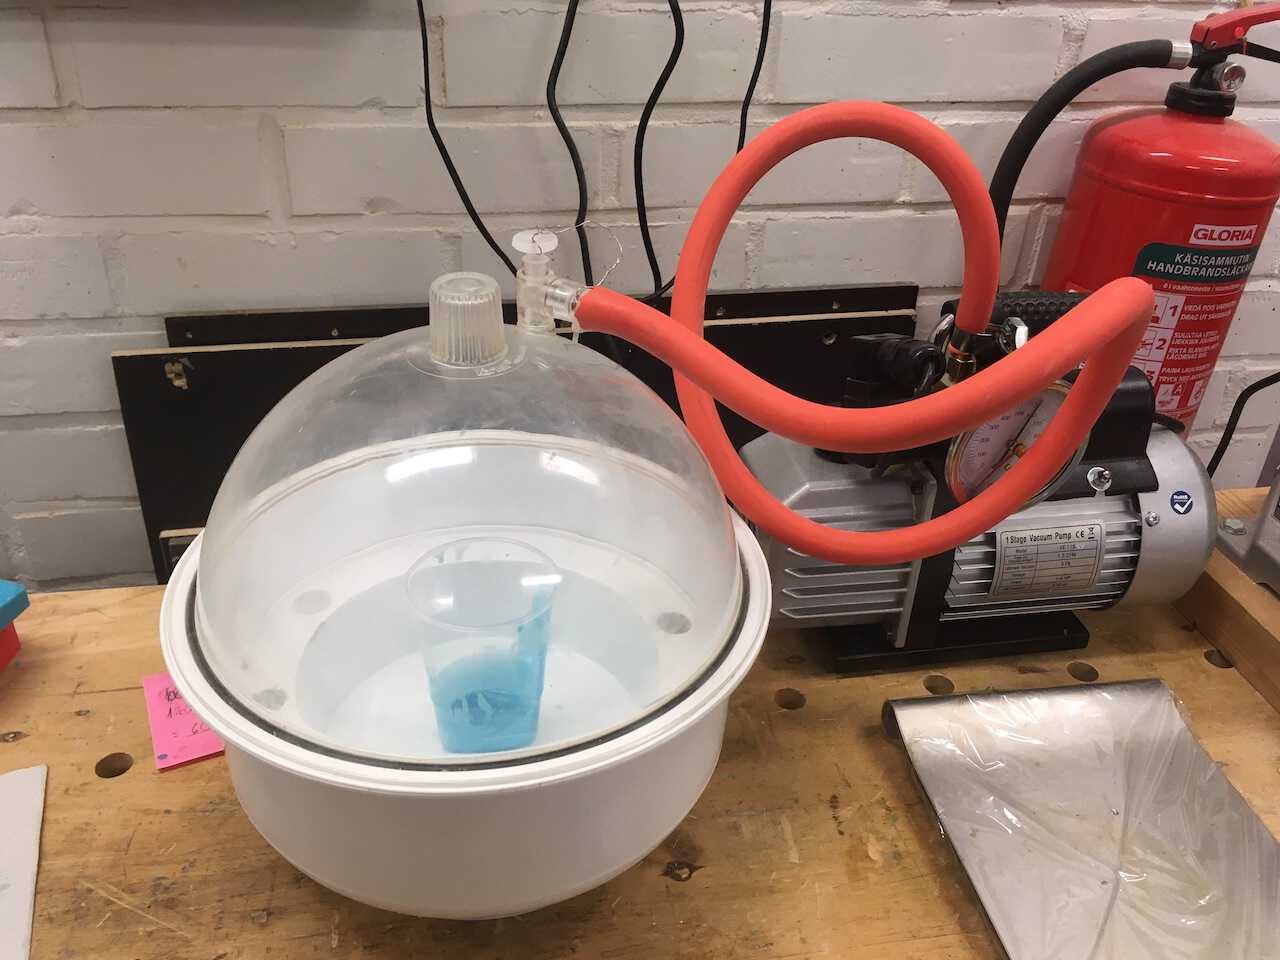
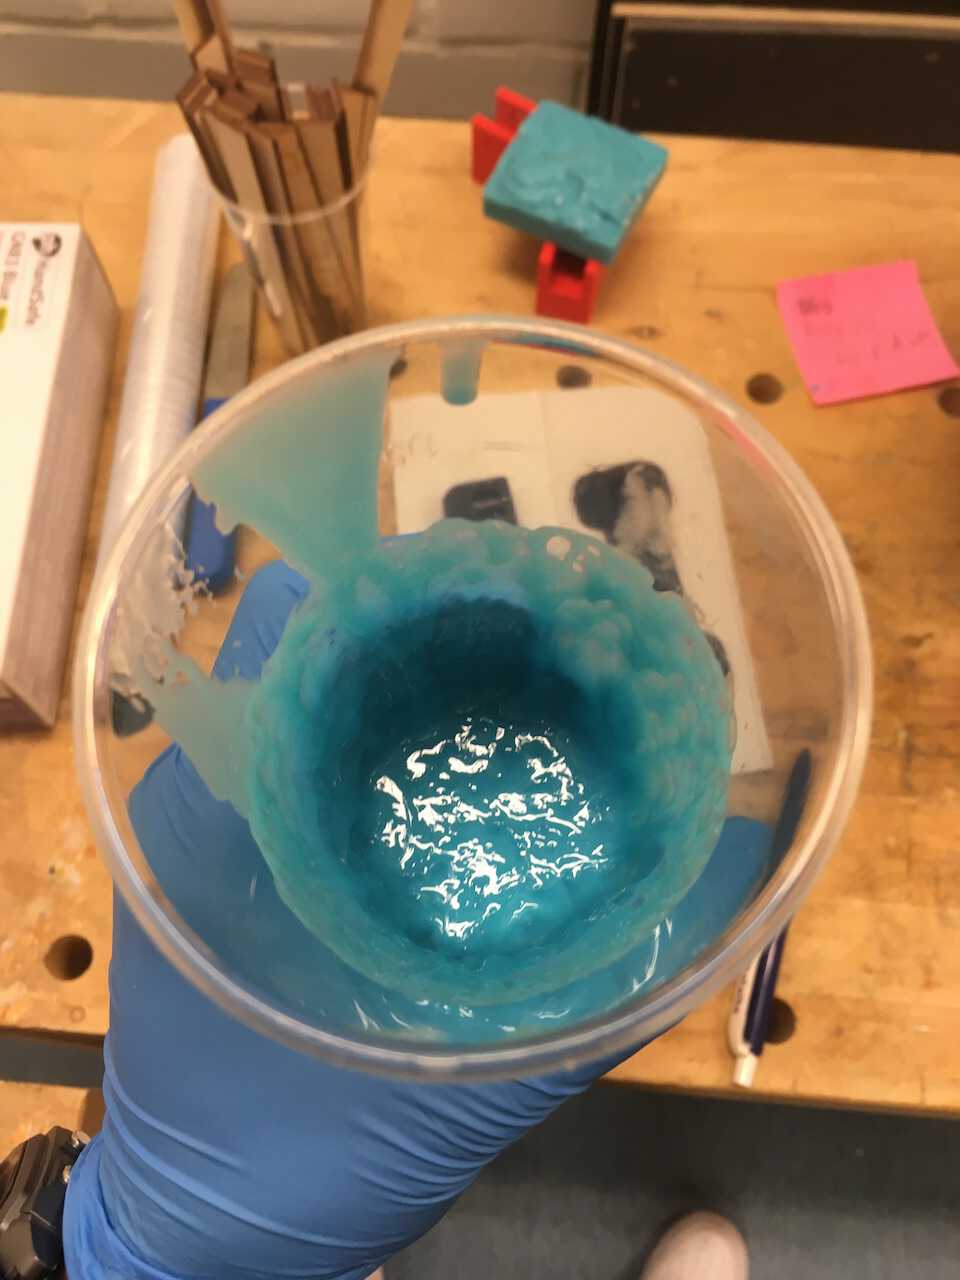
!!Warning: The valve is supposed to be open gradually to avoid the spitting of the mixture.
Wrong!
Correct!
Casting slowly with thinner fall, the bubbles are easier to come out and the silicone is easier to fill up every gap. Depends on different materials, for Mold Star 16 Fast after 30 minutes could finish the cure.

Challenges
-
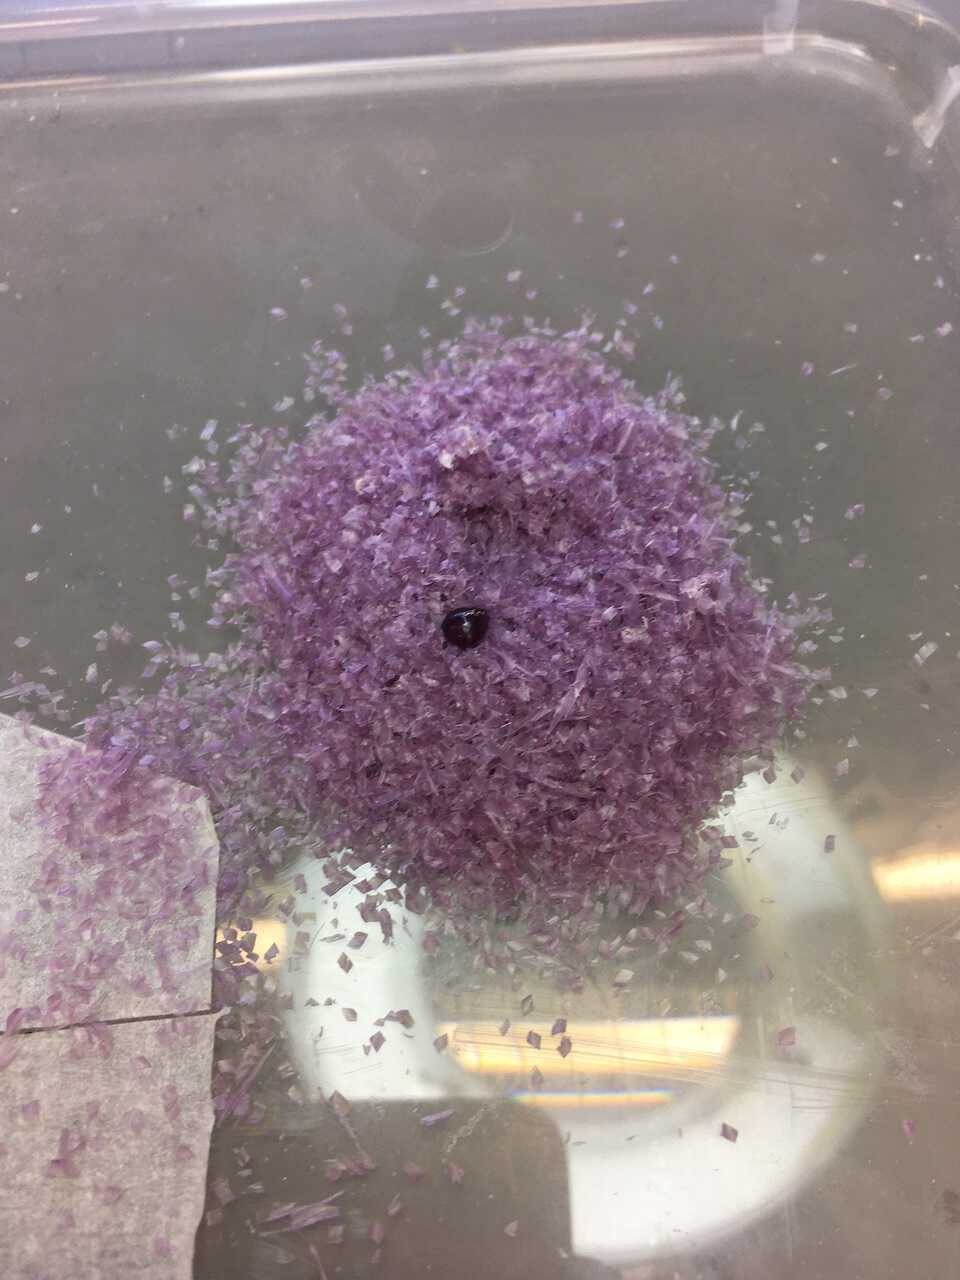
The first molds weren’t cut off totally and also the wax ash was too fine to remove. While I was cleaning the bottom of the mold, it was broken into pieces by the chisel.
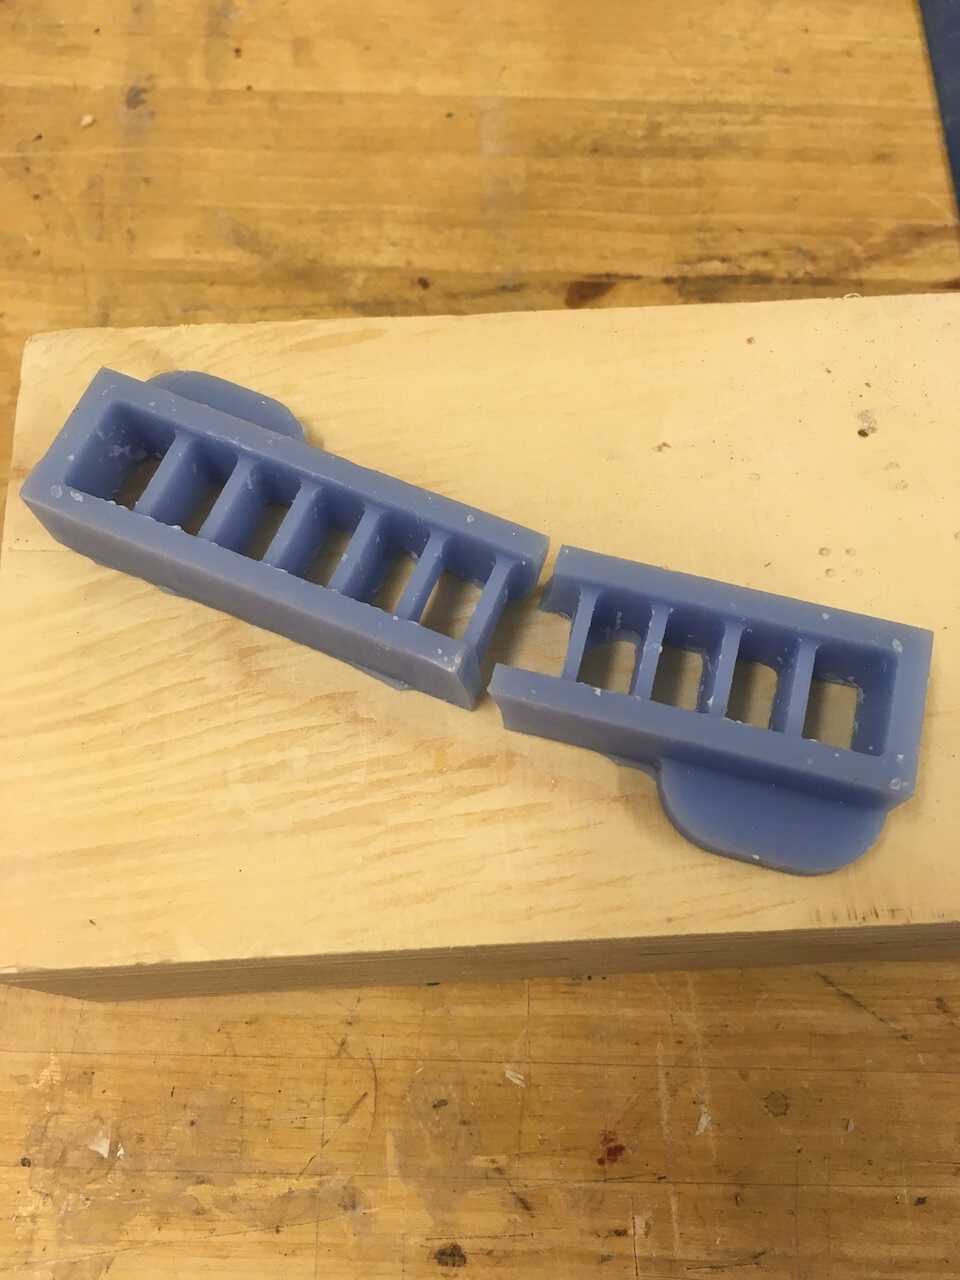
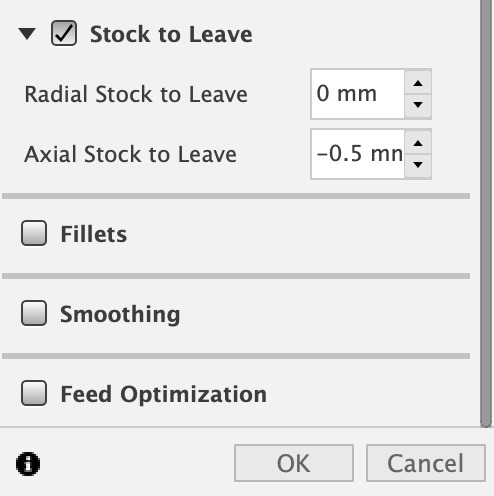
!! Solution: Glue it up with epoxy glue. Next time, increase the stepover to 1mm for roughing and set Axial Stock to Leave into -0.5mm.
-
The second molds were slightly broken while finishing.
?? Reason:
The z-axis of MDX-40 was changed during the roughing and finishing procedure. Might because of the long processing time.
!! Solution:
Fix with a soldering gun to melt the wax ash and fill the broken part up.


-
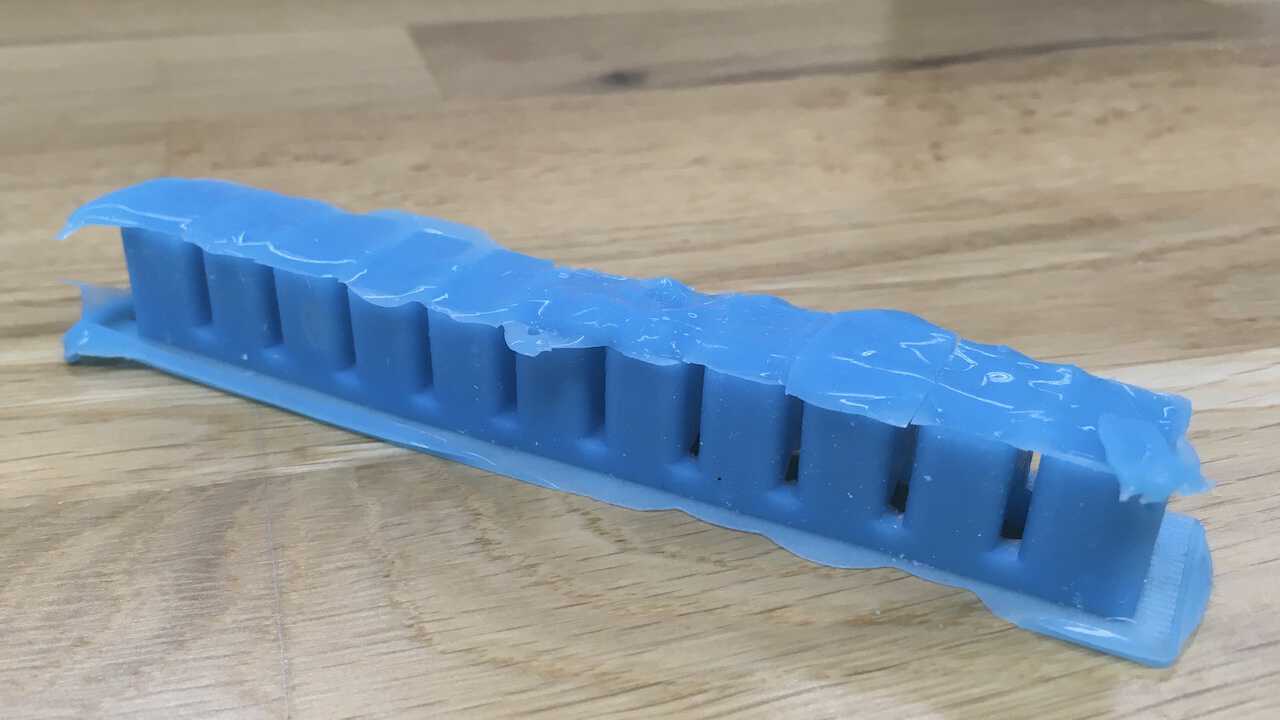
The silicone was dried in 6 minutes.
!! Solution: After mixing the silicone, first cast the silicone into molds. Then put the mold and casting into a vacuum together.
-
The molds broke again because the dried silicone was attached with molds without any space.
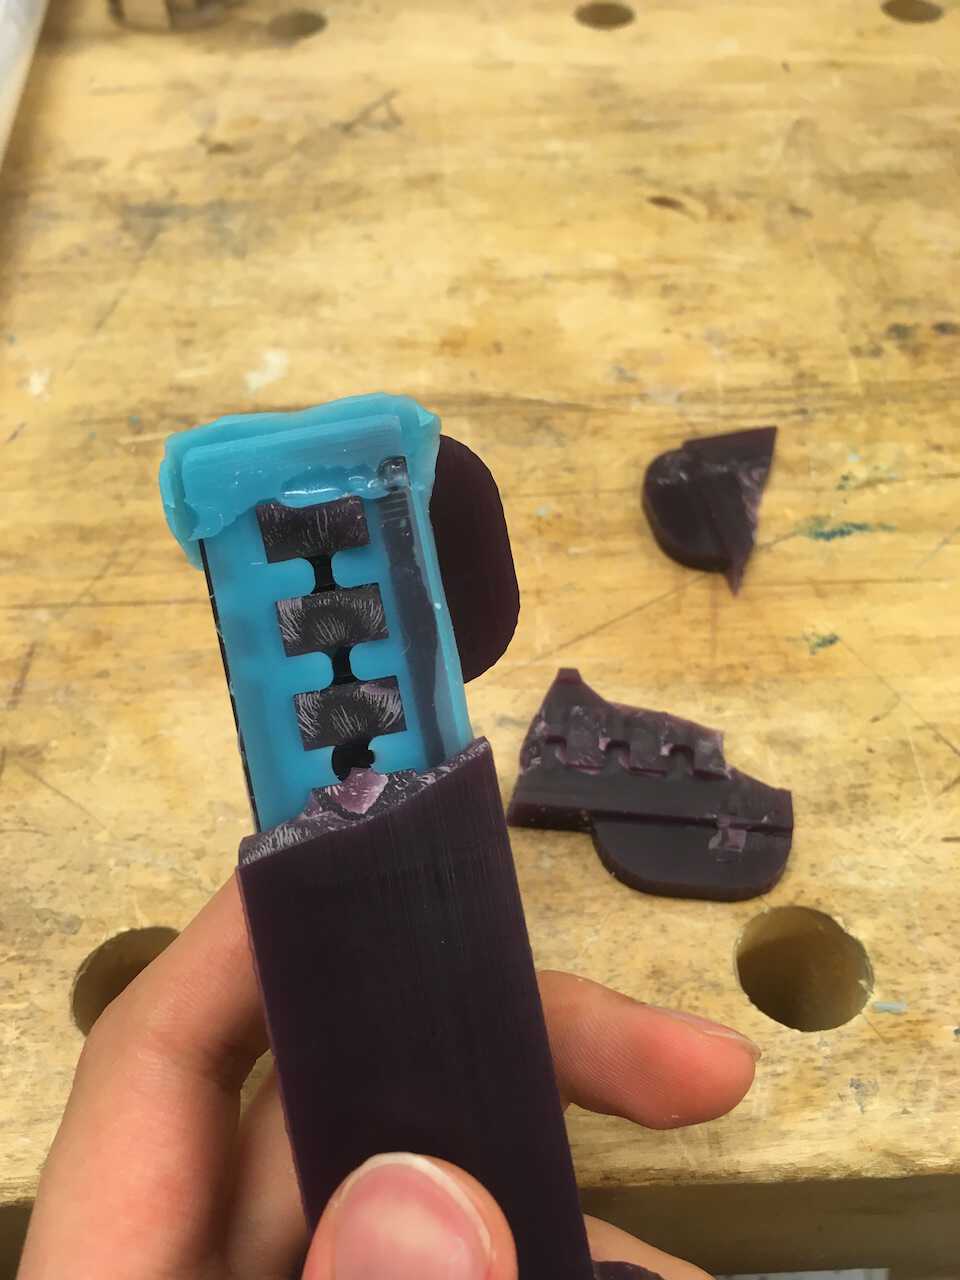
!! Solution: Use talc or Baby powder before pouring the silicone. The casting result would be better.
Download
The Week 13 zip file includes:
-
Cavity Mold from soft robotic toolkits website
-
Base Mold from soft robotic toolkits website