For the group assignment we were required to test different materials using the different laser machines available in the lab. I chose acrylic as my test material. I started with universal laser machine (PSL6MW) and I drew a small circle and I add a text on the circle. I go to print >> preference >> chose the material >> change the cutting (Red color) and engraving (Black color) value as shown on the below table :
| Color | Power | Speed | PPI (Pulse per inch) |
|---|---|---|---|
| Black | 80% | 99% | 500% |
| Red | 100% | 2.5% | 1000 |
and this was the result:
The machine didn’t cut the shape but the engraving was good so I had to change either the power or the speed of the cutting in order to cut the drawing. There is an invers relationship between the power and the speed which is mean if I reduced the speed the power will be more and if I increased the speed the power will be less. Below is the values of my second trial :
| Color | Power | Speed | PPI (Pulse per inch) |
|---|---|---|---|
| Black | 35% | 50% | 500% |
| Red | 100% | 2% | 1000 |
and this was the result :
Again the same thing happened it didn’t cut. So i had to try the default setting for this materials which is shown in the table below :
| Color | Power | Speed | PPI (Pulse per inch) |
|---|---|---|---|
| Black | 50% | 100% | 500% |
| Red | 50% | 100% | 500 |
And finally it cut and this is the result:
After that i had to calculate the Kerf which is a measure of how much material is removed. It can be calculated using the following equation: (Actual length - Measured length)/Number of parts. So we draw a rectangle with a length of 60 and divided into 12 parts and we cut it using the laser machine. After that I measured the length and this was the result :
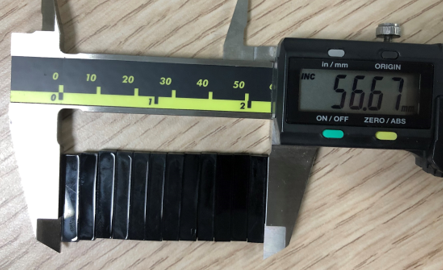
Now I will apply the equation to know the kerf of this machine:
Kerf = (60-56.67)/12= 0.27
I used the Universal laser machine (ILS12.150D) and directly I used default setting for cutting and engraving and it directly worked so I didn’t used different settings for this machine. Below are the default values for the big Universal Laser machine :
| Color | Power | Speed | PPI (Pulse per inch) |
|---|---|---|---|
| Black | 51.8% | 18% | 500% |
| Red | 100% | 2% | 1000 |
And this was the result:
And to calculate the Kerf for this machine I repeated what I did for the previous machine and this was the measured length value :
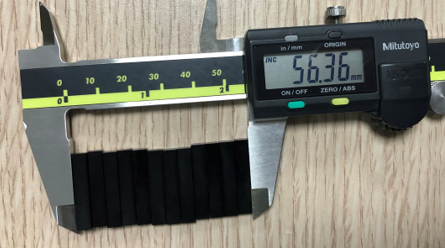
So the Kerf = (60-56.36)/12 = 0.30
For more information about my colleagues results you can visit this page : Material test
Our second assignment for this week, requires us to execute press fit design using any design software so I decided to use fusion fusion 360, I want to start out by noting that I had an extensive background in AutoCAD since in my major it is a mandatory course and every one should know how to use it since most of the designs that are required will be done within this software so fusion was just a piece of cake to me and I was very familiar with its options so I faced no problems at all when I was asked to draw a design. As for my design, It was inspired from aliens, their space ship to be exact. I’m really into astronomy and space sciences and I really wish if one day the aliens were true and I get to see one since I always think how do they look like actually and if they hade space ships how are they going to look like! So simply this inspired me to choose this press fit design. To be honest I didn’t face any issues since the design was just two circles, one big and one small then I started playing with them and fitting them into each other one after the another and I ended up with a space ship! Call me crazy if you want but hey, everyone’s imagination is a sea and i’m sure you’ve got crazy ideas just as me :p, It was really entertaining
In the beginning, I designed a sketch using a parametric software (fusion360). I had to ensure that the design that I did was parametric in case if I wanted to do any modifications in the future since it won’t take any time and it will be easier for me. After ensuring the dimensions were sketched I clicked on modify, change parameters and then I gave each dimension a specific name.

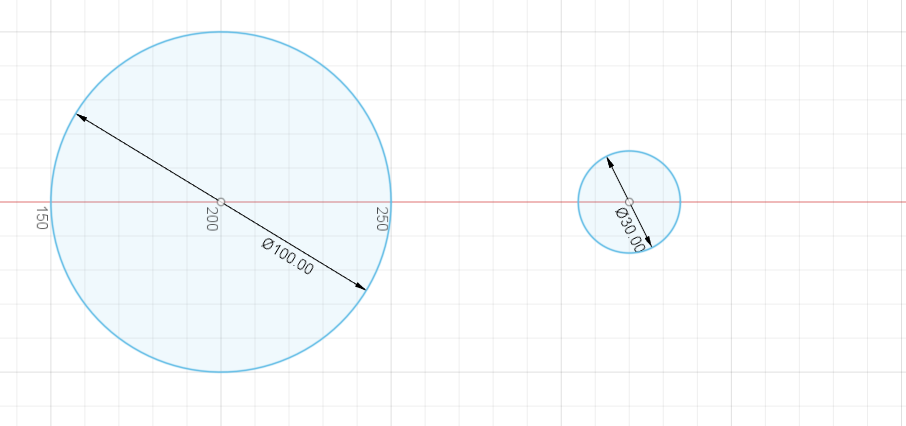
Step 1: two circles were drawn with two different sizes
Step 2: I changed the parameters of the cut and it was set as follows (Width = 6-kref = 6-0.25 = 5.75 mm, Length = 10mm) for the cardboard
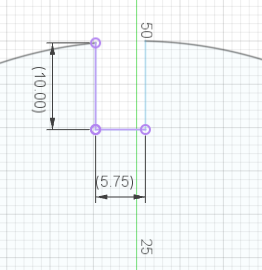
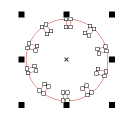
Step 3: Then I had to create the circular patterns for the circle so I clicked on create -> circular pattern -> and set the quantity as 10 then press ok

Step 4: I repeat the same steps for the smaller circle but instead of making the quantity 10 I make it 6
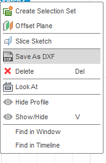
Step 5: I saved the file as .DXF so that I can access it by using Coreldraw software
Step 6: I opened the file on the computer that is connected with the Universal Laser Machine

Step 7: Now I can view my drawing, So I selected it and then right clicked on it and then the color turned red.
Step 8: I changed the line of the object to hairline as shown below

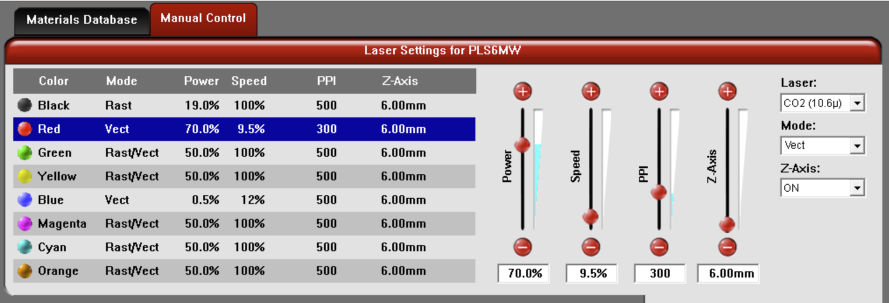
Step 9: I changed the laser settings of the red color and it was set to as what is shown in the figure below
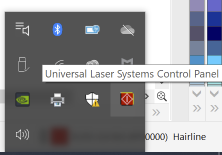
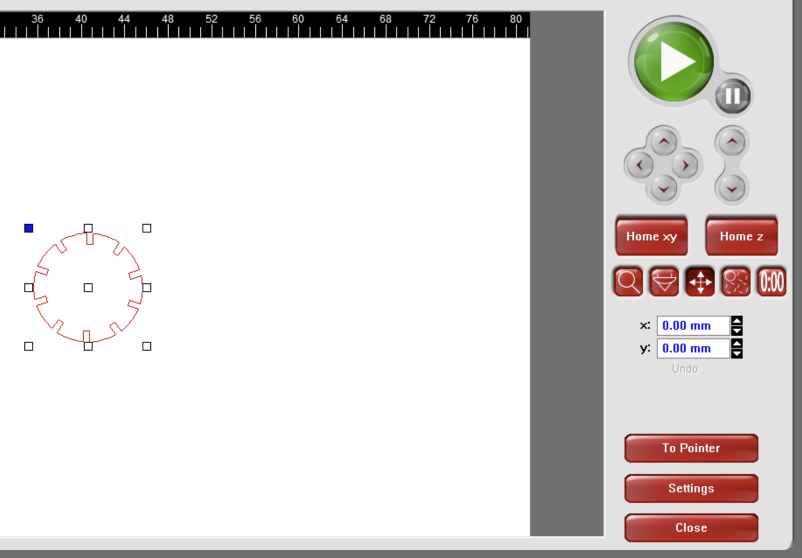
Step 10: I opened the Universal laser system software control panel which is linked directly to the laser machine.
Step 11: : I changed the starting point coordinates of the machine by using the focus view option, then I clicked on print.
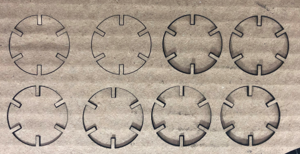
Step 12: This is how the piece looks like directly after printing it from the laser machine so I had to remove the parts manually.
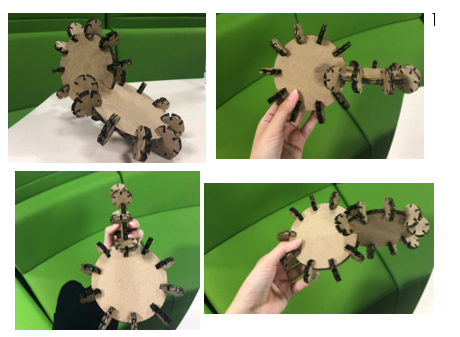
Step 13: This is what my final product looks like after fitting many pieces into one another.
Today was my first time witnessing the vinyl cutter in all its glory. The machine is considered to be very small in size but when it comes to business it truly delivers what it’s really intended to do. I really had a great time this week and in my opinion for now this is the best thing that I did during the fab academy and I’m hoping this is not going to be the last fun thing, It was fun to an extent that I felt that I was playing a game since it was very easy to use and I didn’t have any trouble doing so.
The Vinyl cutting machine requires several steps to be performed in advance before it can cut the Vinyl to the required design so let me take you through the steps in details and with every step there will be a picture that will support my explanation:
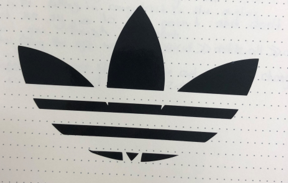
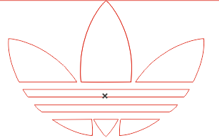
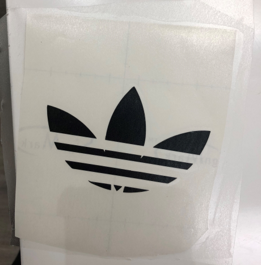
Step 1: I had to choose any design that I wanted from google and make sure to copy it. The design that I choose was adidas. This is the official logo of adidas company.
Step 2: I had to paste to design to the following program Coreldraw.
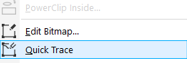
Step 3: I right clicked on the picture and chose the (Quick trace) option.
Step 4: The object then will become a vector, then I have to click on the vector and highlight the borders that are going to be cut by a red color
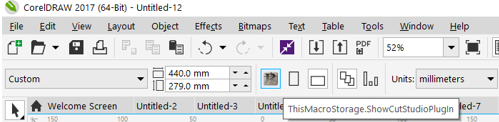
Step 5: After highlighting the borders I had to click a button from the software itself to take me to the printing software as shown in the screenshot below.
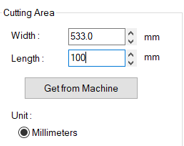
Step 6: Now I had to make sure that the width of the black paper is measured so there is a button within the software to do so.**
Step 7: Then I had to change the width of the Vinyl from the software to make sure that it’s matching the width of the black paper and I inserted the length as 100 mm
Step 8: After that all I had to do was to press cut and sit back and watch the machine cut the entire design.
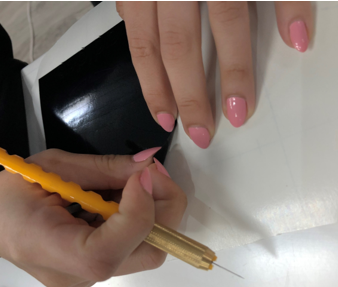
Step 9: After the machine is done cutting I had to remove the unnecessary parts
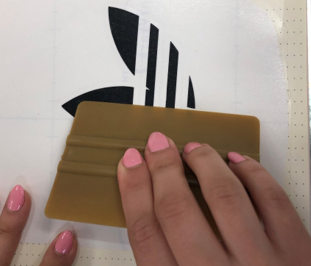
Step 10: Then I had to put another paper on the logo that was just printed and ensure that there are no bubbles in between.
Step 11: Lastly I had to remove the paper from the logo and stick it on my book