In this week, We are required to try out several softwares that are based on sketching and design. We then have to choose a software to sketch our project’s idea, The selection will be done on the basis of the most suitable software. The softwares include the following models ( Raster, Vector, 2D, 3D, Render, Animation, Simulation). We are also required to provide the final sketch of our project. After testing the software, We need to note down every step that we did in order to execute the sketch.
Let me start by talking about the easiest software that I’ve dealt with which is Libreoffice draw. The drawings that I made with this software were a house, sun, 3 flowers and 2 clouds as you can see in the figure below. In order to control the location of the component that I inserted I had to choose (select), then after that I’m able to change the colors of the line and the fill to anything that suits me and by doing so my drawing is ready. I really enjoyed this software since it was very easy to deal with and all the required components are there so if you’re thinking about something just select it and it will be ready. My drawing was inspired by the only thing that I was able to draw back during the school days so that’s why I decided to go with it.
I’m going to explain how i draw this drawing. firstly I used the rectangle from the symbole options to draw the grass and to draw the door and the body of the house. Then I draw a triangle for the top of the house. Then I added the circle for the top of the house. after that I added the clouds, flowers and the sun from the same option which is symbole shape. After I finished adding all the shapes I changed the color. Thats it
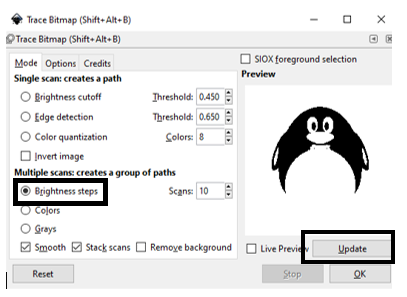
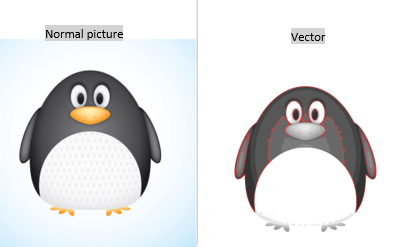
The second software that I used is called inkscape. This software transforms the pictures into vectors and it has many other features and uses. I searched the internet and found a picture of a penguin so I saved it and did the following commands: - File > Import > Select the Image > Open > Select the Image then go to path > Bitmap trace: Unselect all the options except for the brightness step > click update.
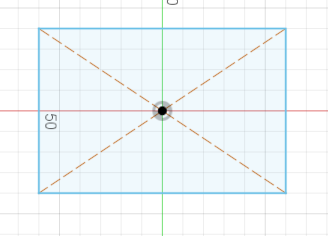
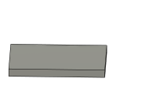
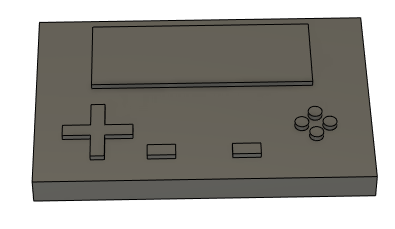
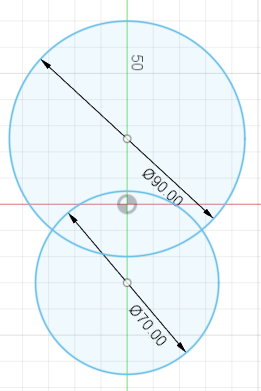
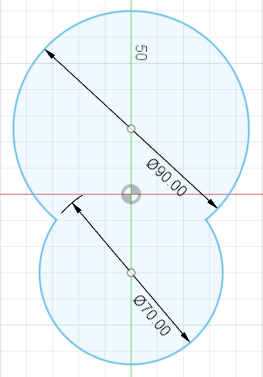
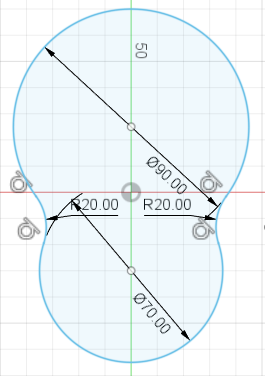
The third software that I used was fusion 360 which is similar to AutoCAD, this software is easy to use and have many features which make it the best option to design our final project with it. But before designing the final project I want to test this software by drawing a game boy ( 3D Design) so let me start with the steps that I followed in order to create a 3D design for the game boy:
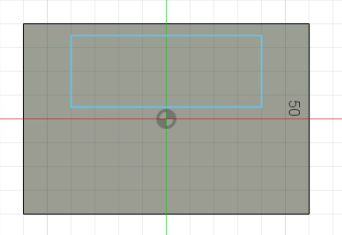
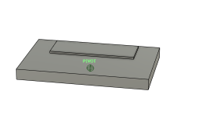
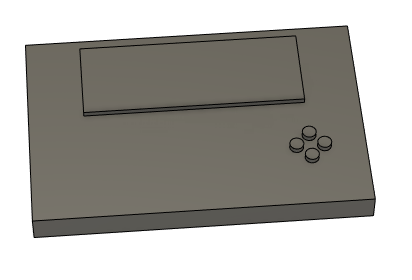
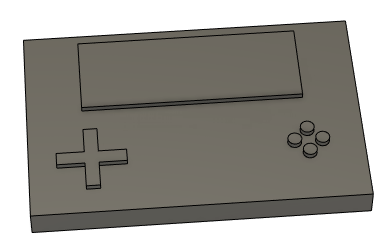
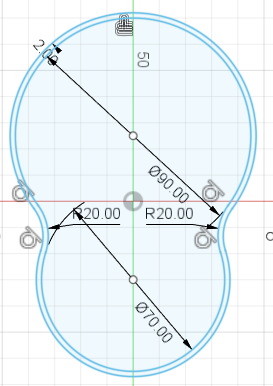
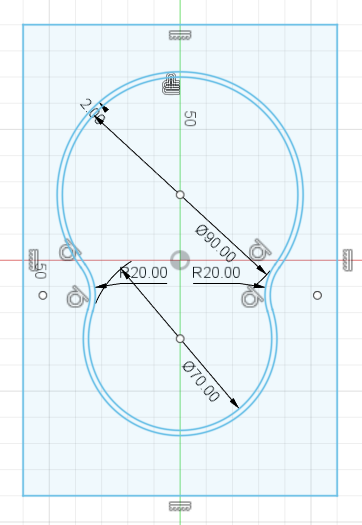
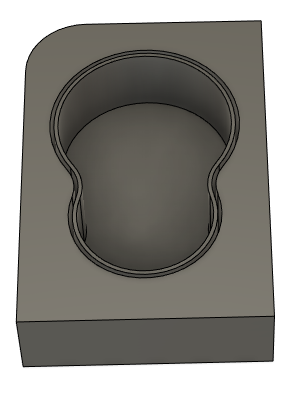
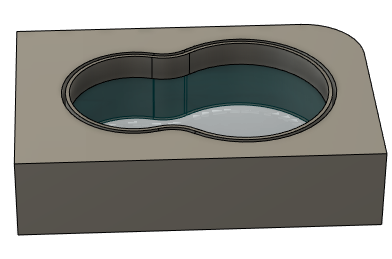
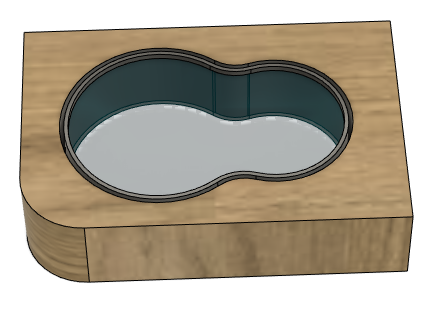
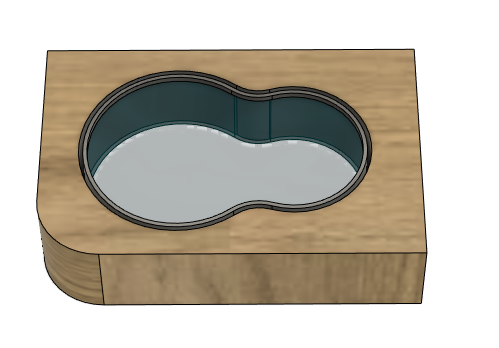
The software that I used to execute my final project design is fusion360 which has many great features and is very easy to use. I’ll write down every step that I did to execute this sketch.

I want to start things off by saying that I’m a person who enjoys using phone apps more than computer softwares and I usually find them to be dealt with easily that’s why I preferred using the phone applications to make a video and to edit some photos. The phone apps can be accessed at any time that suits me and wherever I may be unlike the computer softwares that I used which required me to access my laptop and then try to run the software which I found to be somewhat tedious whereas for the mobile apps I felt comfortable.
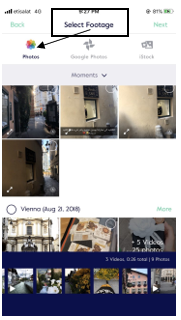
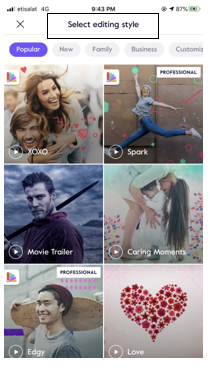
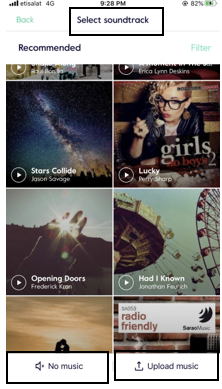
I’m going to list down all the applications that I used along with a brief introduction about each application and then I’m going to write down the steps.
This application allows the user to create a video and has many great features and it’s very easy to use.
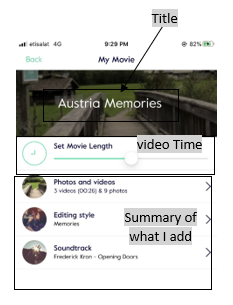
4.After that the final option will show up which asks me to add a title to my video and decide the video’s length and there was an option to edit the video if I changed my mind at the last moments which I found to be very convenient and helpful.
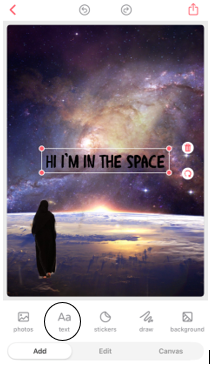
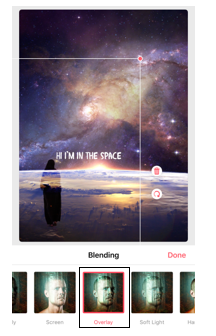
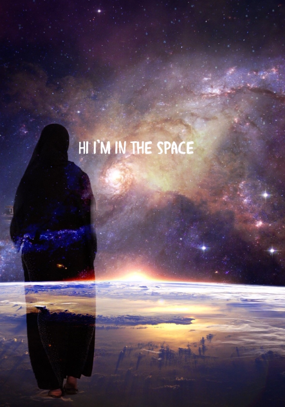
I downloaded this application previously for the purpose of making WhatsApp stickers but the thing that I didn’t know about is that this application has many great features. I knew about these features after watcching a short video that explains the application from the apple store so I really liked the application and I decided to edit my photo with a space background because I like the outer space. This application has many great backgrounds and it will let you ask your self twice if you wanted to choose a background ainply because all of them are attractive.

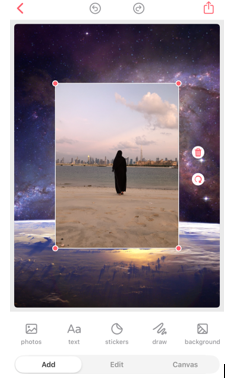
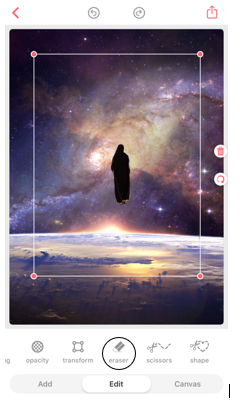
3.I clicked on the photo that I added and then chose the edit option then the eraser option and I kept erasing all the parts that weren’t necessary which left me with the part that I wanted to merge with the background.