In the second week of fab academy, we were tasked to try different modeling and design tools to learn and further expand our knowledge in this area. Our goals this week are the following:
My experience in design is quite limited. I have used Autocad back in high school and college, and the extend of my “art design” tools date to good old Microsoft Paint. So here’s my best effort in designing~
My paint is a free and open source raster graphics editor.
The main interface of the editor is simple and easy to work with. Upon looking further, it appears that the software is full with tools that could be utilized to draw and shape whatever you like.
Here’s a quick video displaying the different tools and brushes available
Here’s another video displaying the color adjuster tools available
Story time:
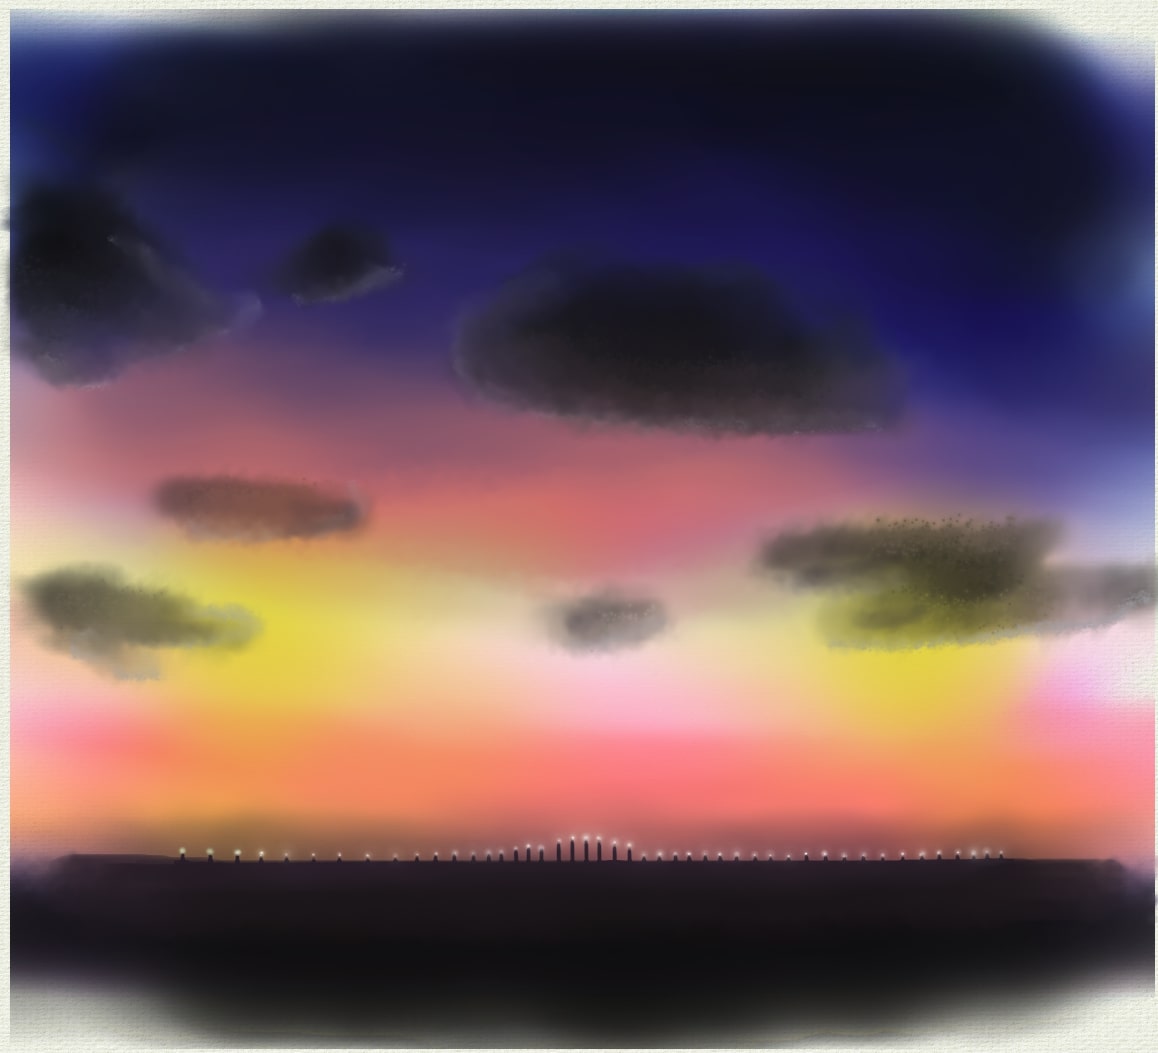
I actually kept this task (raster 2D design) to the last, hence as mentioned before, my art skills are not the best! So I kept postponing this until the weekend where I tried to finish my work while having a bit of fun to relax myself. This painting was inspired by the many sunsets I captured through my bedroom window (Which I strategically insisted on having when I moved to my new house).
A quick video of my inspiration:
And the Sketch that I made:
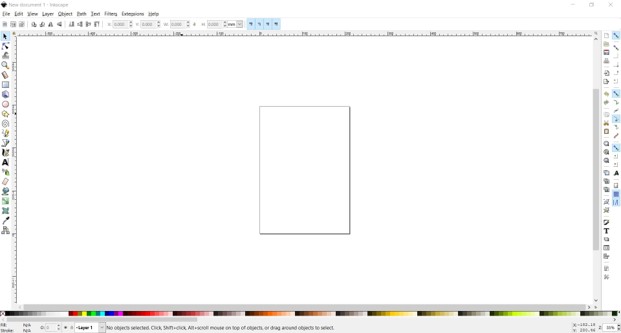
Inkscape is a free and open source vector graphical editor. I used this tool to create a 2D design of my final project.
I began with creating a new project in Inkscape
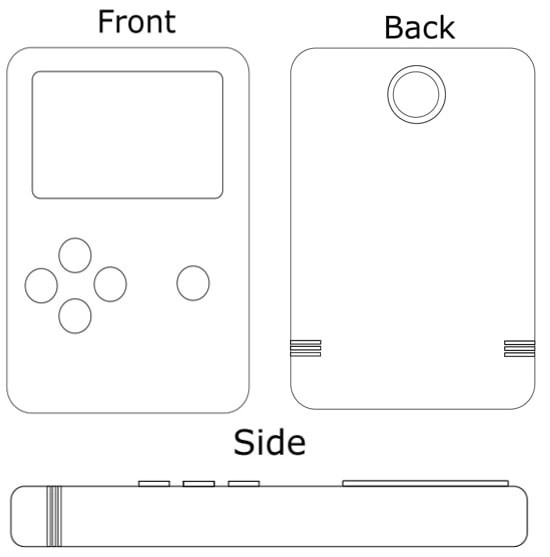
And used the rectangle tool on the left toolbar to create the main case. clicking the corners of the rectangle created will display boxes that can be used to adjust the size and circles that can be used to apply a fillet on the corners.
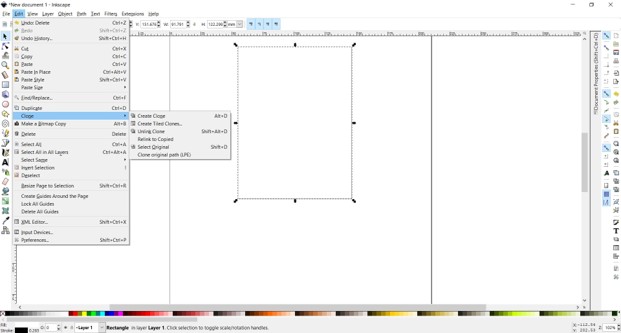
Next, I cloned the rectangle I created so I can add the back profile of my project alongside the front and the side profiles. The clone tool can be accessed by clicking on the edit tab on the top.
Then I was working on one profile at a time. For the front I added the screen, the buttons and the speaker slots. For the Back I’ve added the camera, and the speaker slots. And finally for the side profile I thought that the screen and the buttons would be visible hence the slight elevation, in addition to that the speaker slots that would be visible.
3D Builder is a tool that enables us to view, create and personalize 3D objects.
My initial impression of the tool was quite good. The workspace was simple and the toolbar was easy to navigate.
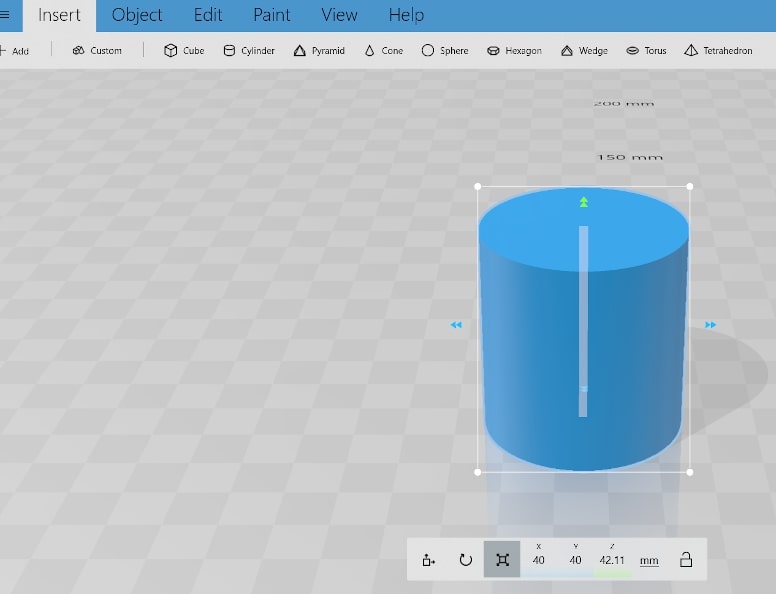
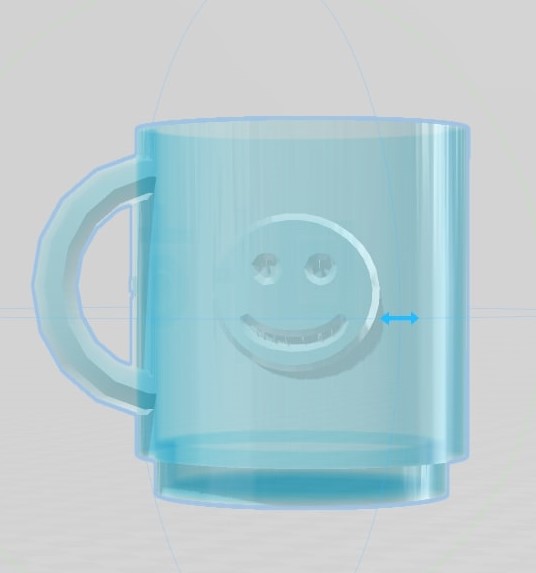
I decided to go with something easy and simple and would test the tool capabilities, so I created a mug!
To start off, I created a cylinder by going to the insert tab showing all the different options for objects that could be created.
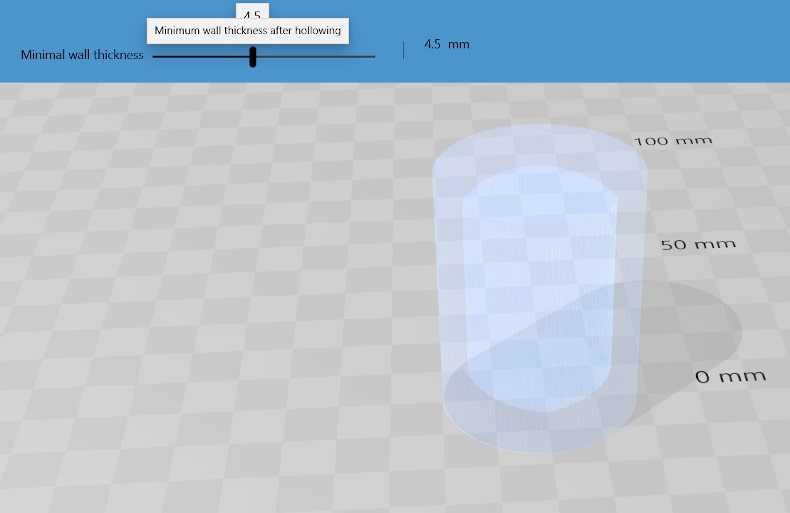
To shell the hallow the cylinder, I went to the edit tab and selected the hallow feature which allows me create a cavity in the object while also having the option to select the shell thickness.
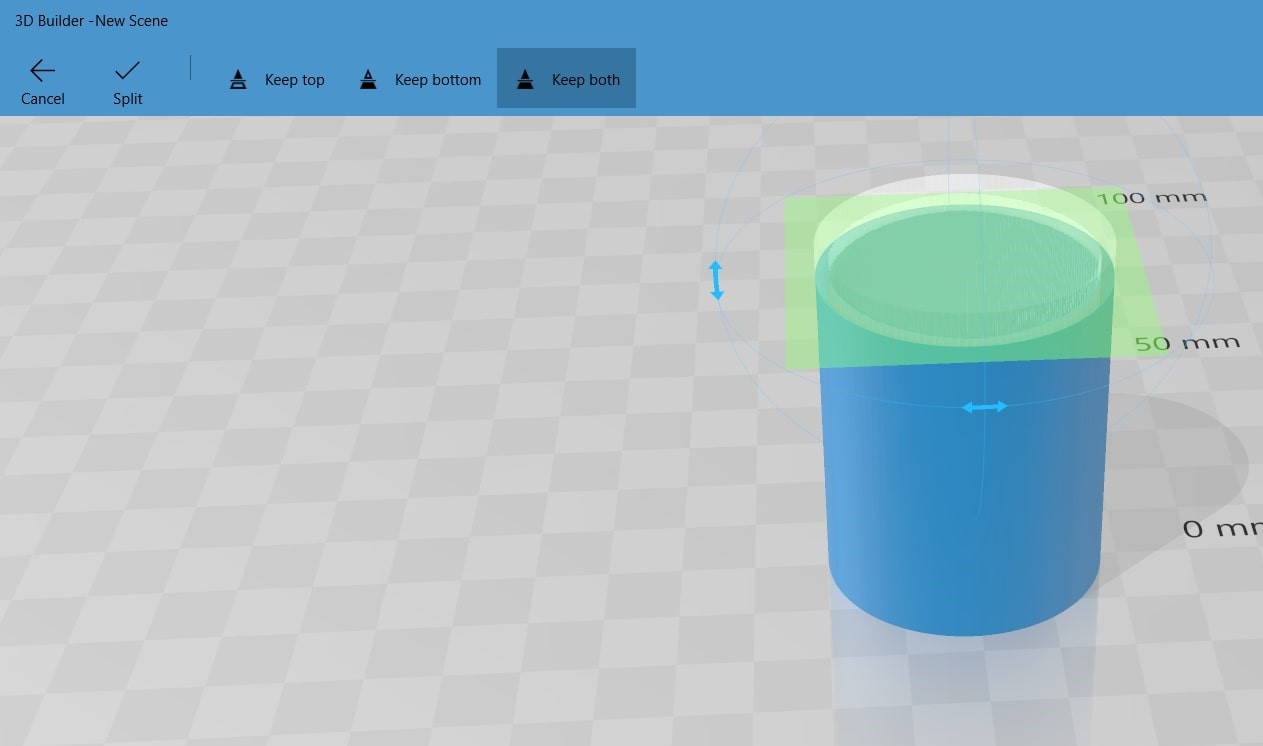
Next was removing the top of the cylinder to create the cup figure, that was done by selecting the split tool which allows me to select where the split is placed and whether I would like to keep the top or bottom section (or both!) of the object.
Now that I have my cylinder ready, I needed a handle. To create one that would specifically fit my mug and allow me to edit the shape area to my liking, I went for the custom tab. I created a torus and tested some shape settings. Here’s how changing the longitude value would affect the shape:

I used the torus for both the base of the cup as well as the handle. I joined and edited all the parts using the merge and subtract tools.
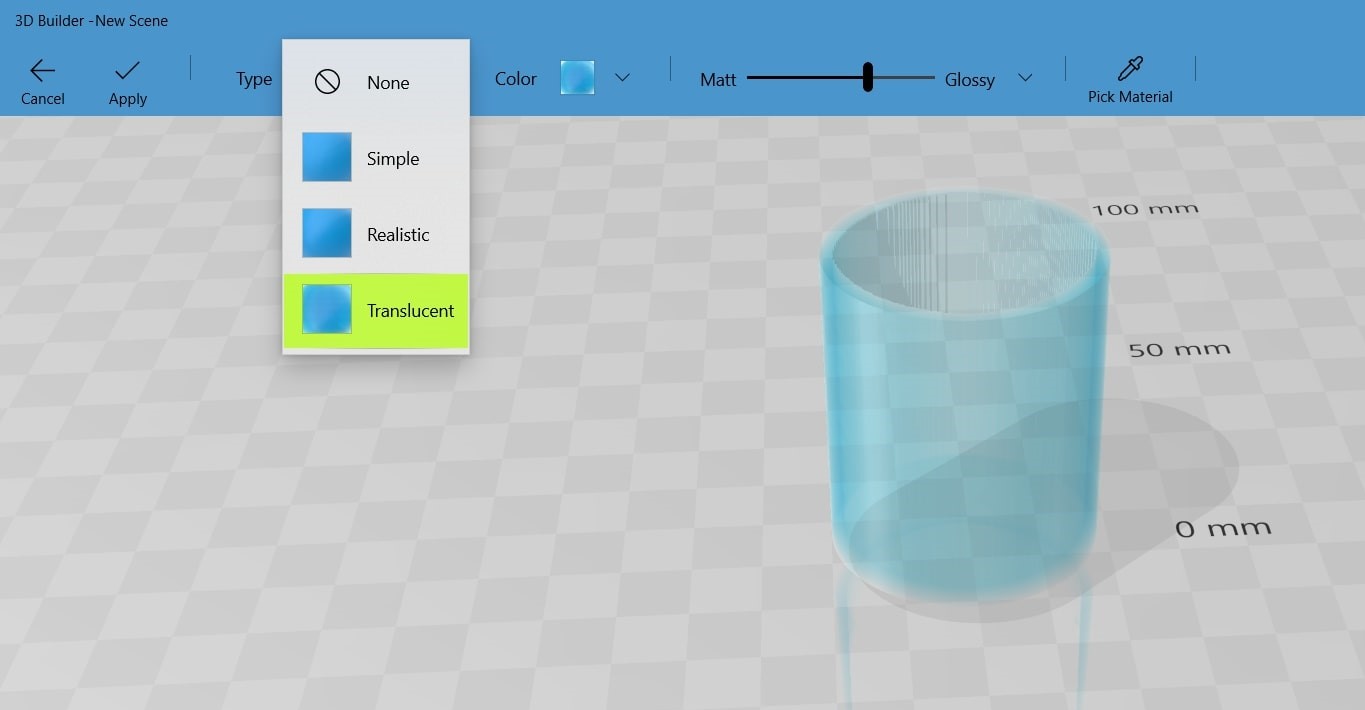
3D builder also has options to pick a material for the object. The options go from simple painting, to choosing textures and stickers and more! feel free to explore all options!
These option can be accessed under the paint>> material tabs. For my mug, I opted for a translucent material to mimic glass and a nice sky blue color!
Finally, I wanted to see how patterns would look like on my nice glass mug, so I went to the emboss tab and explored the different pattern styles offered.
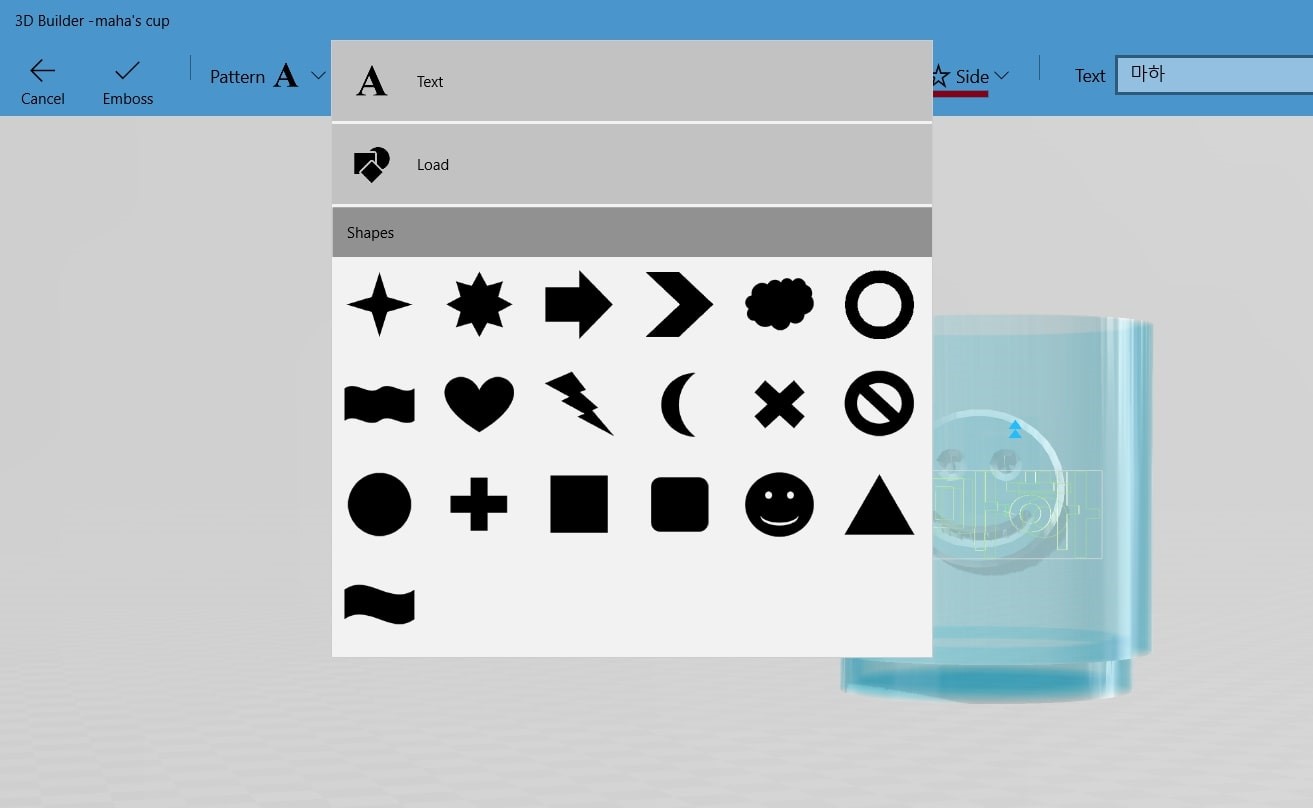
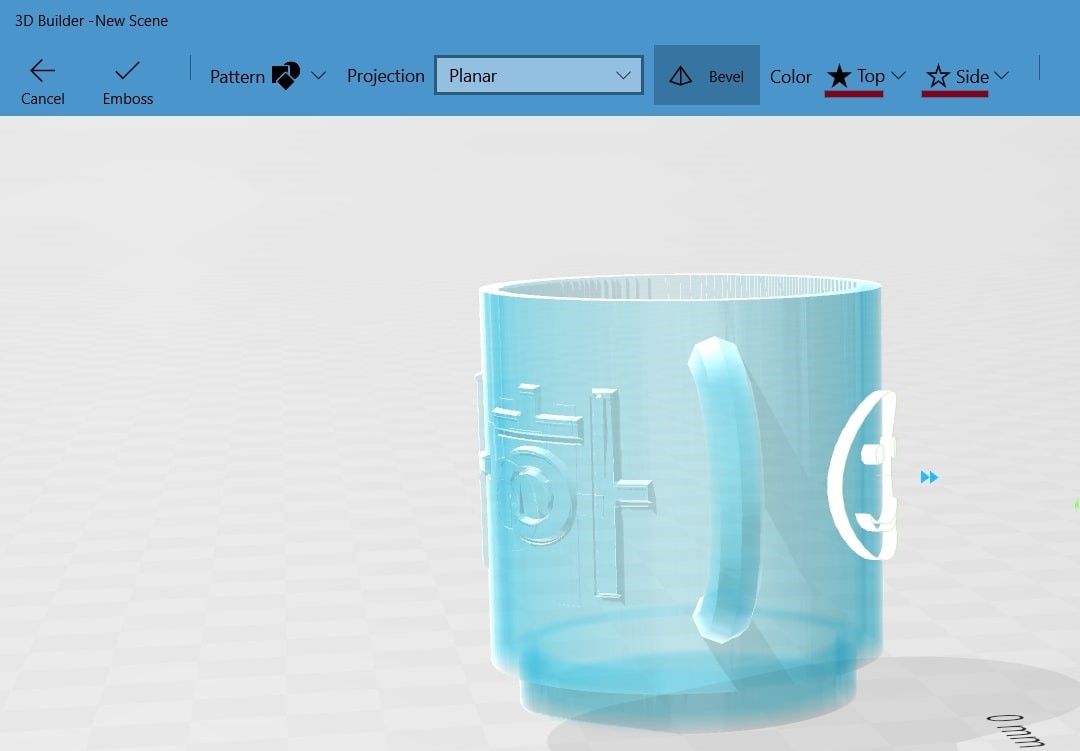
For my mug, I chose to write my name in Korean on one side 마하, and have a smiley face on the other!
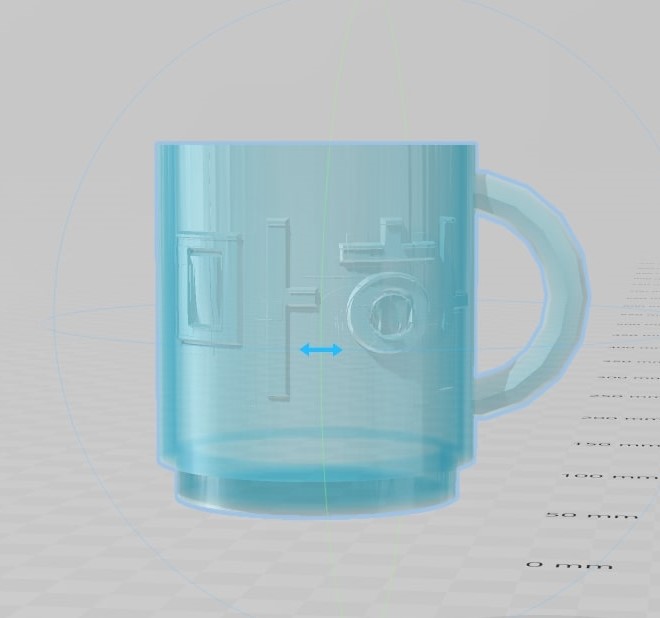
mug by maha.m.alhashimi on Sketchfab
Thoughts
3D builder is A quite fun and relatively easy interface to work on. It offers to create 3D objects without the need of creating sketches first, which might be considered an pro and a con depending on the design. The tool also has a library full of 3D projects to try modifying and printing, Along with the options of exporting the design in different file types which is always a plus!
Fusion 360 is a software offered by Autodesk. Hence I had some experience with the software, I used it to sketch and design my final project.
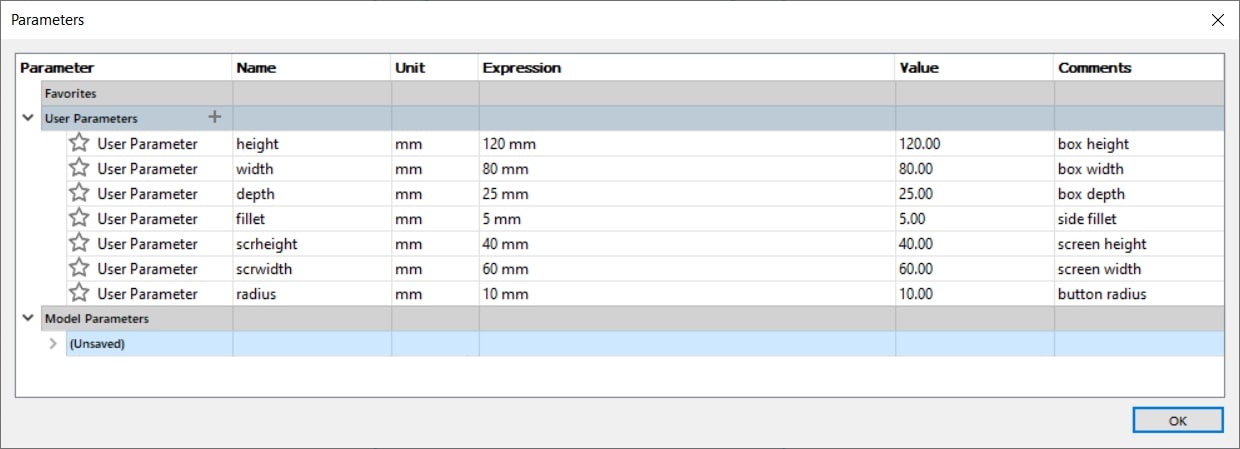
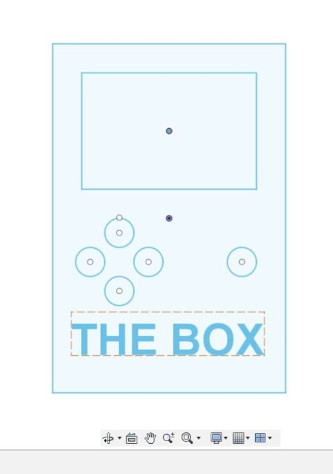
To start off I created a simple sketch using rectangles and circles to frame what would be the casing of “the box”. I tried to keep my design parametric, so any future modifications would be much easier to perform.
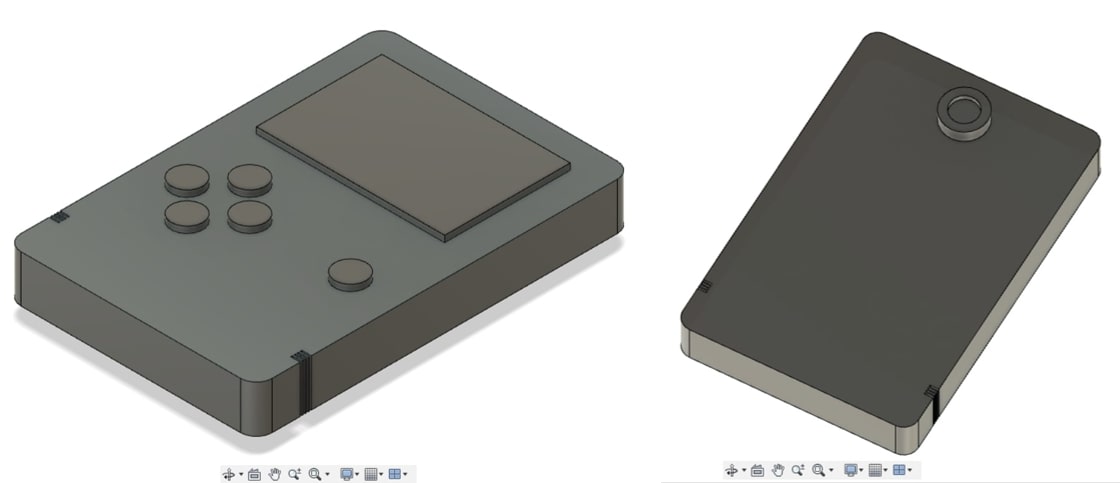
Once I was satisfied enough with the sketch, I progressed to create a 3D object of the sketch. First, I extruded the surface of the sketch along with different cylinders to represent the buttons and a cube for the screen.
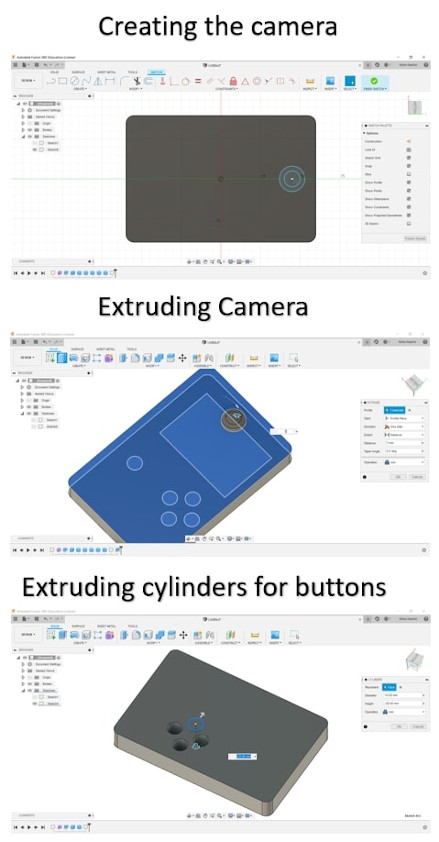
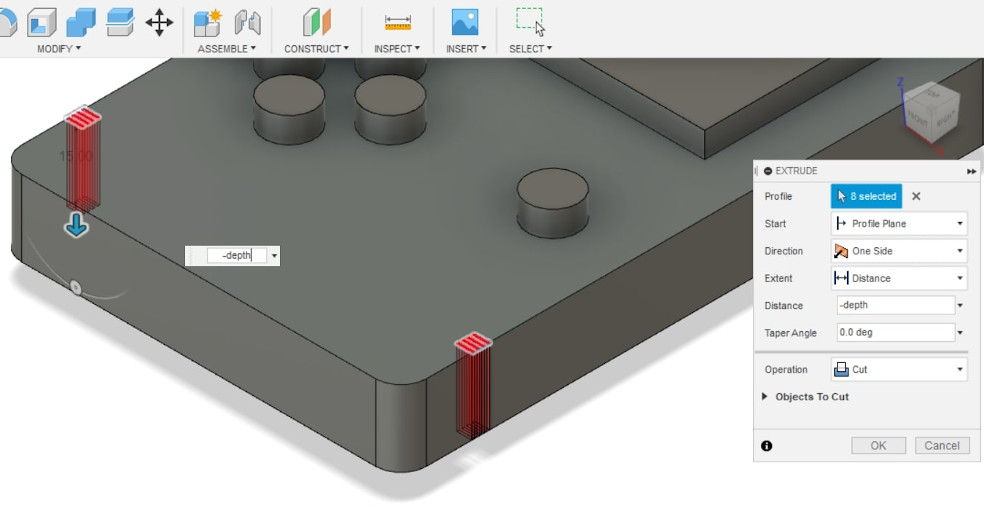
I noticed while designing that I was missing some elements that could make my design slightly more accurate. I decided to add some speaker slots on the side, so I went back to the sketching mode created uniform rectangles on either side of the casing.
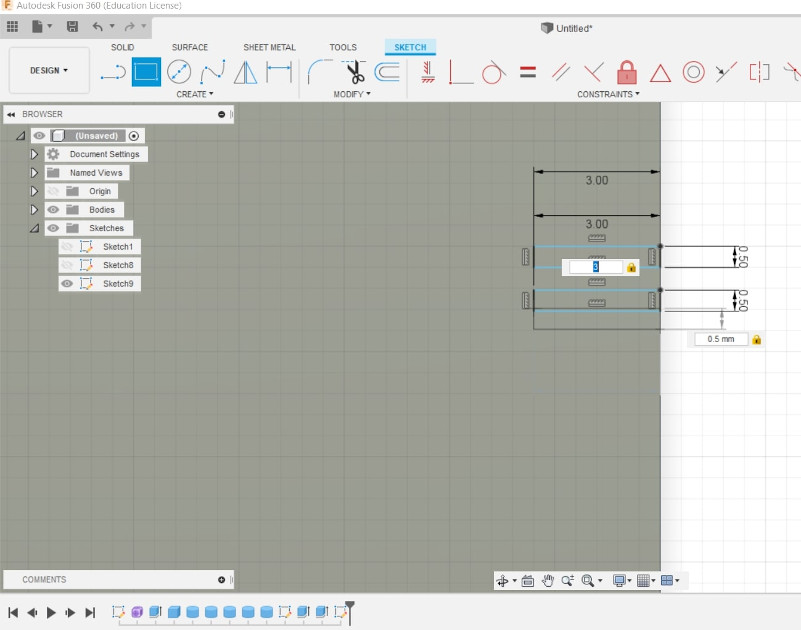
Then I went back to the 3D modelling space solid and extruded rectangles down to create the slots.
With the buttons, the screens and the slots; my final case was done.
Now, to create a realistic look for the case, I selected my object (while still being in the design workspace), right-clicked and selected physical material.
The physical material tool allows us to select a realistic material to build our projects on.
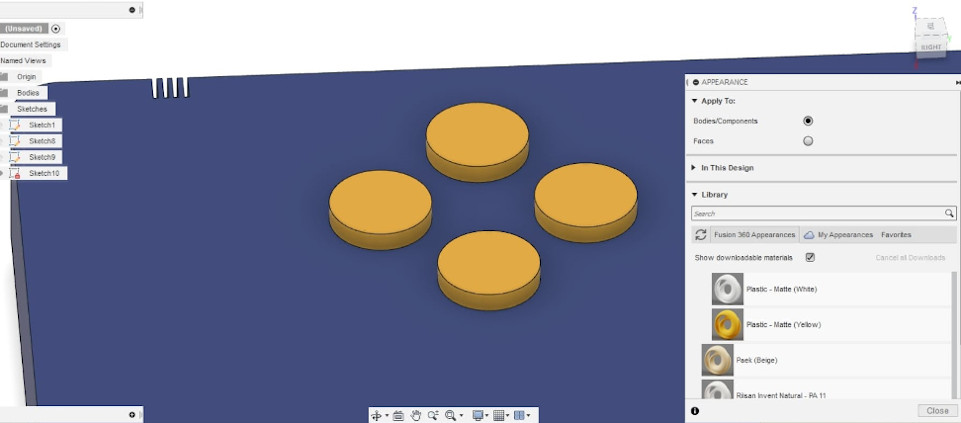
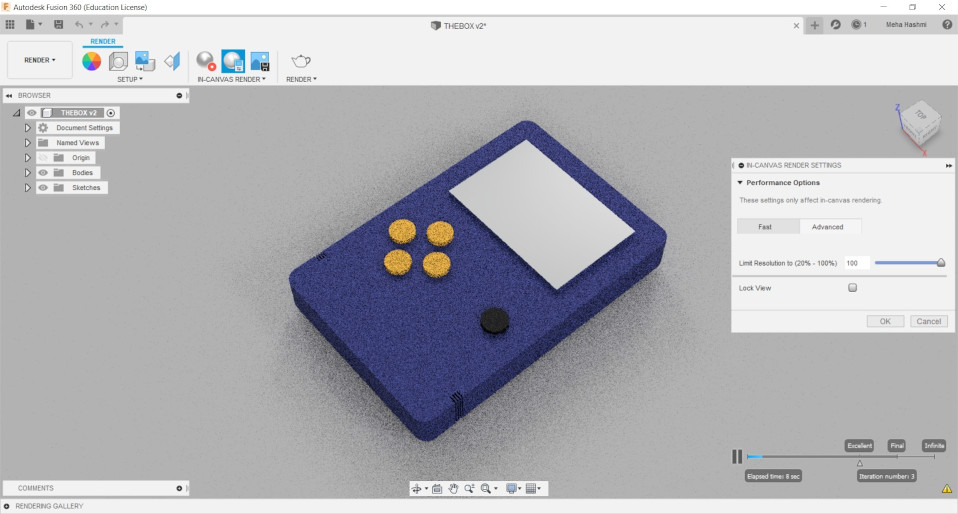
For my casing, I tried different materials from the many options available, and finally settled on blue matt plastic.
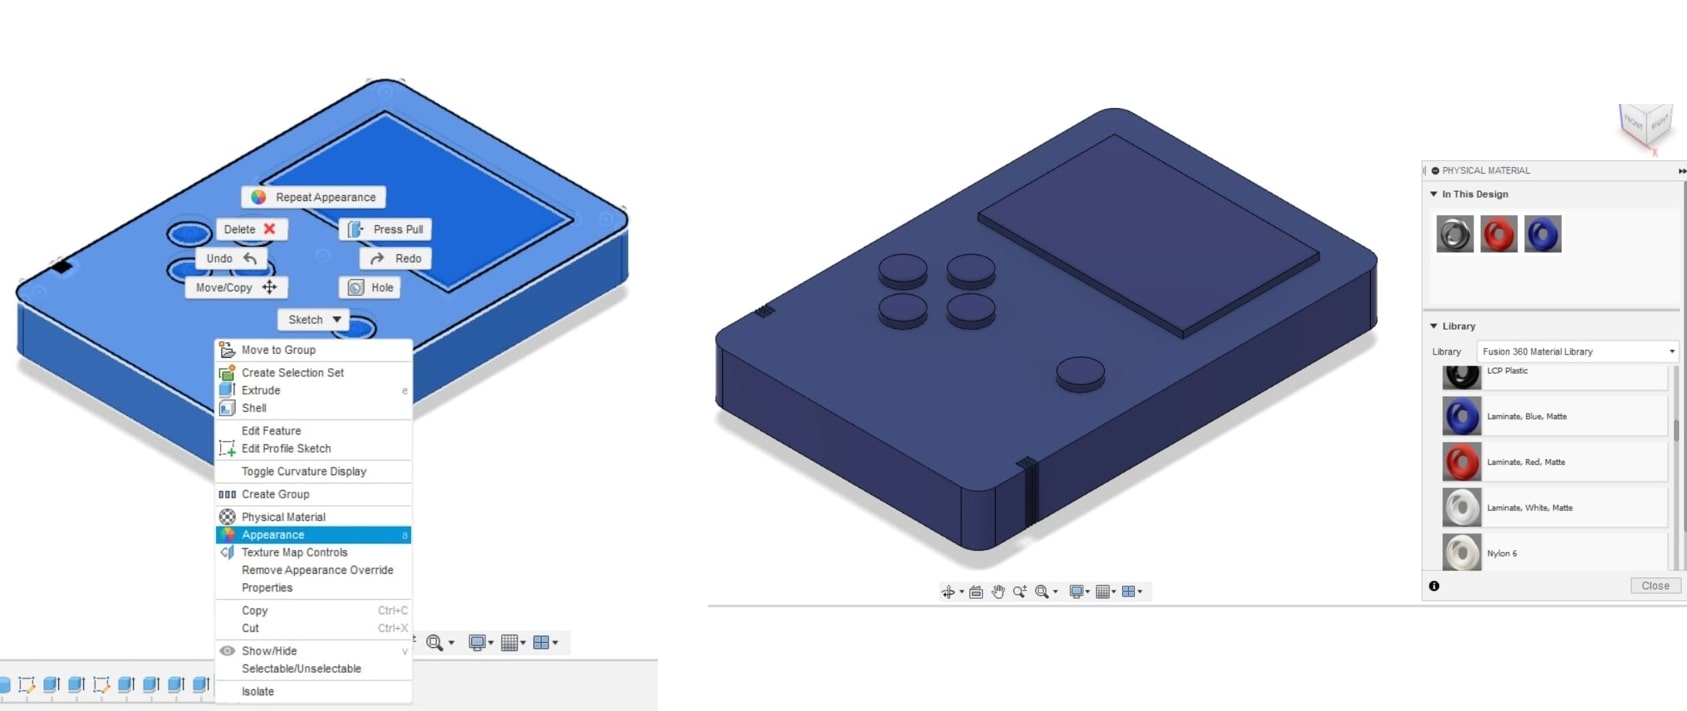
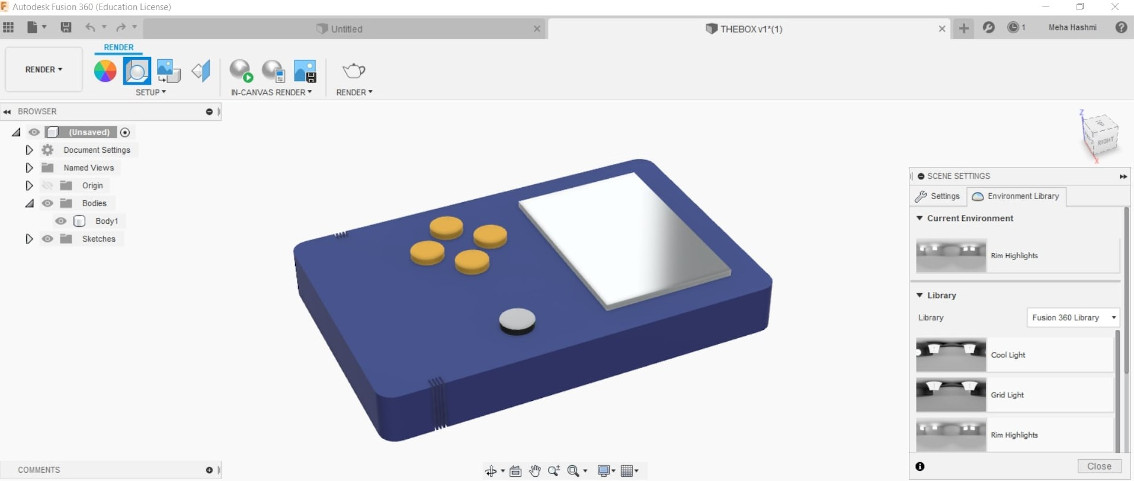
As for the details on my case, I right-clicked the object again and selected appearances. I selected mirror for the screen and the camera lens.
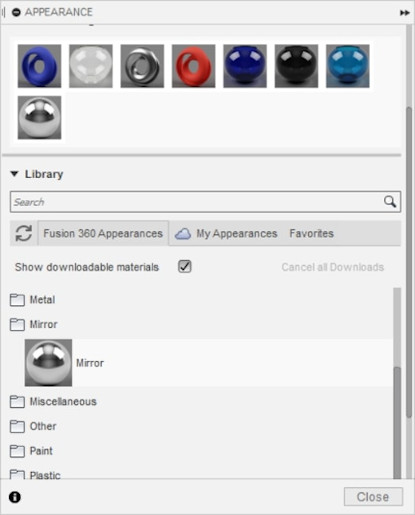
And yellow and black plastic for my buttons!
After the material selection process was done, comes the rendering process. To access the rendering workspace in Fusion, all what’s to be done is going to the design box tab on the upper left. If you hover over it, you can see change workspace, clicking on it would show the different workspaces offered by fusion 360.
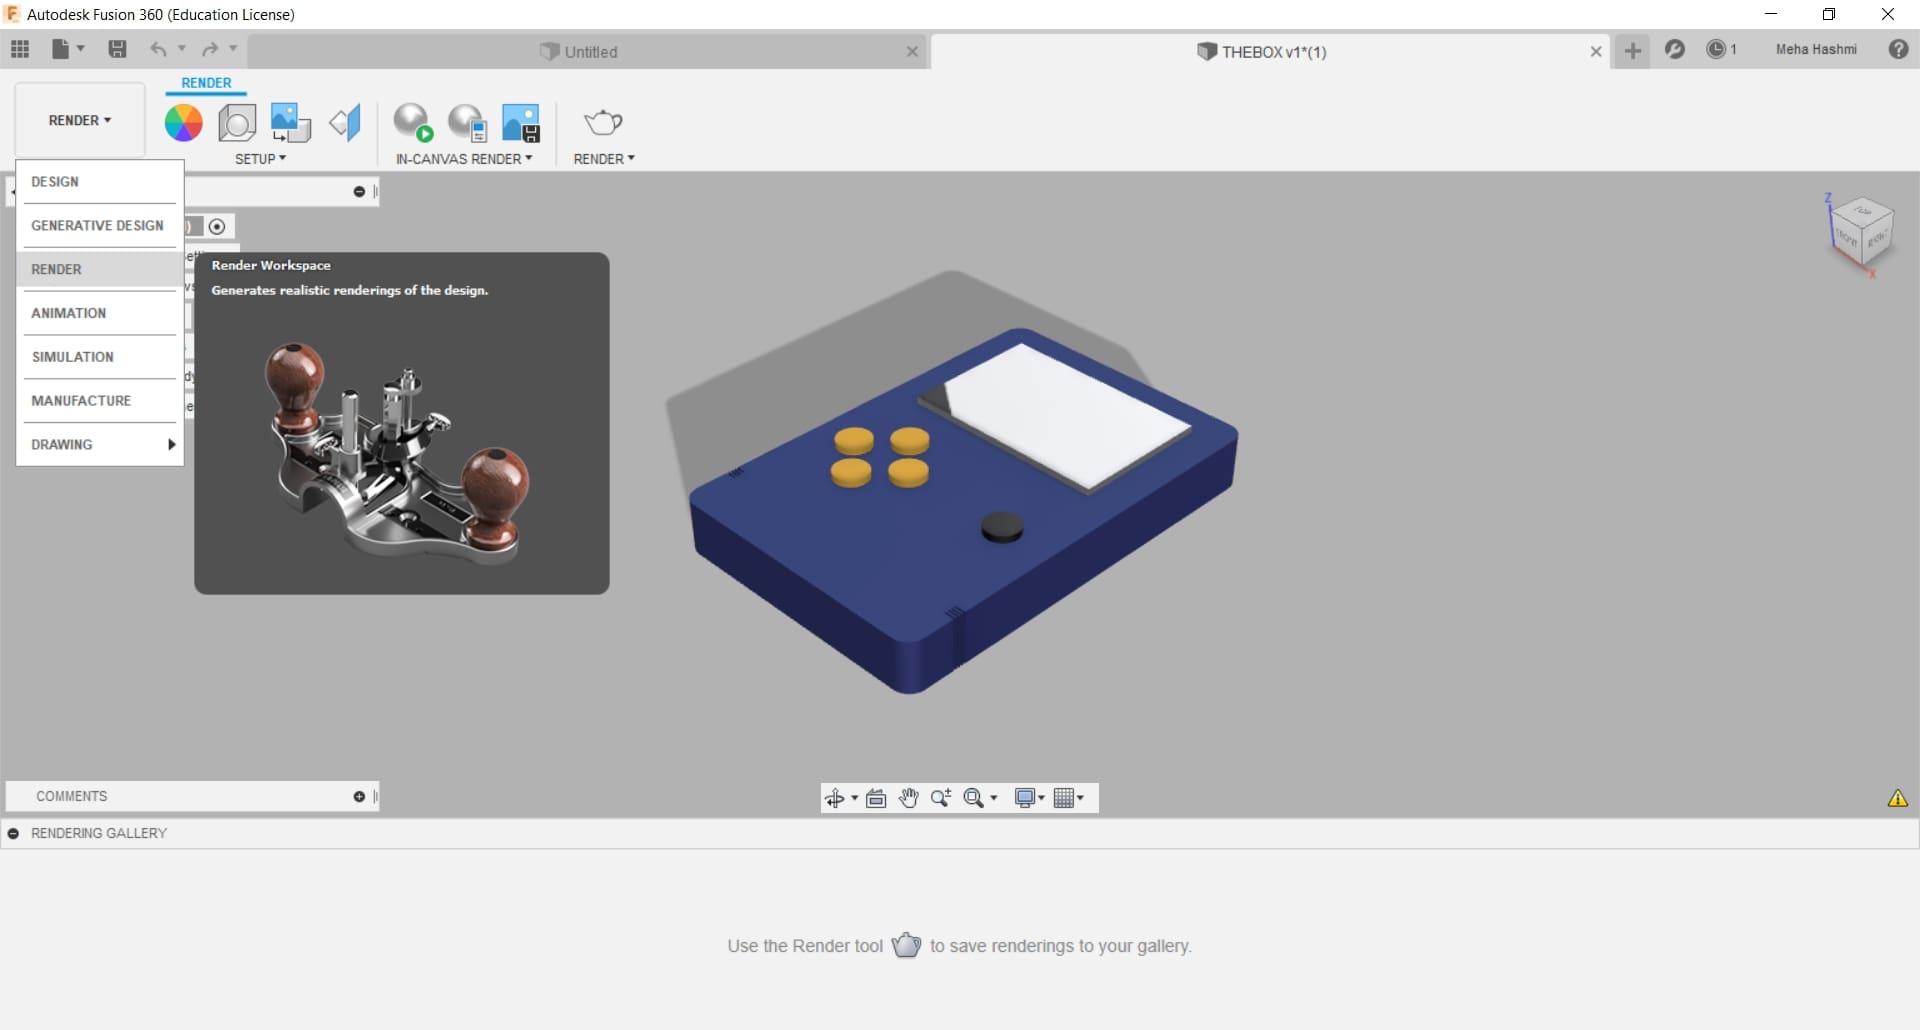
In the rendering workspace, I tried to change the environment of the rendering space, which would allow me to modify the scene by changing the brightness, the ground options, and even the lightning of the space.
Next, I clicked on the in-canvas render settings tab and selected the performance I wanted which was advanced. I chose Advanced because I preferred to have higher quality rendering and lighting for my object.
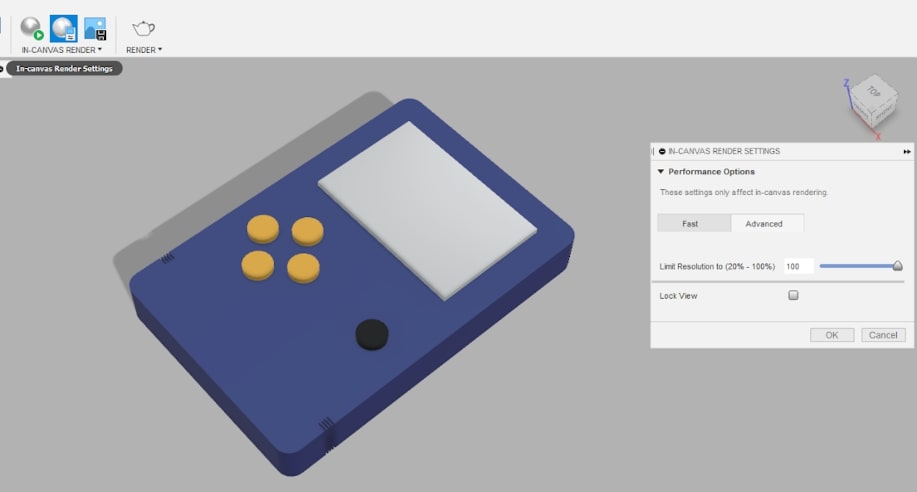
I clicked on in-canvas rendering which presented a time line at the bottom, containing the time elapsed since the rendering, the number of iterations which determines the quality of the rendering and the options for rendering that included excellent, final and infinite [the last option would allow the rendering process to continue until designer stops it manually when it reaches the number of iterations desired]
A couple of notes:
* Moving the object while rendering causes the iteration count and the time to reset to 0, so it is preferred to wait until the rendering is done to move and inspect the object. * The number of iterations determines how realistic the object would look. Let the number of iterations be high enough to achieve a realistic look.
I also tried changing the case material from plastic to wood and observed the change in the rendering space.

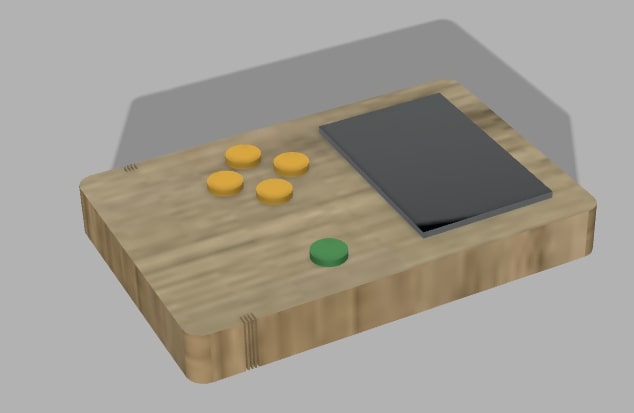
THEBOX wood v0 by maha.m.alhashimi on Sketchfab
Thoughts
As mentioned before, Fusion 360 was not a foreign software to myself, so navigating to the tools and creating my object was done quite easily. I also like the integrated tools offered by fusion 360, such as the rendering, simulation and animation tools that would make the process of designing a project and building it for a certain operation much easier.
__
Gimp is a free and open-source raster graphics editor used for image editing. I tried installing gimp ang giving it a go, as I needed a tool that would make image compression and scaling easier for me.
The tool itself has a bit of an outdated interface for my liking. However, to be fair and square, I did not have much experience in the tool and I haven’t tried it for anything other than image compression and scaling.
To scale an image, I would drag and drop the image in the workspace. Then crop it using the cropping tool placed on the left. Next would be going to the image tab and selecting scale image and manipulating the size and the resolution of the image. And finally exporting the image in the file extension desired.
The video below shows the steps of scaling an image in gimp:
Thoughts Gimp probably has more capabilities than what I have discovered so far. But, for now, I am not very impressed with the scaling tool, as it decreased the quality of the picture significantly.
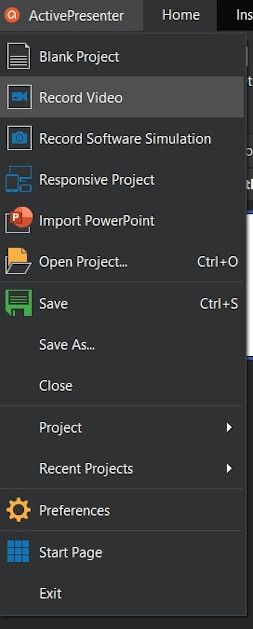
I wish I knew about active presenter tool earlier in my studies, as it would’ve made making presentations much easier!
The tool interface is awfully similar to Microsoft office PowerPoint, where the projects made can be done in stages over ‘slides’.
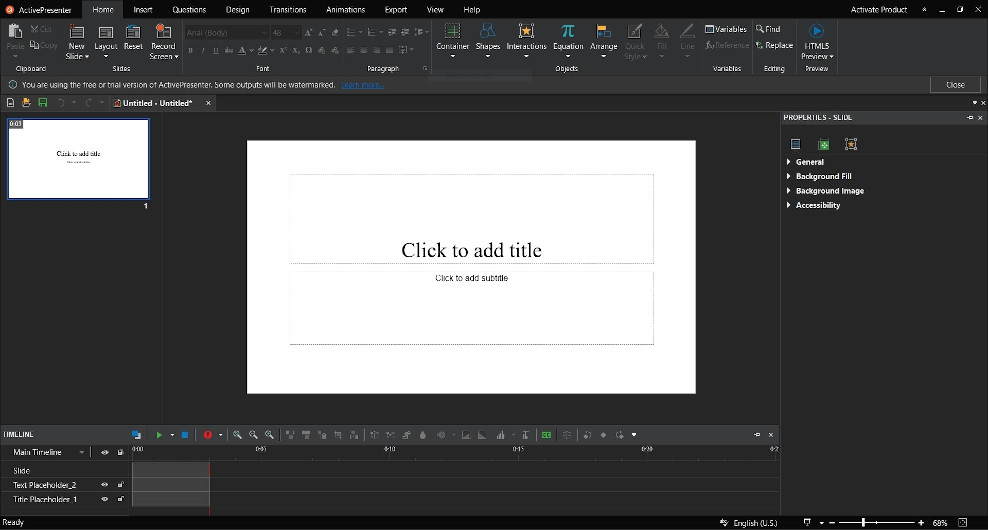
The tool also offers a good range of recording options from recording software simulations to simple screen recordings.
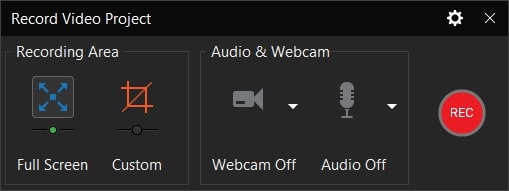
As for myself, I used this tool to screen record and edit the videos I took. I used the screen record tool shown in the previous picture. Upon selecting the tool, a small box appears that allows me to choose between options for the recording area such as having a full screen recording, or customizing the region of the recording!
Also, it allows me to choose my preferences for the audio and the webcam!
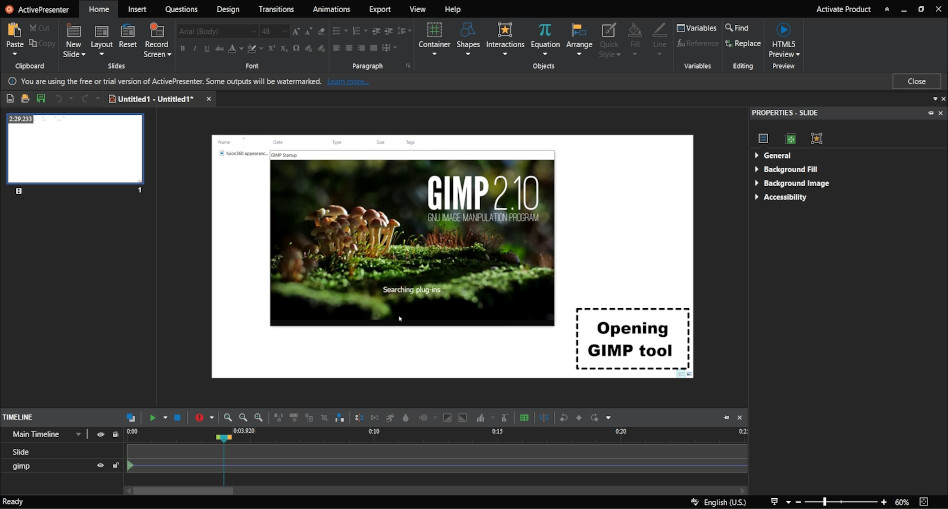
When the recording terminates, it is automatically transferred to a project on the software. Where now we can edit the video playing speed, crop the video to our liking, and edit the video to our desire!
Thoughts
I honestly think that this is a great tool to edit videos easily and professionally due to the many options offered! I think I would keep using this for my future documentation.
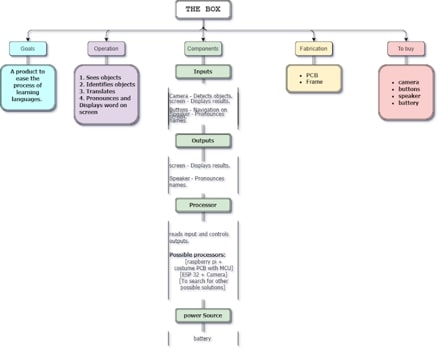
Draw.io is an online tool that I used to create the descriptive diagram of my final project.
The website offers different tools to create diagrams and flowcharts for different fields and purposes.

My descriptive diagram:
PNG to JPG is one of the online tools I have tried for compressing my images. The tool converts a PNG image to a JPG image and reduces it’s size without effecting the image quality much.
The only flaw that I find with this tool is it’s inability to scale an image, So I would have to go back to gimp to scale the image.
My files can be found below:
