

For this week we assigned to try out design softwares as possible as we can to know which software we most feel comfortable with.
Moreover, we have to design an initial model for the final project using one of these software.


Video editing software:
QuickTime Player 
iMovie 
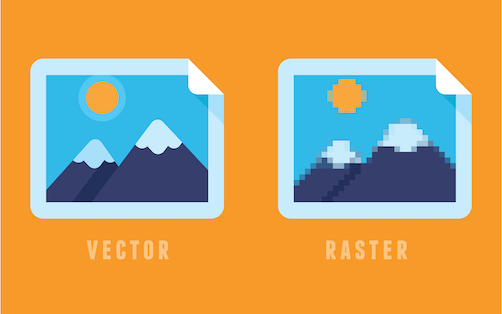
There are two main types of graphics or images in two - dimensions which are:
2D Vector: Vector graphics are composed of paths.
2D Raster: is made up using a collection of pixels referred to as a bitmap.
The image below I found it from the internet shows the difference between vector and raster, it helped me to understand the difference clearly:


The first software I did try was Adobe illustrator, It was already instilled in my laptop, there were 7 days free tallier so I want to try it, In addition, I did decide to do a wallpaper for my phone.
Adobe Illustrator is a program used by both artists and graphic designers to create vector images.
Here is the home page:

As I do love to see Islamic geometric patterns, I decided to draw Islamic Octagram Star.
The images below shows the workspace in illustrator, I did draw two rectangular using the toolbar, then i fixed one rectangular and rotate the other one to generate the Star.

Now, to delete the extra lines I used Trap tool I selected Shape Modes > Unite

Afterward, I copied the stars and changes the colors trying to have a nice design


As shown below the phone wallpaper I designed, this an example of vector model.


Krita s a free digital painting studio for artists who want to create professional work.
Used by :
The video below shows my work in krita, I did draw random patterns to try different tools in software
As shown below the drawing I did made by Krita, this an example of raster model .


Blender is a free and open source 3D creation software, It supporting a lot of the 3D modeling types such as:
First I did watch tutorial for beginner in youtube where I learnt the basic shortcut I will need to use it frequently, Also I did changes some of them to match my laptop settings:
| Shortcuts | Function |
|---|---|
| G | Grab |
| M | Move |
| S | Scaling |
| Shift + A | Add parts |
| ? | ZoomIn object |
| Double click space | Search |
| Shit + space | PlayBack |
There was two default settings I need to change them from blender preference to match my laptop settings:
Shortcut for Search bar : It was " F3 " , the problem was whenever I did press F3, It was overviewing all running application in my laptop as this key is assigned for mission control in MAC. So I did change it to " Double click space ".
Shortcut for PlayBack : As I did change search shortcut, interfere happened between the shortcuts, whenever I click " Space " in workspace page the PlayBack was working instead of search bar. So I did change it to " Shit + space ".
My design was based on Tutorial explained by the owner of a youtube channel called Blender Guru. Big Thanks for him for his wonderful explanation.
The tutorial I did watch was how to design a Doughnut.
First I thought it was only one short video and I will be able to make the doughnut XD, But then I figure out it was series of 6 parts.
I did continue them because I do really like how the his designed doughnut looks. And I would like to learn how to design it by myself.
The video below shows my work, I did fellow step by step the tutorial and I did skip one of the parts because it was extra if I need to enhance the design and the look of the doughnut. Through the series there was a lot of useful mentioned tips.
The image below shows My beautiful doughnut, I think it looks good for my first try designing animations in 3D :)


Fusion 360 : is an online 3D CAD/CAM tool for product development that combines industrial and mechanical design, collaboration, and machining in a single package. Its fast and easy exploration of design ideas with an integrated concept-to-production platform.
The first time I did introduce to fusion 360 it was in winter camp in fab lab UAE. They did teach us the basics and I do really love it. Moreover, I don’t have a lot of experience in designing 3D so I was happy to learn new things.
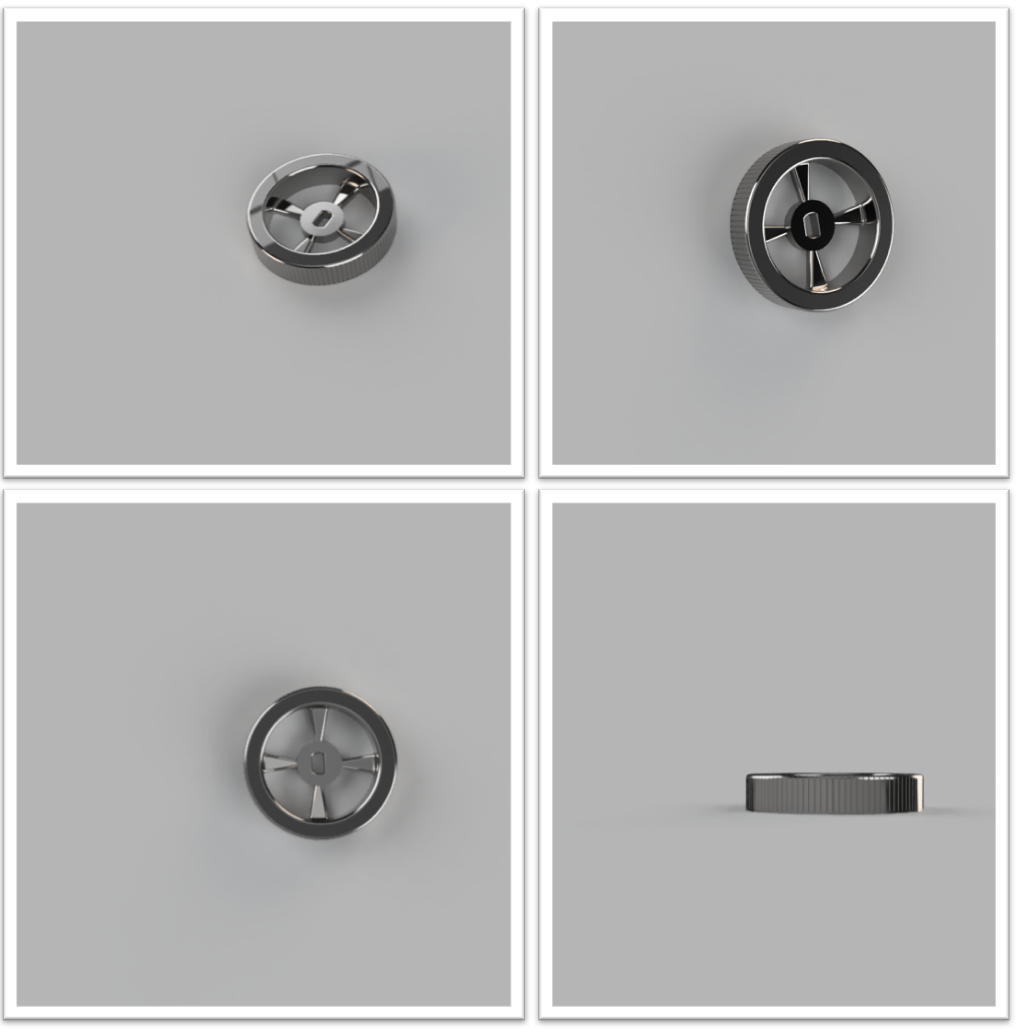
For this software, I did model wheel, as one of my ideas for the final project is a RC car, thus I think it’s good idea to draw the wheel as it part of the project.
I did follow this tutorial to help me in designing the wheels,The video below shows my work in Fusion 360:
Here is the final look of the wheel from different sides:

I designed a simple toy Car, the video below shows the design process, I did follow this Youtube tutorial to form the initial model:
The steps of designing the above car is the following:
(for all the parts I created it own component and then I did all needed sketches and drawings)
1. Desgin the Chassis:
Start with the wheelbase by drawing a line with holes at each end.
Draw the chassis outline.
Sketch the axle holes and crossmembers using rectangle and circle.
Draw the shoulder.
Now the all chassis parts (frame, crossmember, and, shoulder ) are ready to extrude.
Thus, I copy, past and position the second chassis side and fix it.
2. Desgin the Axles:
First sketched a rectangle in the center of the chassis axle hole at 30 mm from the center point.
Add a circle centered in the rectangle extending to the corner of the rectangle.
Symmetric extrude the axle.
Create a second sketch for the axle.
Create a rectangle at the center of the rear edge of top of the axle.
Delete the line projected by the rectangle, Offset three sides of the rectangle.
Extend the fourth side, Cut the rubber band slots by symmetric extrusion of the second sketch.
Create the second axle by copy and past the first axle then position it.
3. Desgin the Wheels:
Project the axle profile into the sketch.
Create offset from the projected profile.
Delete the projected profile, Add a 12 mm circle for the wheel hub, Add a 30mm circle for the wheel.
Hide the remaining components, Extrude the wheel hub.
Extrude the wheel.
Create and position two O-Rings (30 mm Inner Diameter, 3.4 Torus Diameter), With the O-Rings in position create a slot for each, Unhide the remaining components.
Position the wheel on the axle, Now copy and paste the wheel to create the remaining three wheels.
As shown below the designed Car:

Autodesk Fusion 360:
The first time I was introduced to fusion, was in the winter camp we had before Fab Academy to prepare us for the diploma.
In the beginning, I did not like to work with it, and still, I’m not a big fan of Fusion^^! but with trial and repetition, I get used to it and now I can create good designs with it. Moreover, I learned some tricks that let the work with Fusion nicer and easier.
I didn’t think Fusion is considered a complicated software in the 3D CAD world. However, this was my first impression and the reason why still it’s not my favorite because it gets slow sometimes, since it’s work online under an internet cloud.
For Blender, I like it and think its easier to start with as a beginner in 3D designing.
For Adobe illustrator and Krita, both were easy to work with to create 2D designs, but I love Krita more as all features were direct and easy to use, unlike illustrator I need to search to find different basic features.

For screen Recording I did use QuickTime Player which is a software used in mac for play, record, edit, and share audio and video files.


For editing the videos I did used iMovie It is video editing software application developed by Apple Inc. for macOS and iOS, you can view, edit, and share movies easily with it.

Note: For adding the files, I used the format style of a previous Fab Academy student called Tarek Asfour, I viewed the page source of his website and copied the code of the table.
| Files | Link |
|---|---|
| Phone Wallpaper - Adobe illustrator | |
| Paint - Krita | |
| Doughnut - Blender | |
| Wheeel - Autodesk Fusion 360 | |
| Car - Autodesk Fusion 360 |
