Computer-Controlled Cutting
This week we learned about how to perform the computer-controlled cutting, for this we use 1.8mm cardboard, supported by software, solidworks, rhino and trotec job control.
Press-fit testing

I started by making a design for a pressure test with different probable groove measurements.
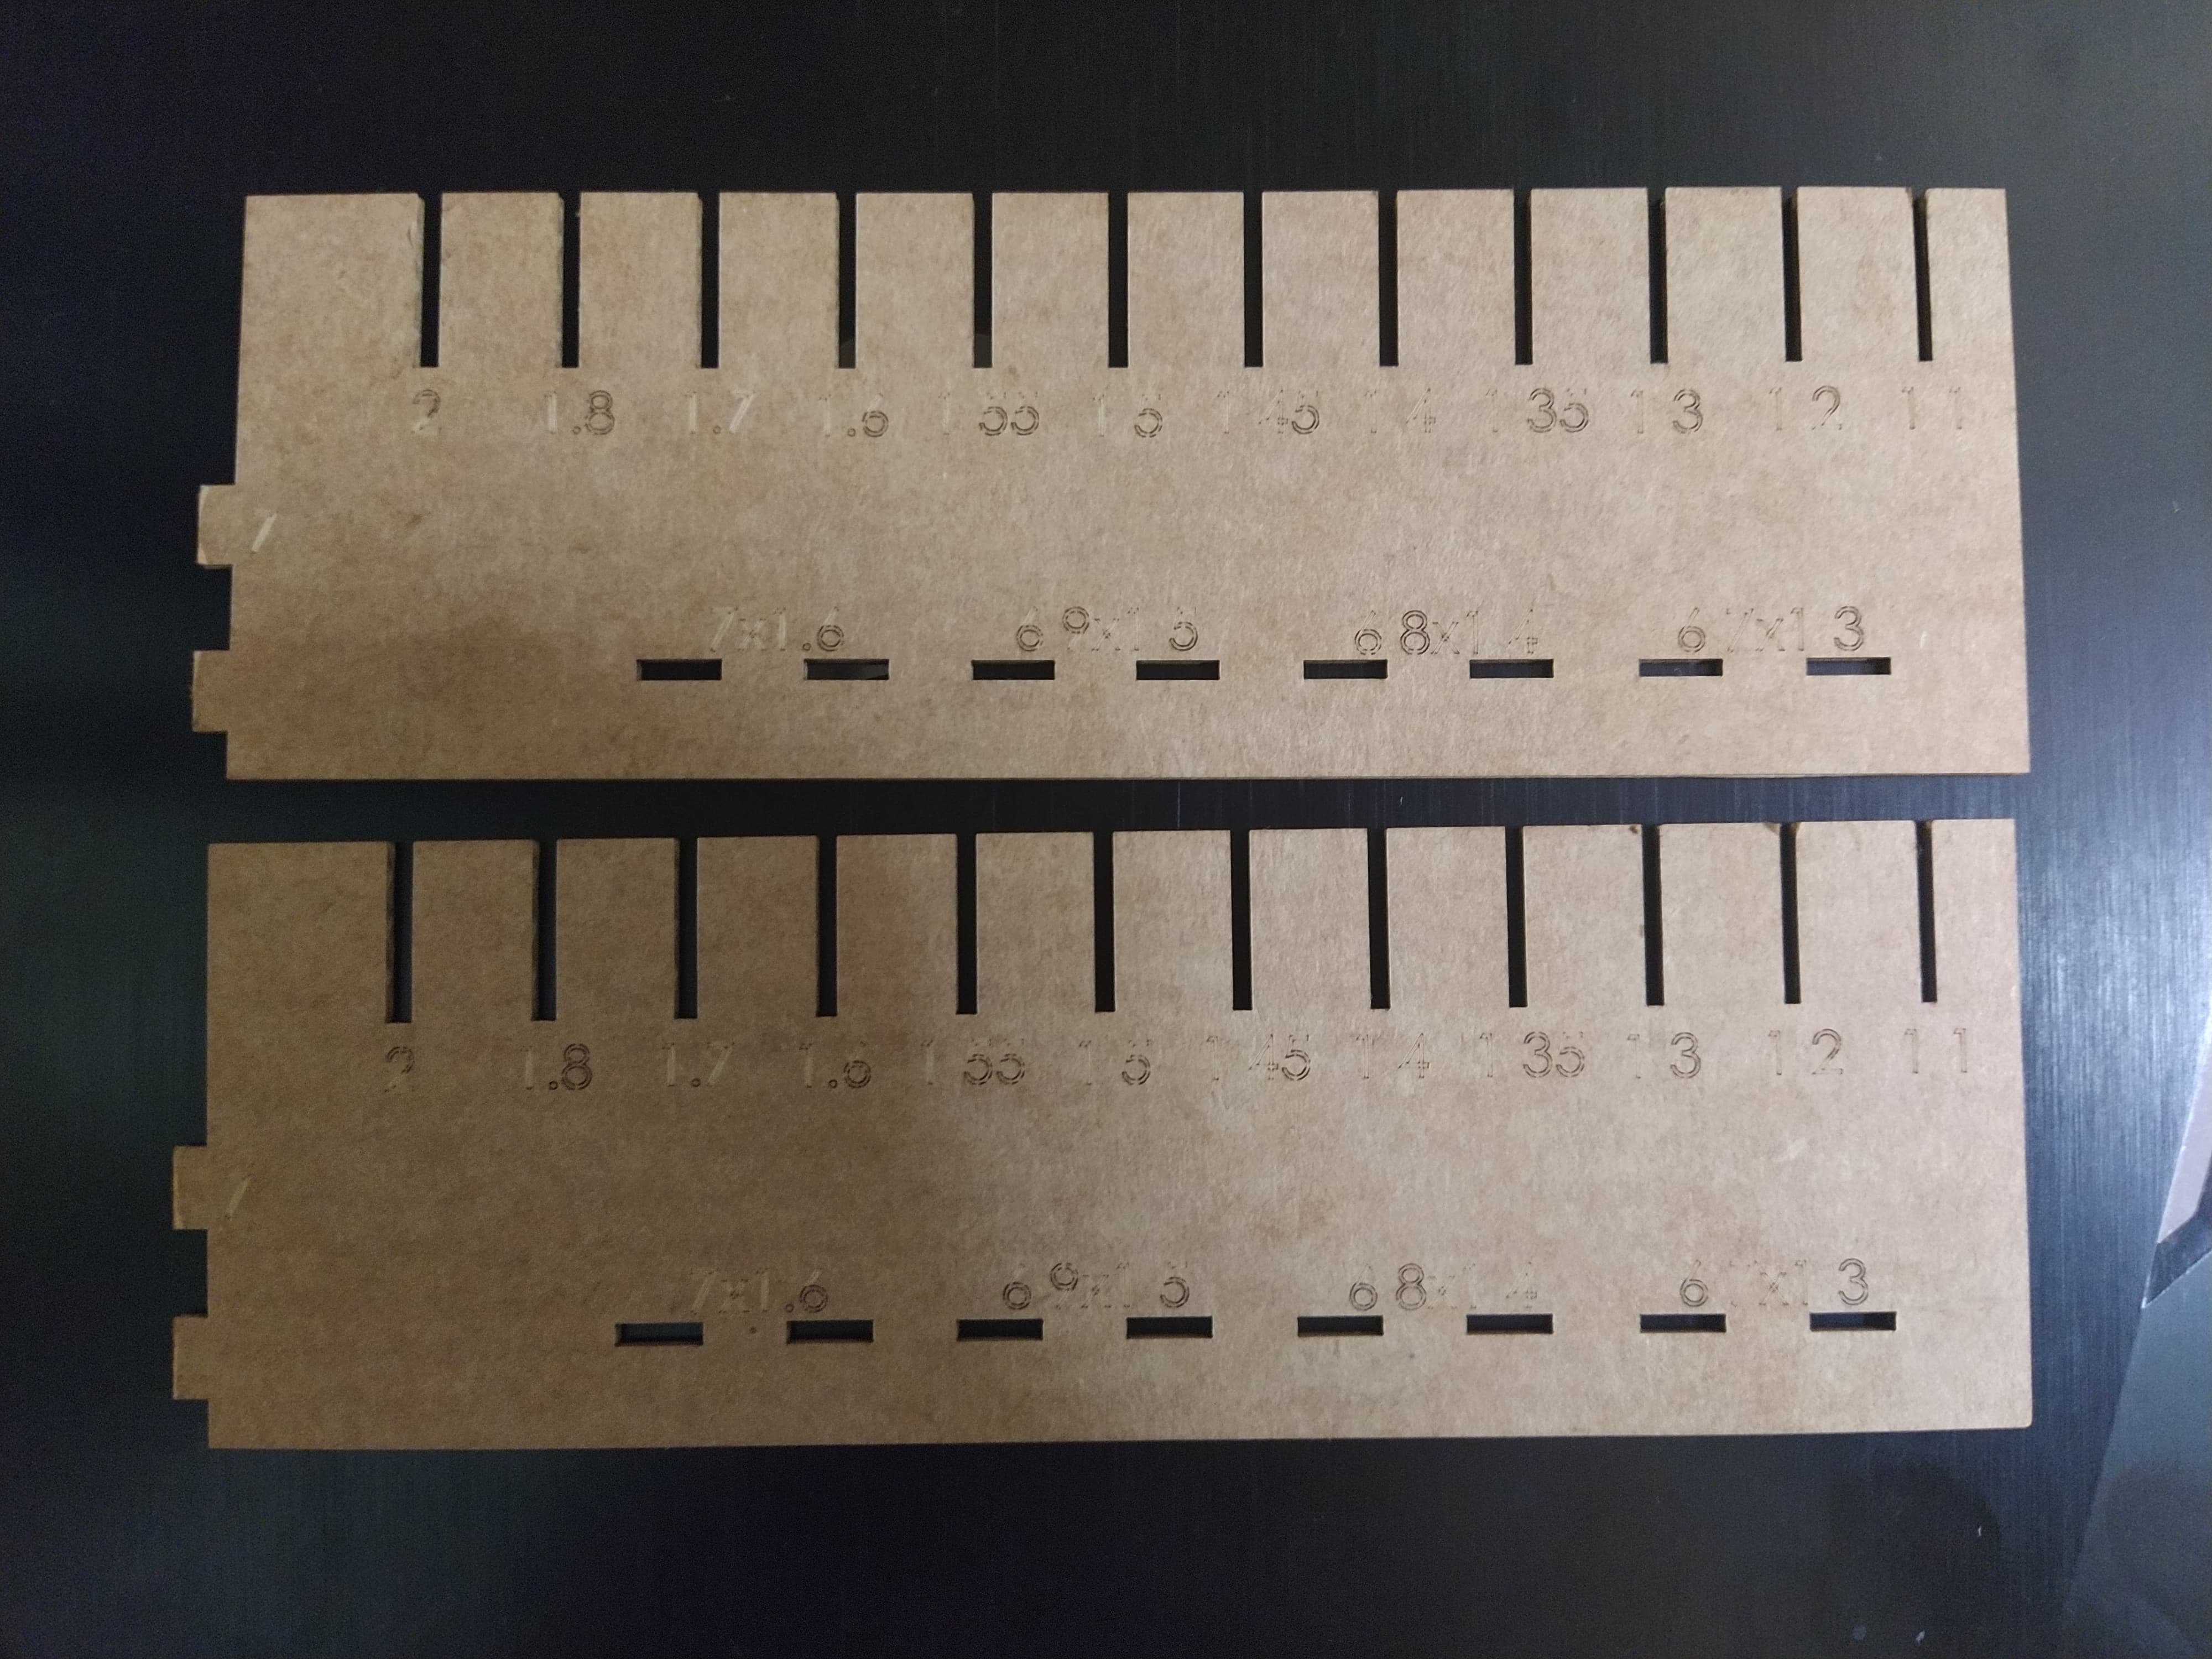
With the cut pieces I realized that the numbers had not been correctly engraved on the cardboard, due to my lack of mastery in the software.

Perform the pressure test, finding the best results in the 1.35 mm slot for the 1.8 mm cardboard, with smaller values the cardboard begins to deform.
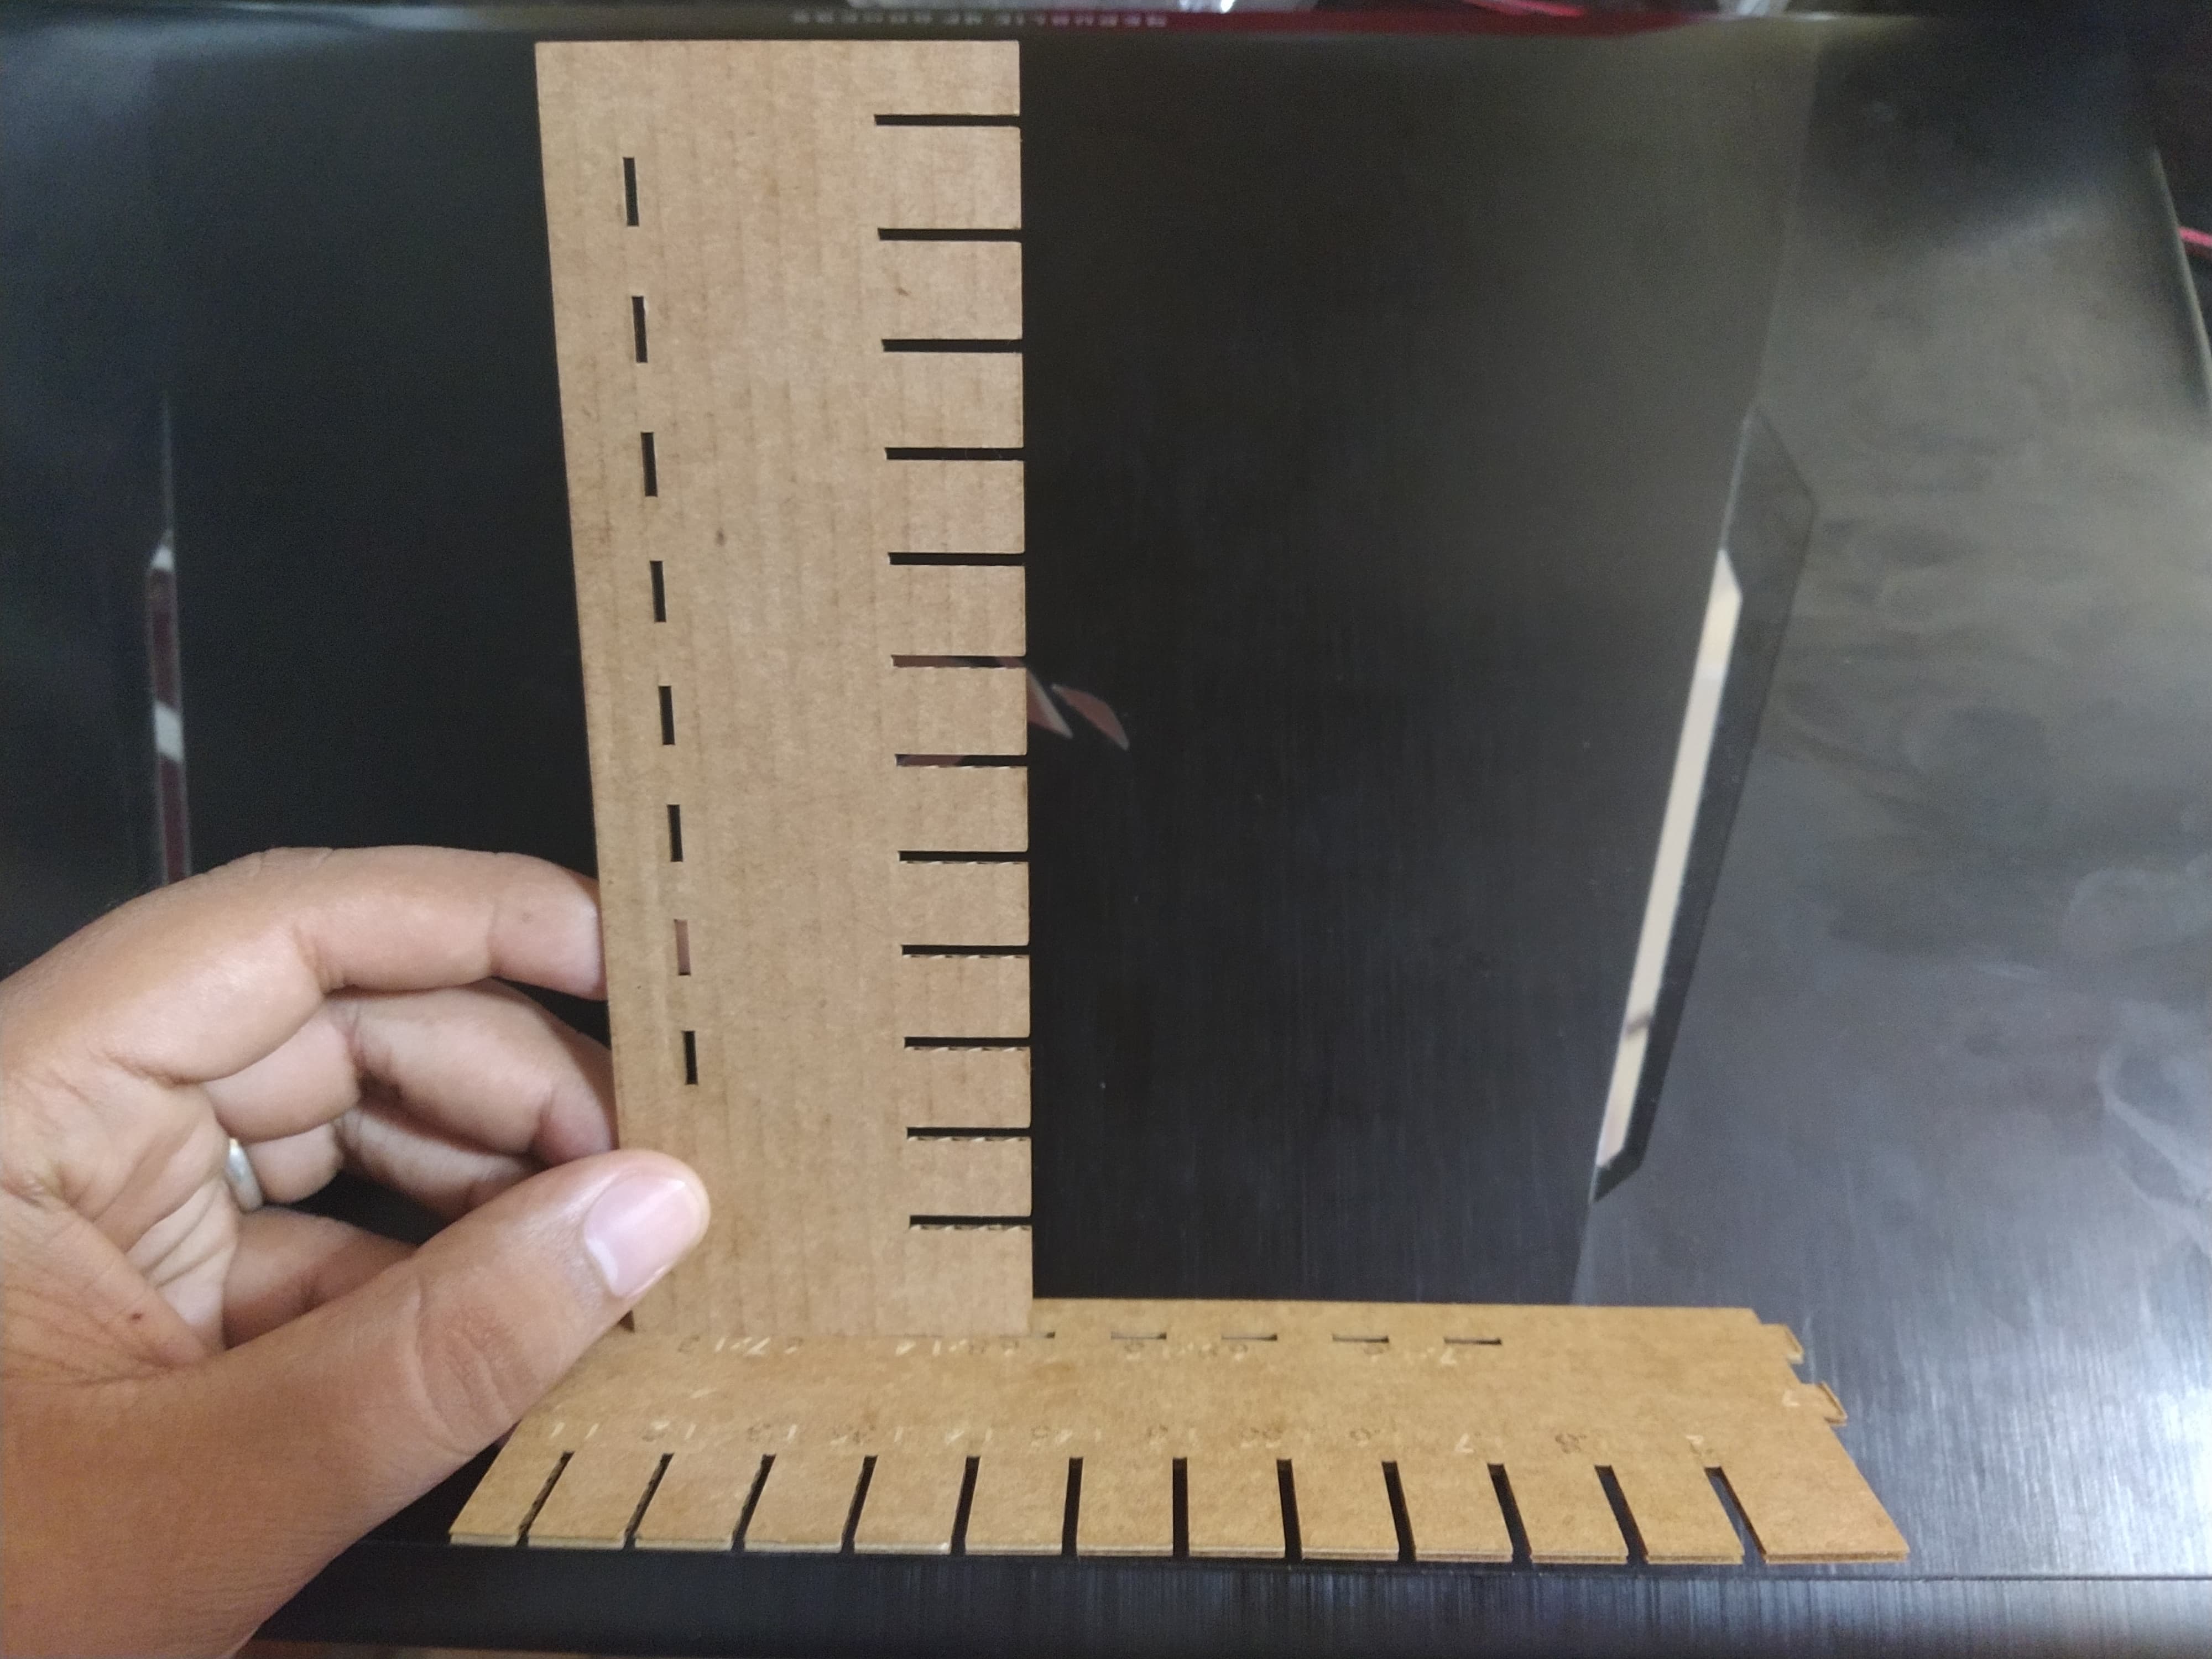
I also tested the pressure in the adjustment of the holes, which were 0.3 mm smaller than the teeth (7 ==> 6.7) and checked a value between 1.3 to 1.4 for the thickness of the cardboard.

According to the tests, I would recommend a value of 1.4 to join parts that will be disassembled frequently, and a value of 1.35 or 1.3 for permanent adjustment given the ease of deforming the cardboard.
Parametric Construction Kit
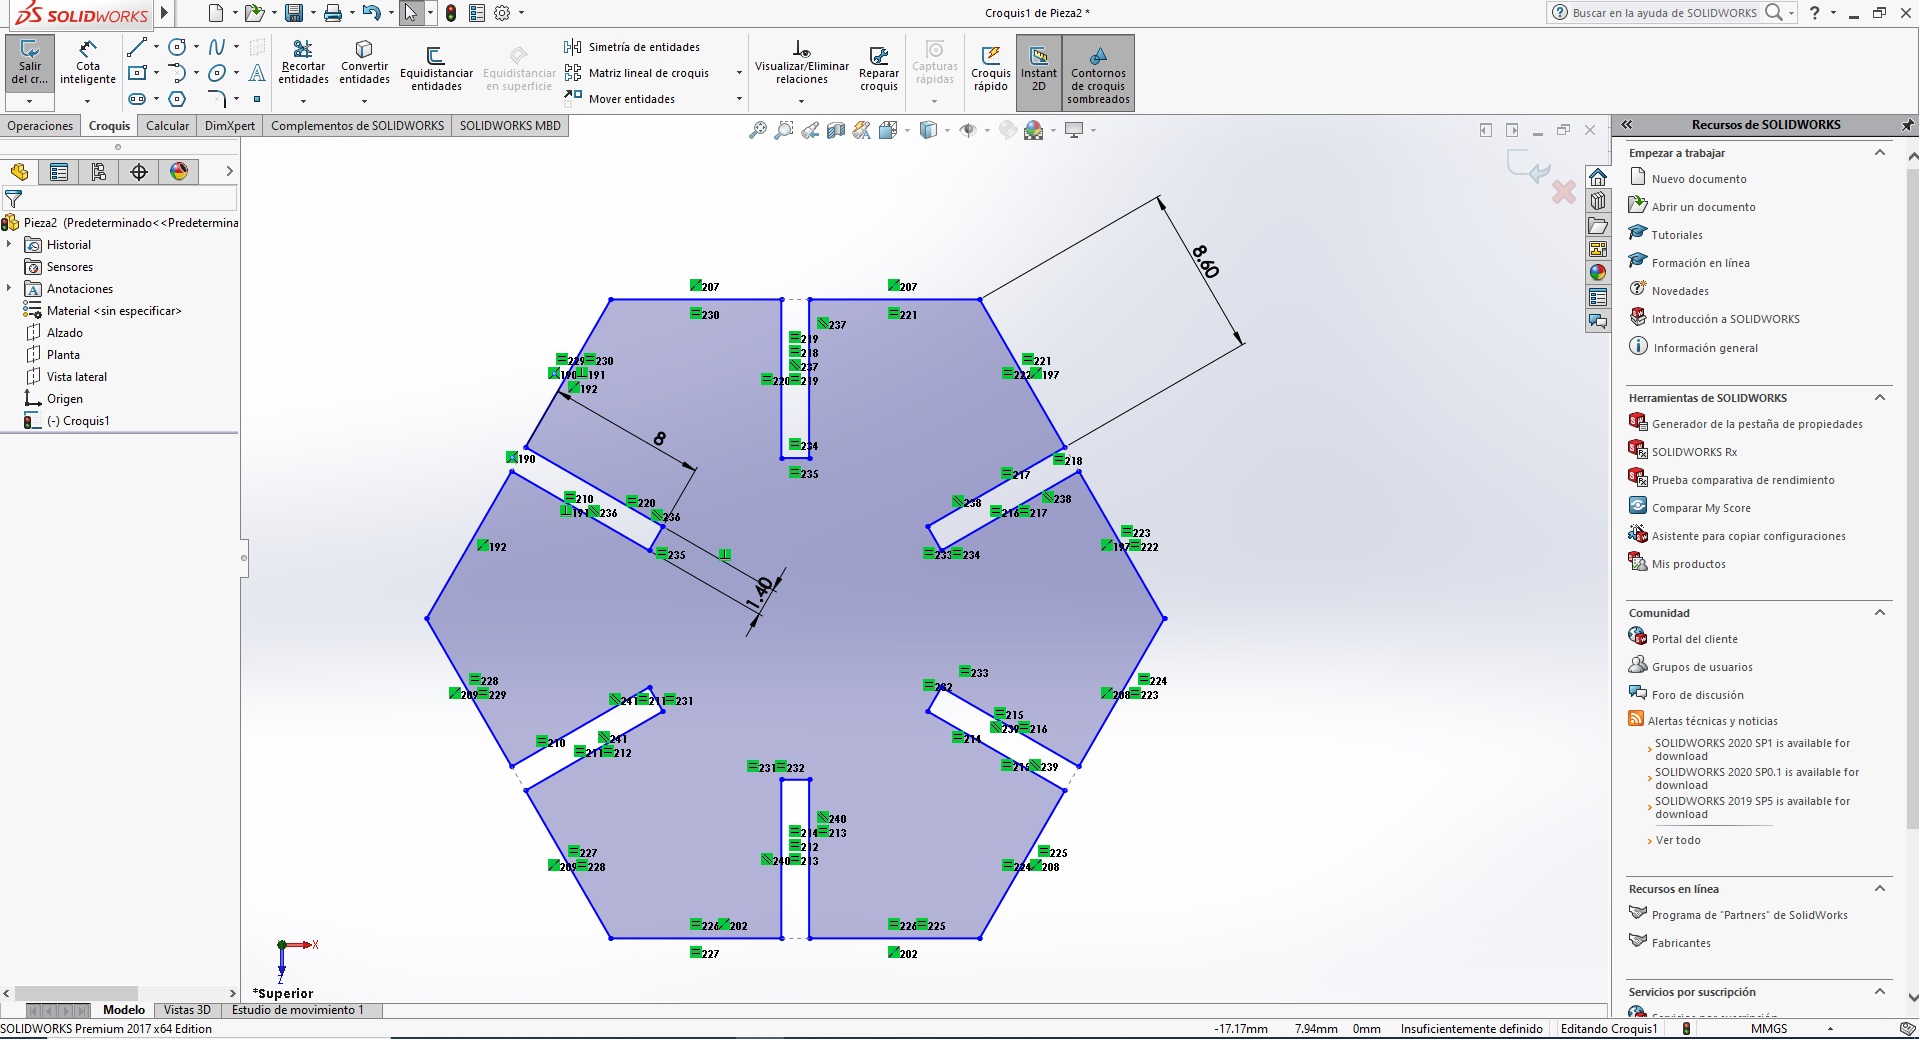
Start the parametric design using relationships for 2D drawing in SolidWorks software, considering the variety of ways to assemble.

Check that the relationships in the parametric design can scale the part ensuring that the joints work independently of the size of the piece.

I continued with the laser cutting of the parts kit.
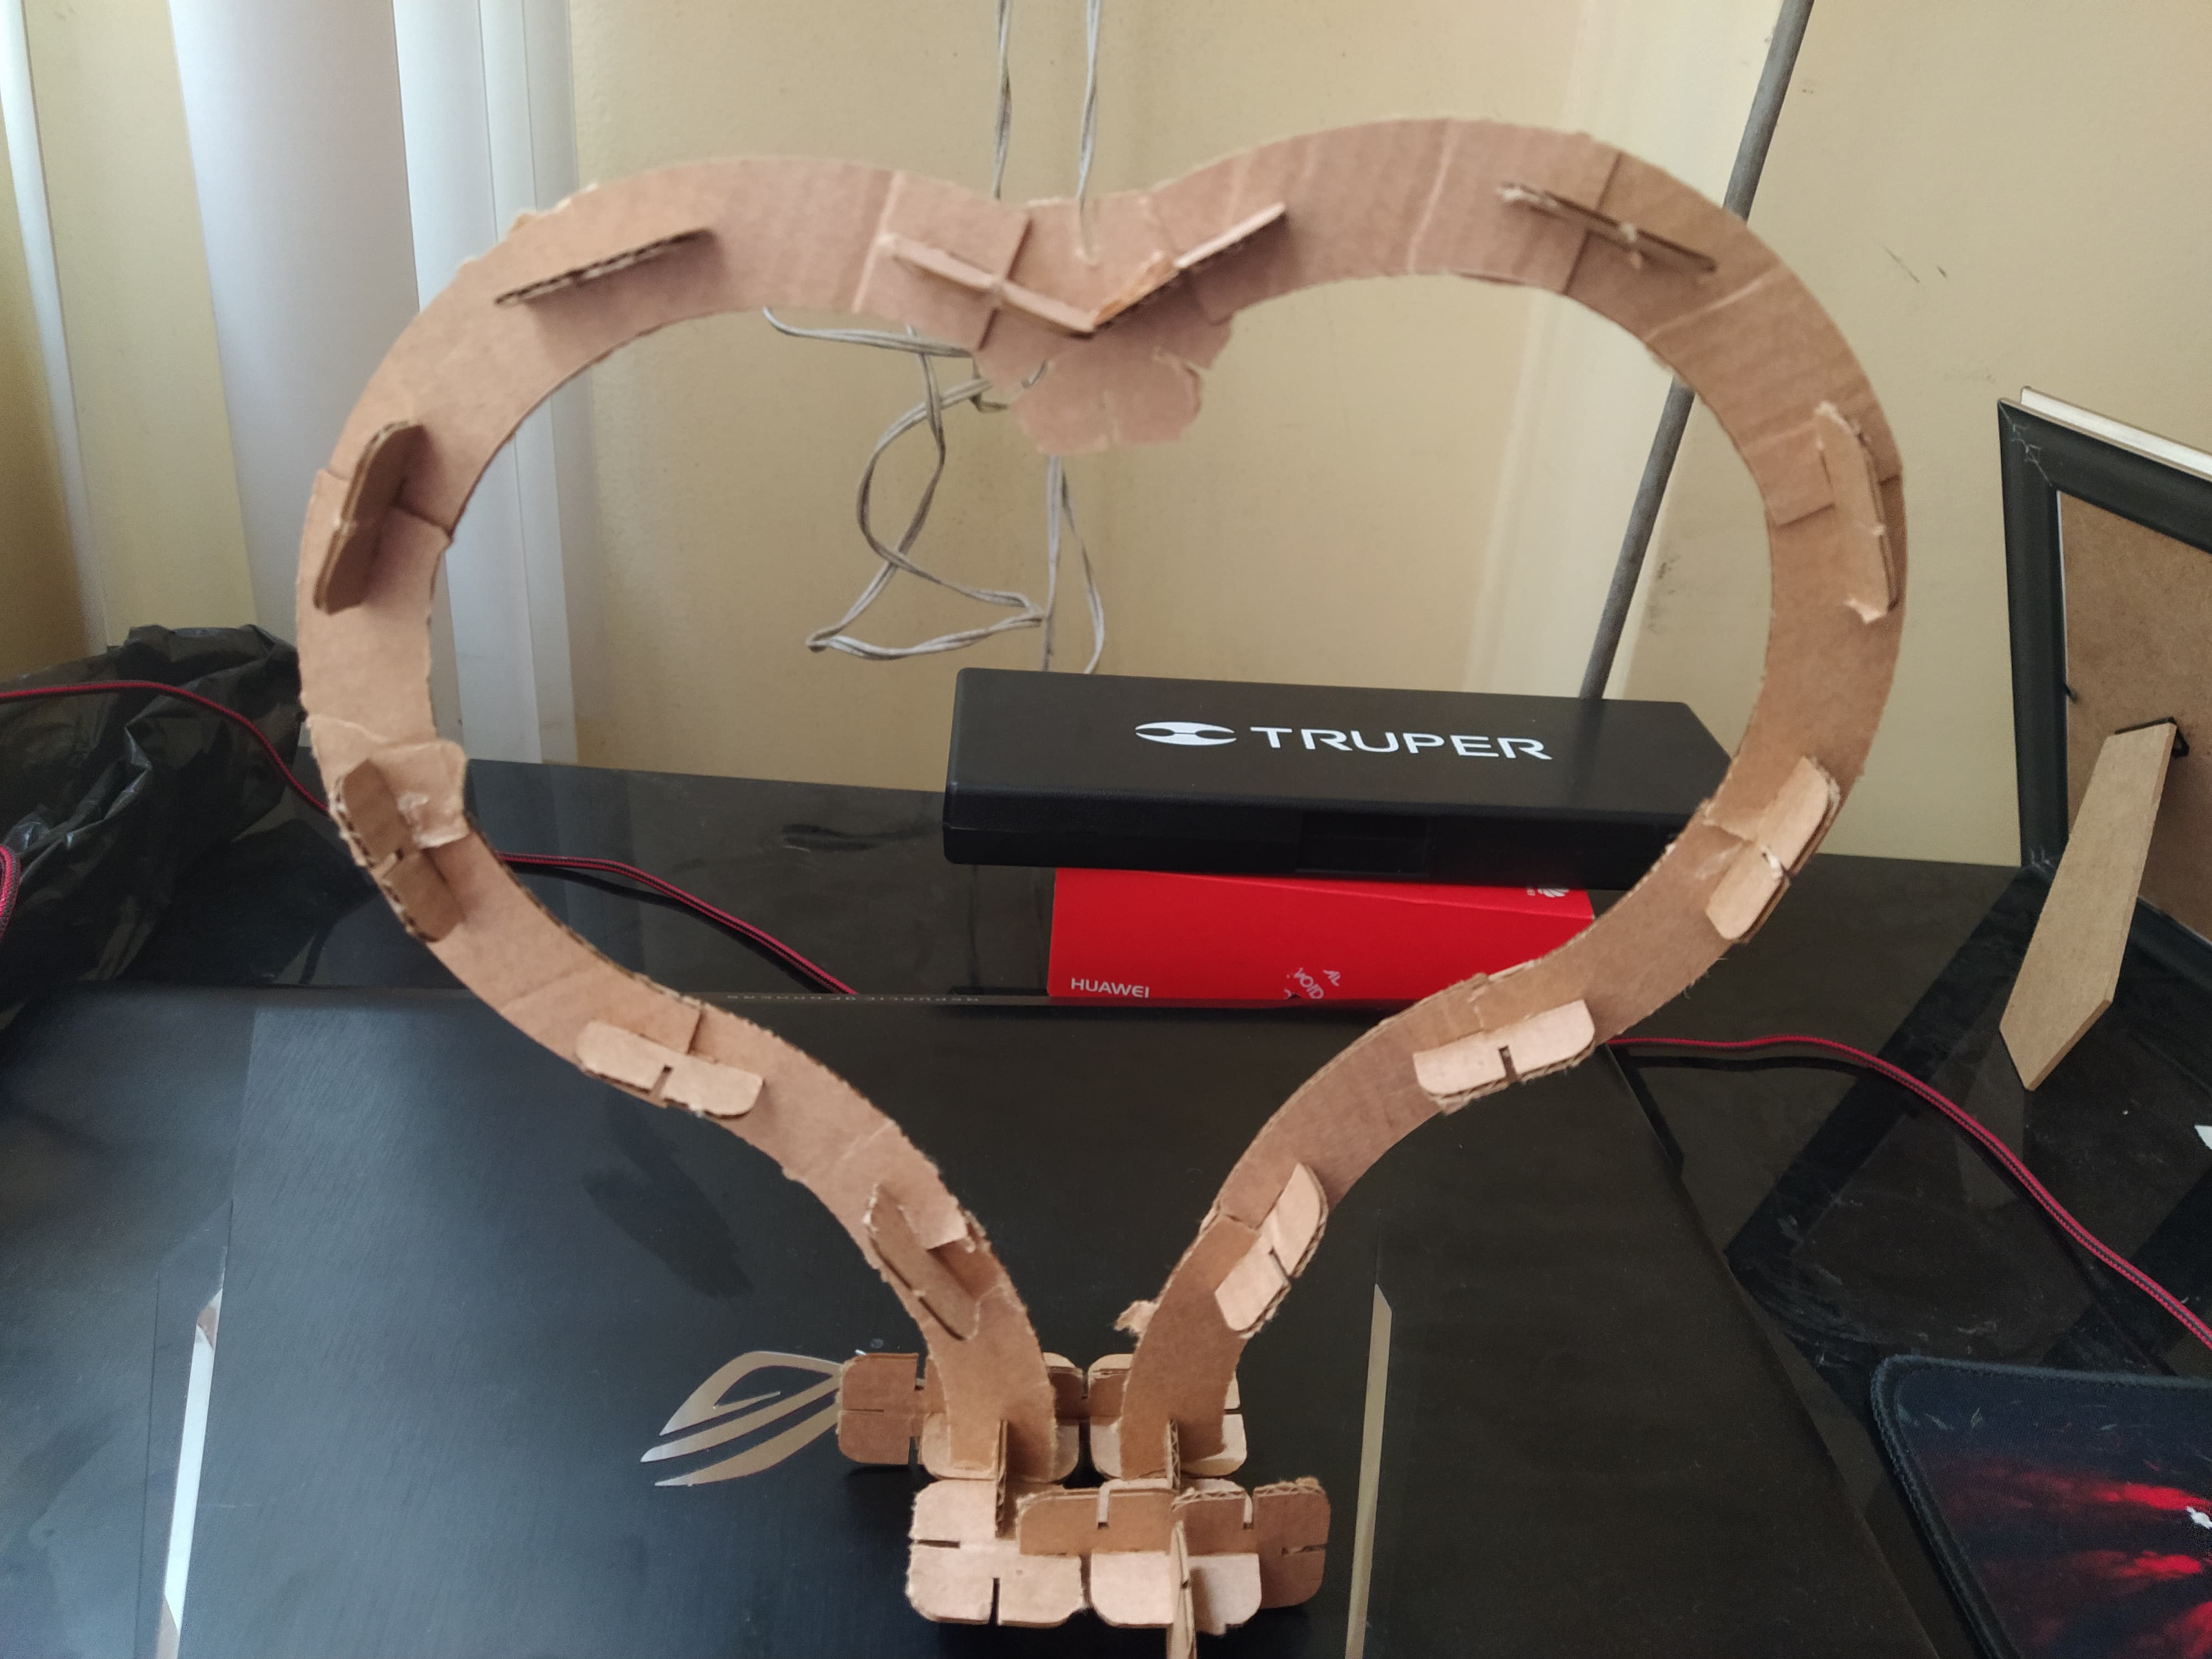
With these pieces I made a construction inspired by Valentine's Day

Then I made the construction of a model inspired by the skeleton of a dinosaur.
Vinylcutter
Firstly, you can see the different buttons, which allow us to adjust the power of the cutter, designate the initial working position and other settings.

Quick tests can be carried out to verify that the cutting force and speed are adequate.
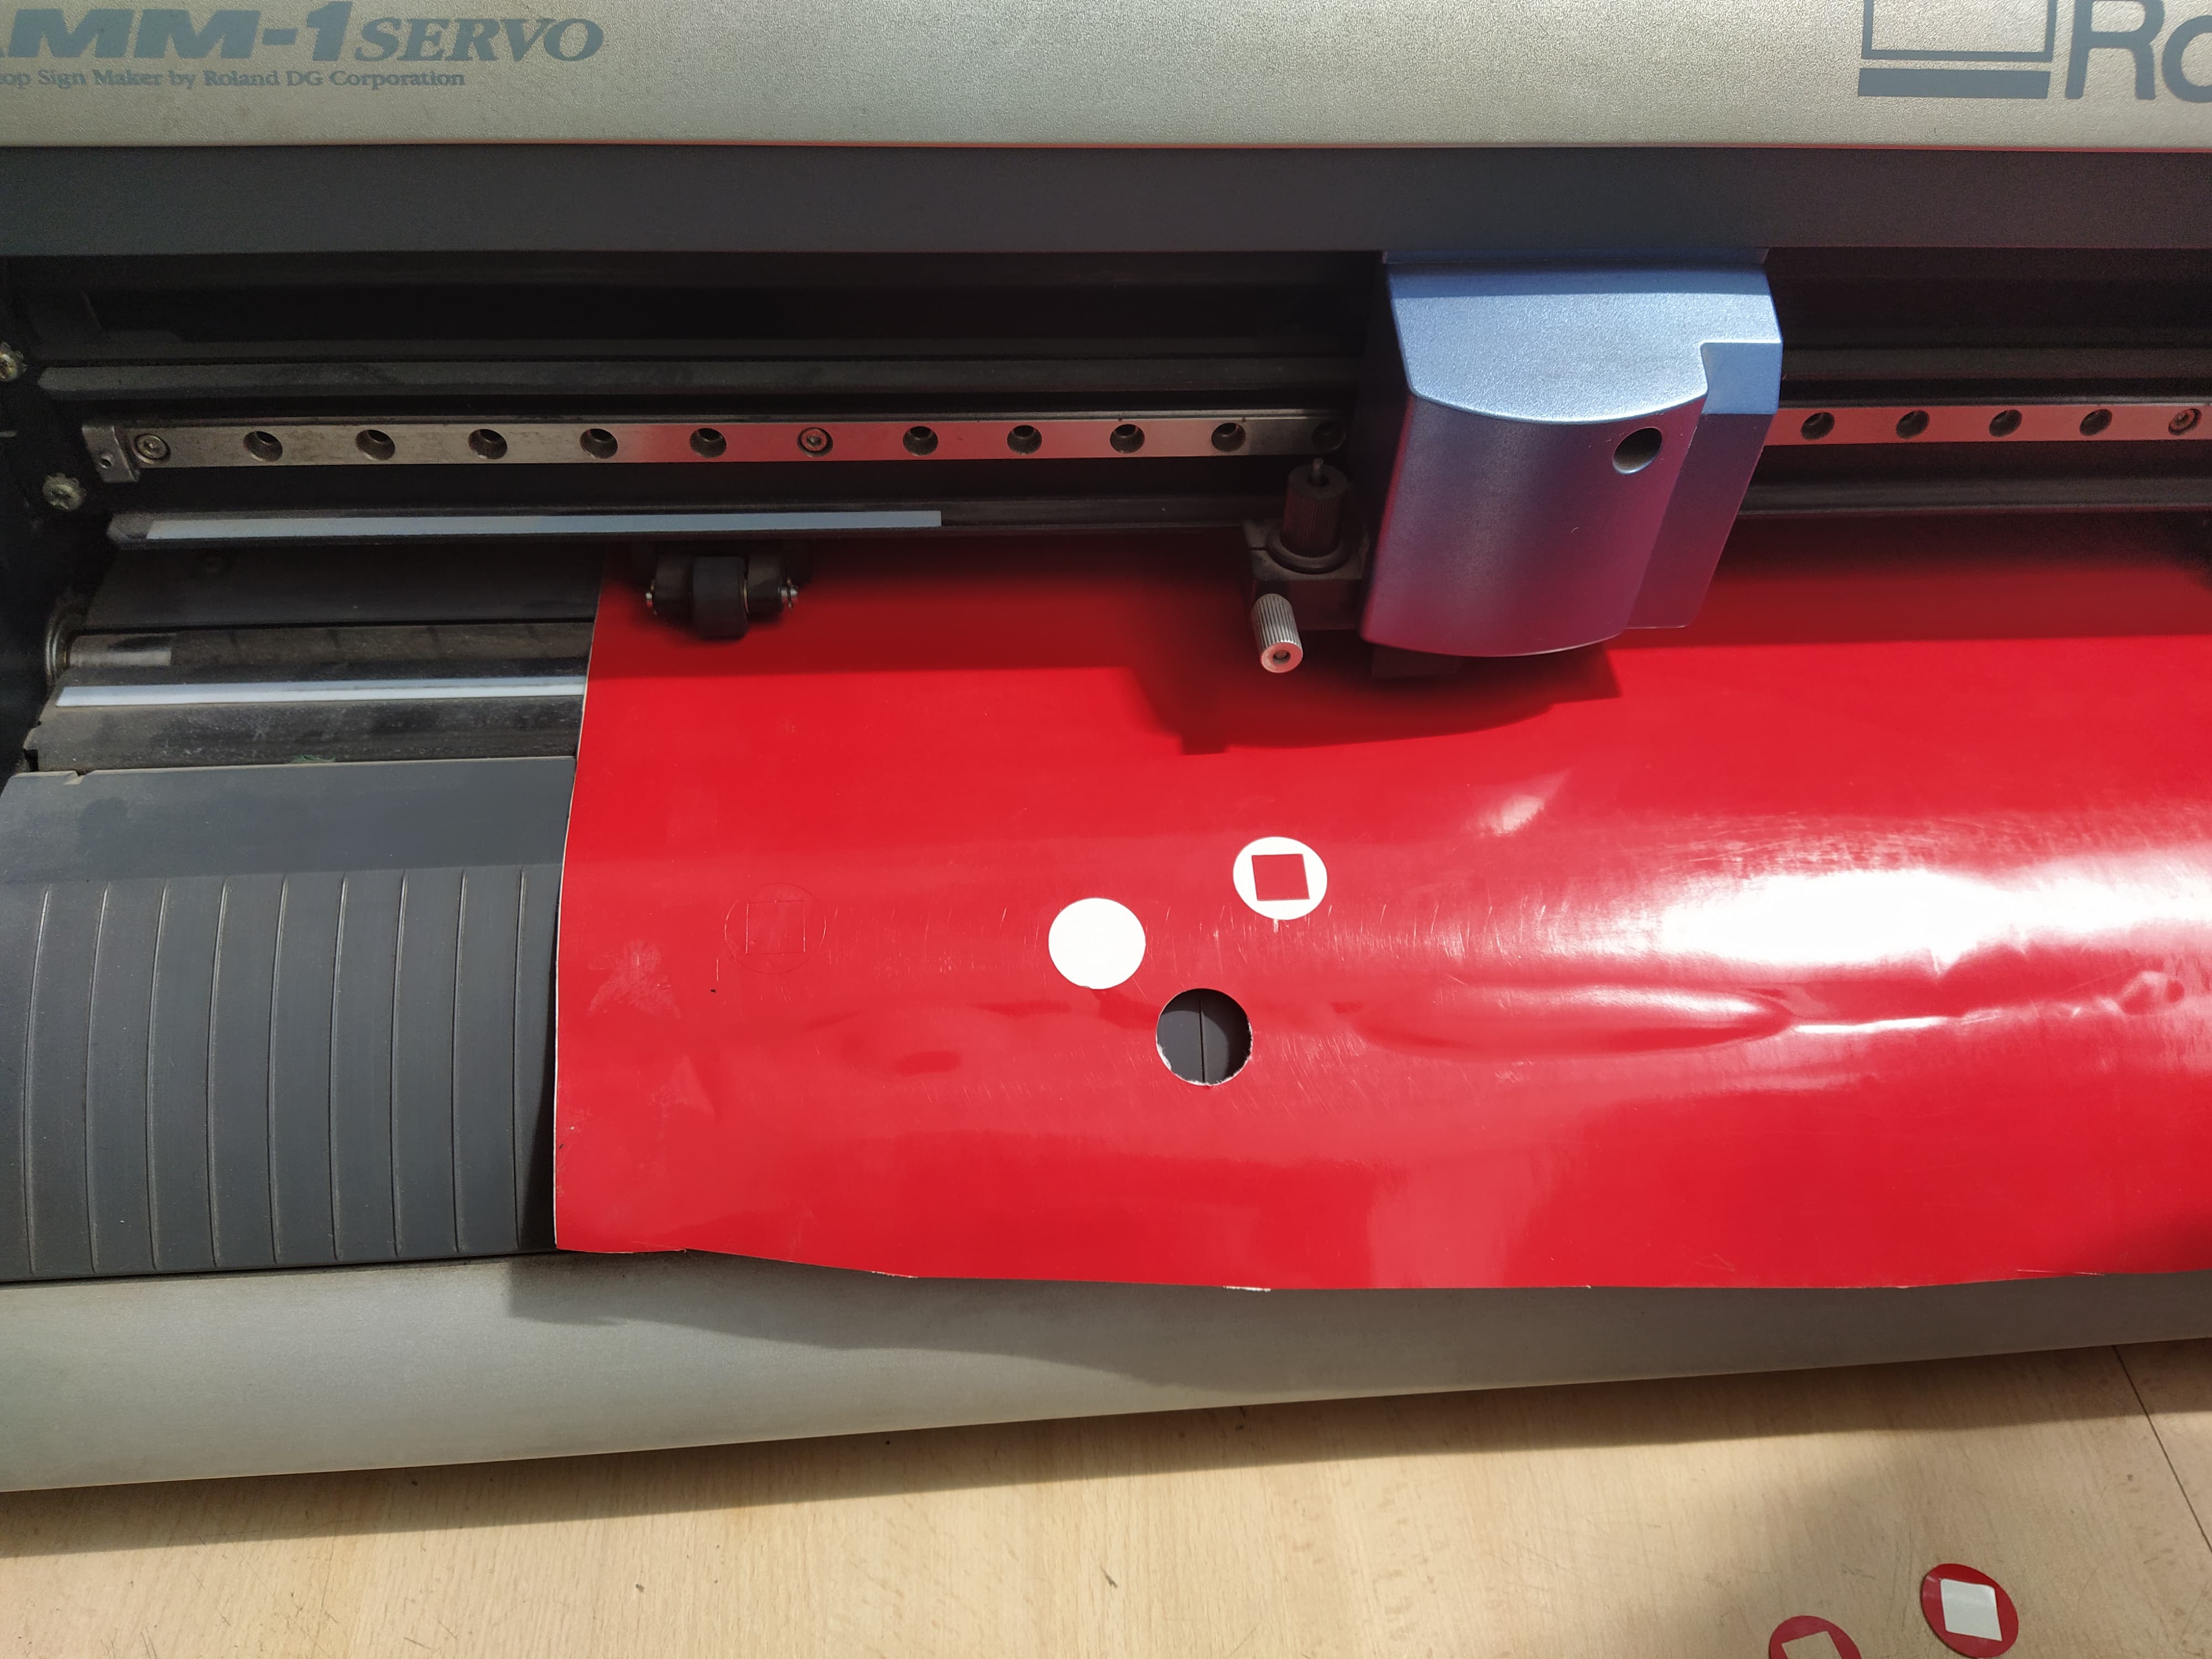
I perform a quick test by writing my name and cutting it, I did this from the cutter's own software.
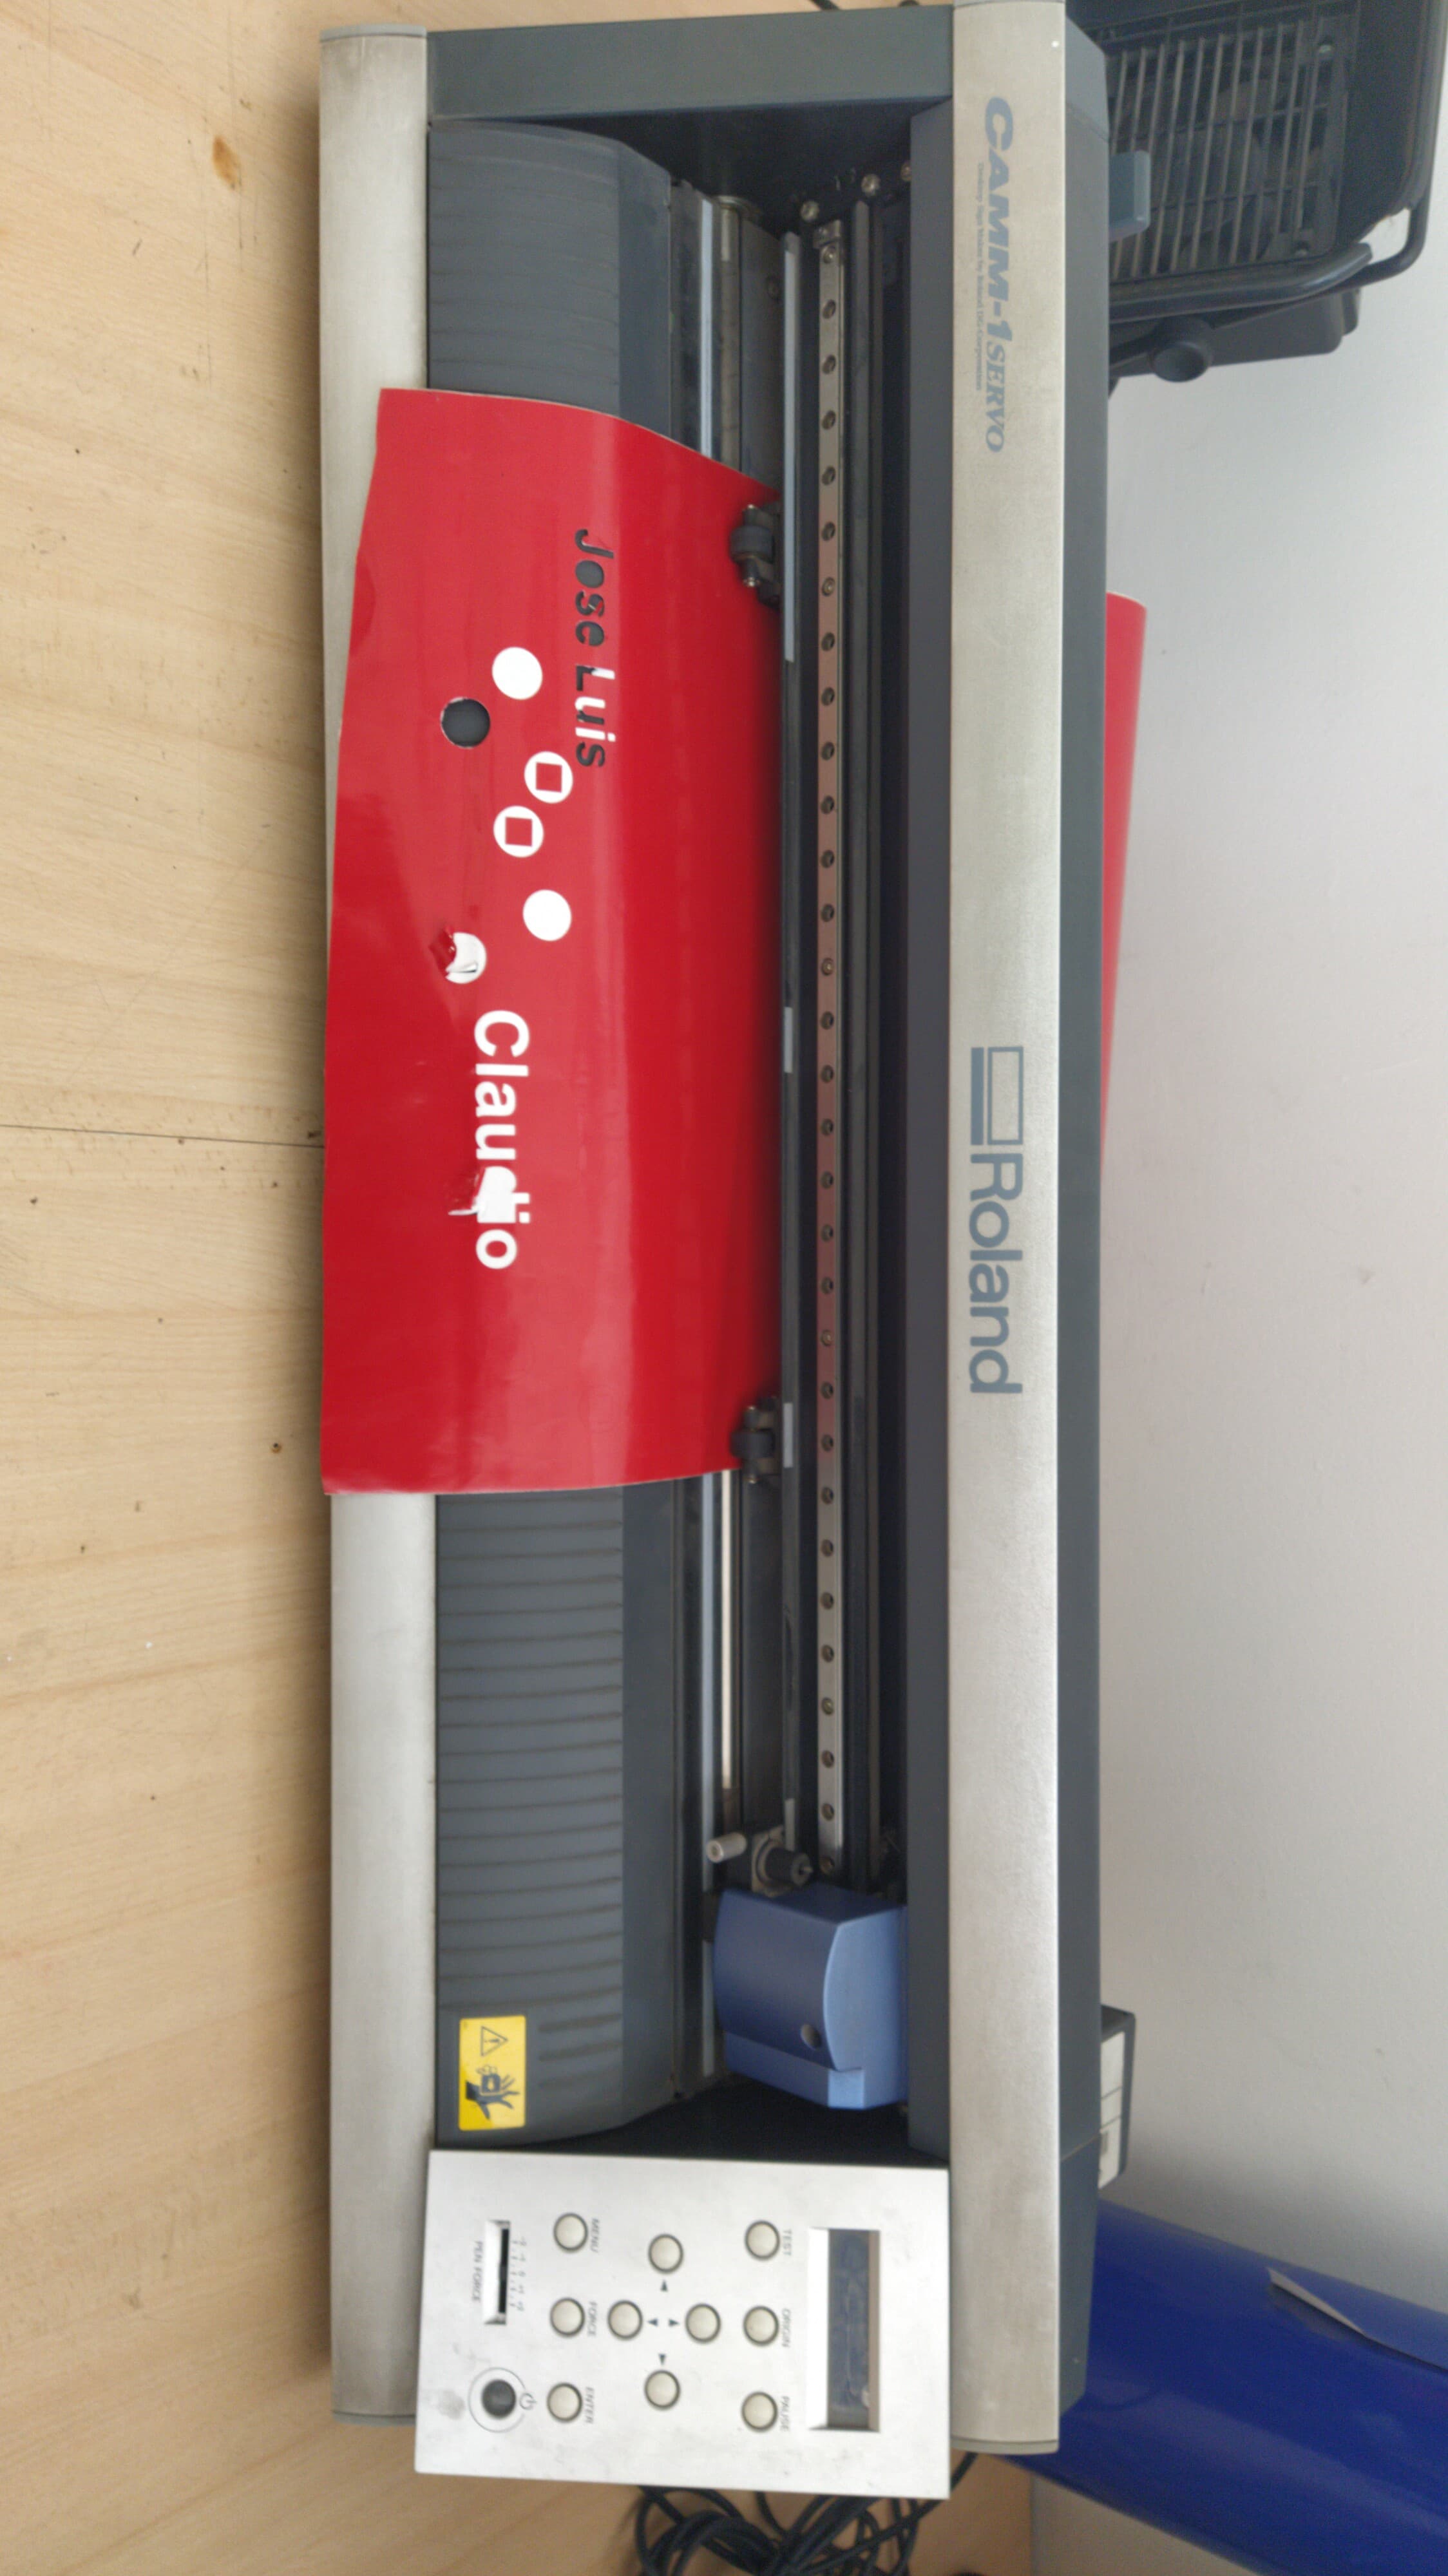
Then, in the cutting machine's own software, I import an image file to be able to draw its lines and thus have design pieces to my liking.

To make better use of the material and avoid waste, arrange the pieces so that they take up as little space as possible.

Here you can see the work done by the machine.

As a final part, I used all the cut pieces to decorate my laptop.

Self evaluation
What problems did I have?
I had problems using the laser cutter and setting the layers.
How did I resolve the problems?
I used a guide to always remember to use correct layers for the configuration I want.
What should I improve?
I must better characterize the laser cutter for better use.