eighth assignment
Date
11 Mar 2020
MAKE SOMETHING BIG !
This week's assignment is to design and fabricate something big by using CNC technology. I am so excited to make it !
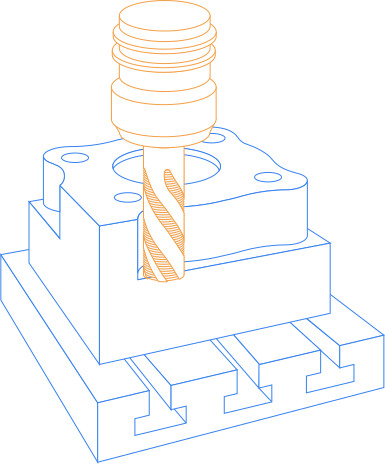
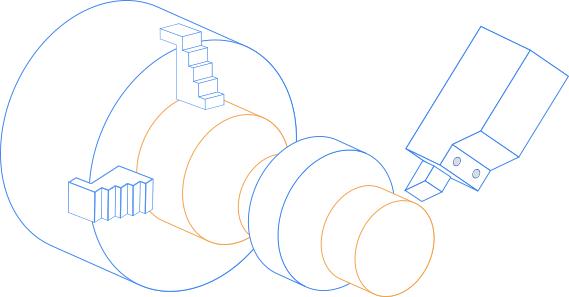
What is CNC Machine ?
CNC stands of Computer Numerical Control, a subtractive manufacturing process in which pre-programmed computer software dictates the movement of machine tools and produces a custom-designed part.
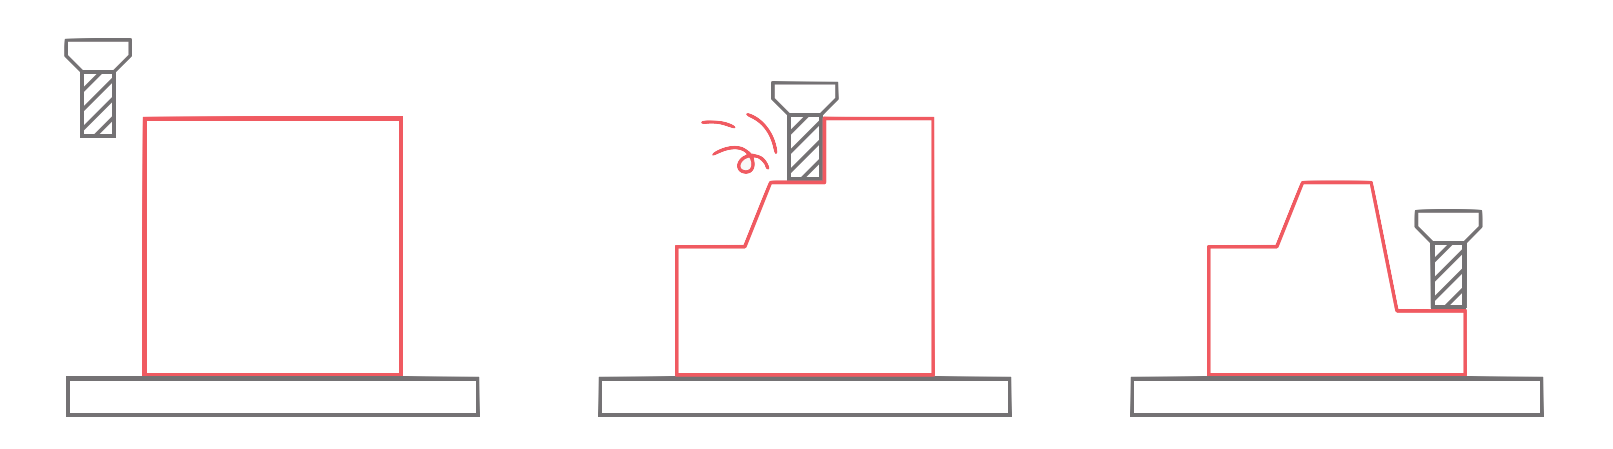
The main CNC Machining Operations :
Milling
Turning
Material can be used in a CNC machine:
Metals such as aluminum, brass, copper, steel, and titanium
wood
foam
fiberglass
plastics
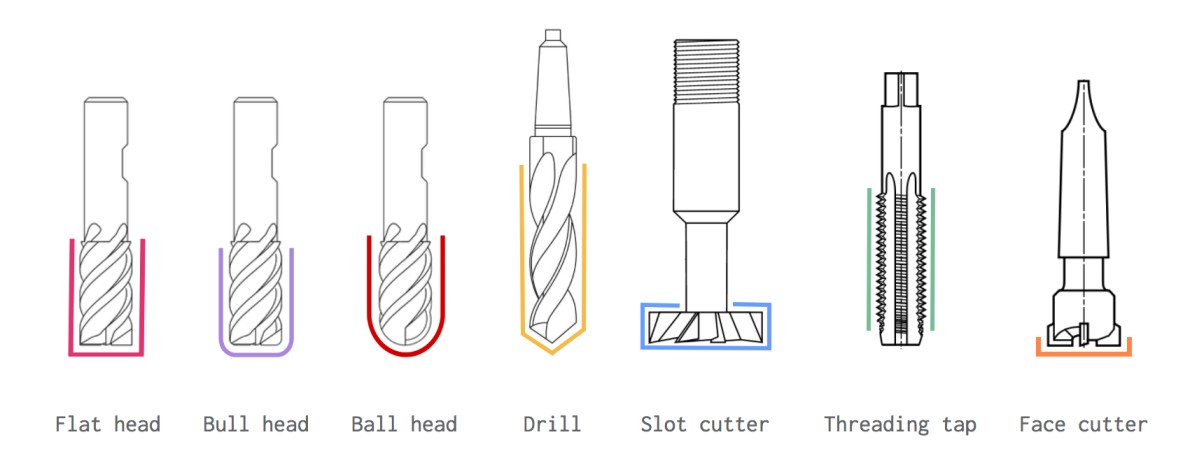
the most commonly used milling tools in CNC:
Idea
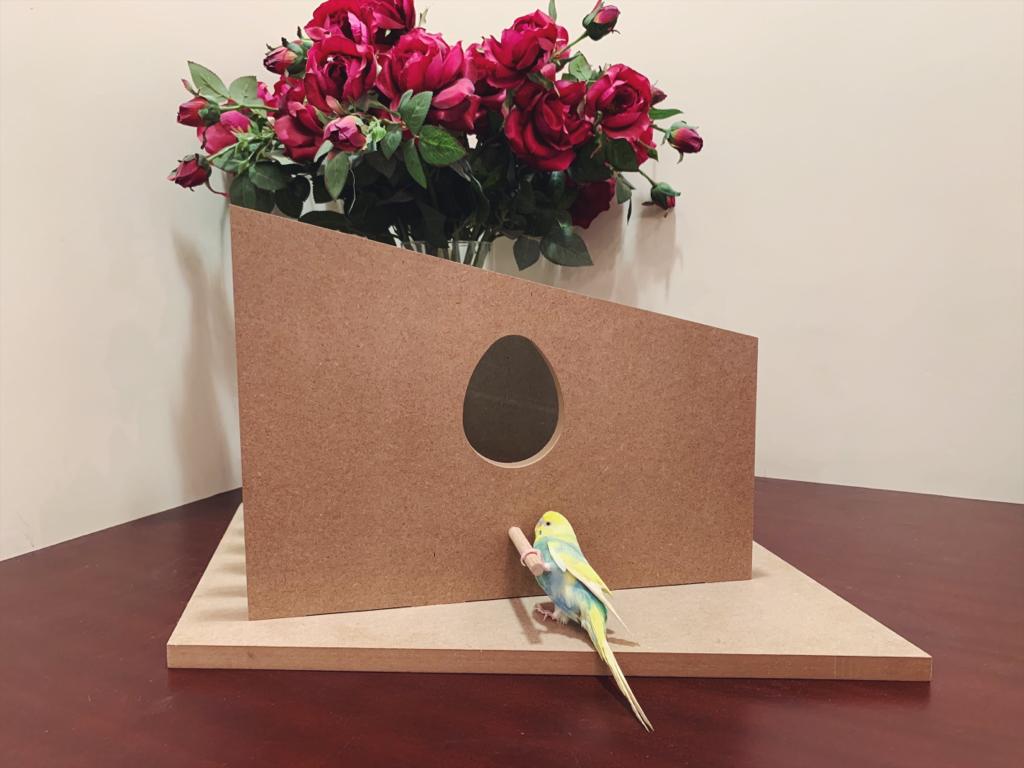
My dad loves animals and birds a lot. I grew up around them. We have many birds in our backyard. I decided to surprise my dad and make a birdhouse using the CNC technology. I searched on pinterest to find inspiration for my Ideas. I don't want to create a traditional birdhouse.
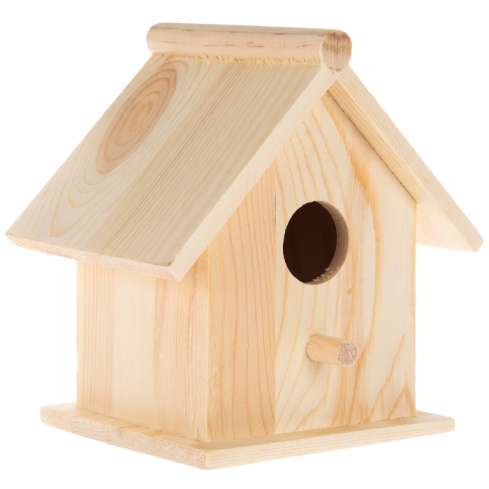
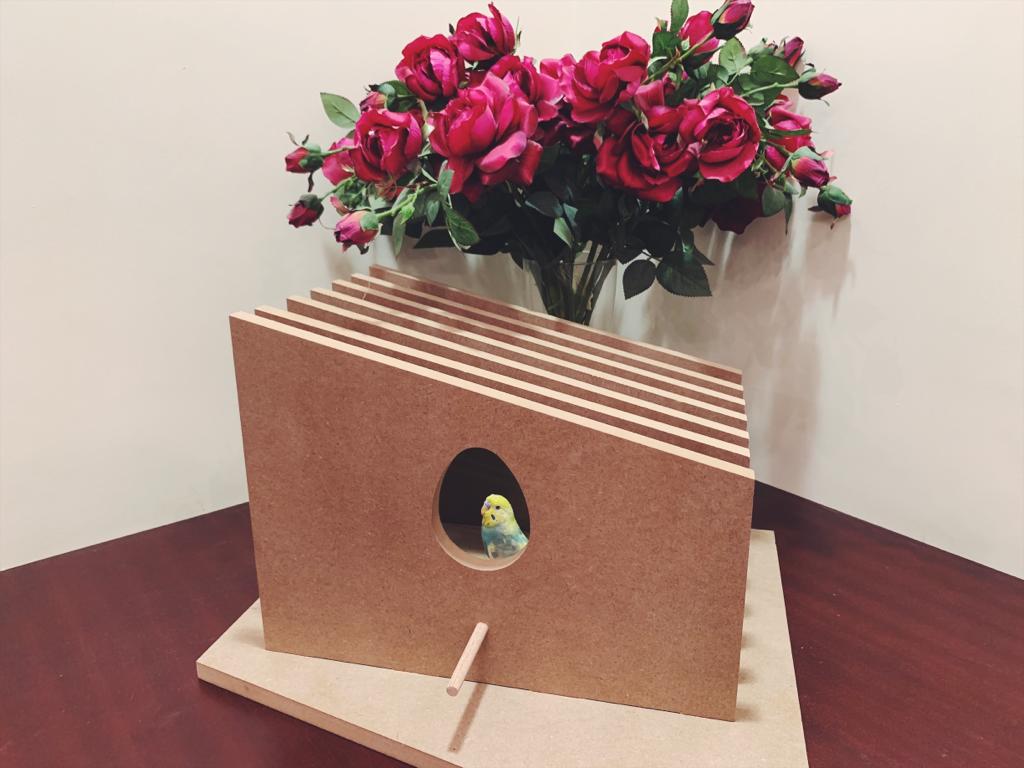
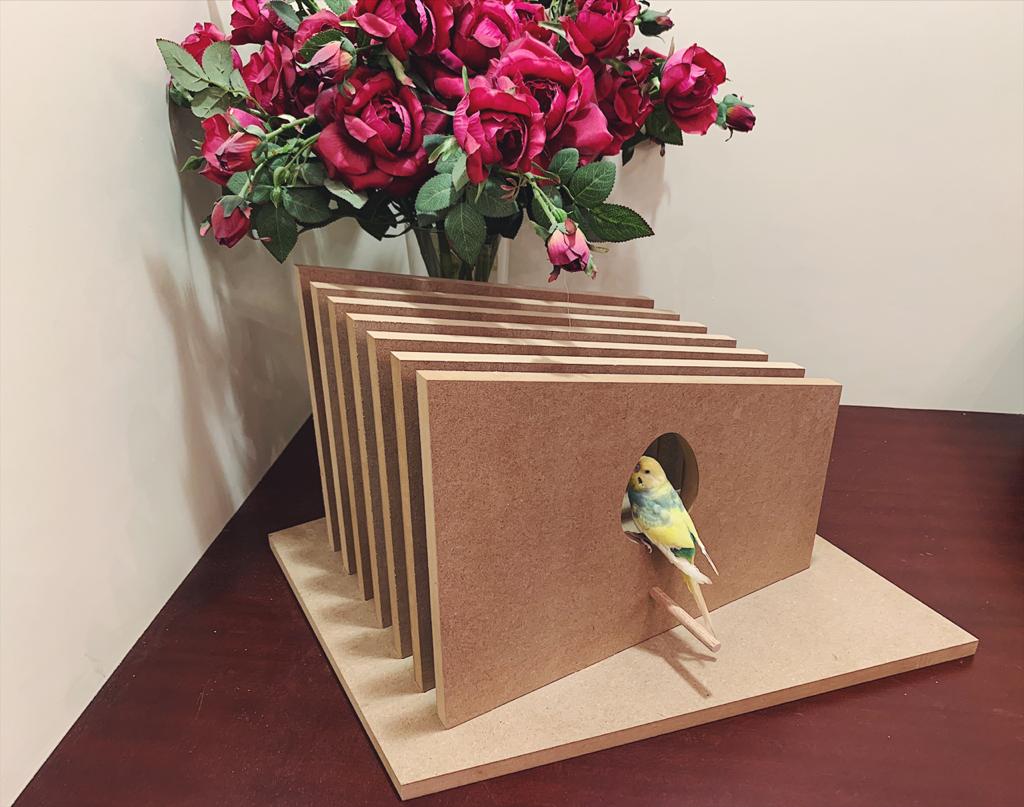
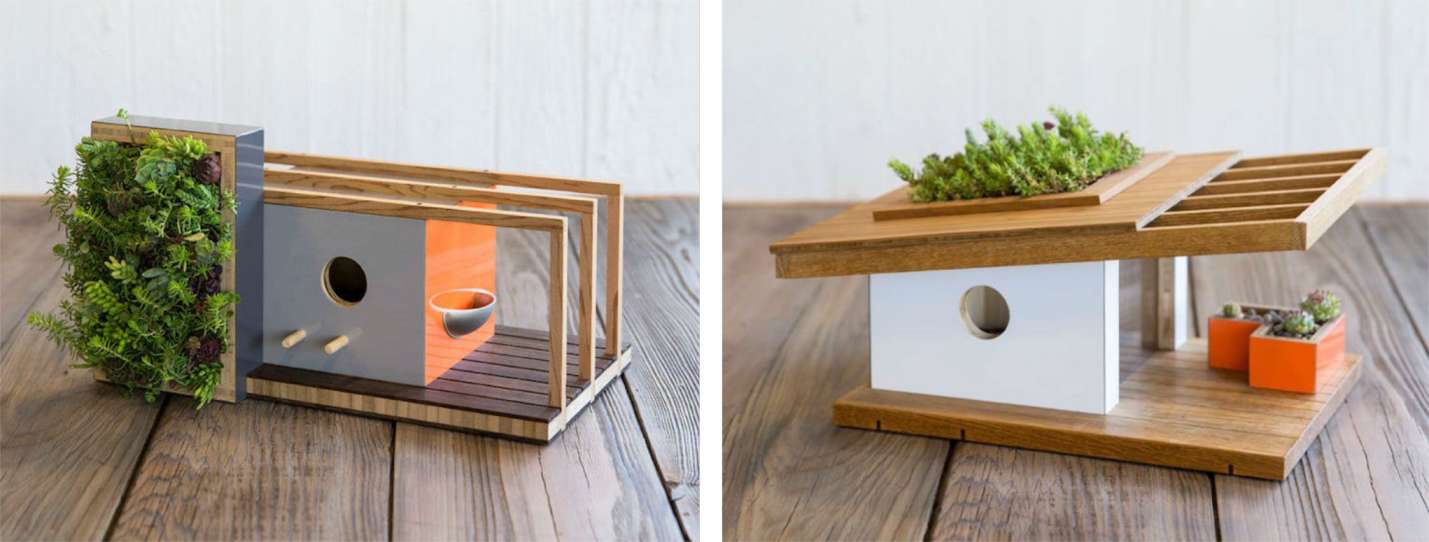
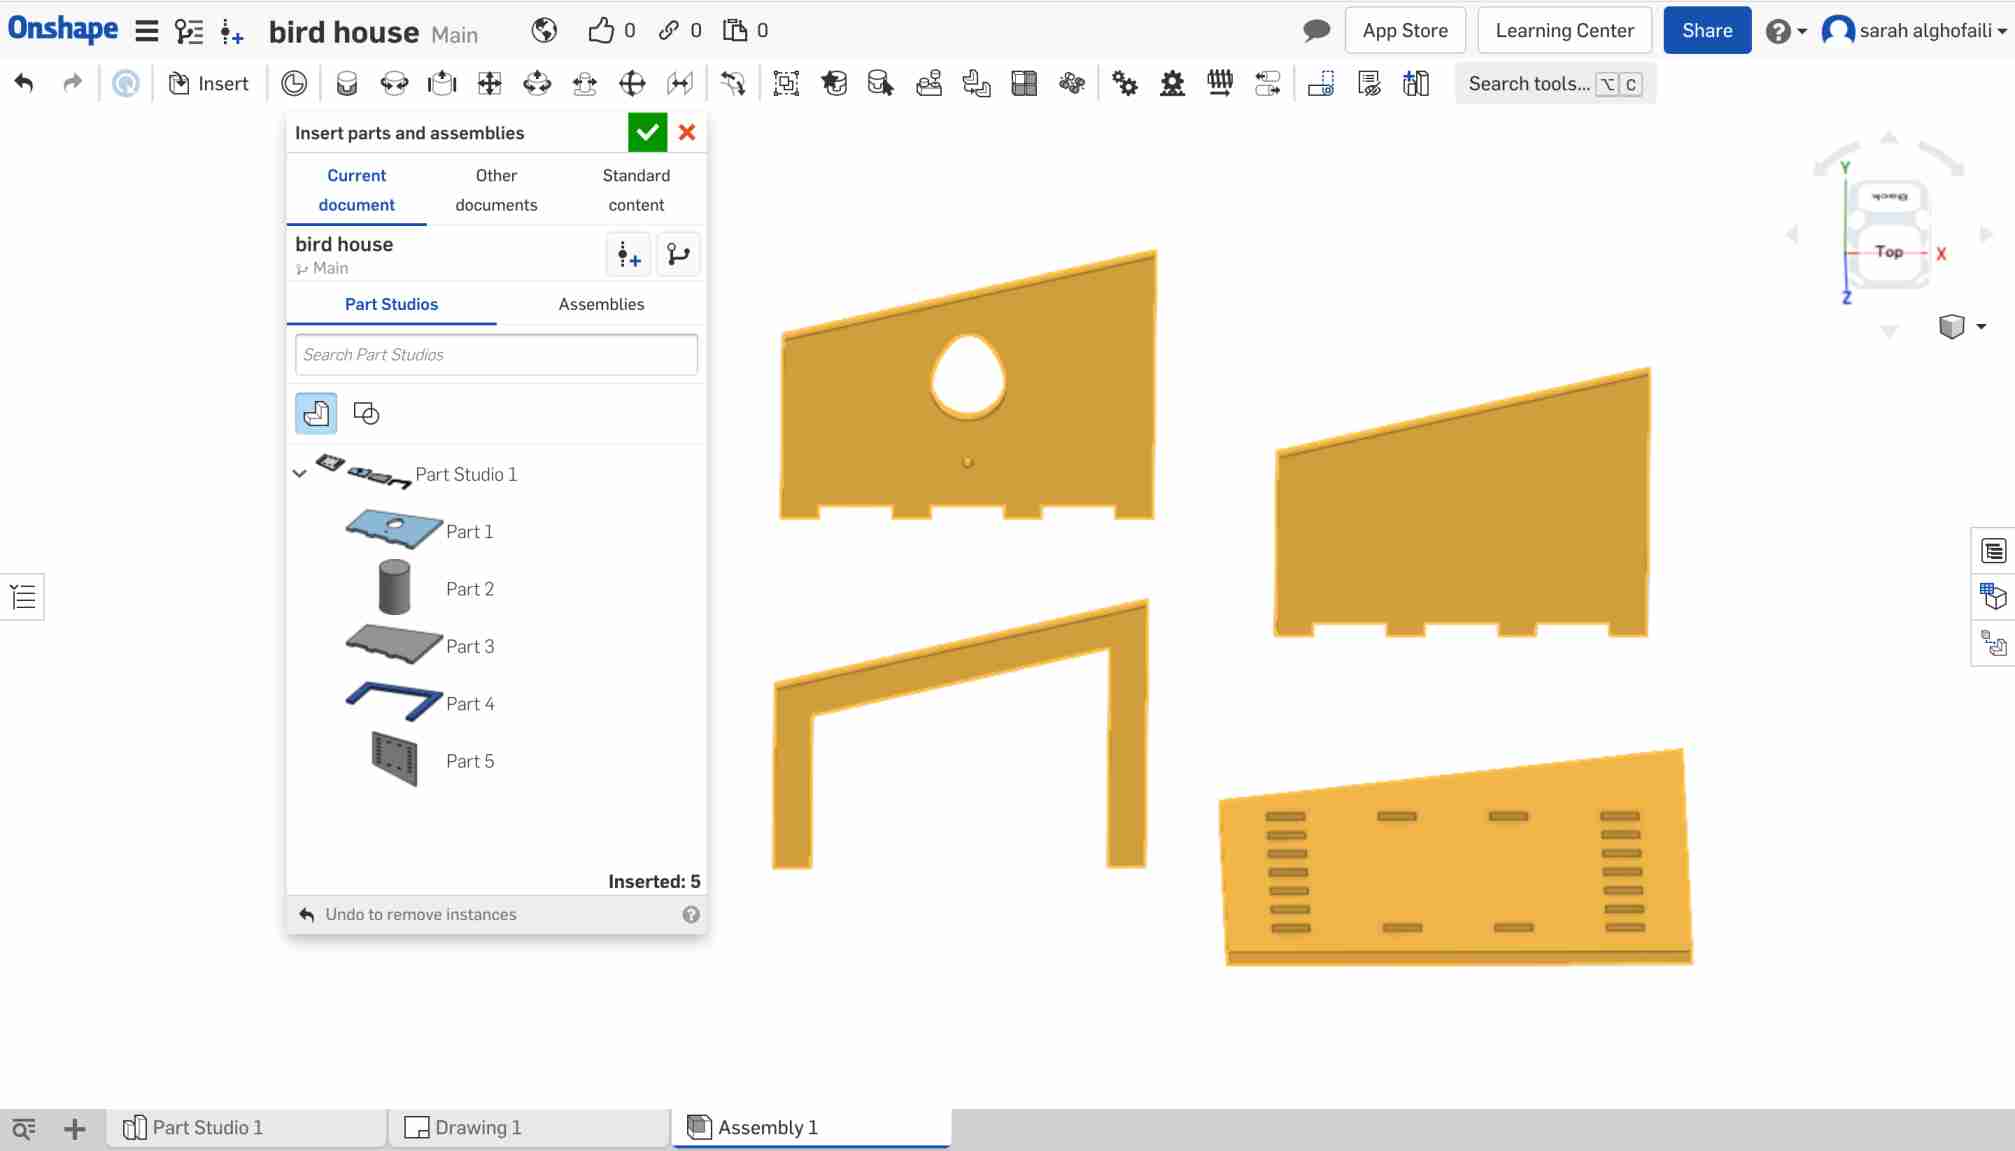
These pictures were the inspirations for my design.I decided to build a modern birdhouse that includes eight parts.
The design parts :
1.Front side
2. Back side
3. Base
4. Middle frames X 5
Designing
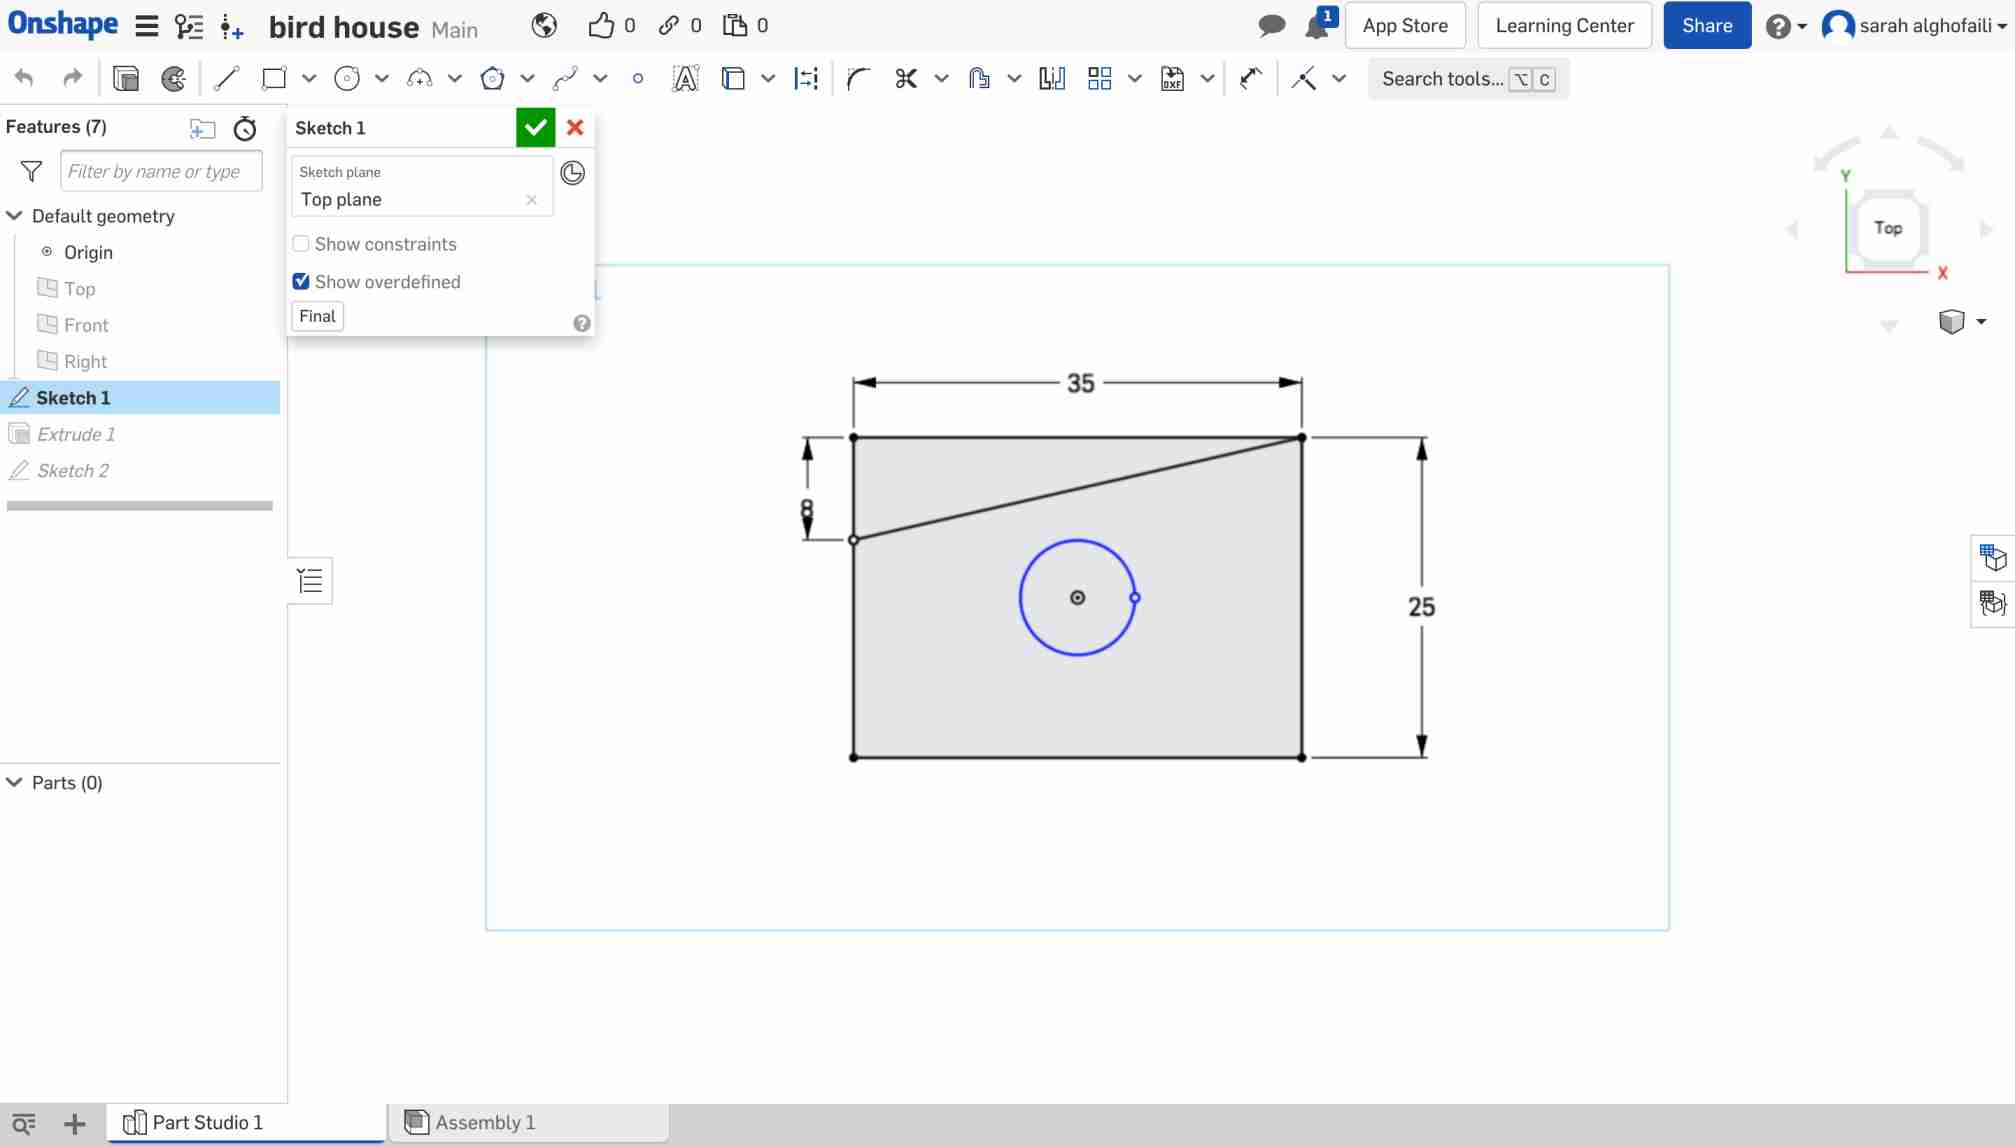
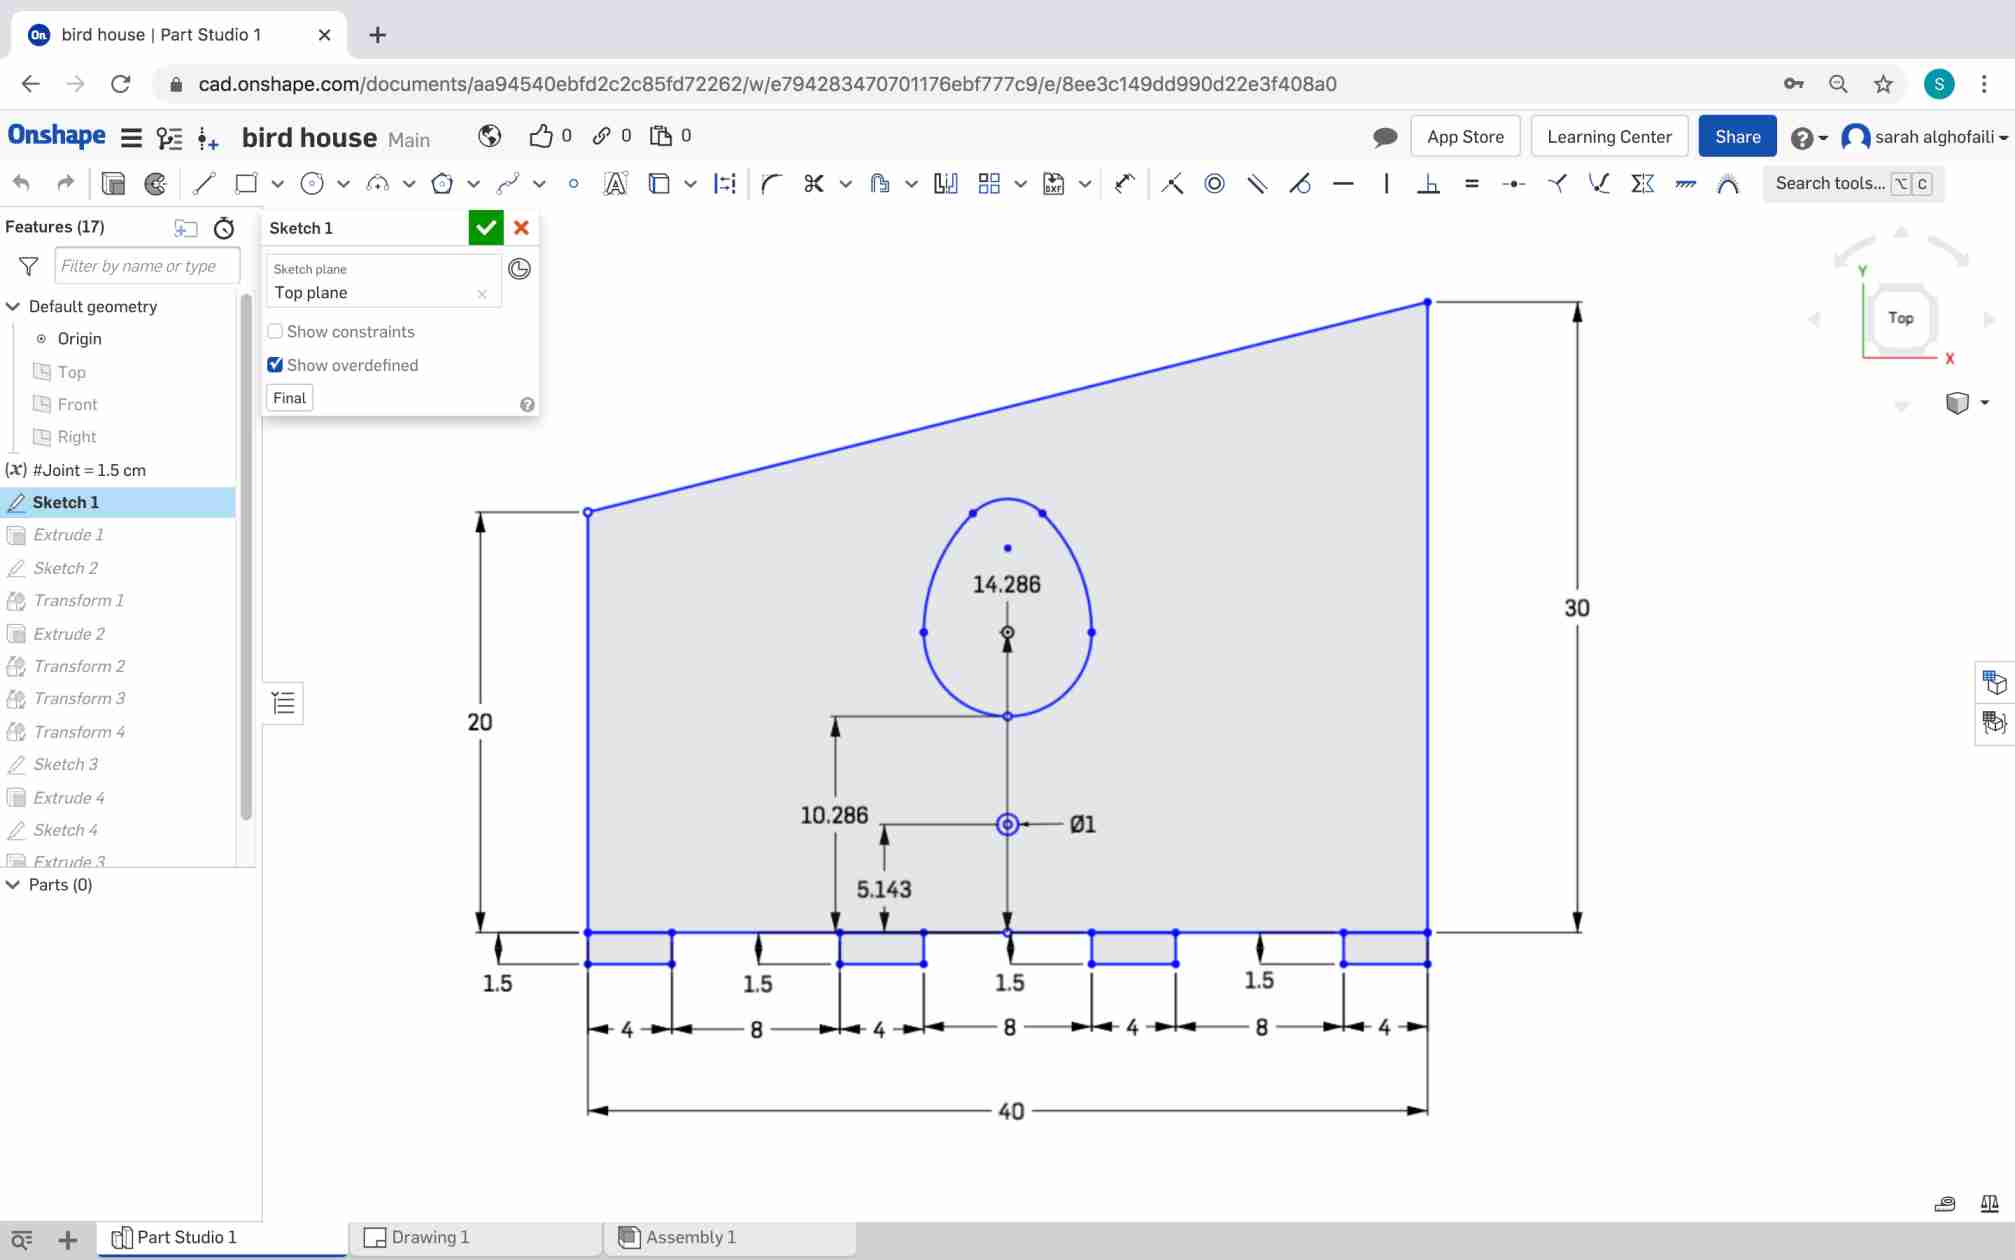
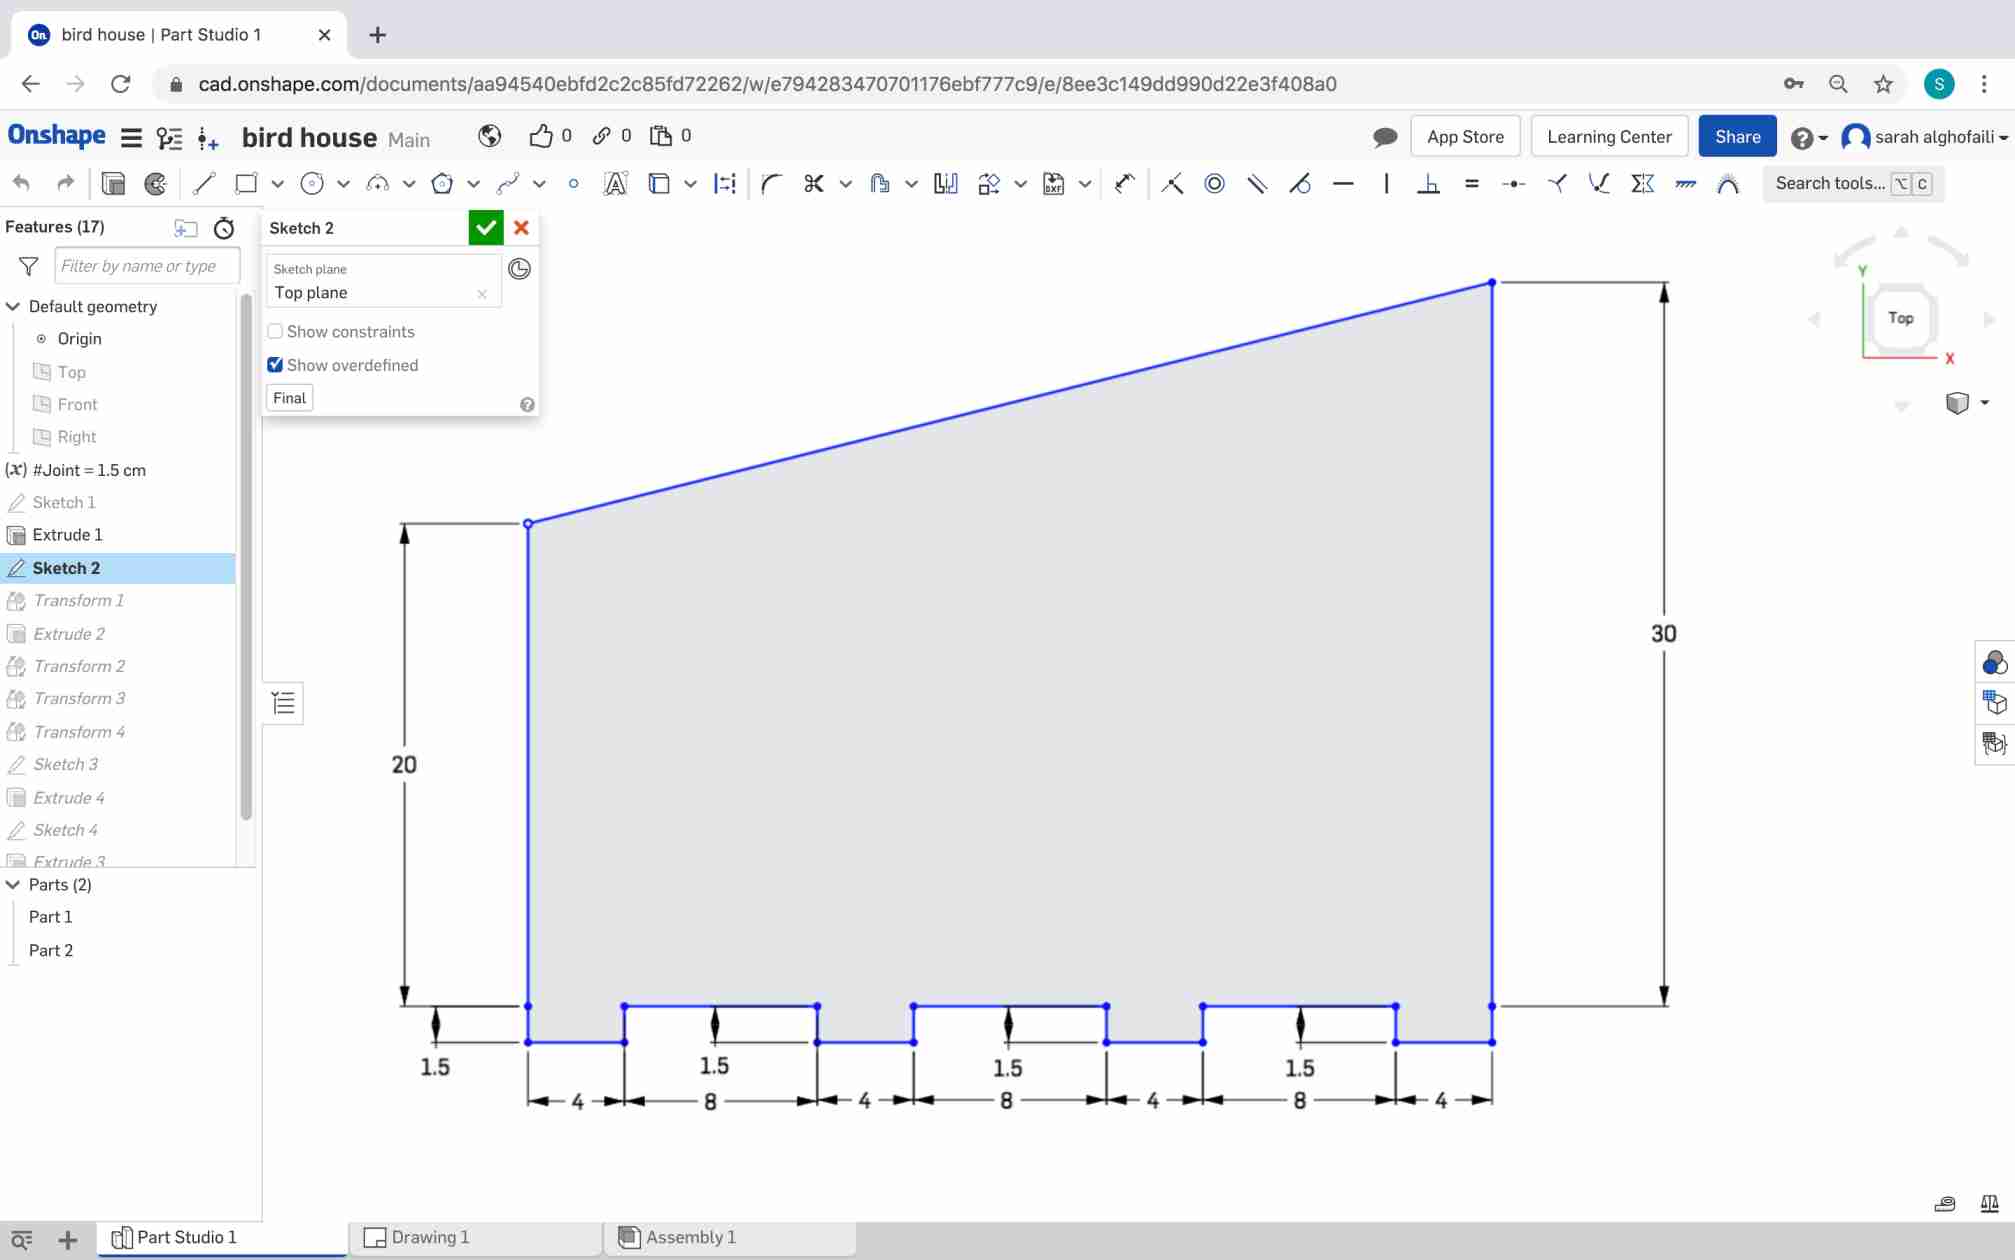
Onshape is the software that I used to design the birdhouse. I started by clicking on the “Sketch” button and chose the top plane. For the front side, I drew a rectangle with dimension 35 X 25 cm. Next, I created a variable to use it in drawing the finger joints.
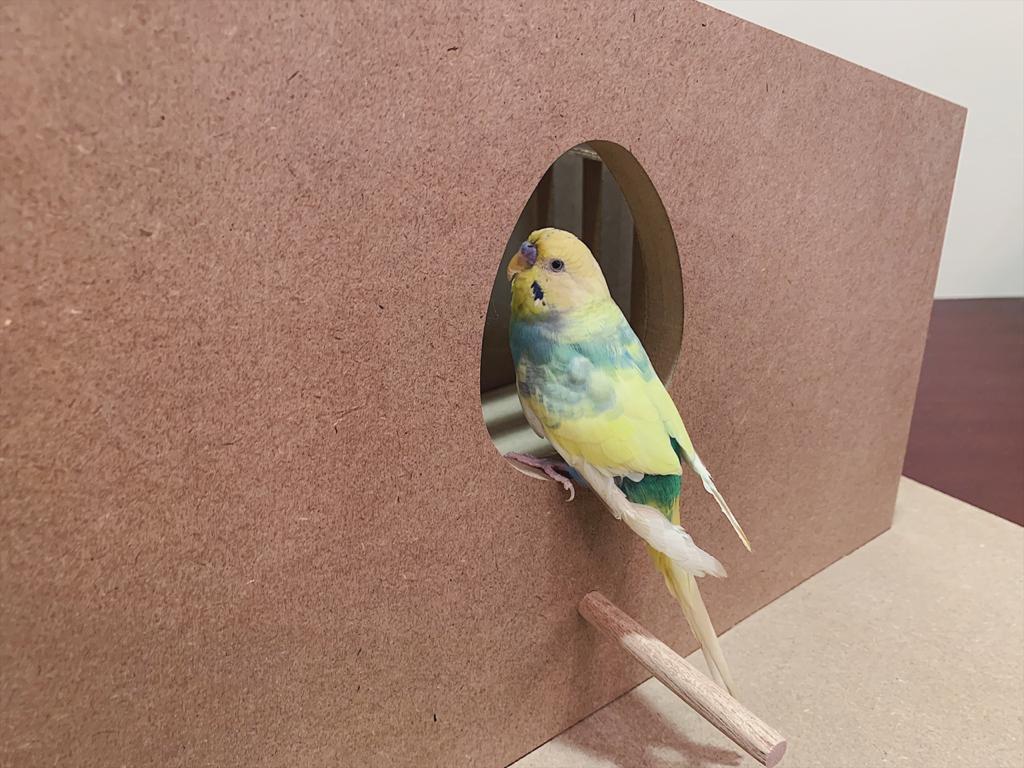
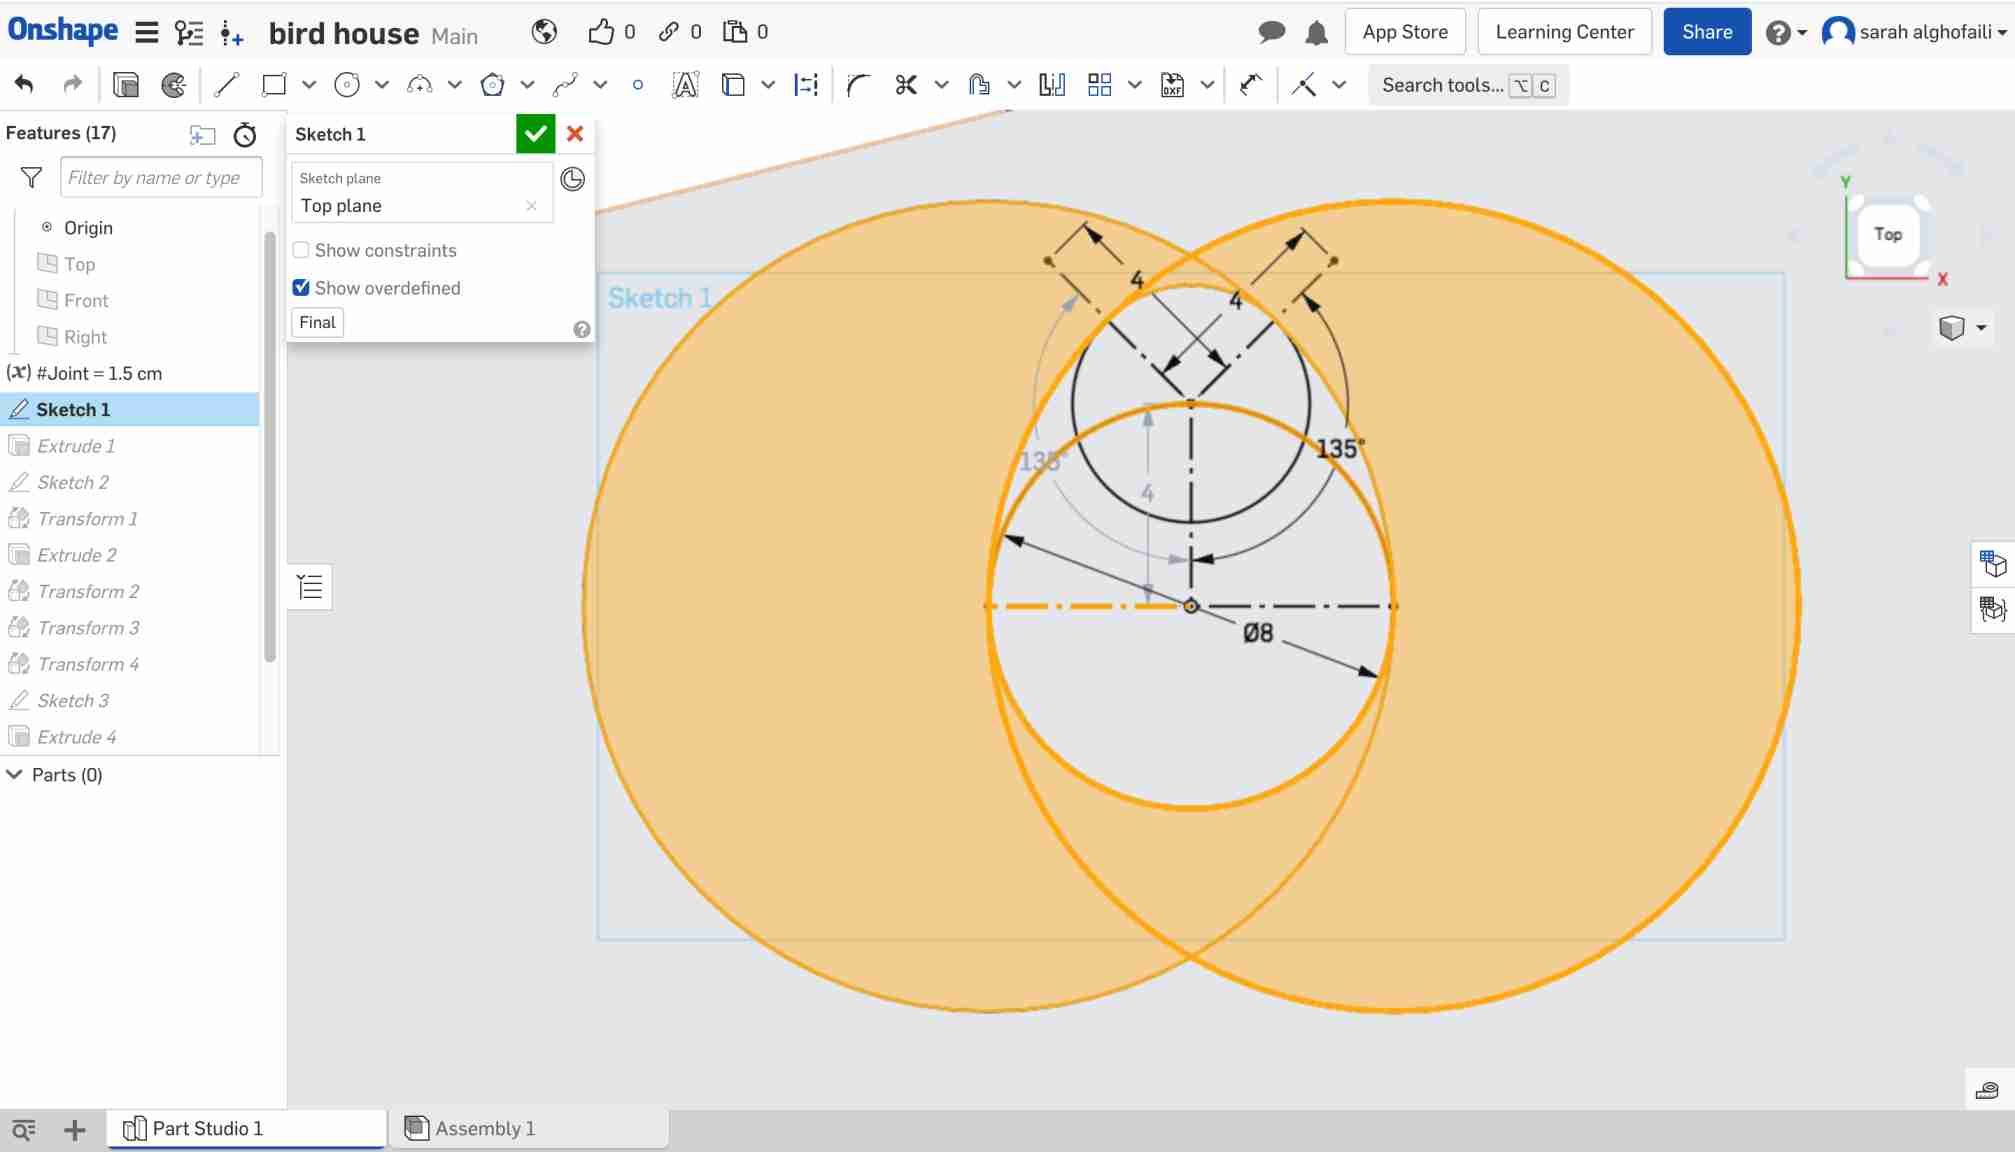
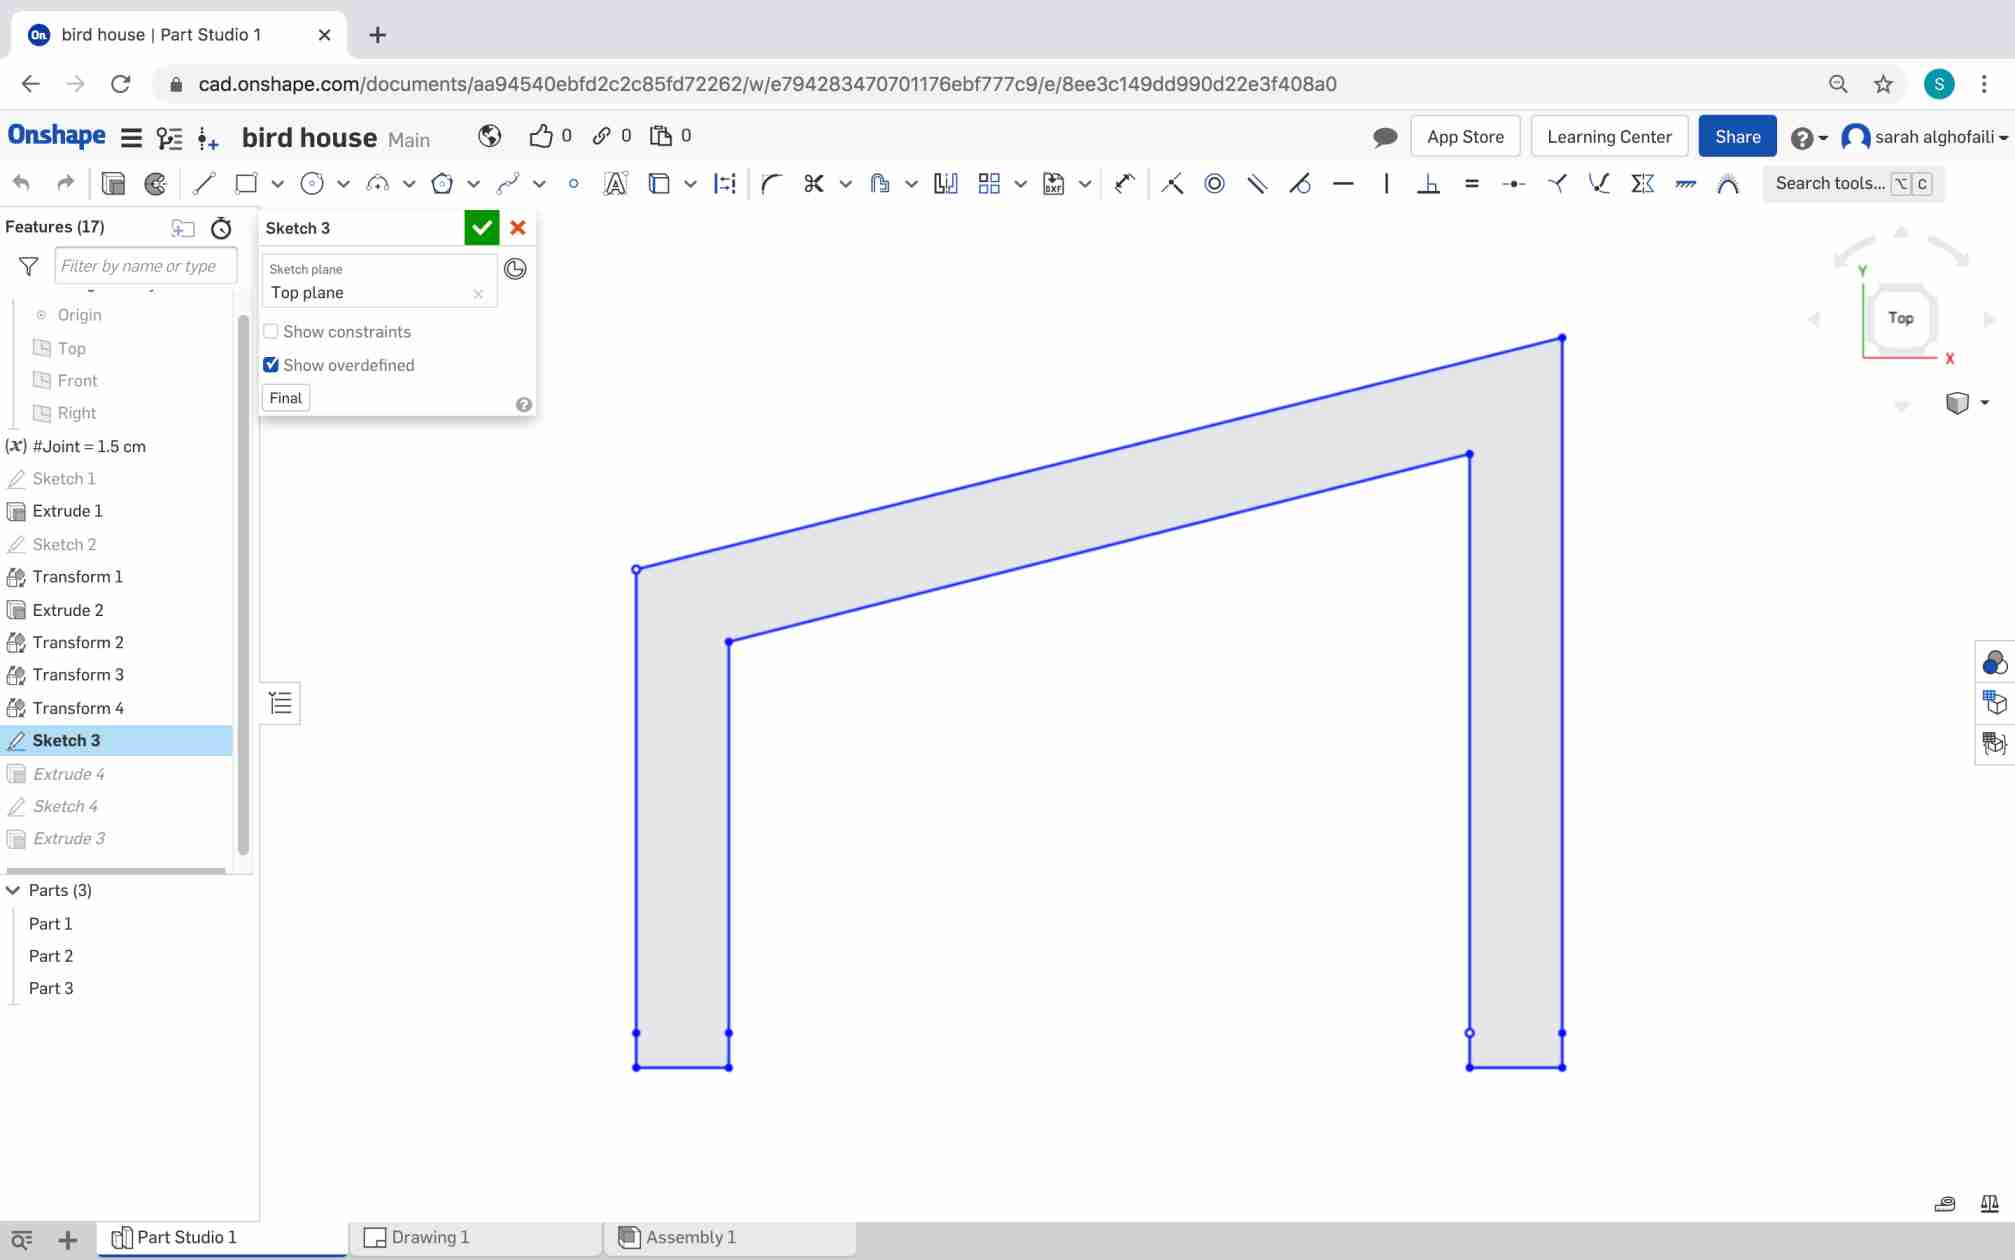
After that, I drew a circle in the middle to make an entry hole. For the house shape, I decided to make a sloped roof by determining a lower point on one side and connected with the top corner on the other side.
For the entry hole, I chose to make it egg-shaped to reflect the idea of the bird's house. To do that, I drew a straight line from the center point to the edge of the circle by using the construction line tool. Then, from the edge point I drew two lines with angle 135 degrees on both sides.
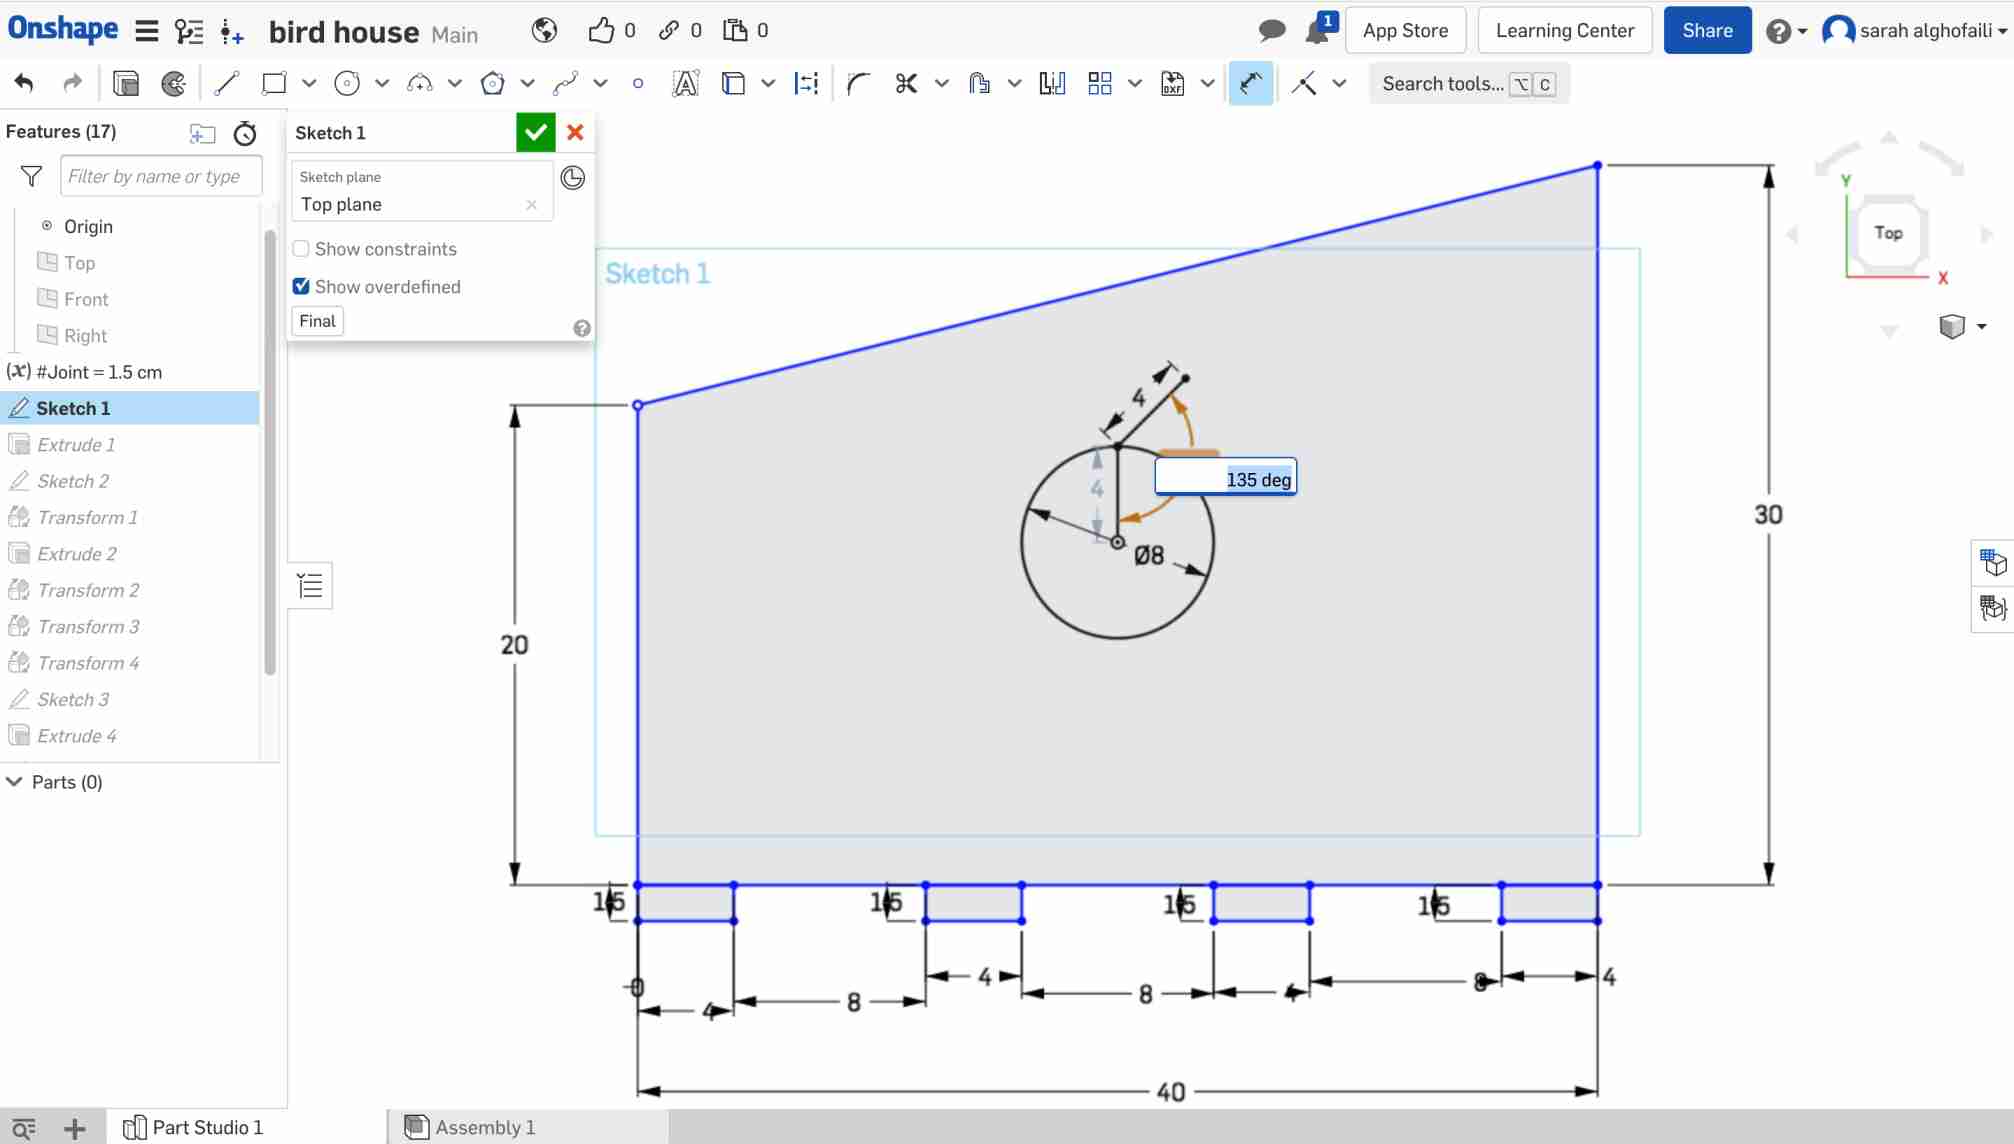

Next, I created a horizontal line in the center of the circle. In each endpoint of this line I drew a circle that intersects with the opposite endpoint of the horizontal line. Then, I circled in the space between the overlapping circles. Last step in creating the entry hole is removing unneeded lines that surround the egg shape.
After that, I created a small hole for the birdhouse perch and placed it under the entry. Also, I created four finger joints in the bottom side using the varibales.
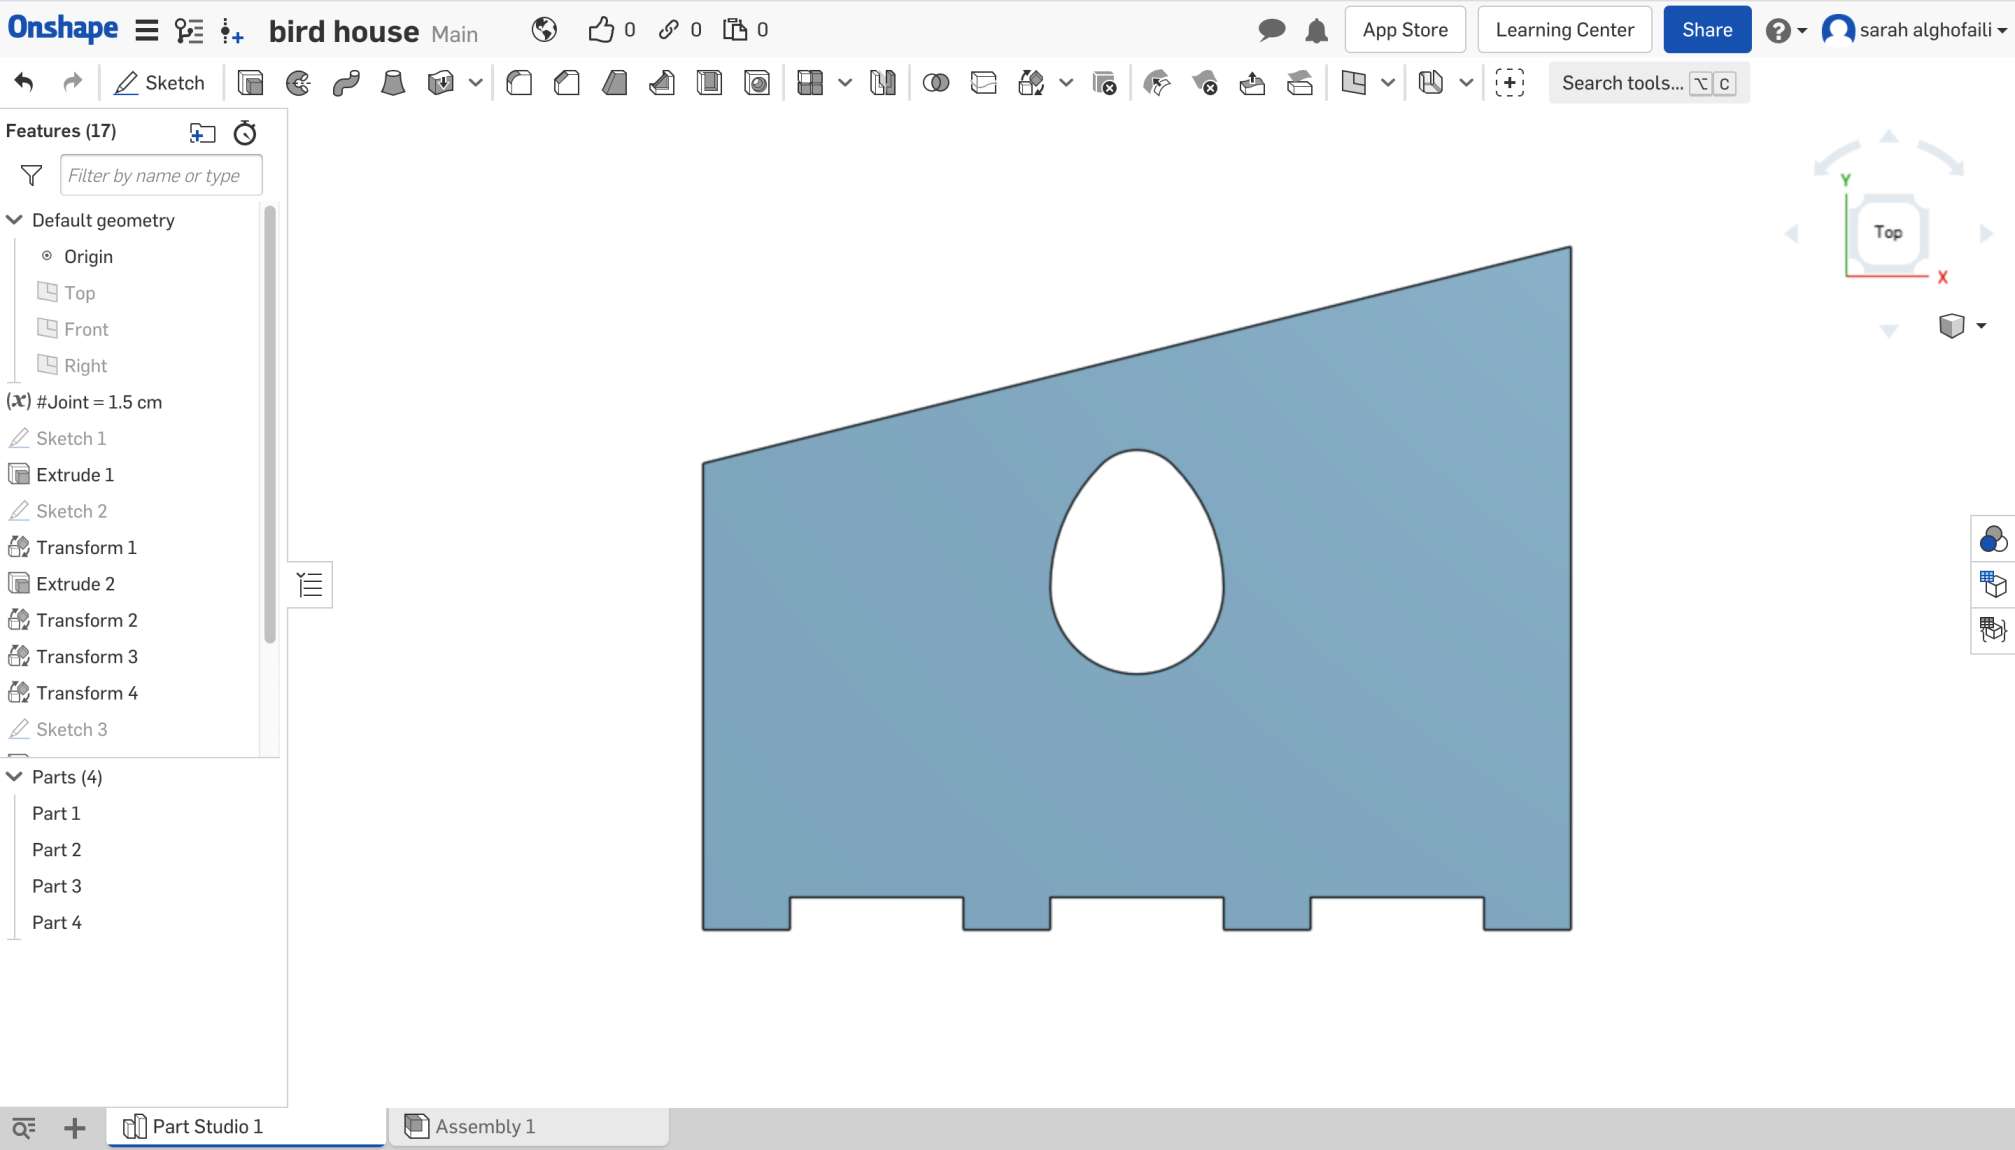
Designing the back side was easy, I just copied the front side and removed all the holes.
The third part is the birdhouse base. I drew a rectangle with slope on one side. Then, I created multiple slots in different positions to secure the front,back and frames parts.
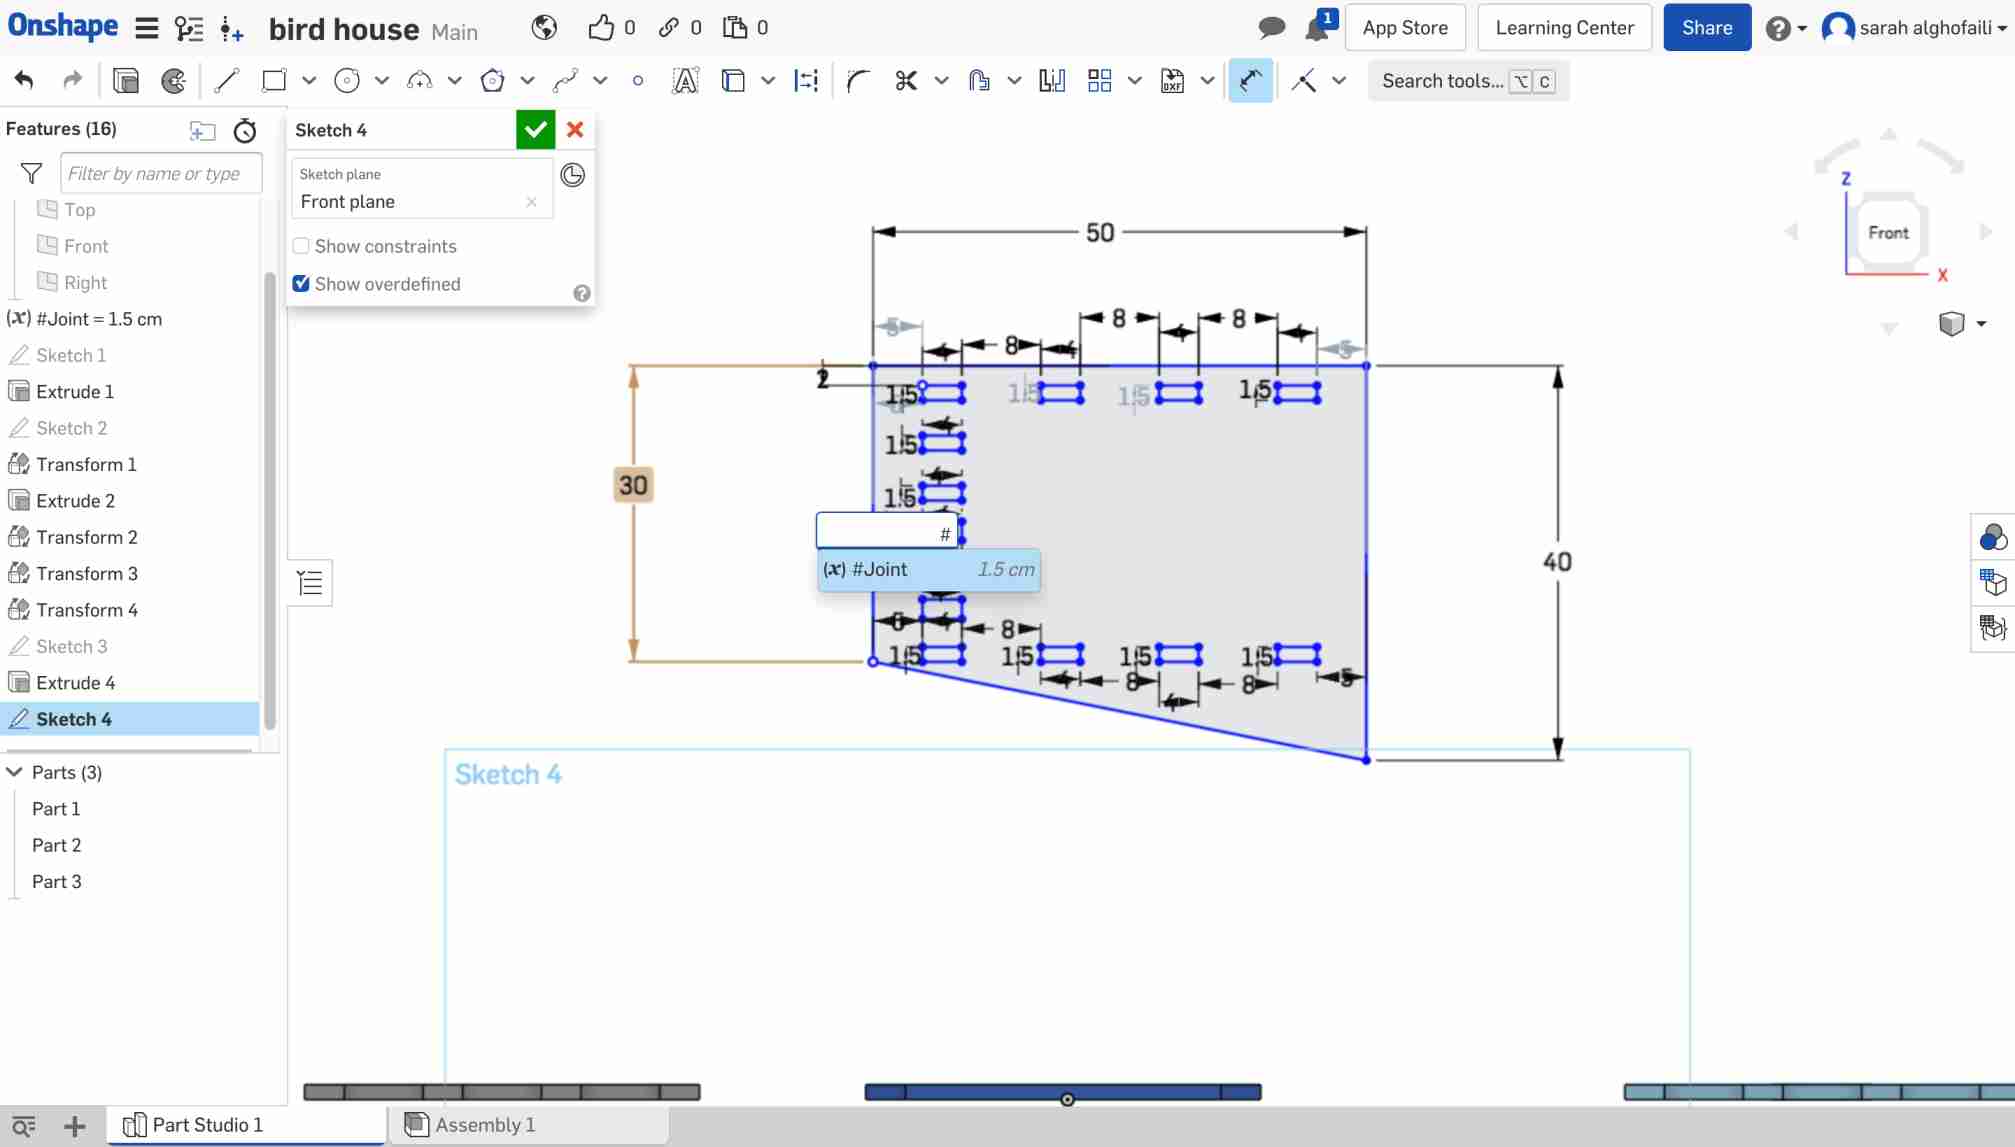
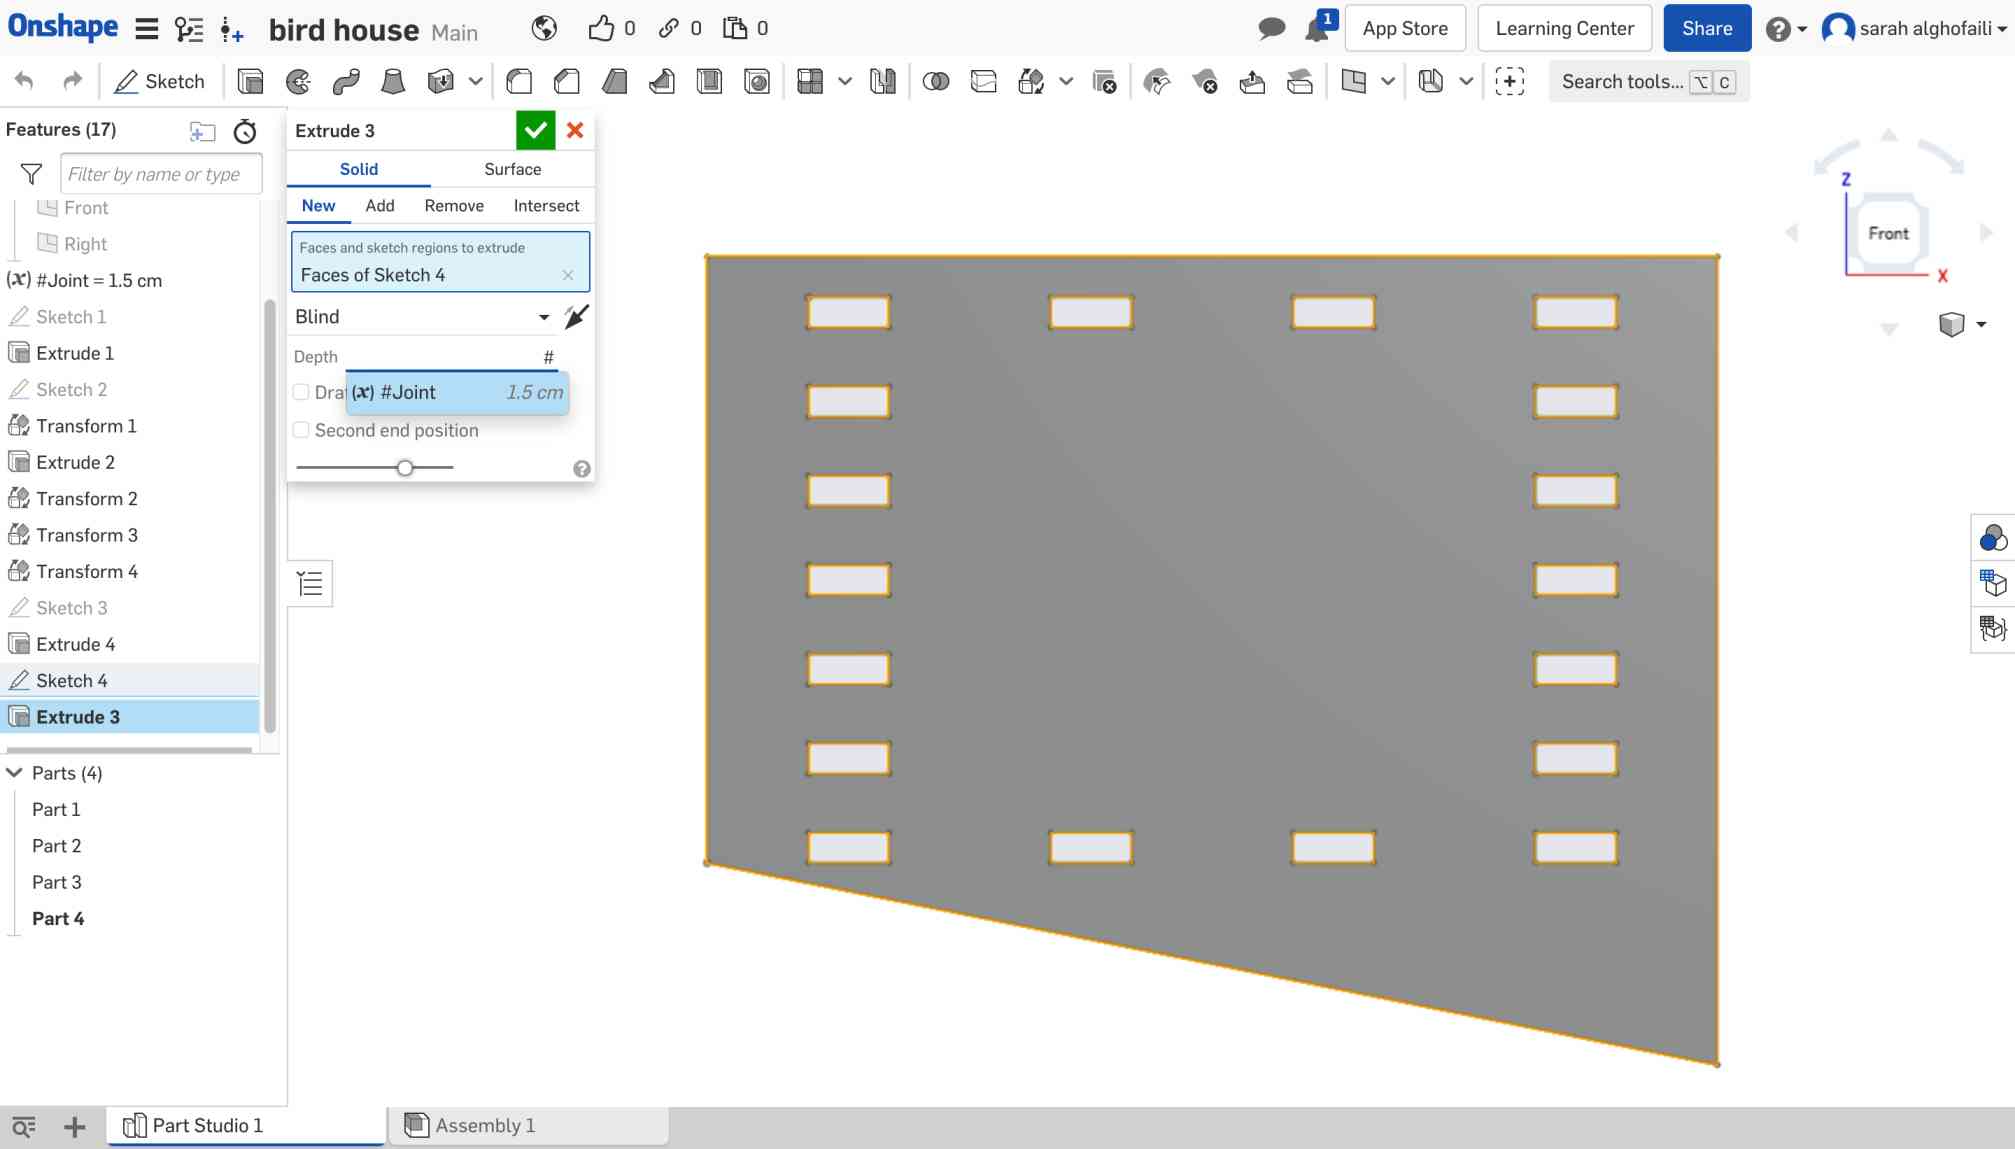
Last pieces of the design are the middle frames. I made the same shape of the front and back sides. Then, I took 4 cm from three sides and extruded by removing the small shape and leaving the frame.

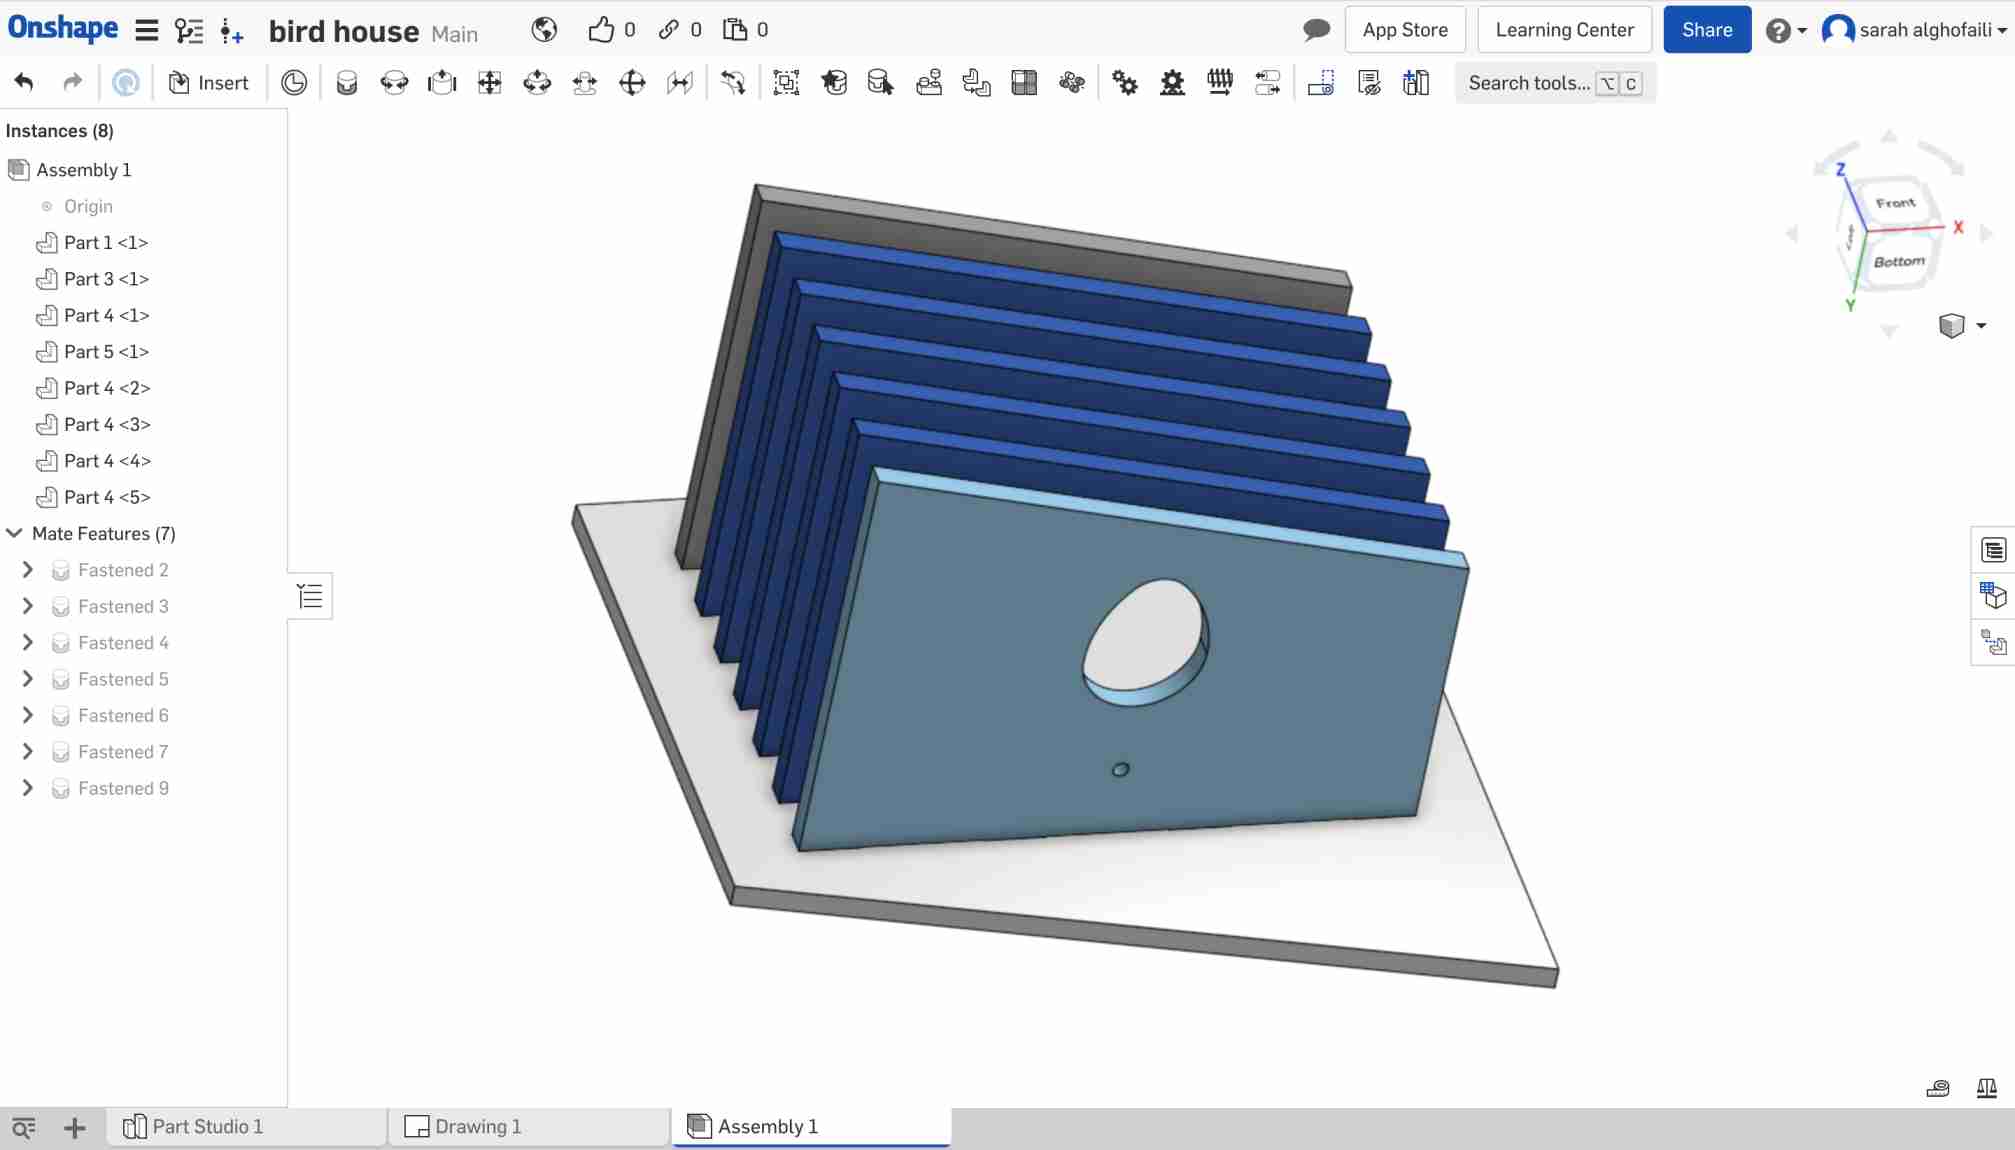
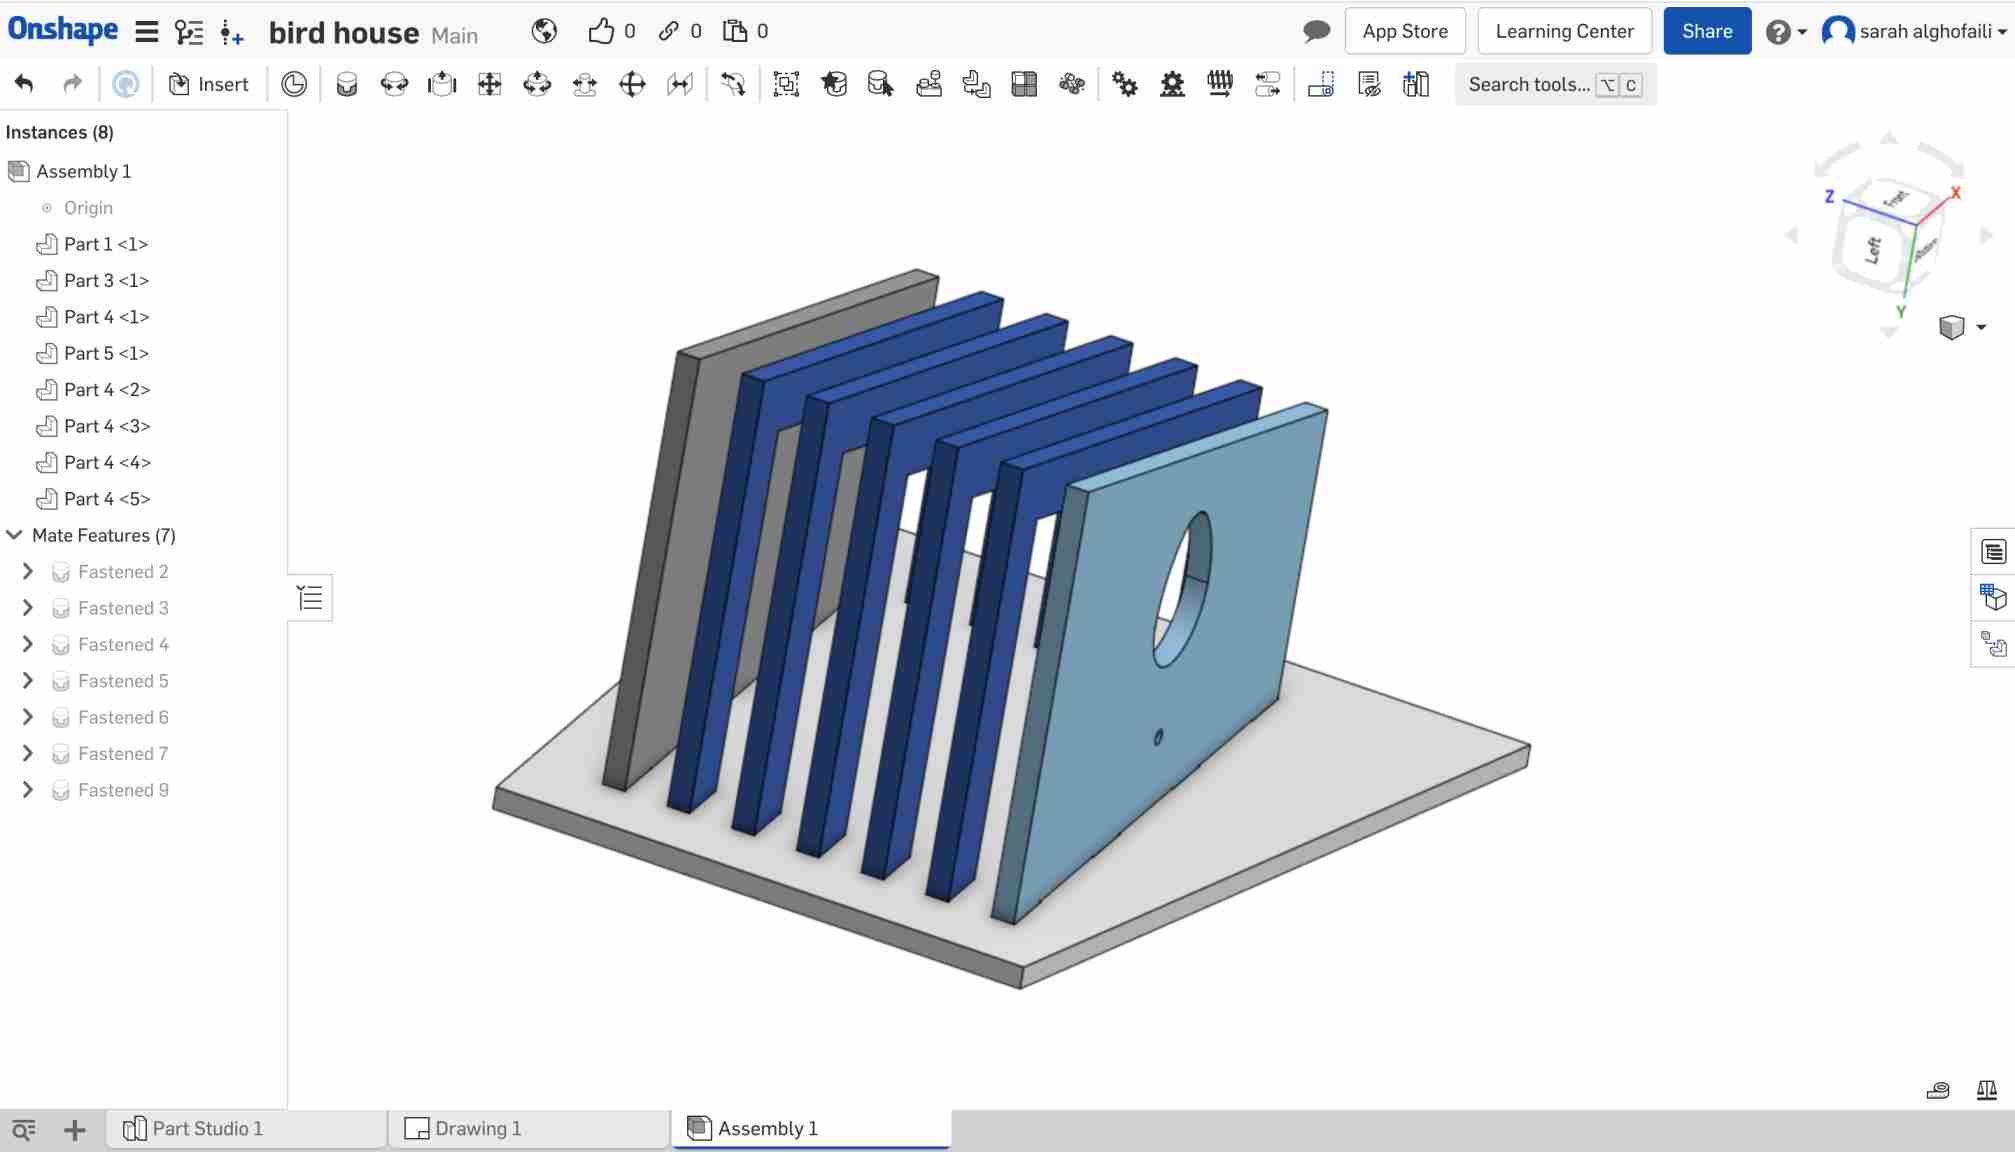
After extruded all the parts I started the assembly process by switching to the assembly page. Then, I clicked on the “ Insert “ button to bring all the parts to the workplace.
The next step,I connected all the parts together by using the fastened tool.
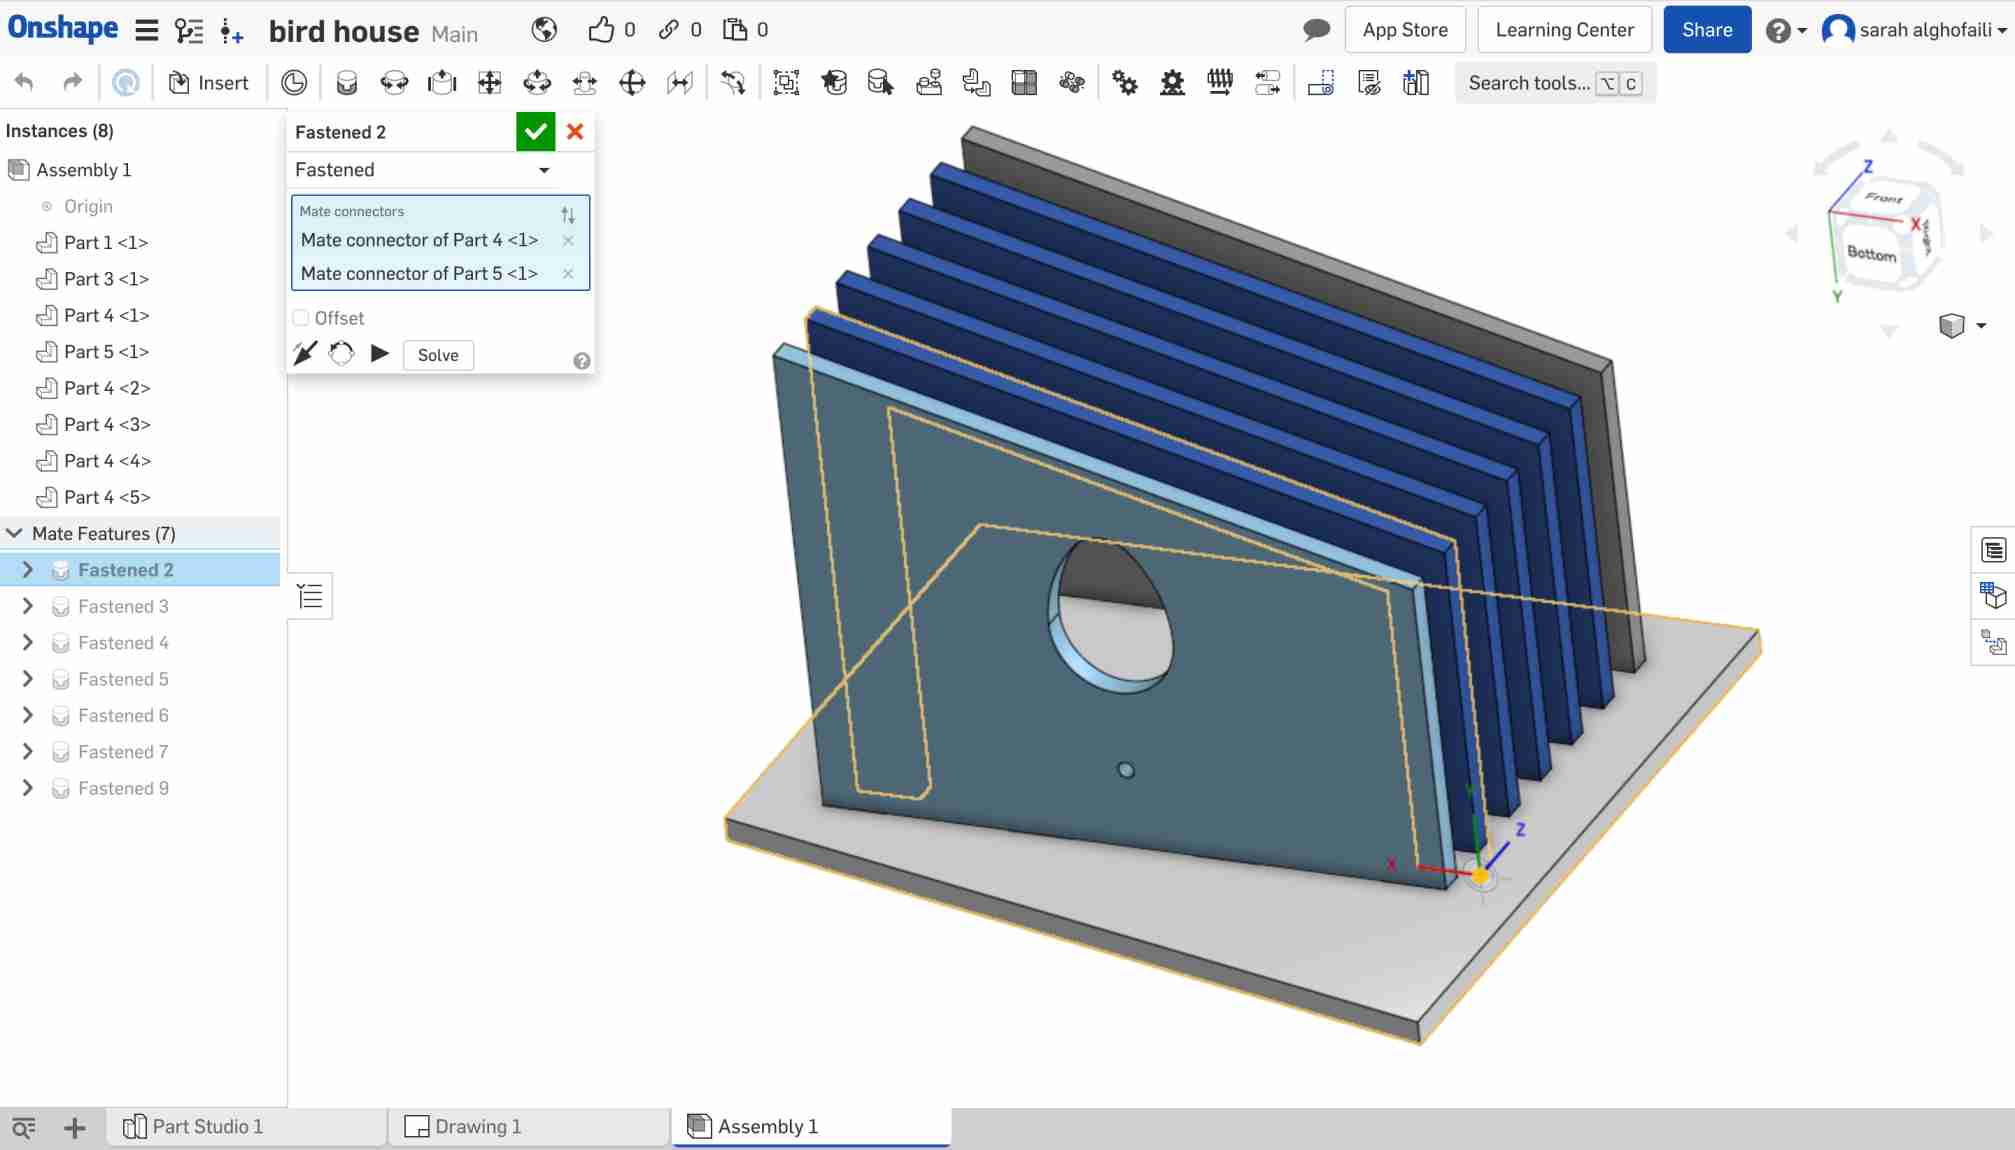
This is the final look of the design :
FABRICATION
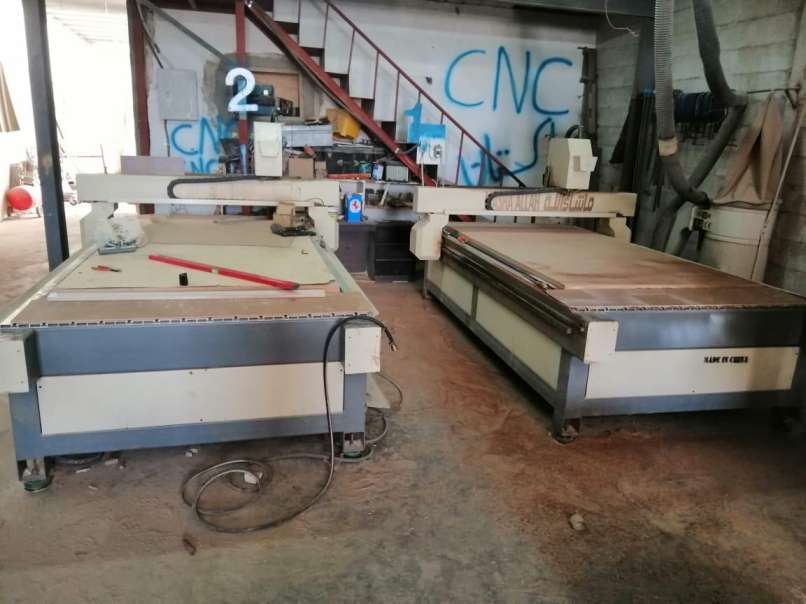
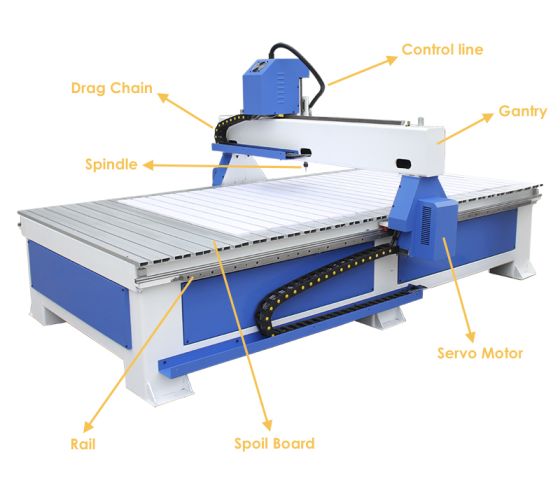
Our plan was to use ShopBot CNC but due to the COVID 19 pandemic, we couldn't access the lab. The plan B was to find open workshops that have CNC machines. After a long search we finally found a workshop that has a CNC machine called “Senrgy router 1325”.
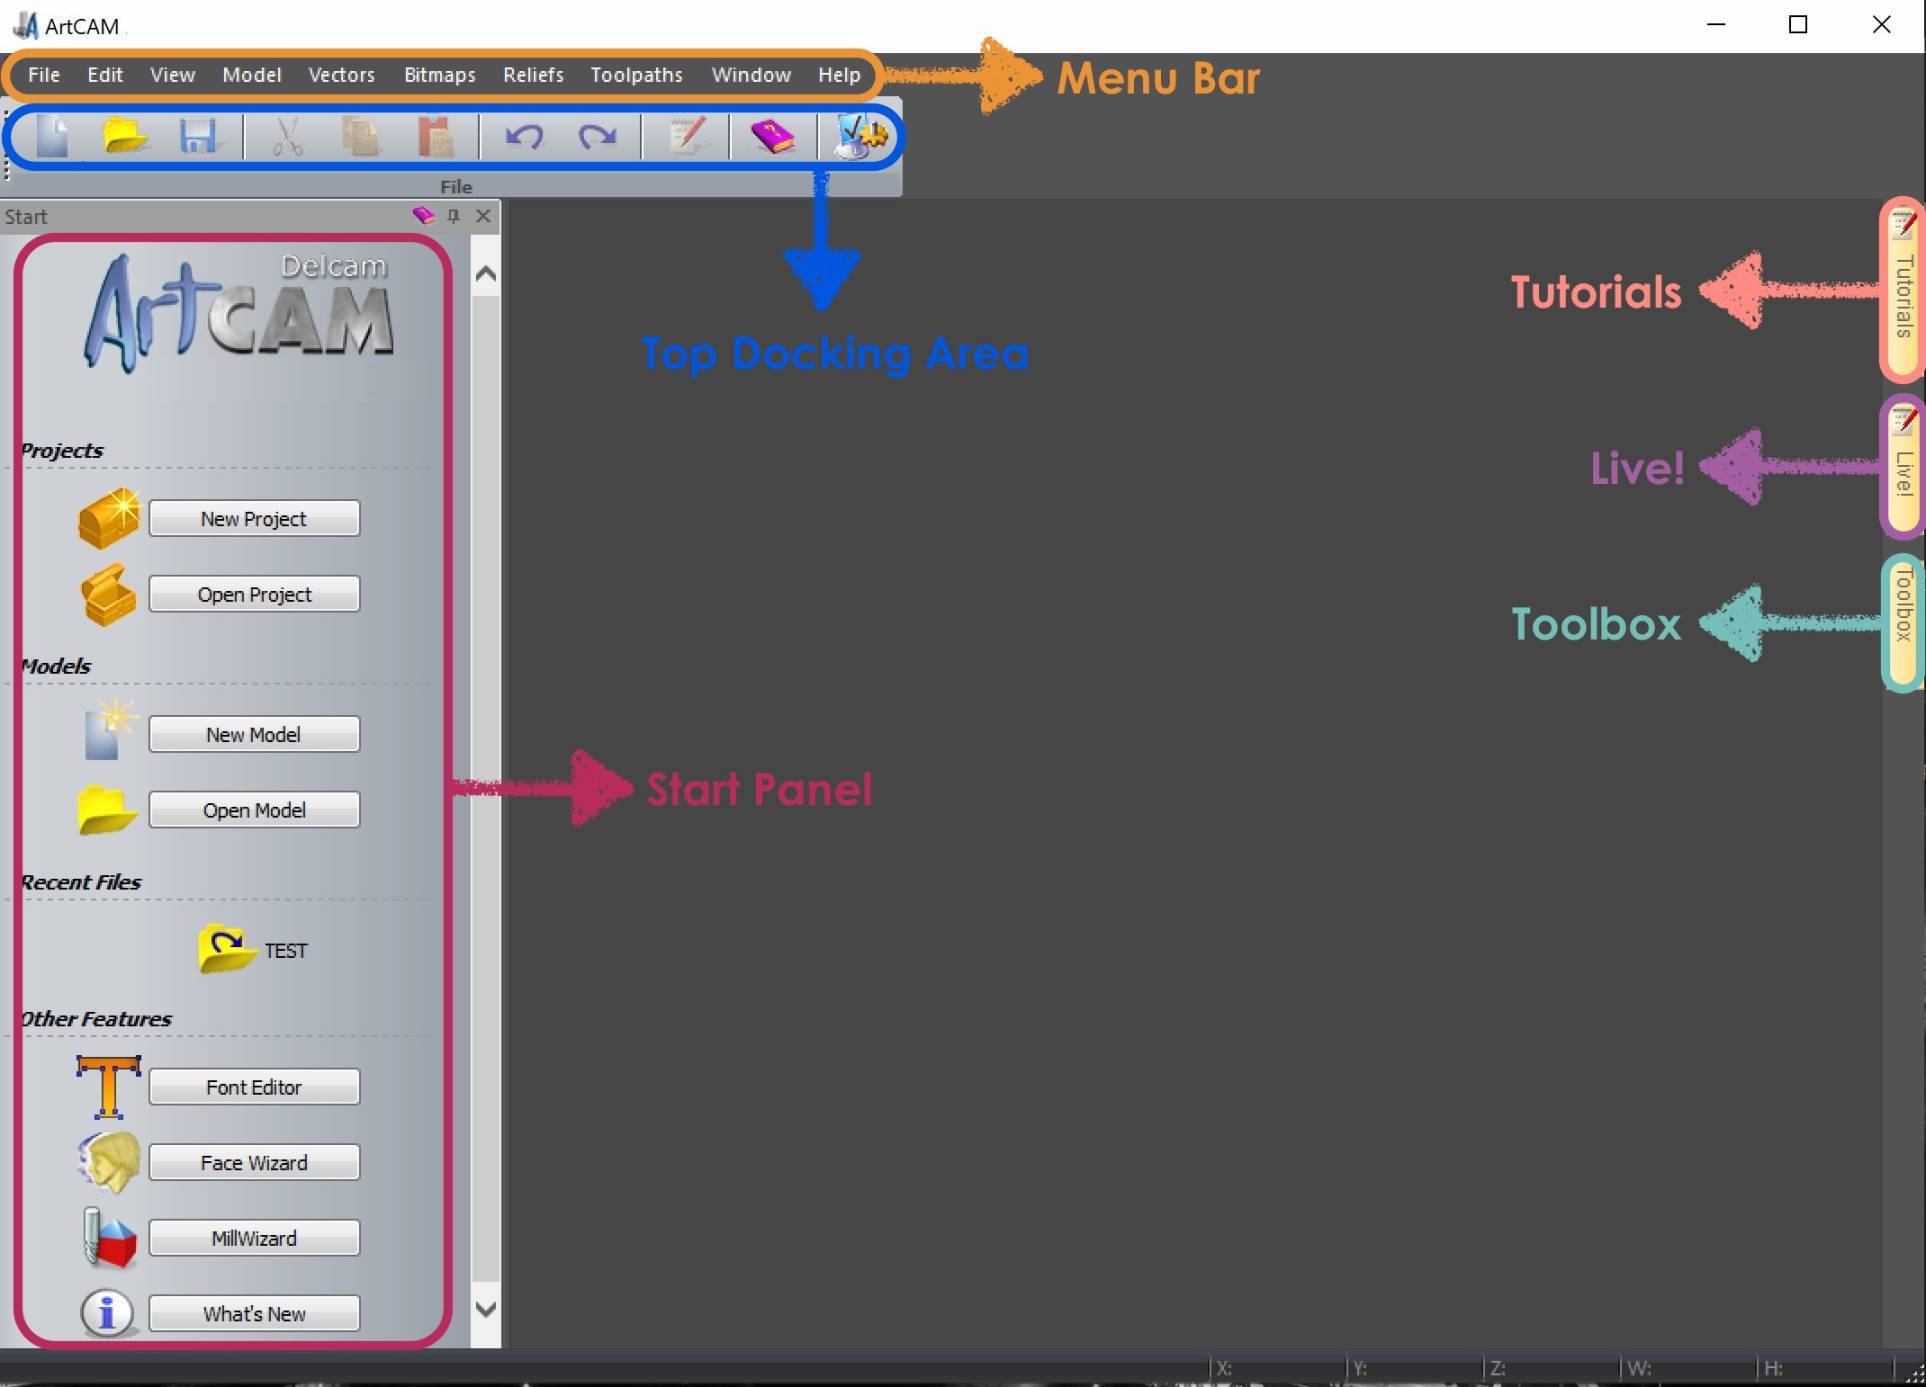
What is ArtCAM ?
Artcam is CAM (Computer-aided manufacturing) software. It is a unique software to create high-quality three-dimensional products starting out as two-dimensional bitmap or vector based artwork.
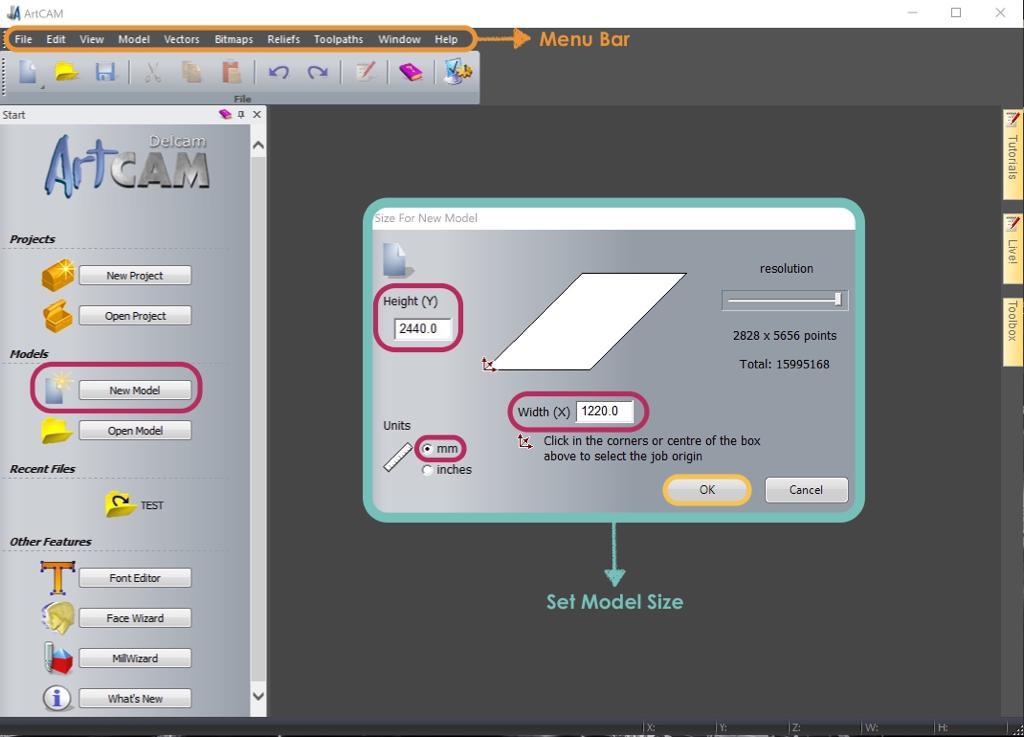
Preparing the Model :
- Click on “ Create New Model “
- Assign the height and width.
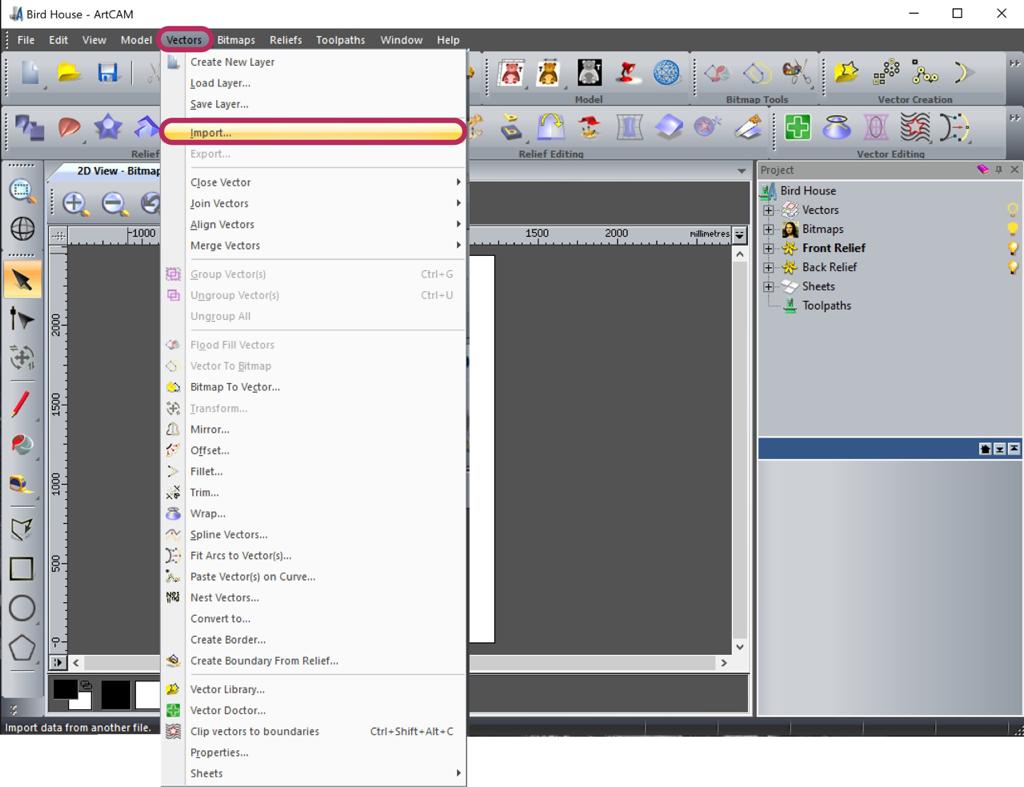
After that, I imported the file with DXF format by clicking on vectors from the top menu bar and selecting Import.
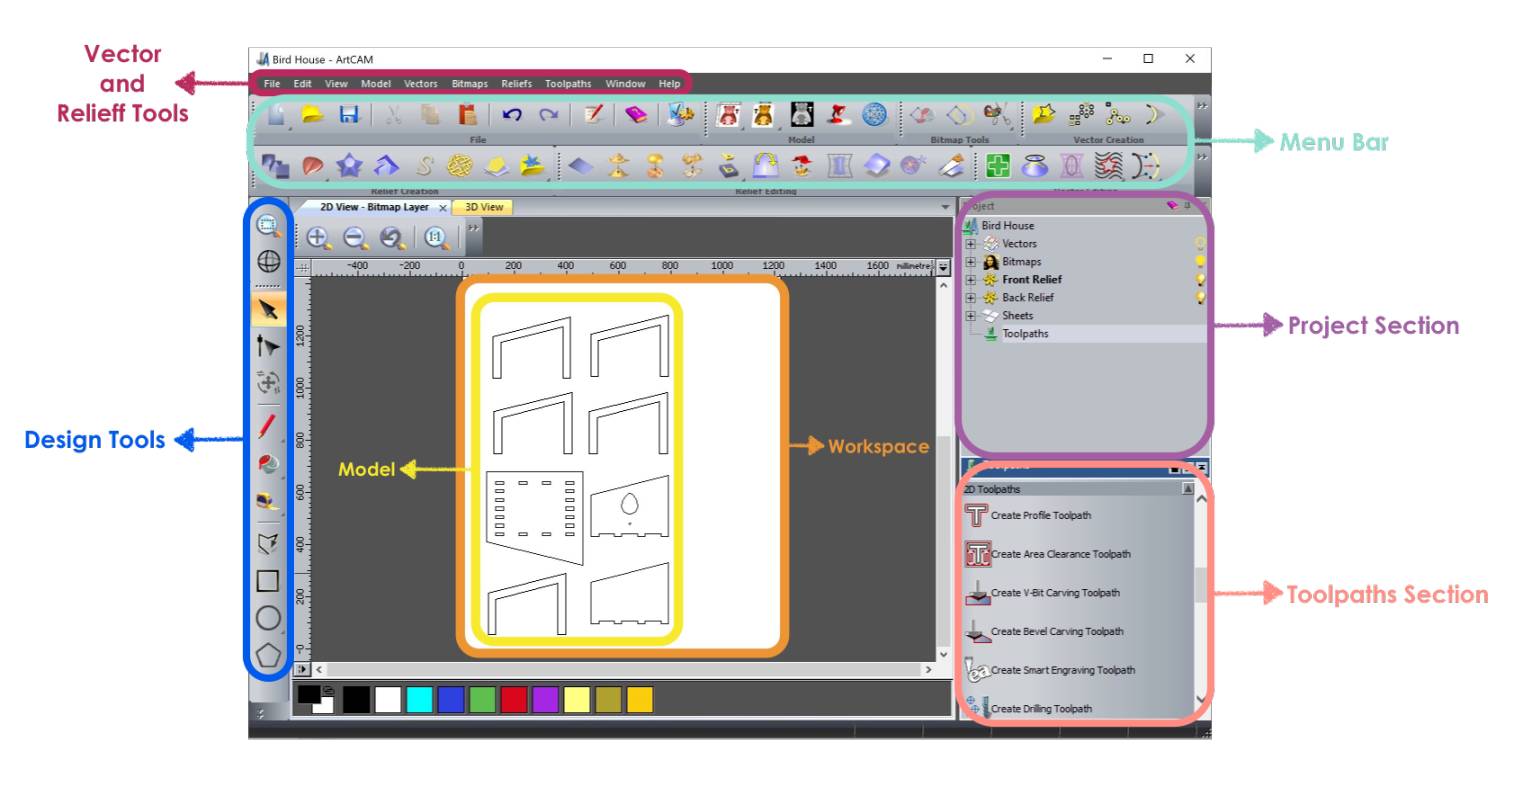
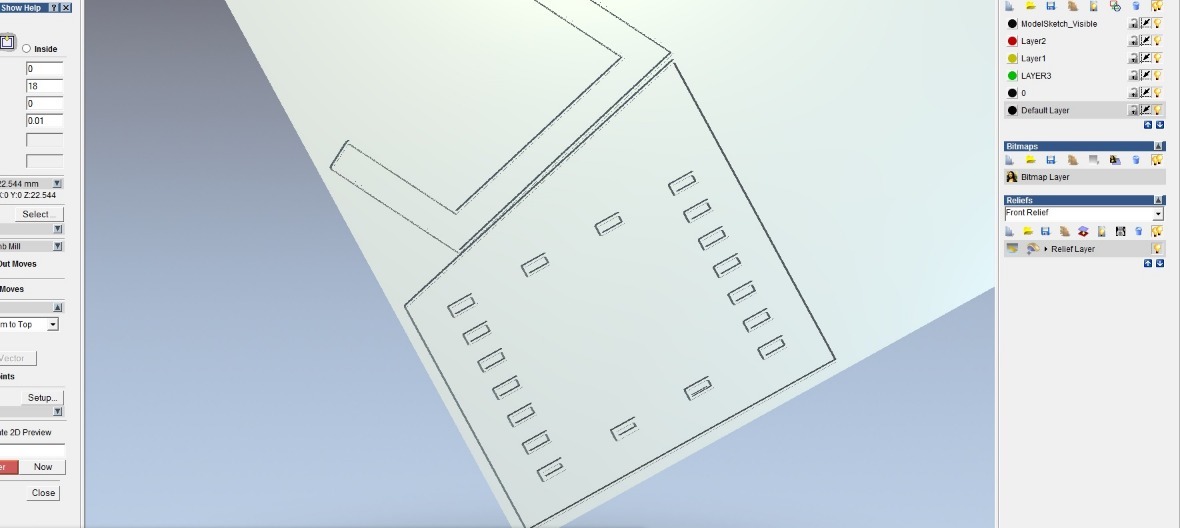
In the below picture, I showed the Artcam Interface tools and sections.
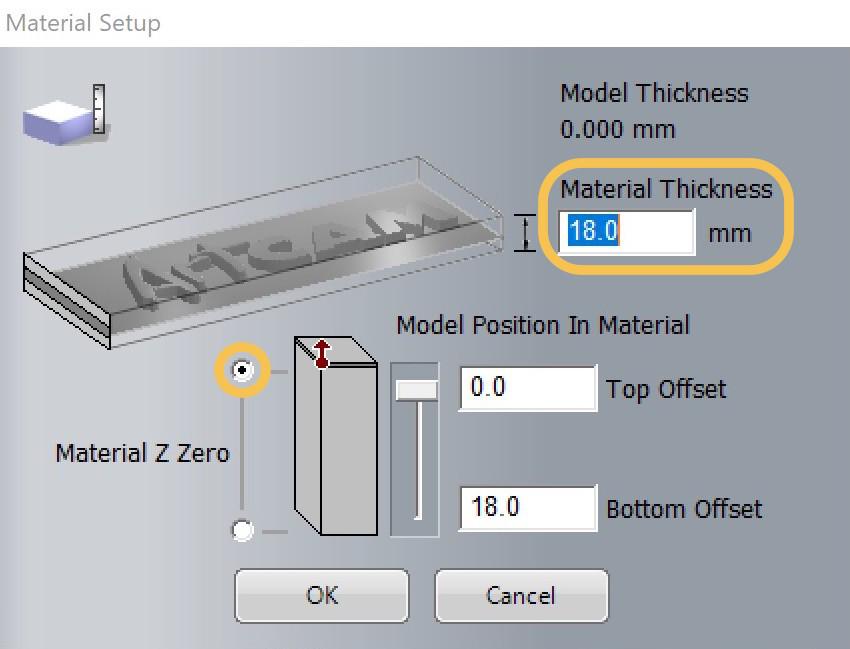
In the material setup, I specified the material thickness and the model positioning.
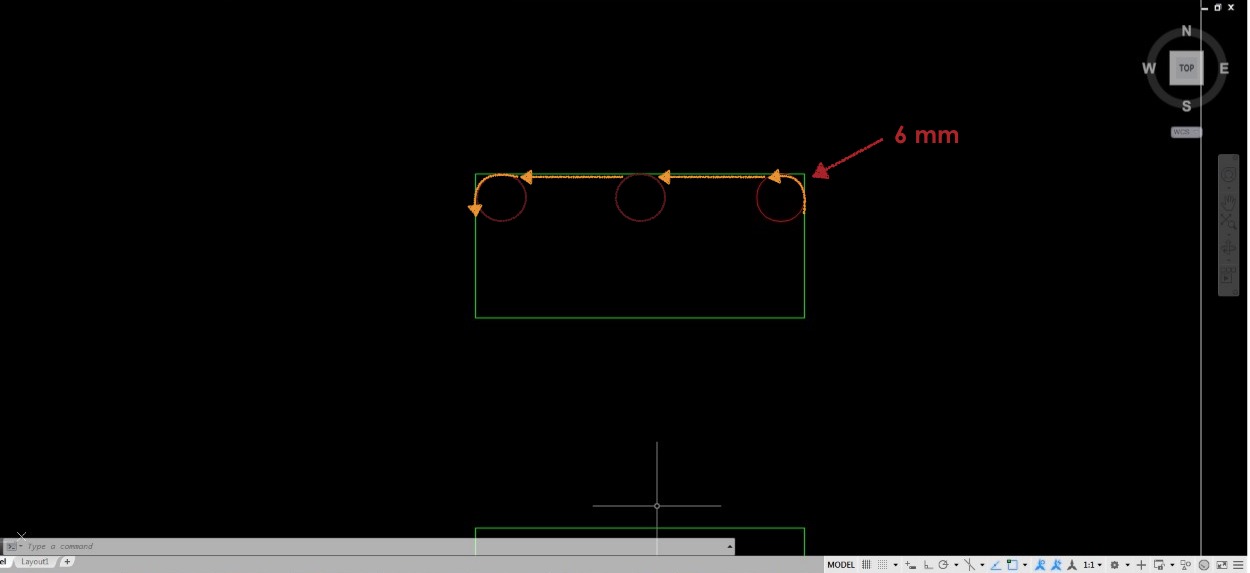
From “Tool Database”, I selected the End Mill 6mm.
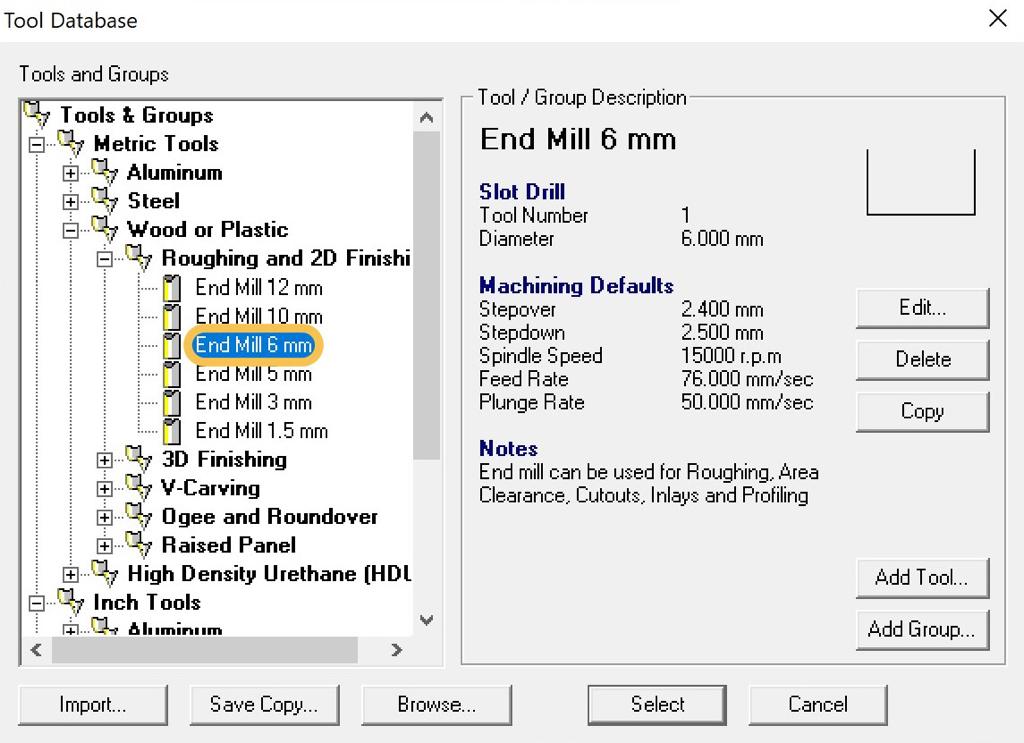
Next, I clicked on the “Add Tool” to open the “Edit Tool” window. From the “Tool Type” list I chose End Mill 6 mm then I clicked “OK”.

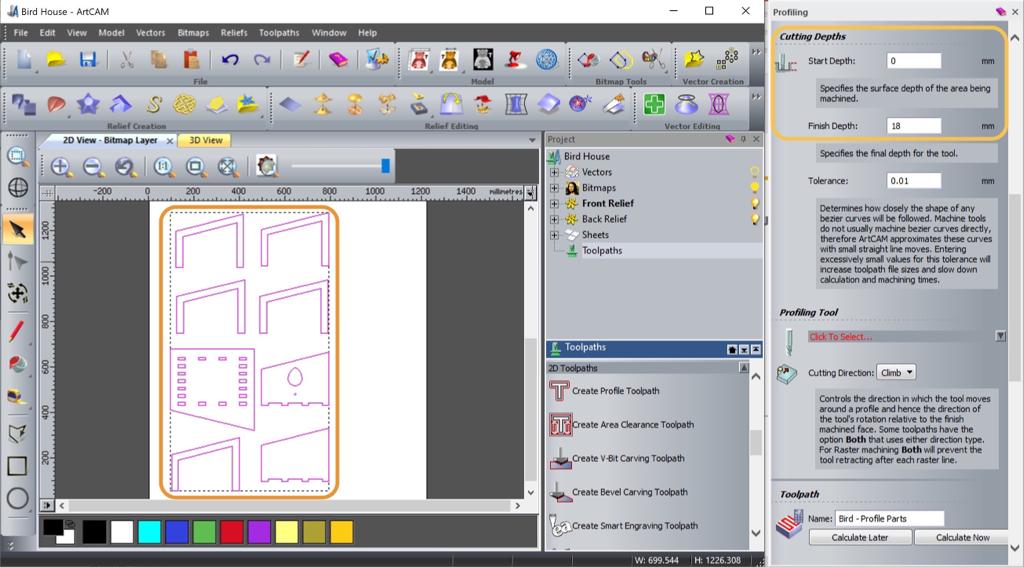
For my design, I just need the cutting process so I selected all the parts and from the “Toolpaths” menu I clicked on “create Profile Toolpath”. I chose 0 mm for Start Depth and 18 mm for Finish Depth.
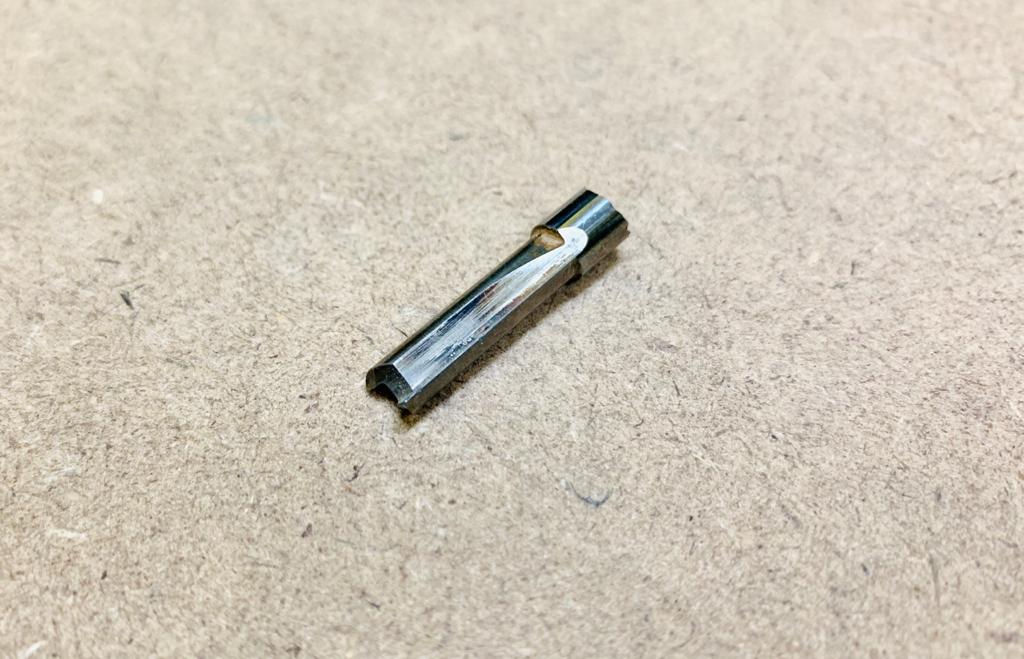
First, I Installed the drilling End mill bit ( Diameter = 6mm ).To start the manufacturing process, I cleaned the CNC machine bed surface and placed the MDF wooden sheet : 2440 mm x 1220 mm x 18 mm .
Then, I Installed the End mill bit. From the controller, I selected my design and ran the CNC machine.
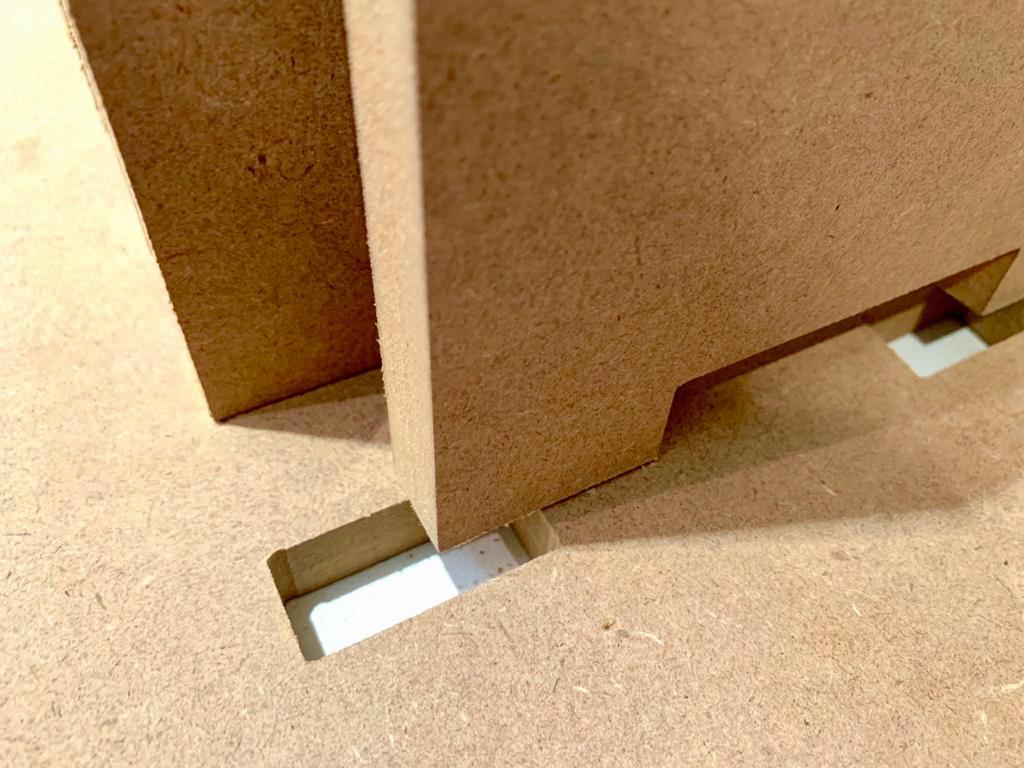
Assembly
The slots and tabs jointd perfectly without any glue or nails.
RESULTS:
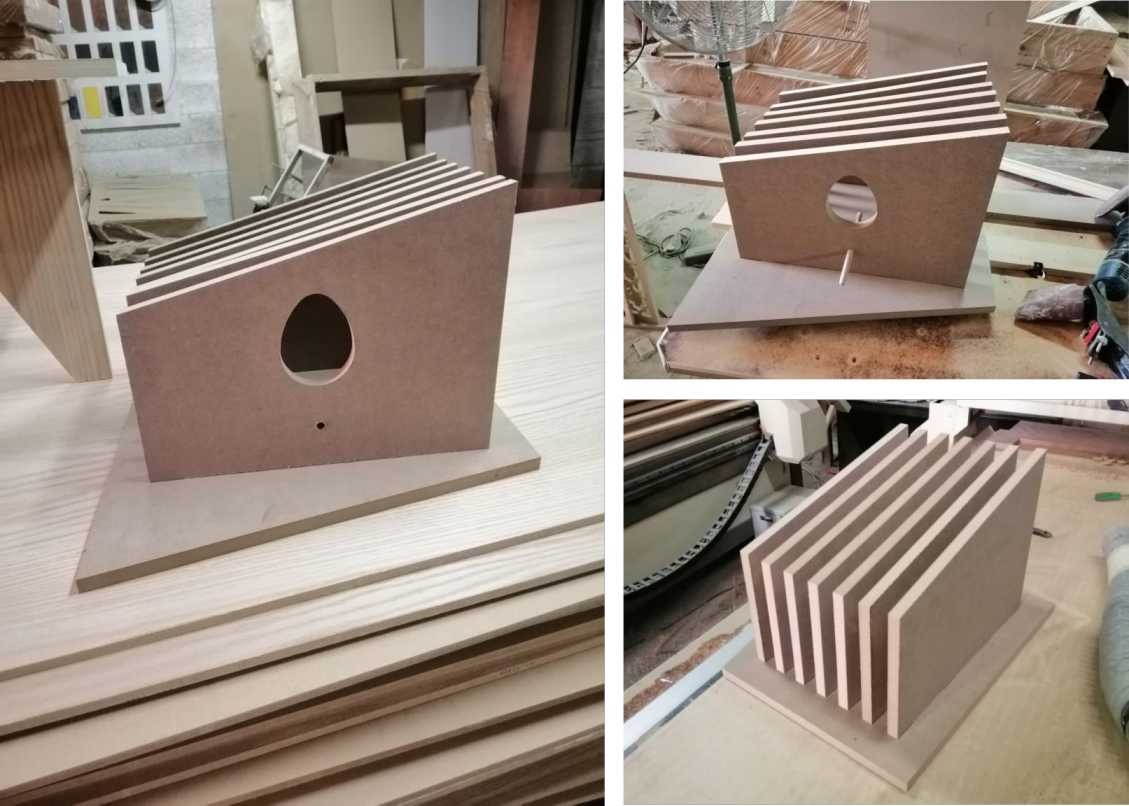
Home Sweet Home !