sixth assignment
Date
26 Feb 2020
The Assignment for this week Consists of two parts.
The First part is the group assignment : Test the design rules and explain the limitations of our printer.
The second part is the individual assignment : Design and print a 3d model (small, few cm3, limited by printer time) that could not be easily made subtractively, and 3D scan an object
The first time I ever saw 3d printing, it blew my mind ! 3D printing is a digital fabrication that builds up models by additive process, layer by layer. It is a wonderful technology that turns our ideas into 3D printed reality. It is like magic !
3D Modeling
I love all kinds of handicraft such as pottery, ceramic, and concrete arts. I feel It allows us to express our creativity. There is an amazing idea of making flower pots using cement and cloth.
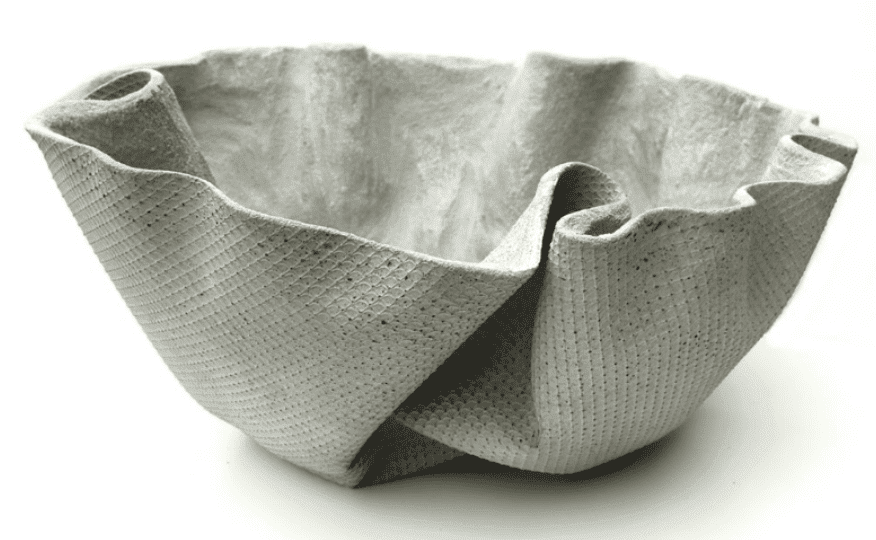
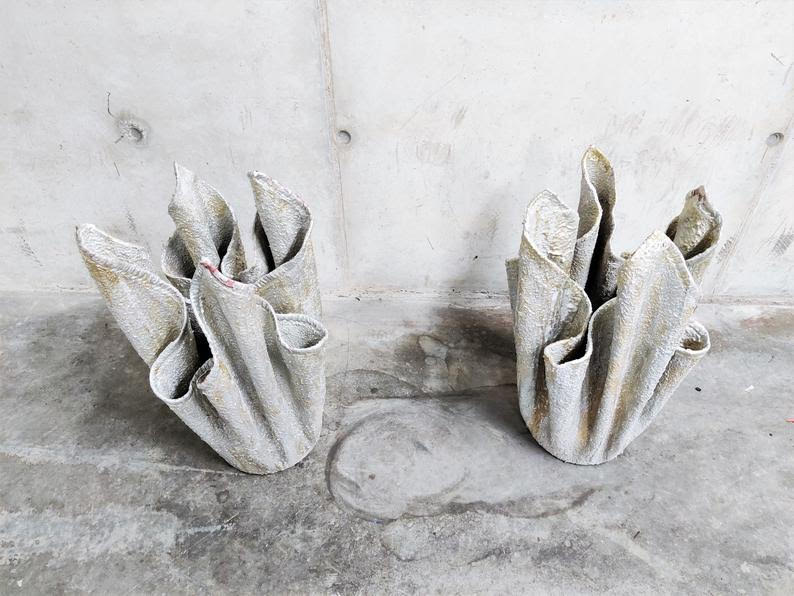
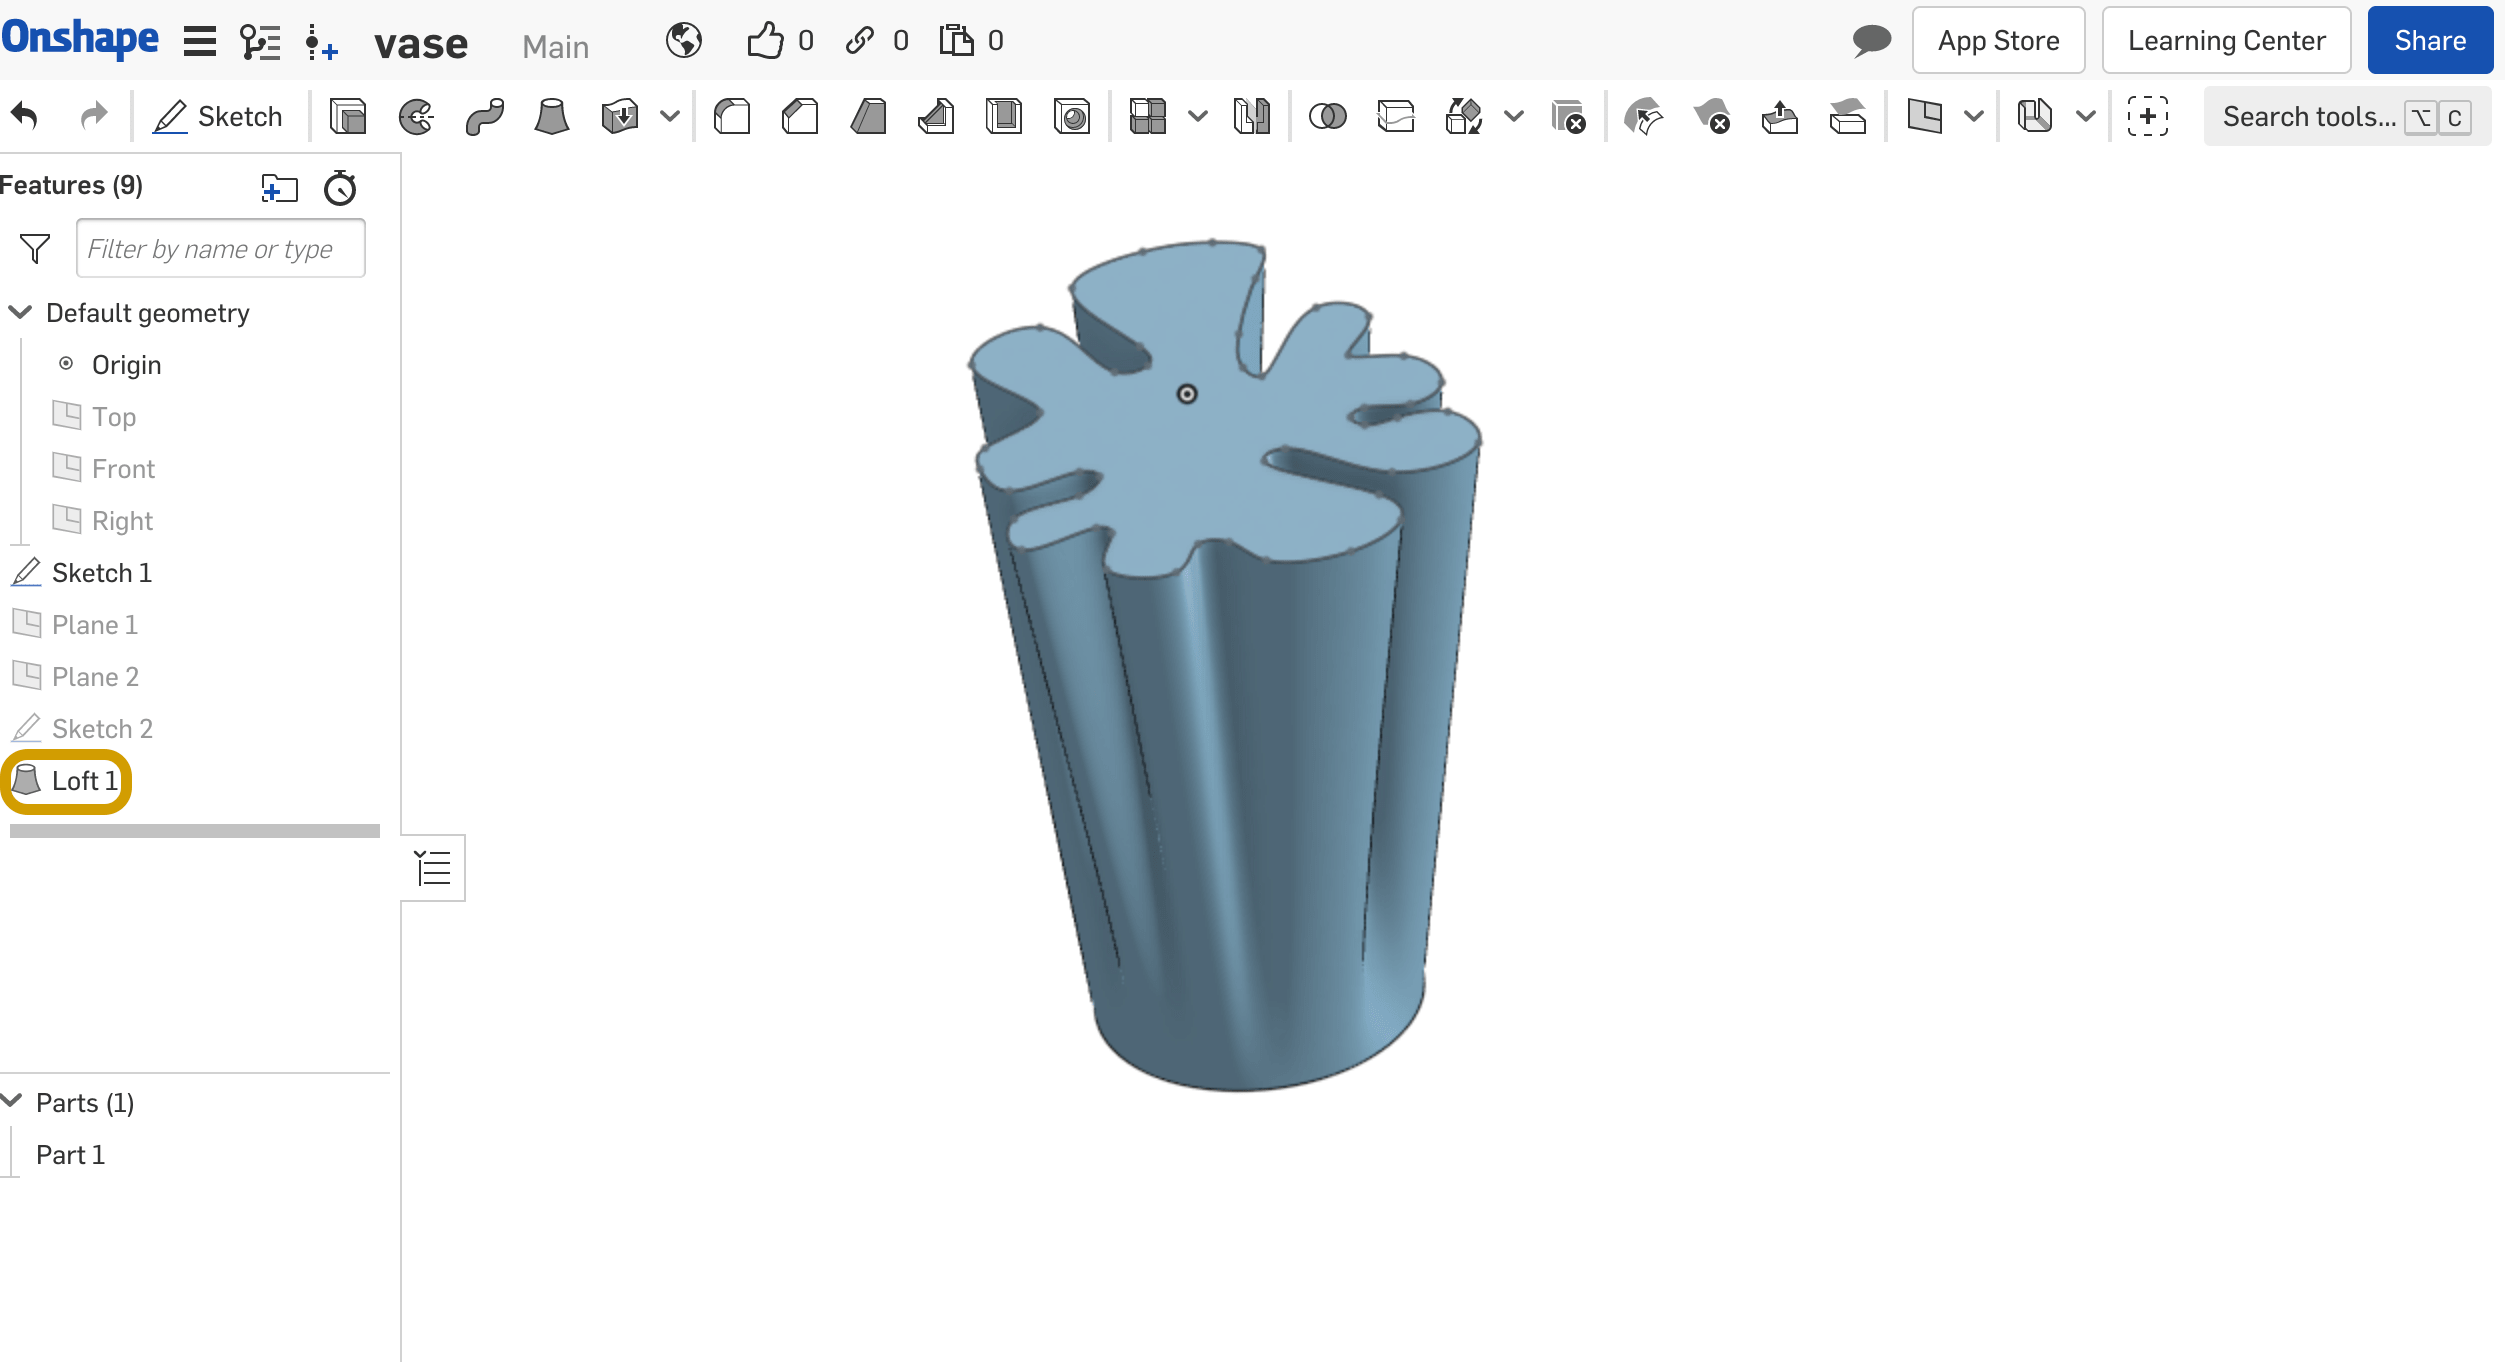
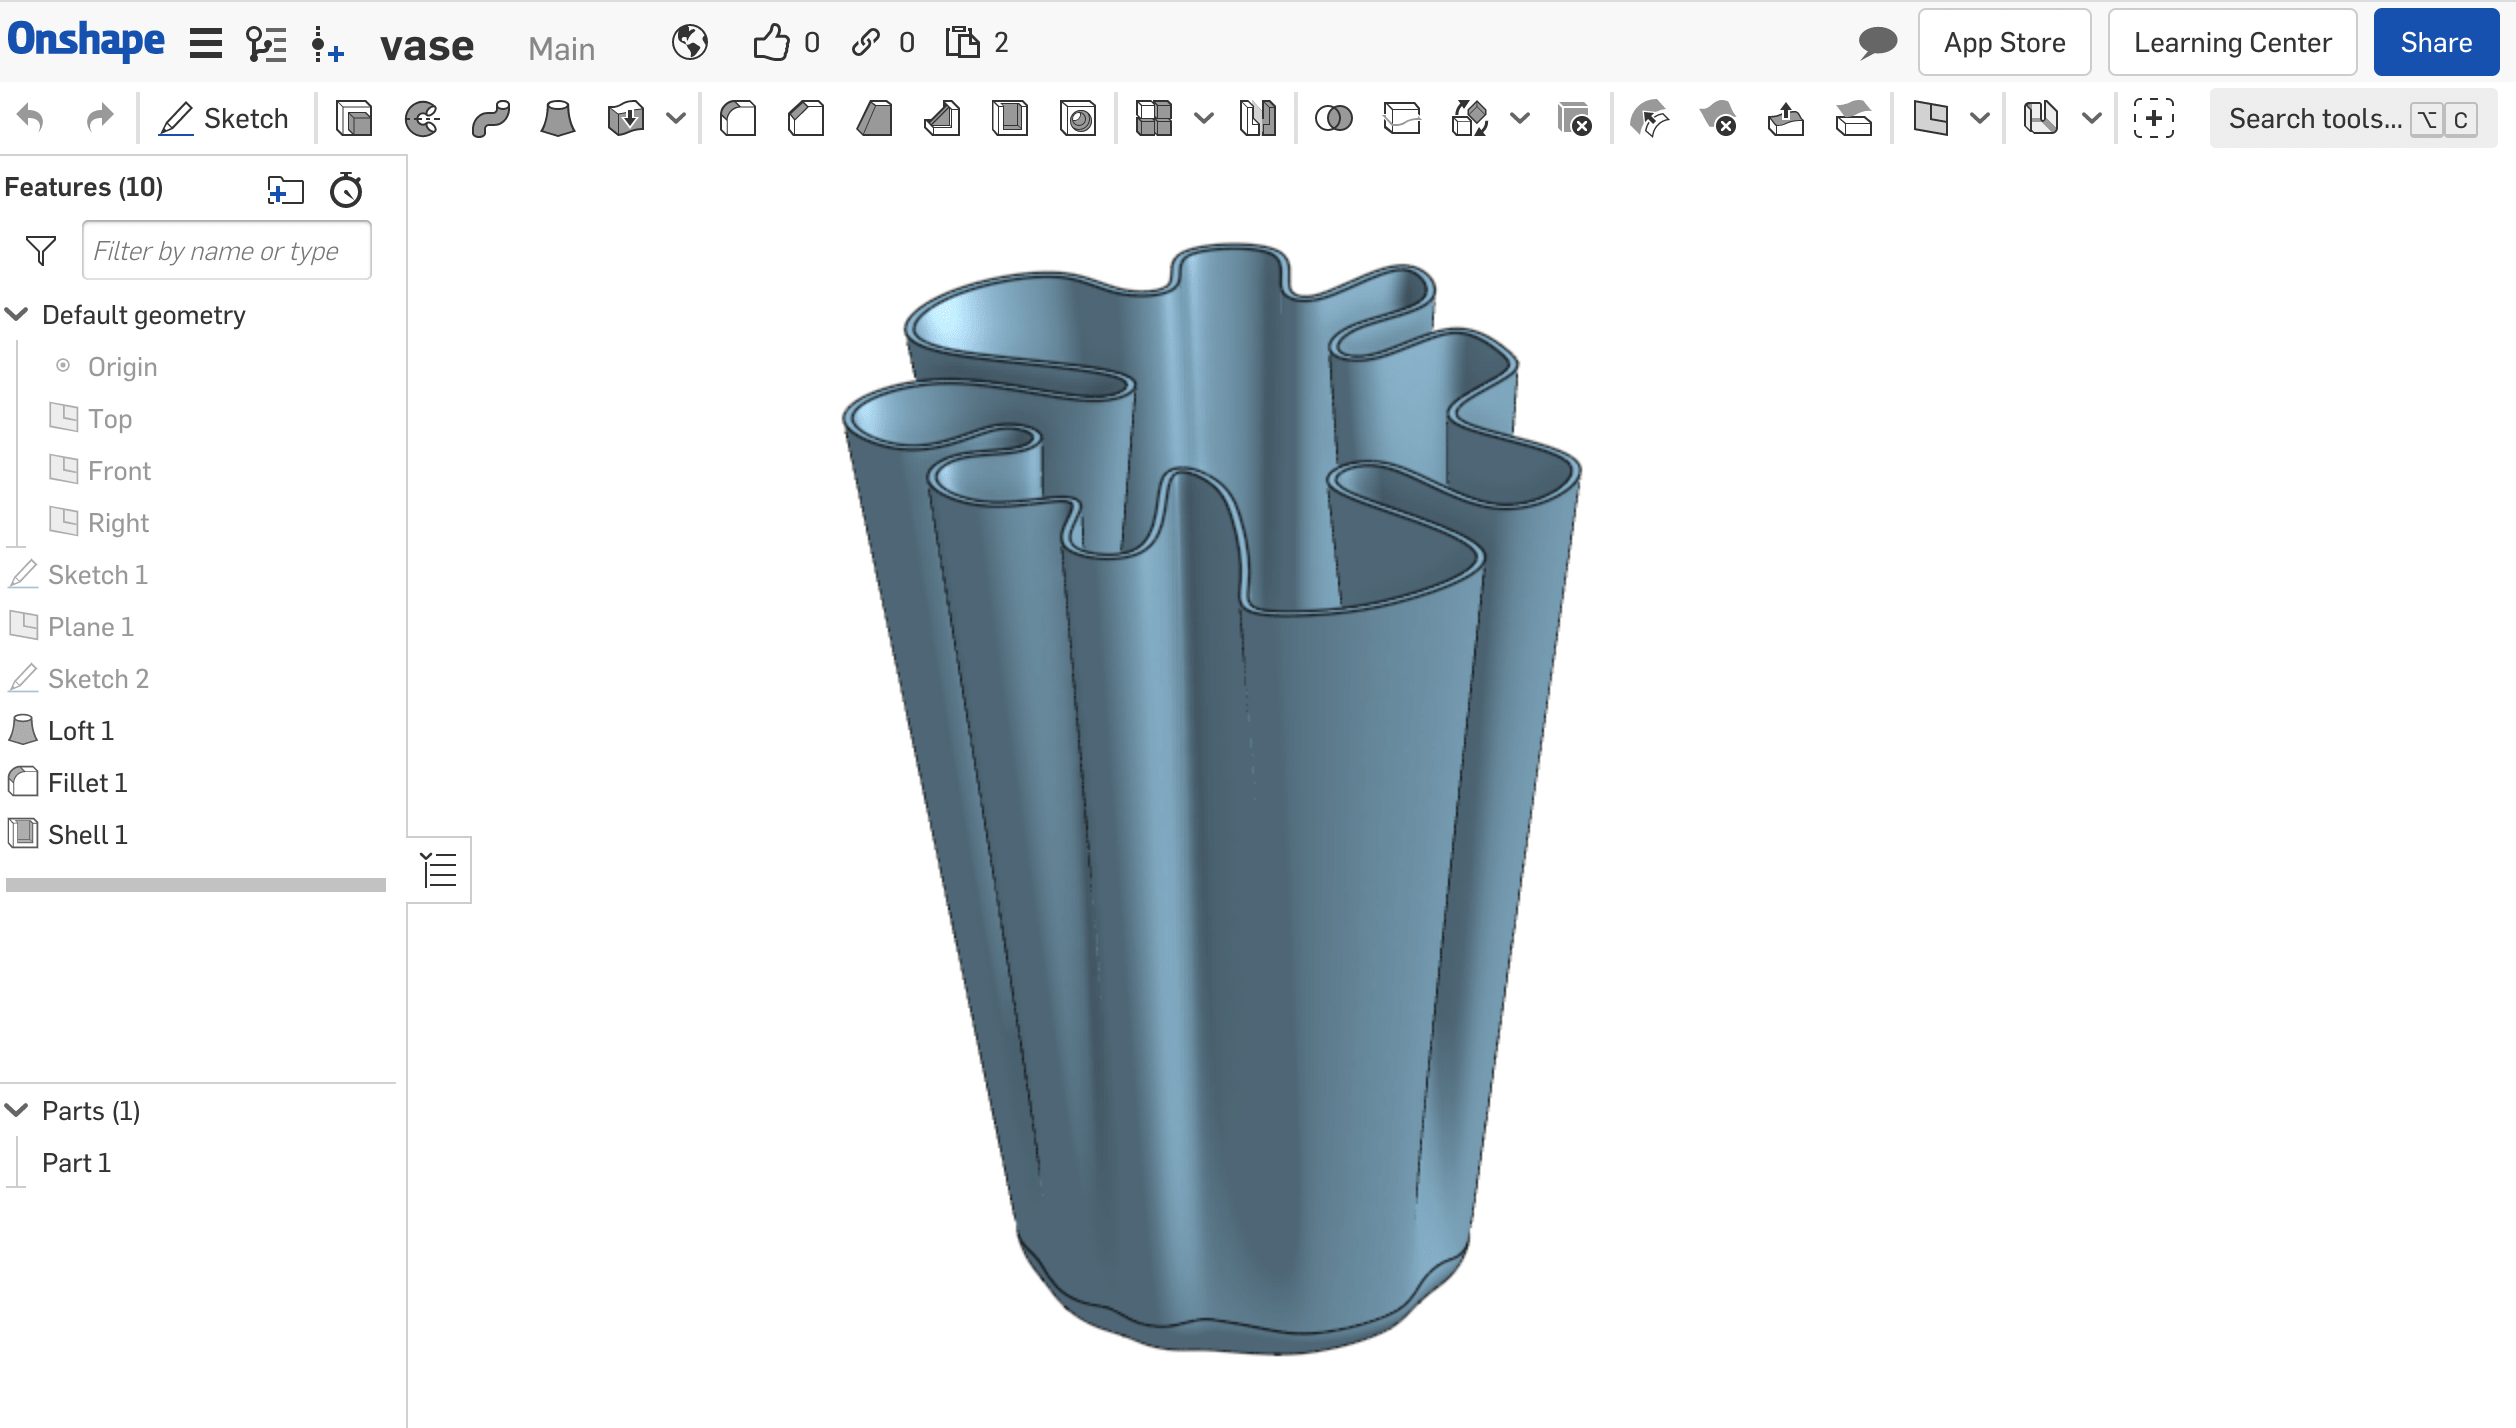
By using Onshape, I created a 3d vase that simulated cloth shape that draped into a round.
why can not be made subtractevely ?
The curves, especially in the inner shell make it impossible to fabricate the vase subtractively.
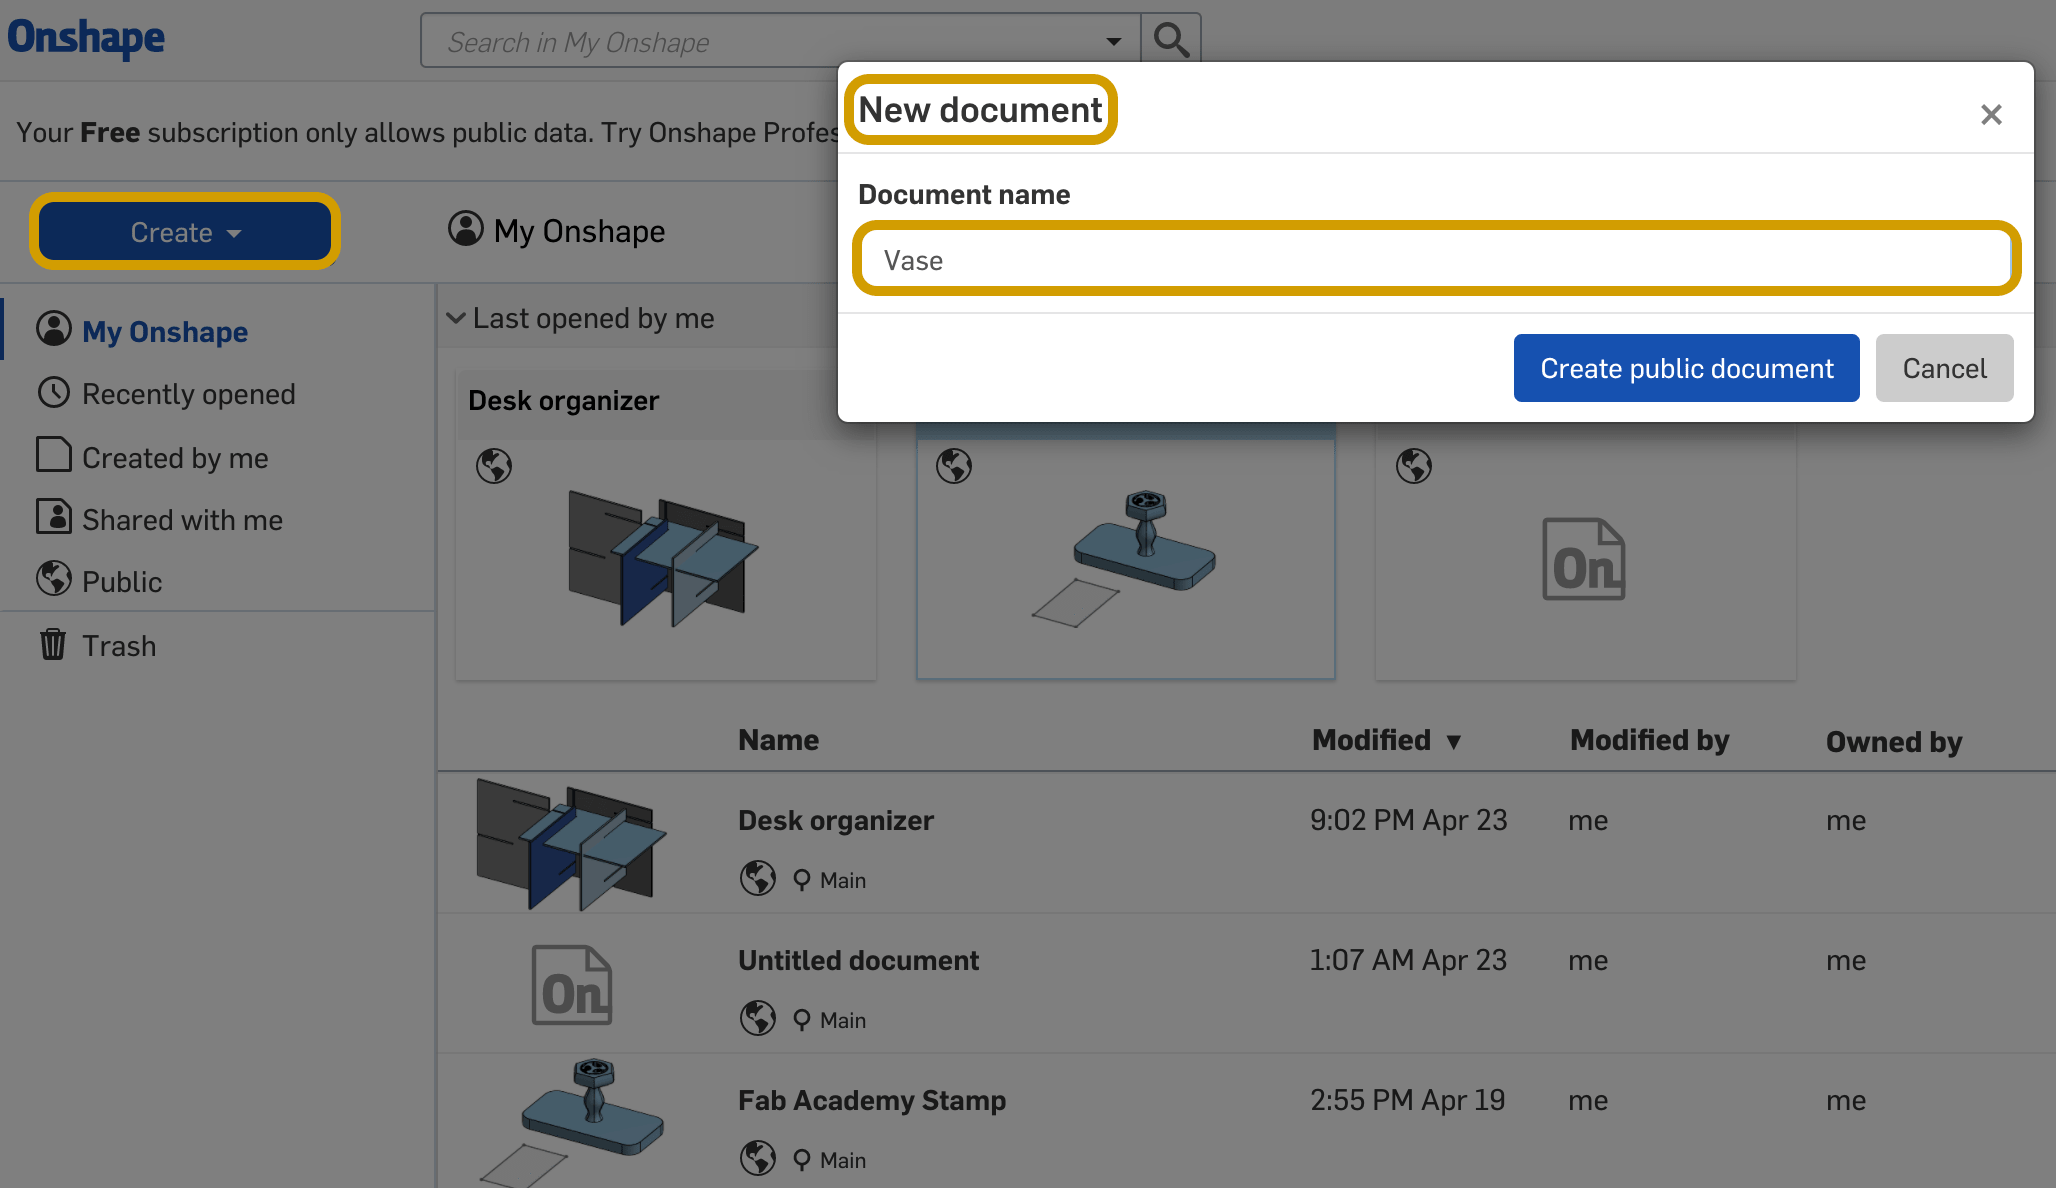
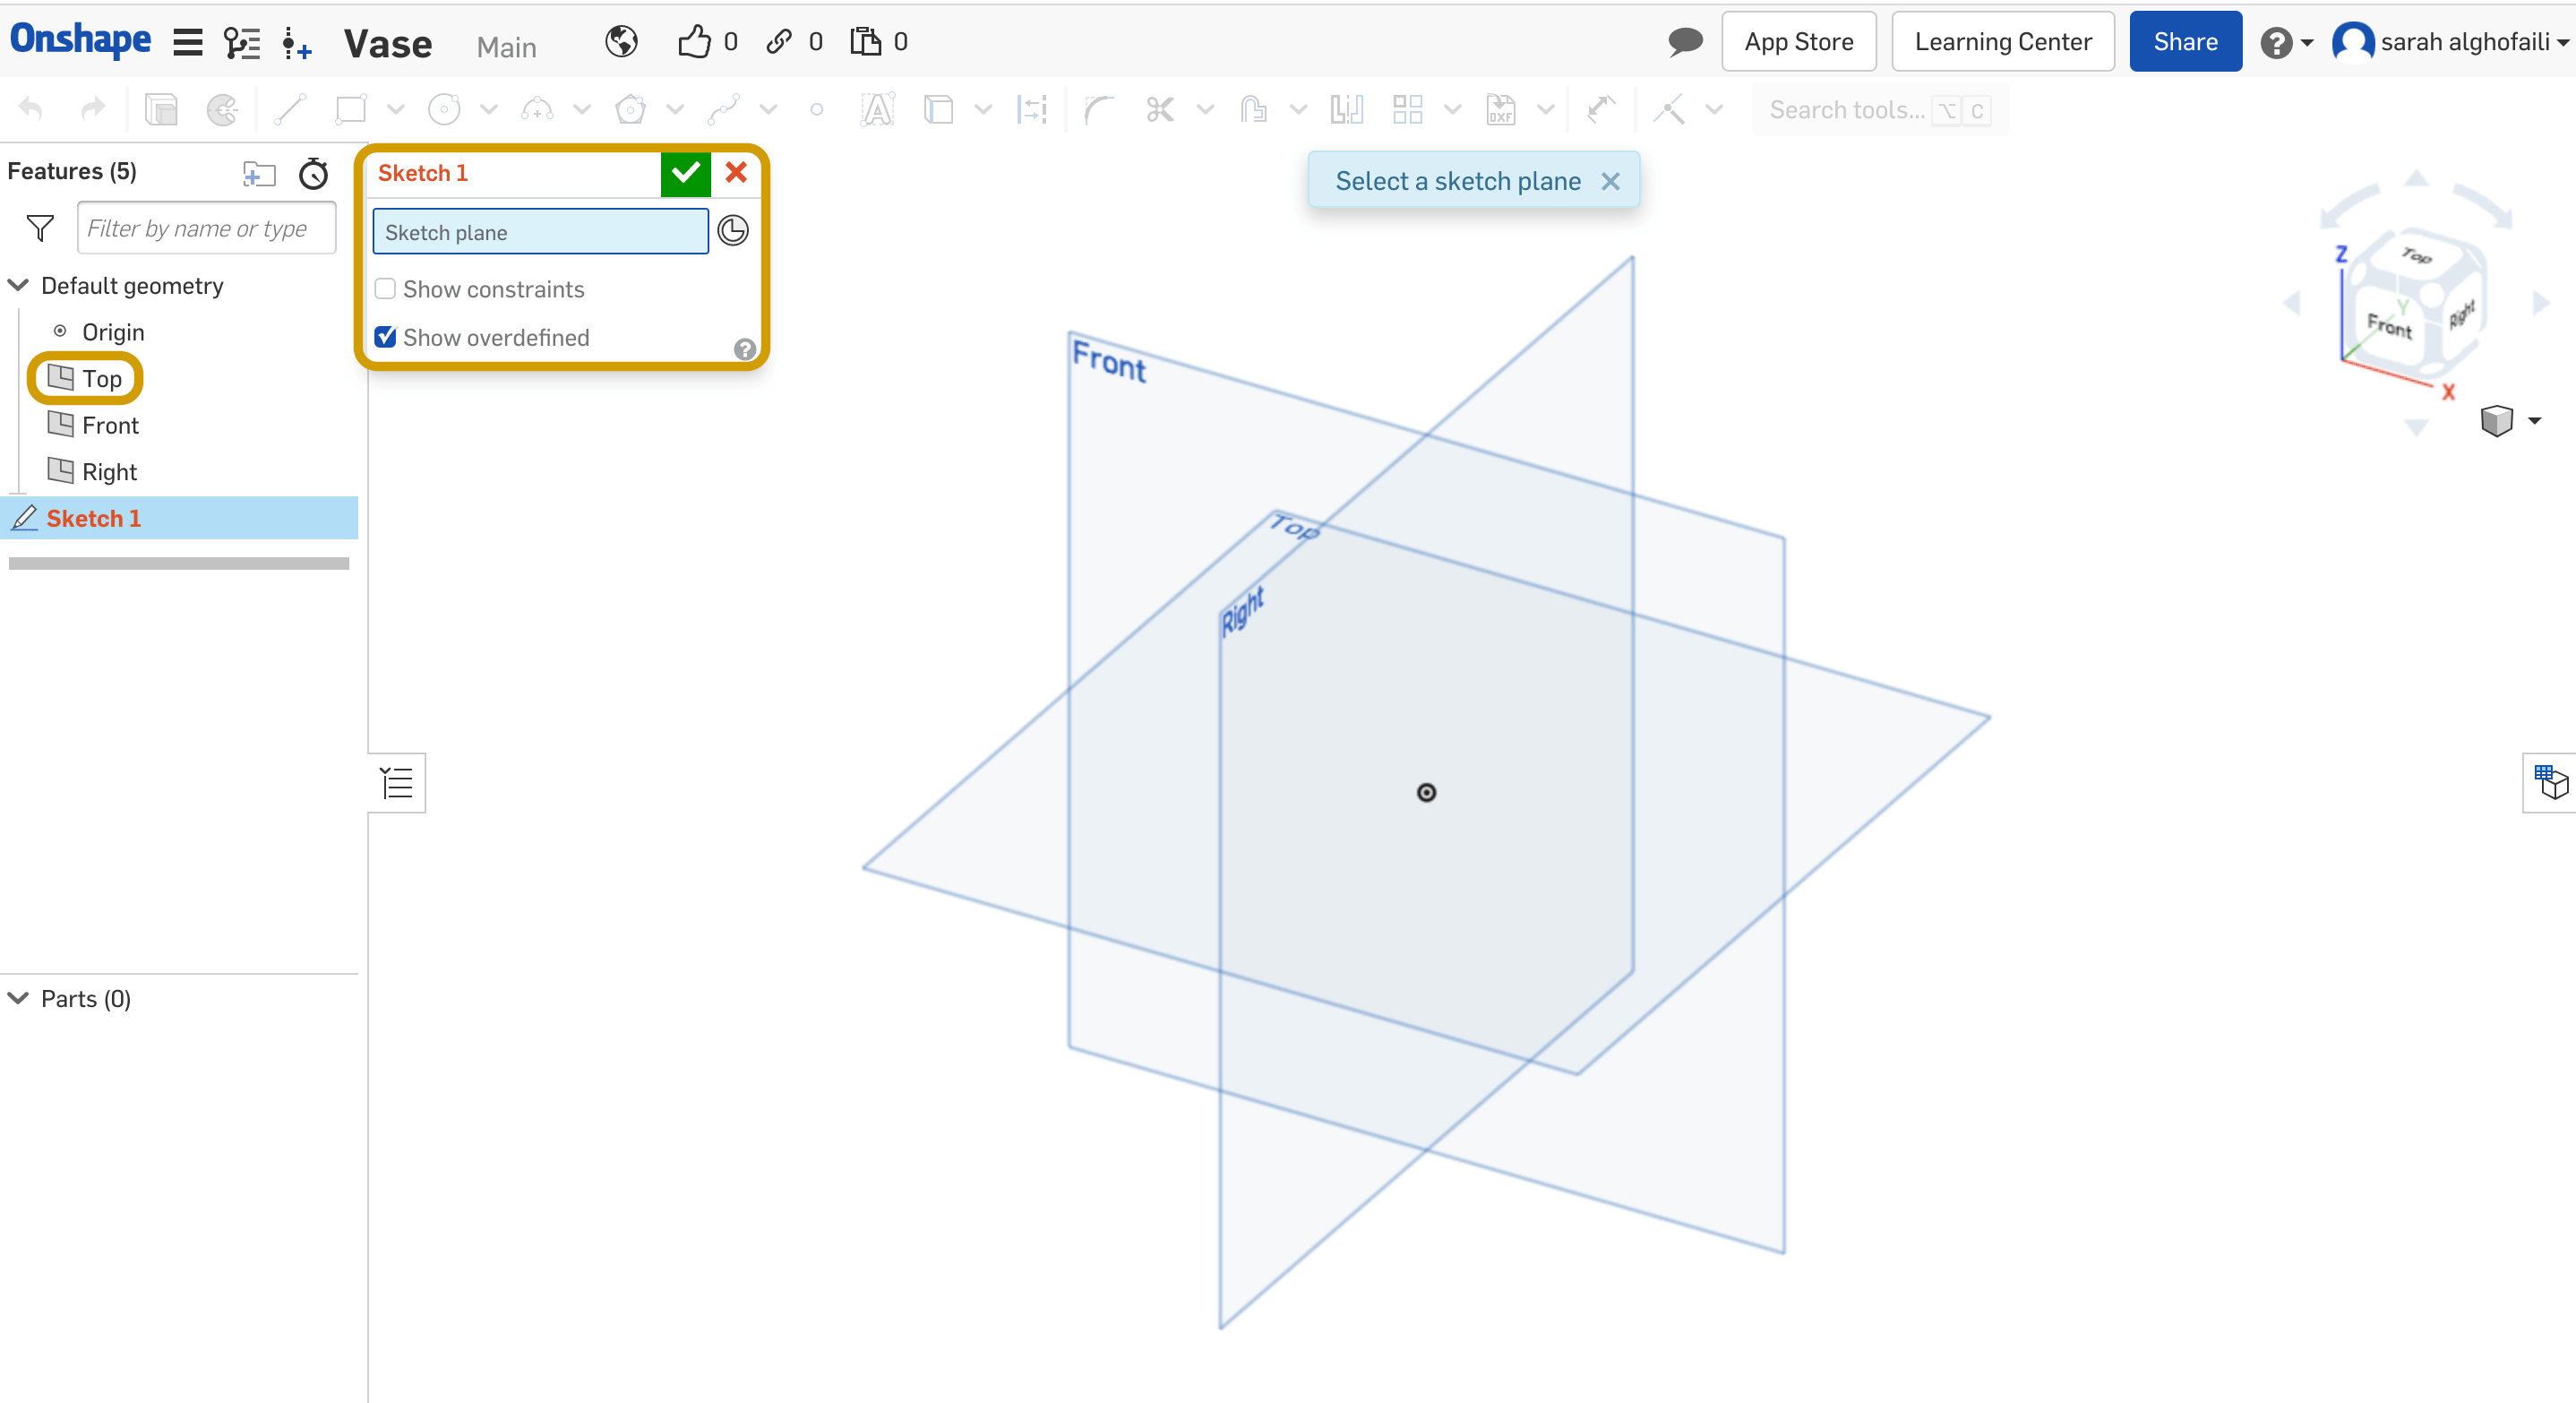
In the beginning, I created a new document to start sketching.
Then, I clicked on the sketch button and chose the top plane.
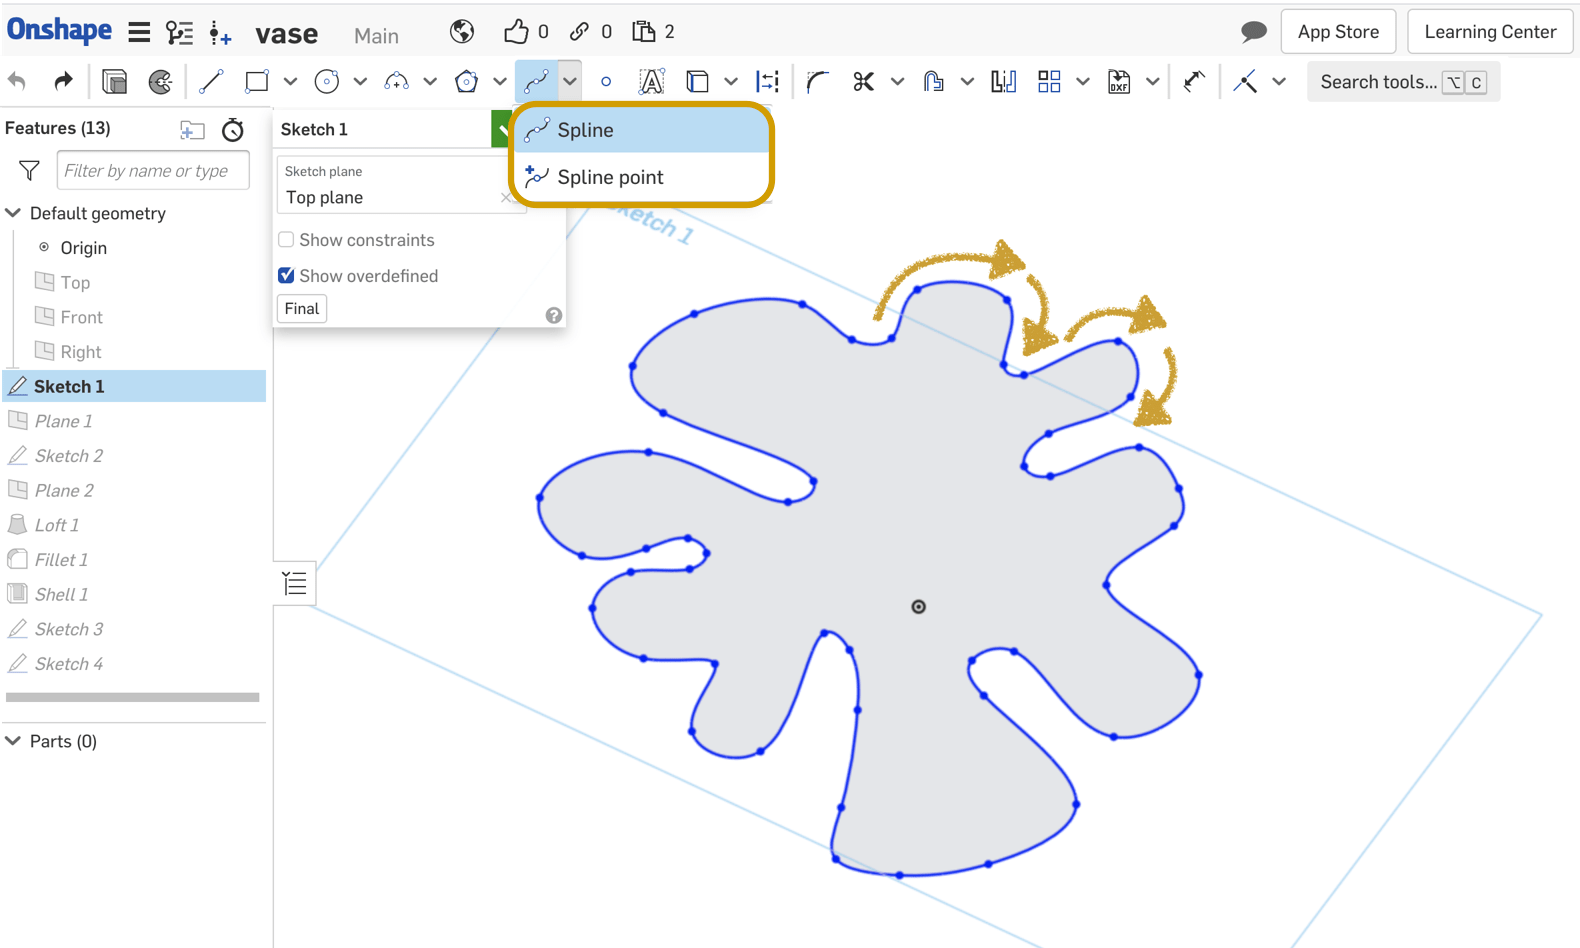
After that, I selected the Spline tool to start drawing the top surface of the vase by creating a random spline through multiple points. Also, I dragged the points to modify the shape.
Then, I created an offset plane by selecting the Plane tool and changing the Offset distance value.
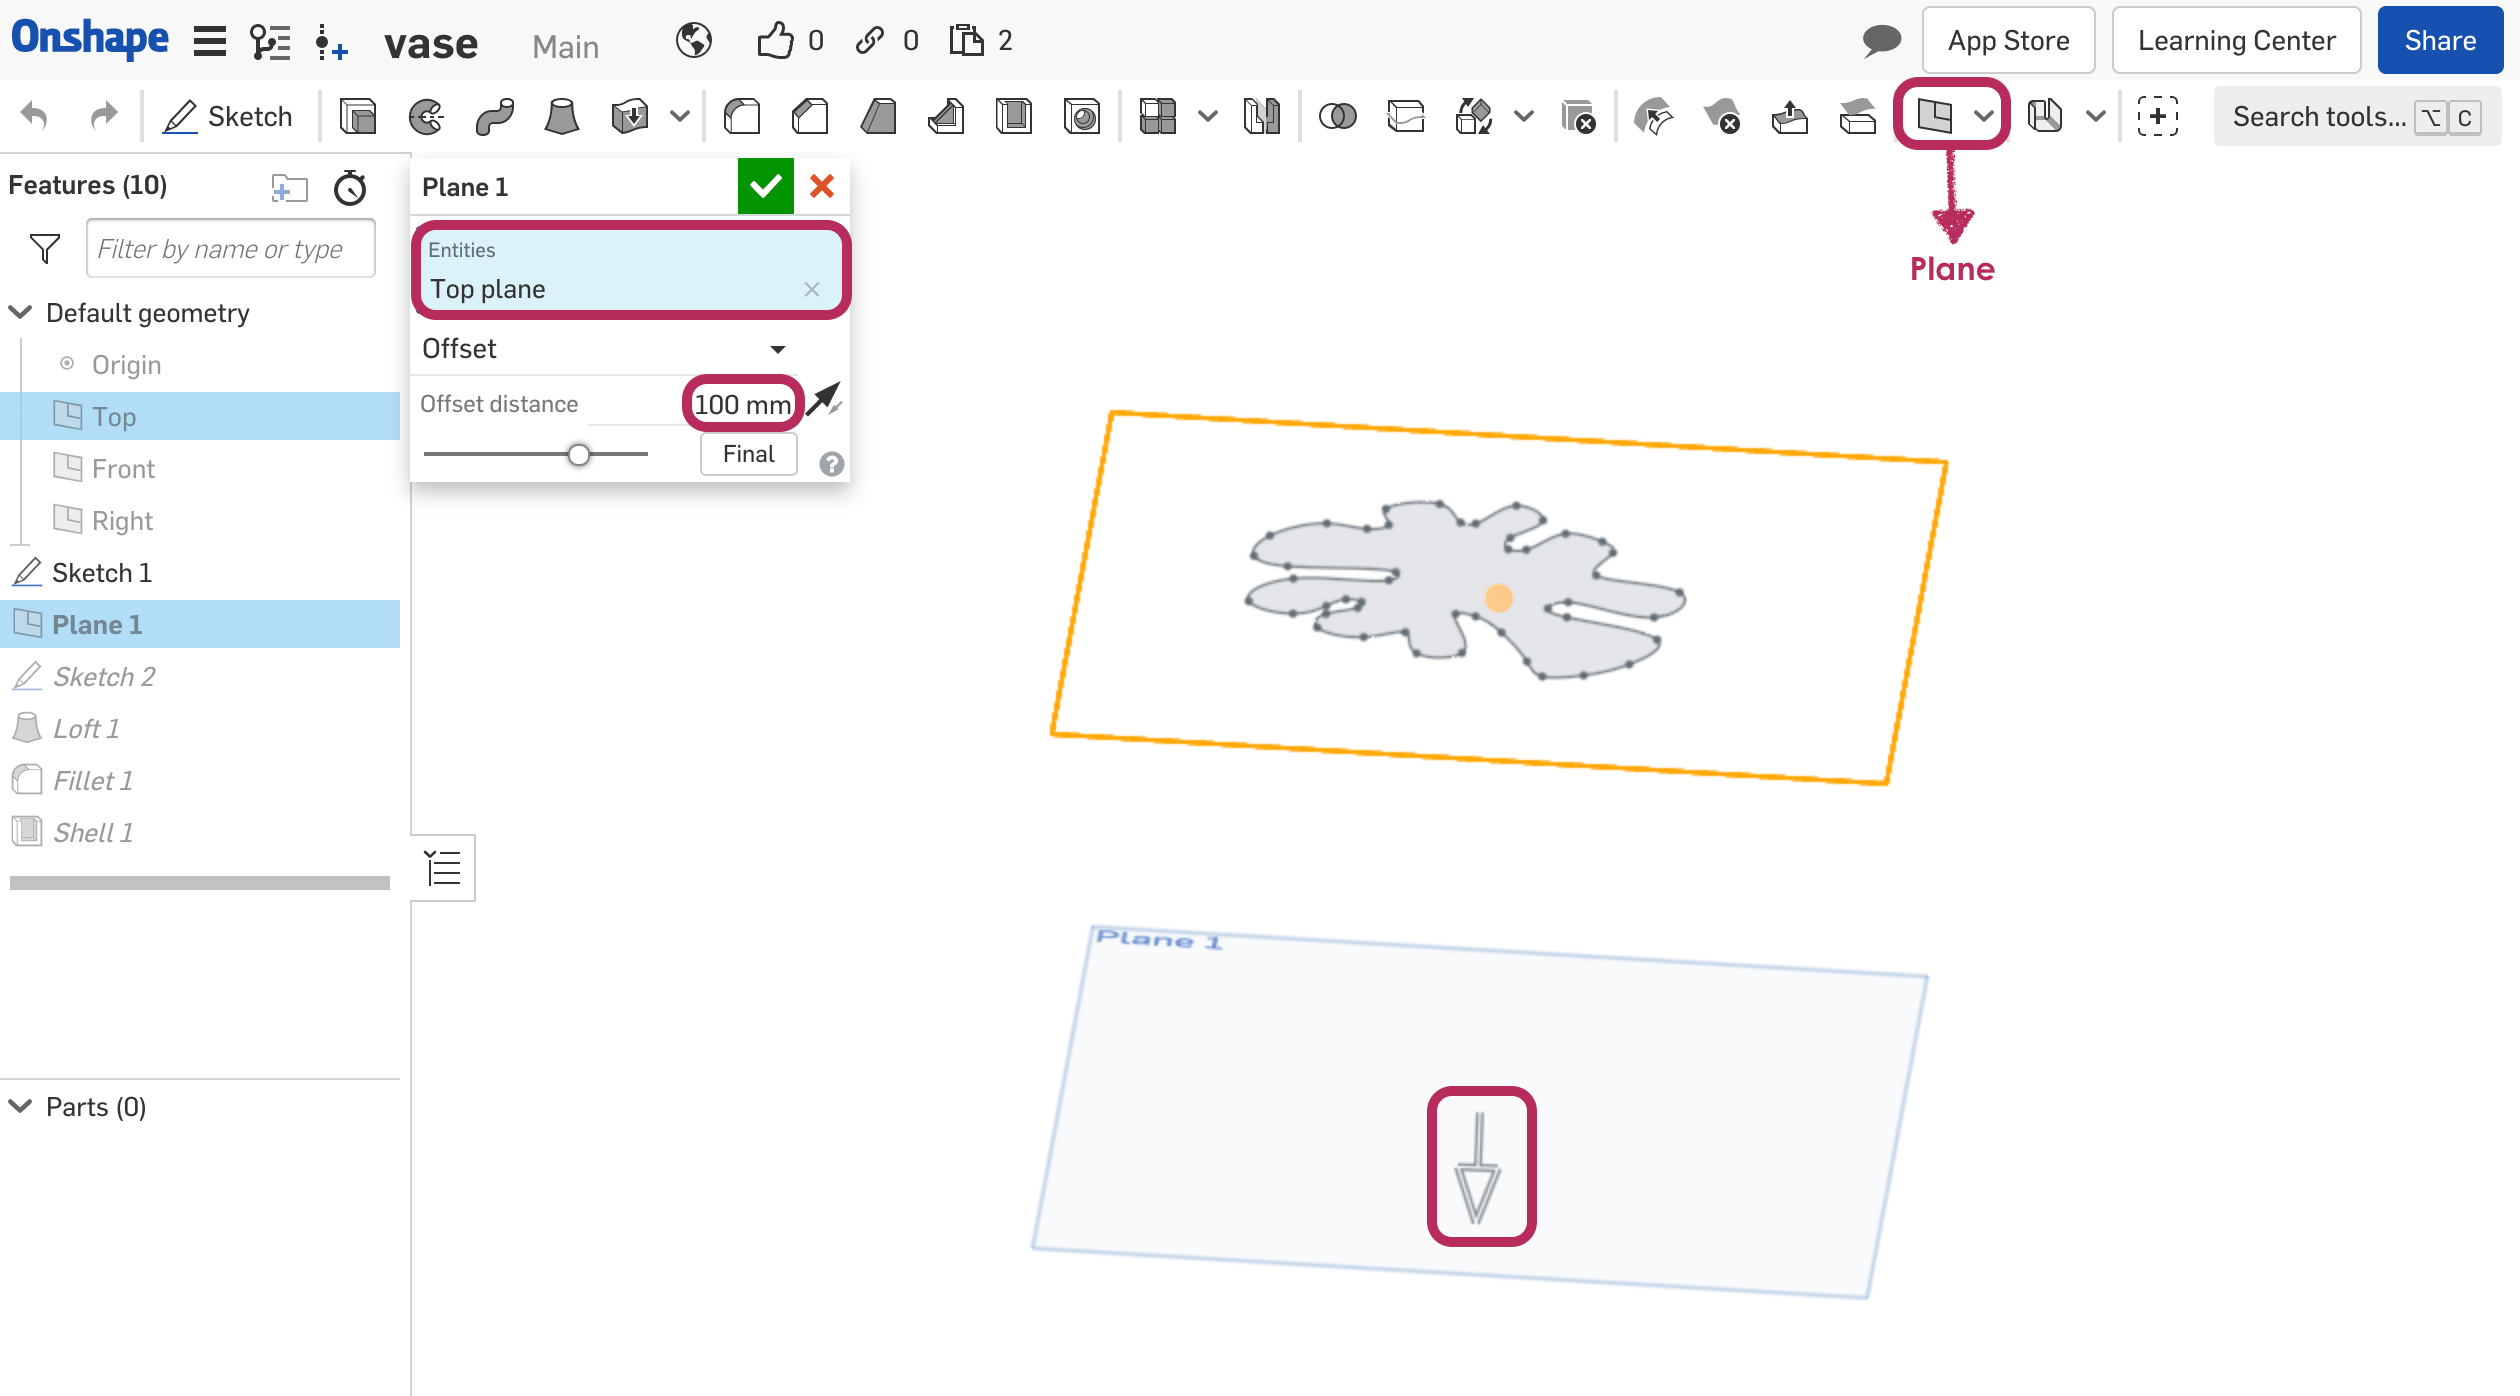
On the offset plane, I drew a circle to be the bottom surface of the vase.

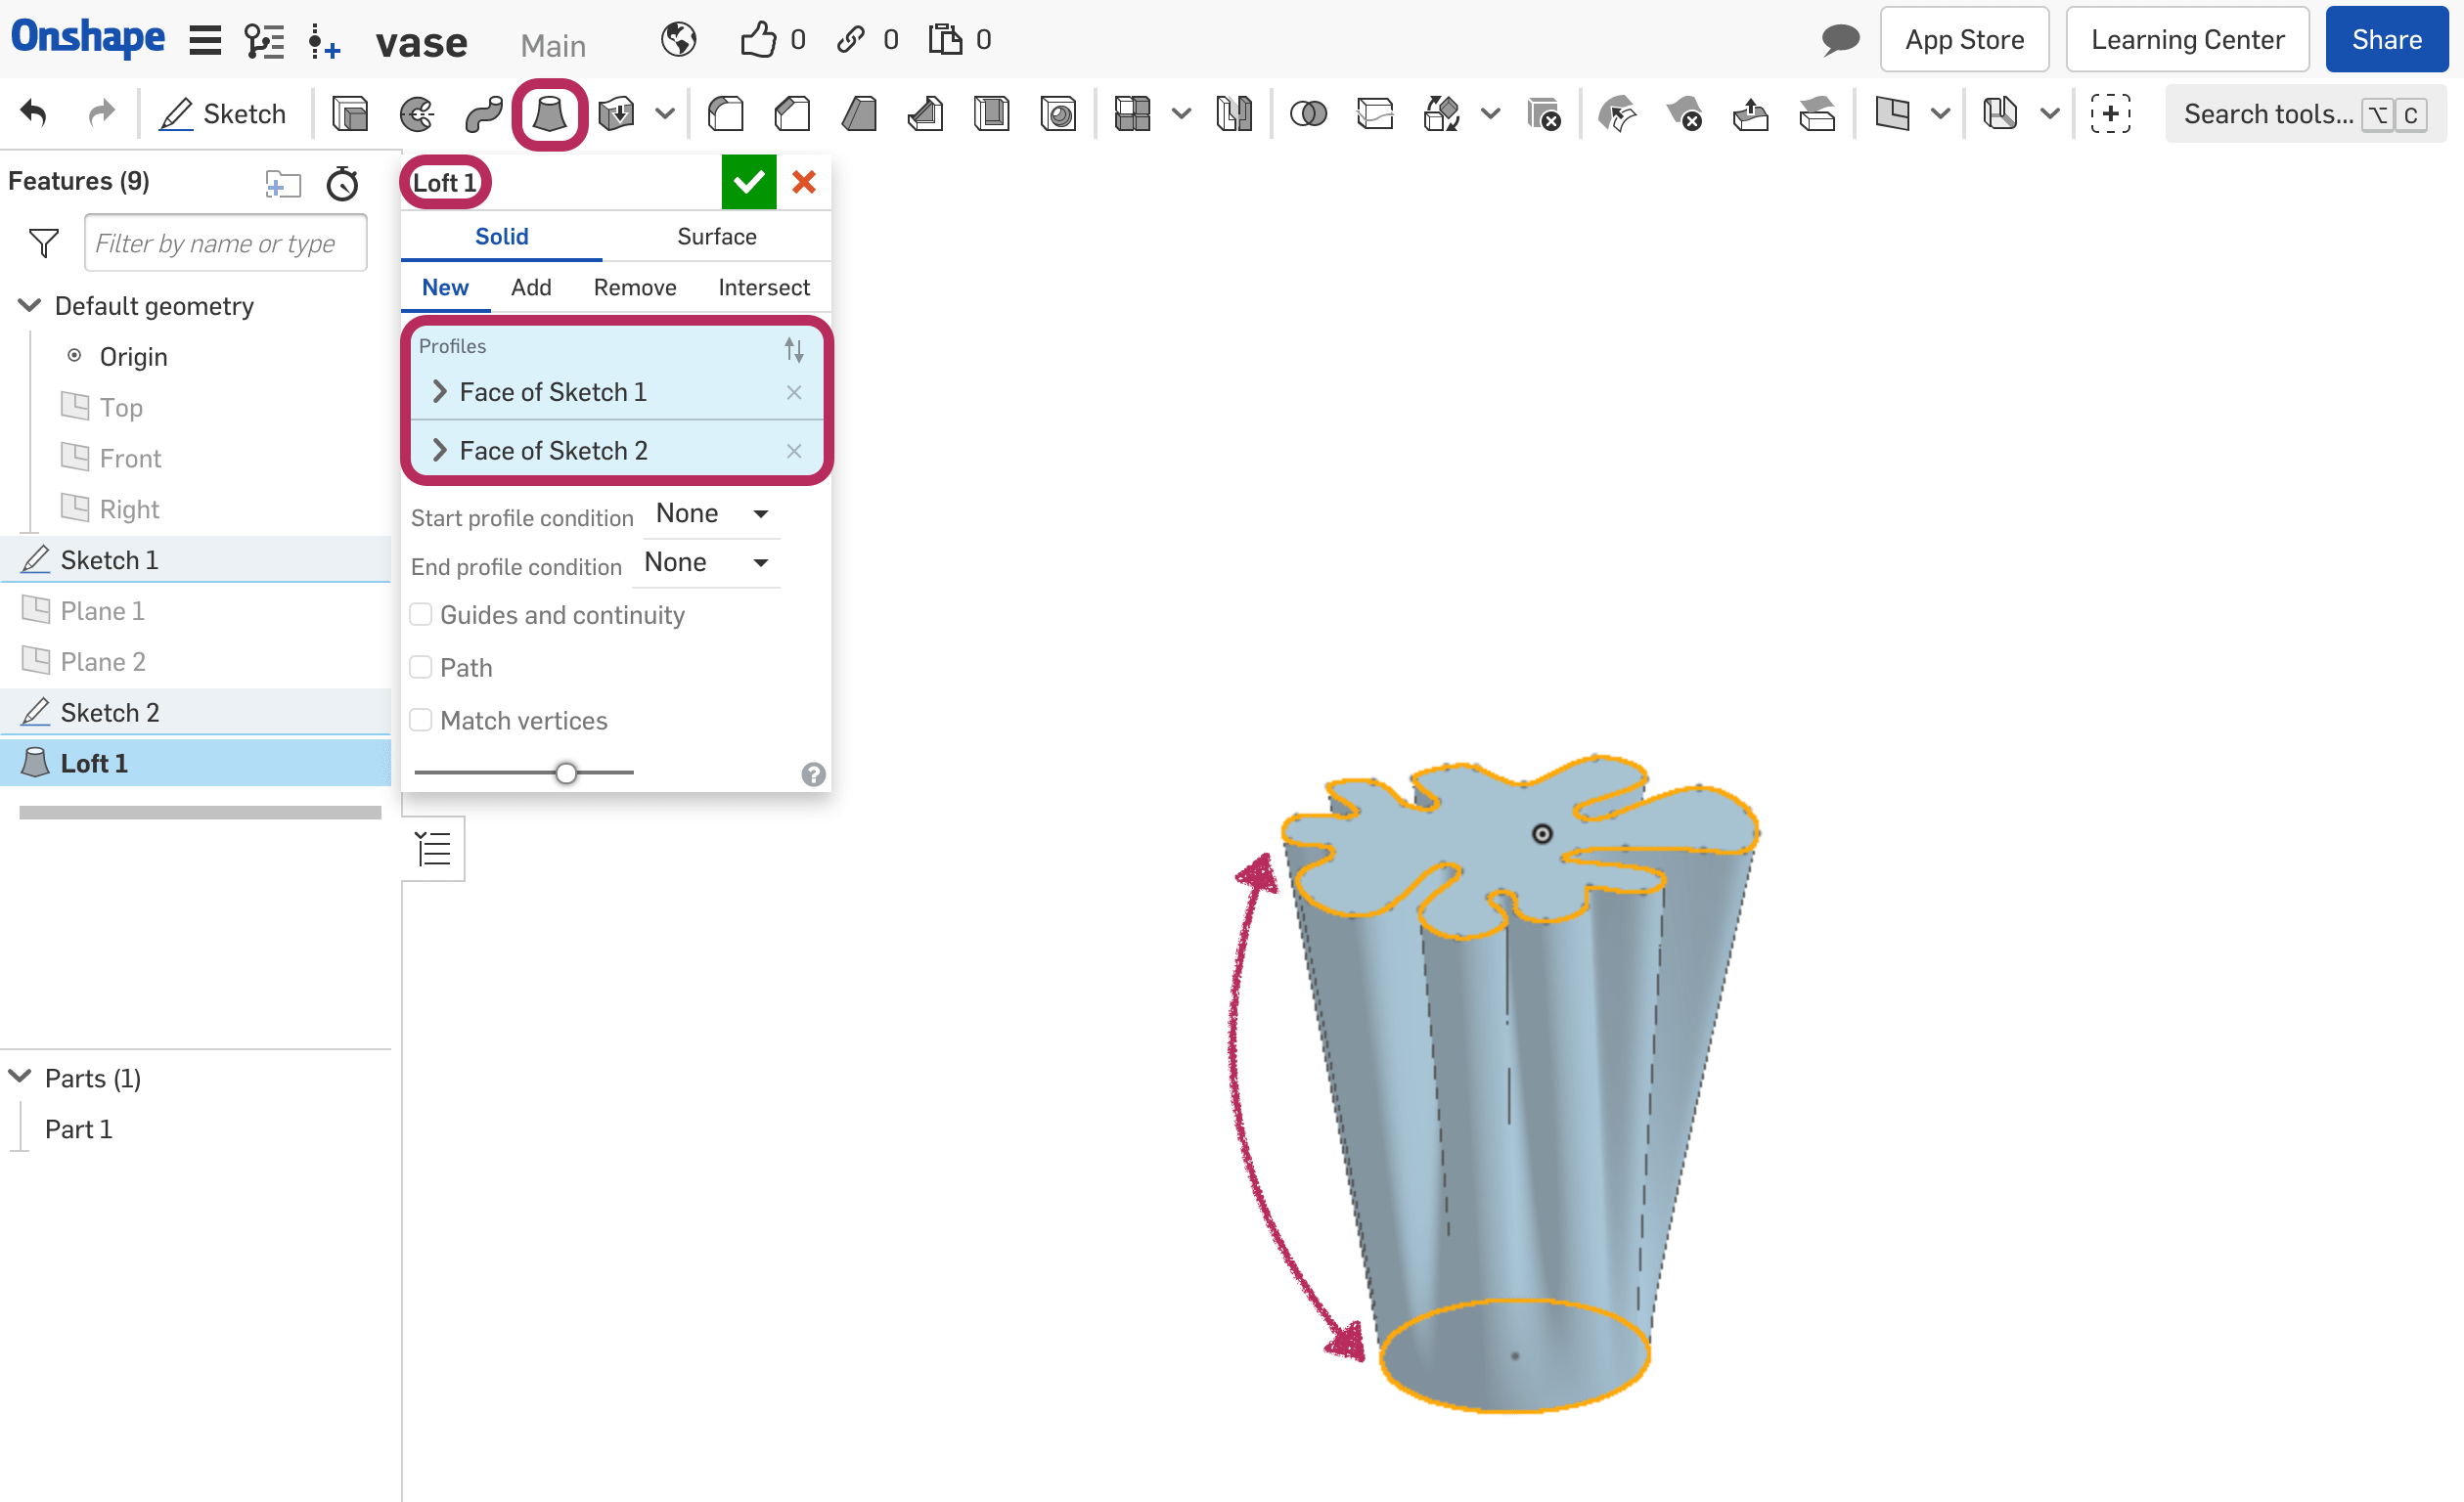
After sketching the vase profiles, I created the vase body by using the loft tool. It is a tool that generates a smooth surface between two profiles.
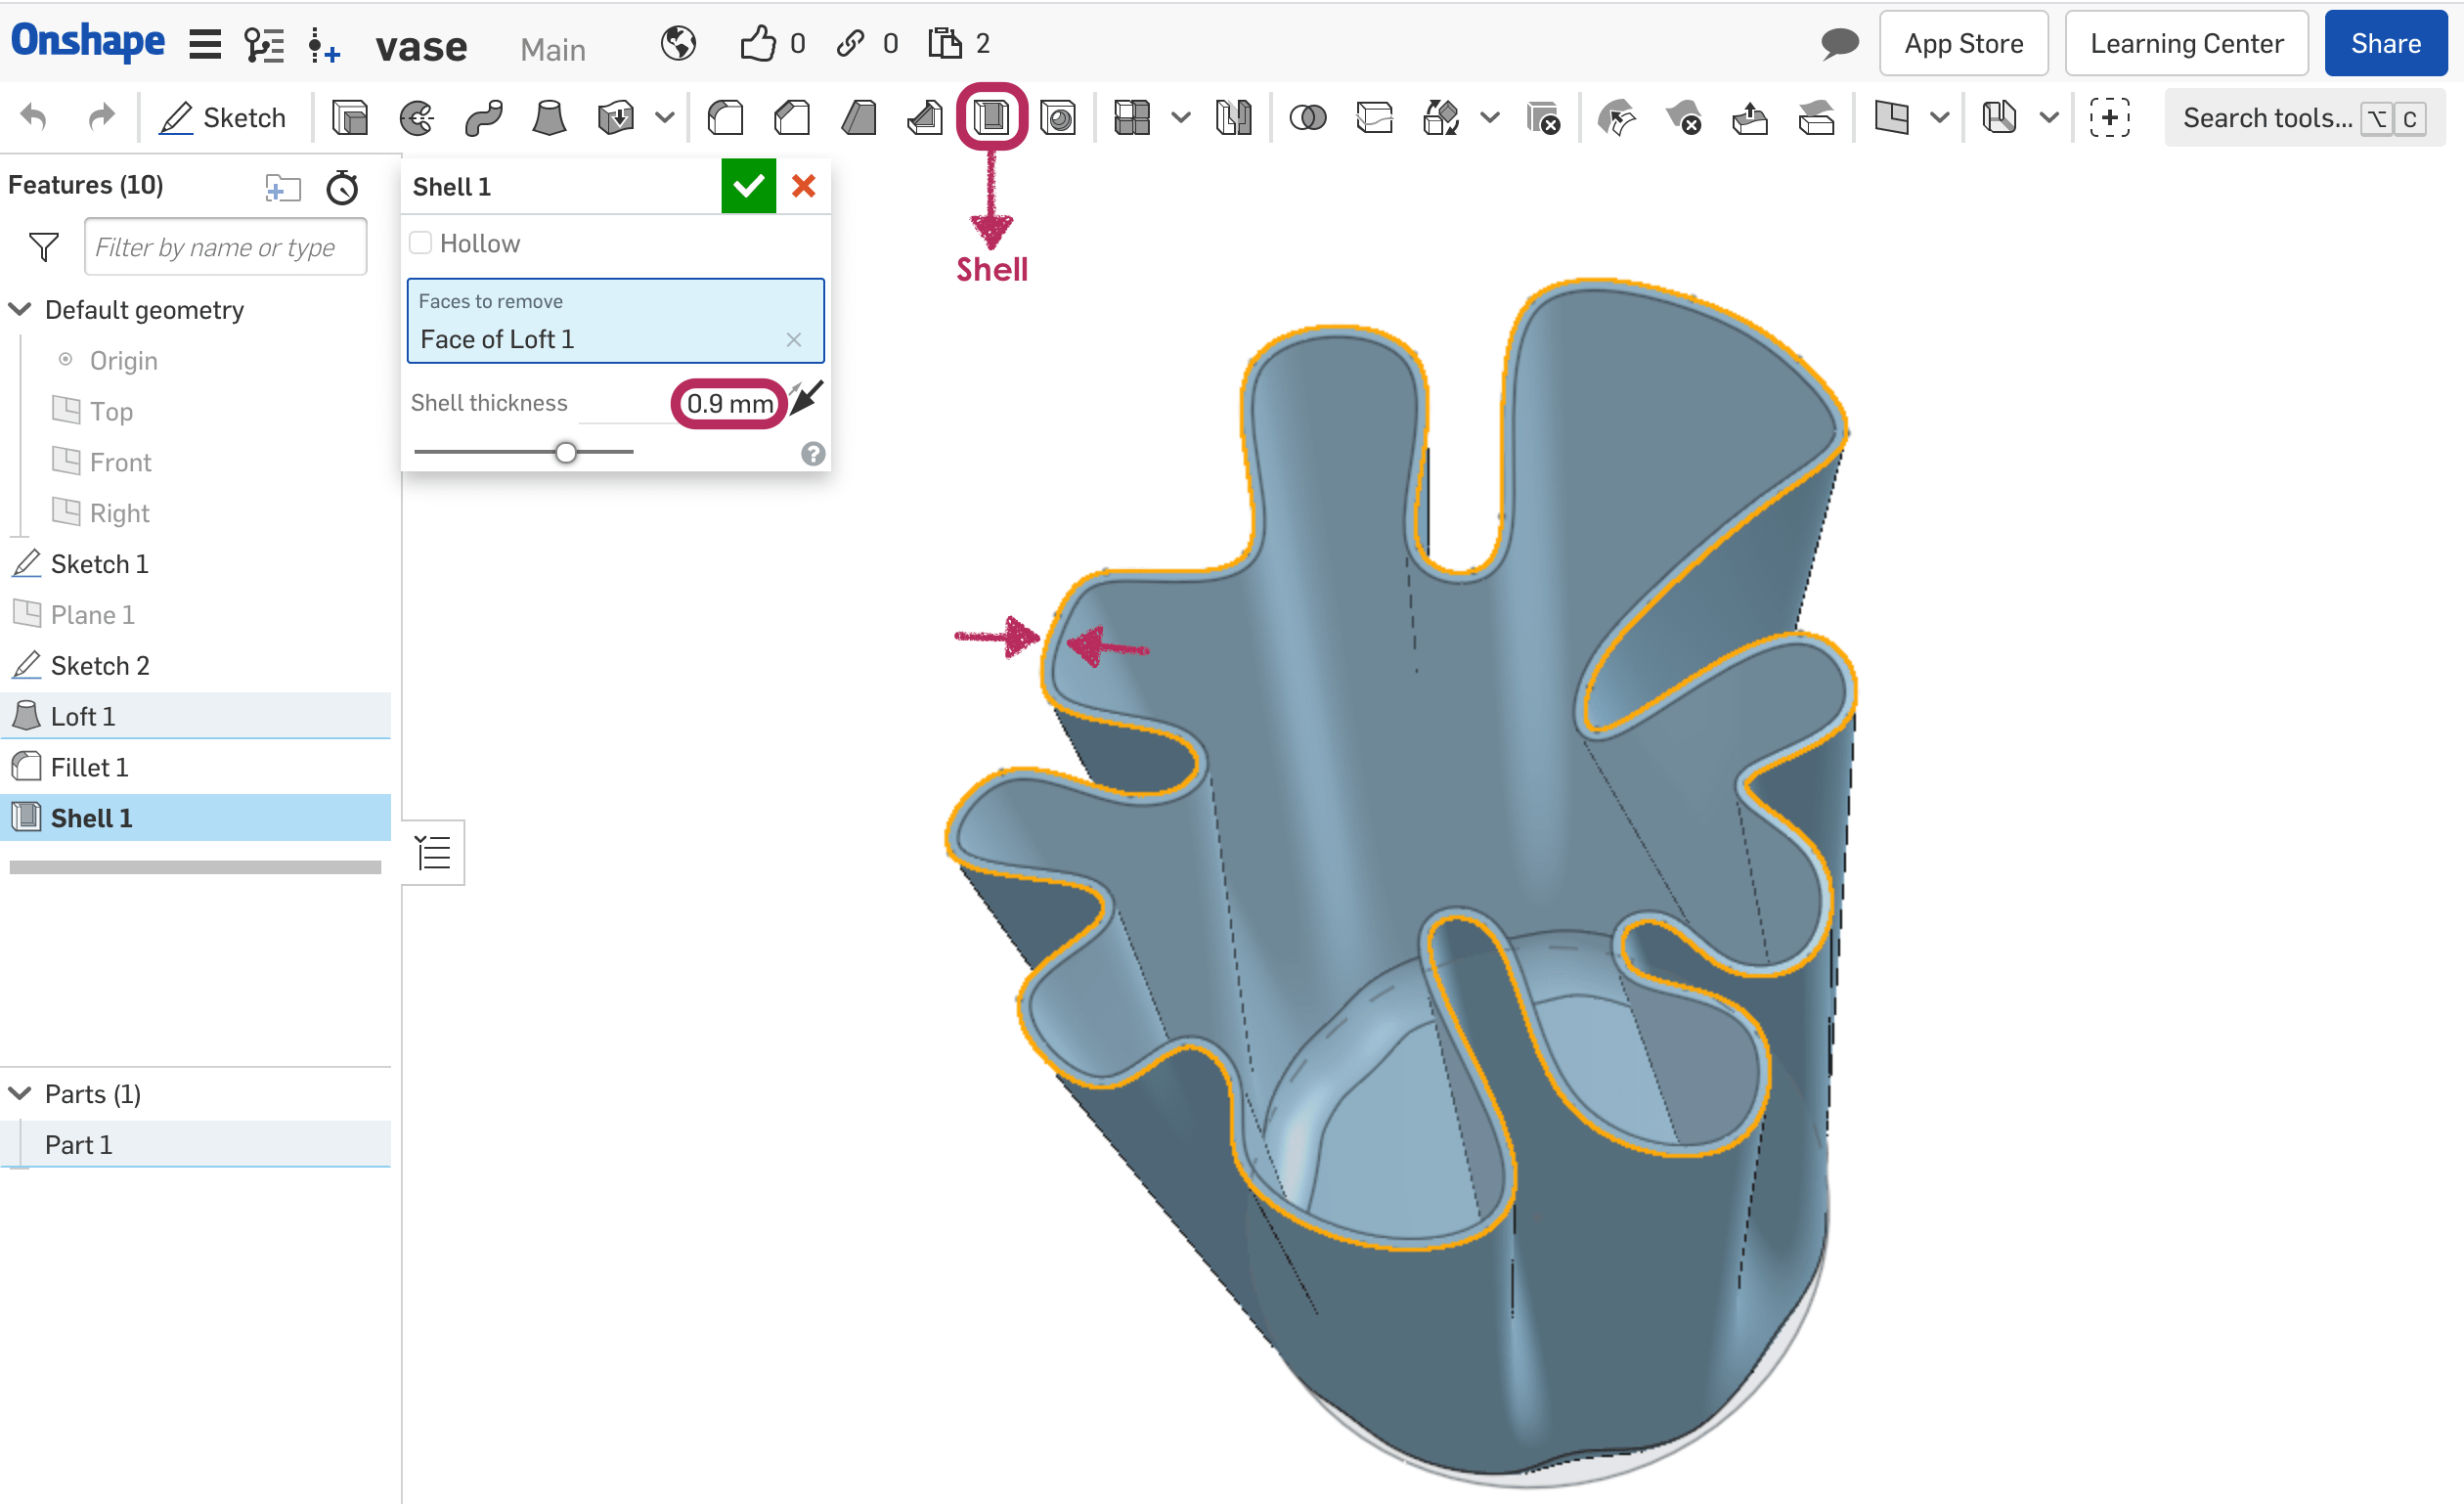
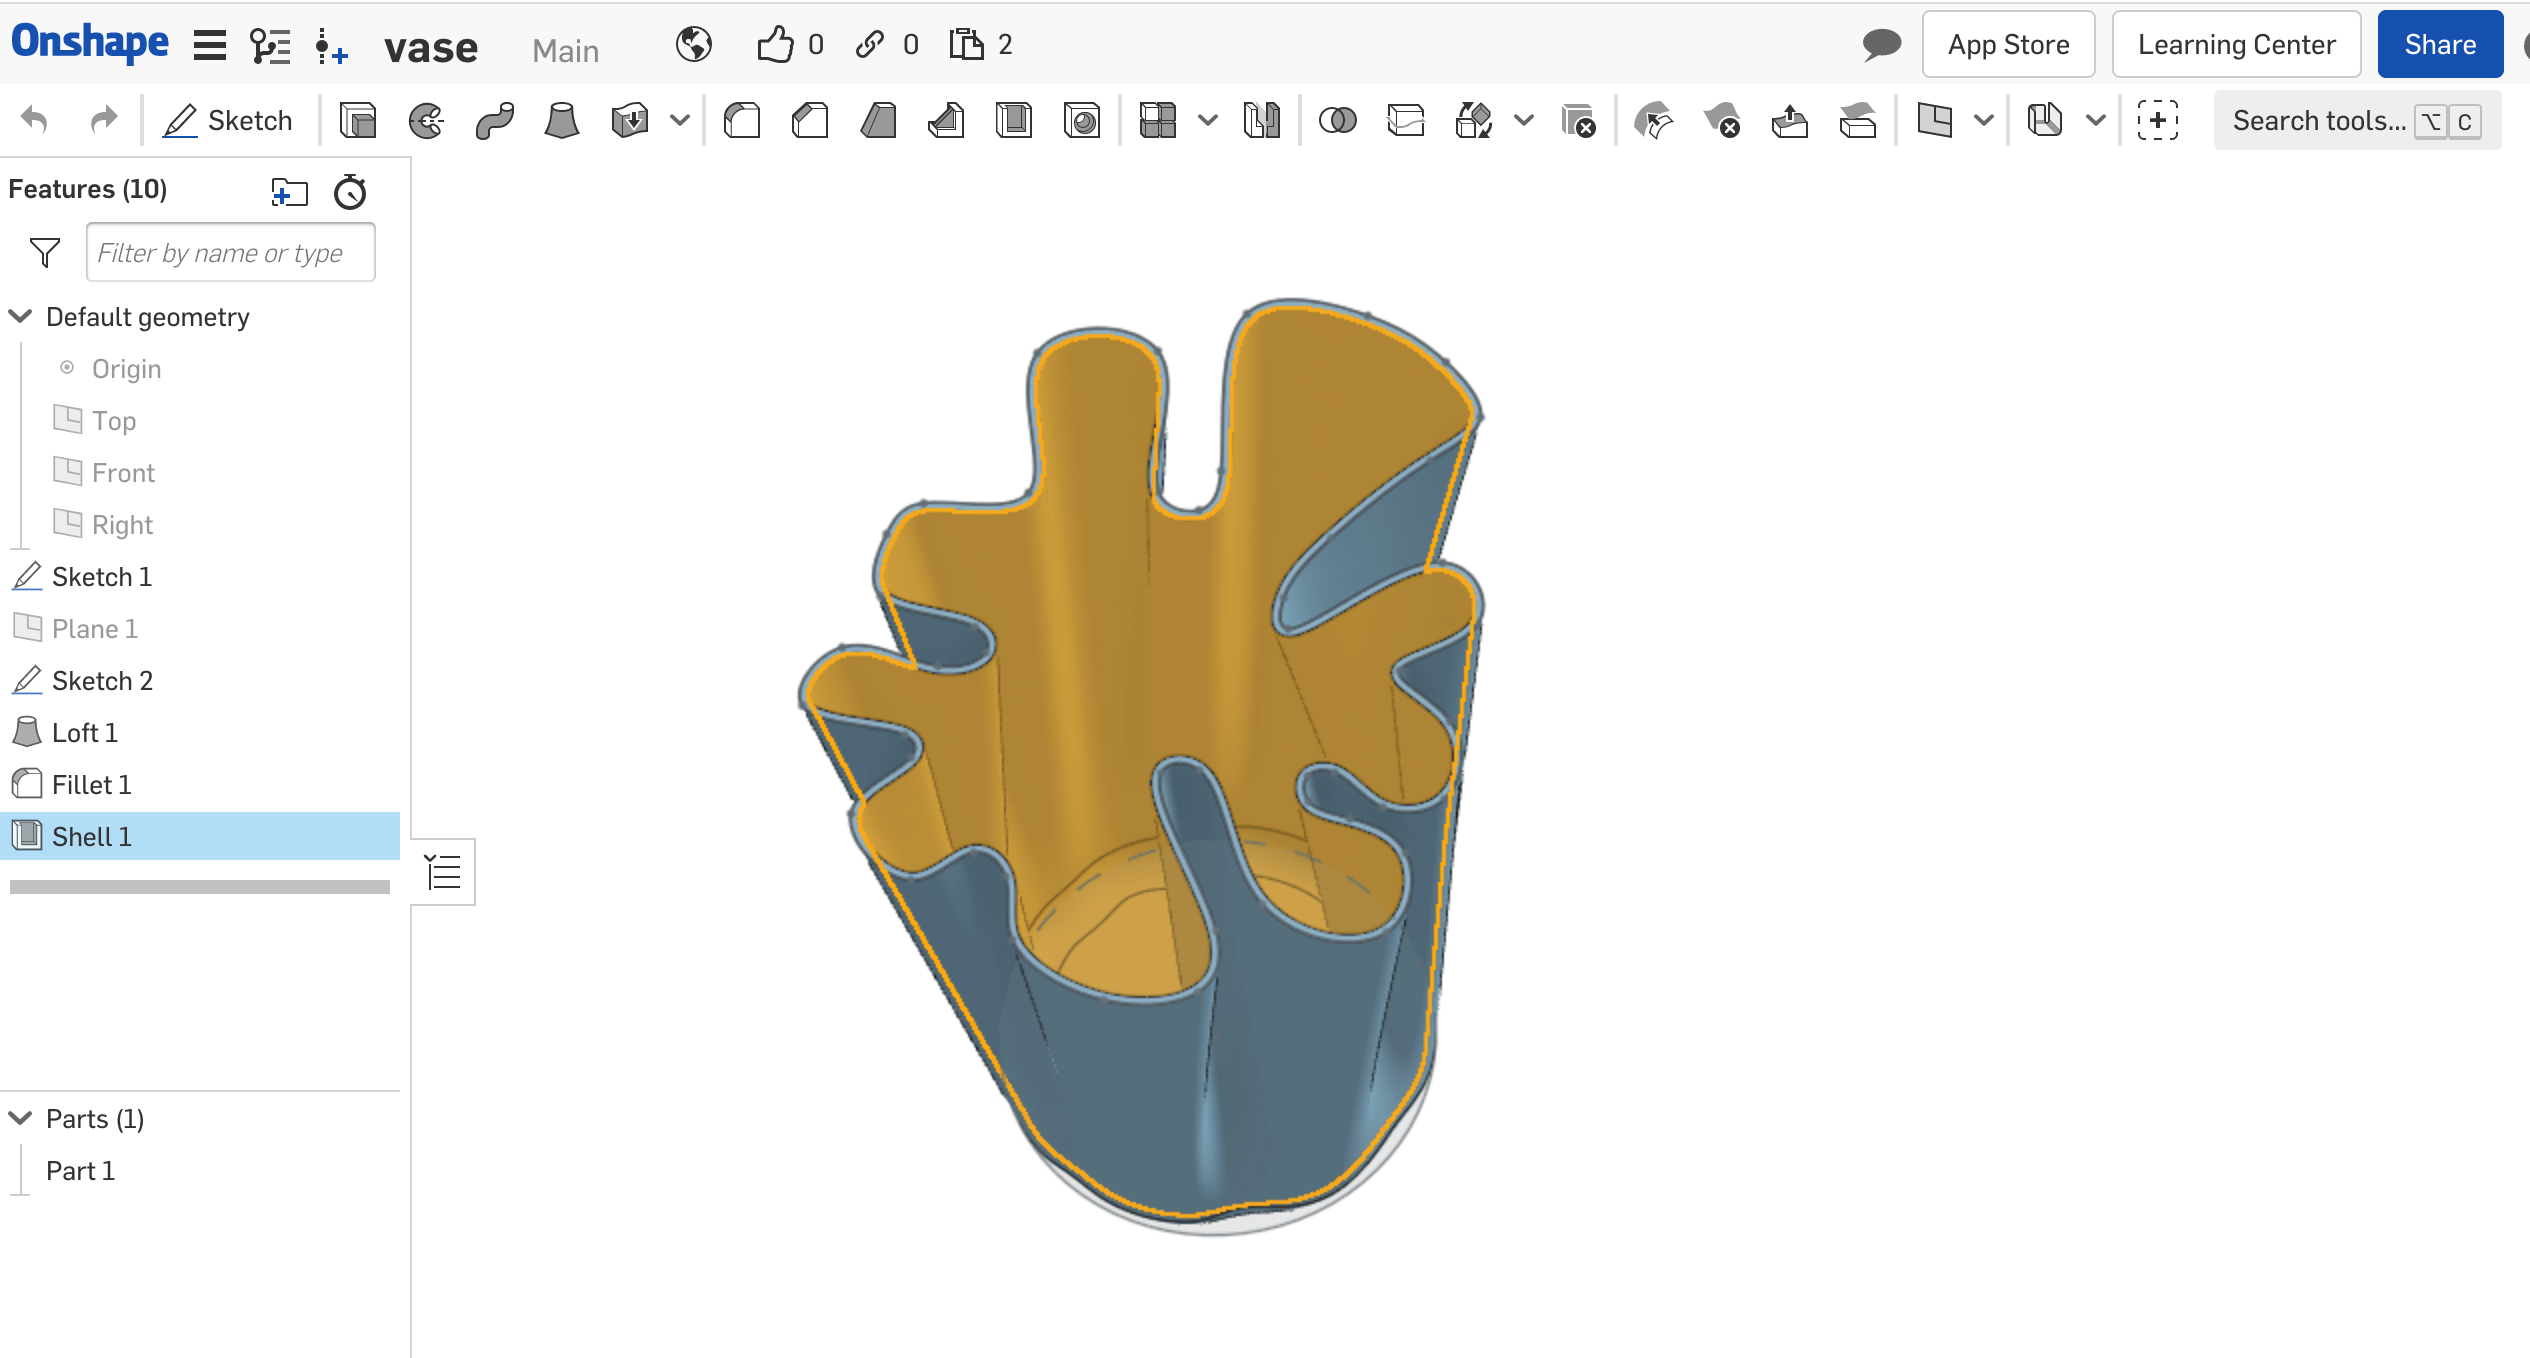
To hollow the vase, I selected the Shell tool, then, I set the shell thickness to 0.9 mm .
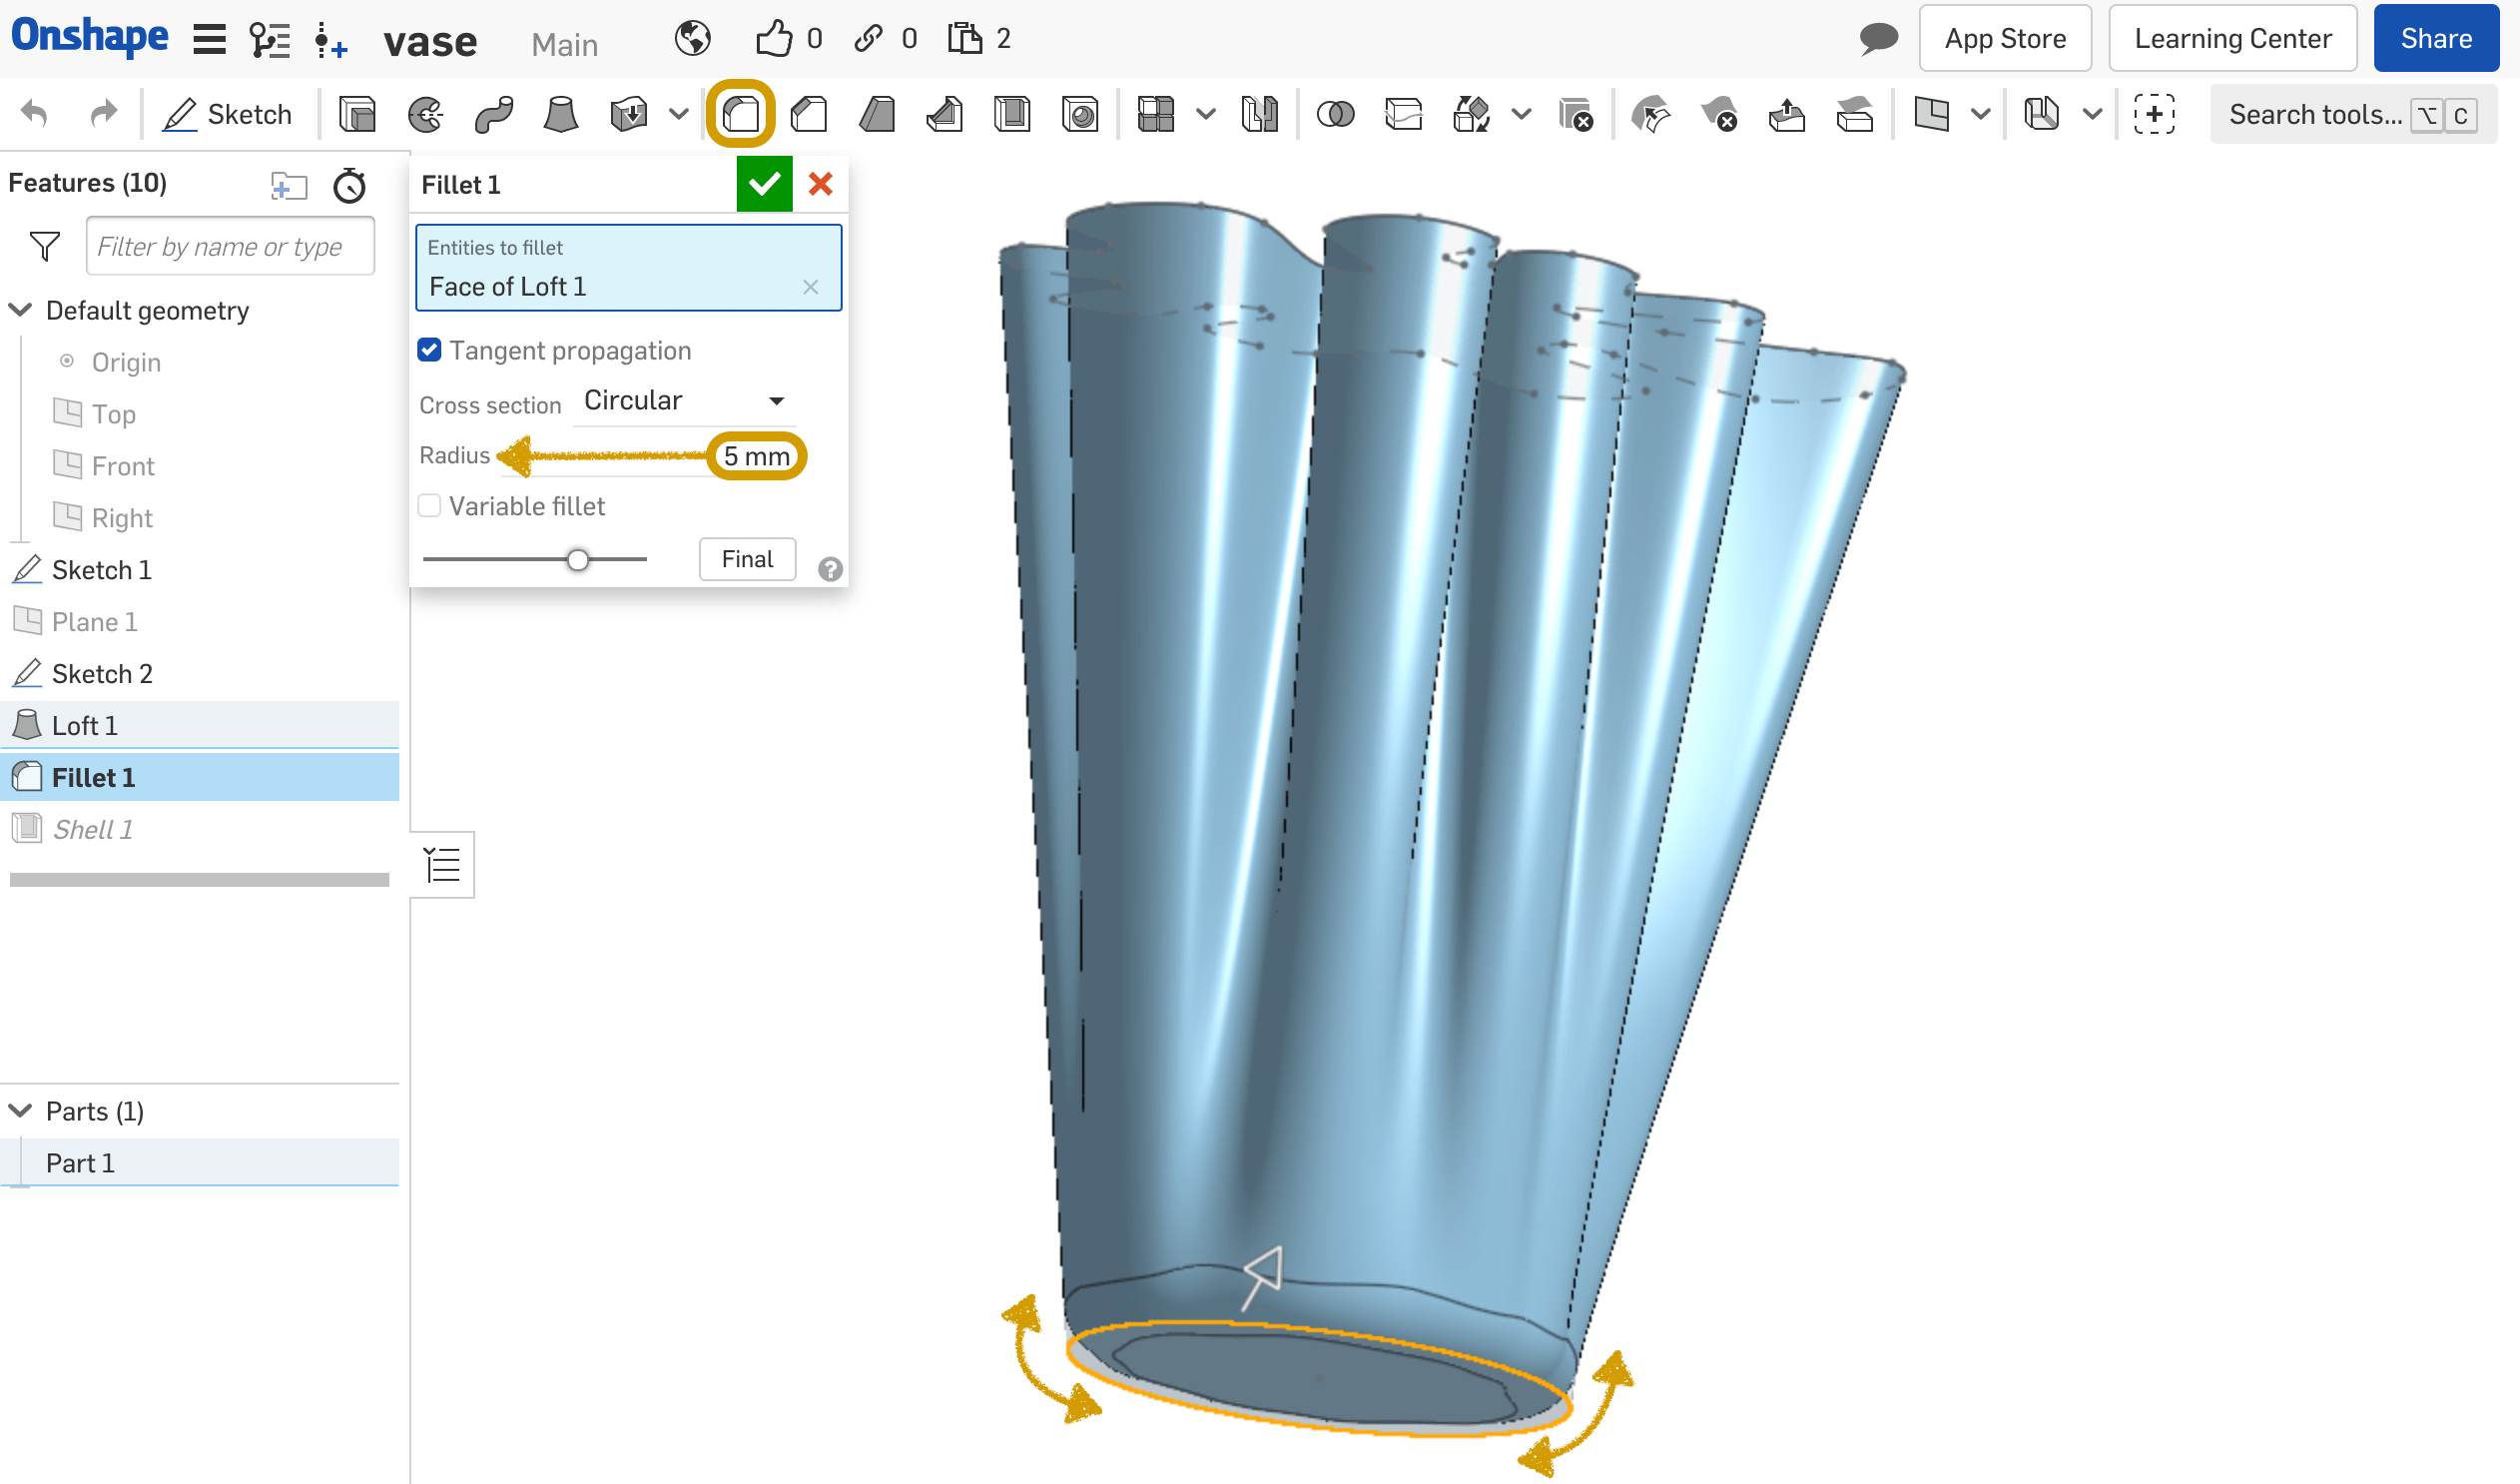
Then, I made the bottom edges curved and rounded by selecting the Fillet tool and change the Radius to 5 mm.
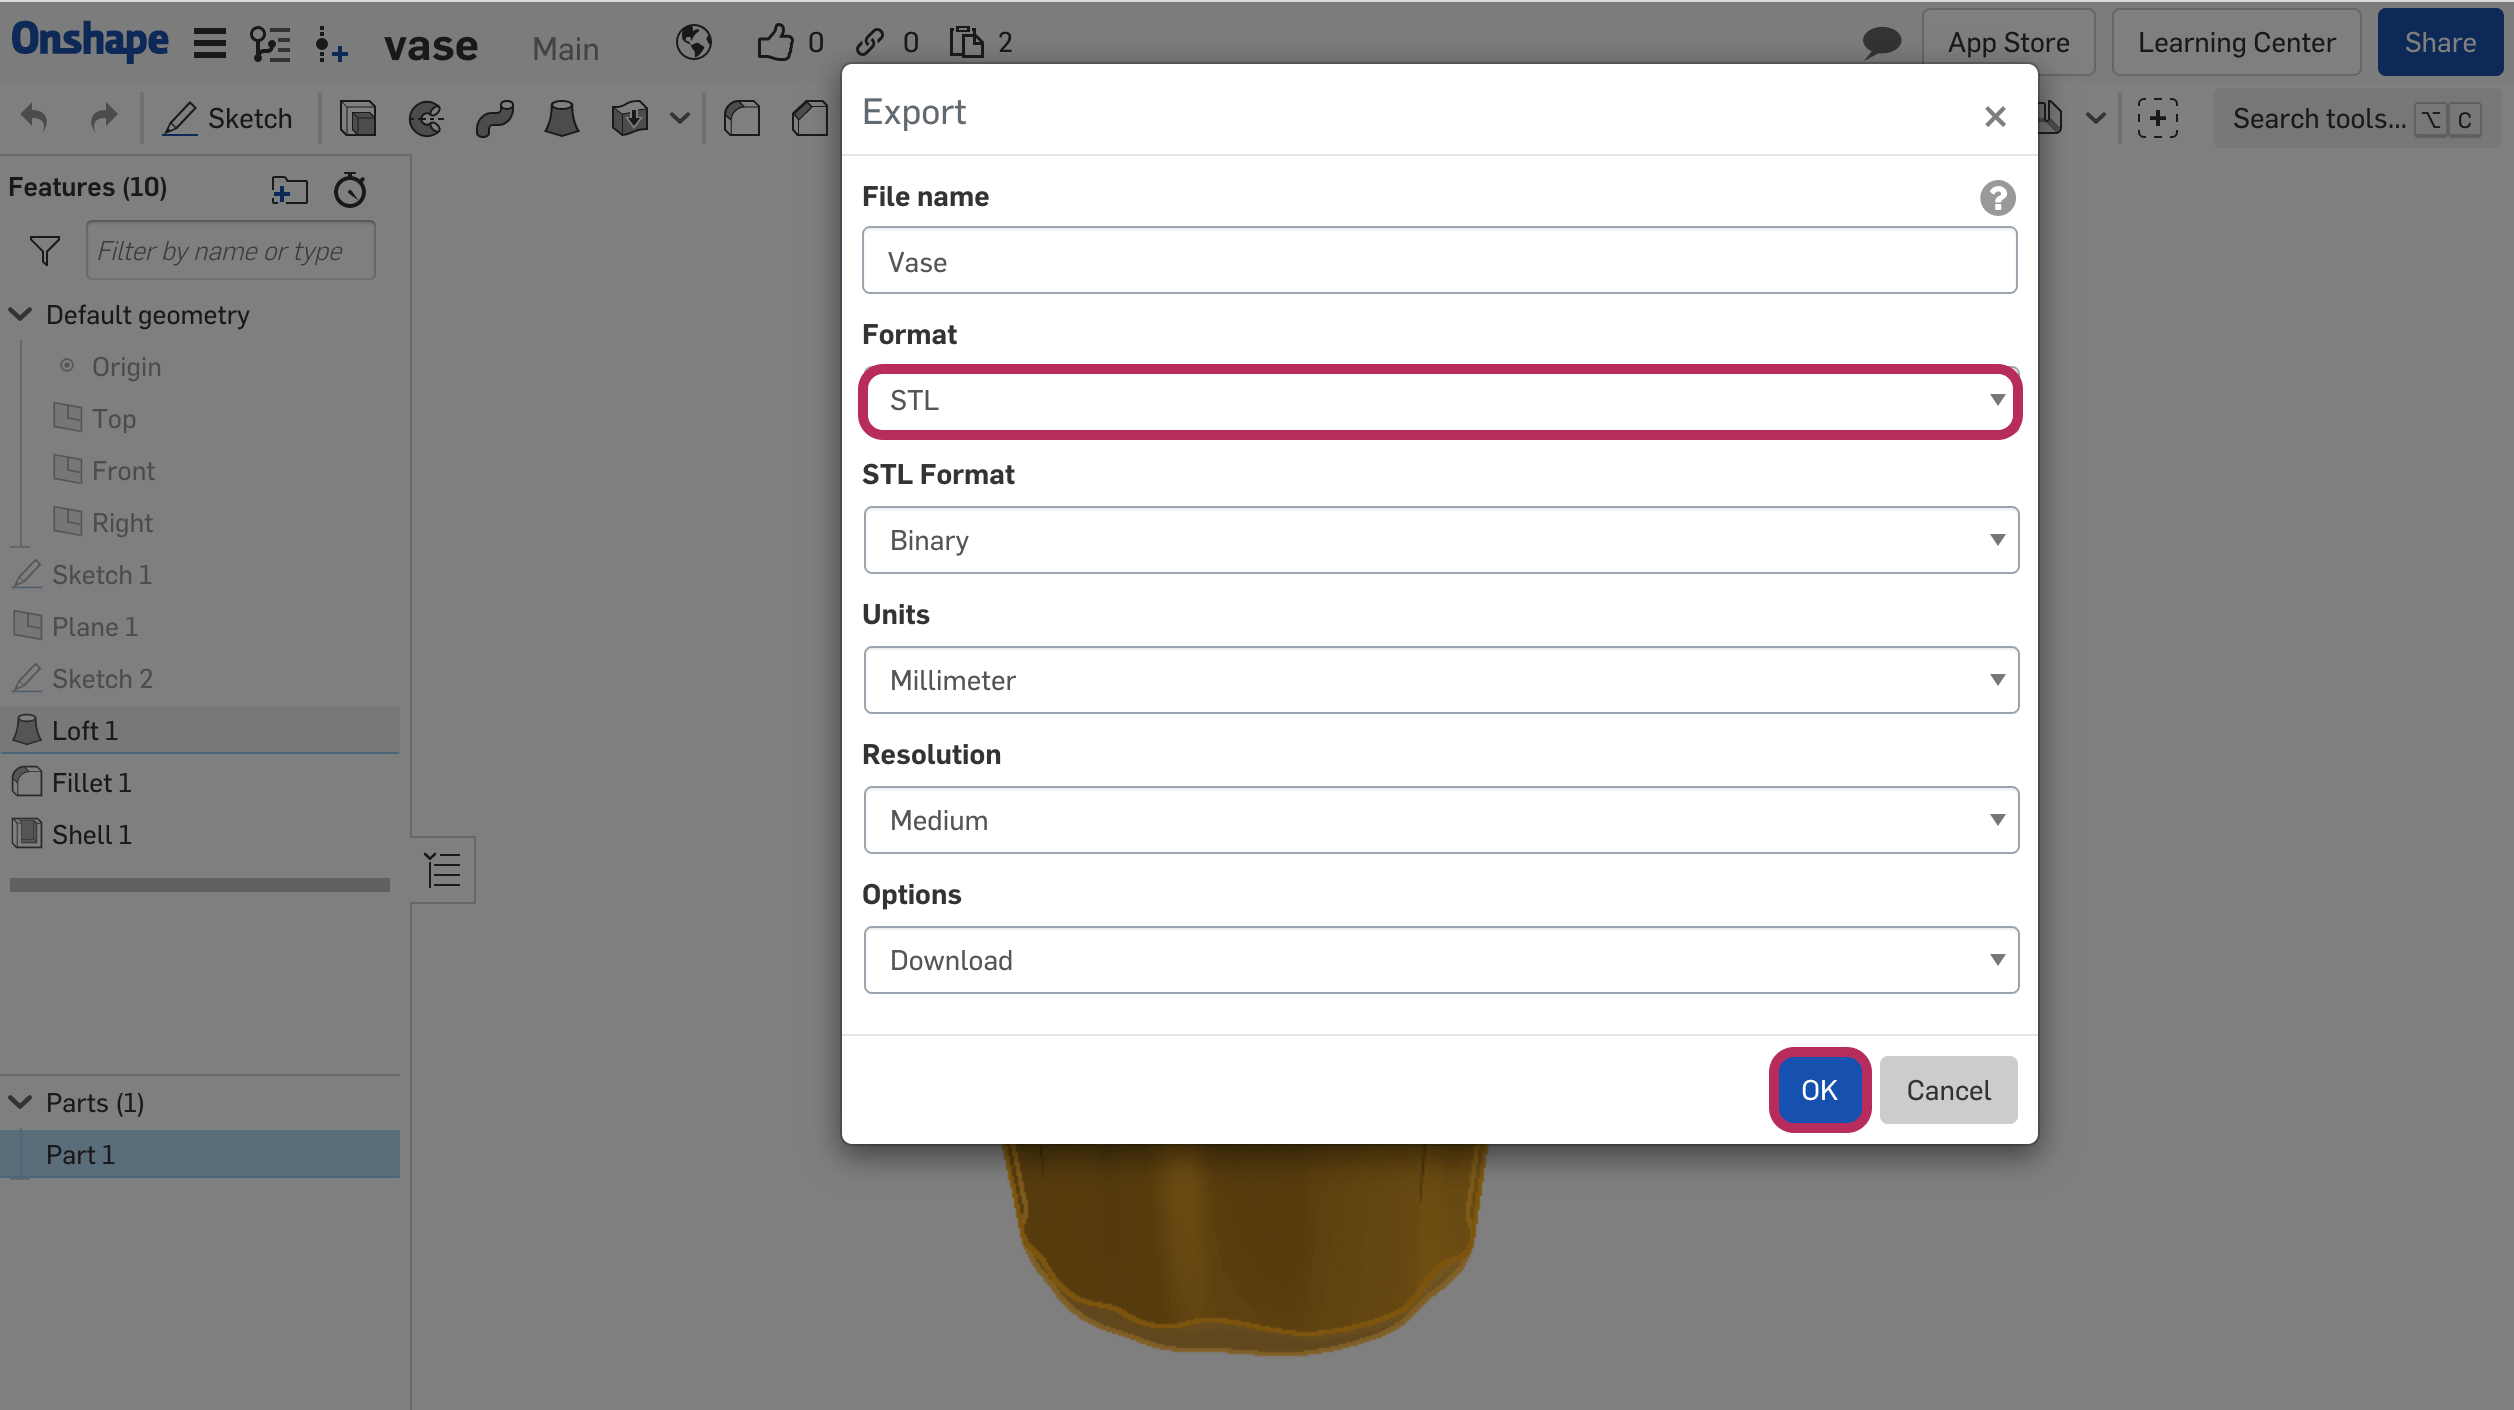
Eventually to print the vase, Right-click on the selected design and choose “Export”.
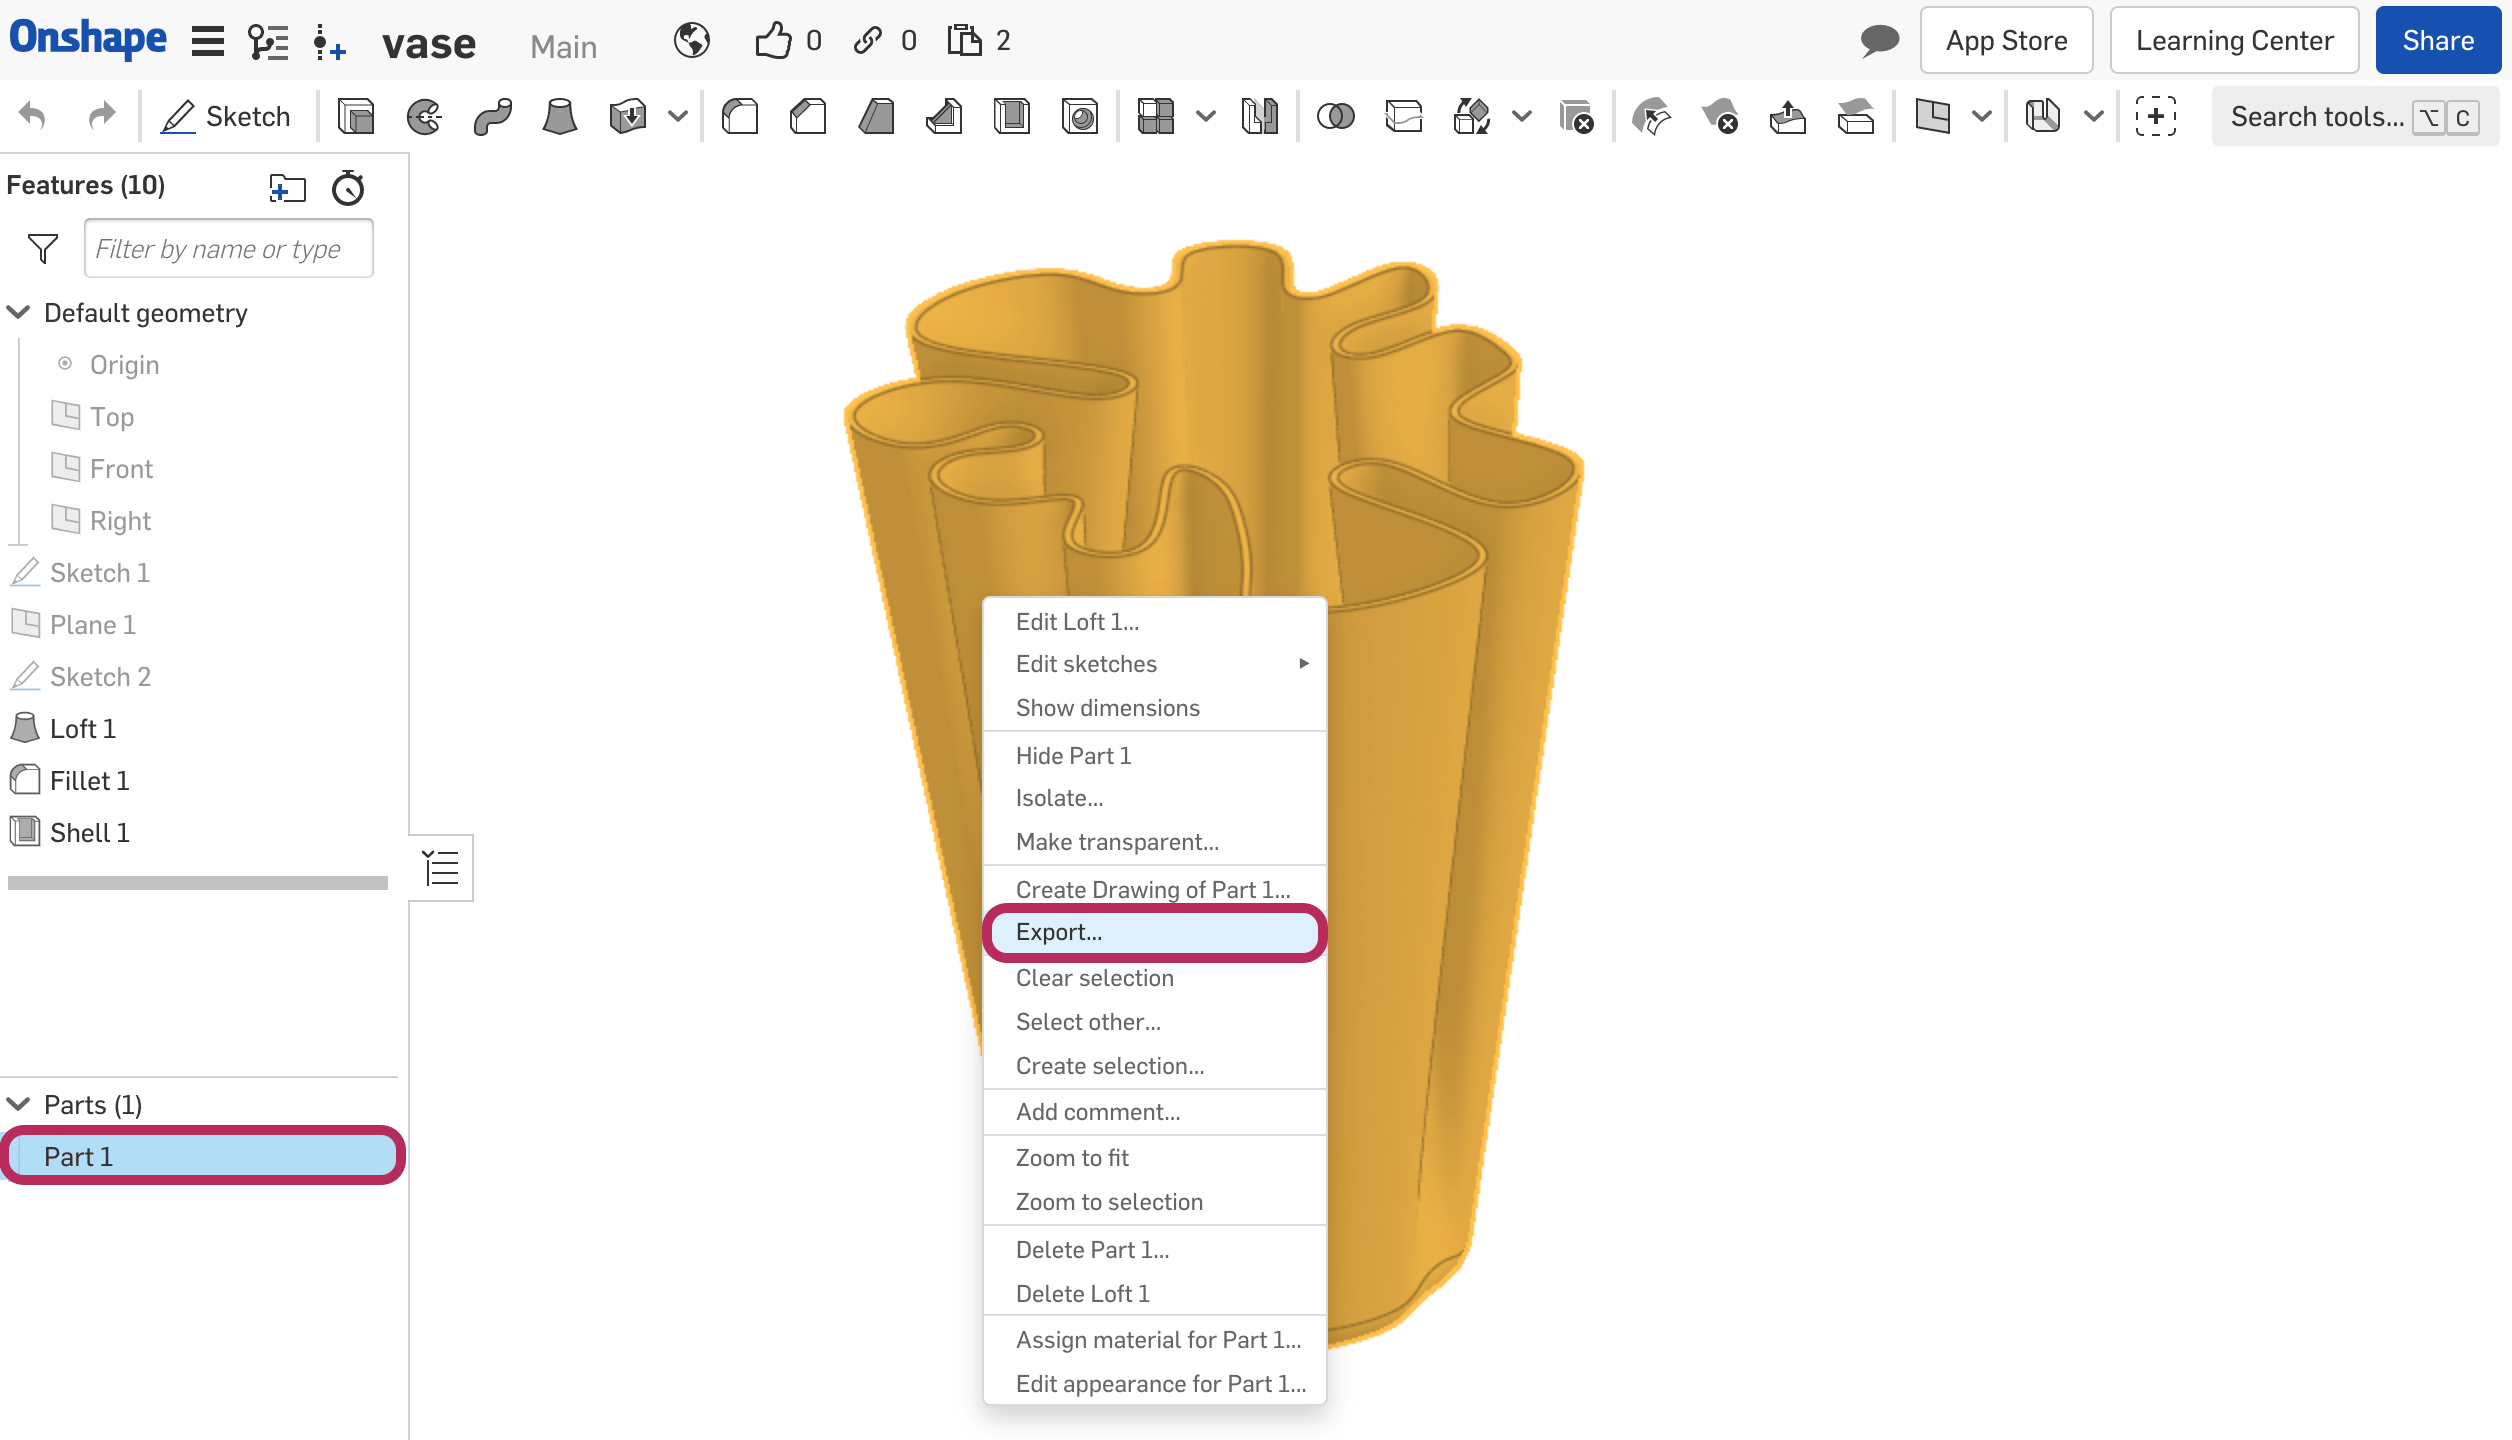
I chose STL format to prepare the design for the print process.
3D printing

Before start printing , I used the PrusaSlicer which is a slicer software and a useful tool that is used to convert and export the (STL, OBJ, AMF) print files for the Original Prusa 3D printer by slicing the model layer by layer and generating G-code files.
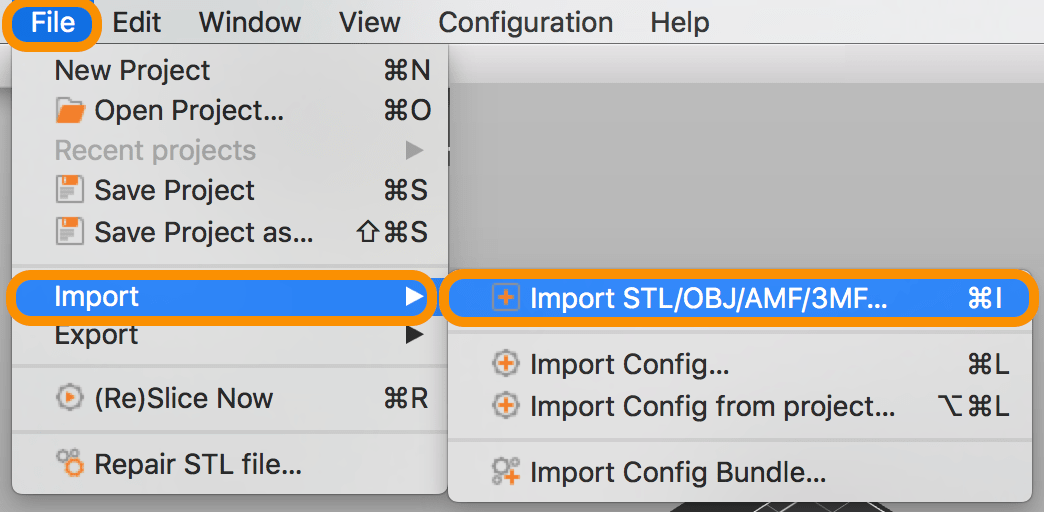
To import the print file to PrusaSlicer, I clicked on File > Import > Import STL.
This is the PrusaSlicer interface. It contains many beneficial features, I will show some basics.
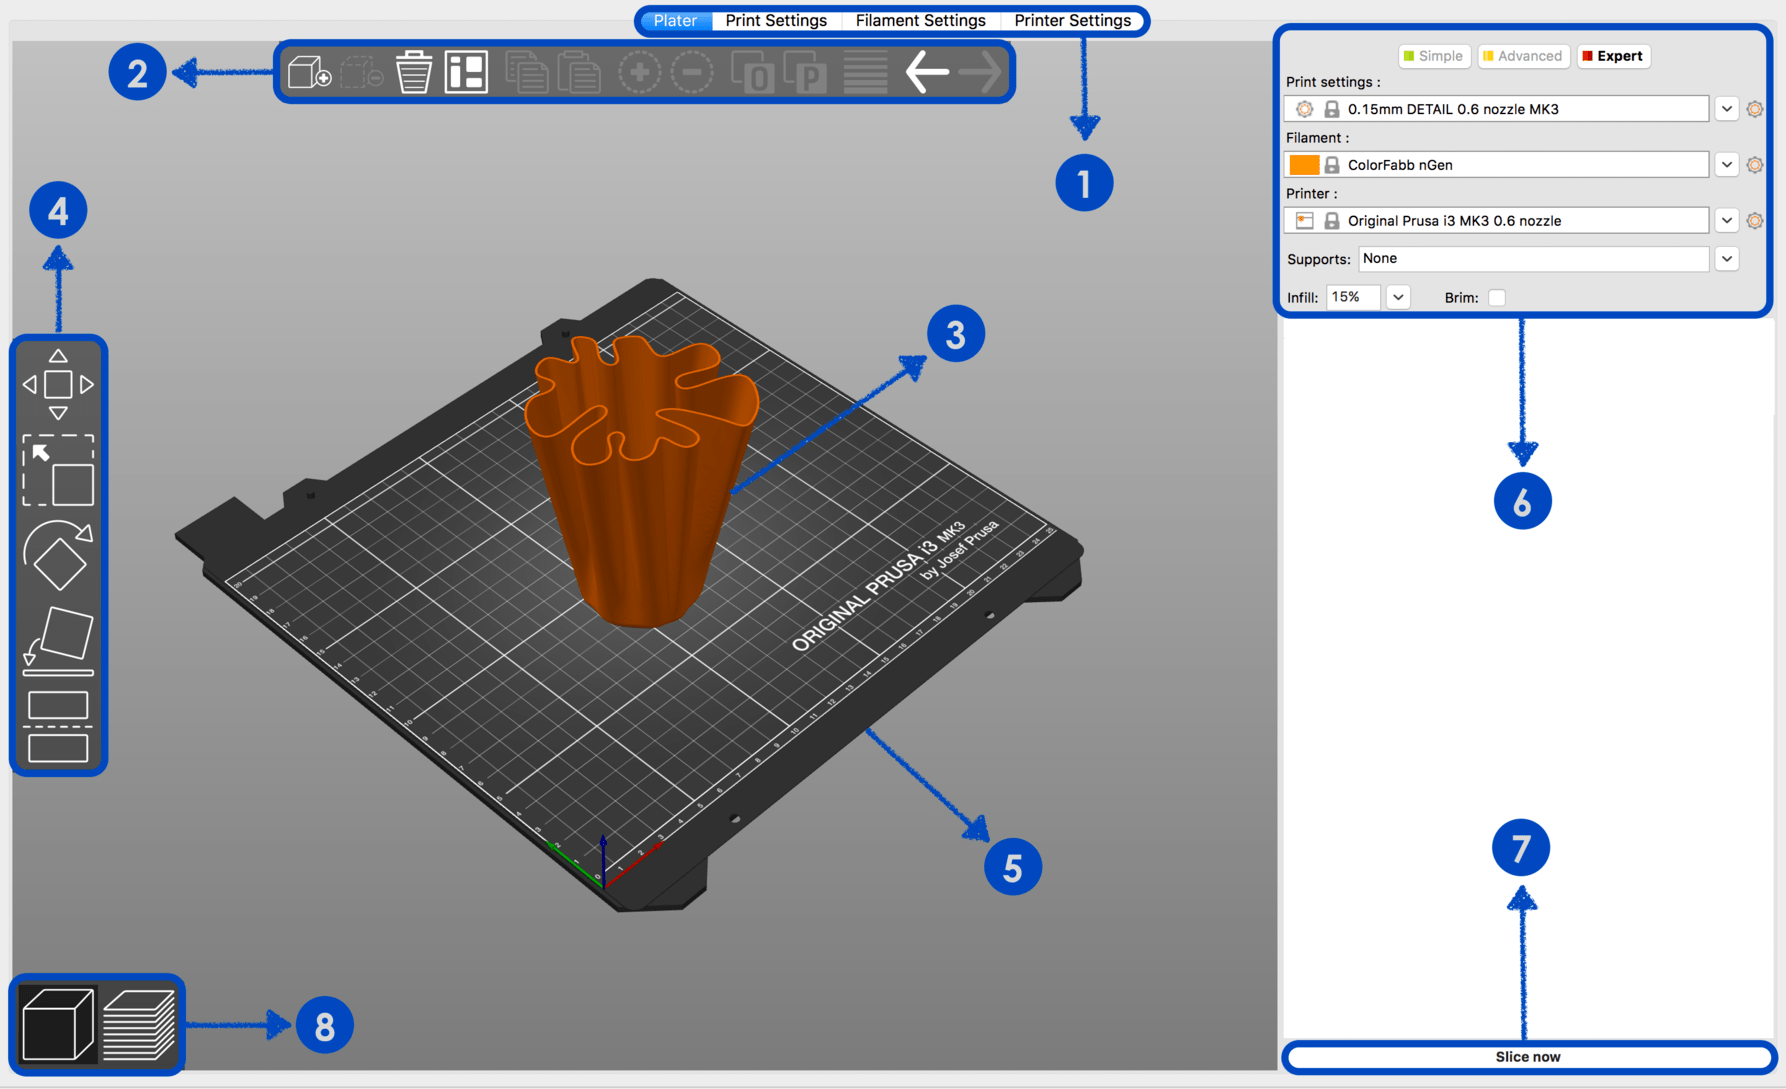
(1) The setting control bar of print, filament and printer.
(2) Top toolbar that includes :
- Add and remove models from the workplace.
- Arranging multiple models.
- Copy, paste, instances one or more models.
- Split the model to objects or parts.
- Defining different layer height in the same mode.
- Undo and redo functions.
(3) Model preview.
(4) Manipulation model toolbar that includes move, scale, rotate, place on face and cut tools.
(5) The workspace for model review.
(6) The main panel that includes three modes, it used to select the printing settings such as filament, printer profile, supports, etc.
Green:
For beginner users.
Yellow:
For advanced users.
Red:
For expert users.
(7) To slice a model and generate the G-code file.
(8) Switch between 3D editor and layers preview.
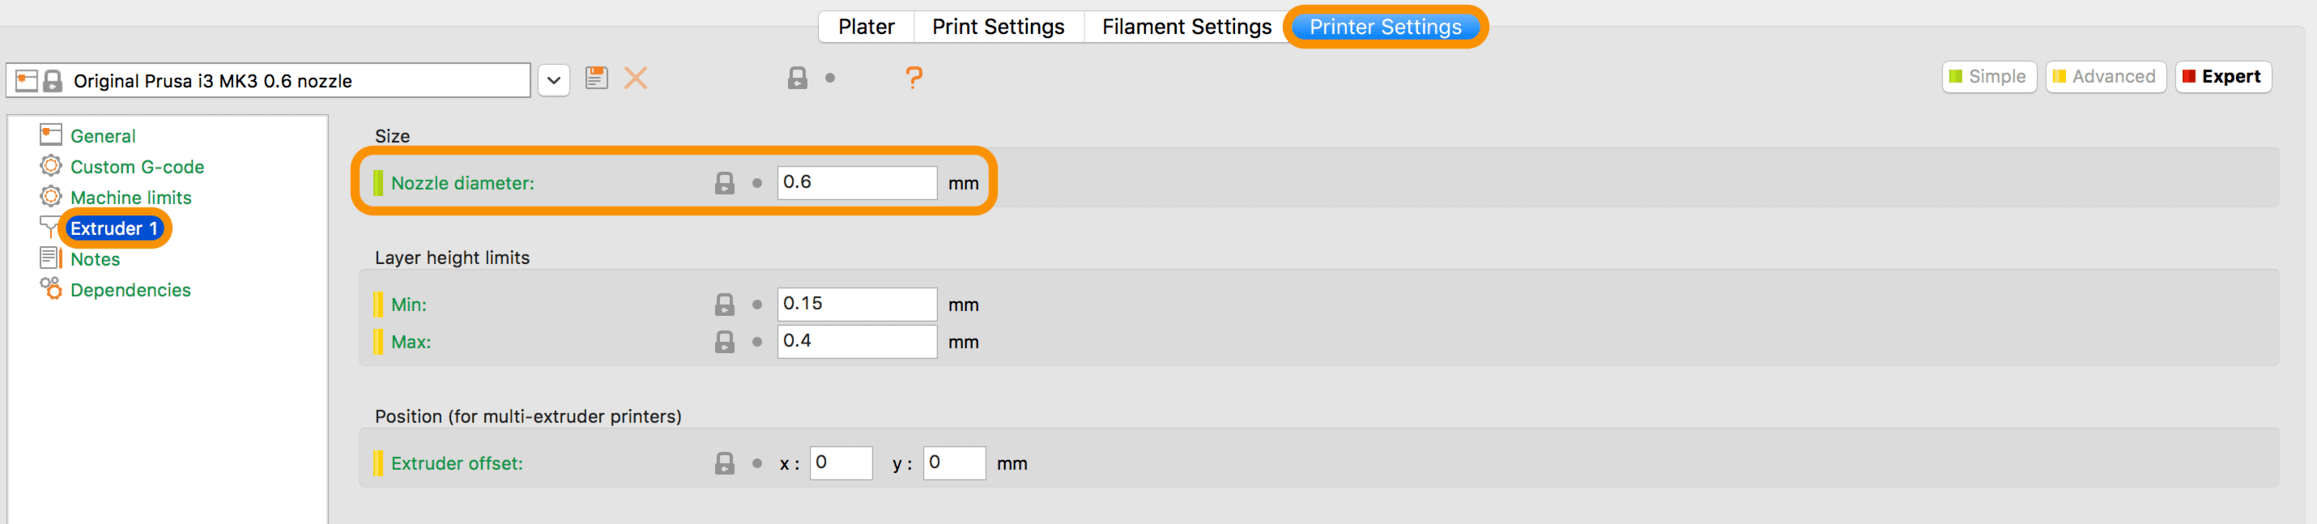
First, I started adjusting the nozzle diameter of the printer to 0.6 mm by clicking on Printer settings > Extruder 1 > Nozzle diameter.
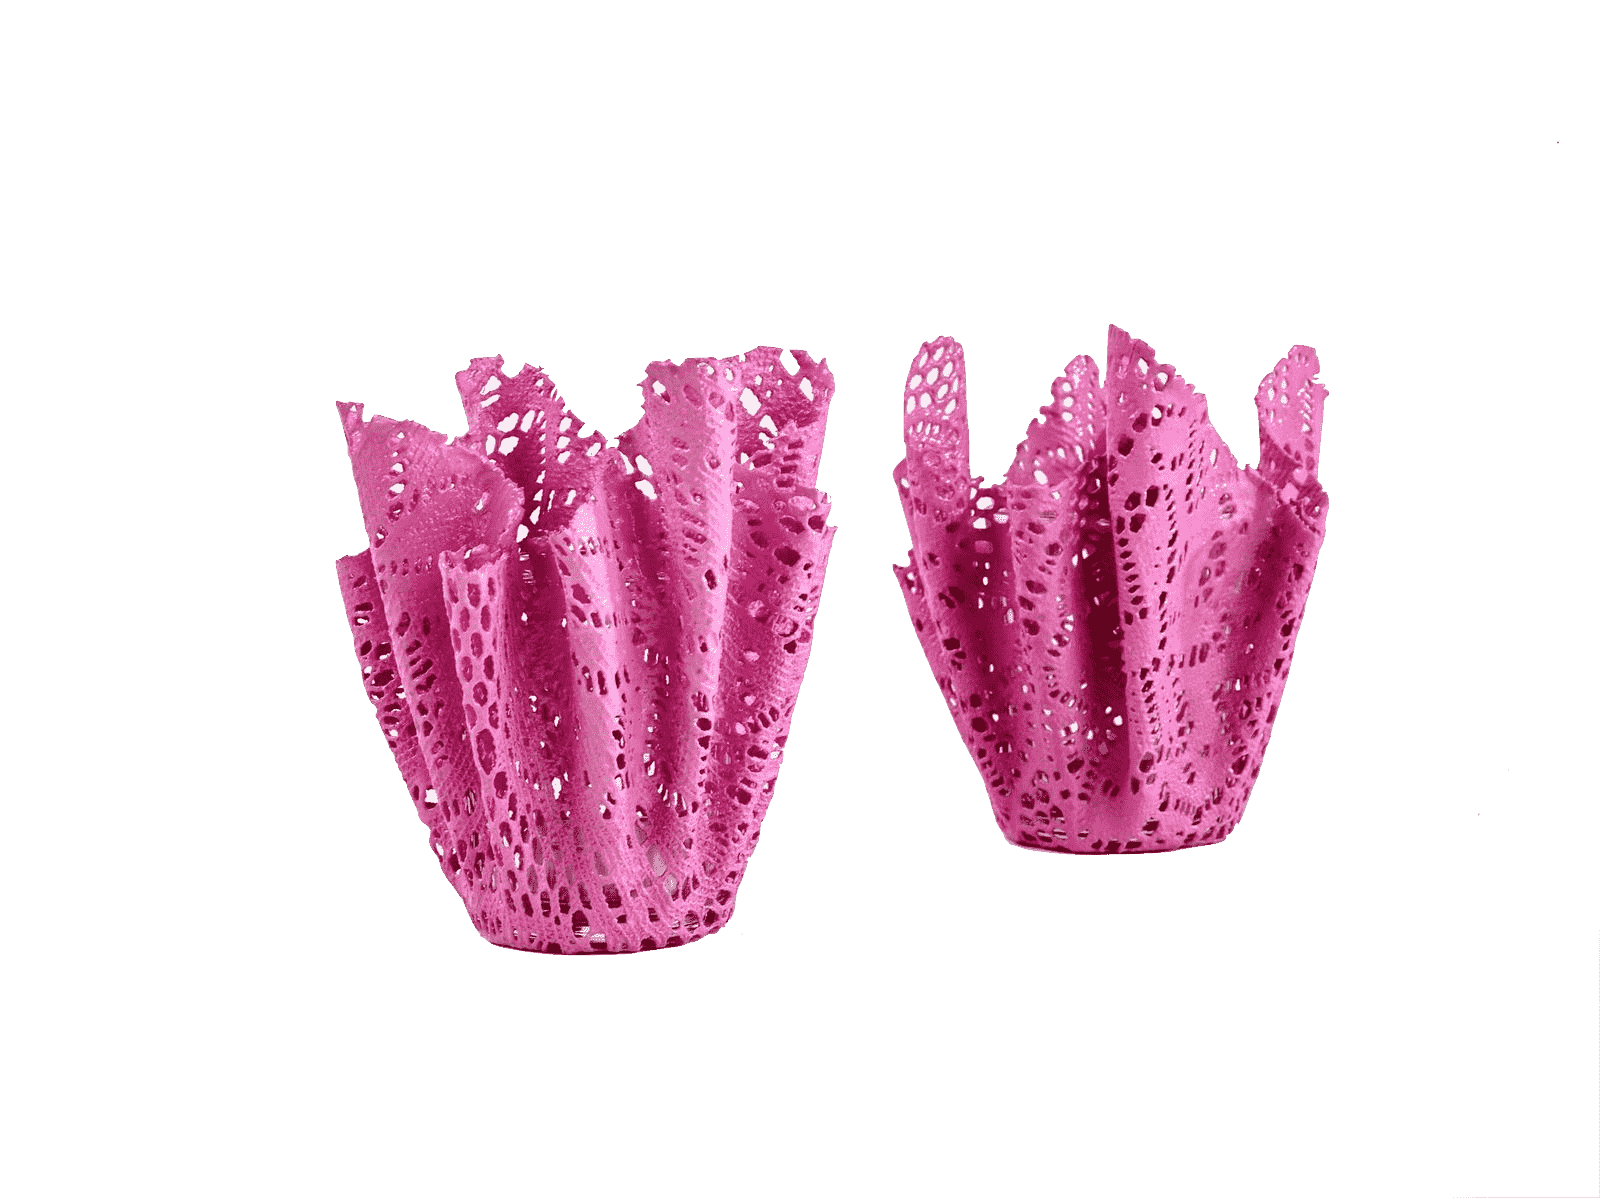
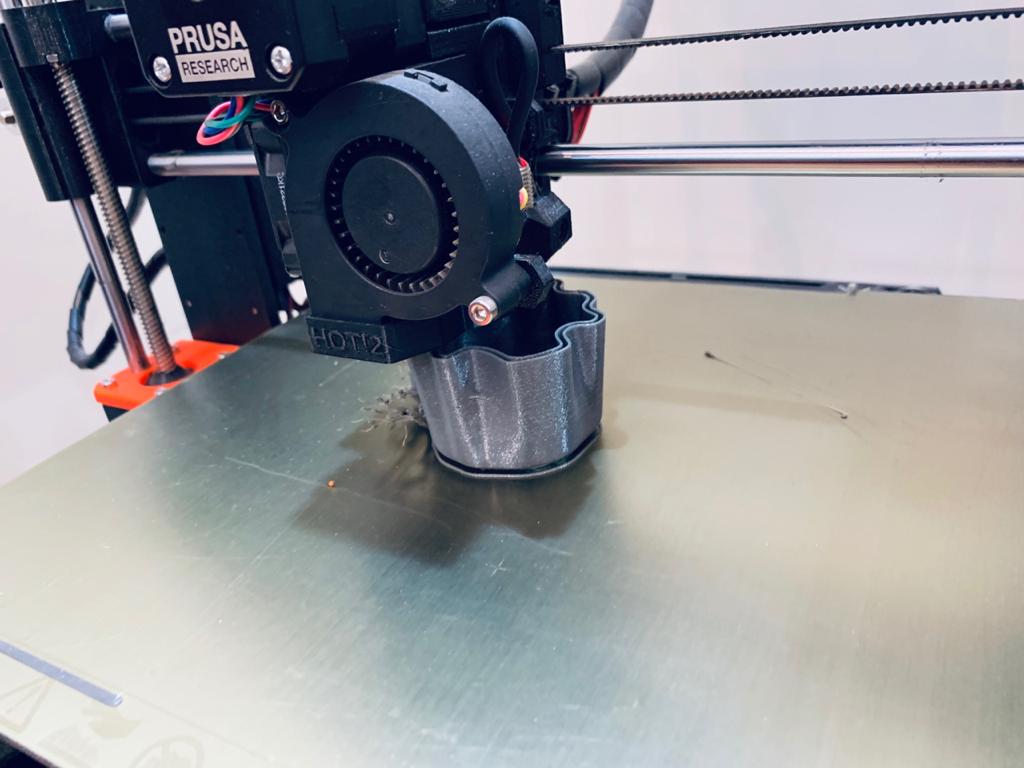
By mistake I forgot that my vase design is already hollow, but I selected the Spiral vase mode which transforms any solid model into a container by removing the top solid layers and making the infill value equal zero.
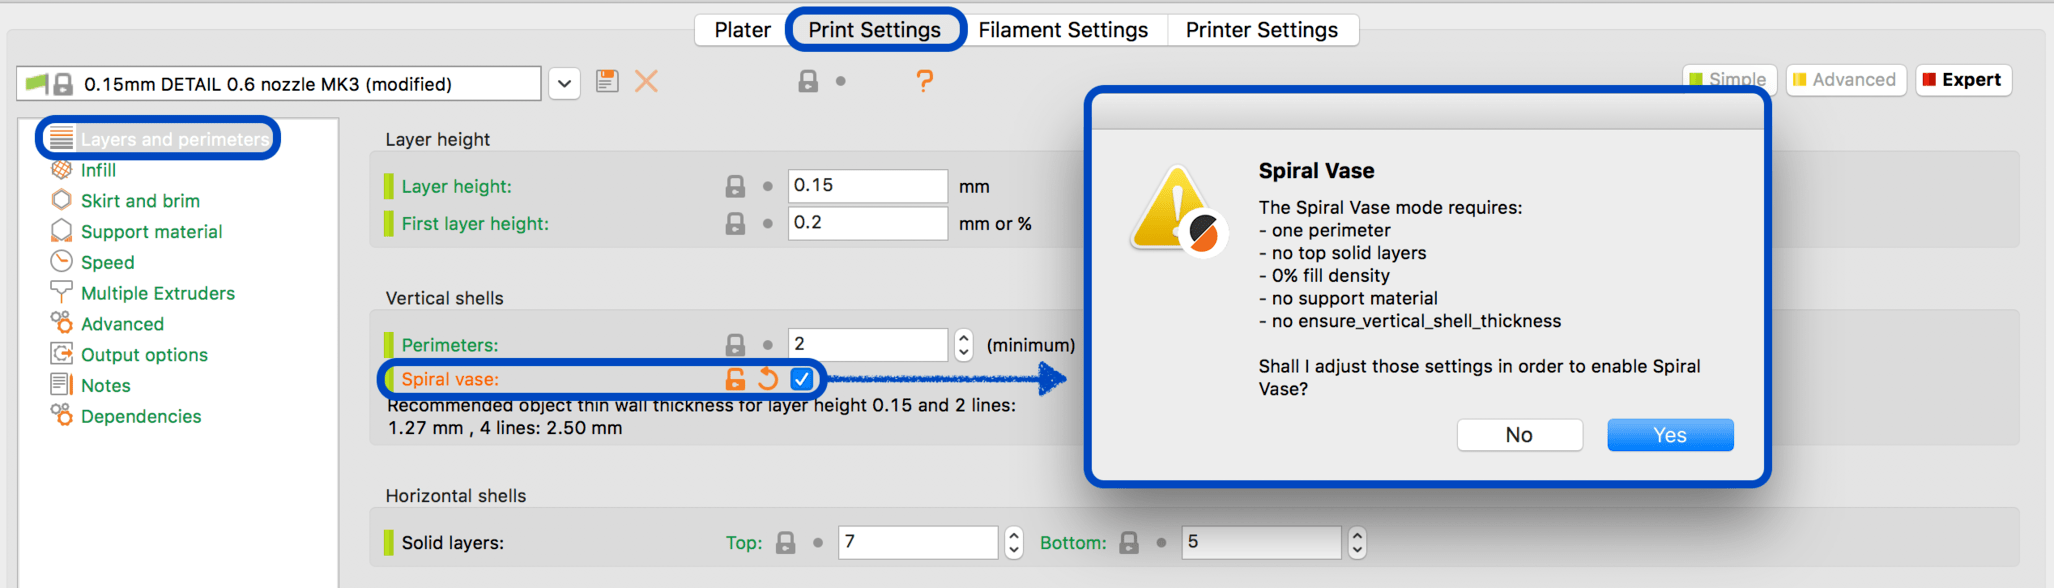
hmm .. I am curious to know what is the result of this mistake ? so, I will try to print it because why not !
Printing time !
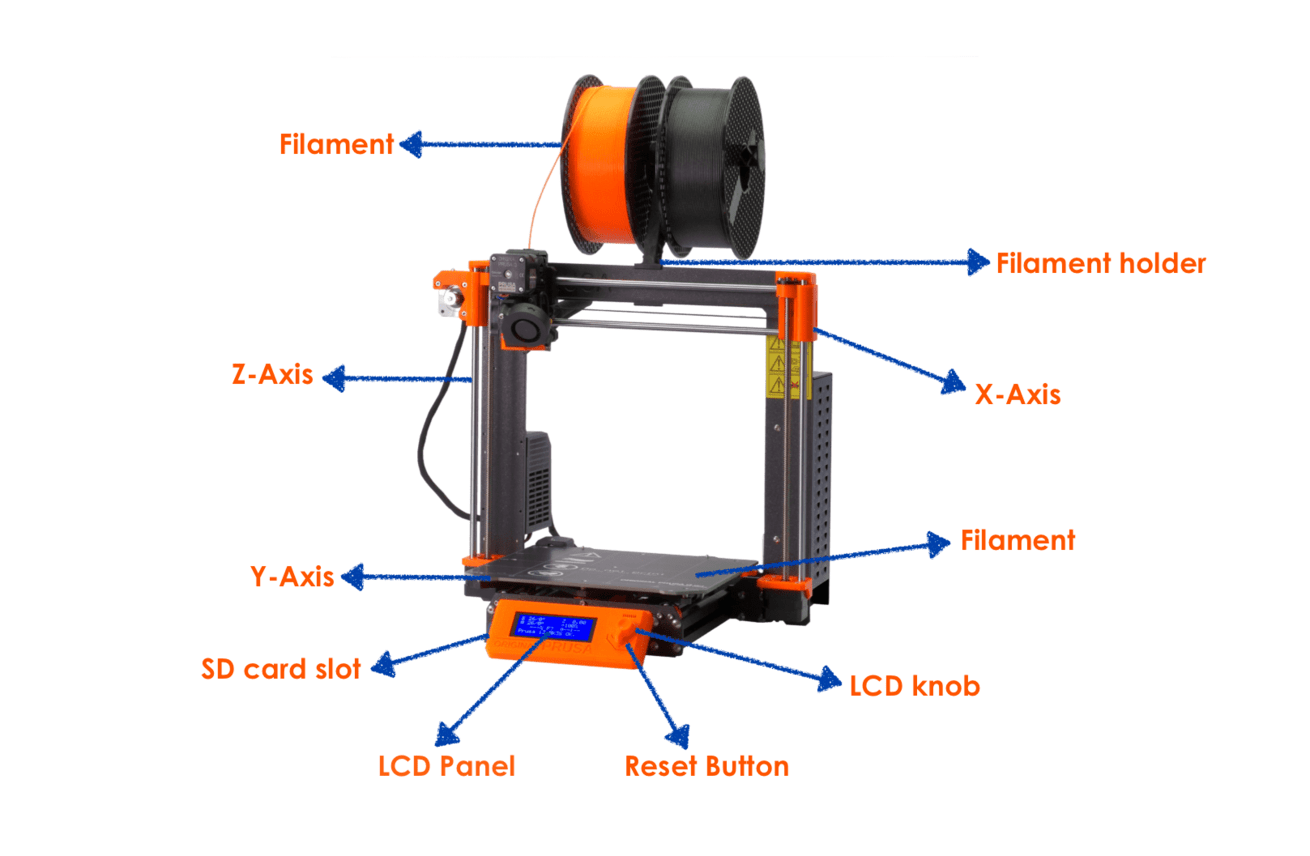
For printing, I used the Original Prusa i3 MK3 that I founded in the TalentS LAB. These are the basic parts of the printer:
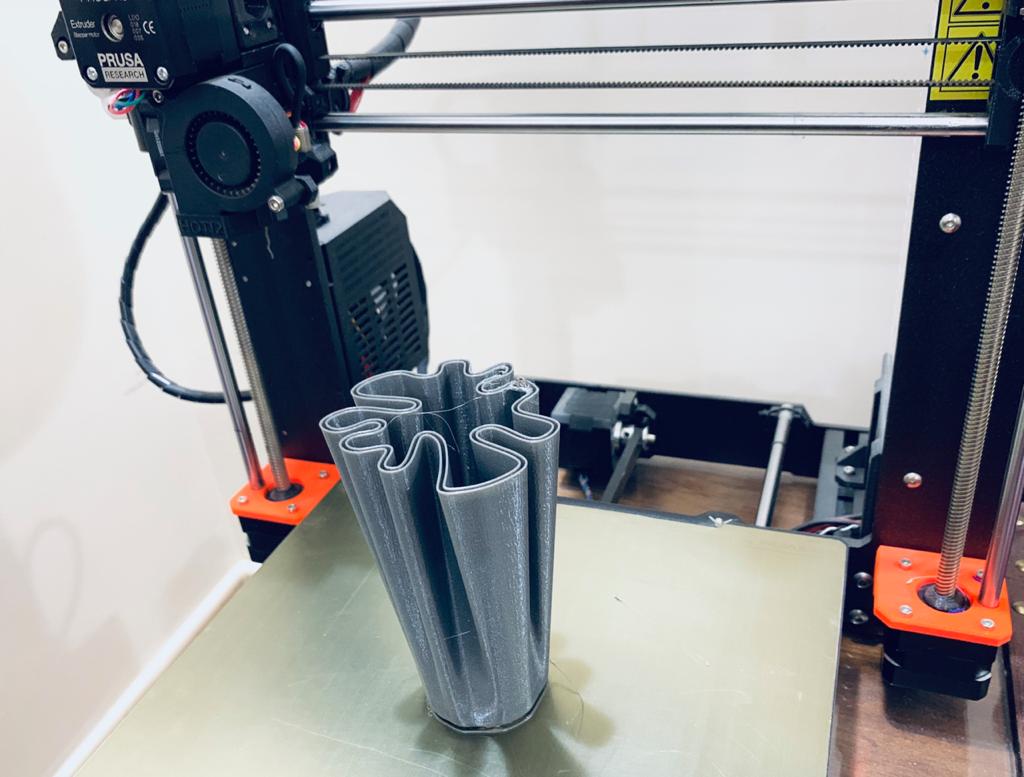
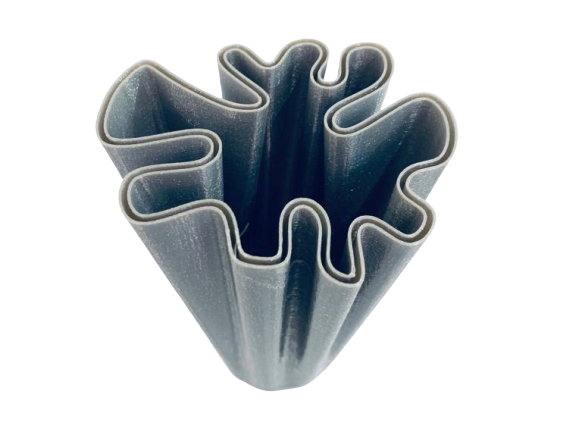
The Result :
3D Scanning

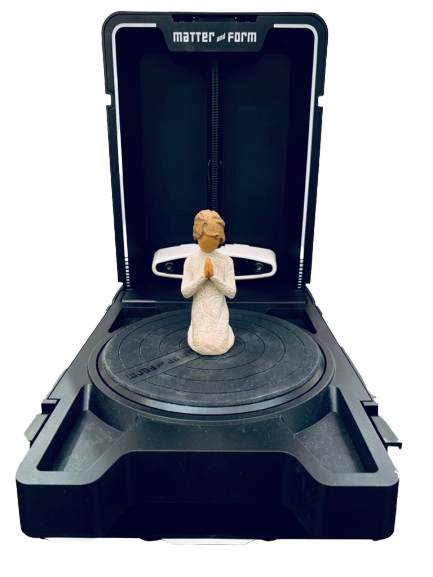
To scan 3D objects, I used the Form and Matter 3D Scanner which I did not use before.
To start scanning:

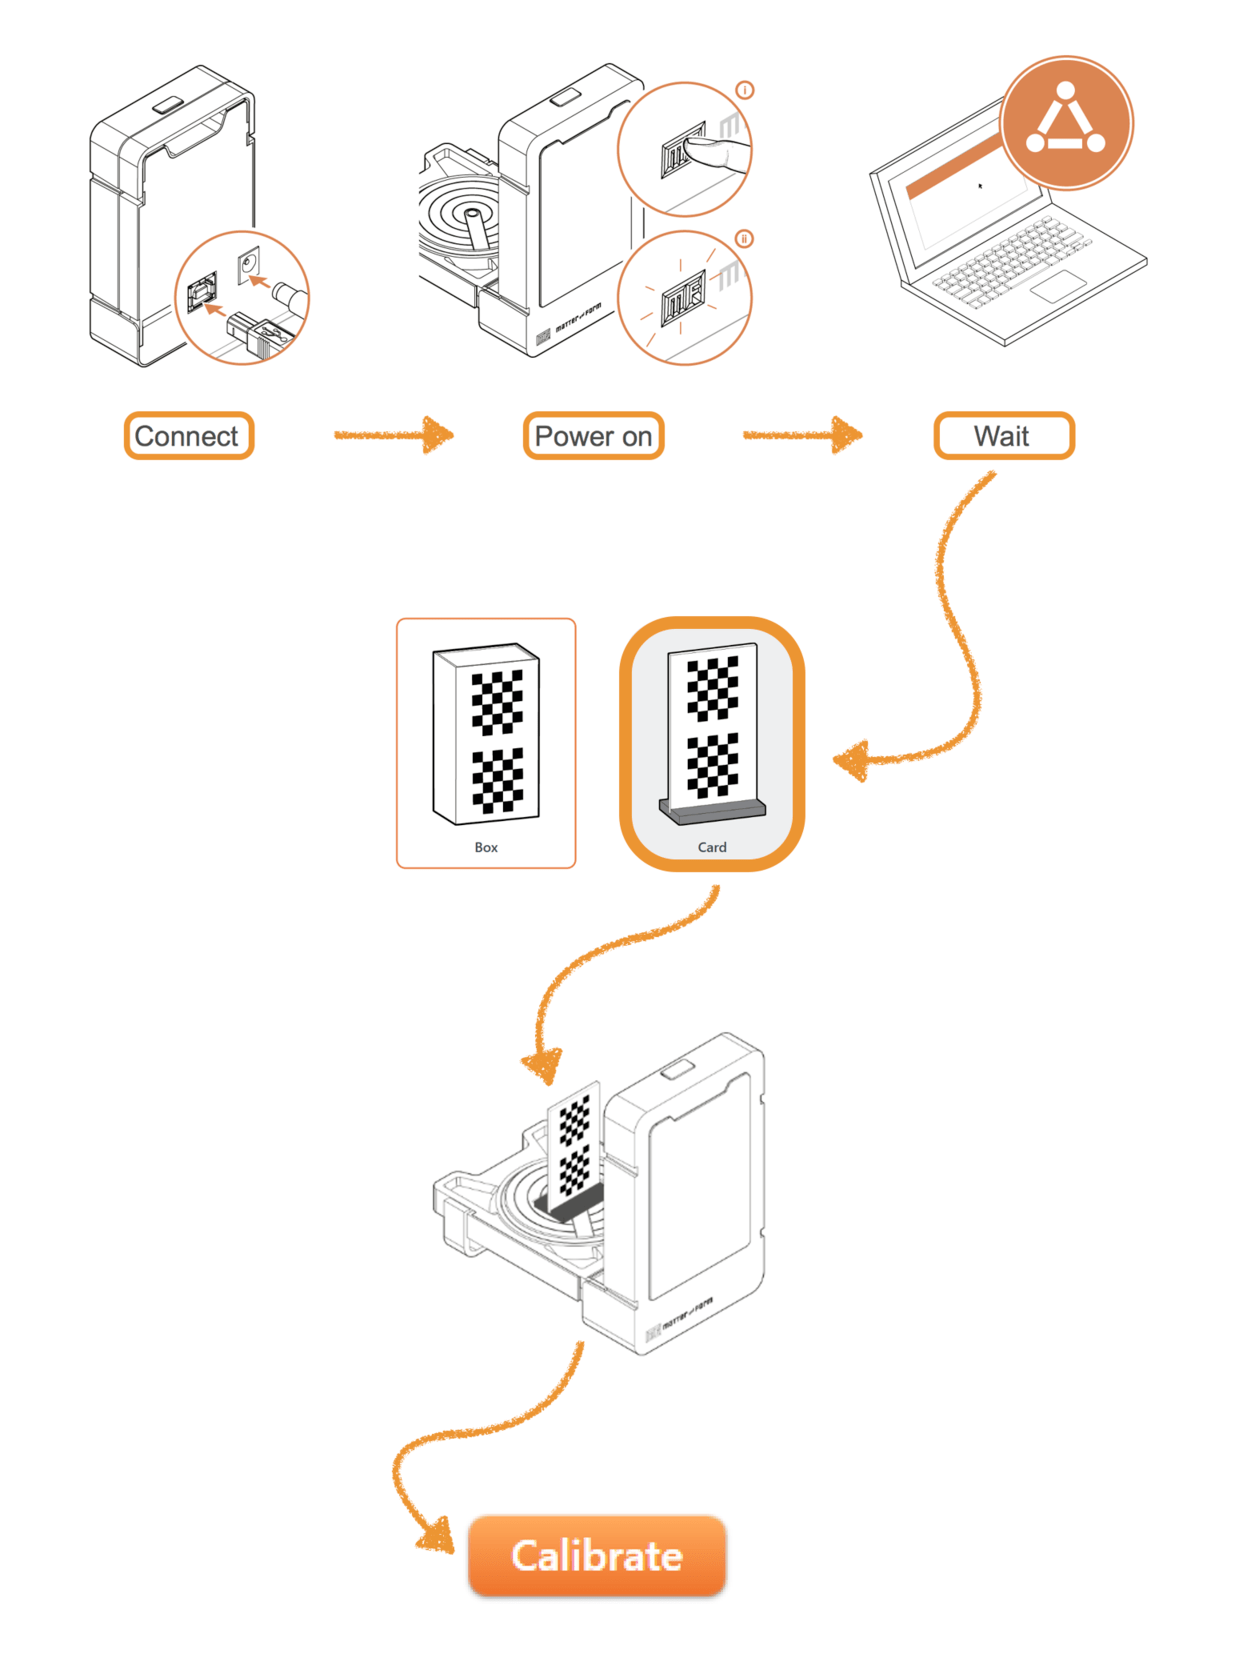
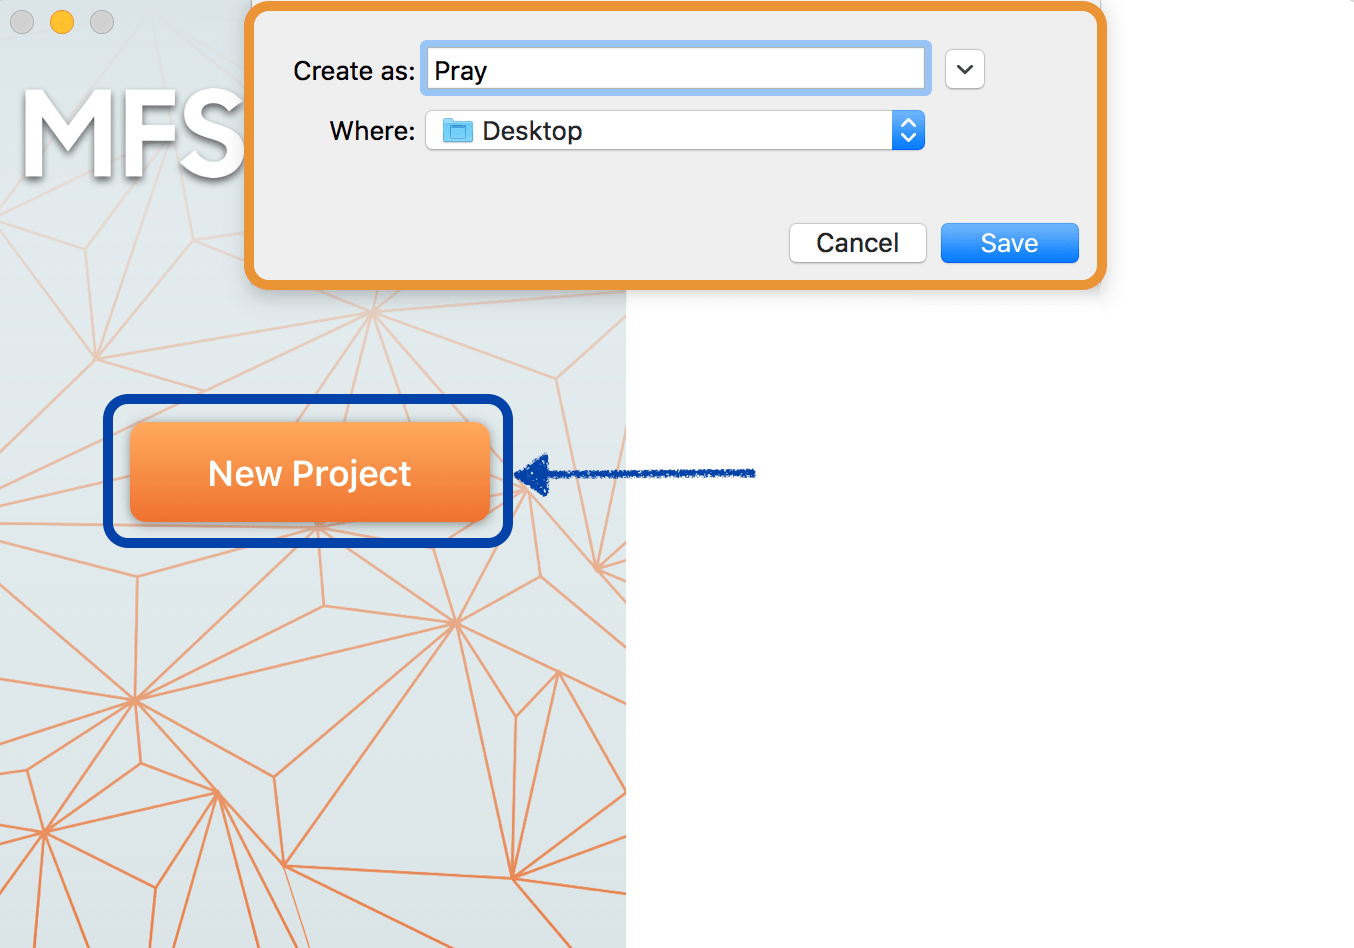
At first, I downloaded the MFStudio software which is a tool that controls all the setup.Then, I connected the scanner machine to the computer and clicked the power button.
To calibrate the scanner, I chose to use the card then I placed it on the center of the bed and pressed the calibrate button to start the calibration process.
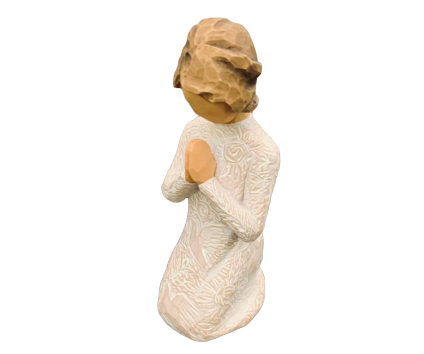
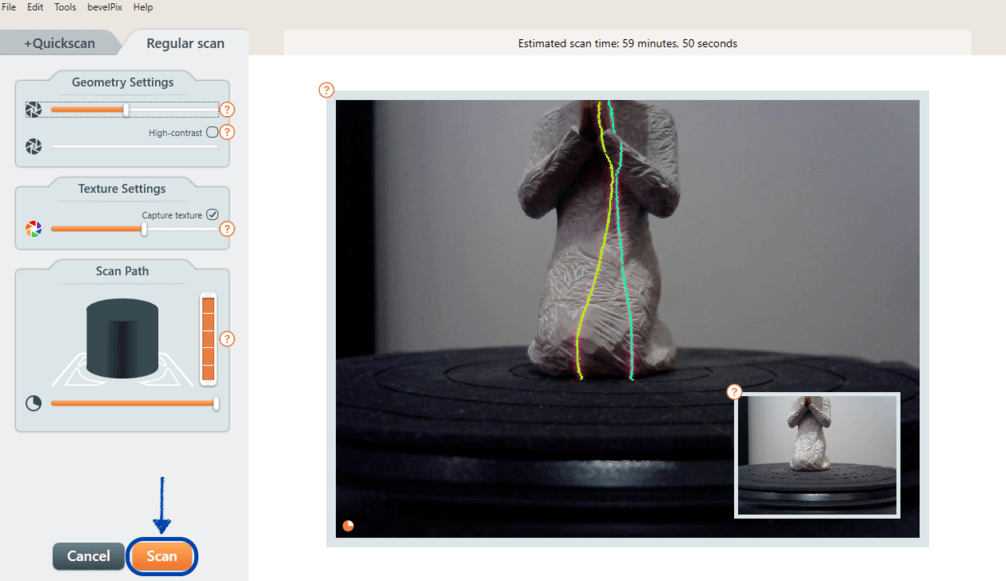
After successful calibration, I chose to scan this figurine which is called “ Prayer of Peace “ that reflects my feelings these days. I hope this pandemic ends soon.
#covid-19
As in the calibration process, I placed the figurine on the center of the bed then I clicked on new project > write a name for the project > new scan.
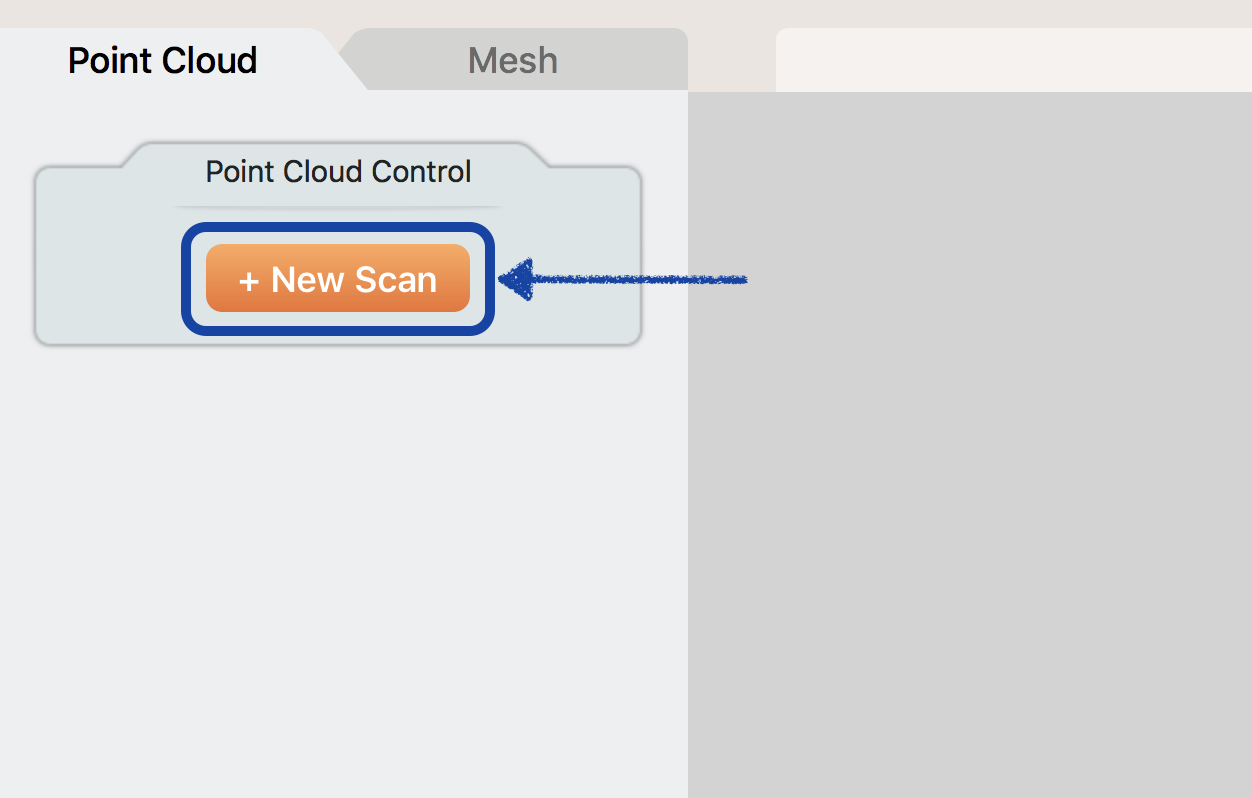
After that, I changed the camera’s exposure by moving the slider in the Geometry settings sidebar to make the lasers more or less visible then I clicked on the Scan button to start scanning.
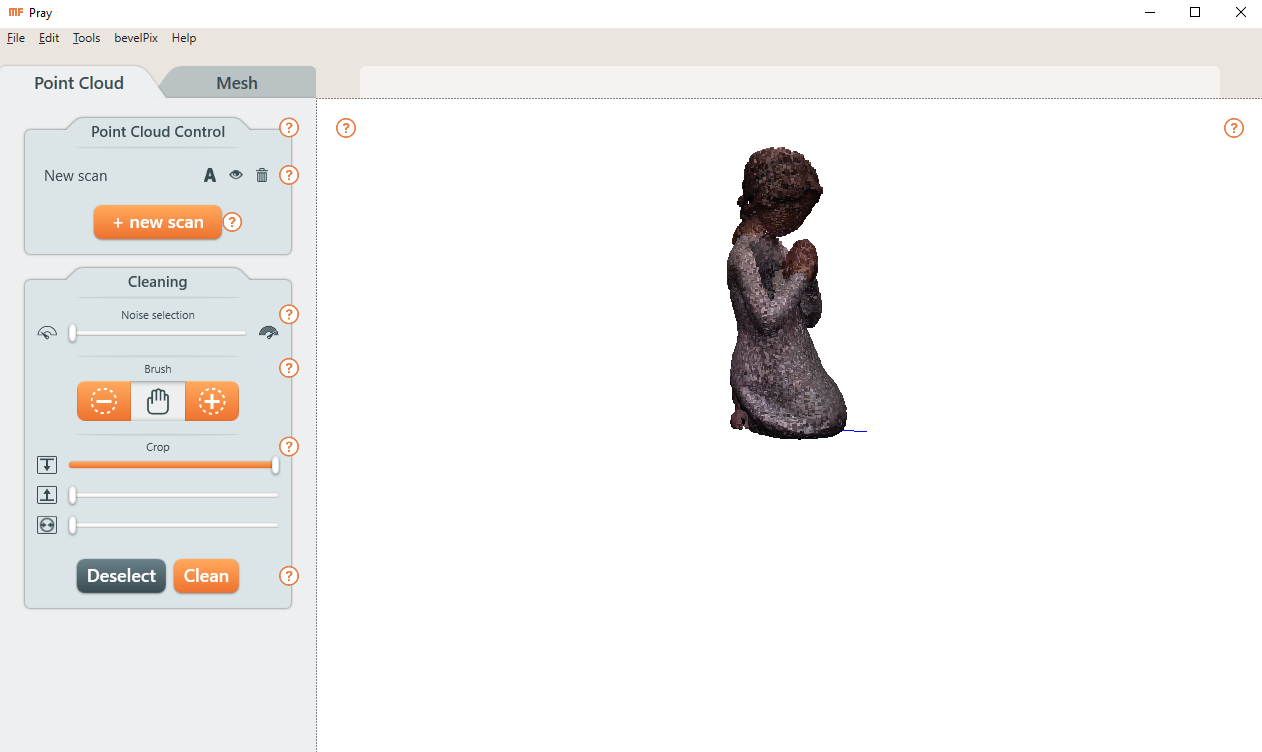
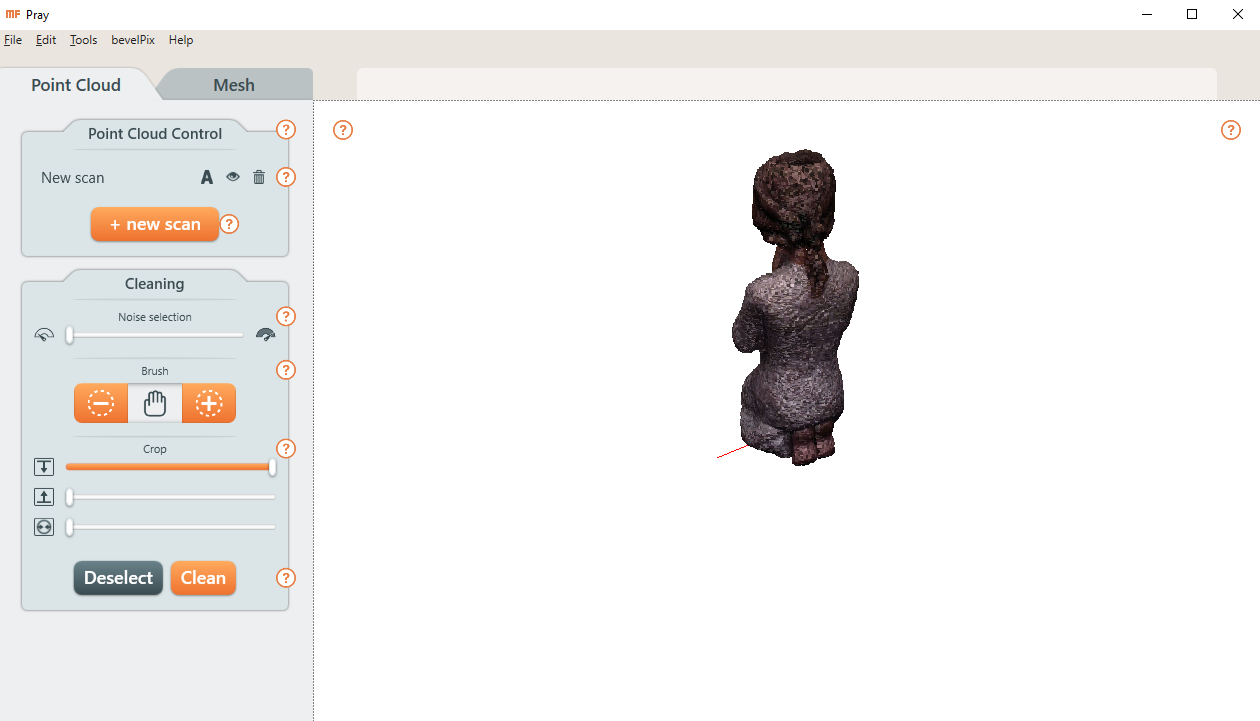
The result :
The design files :
Onshape :
Scan :