Fourth assignment
Date
12 Feb 2020
This week's assignment is a little bit different from the previous assignments, because It consists of two assignments rather than one. The first part is the group assignment that requires describing our laser cutting machine by checking the focus, power, speed, rate, kerf, and joint clearance. The second part is the individual assignment that requires designing, cutting, and assembling a parametric press-fit construction kit. Also, we need to make a vinyl cutting using the vinyl cutter.

press-fit construction kit
I decided to design something useful like a desk organizer. The idea of this design is to make each piece become a support for the other. Onshape is the parametric software that I used to make the press-fit design. Before starting you need to understand the meaning of parametric.
What is the parametric design?
Parametric is the ability to change and modify the shape dimensions by set adjustable variables.
Designing
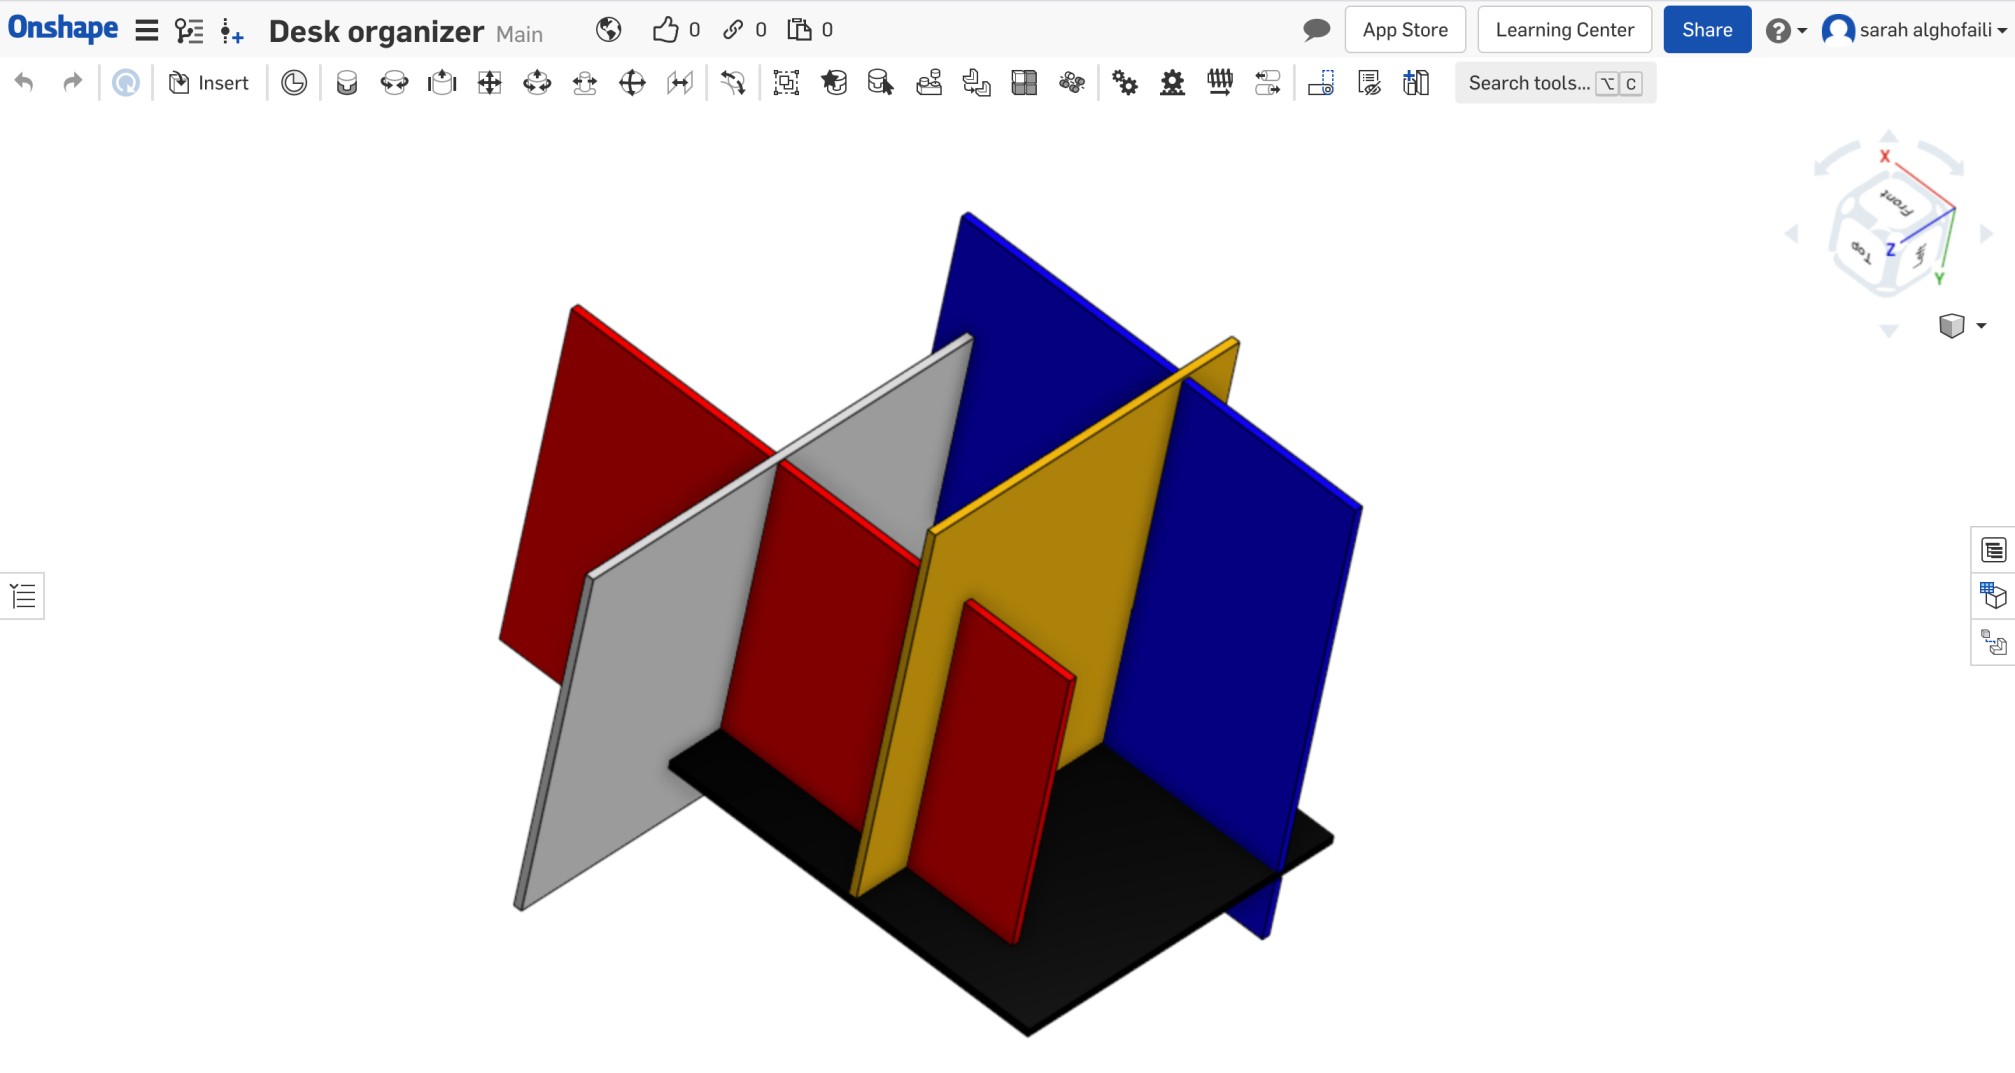
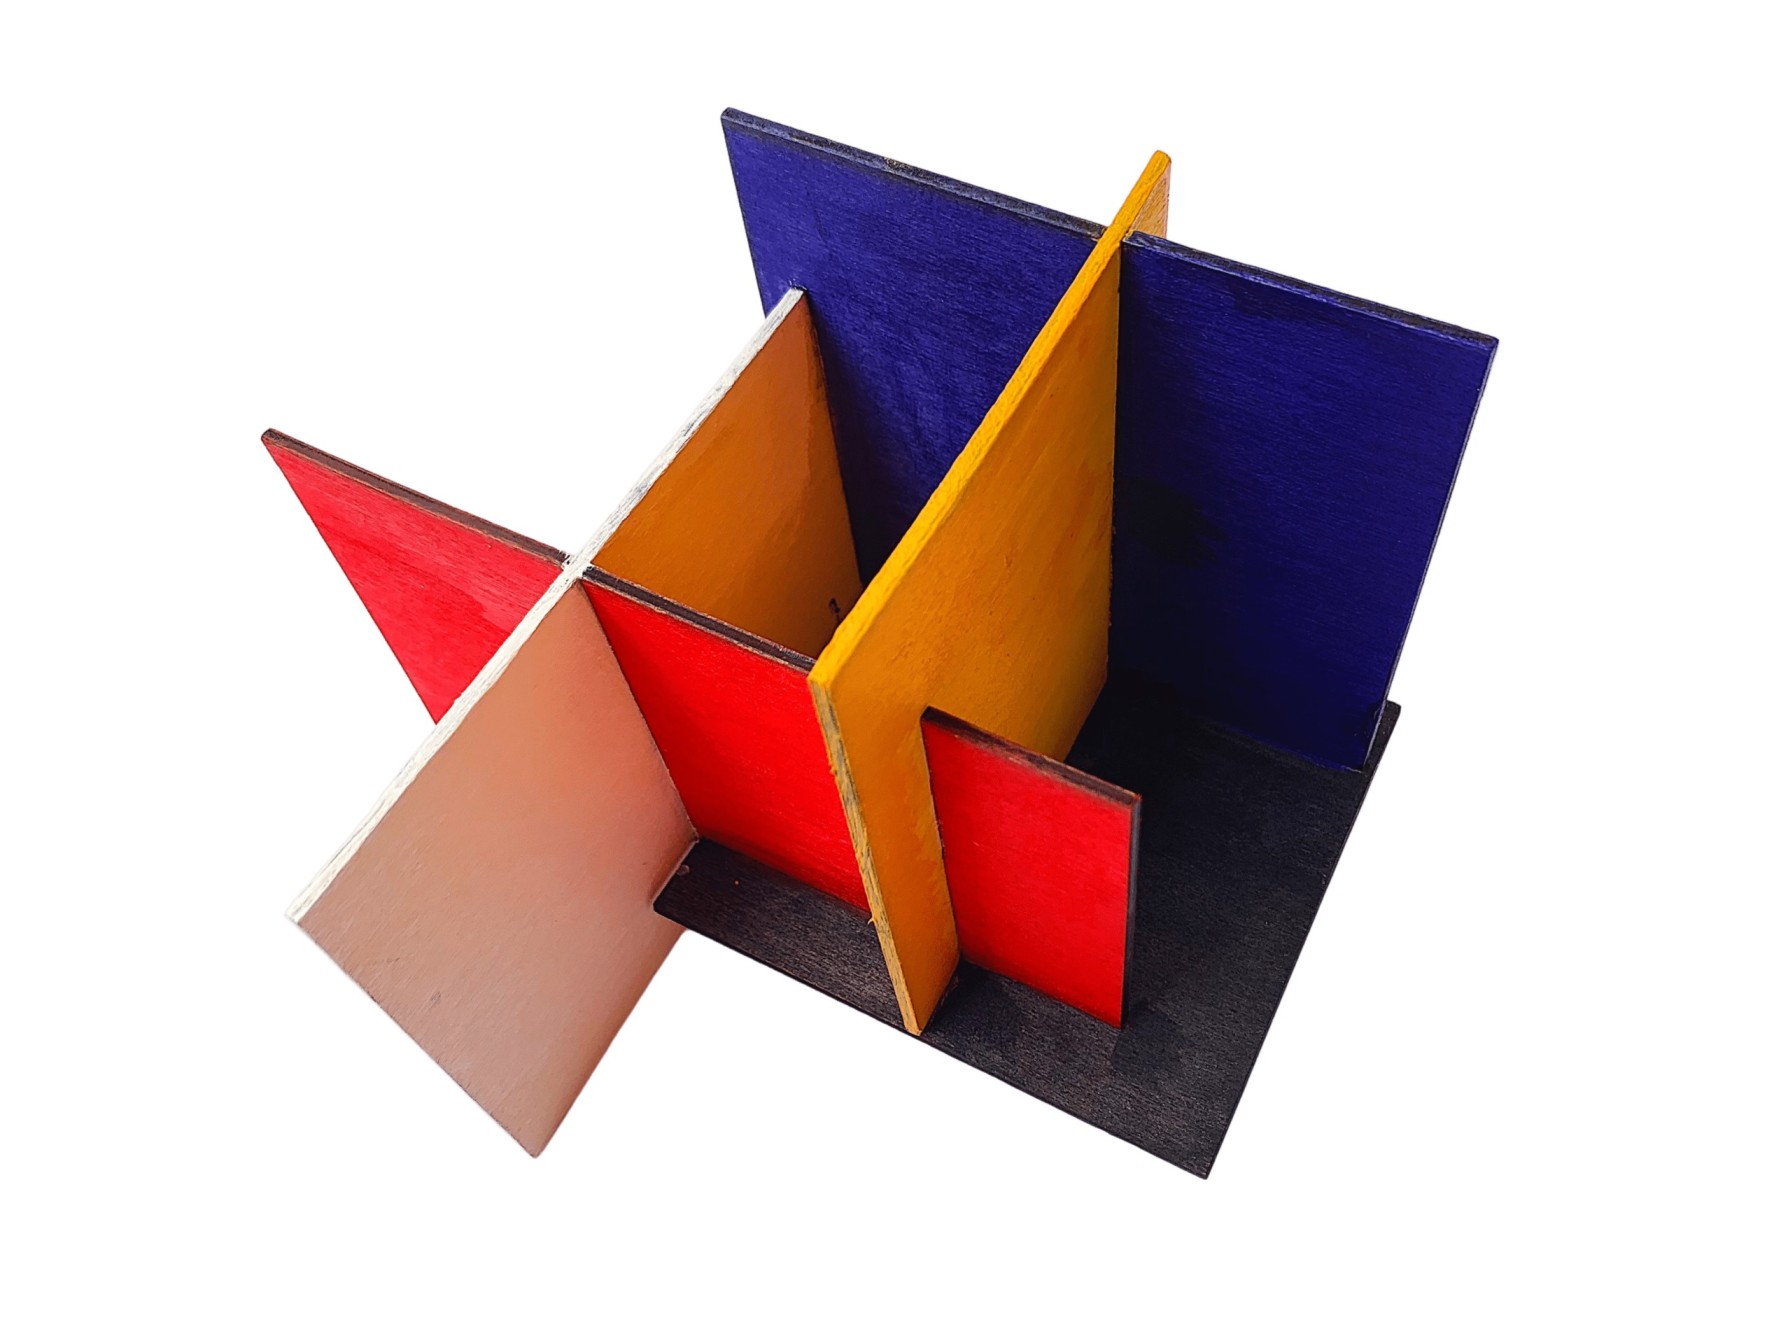
The design concept is to reflect Piet Mondrian's famous painting “ Composition II in Red, Blue, and Yellow “.

First I sketched the idea in a paper then designed it using the onshape software. The desk organizer contains five rectangles that have different sizes. All shapes will have the same depth and joint width size.
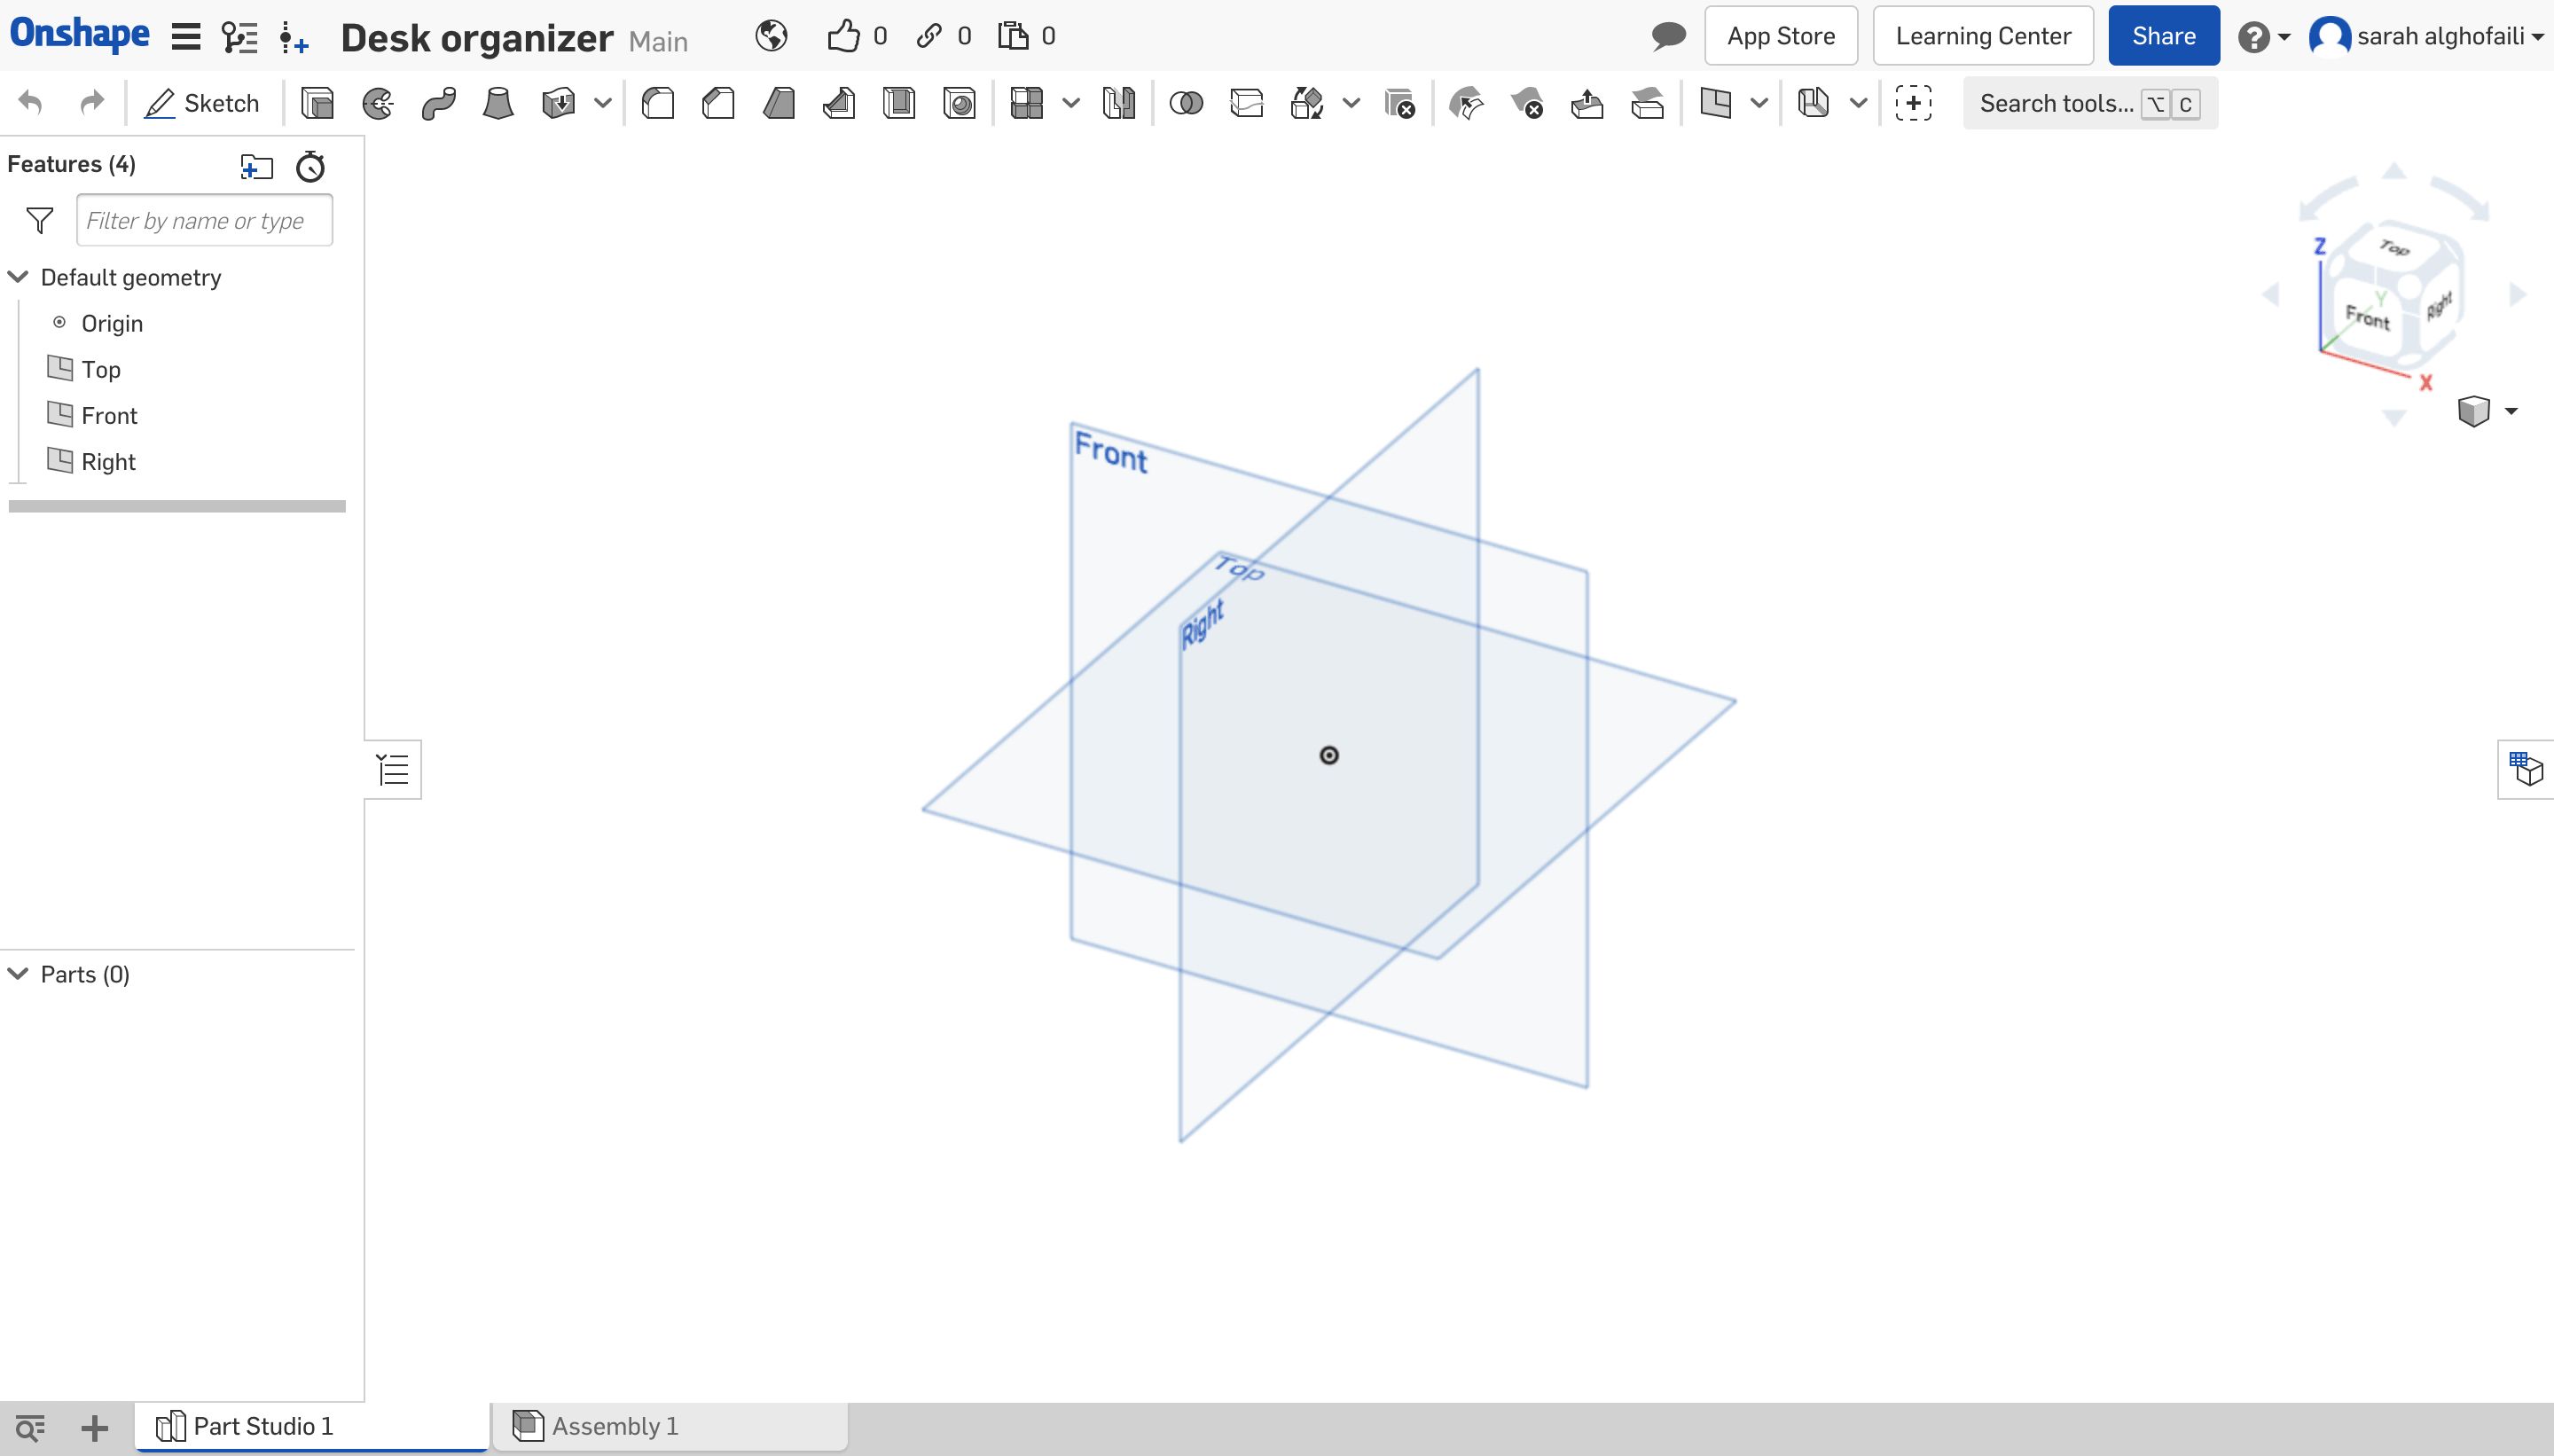
To start, I clicked on the Sketch button and chose the top plane.
What do I need to design?
5 Rectangles.
12 Joints ( Width = Depth = 2.25 ) different heights.

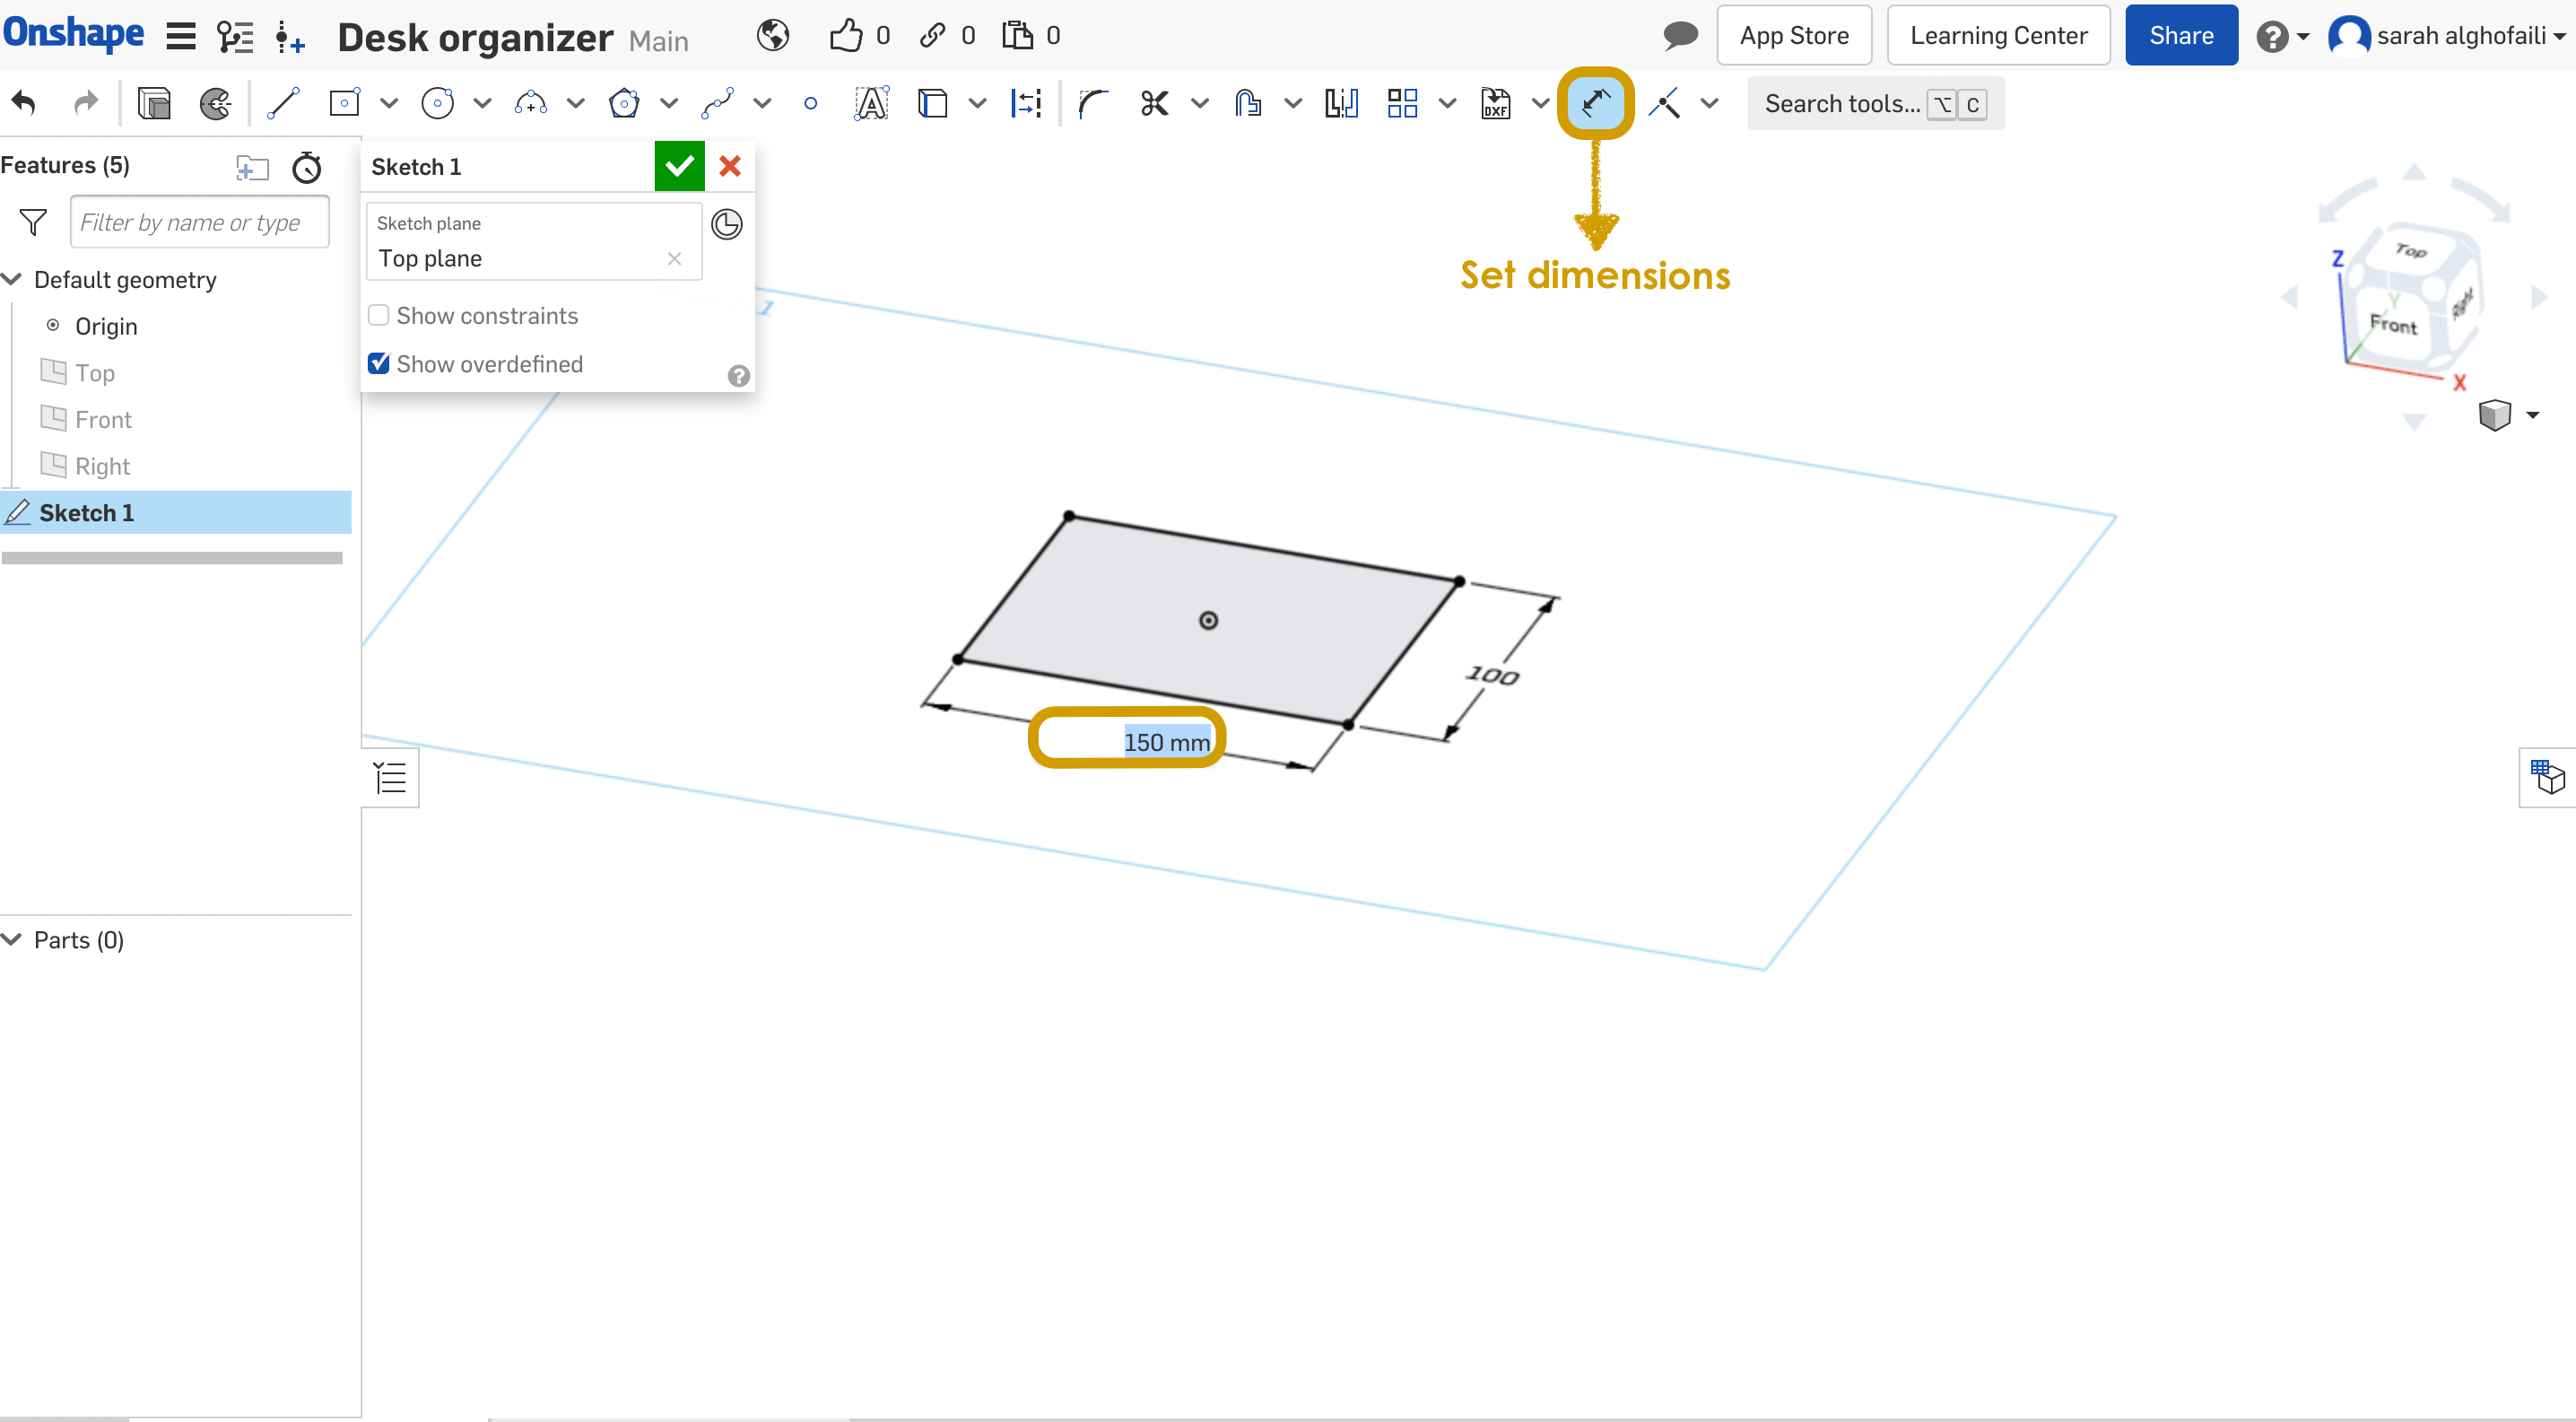
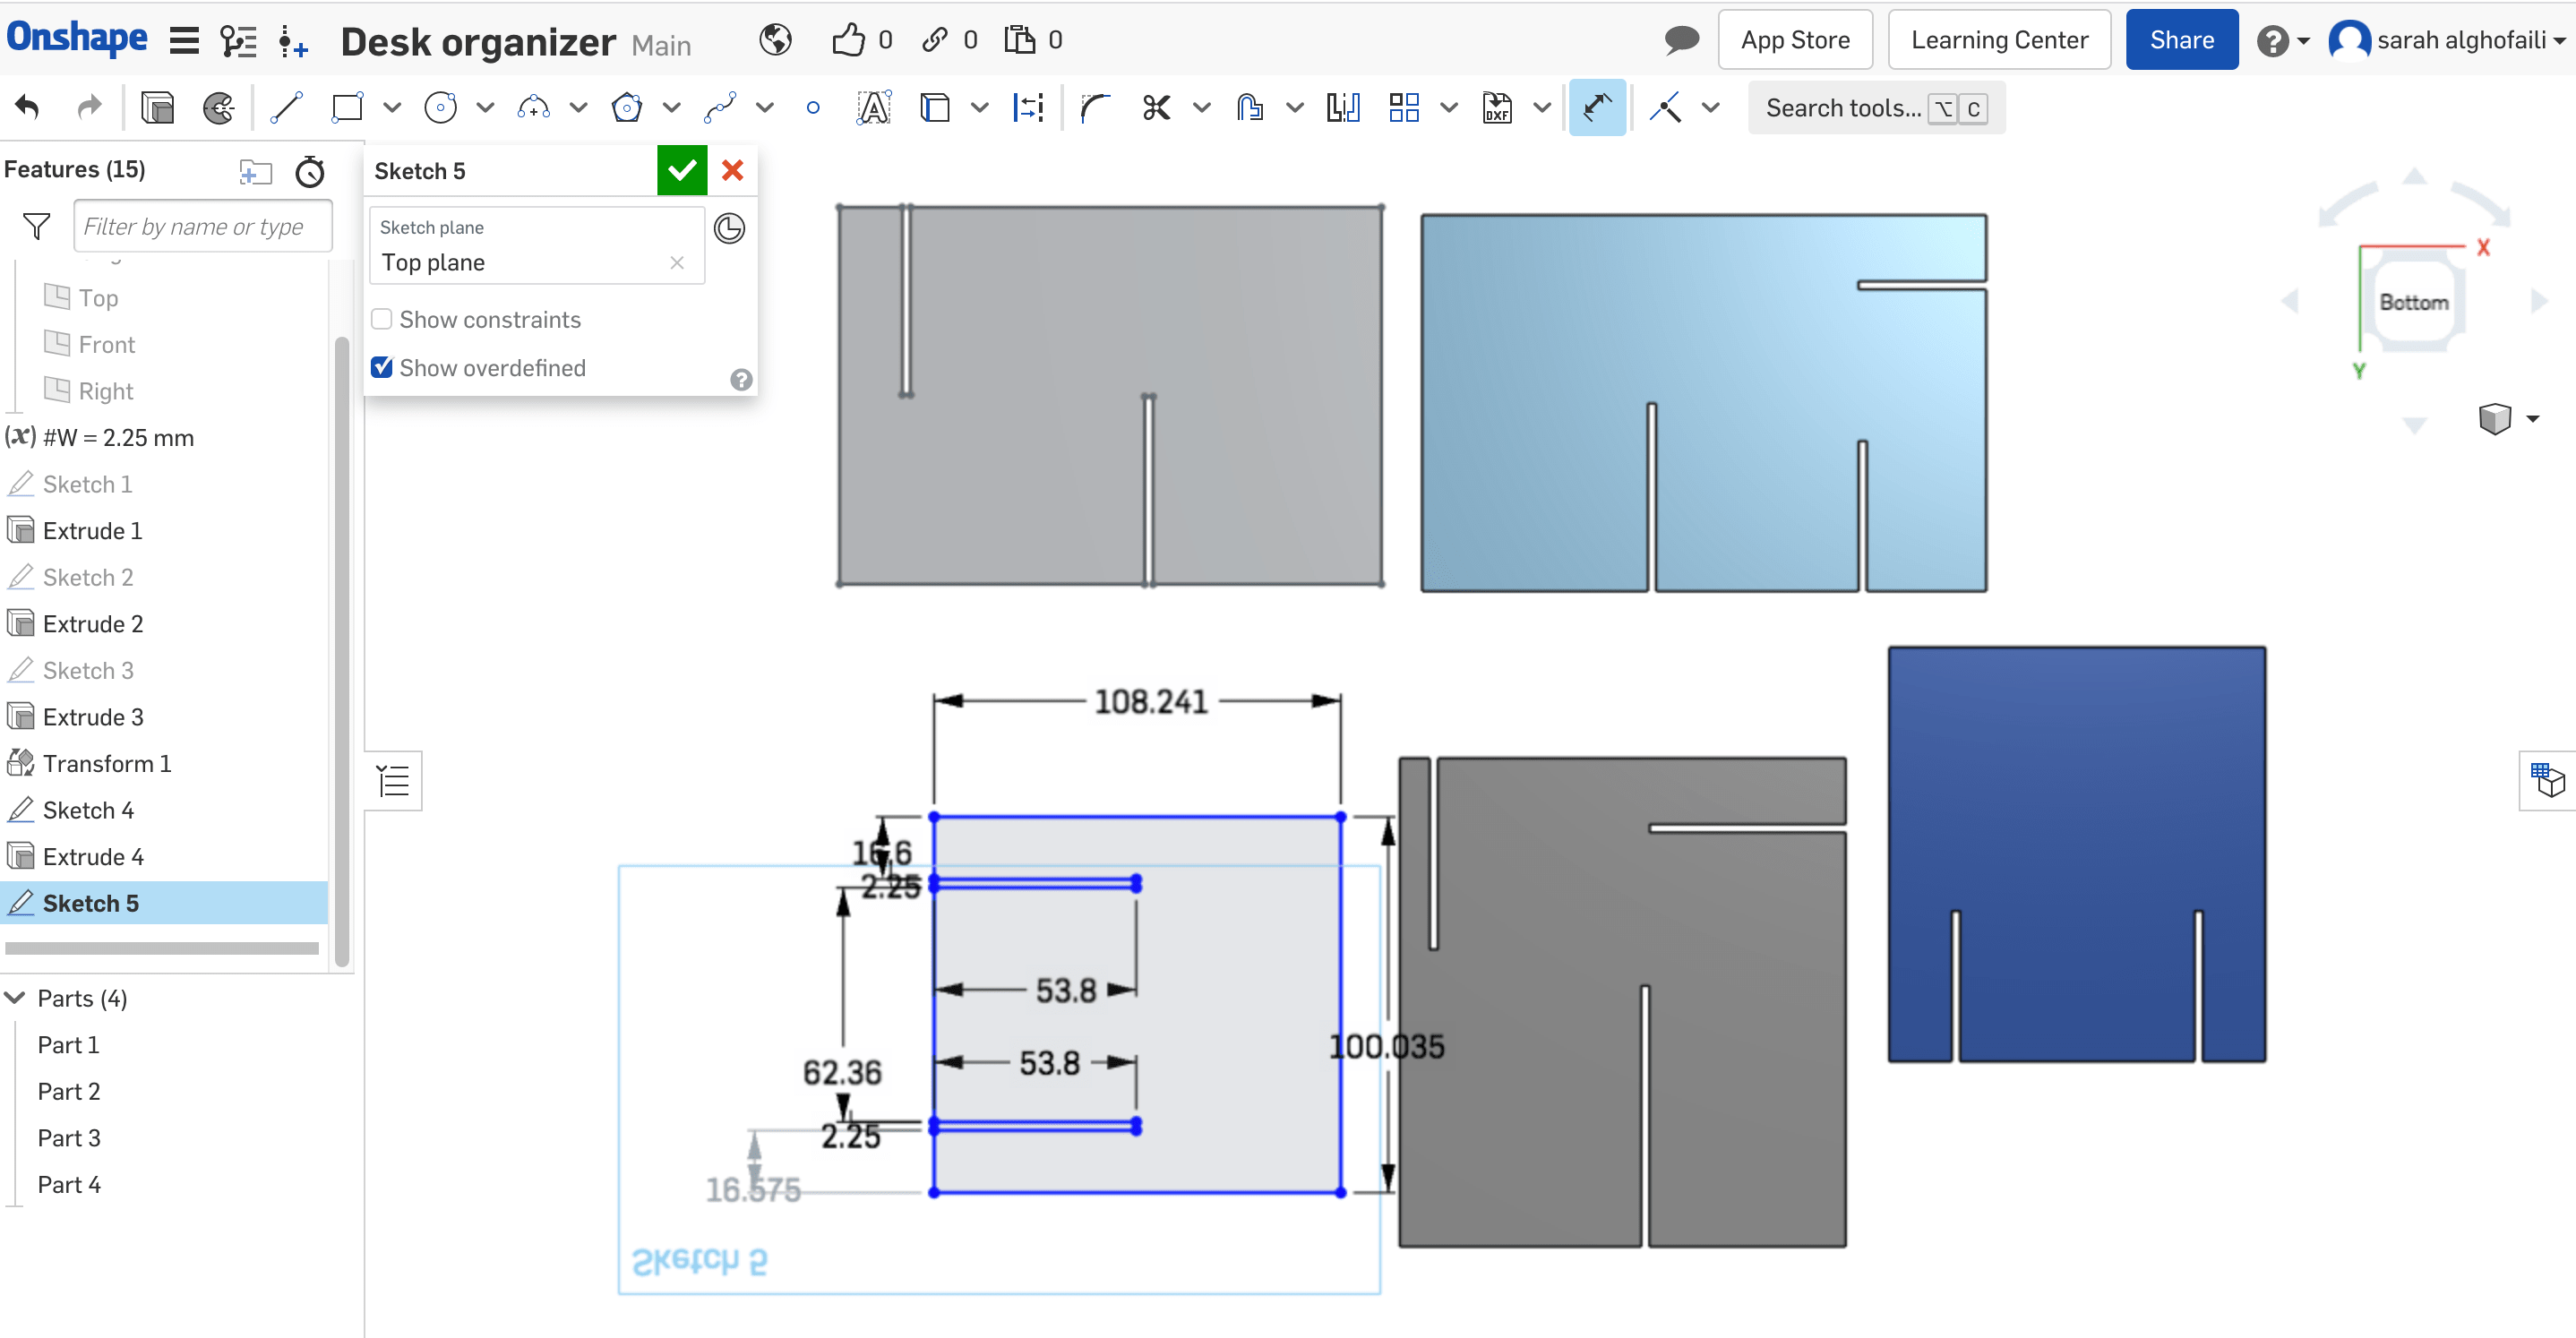
To define the dimensions, I clicked on the dimension icon and entered the width and height value for each rectangle.
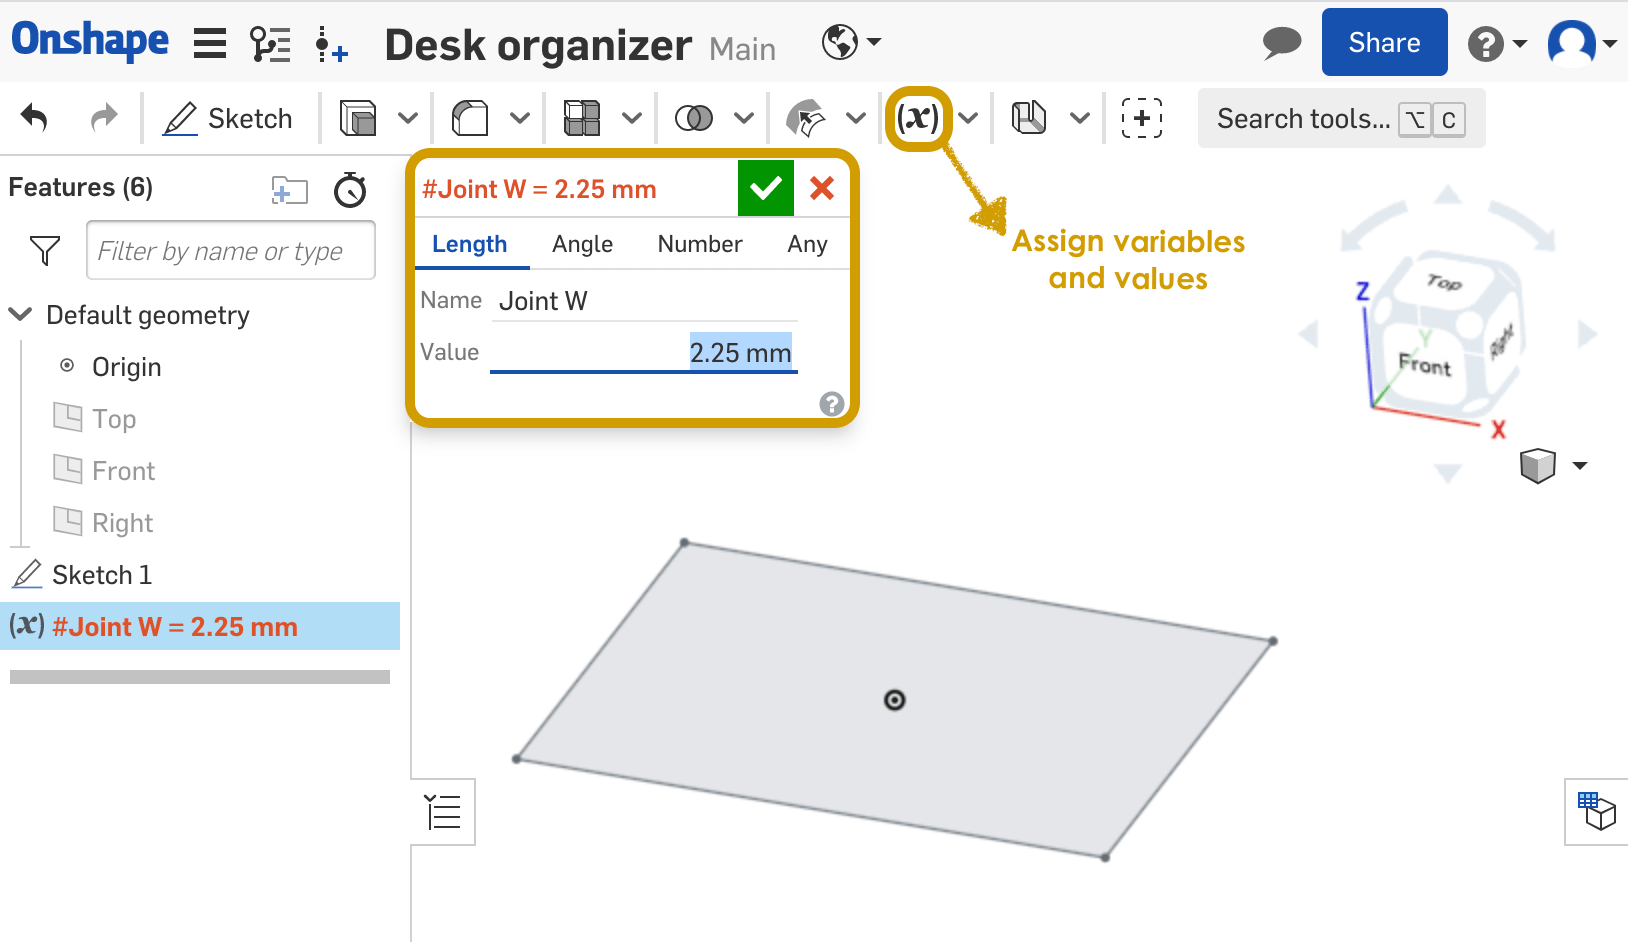
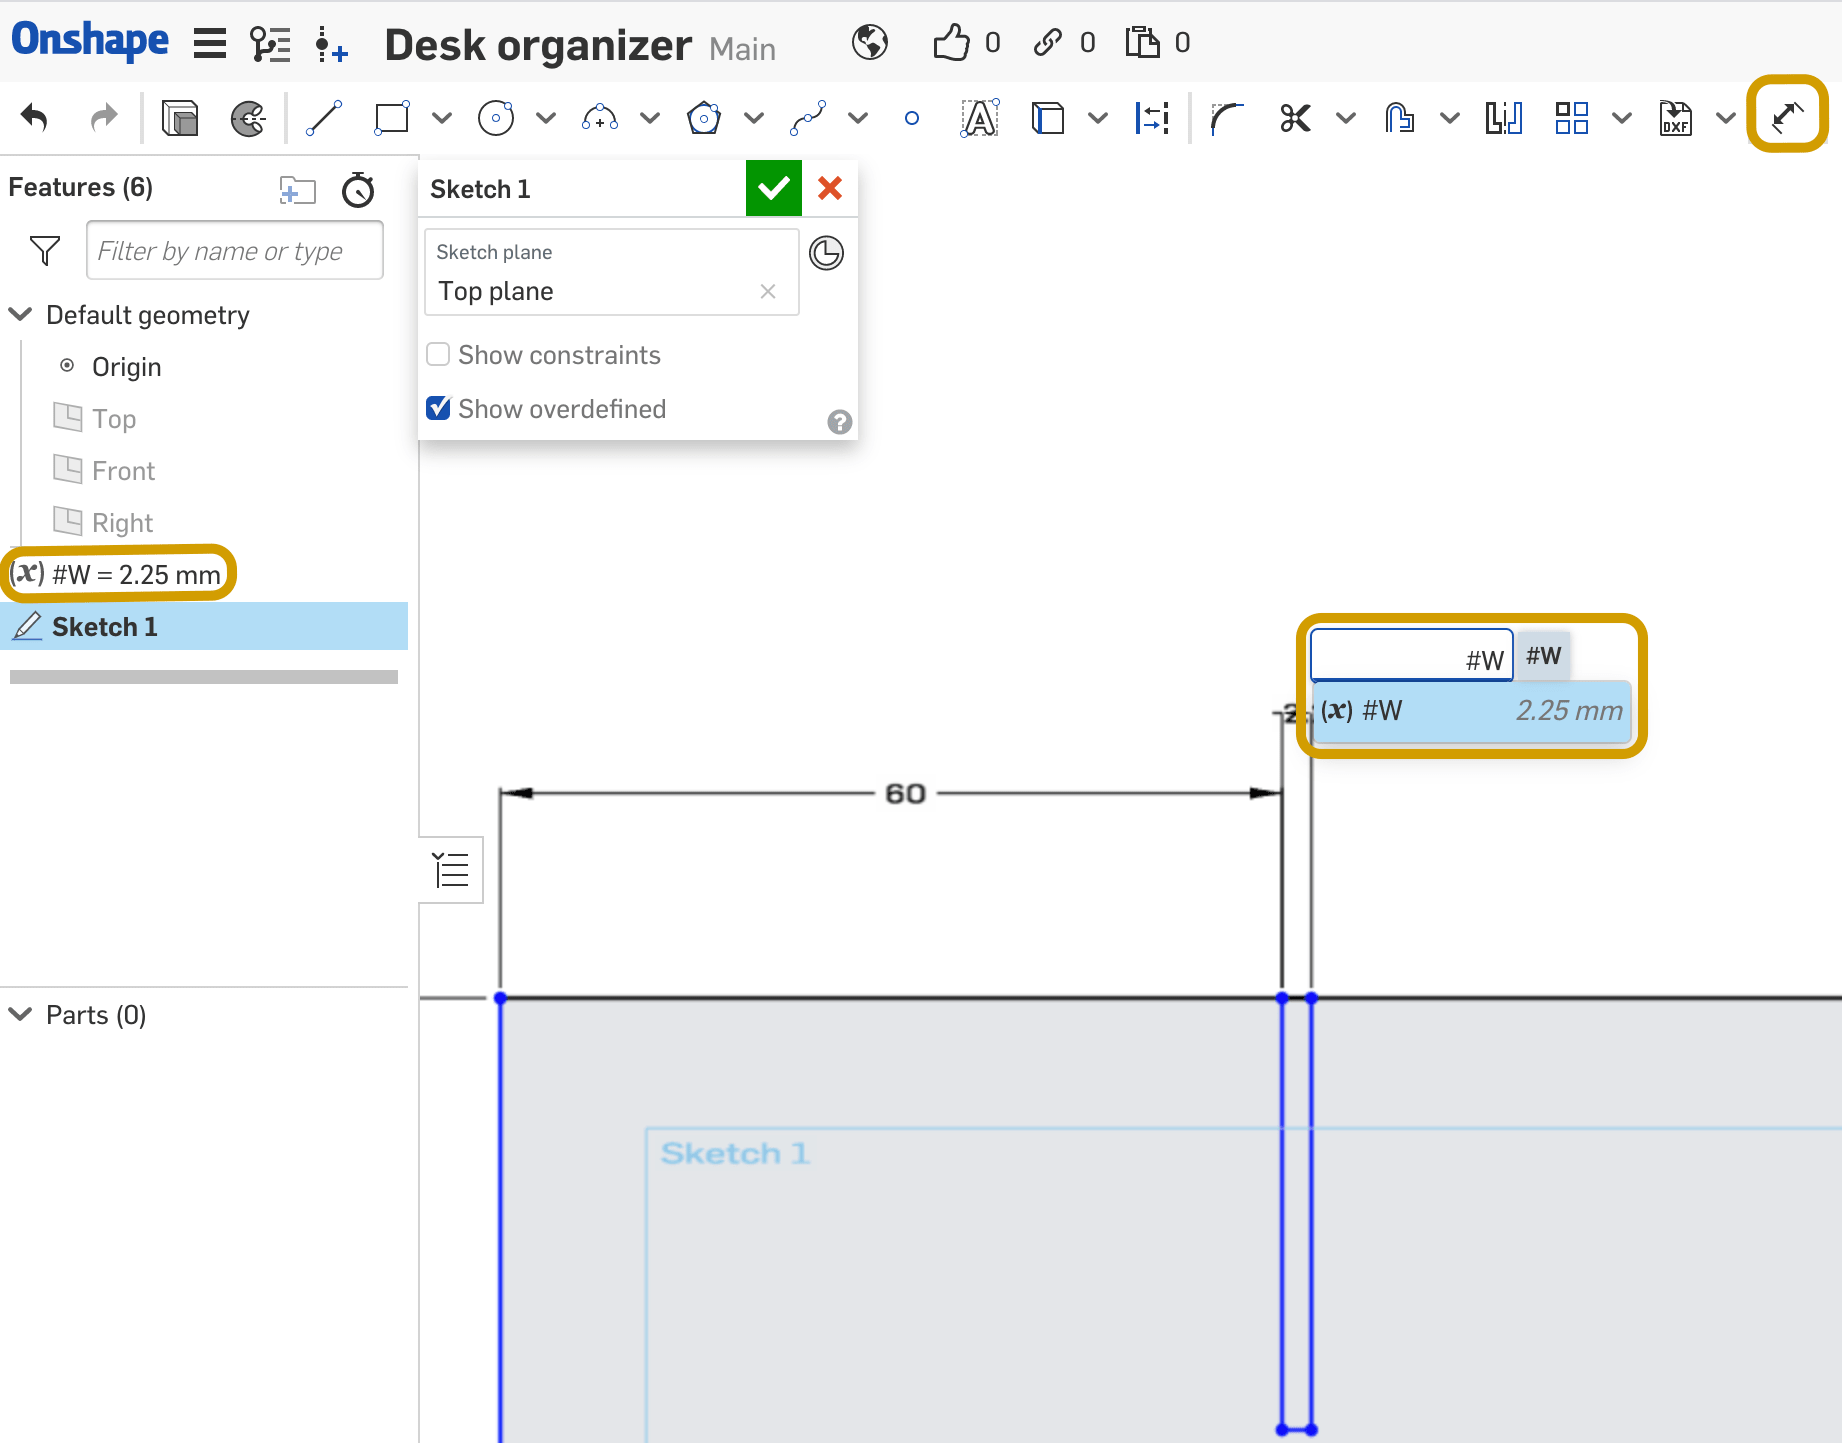
Create variables
The parametric software allows you to determine a particular value to each variable. Any change in these values will affect the whole design automatically.
To create the variables I clicked on the Variable icon then gave it a name and value.
The problem that I faced was the variables does not affect the shape. After a quick search, I found that the variables are order dependent so you need to put the variable higher than the feature that you want to reference.
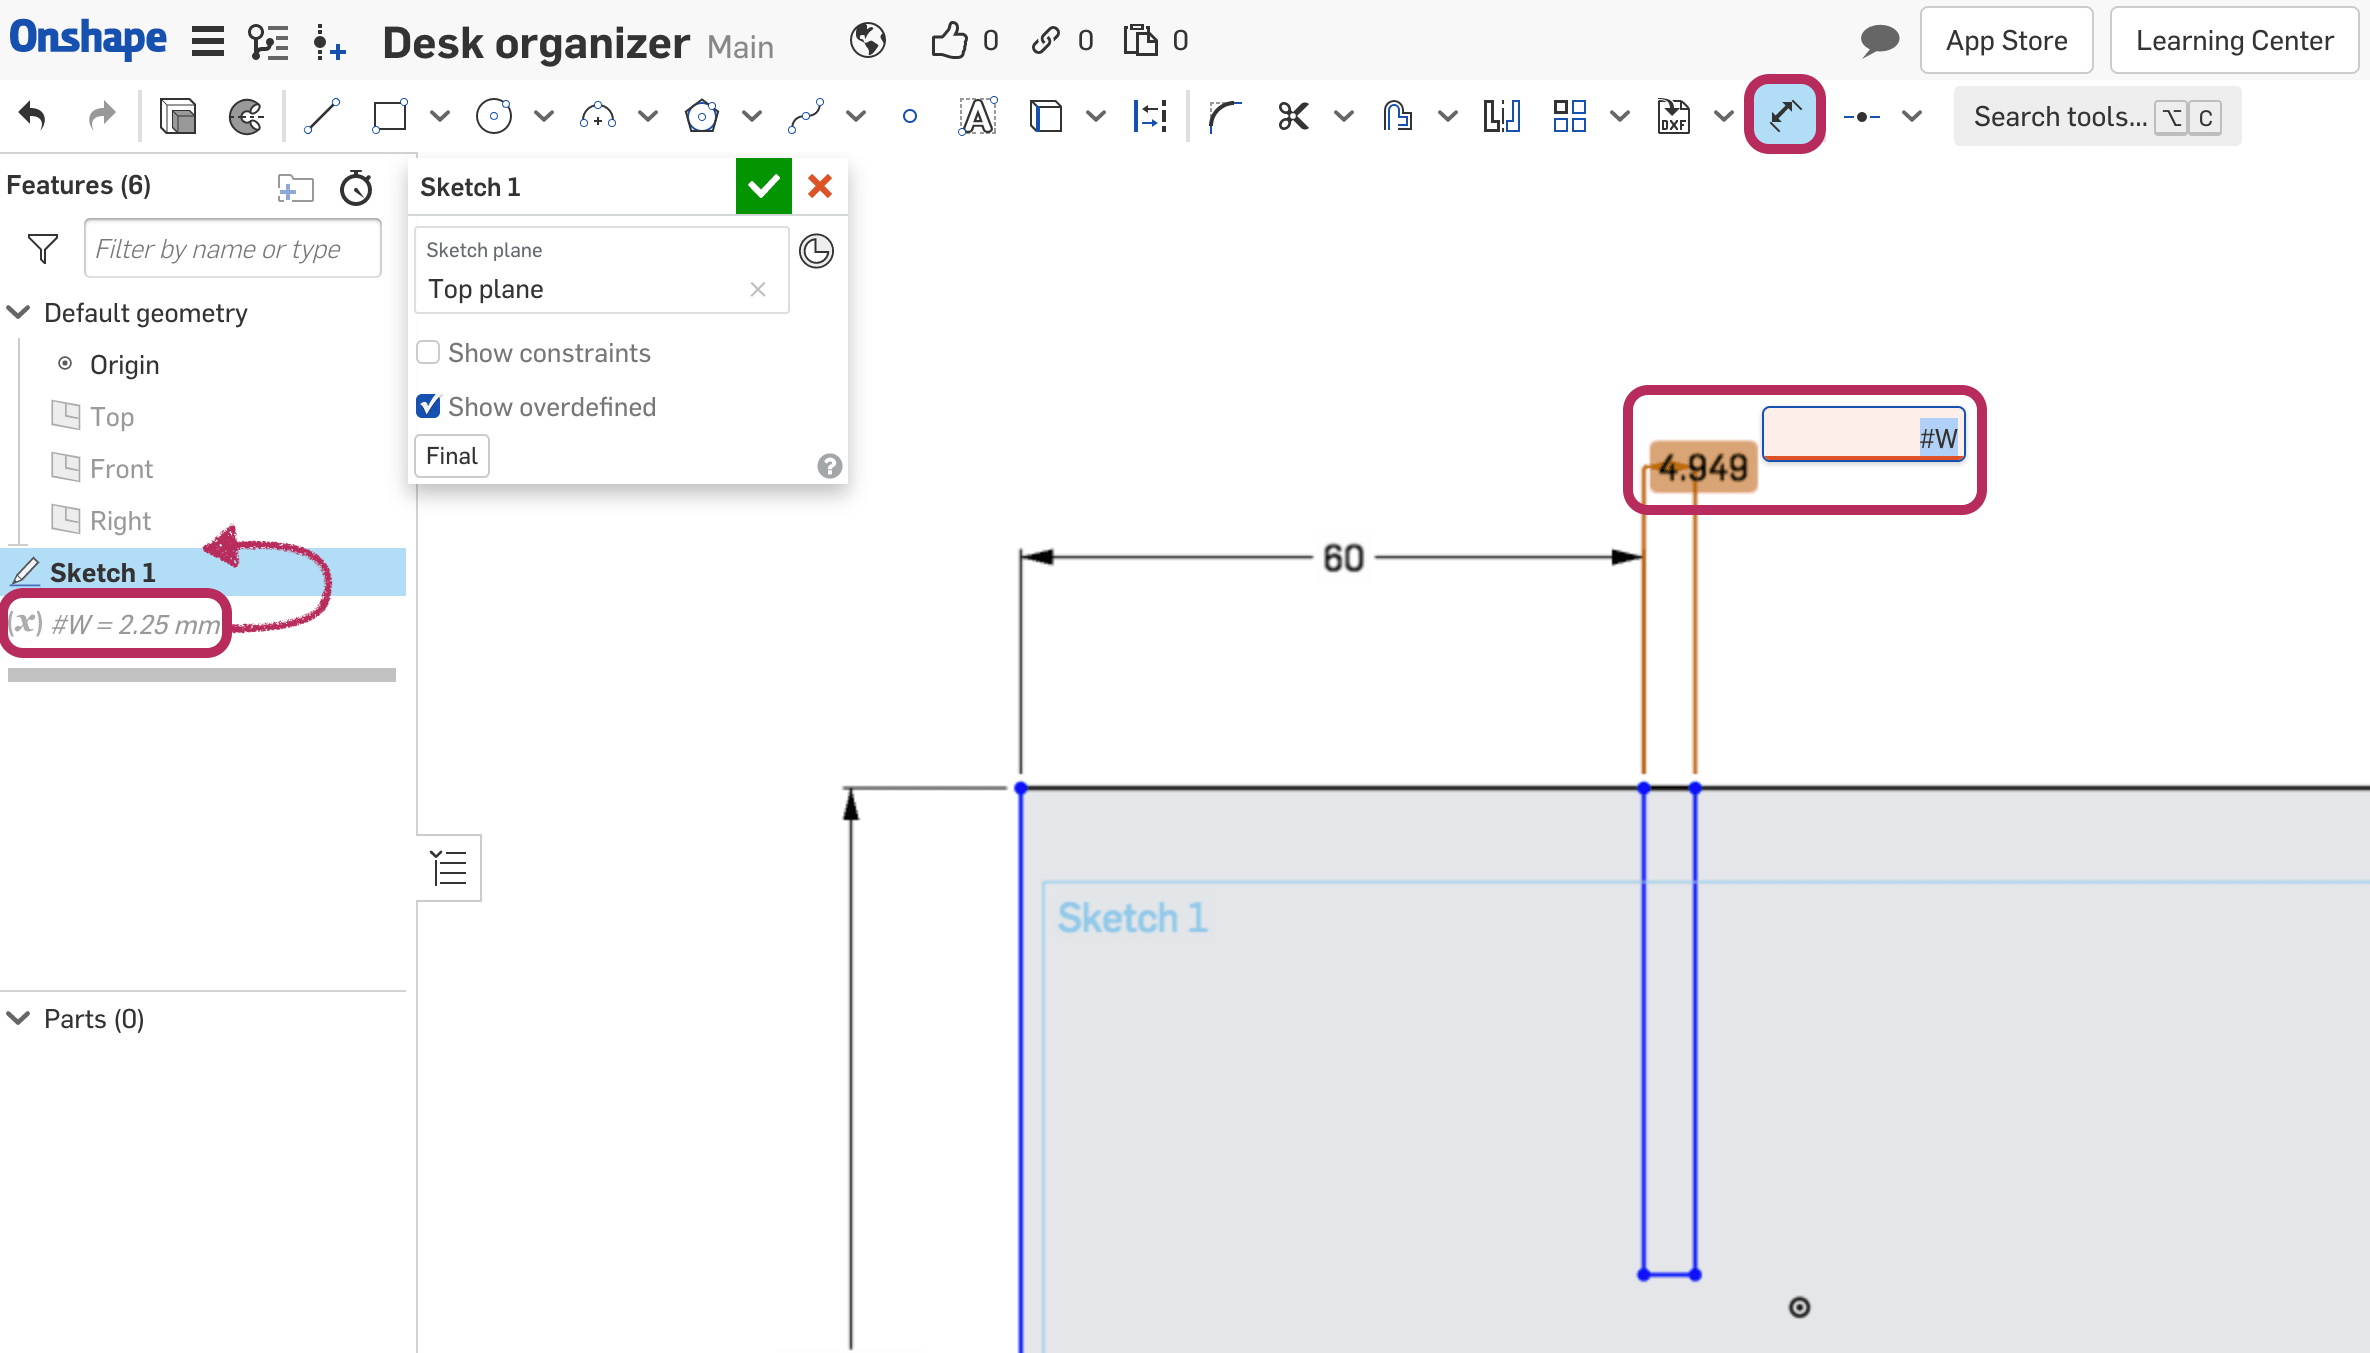
After dragging the variable up in the feasures bar, I start using it by writing # then the name of the variable.
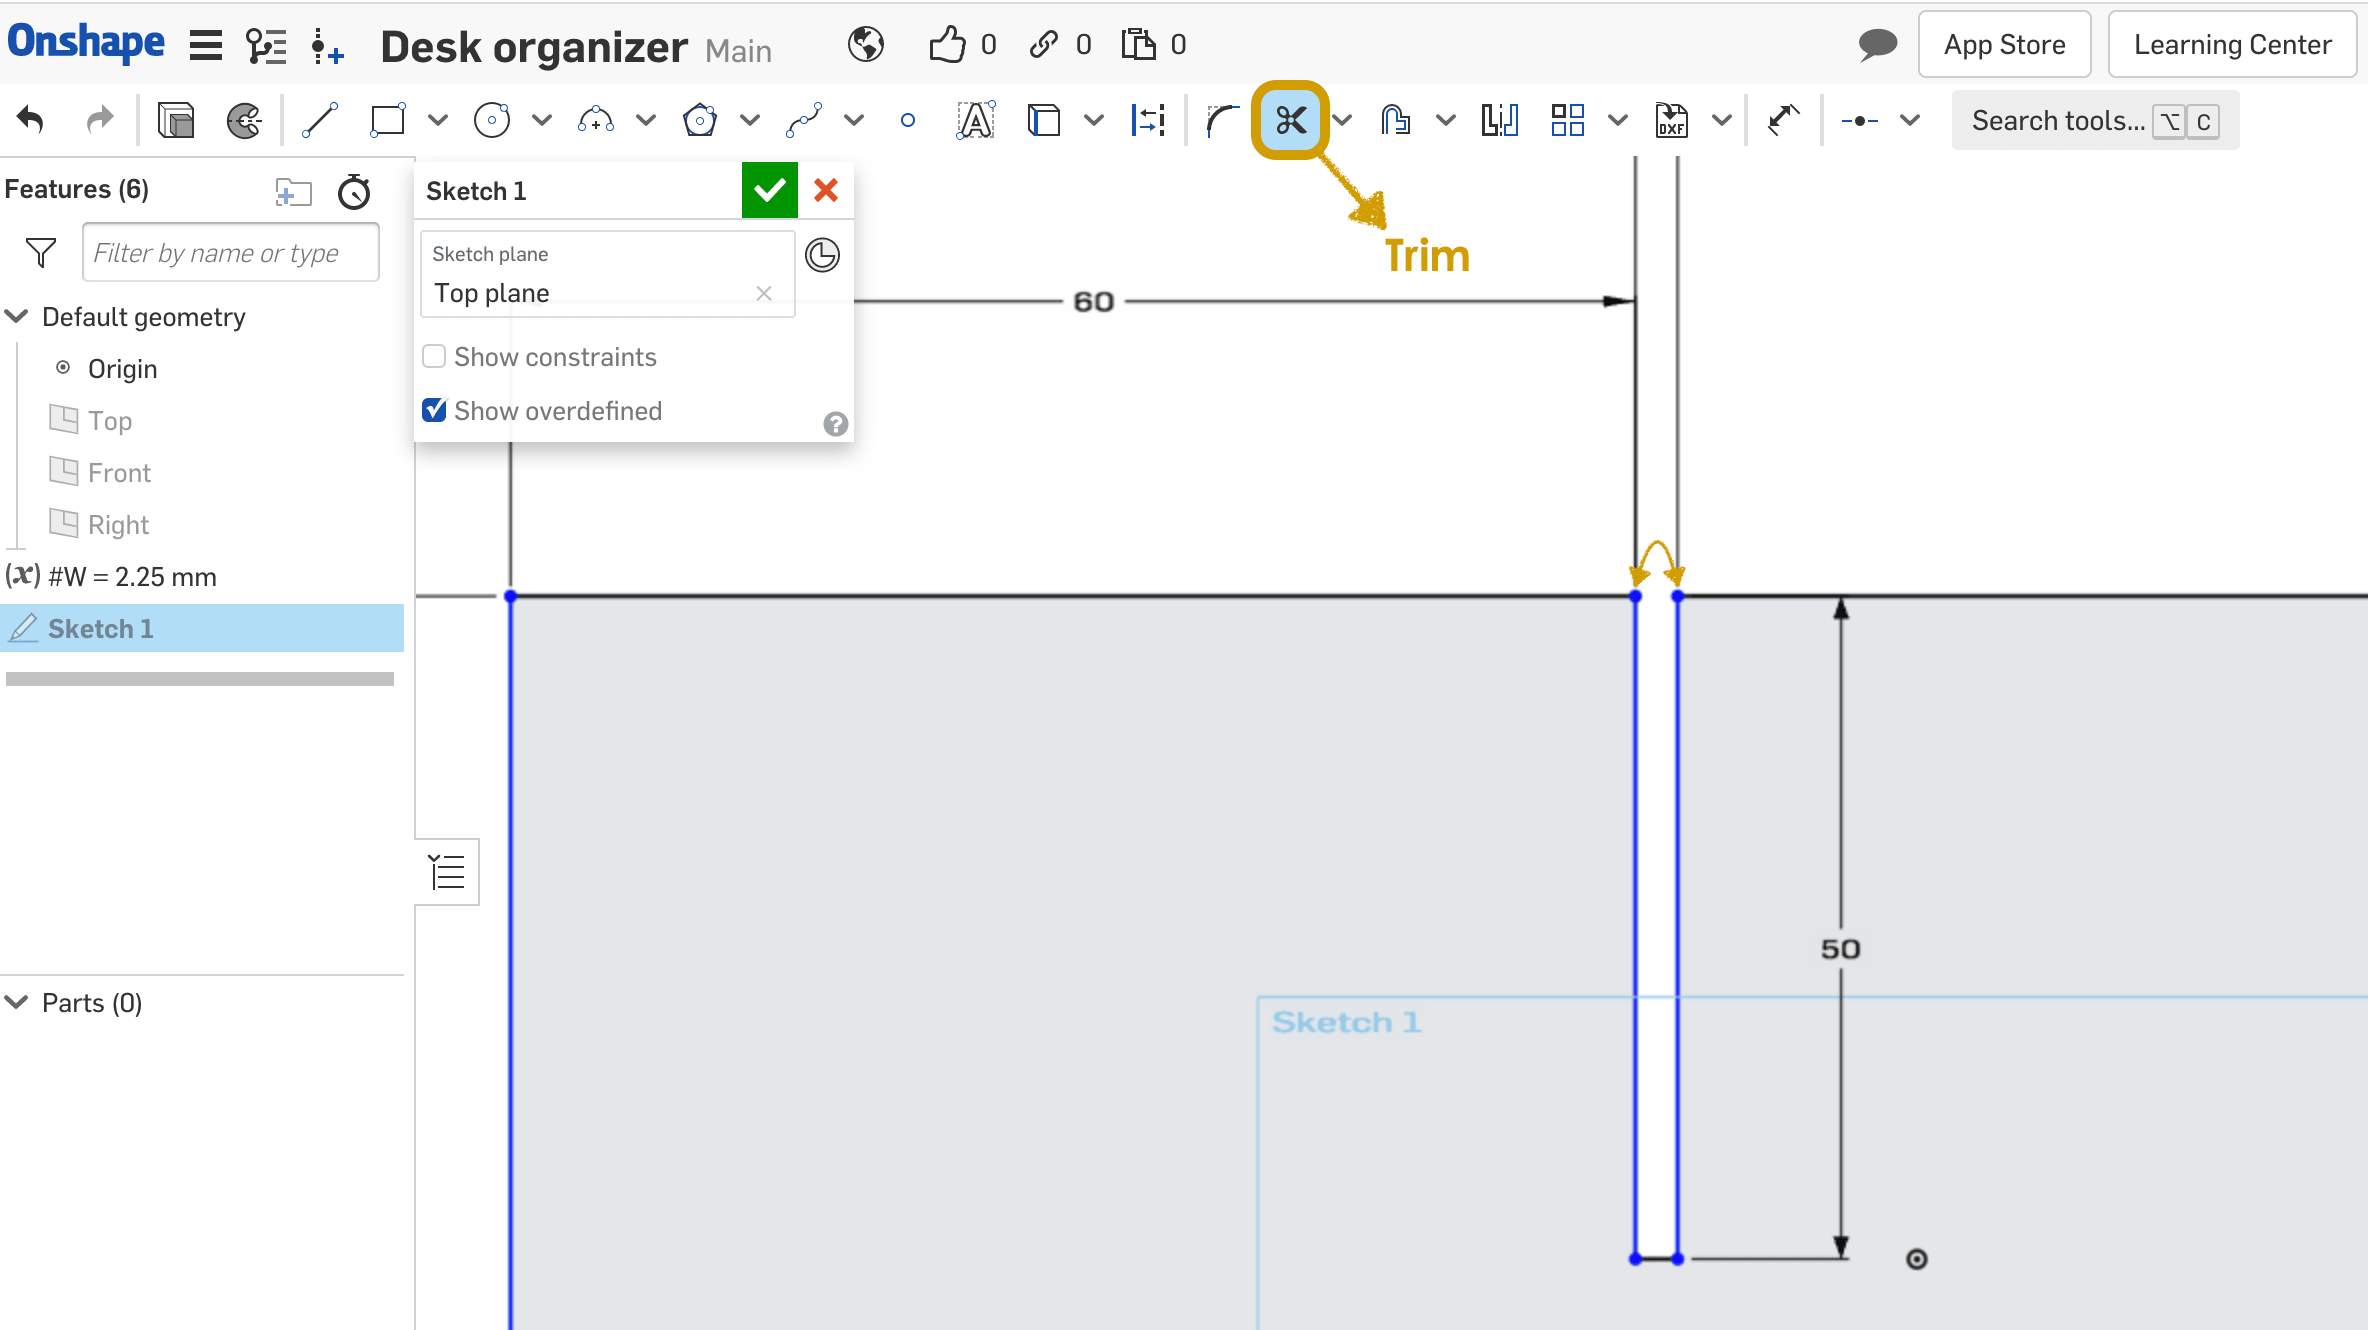
Then, I used the Trim tool to delete one side of the rectangle to create the joint.
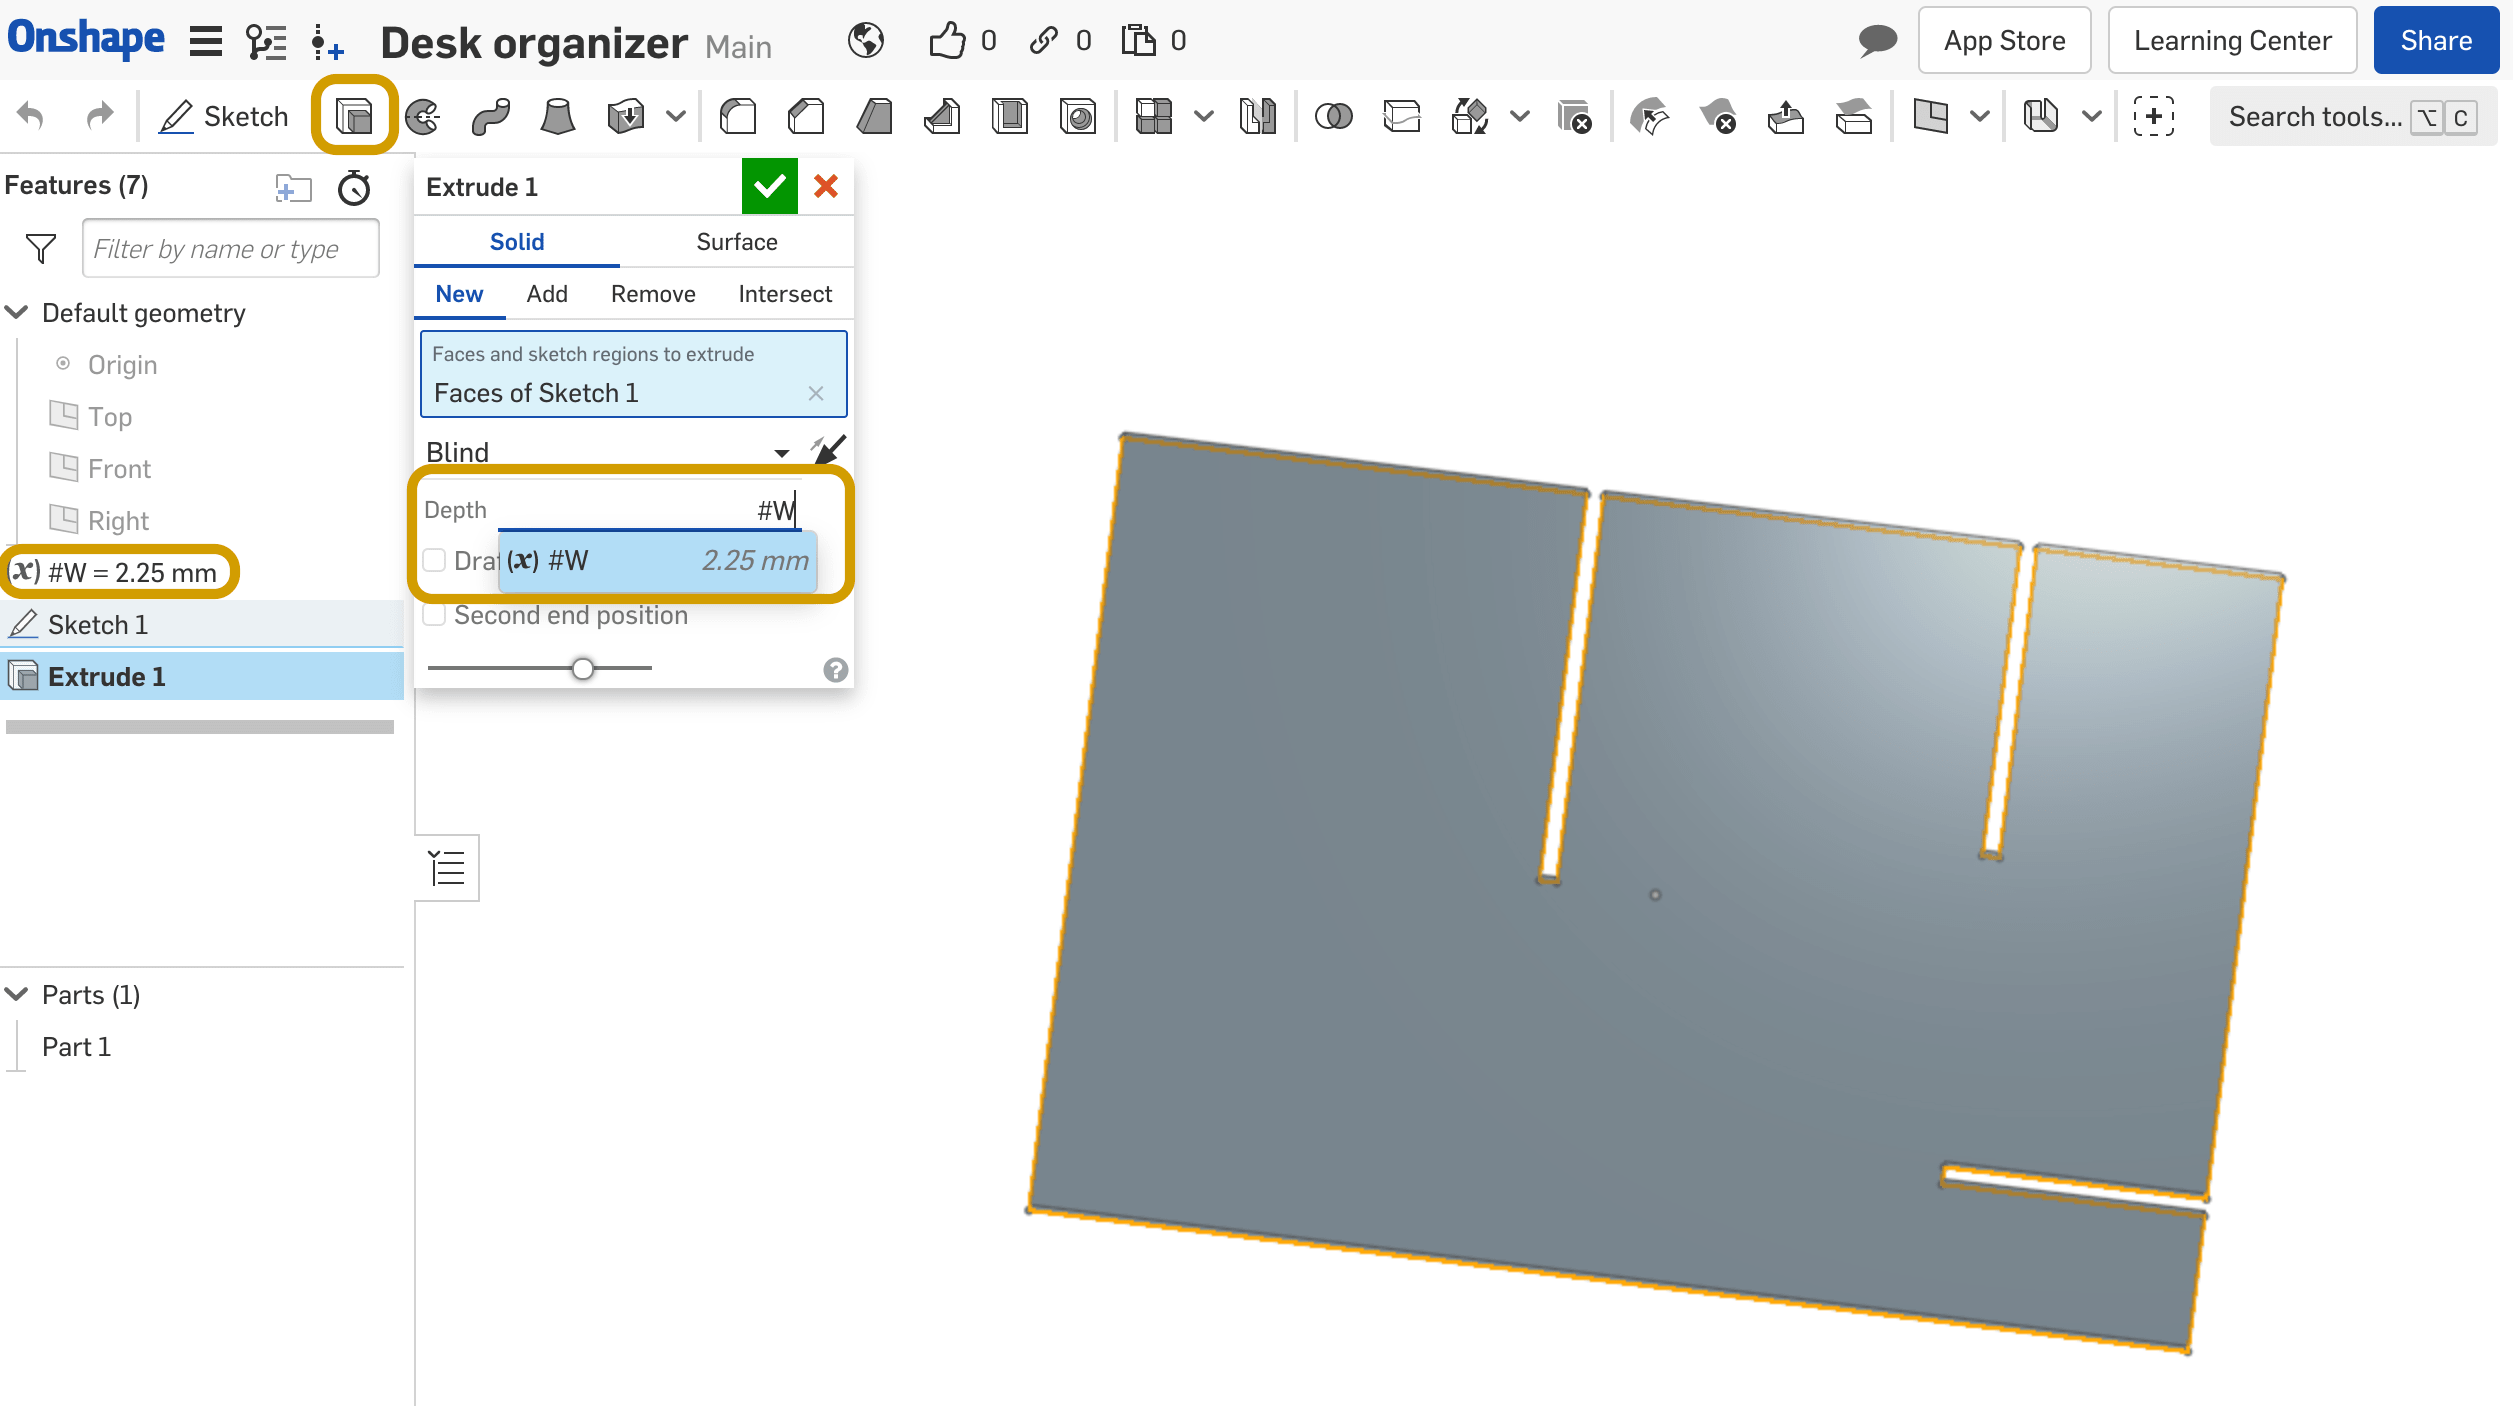
Then I extruded all the sketches with the same variable W = 2.25 mm
To start assembling, I clicked on the Insert button then, I chose all the parts.
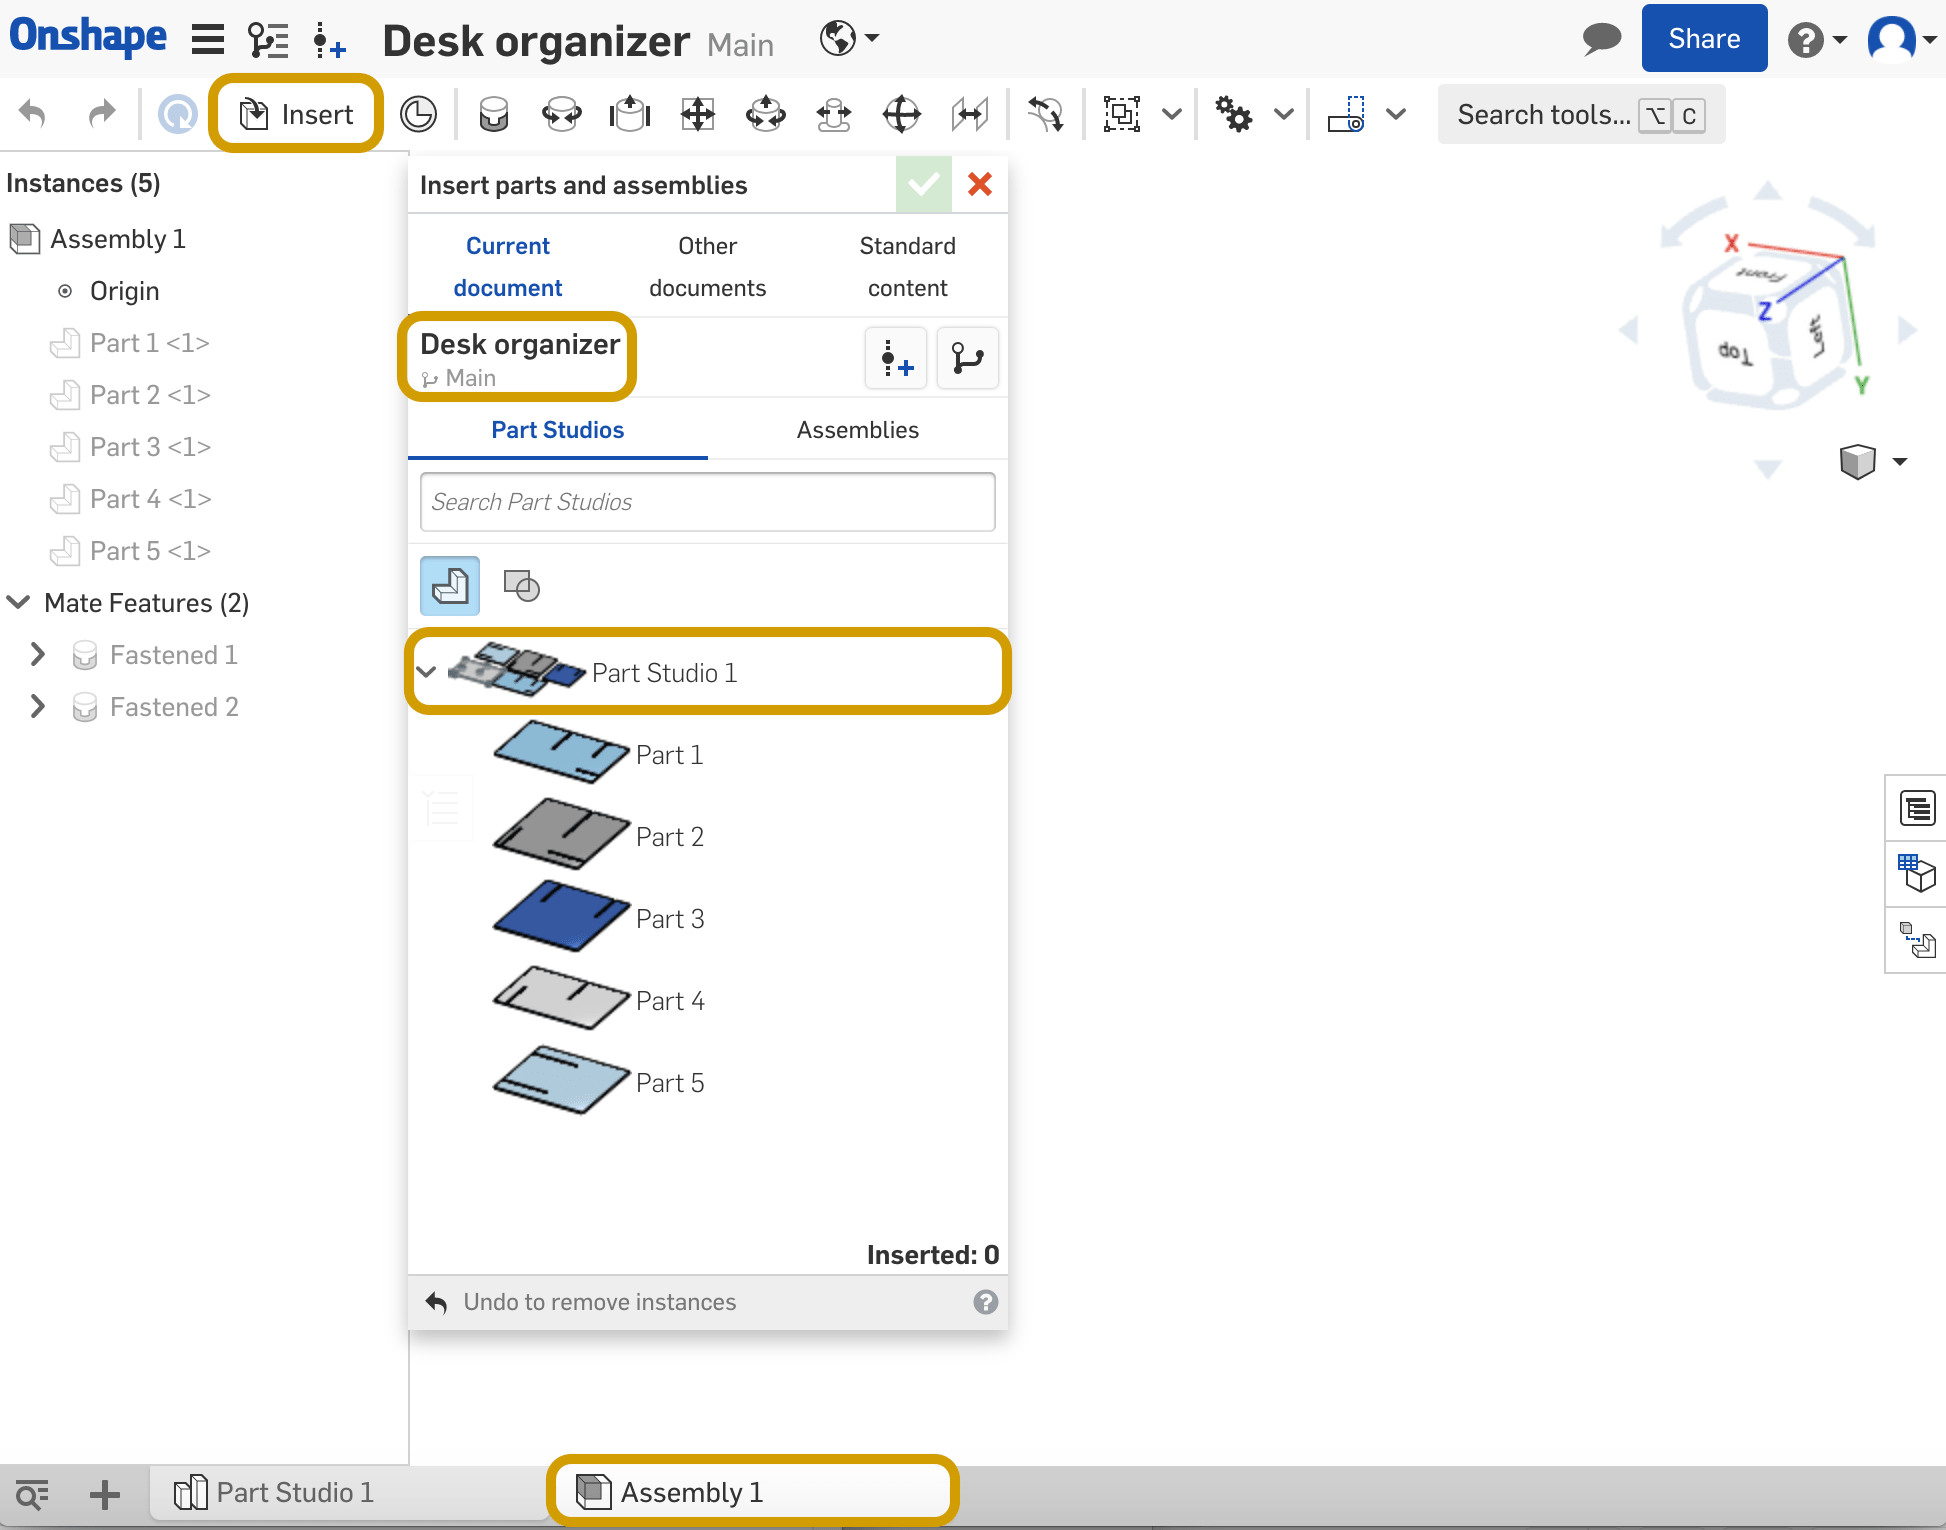
After that, I clicked on the Fastened tool to join two parts together by selecting the edges of both.
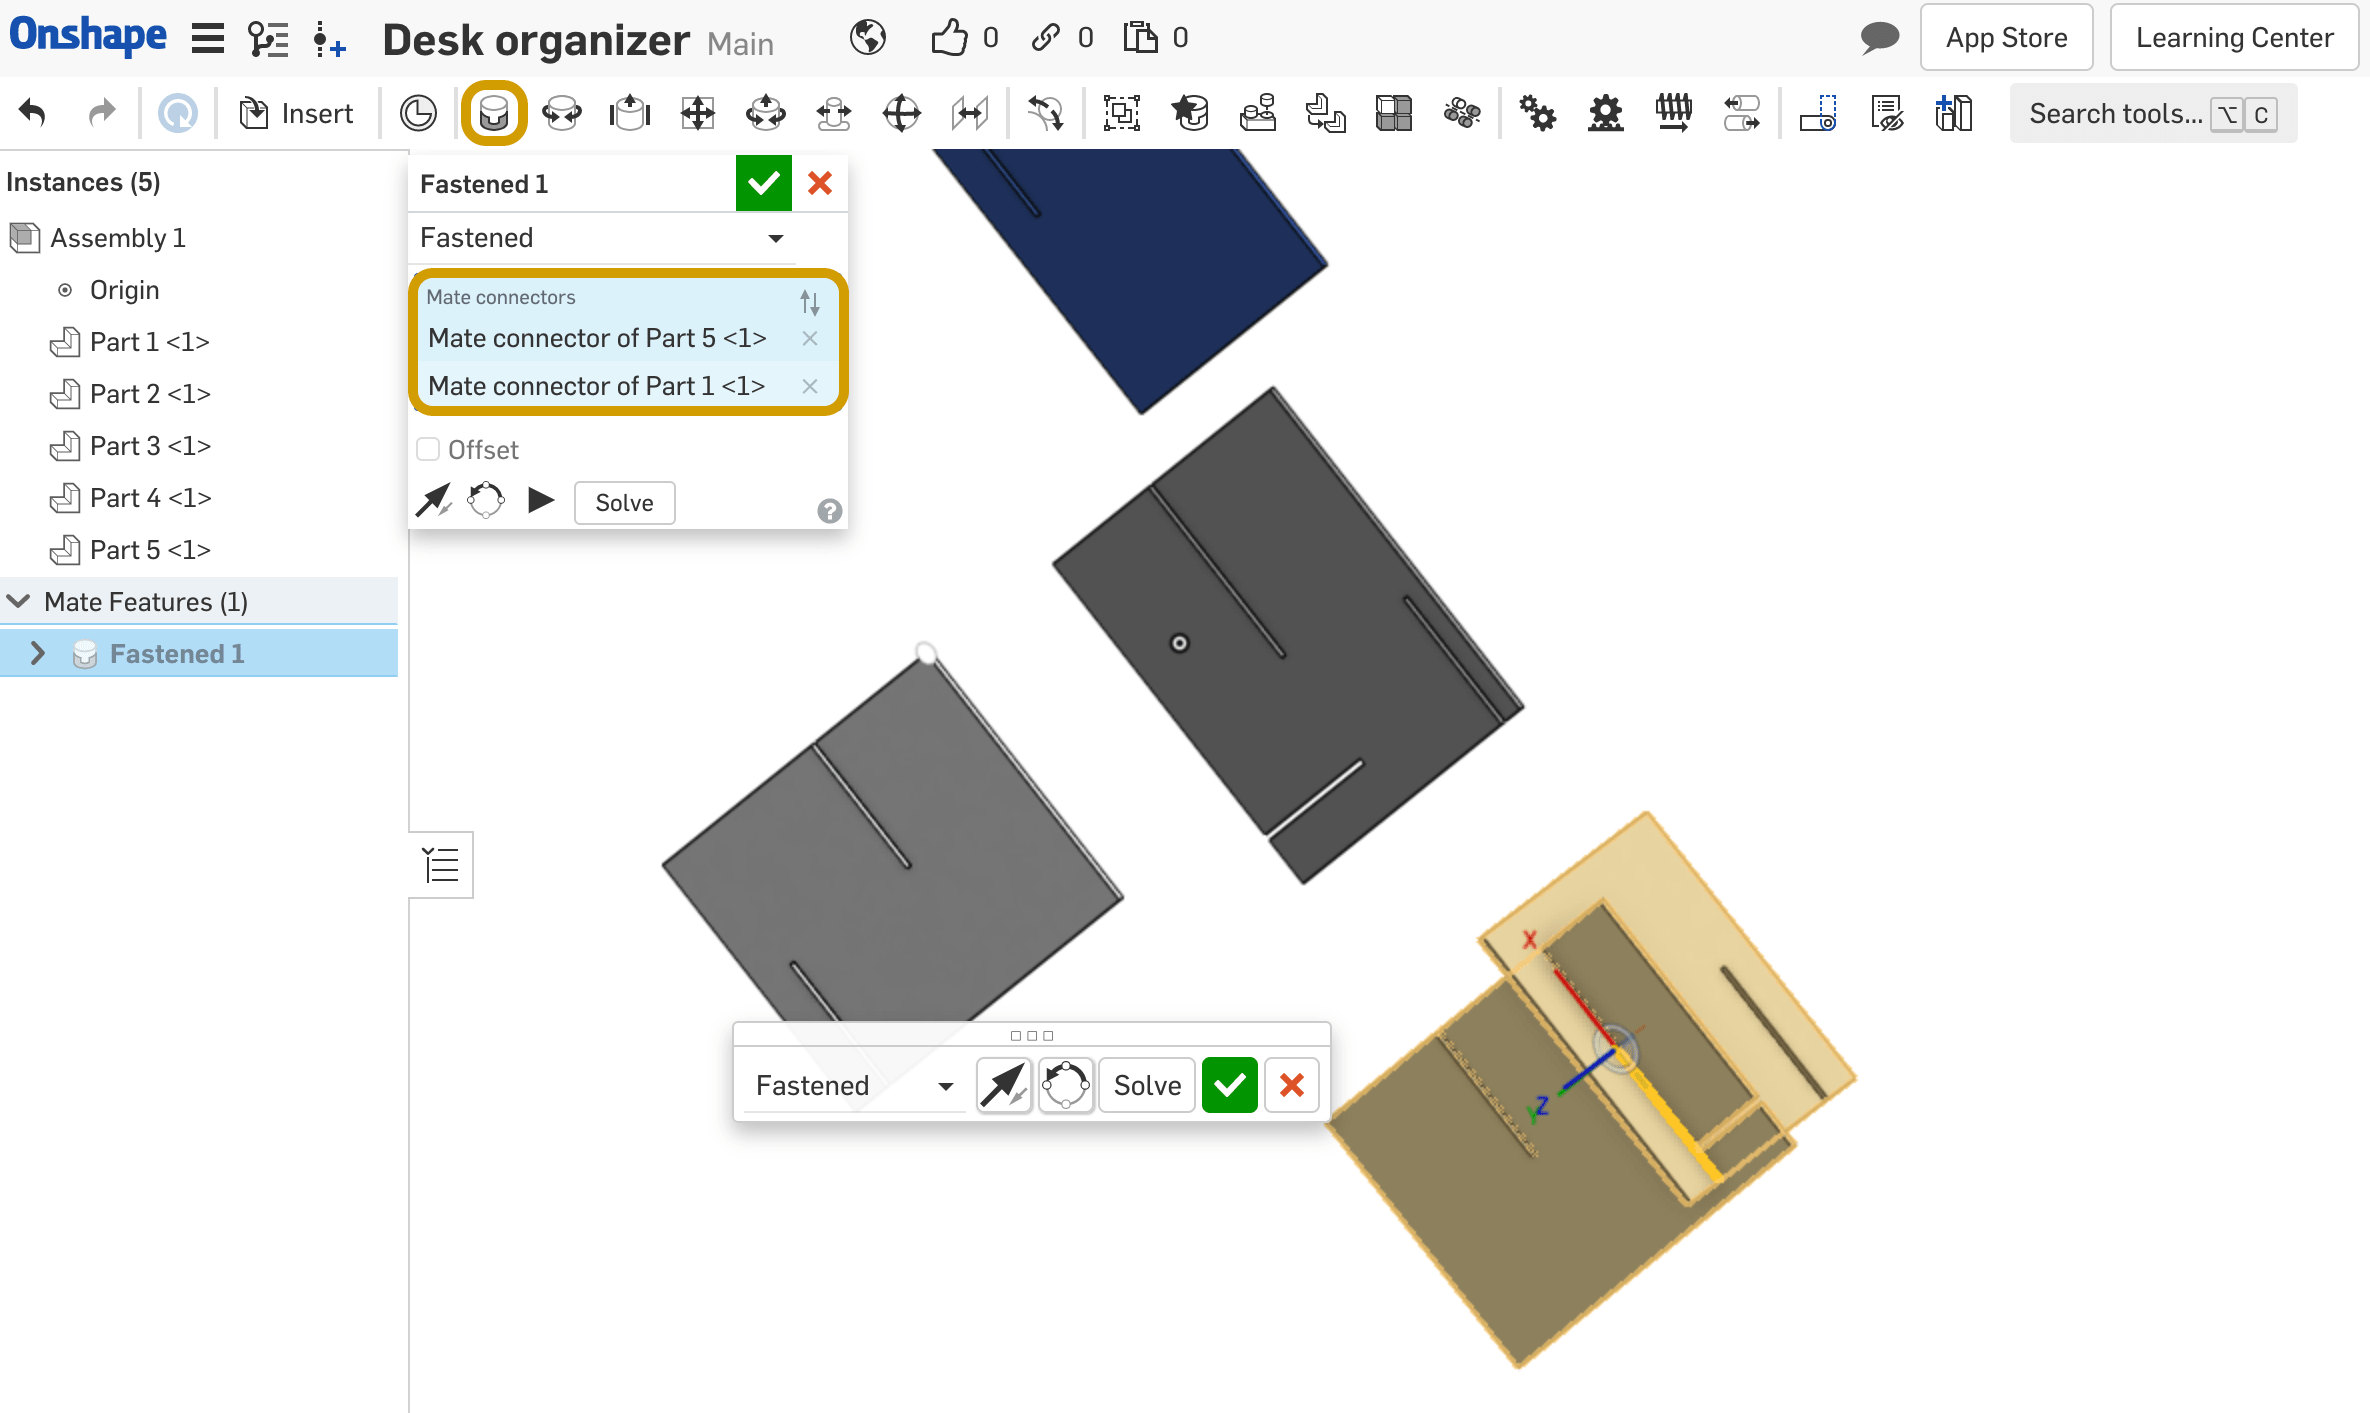
I colored each part in different colors to make the assembly process easier.
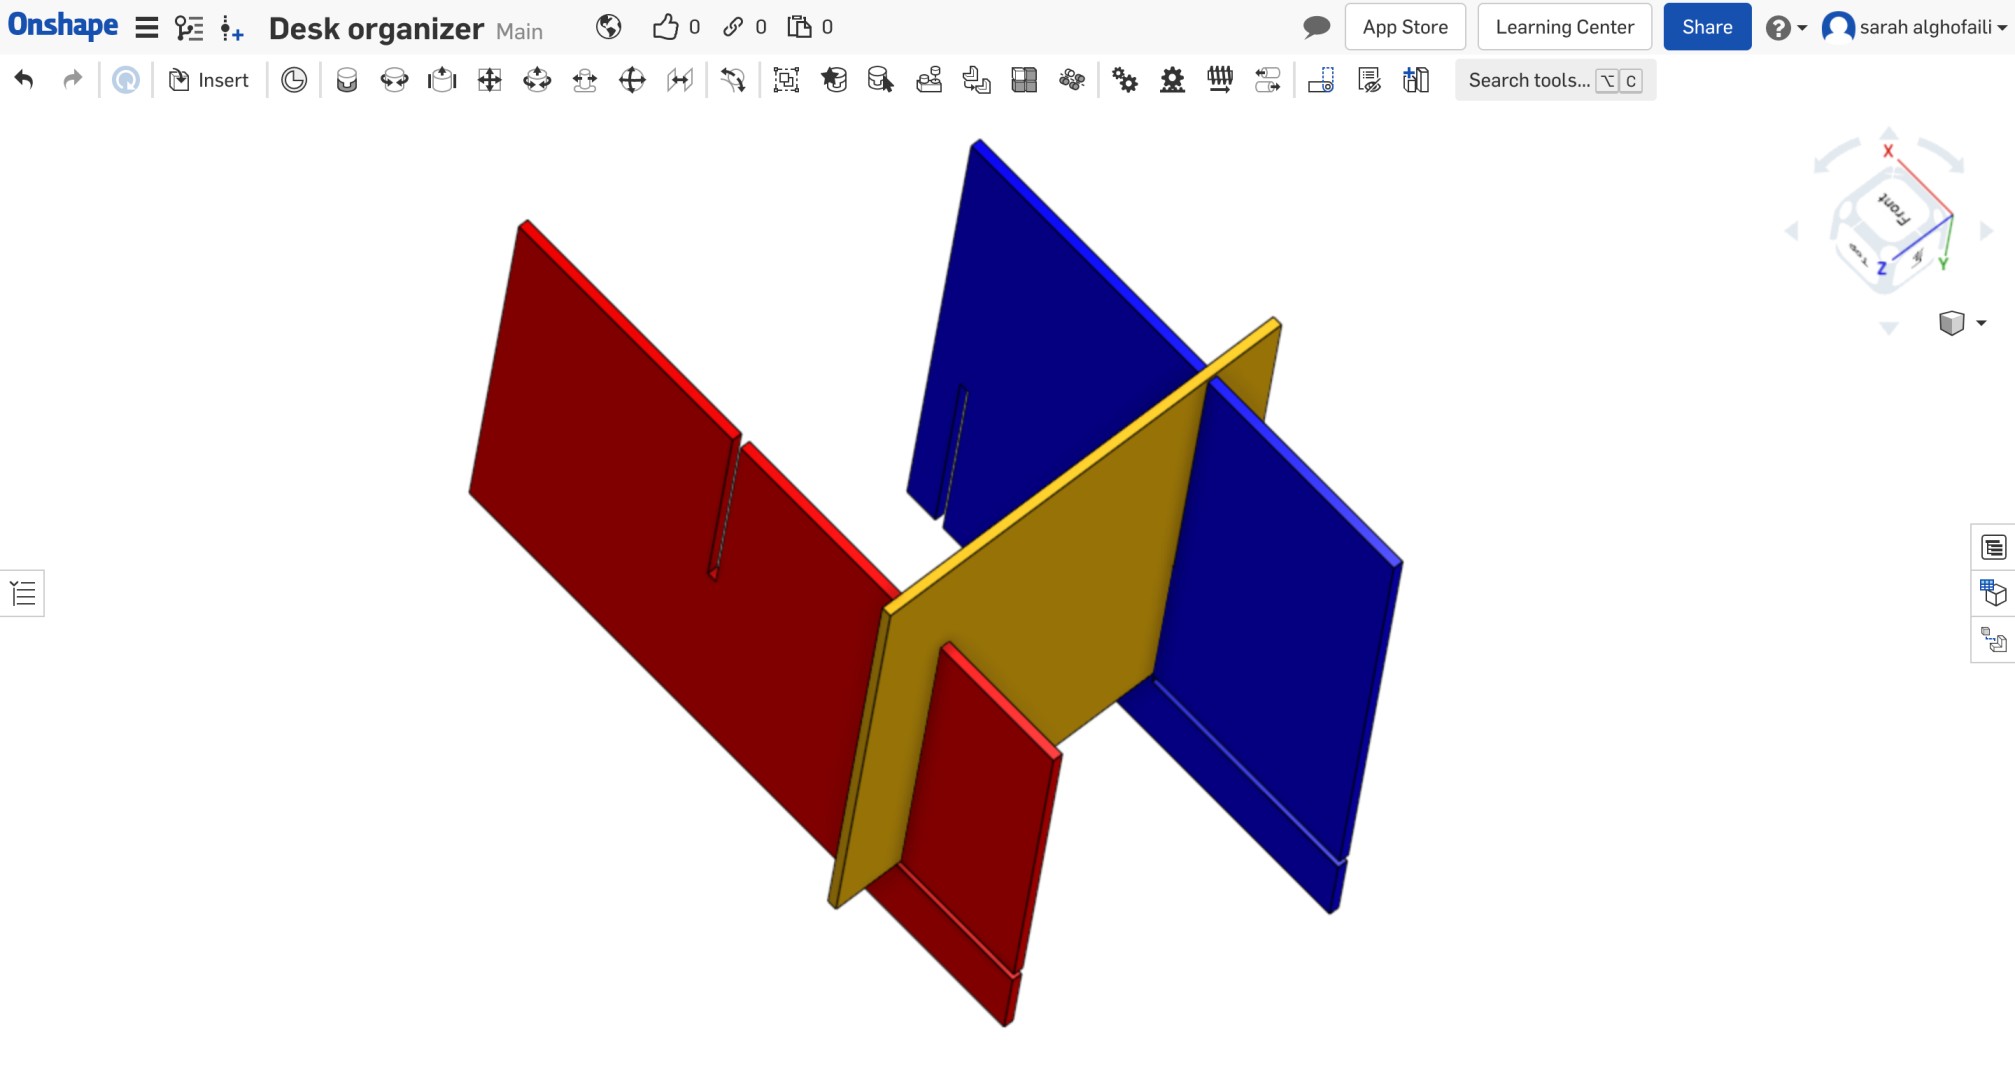
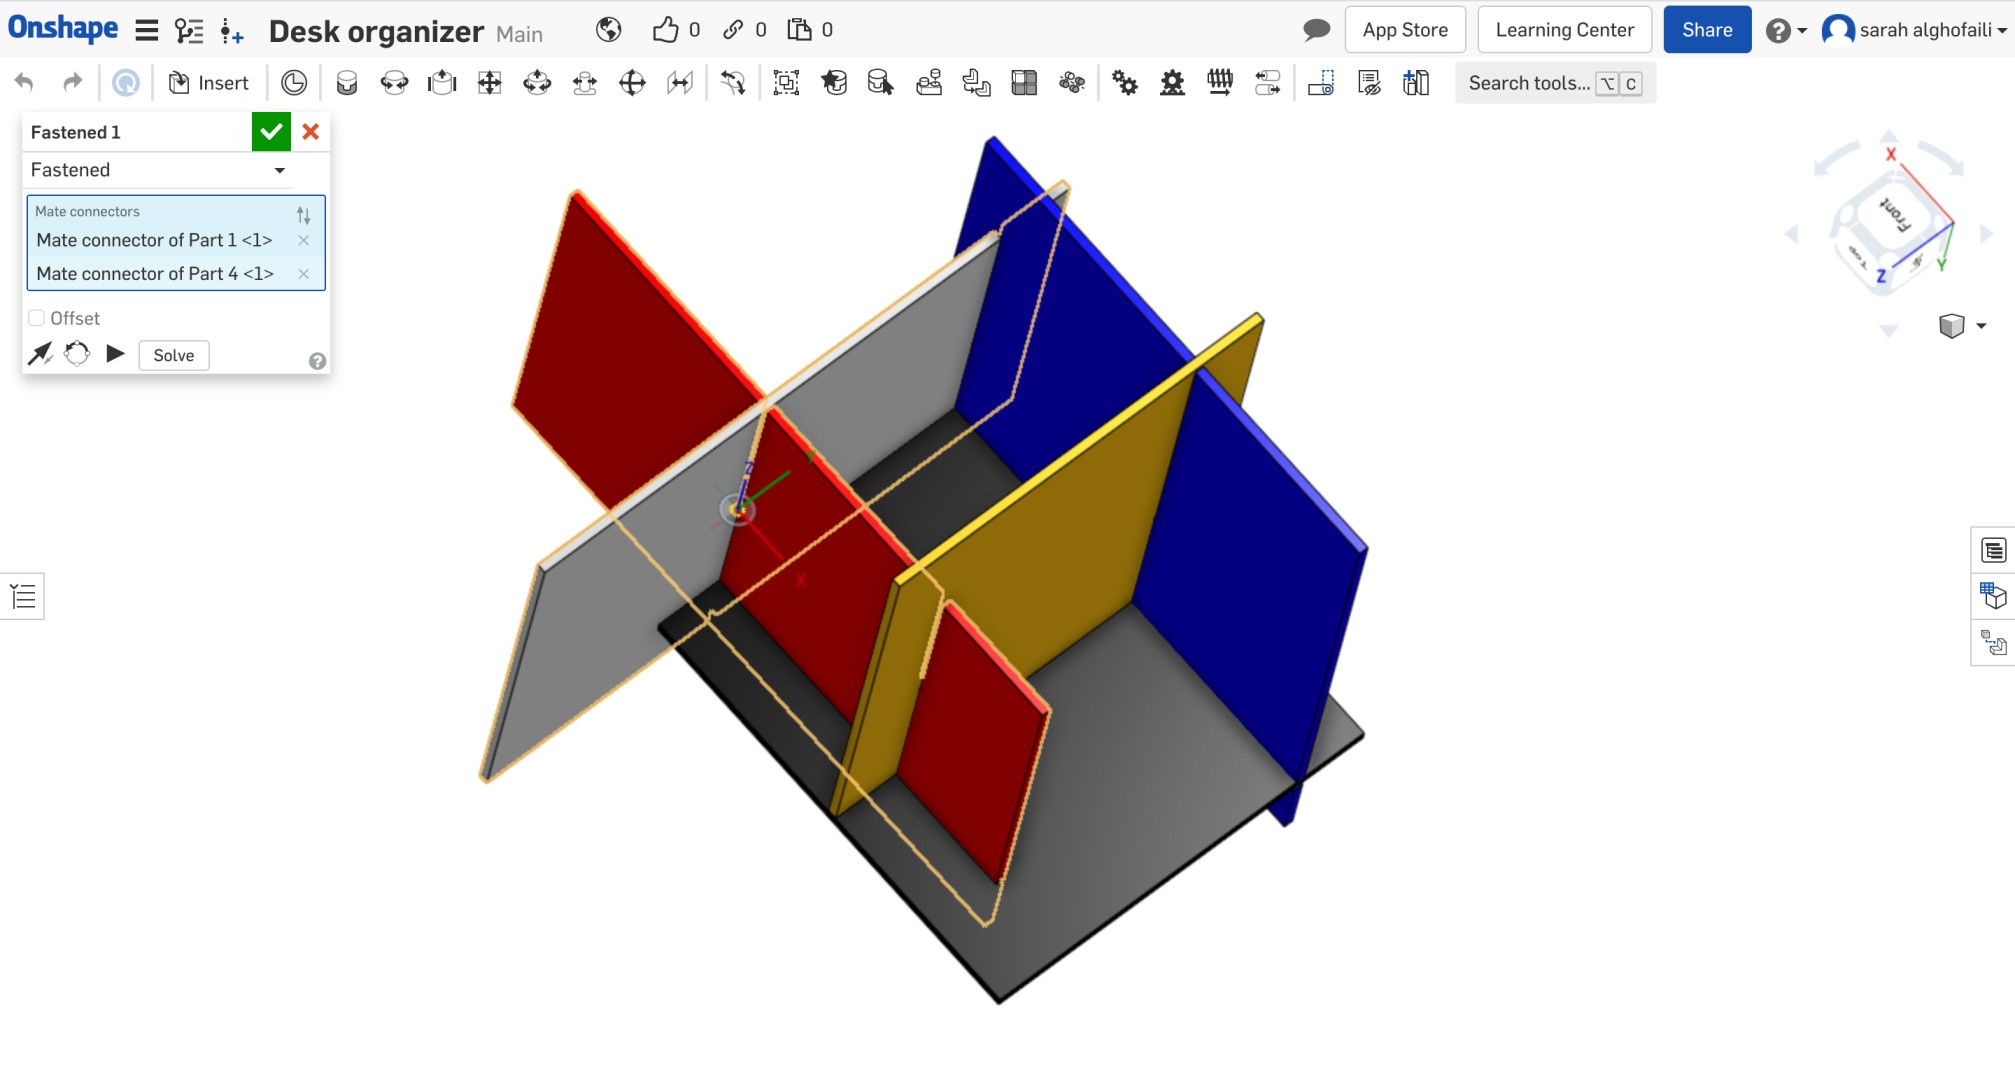
The below figure shows the final design.
Last step, I saved it as a PDF file to prepare the design for the cut using Inkscape program.
Laser cutting
Work Area: 20" x 12"
Machine Dimensions: 32" x 20" x 8.25"
Laser Power: 40W/45W/90W
Power Supply: AC 110V
Laser Type: Sealed CO2 laser tube
Cooling Mode: Recirculating Water-cooling and protection system
Power = 100
Speed = 30
Max. cutting width: 600 mm
Cutting force 350 g
Acceptable material thickness: 0.8 mm
Max. cutting speed: 705 mm/sec
Guaranteed 3 meter tracking
Plugging in the computer in the power cable.
Loading the blade.
Placing the material into the vinyl cutter.
Adjusting the pinch rollers.
CHARACTERIZE LASER CUTTER
In our lab, we have a laser cutter called Full Spectrum Hobby Series laser. It is CO2 laser system.

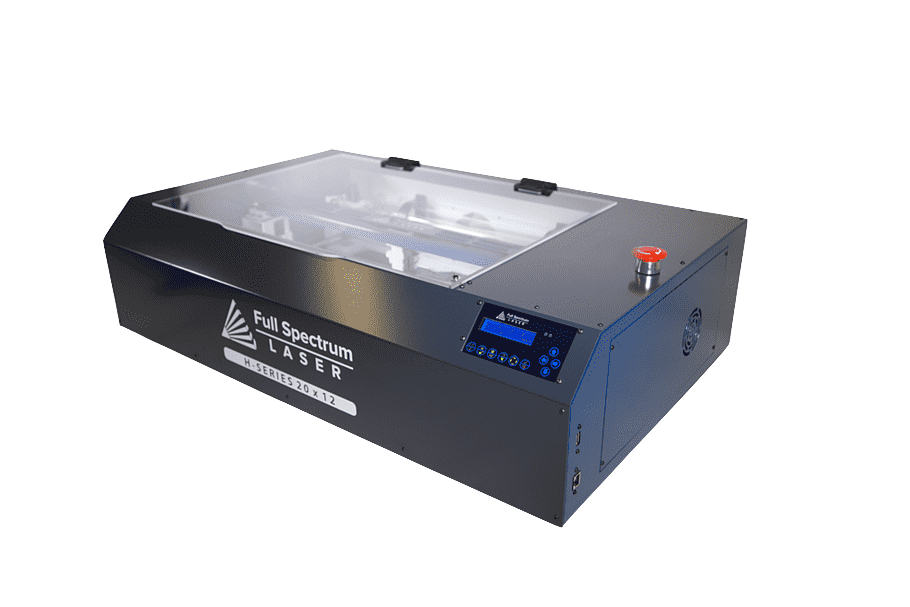
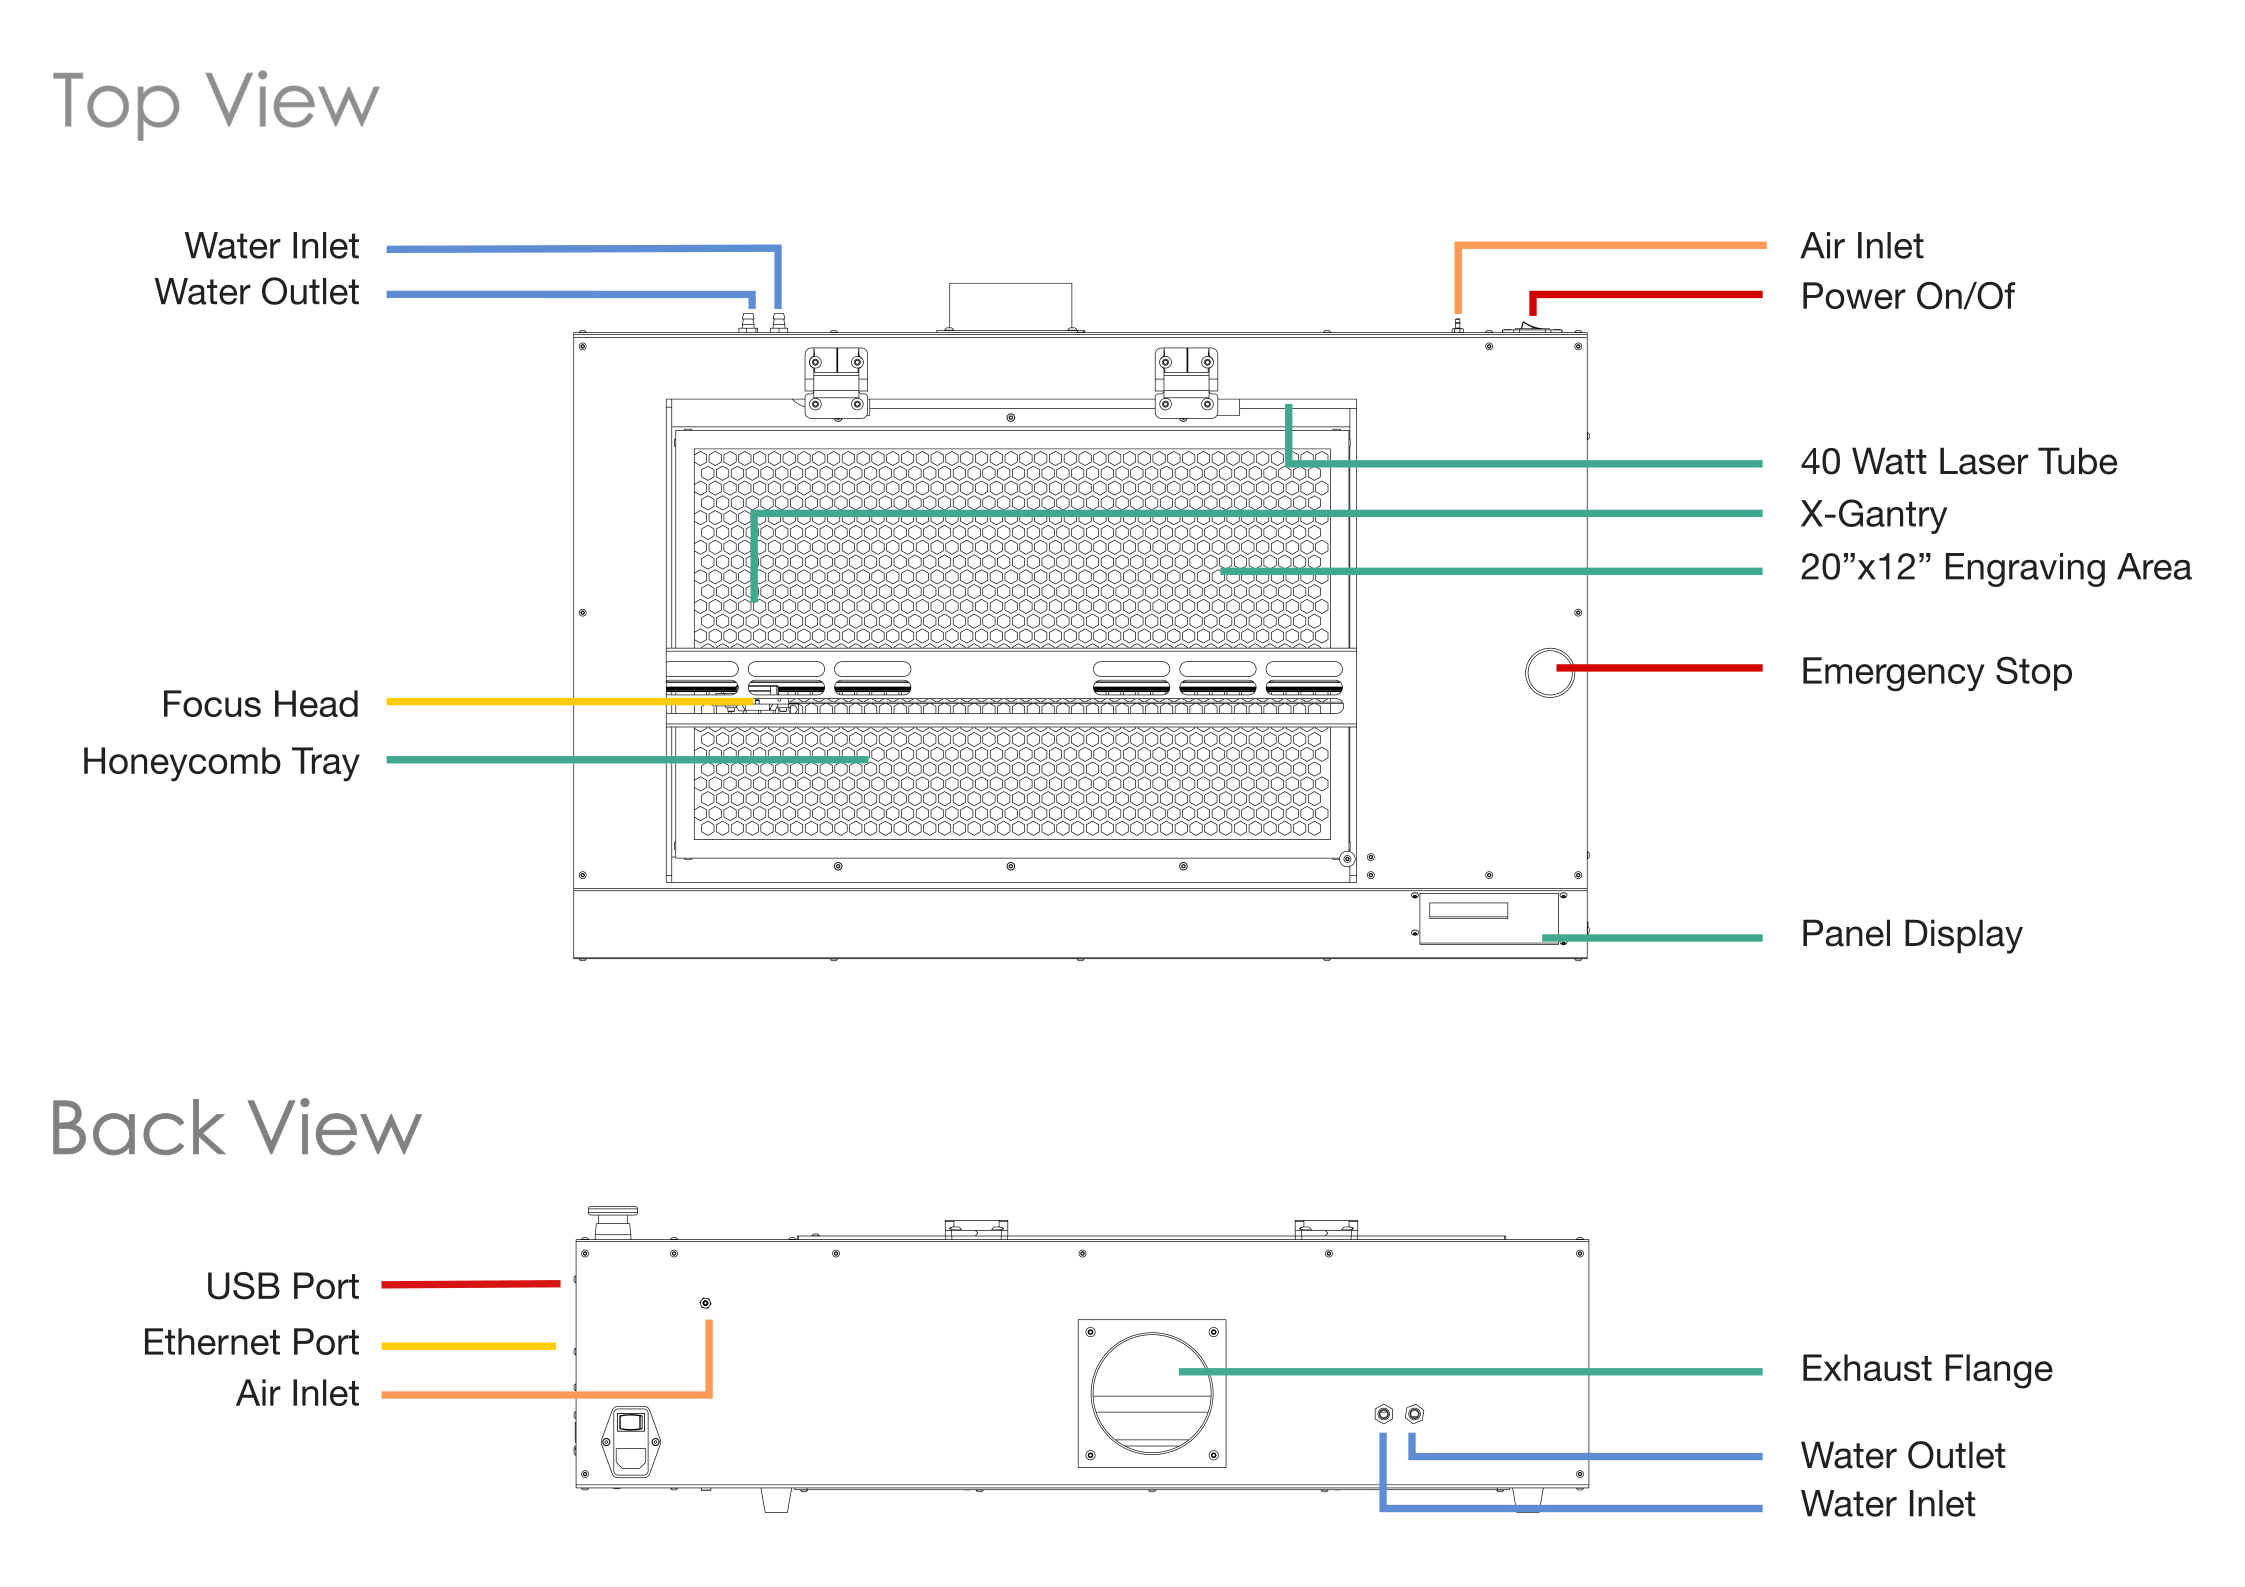
Full Spectrum H-Series laser cutter features:
After connecting the water system,air compressor and the exhaust to the machine, I opened the RetinaEngrave software.
To start the cutting process, I connected the laser cutter to the software via Ethernet and entered the IP address. Then, I imported the design using the print function on the inkscape program.
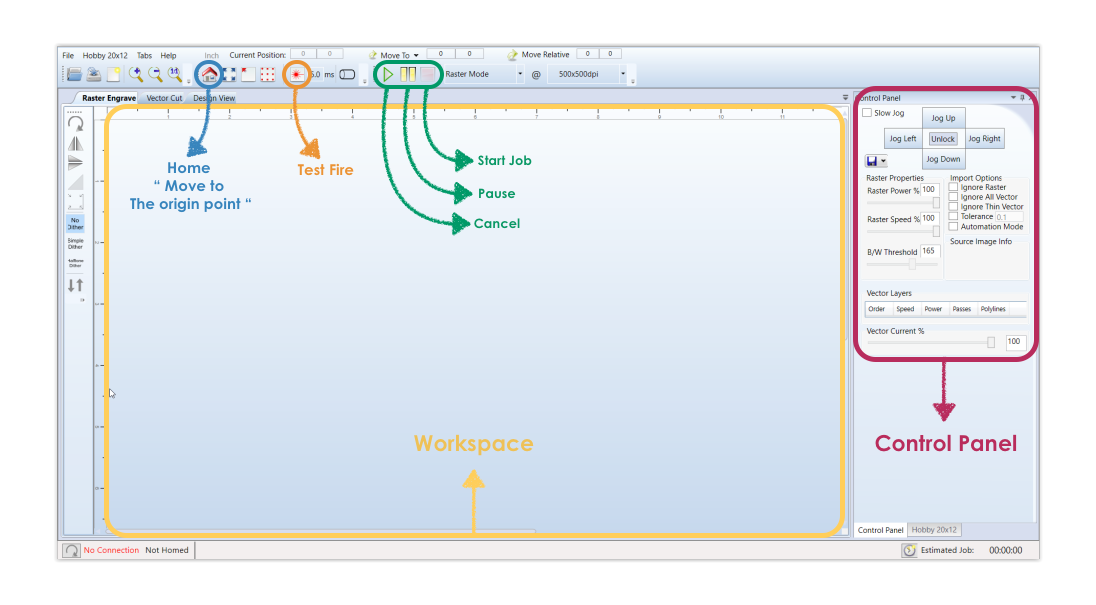
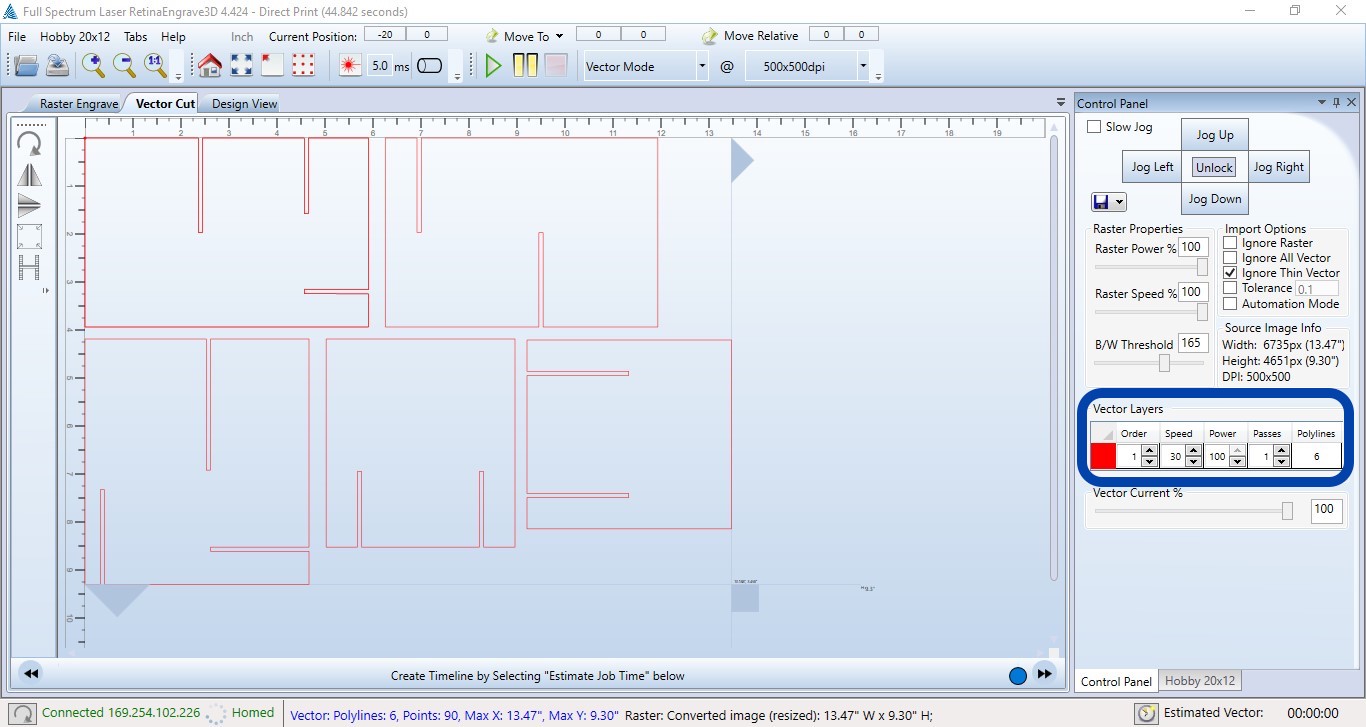
What is RetinaEngrave software?
It is a software that combines both raster and vector jobs into one print job.
This is the RetinaEngrave interface.
After a quick search in the Full Spectrum website, I found the recommended settings for the power and speed depending on the material type.
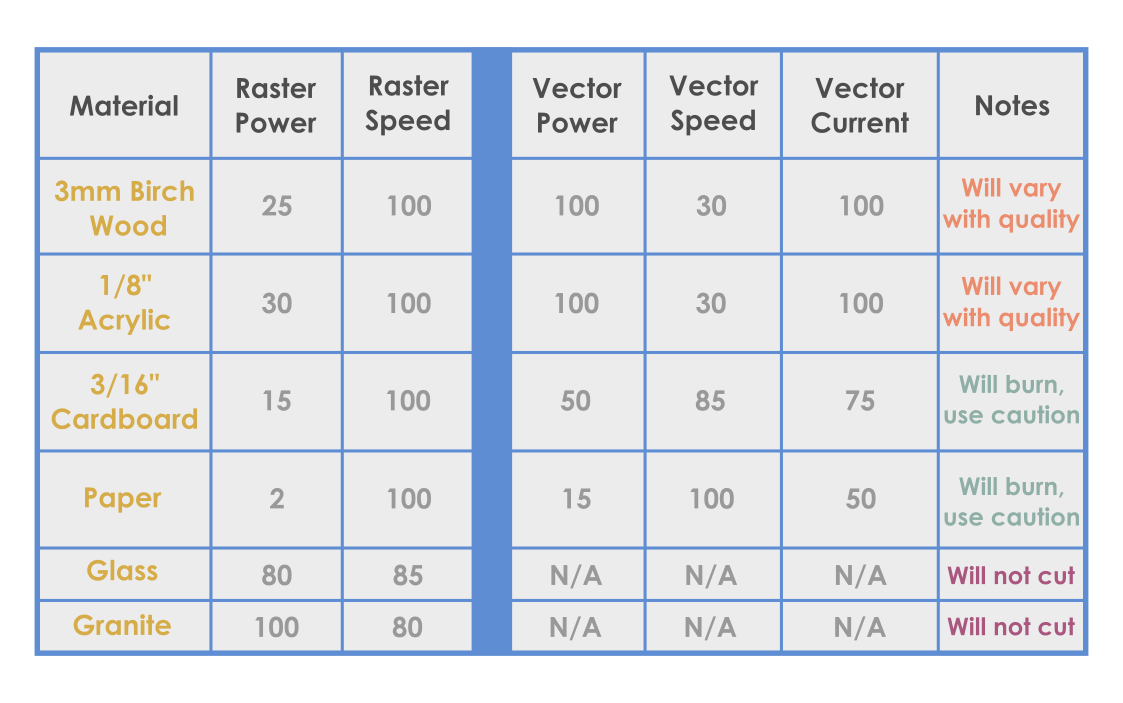
For my design, I decided to use the wood material.
Aslo, I just need to use the vector setting for the cutting.
The Laser cutting setting :
The last step is placing the material on the workplace then pressing the Run job button.
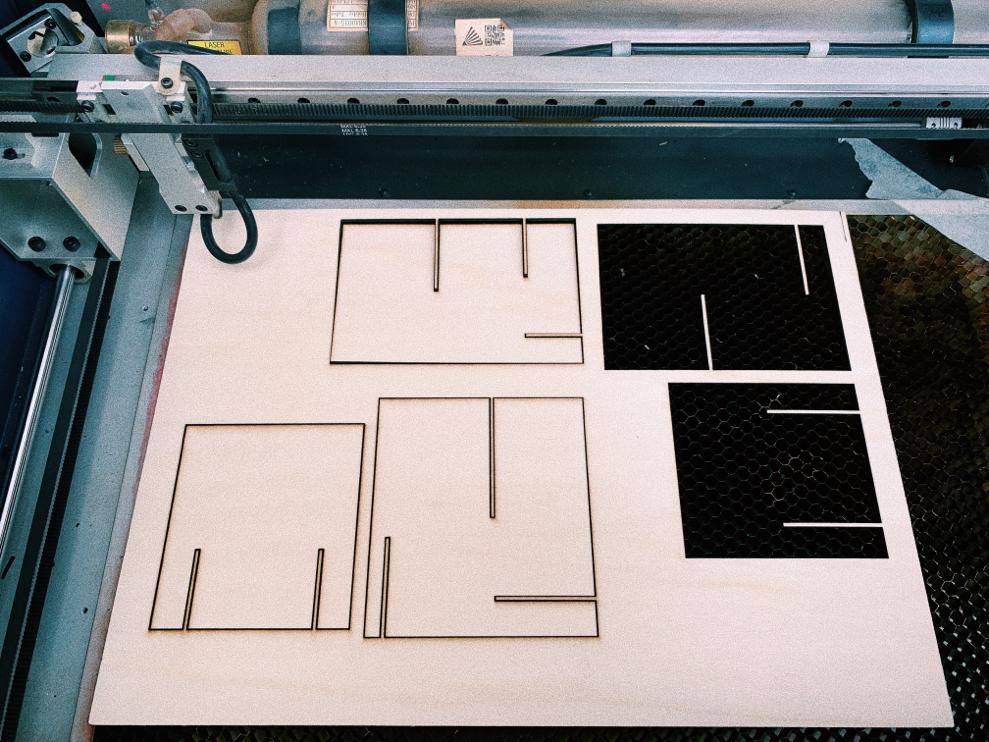
Yes! The parts were cut perfectly, and the junctions fit correctly.
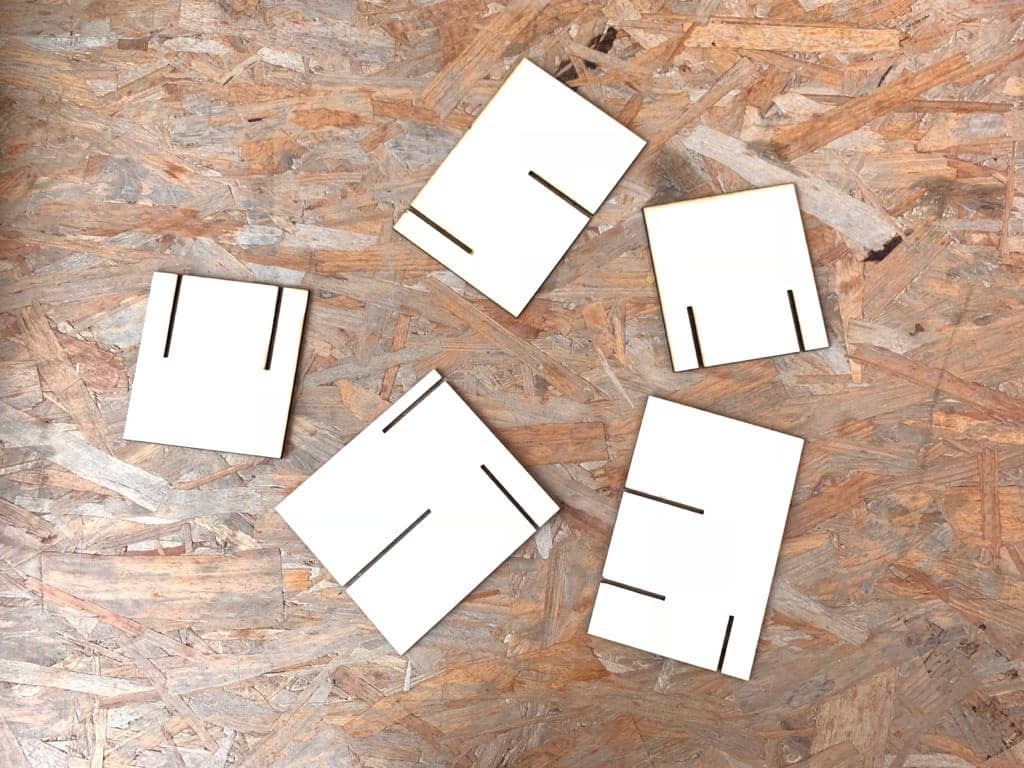
Finally, this is the result !
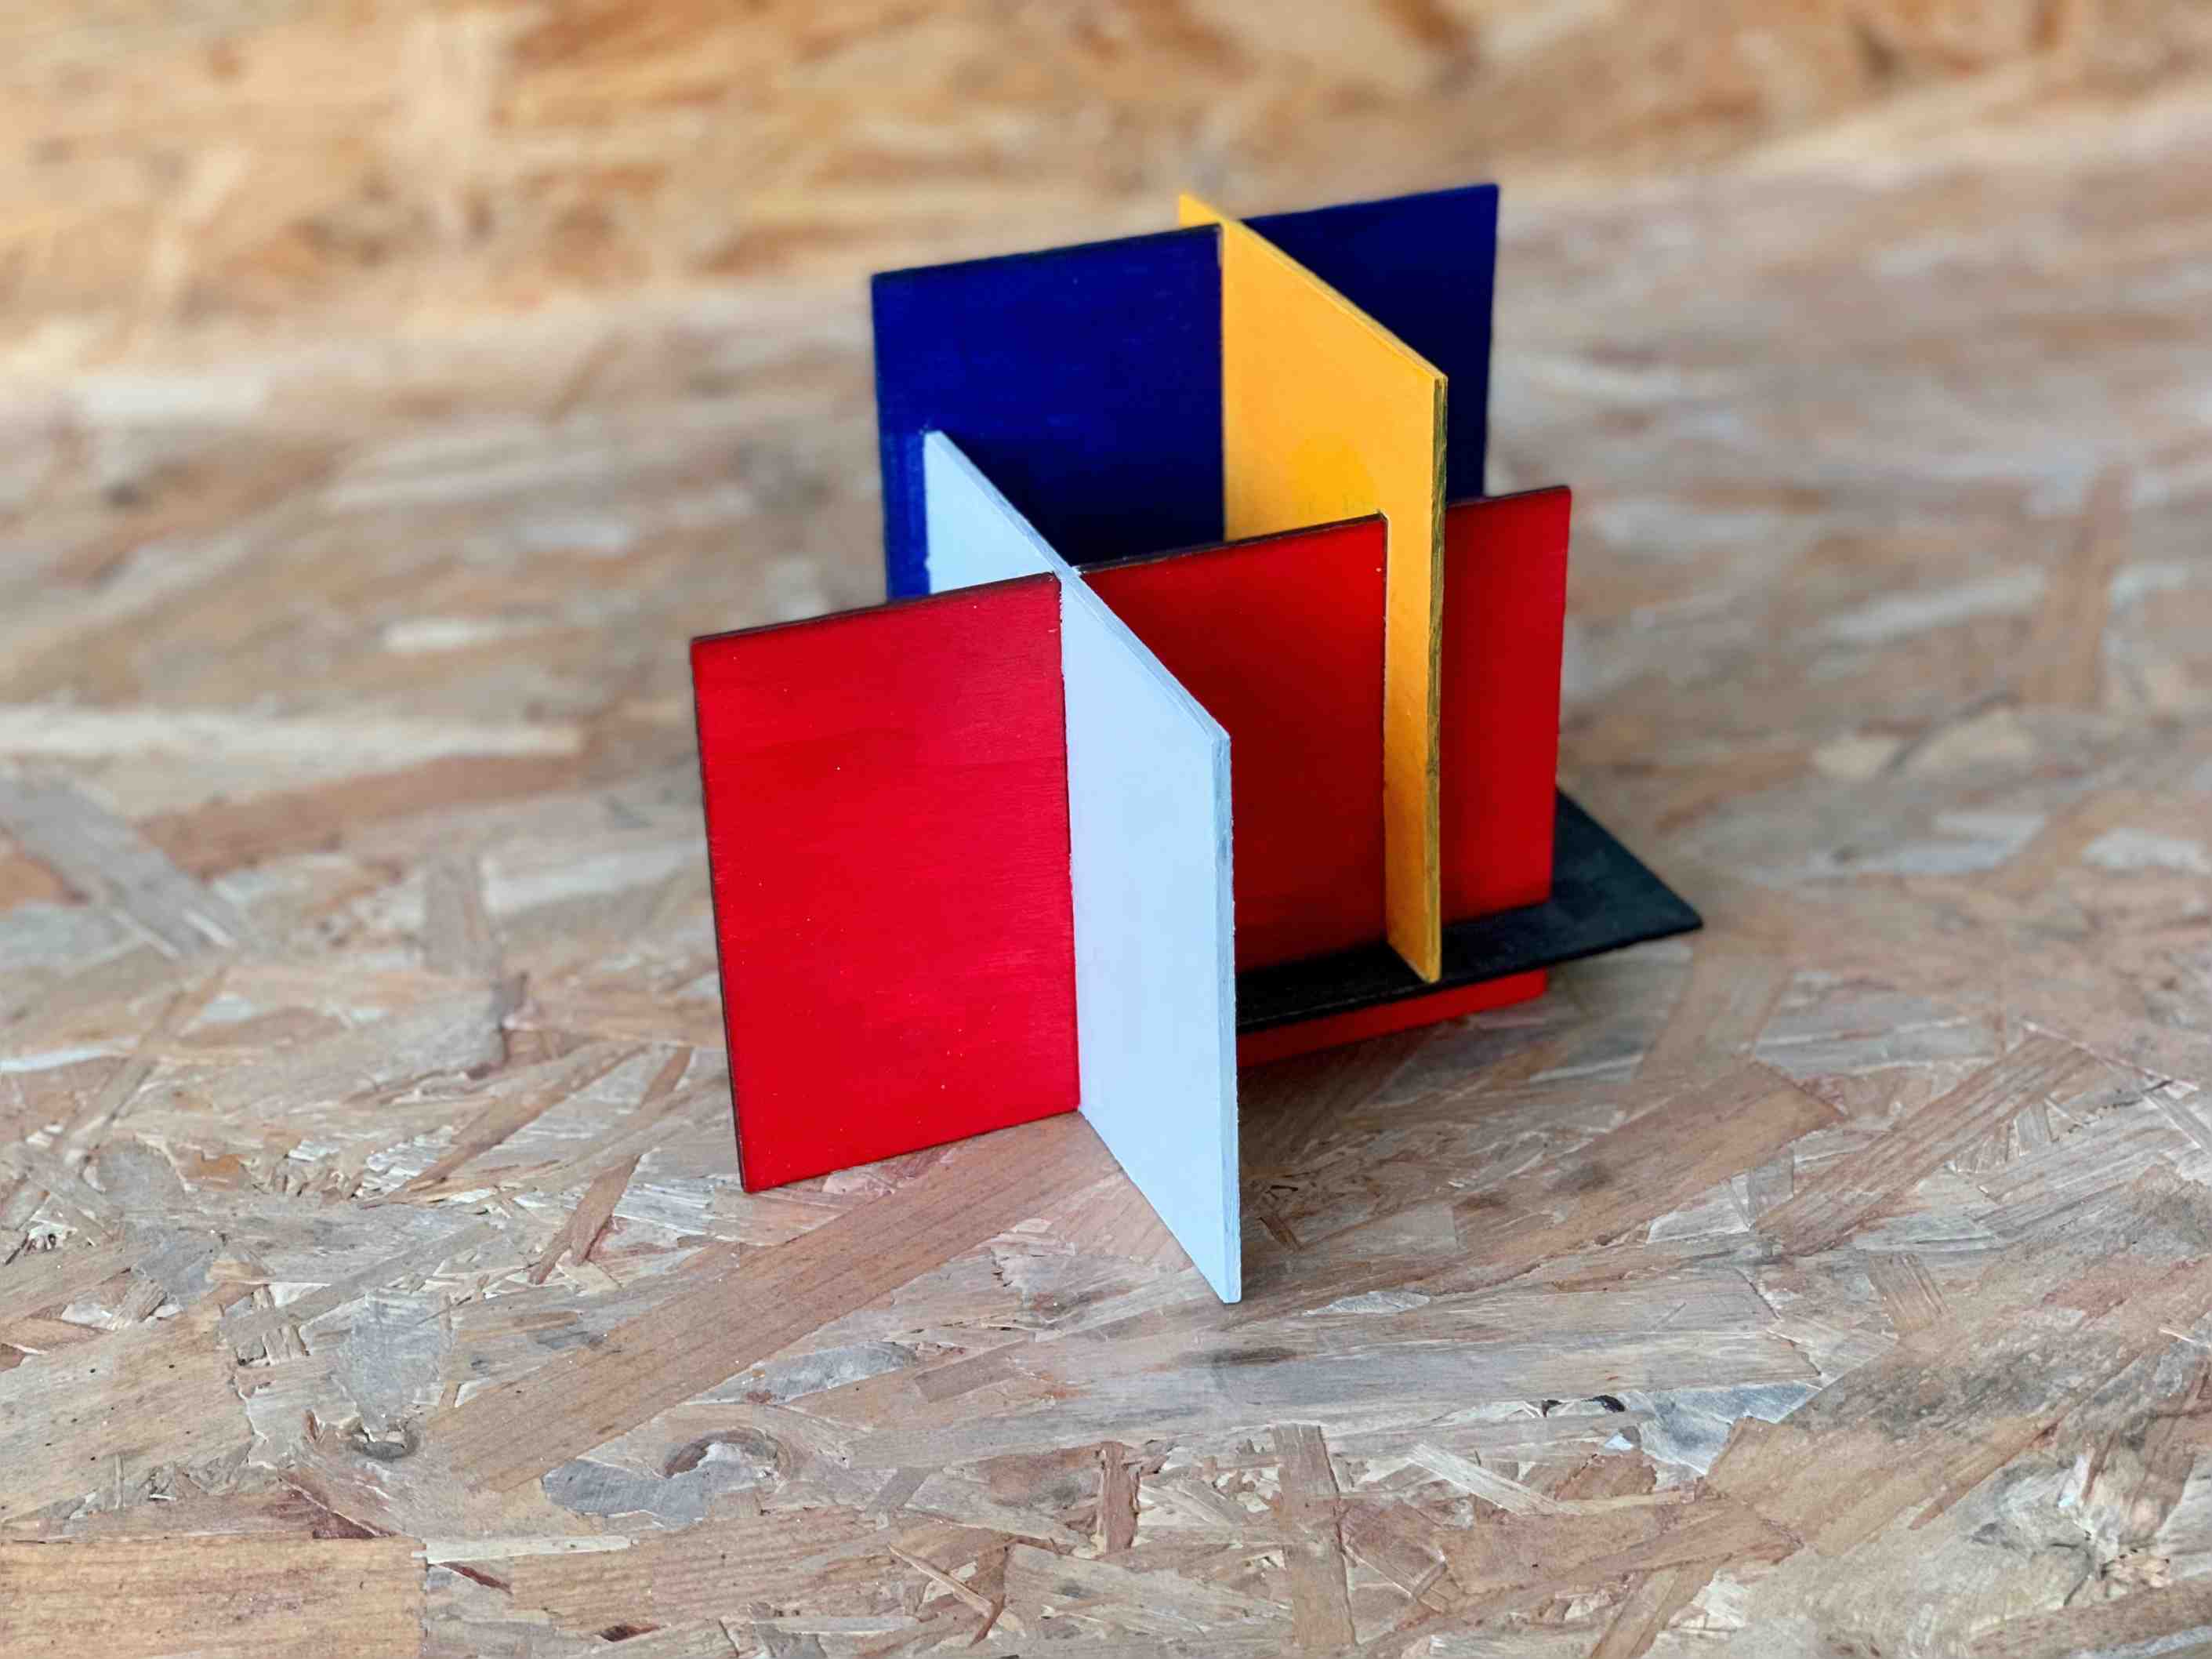
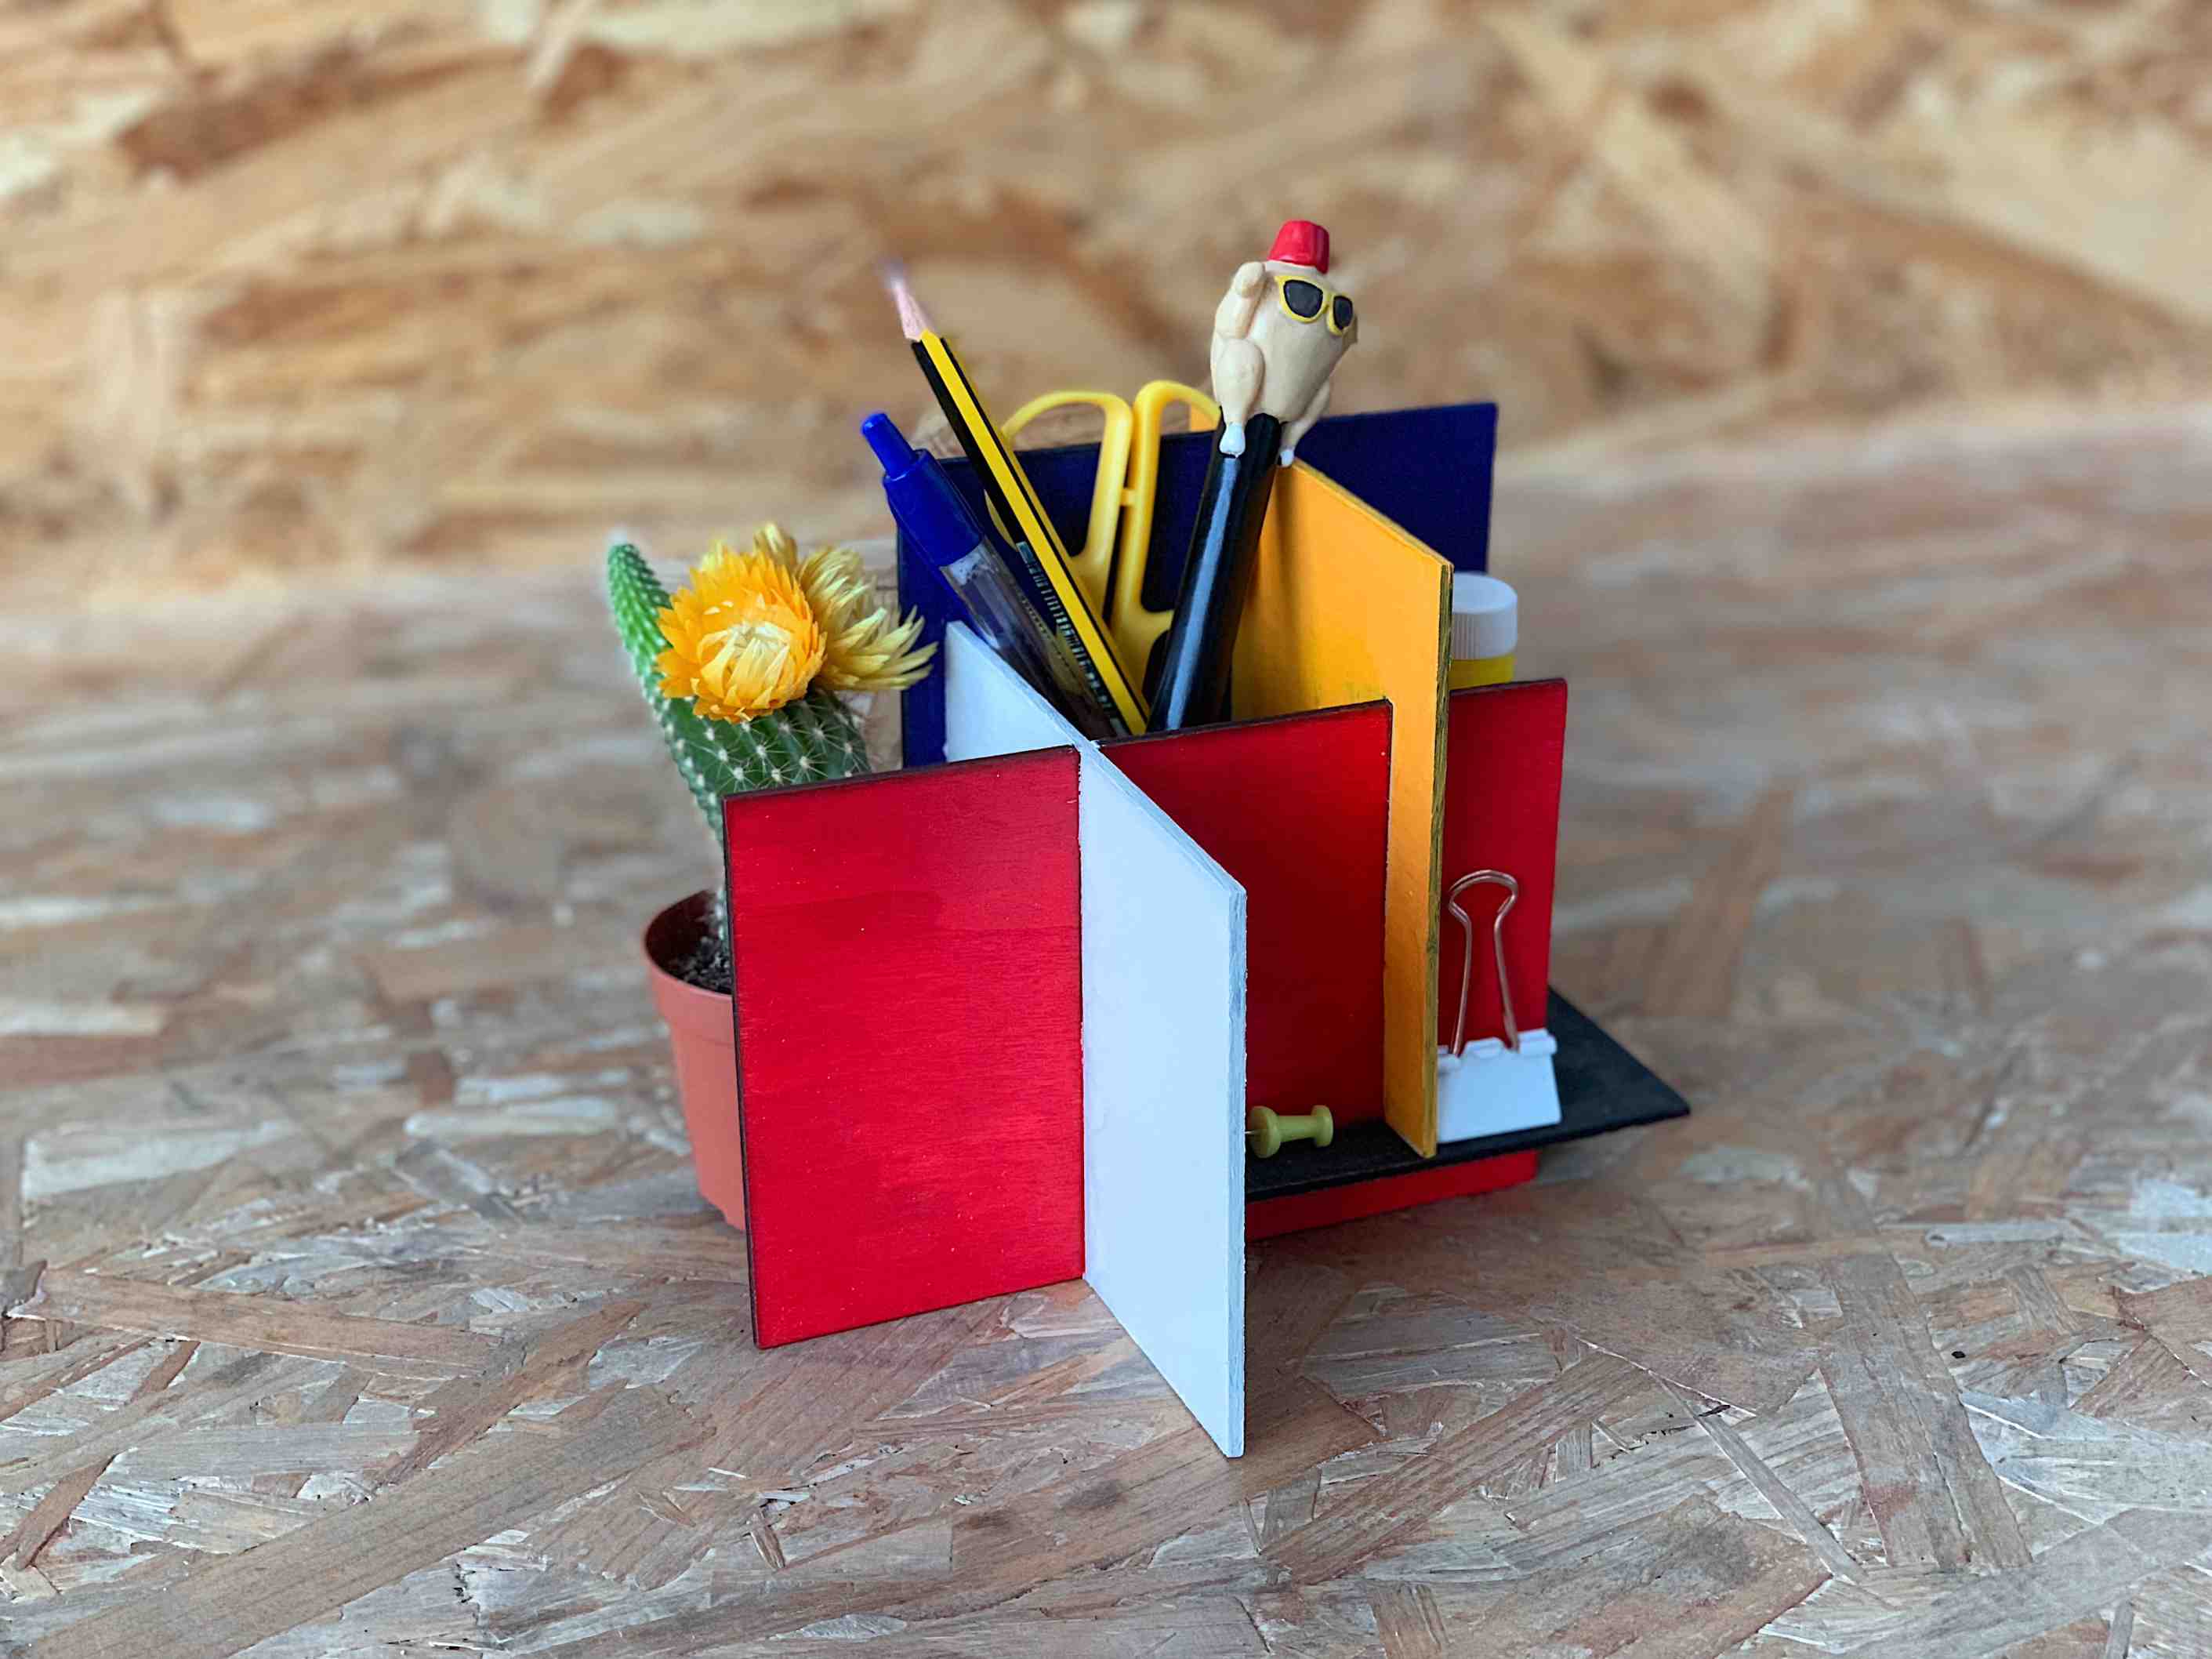
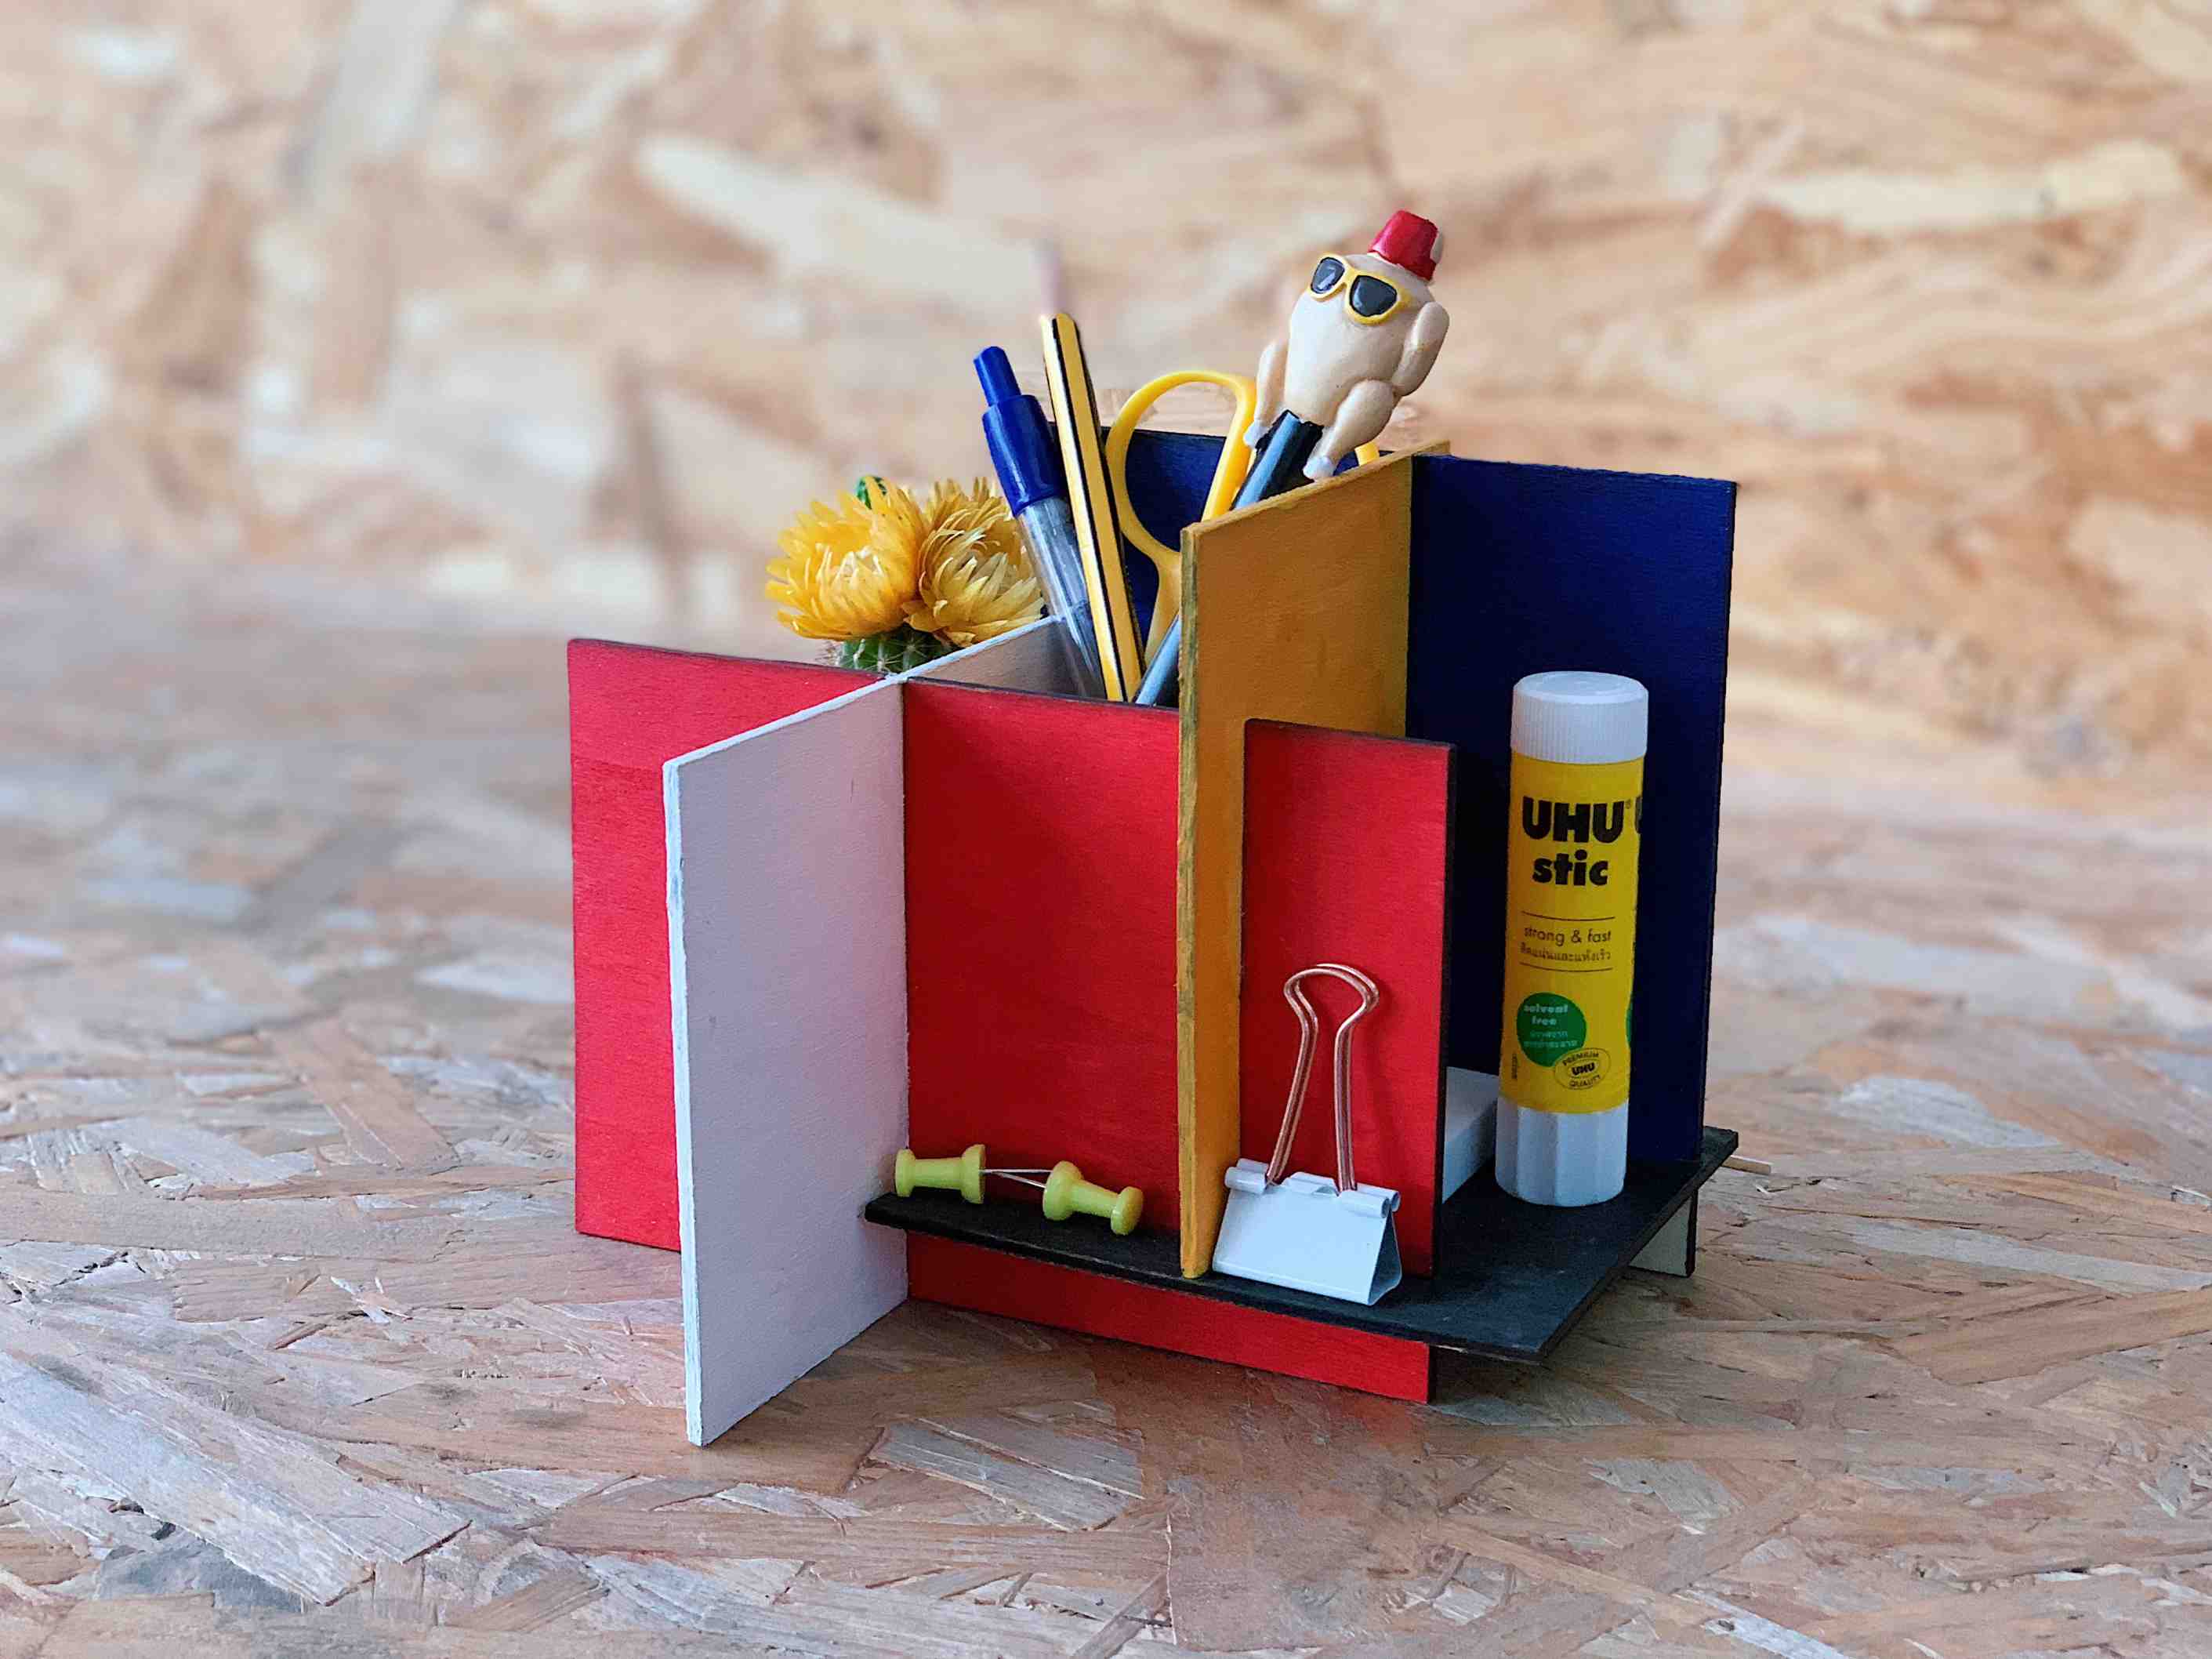
Like it ! So happy with the result !
Vinyl Cutter
What is Vinyl Cutting?
A vinyl cutter is a type of computer-controlled plotter. The computer controls the movement of a sharp blade to cut designs and text into a single color thin self-adhesive plastic or vinyl.
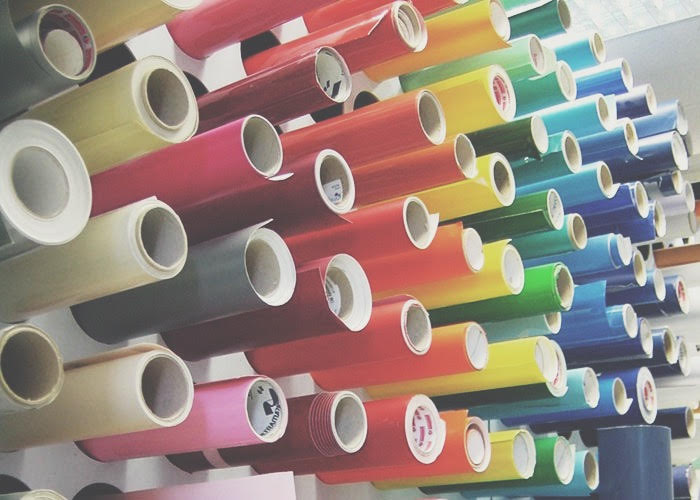
For the vinyl cutter, I chose to make a sticker for decorating my laptop. Dwight Schrute is one of my favorite characters from “The Office” show so I decided to make his face and his famous word “False” as a sticker. I think it will be very funny, right?
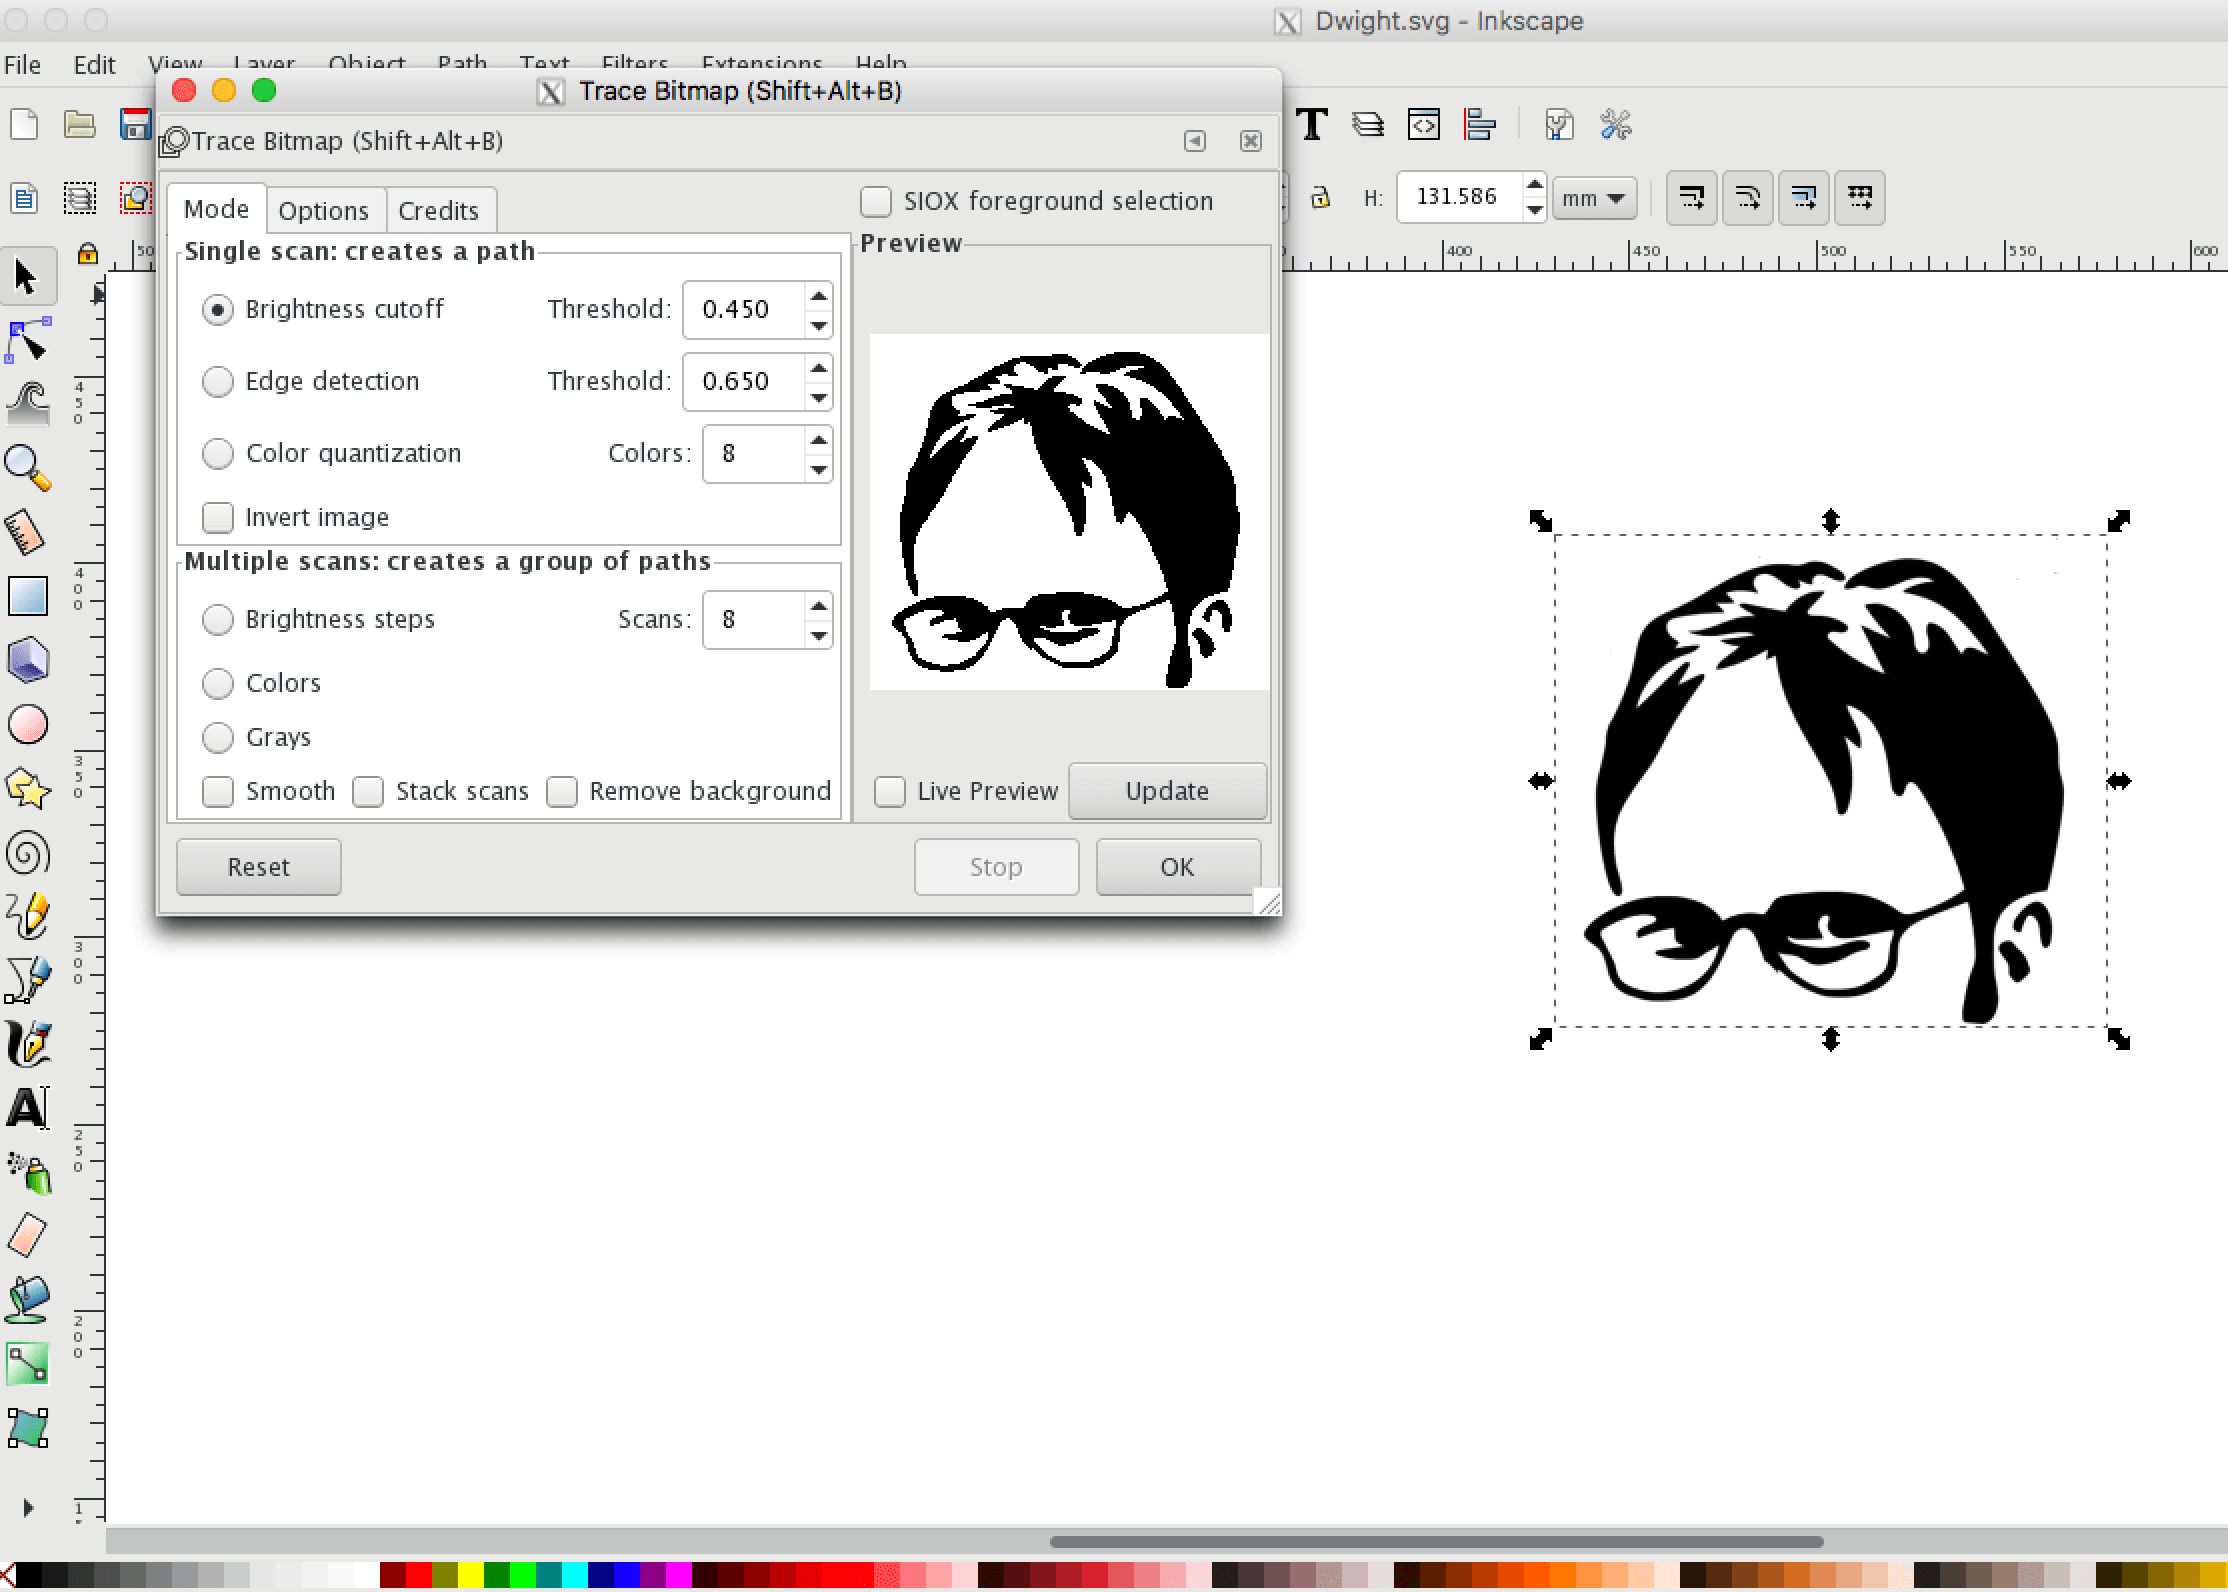
After choosing the image, I need to vectorize it first. For that, I opened the Inkscape to use the Trace Bitmap tool.
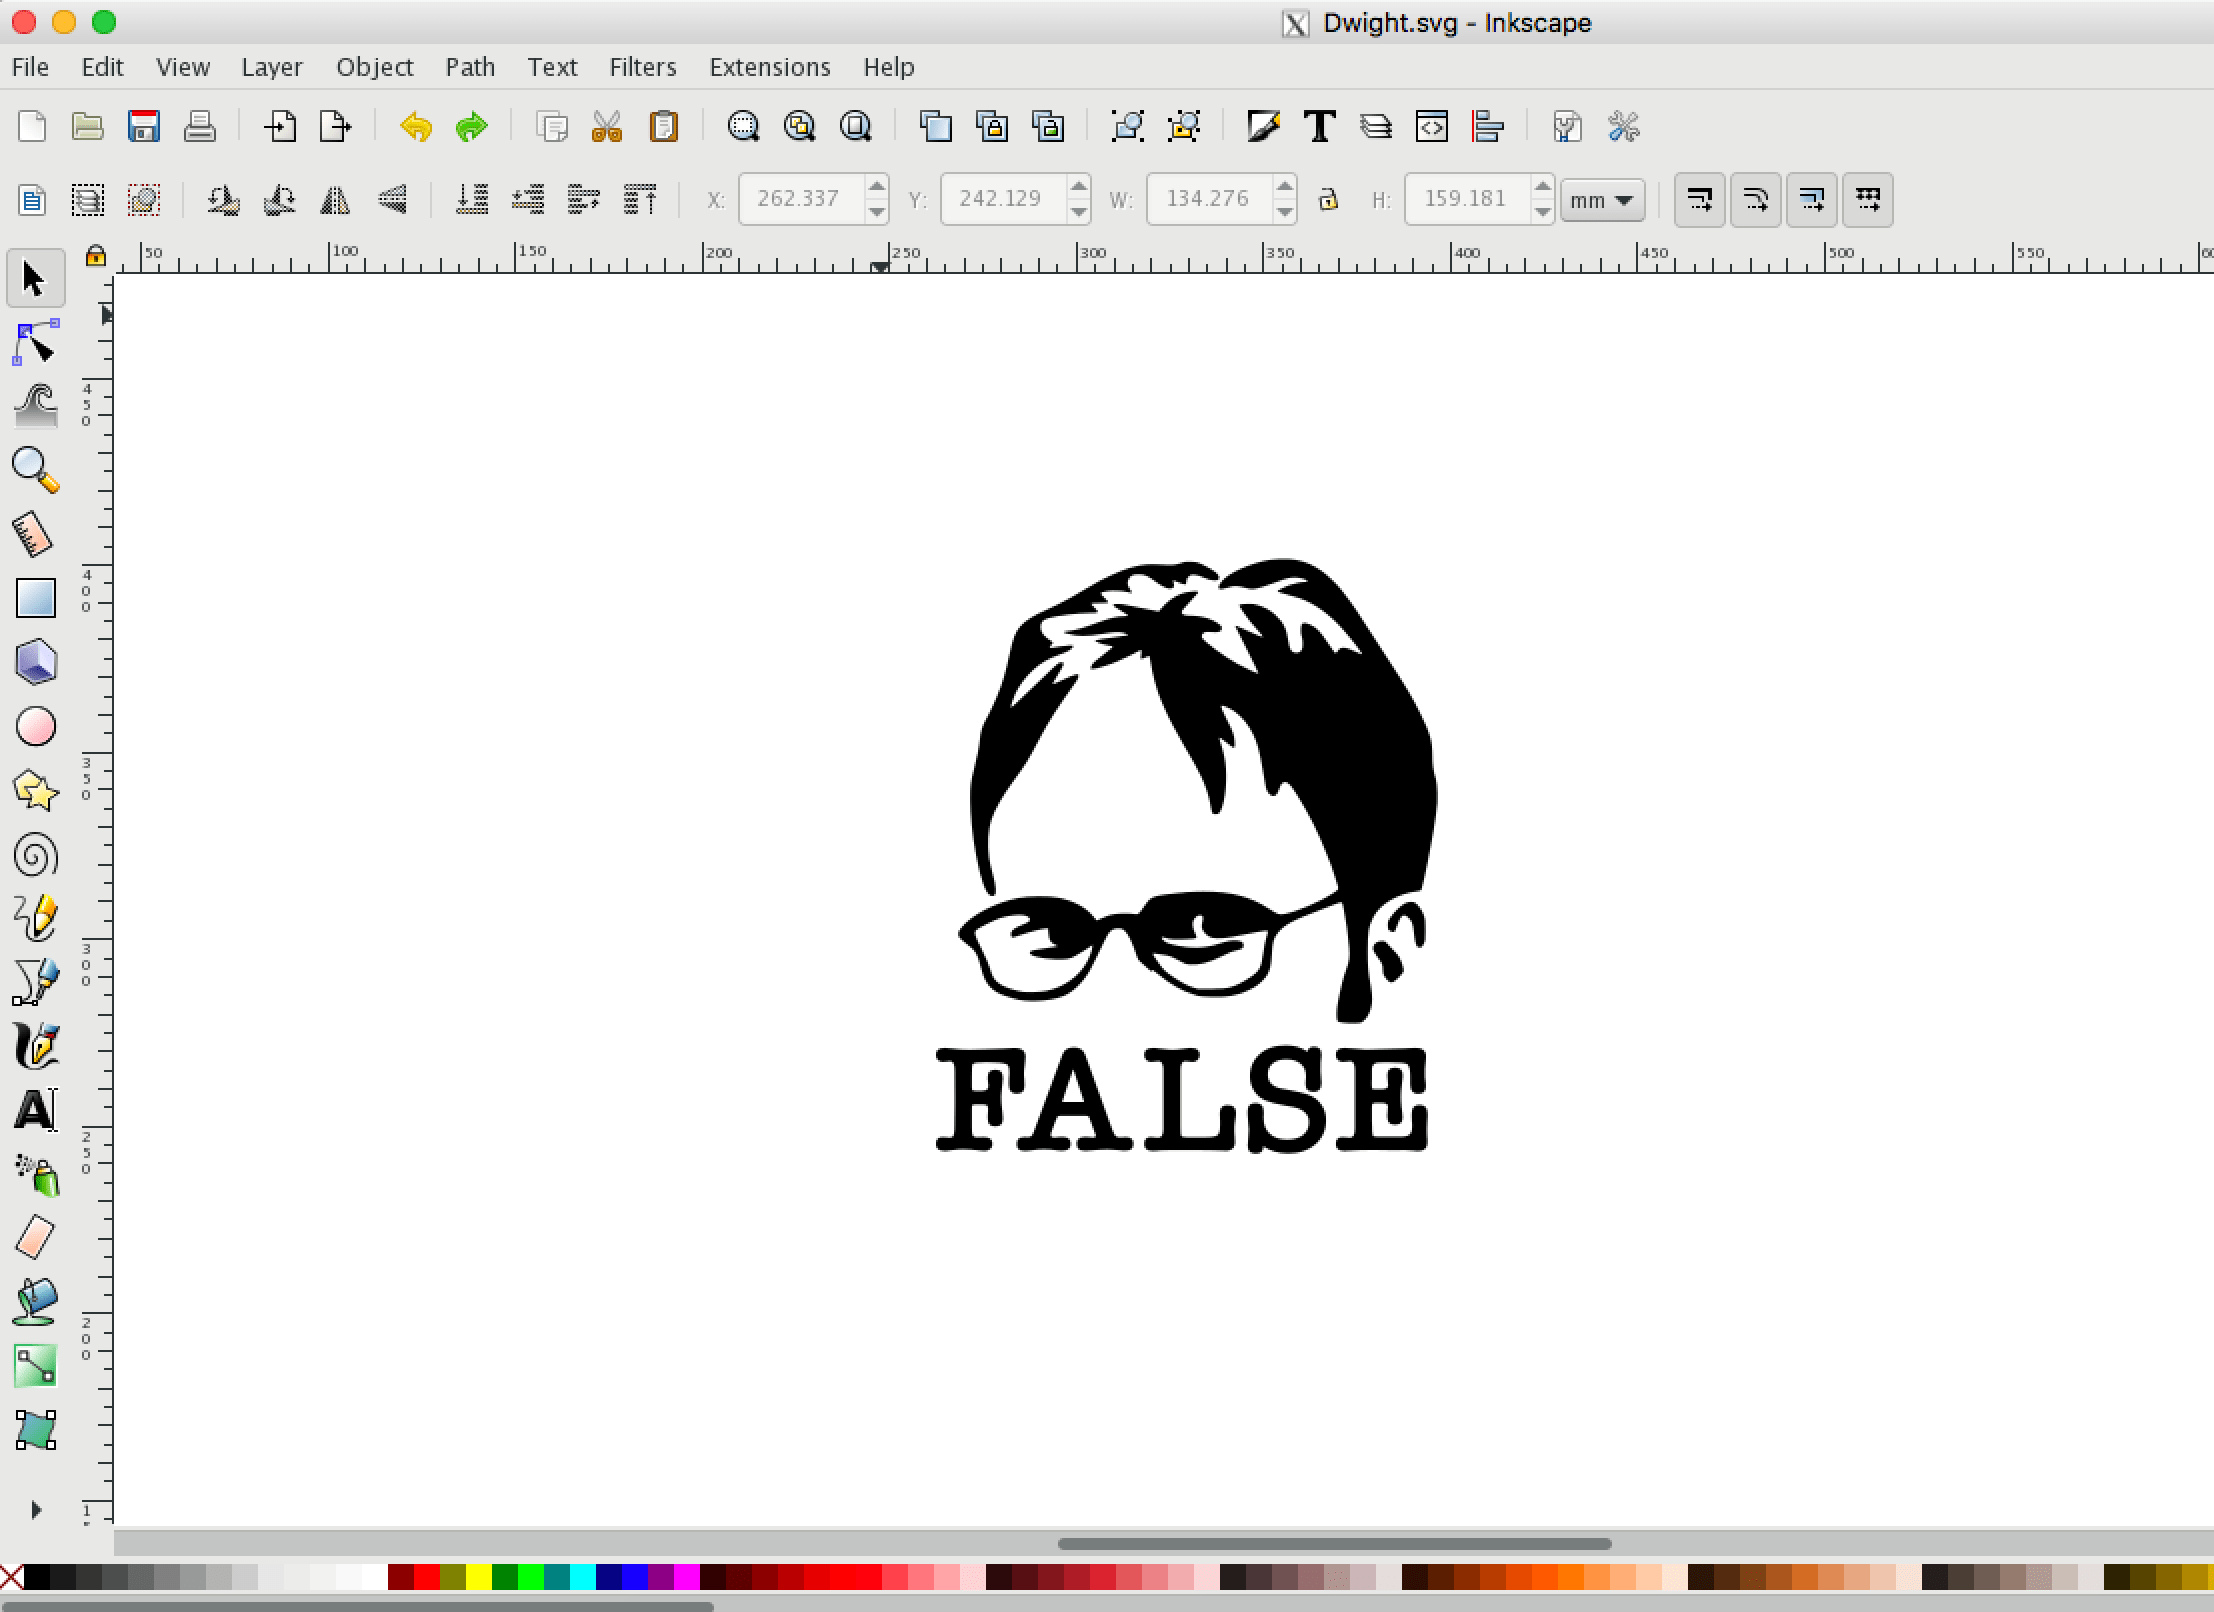
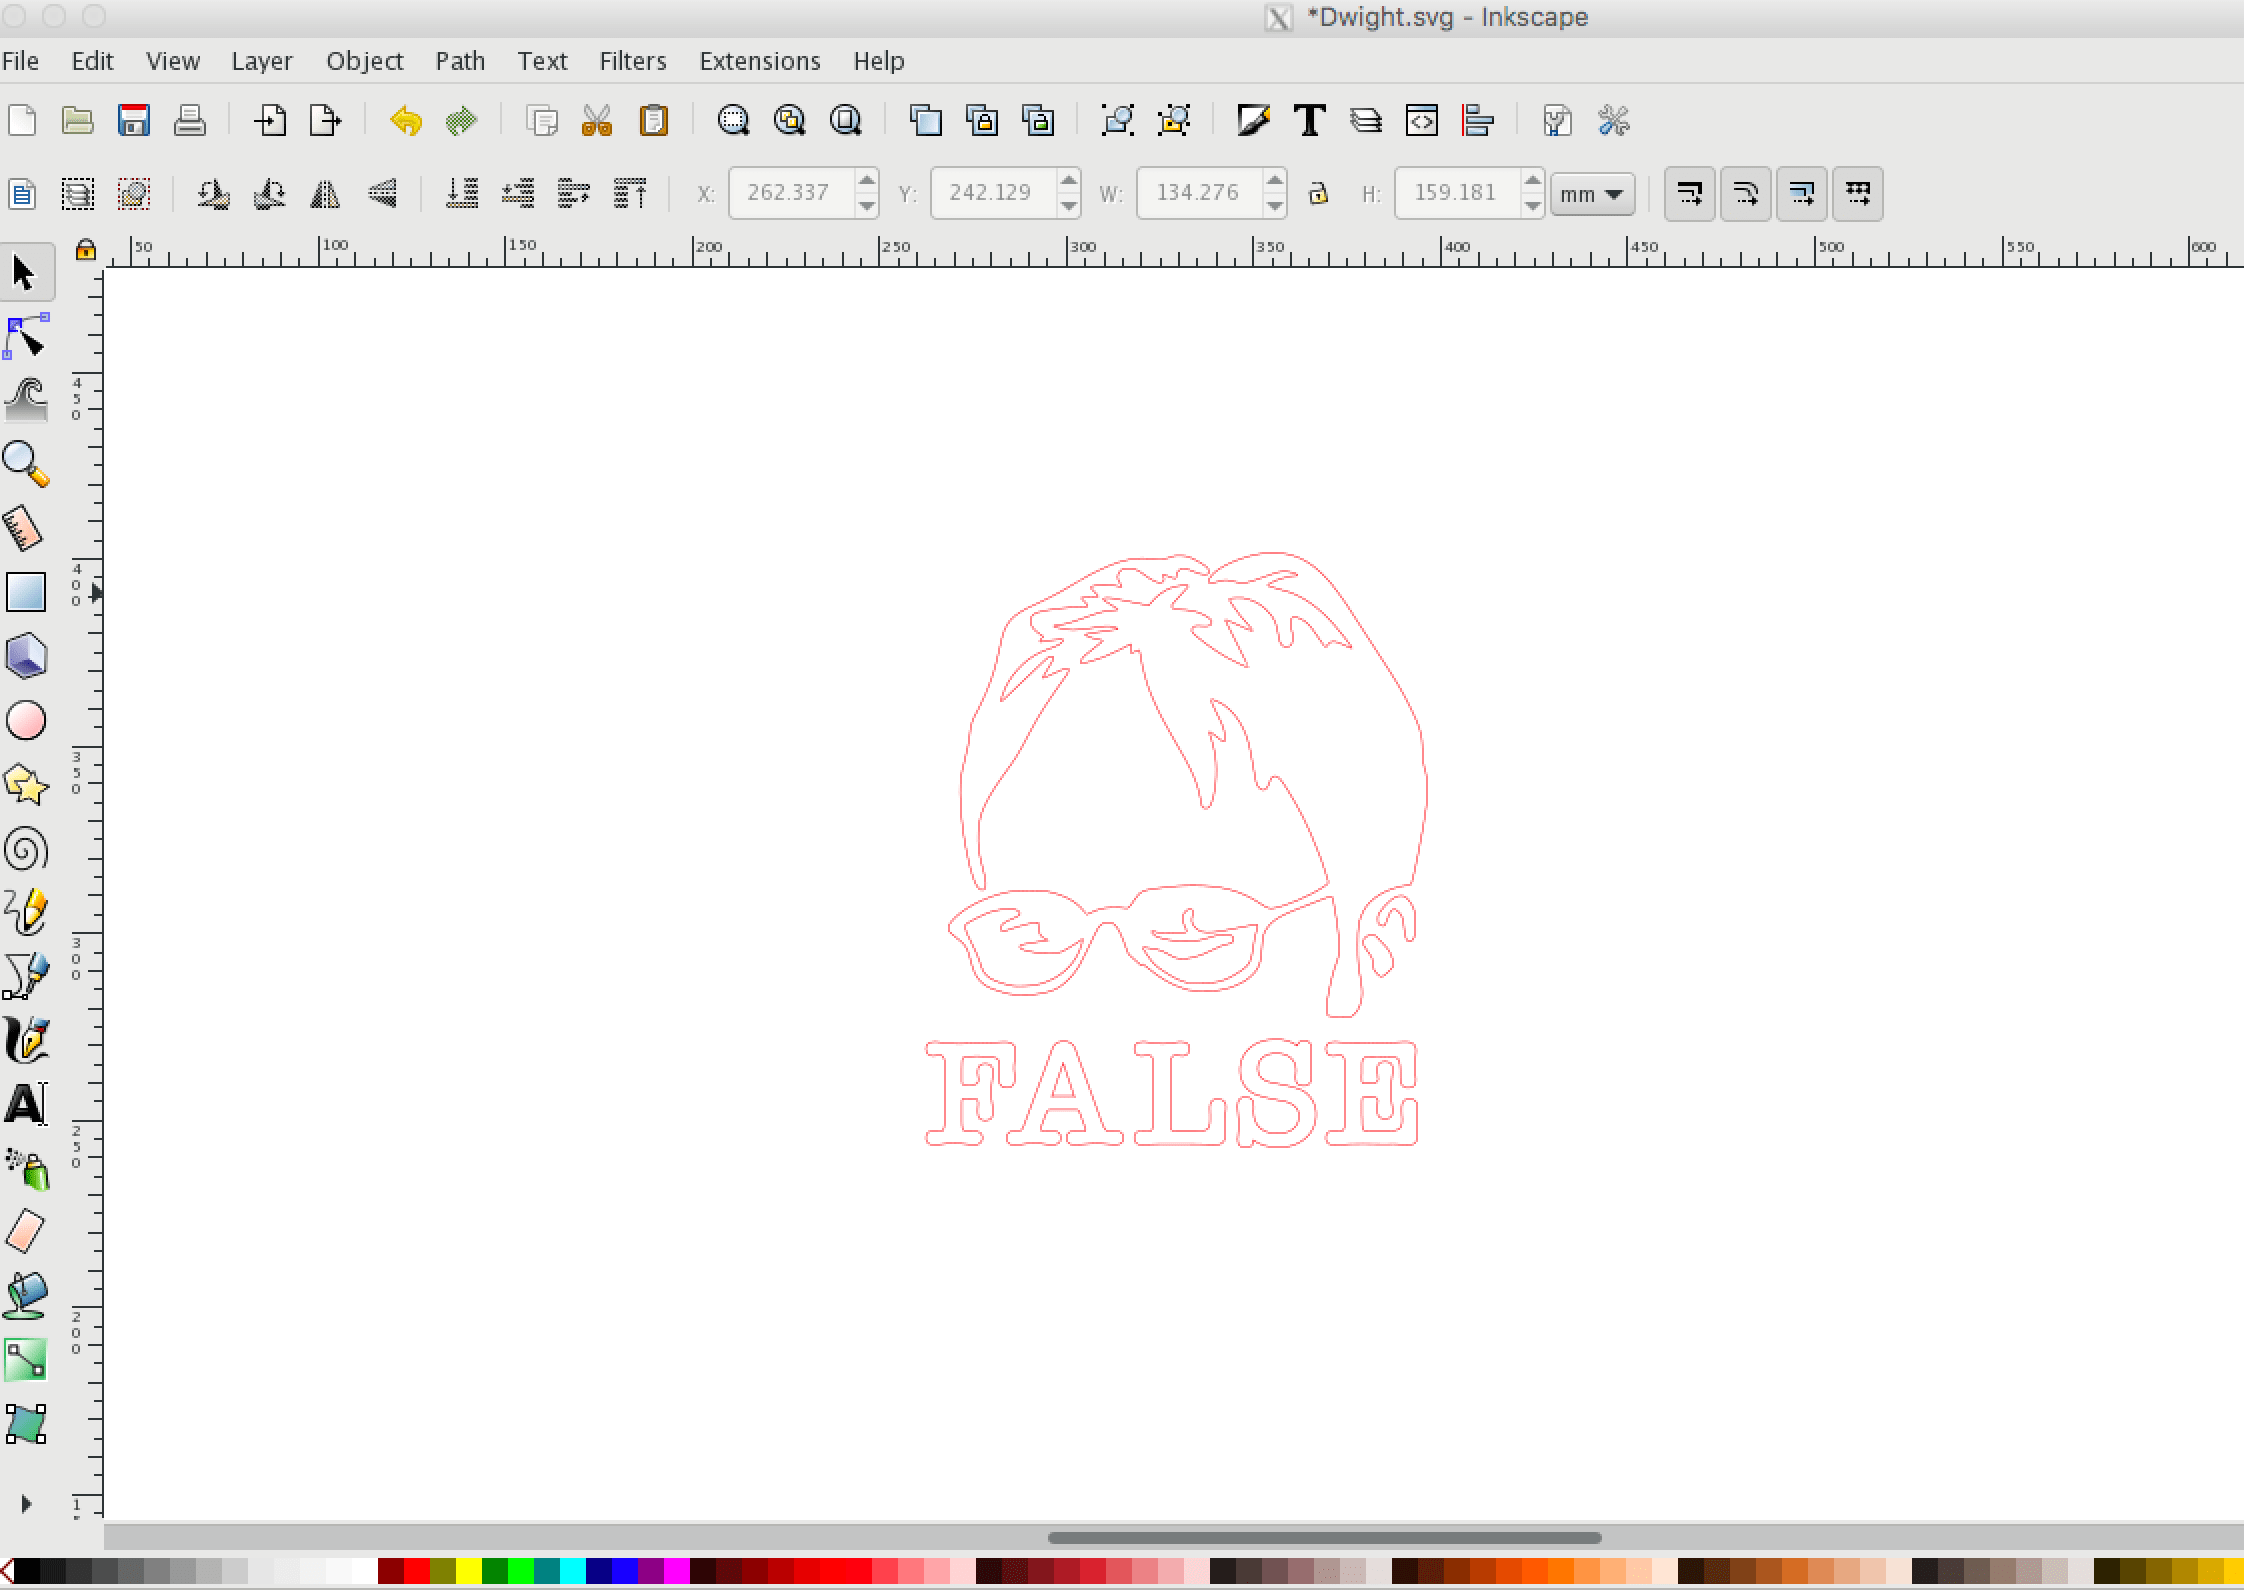
I added the text “False” then I converted it to path by selecting the text then clicking on Path > Object to Path. This tool allows you to edit each letter separately.
CHARACTERIZE Vinyl CUTTER
For cutting my sticker, I used a vinyl cutter machine called GCC Expert II Cutter.
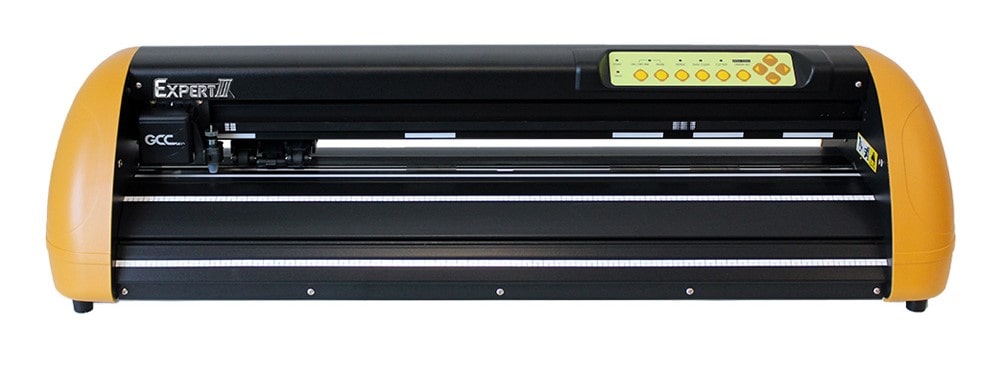
GCC Expert II Cutter features:
After designing the sticker, I followed some steps to prepare the vinyl cutter machine :
Next step, I connected the vinyl cutter to my computer and opened the GreatCut software which is the software that supports all GCC cutters.

After that, I dragged the artwork to the workplace. Then, I positioned it near the origin which is the intersect point between X and Y axes.
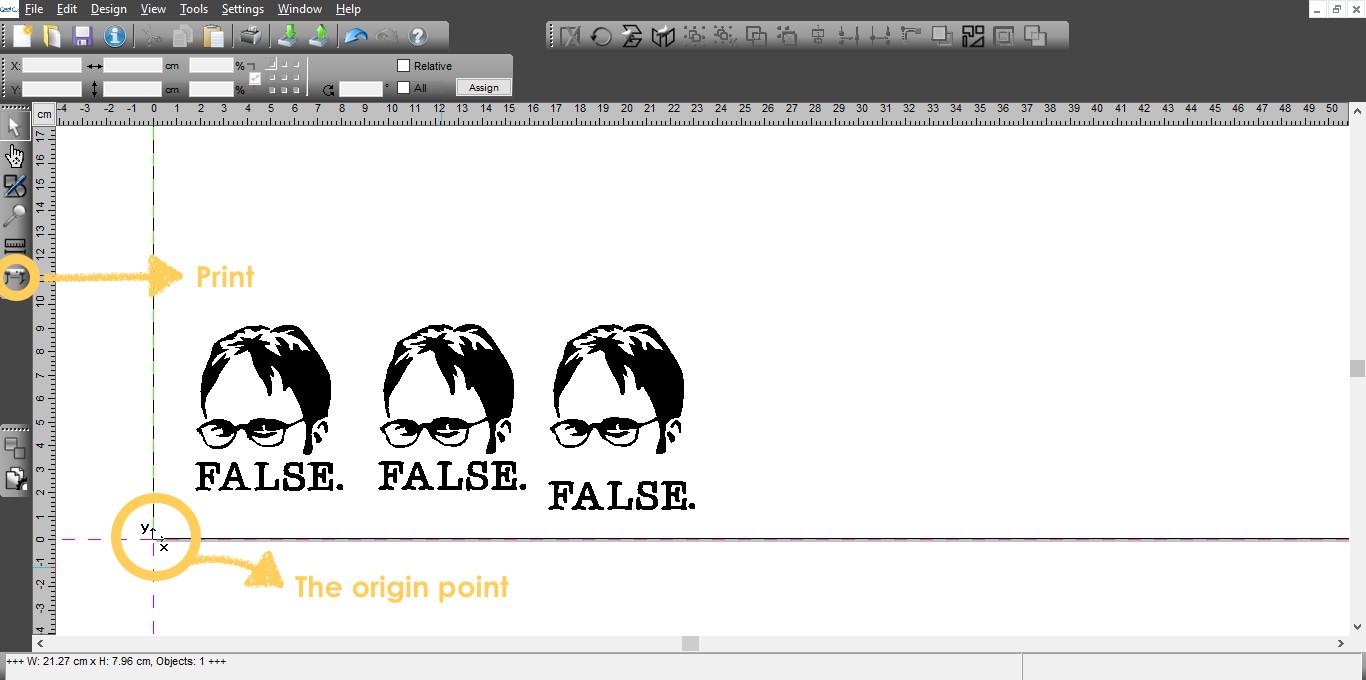
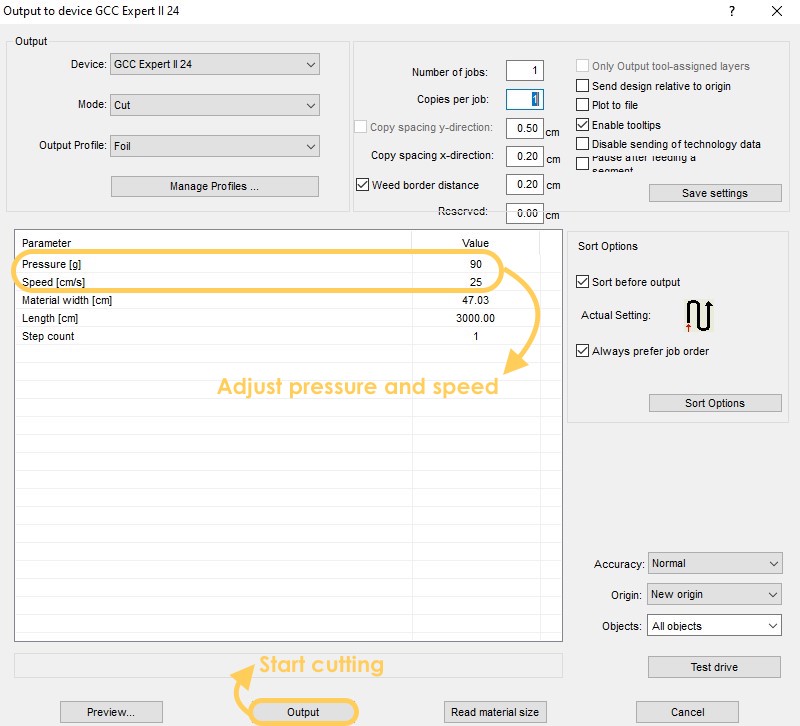
To start the cutting, I pressed the Print button, and modified the pressure and speed values.
Last but not least, I clicked on the Output button to start the cutting process.
Next, I trimmed apart the design then I removed the excess material. The last step, I used transparent tape to place the sticker on the laptop.
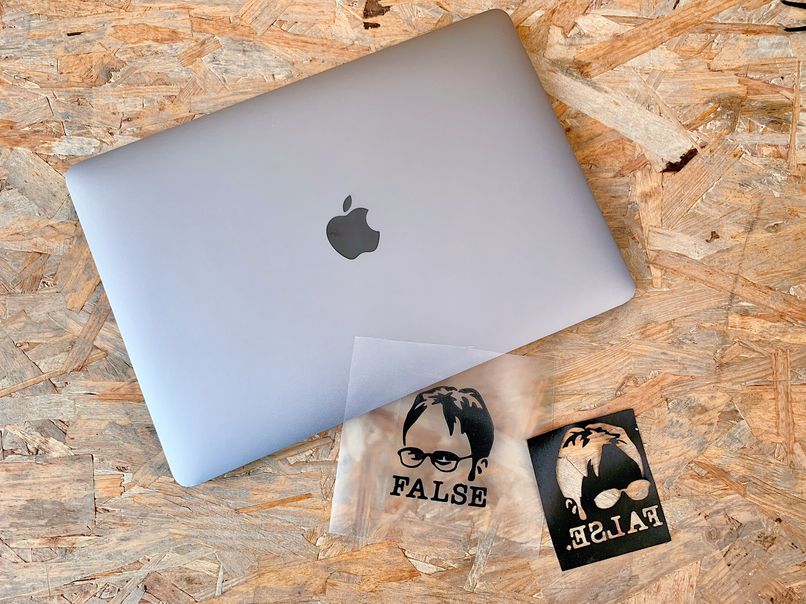

Looks amazing, right Dwight ?
The design files :
Onshape :
Vinyl :