eighteenth Assignment
Date
27 May 2020
Machine Building !
This week's assignment is group work. We were asked to design a machine that includes mechanism, actuation and automation. Also, to build the mechanical parts and operate it manually.
Brainstorming
The first thing done was a brainstorming meeting via Zoom application to discuss what we will design. At the beginning of the meeting, we assigned Norah as a team leader of the project. She shared with us a google sheets file to arrange all the tasks.
As a group, first we suggested multiple ideas. Then, each one of us voted for the best Idea for the assignment. We decided to build a vending machine. In addition, we discussed the project timeline and defined the roles for each member.
The tasks were divided on the team members in this way:
Design Part : Sarah and Norah.
Electronics Part : Mohammed and Duaa.
Assembly : Sarah and Norah.
Poster/ Video : Mohammed and Duaa.
Filament Vending Machine
Norah and I decided to make the vending machine suitable for our work domain which is the digital fabrication labs and makerspaces. For that, we chose the vending machine to be for filament. This machine will solve several problems that we faced in our lab. It will protect the 3D filaments from their worst enemies, humidity and dust. Also, it will contribute to saving space for filament storage and become easy to access.
Depended on the electronics and available resources at our lab, these are the component that we used in our machine:
Servo Motors x2
Push Buttons x2
LEDs x2
IR Sensor x1
At first, Norah and I started with the design part by planning the vending machine shape and CAD. We chose to make the design using Onshape software.
After taking measurements of all the electronic components that I mentioned before, we divided the work between both of us.
Following that, we shared the onshape file to work together in designing the parts.
2D DESIGN
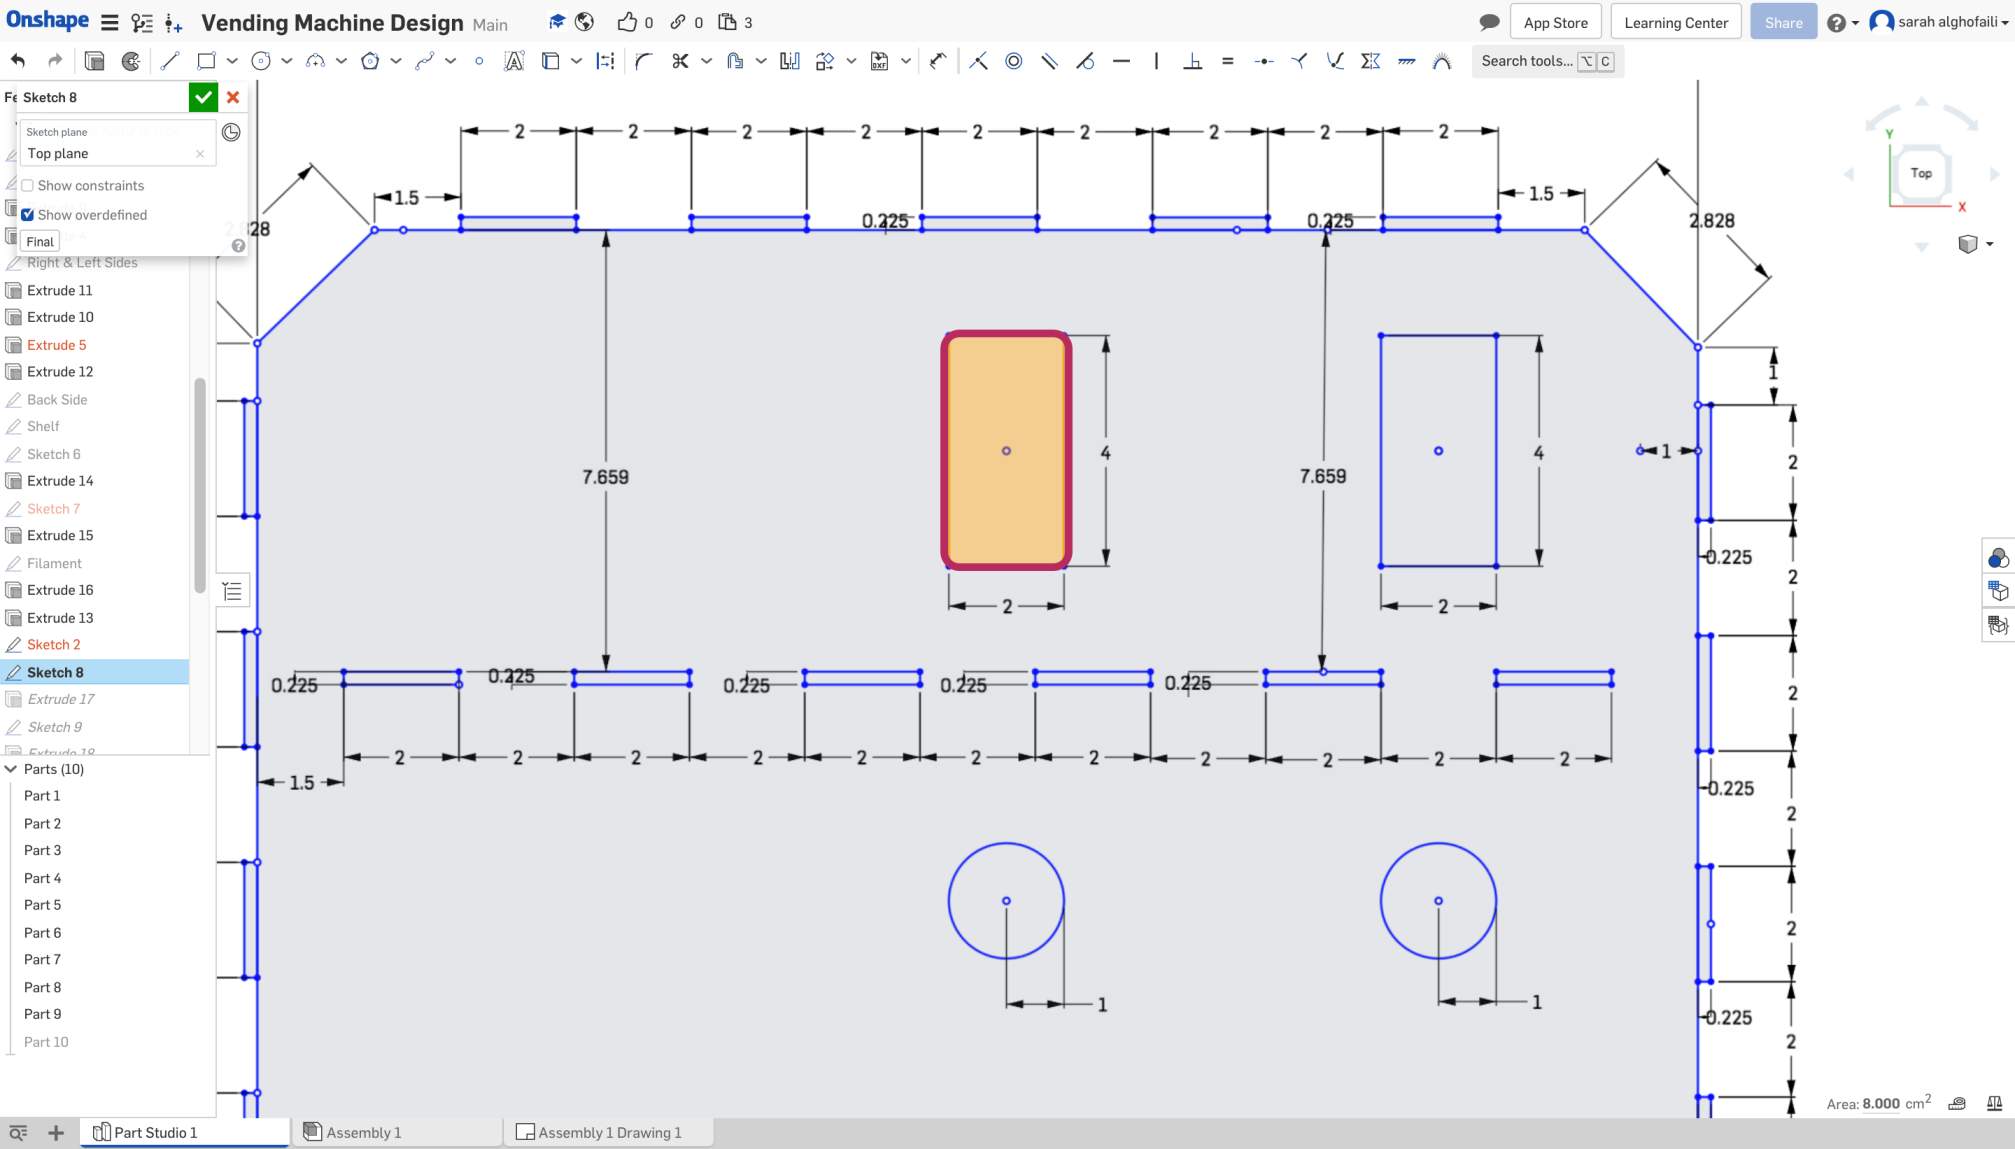
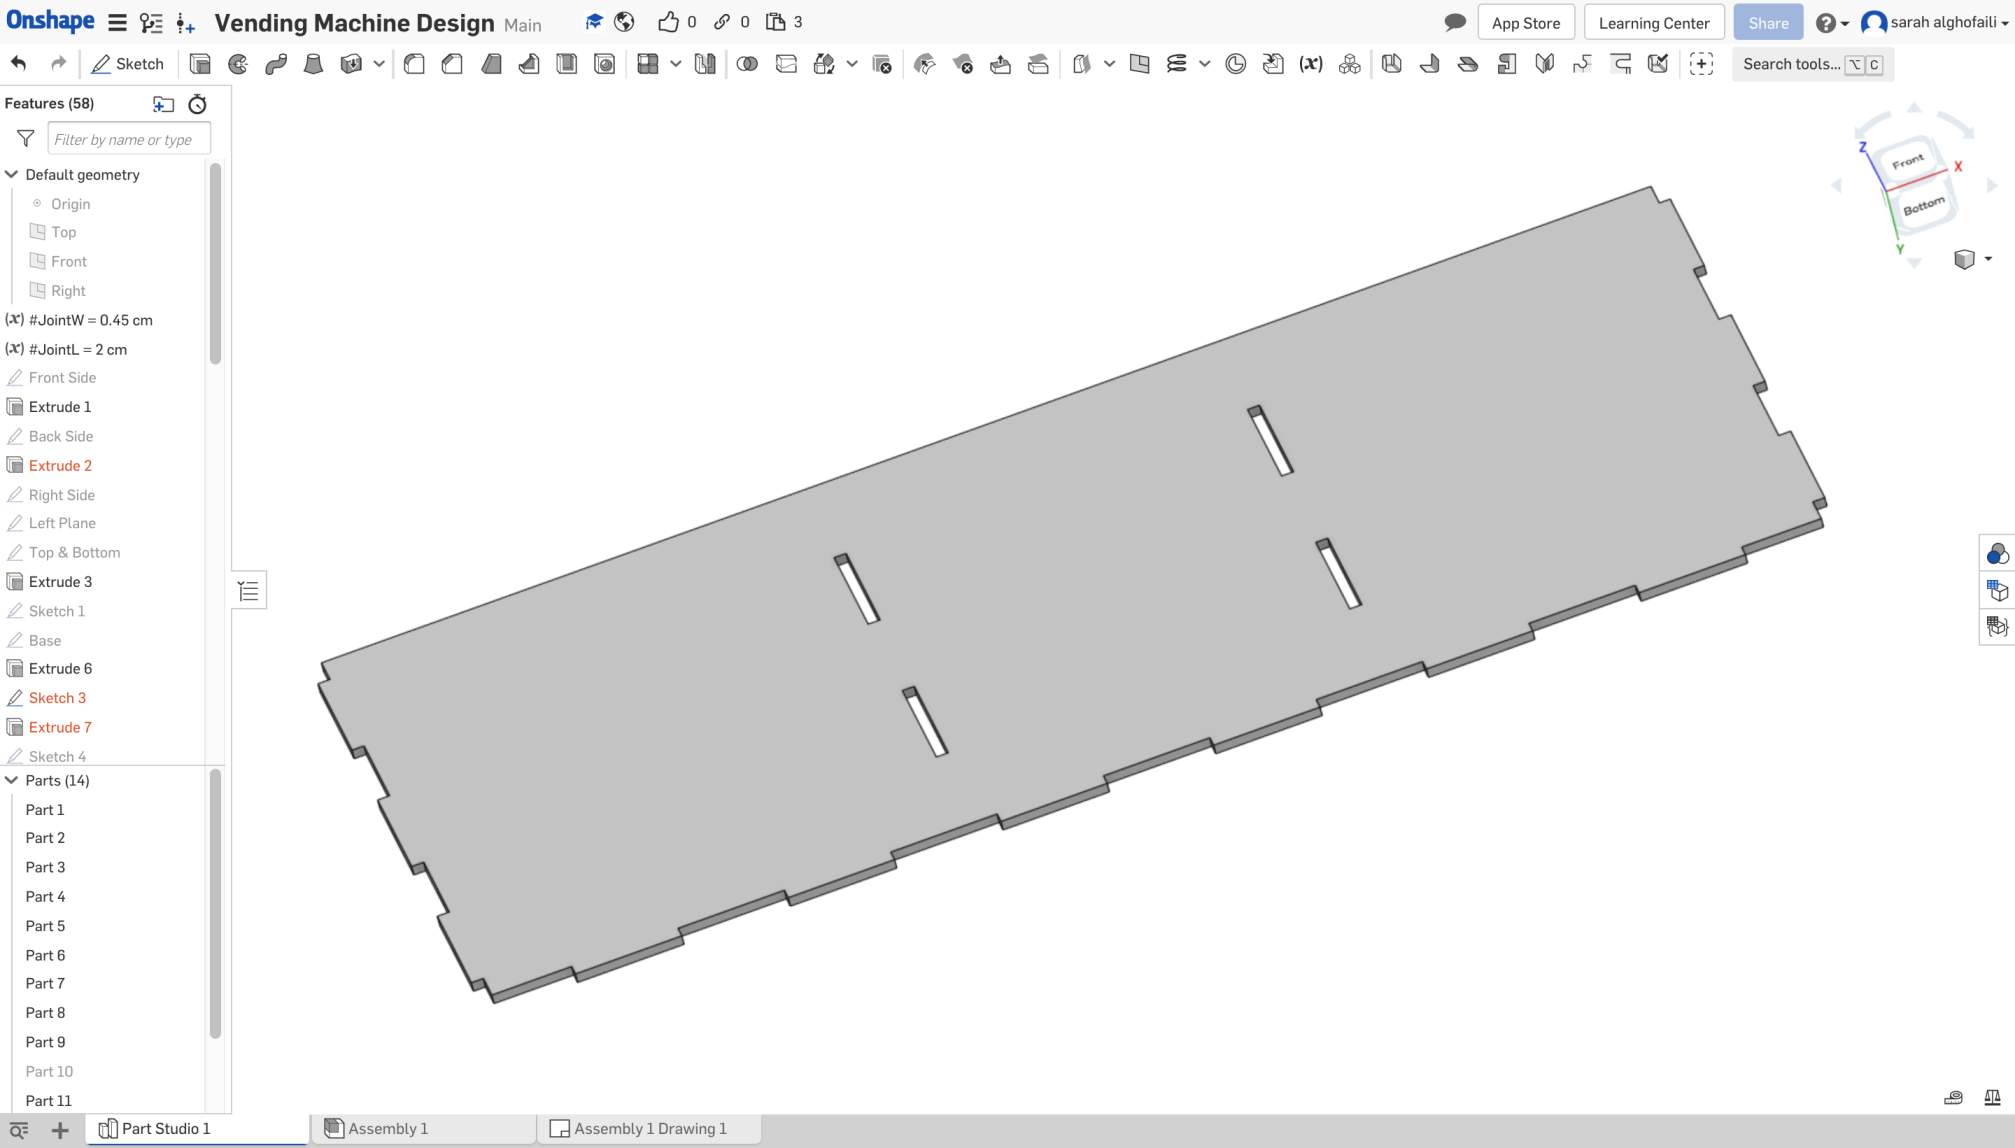
We started by clicking on the Sketch from the top menu to draw the backside of the vending machine. The dimension that we agreed on of the rectangle is 25 cm x 20 cm. Next, we determined the height and width of the finger joint using a variable tool.
height = 2 cm
width = 0.225 cm
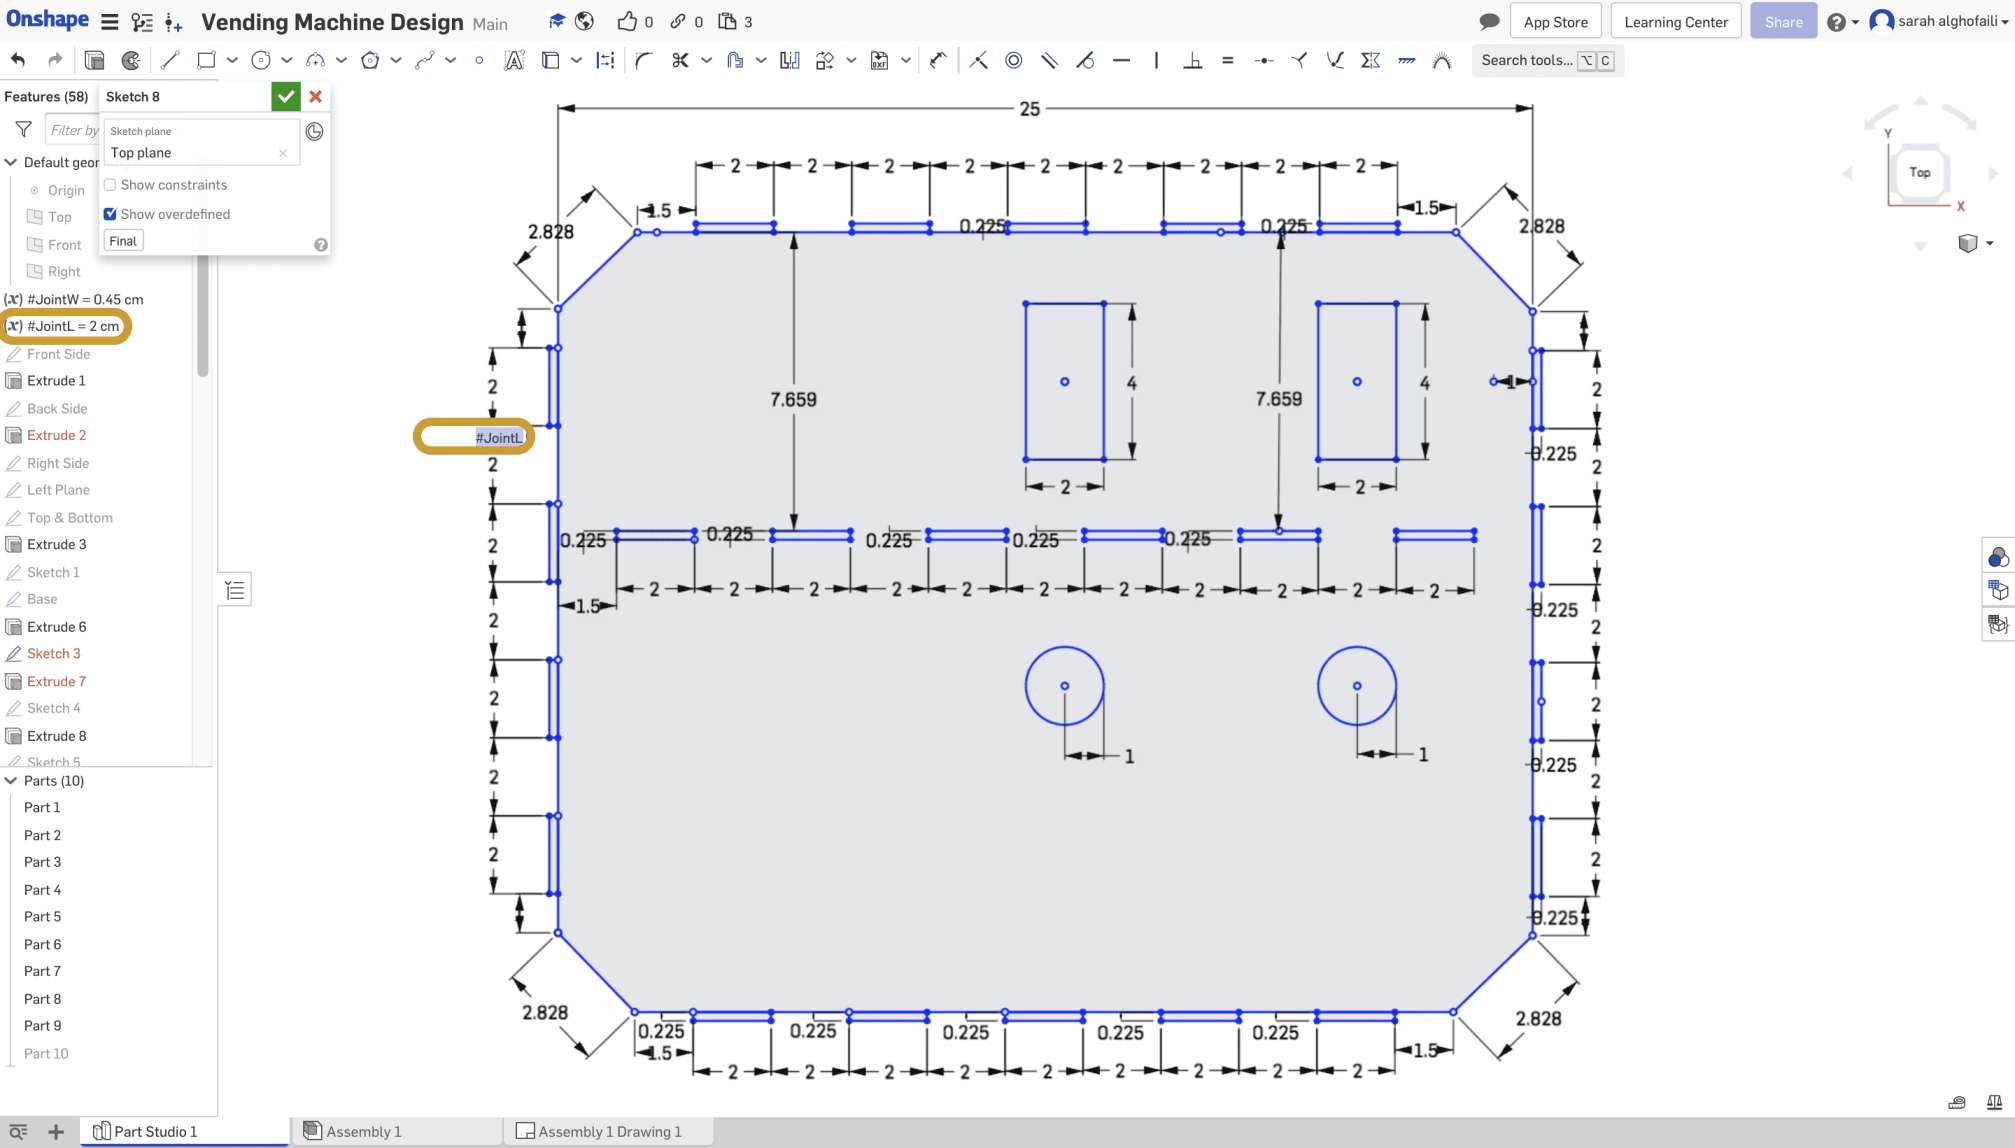
Then, we created 2 slots and 2 holes for the servo motors and wires. The servo motor dimensions is 2 x 4 cm.
Also, we used the same variables that we were created before to draw rectangle slots for the joint of the shelf part.
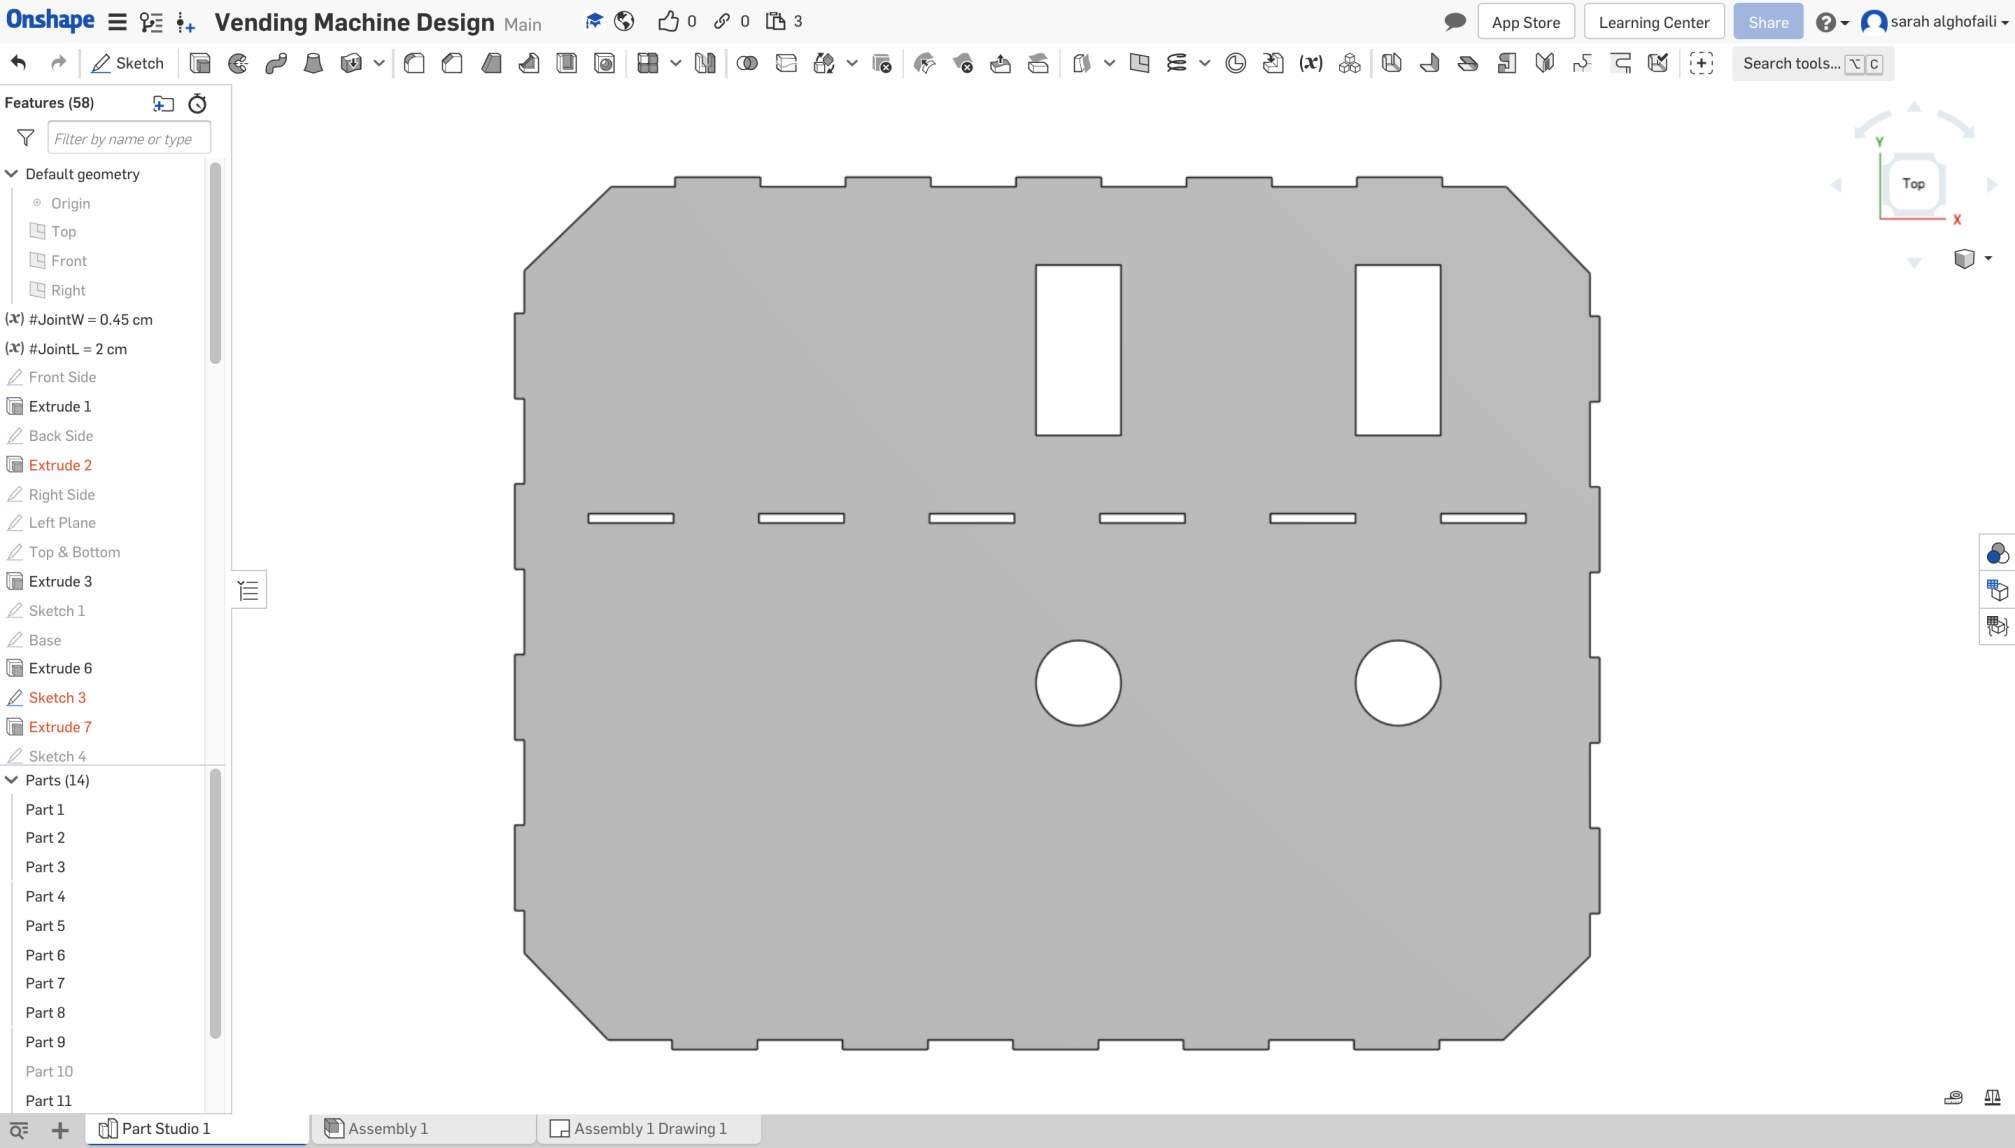
The picture below shows the backside part after extruded with all the details needed for the electronic components.
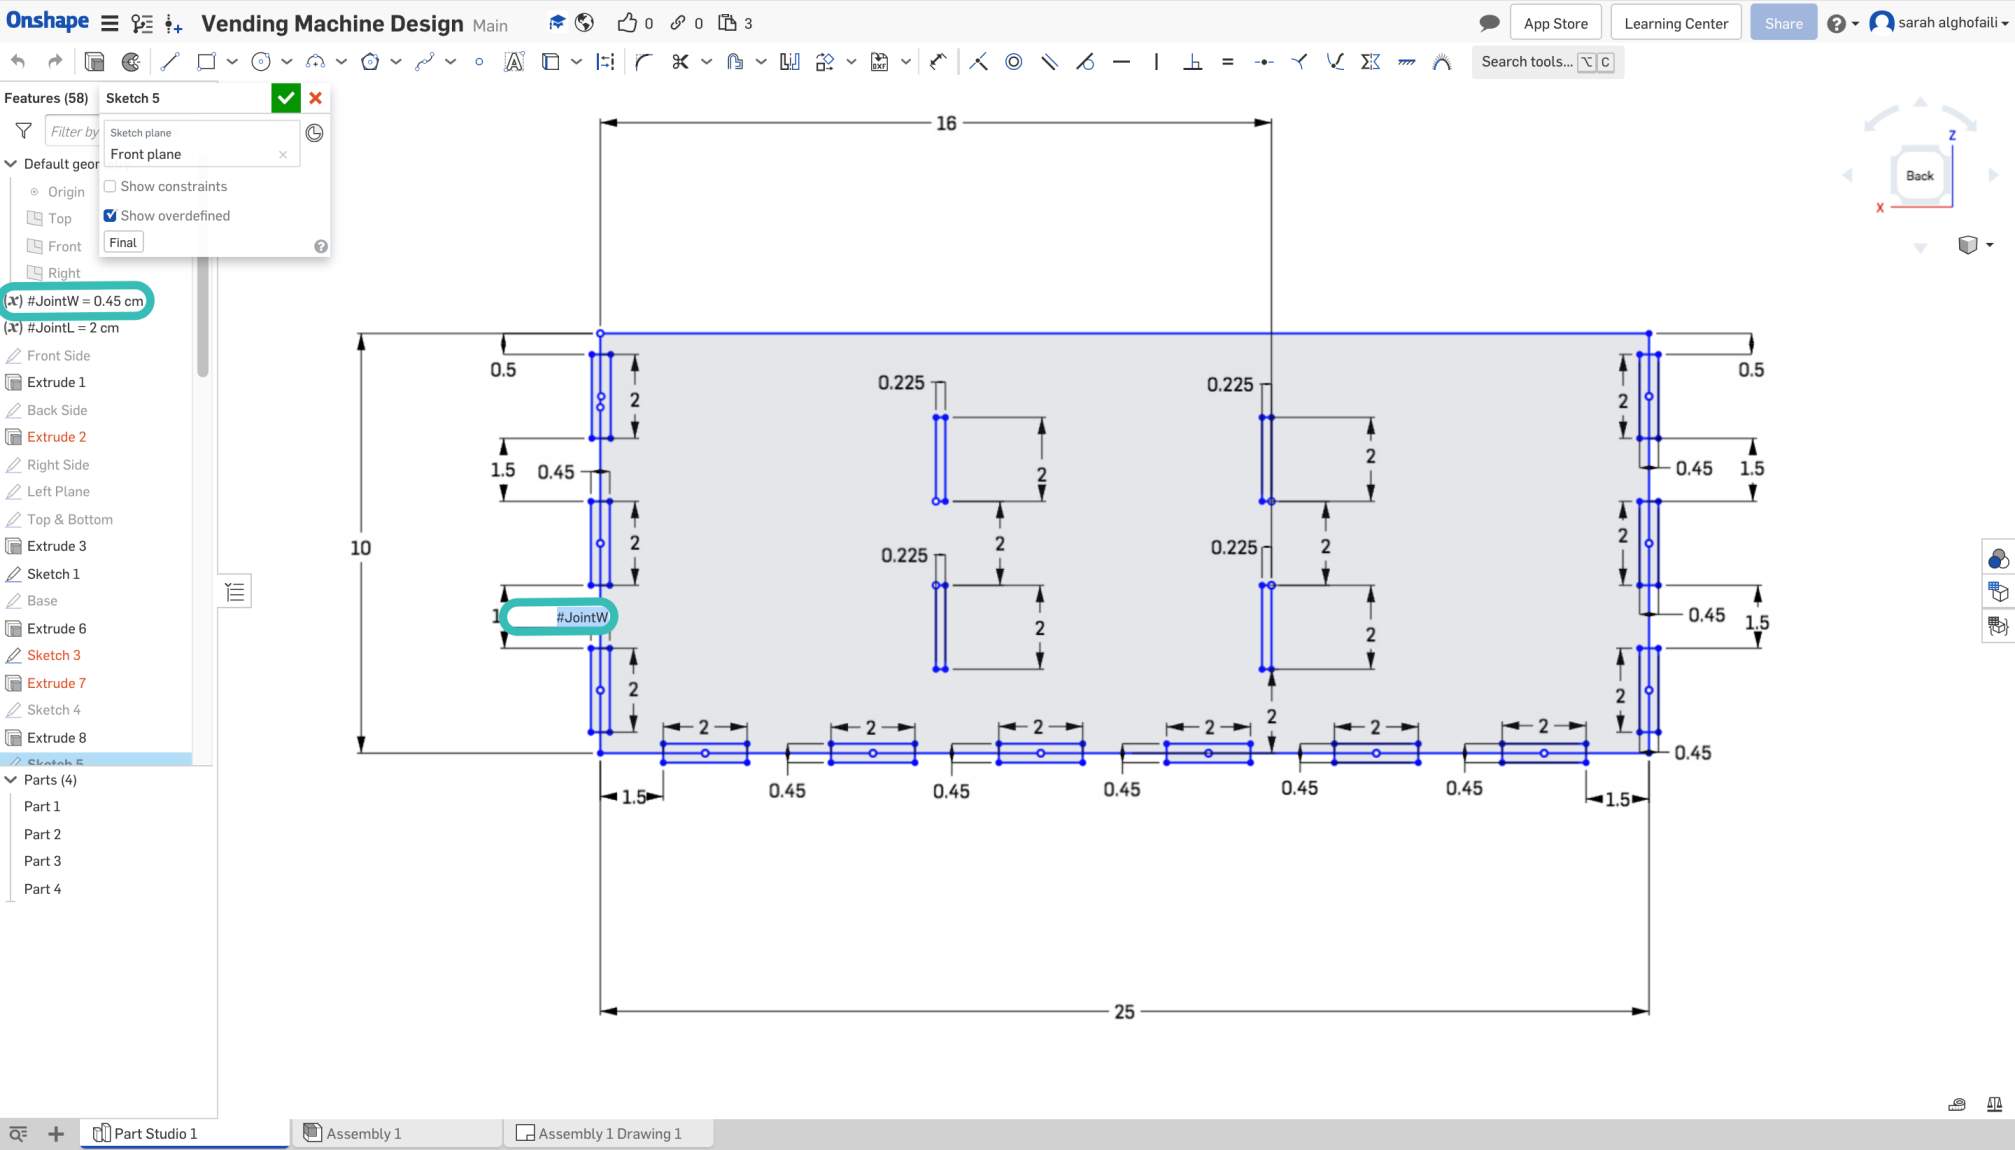
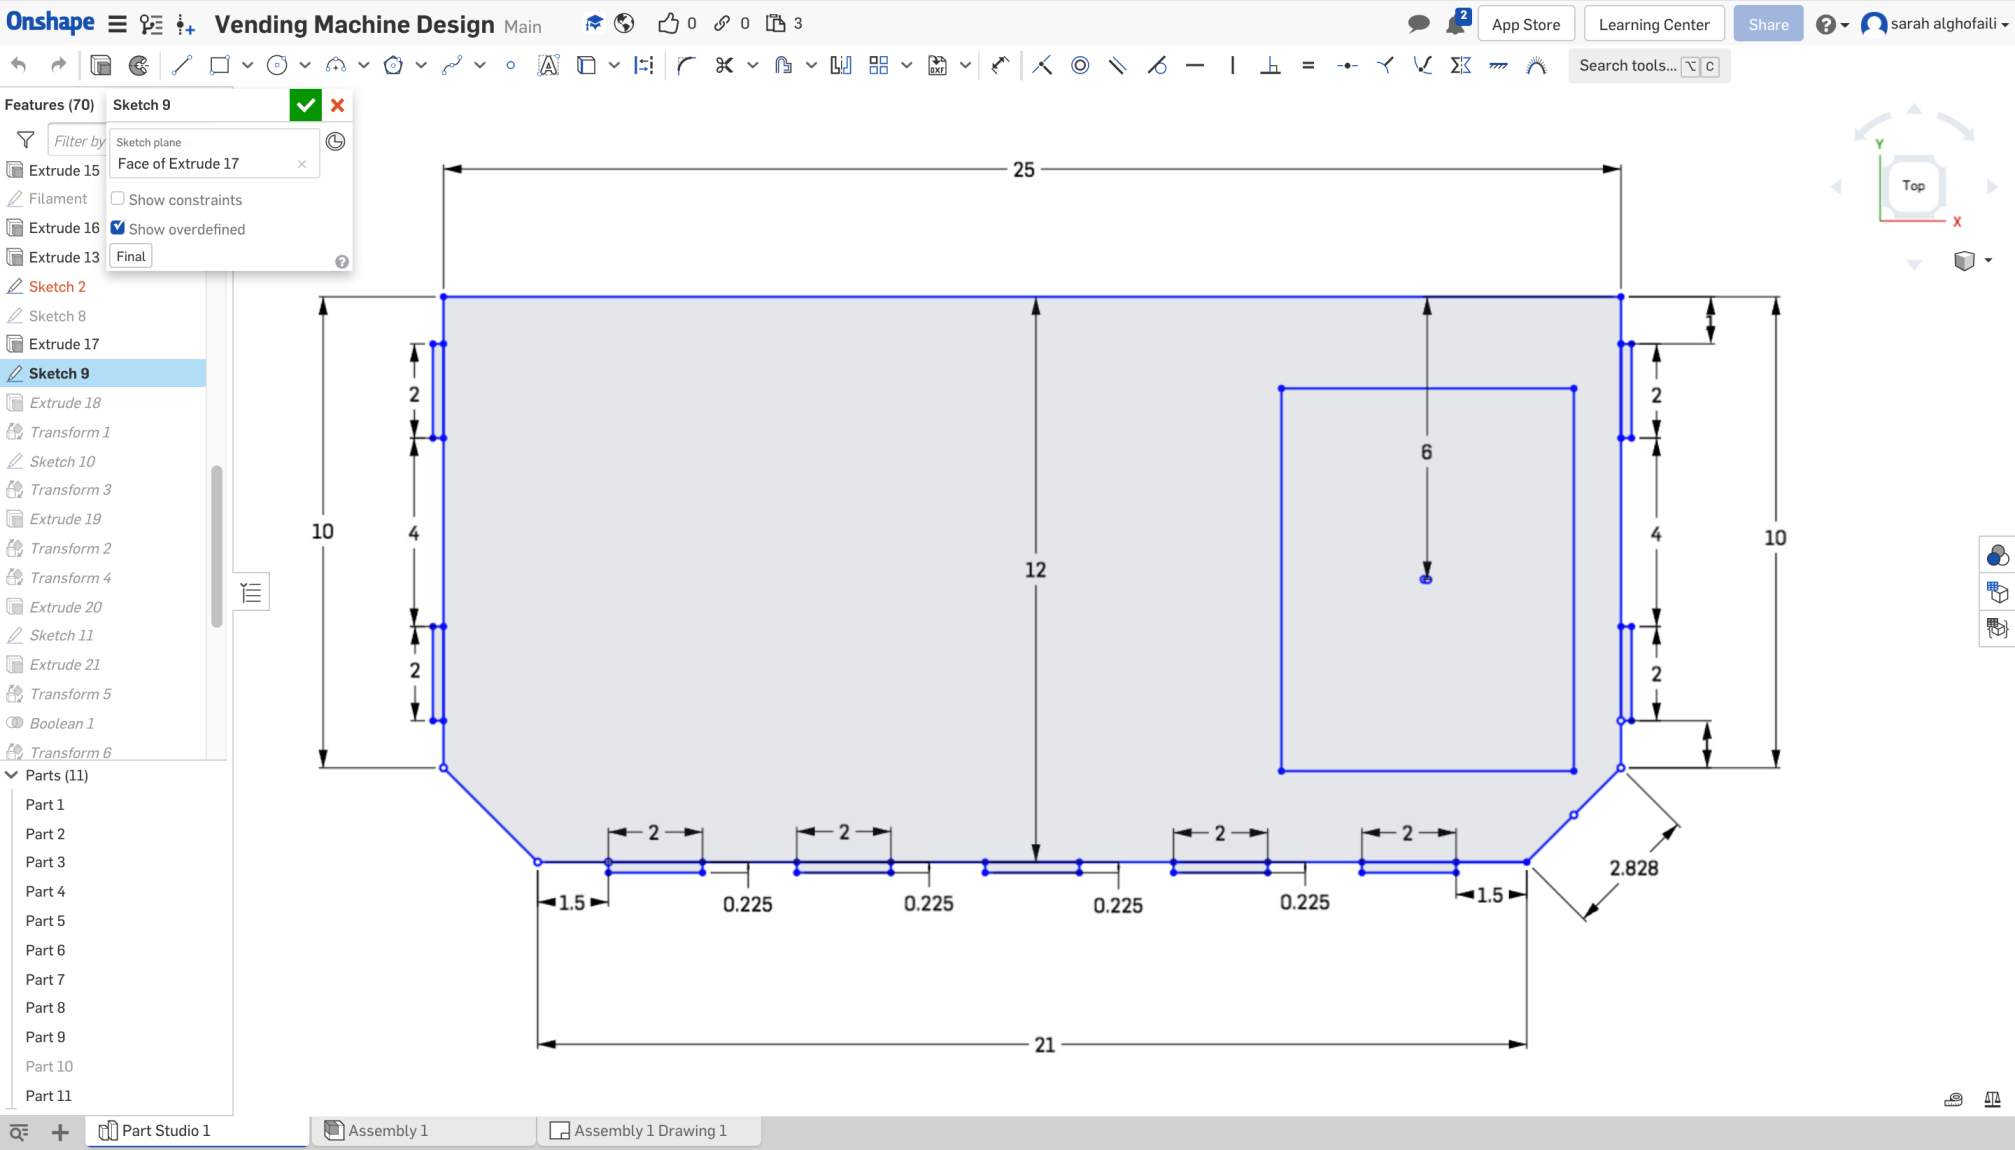
After that, we designed the display shelf of the vending machine by drawing a small rectangle with height = 10 cm and width = 25 cm. It included 4 slots and surrounded with many finger joints that distributed on 3 sides.
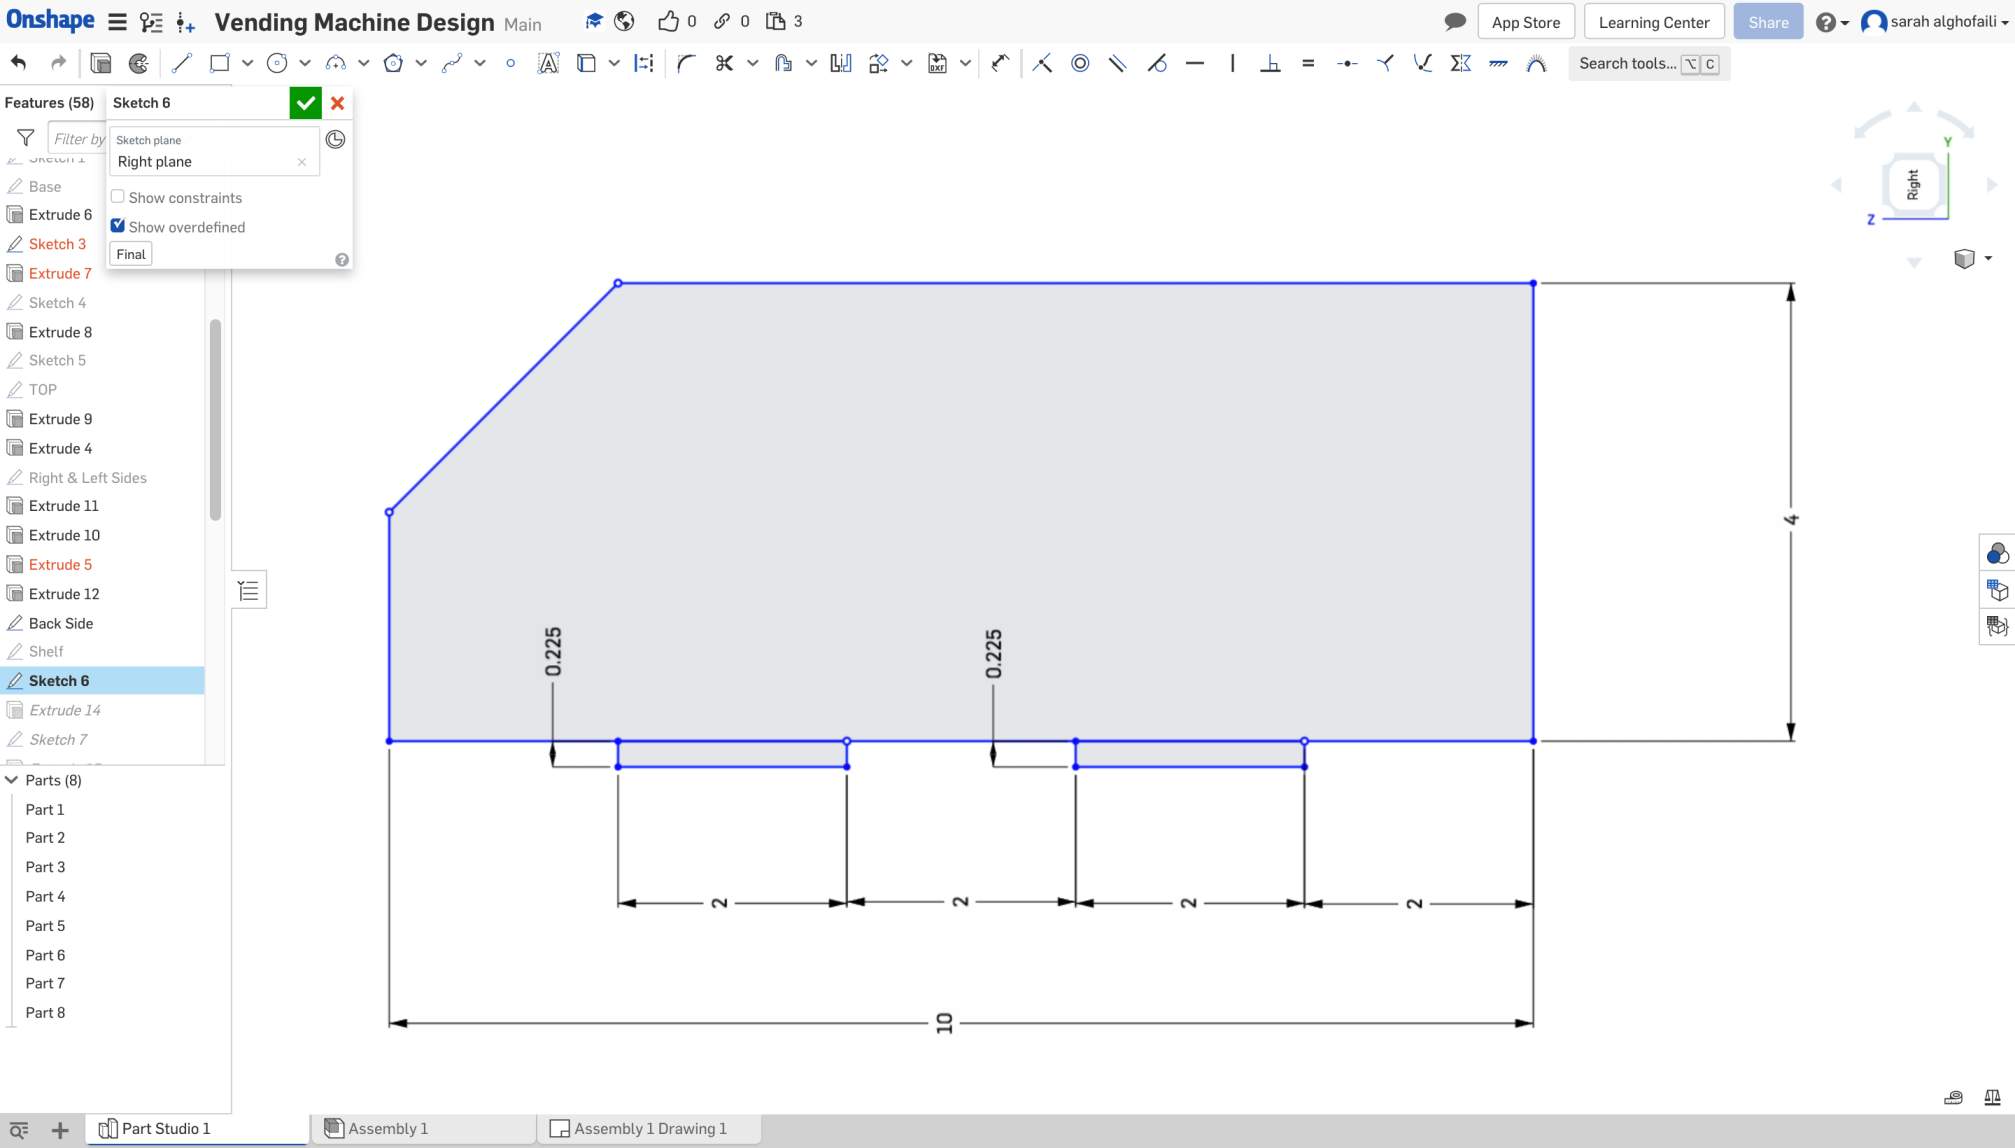
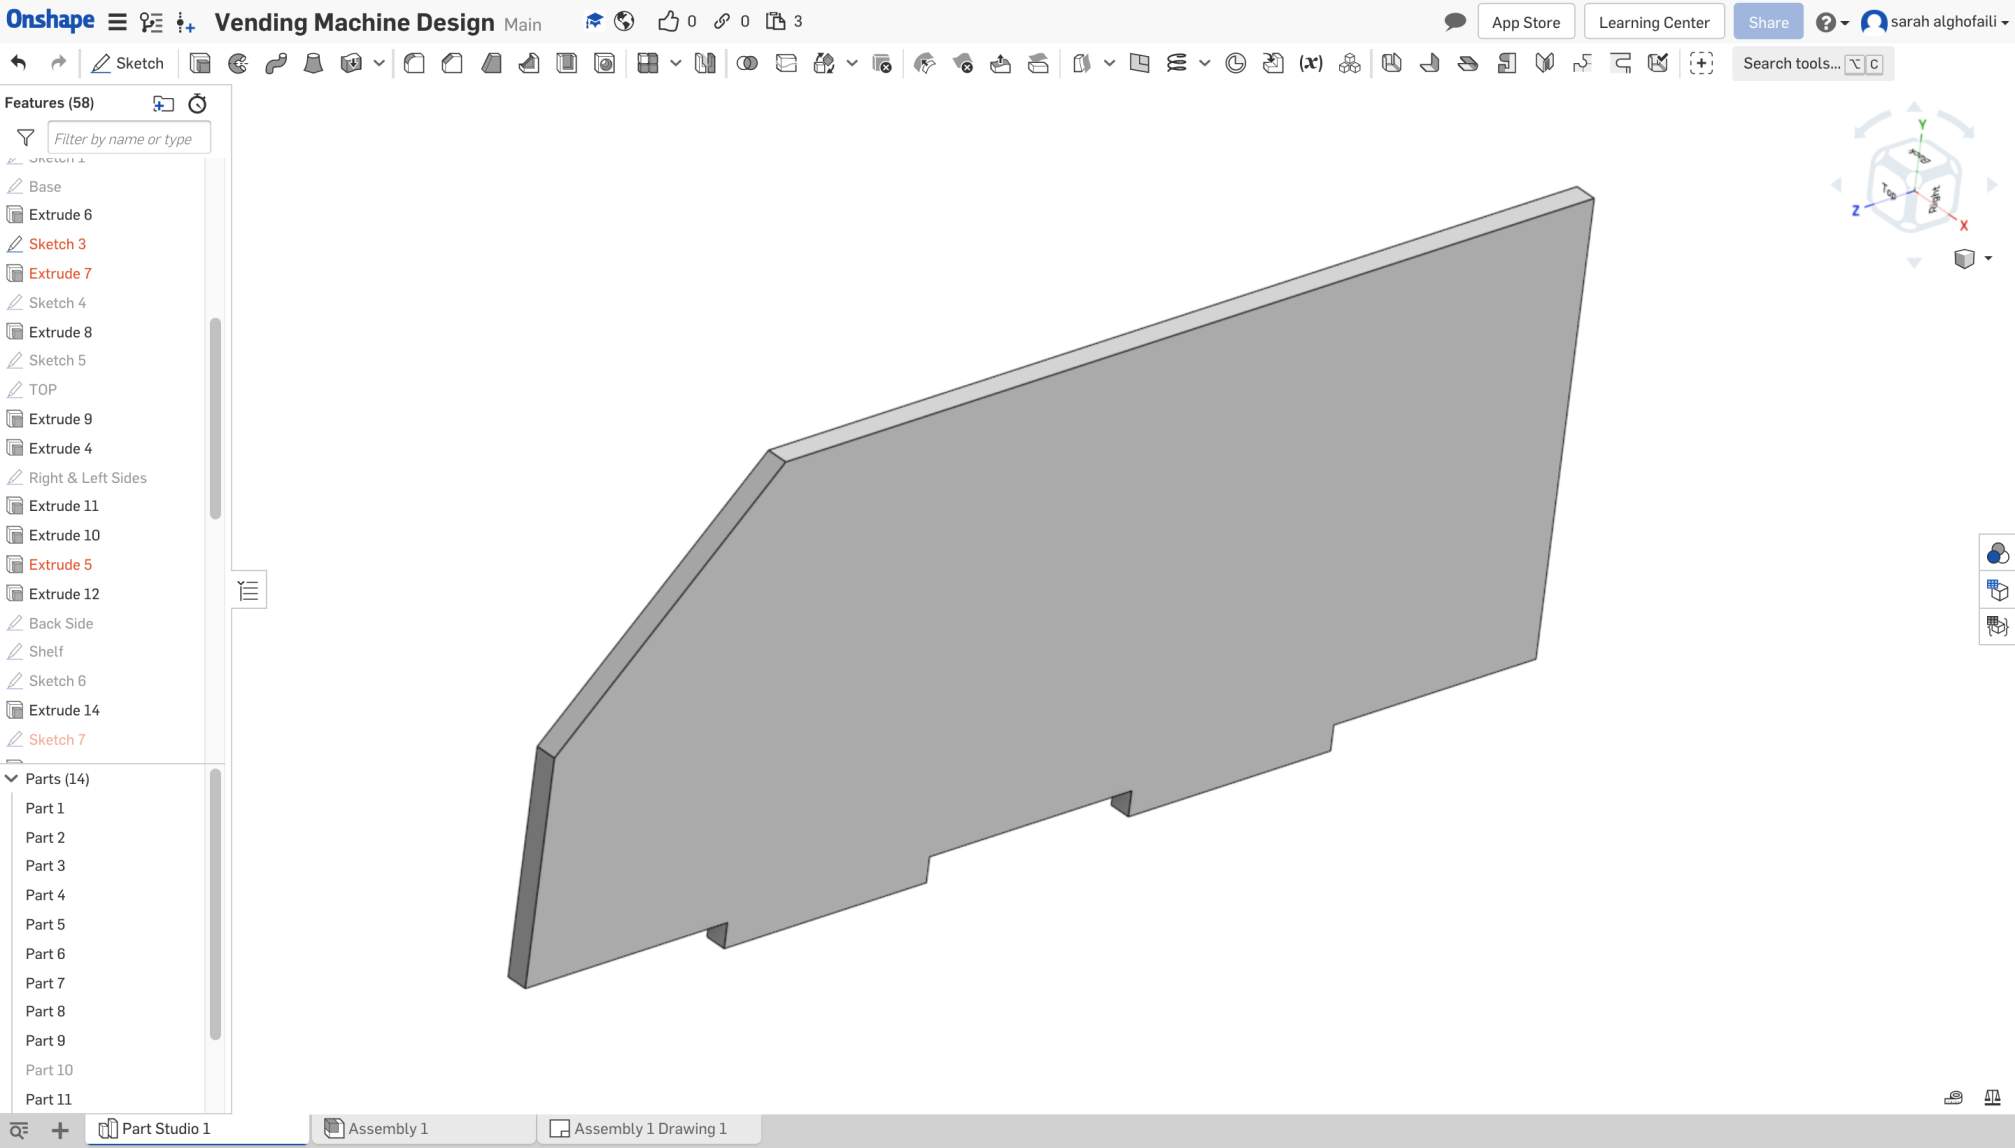
The next step, we sketched the dividers to partition between the two areas. For our filament vending machine we just need two dividers. We drew a rectangle with height = 4 cm and width = 10 cm.
Then, we made one slanted corner by determining two points and removing the rest lines. The last step in this part before extruding was adding two finger joints by using the same variables.
In addition, we designed a part that is located in the middle between the front and backside of the machine to cover all the electronics components and wires. It includes a big slot to make it easy to put or remove the electronic components.
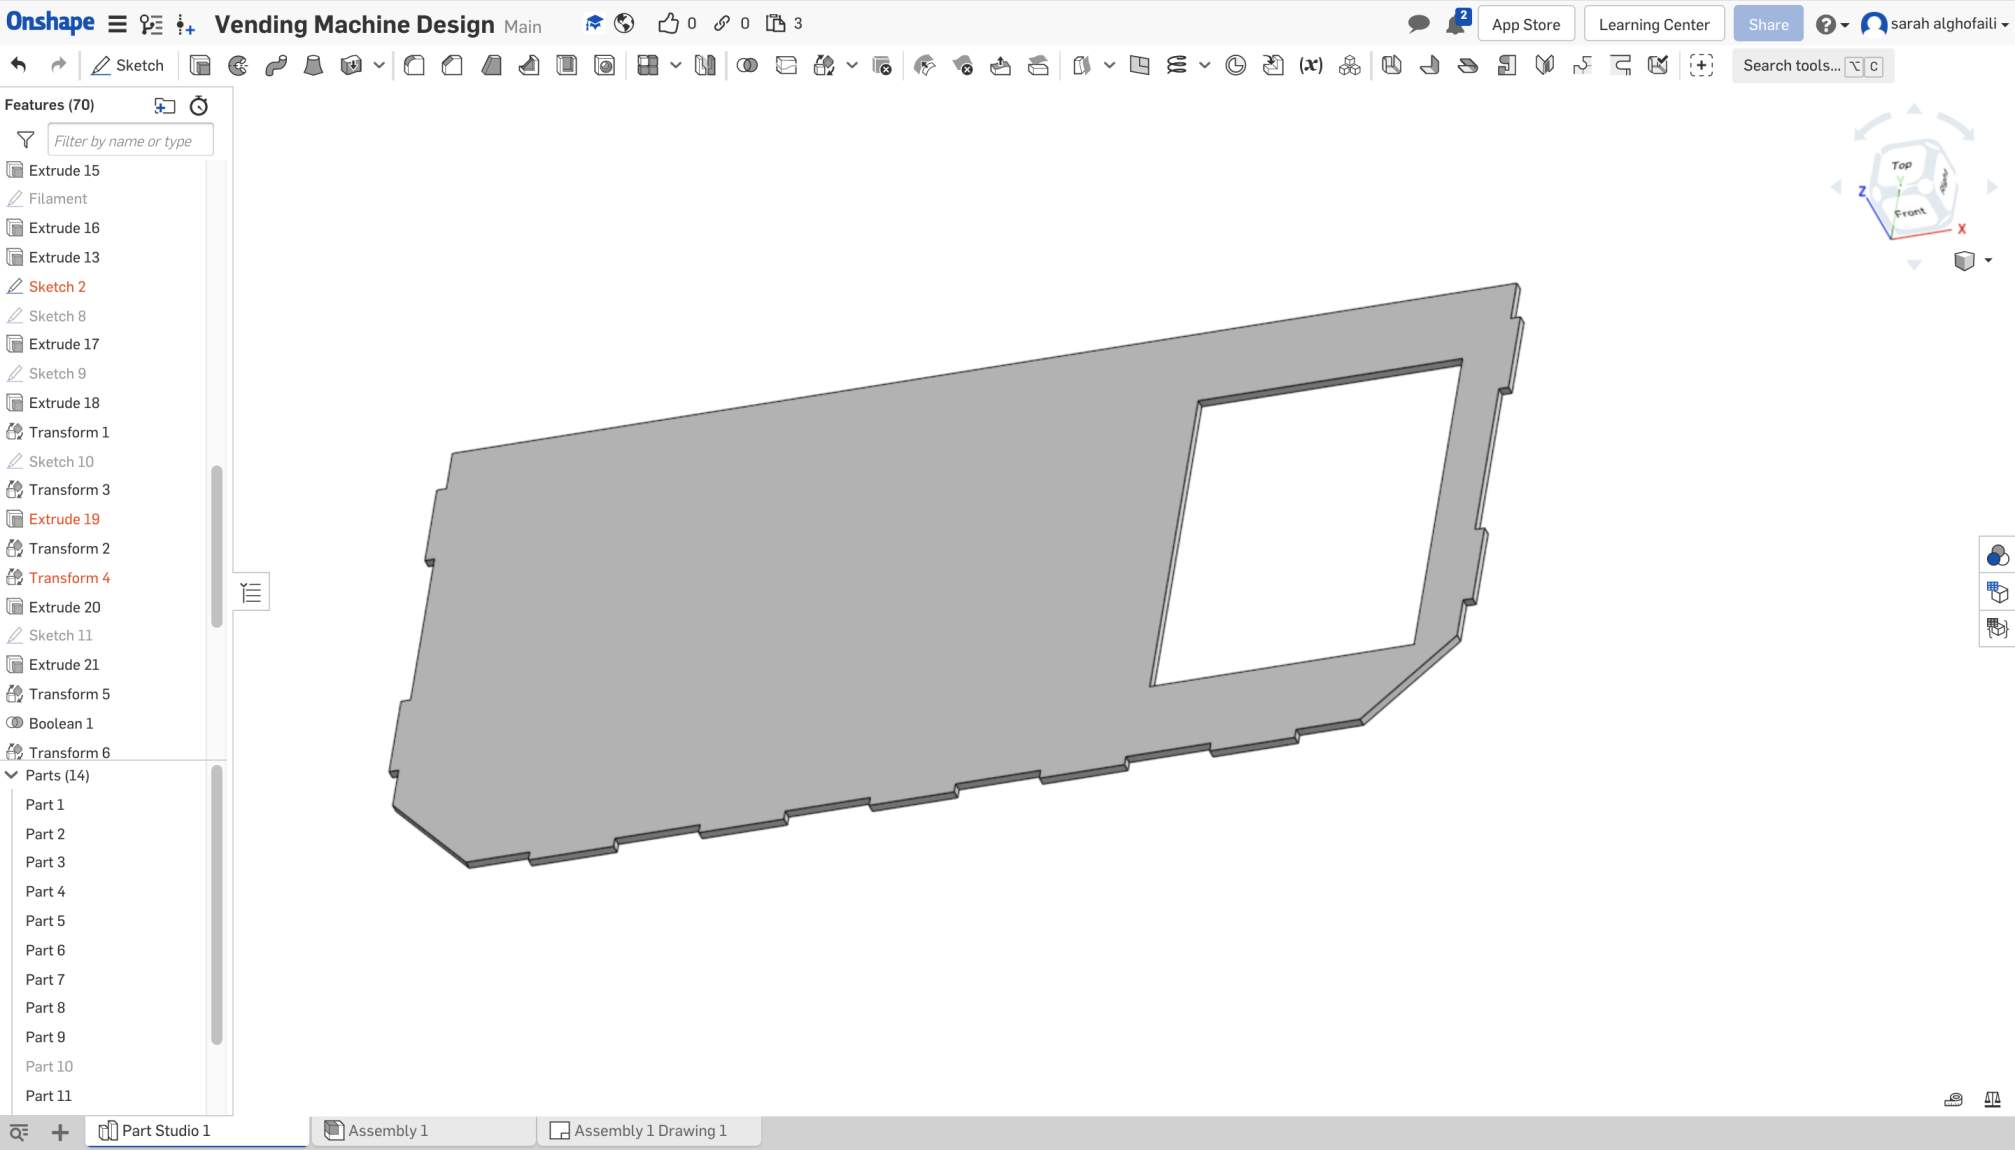
For the rest of parts, you can check Norah's page.
The final part in the 2D design is the machine base. We created a box to put the filament vending machine sign on it.
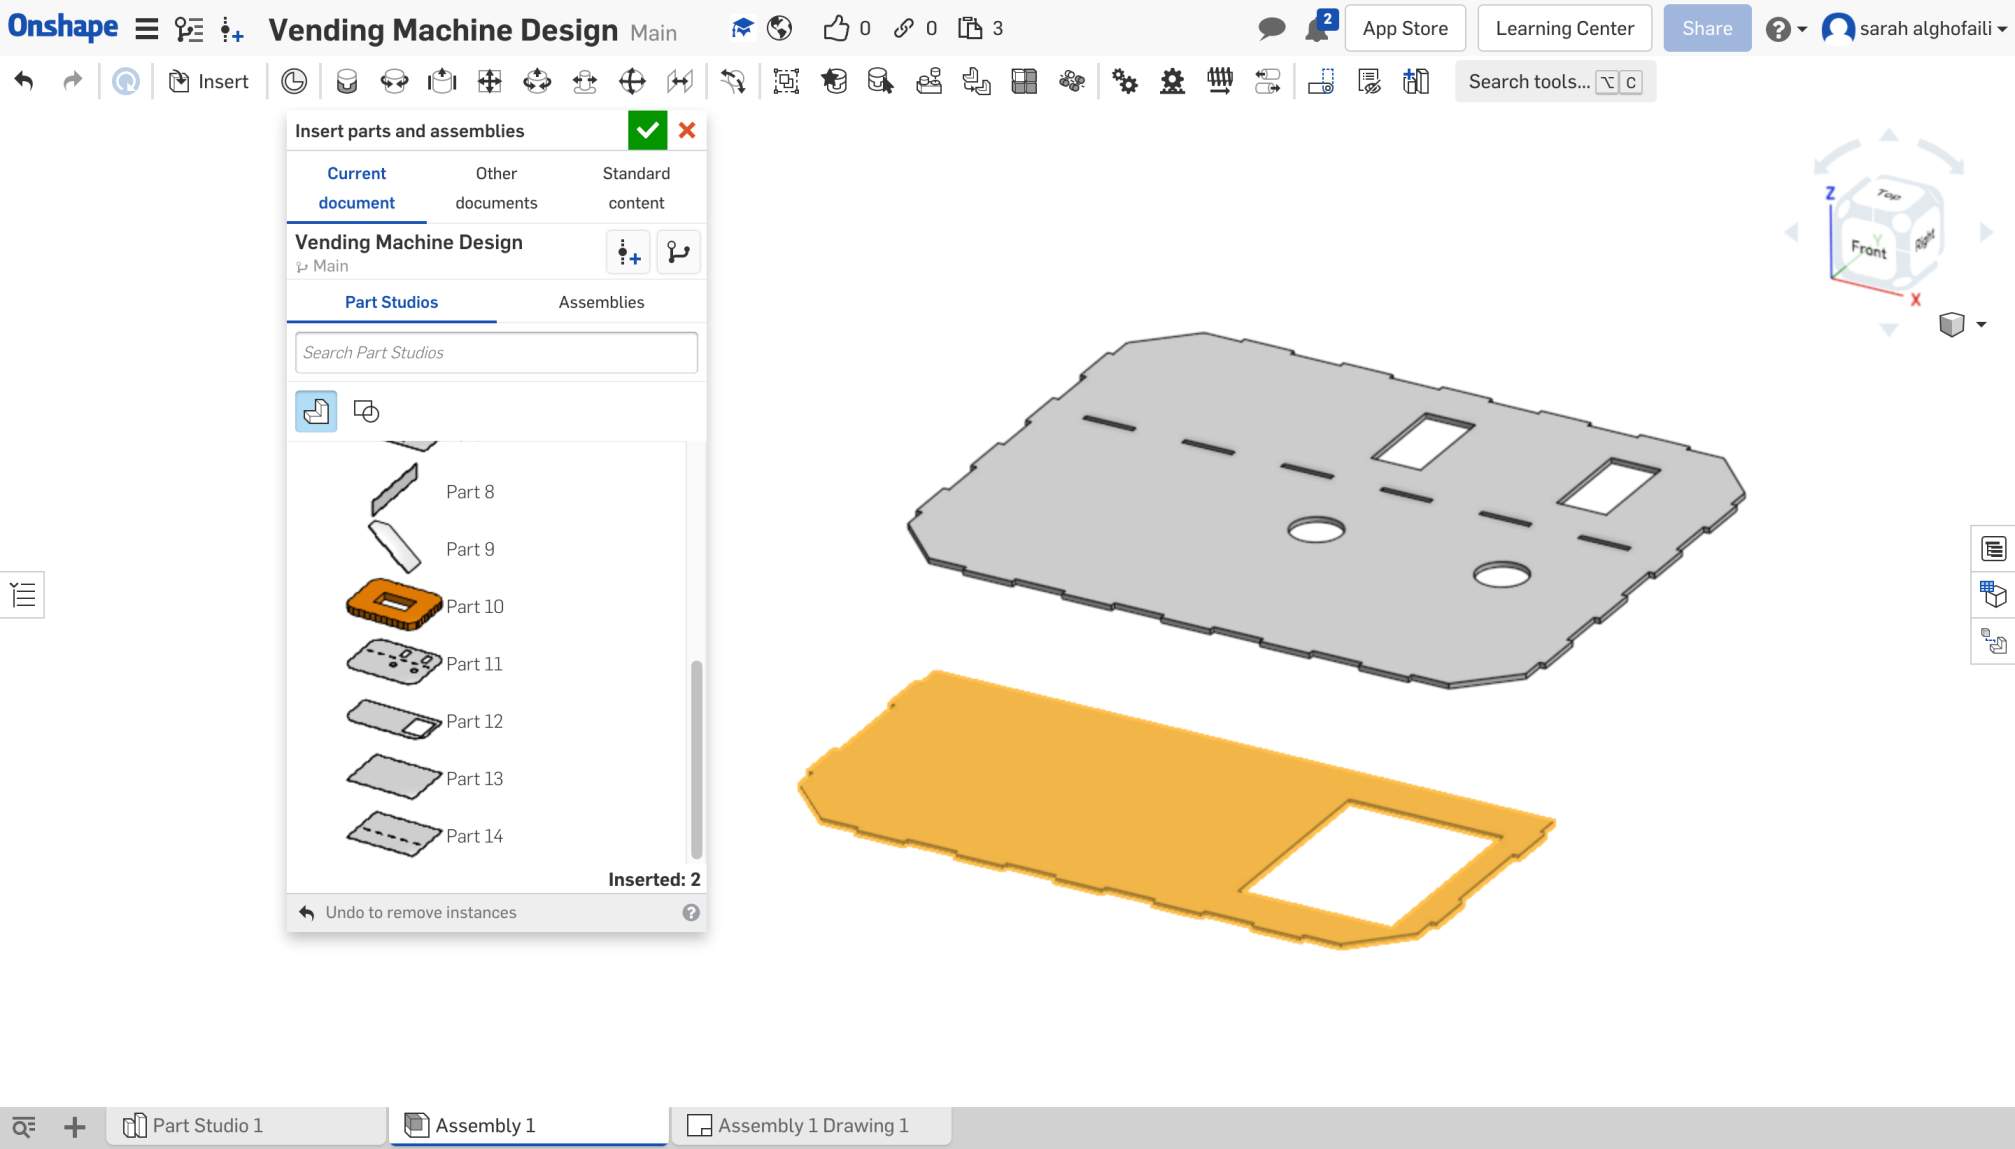
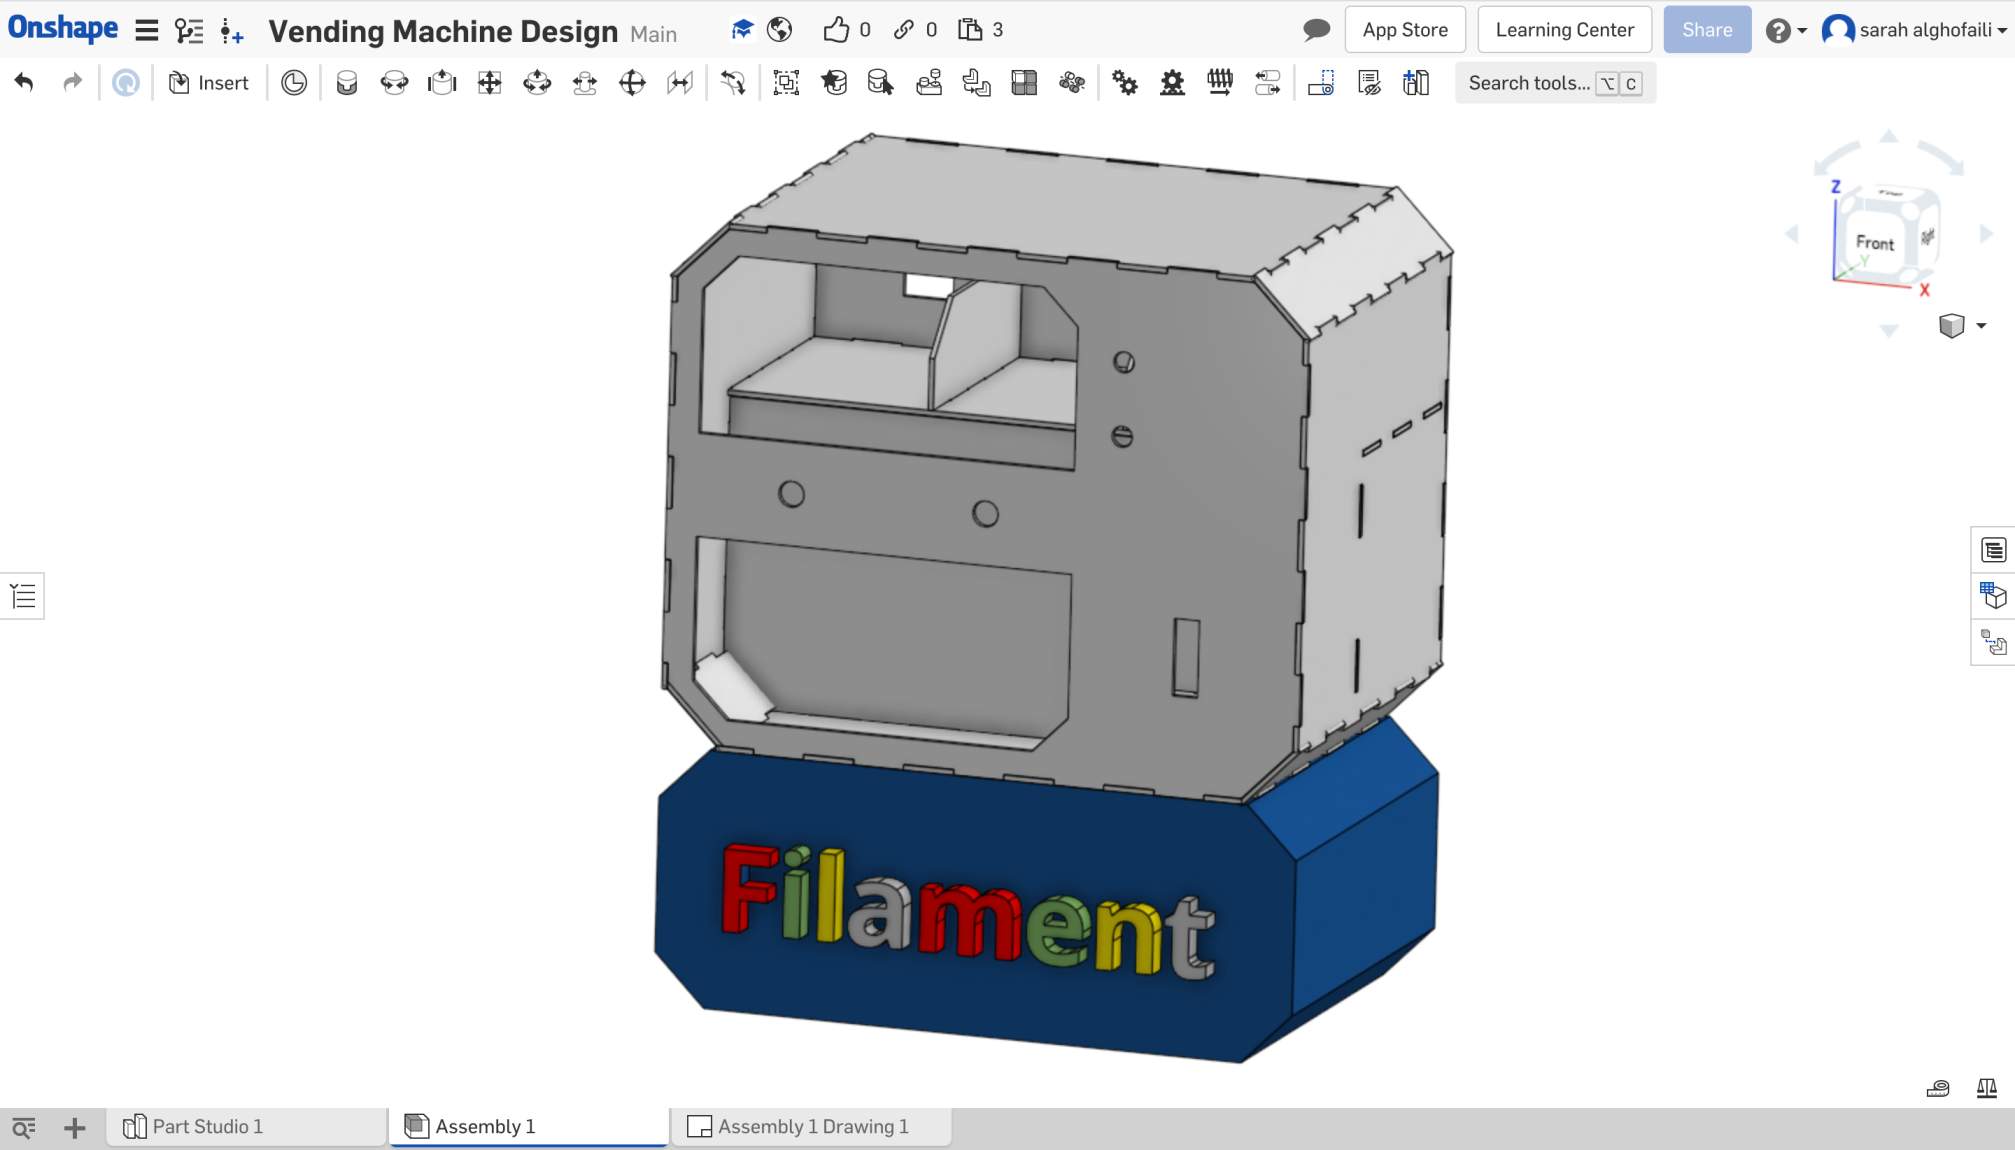
To predict the filament vending machine shape, we need to create an assembly model of our design. First, we clicked on the assembly tab. Then, we pressed on the insert button to add parts to the workplace.
Using the Fastened mate tool, we connected each part with the other.
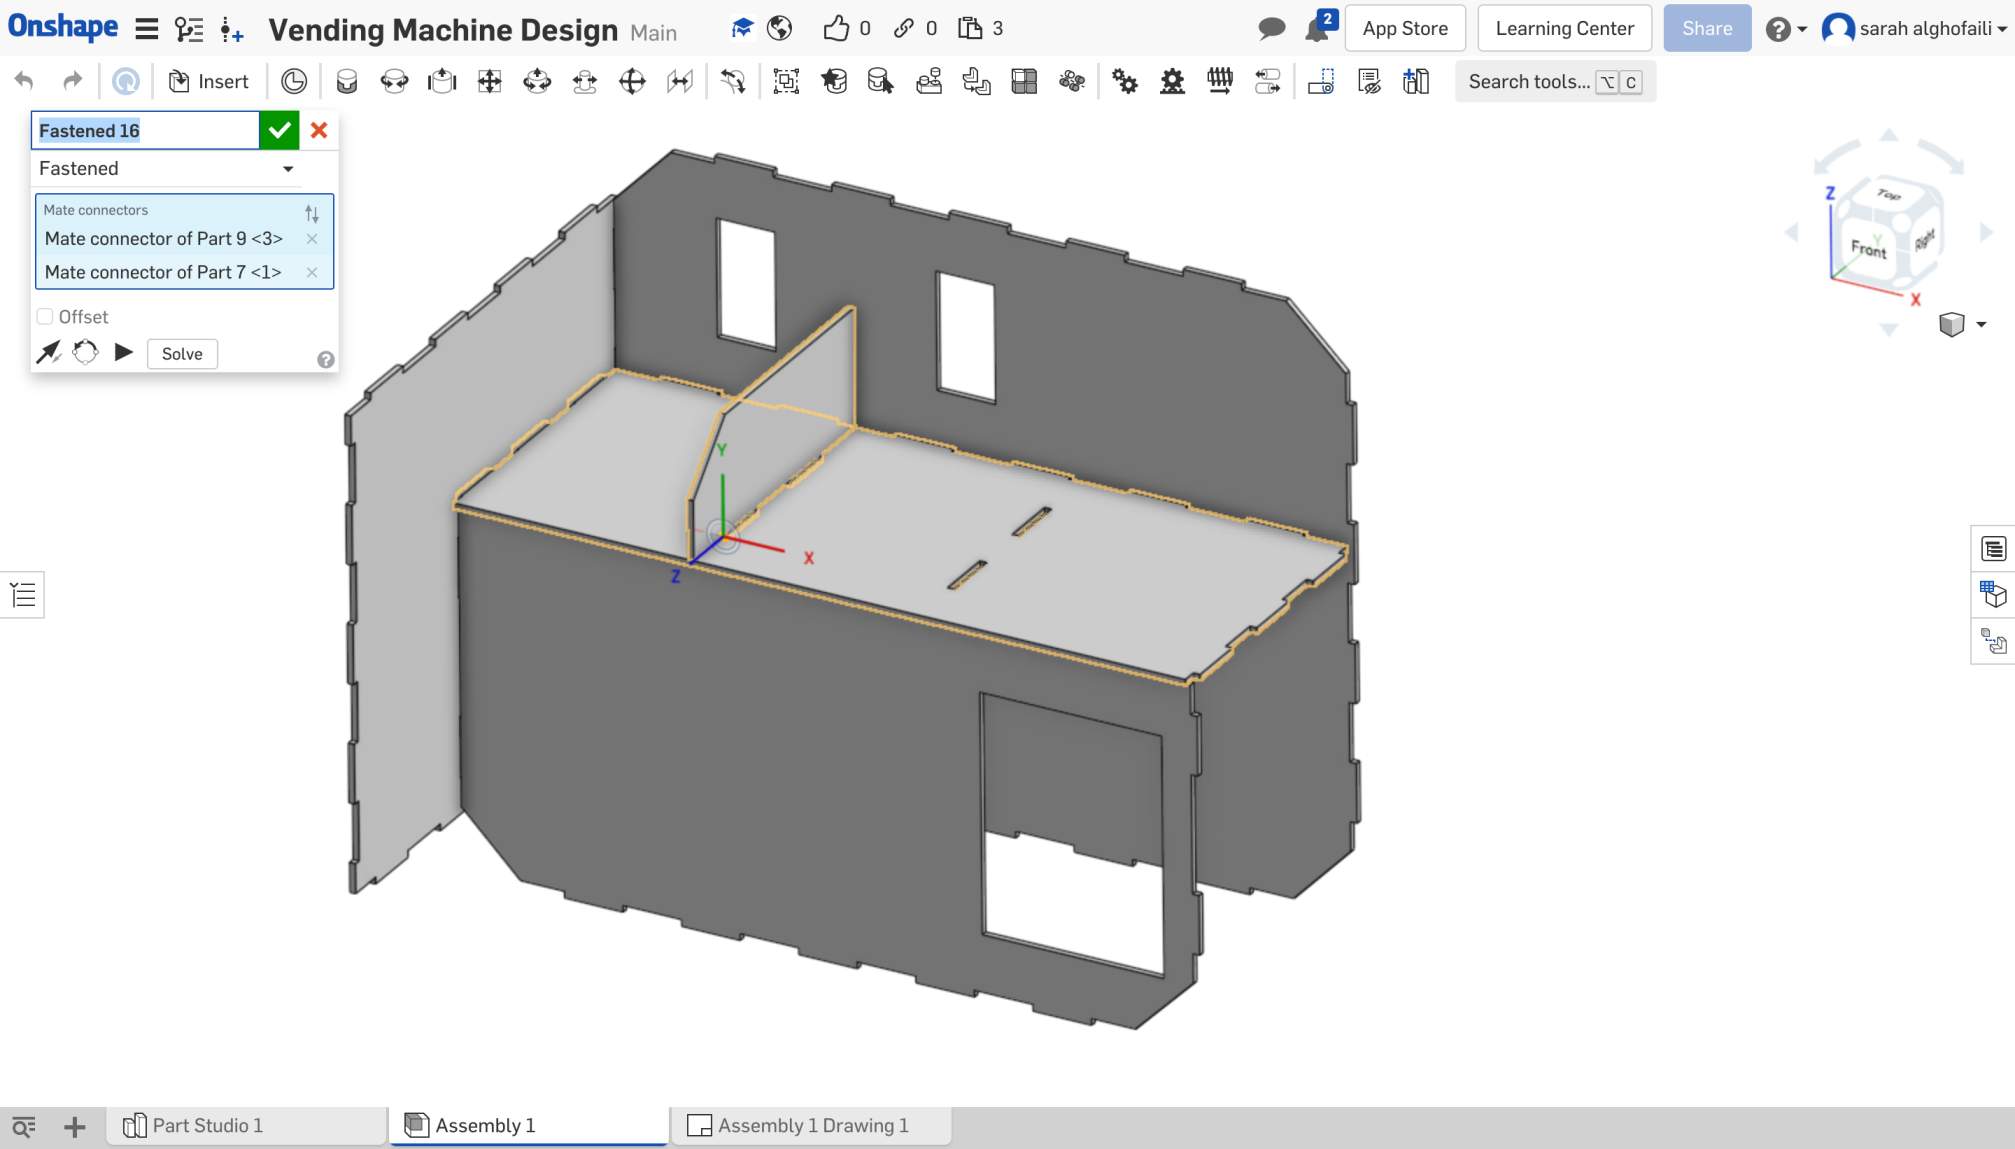
The picture below shows the final model of the machine.
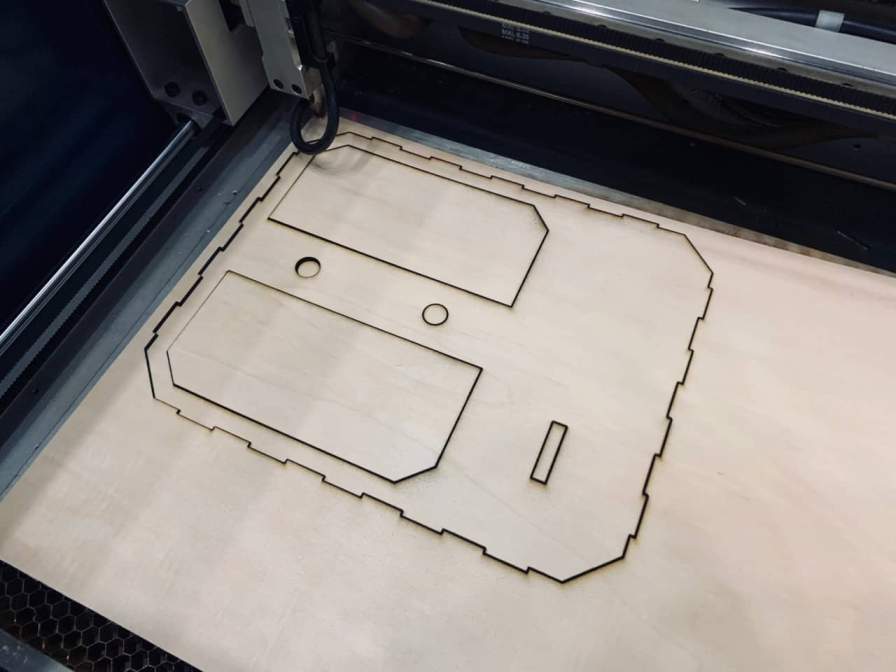
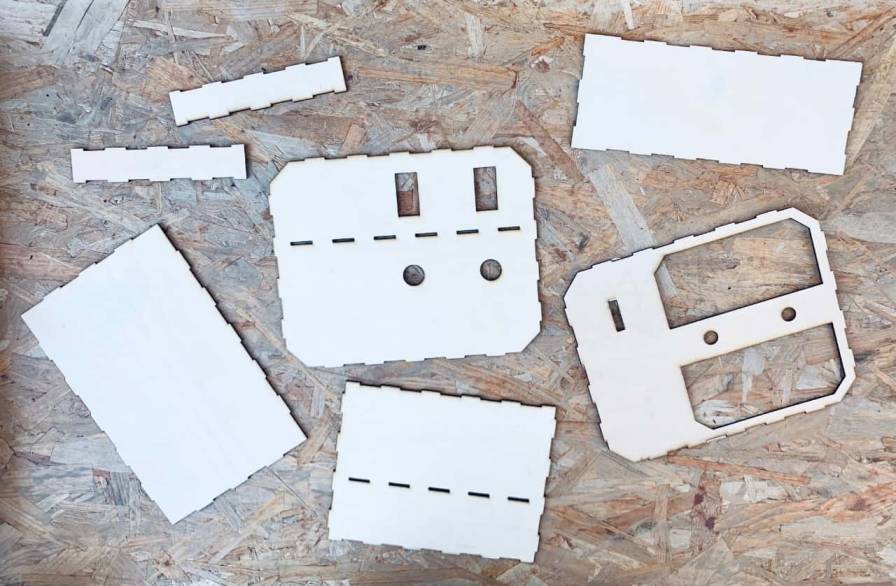
Laser cutting
By Using the full spectrum laser cutter, we cut all the parts with wood material. We decided to color the part with silver color spray.
3D DESIGN and modeling
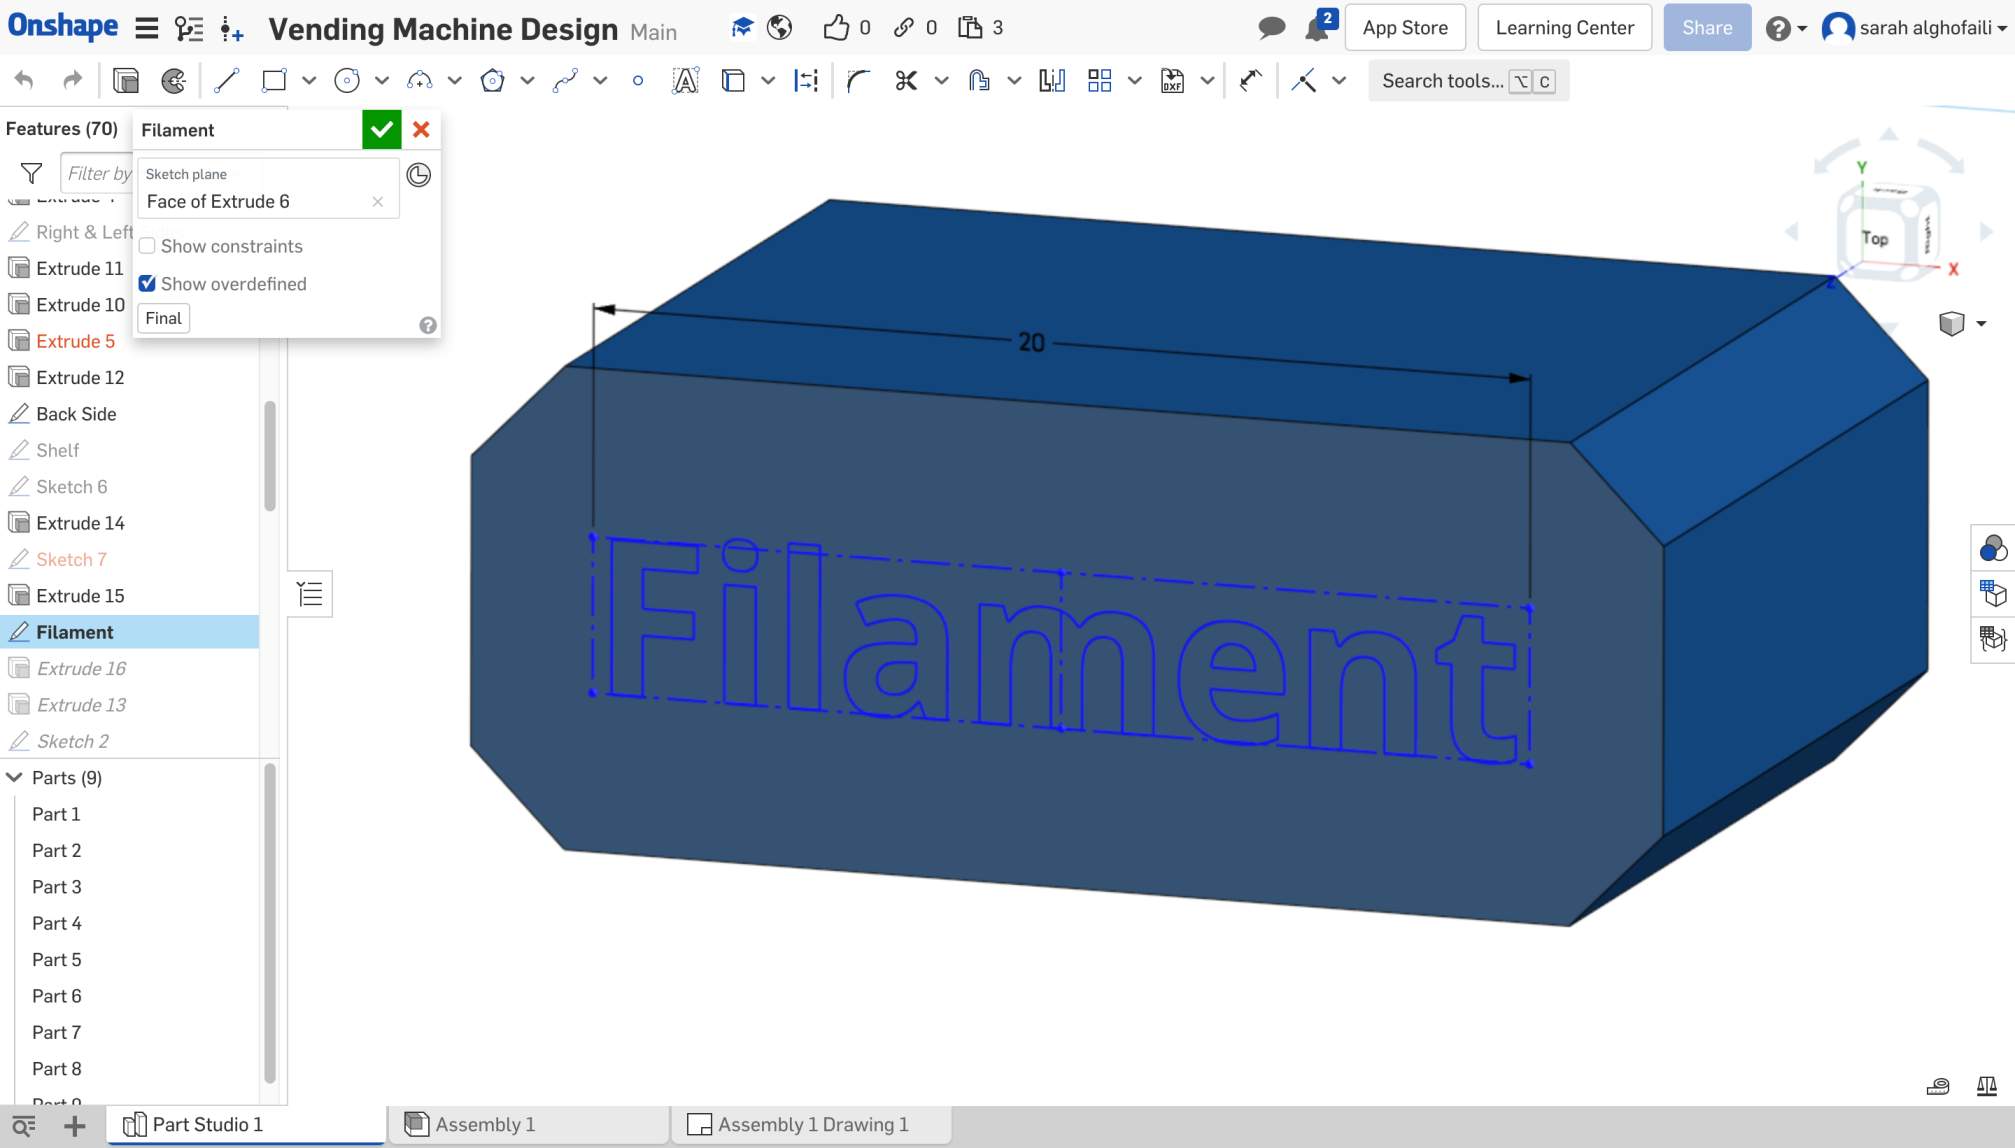
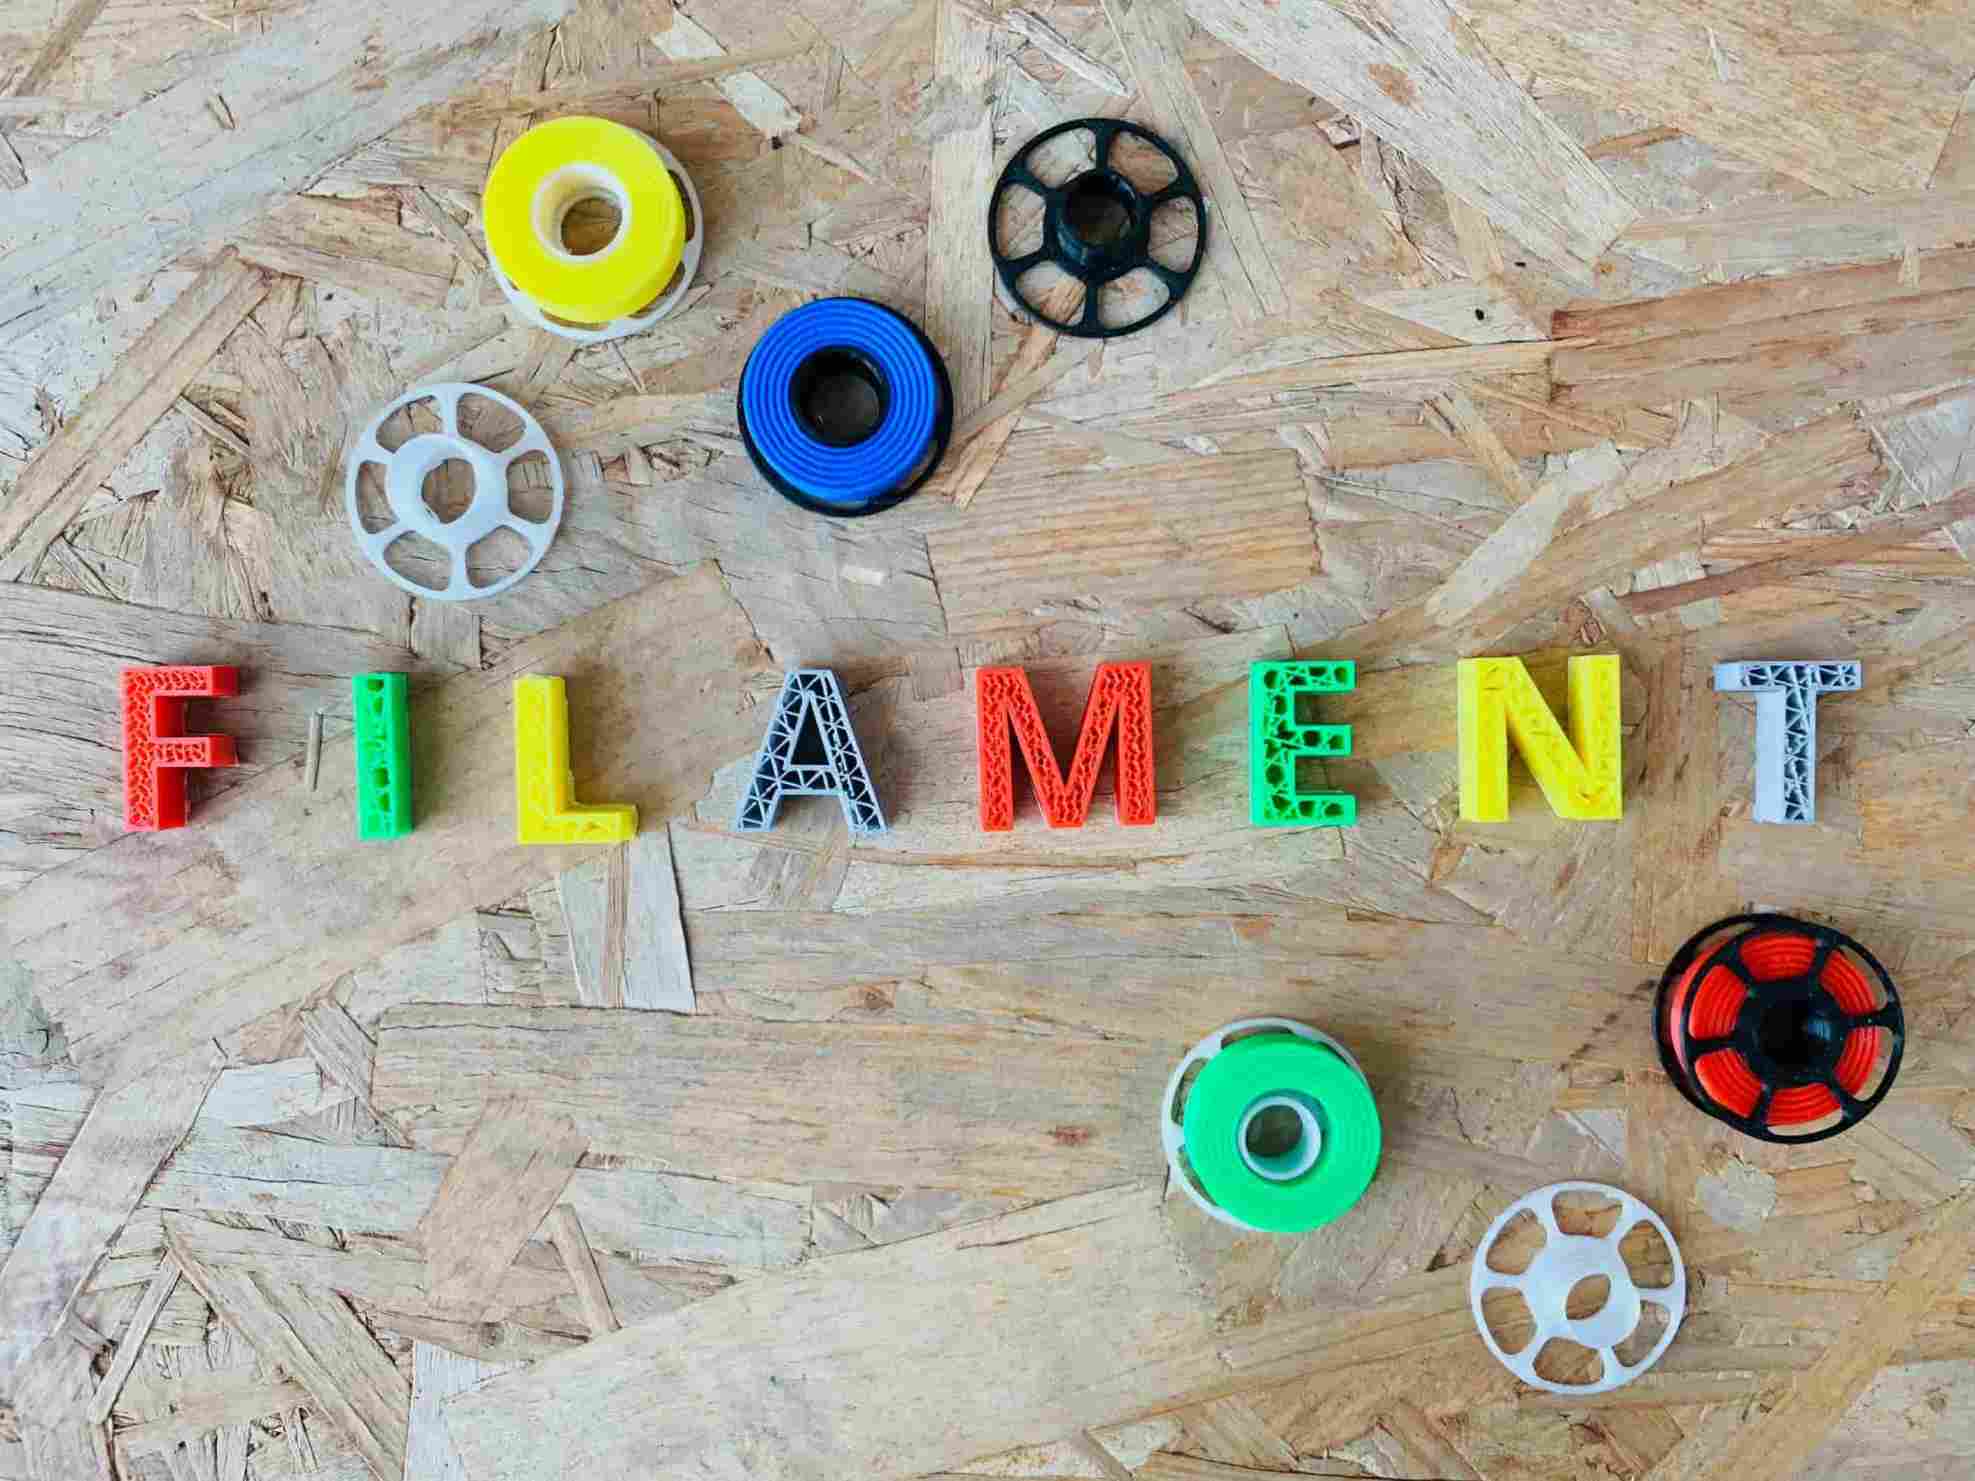
For the machine sign, Norah and I thought about a design that reflects the filament vending machine idea. We decided to make the work “ Filament “ with different infill patterns such as Gyroid, Cubic, zig zag, etc.
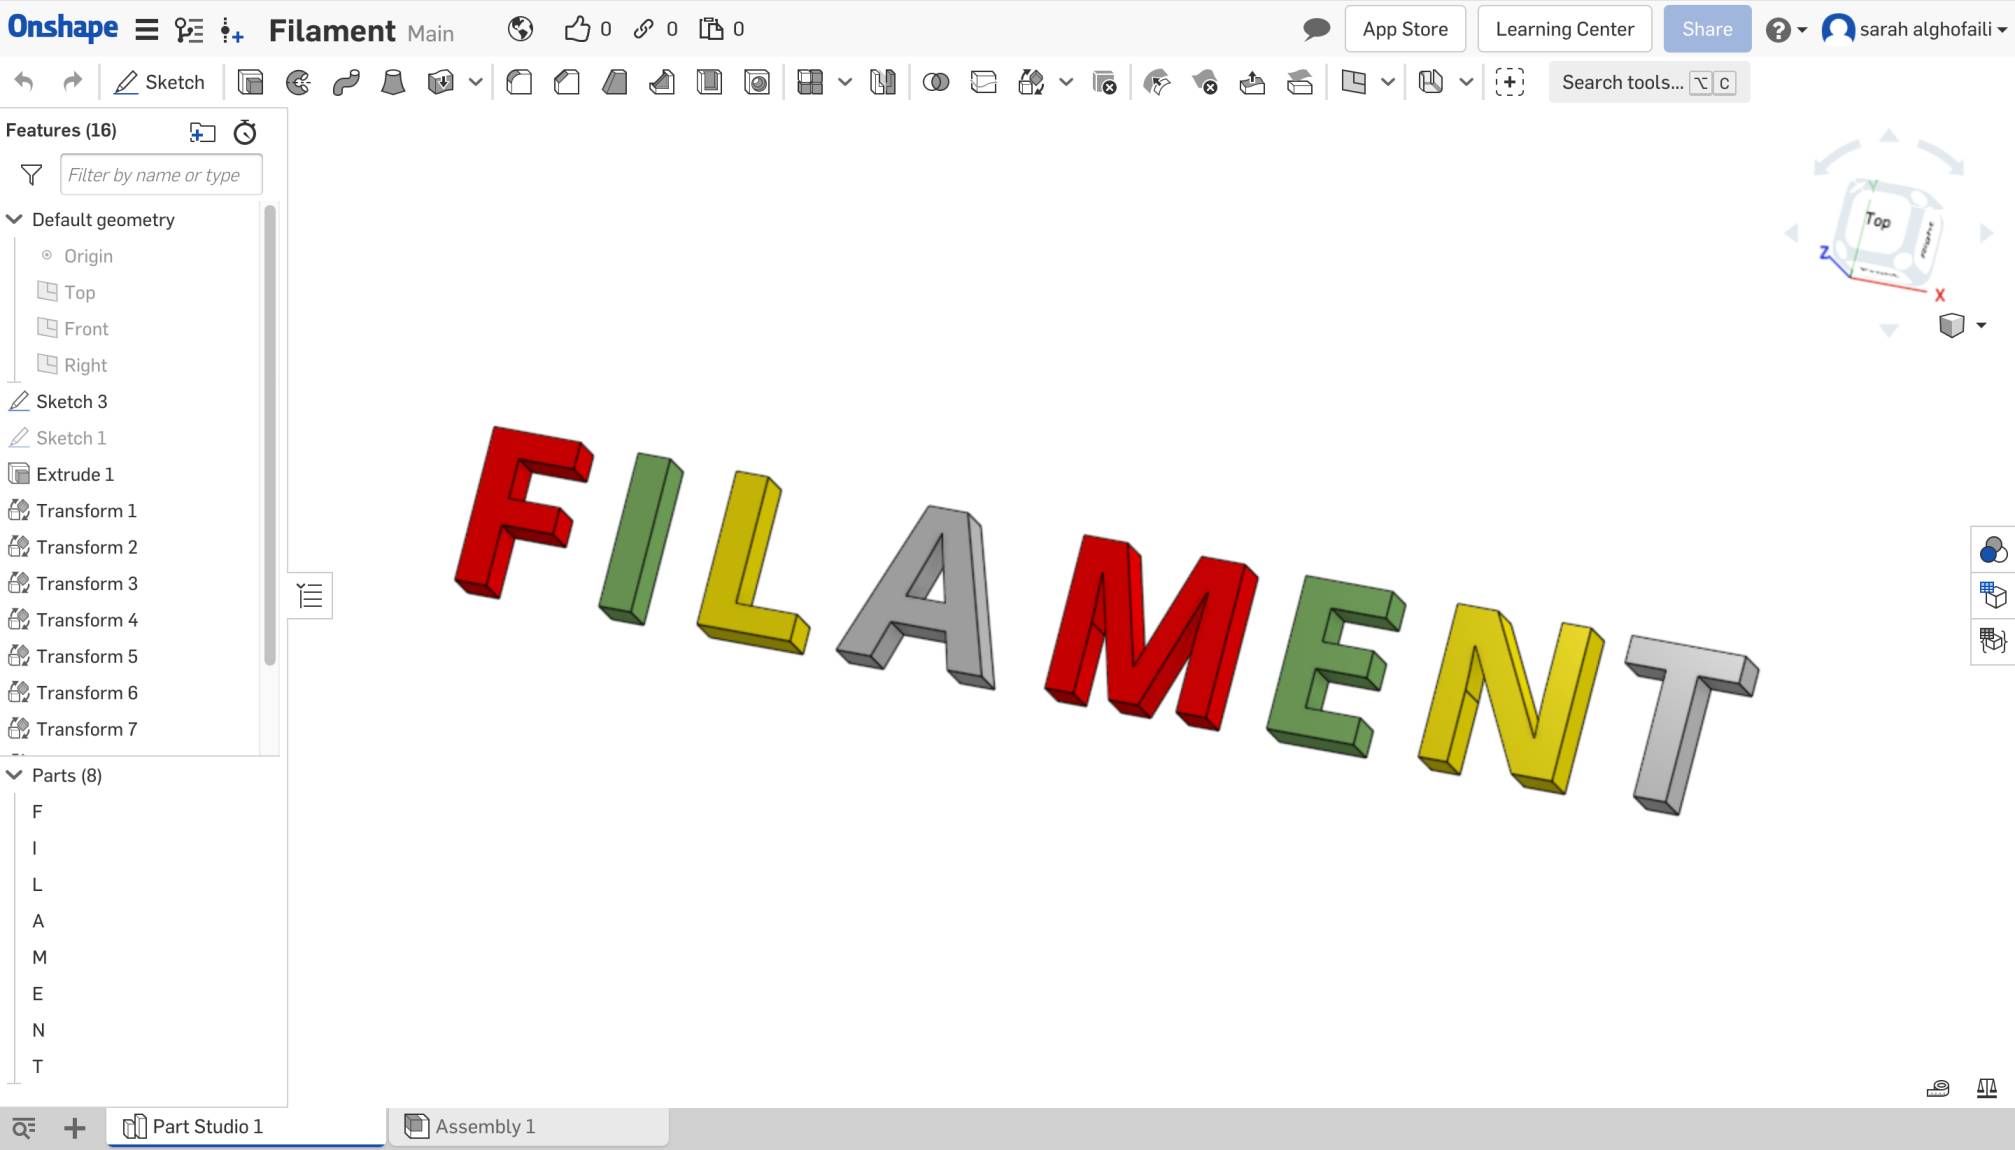
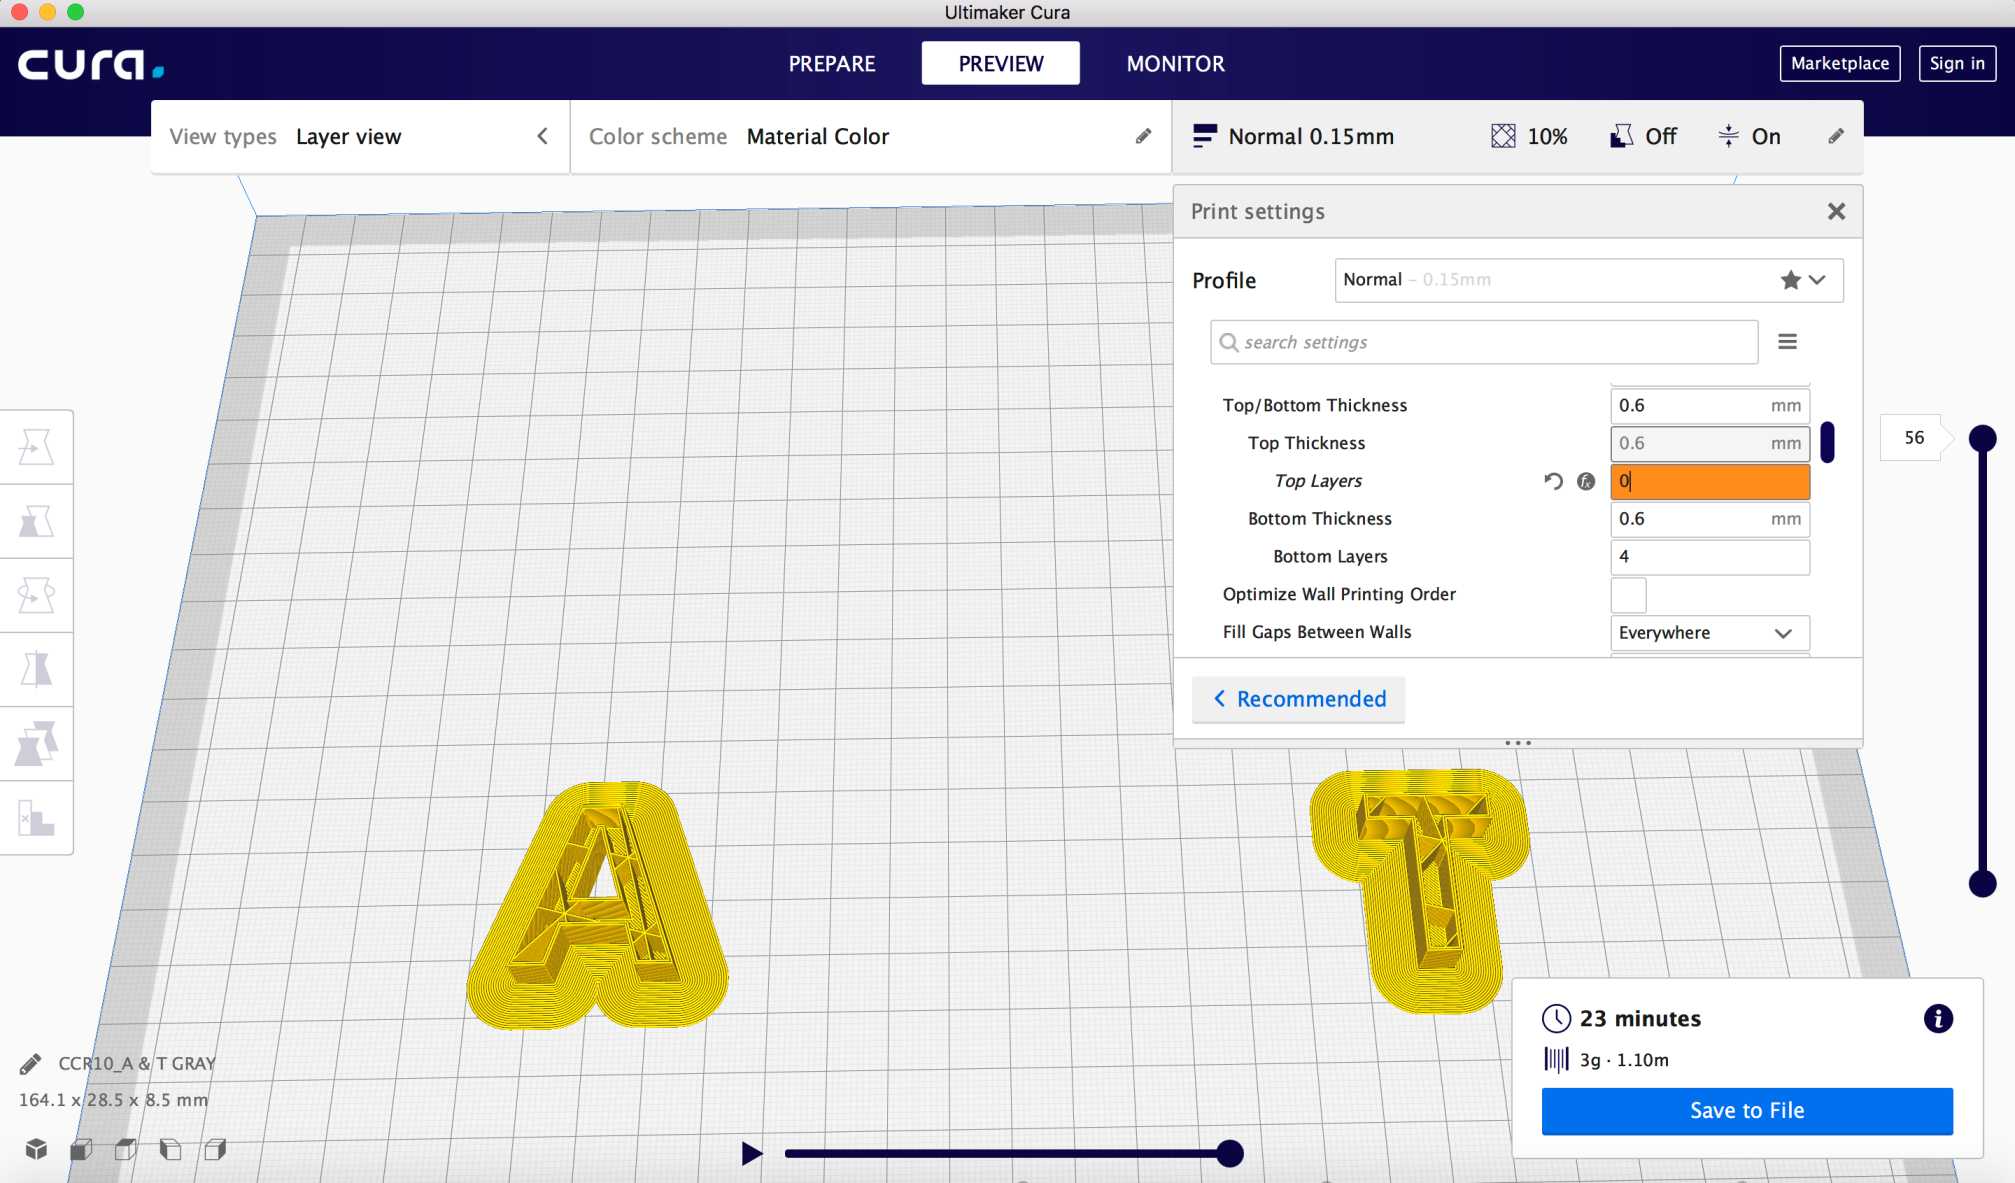
To print the letters, we used a CR10 3D printer. The Cura software is compatible with this printer. To make the infill visible, we removed the top layer by changing the value to zero. Also, we determined different infill patterns for each letter.

For the vending machine products, we found filaments 3d design in a website which is a design community that includes an open source, printable file.
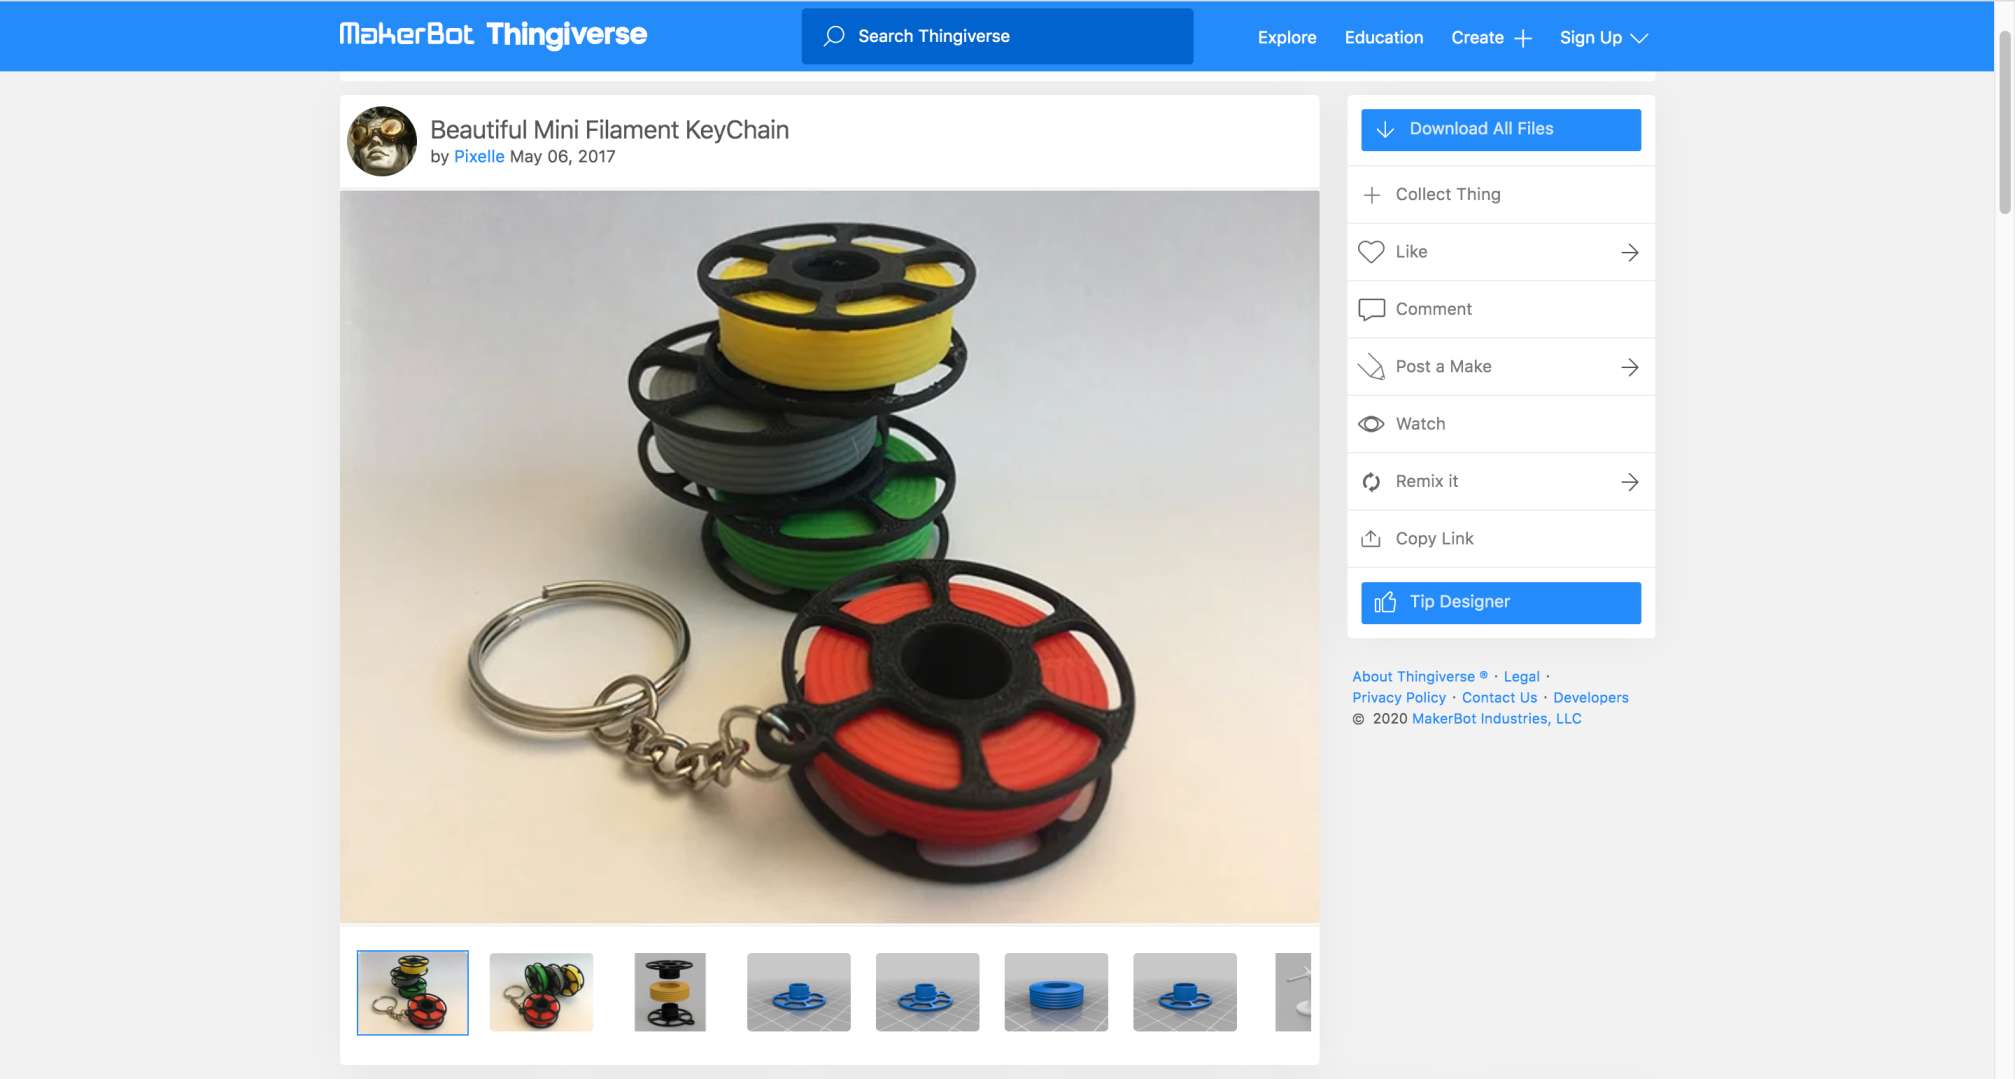
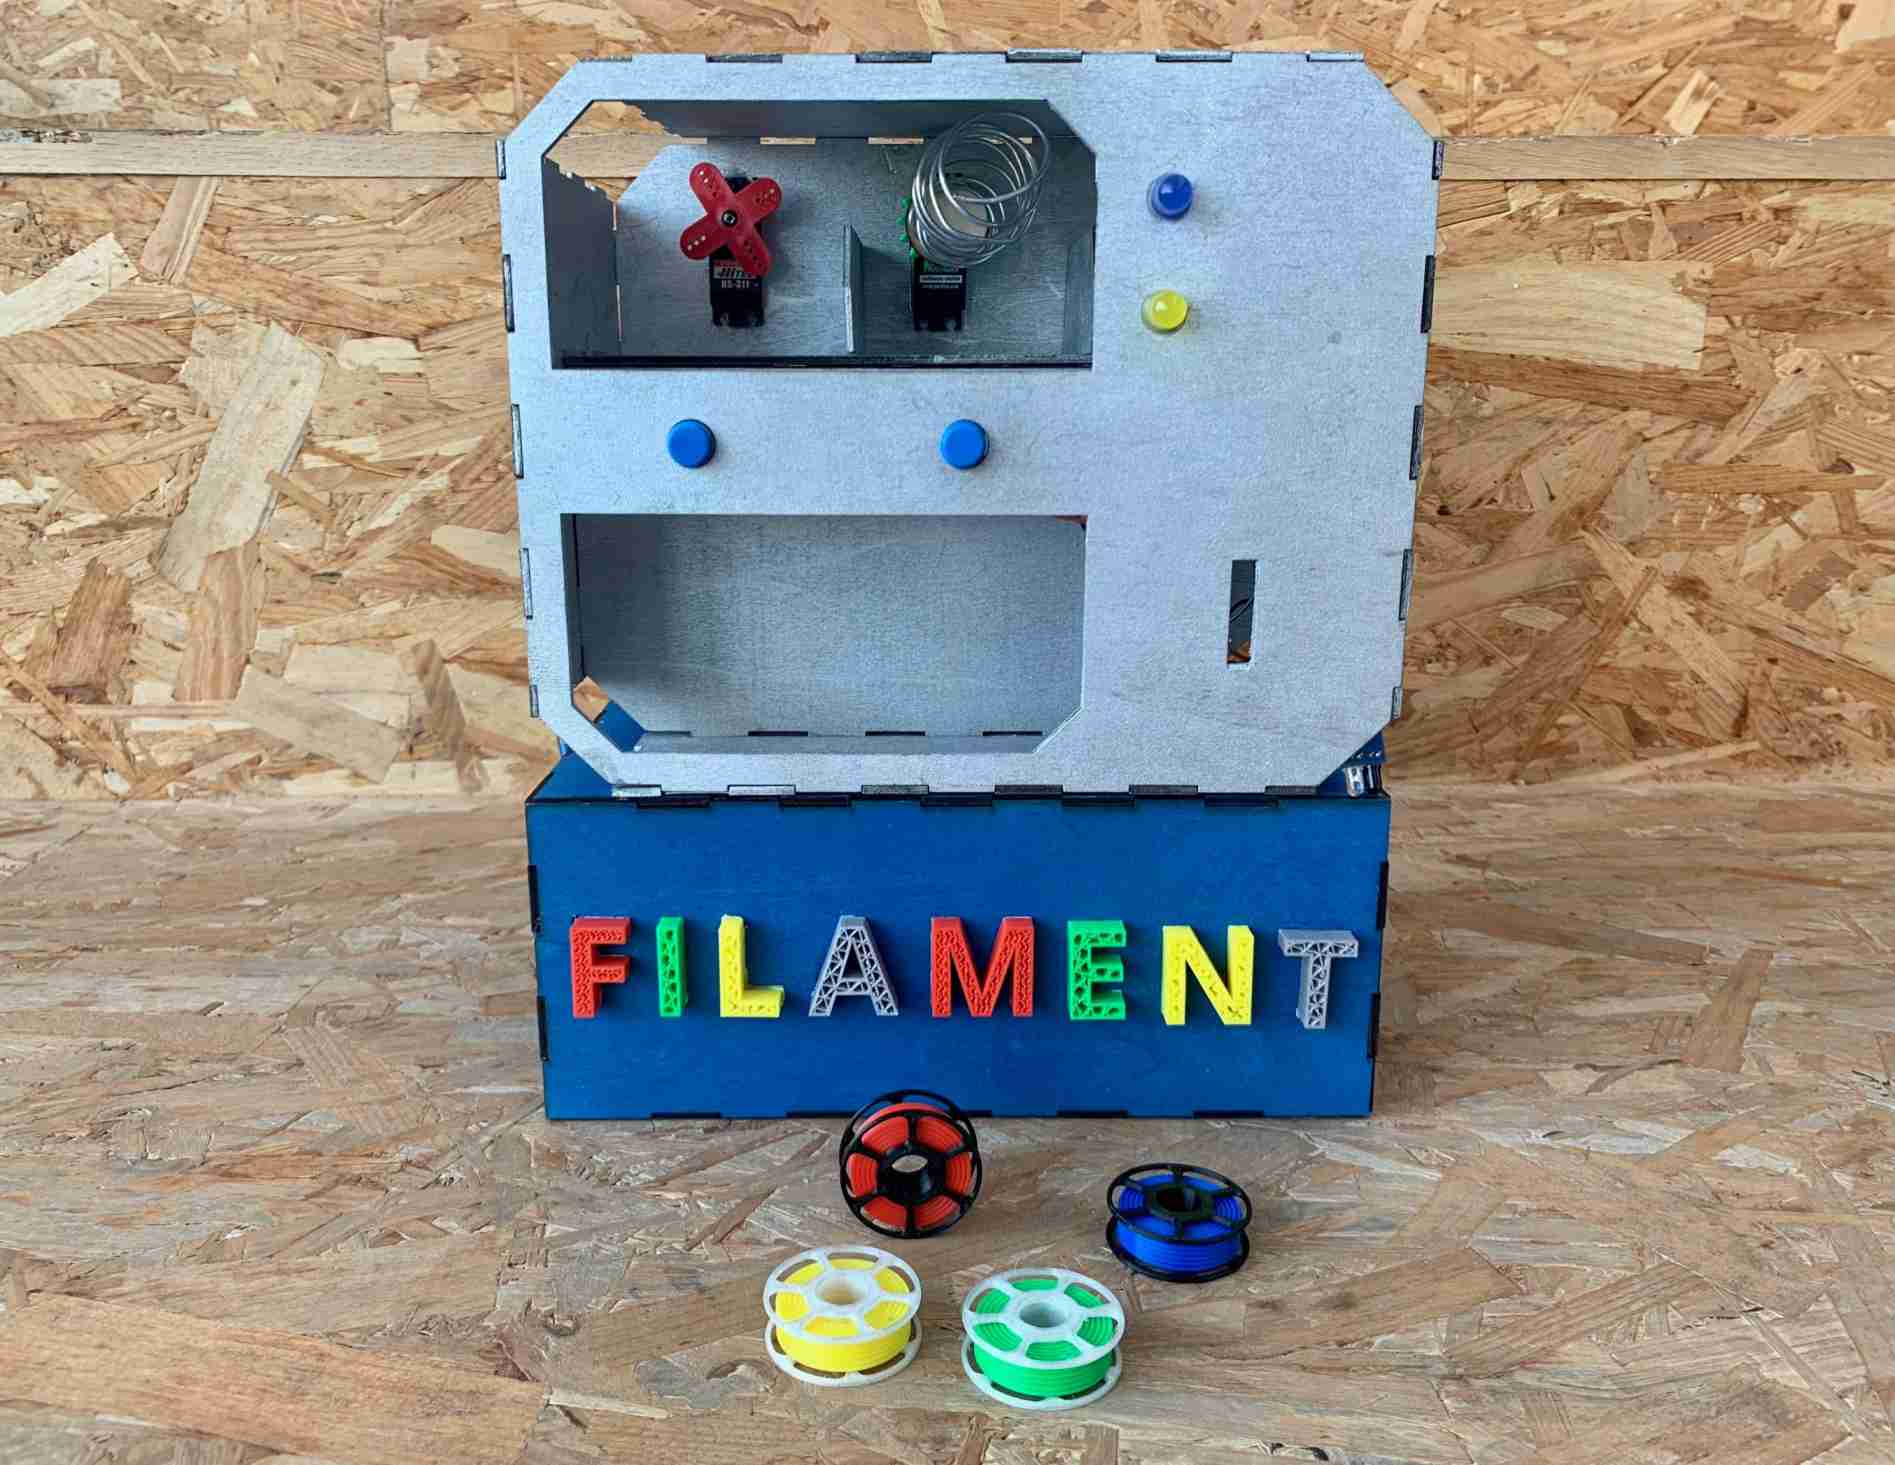
To save time, I printed the filament spools models using the Prusa 3D printer and Norah printed the letters using the CR10 3D printer . The image below shows the result of the 3d printing.
Looks cool, right ?
Electronics and Programming
As I mentioned before, the electronics and programming parts were assigned to Mohammed and Doaa.
For more details, you can visit Mohammed and Doaa pages.
ASSEMBLING THE MACHINE
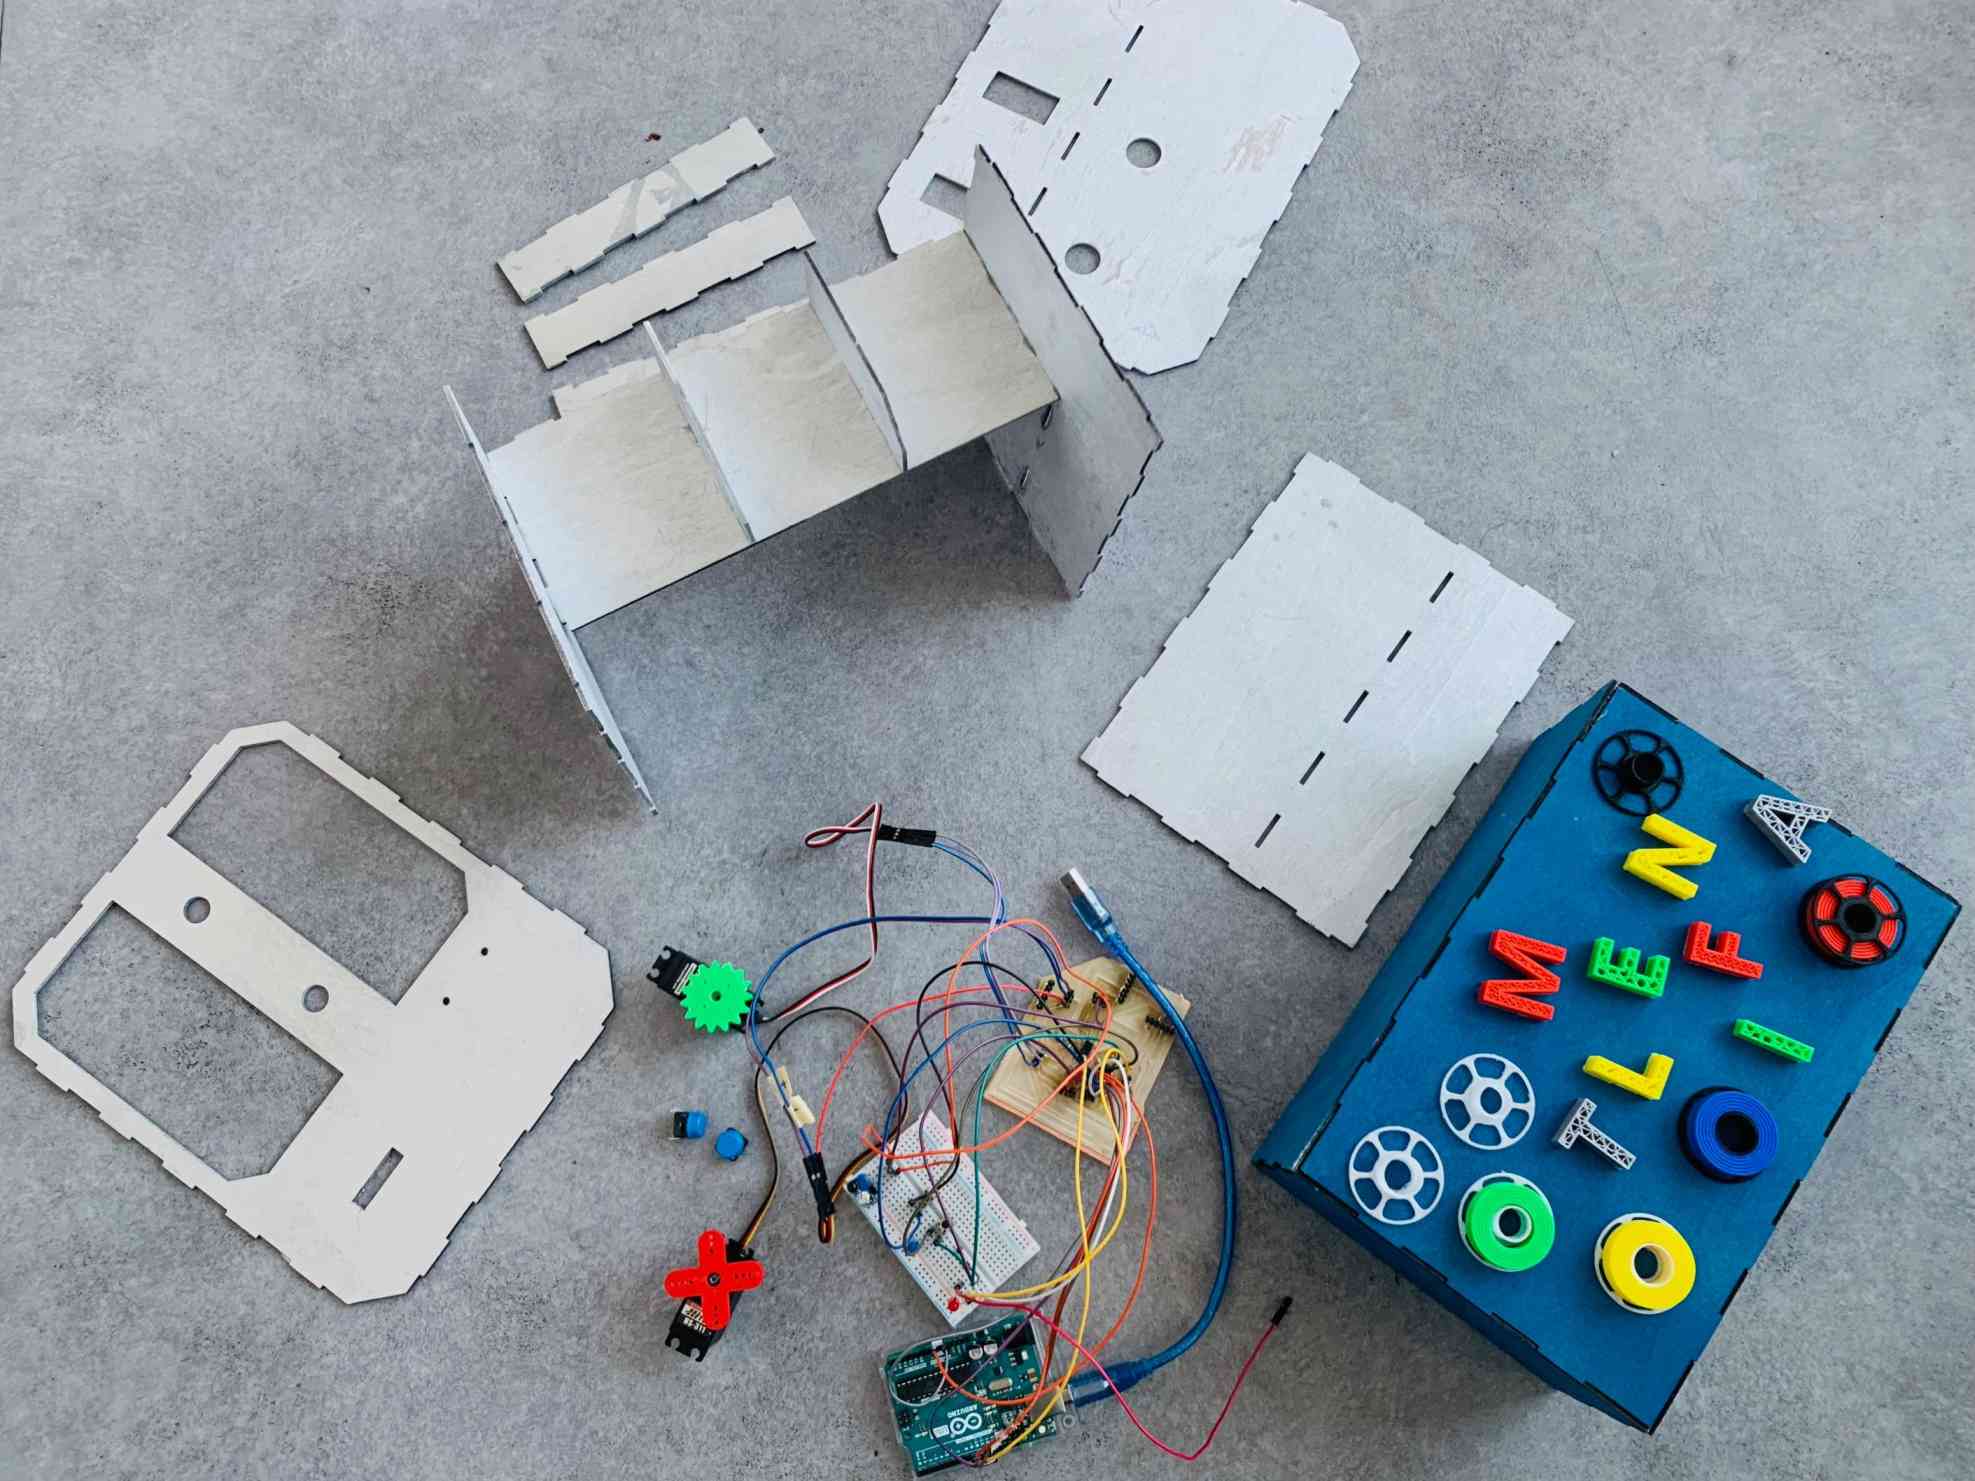
Assembly of the machine is the most exciting part of the project. Nora and I opened the 3d model file to start the construction process.
We started by securing the two servos to the backside part. Then, we attached all the parts together. The thickness of the wood and the slots and finger joint match, this will make the part fit tightly.
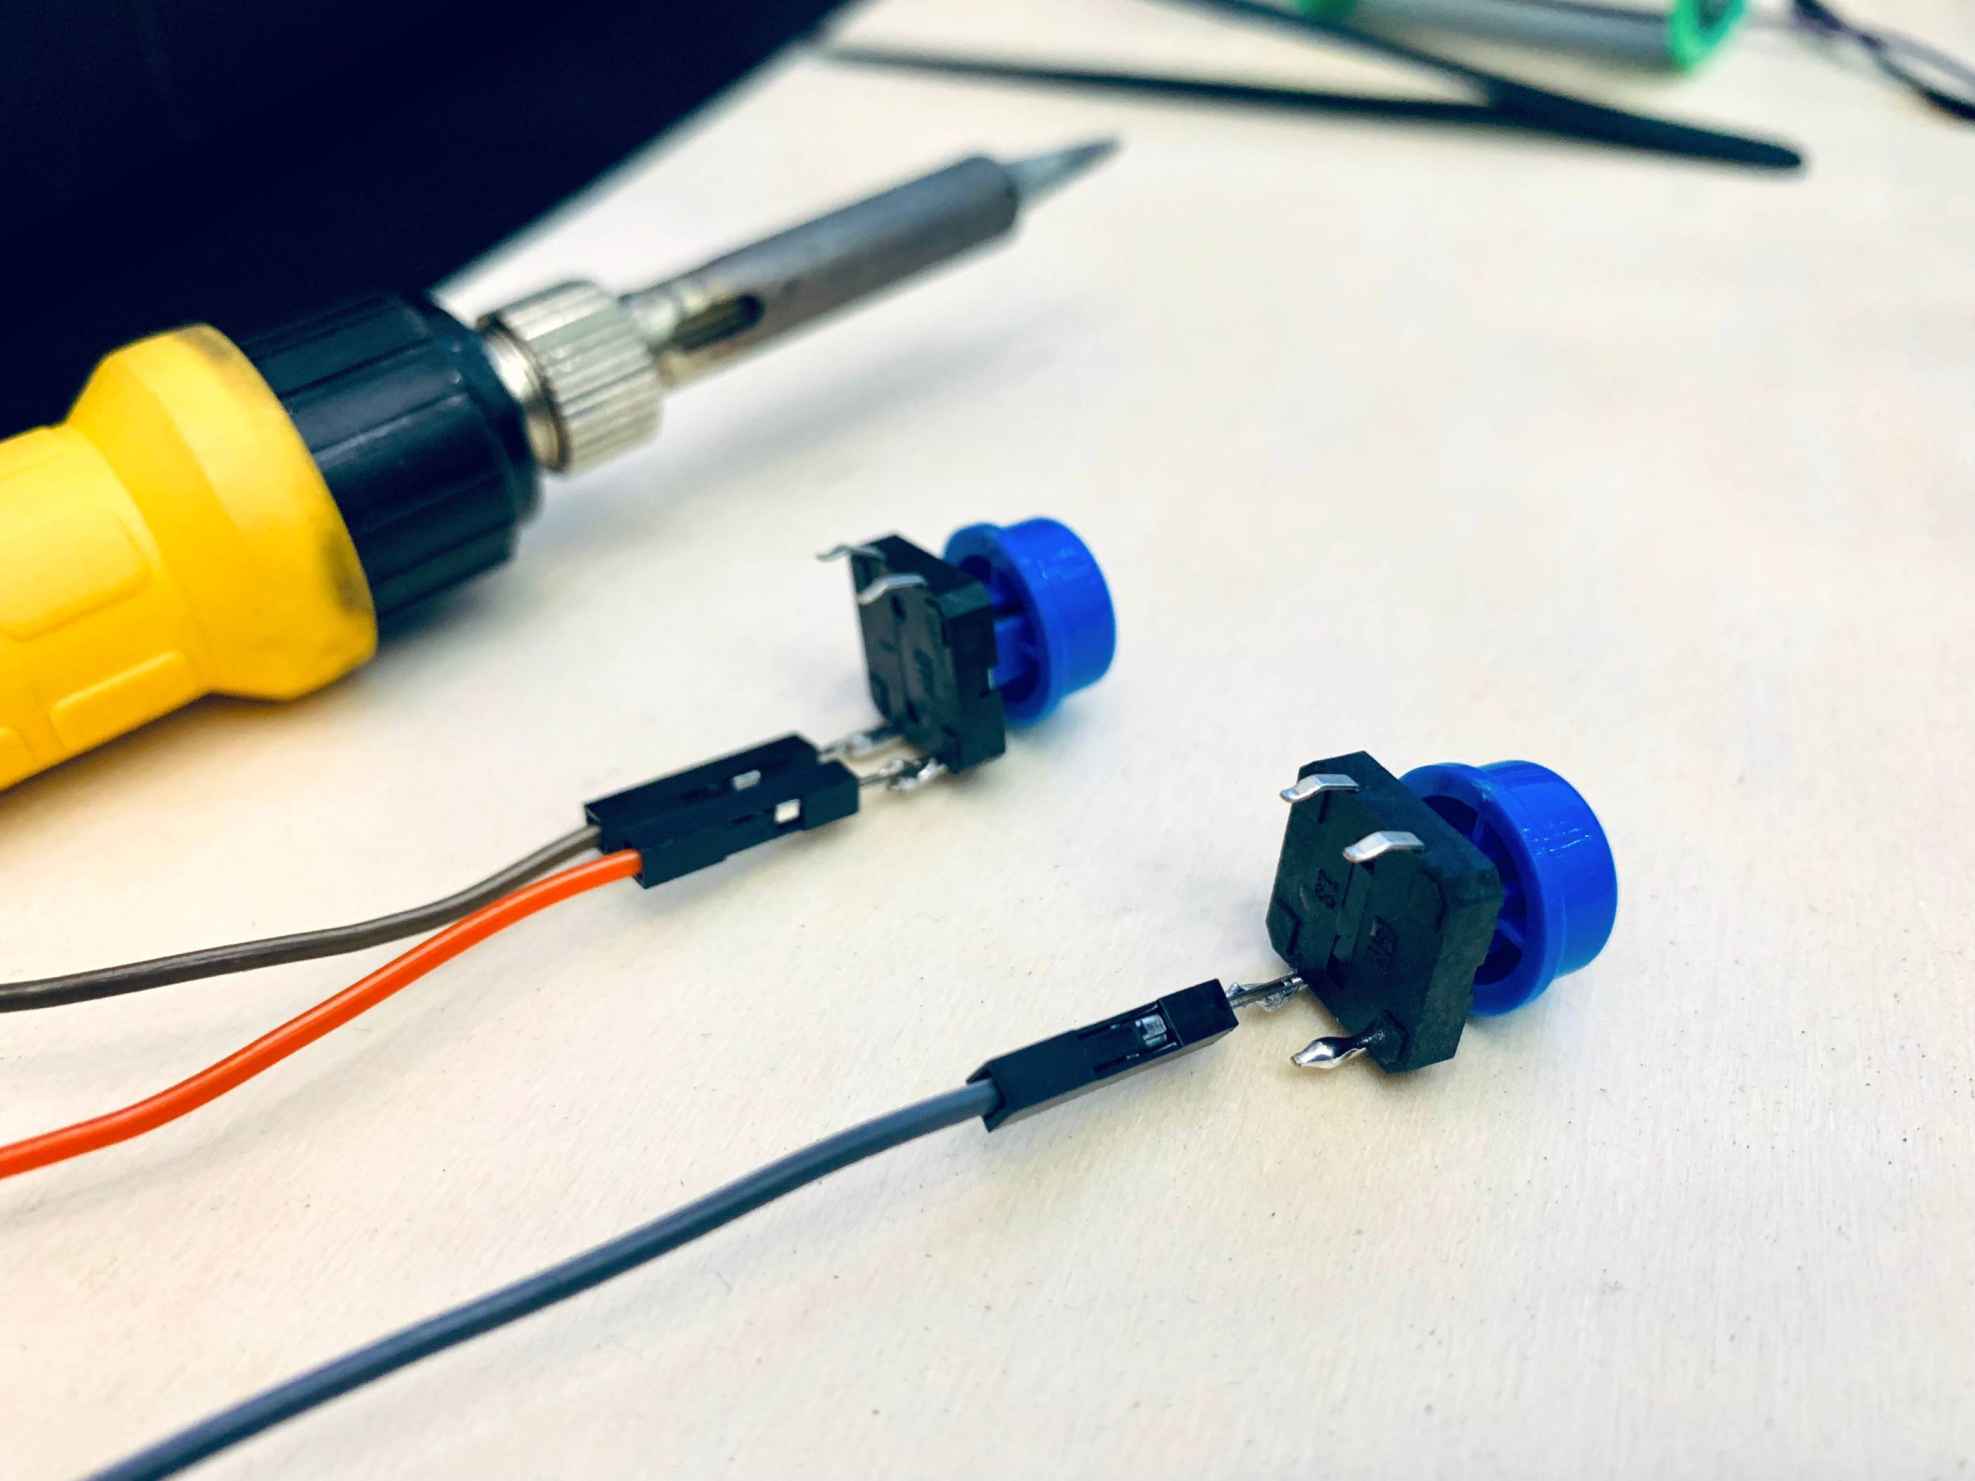
While Norah was working on the PCB connections, I soldered the buttons with male to female jumper wires.
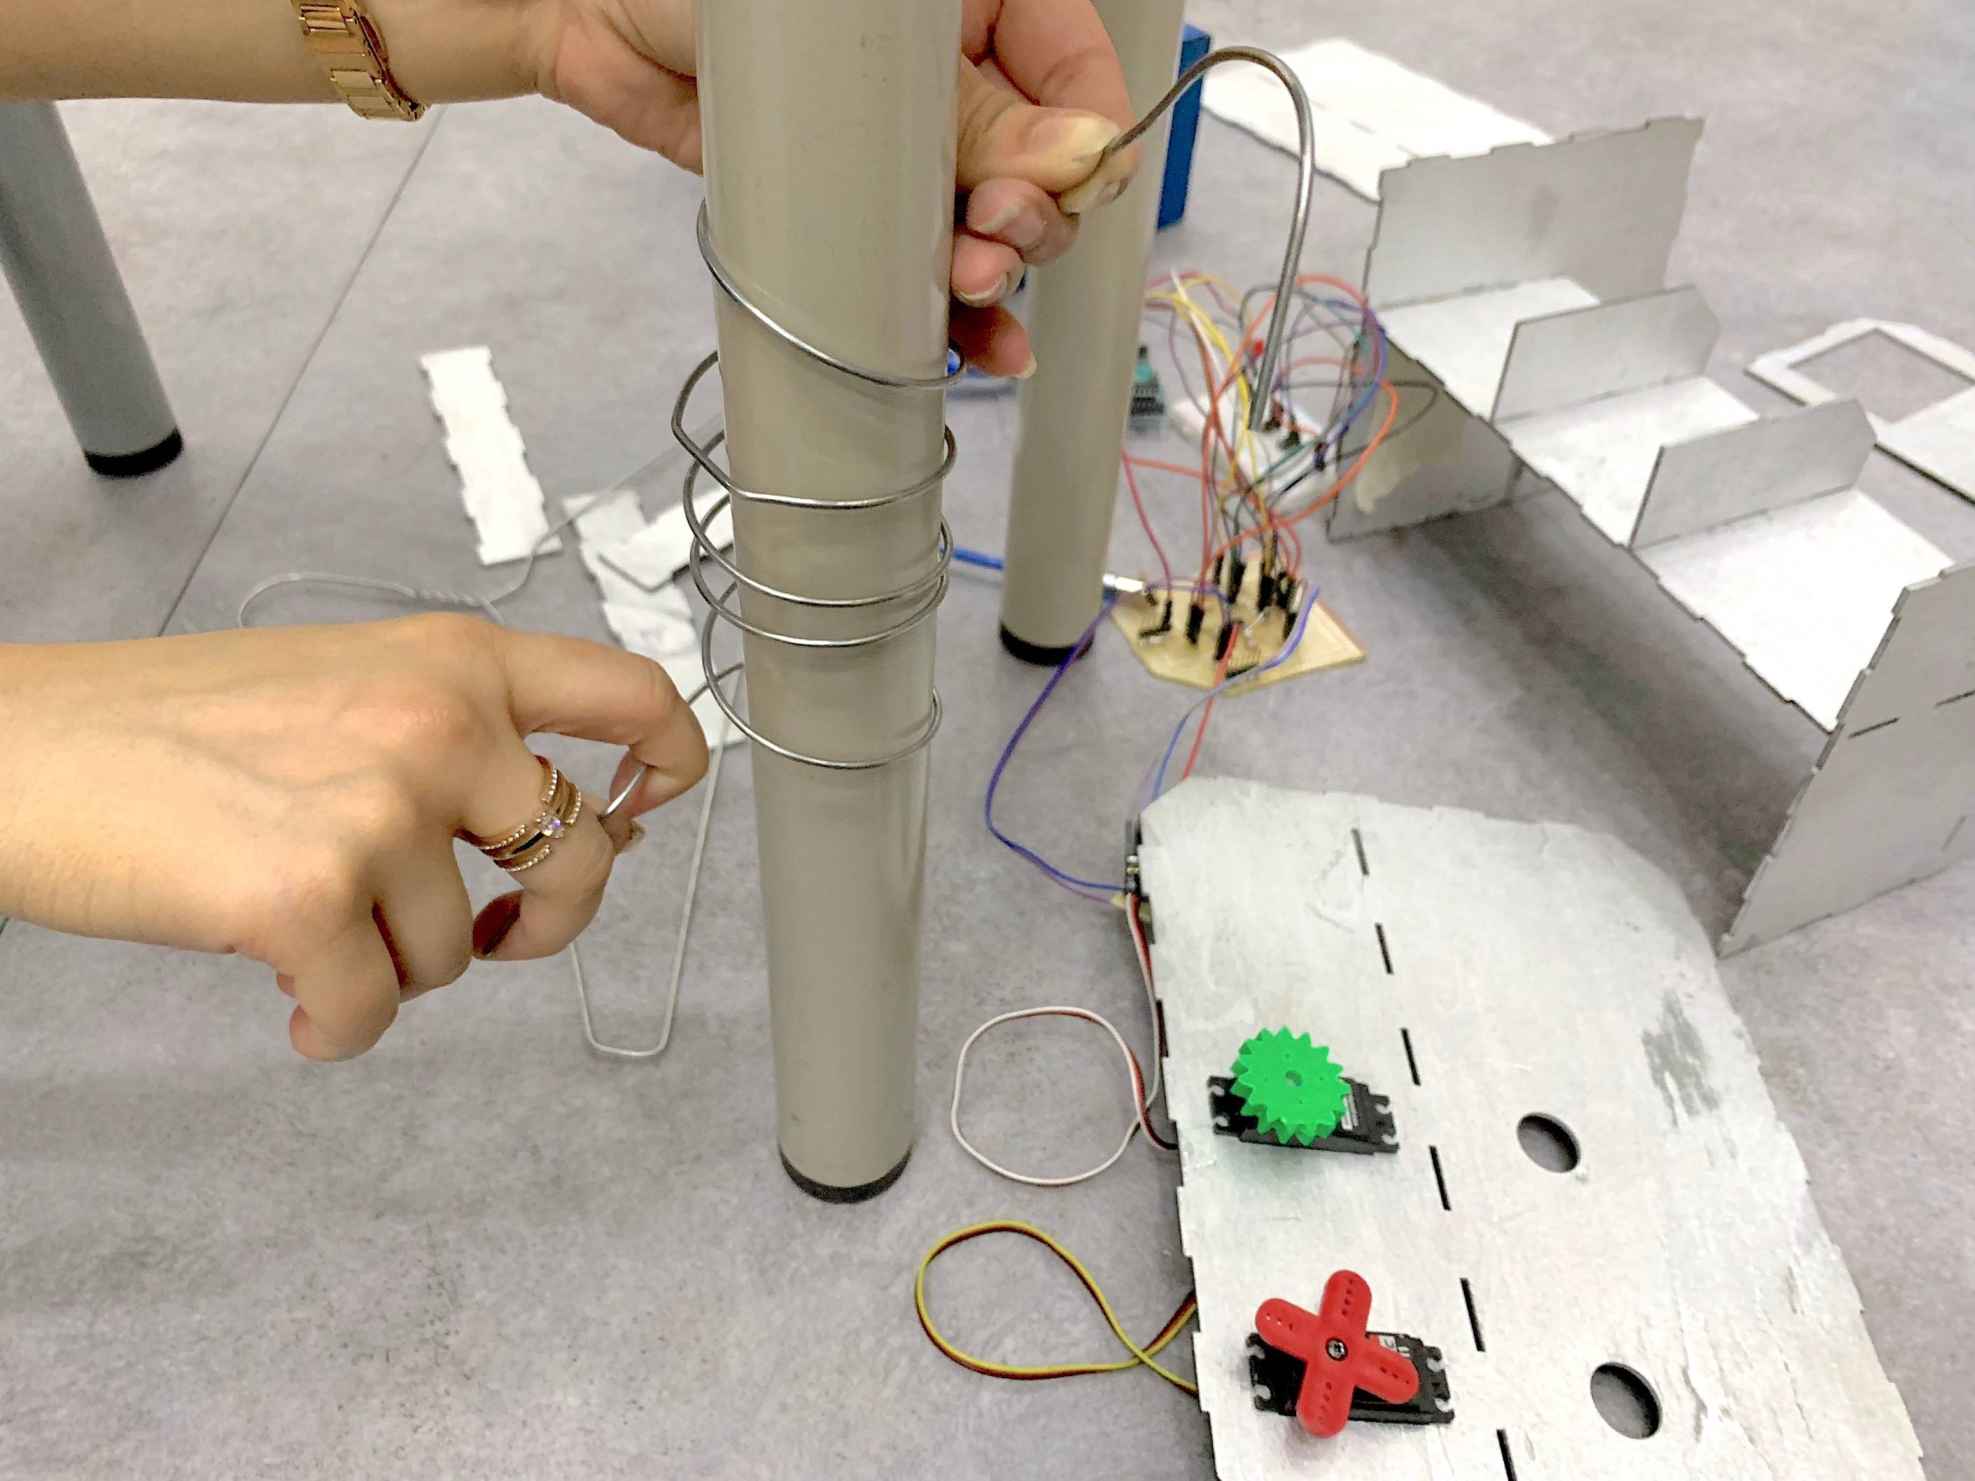
Using a coat hanger, we made a helical coil metal wire by wrapping it around the table leg
.
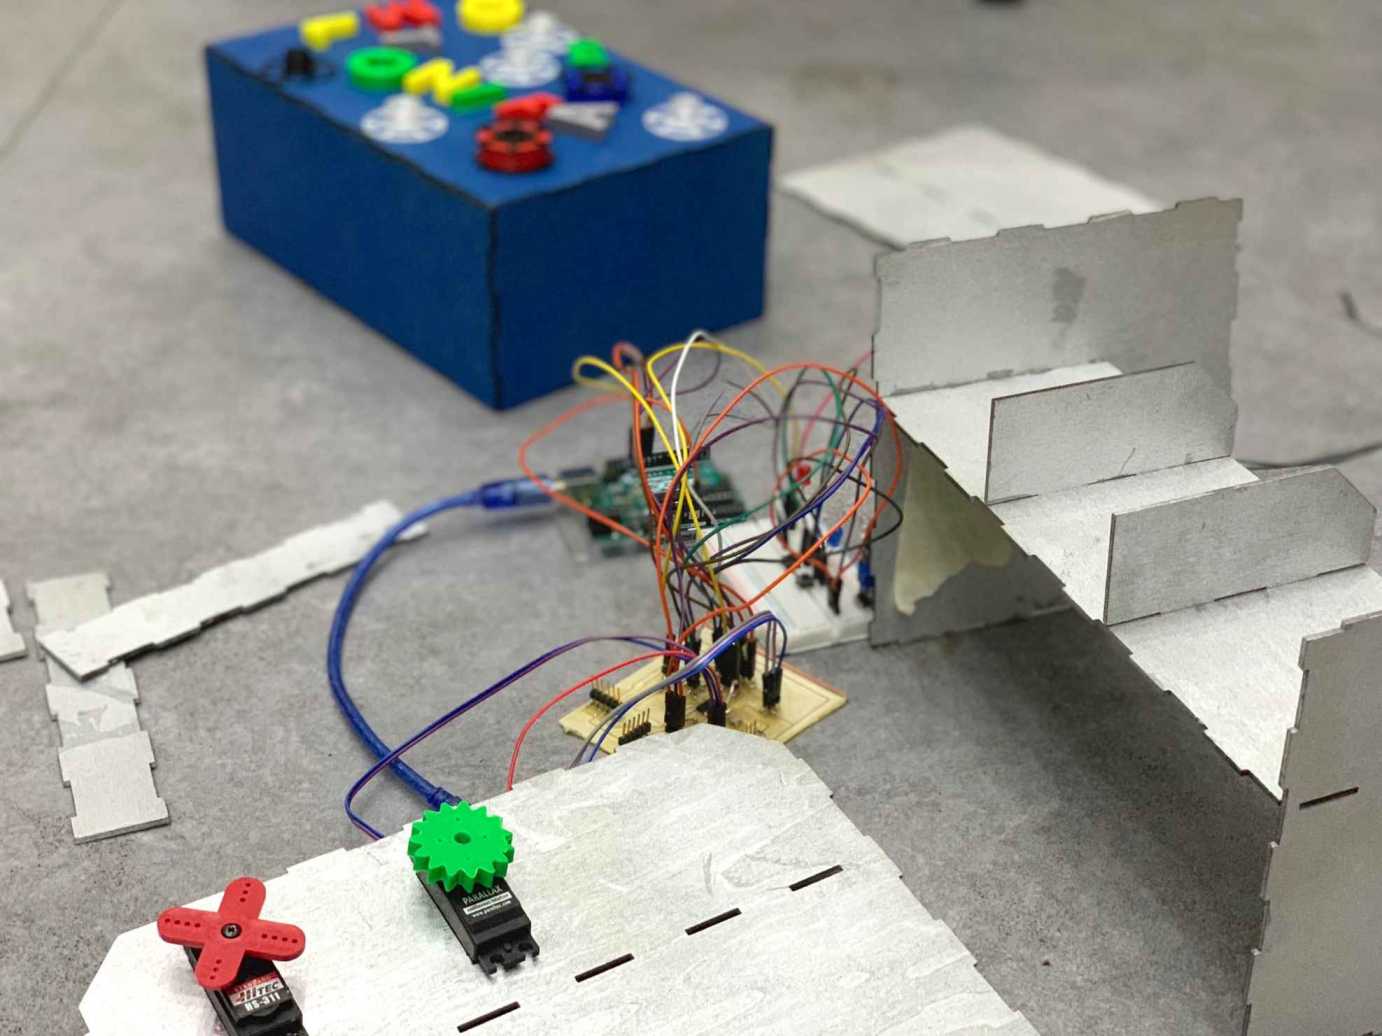
Also, we operated the vending machine manually to check if it works correctly or not.
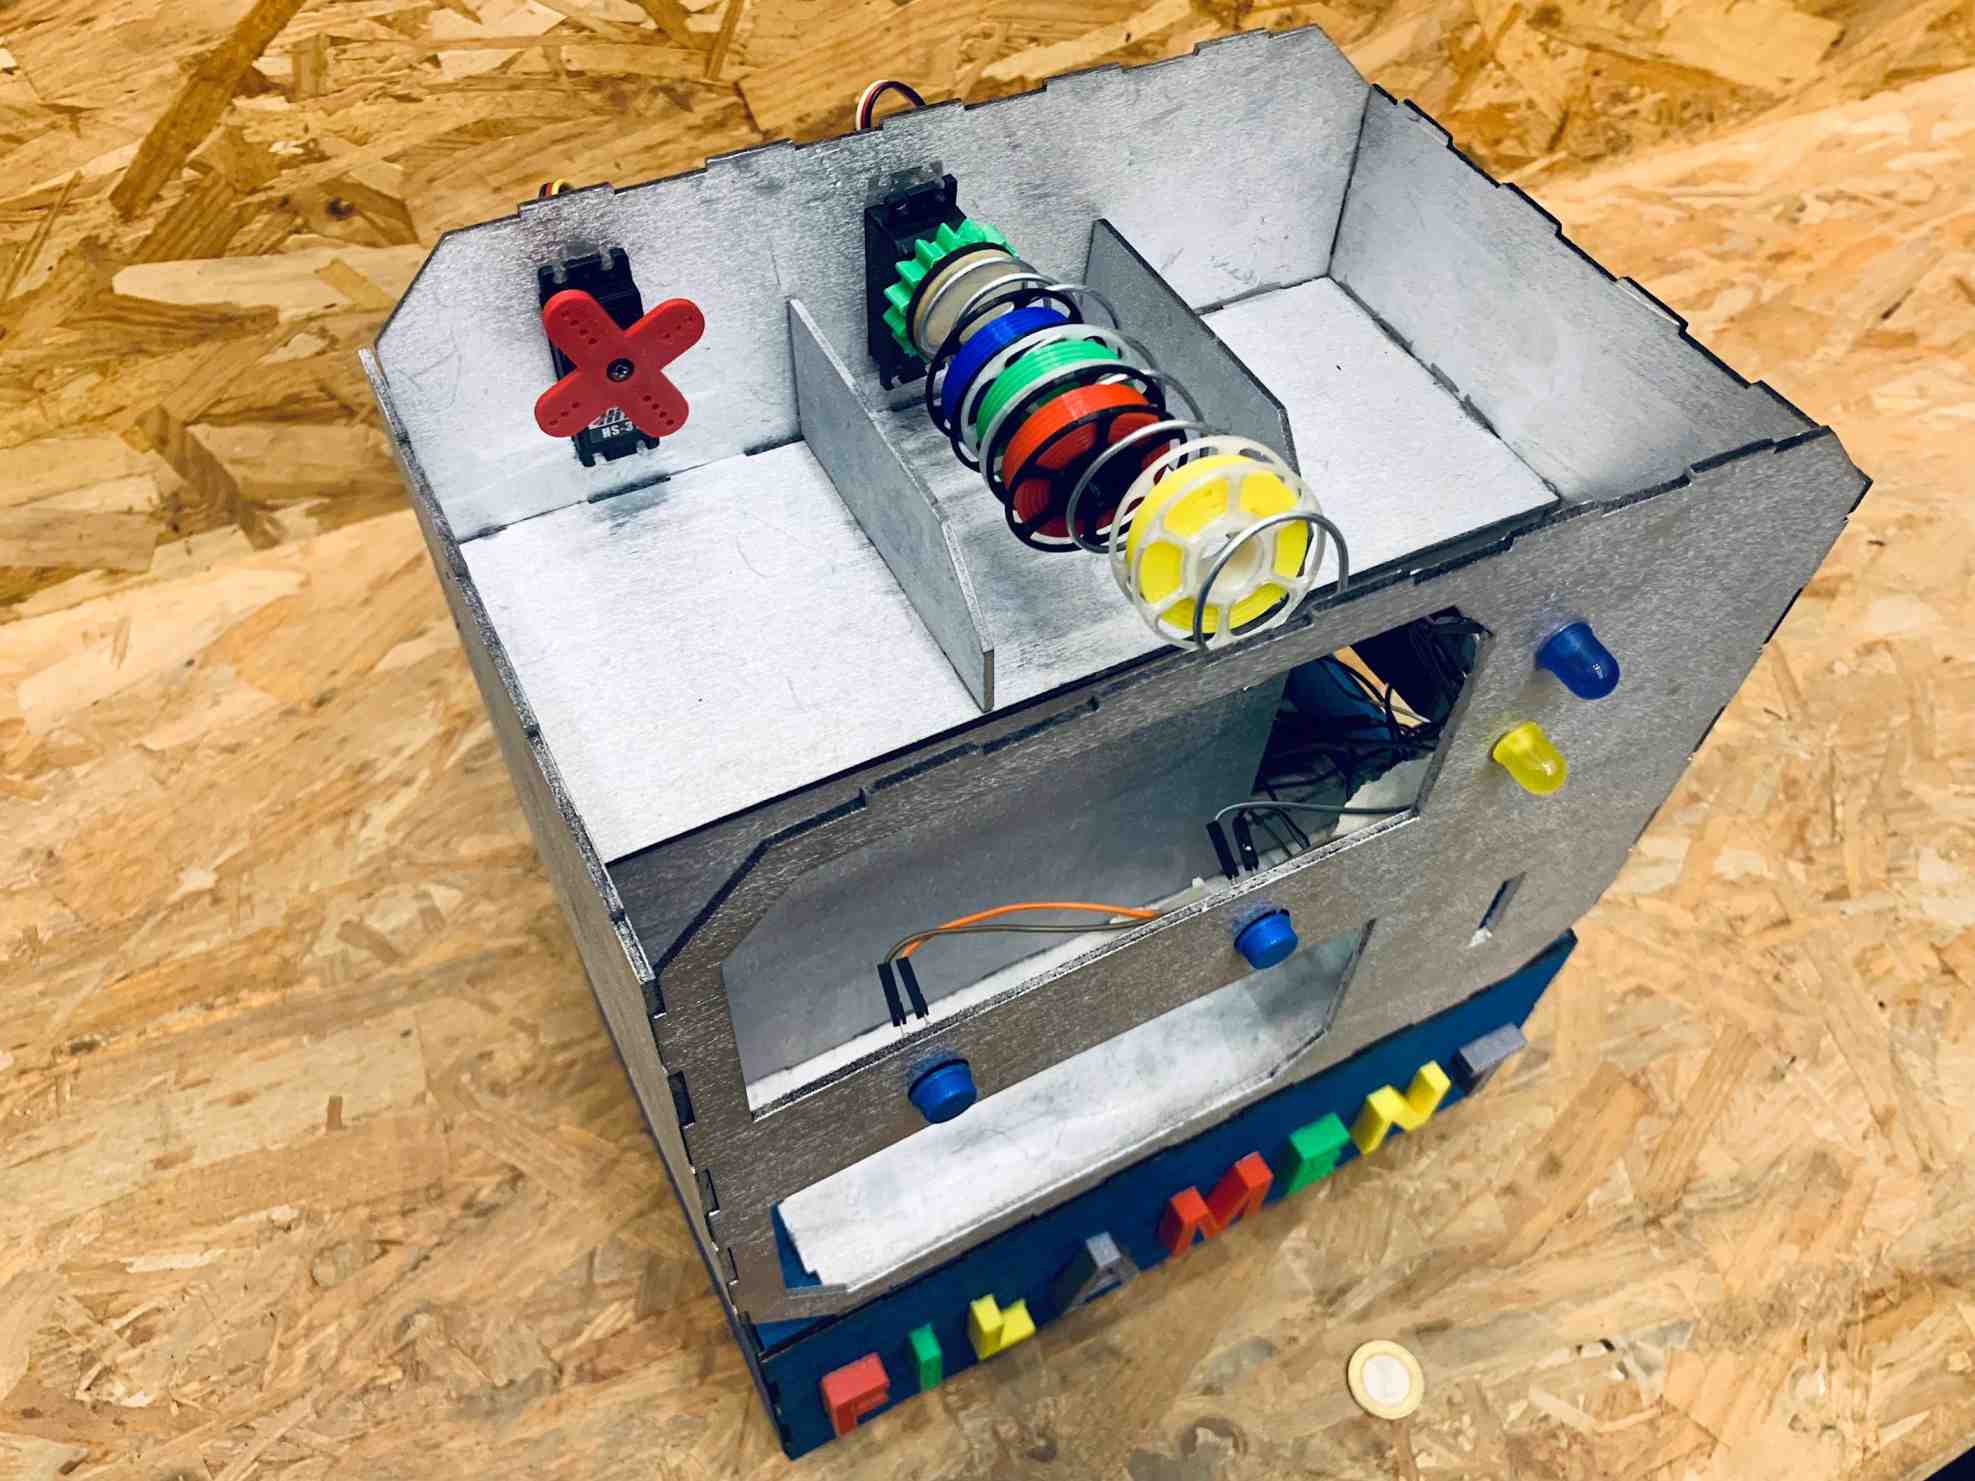
Last but not least, we filled the vending machine with filament spools models.
Testing
Everything is ready, now it’s time for testing !
AWESOME !
It works perfectly.
The design files:
Onshape :
Reference:
Thingiverse : Filament 3D Design