Sixteenth assignment
Date
13 May 2020
In this week's assignment, the requirement is to design and mill a mold and then cast it to create a 3D object.
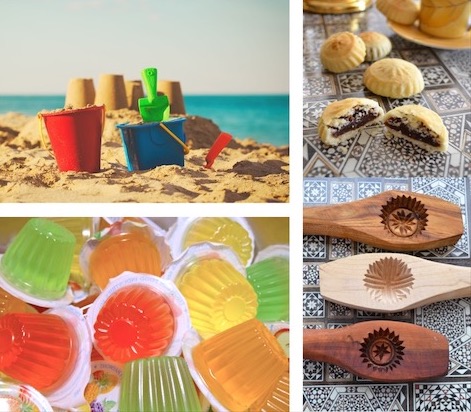
I am so excited to do molding and casting because they remind me of our childhood, building sand castles at the beach, eating jelly candy by removing its mold, baking "maamoul", a traditional sweet on the religious holidays "Eid", using wooden floral shaped mold.
What is molding?
Molding is the process of manufacturing by shaping liquid or pliable raw material using a rigid frame called a mold or matrix.
Molds are negative forms that are used to shape casting materials, creating duplicates of the model that mold was made from. The resulting cast will be an exact likeness of the shape of the hollow mold form.
There are many Materials that used to make the mold such as:
Machinable Wax
Liquid latex
Wood
Silicone
Urethane rubber
Alginates
Gypsum plasters
Machinable wax
There are 3 basic types of molds:
One part: open face.
Two parts: close box.
Multi-parts: complex shapes.
What is Casting?
Casting is the act of pouring liquid material into the cavity of a mold. It is a positive shape complementary to the mold, and it is the final result of the process.
There are many Materials that used for casting such as:
Gypsum
Concrete
Plaster
Resin
Epox
Wax
Metal
There are many applications of molding and casting in our life
Typical applications include:
Prototyping
Dental
Jewelry Manufacturing
Manufacture of turbines and pump impellers
Candle Making
Cosplay
Food industry
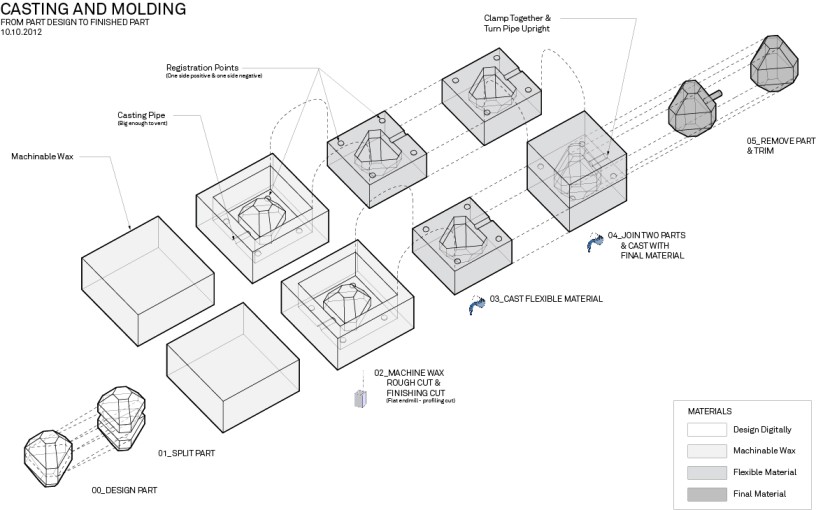
The below figure shows the process of molding and casting.
DESIGNING THE MOLD
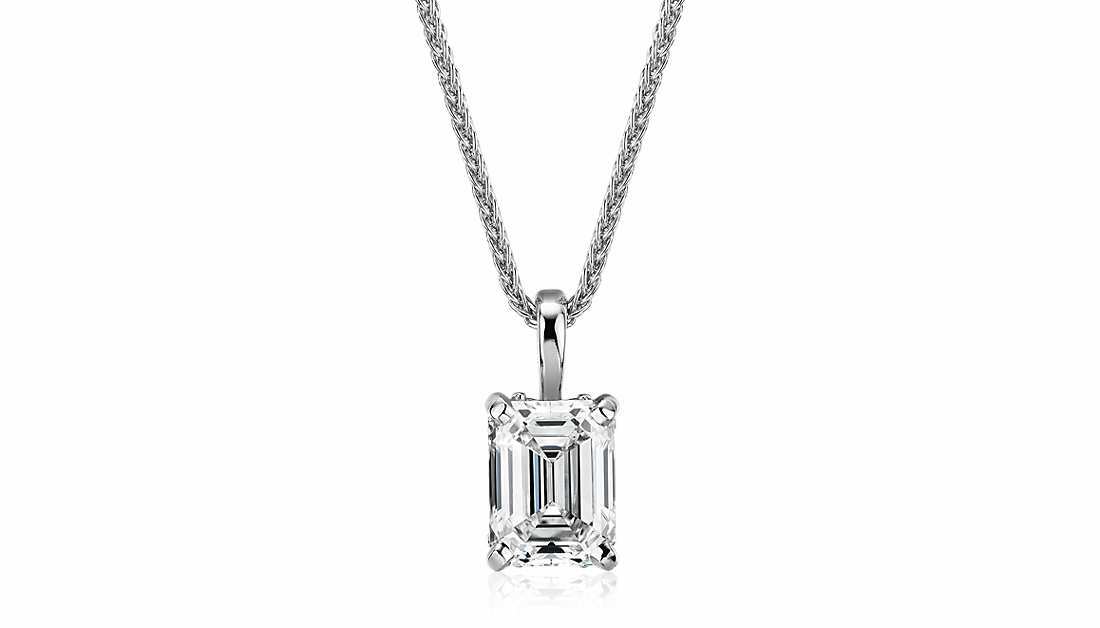
I planned to design a necklace with emerald shapes.
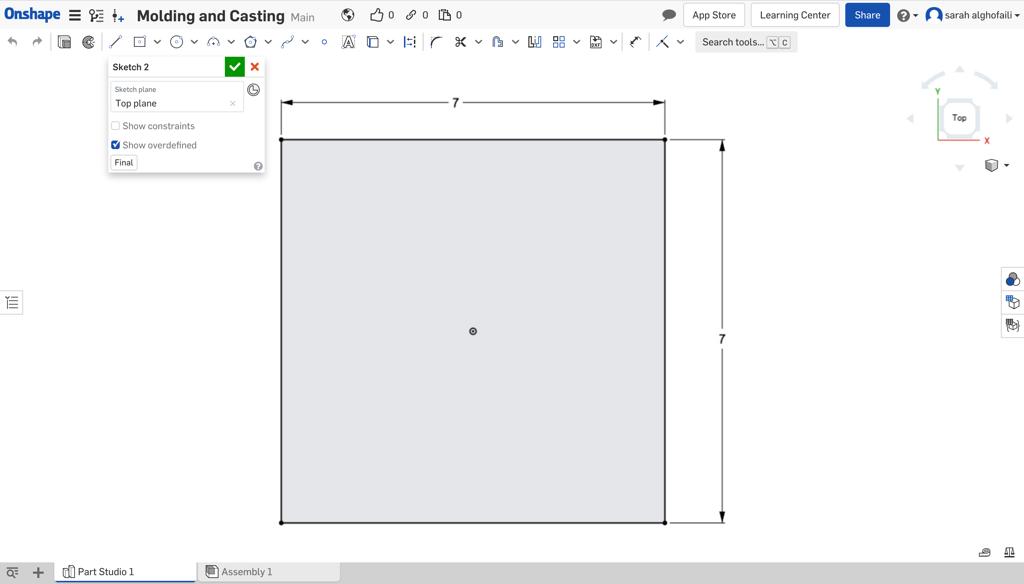
To start designing the mold, I used Onshape software.I sketched a square for the molding base and extruded.
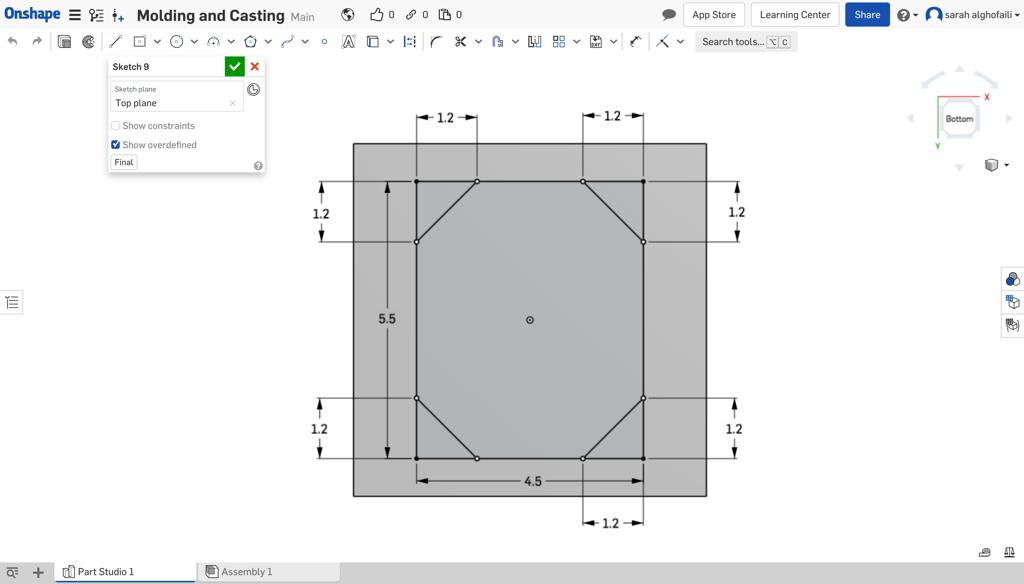
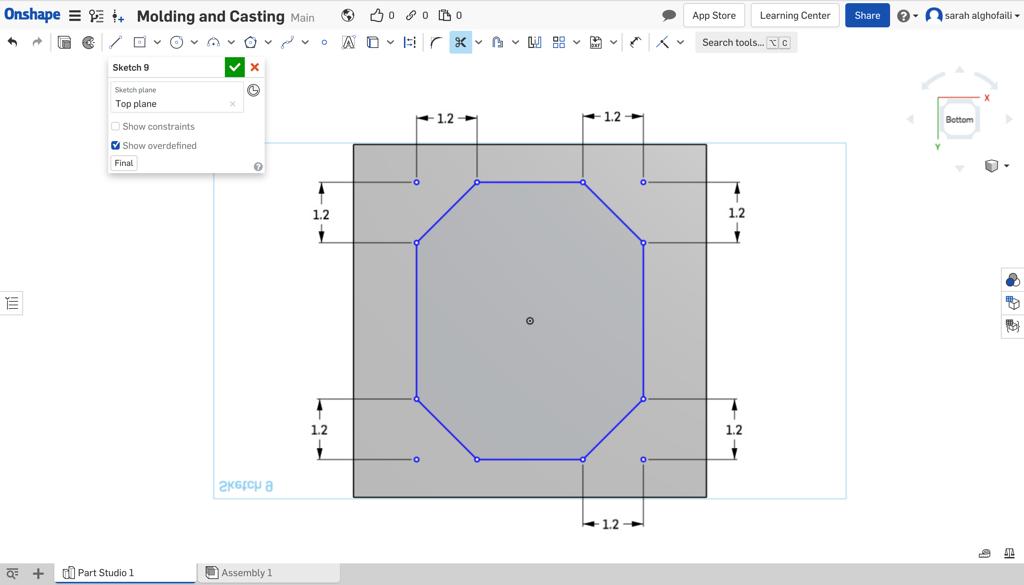
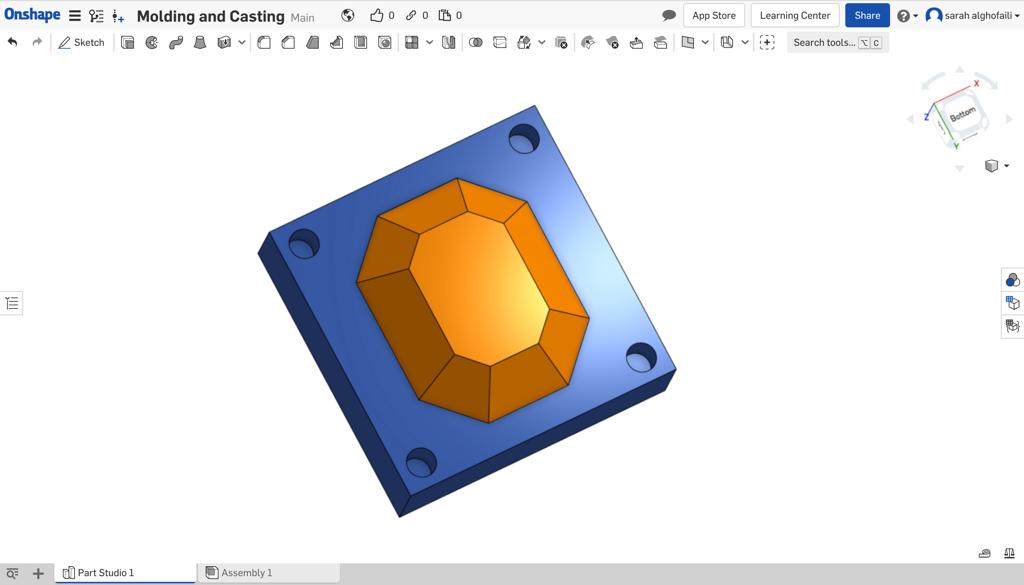
Next, I drew a rectangle on the top plane to start the emerald shape.

Then, I created corners for the rectangle by identifying multiple points.
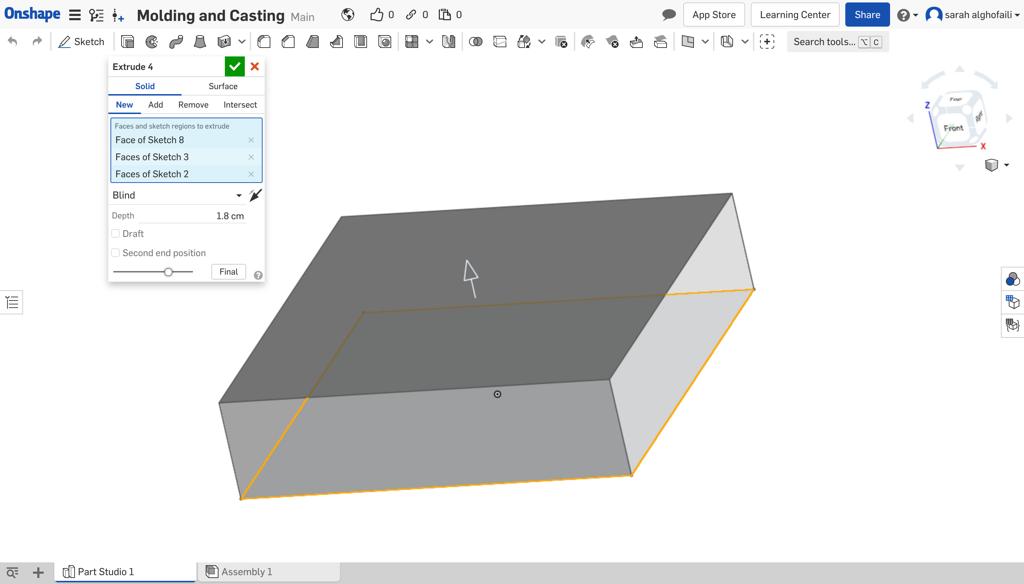
After that I extruded the shape with 1 cm depth.
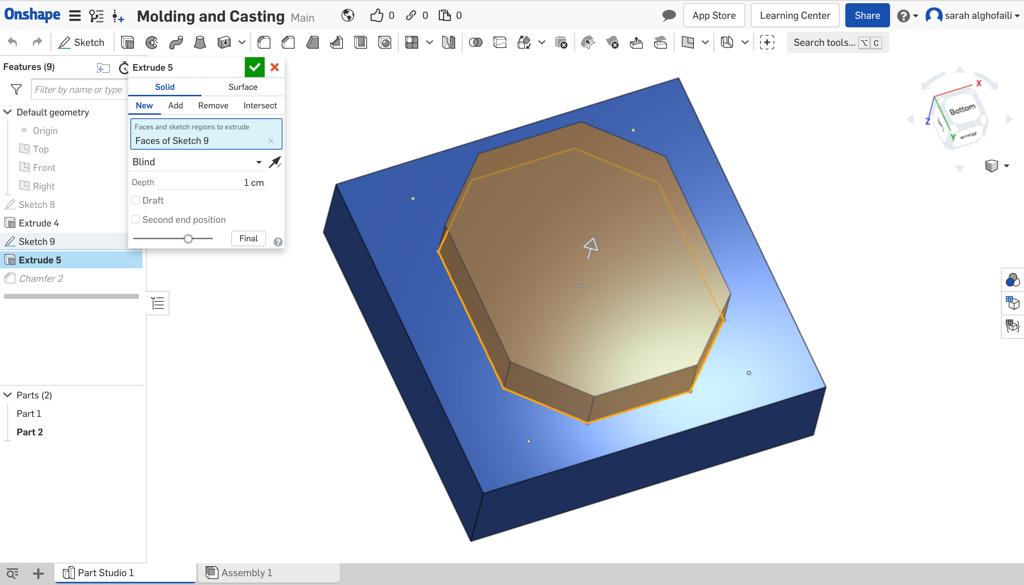
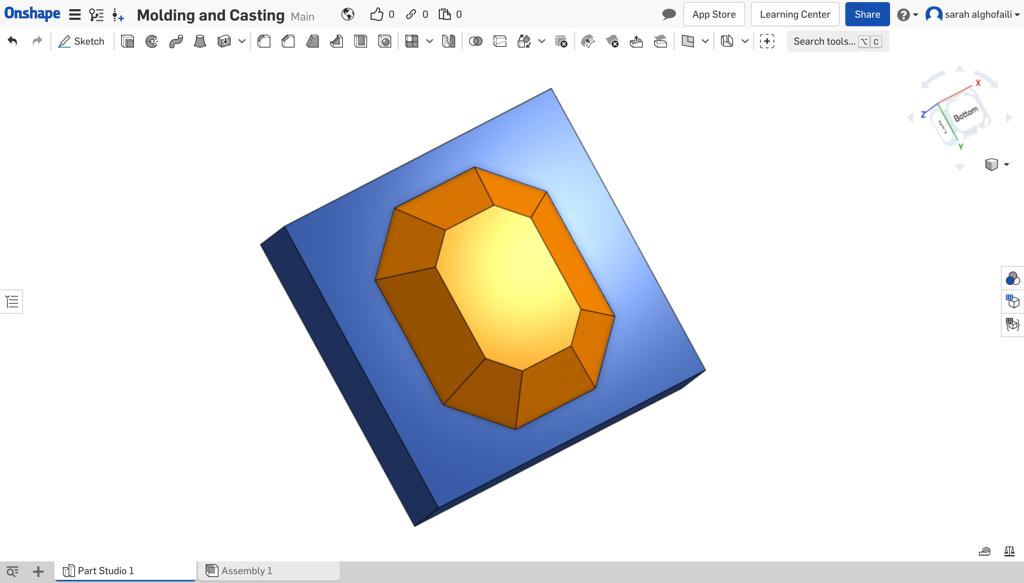
The next step, I used the chamfer tool for all edges with equal distance = 1.2 cm.

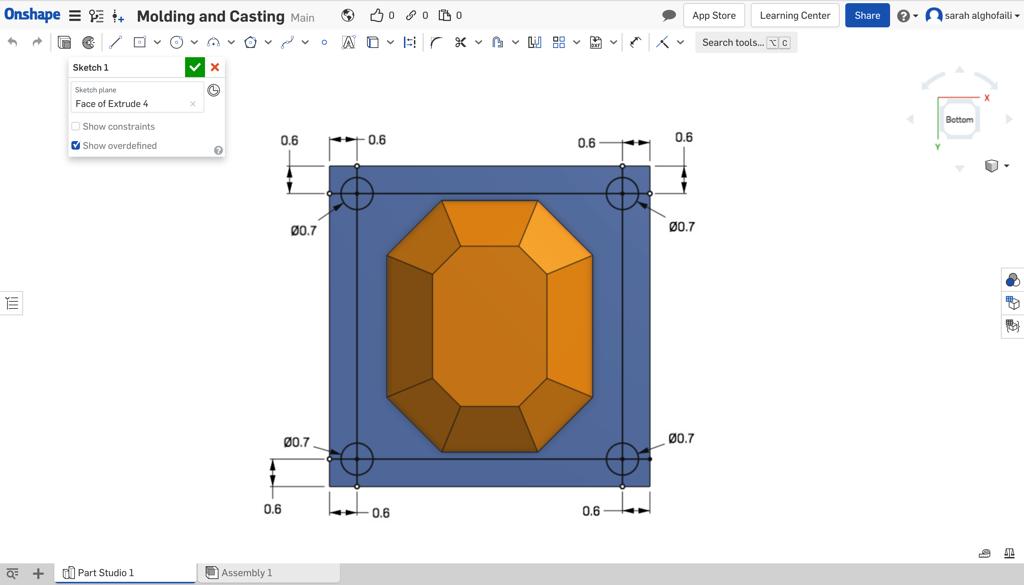
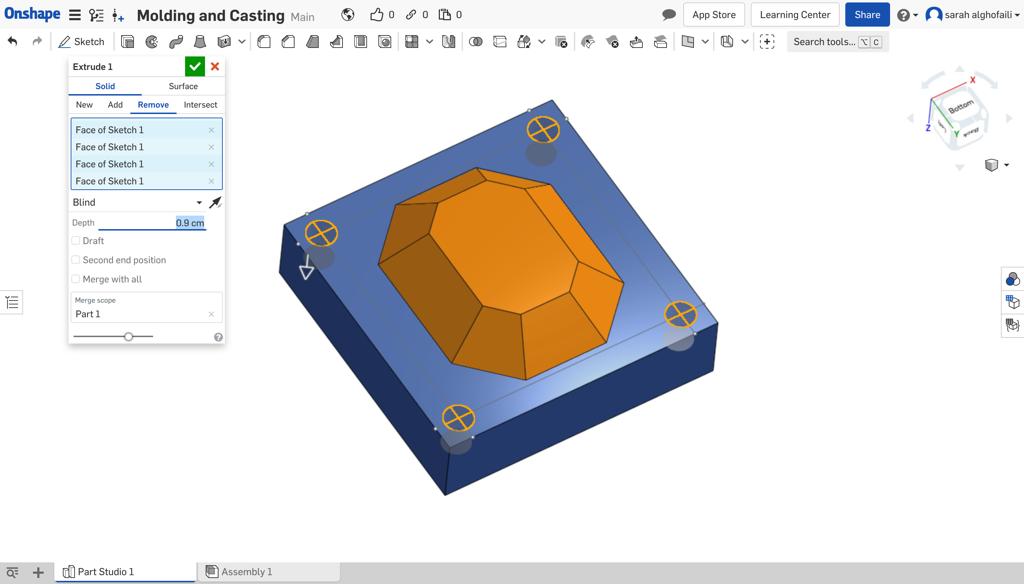
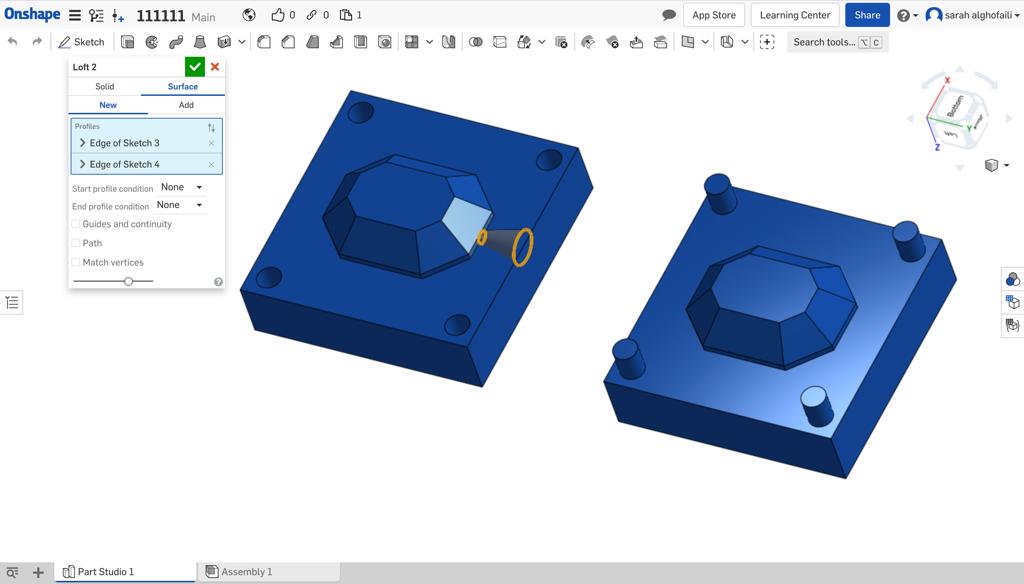
The important step is adding registers. I created four holes in each corner of the one side and four pins on the other side of the mold.
To create the holes I clicked the extrude tool and removed depth with 0.9 cm.
Also, I created a casting pipe/pour spout for casting material.

The next step, I copied the design and pasted it to create the second part of the mold. I extruded the other part holes to become pins.
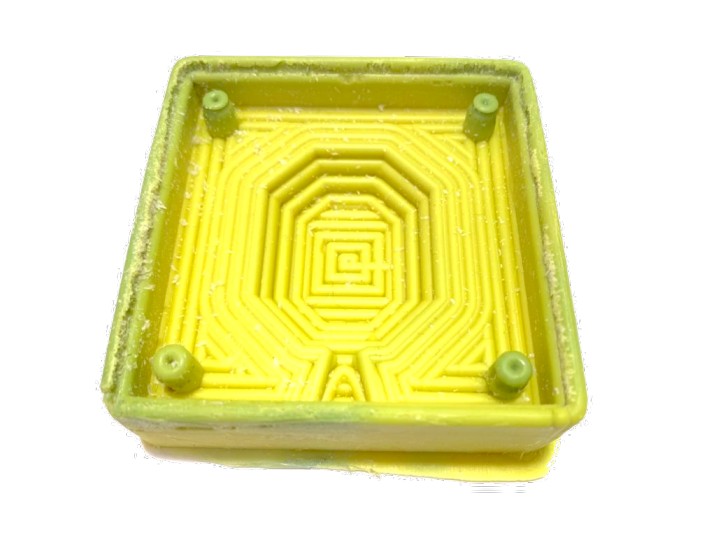
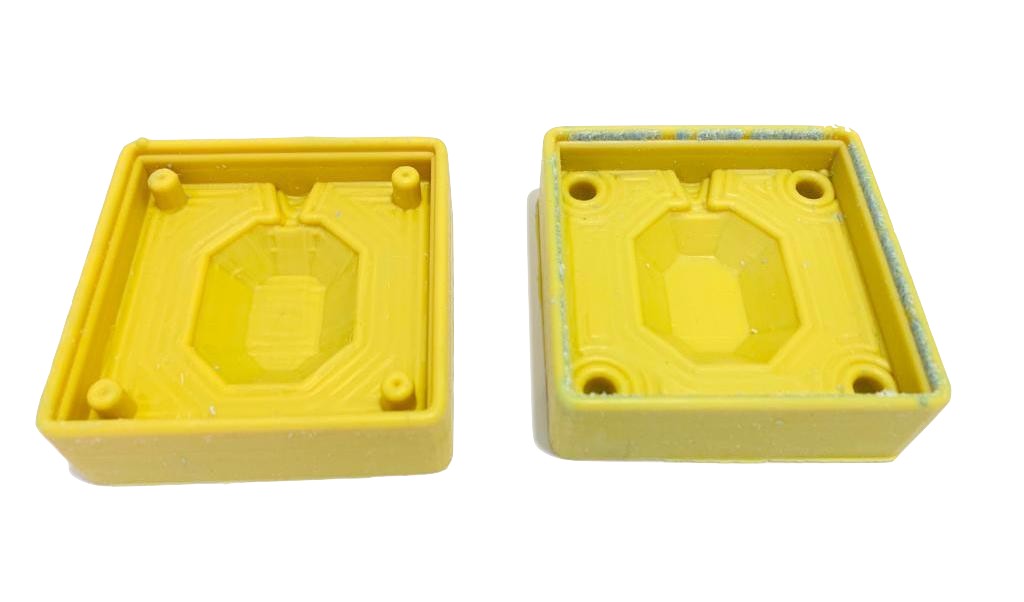
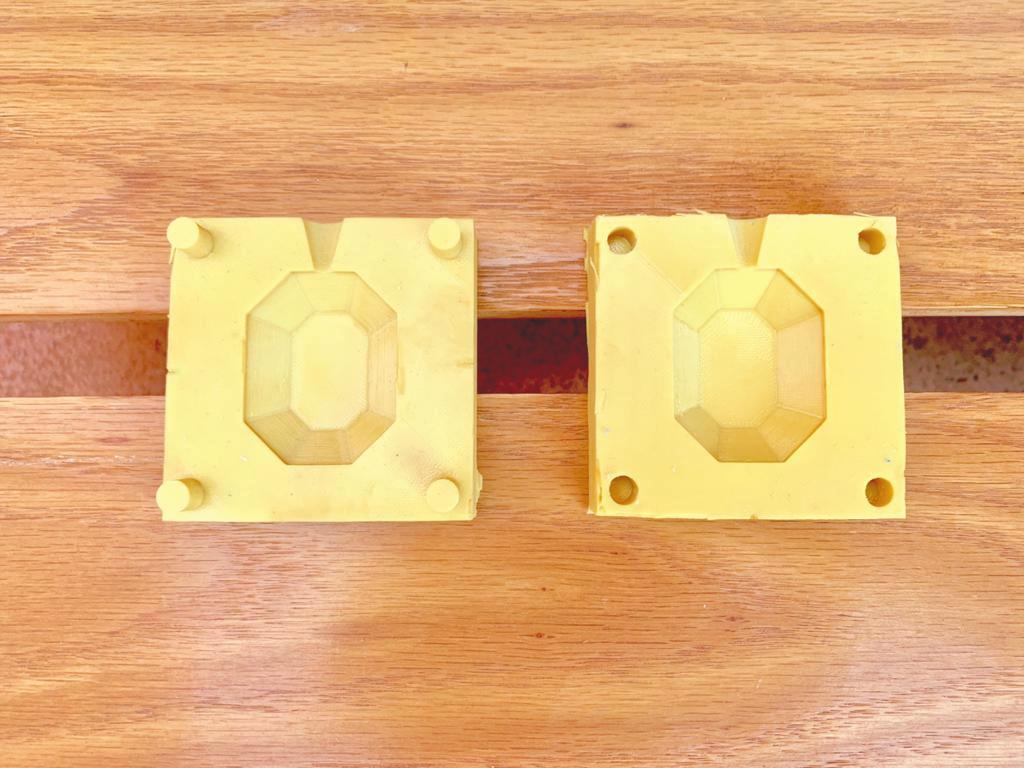
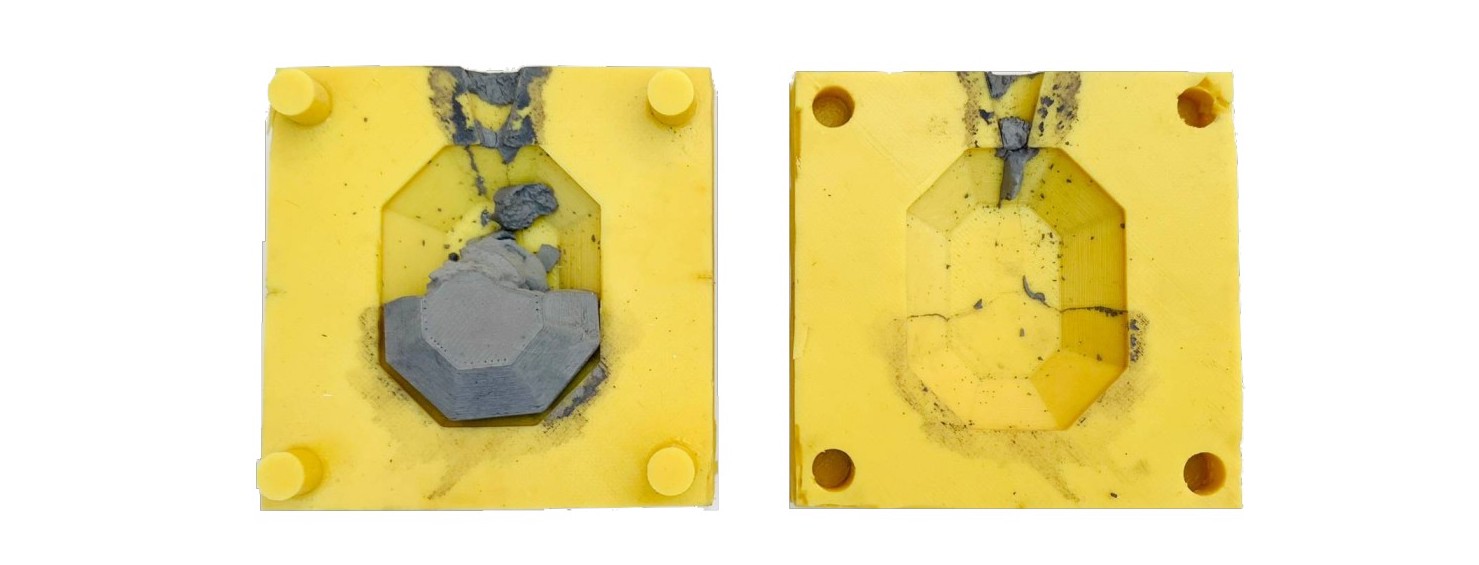
Due to the COVID 19 pandemic, I couldn't access the lab. The plan B for me was to use the 3D printer that I have at my home to test the mold design until the lockdown ended at the mid of July.
3D printing mold
I printed the two parts of the design using the Prusa 3d printer.

The result of the molding was amazing ! I showed the picture in the molding section below.
MILLING THE wax
Finally !
The lockdown ended and I have access to the lab to complete this assignment.
Let’s work !
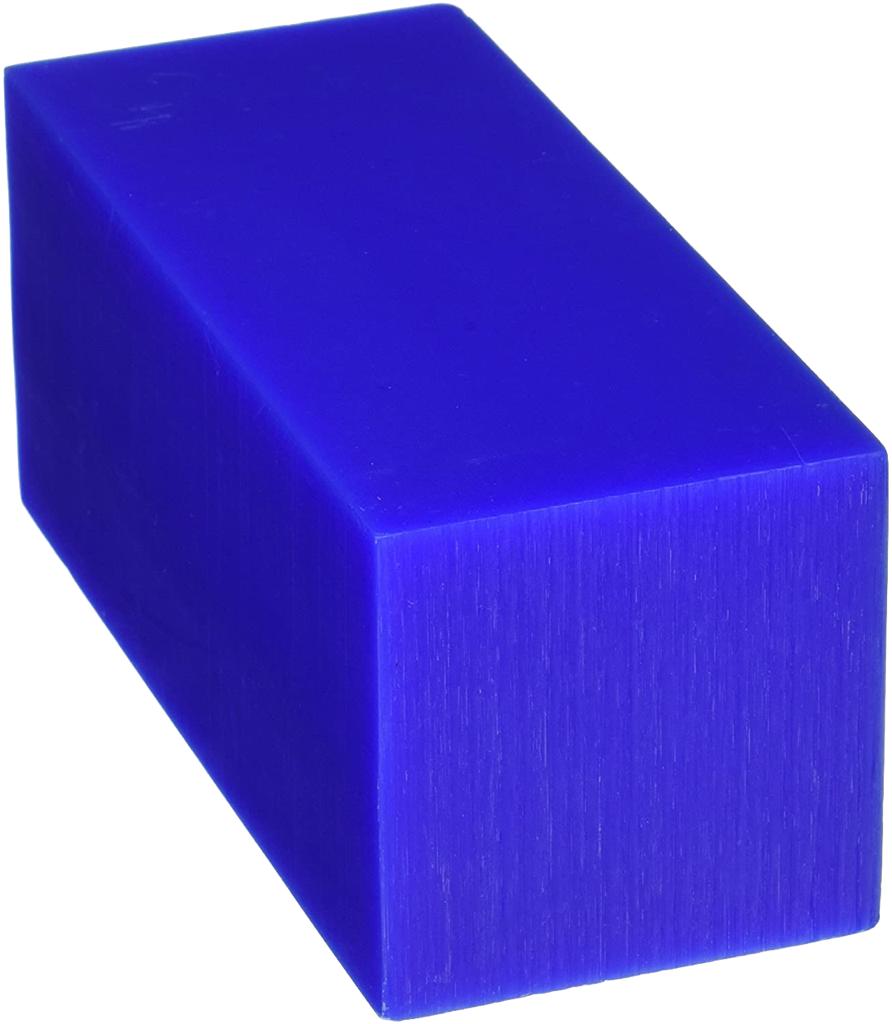
The material that I used called MACHINABLE WAX.
What is MACHINABLE WAX ?
Machinable wax is a mixture of castable wax and special plastic. It is an extremely hard wax with a high melt point that has been formulated to deliver exceptional machining properties with high resolution detail.
Advantages
Reliability
Hardness
Recyclable
Superior surface finish
Can be carved
Disadvantages
Difficult to repair
Limitations on the shape
High burnout temperature
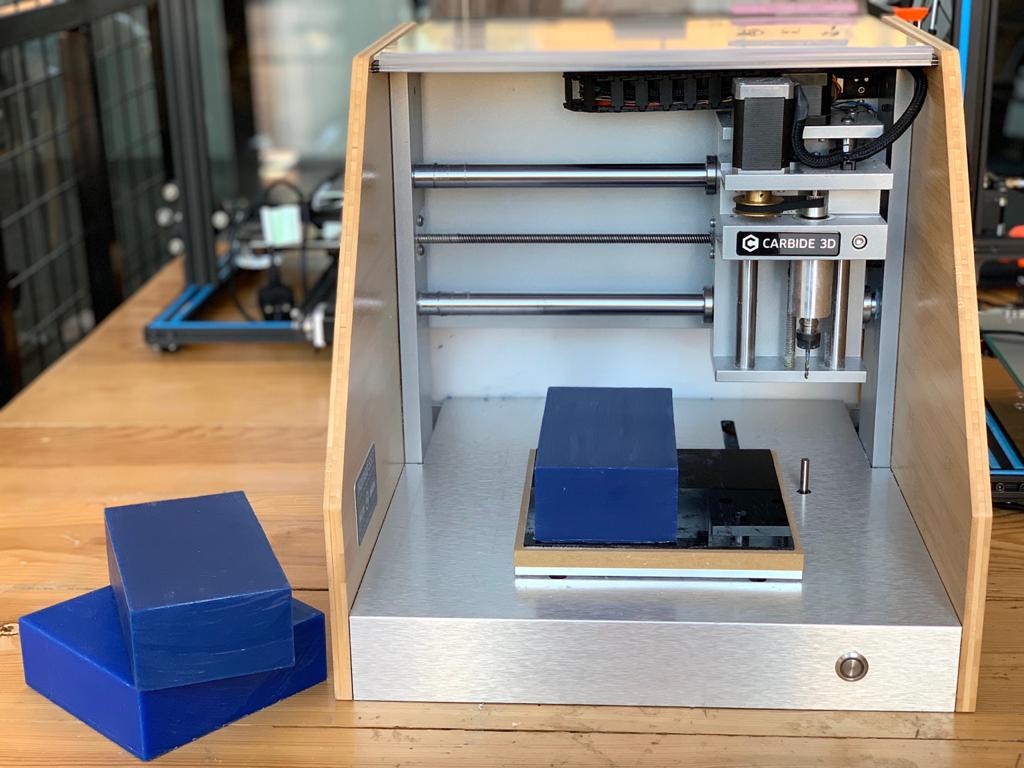
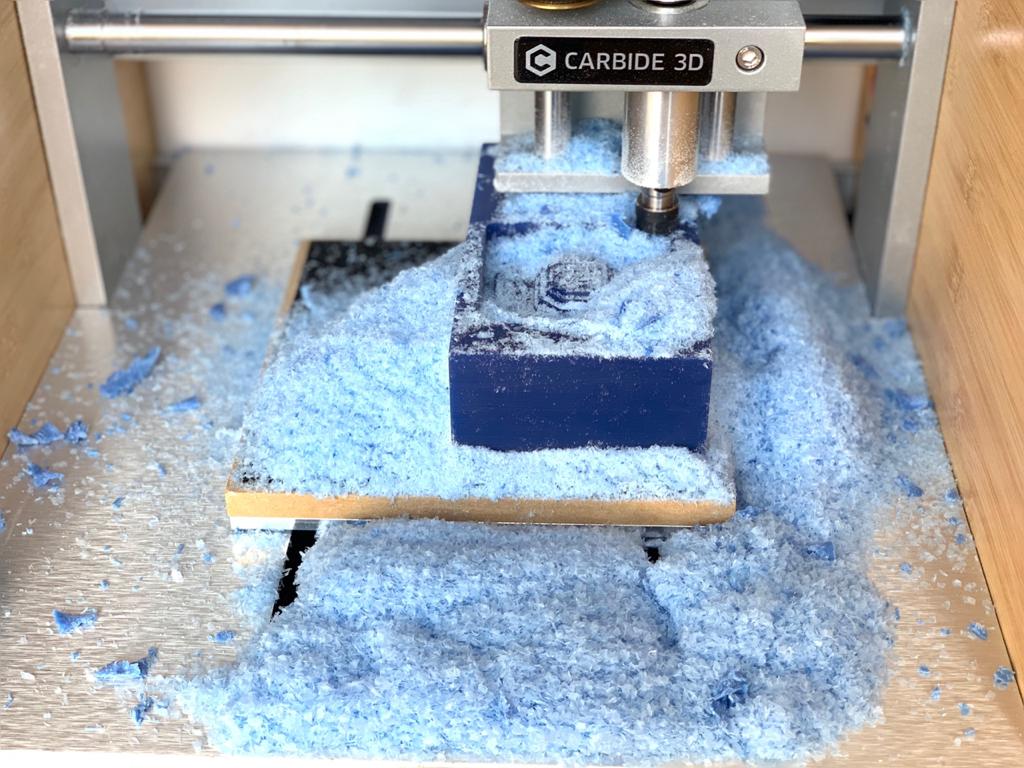
After designing the mold, I started the milling process by using the machine that we have in our lab called “Nomad 883”. It comes fully enclosed to contain both dust and noise.

FEATURES:
White HDPE Case
Travel (X): 8in
Travel (Y): 8in
Travel (Z): 3in
Max Speed (X, Y): 100in/min
Max Speed (Z): 50in/min
Mechanical Resolution: .0005in
Mechanical Repeatability: .0015in
Mechanical Accuracy: .005in/ft
Spindle Power: 50 Watt
Spindle Speed: 2000-10000 RPM
Spindle Collet: ER-11
Max Cutter Diameter: 1/4in
Power Supply: 240 Watt
Voltage: 120/240V
Weight: 60lbs
USB Computer Interface
The Nomad 883 Pro includes MeshCAM, easy-to-use 3D CAM software.
What is MeshCam ?
MeshCAM takes an standard STL file from the CAD program and generates a toolpath with minimal input.
The software can load your CAD files and create efficient tool paths based on the measurements. It can open the two most common 3D file formats, STL and DXF.Also, It is the fastest way to generate gcode.
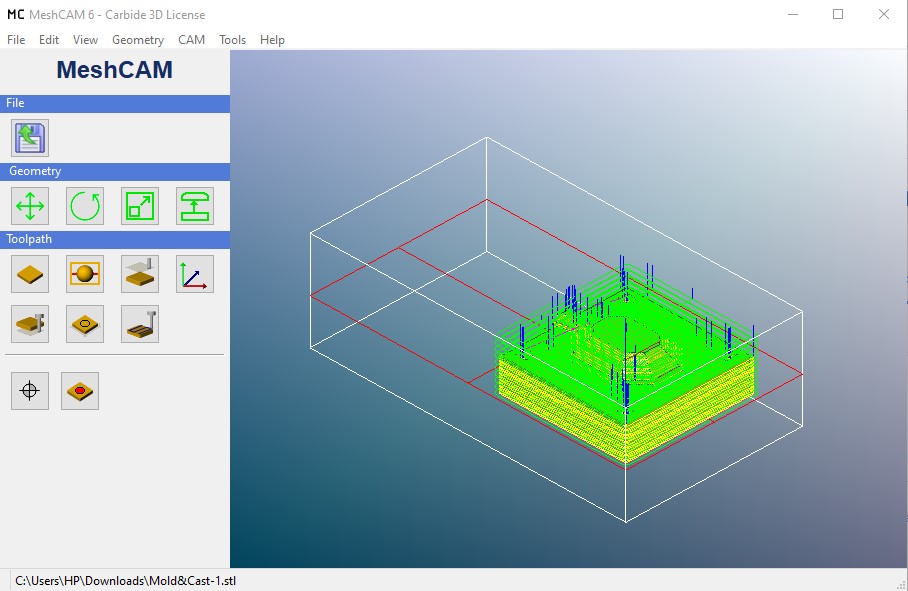
I started by loading the file that I exported from the Onshape CAD program with STL format.
Click File > Open
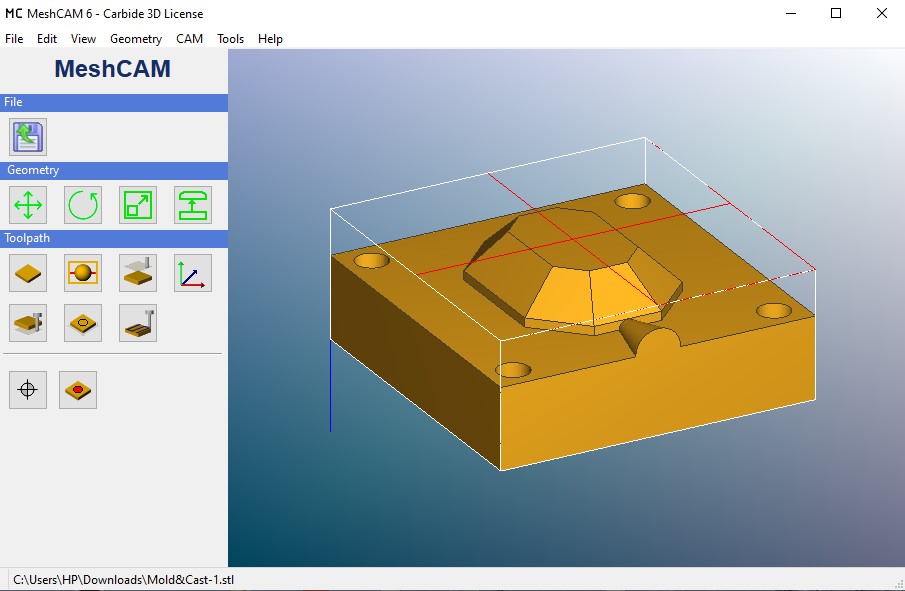
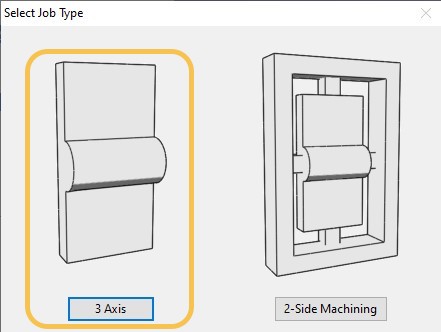
For the job type I chose 3 Axis.
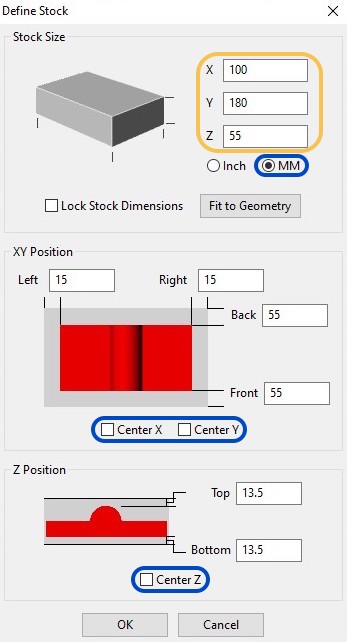
The next step is setting the stock which is the raw material. By defining the dimensions.
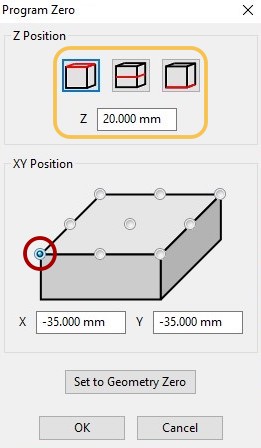
For the program zero, I set to the top of the stock and the upper left-hand corner of the material.
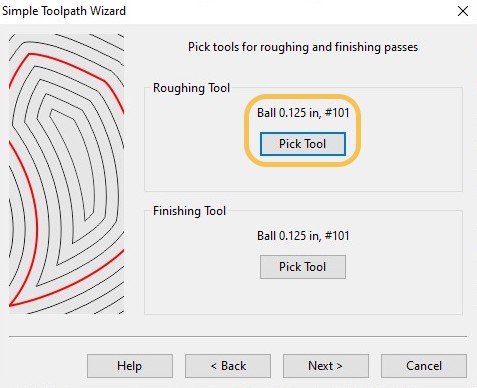
The next step is making the toolpath by picking the 0.125 in ball tool for roughing and finishing.
Last but not least, I moved to get closer to check the toolpath when it appears in the 3D model.
After generating the toolpaths, it is time to prepare the wax brick by securing it into the milling machine bed using Double-sided tape.

What is Carbide Motion ?
It is the machine control software that used to operate the Nomad machine from Carbide3D.
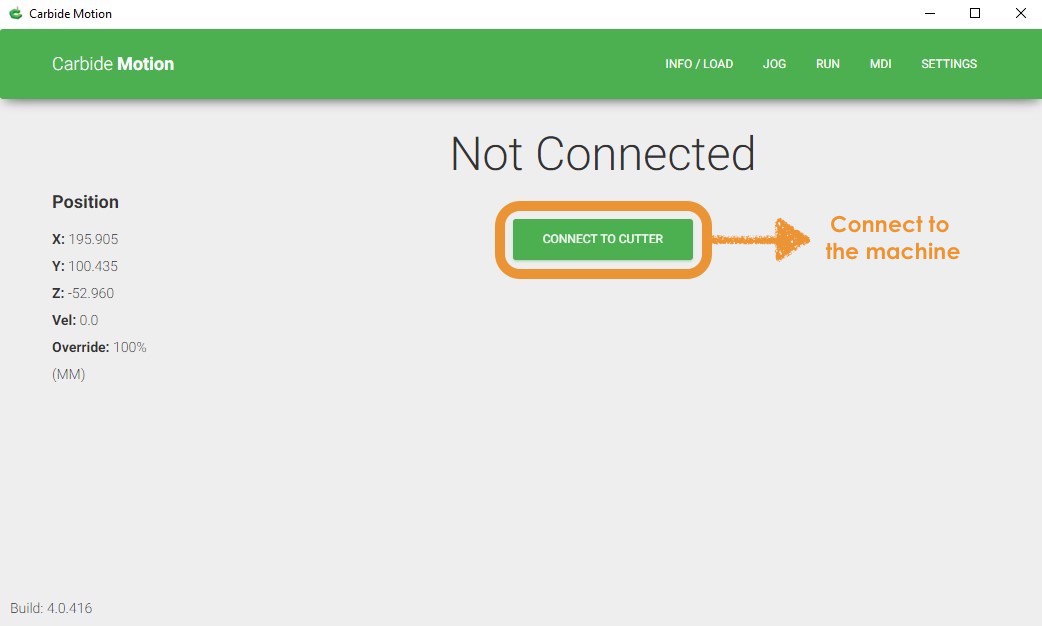
After installing the Carbide program, I connected the Nomad machine to the computer with the provided USB cable and pushed the power button. Then I clicked the "Connect Cutter" to start the connection.
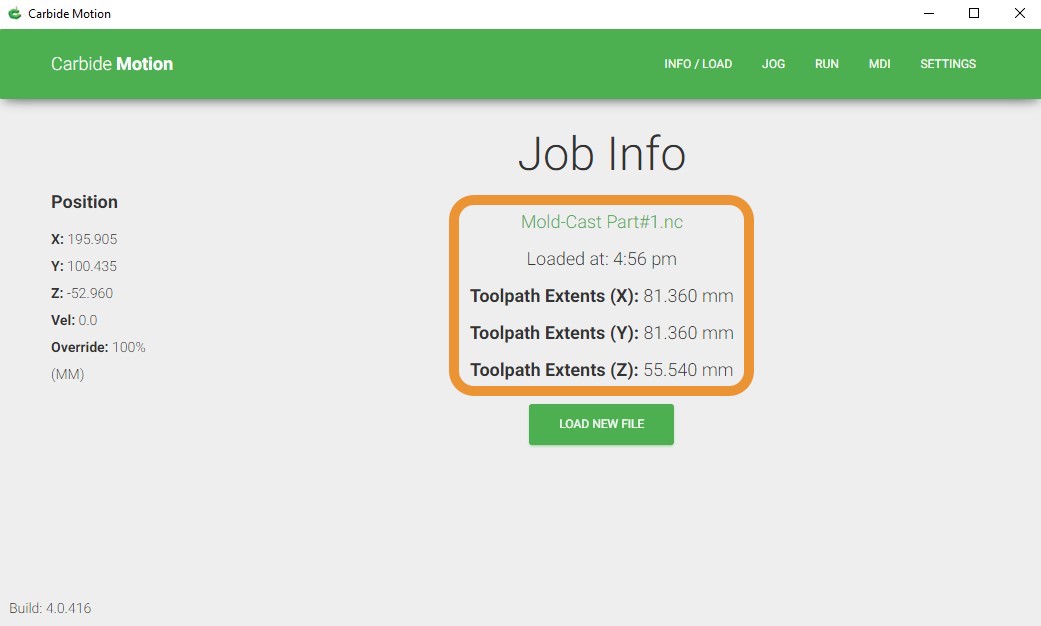
Next, I loaded the G-Code file to the software. In this screen we can check the extents of the model if they match the expectation.
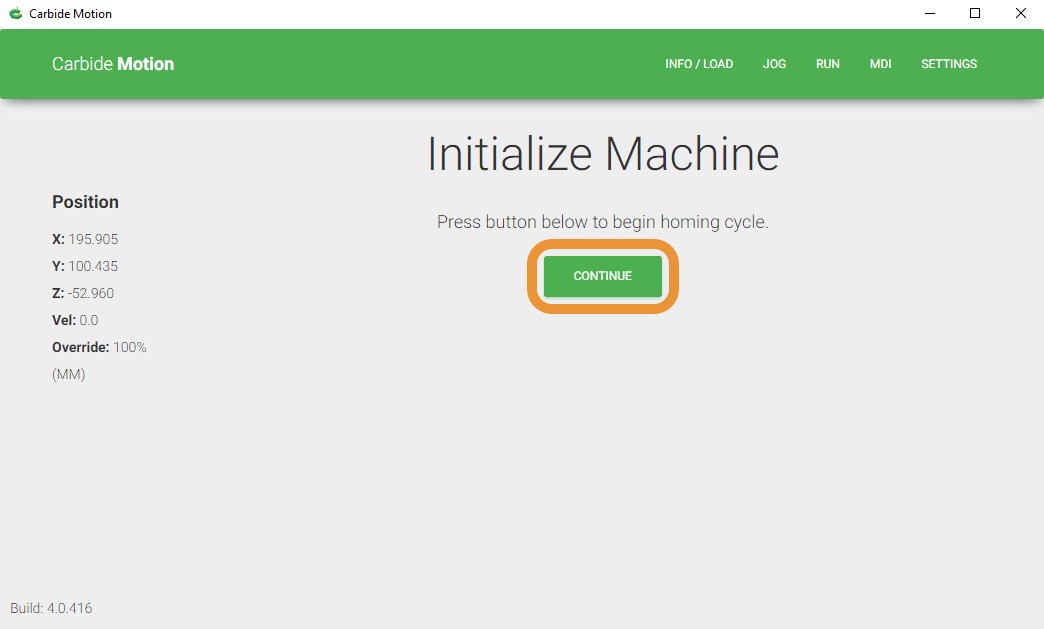
Then, I clicked the "Continue" button to home the machine.
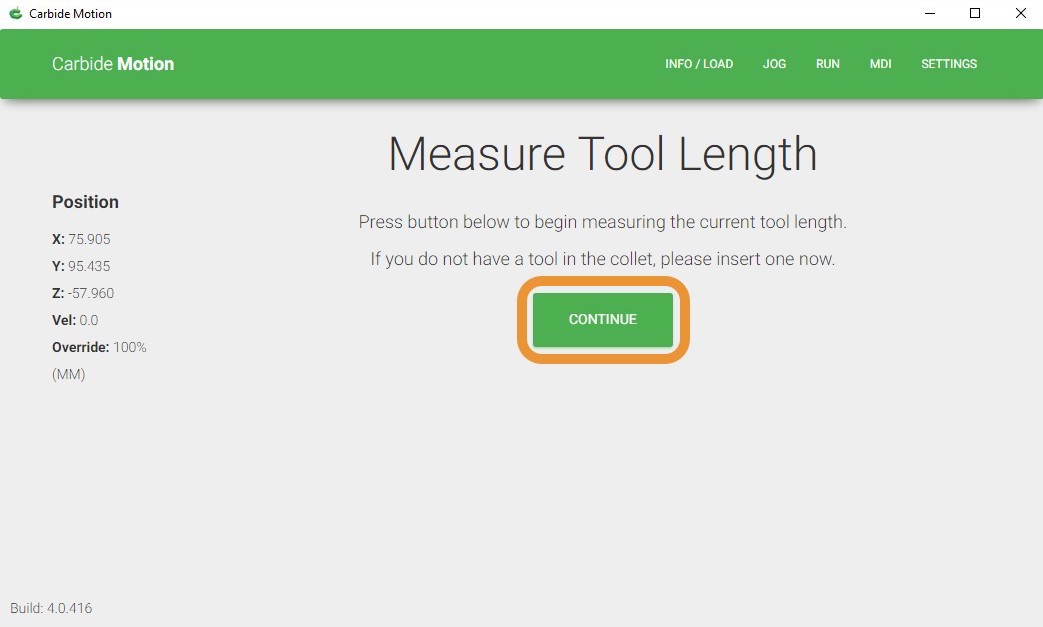
The “measure tool length” step required to insert a bit. Then, I clicked “Continue”.
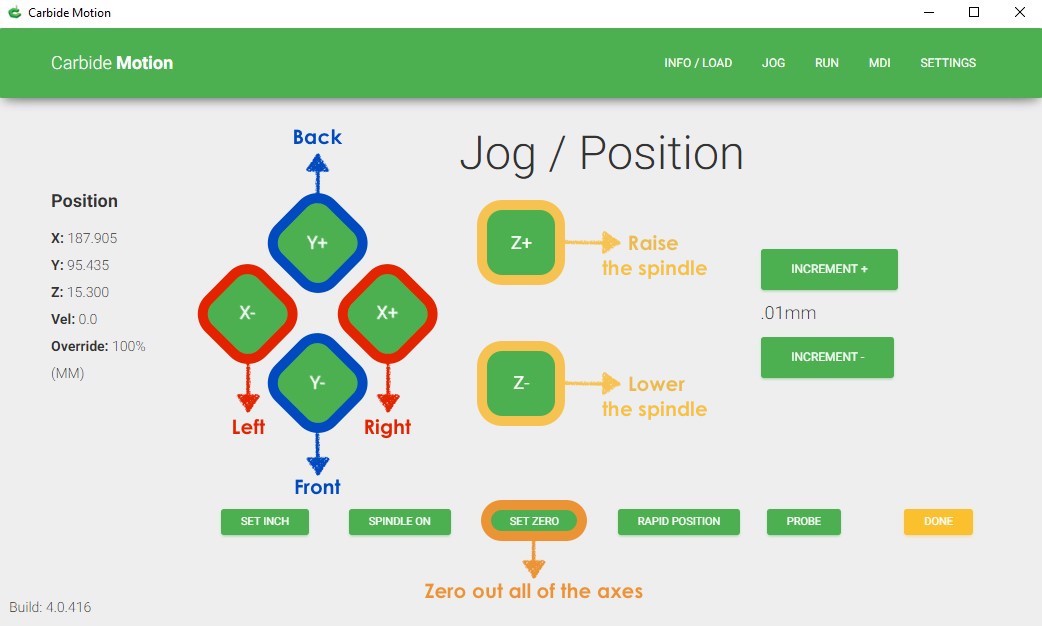
After that, I used the jog feature to position the router by using X, Y and Z controls. also , rapid position.
Y+ and Y- for back and front.
X+ and X- for right and left.
Z+ and Z- for rise and lower the spindle
Then, I clicked on set zero to tell the router where it needs to start cutting.
The last step To begin the job, I clicked on Run > Start.
Oh Nooo!
When the milling started, the Machinable wax moved ! I tried multiple times to secure the wax to the milling bed but still it moved. I decided to change the tape to another type. Finally ! It works !

Molding
After the milling process, I cleaned the wax to prepare it for the molding process.
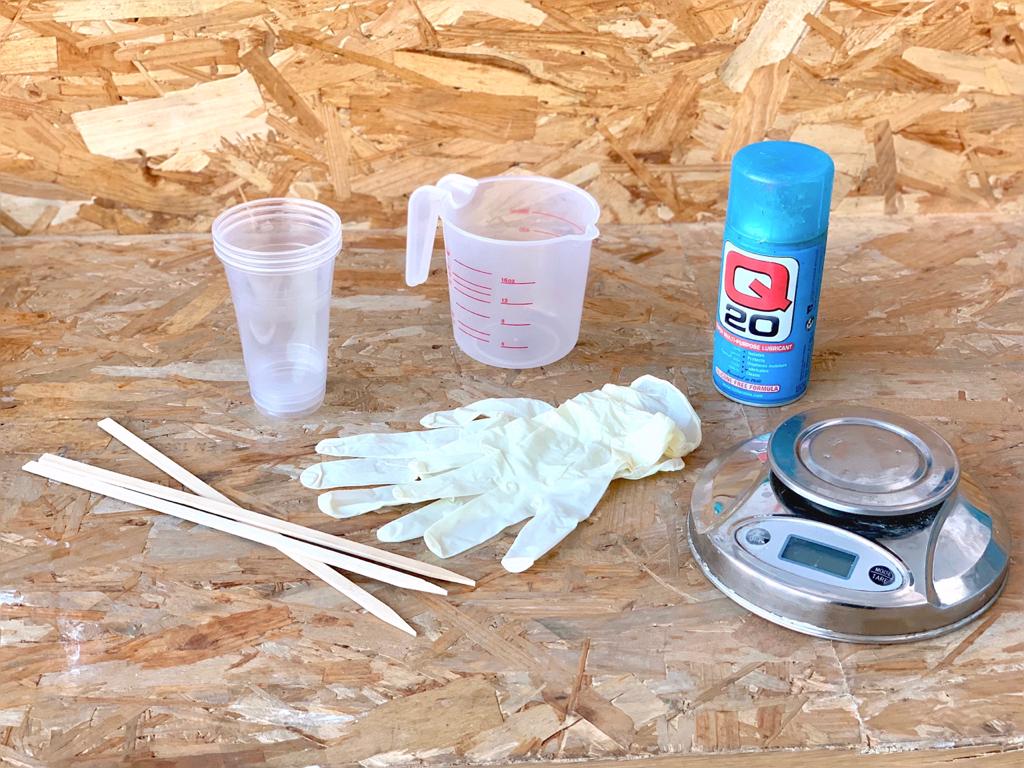
Requirements :
74-Series Liquid Rubbers
Q20 Multi-Purpose Lubricant
Plastic container
Gloves
Measuring Tool
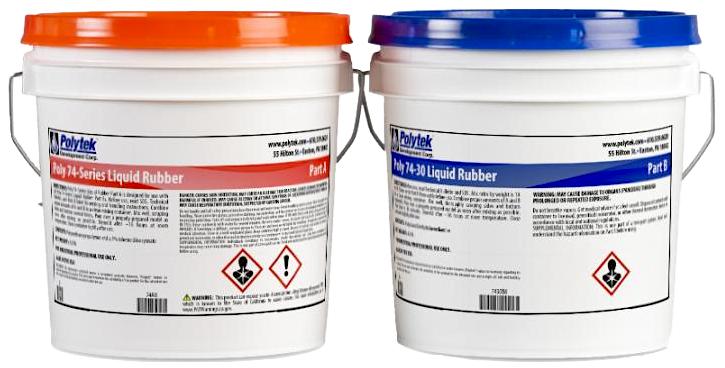
To make the Silicon mixture I used Poly 74-Series Liquid Rubbers which consist of two parts (A and B). I mixed 1:1 ratio weight of Parts A (orange bucket) and B (blue bucket) into a plastic mixing container. I mixed it thoroughly for around 10 minutes.
The next step, I poured the mixture into the wax model.
Then, I removed the silicon mold from the model after 16 hours.
hmmm . . . this was the first result, not bad but not the best. I faced some problems during the milling process that I showed in one of the videos. So, I decided to repeat the milling process and the molding process.
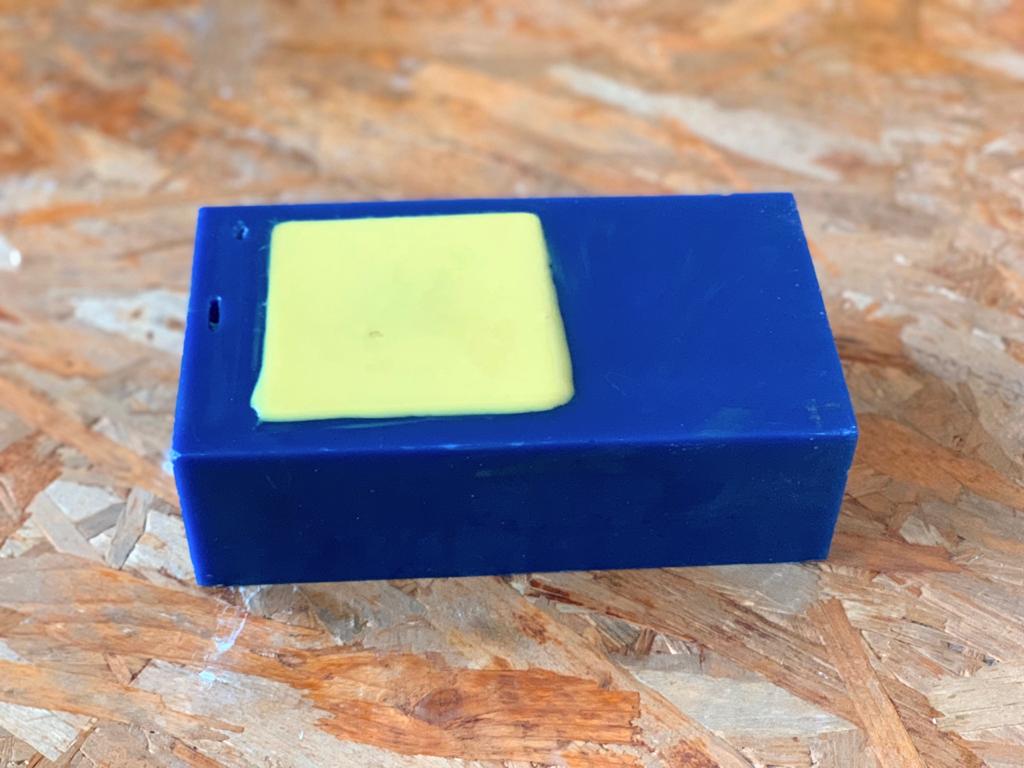
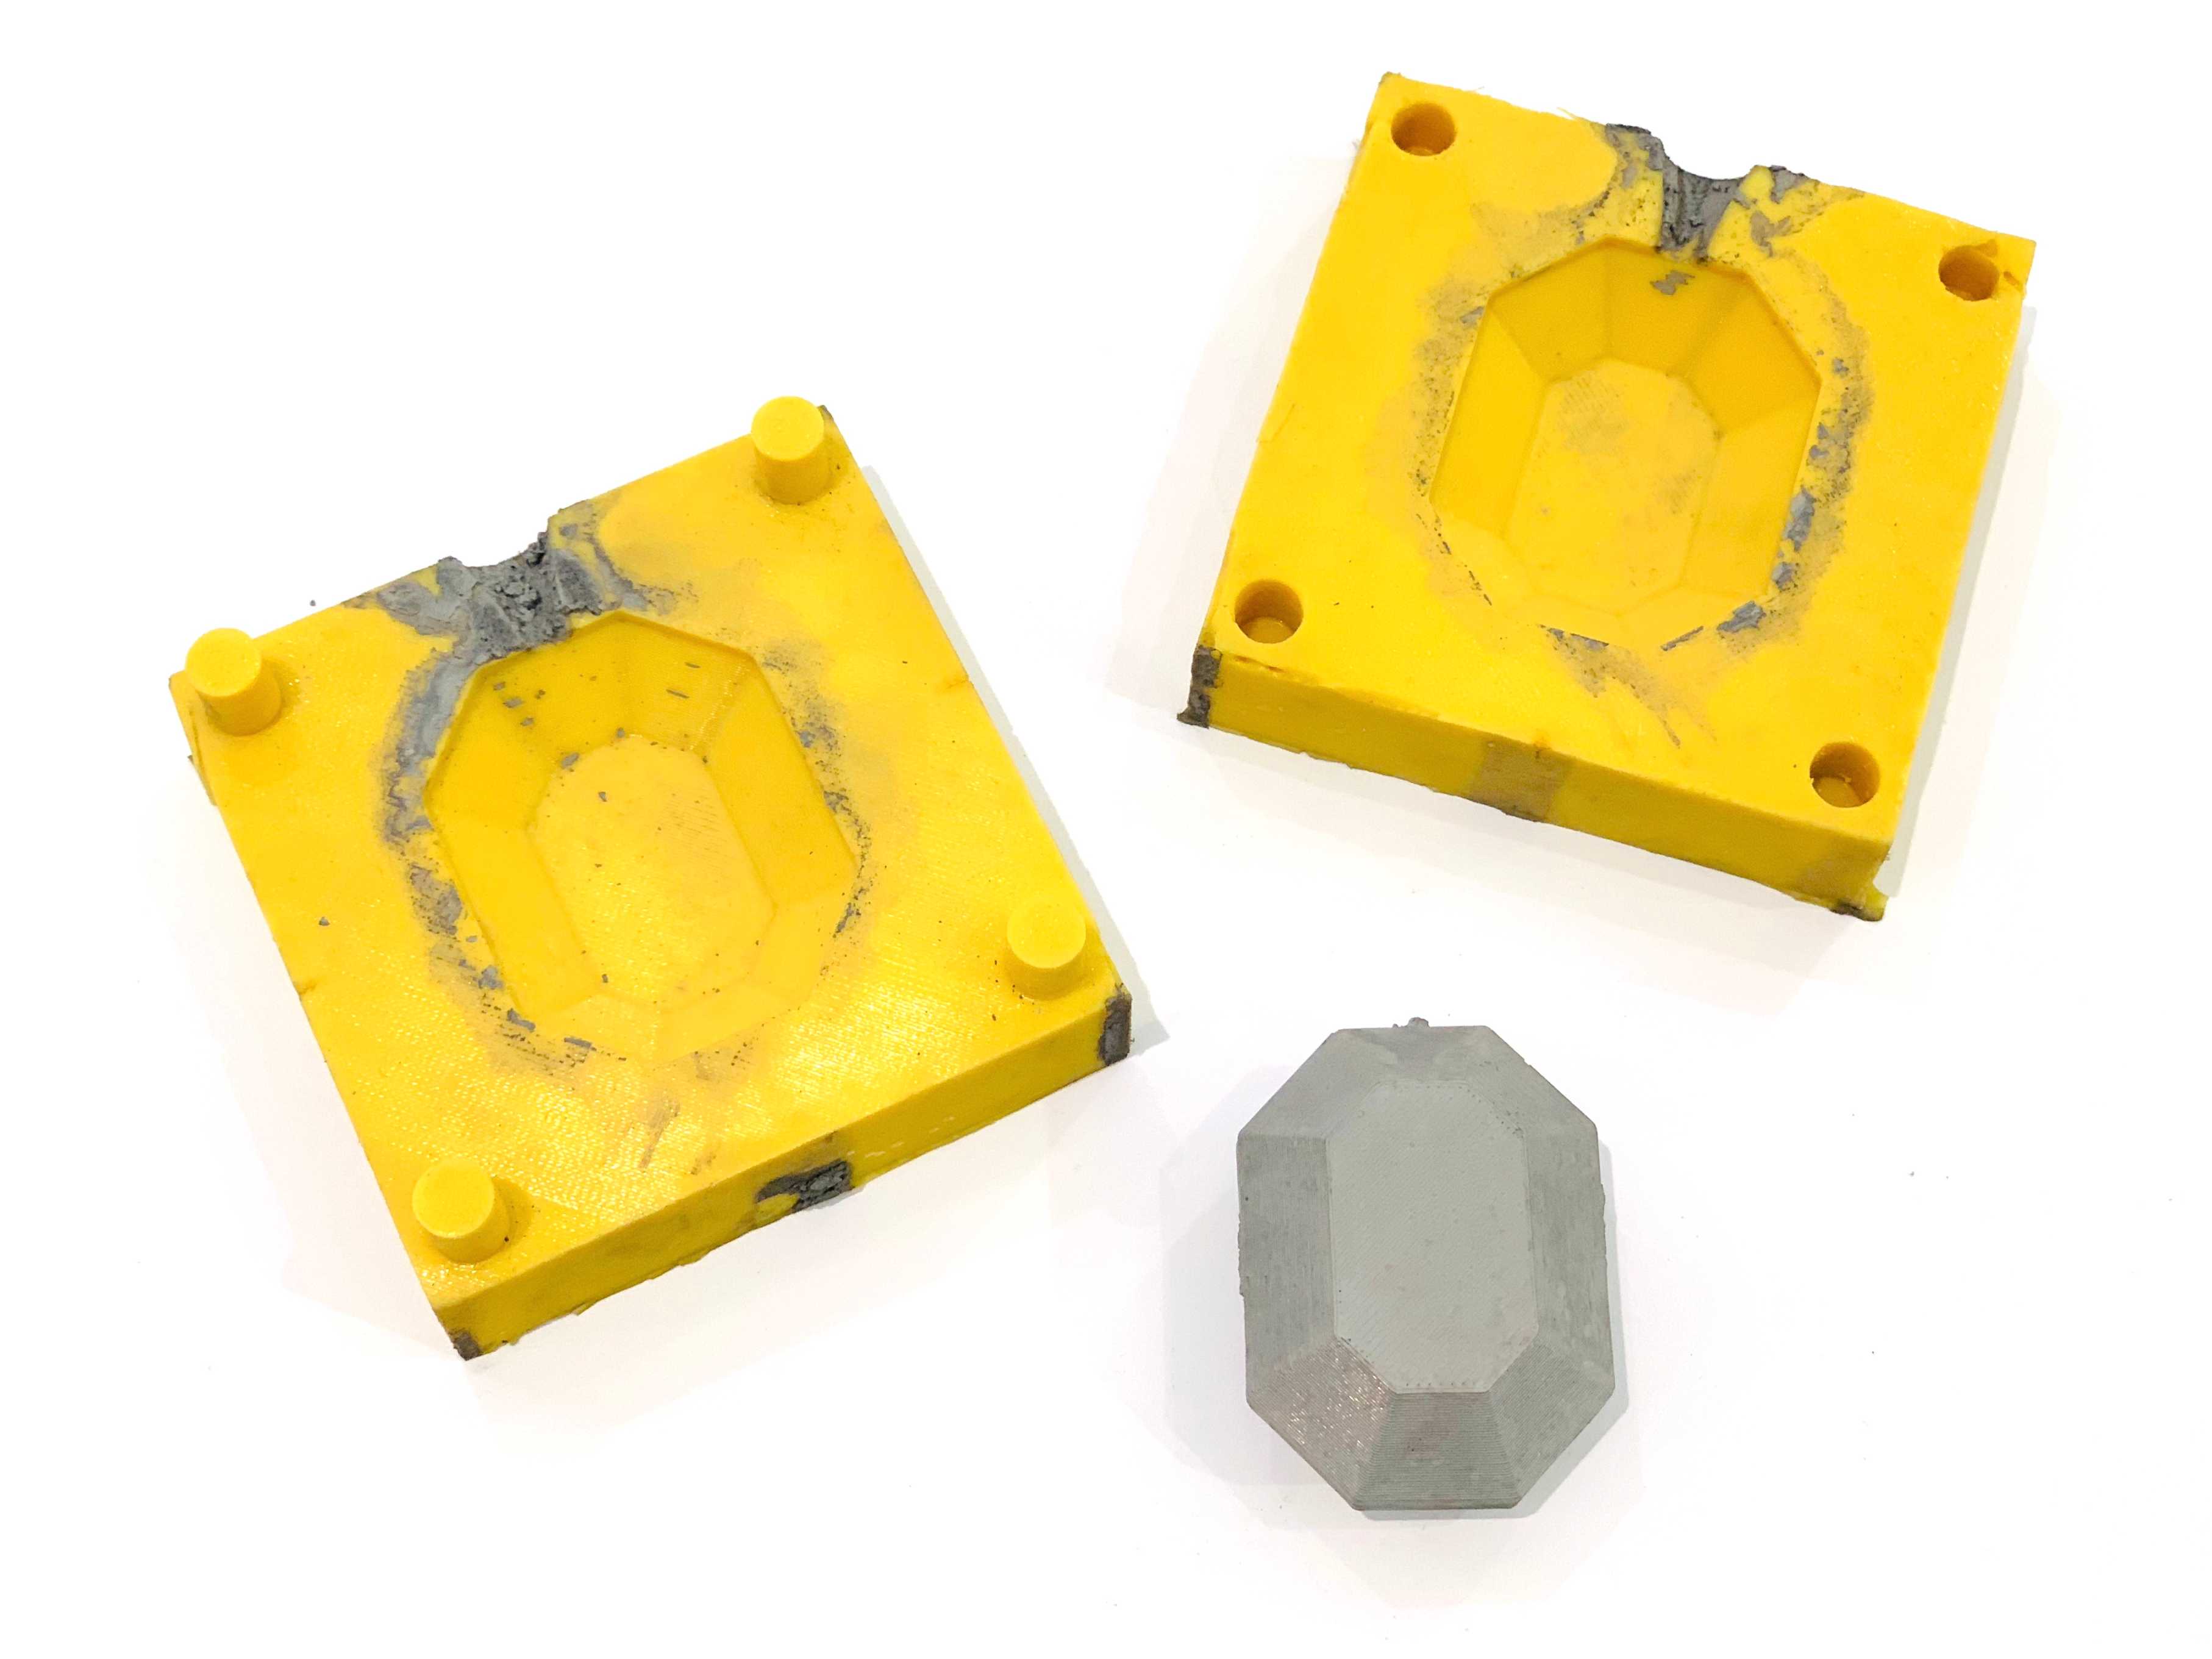
This is the second result. I liked it !
Do you remember the 3D model that I made during the lockdown? This is the molding result ! Amazing right ?!
Casting
For casting, I decided to use concrete material.
Requirements :
Concrete
Water
Plastic container
Plastic funnel
Gloves
Measuring Tool

I mixed 20 g of water with 100 g concrete. Then I poured the mixture gently into the silicon mold.I left the mold with concrete for one hour drying.
Casting the wax mold
The final result:
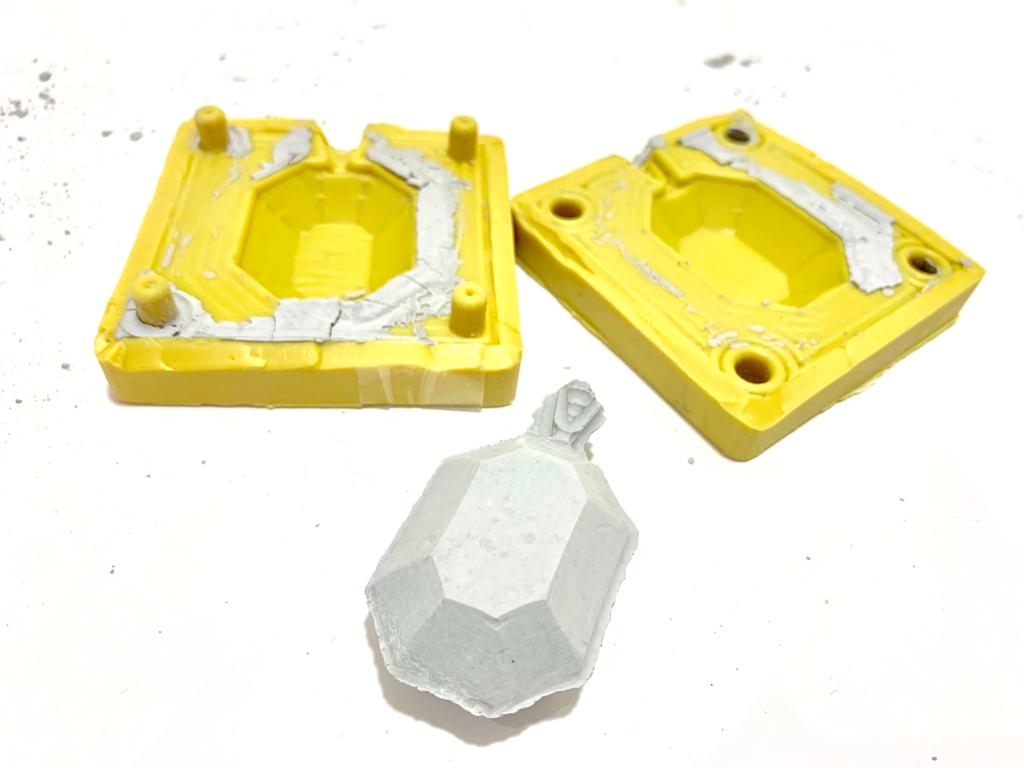
Casting the 3D mold
Oops!
The mistake was not filling the mold completely. So, I repeated the process again.
The final result is amazing !
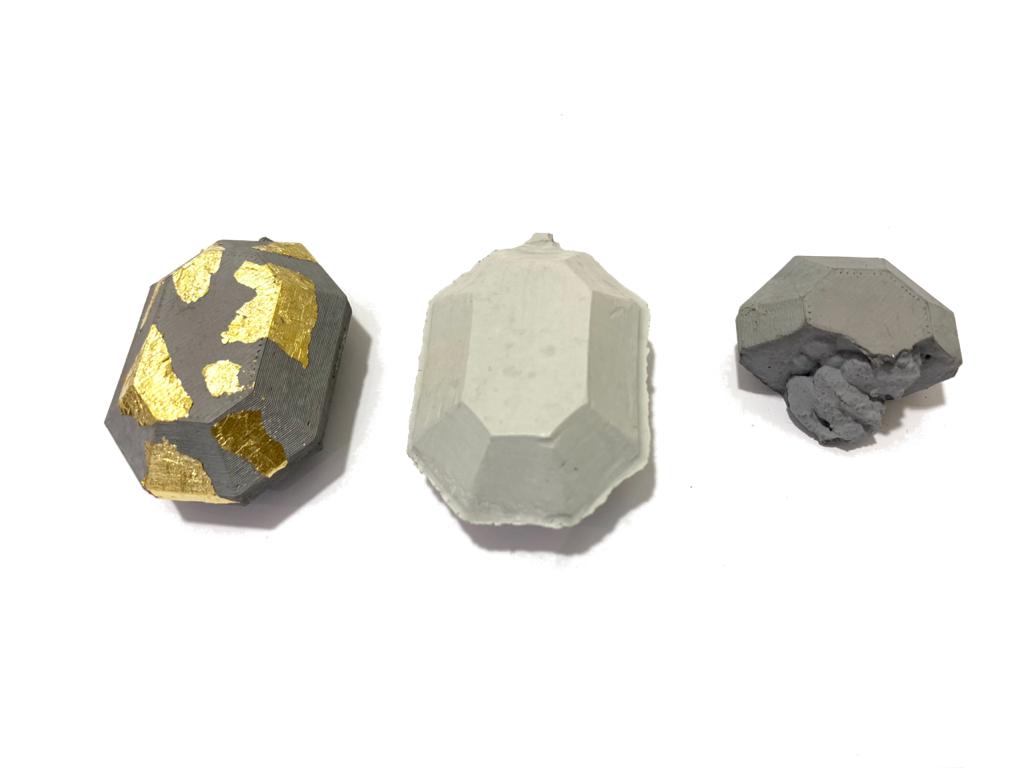
I decided to decorate the necklaces using the gold leaf. I used glue that designed specifically for working with metal leaves.

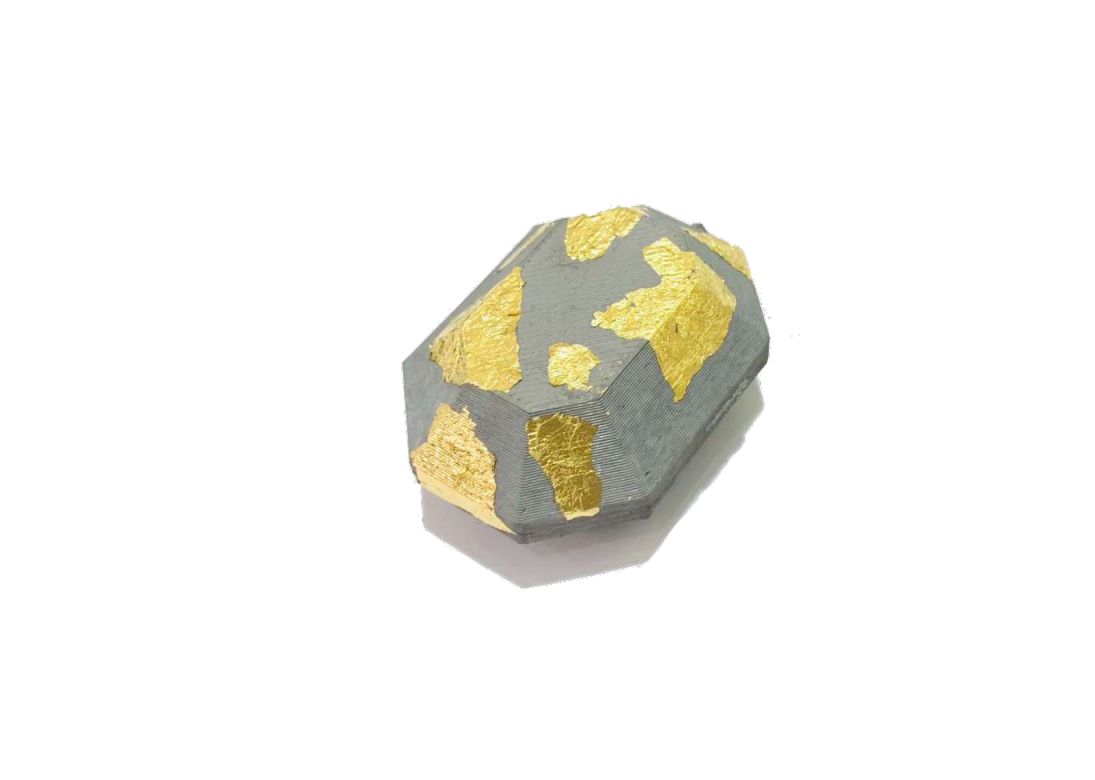

Love it !
All the results:
I used two techniques, the machinable wax mold and the 3d printing mold. These are all the results. The first and third were from the 3d mold and the second was from the wax mold. Removing the silicone from the wax was easy,unlike the 3d mold it was so hard.