Thirteenth assignment
Date
22 Apr 2020
In this week's assignment, we focused on application programming more than embedded programming. The goal is to create an application that provides an interactive interface to a user with an input or output device.
I am so excited about this assignment especially when Prof. Nail said “ It is a creative week “ Let’s see !
Based on his recommendation, I decided to use processing software for building my user interface.
Hello Processing !
What is Processing ?
Processing is a free,open-source graphical library and integrated development environment (IDE) based in Java, built for electronic, media art and visual design projects. It allows us to learn the basics of computer programming within the context of the visual arts.
What is UI ?
UI stands for “User Interface”, the visual part of the application which a user interacts with a computer or a software.
What is GUI ?
GUI stands for "Graphical User Interface", a part of UI that includes interactive visual components for computer software.
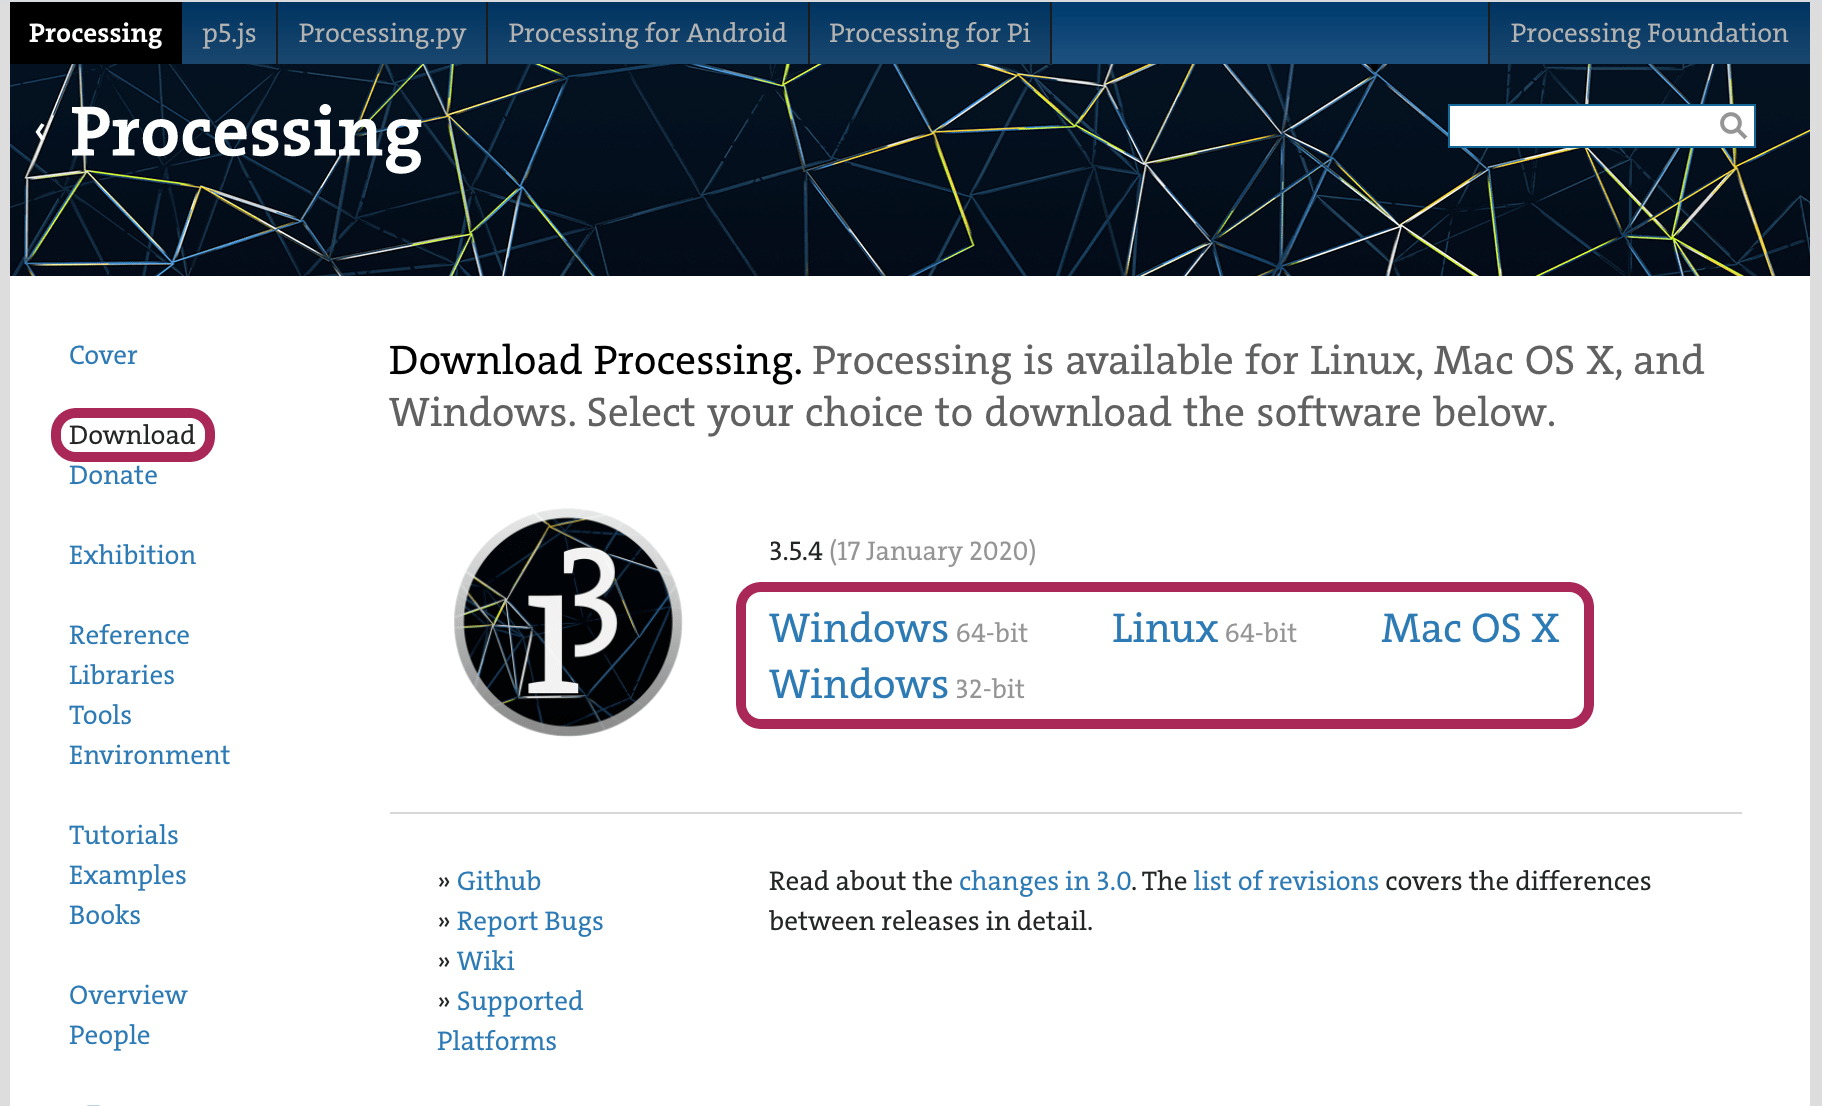
I started by downloading the Processing software from the website. As I mentioned before, I use both Windows (HP) and Mac OS (MacBook Pro) but I decided to download it on my Macbook.
After clicking on the Processing software icon, the Processing Development Environment (PDE) window will appear. It has a simple interface that reminds me of Arduino IDE.

The Processing Development Environment (PDE) main components :
(1) Menu bar : File, Edit, Sketch, Debug, Tools, Help.
Run button : To executive the code by compiling the code, opening the display window, and running the sketch inside.
Stop button : To terminate the execution if the code is running.
(3) Debug : The Processing Debugger is a tool for diagnosing problems with a sketch.
(4) Mode : To add programming mode for processing.
(5) Text Editor : The place that the Programs are written in.
(6) Message Area : To give feedback while saving and exporting and also displays errors.
(7) Console/Errors : The console displays text output by Processing sketches including complete error messages.
Each Processing program that we created in processing software is called a sketch. We can find all the sketches in the sketchbook folder. To access any sketch, click on

There are many programming modes for processing such as Java, Android and Python mode. They are used to deploying sketches on various programs and platforms. The default programming mode for processing is Java mode.
To add other modes, from the drop-down menu in the toolbar > Add Mode

To learn more about processing, I saw and read many useful tutorials on the processing website. Also, I liked a youtube channel called “ The Coding Train” which runs by Daniel Shiffman. He is a great teacher and his enthusiasm made me so excited to learn the Processing more !
After that, I took a look through the processing examples by clicking on
It includes a range of different basic examples such as form, image, data and color. Trying to run some examples gave me a clear sense of what I can do with processing.
I have a good knowledge of Java, for that it was easy for me to understand the processing commands.
Some simple Processing instructions and functions that include shapes, colors, interaction and Conditionals :
Draw a rectangle :
rect(x, y, width, height);Draw a ellipse:
ellipse(x, y, width, height);
Set the background color:
background(r,g,b);Set the outline color:
stroke(r,g,b);Set the interior color:
fill(r,g,b);Rgb is the color value in the range from 0 to 255.
Void : indicate that a function returns no value.
Curly brackets { } : Mark the beginning and end of the programming statements inside a block.
Setup : all the code happens once at the start
Draw : all the code loops continuously over and over again.
void function {
statements
}
void setup() {
size(width, height);
}
void setup() {
void Draw() {
}
If: Allows the program to make a decision about which code to execute.
Else: execute when the expression in if is false.
if (expression) {
statements
} else {
statements
}
Interfacing with Processing
After exploring many processing functions and testing some examples, I decided to make a continued colorful Pac Man face that moves randomly with the mouse movement.

Processing & Arduino
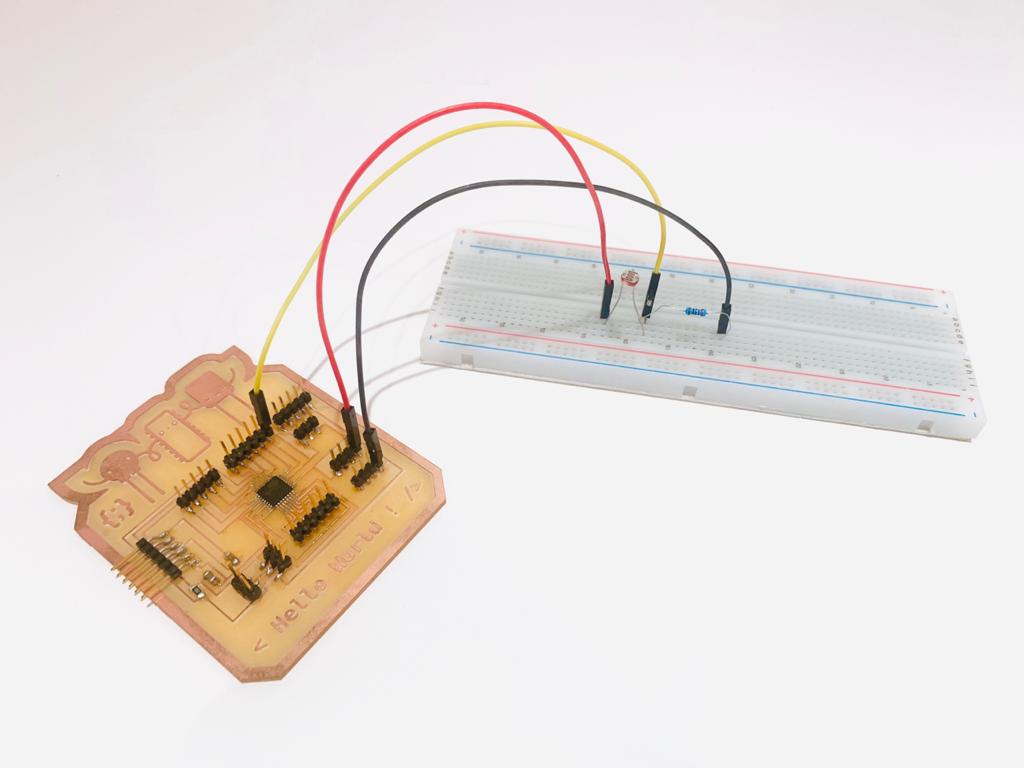
I decided to program an Arduino to read a LDR sensor and direct the data to the Serial.
I started by defining the input pin for LDR and the variable to store the value coming from the sensor.
const int AnalogIn = A0;
int sensorIn = 0;
To create the Interactive communication between arduino and processing, I set up the Arduino sketch to send information over serial by Initializing serial communications at a 9600 baud rate which is the rate of sending data to the computer.
void setup()
{
Serial.begin(9600);
}
In the loop(), which is going to repeat over and over as long as our program is running, I read and printed the values coming from the sensor on the screen
sensorIn = analogRead(AnalogIn);
Serial.println(sensorIn);
delay(100);
}
Processing Code:
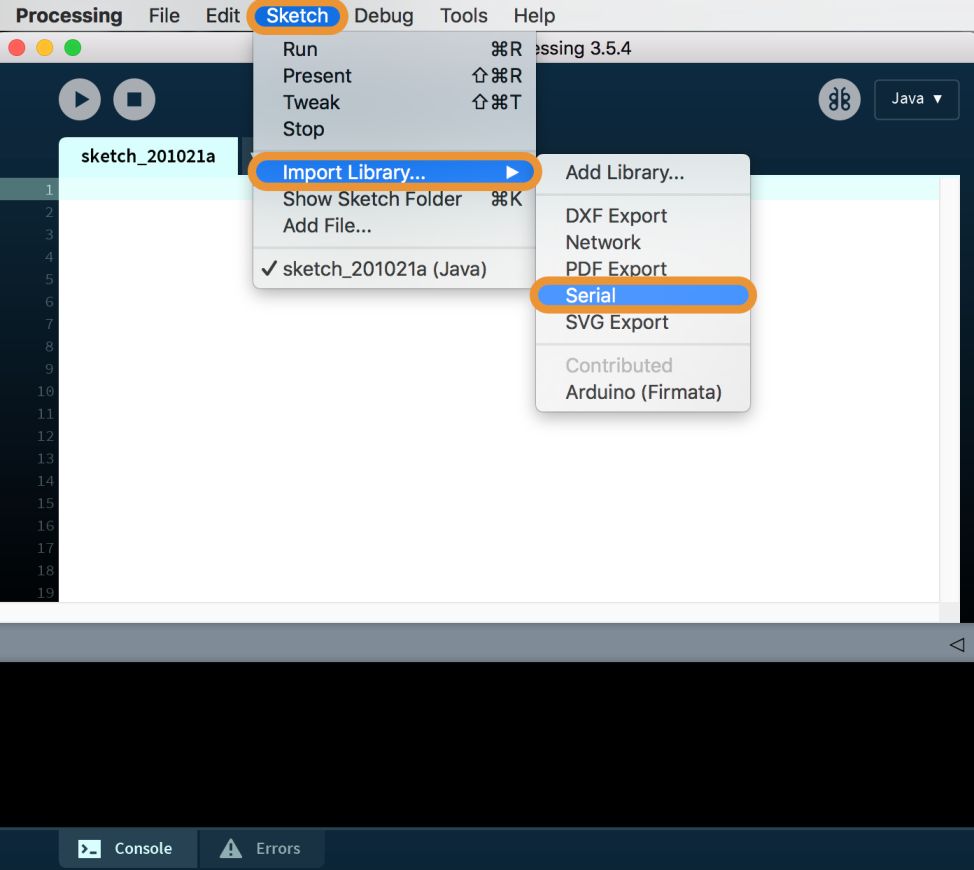
First step was importing the Serial library
Sketch > Import Library Serial
Afterimport processing.serial.*; shown at the top of the sketch, I wrote a code to make a yellow circle change its size depending on light intensity on the LDr sensor that connected to the Arduino.
int lf = 10;
String myString = null;
Add the The serial port :
Serial commPort;
Float the number to format:
float num;
In the void setup()
I chose a grey color for the first background
background(211,211,211);
Then, I set the size of the window
size(320,240);
After that, I specified the number of frames to be displayed every second
frameRate(120);
To open the port that I used and choose th rate :
commPort = new Serial(this, "/dev/cu.usbmodem1431", 9600);
Next, I Cleared the buffer
commPort.clear();
In the void draw()
The next step is checking if there is something new on the serial port and store the data in myString
while (commPort.available() > 0) {
myString = commPort.readStringUntil(lf);
Then check if we really have something
if (myString != null) {
After that, print out the data we just received
print(myString);
num=float(myString);
println(num);
println(frameCount);
Last, I set the color of the background, the circle and its location.
background(153, 204, 255);
fill(#FFE02E);
ellipse(160,120,num*4,num*4);
Arduino Testing :
PCB Testing :