Exercise 16 - Digital Embroidery (Wildcard Week)21/5/2020 to 28/5/2020
The assignment this week is vastly different from past weeks, instead for meeting assignment assessment requirements, we have the liberty to design and produce something using a digital fabrication process that is not covered in another assignment. We are to document the workflows, and including everything necessary to reproduce it.
Digital Embroidery
🌼Embroidery Machines
For this wildcard week, I have decided to try out digital embroidery. Since SP Fablab is closed due to Covid-19, only the design work is carried out and the workflow is documented for this week. When I have access to the Fablab, I will carry out the embroidery and update the site
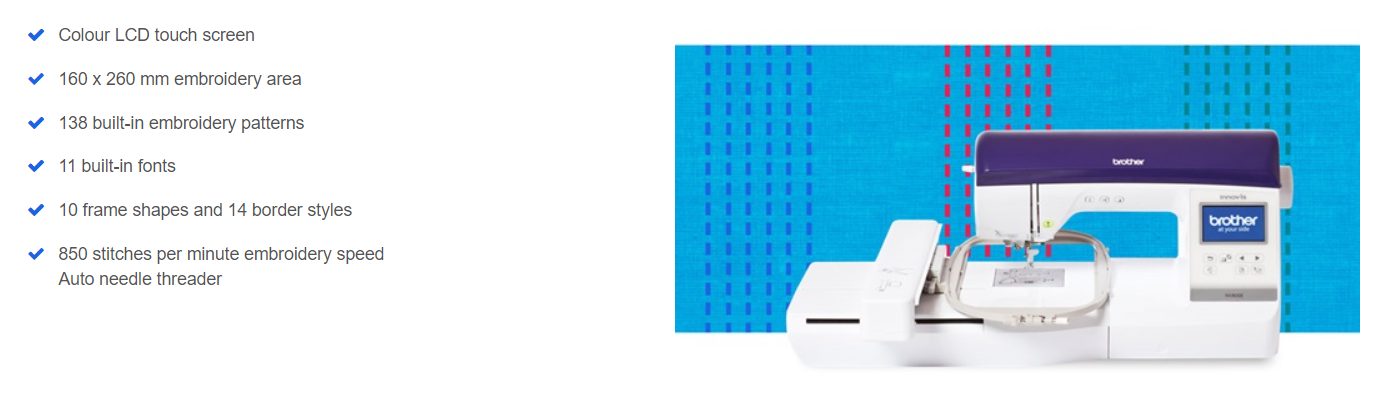
SP Fablab has 2 different embroidery machines from Brothers. They are the Innov-is NV800E and PV1050X.
Innov-is NV800E is a feature-packed embroidery-only machine which has wide inner-arm space for large projects, and a full-colour touch screen for ultimate ease of use. Design files can be loaded directly to the machine using a USB device such as a memory stick or a card reader/writer.
PR1050X is a feature-packed embroidery machine. Not only can it handle larger garments such as jacket backs and quilts with ease, it has 10 needles which allows for 10 different colours without changing threads giving it tremendous flexibility. The key featurs are sumarised below:
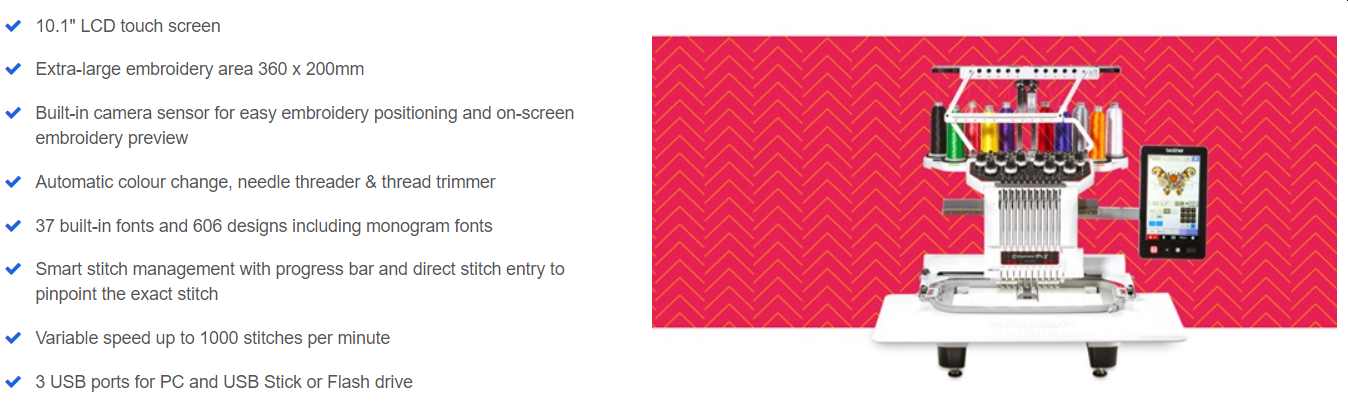
For this assignment I plan to use the PR1050X as I am very intrigued with the simultaneous working of 10 needles.
NOTE: All images and details for the 2 embroidery machines are taken from the manufacturer website
.🌺Design Softwares
The Brother embroidery machines cannot directly stitch from design files like EMB or ART. The default format to export from embroidery software is PES where designs can be somewhat modified on the machine directly. For Tajima data file (DST) the special settings are required to avoid unexpected trimming or no trimming at trim. More details is available from the operating manual (page 227)
There are numerous embroidery softwares available and several websites give very comprehensive comparisons and rankings of these softwares. The website by Mary Janes & Galoshes gives a comparison of 23 softwares!
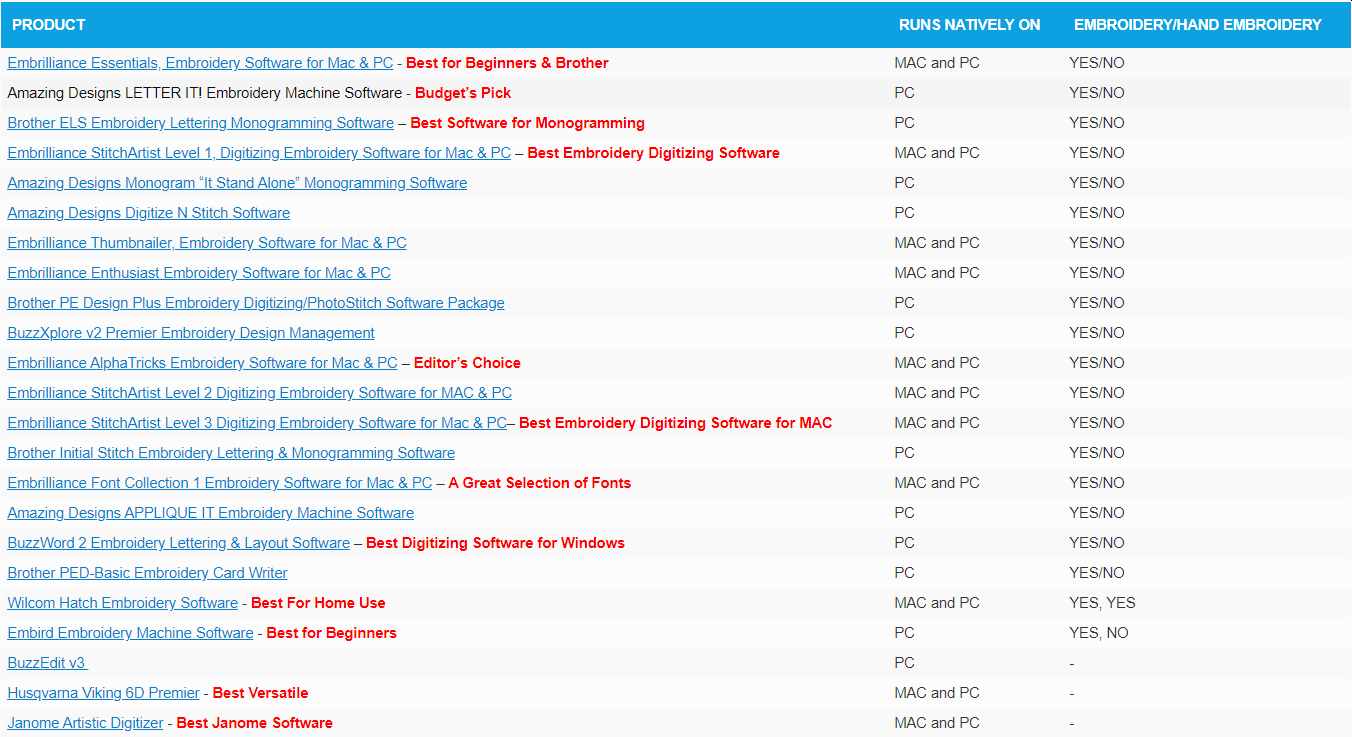
Table from maryjanesandgaloshes.com
After checking the prices of some of the above softwares, I realised that digital embroidery is definitely not the cheapest hobby out there! Apart from the expensive machines and the investment on the threads, most of the softwares are in the hundreds or even thousands of dollars. SP Fablab is using PE Design, however this software requires a tongle to be plug in to enable the "save file" function. Since I am working from home, this becomes very unattractive for me to learn this software.
I try to search for freewares, as after using freewares like Handbrake and Inkscape, I start to believe that some good things can be FREE!. Although free embroidery softwares may not be as comprehensive and customization may also be very limited, I believe they can still meet my needs which are very simple at this point of time. From the homeembroiderymachine.com website, four free softwares are recommended; namely Bernina Artlink7; TrueSizer; My Editor and BES Embroidery Software 3. However, to my dismay, I realised after reading the reviews that Artlink7, My Editor and TrueSizer are actually viewer and editor programs and cannot digitalise an image to create an embroidery design. BES Embroidery has also changed the trial from full function for 30-days to one that cannot "save" or "save as".
🌻PE Design 10
With little choice, I decided to learn PE Design 10. Although the trial version has several limitations (listed below), using the trial version to acquire the skills now will allow me to quickly digitalise an image and create an embroidery design quickly using the licensed software when SP Fablab is opened. I watched several videos from Oleens Embroidery before using the PE Design software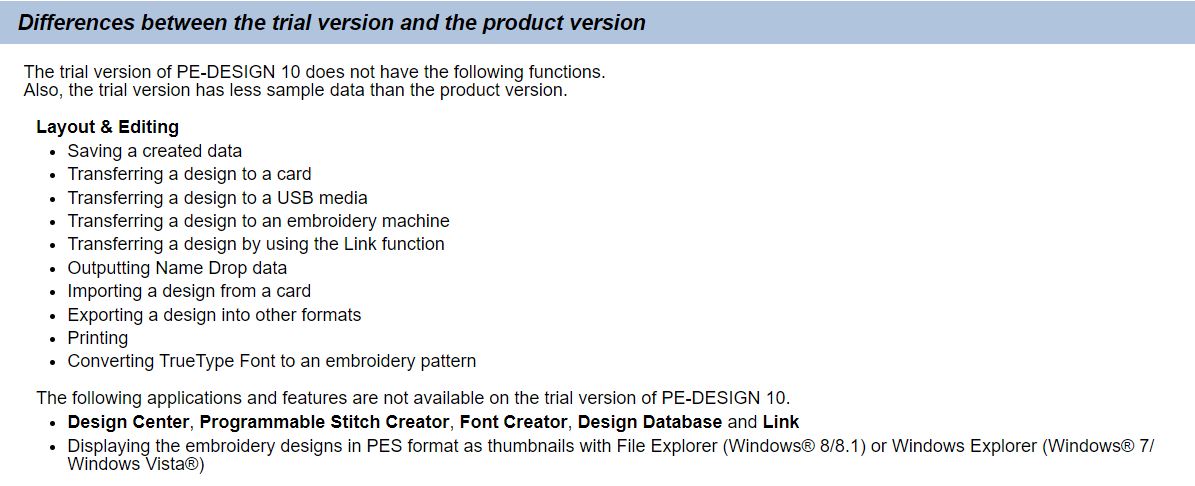
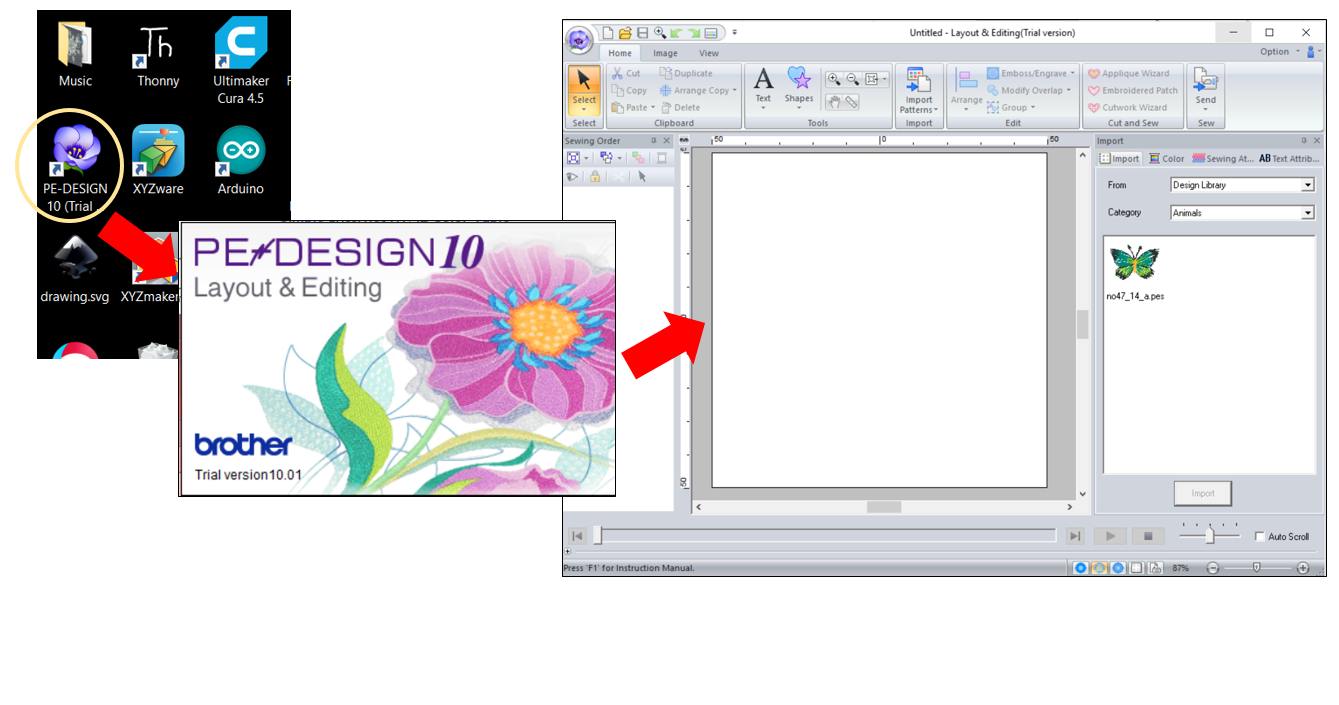
The trial version can be downloaded from brother.com website. After installation, clicking on the icon will launch the software.
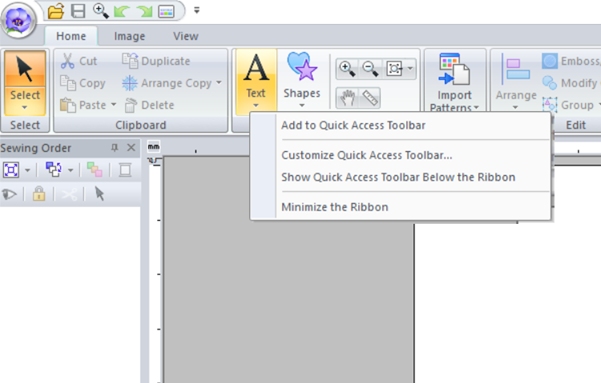
One useful and unique feature that I enjoyed about the PE design 10 software is the ability to add almost any function into the quick access bar. By pointing on the function and do a right mouse click, the function will be added to the quick access bar.
PE Design 10 Software allows design to be drawn directly on the workspace using the shape palette but this function is less commonly used to create an enetirely new image. Many a time, an image is imported into the workshape and the shape palette is used to create a frame or touch up the image. PE Design allows many different image formats to be imported.
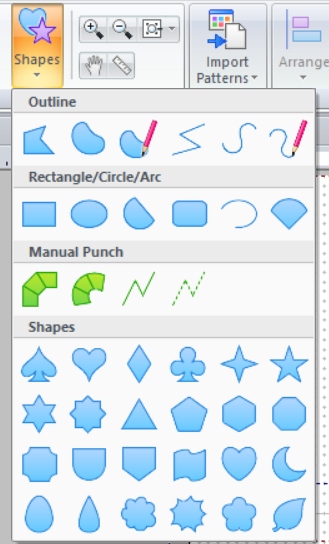
Shape Palette
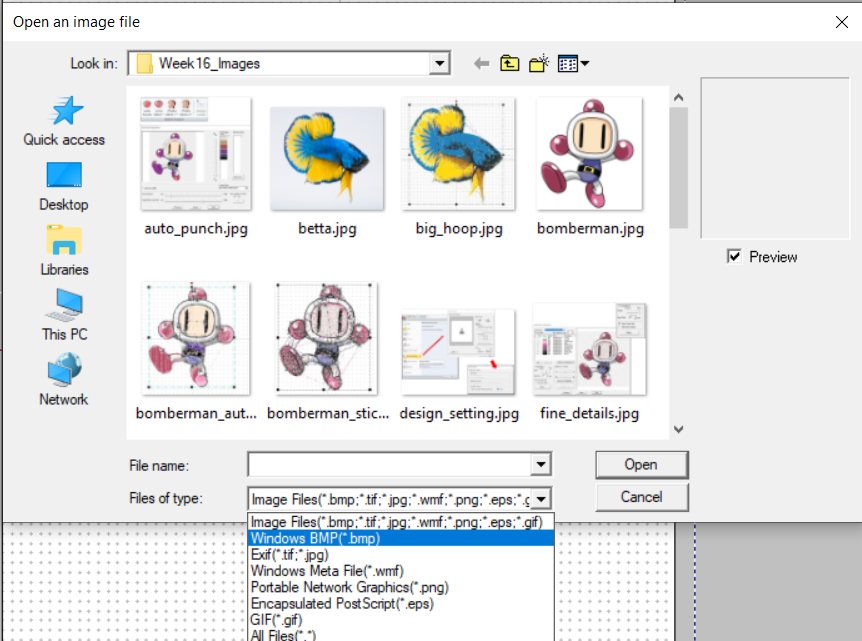
Many image formats can be read
Link to Youtube Channel on Digital Embroidery from Oleens Embroidery
🌼Importing a Drawing
Before importing and digitizing an image, the workspace must first be setup. The first step is to input the required design settings. The Design Setting menu can be accessed by clicking on the purple flower icon on the top left corner of the screen
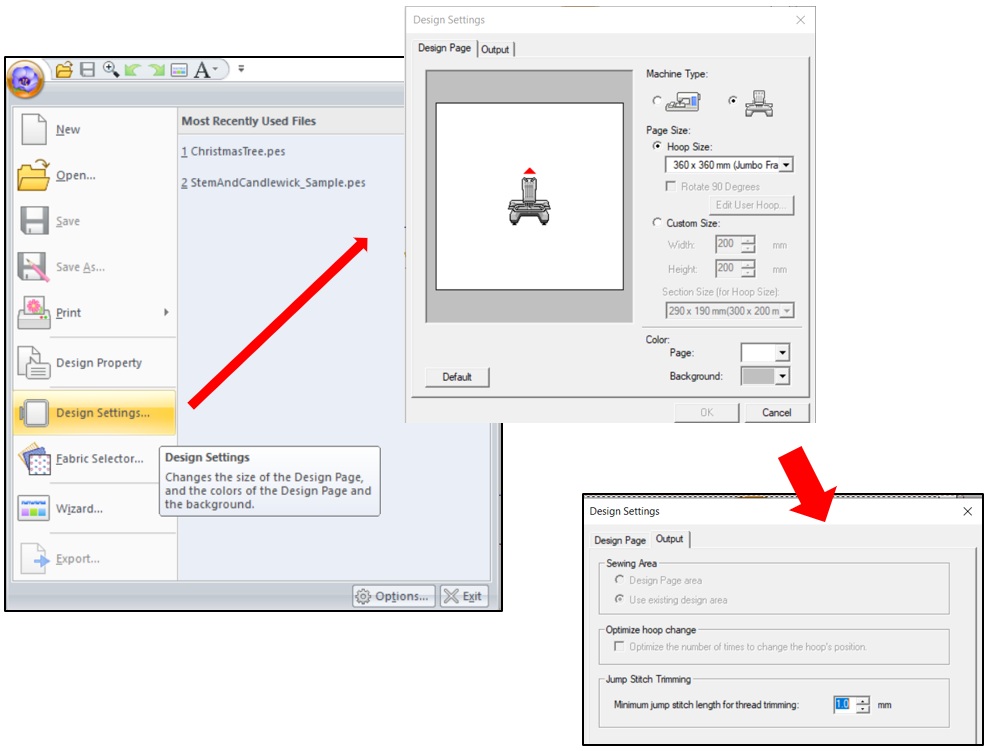
The menu allows the machine type (single or multiple needle), the hoop size, the appearance and the minimum jump stitch length for thread trimming to be set. Also to enavle the Stitch View the multiple-needle machine musbe selected.
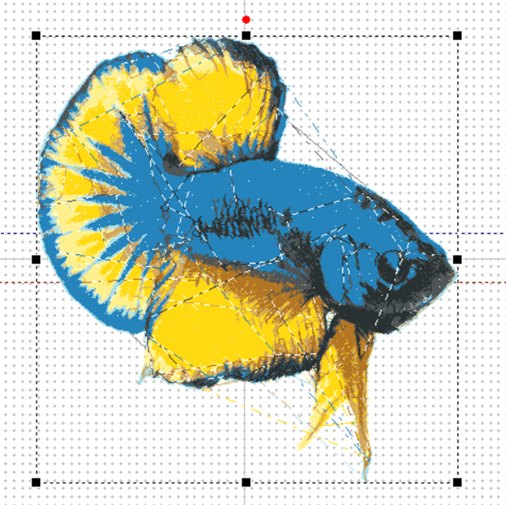
Drawings, photographs and images can be imported into the PE Design worksplace by opening the folder and adding the file. For this exercise, I downloaded a jpg file from the internet and opne it in PE Design 10. To digitize the image, there are several options, the first option I tried is Auto Punch
.
Original Image of Bomberman from the internet
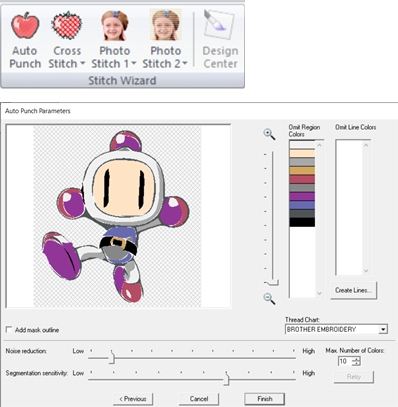
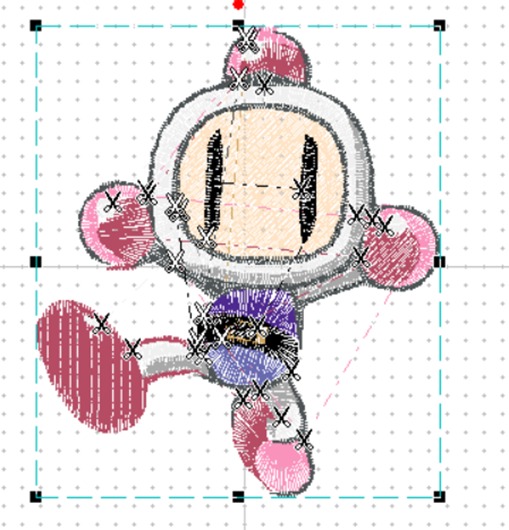
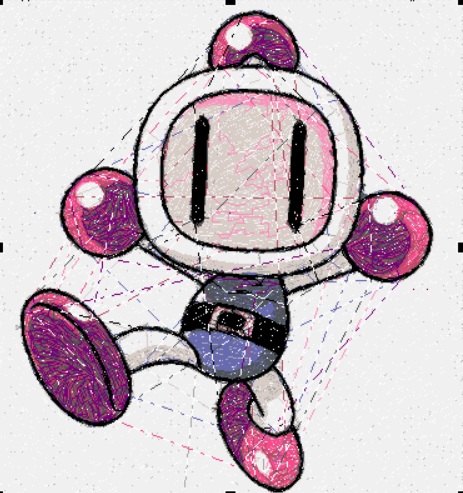
Using Auto Punch to digitize image
A dialogue will opened up, which allows the user to size the image, adjust the noise reduction and segmentation sensitivity. After adjusting these to the user's preference, the Finish button is clicked. This will generate the Stitch View of the image which allows the user to better visualise the finished product.
The second digitizing option I tried is Photo Stitch 1. The process is quite similar to Auto Punch, however there are more options available to finetune the stitch image. The image below is the first cut using all the default settings, the image is already showing more details compared to the Auto-Punch image (check out the foot region)
First-Cut; more details are captured
By adjusting the Sewing Option, the stitch image can be further improved. In the below image, the sewing option is set to the finest.
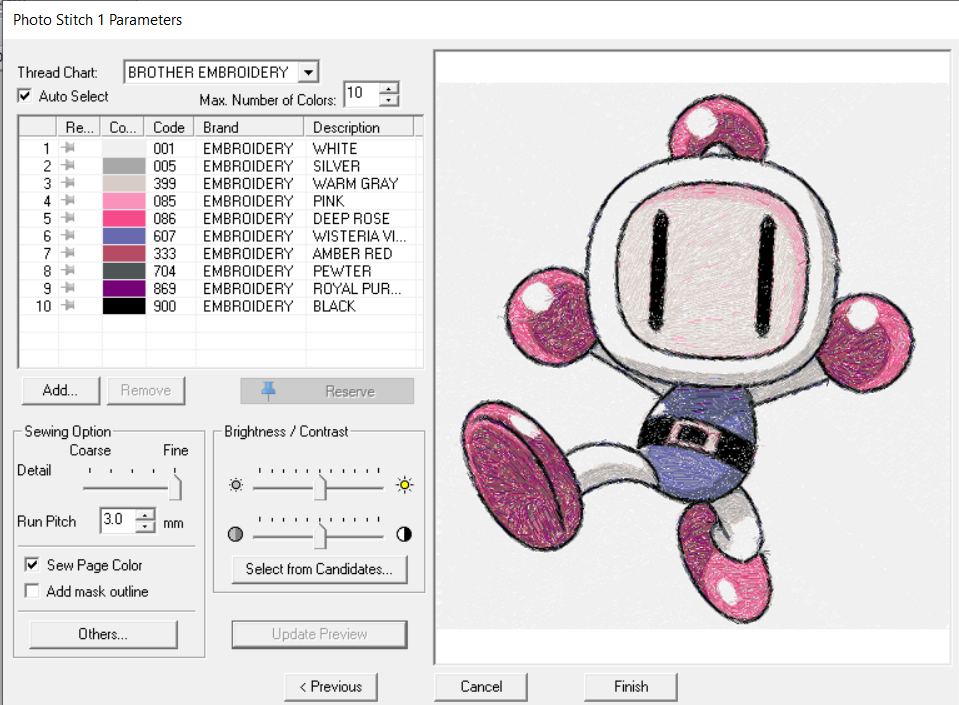
By adjusting the Sewing Option, the stitch image can be further improved. In the below image, the sewing option is set to the finest.
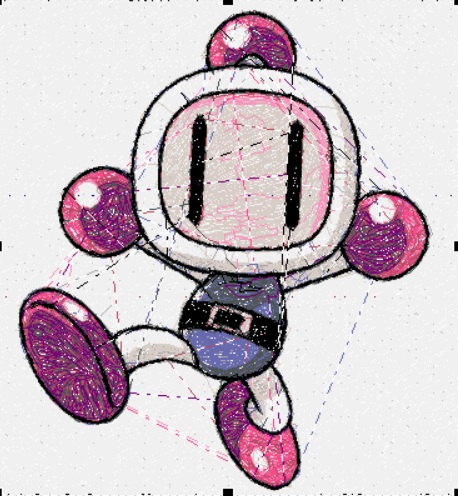
Stitch Image is much sharper
🌷Importing a Photograph
Having some good results with digitizing a drawing, I decided to up the challenge a bit by importing a photograph.

I used the Photo Stitch 1 option again and the results are however less than satisfactory despite several attempts to finetune the stitch image. I decided to try using a bigger image and the stitch image is much better, which indicates that photographs because of the many different lighting tones, a bigger image (Jumbo hoop size 360x360mm) is required to produce the resolution.
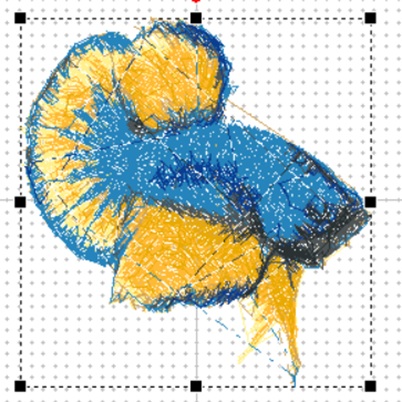
Small Image; (hoop size 100x100mm; Result is not good
Larger Image, better result is achieved
🌼Embroidery the Design
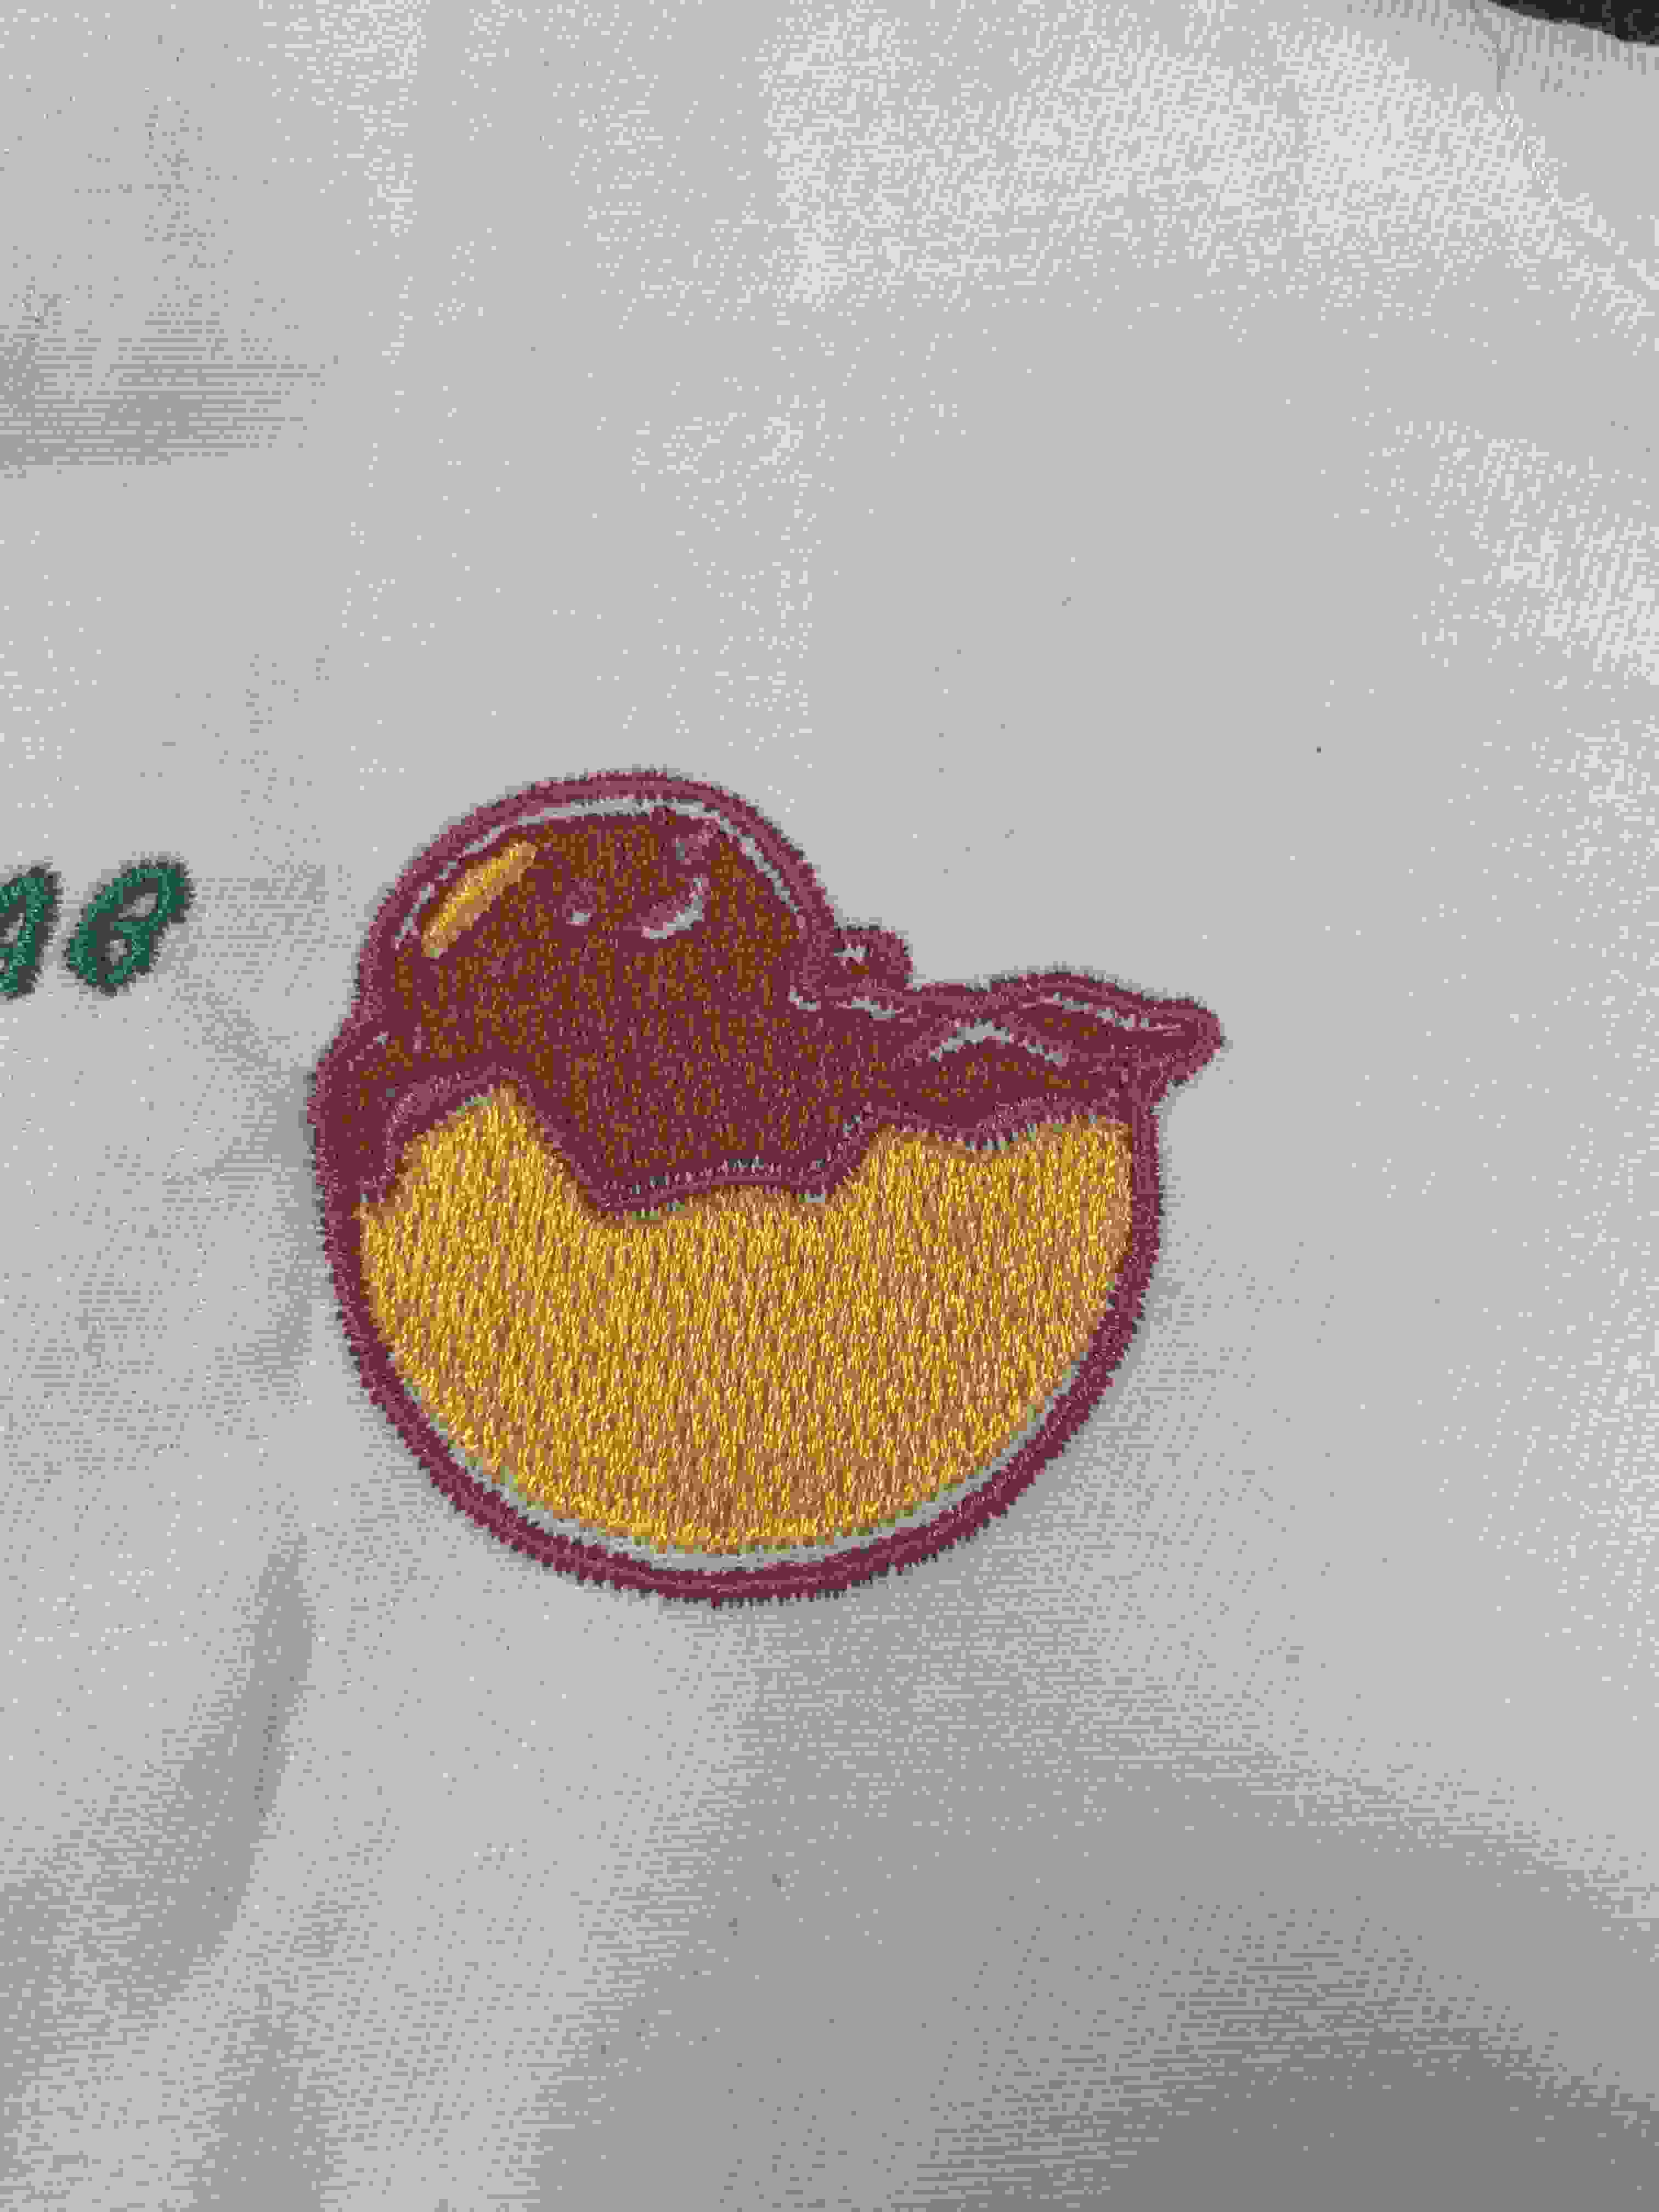
SP Fablab is opened from 8 June 2020 and I can continue with the actucal embroidery of the design. With the tongle, the licensed software can be installed and used. Using this licensed software, I created a new design as my "bomberman" requires several shades of pink that SP Fablab does not have. I decided to work with the drawing of "Gudetama", a popular Japanese cartoon character.

The image preparation work for embroidery is similar as described above and hence not discussed here. After image processing, the file is saved in PES format on a thumbdrive and ready for use.
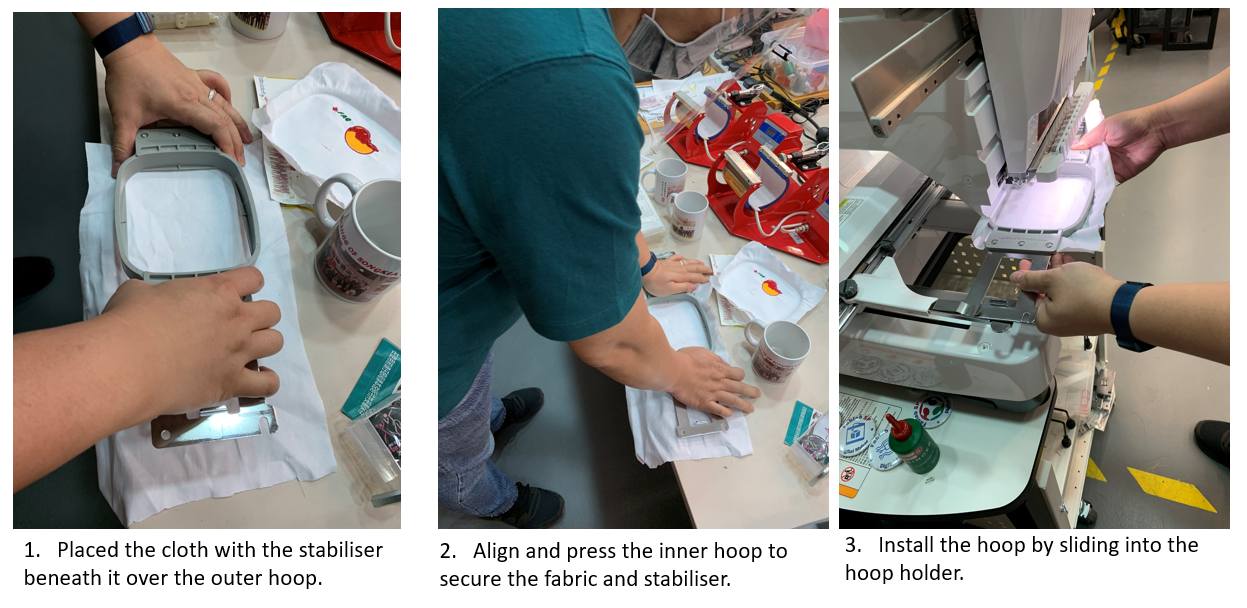
Preparing the embroidery machine - Hoop setup
As the number of stitches are extremely high in a typical embroidery project, the fabric may tear during the embroidery process. As such a backing also known as stabiliser is required. The selection of stabiliser is dependent on several factors, with the type fabric being the most important one. The article on www.embroiderypress.com is excellent in helping the user select the most suitable stabiliser.
The fabric with the stabliser as backing must first be loaded onto the hoop. The steps are summarised as below:
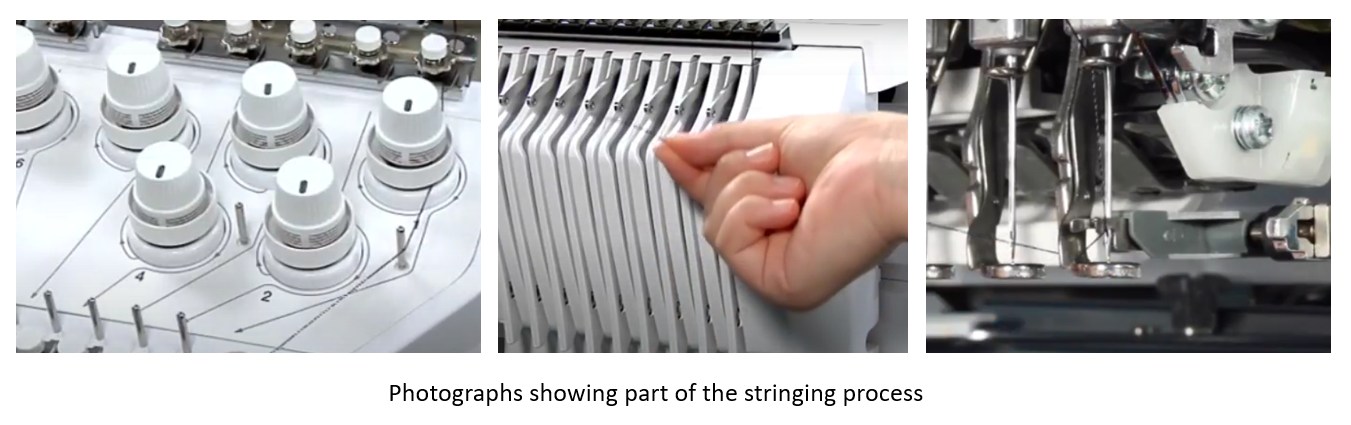
Preparing the embroidery machine - Upper thread and Bobbin setup
The PR1050X embroidery machine has 10 needles which allows for 10 different colours without changing threads. Before use, each of the colour thread must be properly stringed. There are indications on the machine that guide the user. In addition, video tutorial is pre-loaded to help the user. The video is also available online.
It is also important that there is thread on the bobbin spool. The video guide for preparing and installing the bobbin is also available on the machine as well as online. Some of the critcal steps are summarised below:

Start the embroidery process
After the hoop and thread setup, the embroidery can commence. Following the onscreen instruction, the PES file can be loaded to the machine.
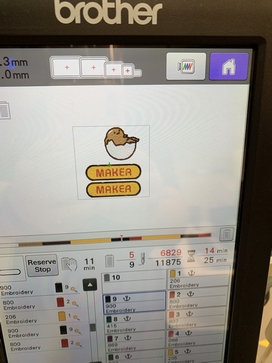
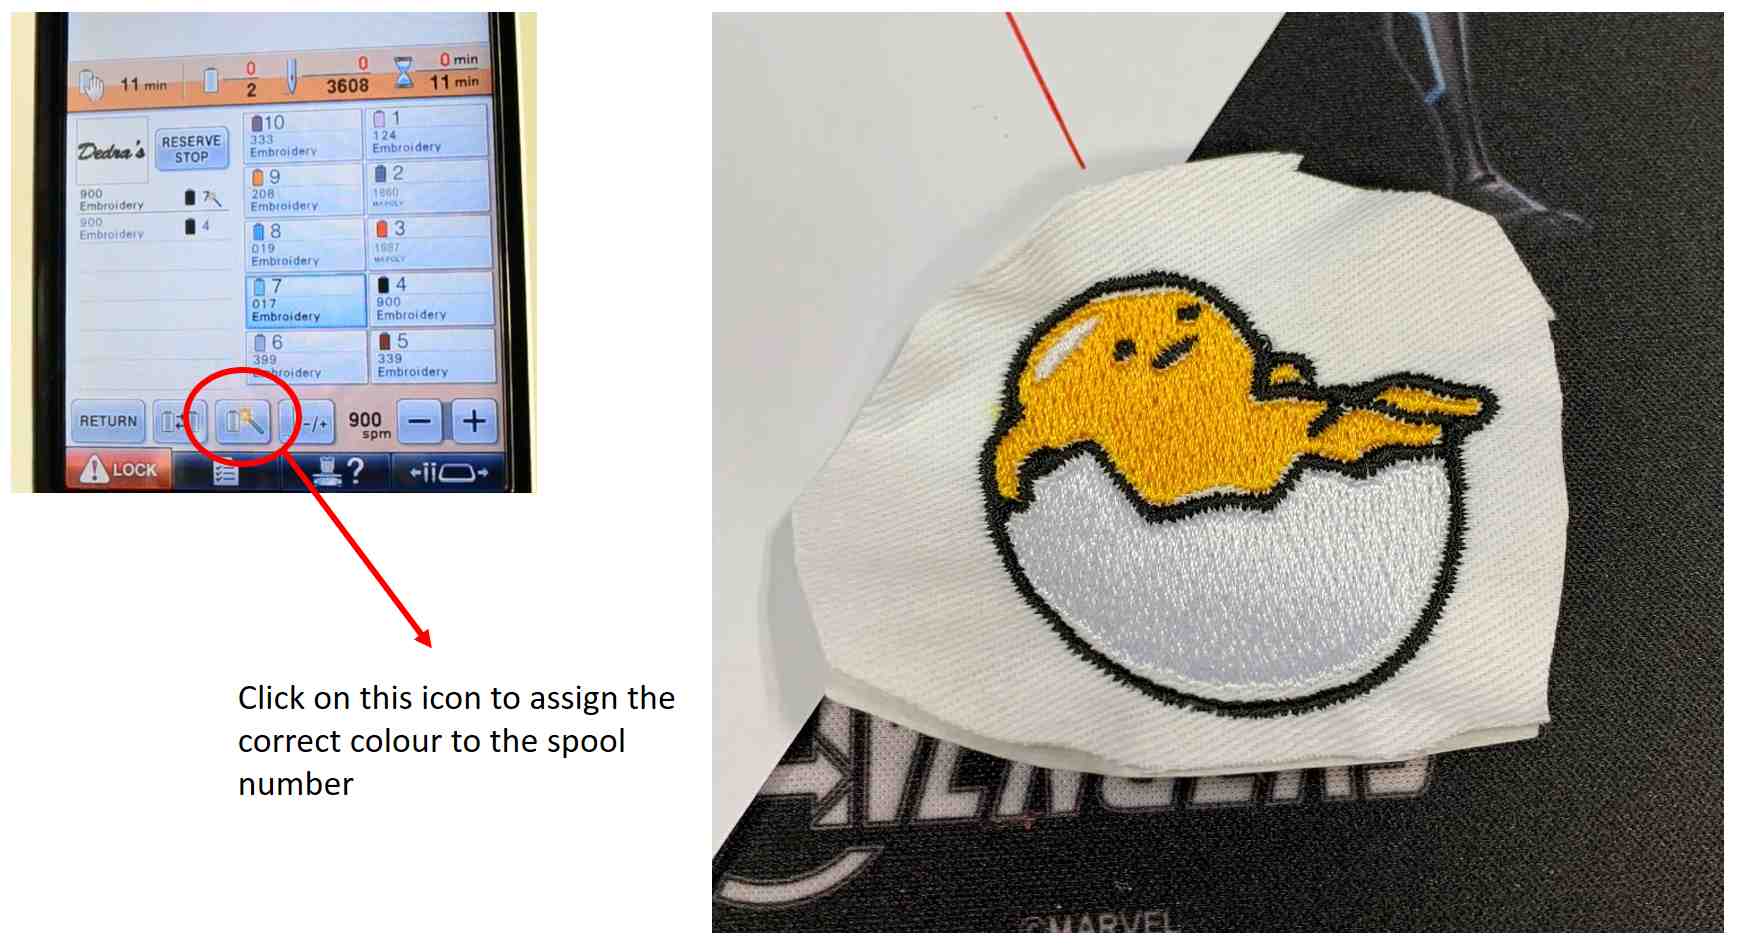
After loading the file, it is important to check that the required thread colour is at the correct spool location. For the first run, I overlook this and as a result, the colours are completely wrong although the embroidery process was smooth.
To set the correct spool location for each colour, the onscreen button (circled in red) is selected and the position for each colour is set one at a time. After setting this, I managed to get the machine to embroider my design properly.