
Fab Academy 2020
15. Molding and Casting
15. Molding and Casting
Group assignment:
Individual assignment:
This week topic sounded interesting and fun, and it will be my first time doing molding and casting.
Problem I faced this week :
The CNC machine in the SP Fab lab broke down and I am not able to use, it having some issue with the tool changer. So I faced some delay and had to look for another cnc machine.
I will be making a "two part mold" to cast out a smiley face ball.
Learning for this week:
|
Some basic info : 3D Printing vs molding and casting :
It is possible to 3D-print the mold, however you would need to do some post processing of the surface, as a typical 3D-printed mold is not going to have a smooth 'surface finish' because it might contain tiny jagged edges along its
surface (or steps along a slope). To have a better and smoother surface finish, we would need to machine the mold. Example LEGO® brick is created using molding and casting and not 3D print.
2D, 2.5D vs 3D toolpath :
We have been using cnc machining over the last few weeks; example to mill our PCB boards as well as in "making something big" week.
Molding and Casting
Molding is a process of creating a 'hollow' container with a desired shape of the 3D model/object. This hollow container is call a 'mold' (or 'mould') and will be use to shape the casting materials and thereby we are able to
create duplicate copies of the model/object from the mold. Molds are negative forms that are used to shape casting materials.
|
The first step is to
I am using an old 3-axis CNC Machine in the FabSTUDIO, comes with a EAS (made in Germany) 3–axis stepper motor control unit MC 400/C/3 axis and a milling table dimension of around 300mm(x-axis) x 400mm(y-axis) and z-axis height of around
100mm.

The "cutting length" of the ball nose end mill is around 20mm. The cutting diameter and length will influence my design with regards to maximum depth of cut, the narrowest gap between objects as well as the smallest features that I can design.

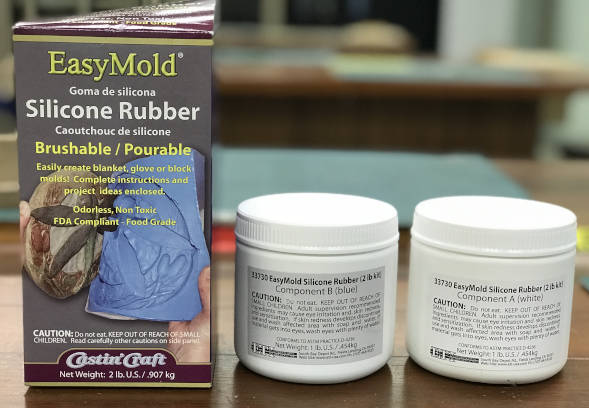
I am using EasyMold™ Silicone Rubber (Liquid) for the mold and for the casting material I be using 'FastCast™ Urethane Casting Resin'. Both are manufactured by ETI (Environmental Technology
Inc.).
Molding material : EasyMold™ Silicone Rubber (Liquid)
EasyMold Silicone Rubber is a easy to use, odor free, non-toxic, two component silicone rubber. ~ www.eti-usa.com
Working Time : 45 minutes to 1 hour of working time at 70° F / 21° C.
Mix Ratio : 1 : 1
Curing Time : 24 hours

Casting material : FastCast™ Urethane Casting Resin
"FastCast™ is a two-component clear urethane casting resin, which turns white once set. Easy to use, 1:1 ratio and is odorless. Ideal for casting, quick prototyping, miniatures, models, taxidermy and more. FastCast™ sets to a hard cast in
approximately 10 minutes at 70°F. Once cured, FastCast can be drilled, sanded, shaped and painted."" ~ www.eti-usa.com
Working Time : maximum 2 minutes of working time at 70° F / 21°C. Mix for 2 minutes and pour immediately into mold
Mix Ratio : 1 : 1
Curing Time : 10 to 15 minutes (cooler room temperature or high humidity might take longer)


Video Tutorial on how to use Easy Mold™ Silicone Rubber on Youtube :
Source: How to Make a Block Mold Using Easy Mold Silicone Rubber @ https://www.youtube.com/watch?v=cImkZzJeiA0
Video Tutorial on how to use FastCast™ Urethane Casting Resinon Youtube :
Source: How to Use FastCast Urethane Casting Resin @ https://www.eti-usa.com/how-to-use-fastcast-urethane-casting-resin-video
A Safety Data Sheet (SDS), or previously known as Material Safety Data Sheet (MSDS) or product safety data sheet (PSDS), is a document which is usually prepared by the manufacturer to help you learn more
about
the
substance/chemical/product pertaining to the safe use of the substance/chemical/product or occupational safety and health aspect.
The manufacturer, ETI, had posed the 'SDS' for all the their product range on their website, including the EasyMold and FastCast.

Safety Data sheet for :
- EasyMold™ Silicone Rubber Part A
- EasyMold™ Silicone Rubber Part B
- FastCast™ Urethane Casting Resin Part A
- FastCast™ Urethane Casting Resin Part B
The SDS contain the following sections :
1. Product and Company Identification
2. Composition and Information on Ingredients
3. Hazard Classifications
4. First Aid Measures
5. Fire Fighting Measures
6. Accidental Release Measures
7. Handling and Storage
8. Exposure Controls and Personal Protection
9. Physical and Chemical Properties
10. Stability and Reactivity
11. Toxicological Information
12. Ecological Information
13. Disposal Considerations
14. Transportation Information
15. Regulatory Information
16. Other Information
SDS of EasyMold™ Silicone Rubber (Liquid) :
I looked through the SDS. As a Safety Officer and a In-charge of my own workshop, the first thing I would look at is the header title, to check that the product code (or product name) in the SDS header matches exactly the product that I be
using.
Hazards :
Next is to look for any information regarding the physical hazards of the product. Here, there is no acute or chronic health effects, however product might cause slight eye irritation if some of the product comes
in
contact with the eye.
Skin contact: No acute toxic skin effects are expected.
Inhalation: Inhalation is not expected due to low vapor pressure.
First Aid measure :
After contact with the skin: Wipe off excess material with cloth or paper. Use a waterless hand cleaner to remove as much of the remaining material as possible. Wash with soap and water.
After contact with the eyes: If contact with eyes, immediately hold eyelids apart and flush with plenty of water for at least 15 min.


Handling and Storage :
To me, this section is the second most important piece of information to look out for. How the product can be store in the Fab Lab and how to handle it. Example you might not want to trigger any unwanted chemical reaction. I have two hazardous
substance storage cabinet in my workshop, I will typically store them inside to keep them away from other users.
- Open and handle container with care
- Ensure adequate ventilation
- Do not store with basic substances (e.g. alkalis, ammonia, amines), oxidizing agents, strong acids
- Protect against moisture
Personal Protection :
Hand protection: Recommendation: Any liquid-tight rubber or vinyl gloves.
Eye protection: Recommendation: Safety glasses with side shields.


SDS of FastCast™ Urethane Casting Resin :
The Casting Resin is a much more harzardous than the molding material and need to be taken very seriously.
Hazards :
Harmful if inhaled.
Causes skin irritation.
Causes serious eye irritation.
May cause allergy or
asthma symptoms or breathing difficulties if inhaled.
May cause an allergic skin reaction.
May cause respiratory irritation.
May cause damage to organs (Respiratory System) through prolonged
or repeated exposure.


Handling and Storage :
Do not breathe mist or vapor.
Avoid contact with eyes, skin, and clothing.
Avoid prolonged exposure.
Use only outdoors or in a well-ventilated area.
Wear appropriate personal protective
equipment.
Wash thoroughly after handling.
Observe good industrial hygiene practices.
Personal Protection :
Wear safety glasses or goggles
Wear chemical resistance gloves


In addition to the info provided in the SDS, some Do's and Don'ts of casting :
Reference :
Castin'Craft
Ideal Book by Casey Carlton' on ETI website.
Before you dive right in to make the final mold or cast the pieces, it is a good idea to make test casts with both the molding and casting material that you be using. These small test casts help me understand the characteristics of the silicon
rubber and casting rasin, as well as by doing a few times of castings provided me with valuable expriences before my final cast.
I had carried out some simple testing :
For EasyMold™ Silicone Rubber (Liquid) :
1) My workspace for the molding and casting with old newspapers and A2-size white recycled drawing paper. I had bought some small plastic containers for making the test casts

2) Using a measurement cup to mixed 'Part A' and 'Part B' of the EasyMold™ Silicone Rubber into the various mix ratios that I wanted.

3) Poured the Silicone Rubber molding material into the various small containers.

4) I allowed all the silicone rubber to cure accordingly to their timings under normal room temperature of around 21°C.

Test cast 1 (mix ratio) :
Photo below showing test casts of different mix ratio :
(Part A 0.5 : Part B 1), (Part A 1: Part B 1), and (Part A 1 : Part B 0.5).

The first and second samples feel the same and offers the same rigidness and hardness.
The third sample (A 1: B 0.5) feel a bit soft and you can easily twist it. I looked back at the SDS and relasied that both Part A and B contain the
same chemical, but Part B has an additional chemical compound (Polydimethyl hydrogenmethyl
siloxane) inside. In simple explaination, what it mean is that you can mix with a little portion of Part A and still have rougly the same strength. But Part B might be the bonding agent, if you mix less amount of Part B, your mold will becomes
softer, which is not good if you are looking for a rigid mold.
Test cast 2 (cure Time) :
Photo below showing test casts of different curing timings (17 hours, 20 hours, 24 hours).

I am hoping to see a softer or even a wet surface on the sample that only had cured 17 hours. But all three samples seem the same to me. All three are very rigid and hard, cannot eaily twist.
Perhaps I should cut the first test cast into half to have a look at the inside to see if it is still wet and soft on the inside...
For FastCast™ Urethane Casting Resin :
Here I dripped two drops of the yellow color dye into a Part A solution and mixed it first before adding Part B. Then I cast another piece with 1:1 ratio of Part A and Part B without any additional color dye.

Working-time : Under room temperature of around 32°C, the working time for Urethane Casting Resin is around 30 seconds to 40 seconds after your mixed Part A and B together and start stiring.
Stiring the mixture is very important for the casting
rasin, if you did not stir enough of it will, some portion of the mix will not be able to solidify, you end up with liquid portion here and there (along the edge/corner in particular). Stiring have to be fast but gentle, do not cause any wave as it will result in bubbles. Around 30 seconds, you can pour the
casting rasin. If you starts to feel the 'heat' from the mixture, it will be a bit late, but you can still hurry to pour it into the mold. Problem is it already starting to solidify while you pour.
The cast pieces on the right look a bit darker, which had two drops of the colour dye added. But not that obvious.

I relaised that the yellow color dye that I added is for transparent epoxy casing rasin. Therefore there is not much colour changes.
I designed a small "Smiley Face Ball" of 40mm in diameter in Fusion 360 and attempt to experiment on making a two-part mold.


I am using the recycled foam board availabe in my workshop for my first modling and casting as the machining wax block is very expensive in our country. Therefore the surface finish is not that good.


Molding and casting is fun! However it is not as simple and straight forward when I first imagined. You need to do a bit of practises to get use to the process.
3-axis machining :
This week I had learned the important lesson of machining a 3D object, what is roughing cut and what is finishing cutting. Which is quite useful and cool, as I now understand how to machine 3D object in the future.
3D Mold design :
For the design of my mold, I should cater for much thicker wall; like say 10mm instead of 3mm. 3mm is too thin.
Molding :
Next time, I would consider trying out a wax block for my mold box or look for better material. The foam block that I am using is old and filed with cavities within, perhaps I should have paint it over.
Casting :
For casting, you have to mixed the Part A and Part B thoroughly all within 30 seconds, before it starts to harden. You have to test it out a few times as working time also include the pouring into the mold time.
When stiring, it have to be in a steady movement to avoid forming of bubbles. Instead of using a thin wooden stick to mix, next
time I might use a brush for mixing as it be more efficient.
Next time, I will consider using a air vacuum machine to remove the bubbles. It is very important to ensure that there are no bubbles formed inside the silicon mold as well as during casting.
My 3D model and mold design in Fusion 360 :
Smiley Face Ball (for molding).f3d
Cut3D file :
Cut3D front mold.v3d
Cut3D back mold.v3d
Lydia Sloan Cline, 2018, Make: Fusion 360 for Makers, Maker Media, Inc. CA.
Shopbot : What is CNC Anyway?
Instructables: Mold making & casting basics
Wikipedia: Molding
Wikipedia: Casting
Wikipedia: Curing (chemistry)
Smooth-On: Basics of Mold Making
Product Design Online : Tutorials on Fusion 360
Fusion 360: Mold Making Tips
Autodesk Fusion 360 - Mold Creation
Lydia Sloan Cline, 2018, Make: Fusion 360 for Makers, Maker Media, Inc. CA.
Casey Carlton, 1982, Castin'Craft Ideal Book by Casey Carlton, Field Landings, CA