Kerf Assignment
The aim of the group assignment was characterize our lasercutter's focus, power, speed, rate,
kerf, and joint clearance.
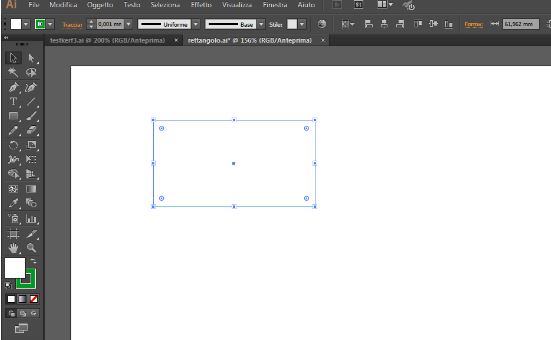
We decided to take a matrix model from this page of the Fab Academy 2018 archive. However, we changed the speed and power values (picture of the Illustrator model) using the Illustrator software.
On Job Control (the software that controls the Laser Cutter Trotec), by double-clicking on the worktop, we created a new folder for group work. Then we assigned different speed and power values to the colors for CO2 cuts.
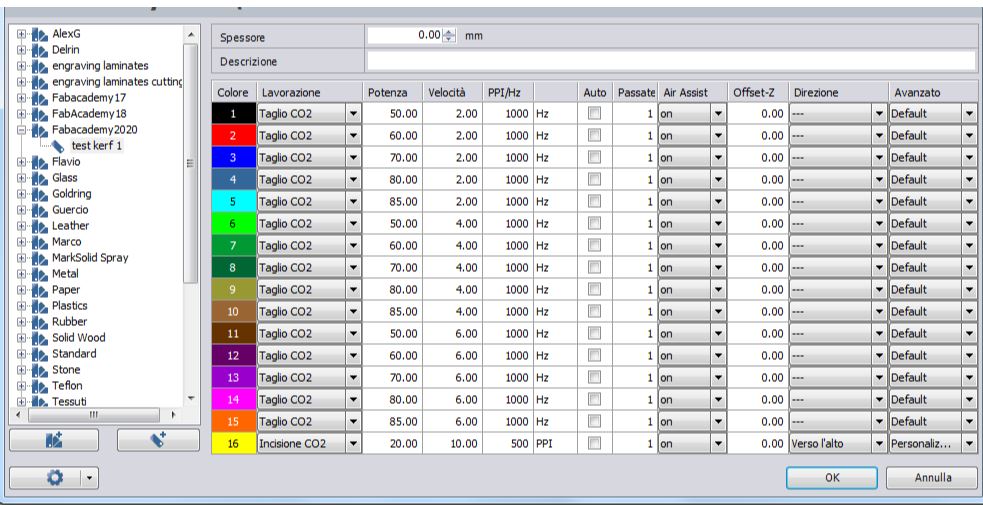
Back on Illustrator, we have assigned each square the color corresponding to the speed and power value using RGB values.
We had to divide our table into 2 parts because the maximum number of colors on Job Control was not enough. Finally, we also assigned a different color to the text by assigning CO2 engraving values predefined by the software.
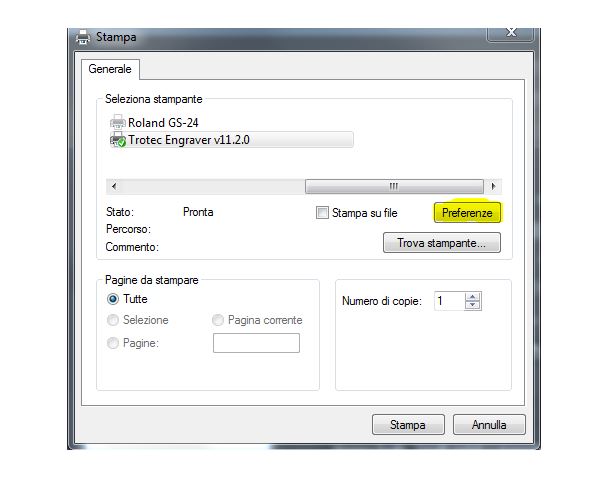
Once saved the file in the group job folder on PC, we gave the "Print" command, the "Ignore work table" command, we verified that the size of the worksheet was as desired (i.e. one millimeter more than the size of the file. At this point, from the Print window we clicked the "Set" button at the bottom left. At this point, another window opened and we selected the right "printer" (Trotec) and clicked on the "Preferences" button.
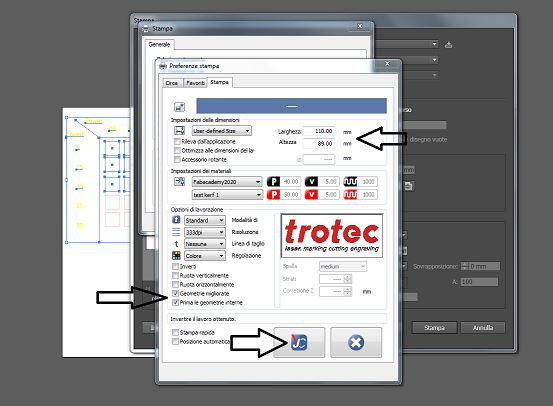
At this point another window opened where we could choose the Job Control folder previously created through "Material Settings". We checked for safety the width and height of our worksheet and that "Improved Geometries" (so the machine optimizes the space of the worktable) and "Internal Geometries" (so that the laser does not lose focus by cutting the external lines of the internal ones first) were selected. Finally we pressed the button with the Job Control icon. To be sure, we clicked "Set" and "Print" again. This opens the job on Job Control.
To see the preview of the work we pressed ctrl i, pressing above the file, in the bar on the left we could see the table with the colors and the respective working times. We connected the machine by pressing the "Ready" button (the icon with the cable at the bottom right). Now that the machine is connected, we can see the laser pointer cursor on the worksheet. ). To make sure that everything is in order, we have pressed the "Refresh" button at the bottom left (in the bar).
At this point on the machine: we have positioned the table on the worktable in a concave position and we have fixed it with rubberized paper so that it does not move and face any buckle that could change the actual measurements of our cuts.
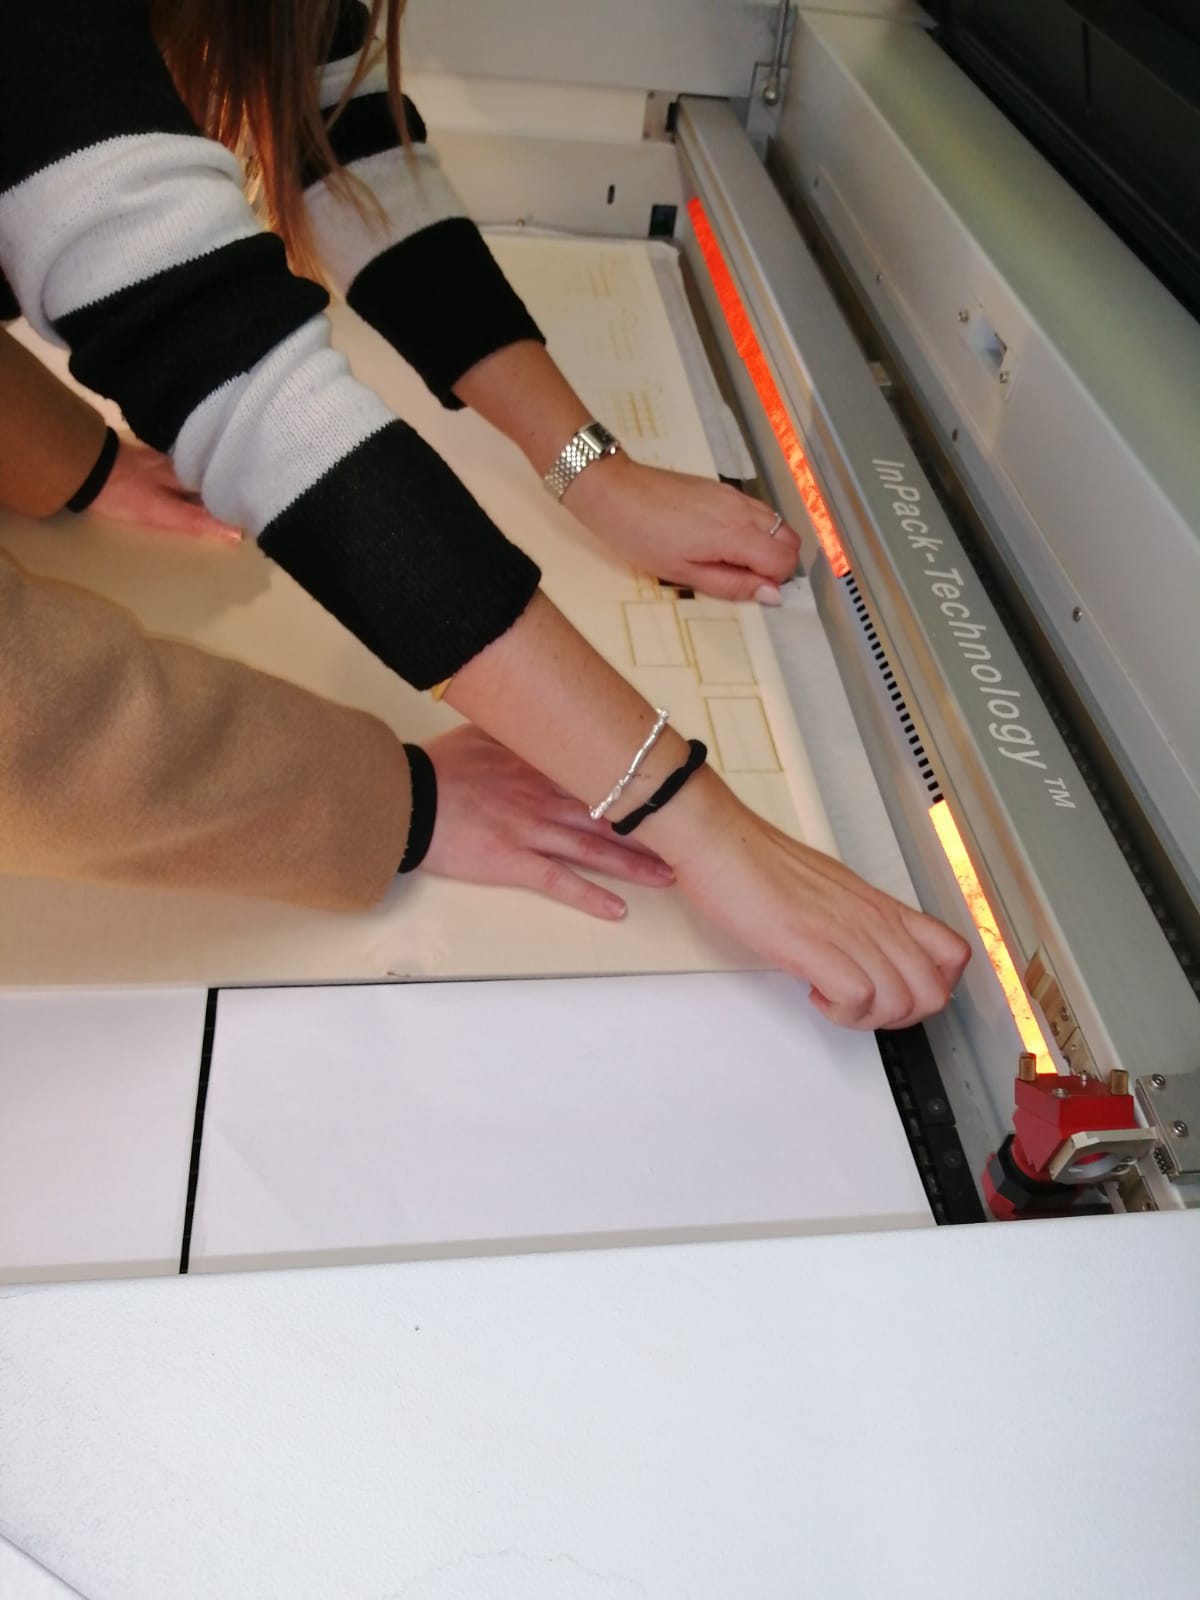
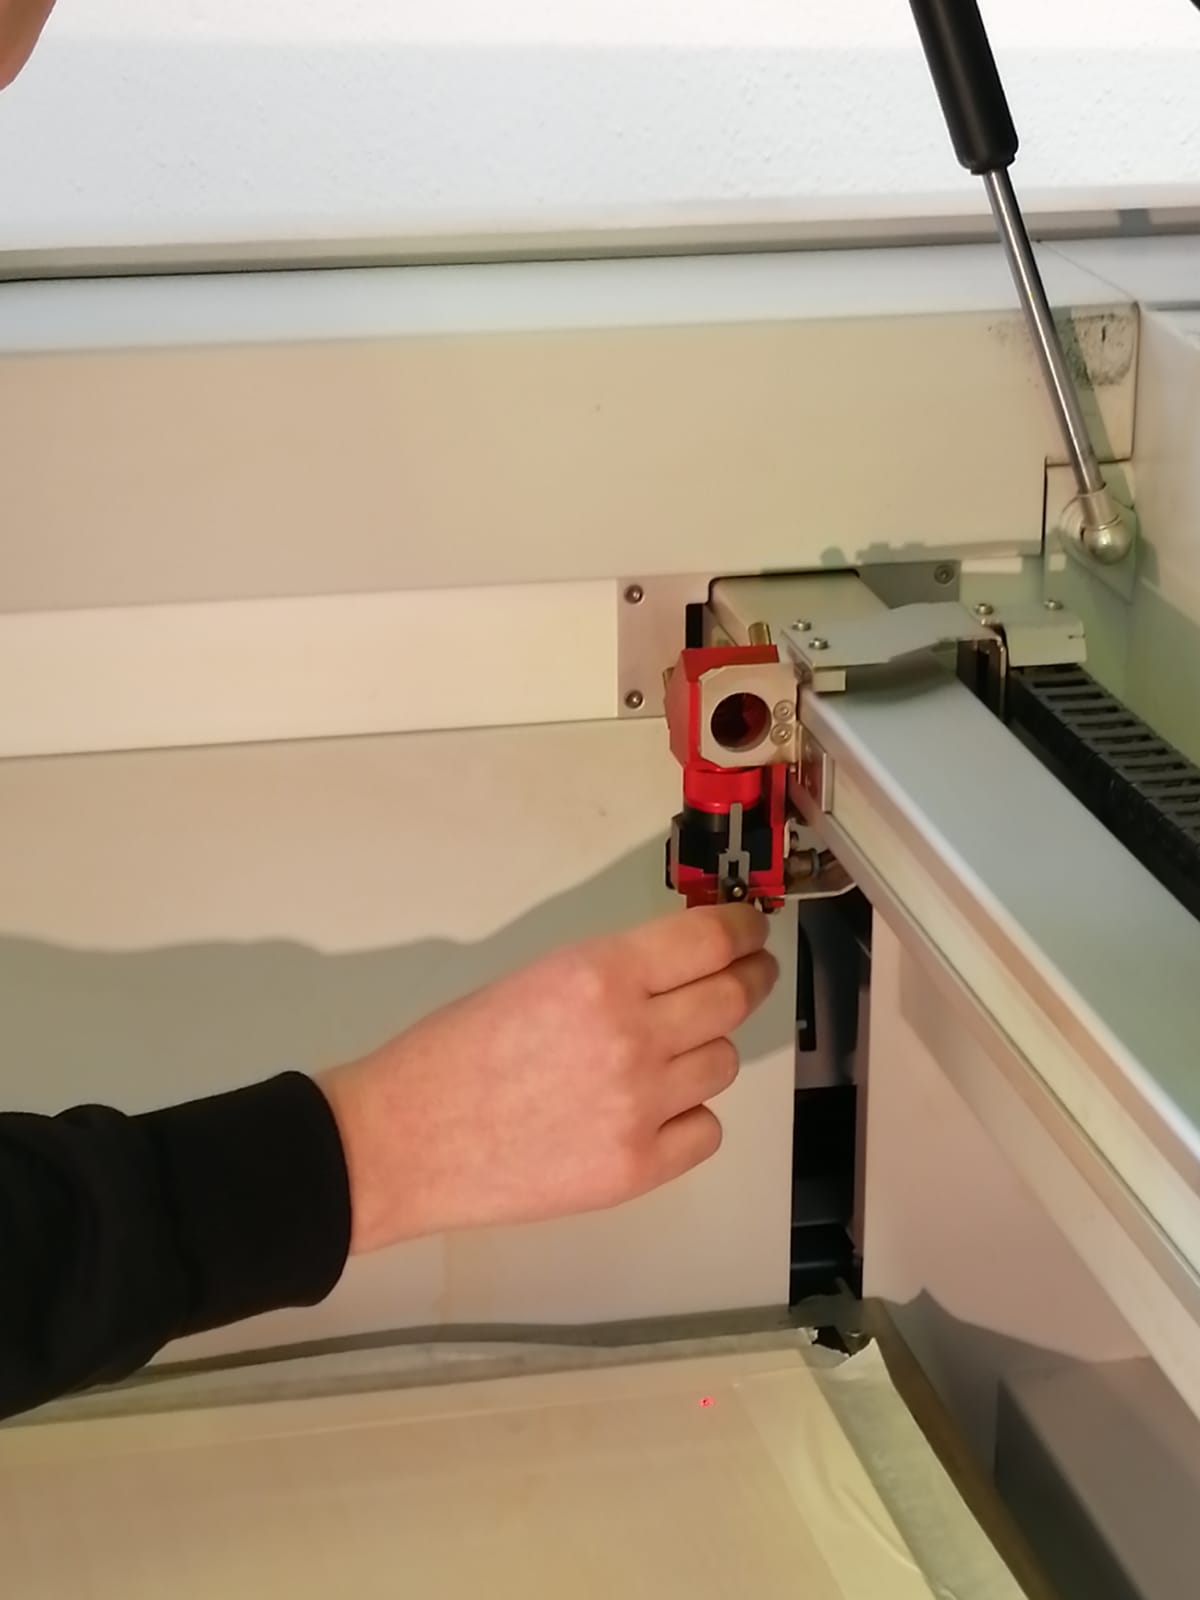
We then focused the laser by putting the appropriate "key" in the pointer and slowly raising the table until it fell. We positioned the laser in the most other point where we wanted to work.
We did an additional check with a simple rectangle cut 10 times.
We measured both the width and the height of each with a digital gauge.
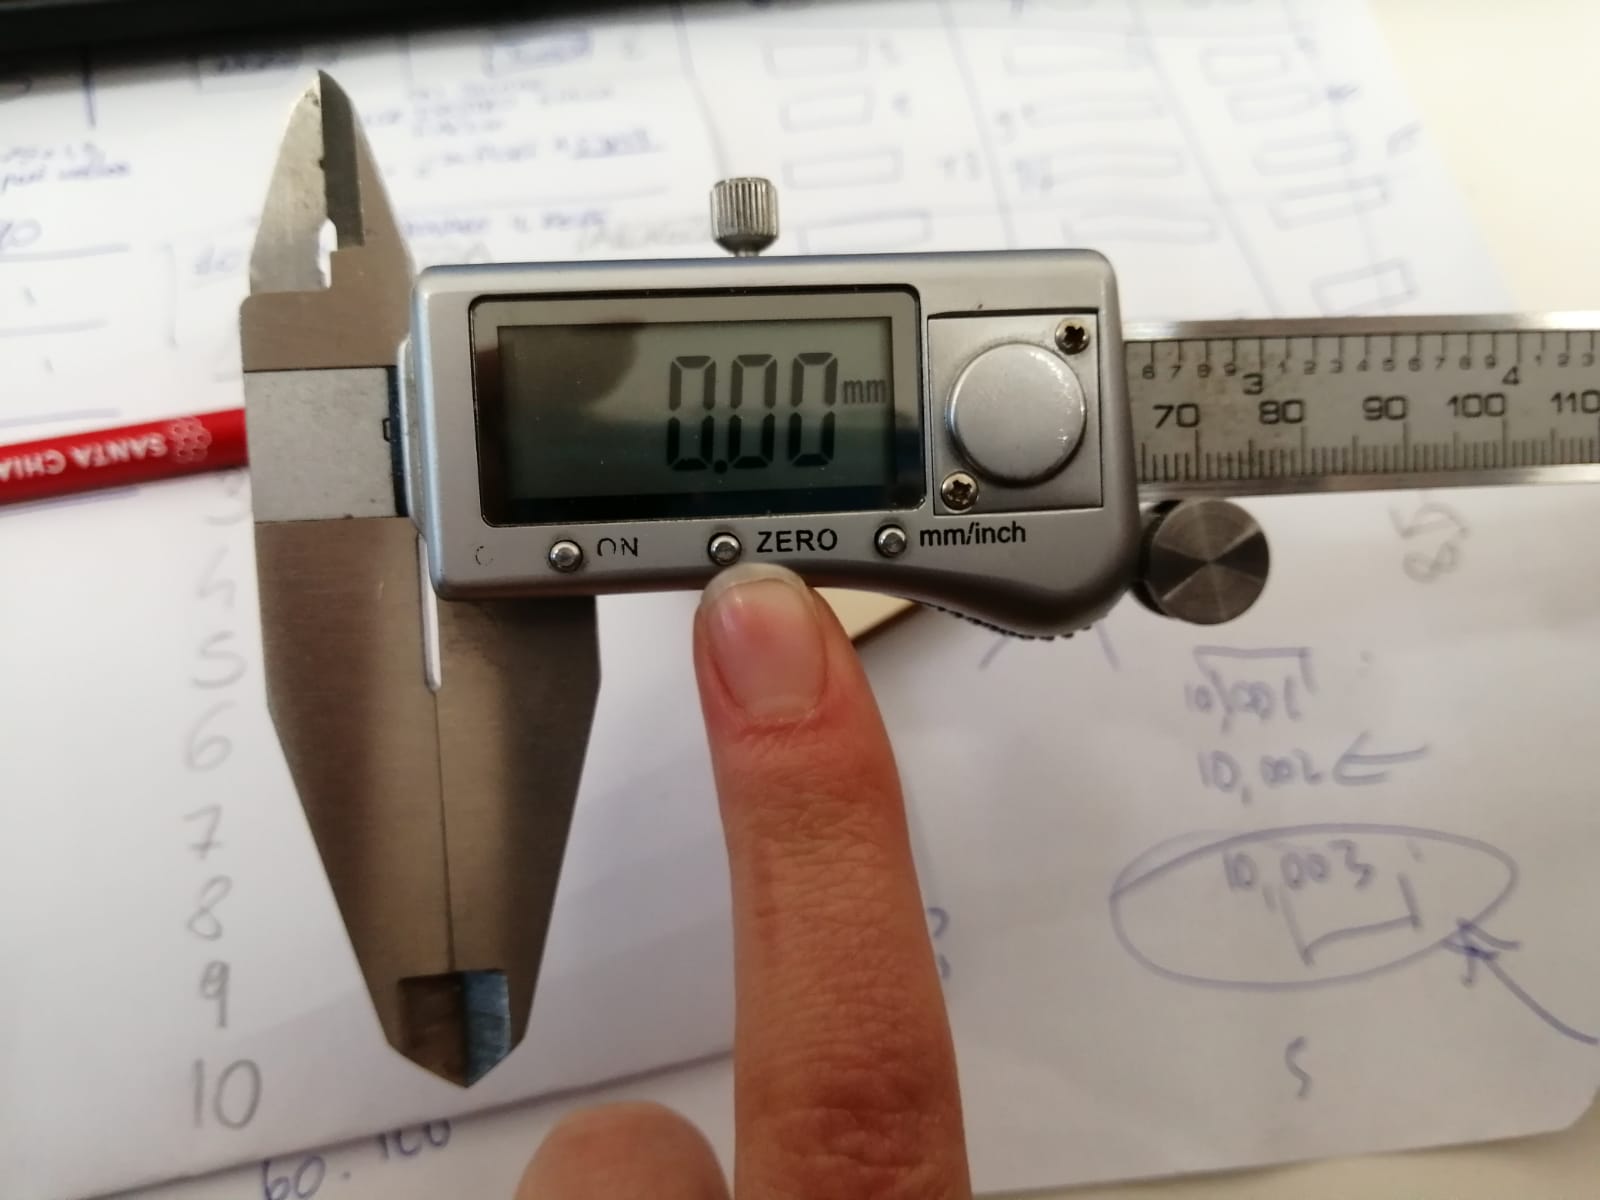
It turned out that they all had slightly different dimensions for a few hundredths of a millimeter. To calculate the kerf we then added up the widths of all the rectangles and divided the result by 10 (number of rectangles). The same procedure was done for the heights. The two averages were then added together and divided twice by two. Our kerf is therefore 0.0775. To be further sure we modified the kerf in a puzzle made with OnShape with a joint giving initially a value of 0.07, then 0.08 and finally 0.09 (taking as a reference measure 0.08, and then calculating a slightly lower and a slightly higher value).
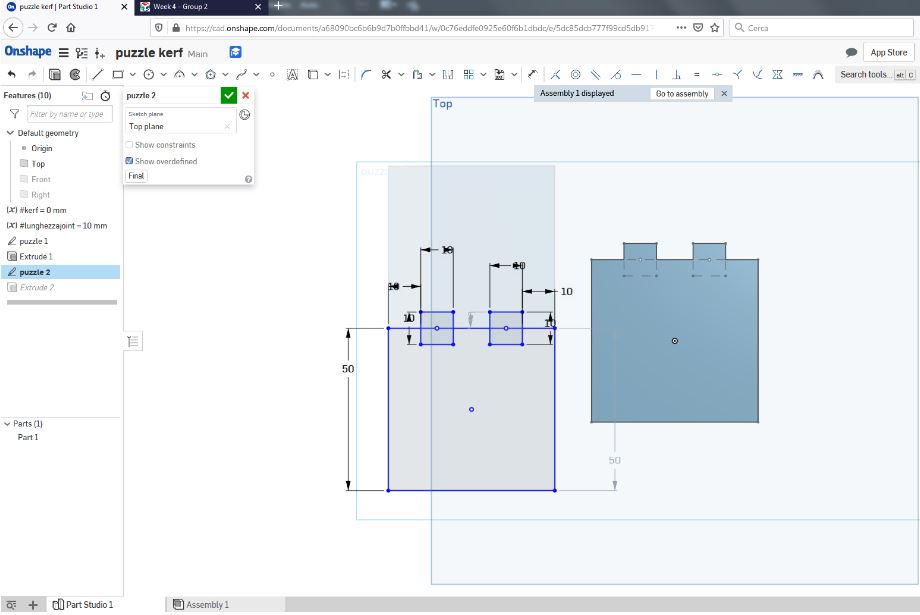
It turned out that on the first attempt all three joint worked, but on the tenth attempt none worked. So we increased the value to 0.10 and it worked! To be sure, we also tried kerf 0.11: we had to force the joint too much, which means it's too high, but on the tenth attempt the material started to give out a little bit. With a view to precision, we finally decided to insert a kerf with a value of 0.105. The interlocking was too forced.
On the instructor's advice, we tried a value of 0.095 (a middle way between 0.09 and 0.10) and it worked!