Week 17
Mechanica design, machine design

First of all, I would like to introduce the amazing crew of Fablab Iceland, students and instructors: Gísli Snær Guðmundsson, Hafliði Ásgeirsson, Thordur Hjalmarsson, Arnar Daði Þórisson, Vilhjámur Magnússon, Magnús St. Magnusson, Aida González Vicente (me) and Jón Þór Sigurðsson.
This week we met in Fablab Akureyri to work together on our projects and on the machine design and build.
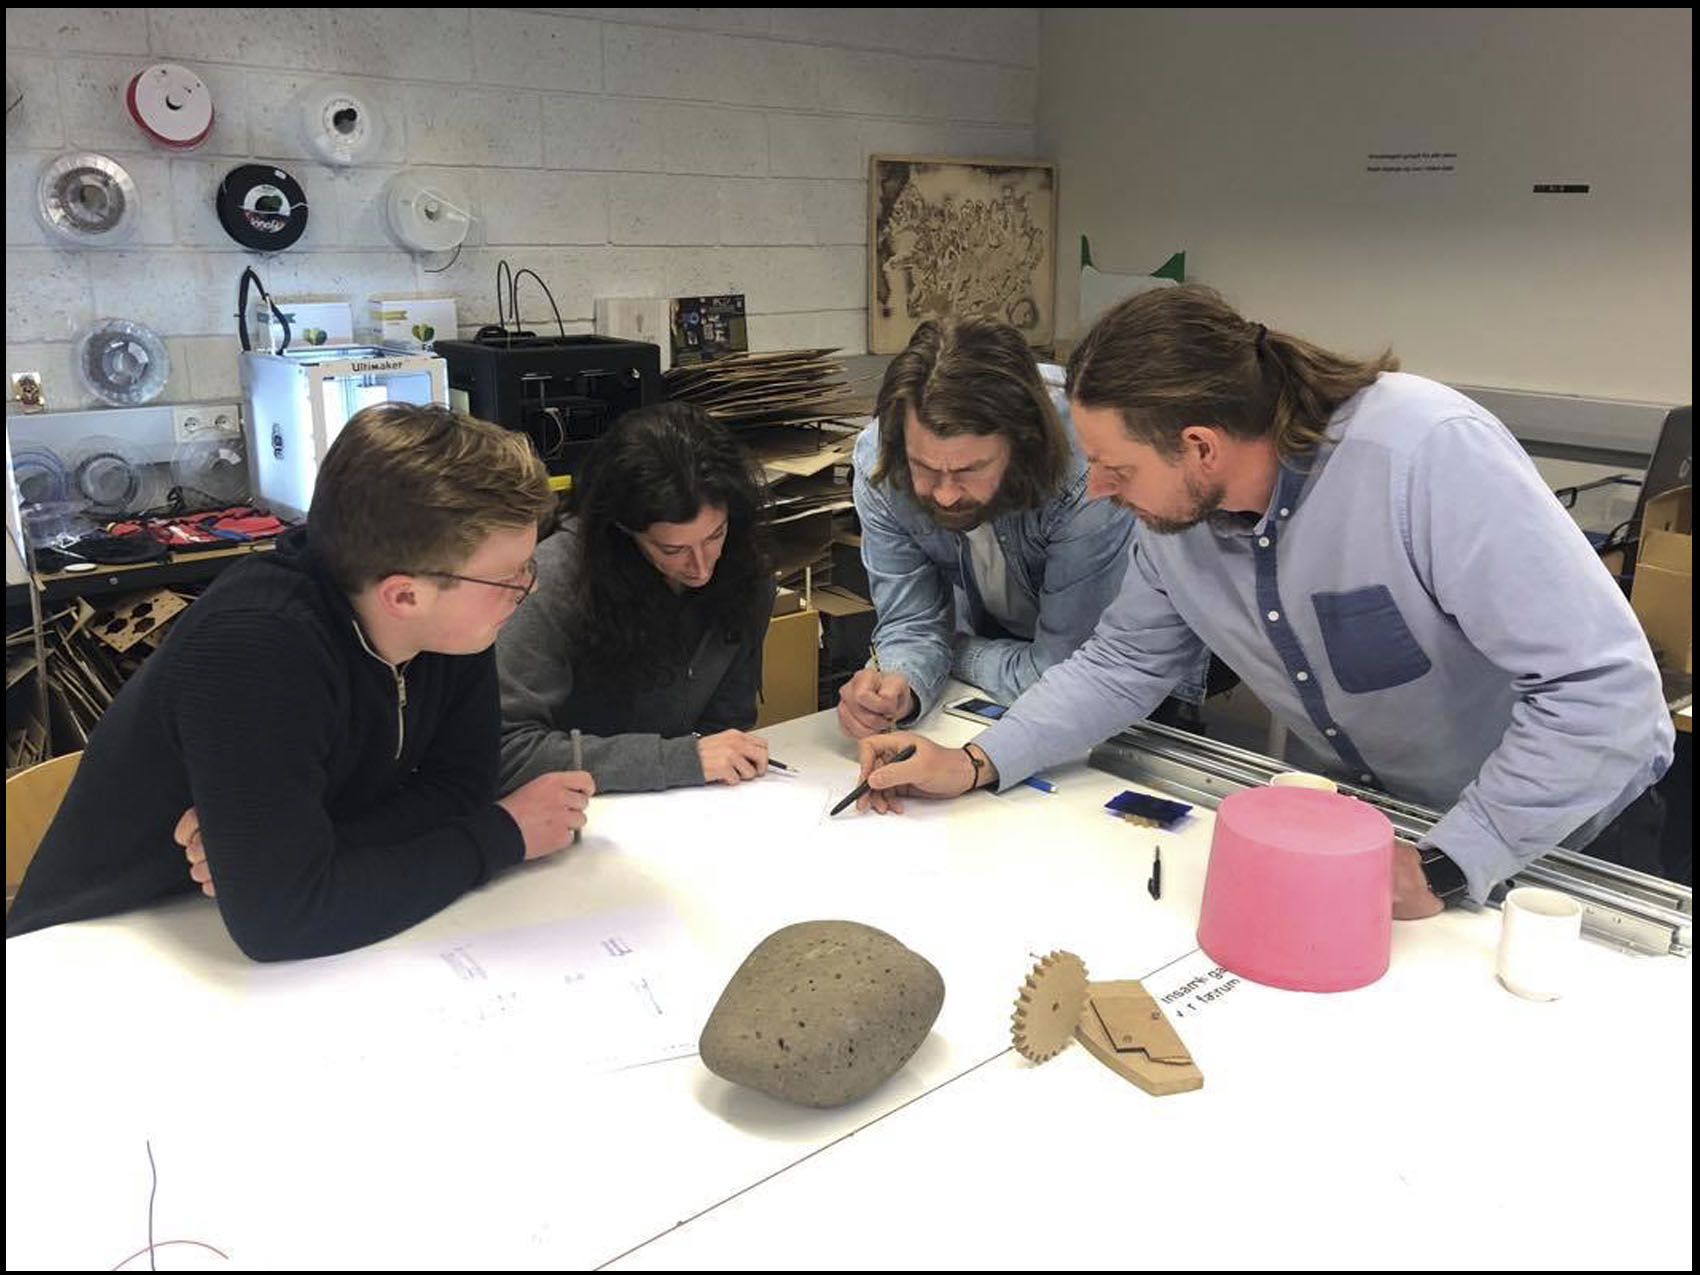
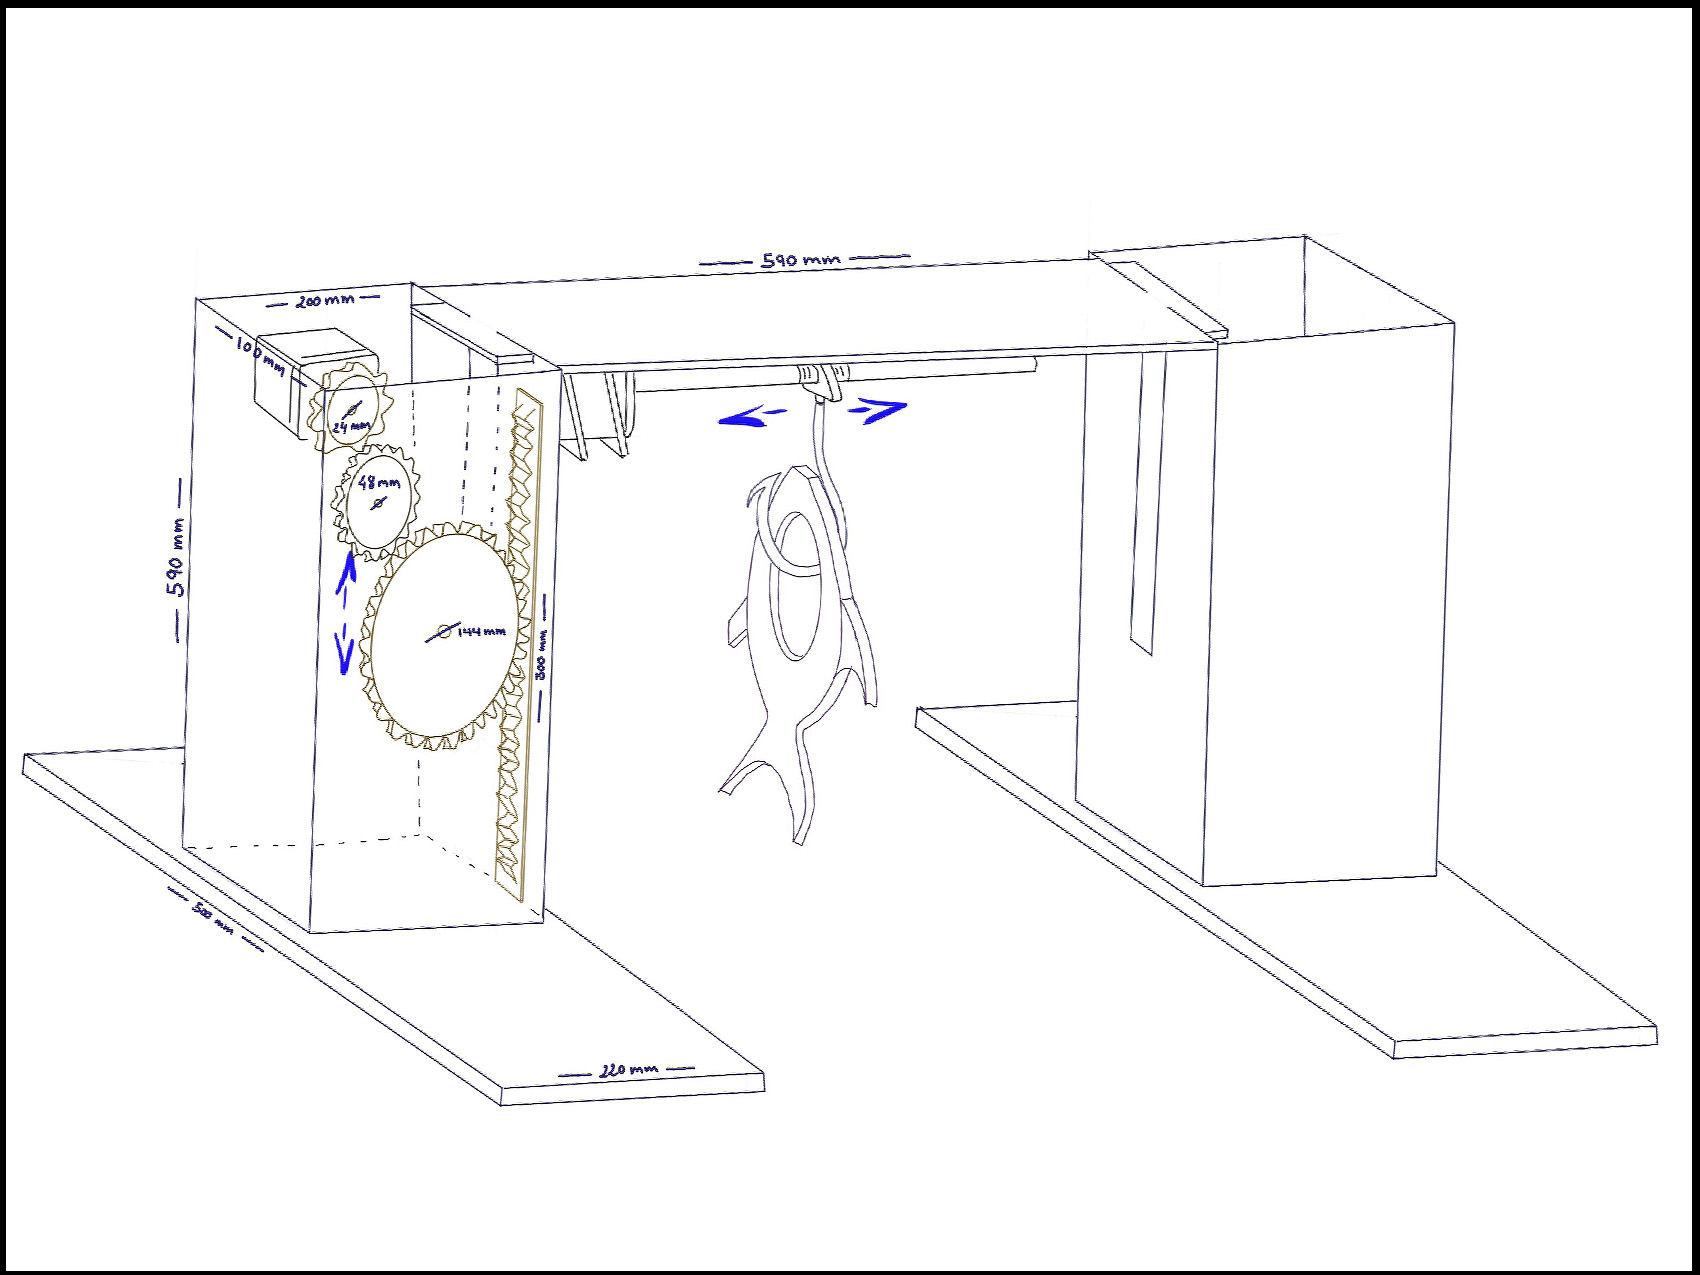
After a brainstorming, we decided to keep it as simple as possible but good and usable for another project’s development. That is a challenge. So, we came up with a preview sketches where you can see a structure is able to up and down with a hook at the middle that is able to move right and left.
Once the sizes and the material are decided, we divided the work between the four members of the groups. On one hand we have two of us researching about how to use a TinyG, the step motors, the power and the programing. And on the other hand, the other two designing the frame and the gears. We decided to use fusion 360 to be able to see the design on 3D.
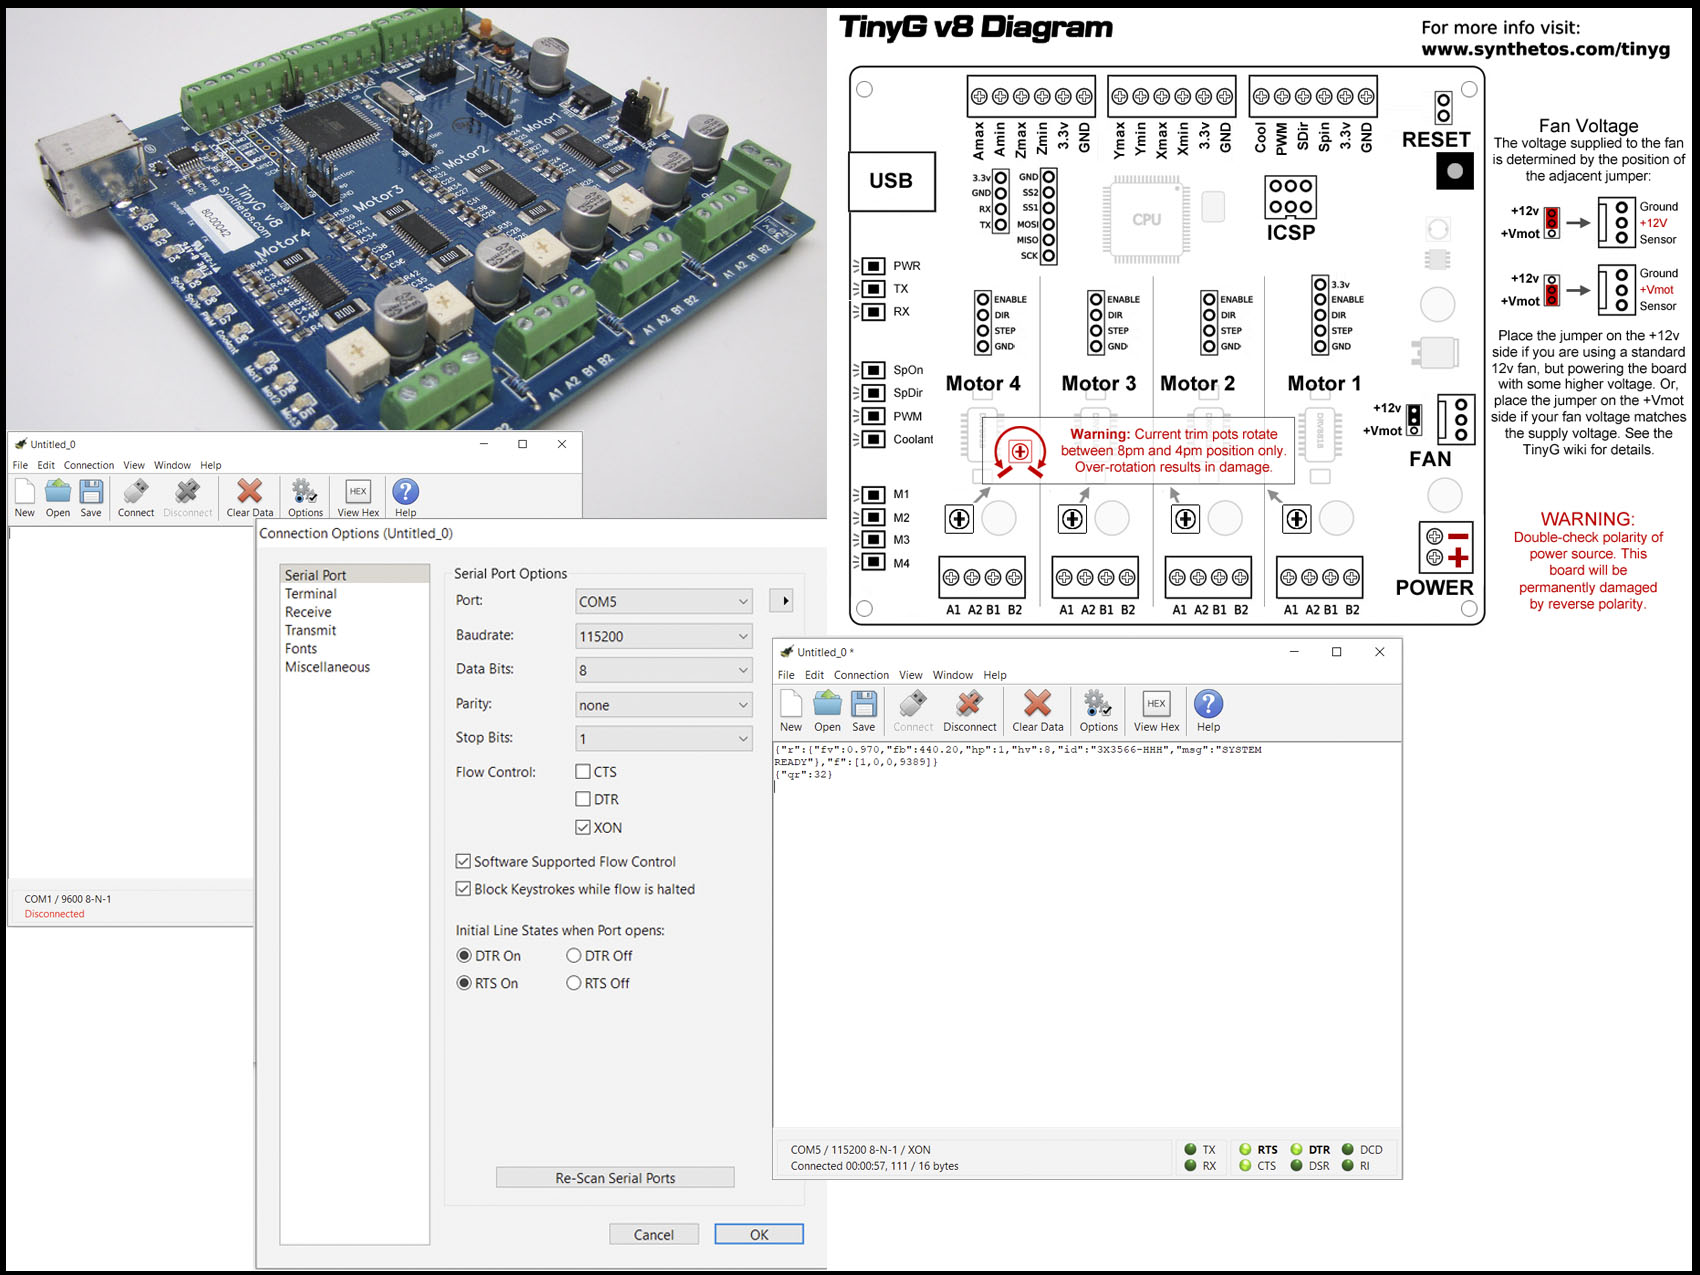
The first group was developing which kind of electronic will able to fit in our machine. After a couple of test they decided to go forward with the TinyG. However, they need to communicate the machine with the electrocnic and study how to move and control using the computer. On that case helps the Chillipepr that is a hardware fiddle, this means: a website that lets you create a workspace to fiddle with your hardware from software. Our research for this came from the Icelandic FabAcademy group of 2018
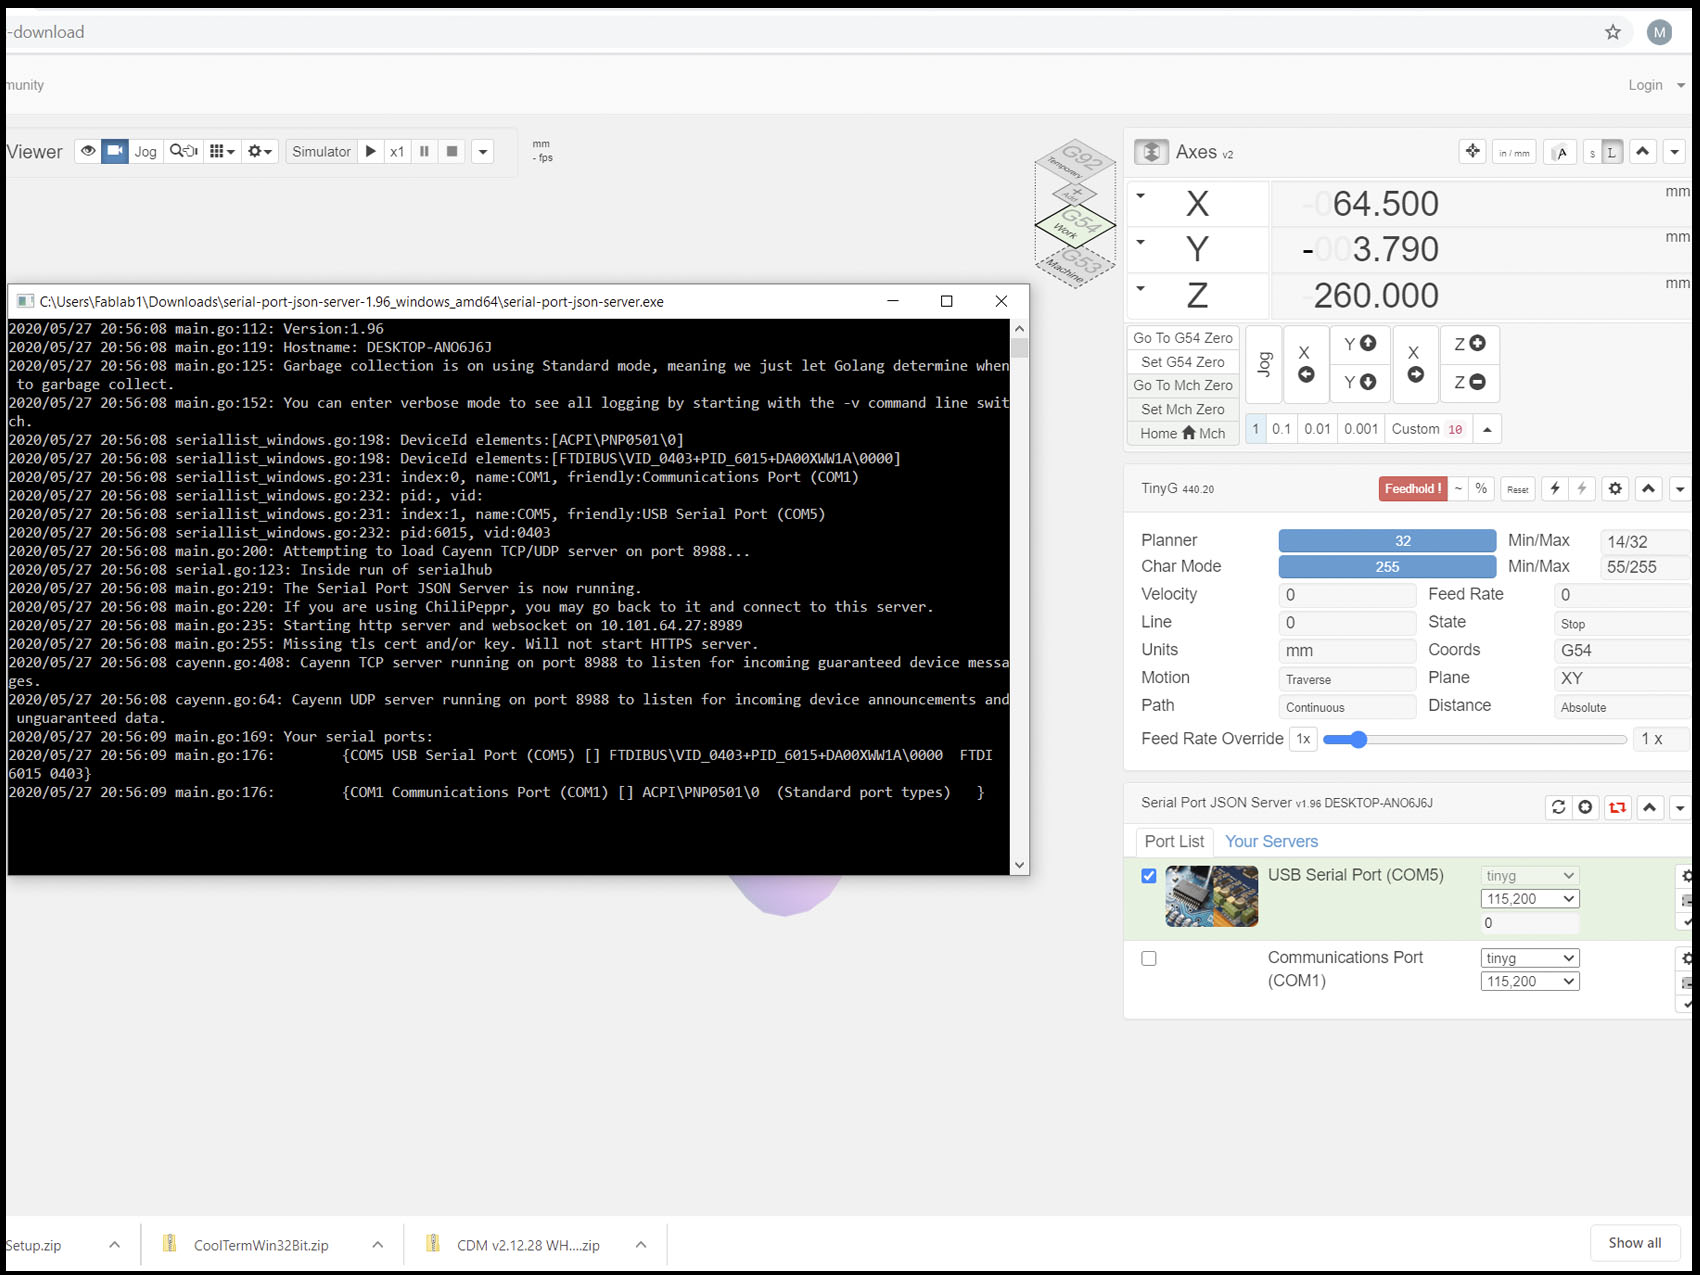
Chillipepr is quite intuitive but it is important to set the port. Once, you connect TinyG and follow the steps, you have the power:
And on the other hand, the other two designing the frame and the gears. We decided to use fusion 360 to be able to see the design on 3D.
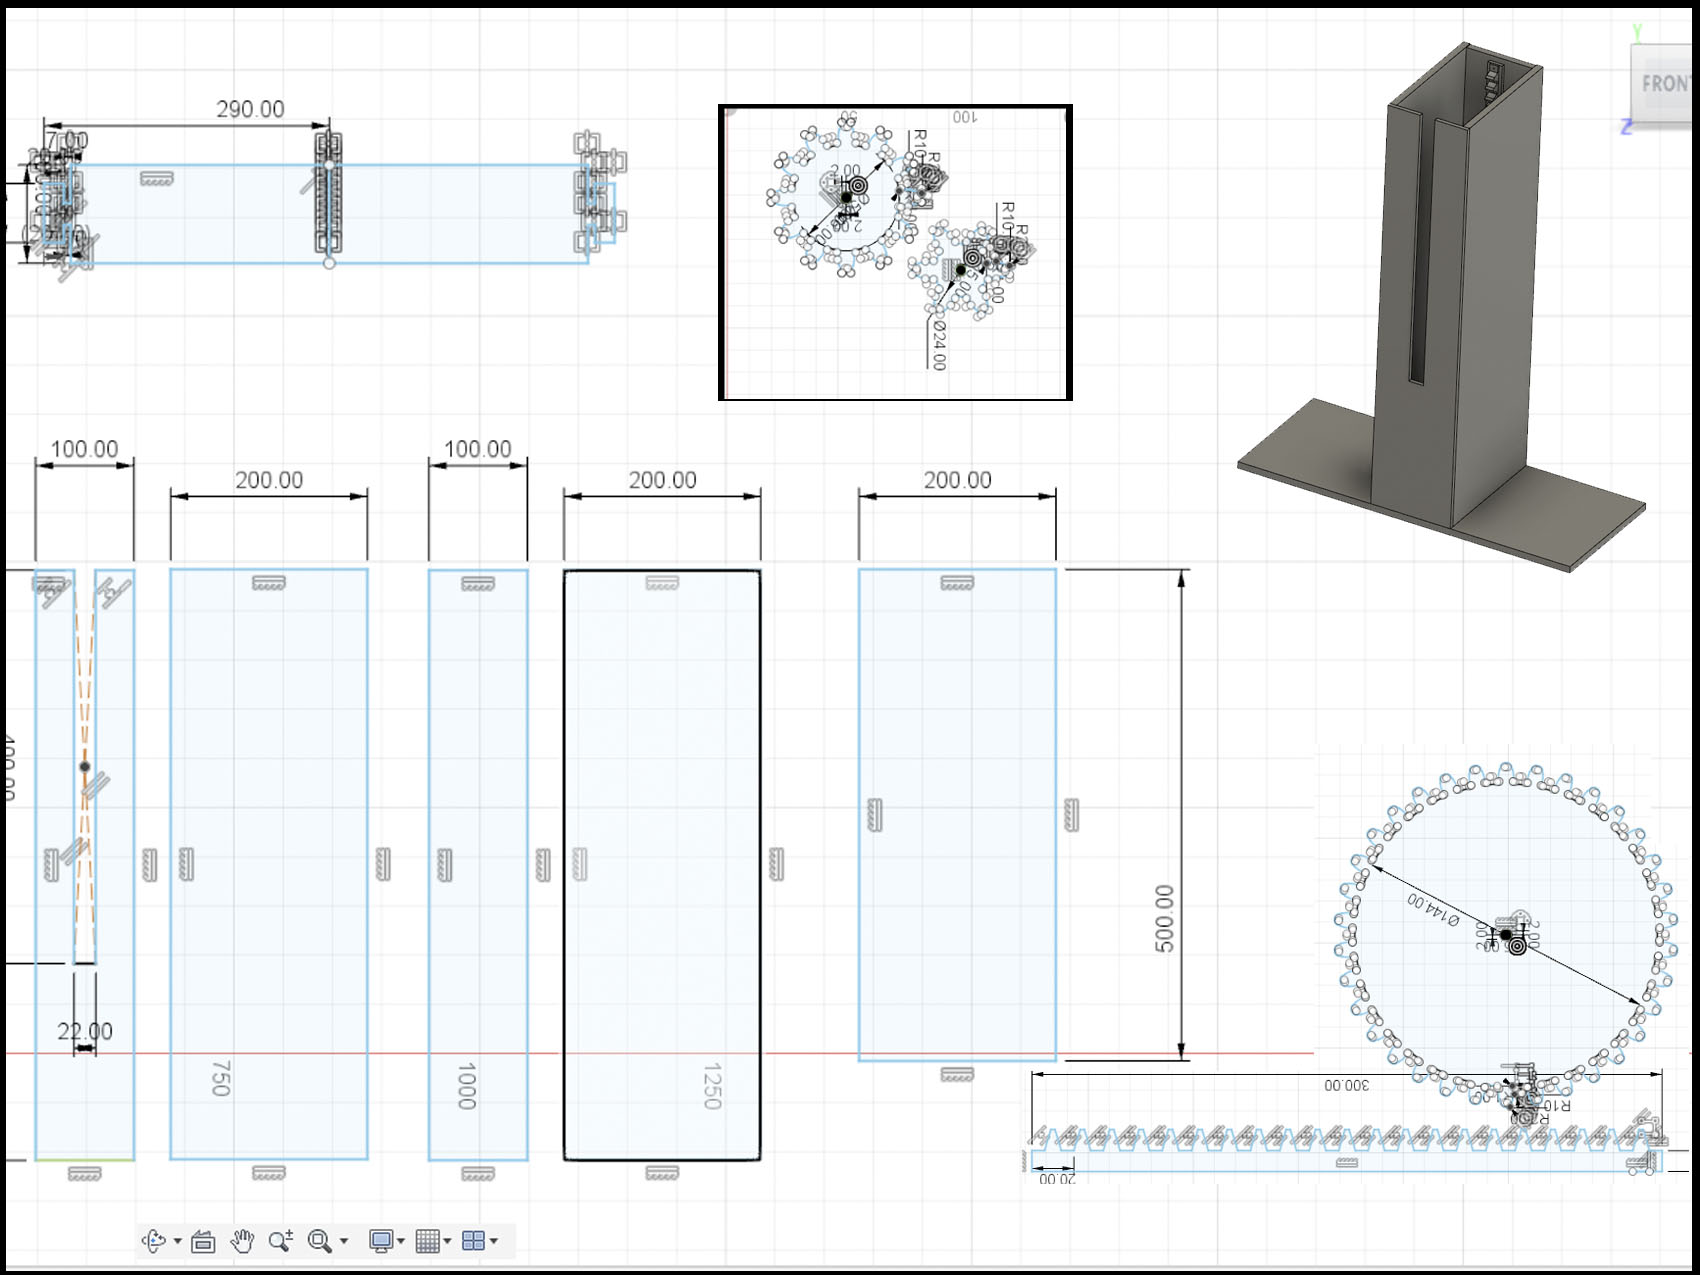
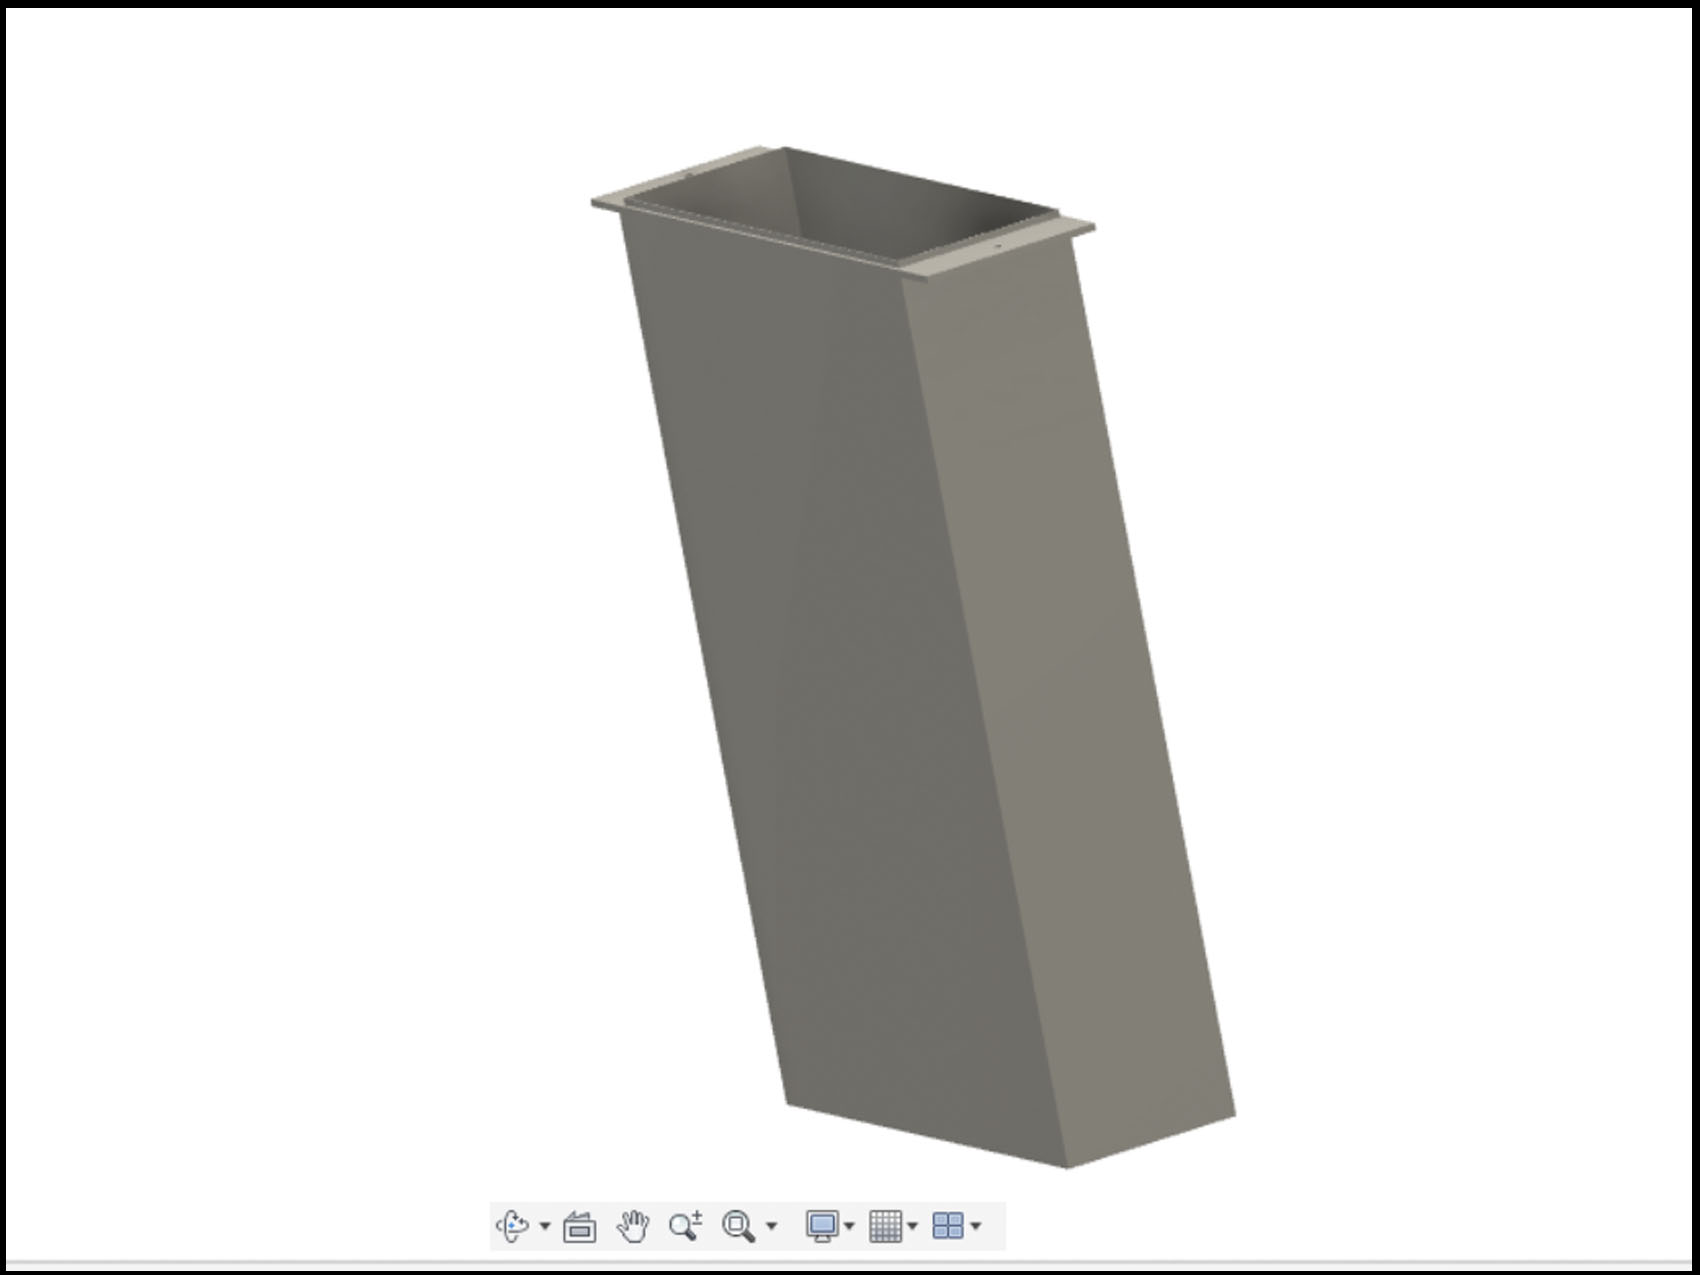
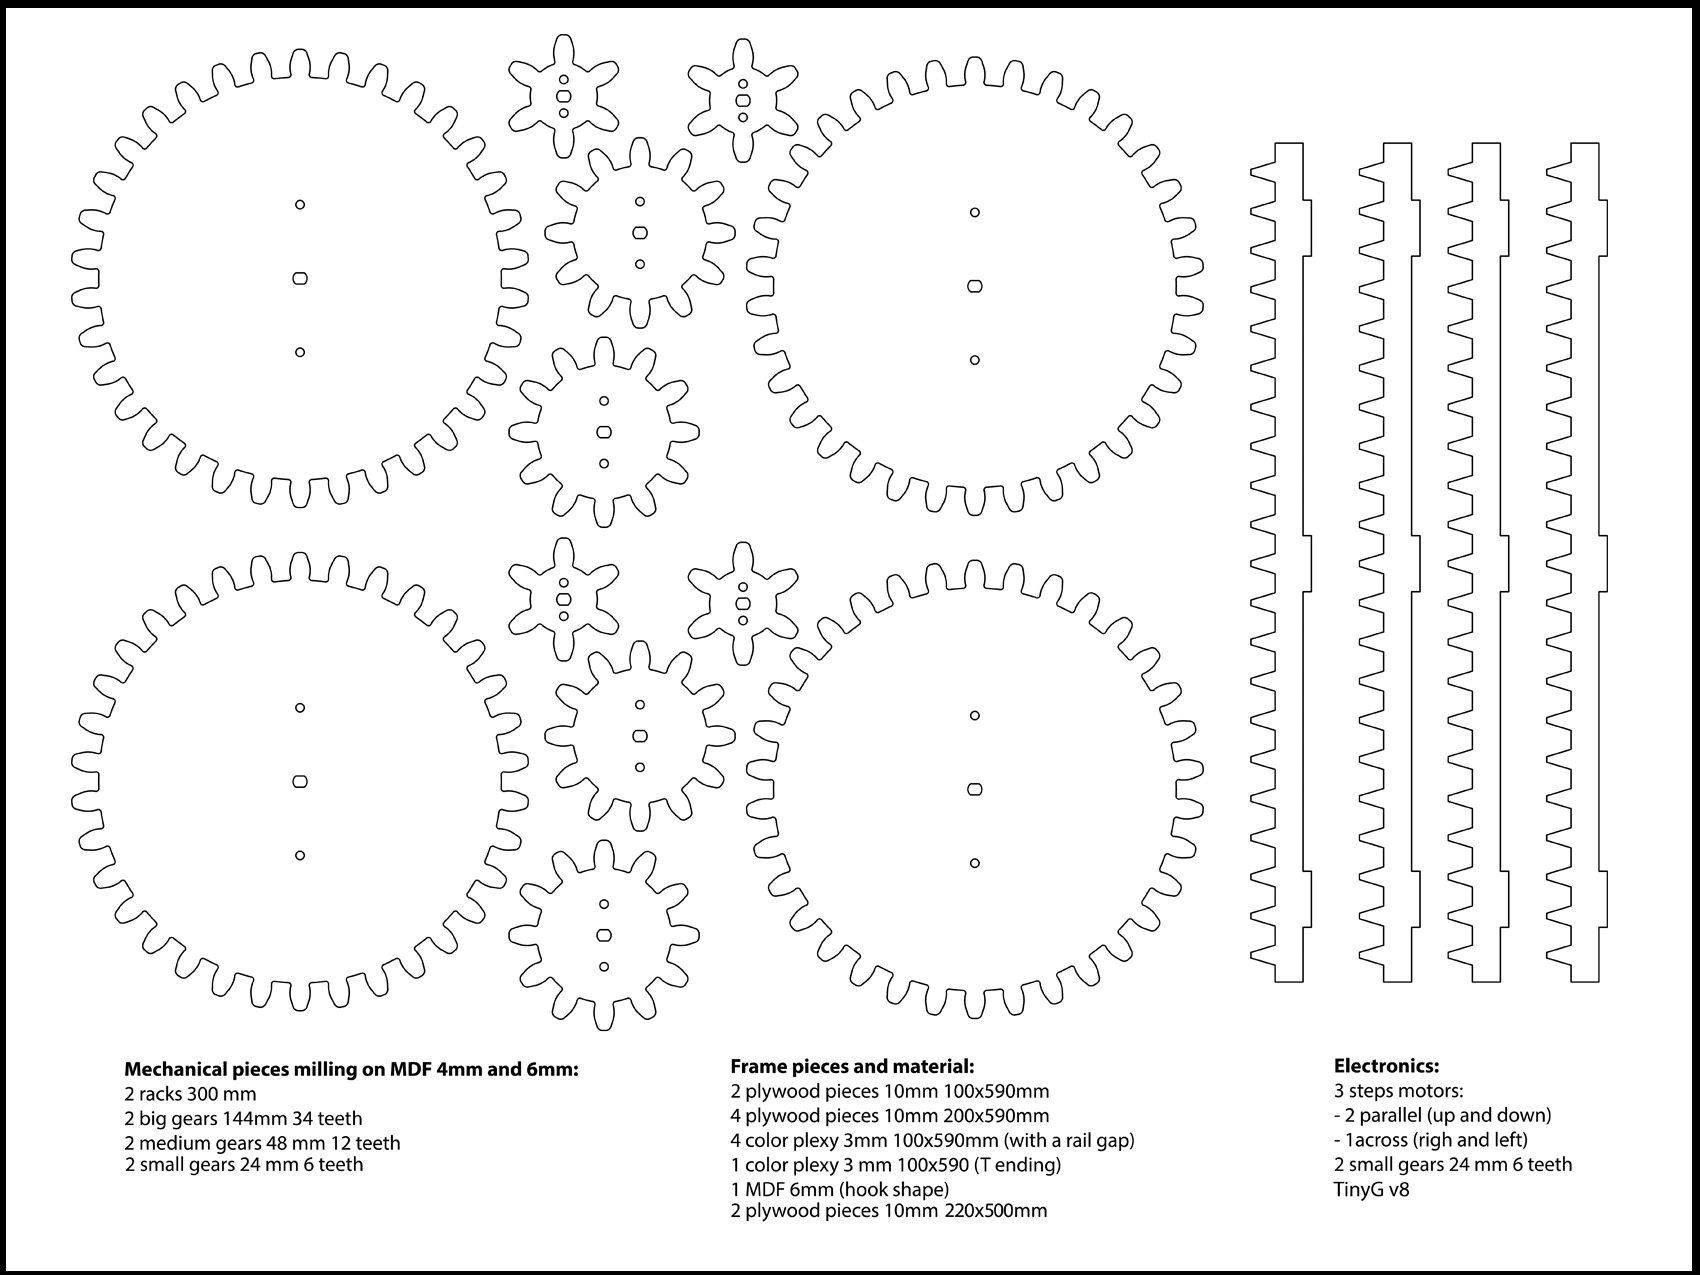
While that part of the group was pursuing the target, the other part, the one I was in, were sketching and testing different material for the gears that will move the machine. Nevertheless, the first steps taking after the sketch were to design the machine on Fusion360 and see it better on 3D. To save milling time we decided to do it with a material that we can laser cut, glue and screw together without problem and also cutting directly using the old fashion way, handmade. On the picture below, you can see with more details the materials used.
Even if we make a big step, it was a lot of work more to do. To assemble the pieces together, the group split again because we still with the problem of the gears and the racks. Because of the main problem of my project were the racks and the way to move the table up and down, I offered myself to keep going on that way. Using Fusion360 I designed and tested different gears with the respective racks to go through: MDF, plexy, plywood...
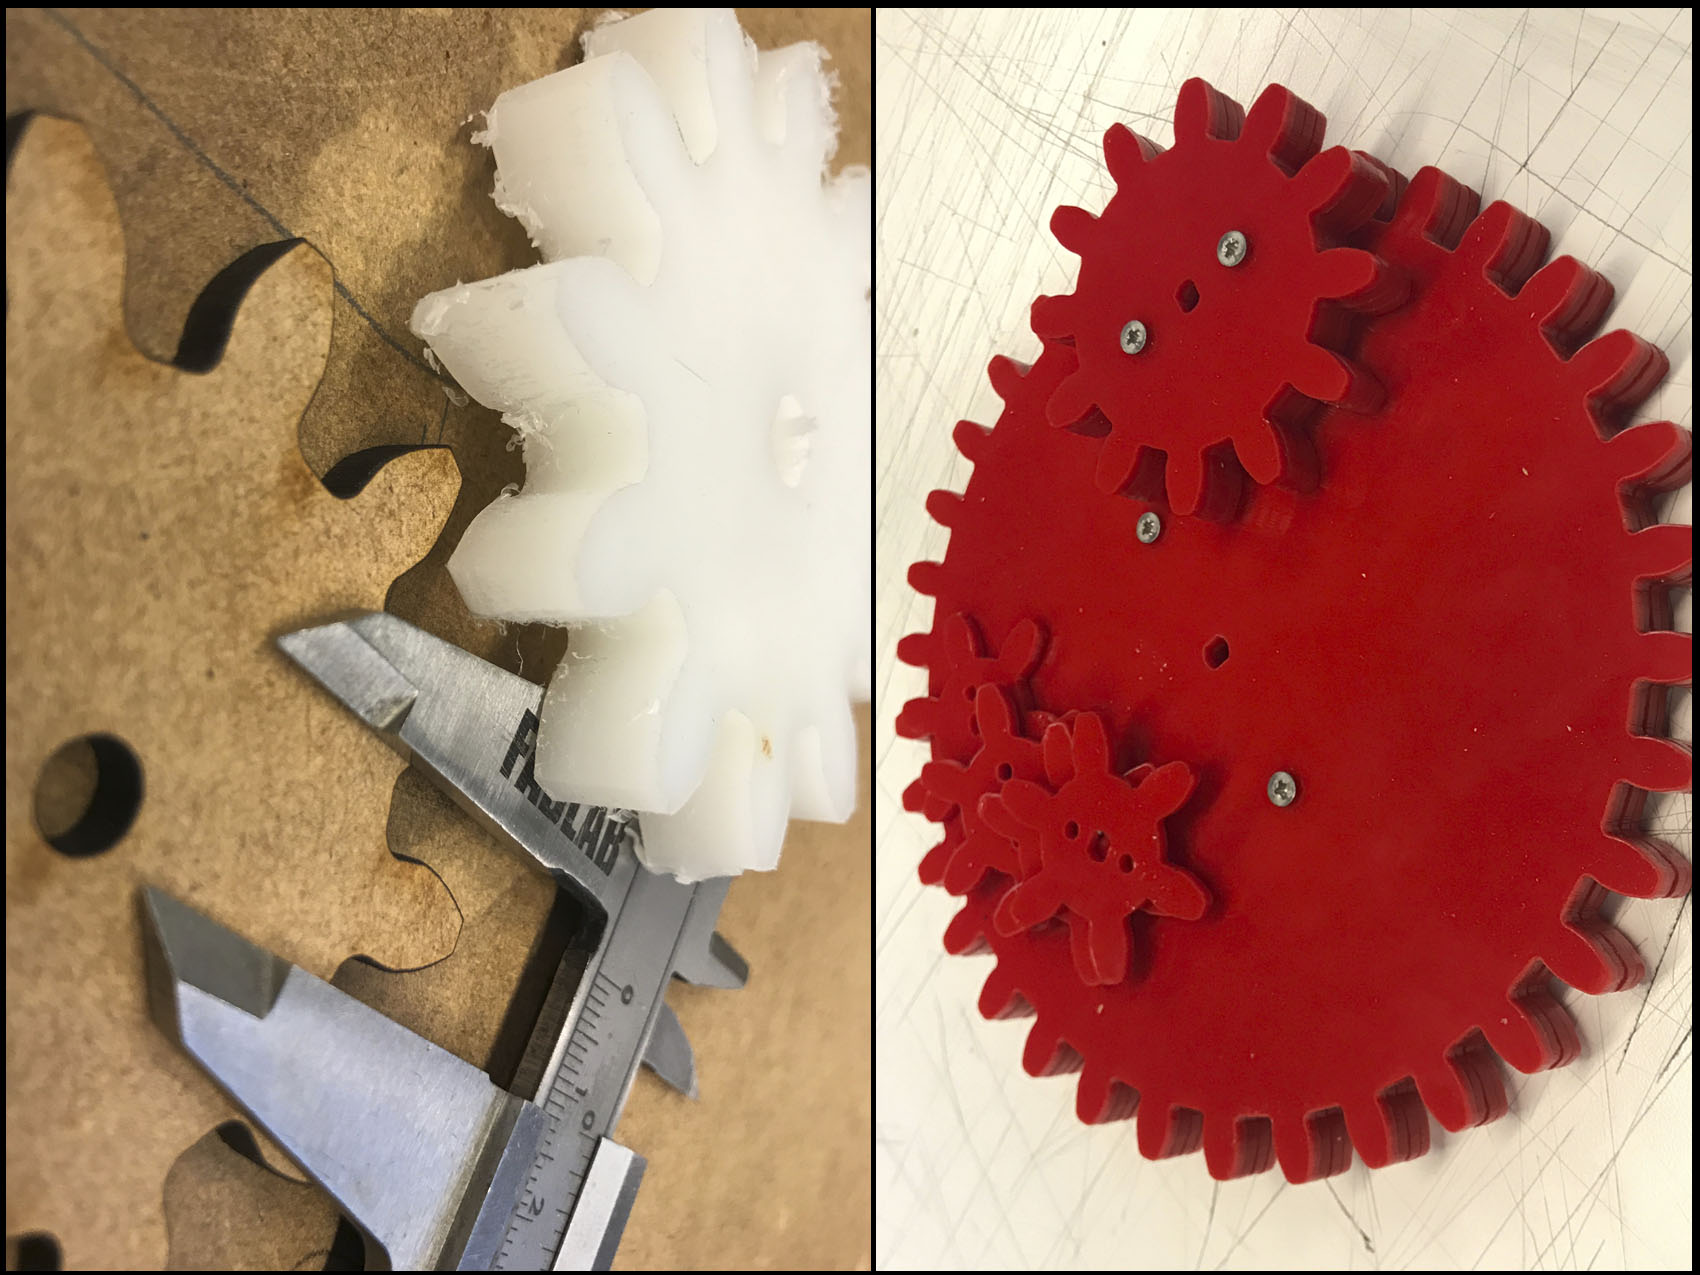
This picture shows some un the tests. After of the test we decided that the one with less friction that the force of the move can create in addition with the material used.
The machine looks like this:
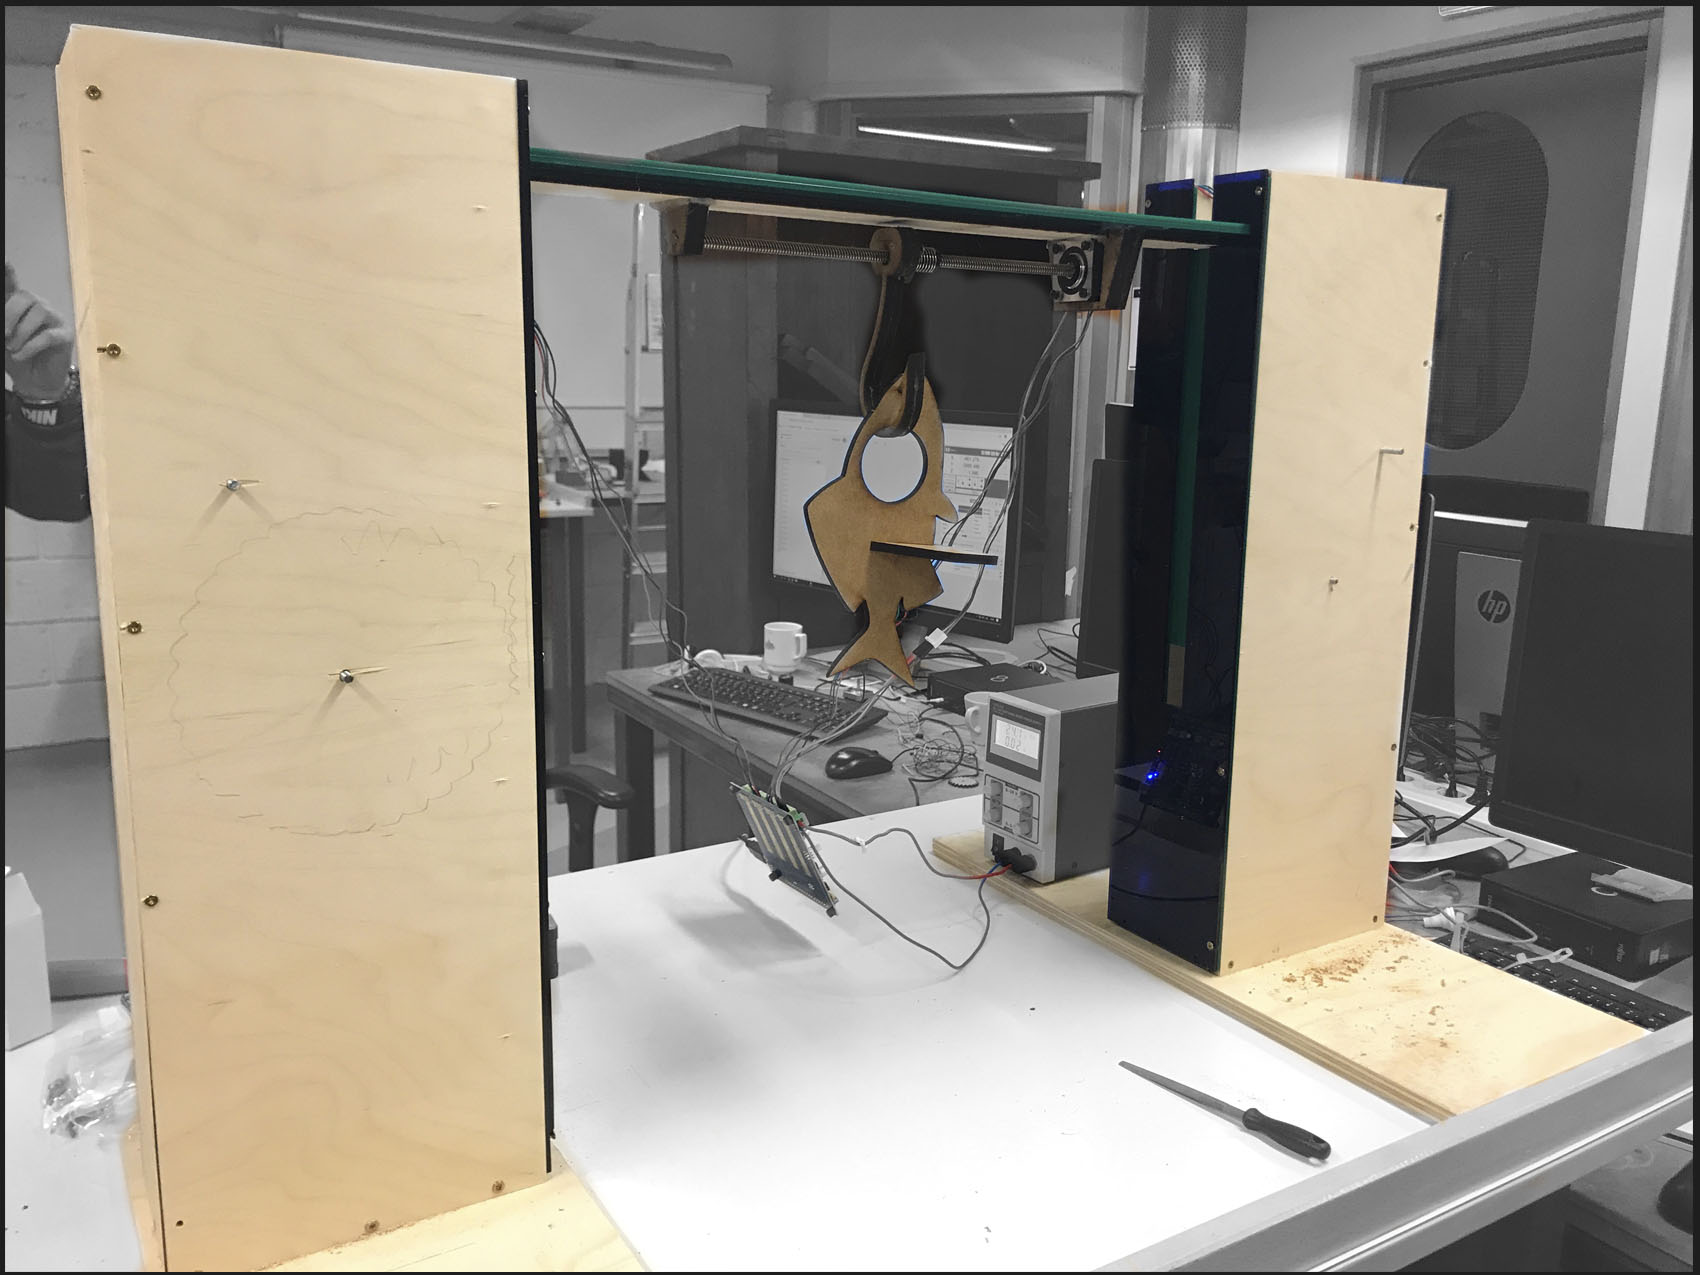
Now, it was the time tested:
On the video we can see how we can control de machine to go down. The mask video shows how the gears and rack work to go up and down shortly. However, when we got the fish, we discover that the frame and the fish together were so heavy to lift it up.
This research with the group about the machine helped me to develop the movement of the mirror and how could be possible to lift the table of the final project up and down.
Although I had to forget about the legs lifting, it was good to see how the hook on the machine was turning around, that meant that on my project, the mirror will need a case to stop that movement on the moment that it is going up or down.