Computer Controlled Cutting
Week 03
Machines and Materials
Softwares
Files
This week we started working with Computer controlled cutting, first we used a small version for vynil, the we used the laser cutter and next week CNC Shopbot. For the Vynil Cutting at QBIC Fablab we are ussing the "Silhouette Cameo" you can check them in Silhouette's website. and the software for it is called "Silhouette Studio" and it can be downoad from their website for free. Silhouette Studio.
Group Assignment
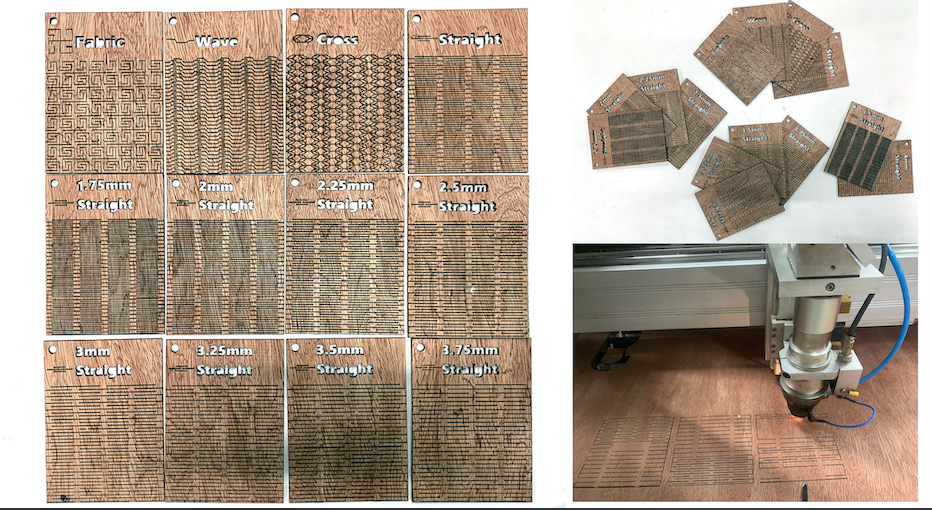
For the group assigment we tried different materials and we did kerf tests. First we used 4 mm cardboard and then plywood.
1- First one of my colleagues made a design to test the fit of the 4 mm cardboard and then we exported it to DXF

2. We opened the file in "Lasercut" and set the parameters. The we donload it and finally export the gcode.
For cardboard we use speed: 100 power: 20 engrave: 100
2- Click on input format and choose (image.png)
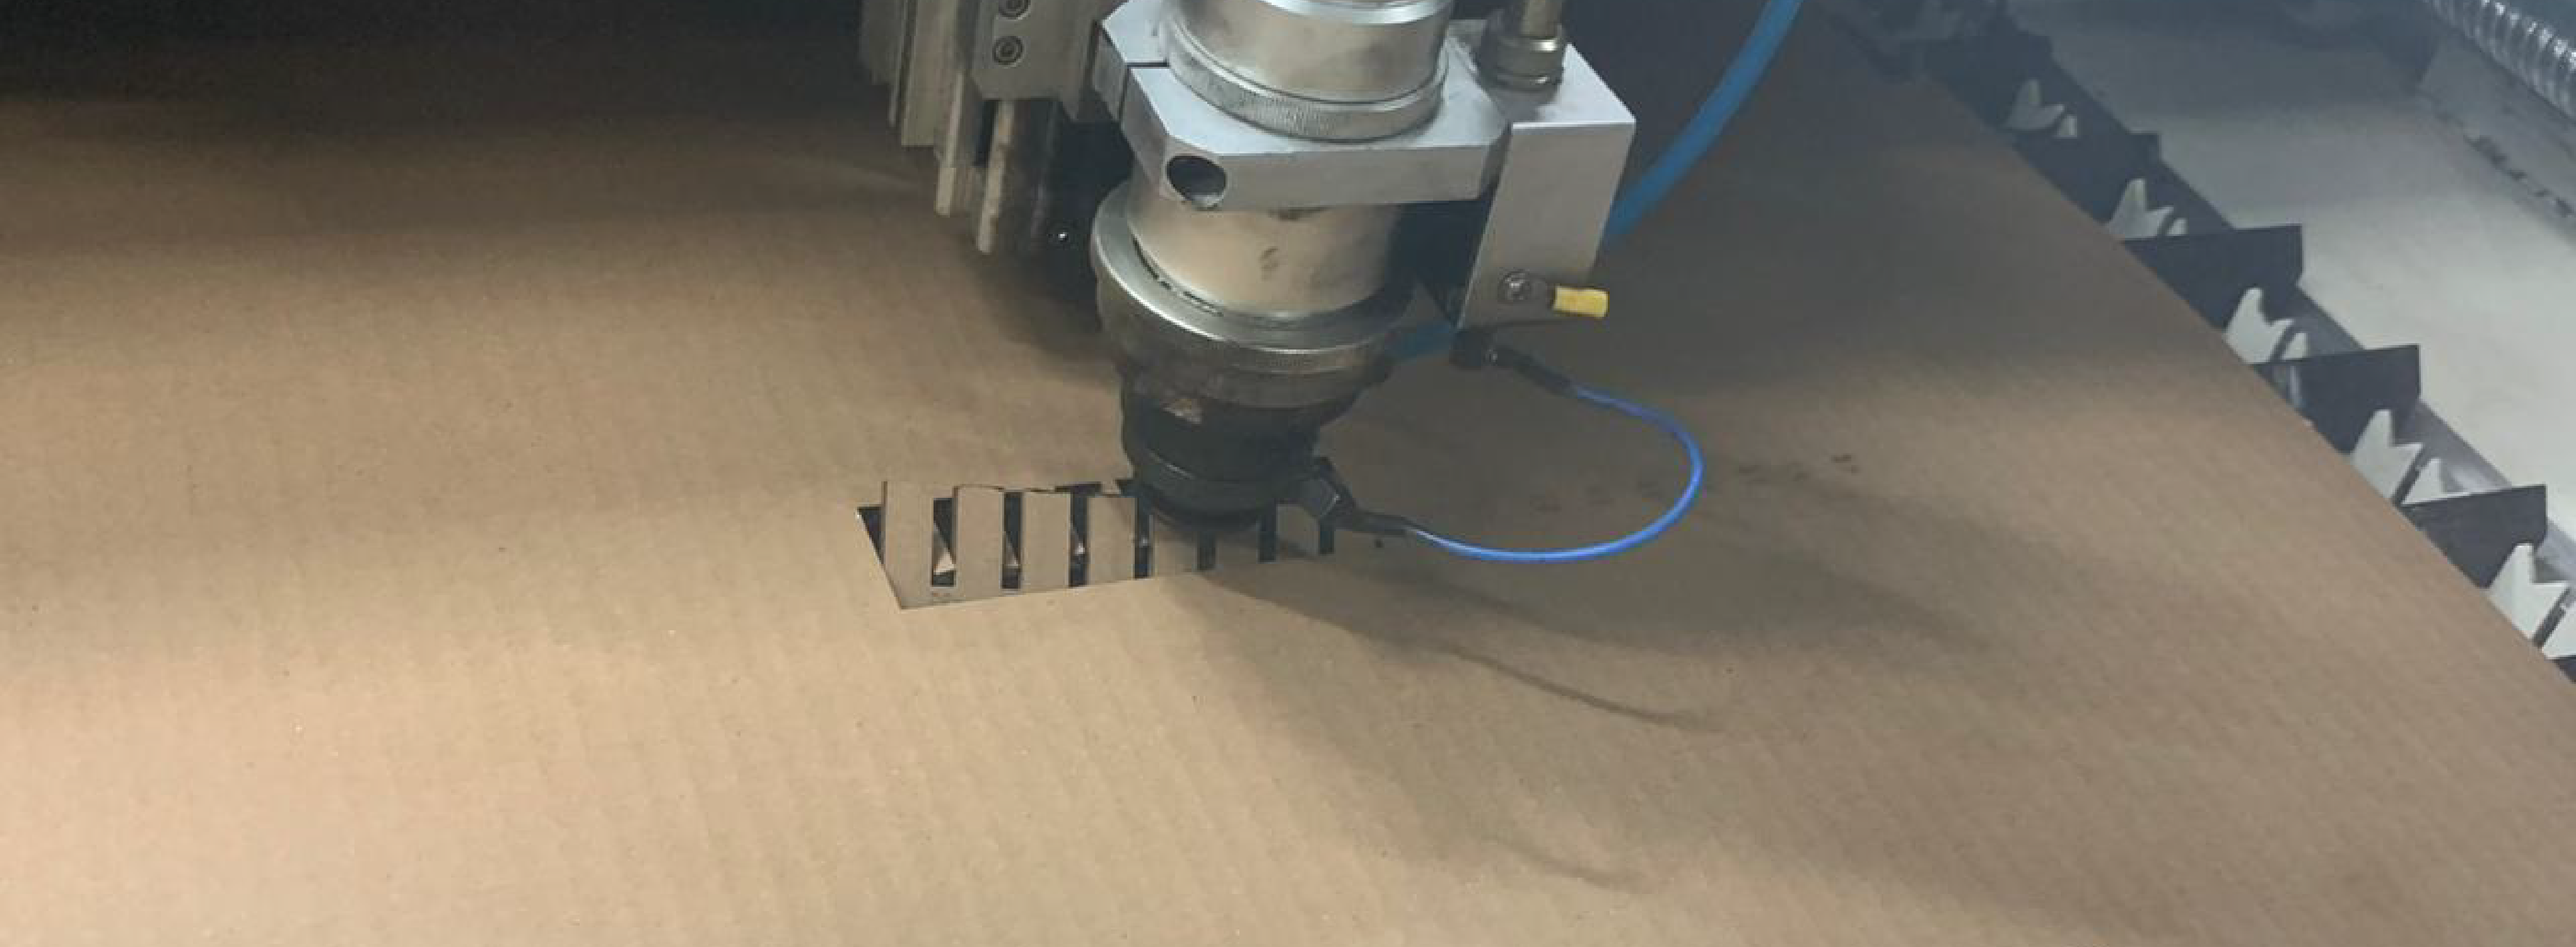
3- To start cutting we need to follow a few steps, turnin on the power, the compressor and the machine.

4- Time to cut!
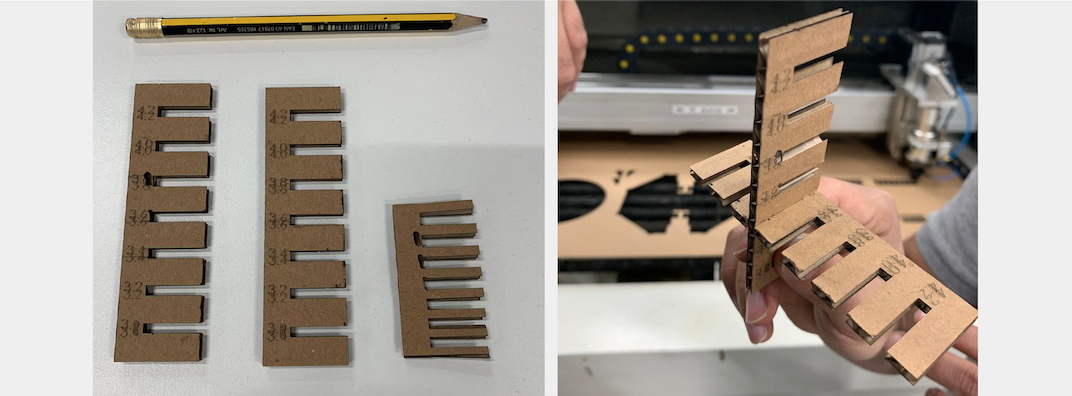
5- Our cut was not satisfactory cause it was to fragile so we made a wider piece
6- We found that the best fit for a 4mm cardboard was 3.6 due to compression
Individual Assigment - Vynil cut
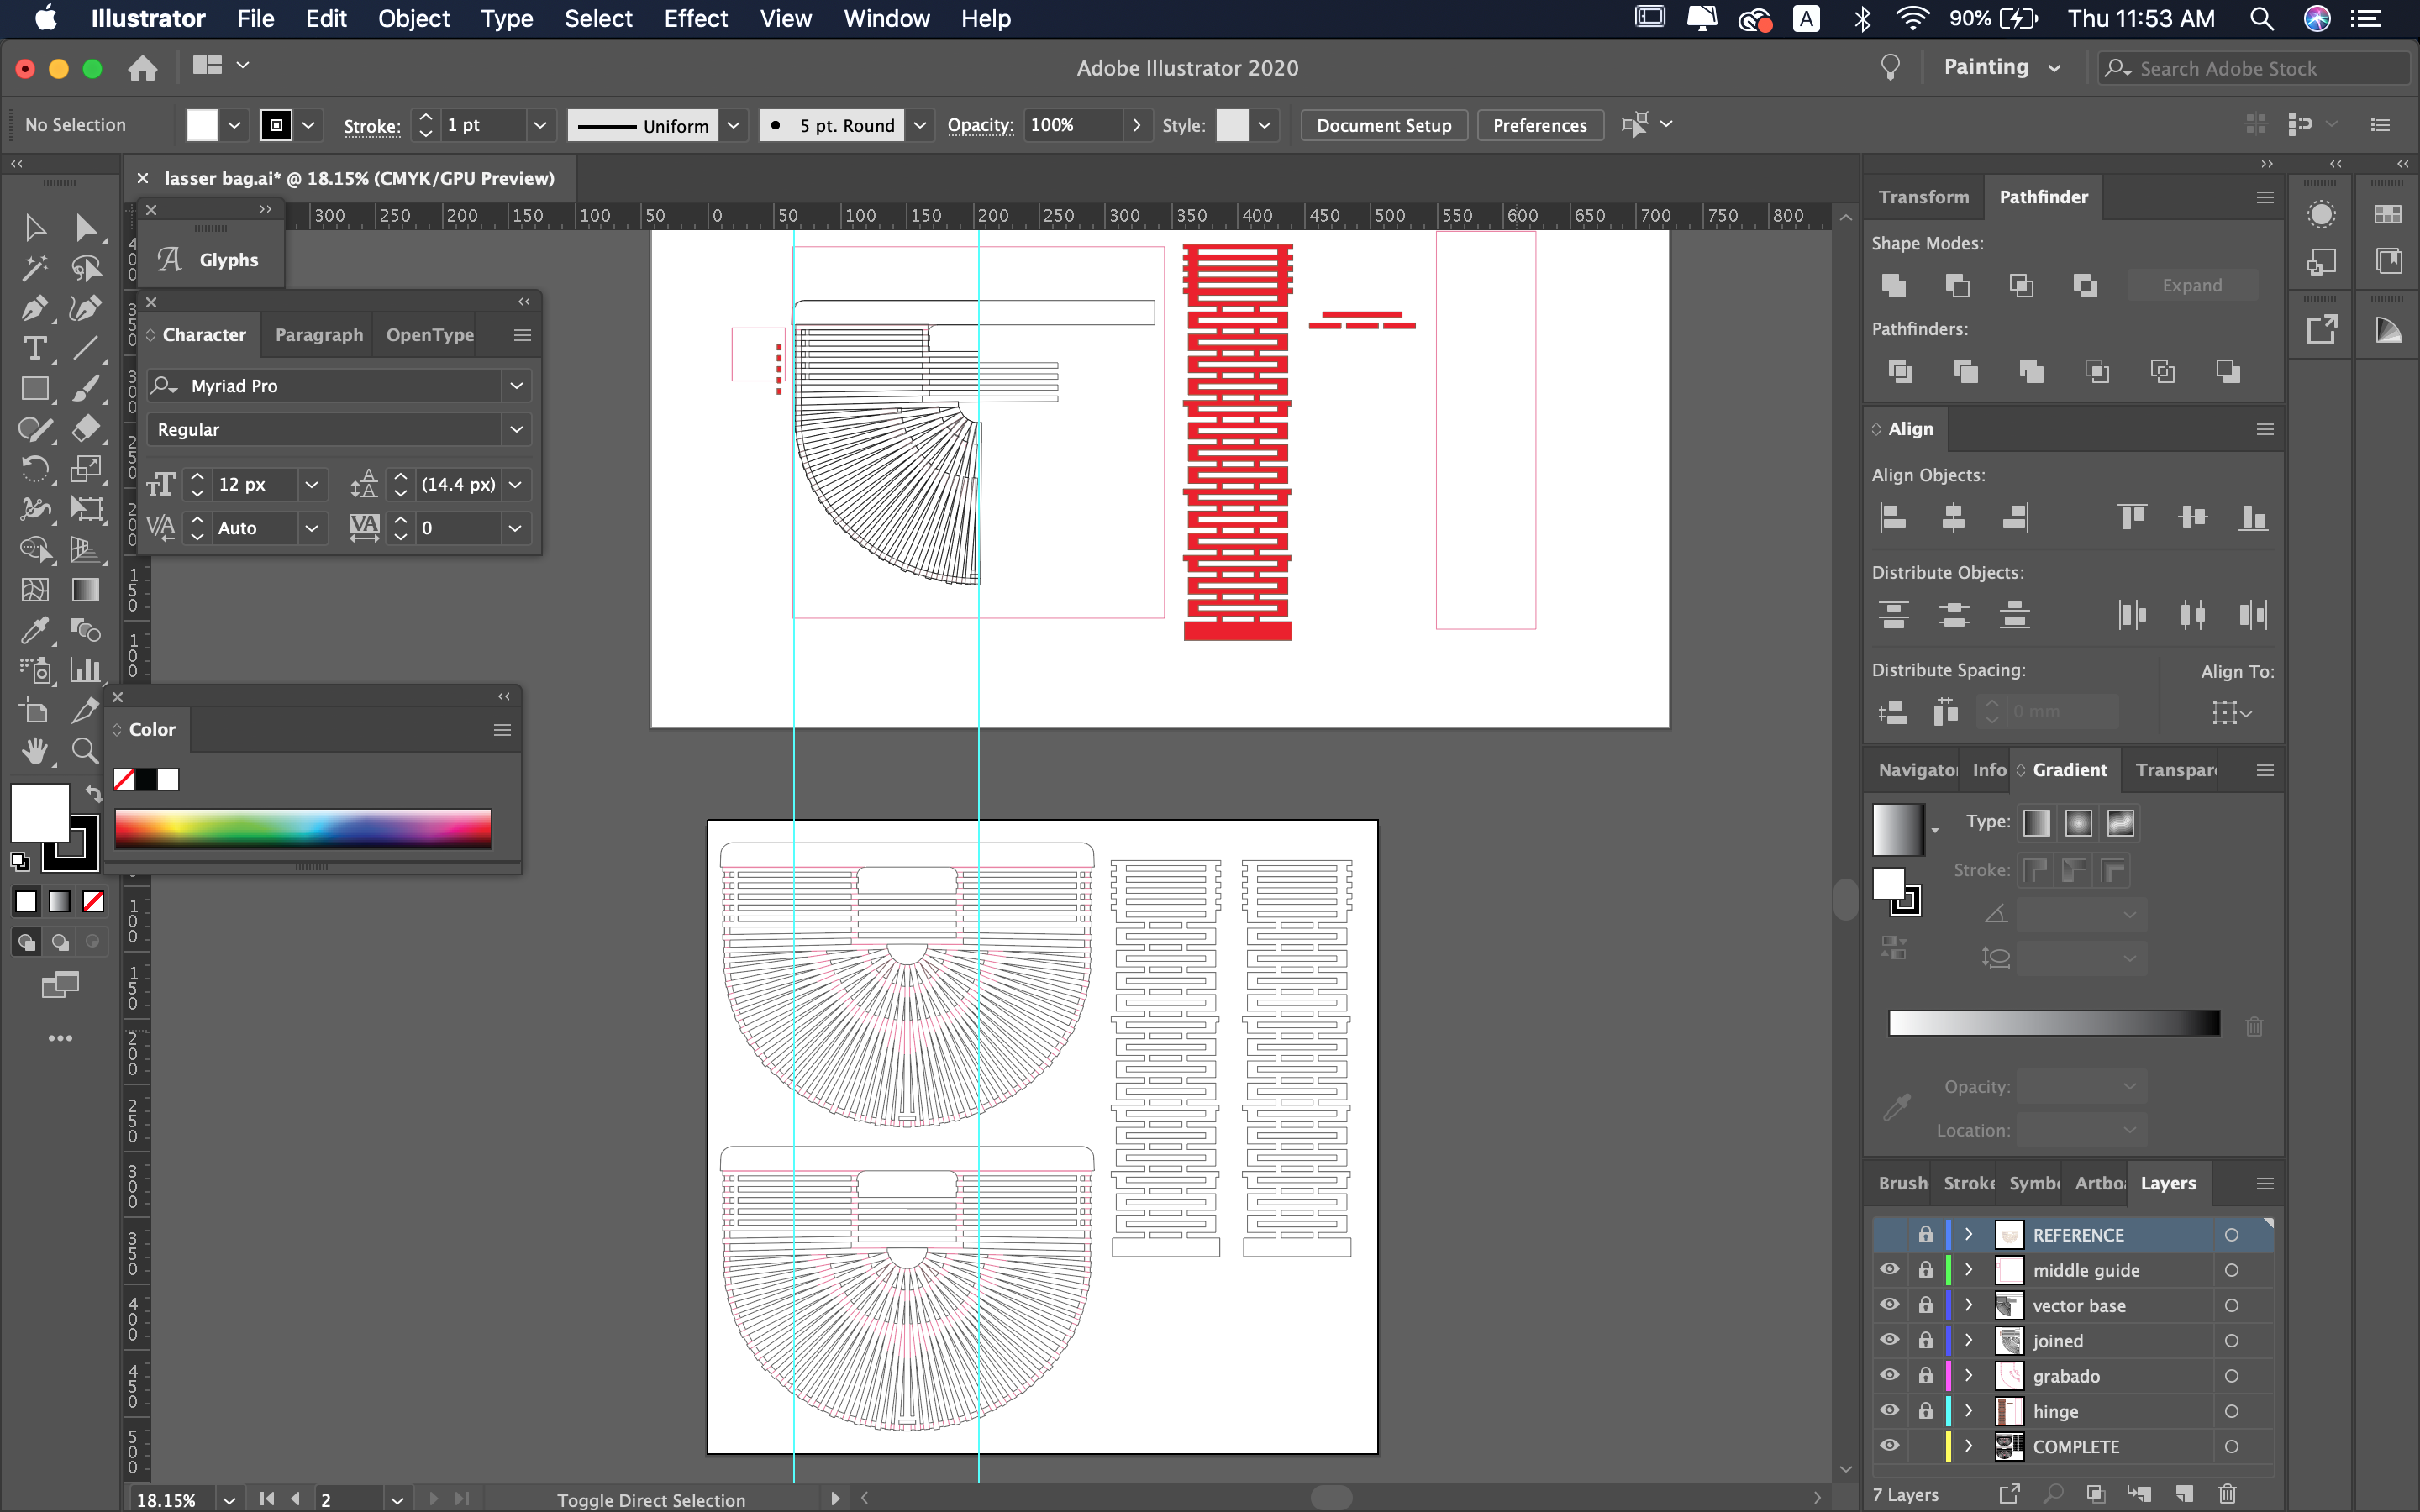
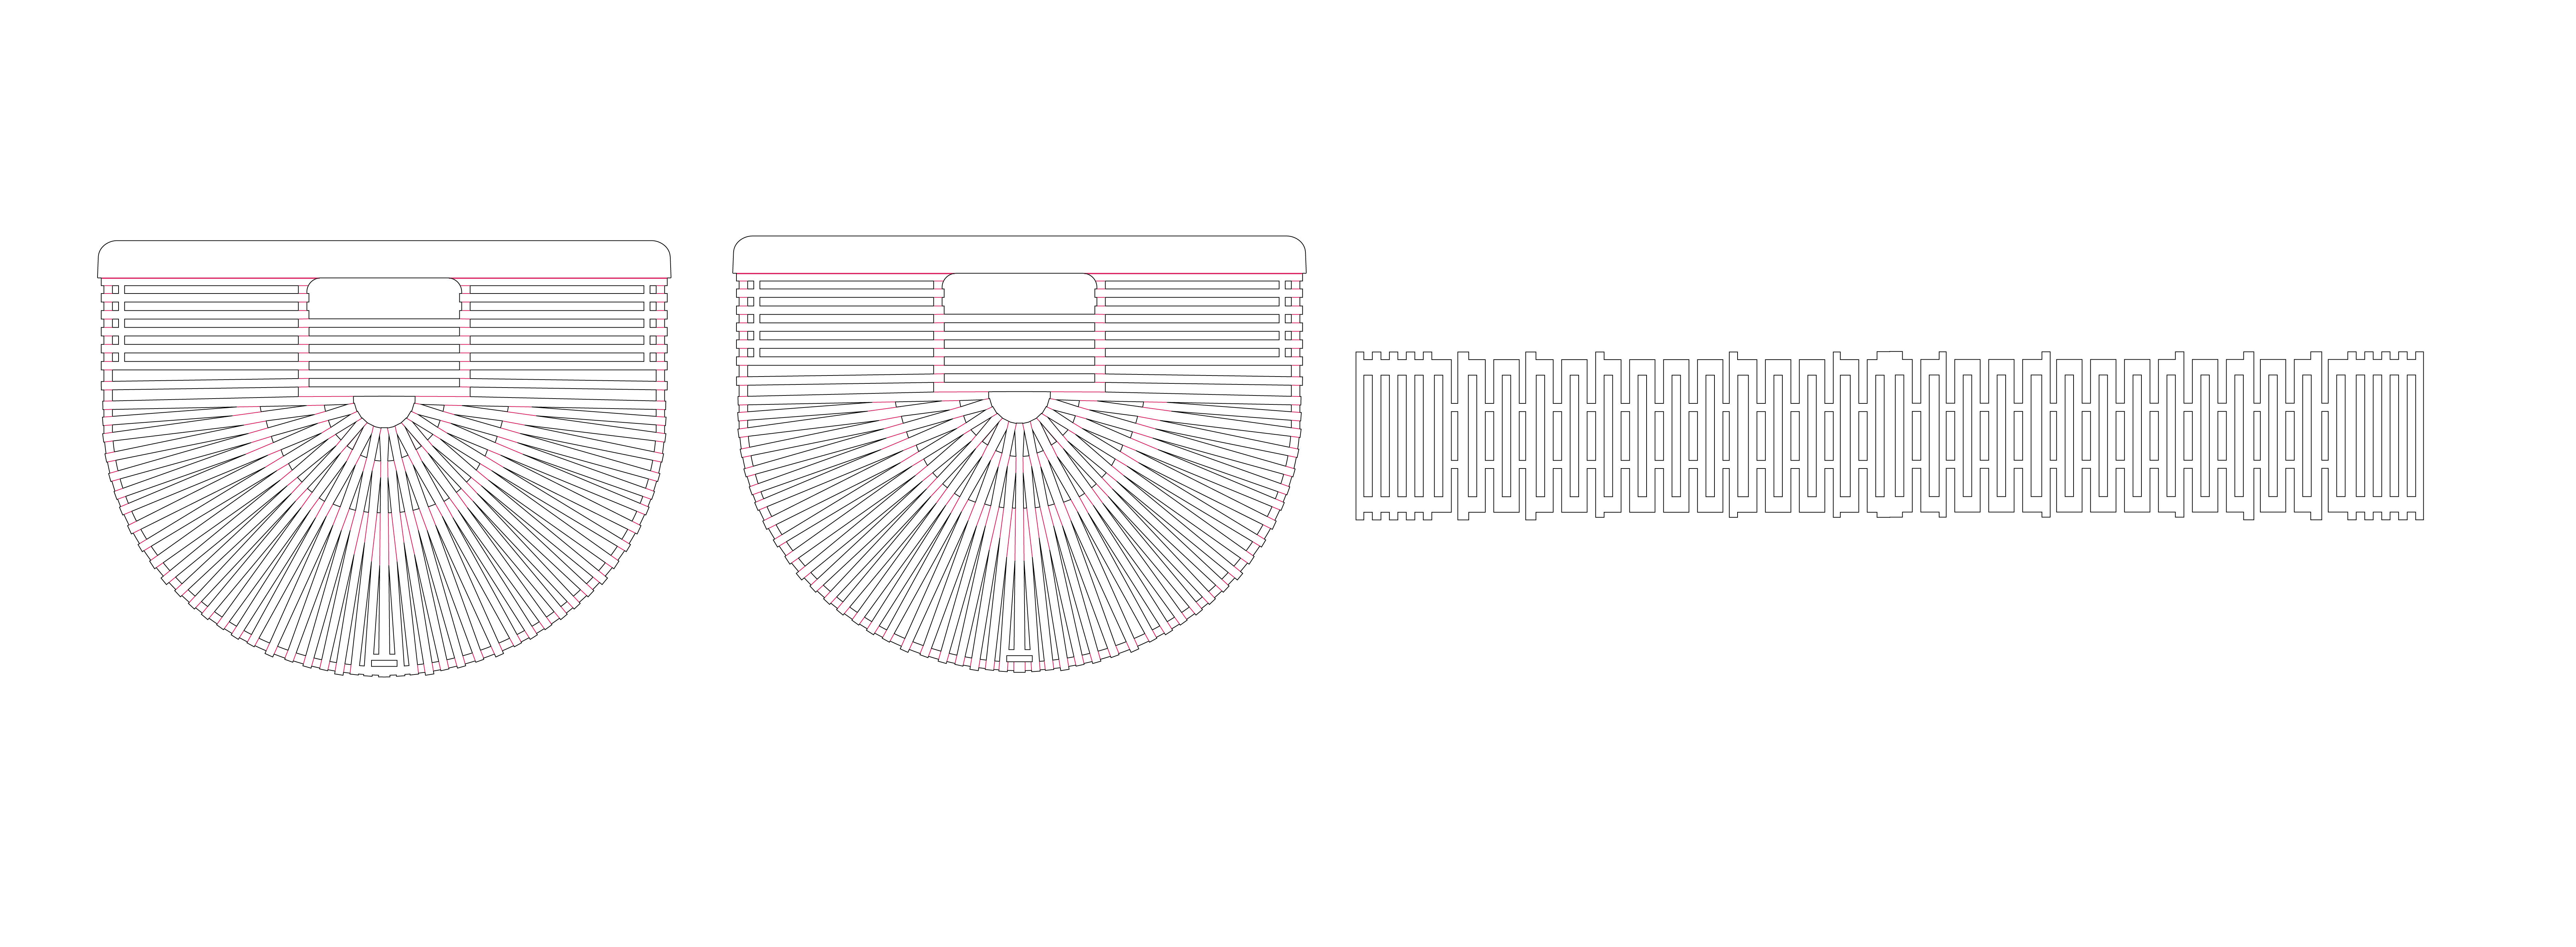
For the Laser cut assignment I designed a digital craft bag. This bags are usally found in craft stores in asia and are made with bamboo sticks, I vectorized the design in Illutrator and the cut it in the laser cut to try new alternatives and process for craft.
1- First I vectorized the design in Illutartor. The back lineas are the cuts and the red are engraving.
2- I made and adaptation of a living hingue for the side of the bag.
Eport it to DXF and open in in the laser software.

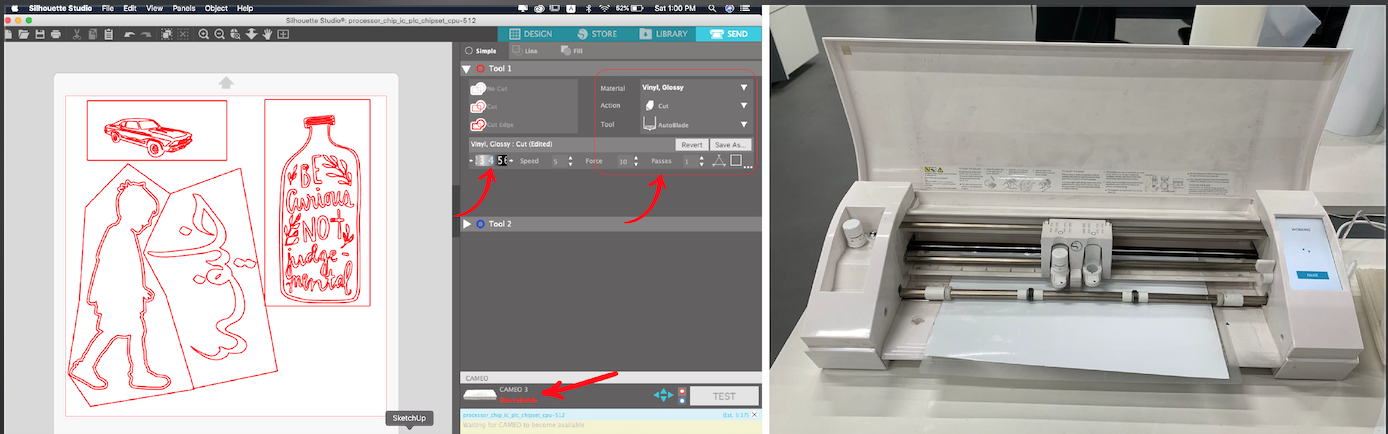
3- We set it up and selected the material and other parameters.
If it's showing unavailable, make sure to select the correct vynil cutter
4- Load the material and start cutting.
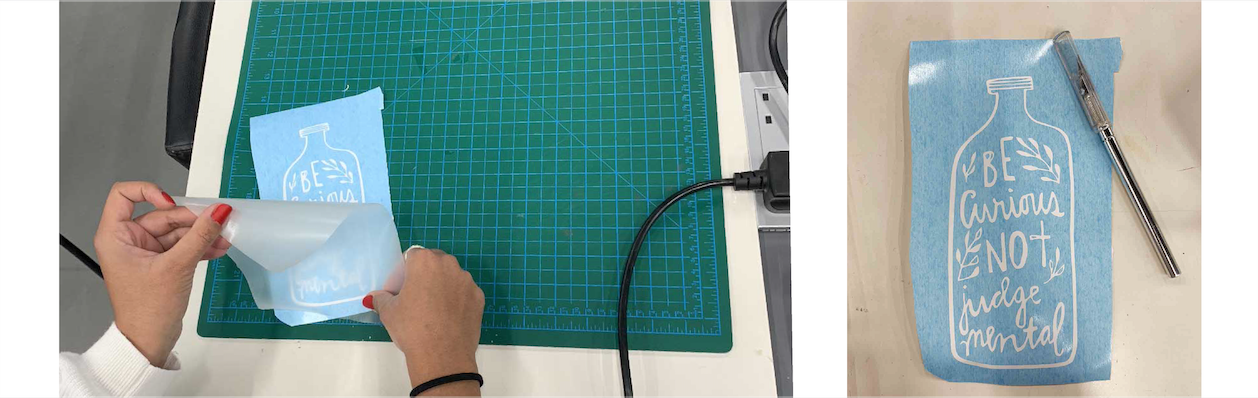
5- Time to remove the negative material.
6- Paste transfer paper on top so it is easier to remove and paste where you want.
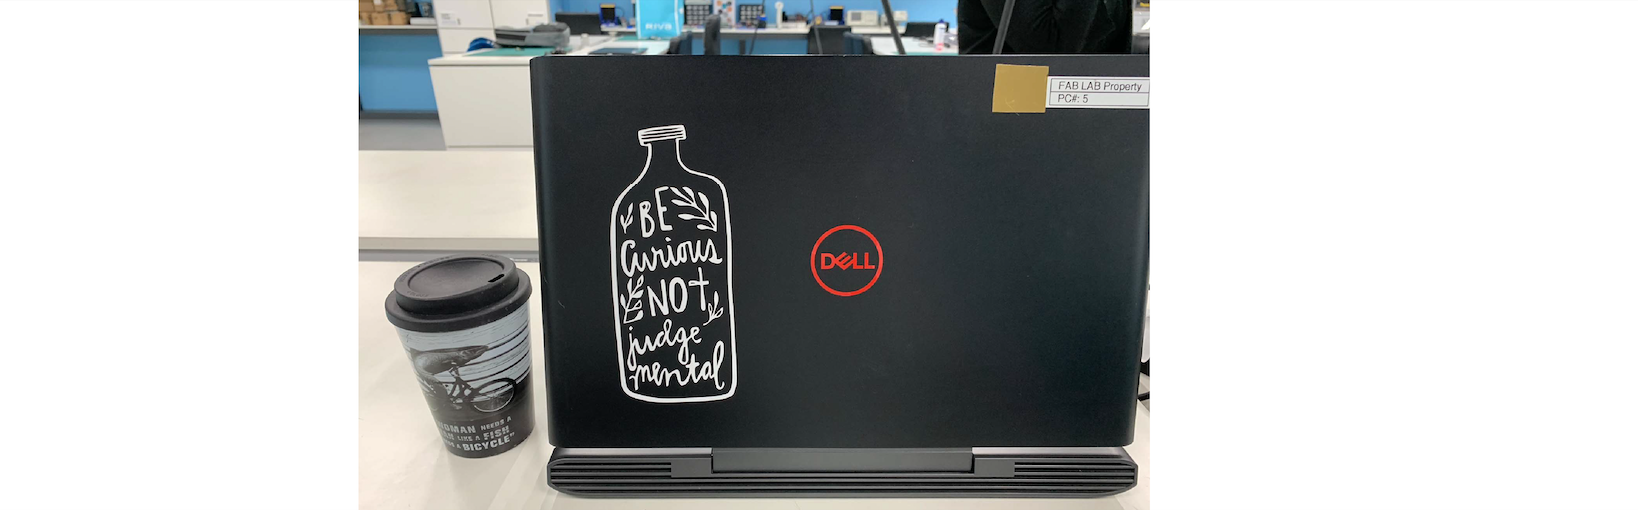
7- Paste it and remove the transfer paper
Results
Individual Assigment - Laser cut
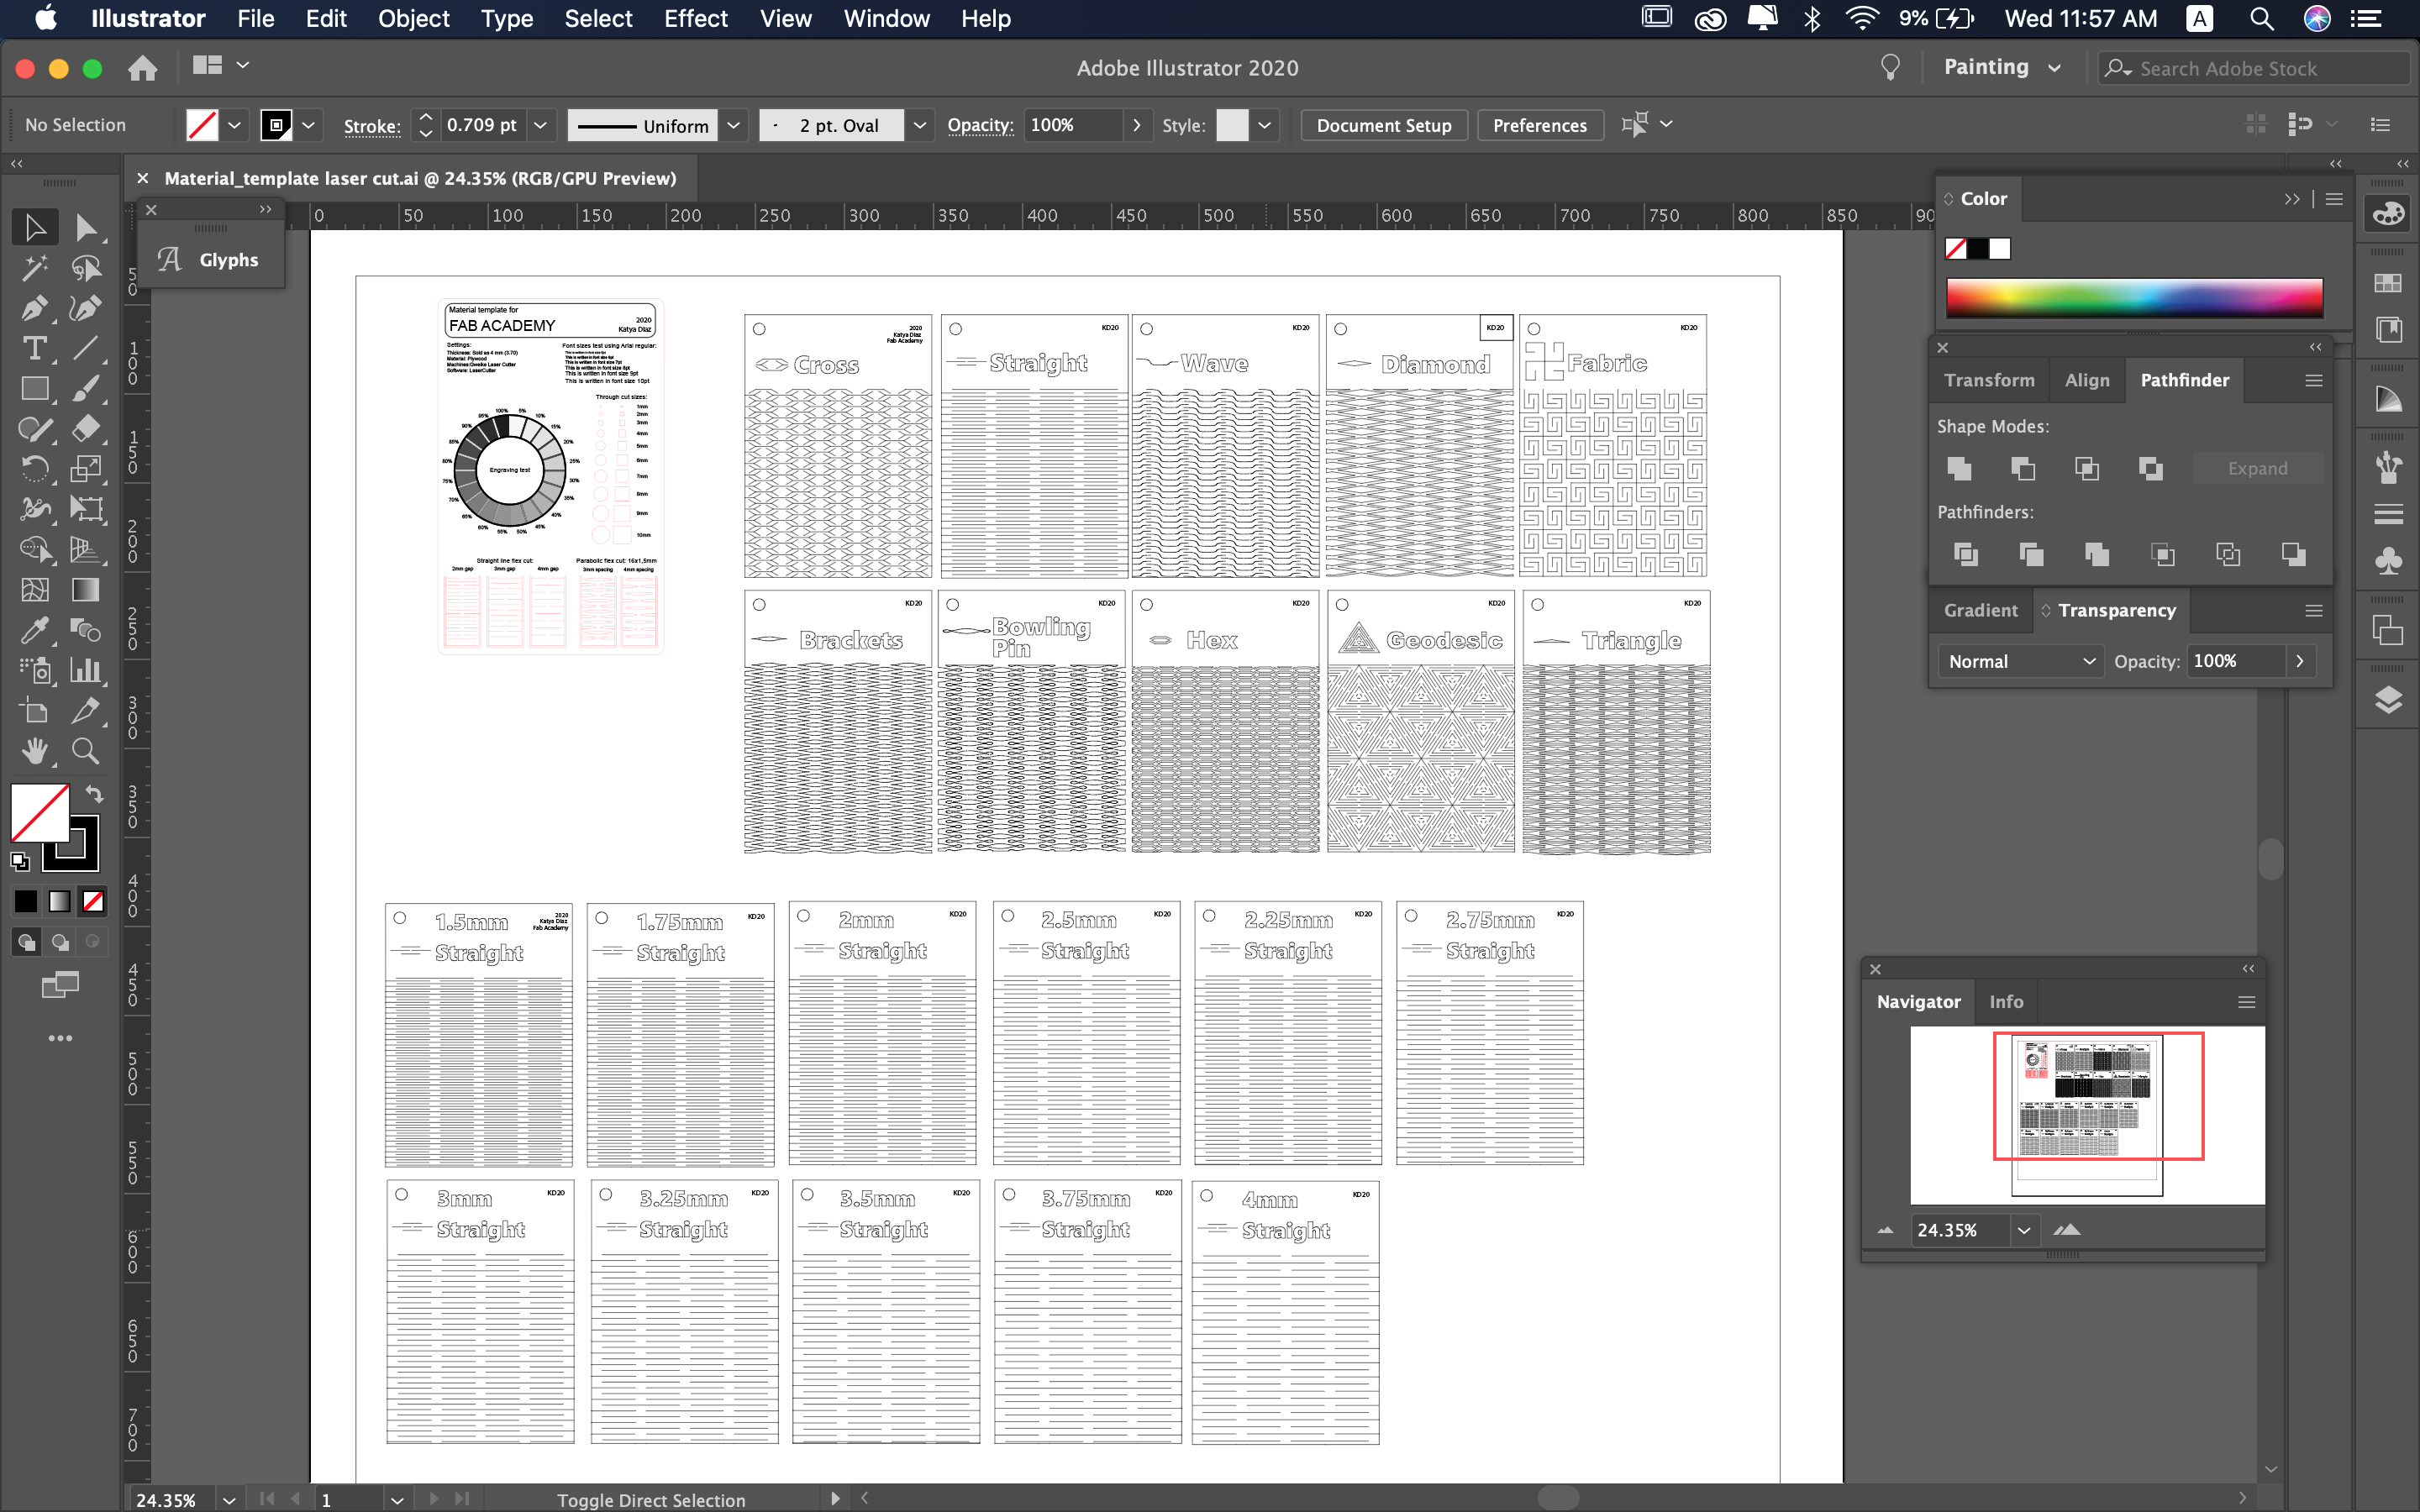
1- First I made a design in Adobe Illustrator and exported it to DXF
2- Imported the files in "lasercut" software and slected the lines for engraving and for cut. Red = engrave, Black = cut.
3- The settings I used for the laser cutting Plywood 3mm are:
Cut: Speed = 30, Power = 100
Engrave: Speed = 100, Power = 30

Besides the craft bag I did some living hinge testings you can se bellow:
Individual Assigment - Parametric Design
Design, lasercut, and document a parametric press-fit construction kit, which can be assembled in multiple ways. Account for the lasercutter kerf.
Parametric design: is a process based on algorithmic thinking that enables the expression of parameters and rules that, together, define, encode and clarify the relationship between design intent and design response.
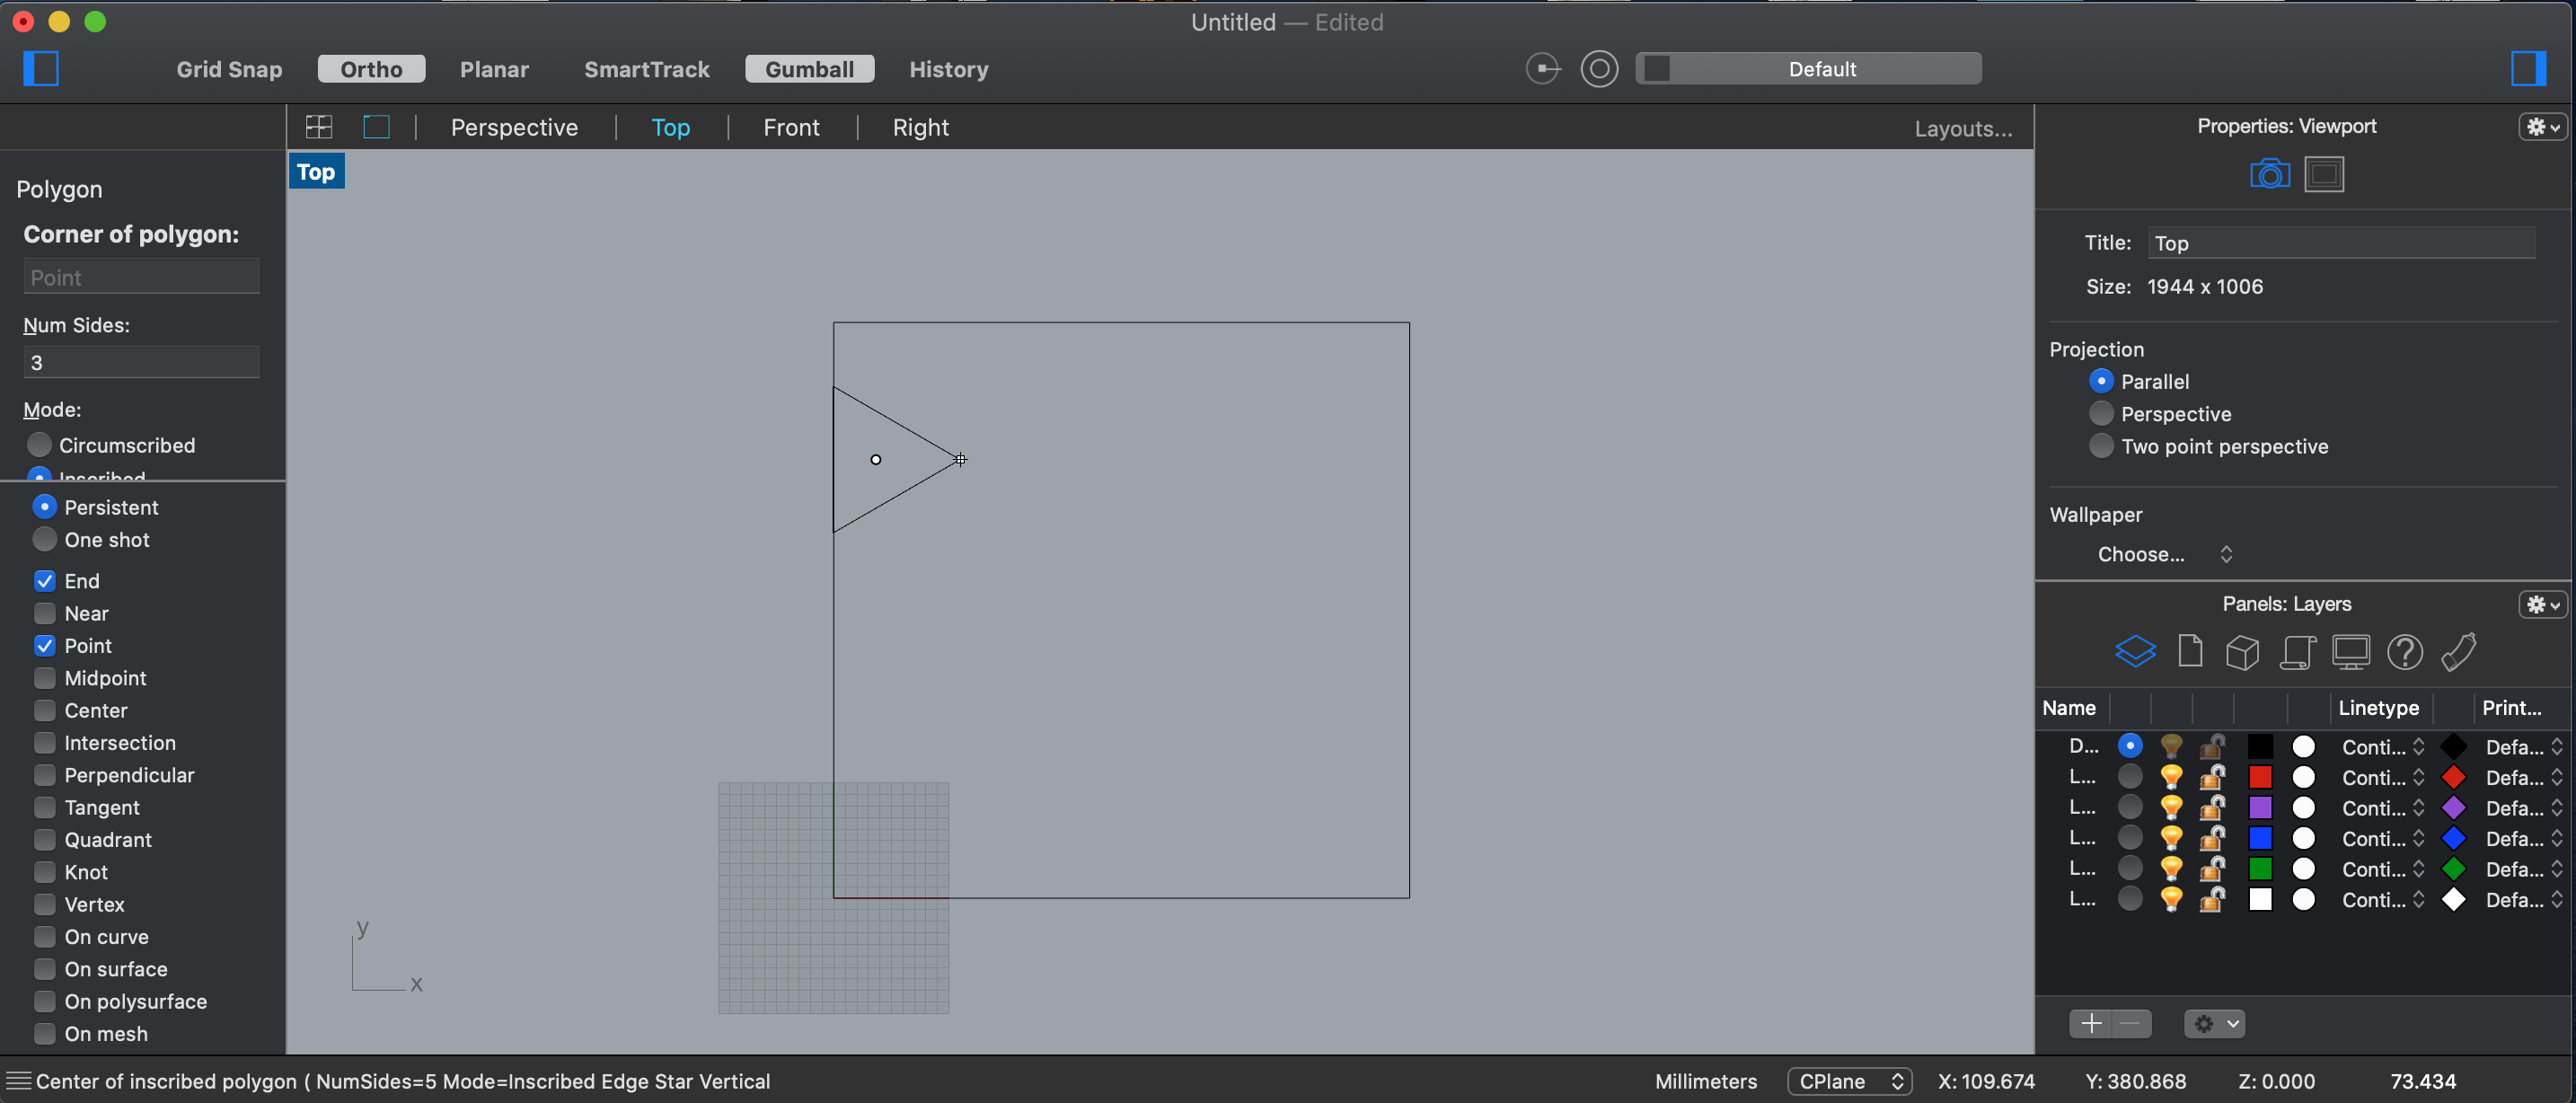
1- For my design I used Rhino, and stated by making a simple rectangle of the size of my material
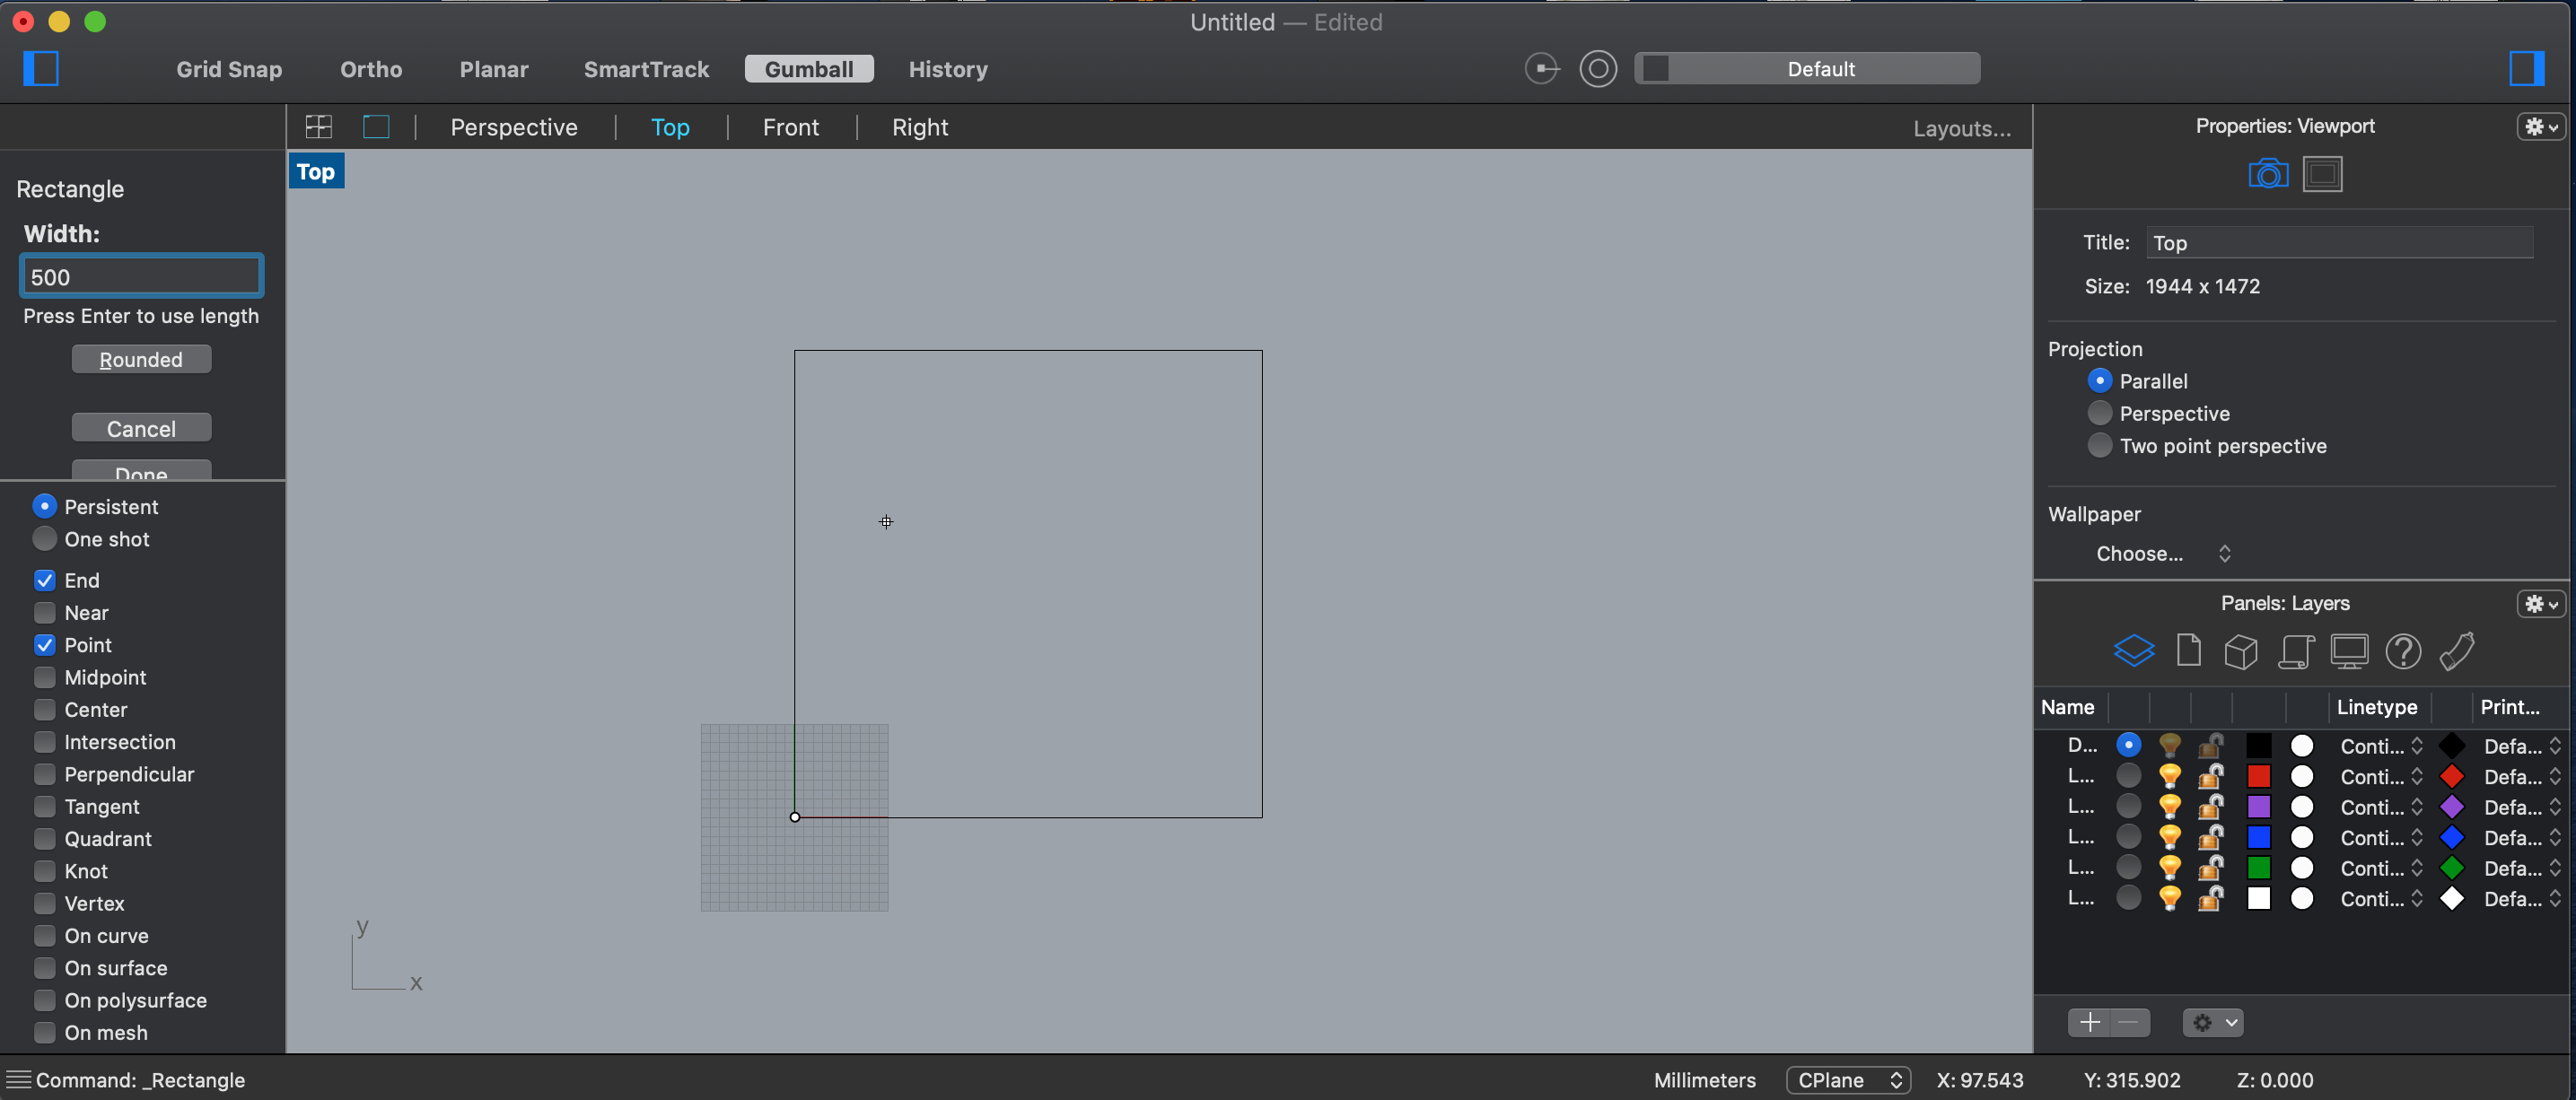
2- After sketching and researching a bit about structure and how almost all shapes can be represented in triangles (mesh for examples) I decided to work with it. With the polygon option of 3 corners.
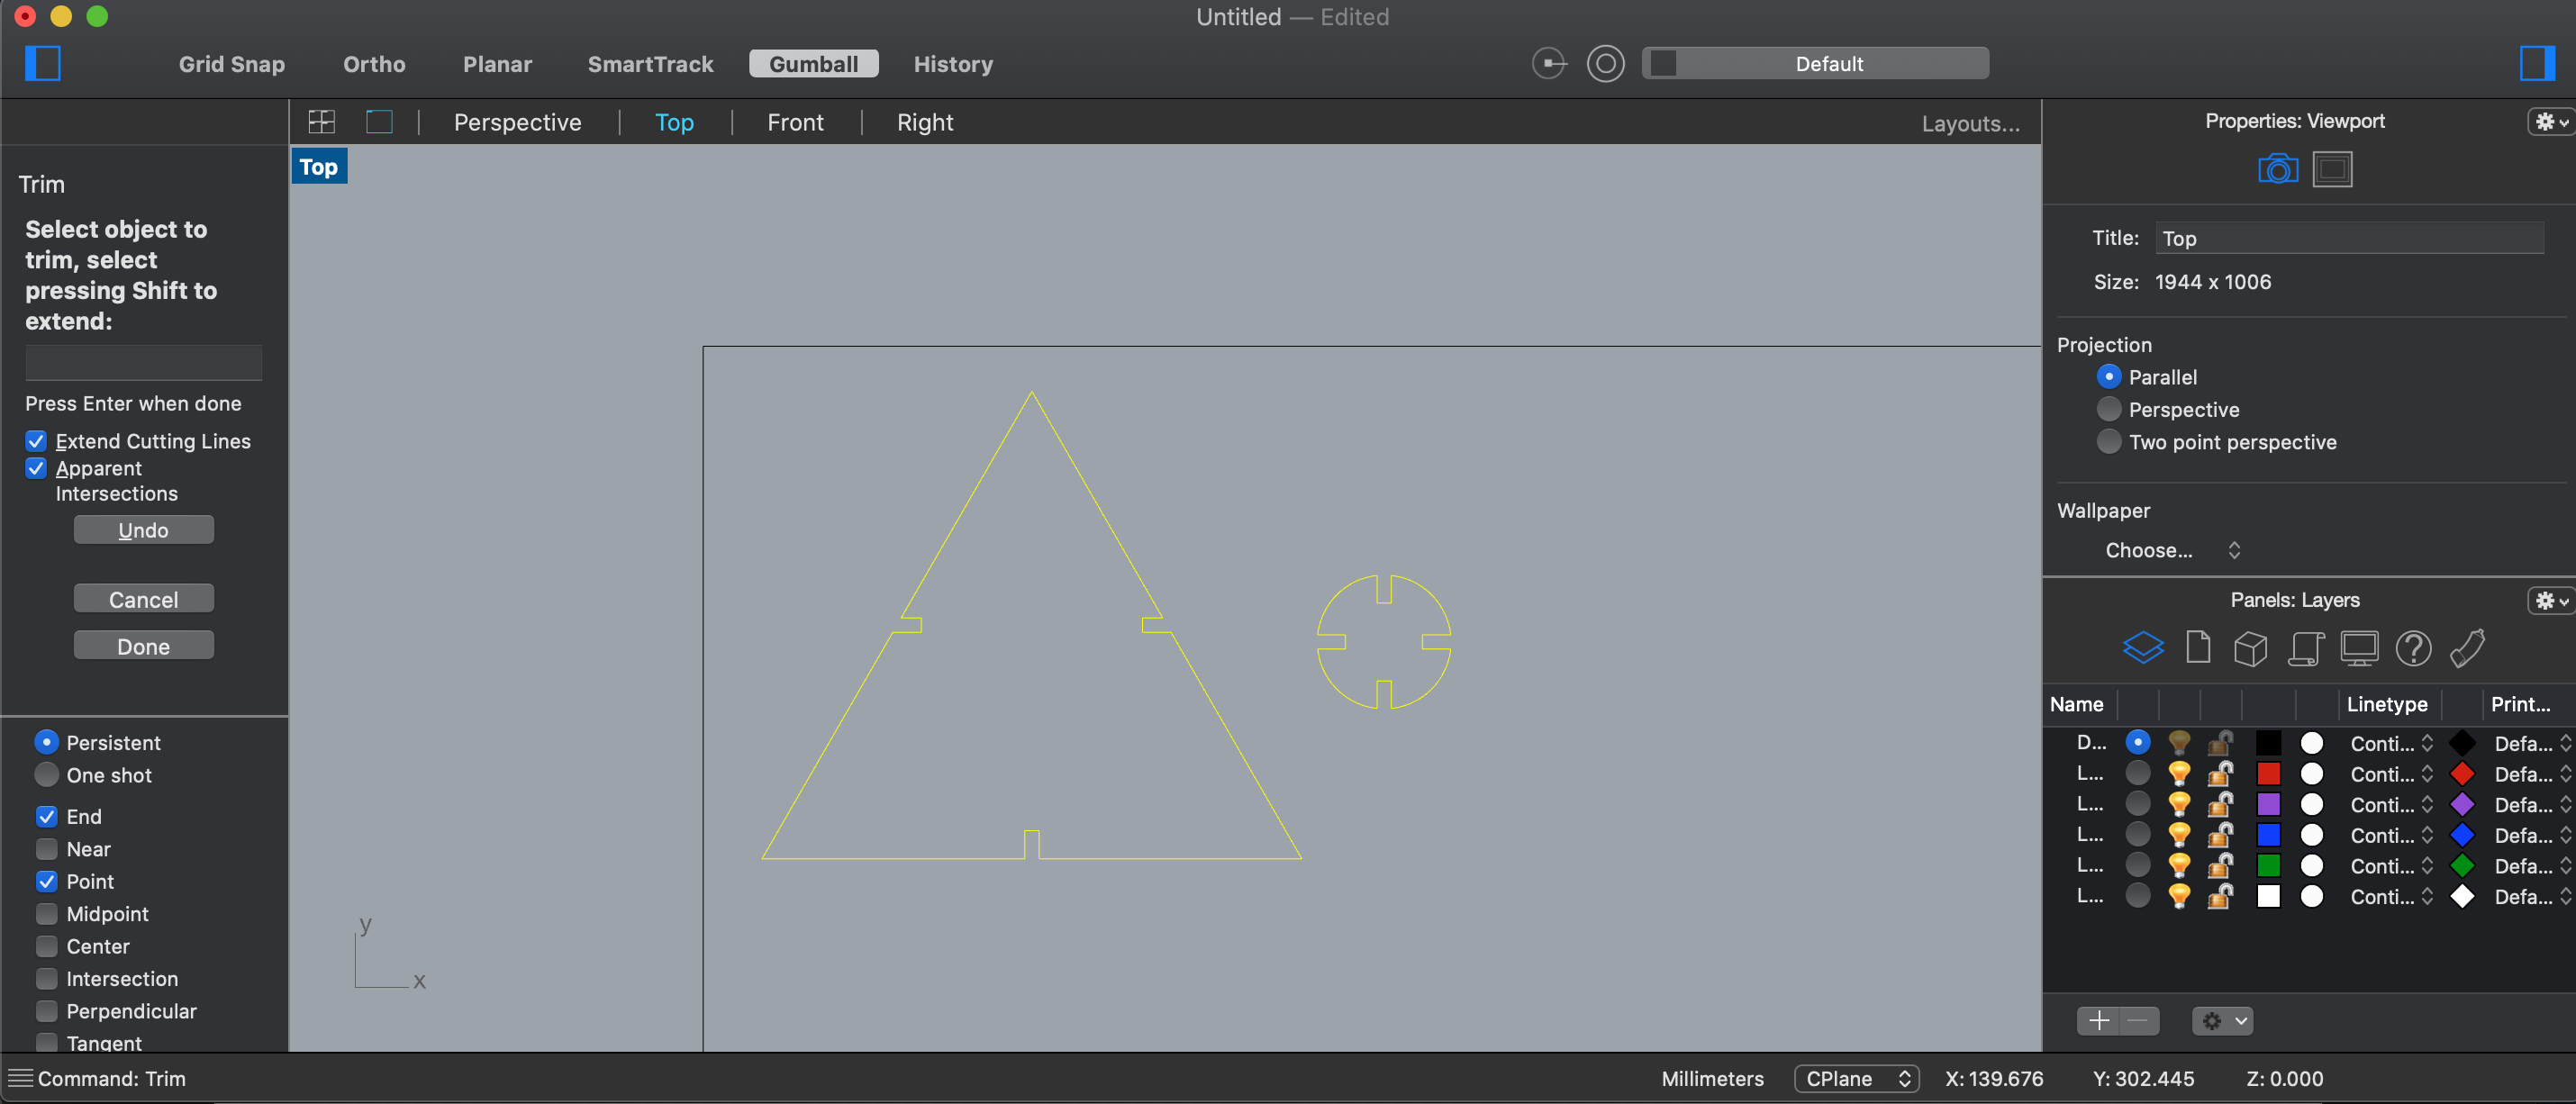
3- I decifed the slots with the material thickness (3mm) and added some locks, these was achieved by repeating the same feature (rectangles) and trimming the unwanted parts.
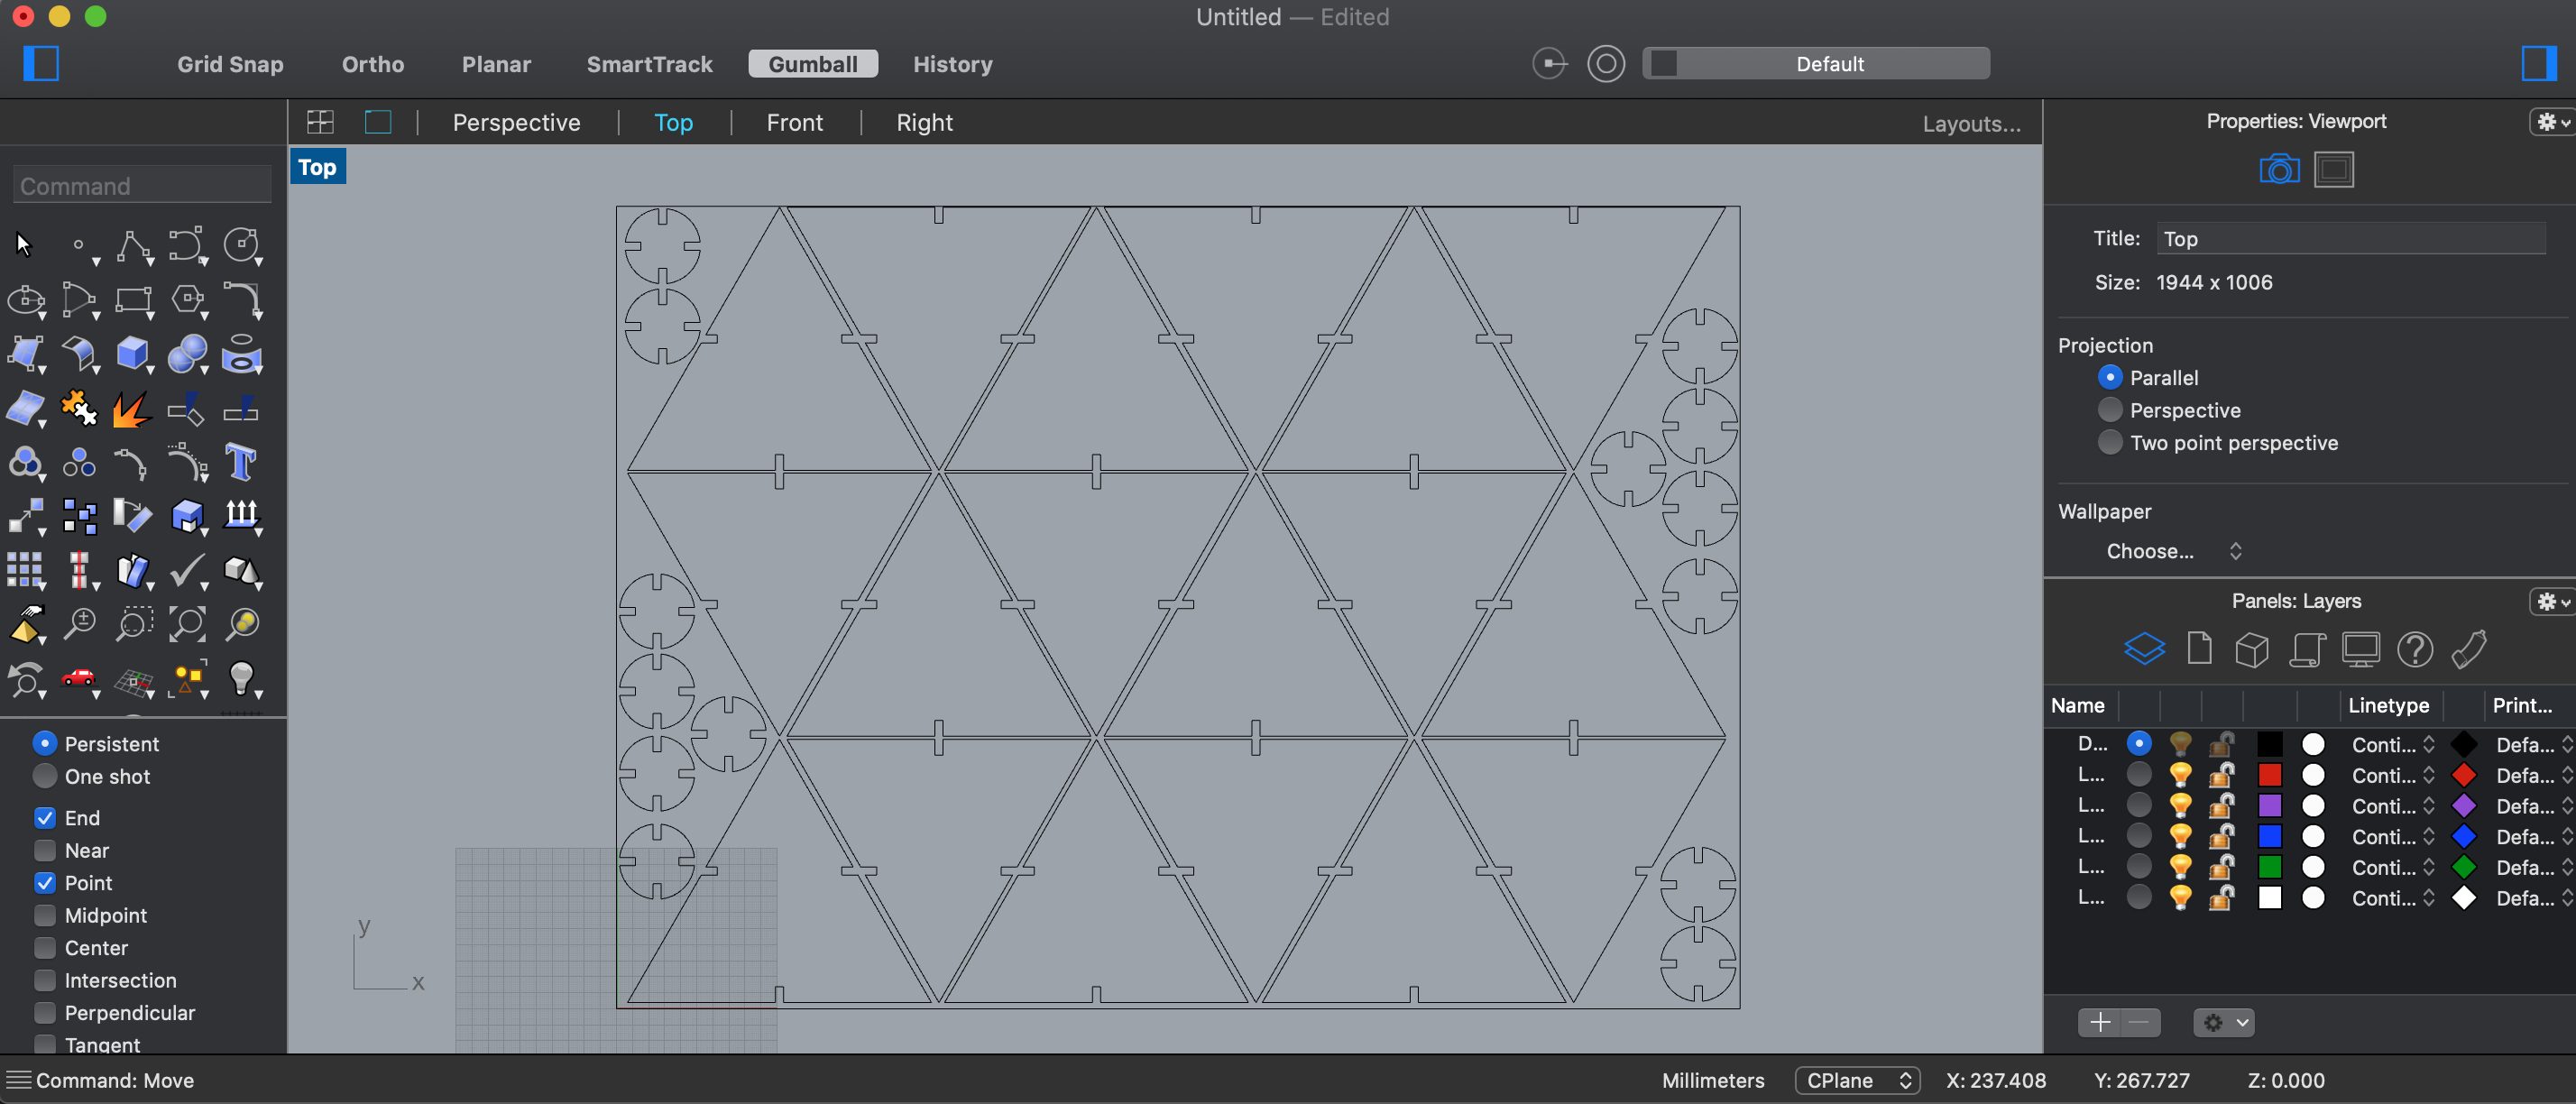
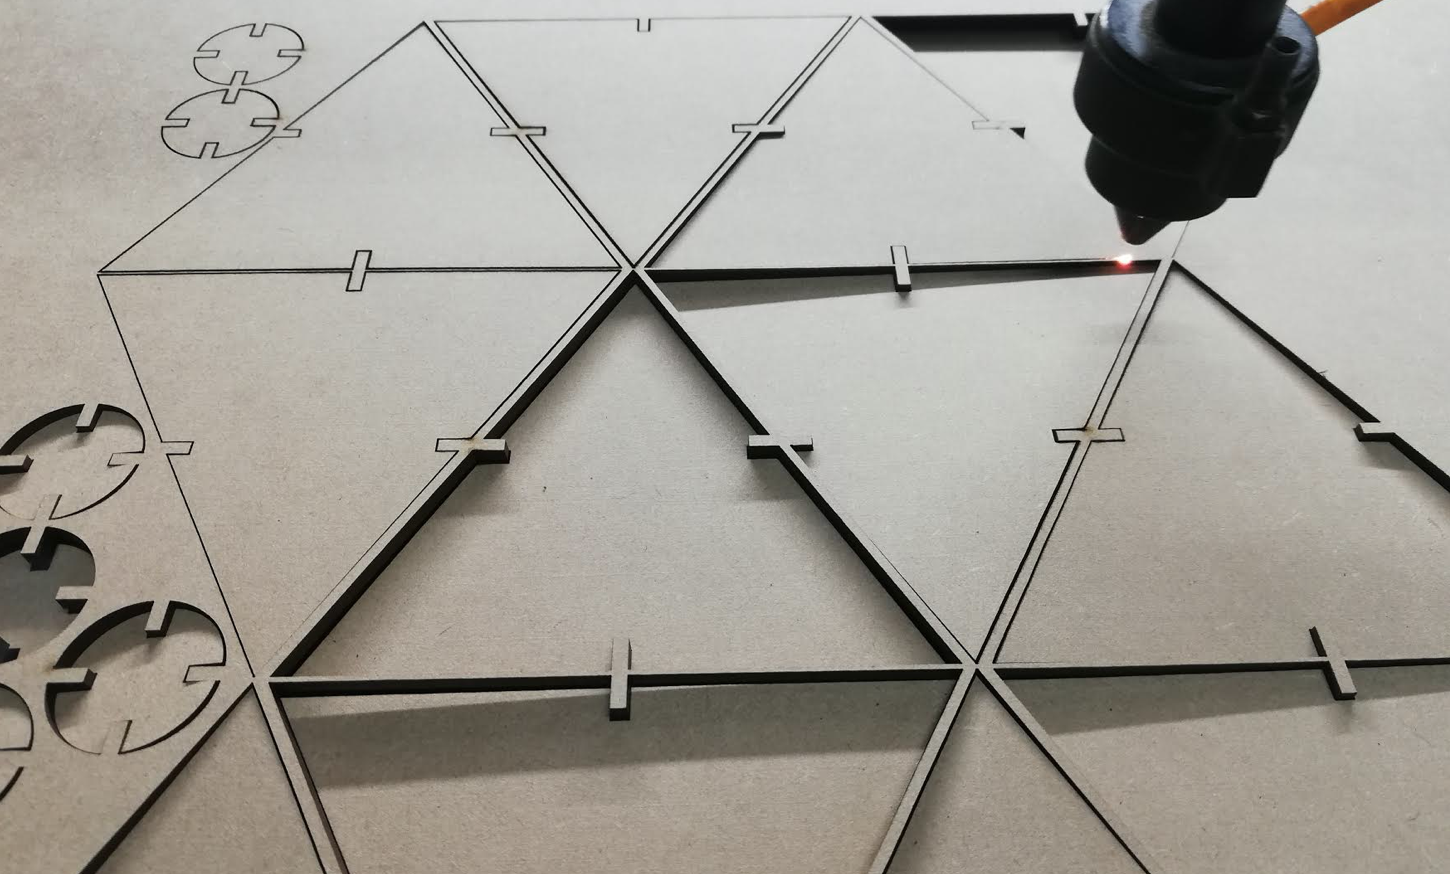
Finally we arrange the geometrical shapes in the artboard we previosly drew and usead the "rectangular array" command to coppy the froms keeping the same characteristics and distance from each other .
We prepared the file, same as the previous ones, defining the speed and strenght of the laser. In this case I will be using the same parameters I used for plywood, since its the same thickness.Cut: Speed = 30, Power = 100
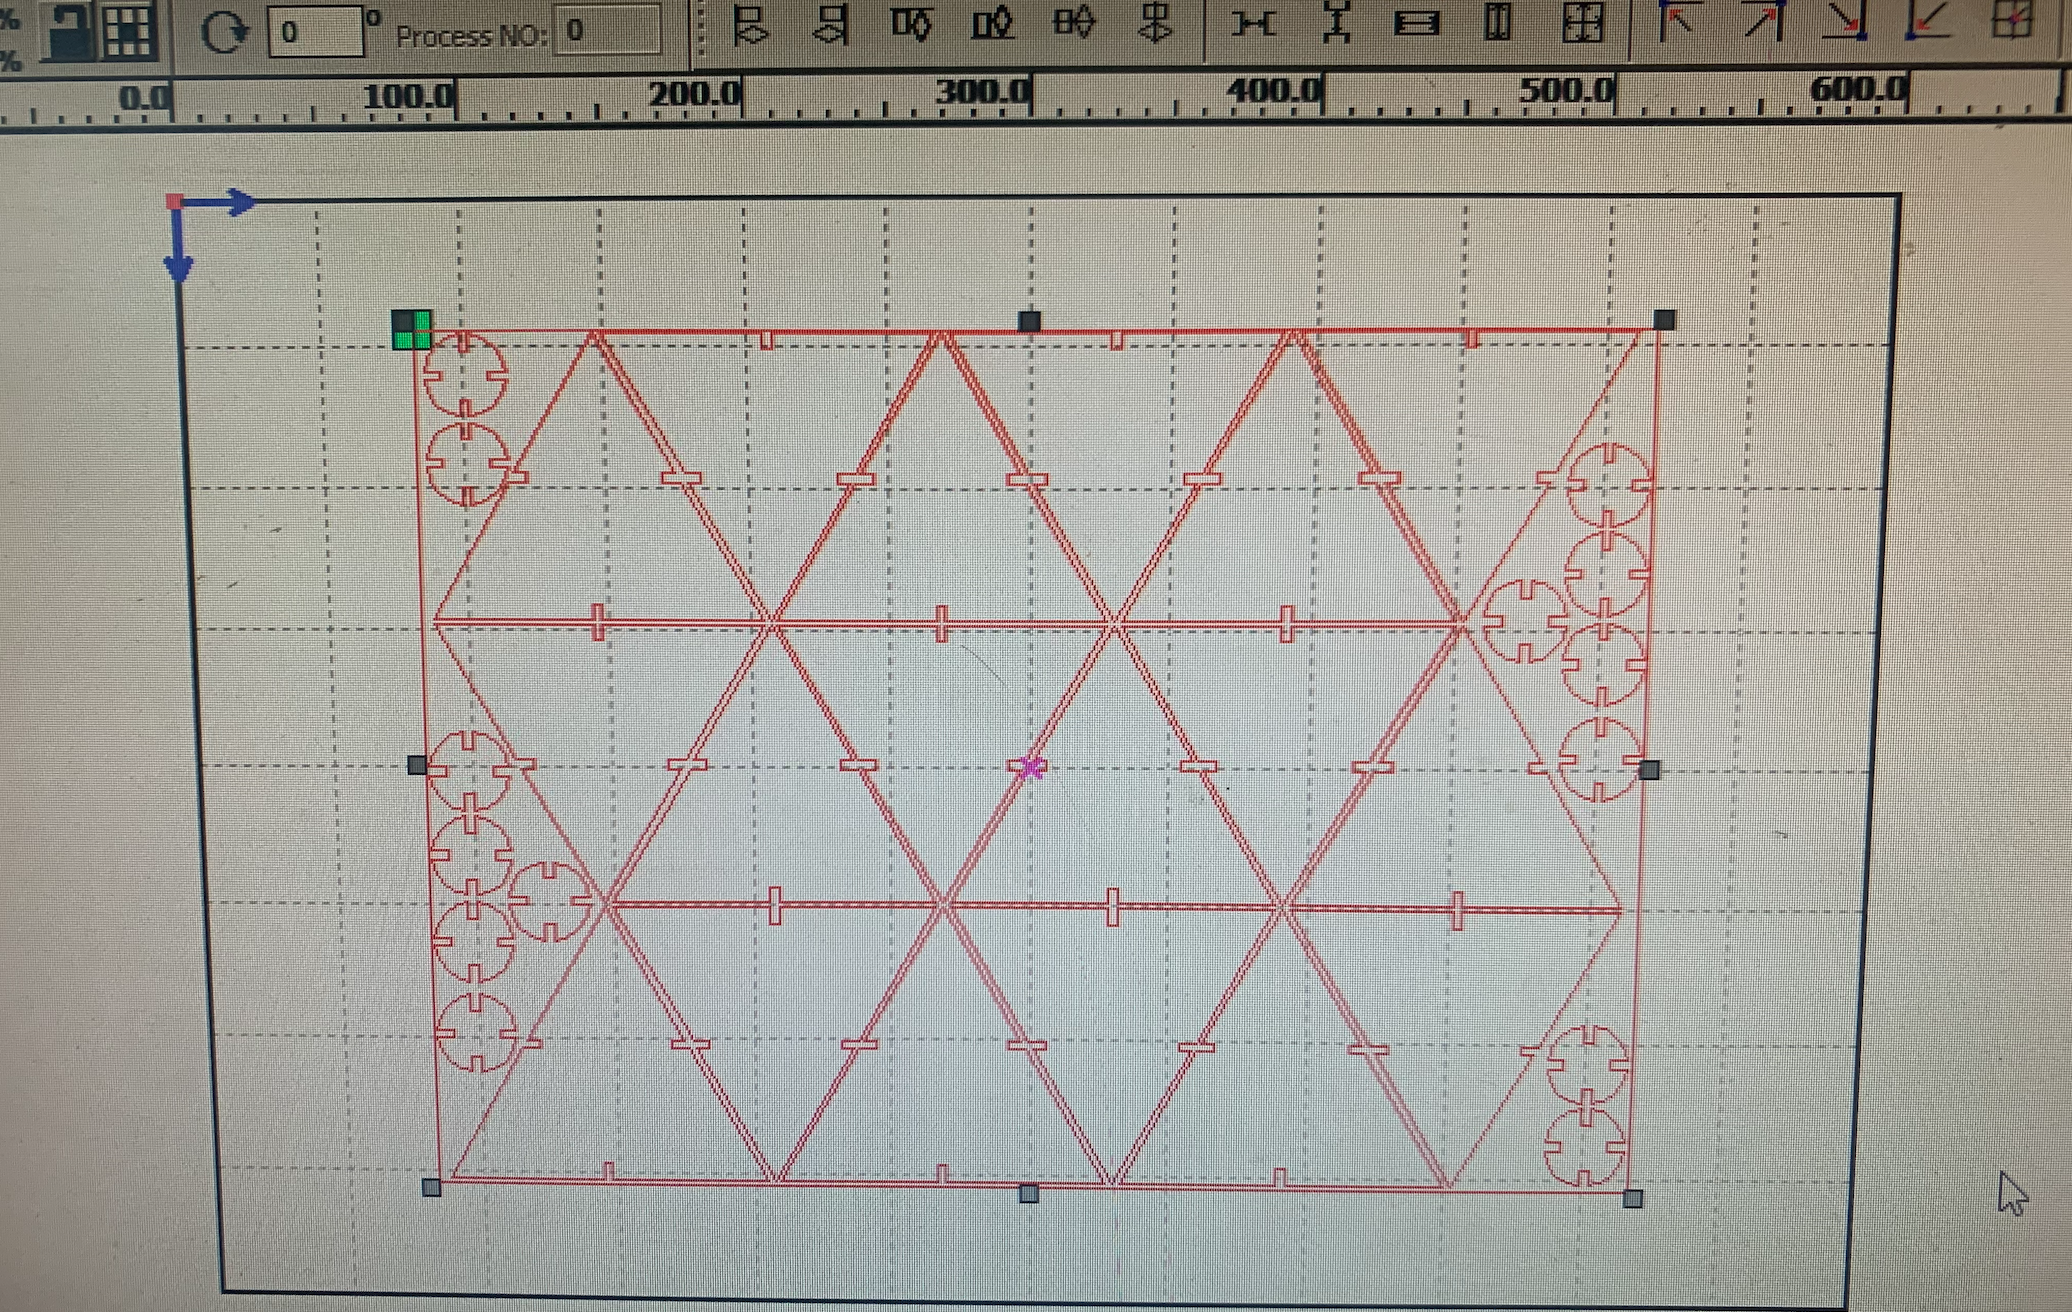
We are ready to cut. Again, following the same steps and security measures as before
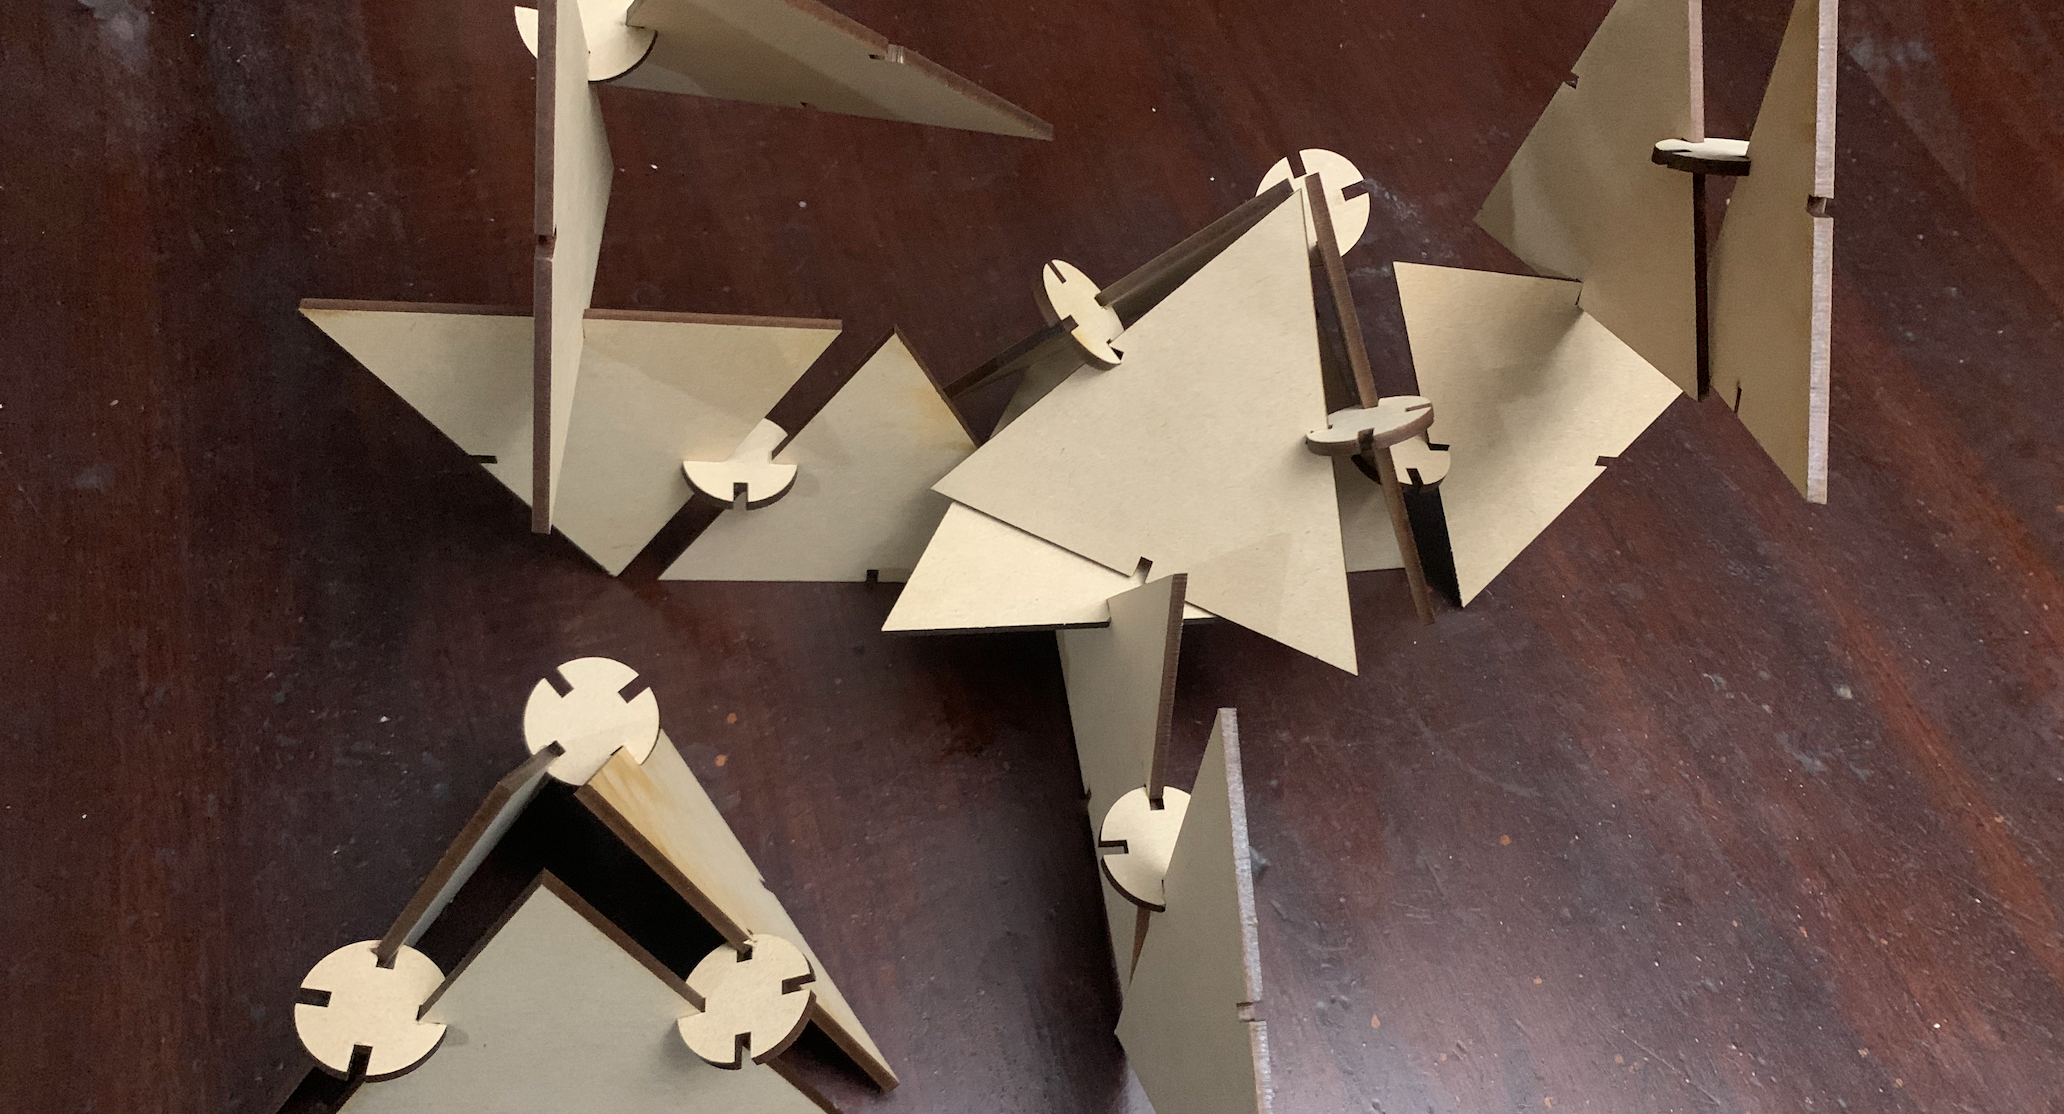
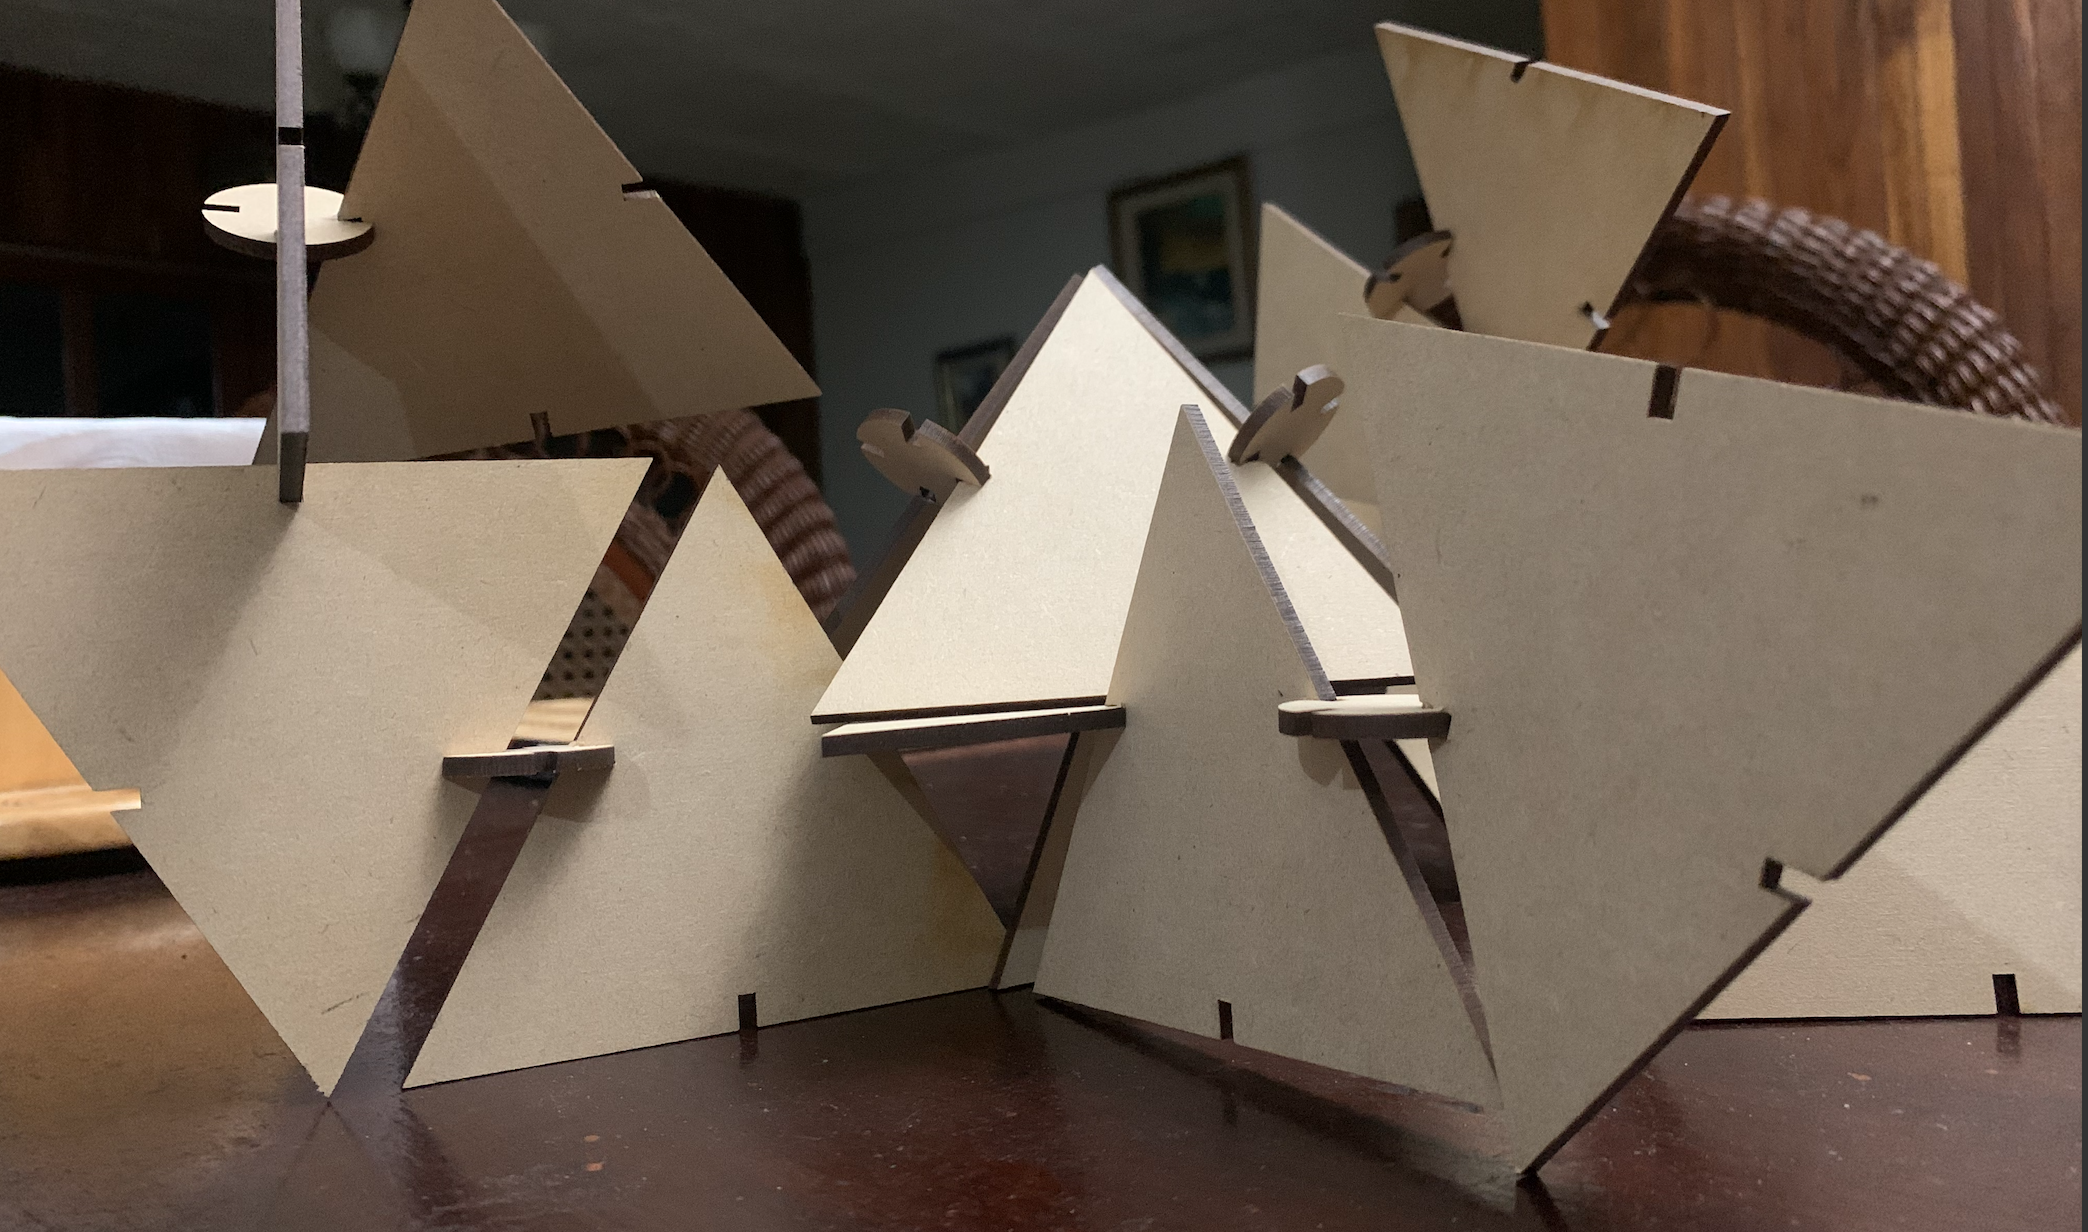
Here are the final pieces cutted
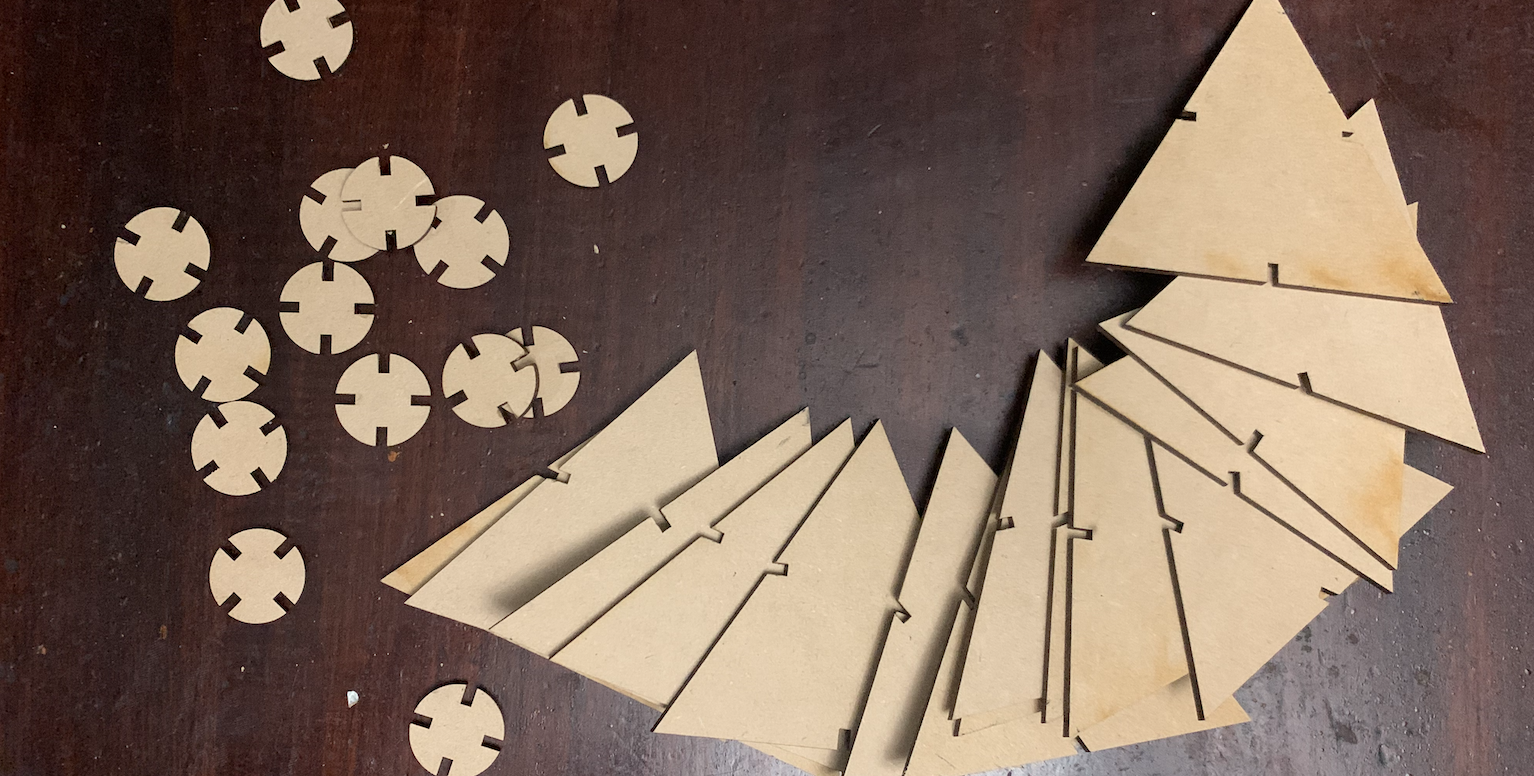
The results: