Computer Aided Design
Week 02
Machines and Materials
Softwares
Files
During this week we learned about Computer Aided Design, and how different softwares can work as a tool to achieve our projects and digital fabrication.
Individual Assignment
For the Final project I want to develop an "Earthquake alert" divice that will alert people a few seconds before a seismic event happen. Based on this I stated making some sketches and modelling a possible case for the divice, this weeks main objetive is to model (raster, vector, 2D, 3D, render, animate, simulate, ...) a possible final project.
Here is my process:
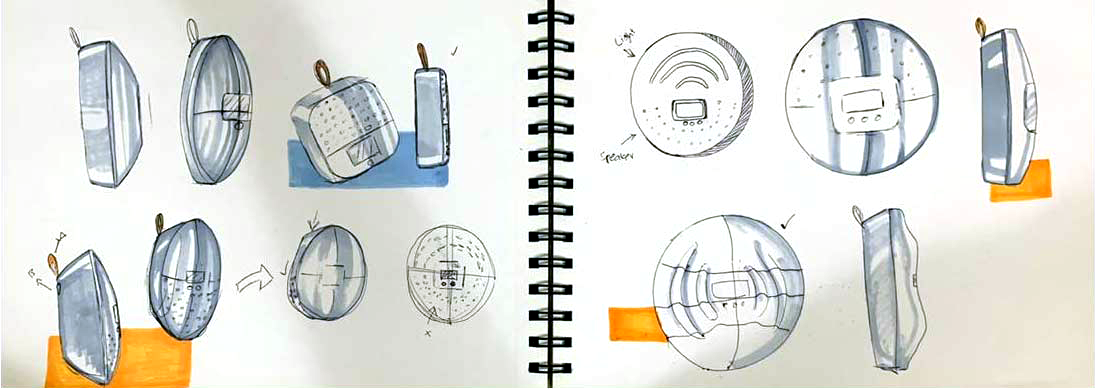
1- I started by sketching different forms, taking in consideration the material and facilities we have at the lab as well as parts that I might need like screens and buttons.
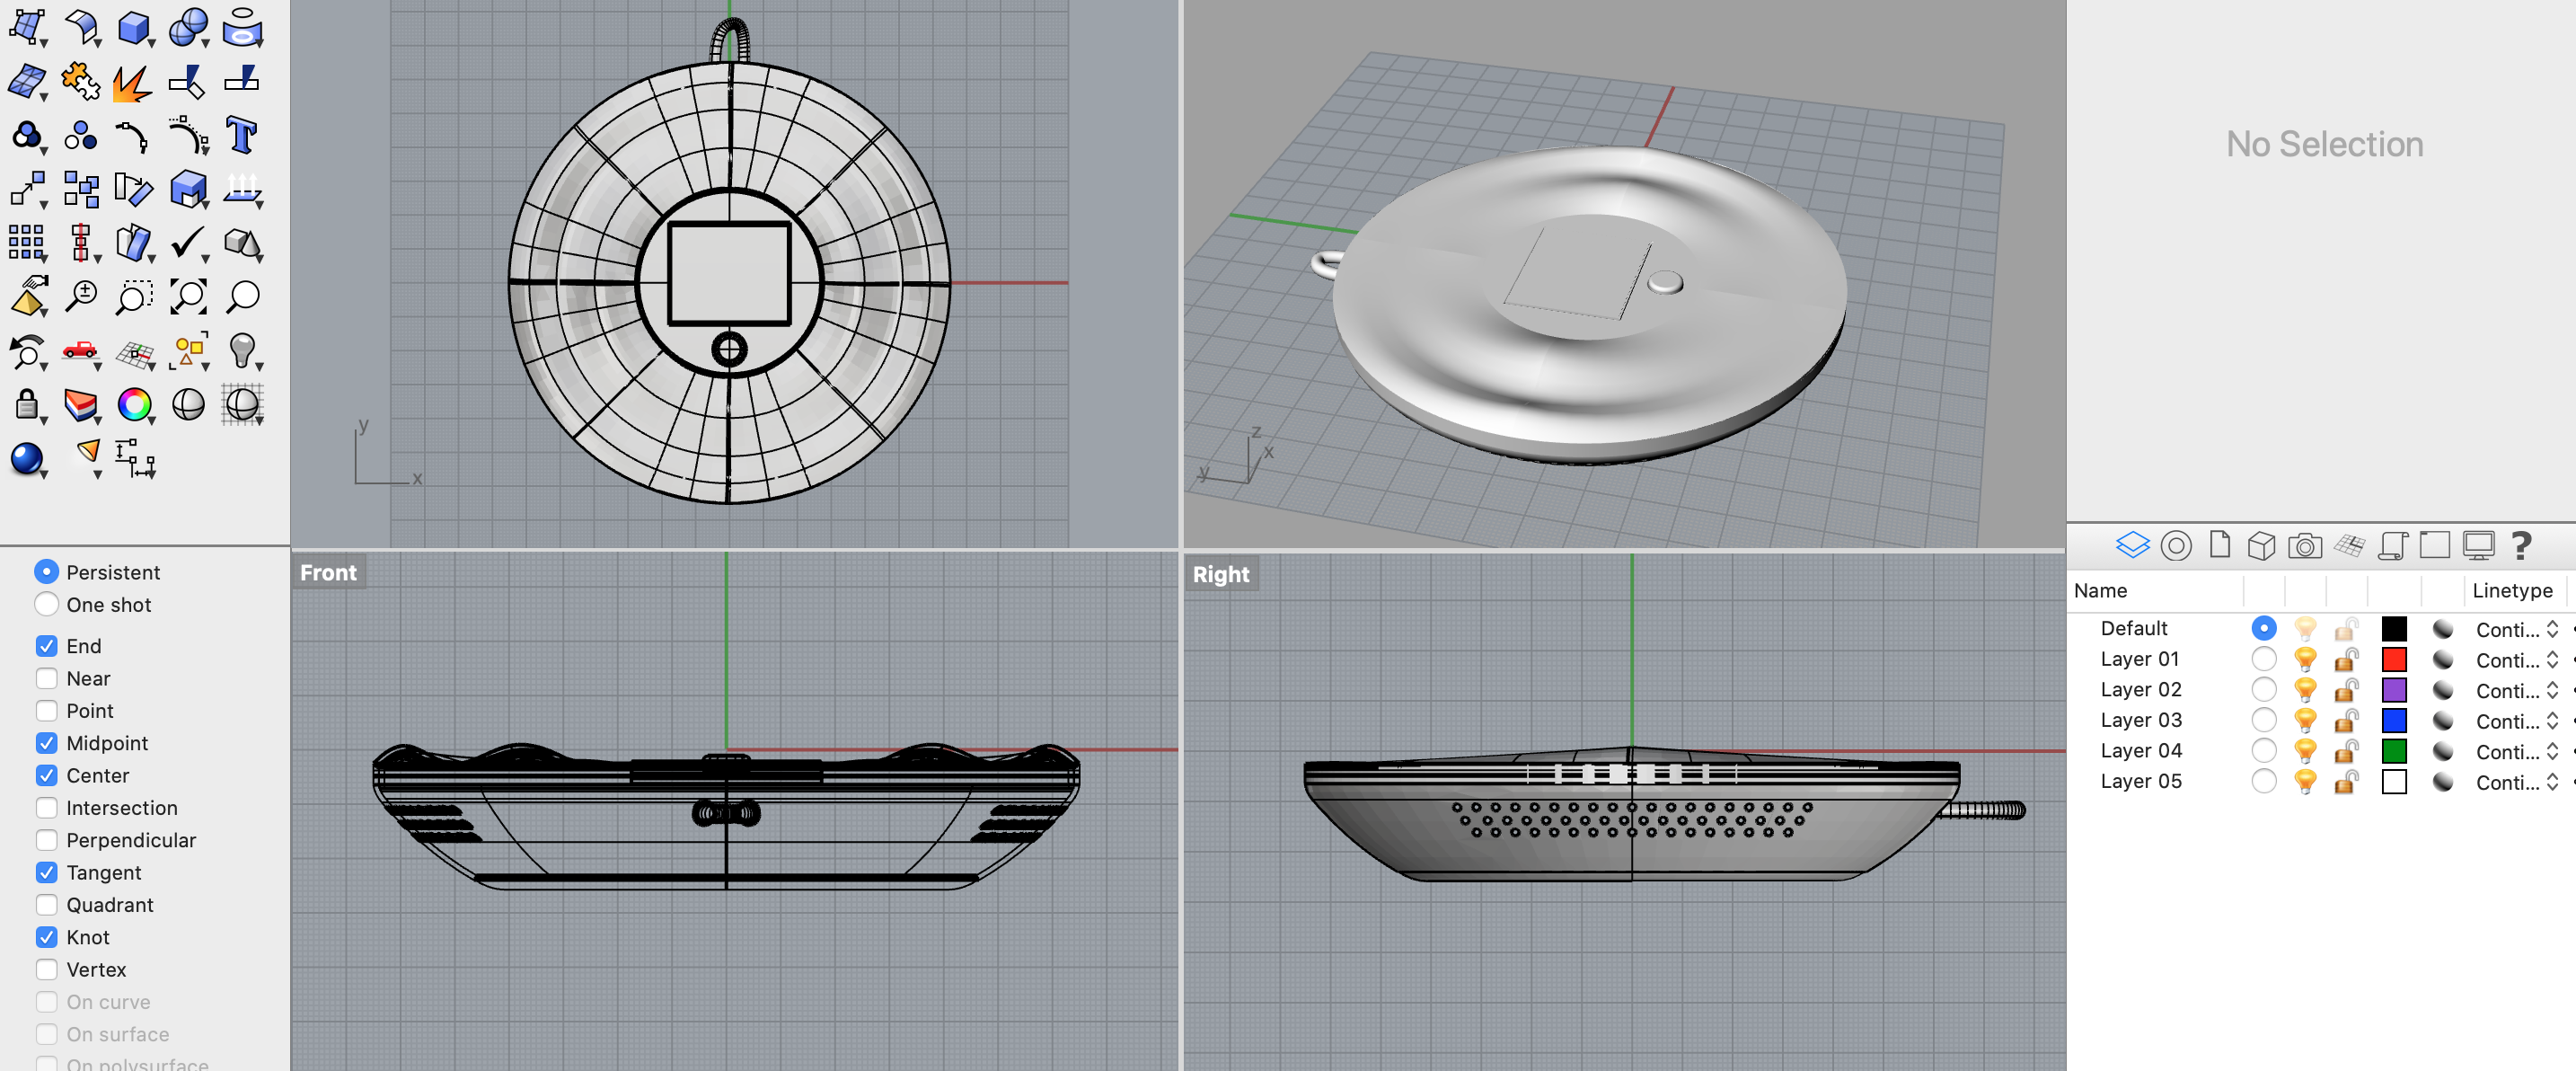
2- Usually I use Rhino for 3d modelling so I started in Rhino but below you can see how I tried to use Fusion.
3- To previsualize my products, proof concept and to show to other I always try to make some renders
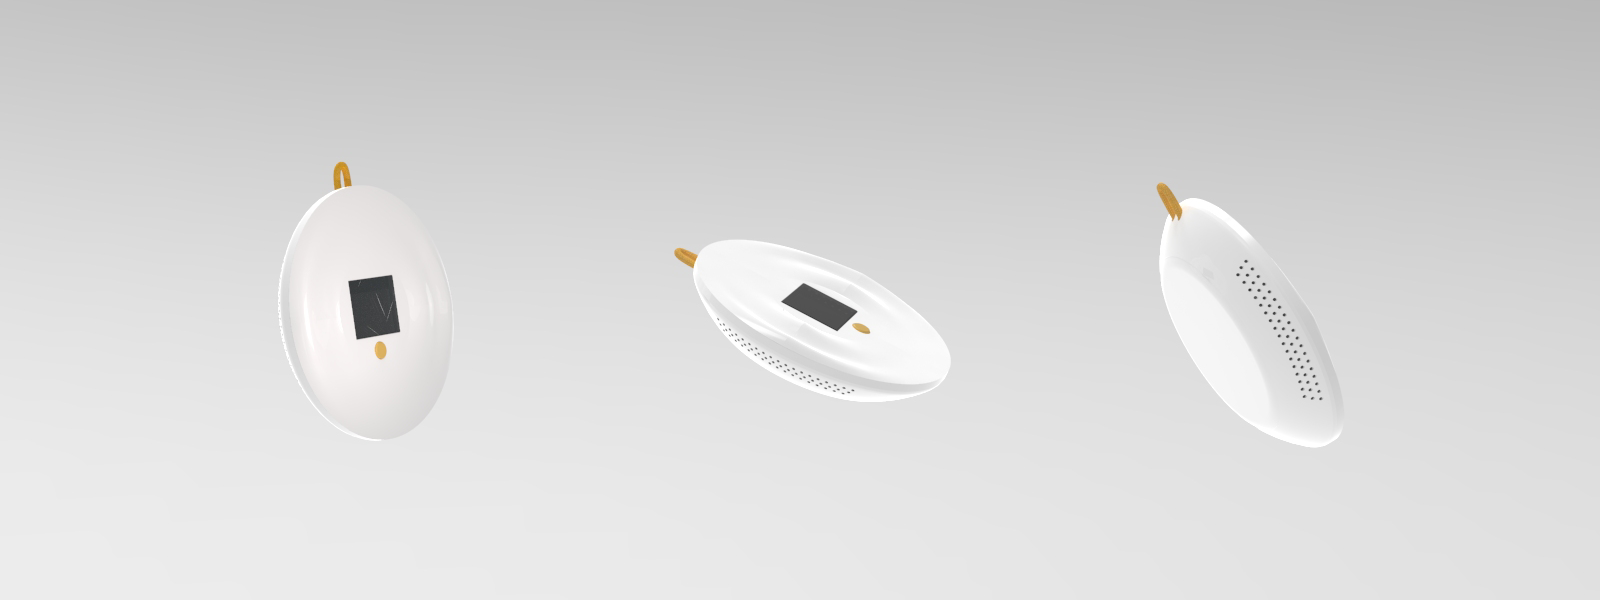
I made a quick (basic) guide on how to render in Keyshot. By far one of my favorite softwares to render, the interface is really easy and friendly and you can achieve professional results.
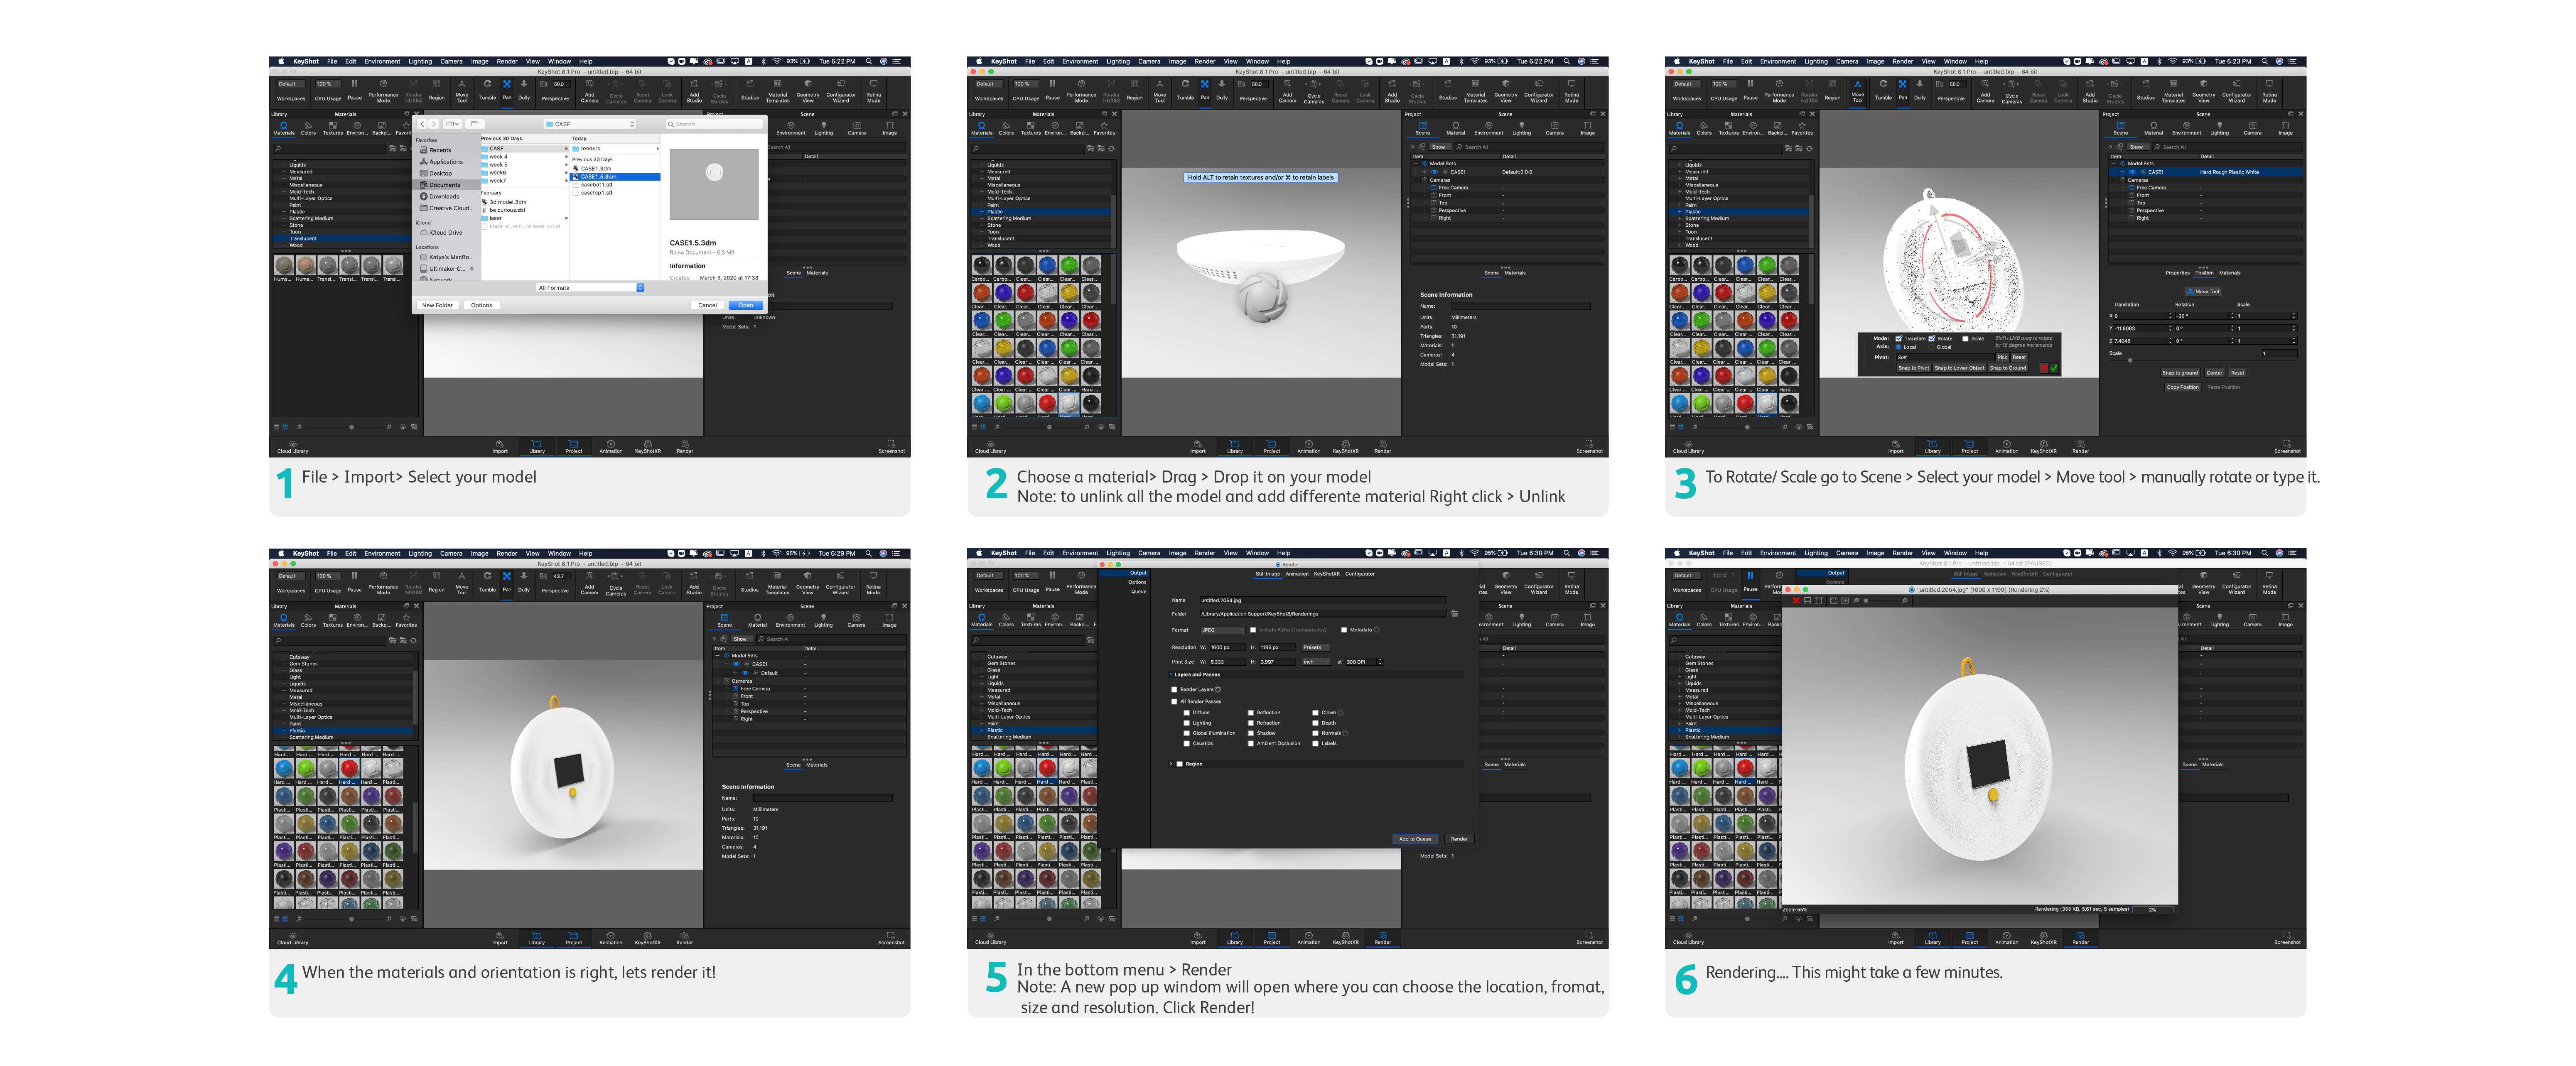
In case the text in the image is too small...
1- File > Import> Select your model
2- Choose a material> Drag > Drop it on your model
3- To Rotate/ Scale go to Scene > Select your model > Move tool > manually rotate or type it.
4- When the materials and orientation is right, lets render it!
5- In the bottom menu > Render
Note: A new pop up windom will open where you can choose the location, fromat,
size and resolution. Click Render!
6- Rendering.... This might take a few minutes.
2D Design
For 2D design I find Adobe Illustrator one of the most used and friendly software, it is compatible with many 3d modelling softwares like Rhino, Fusion and sketchup amongt others. Illustrator is use for creating vector graphics for print or the web, from logo making, packaging, rendering, illustrating etc.
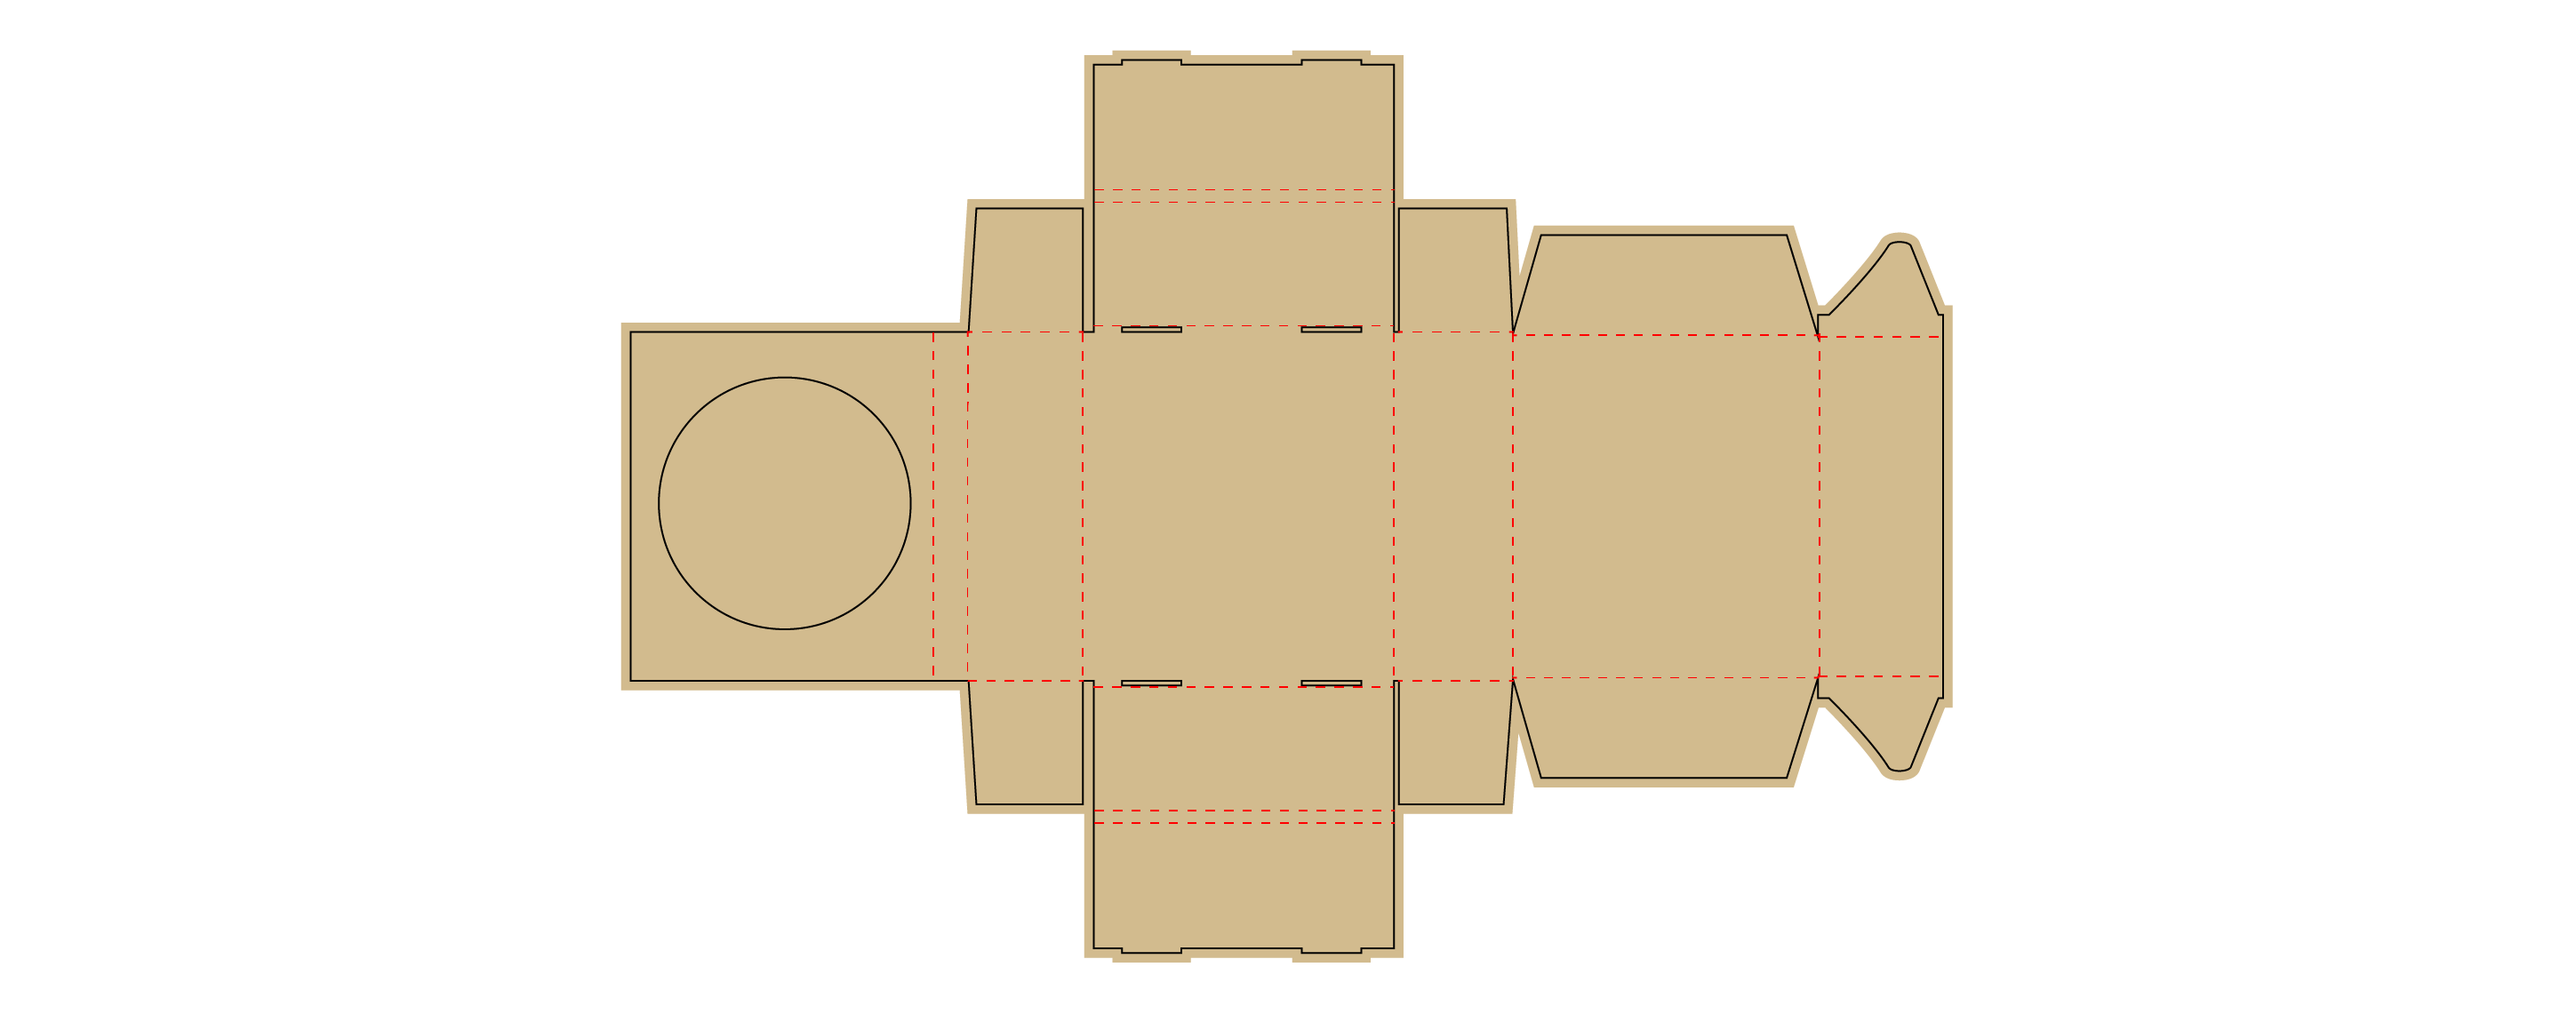
I used adobe illustrator to design the packaging for my Earthquake detector projects: Here is my process:
1- To keep everything organized, in the layer panel, I created a layer for "reference", "cut" and "fold".
2- Then I clicked on the "pen tool" (short cut "P")and start drwaing the outline of the box in its layer
3- Folding lines in the fold layer, the save it or export it. Most of the prototyping machines (2d) only read DXF so you can export it from Ai (Adobe Illustrator).
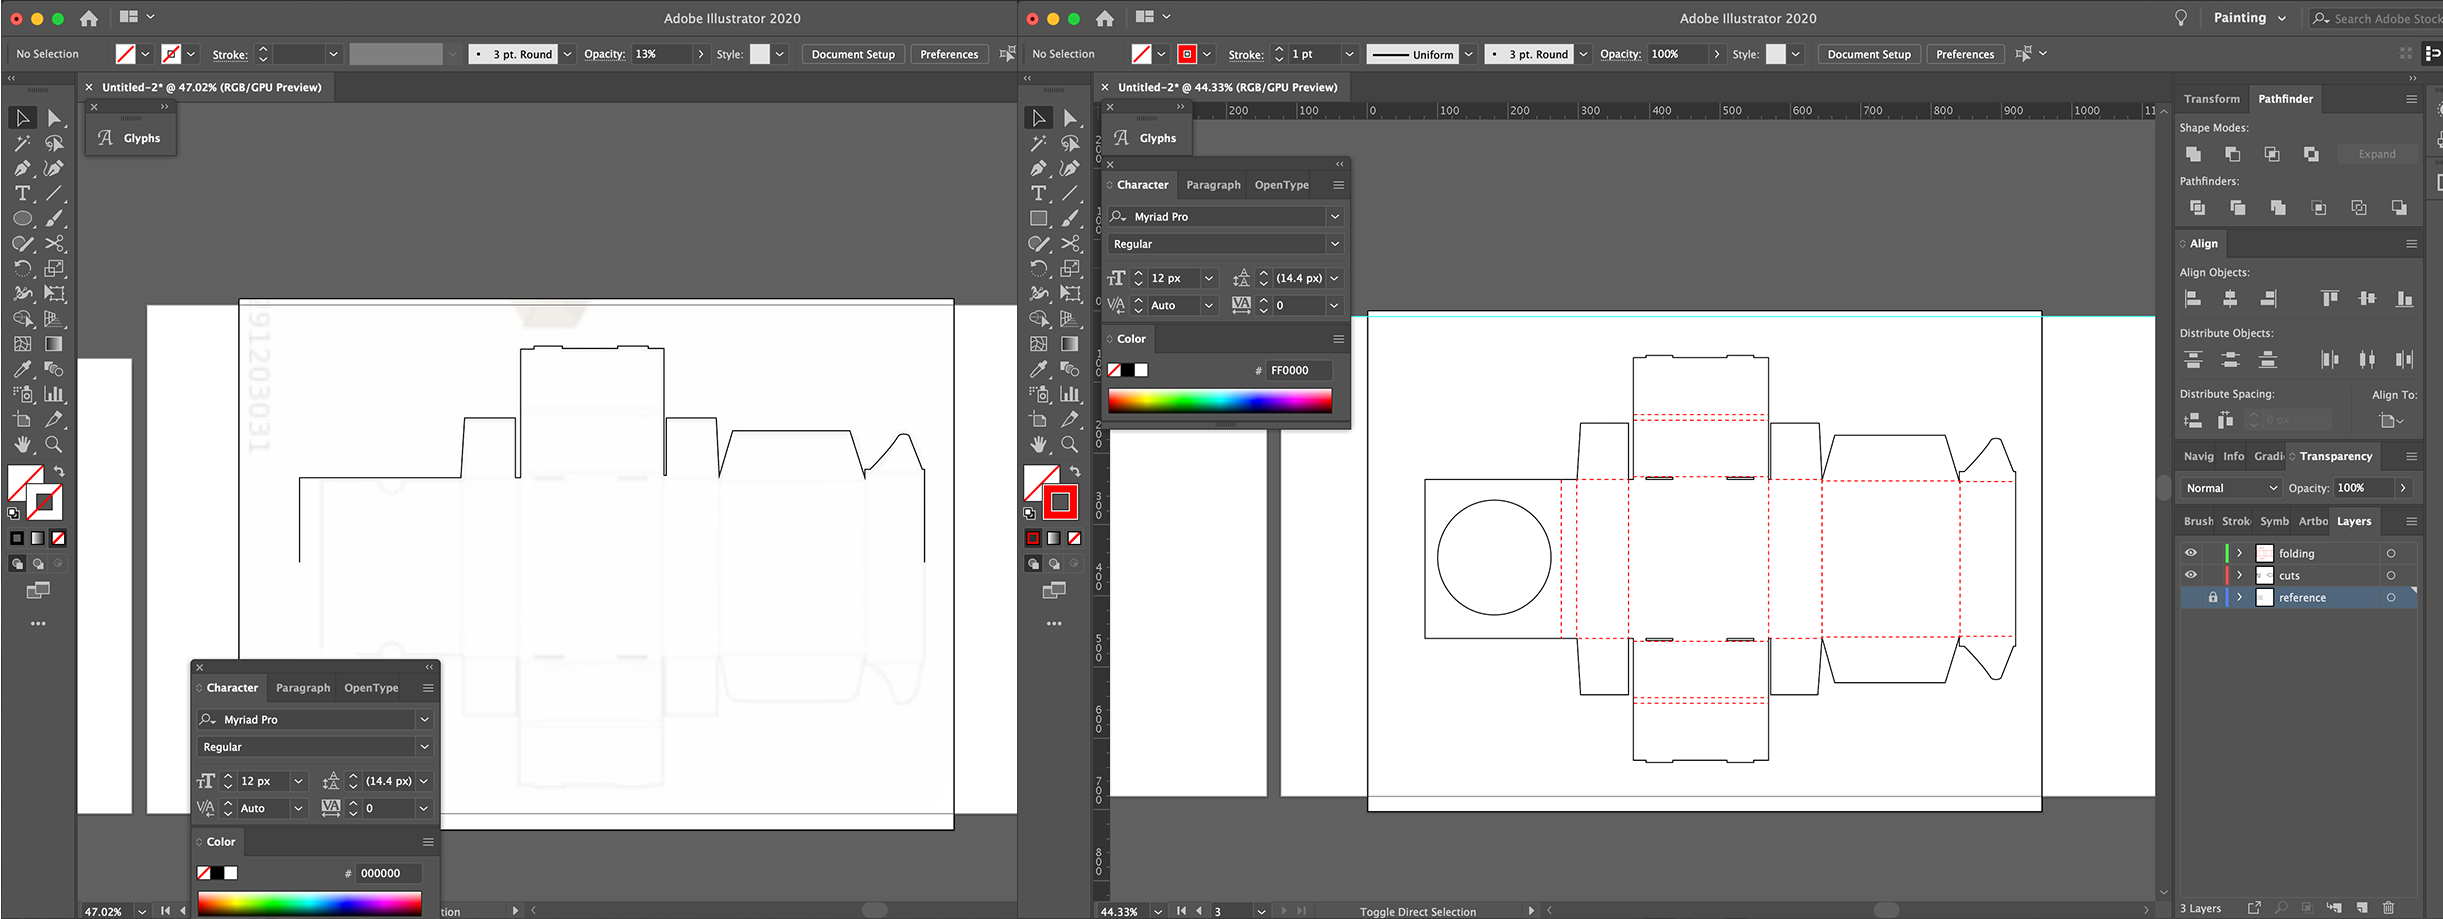
And here is the structural packaging for the Earthquake detector: