Embedded Programming
Week 08
Machines and Materials
Softwares
Files
Group Assignemt
During this week we started programmings our board first we read the datasheet for the microcontroller we are programming and then, in my case, using arduino, I programmed the board I have made to do something.
Individual Assigment
-Read the datasheet for the microcontroller you are programming.
-Program the board you have made to do something, with as many different programming languages and programming environments as possible.
Some useful links:
1- Tasneem Hussain - Fabriacademy Link
2- High Low Techa Link
3- Instructable Link
ATiny 45
ATTINY45 is high performance, low power controller from ATMEL. It is an 8 bit controller based on Advanced RISC architecture. It is one of members of ATTINYXX series, popular because of its small size and features.

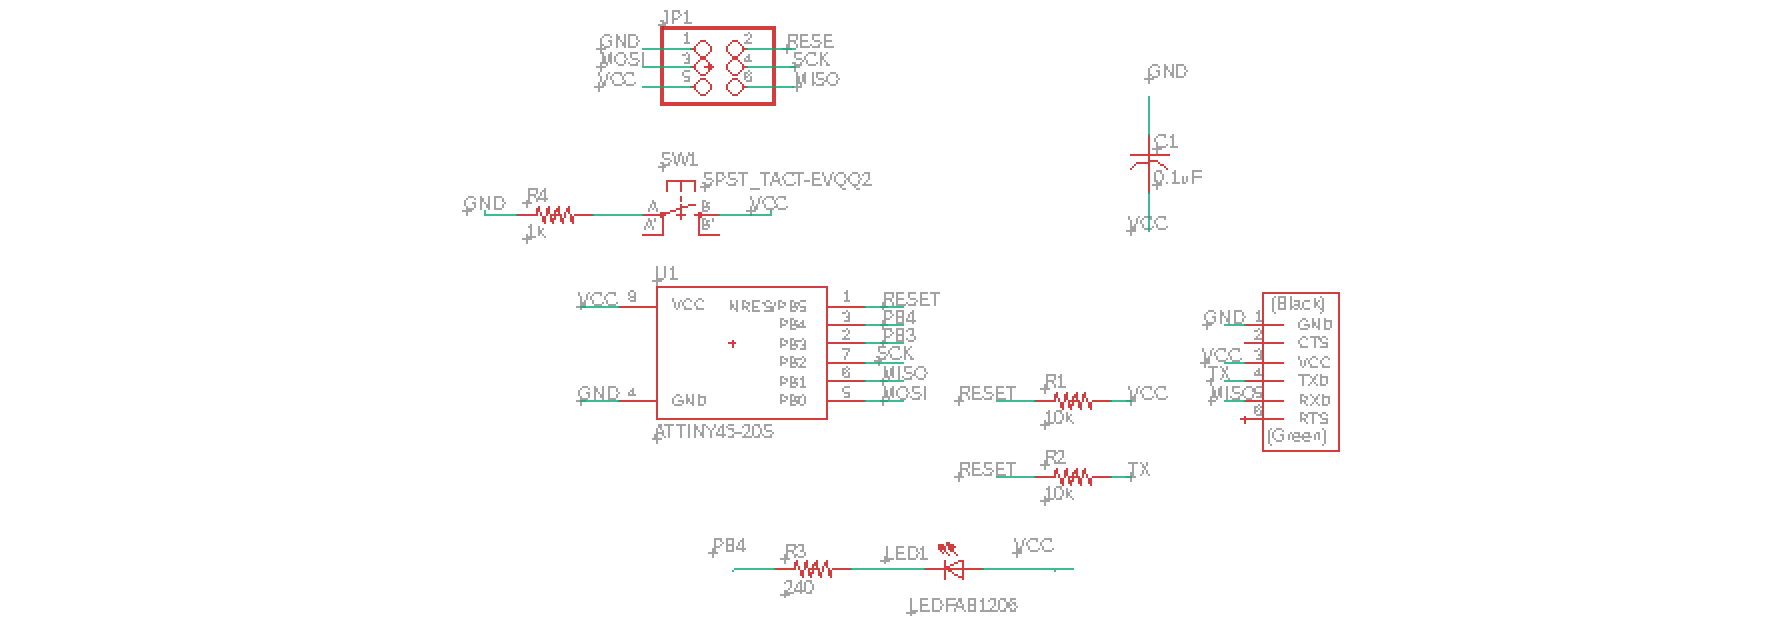
Here is a quick guide for the pinouts:

Before step number 1, I found a mistake in my board (1 pin was not connected) so I solder it in order to create a conection.
Here are the steps:
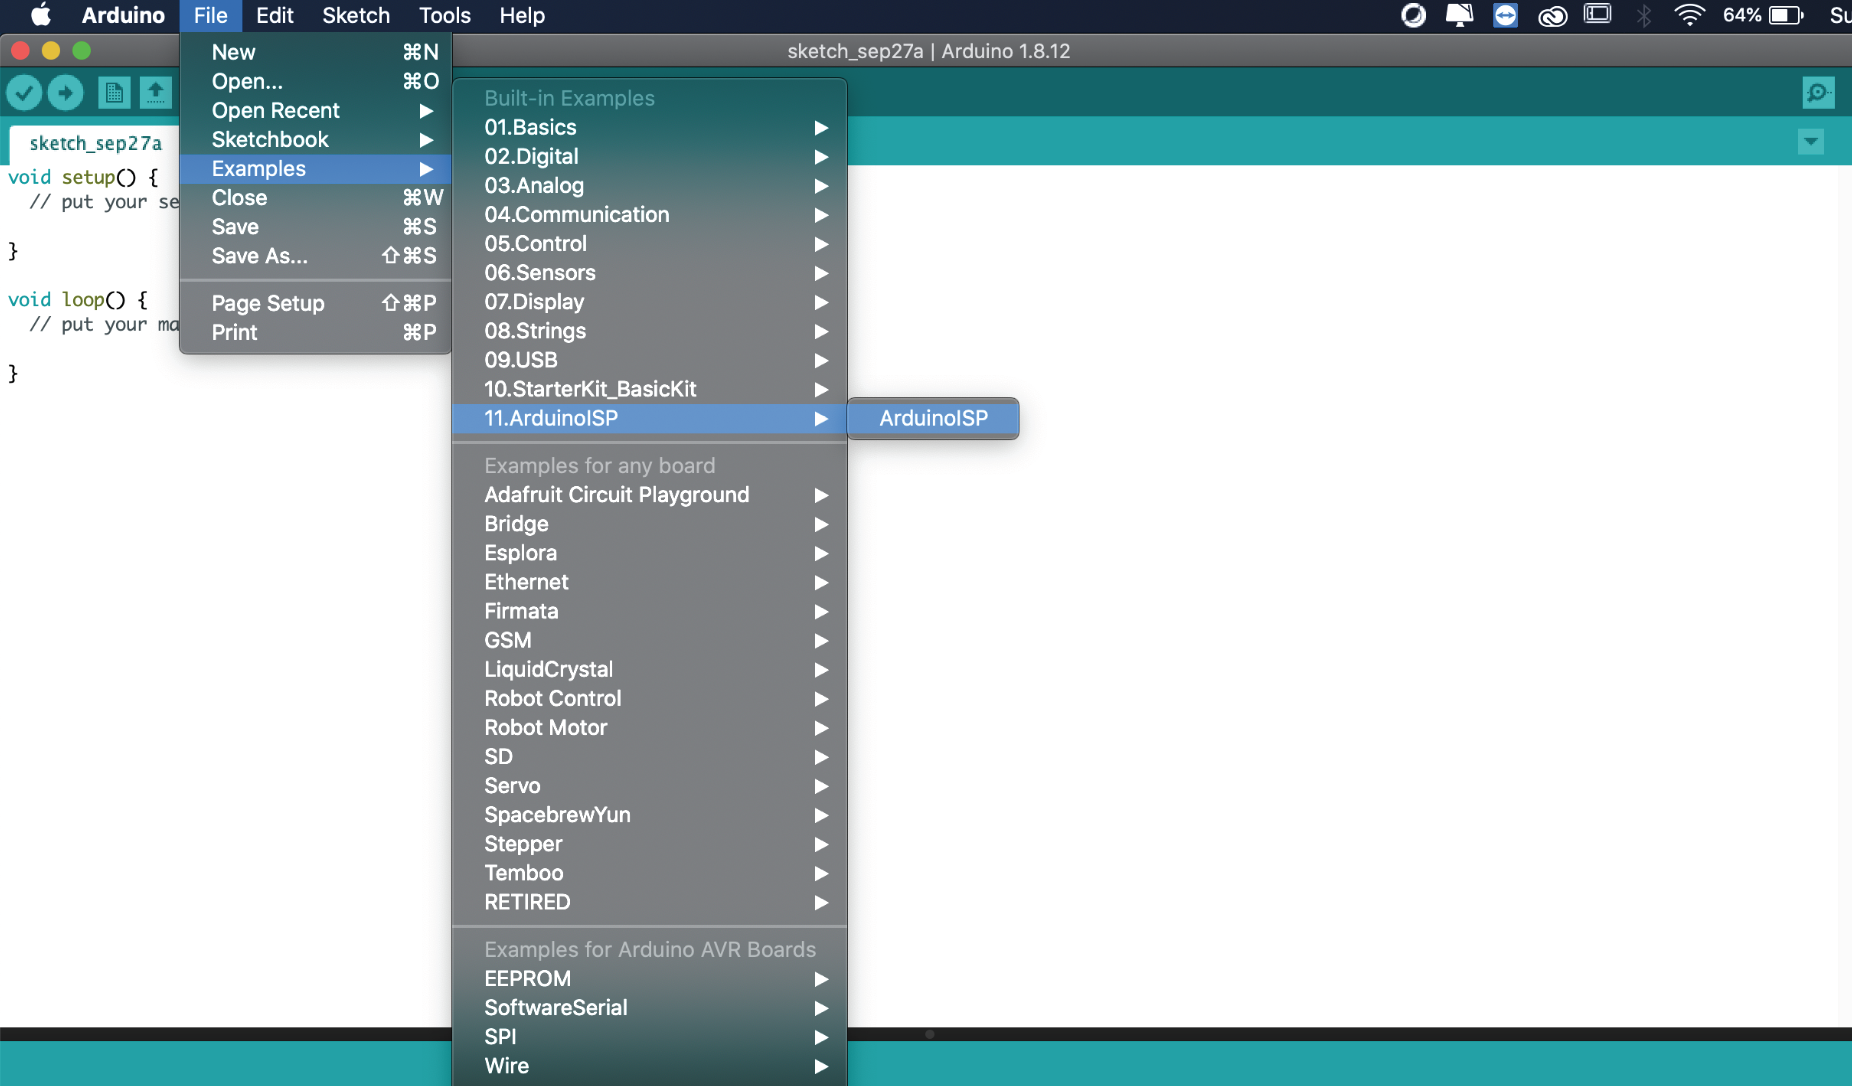
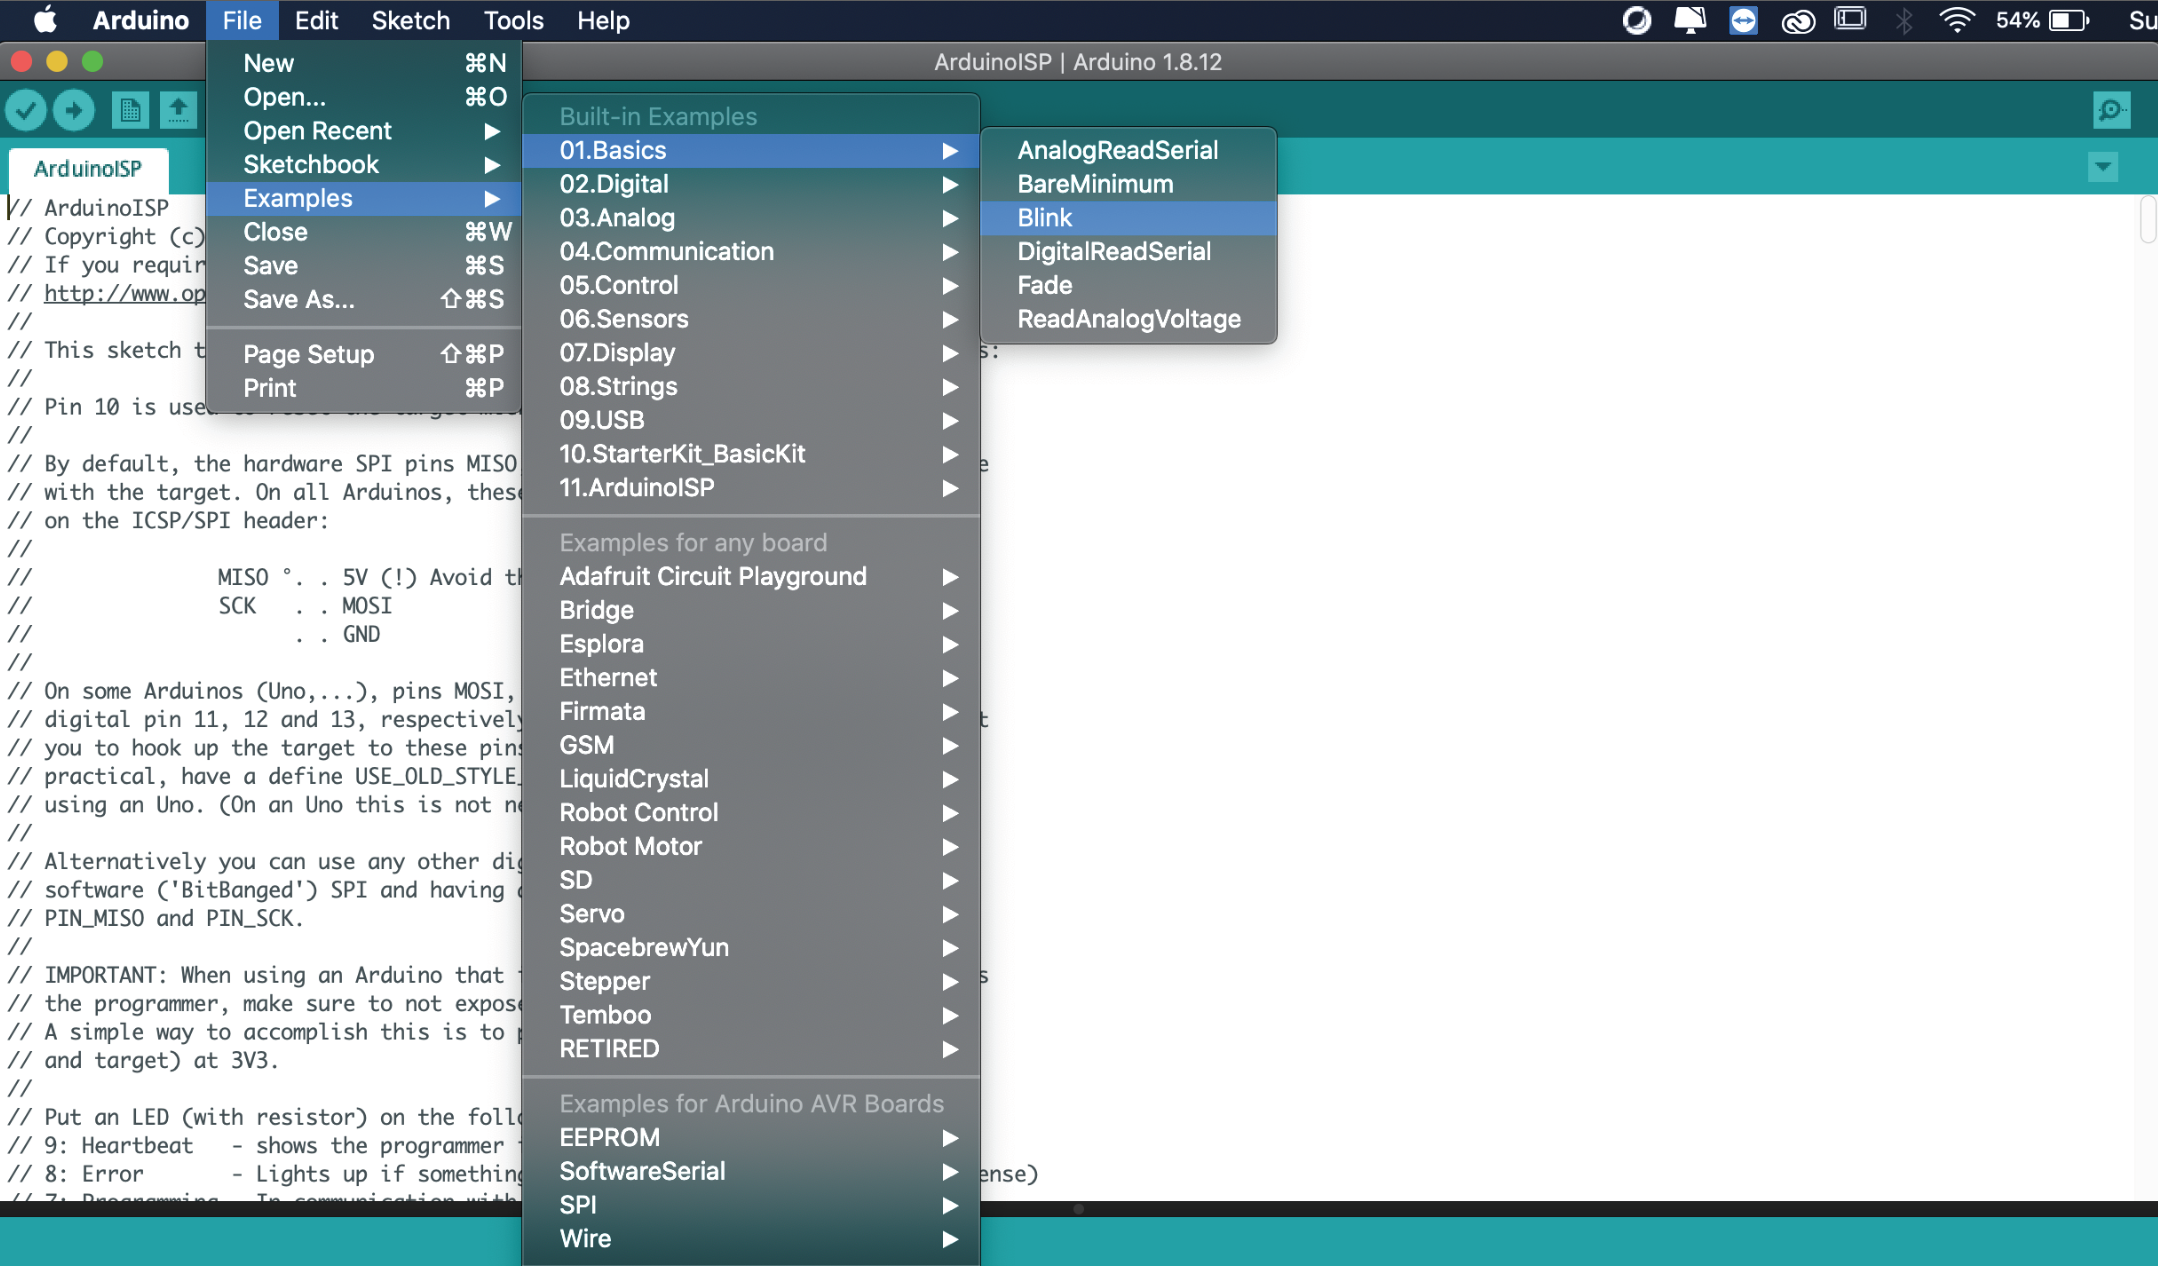
1. Open Arduino IDE -> Example-> 11.ArduinoISP -> Arduino ISP -> Upload to the arduino conected by a USB cable
2. Instal ATiny board in Arduino IDE:
File -> PReference -> Additional Board Manager -> paste the following link:
https://raw.githubusercontent.com/damellis/attiny/ide-1.6.x-boards-manager/package_damellis_attiny_index.json
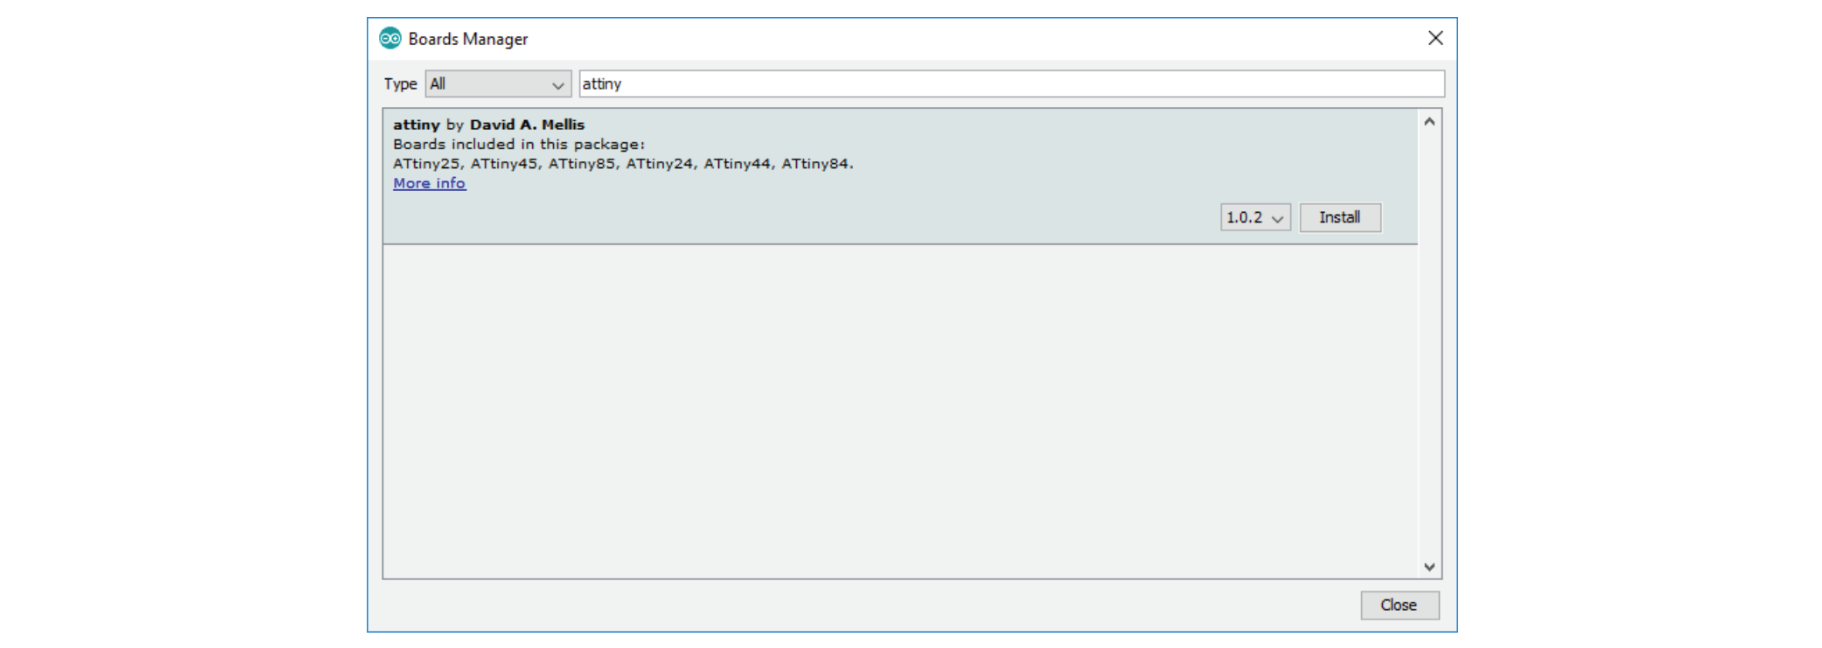
3. Go to tools -> Board -> Board Manager.
4. Search "attiny" -> Install

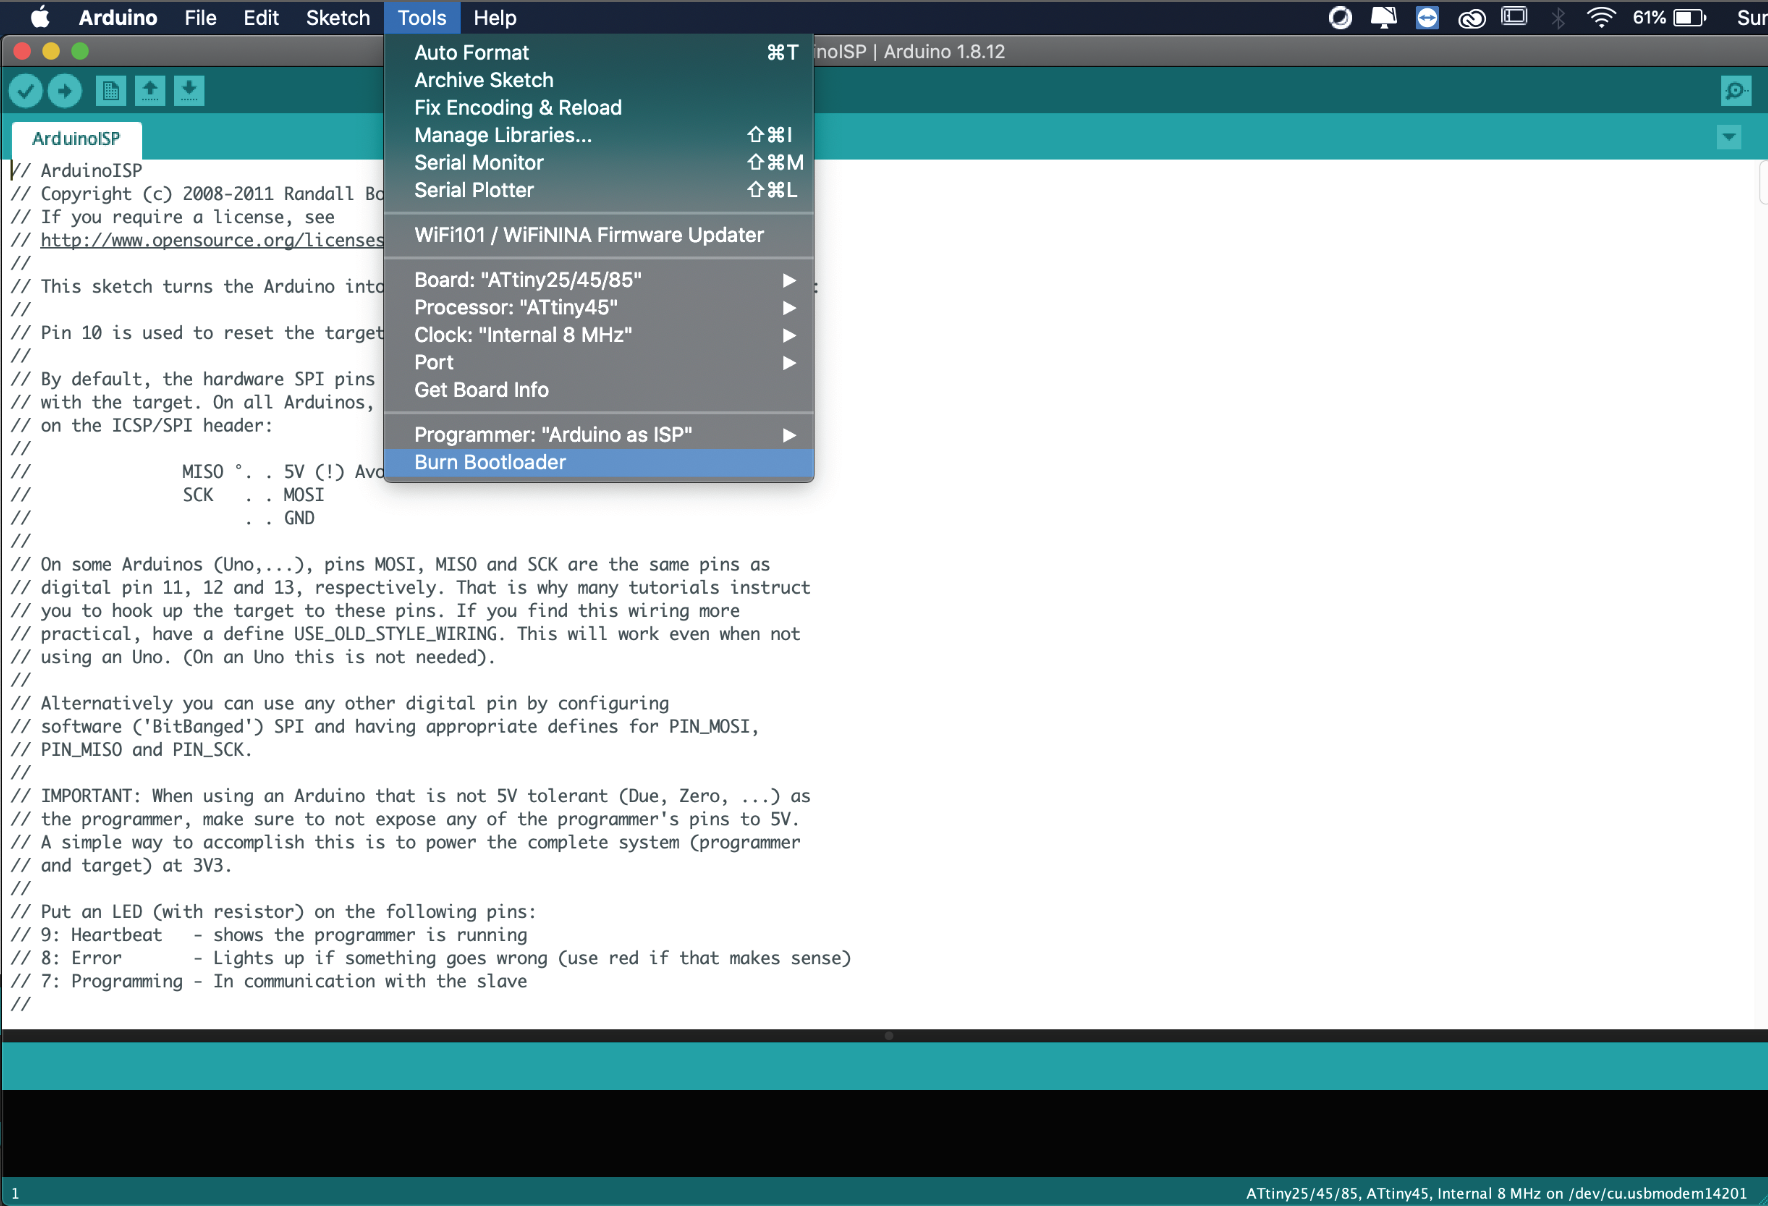
5. When it is already installed follow this settings
-> Tools:
-> Board ->Attiny25/45/85
-> Processor -> Attiny45
-> Clock -> Internal 8MHz.
-> Port -> Programmer -> Arduino as ISP
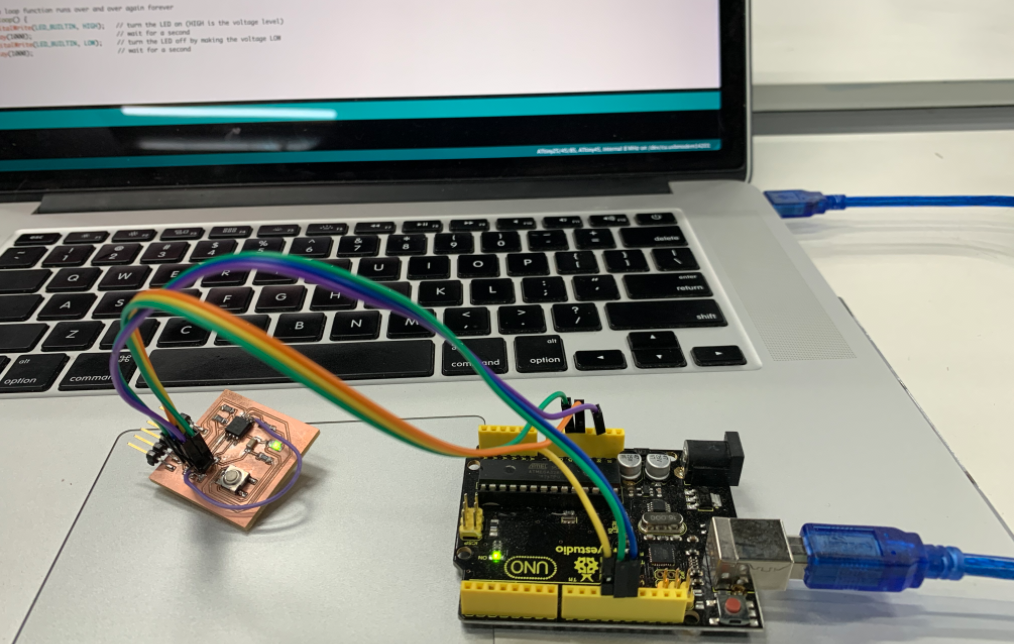
6. Connect the Arduino to the board following the diagramas shown above. For my board I conected as followed:
PIN 1 - PIN
PIN 2 - PIN
PIN 3 - PIN
PIN 4 - PIN
PIN 5 - PIN
PIN 6 - PIN
PIN 7 - PIN
PIN 8 - PIN
7. Conect the Arduino to your laptop.
8. Tools -> Burn Booloader (this might take a while)
9. In case it doesnt work, make sure:
- You have the last version of Arduino IDE
- Your pins are conected properly
- No cables are loose
- Press reset and try again
10. To make your LED blink, in Arduino IDE open -> File -> Examples -> Basic -> Blink.
11. Change the pins to match yours.
12. To upload DO NOT click the upload booton! Go to Sketch -> Upload using programmer.