Week 3 COMPUTER AIDED DESIGN
The laser cutter in our lab is a GLS, a GCC SpiritGLS CO2 laser cutter.
Work area: 960x610mm
Materials: acrylic, plywood, cardboard, felt, textile, rubber, MDF, plexiglass
But we should consider that some materials, like acrylic and MDF, emit toxic gases and shouldn't be chosen for big productions and made using a protective mask.
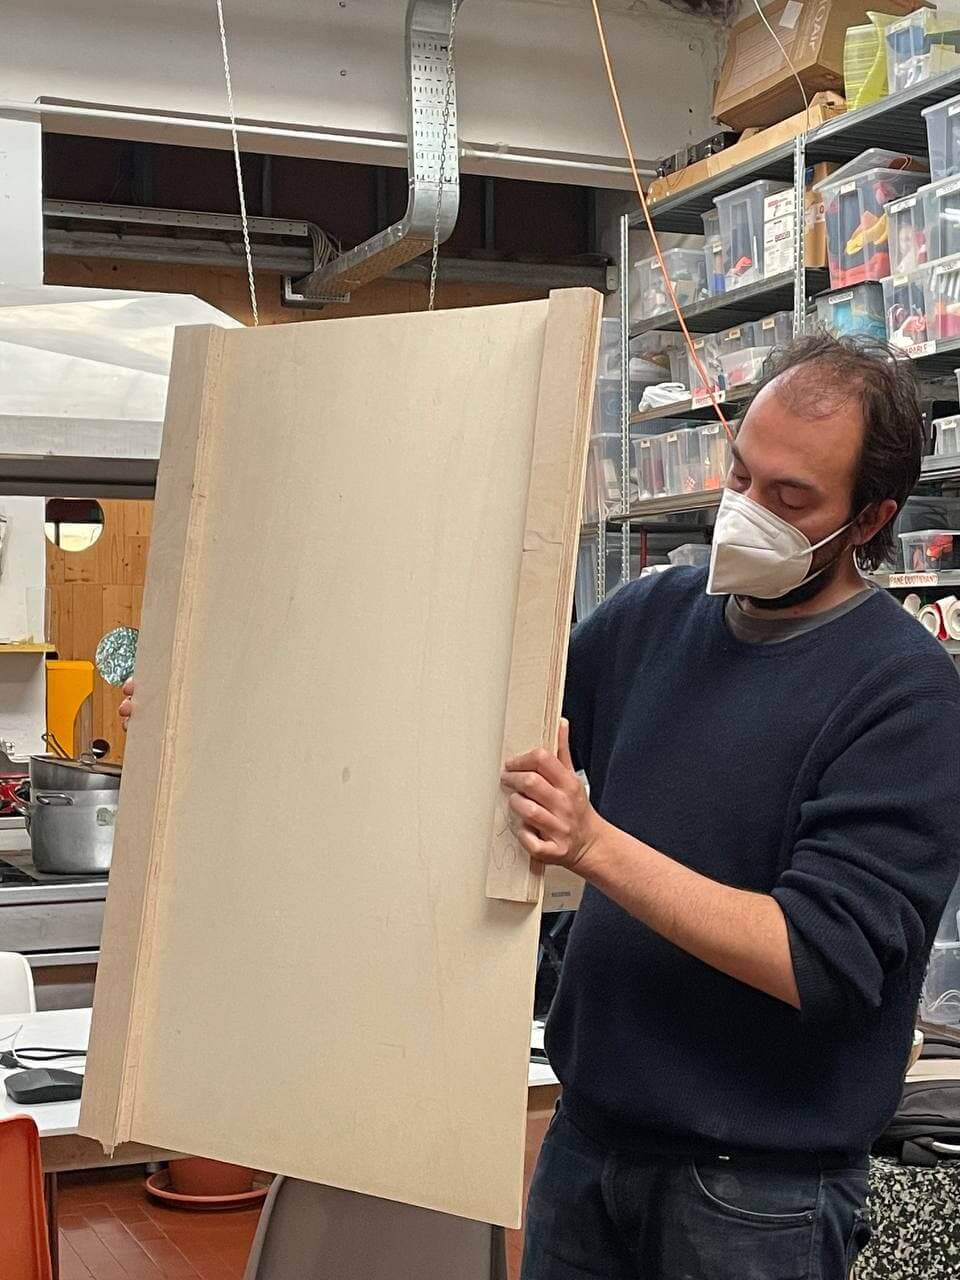
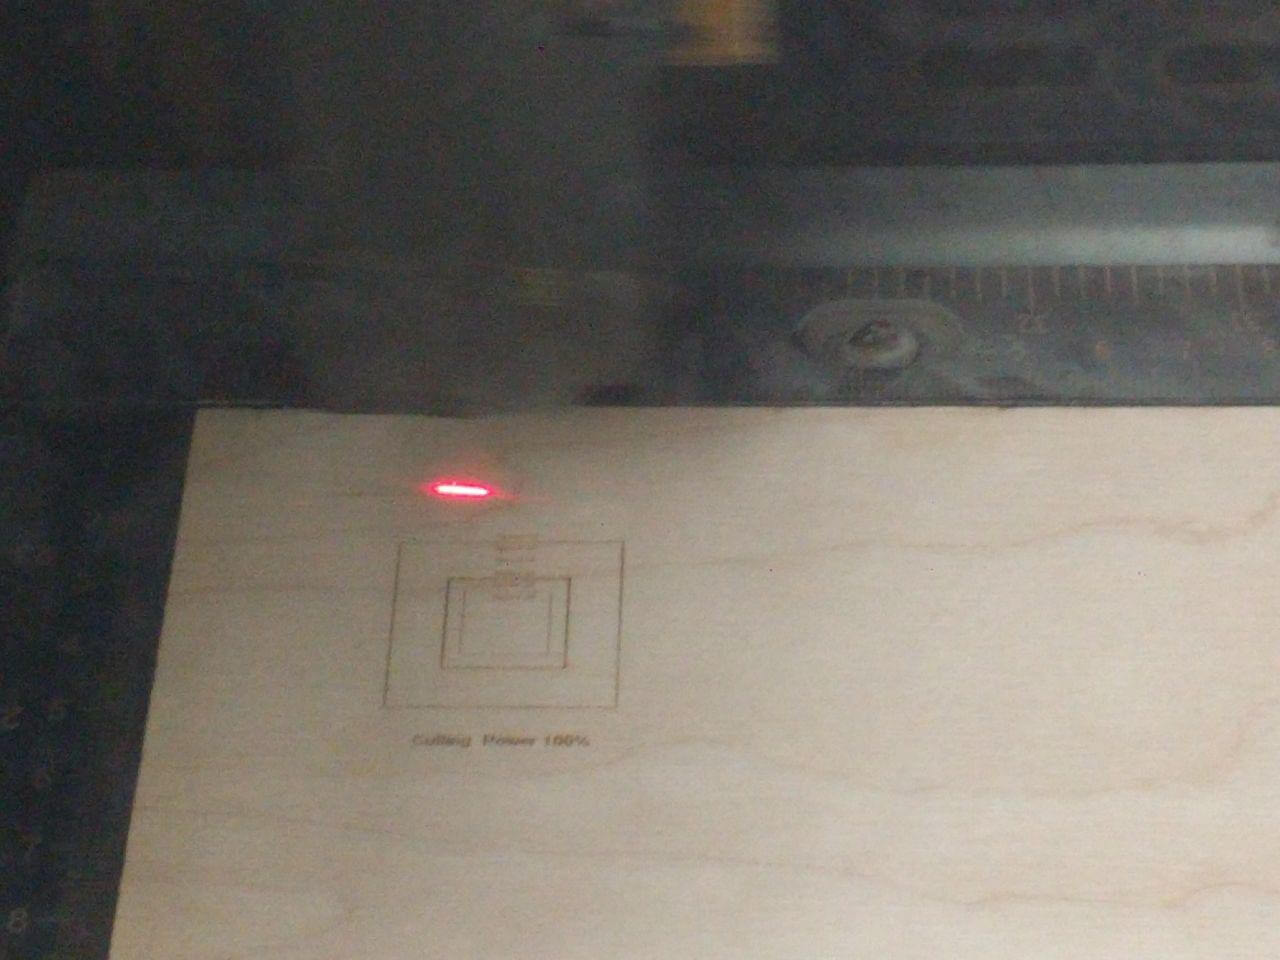
When putting a material on the lasercutter mind to use some burdens to make the surface flat, especially when cutting a plywood surface.
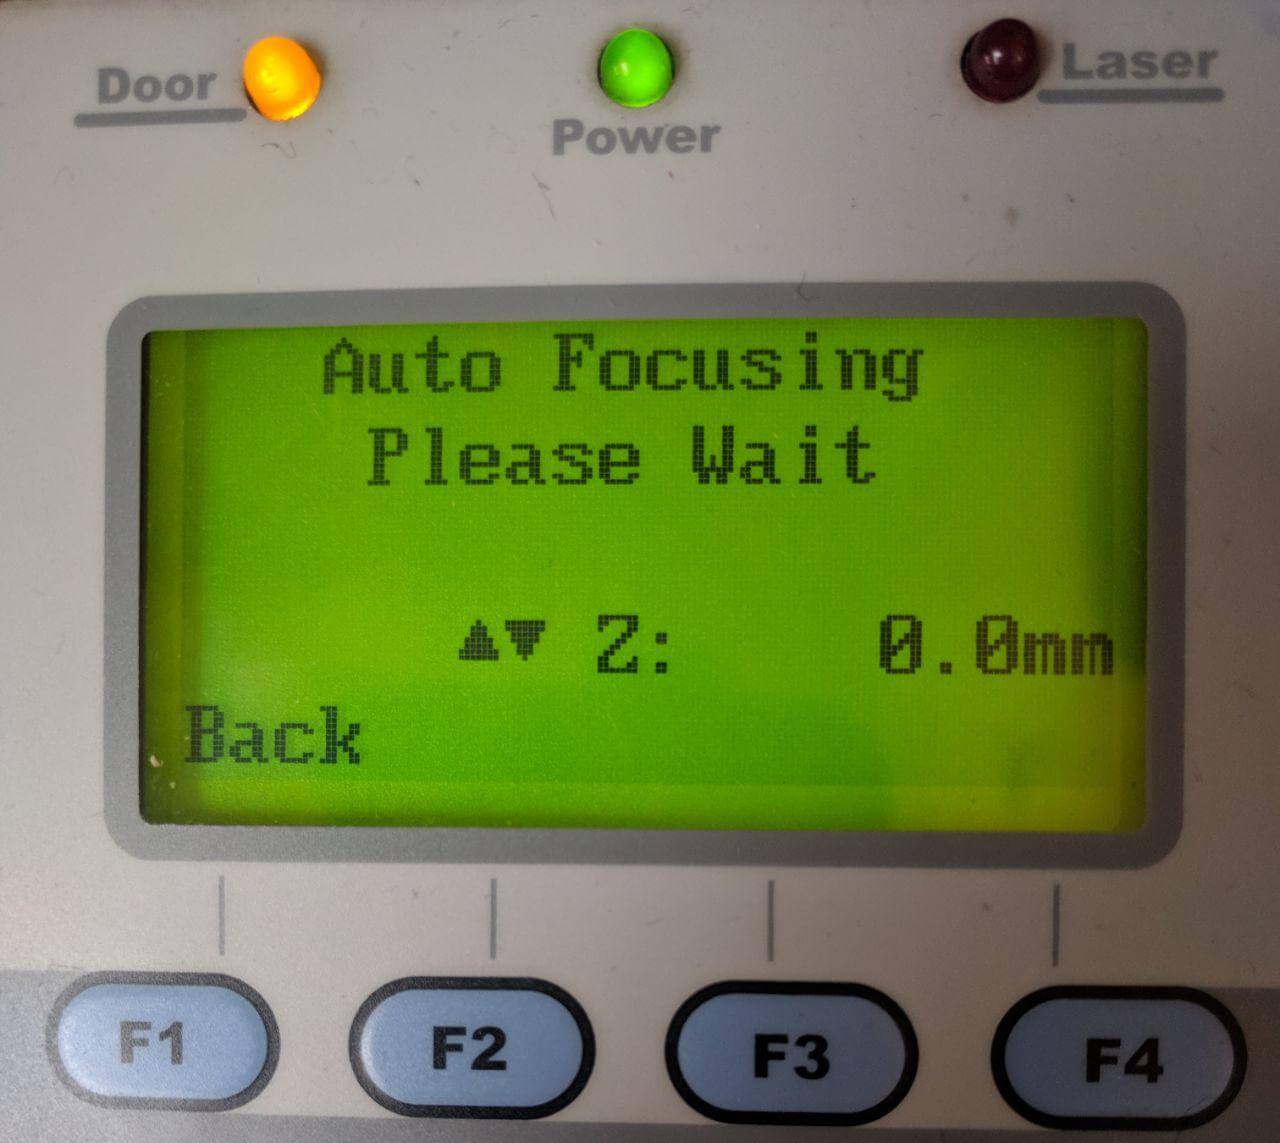
Before cutting mind to make the autofocus, positioning the focus calibration tool and activating autofocus mode on.
In order to make planar a material that got curved due to ambiental reassona, you can make it planar again nailing it to a wooden structural frame.
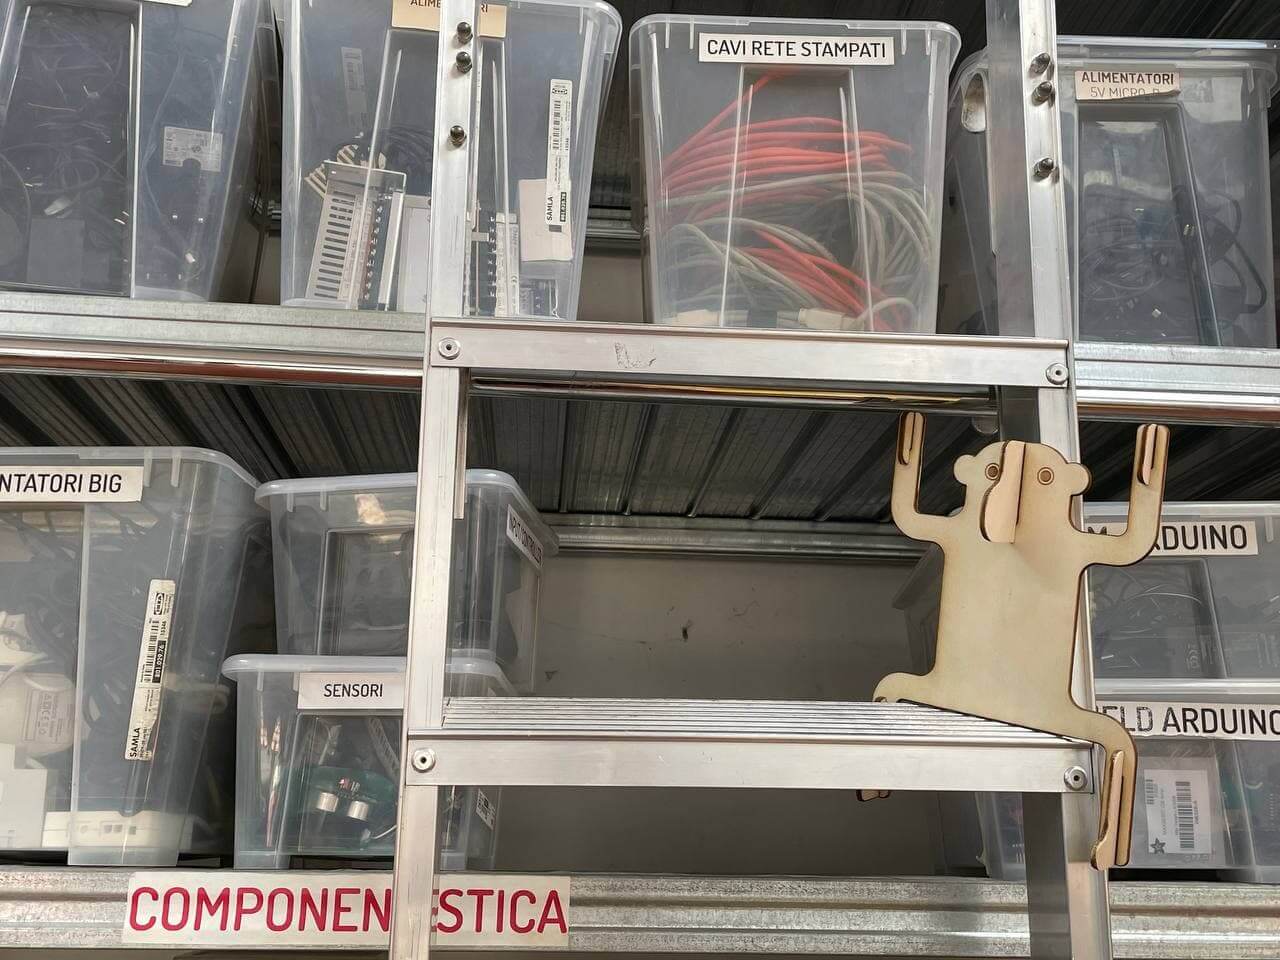
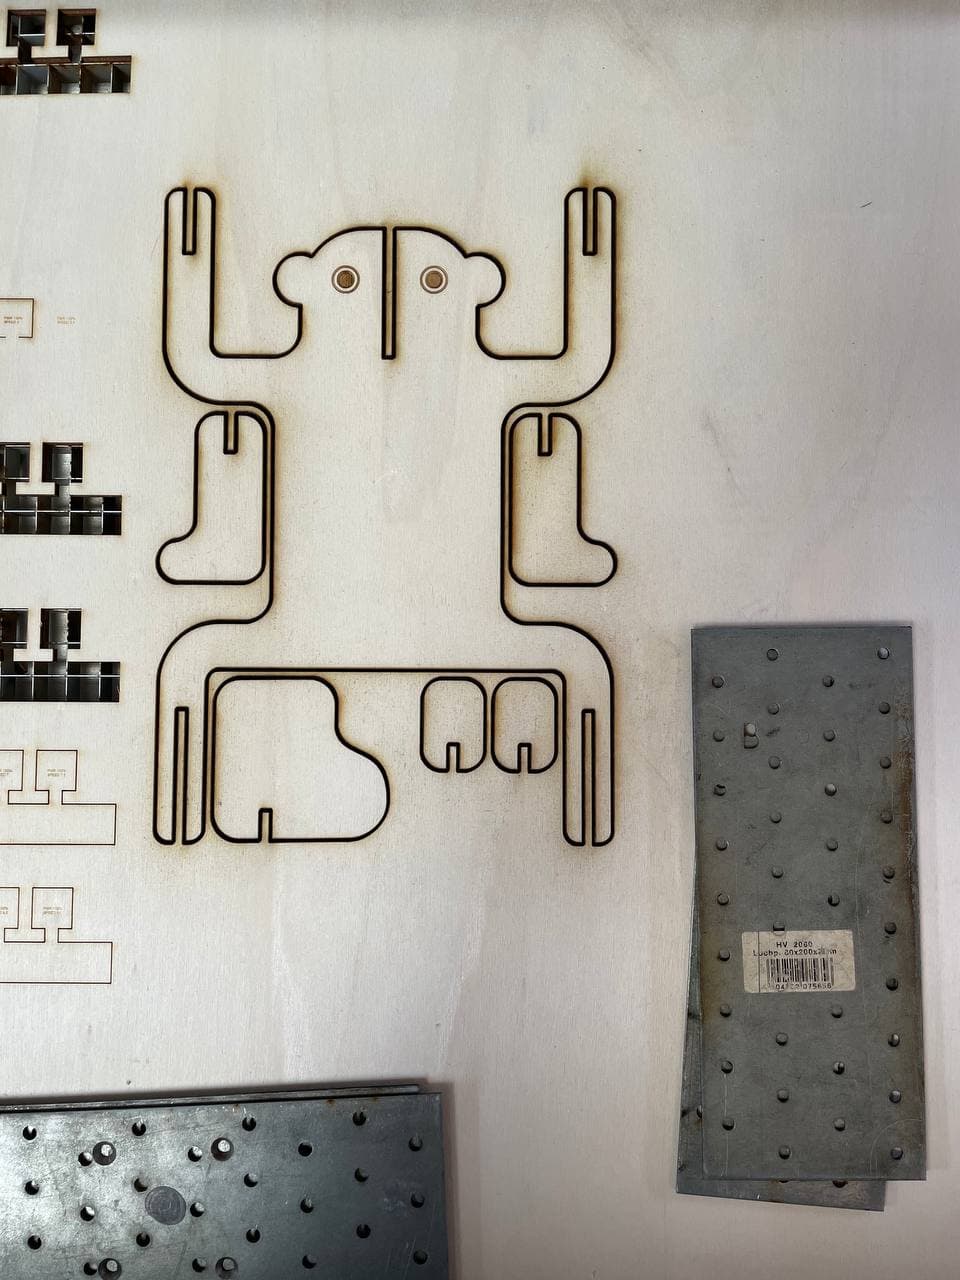
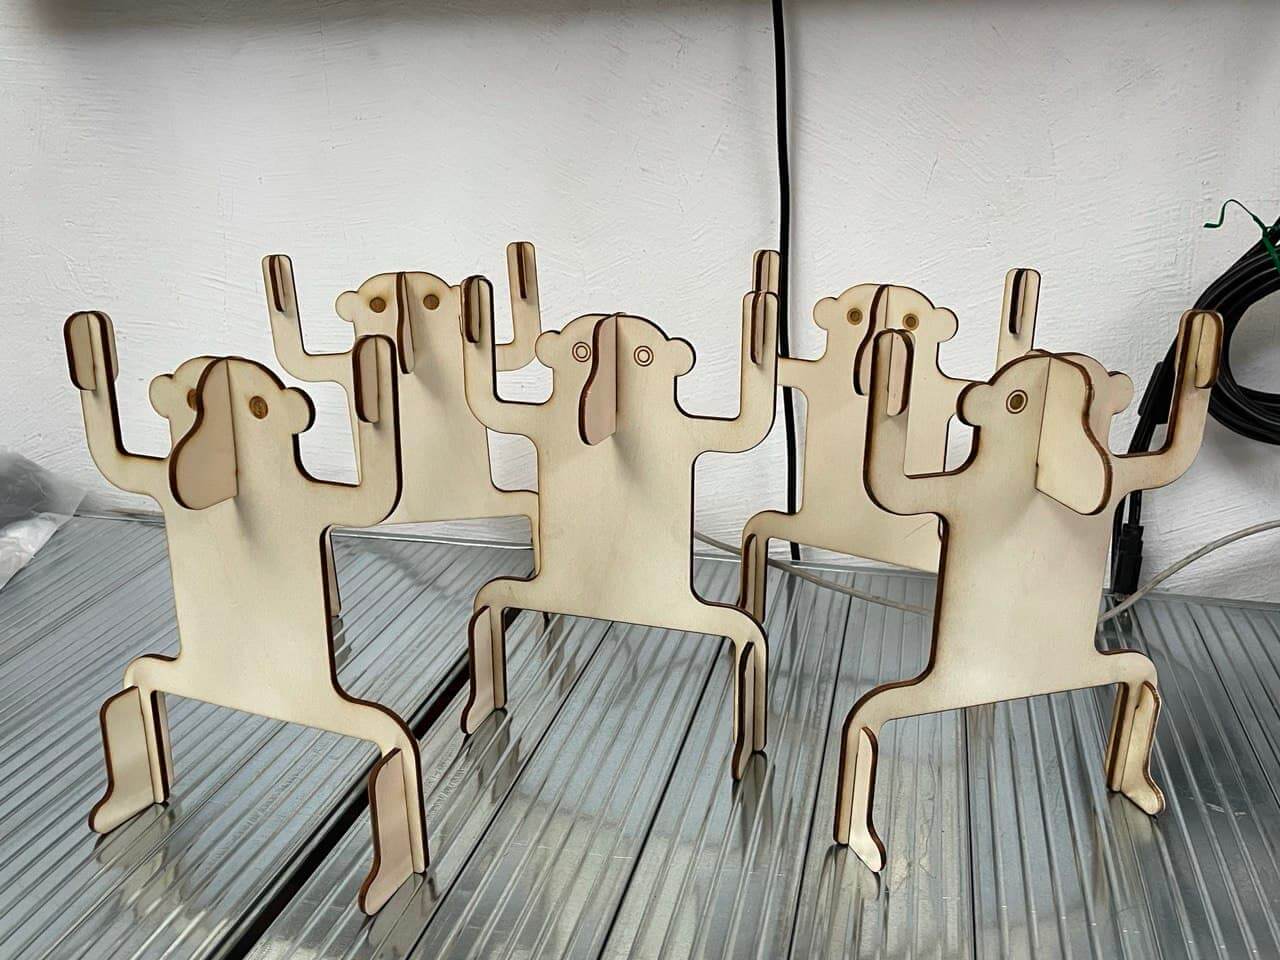
LAB MONKEY
In order to make the digital fabrication process more joyful and involving, I though that design could be a helpful tool to make the learning experience memorable.
As Fab Lab is not just a workshop for model making, but an actual part of the city where citizen can approach an innovative production philosophy.
The future generation of digital natives will be very technologically skilled and it would be important to create connections between education and productions to make people able to make almost everything.
This is the intent of this Monkey doll.
The inspiration comes from the Danish design wodden toys and by the Zizì monkey by Bruno Munari, who first experimented the new material for the rubber company Pirelli with a collection of foam rubber toy animals. The Zizì monkey become the most iconic piece winning a Compasso d'Oro in 1954.

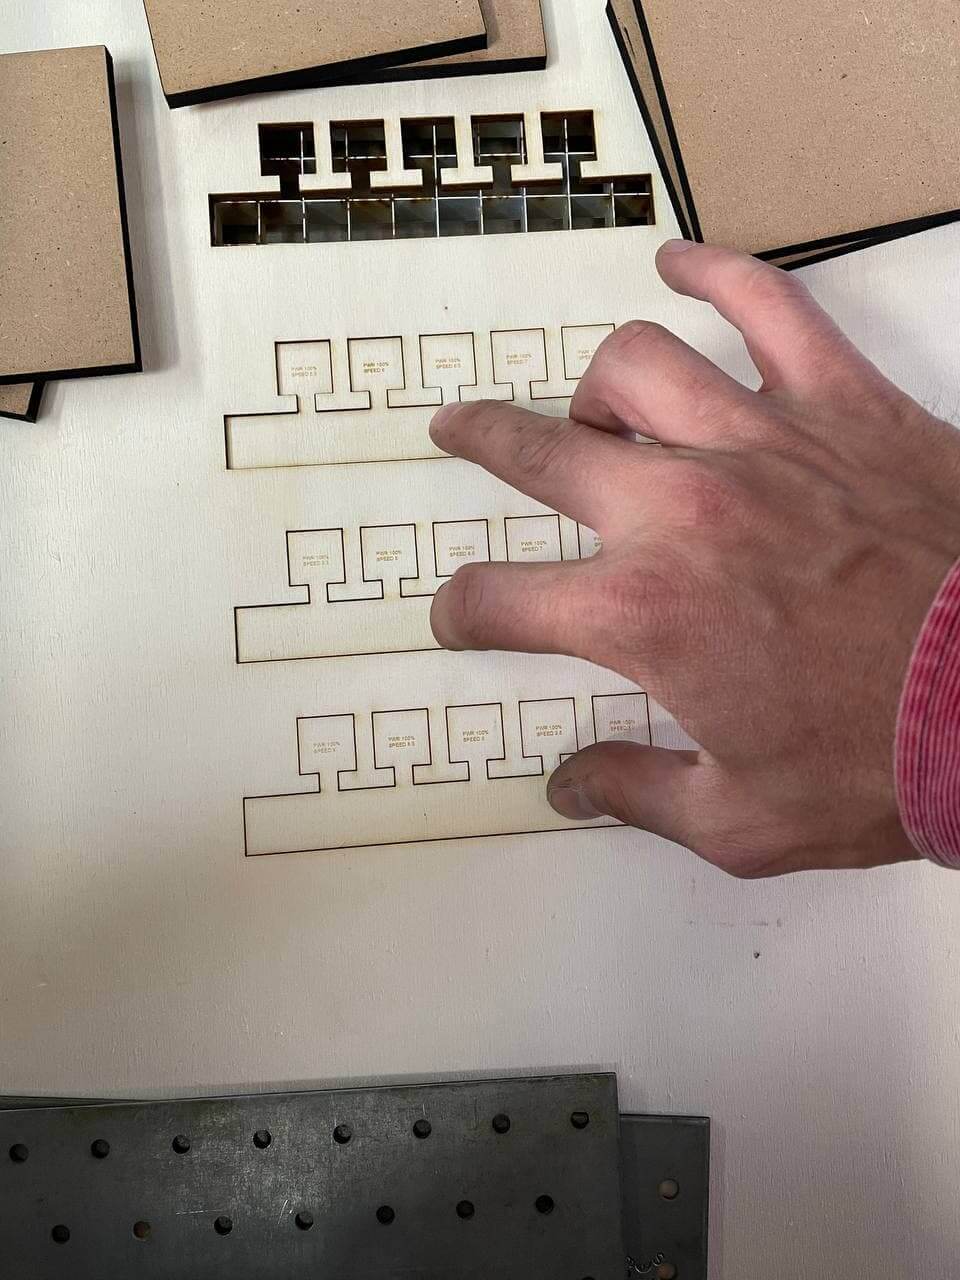
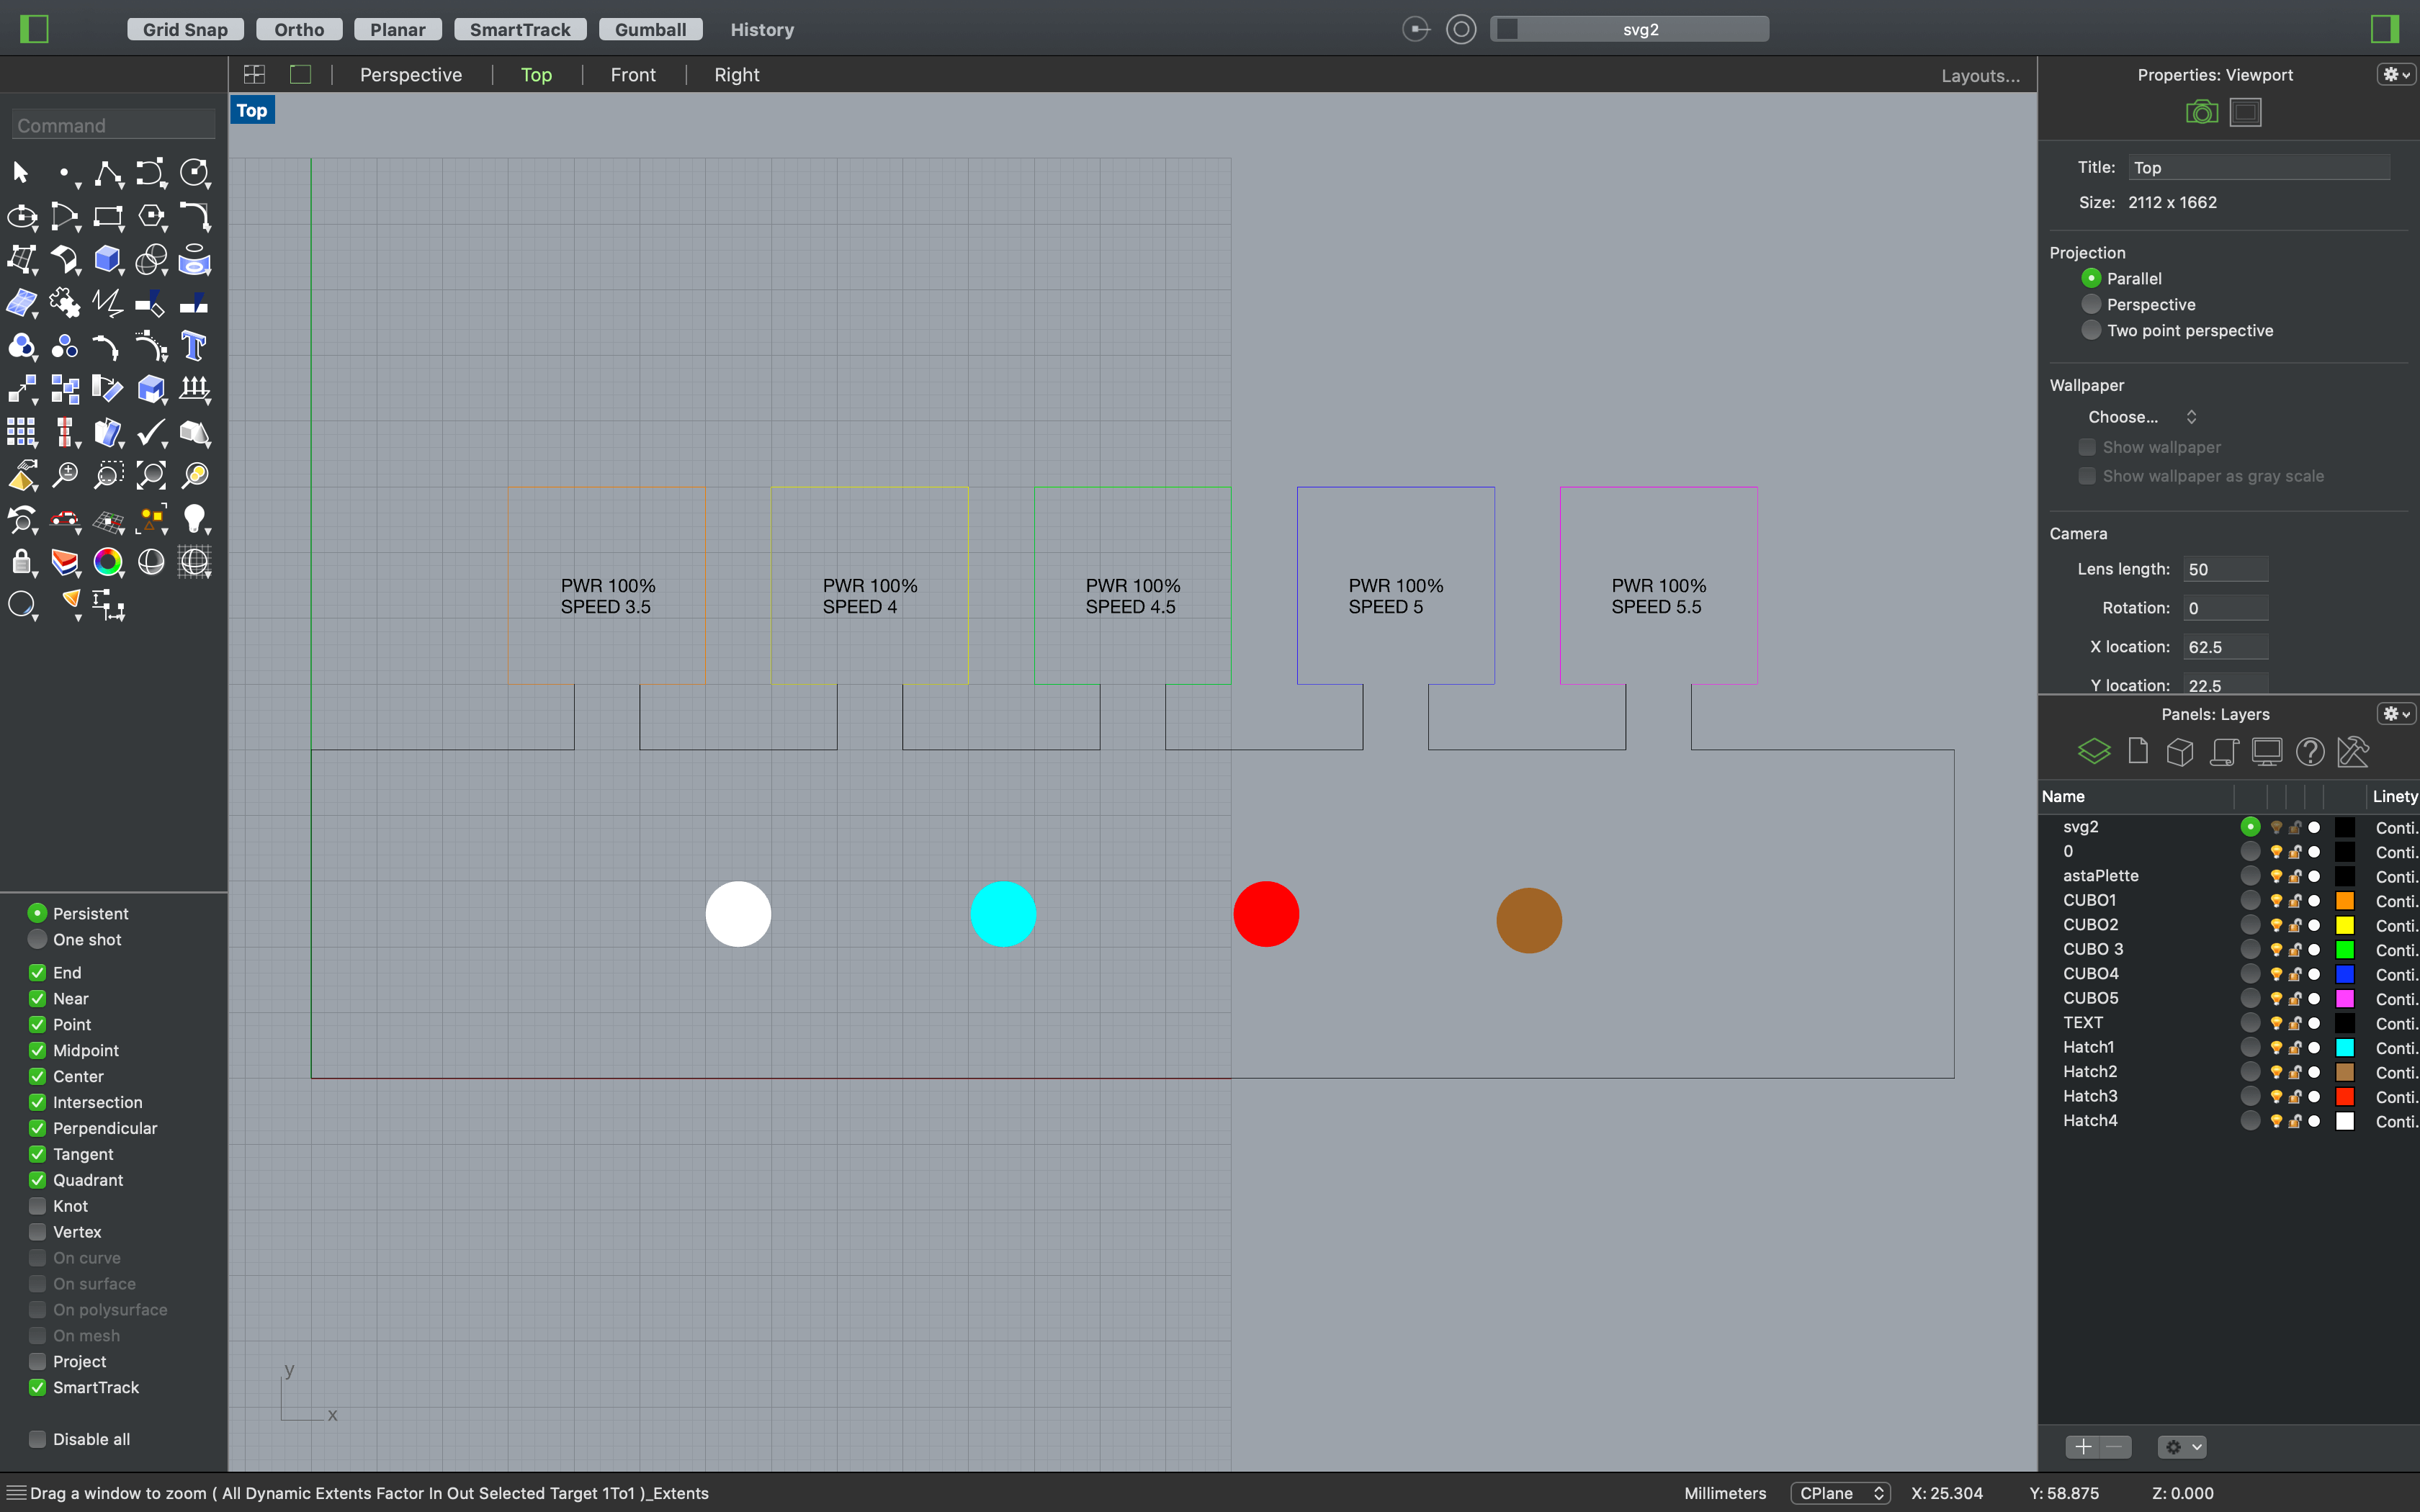
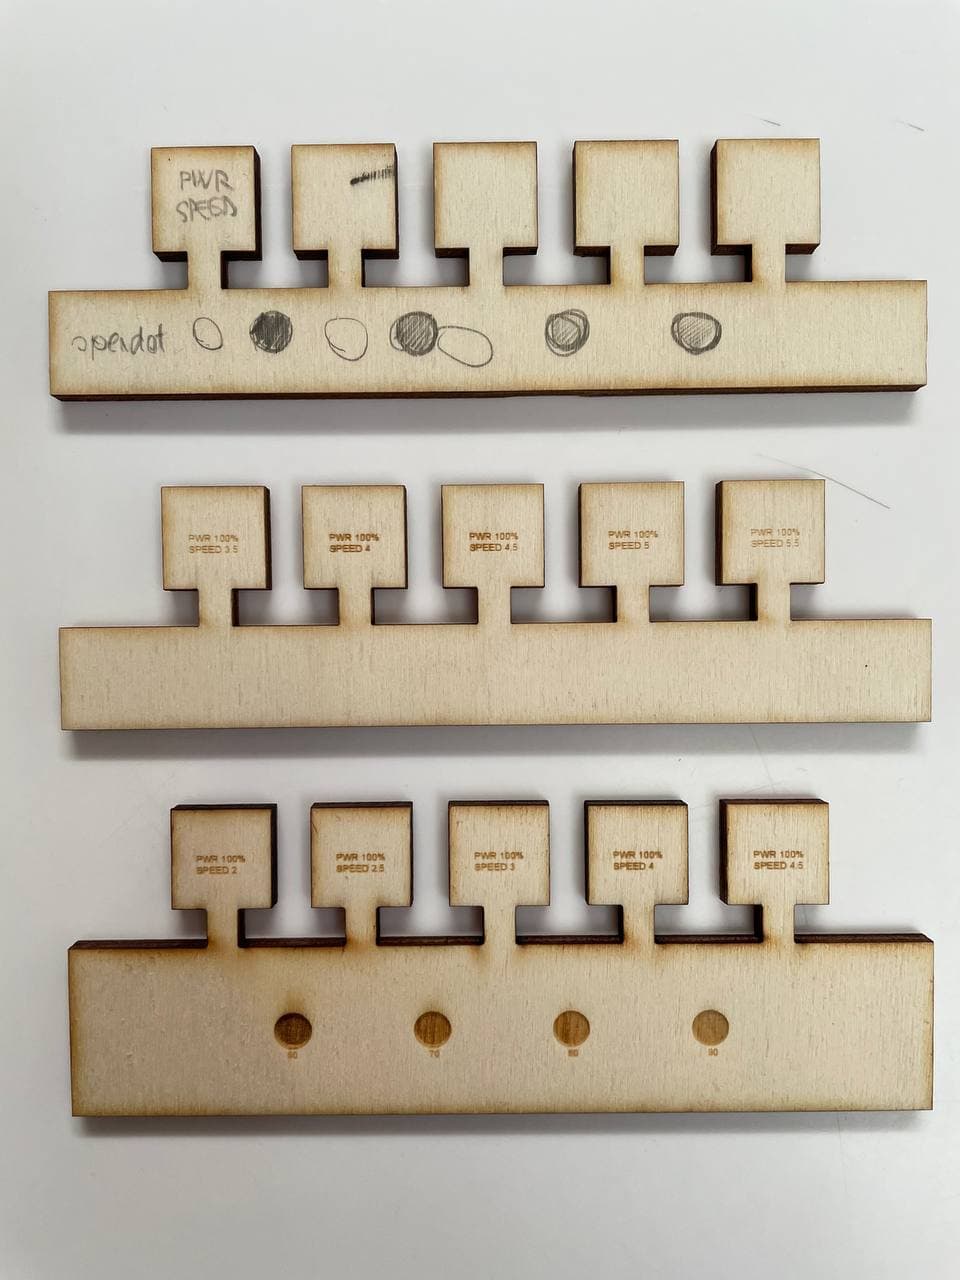
Kerf Test for Opendot
The design of a user friendly kerf test for the Fab Lab users.
In order to help the user to define better the parameters, the cut lines are divided in different layer colors and the text helps to read the choosenparameters on the cutting palette.
Lasercut exercise: SCAN ME SIGNBOARD
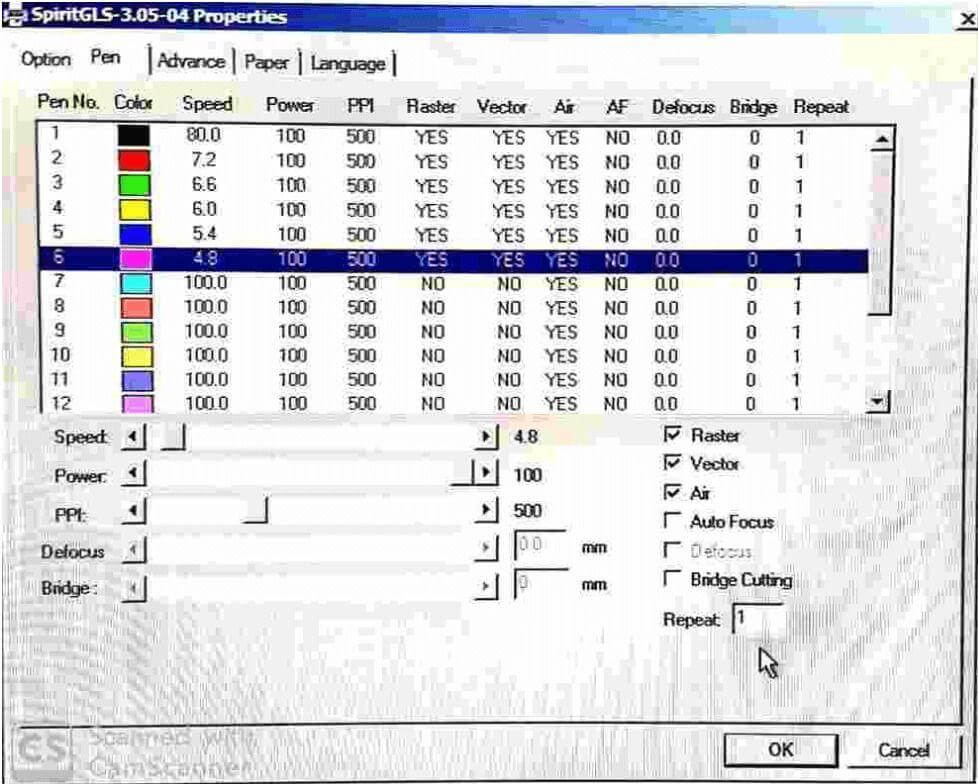
The PC connected to the laser cutter is setted to permit the use of the machine for every user in the laboratory.
We followed Antonio’s instructions about the best practices about the laser cutter.
Step by step:
- Import of the .DXF file
- Clean up the drawing: overkill the double lines and join the lines.
- Make sure that each kind of engrave and cut process is set at the proper color by layer. Hatch in case you have to entirely fill an area.
Vinylcut exercise
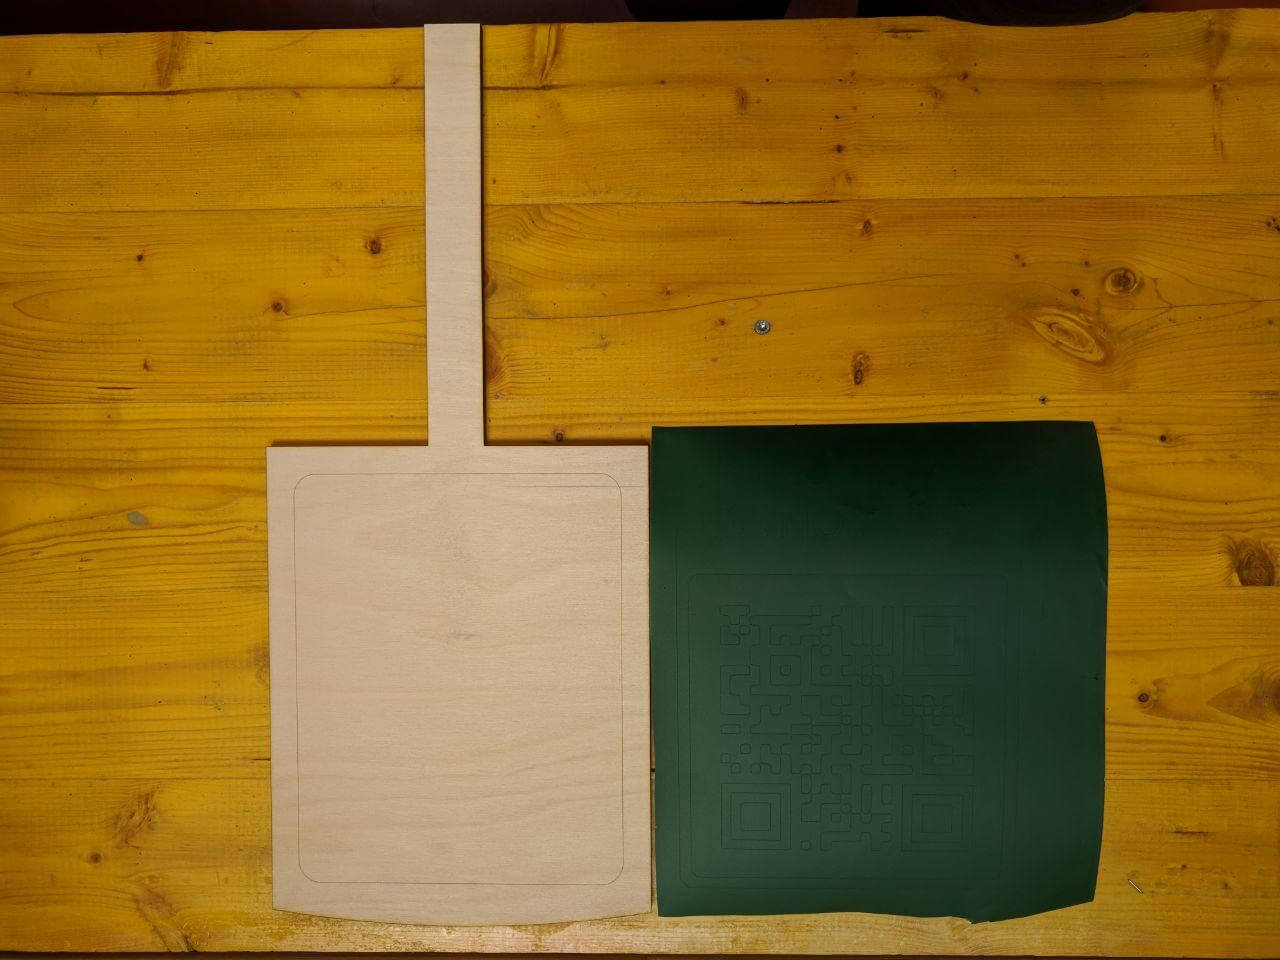
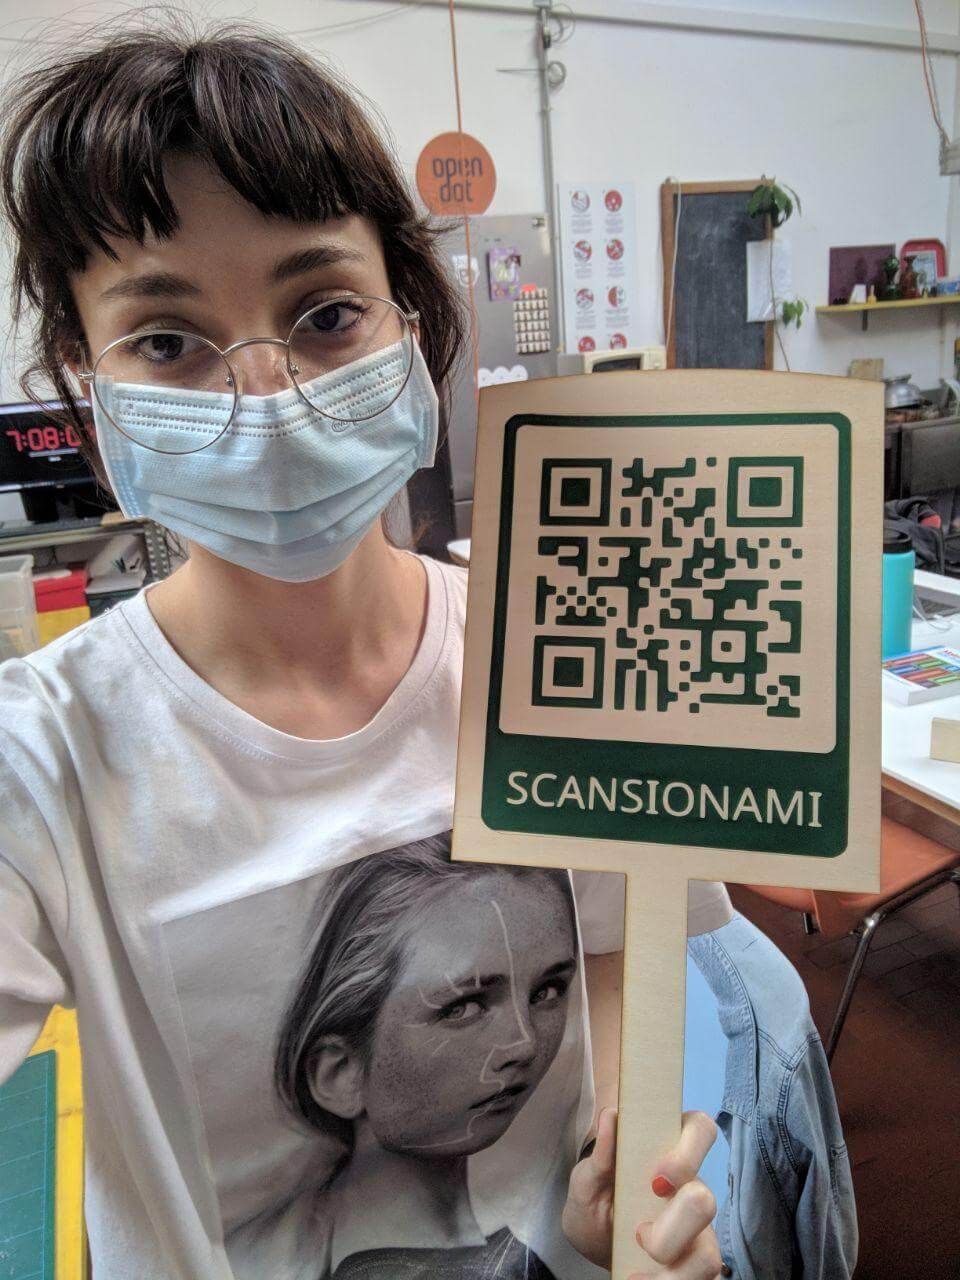
The vinyl cutter in our lab is a Roland GX-24. I designed a sticker for my personal webpage: a directory to the FabAcademy website. I was looking for an idea to promote the website and convice people to check it, so I though about a different way of showing it: a signbboard.
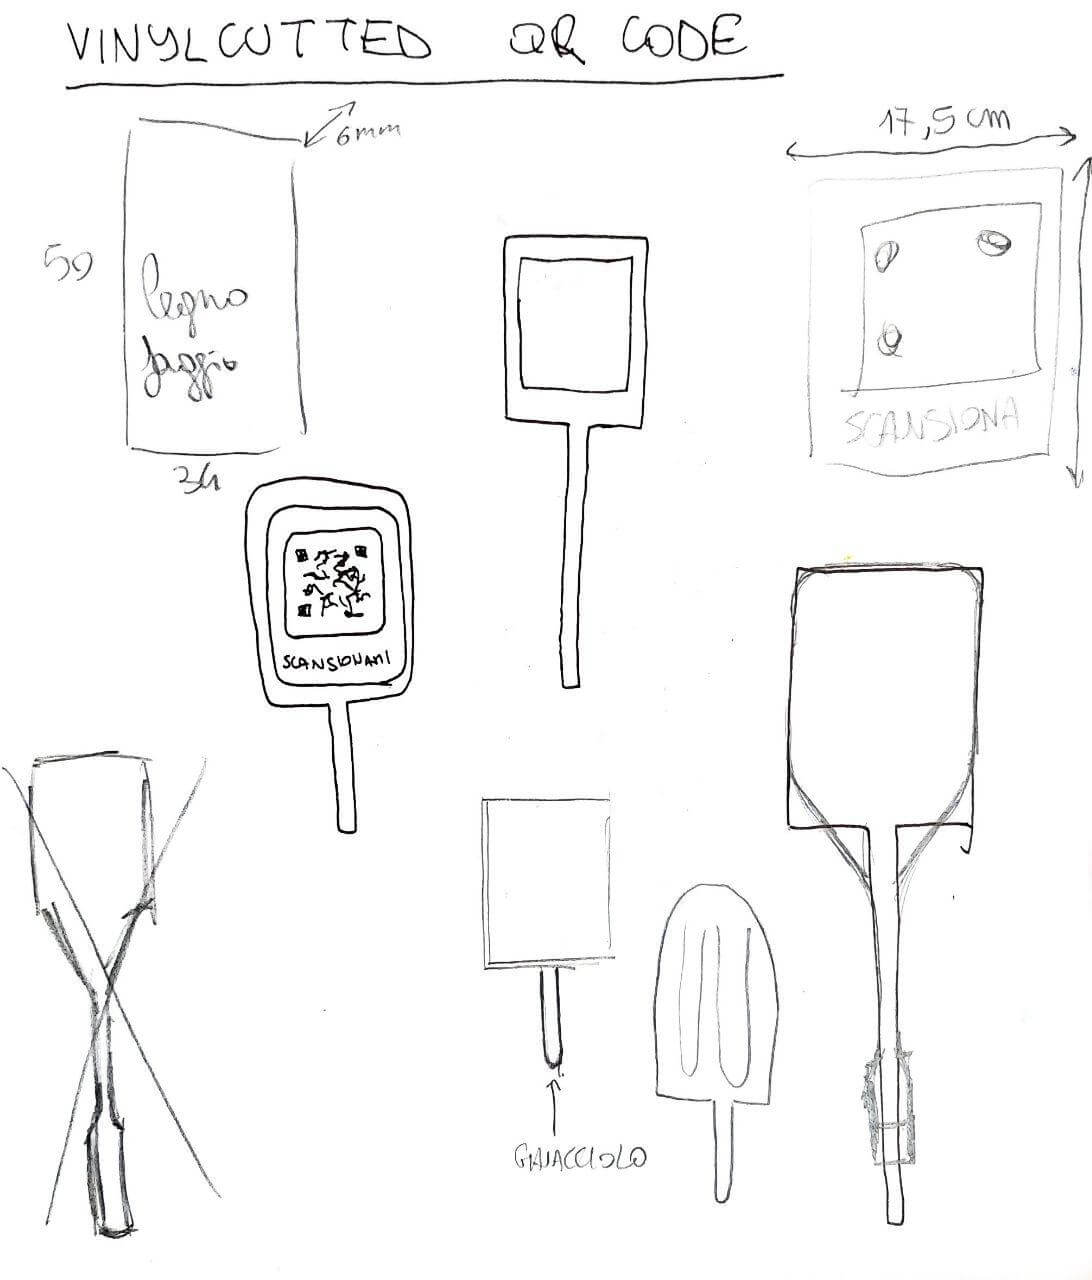
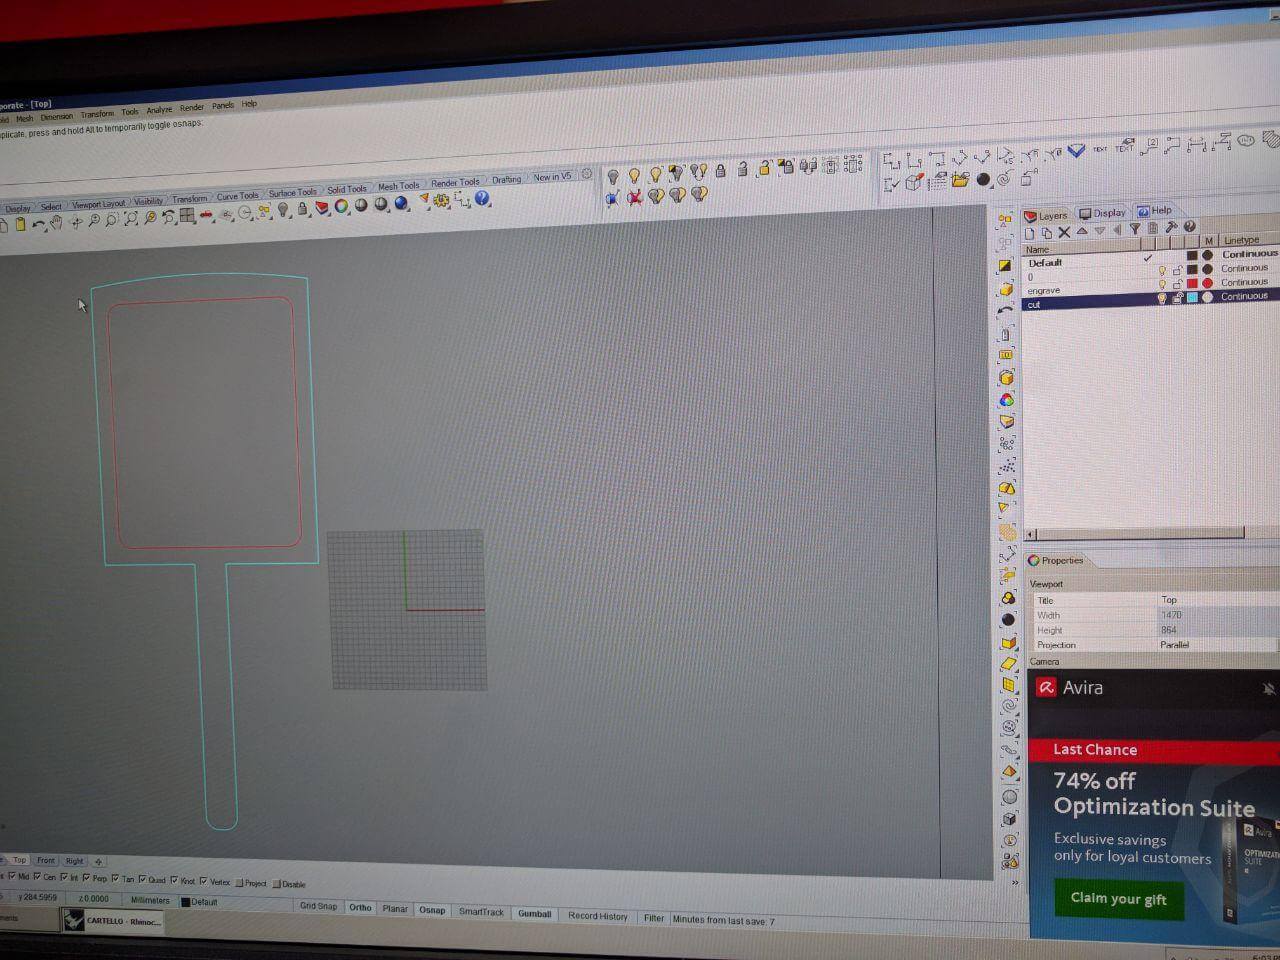
The passages to realize it were the following: first of all I created the signbboard, using autocad and the lasercutter, I launched the dxf file to the machine.

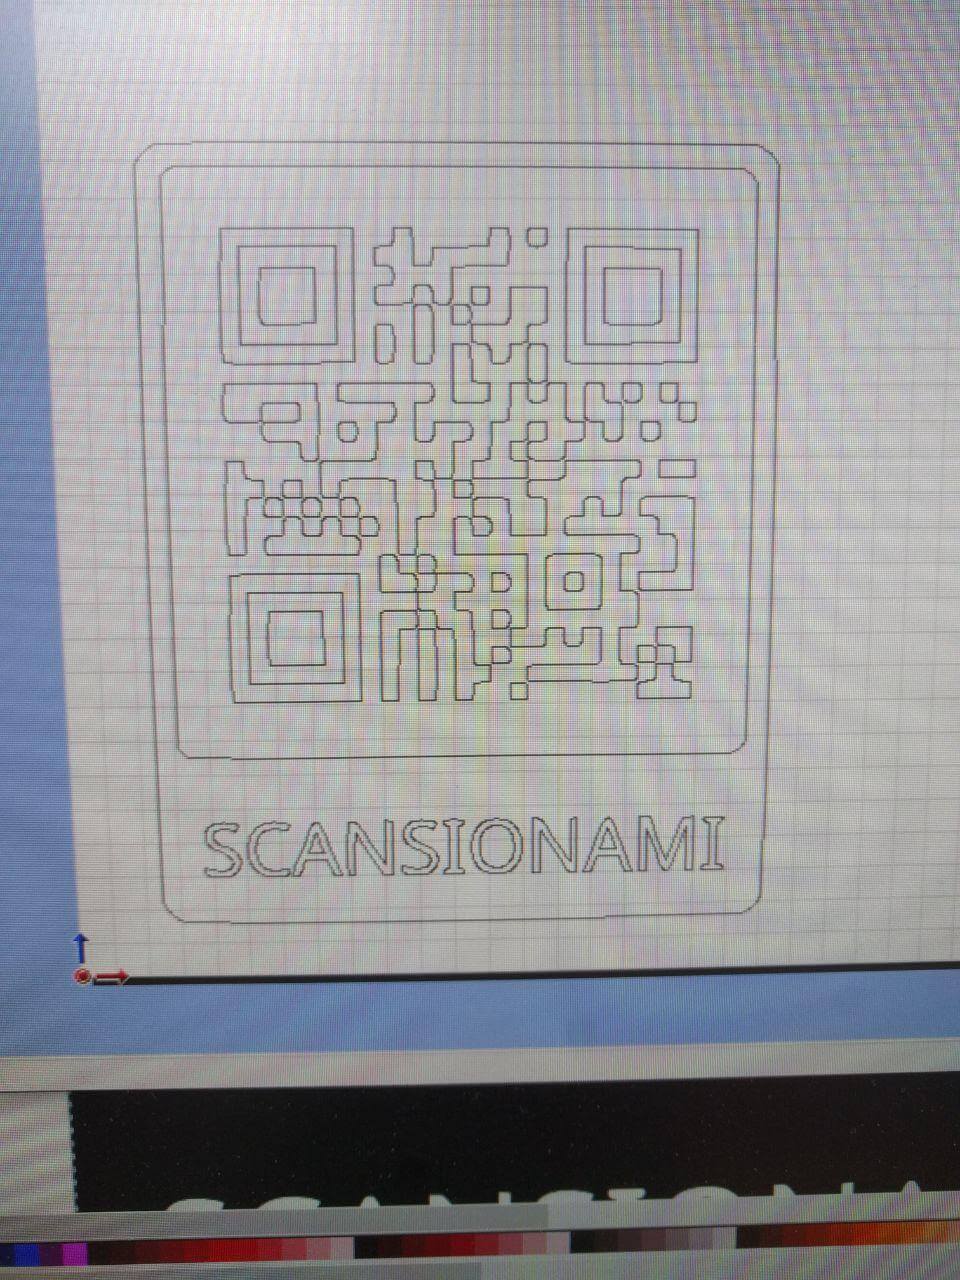
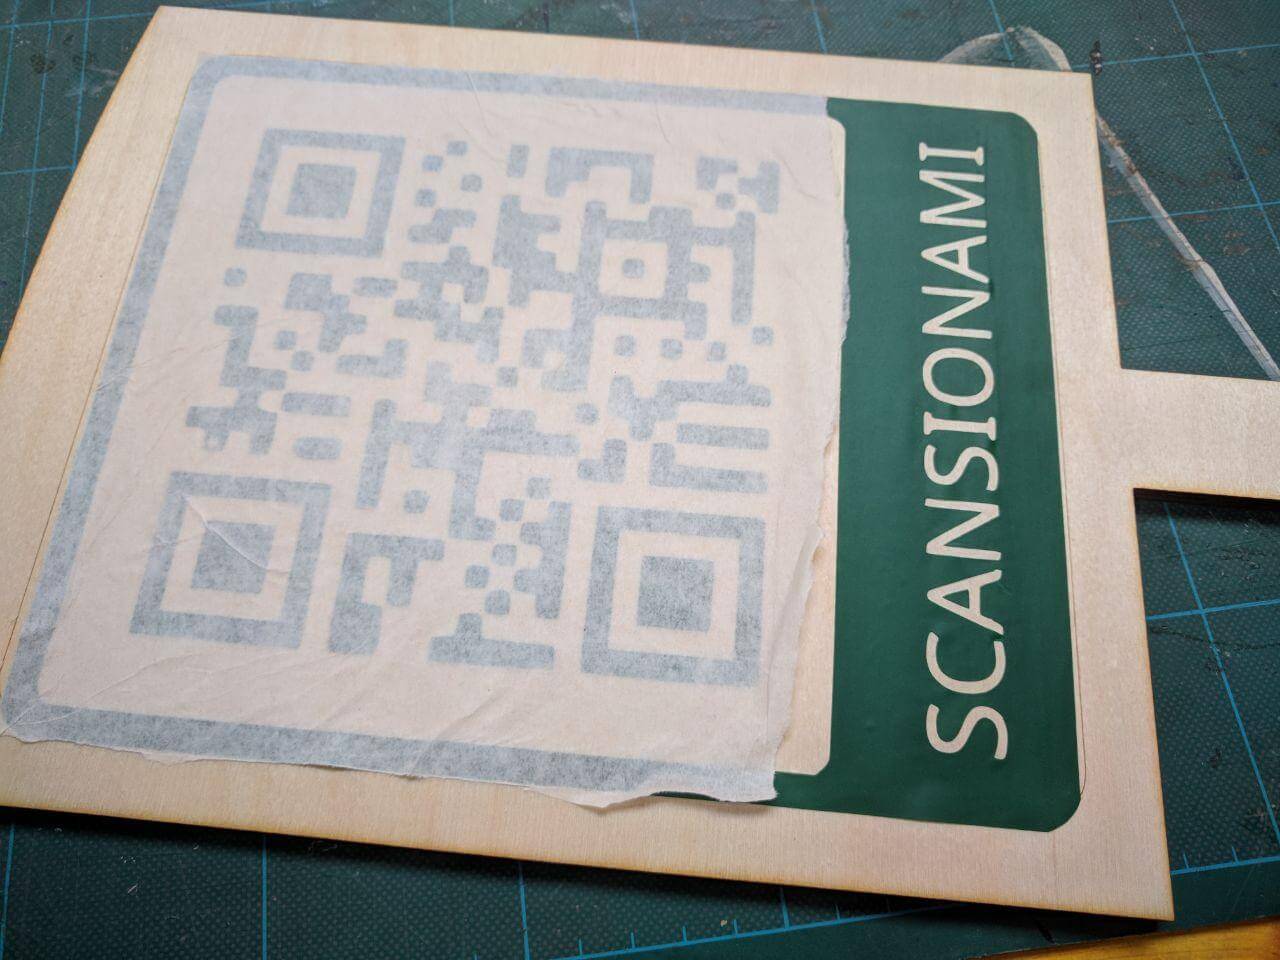
Then I created the QR code from an online application, having a PNG image.

I needed a vectorial path to cut the file, so I used gimp to find the pathway around the lines with an automatic tool.
The resul was slightly more rounded than the original image, but still readable for the QR scanner.
I sent the file to print, setting the machine.
Then I got the vinylcutter ready to go and started cutting the sticker.
I started unsticking the parts I didn't need.
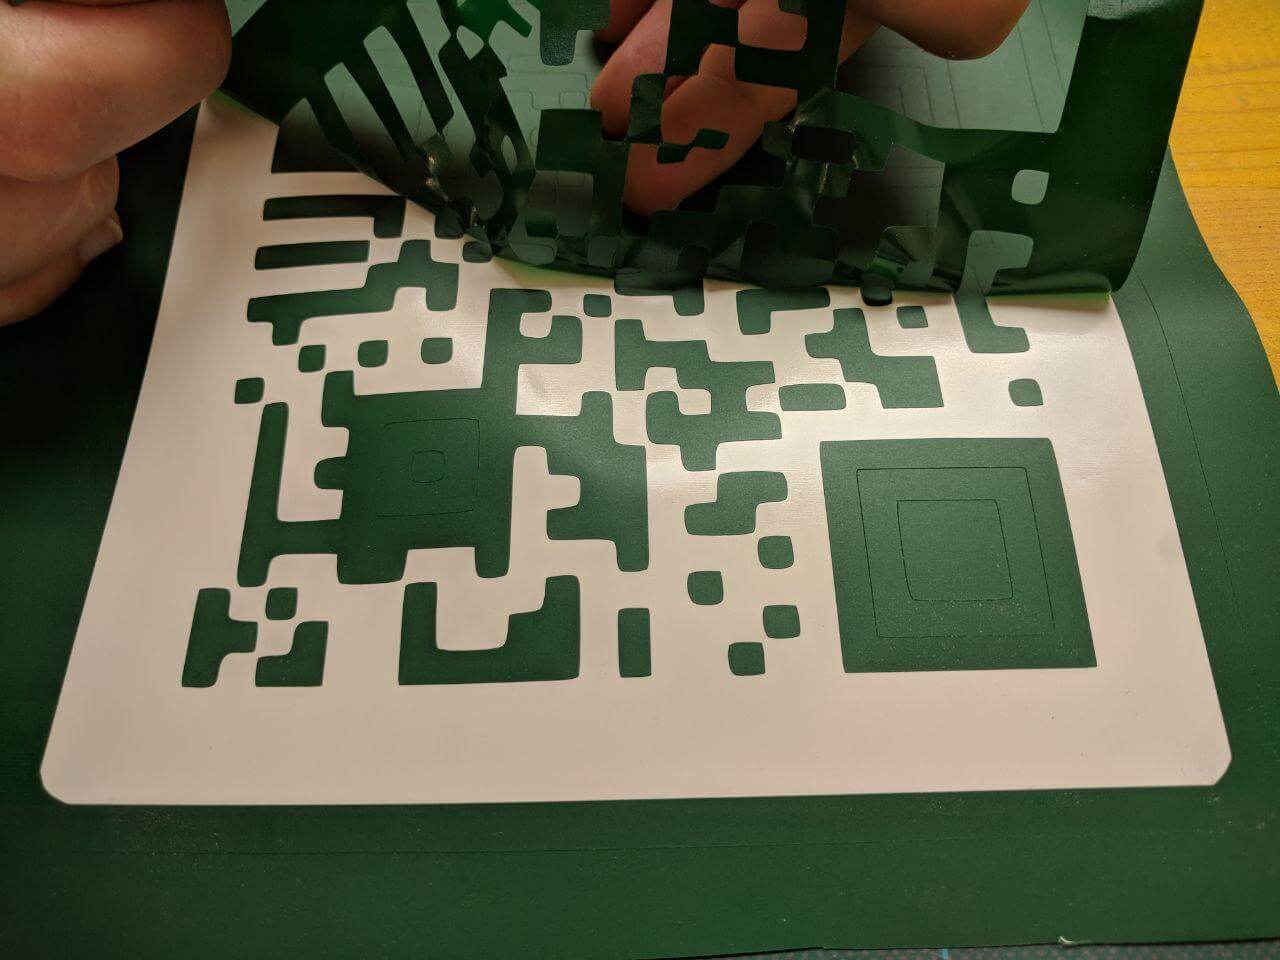
I applied a masking tape to apply the sticker to the wooden surface, trying to avoid air bubbles as much as possible using that triangle, that is usually used for smartphone glasses.
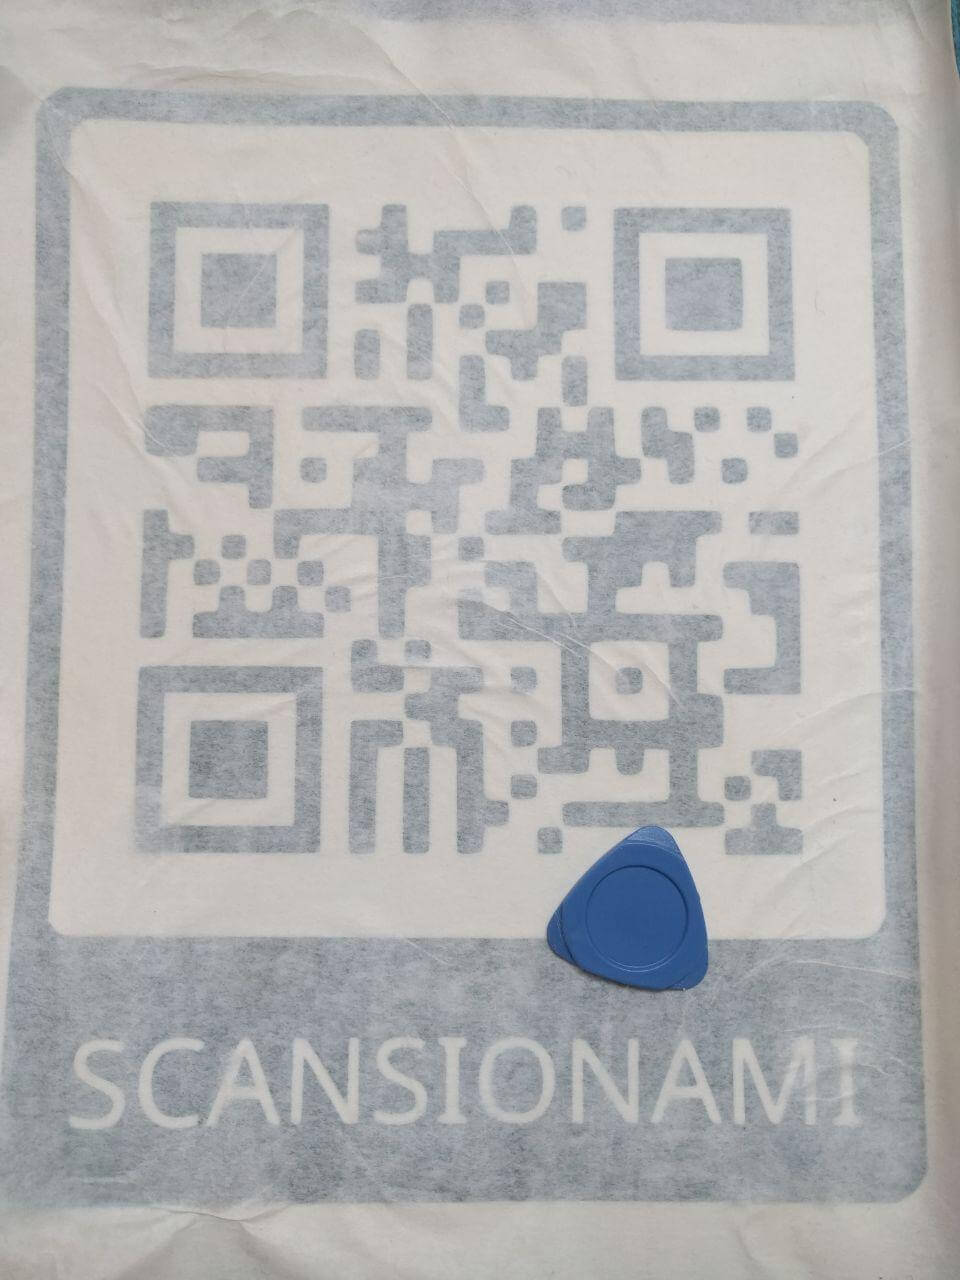
And in the end I sticked the QR on the lasercutted signboard, using engraved railways to stick it properly.
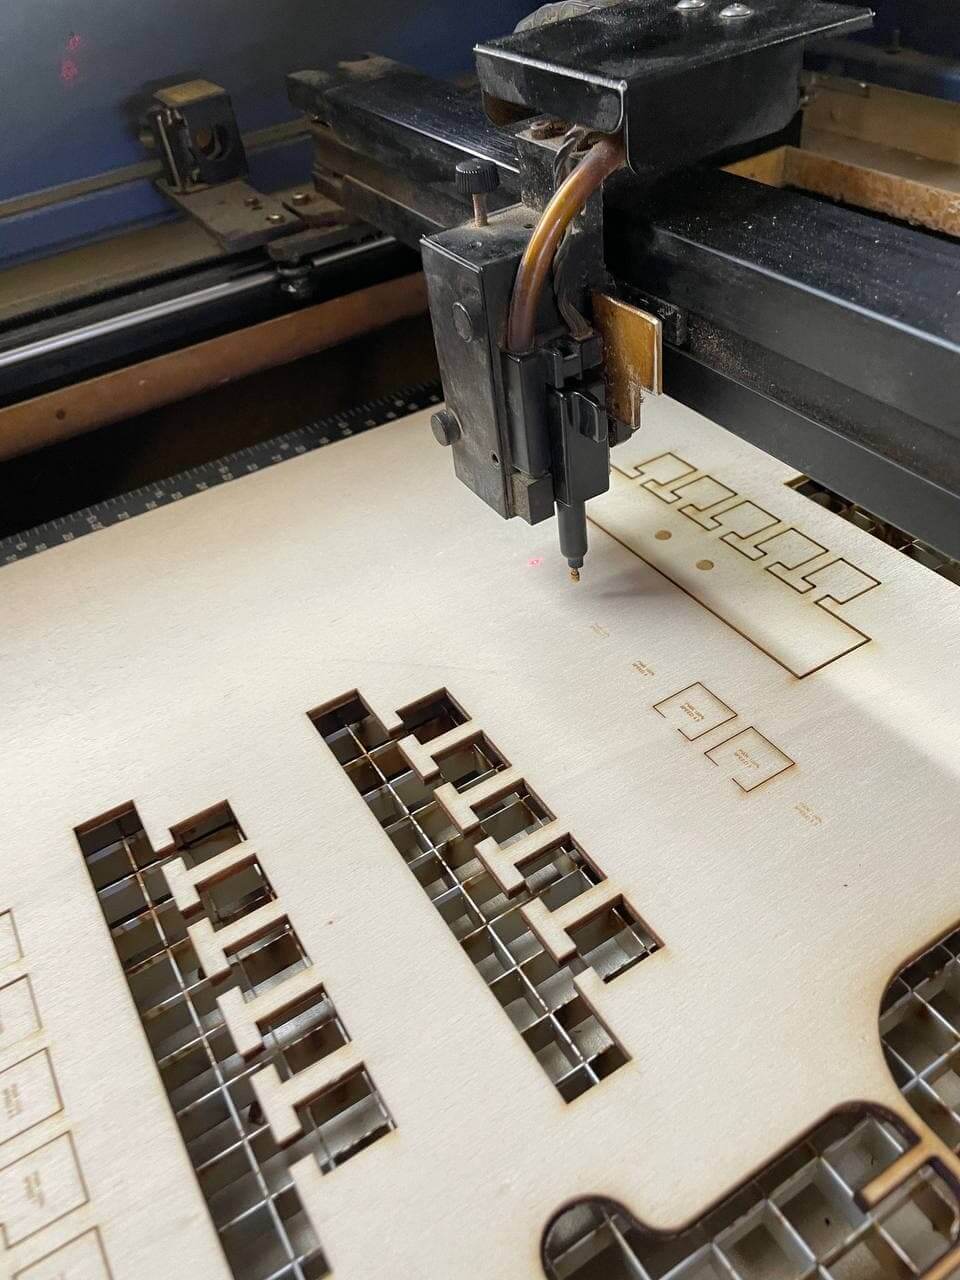
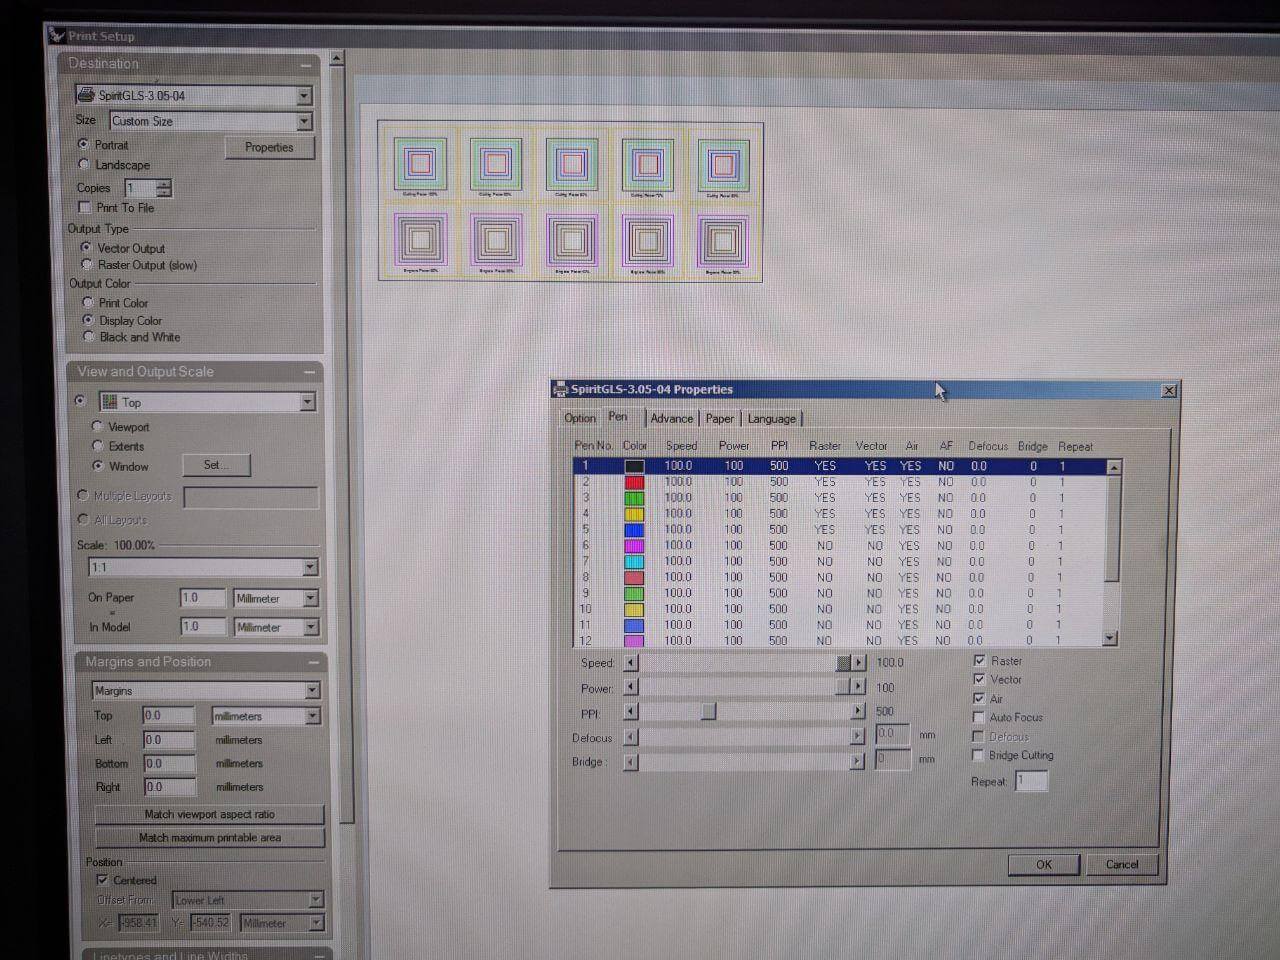
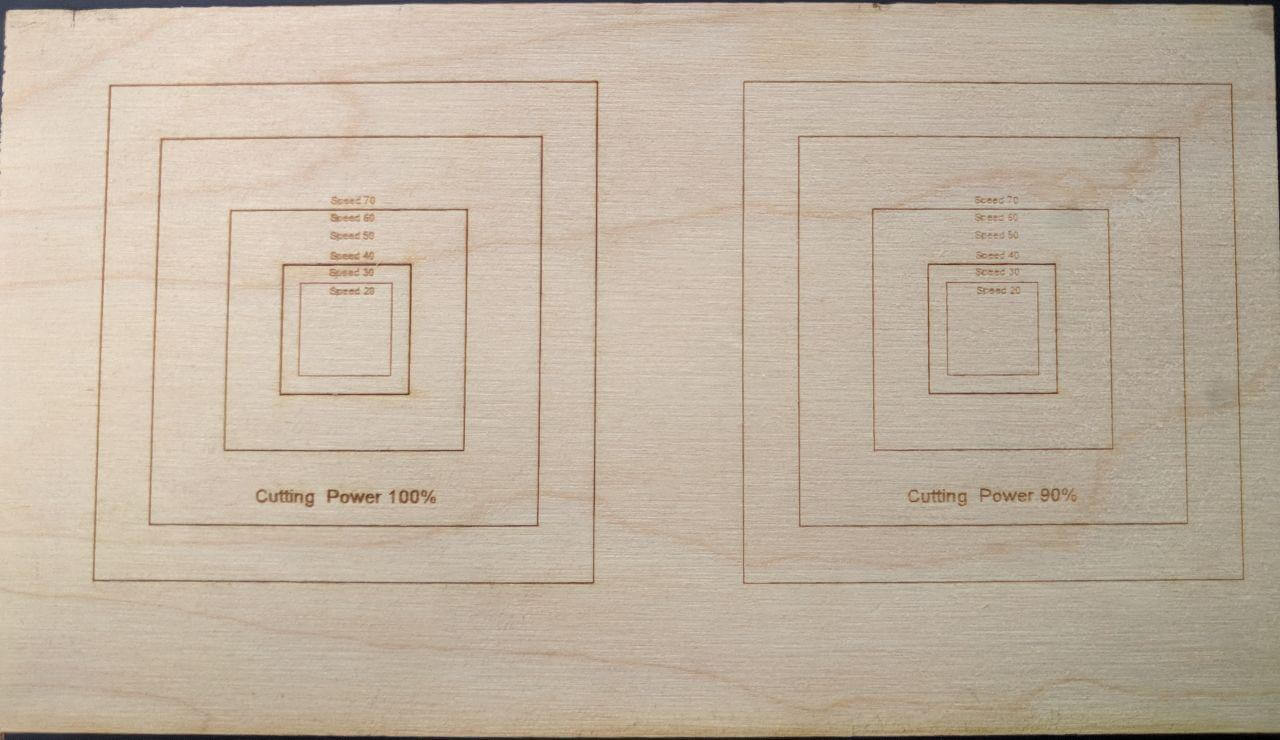
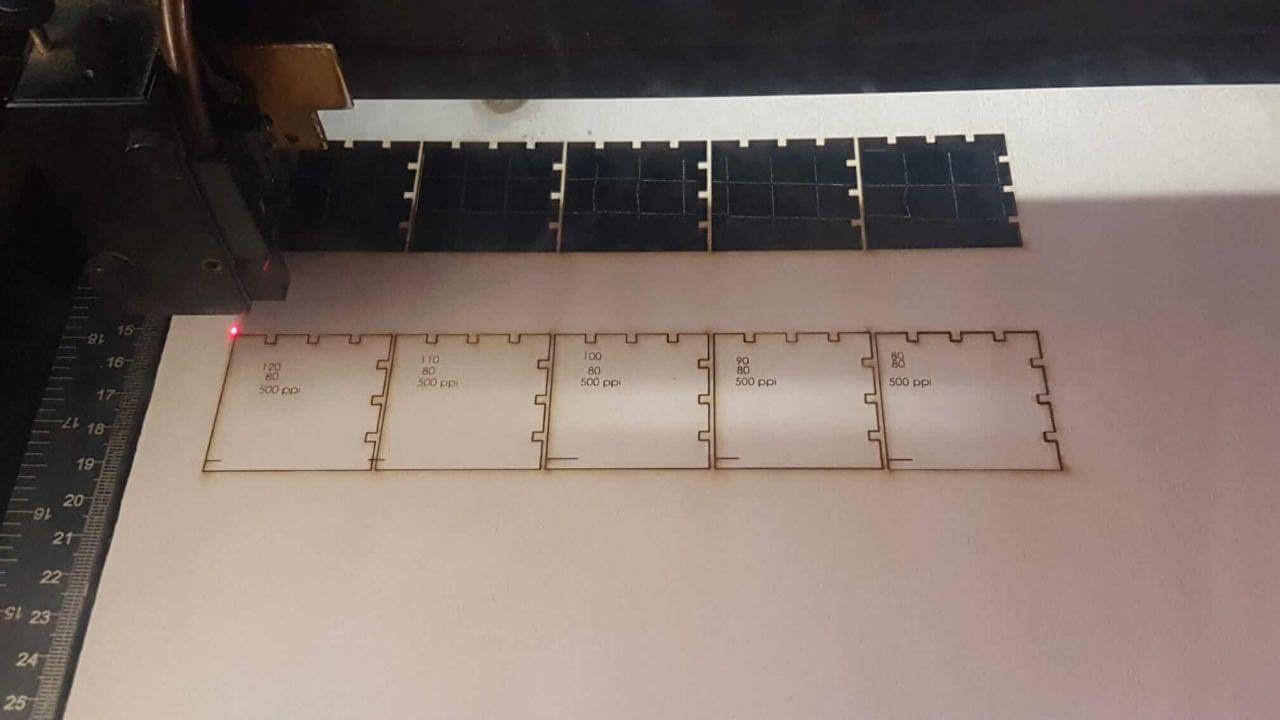
Lasercut exercise: CUTTING POWER TEST
I setted the intensity and speed of the laser using Rhino and the command "Print".
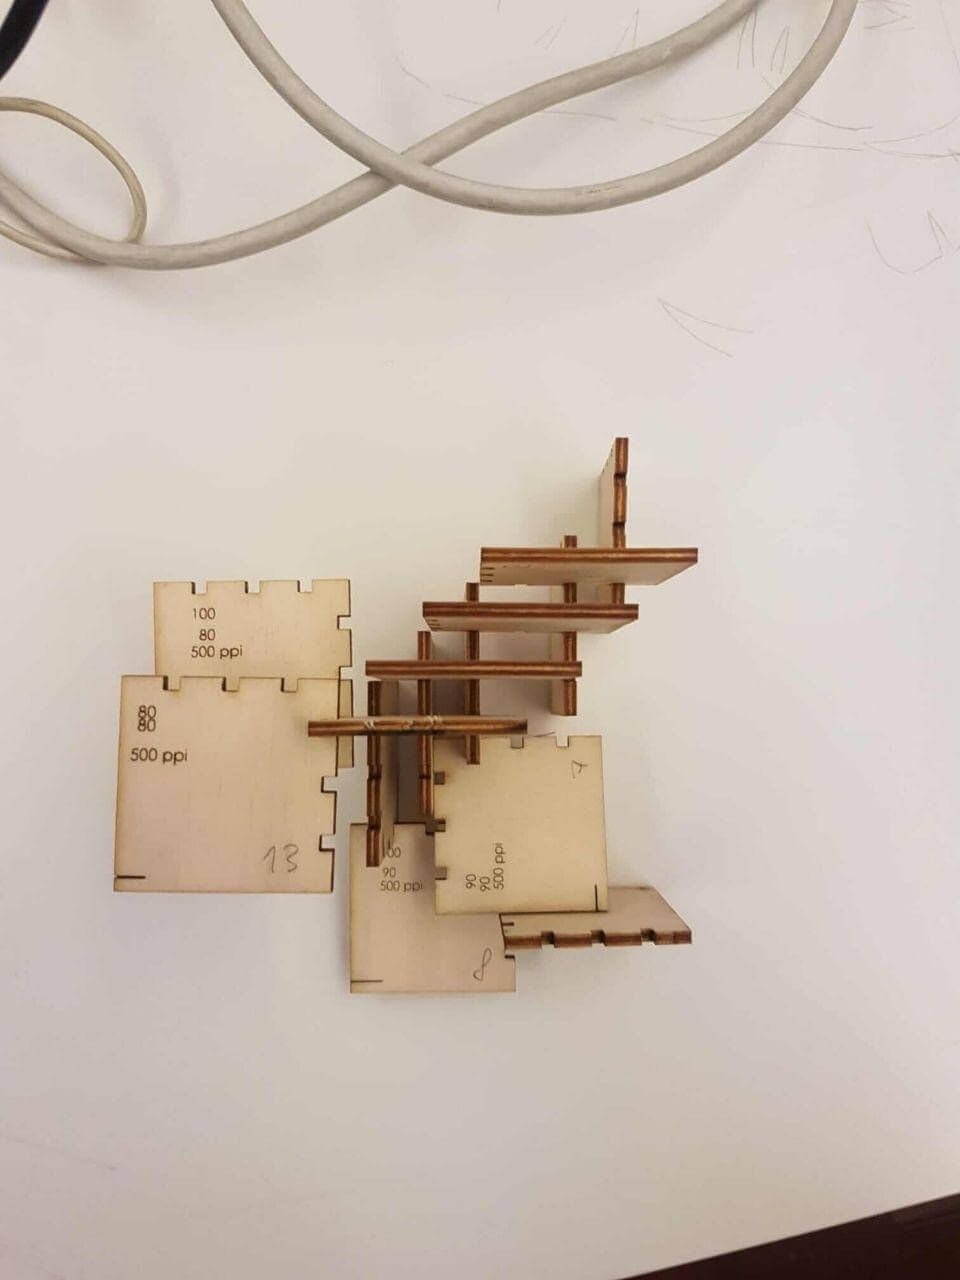
Lasercut exercise: assembly kit
Managing the intensity of the laser we created a joinable modular structure.
First of all, making a kerf test.
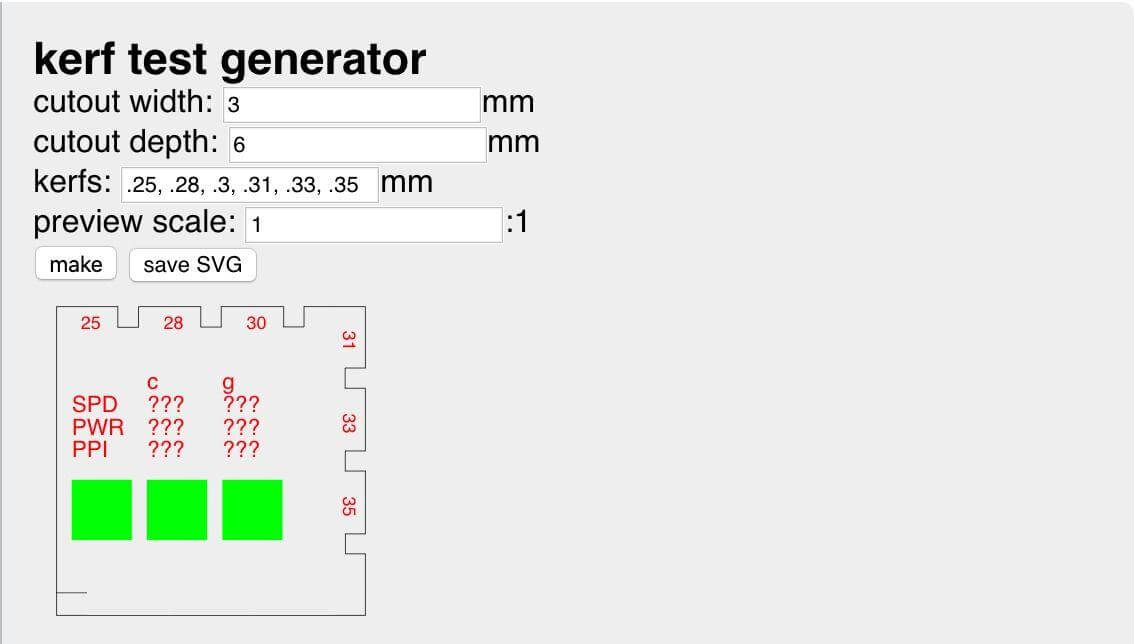
Then adjusting the speed of the laser.
And lasercutting the single modules...
We created a joinable lasercutted structure.