Week 5- 3D printing and scanning
Overview
For this week we have two assignments:
- Group assignment
- Individual assignment
Test the design rules for your printer(s)
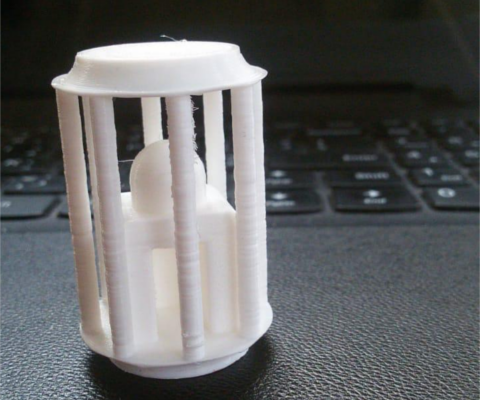
Design and 3D print an object (small, few cm3, limited by printer time) that could not be made subtractively.
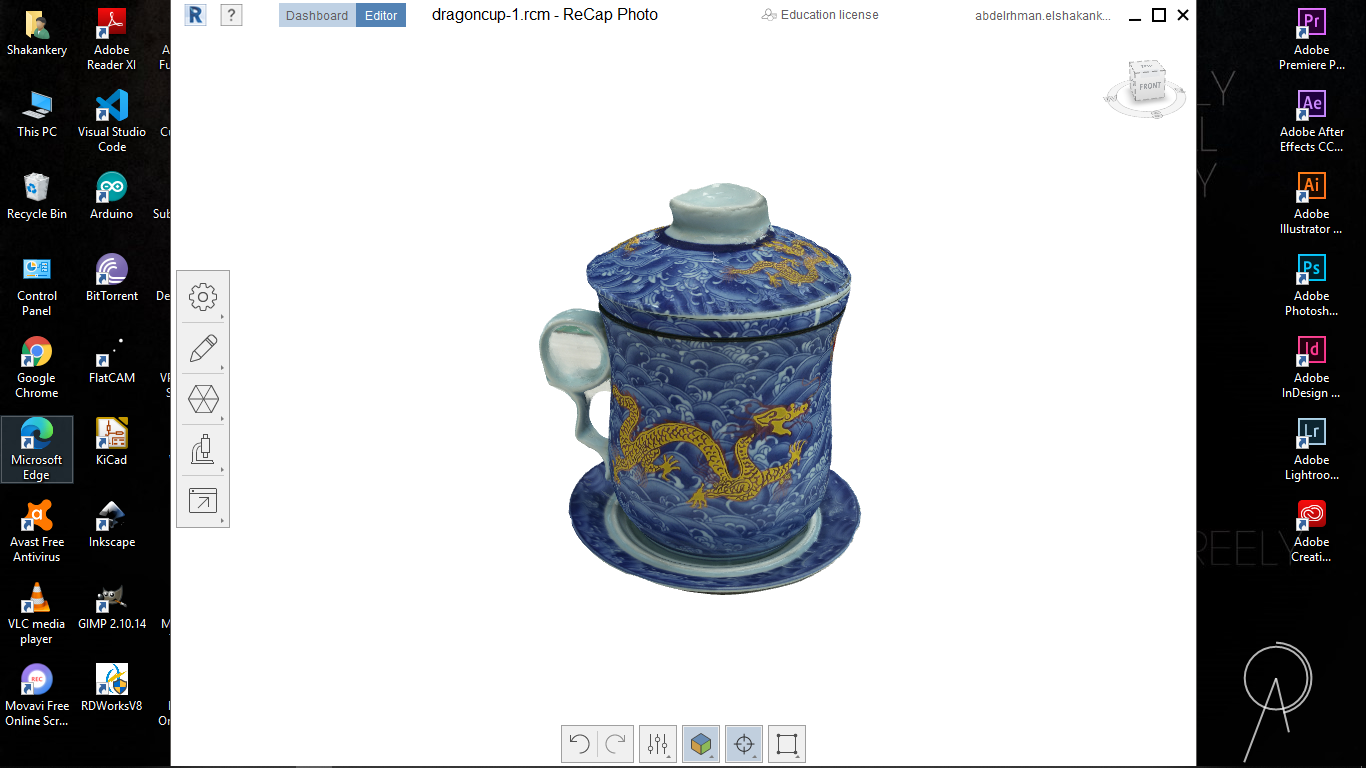
3D scan an object (and optionally print it)
My Assignment Steps:
Step (1):Know all the basics about 3D printing and scanning.
Step (2):Design and 3D print an object that could not be made subtractively.
Step (3): 3D scan an object.
The Process
3D printing basics
3D printing is the automated process of building a three-dimensional object by adding material rather than taking material away (as in drilling or machining).it also known as additive manufacturing.
This technology allows for endless customization with regards to design and material that enables designers to rapid prototype, ultimately saving time in the design process.
3D printing Technology
- FUSED DEPOSITION MODELING (FDM):
- STEREOLITHOGRAPHY (SLA):
- Digital Light Processing (DLP):
This is the most common technology used in 3D printers. Thermoplastic material is heated and extruded through a nozzle. The nozzle deposits the molten material layer by layer onto a build platform. Each layer sticks to the one beneath it.
The build platform is lowered into a bath filled with a special liquid photopolymer resin. The resin is light-sensitive and becomes solid when exposed to a laser beam. Each cross section of the 3D model is traced onto the layer of cured resin that came before it. This is repeated layer by layer until the 3D object is completed.
these types of 3D printing technology are almost the same as SLA. The key difference is that DLP uses a digital light projector to flash a single image of each layer all at once (or multiple flashes for larger parts).
you can find more about 3D printing technology Here
3D printing Filaments
In printers using FDM technology, filament is the name given to the material used by the 3D printer to print. the material comes in the form of a filament coiled around a small spool. The filament is then fed into the extruder through a guide tube. Usually, thermoplastics for 3D printers using the FDM method come in the shape of filaments.
3D printing filaments materials
1-PLA (Poly Lactic Acid) filament
It’s a special type of thermoplastic made from organic materials, namely cornstarch and sugarcane. The main benefits of PLA are that it’s safer and easier to use, and with no toxic fumes to worry about. compared to ABS, PLA is easier to work with and produces 3D parts which are more aesthetically pleasing. This finish is thanks to its unique sheen and smooth appearance.
However the melting point of PLA is much lower than ABS, and that makes it weaker. This matters only if you’re printing moving parts or exposing the parts to high temperatures. plus PLA can attract moisture that makes it potentially brittle and more difficult to print
Temp: 180ْ :230ْ
Application
PLA filament is great for producing a whole range of consumer items. At the professional level we can used PLA for various surgical implants, including surgically implanted pins, rods, screws, and mesh. The applications work thanks to the material’s degradable properties.
2-ABS filament
It's an easy material to work with. it's tough, and has impact-resistant properties. It’s also easy to extrude from the printer’s nozzles.
Despite its popularity for 3D printing, ABS is not the best filament for printing as it produces unpleasant fumes that can irritate some people also ABS is petroleum-based, making it a non-biodegradable material .
Temp: 210ْ :250ْ
Application
ABS is durable, strong 3D filament, Quite flexible and lightweight which make it a great choice for printing plastic automotive parts, moving parts, musical instruments, and electronic housings.most home users.
3-PVA filament
PVA is a biodegradable, non-toxic material that easily dissolves in tap water. it is a good 3D filament that’s typical use is as a support material when printing with ABS or PLA. Support materials are necessary when printing 3D parts with notable overhangs. As a support material, PVA works best with printers that have duel extruders.
Temp: 190ْ :220ْ
Application
PVA works as support material.
4-PET filament
PET is a popular 3D material. as it's strong, flexible, food safe, doesn't warp, doesn't absorb moisture from the air and doesn't degrade in water. Another common use for PET is in everyday plastic bottles. A more advanced version if PET is a filament called PETG
Temp: 210ْ :230ْ
Application
PET is completely ‘food safe’, meaning it’s safe for products like cups, and plates, etc.
5-TBU filament
TBU is the most flexible of all the printer materials. It is ‘super stretchy’ because of the thermoplastic elastomers, It has such high elasticity properties that it feels like real rubber, If you need to fabricate stretchable 3D parts that can endure more punishment than any regular ABS or PLA, this is your material.
Temp: 225ْ :235ْ
Application
It’s popular for kid’s toys, wearables, and smartphone cases, etc.
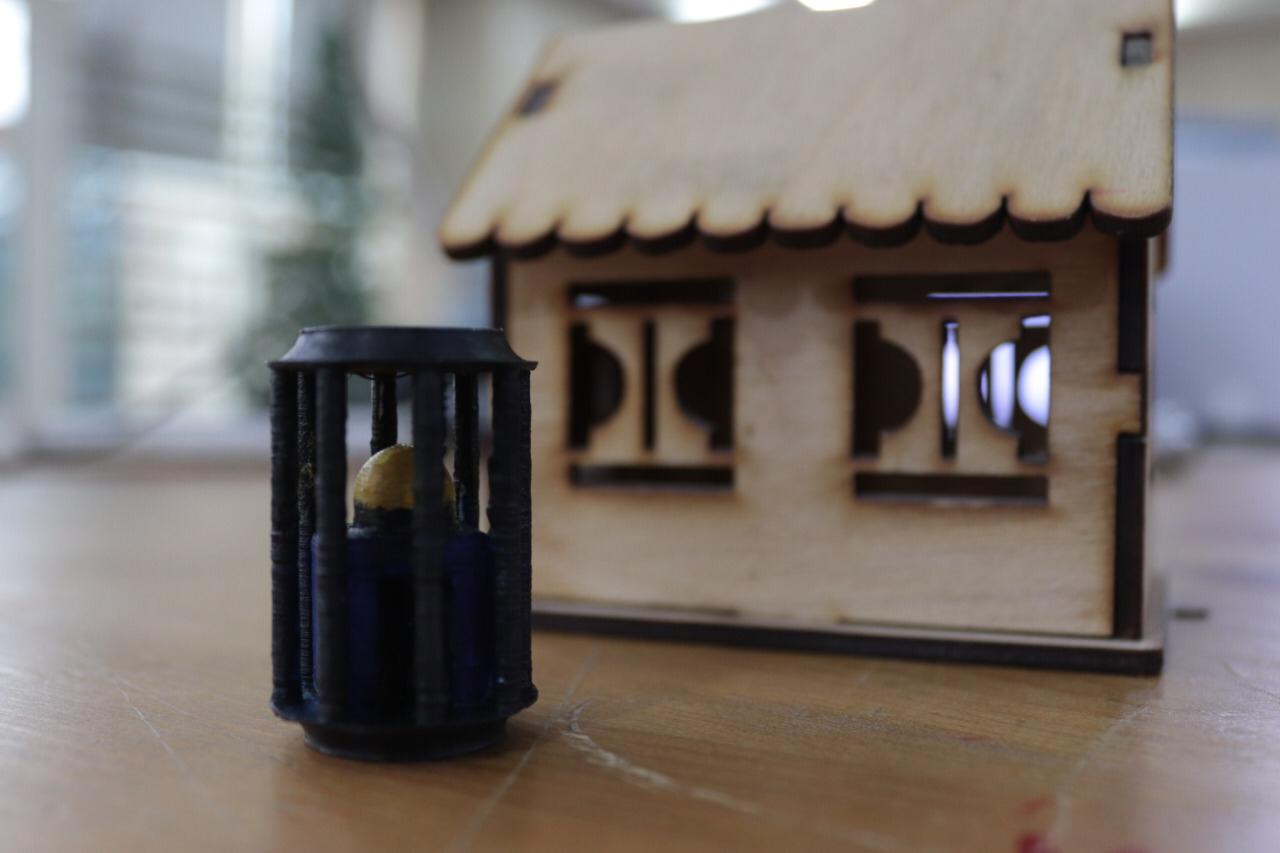
What non-subtractive mean
At the beginning I asked myself what non-subtractive mean ? I found that it mean a design that CNC machine cann't do, but really what's the condition for such a design to say that a CNC machine won't be able to fabricated
I found it down to :: Design Accuracy, Design Geometry, Design Complexity in another word it all about module level of details, type of material and if the design is consist of an object inside another one.
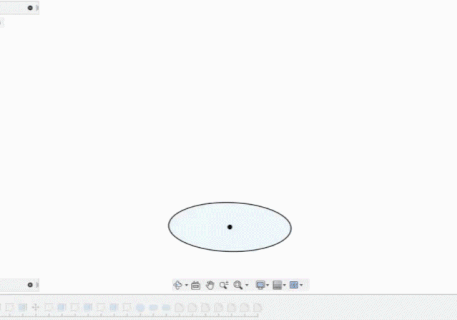
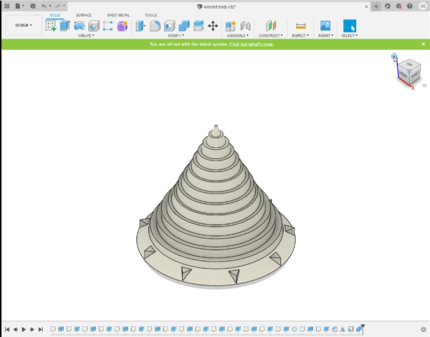
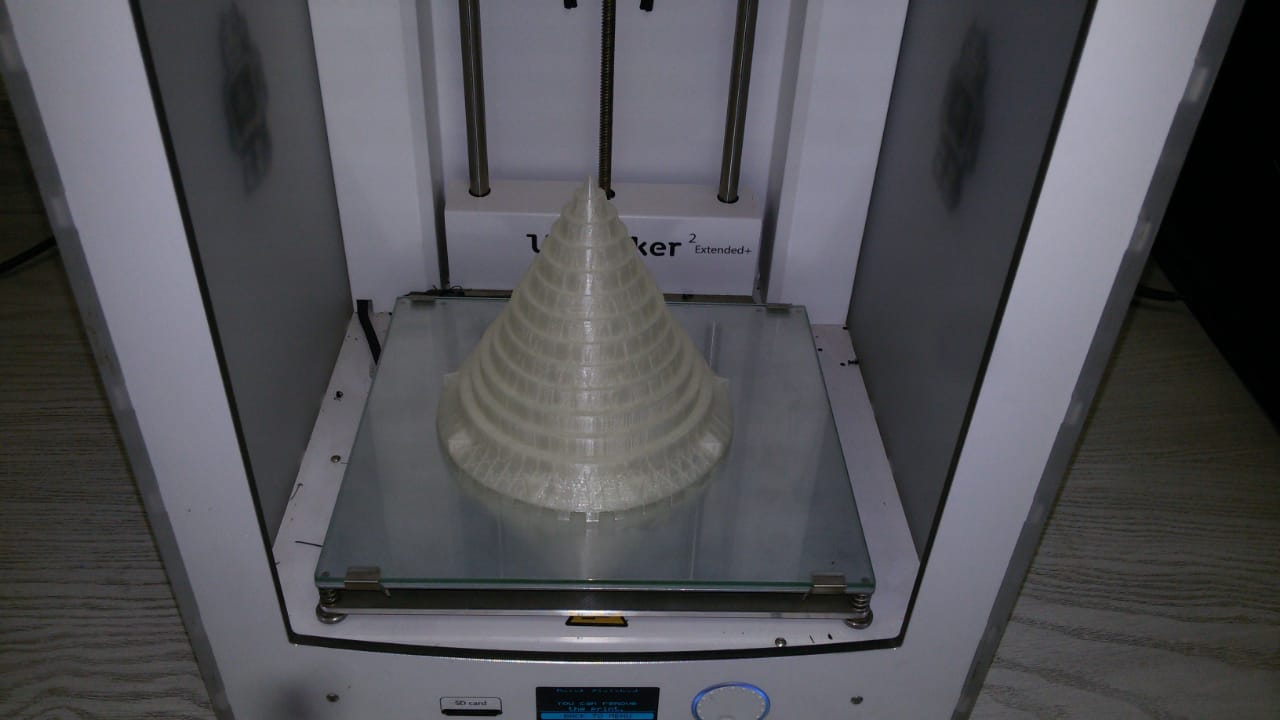
I decided to create an object inside another one, but in a condition to be a parametric design. it's time now to find inspiration to my design.
Using Fusion 360 to design
The steps

- drawing the base.
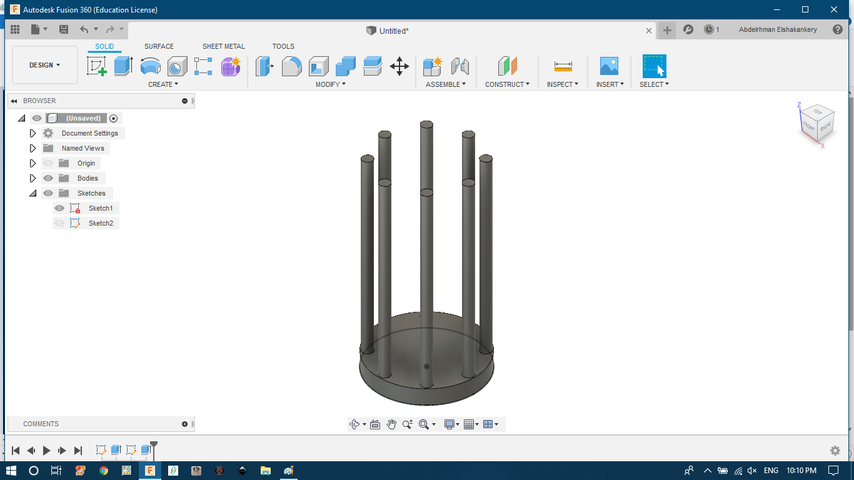
- build the cage.
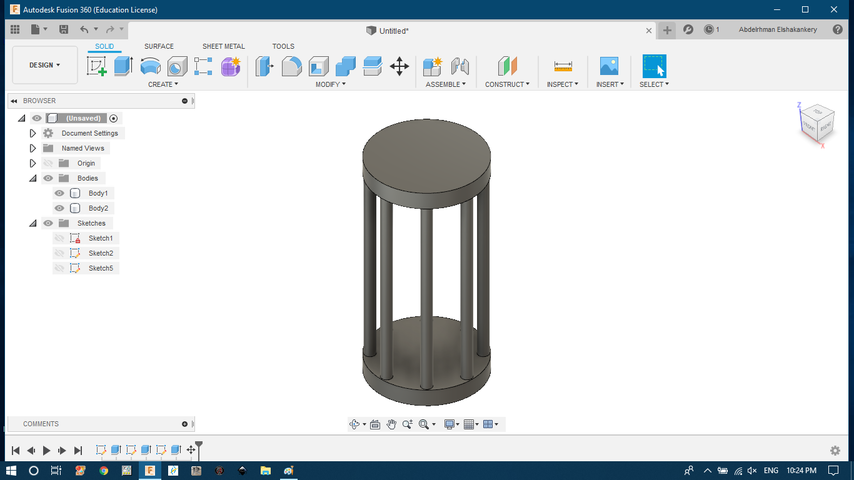
- the top part
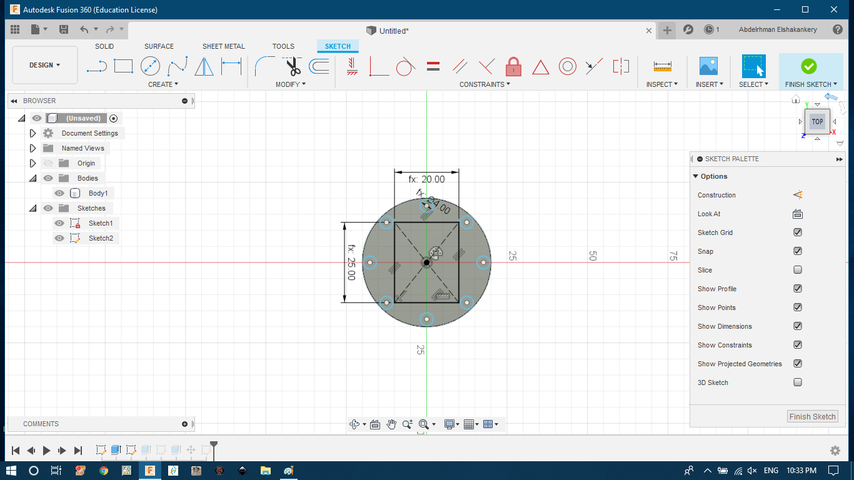
- building the inside object base.
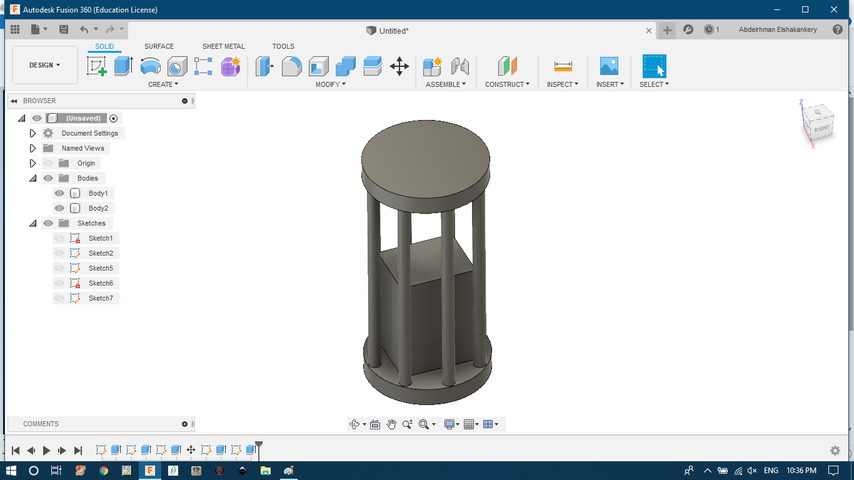
- Extrude the inside base
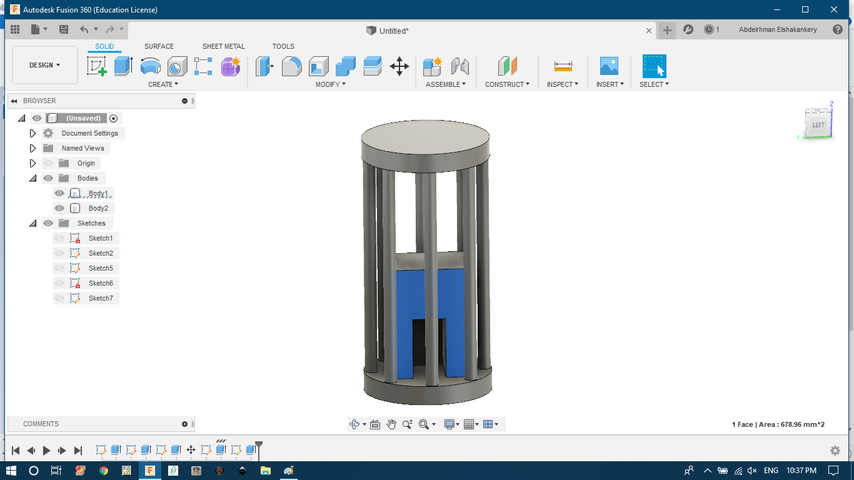
- Create a door with some fillet inside
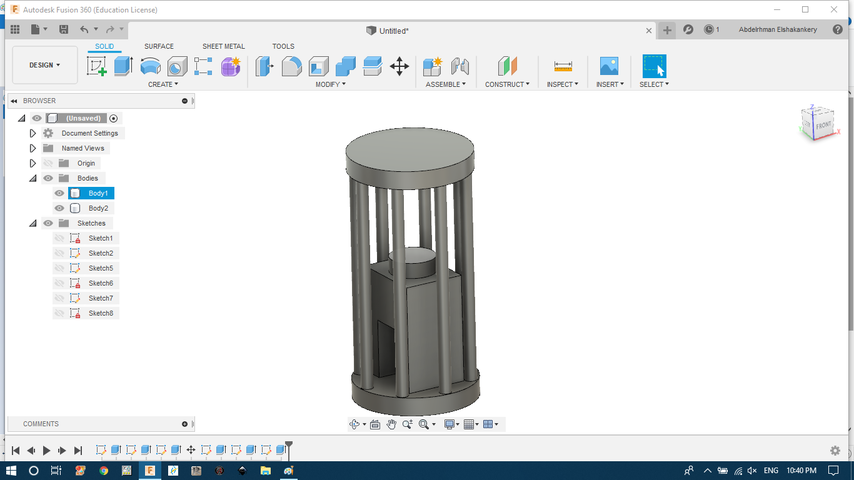
- make the top circle
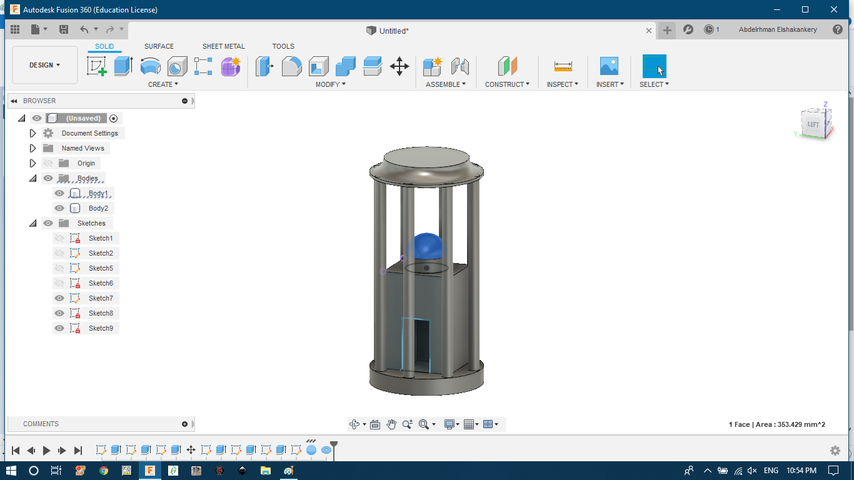
- add the final part on top
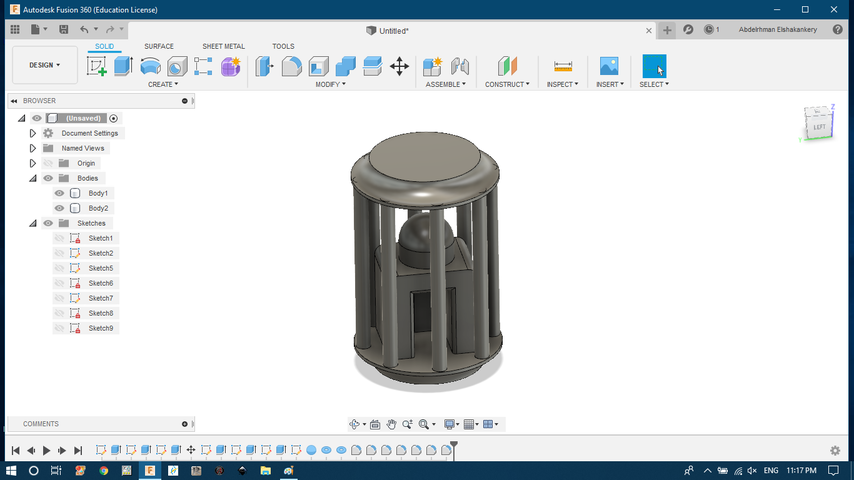
- create fillet and curves
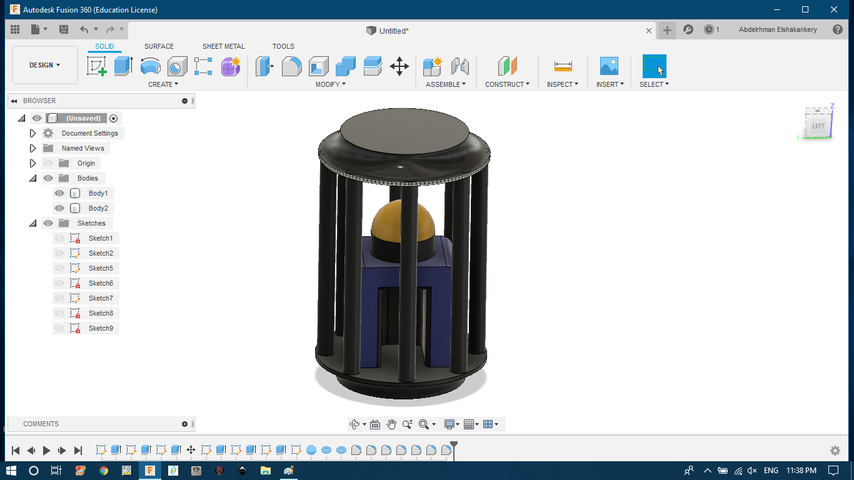
- Refining process by changing the apperance.
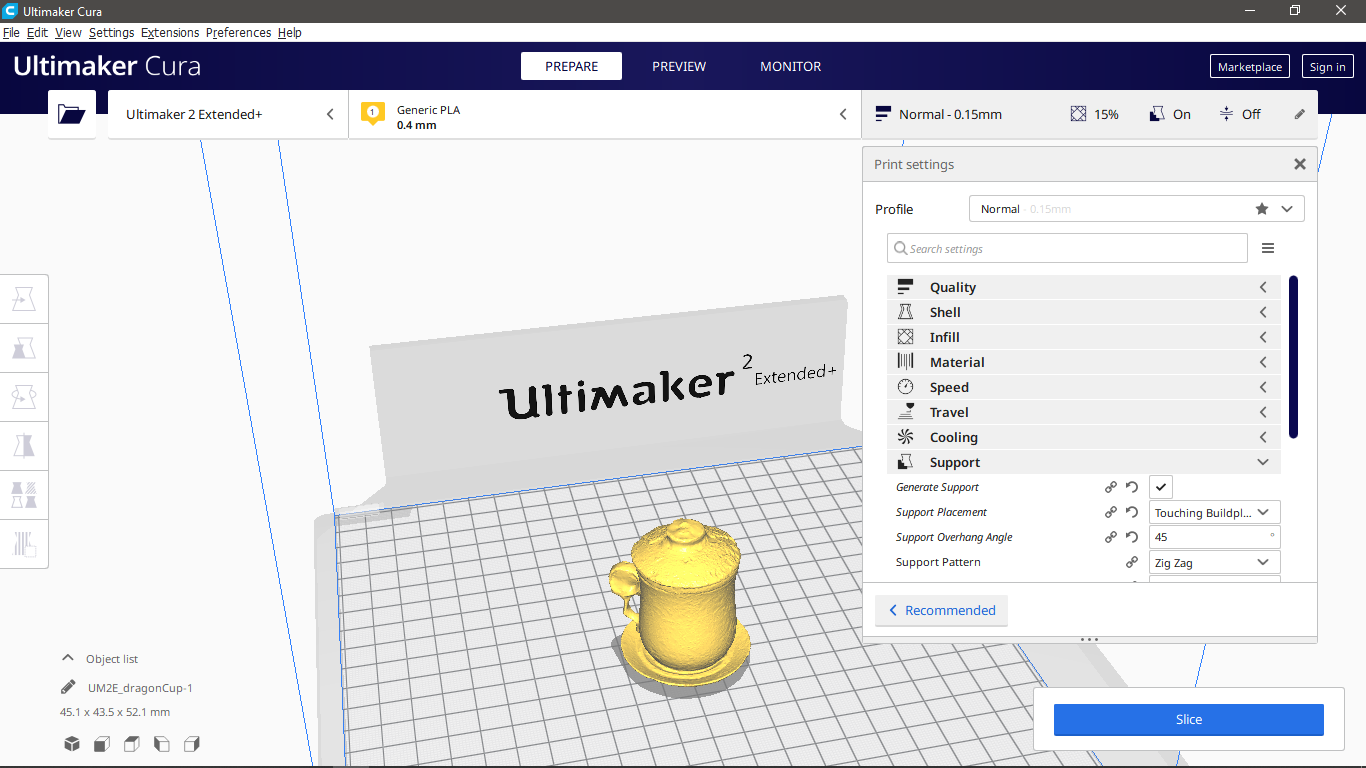
It's Cura Time
Let's Go Quickly with the meaning of cura parameters.
1) Quality : Here You Select your Layer Height to Can control how much material You need to work with and To make your design more Presice
2) Shell : Here we Define the Wall Thickness and top Bottom Thickness as you control here how much solid is the last surface ..
3) Infill : This is how to control the infill denisty and How the Infill Looks like as there are a lot of shapes for the Infill
4) Material : Here control Retraction to Reduce it .
5) Speed : Here control the Printing Speed and Better not to play with it ..
6) Cooling : Here you select if you need cooling while printing or not ..
7) Support : Type of Support and If you need it Everywhere or not .. You can add here the type of support " Support Pattern "
8) Build plate : To make the Print Stick to the Bed
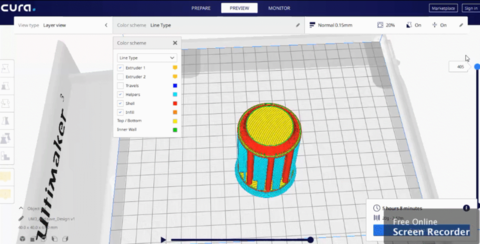
The slicing process.
Print Parameters
- Profile:Normal.
- layer height:0.15.
- Infill:Concentric with density=20%
- Material:Temp=200, Build plate=60
- Speed:50.
- Supoort: Everywhere, lines pattern, 5% density.
3D printing
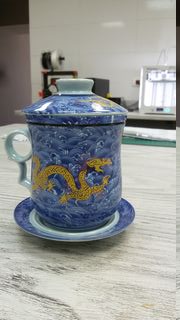
3D scan an object
3D scanning is the process of analyzing a real-world object or environment to collect data on its shape and possibly its appearance The collected data can then be used to construct digital 3D models. you can find more info about 3D sanning Here
I used a handheld tech in which I took several images to an object then use a Photogrammetry software to compute the images into a 3D model. For this I use MESHROOM which is an open source software photogrammetry software.
MESHROOM Tutorials.
I start by taking 44 picture to an object then open MESHROOM and import all of them.

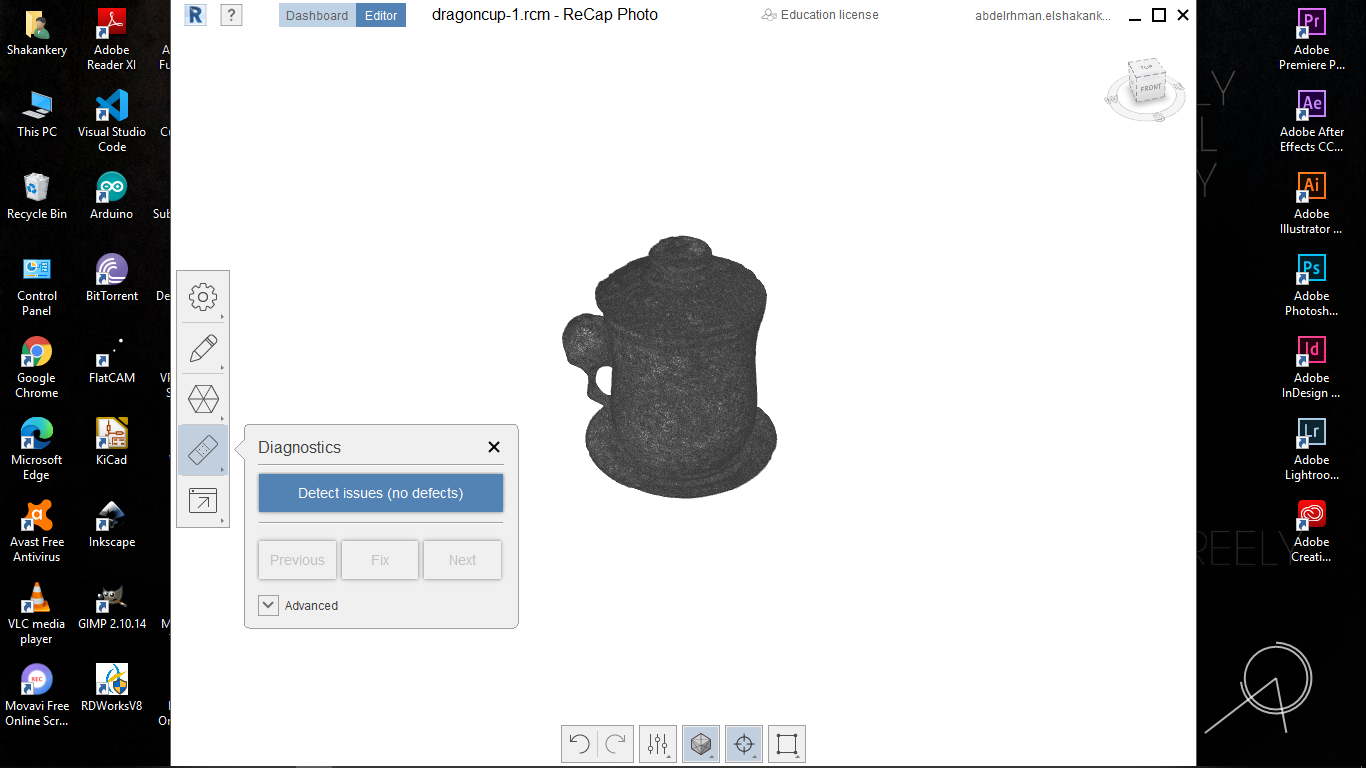
After a lot of investigation and so many trials, I couldn't solve the DepthMap error in
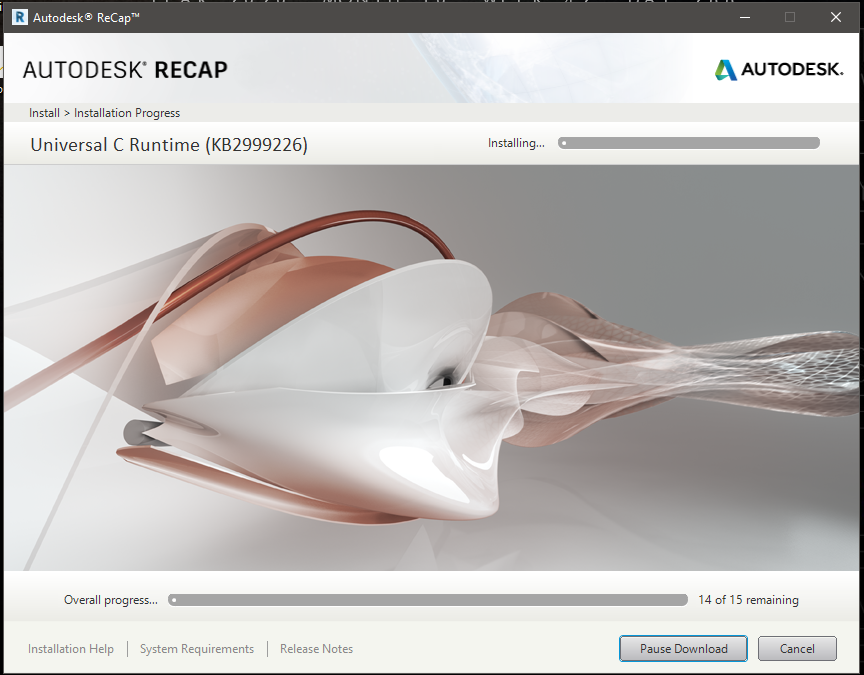
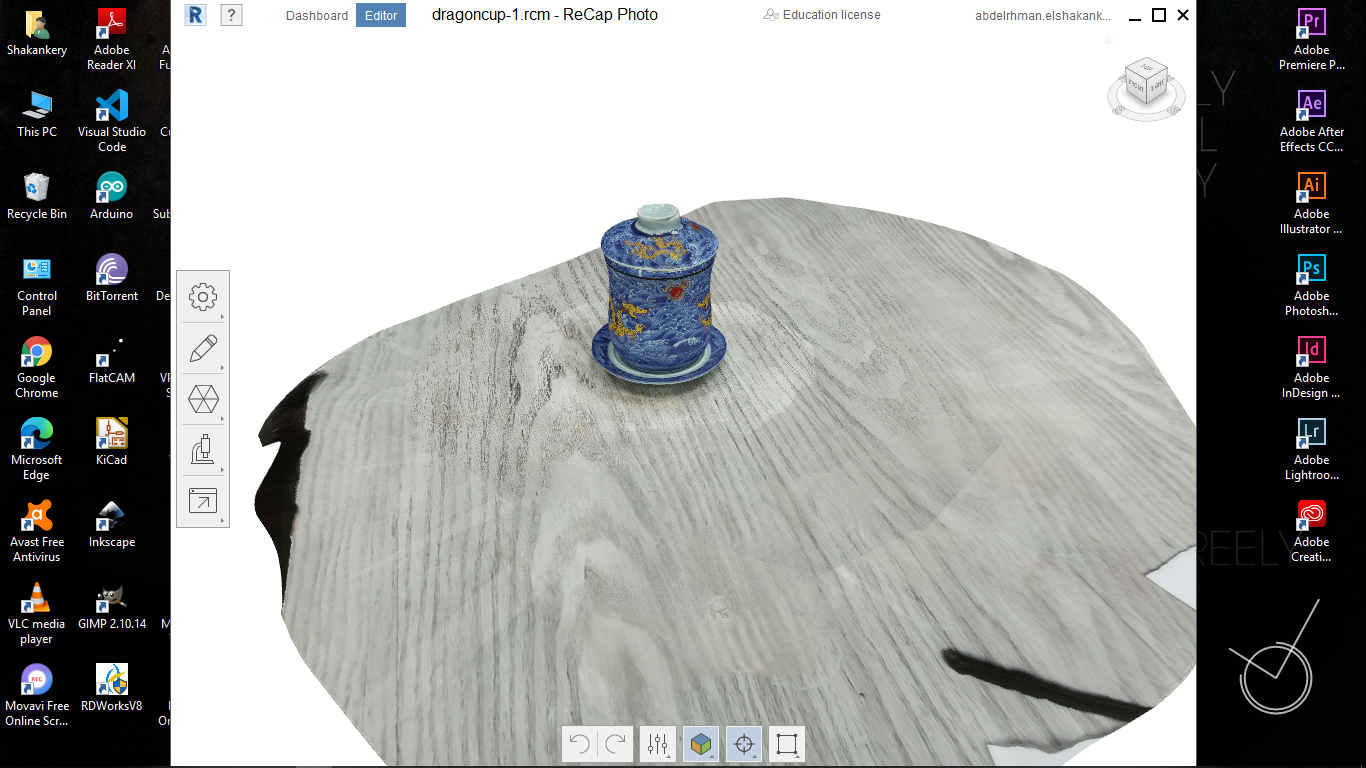
MESHROOM. so I took my instructor's -May Eldardiry- advice to use Autodesk ReCap software

Group Assignment
- (Know Your Machine!) Features, Work instructions, Materials
- All-In-one Test overhang test, bridging test, stringing test, sharp-corner test, tolerance test, and scale test
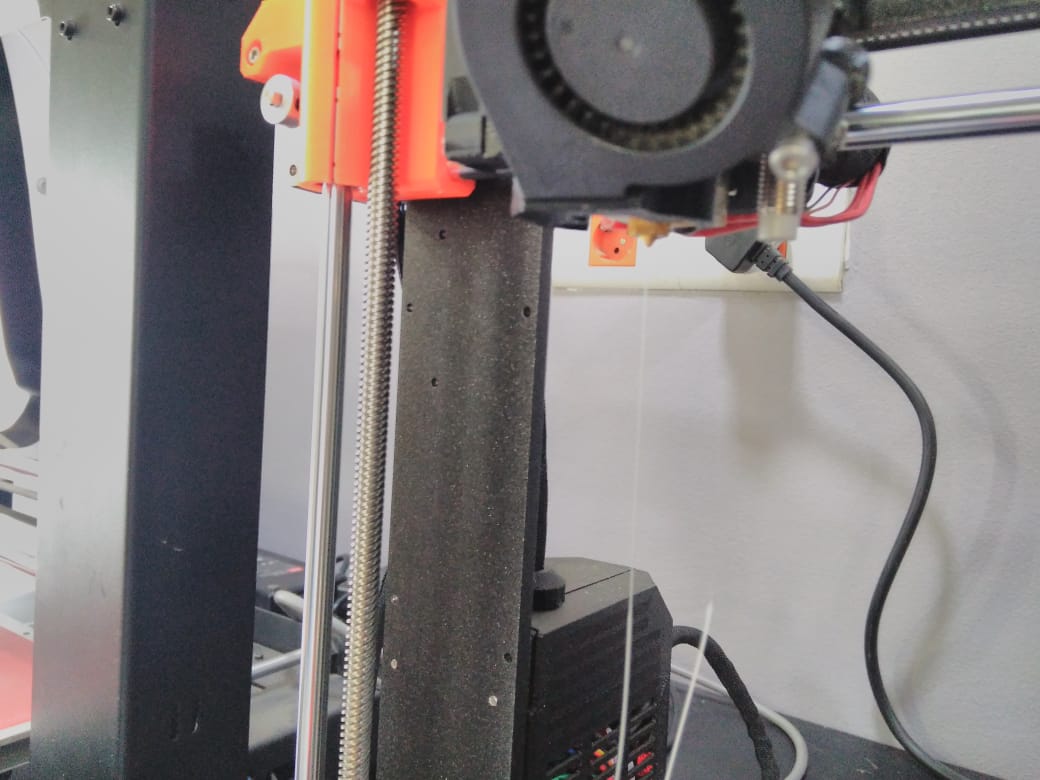
Our Machine
The 3D printer we used in fablab is Prusa i3 MK3S.
you can find all its features, instruction and how to operate it HERE
Before we start printting, we need to make sure everything is working fine such as Fan, Bed, Nozzle, Temperature.
following this amazing step by step tutorials by Josef Prusa.
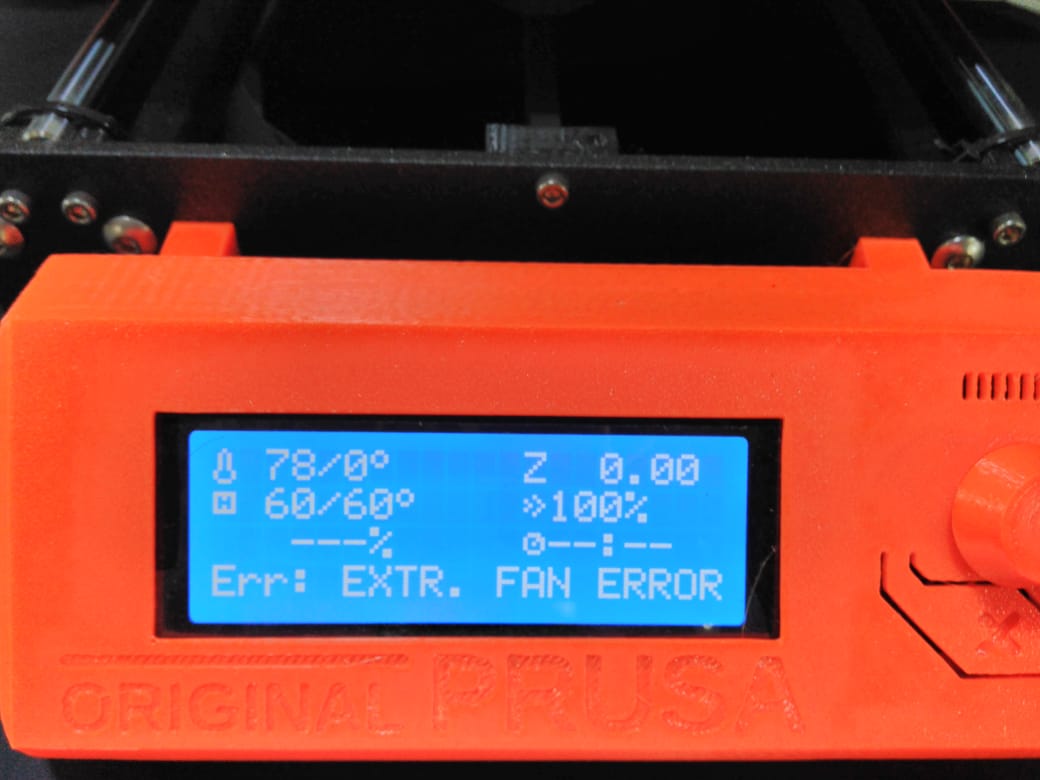 Just start and facing this fan error !!!!!
 it was due to a plastic shredder inside the fan that prevent it from moving.
 Now everything is fine and to start our test.
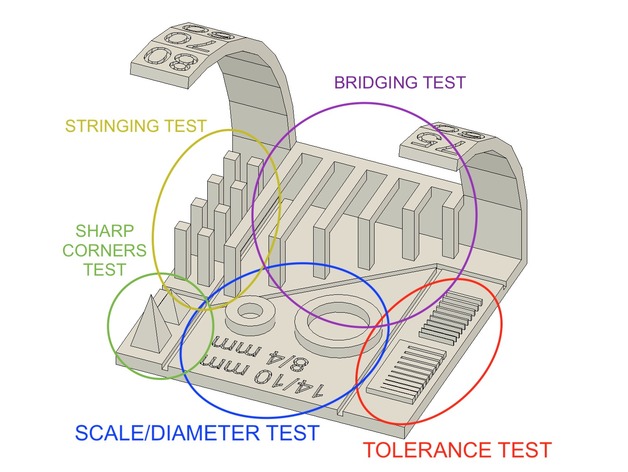
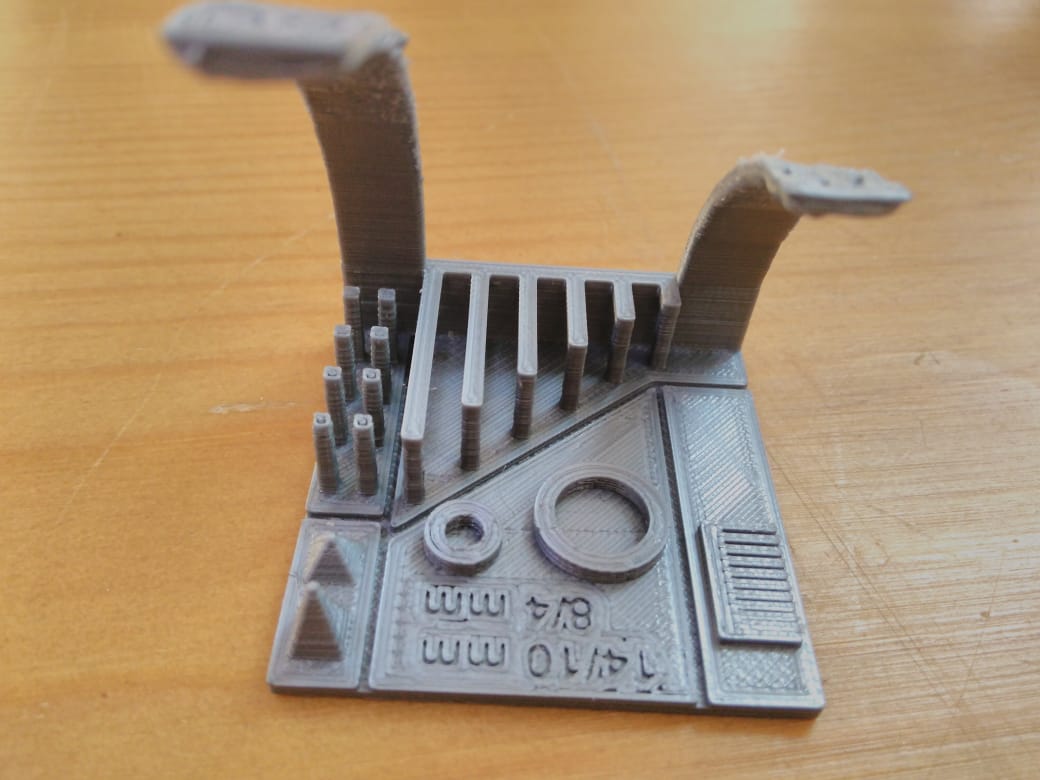
All-In-Test
We found this link on Thingiverse after reading the description we found that he create a modified micro part and we decide to use it HERE
Test observation
At the beginning we understand what every test talks about and what parameters we should take into our consideration from here
- Bridging test: we found that Prusa can easily handle this test, but make sure that the setting is 0.1 layer height, speed 60 and temperature 215.
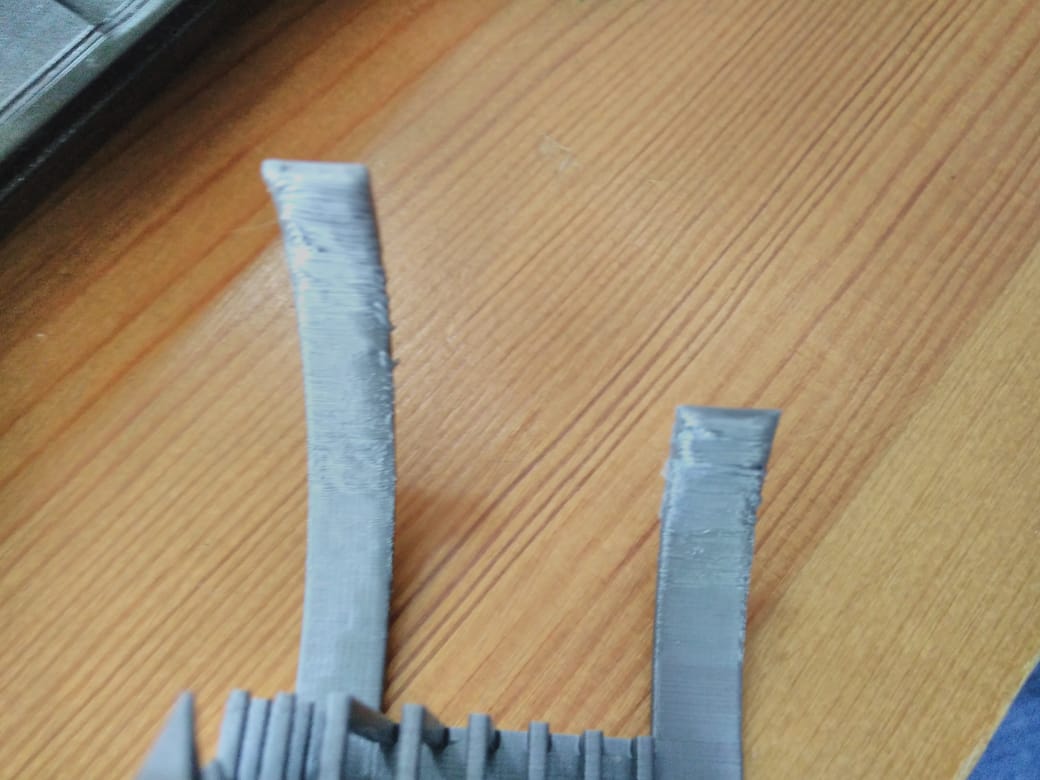
- Stringing test and Sharp-corner: came out nicely.
- Tolerance: test the measurement we get are consistently different than the actual then this indicates that the nozzle of the 3D printer is wearing out, so we decide to make another more accurate one.
- Overhang test: we found that Prusa can easily handle printing up to a 45 degree overhang without any support.
 All-In-one Test
Final Project
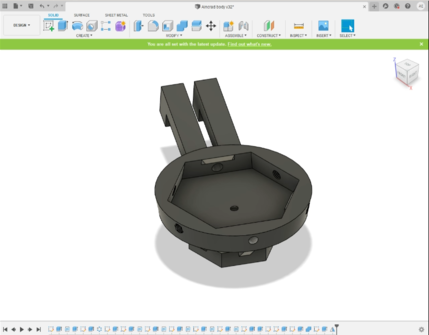
Design Aincrad body
I've designed Aincrad body using Fusion 360. The body is cosist of 5 Main components:
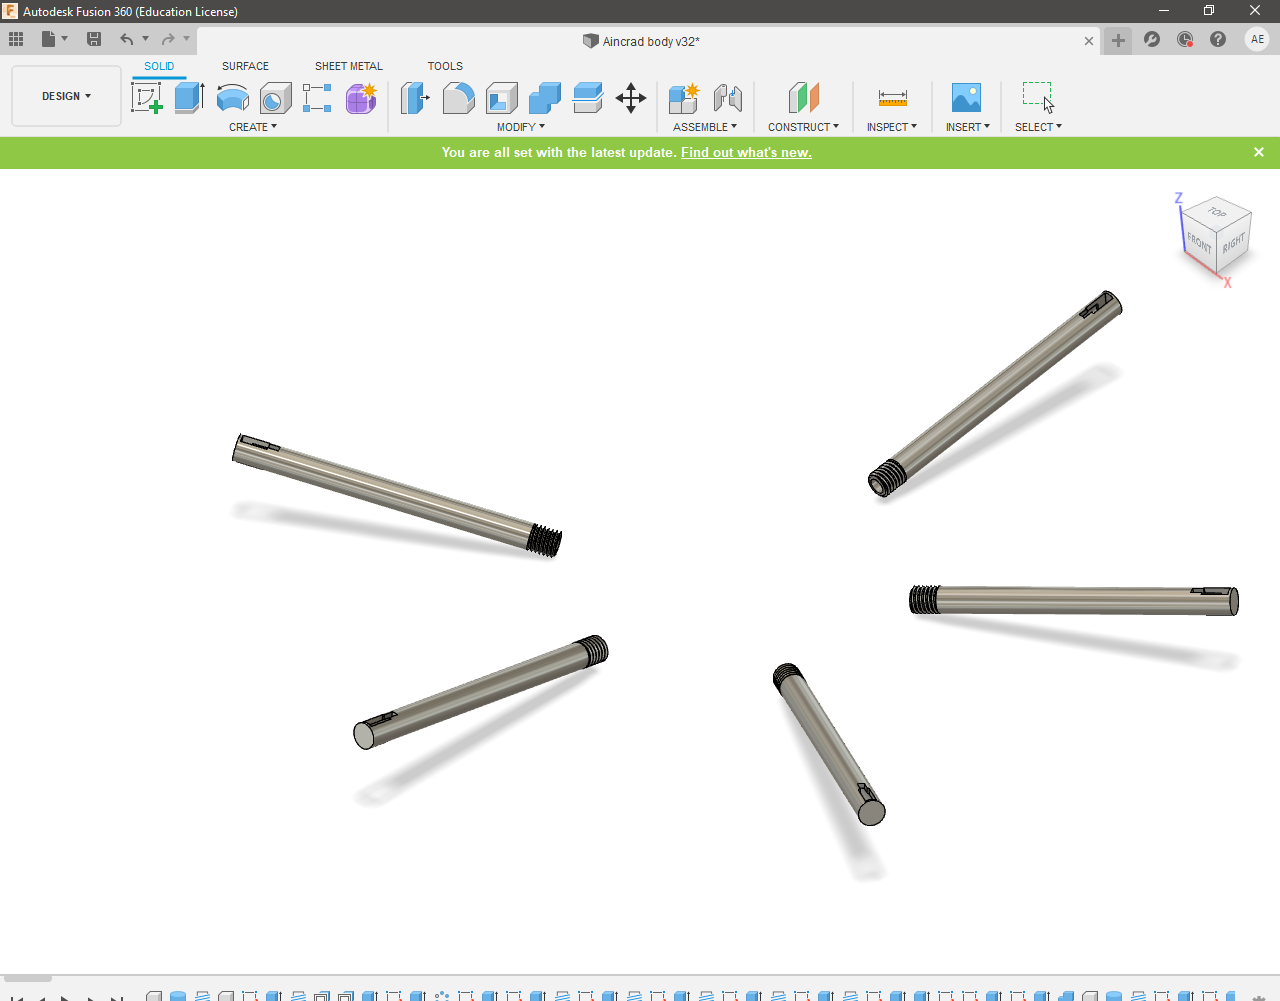
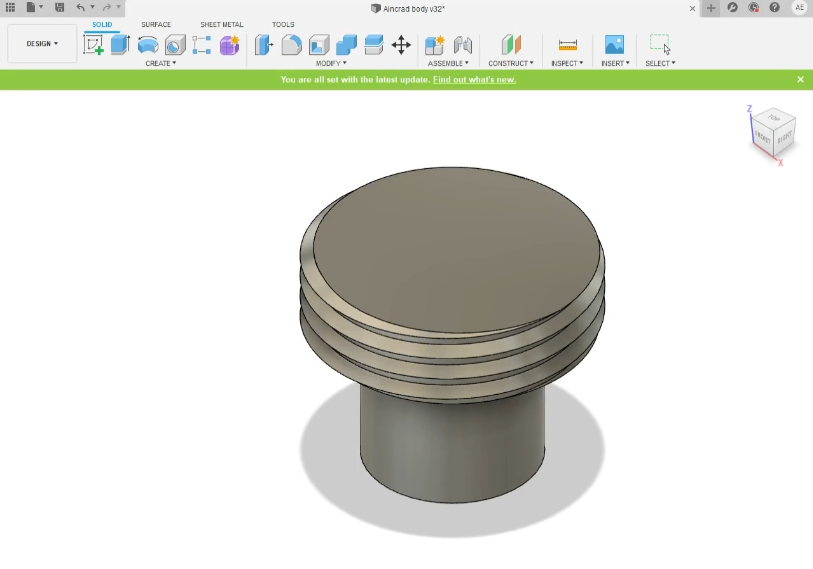
For the Top, Middle, swordHolder and baseThread all of them will be made out using 3D printing. so following the same process as I did in the assignment I have exported the .stl file for each part
-
Top part.
-
Middle part.
-
swordHolders.
-
baseThread.
3D Printing
The top, middle, baseThread and swordHolders
 top part with transparent filmant.
 Middle part with black filament.

- baseThread to make the joint between the middle part and the base.
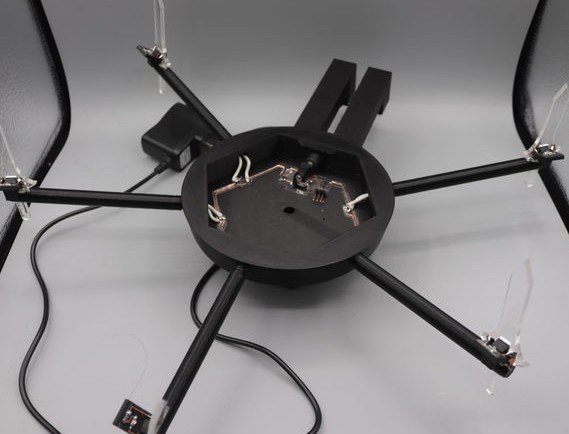 sword holder integrated with the middle part.
Files:
Find below the files that I made for this assignment. Please do not hesitate to download it!!