assignment for this week
cut something on the vinyl cutter
design, laser cut, and document a parametric construction kit
accounting for the laser cutter kerf
which can be assembled in multiple ways
and for extra credit include elements that aren't flat
vinyl cutter Roland BN-20
vinyl cutter is a type of computer-controlled machine, Like a printer controls a nozzle, the computer controls the movement of a sharp blade over the surface of the material. This blade is used to cut out shapes and letters from sheets of thin self-adhesive plastic (vinyl).
The vinyl cutter Roland BN-20 prints first. After printing is finished, it does the second cutting process.
Features
A gold-plated head to reduce static and prevent ink-clogging.
A wiper system that decreases wear and tear on the print head— prolonging its life by reducing ink buildup.
An automated ink circulation system reduces ink waste to dramatically lower running costs while ensuring consistently professional image quality.
Compact 20-inch inkjet with integrated printing and contour cutting A versatile machine for printing t-shirt graphics, decals, stickers, signs, posters .
Ink options include CMMYK, CMYK+White and CMYK+Metallic Silver Legendary Roland DG reliability for continuous, economical production.
To deal with the machine and with the programs,I used this Titorial

I download the fab logo from our website, but image is raster so we need to make it vector . i used illustrator to make it vector by using image trace tool.

After doing image trace of the image and editing it, it becomes the image as below

After I downloaded another image from the internet and modified it in illustrator using the pen tool

After collecting the shape from the command tools, we use the cut to lift the hair line. Then we choose the pink color to do the cut. Upon completion we click on print or ctrl + p.

We take the program to CorelDraw to do the amendment on the stickers, then we click on the print command, and these stickers go to the VersaStudio machine program to start printing after setting the appropriate settings through this program.

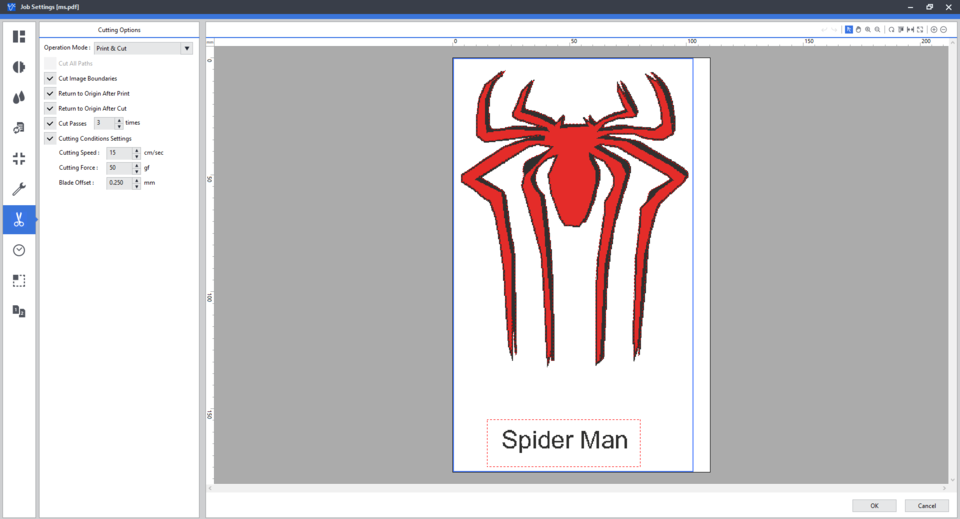
Controls the speed, strength, blade offset,and cut passes

The software used for vinyl cutter is VersaStudio BN-20
I tried cutting with more than one setting, and the result was noticeable
When you put different settings such as changing the cutting speed, cutting times and cutting force, all this I have tried more than once until the design was cut perfectly, as is evident with the settings in the picture above. (When you put different settings such as changing the cutting speed, cutting times and cutting force, all this I have tried more than once until the design was cut perfectly, as is evident with the settings in the picture above.)
After adjusting all the print and crop settings, press OK and press the right button of the mouse to print
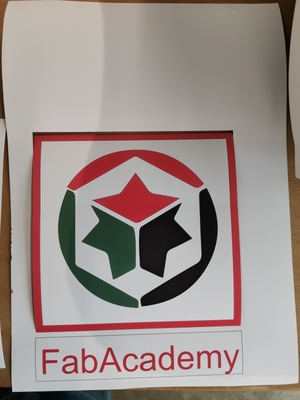
This is the result, below


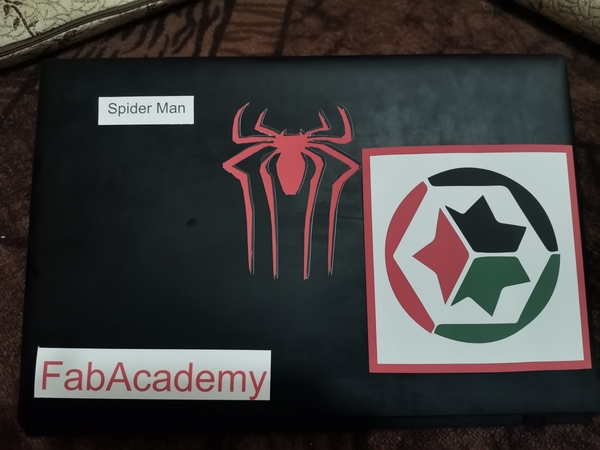
After finishing the printing, we will paste the sticker on anything we want

.jpg)
.jpg)
.jpg)
.jpg)
LASER CUTTER
Laser cutting works by directing the output of a high-power laser most commonly through optics, The focused laser beam is directed at the material, which then either melts, burns, vaporizes away, or is blown away by a jet of gas, leaving an edge with a high-quality surface finish

Operating the trotec laser cutter The software we used for laser cutting is trotec JobControl to download it fromHere.
On the machine there is a panel that shows various rows to move the pointer for setting the origin.
After the design is ready, we put the material to be cut and engraved.
After we have zeroed the coordinate machine, we start cutting and drilling.
Settings used for Materials on the Speed And Power
Cut:
3mm acrylic white: 89 Power, 0.55 Speed, 1000 PPI
I did several tests by changing the speed and power settings, and the difference was very clear
What Is Parametric Modeling? Parametric modeling is an approach to 3D CAD in which you capture design intent using features and constraints, and this allows users to automate repetitive changes, such as those found in families of product parts.
I've used a lot of other 3D modeling programs and I think Fusion 360 has exciting potential. For software focused on CAM (computer aided manufacturing) I think its the easiest and most powerful tool available.
The first step is to open the Fusion 360 program, then I adjust Parametric settings according to the required sizes, then I make a link between these sizes so that if I want to change the size of the designer shape, no part in it changes, except that it gets bigger or smaller.

After we drew a rectangle and made a sketch dimension To pan it using Parametric from the Create menu

We made this 2D to 3D using the Revolve tool from the Create menu

I designed another look, using the above commands, to try out

I can zoom in and out on this shape using Parametric that I have previously set up


After design is finished, we save it in DXF format
I open the DXF file from Corel Draw , And we set the settings for cutting the hair line and the red color for cutting
We press Ctrl + p to print from the machine program
Then the file goes to the JobControl machine program to perform the shear, after the machine is zeroed from the panel, then we adjust the speed and power settings and make an update from the program, after that we start cutting
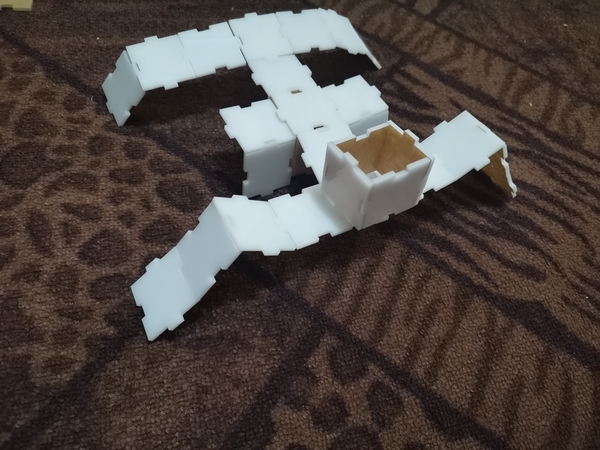
These are the final results of cutting


group assignment: characterize your lasercutter's focus, power, speed, rate, kerf, and joint clearance
Accounting for the kerf
Kerf is basically the material that gets lost during the process of operation,Basically some of material which get lost during the process is of very minute order depending upon the machine but to have a better understanding for making a press fit the know how of kerf was important for a good design rule.
KERF SCALE
Kerf means width of material that is removed by a cutting process. here the laser beam burns a negligibly small portion of material when it cuts the material this is known as " Laser Kerf ". The ranges of laser kerf from 0.08mm to 0.45mm, it is depending on the type of material and other conditional factor
To measure the kerf we draw a rectangle divided by lines on one of the design programs with appropriate width and length, then we save the file in DXF format and open it through Corel Draw and set the borders for the shape, then we make the hair line shear, and the color of the cut is red, and we will make the cut on acrylic white, we Clicking on Print, and we go to the JobControl program to do the trim command after adjusting the settings

After printing, we calculate the kerf according to the following formula:
(DL(True value before laser cutting)-ML(Actual value after laser cutting)/Number of line
The kerf helps us to make the pieces more suitable for some
I tried to cut the PCB with a vinyl cutter and I tried it more than eight times with changing the settings every time.
These are the design files
Fab logo
Spider Man a poster
Parametric Design 1
Parametric Design 2
This is the site for group assignments:Press here
group assignment:
characterize your lasercutter's focus, power, speed, rate, kerf, joint clearance and types
This link contains documentation for group work.