This week we learned about laser cutting and an overview of the types of cutting, And it was different from the weeks before, Because we have a group assignment,This is a summary of this week.
Laser cutting
Laser cutting is a technology that uses a laser to slice materials. While typically used for industrial manufacturing applications, it is also starting to be used by schools, small businesses. Laser cutting works by directing the output of a high-power laser most commonly through optics. The laser optics and CNC (computer numerical control) are used to direct the material or the laser beam generated. A commercial laser for cutting materials involved a motion control system to follow a CNC or G-code of the pattern to be cut onto the material. The focused laser beam is directed at the material, which then either melts, burns, vaporizes away, or is blown away by a jet of gas, leaving an edge with a high-quality surface finish. Industrial laser cutters are used to cut flat-sheet material as well as structural and piping materials.
With the development of science and technology, there are more and more cutting methods, such as laser cutting, waterjet cutting, plasma cutting, wire cutting, etc. What’s the difference?
First, let’s dive into the explanation of each cutting method.
Definition of Laser Cut, Waterjet Cut, Plasma Cut and Wire Cut :
Laser Cutting
Laser cutting is to make the irradiated material melt, vaporize, ablate or reach the ignition point by irradiating the workpiece with the focused high power density laser beam, and at the same time remove the molten material by means of the high-speed airstream coaxial with the light beam, so as to realize the cutting of the workpiece. Now CO2 pulsed laser and fiber laser are commonly used. Laser cutting is one of the thermal cutting methods.
It has many features when applied in the cutting process.
And laser cutting mainly has four different cutting methods to deal with different situations.
Fusion cutting
In the laser fusion cutting, the workpiece is partially melted and the molten material is ejected by airflow.Because the transfer of the material occurs only in its liquid state, the process is called laser fusion cutting.
The laser beam is accompanied by a high purity inert cutting gas that causes the melted material to leave the slot, and the gas itself does not participate in the cutting.
Laser fusion cutting can achieve higher cutting speed than gasification.
The energy required for gasification is usually higher than the energy required to melt the material.
In laser fusion cutting, the laser beam is only partially absorbed.
The maximum cutting speed increases with the increase of laser power and decreases with the increase of plate thickness and the material melting temperature.
In the case of laser power under a certain level, the limiting factor is the air pressure at the slot and the thermal conductivity of the material.
The laser fusion cutting can get no oxidation incision for iron steel and titanium.
There is melting but cannot reach the laser power density required for gasification. For steel materials, it’s in the range of 104W/cm2 ~ 105W/cm2.
Vaporization cutting
In the process of laser gasification, the surface temperature of the material rises to the boiling point so fast that it can avoid the melting caused by the heat conduction. Some of the material vaporizes into steam, and some of the material is blown away by the auxiliary gas flow from the bottom of the slit.In this case, the very high laser power is required.
In order to prevent the material vapor from condensing into the slit wall, the thickness of the material must not exceed the diameter of the laser beam.
This process is only suitable for applications where there is a need to avoid the removal of molten material.
It is actually used only in small areas for ferrous alloys. It cannot be used for materials such as wood and certain ceramics that has no molten state and therefore less likely to cause the material to be condensed.
In addition, these materials usually have to reach a thicker incision.
In laser gasification cutting, the optimal beam focusing depends on the material thickness and beam quality.
Laser power and gasification heat have only a certain effect on the optimal focus position.
In the case of plate thickness under a certain number, the maximum cutting speed is inversely proportional to the gasification temperature of the material.
The required laser power density is greater than 108W/cm2 and depends on the material, cutting depth and beam focus position.
Under certain plate thickness, the maximum cutting speed is limited by the velocity of the gas jet.
Fracture-controlled cutting
For brittle materials prone to heat damage, high speed and controllable cutting through laser beam heating are called fracture controlled cutting.The main content of this cutting process is:
The laser beam heats the small area of the brittle material, causing the large thermal gradient and serious mechanical deformation in the region, and lead to the crack of the material.
As long as the balanced heating gradient is maintained, the laser beam can guide the cracks in any desired direction.
Oxidation melting cutting(Laser flame cutting)
The melting cutting usually uses an inert gas.If using oxygen or other reactive gas, the material was lit under the irradiation of the laser beam, and react chemically with oxygen violently and produce another source of heat, which further heating the material.
This process is called oxidation melting cutting.
Because of this effect, the cutting speed for the same thickness of structural steel is faster than that of fusion cutting. However, cutting incision may be worse.
In fact, it will produce wider cut seams, obvious roughness, increased thermal impact zones and worse edge quality.
Laser flame cutting is not good for machining precision models and sharp corners (risk for burn sharp corners).
The pulse mode laser can be used to limit the heat effect, and the power of the laser determines the cutting speed.
In the case of certain laser power, the limiting factor is the supply of oxygen and the thermal conductivity of the material.
These are the four most commonly used methods of laser cutting. The user can determine the cutting plan according to the cutting equipment’s power, processing requirements and material characteristics.
Waterjet Cutting
Water cutting, also known as water knife, is a cutting machine that makes use of high-pressure water flow to realize the purpose of cutting. Under the control of the computer, it can carve the workpiece at will, and material quality is less affected. Water cutting is divided into two ways: no sand cutting and sand cutting.
Plasma Cutting
Plasma arc cutting is a processing method that utilizes the heat of high-temperature plasma arc to melt (and vaporize) the metal at the cutting edge of the workpiece and the momentum of high-speed plasma is used to eliminate the molten metal to form an incision.Wire Cutting
Wire Electrical Discharge Machining, for short WEDM belong to the electrical processing category, Wire Cut Electrical Discharge Machining sometimes referred to as wire cut. Wire cutting can be divided into fast wire cutting, medium wire cutting and slow wire cutting. The wire traveling speed of fast WEDM wire cutting is 6 ~ 12 m/s. The wire travels back and forth at high speed with poor cutting accuracy. The medium WEDM wire cutting, which is one new technique in recent years, realize frequency multiple cutting functions based on fast WEDM wire cutting. The wire traveling speed of slow WEDM wire cutting is 0.2m/s. The electrode wire moves in low speed and unidirectional, and the cutting precision is very high.This is our laser cutting machine in FabLab Irbid
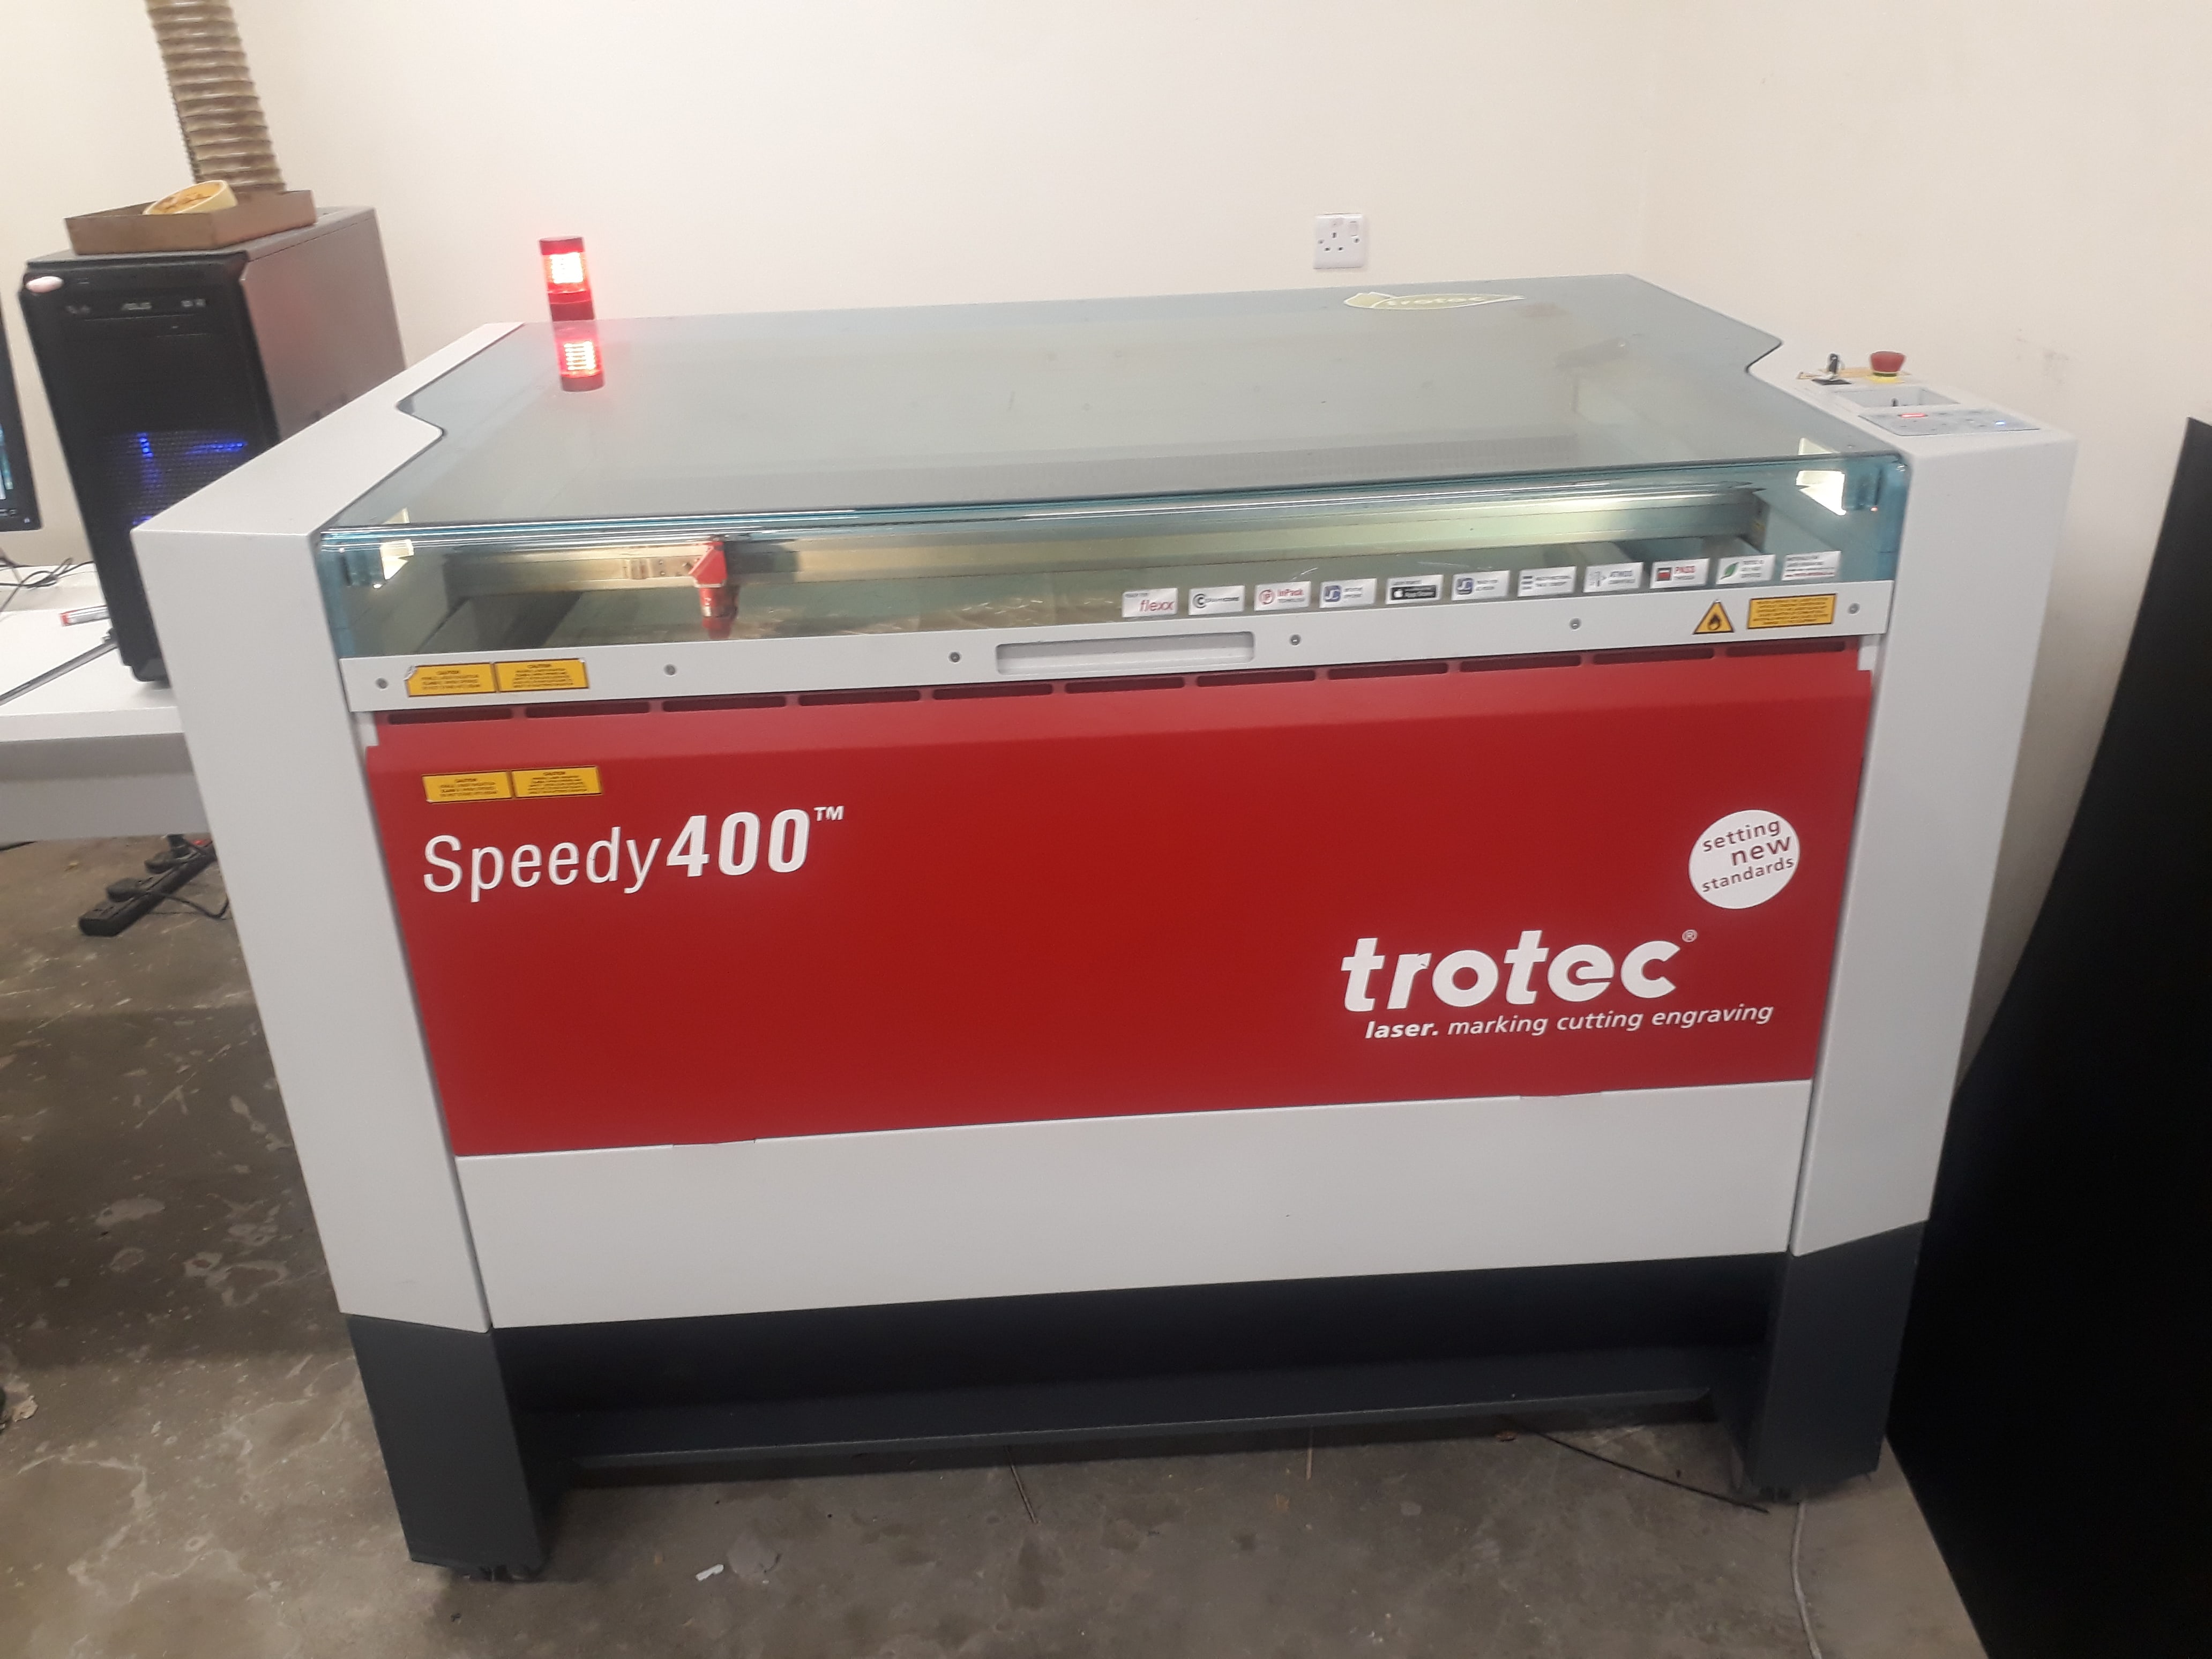
For more information about trotec laser, you can download the operation manual, click here
Let's start with the assignment group
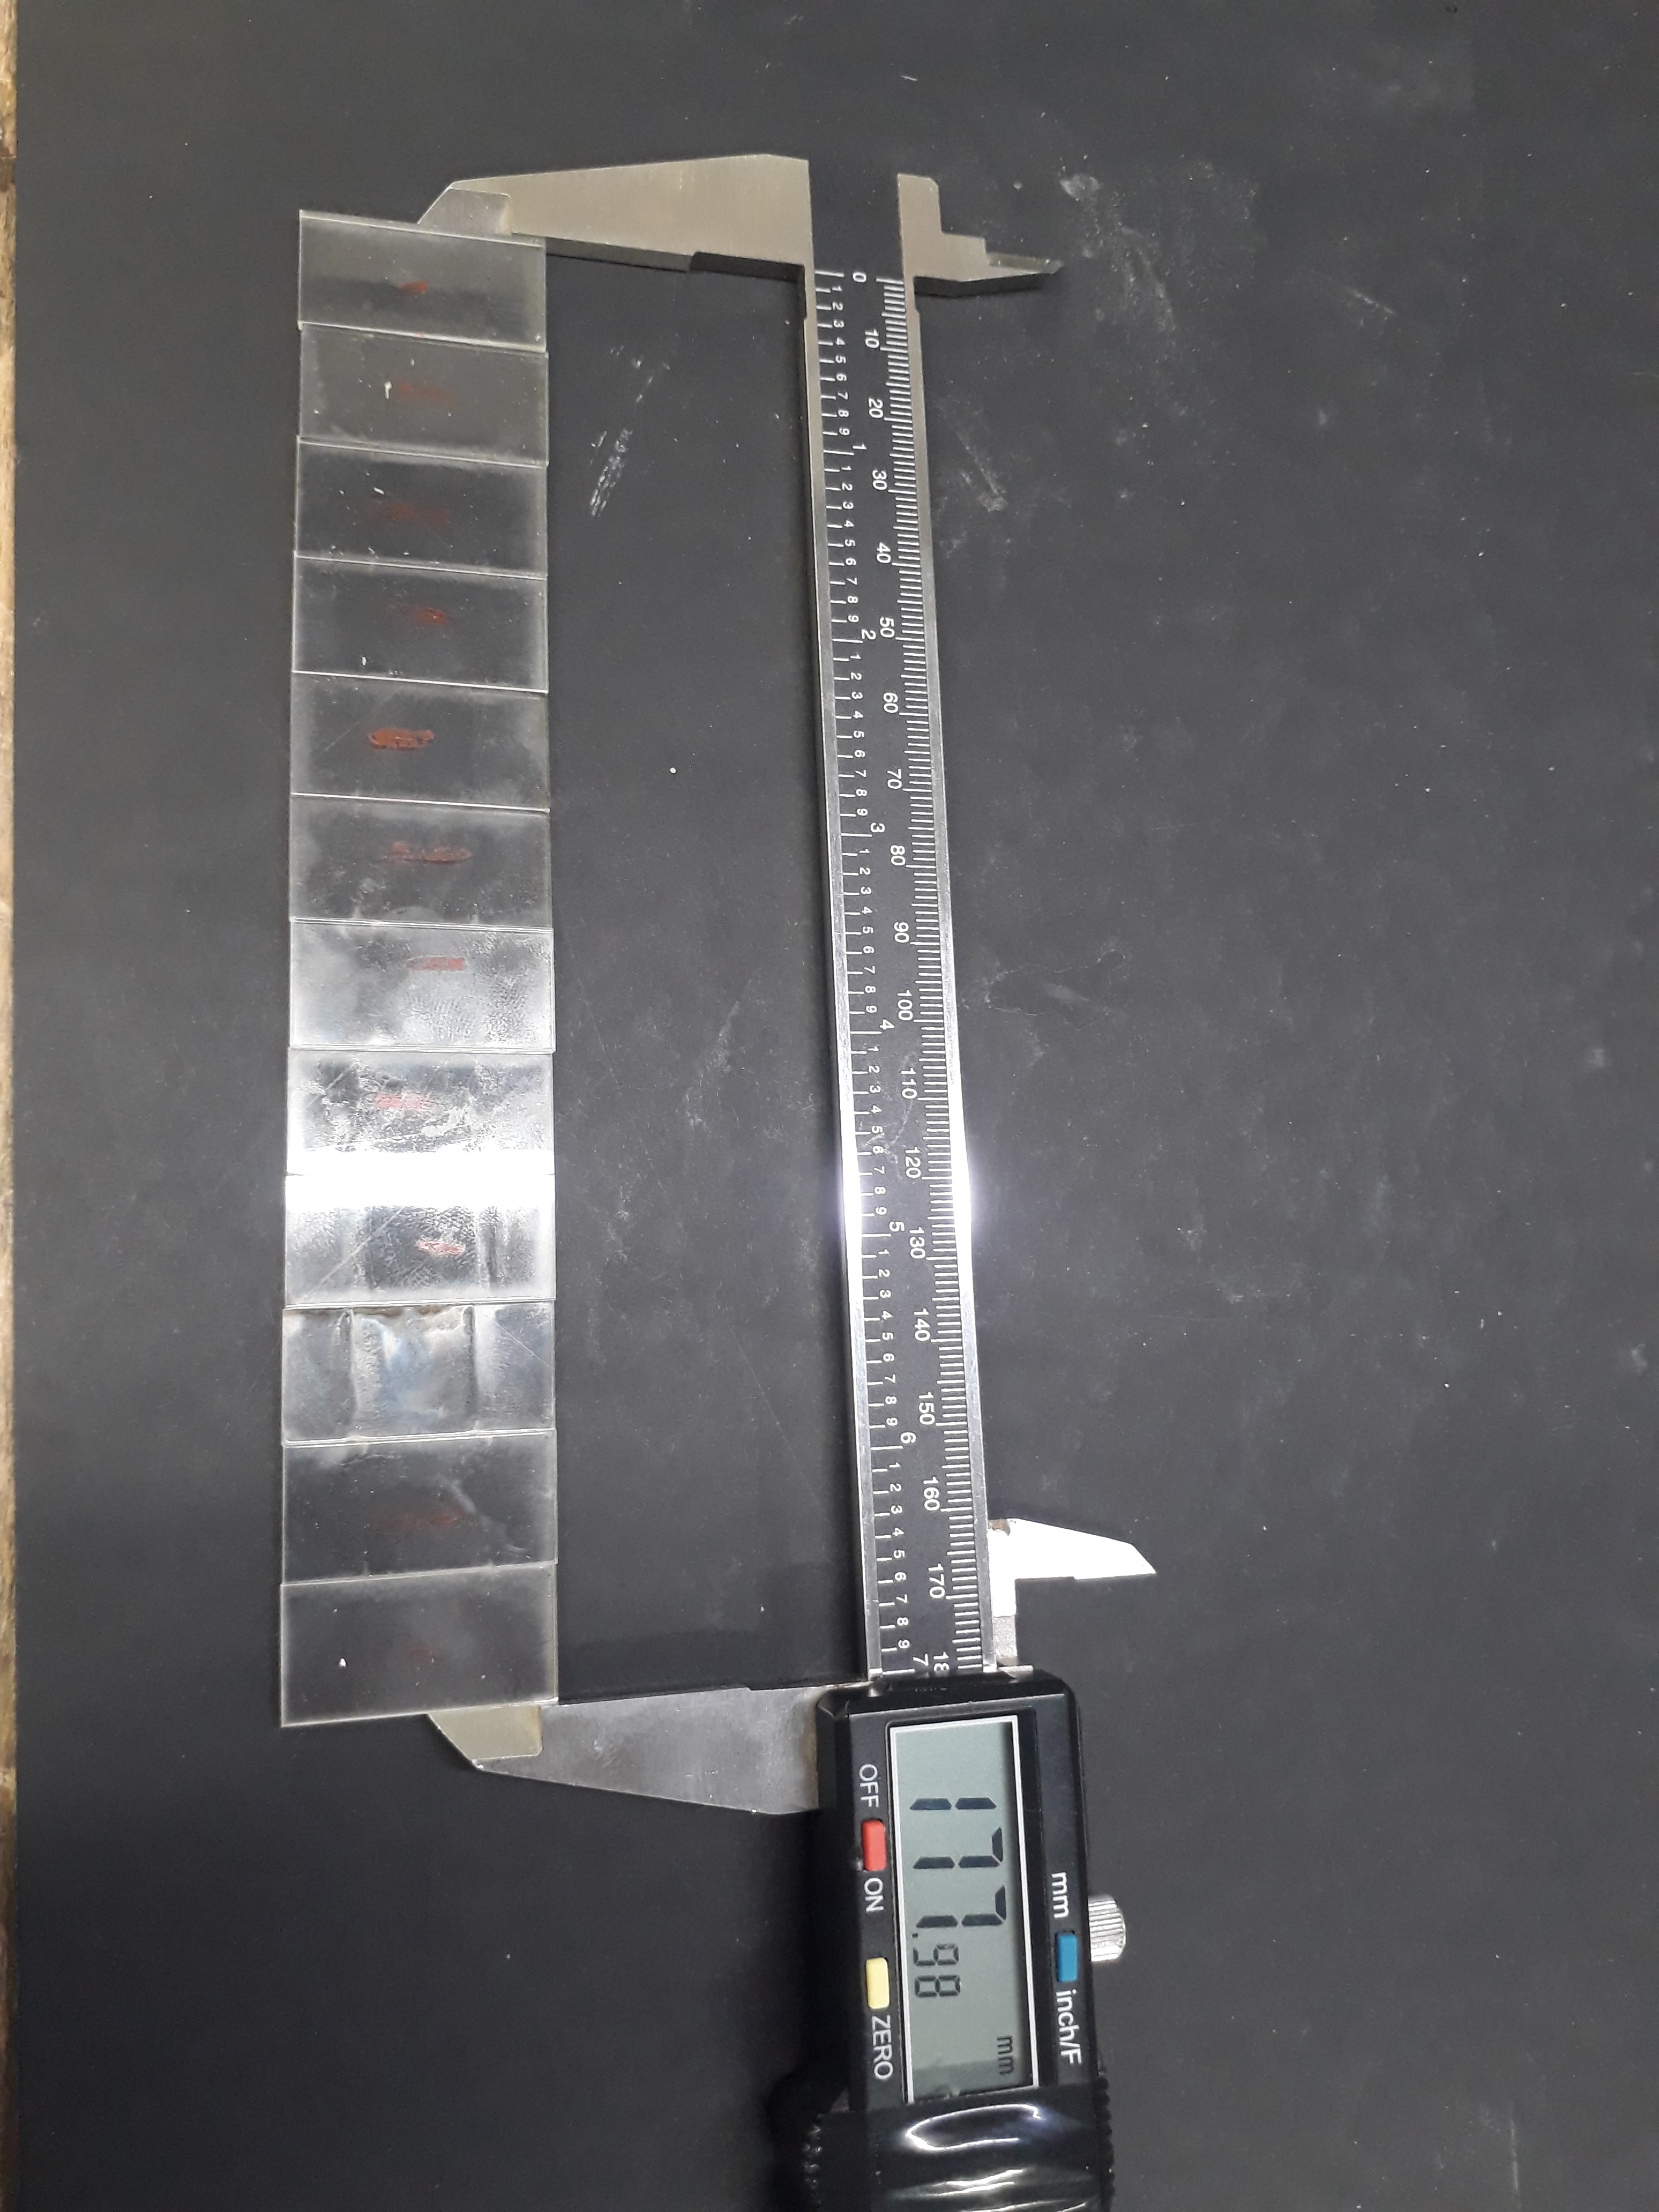
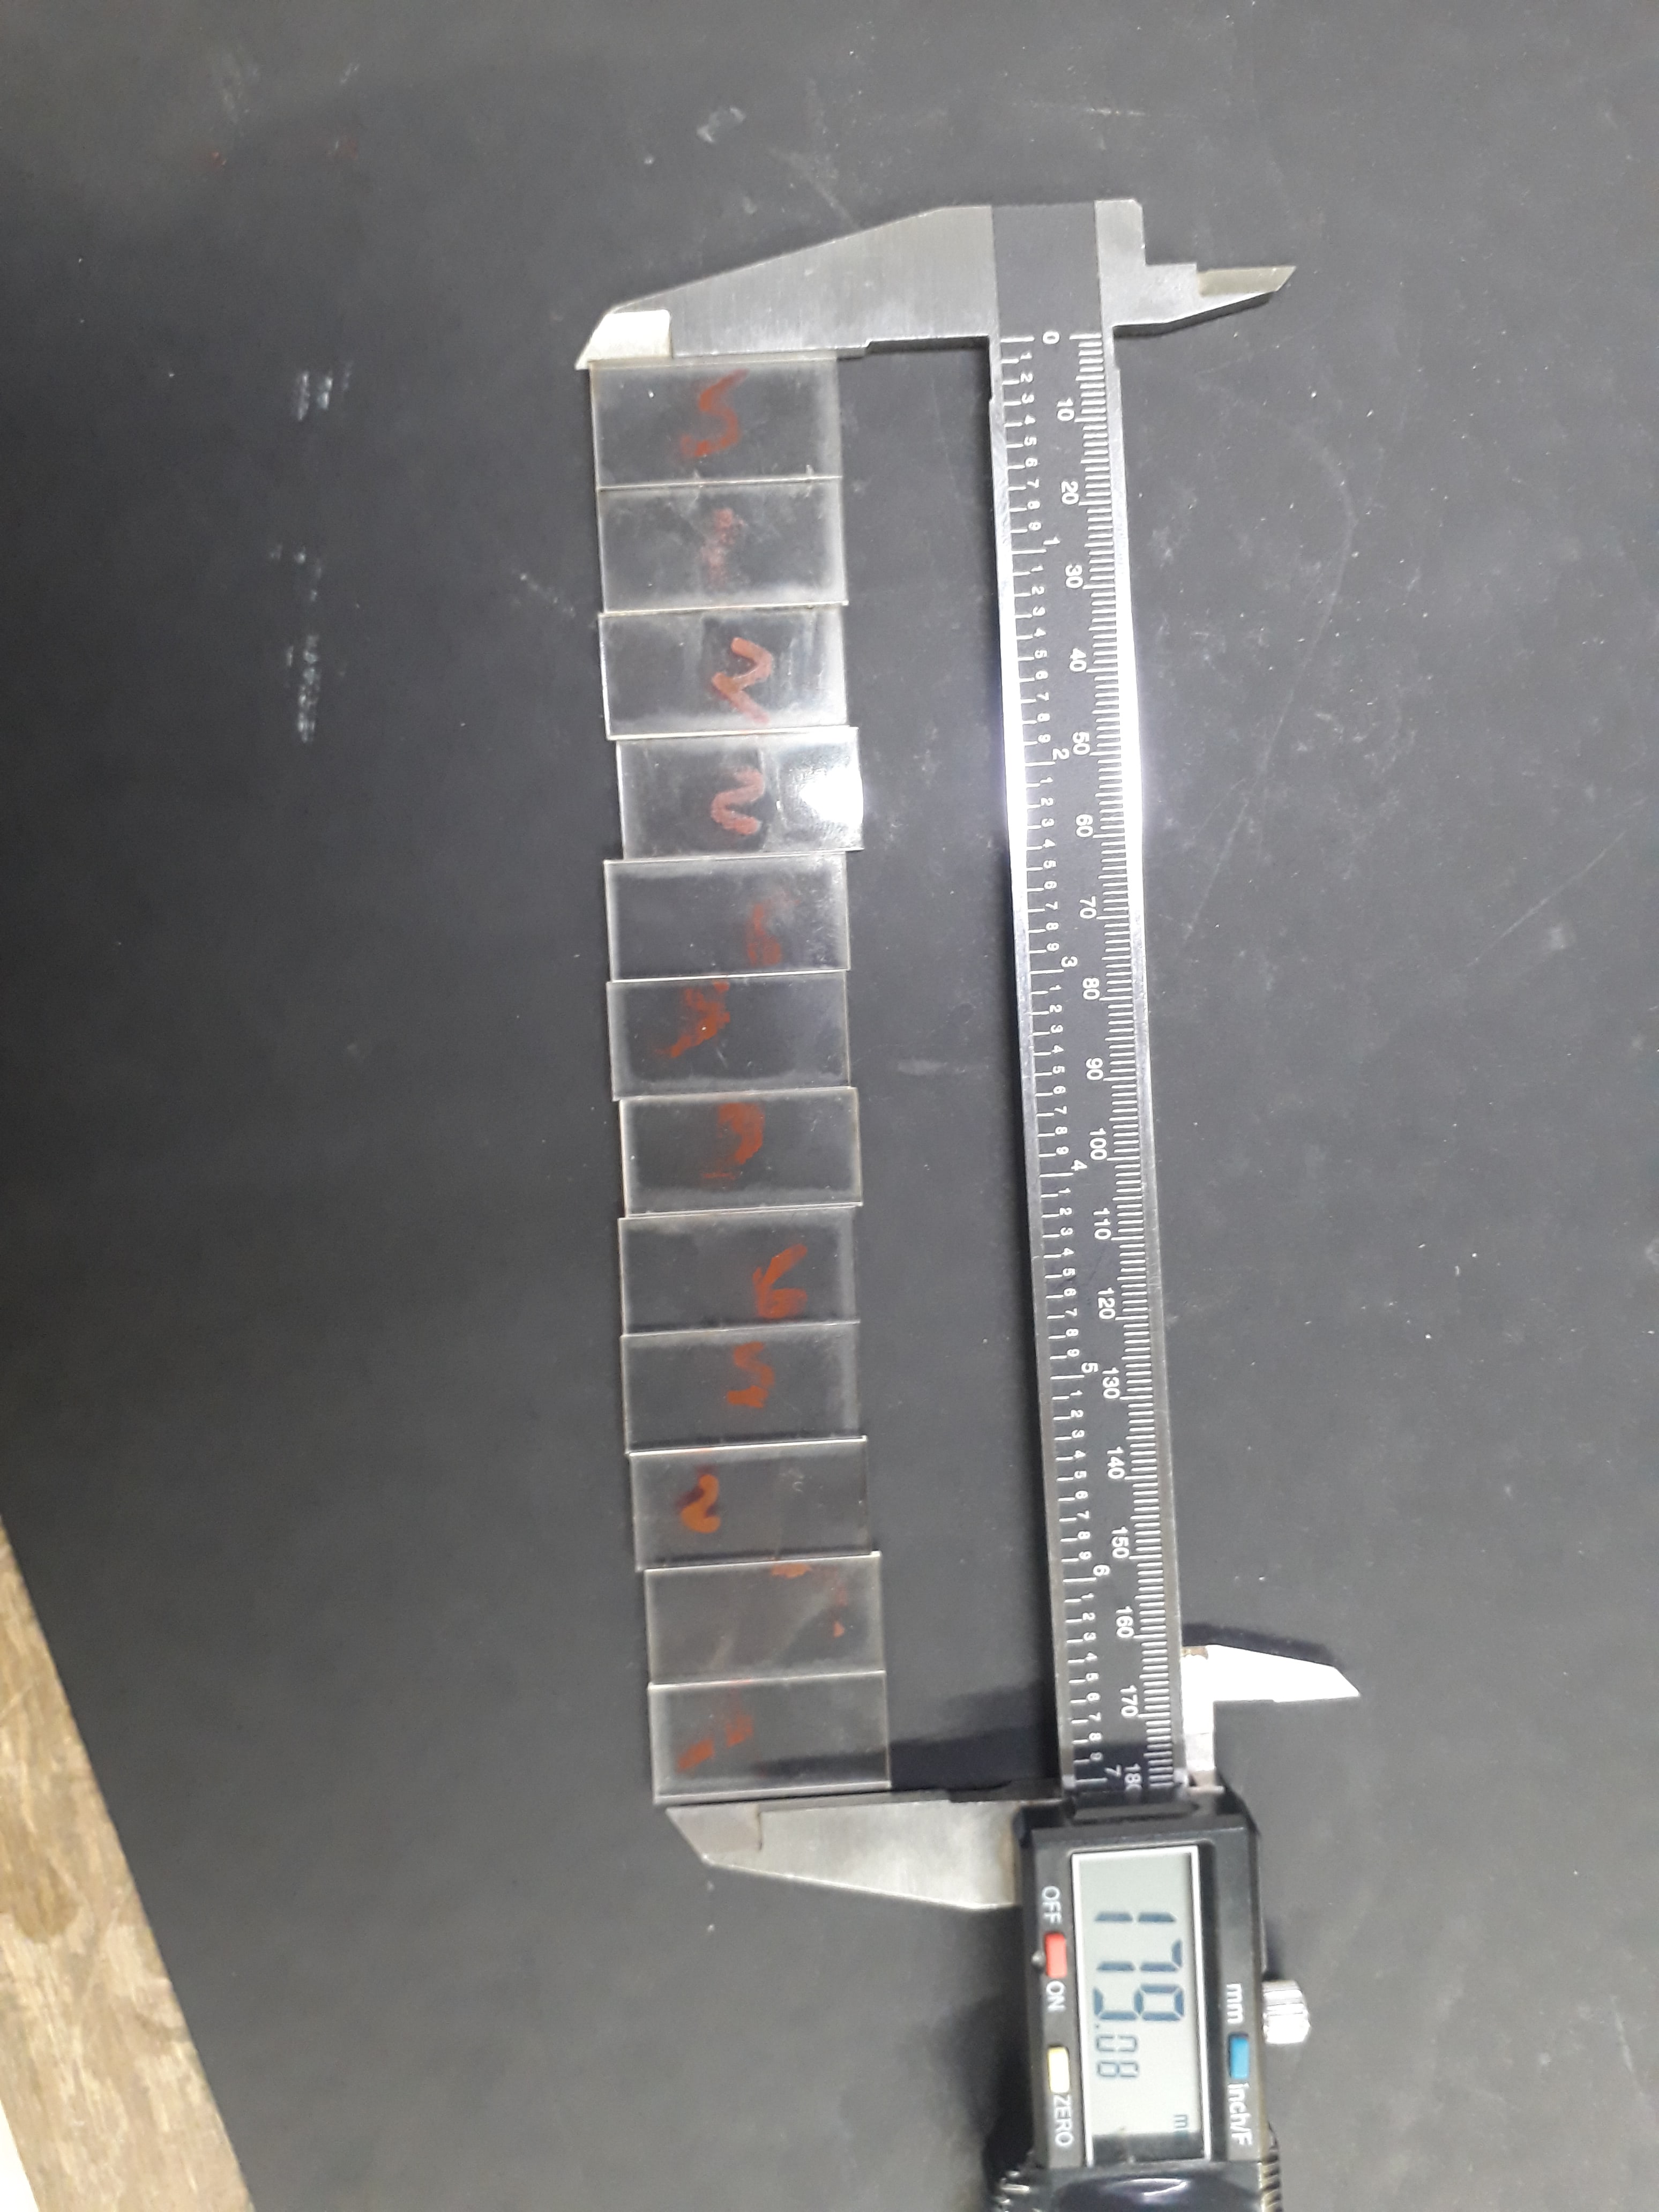
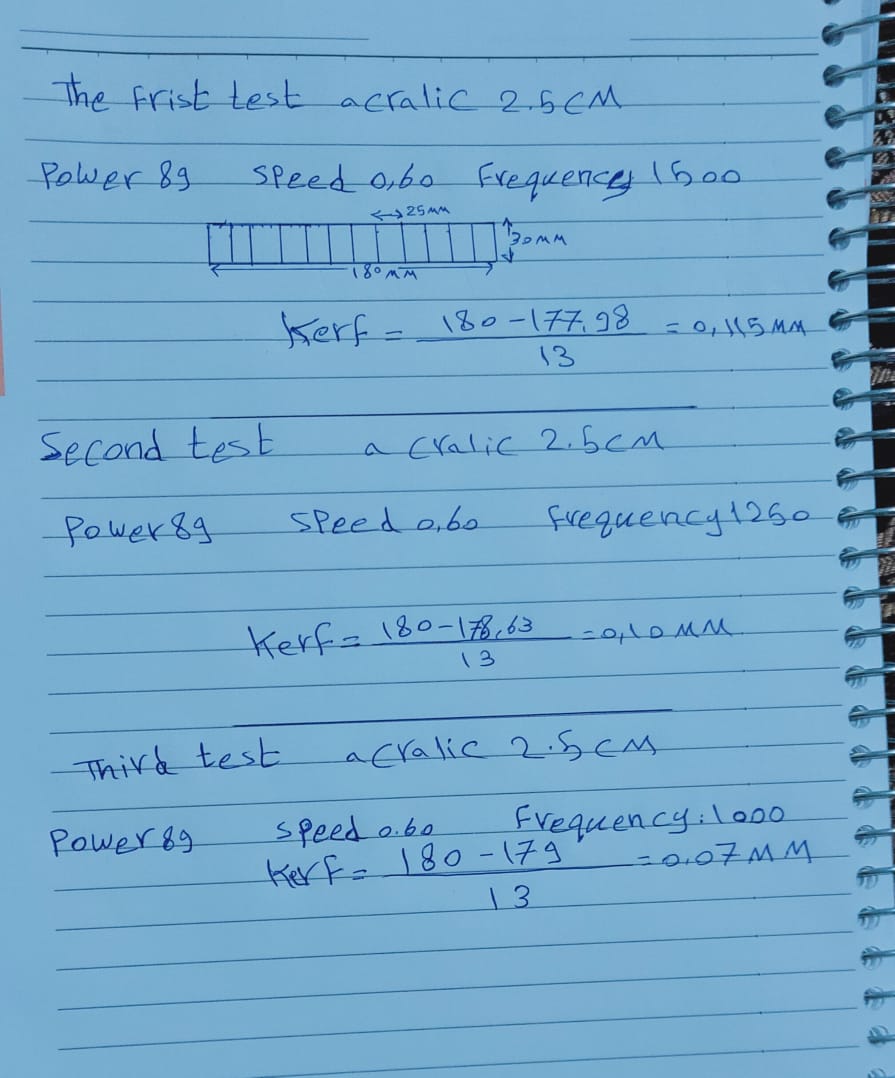
The idea of the assignment group was great. It helped us work with team spirit and divided the roles, and everyone had the task of doing a test of his choice so that we cover most of the materials used in the FabLab. We divided the roles among the members of the group and It was my turn the calculation of the kerf on acrylic was 2.5 mm
What does kerf mean?
The laser burns away a portion of material when it cuts through. This is known as the laser kerf and ranges from 0.08mm – 1mm depending on the material type and other conditional factors. Although above c0.45mm is only experienced when cutting thicker foams. Any areas in your design where cut lines come closer than 0.5mm together could burn away entirely. Any details narrower than 1mm are likely to be very fragile and in some cases can cause the material to warp whilst cutting. As a benchmark, we recommend that minimum cut widths be no smaller than the corresponding thickness of the material. For example, if cutting from 3mm acrylic, it’s best not to allow any widths less than 3mm. We can go smaller (see the cut width image on the material pages) but this can make your pieces very fragile which might not be suitable for your application. We will advise if your drawing has cutting tolerances that are too small, but we can’t be held responsible if your components do not hold together sufficiently.
Kerf is determined by material properties and thickness. But other factors also have an impact on how much the laser takes away. The focal length of the lens, pressure of compressed air both have an impact. Kerf widths can vary even on the same material sheet, whether cutting a straight line or a curve line or from laser cutting in the x or Y dimension. The manufacturing tolerance of the material can also impact the kerf.
kerf =(Design length-Actual length)/numbers of cuts
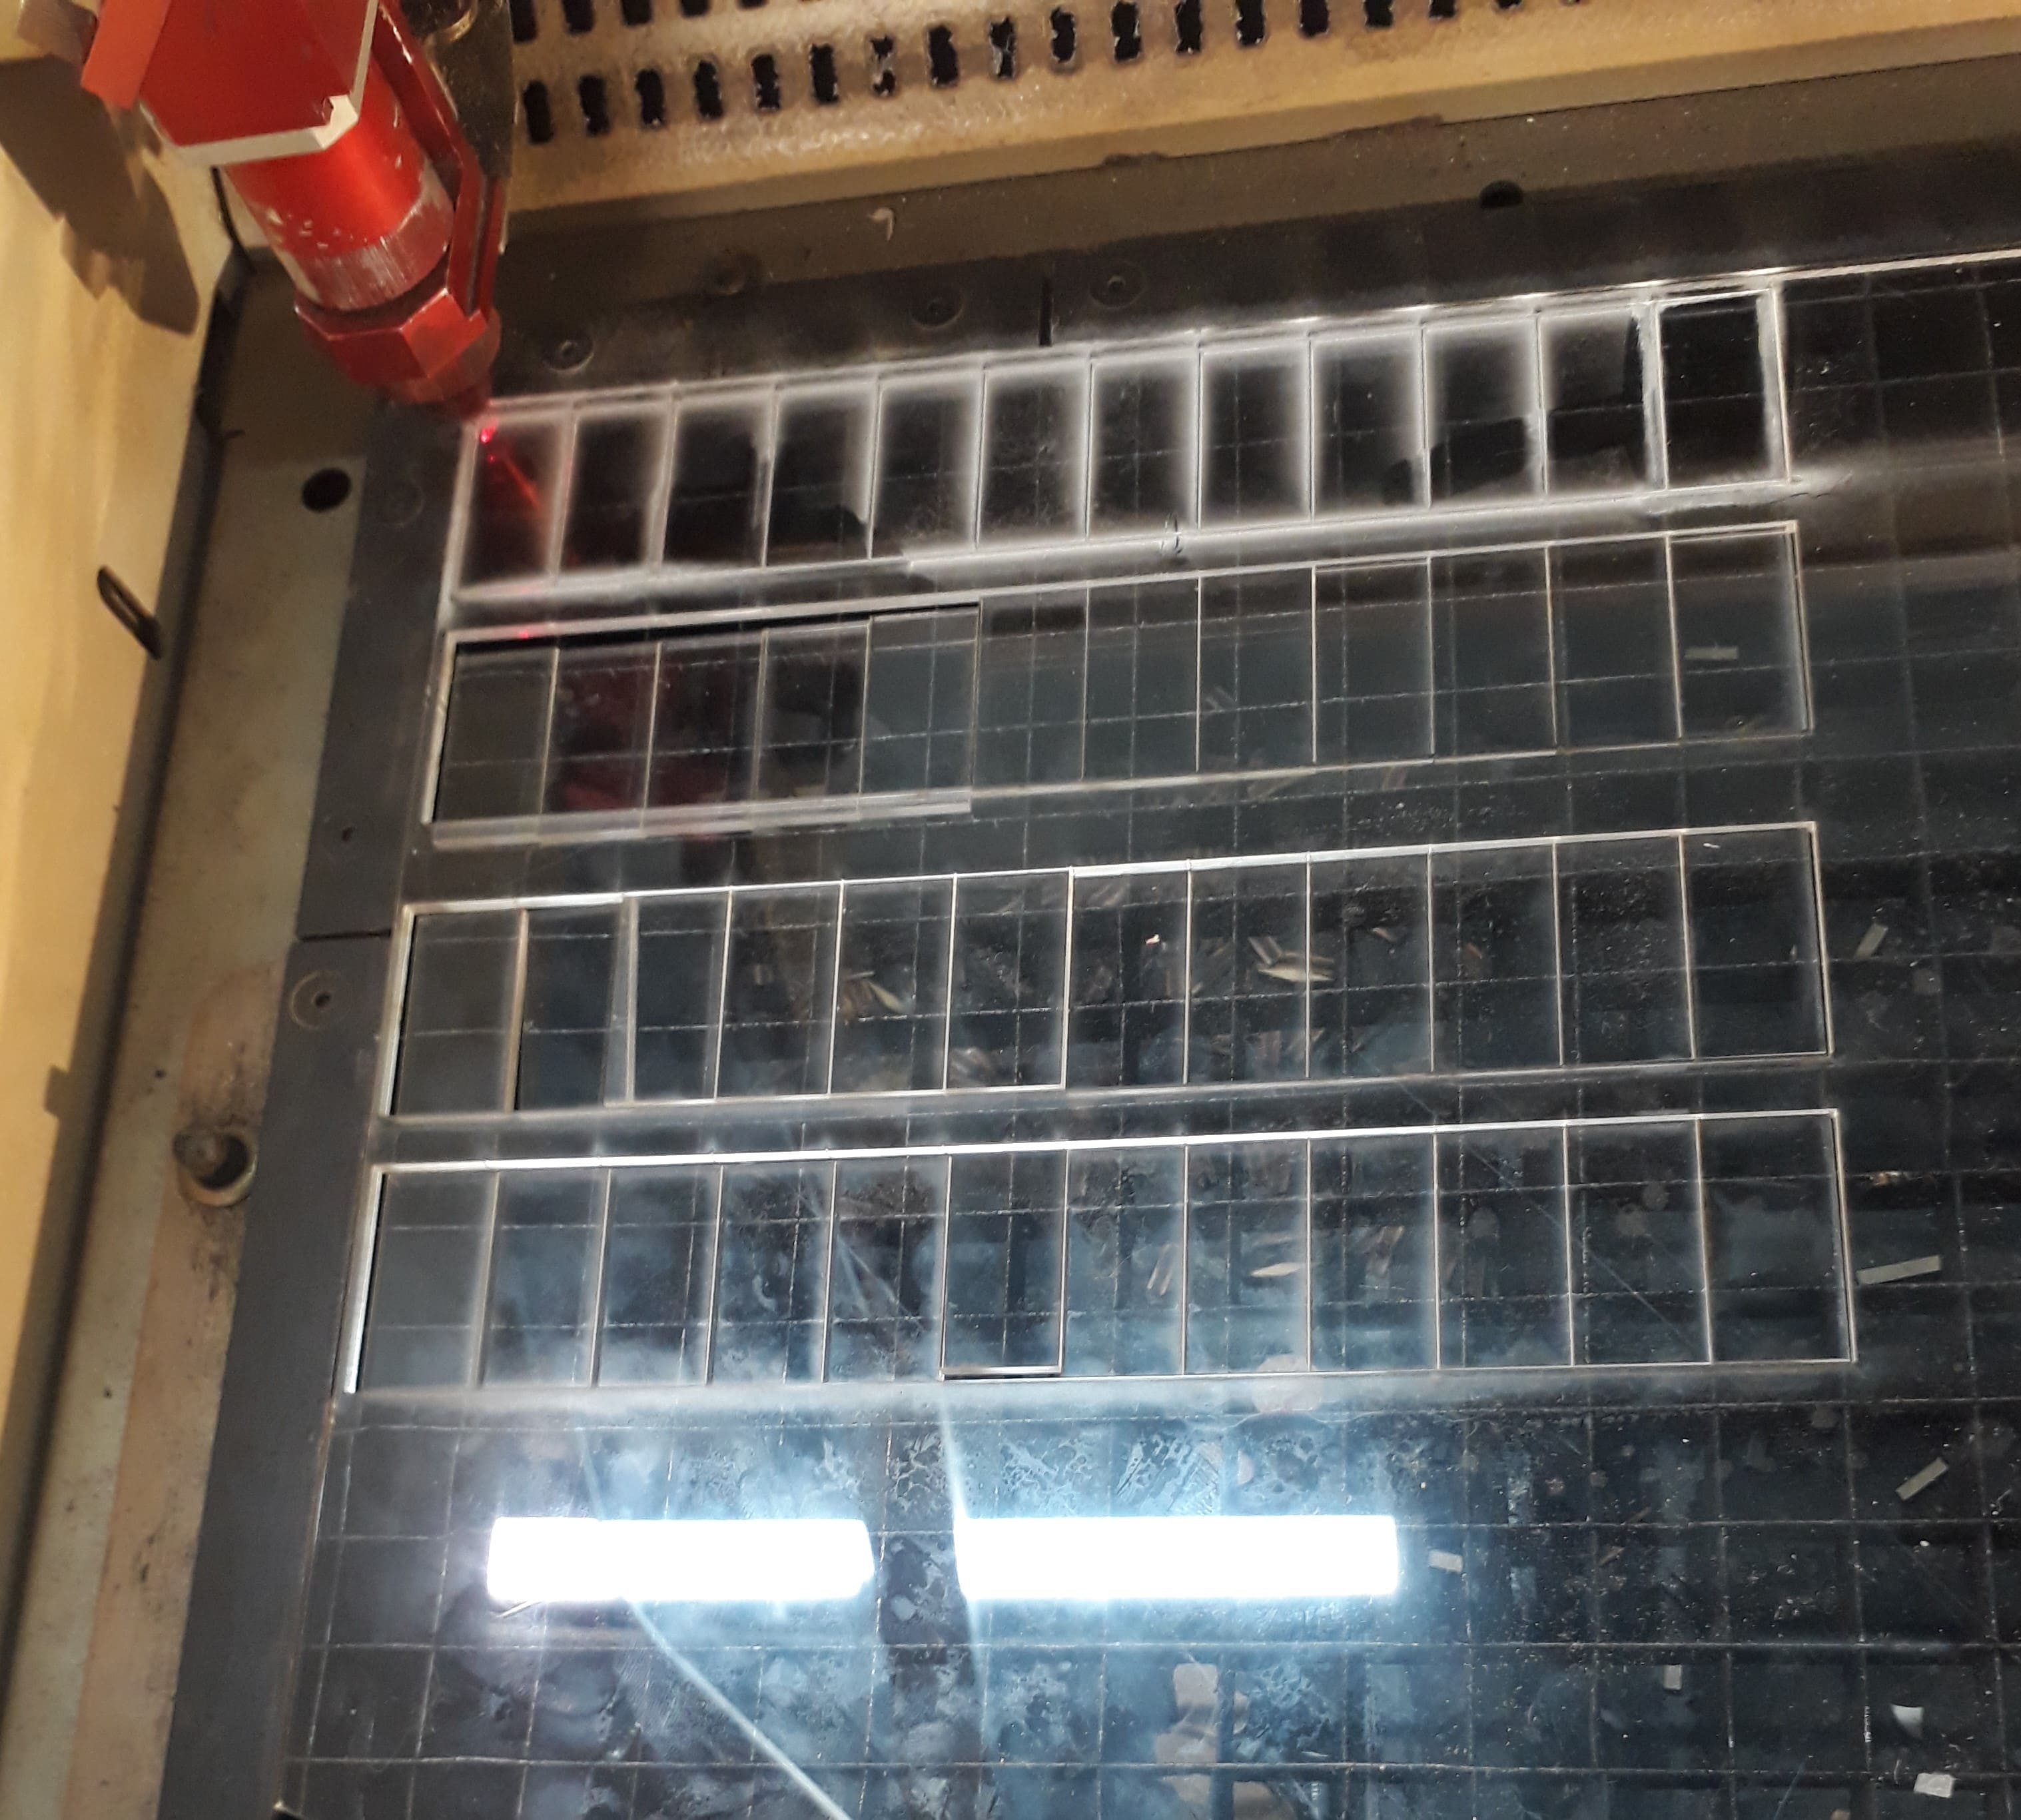
The first test
The second test
The third test
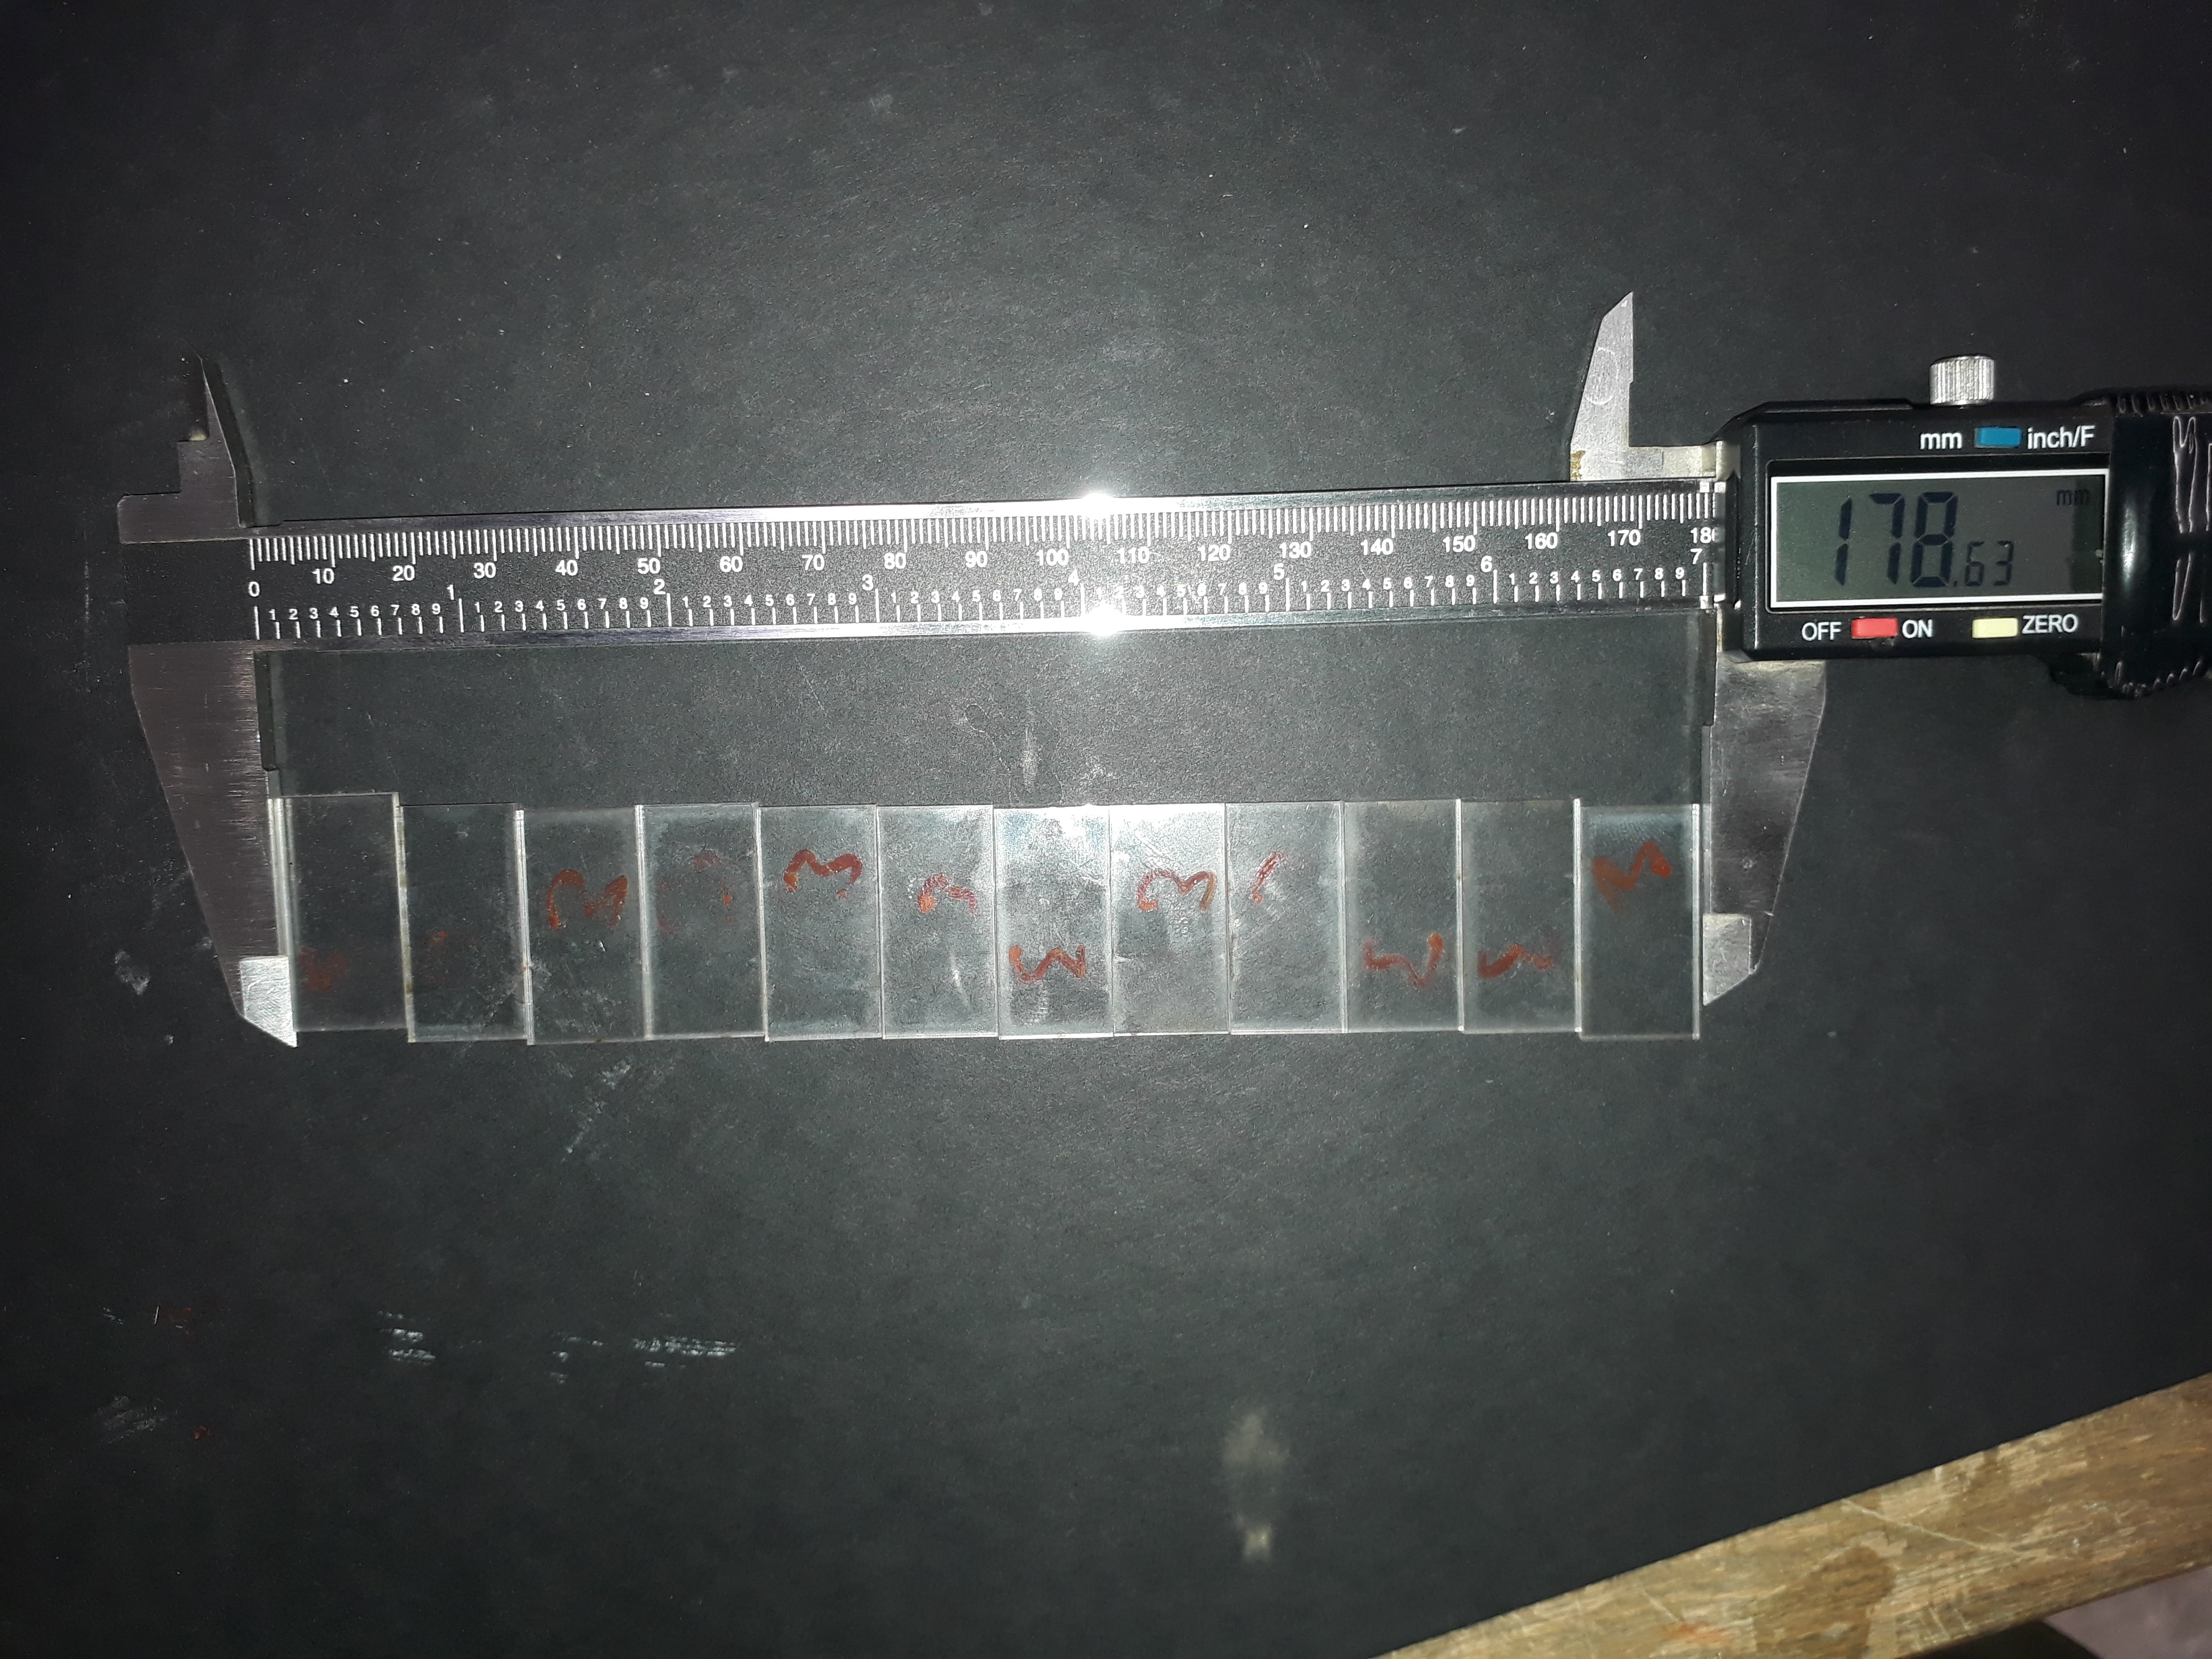
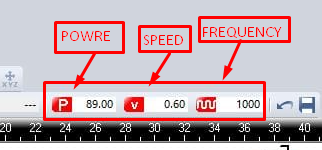
the best result of a 2.5mm acrylic cut was the following : Power :89 , Speed: 0.60 , Frequency : 1000 ,Depth:2.5mm
Using laser cutting and making something can be combined in more than one way and parametric construction kit.
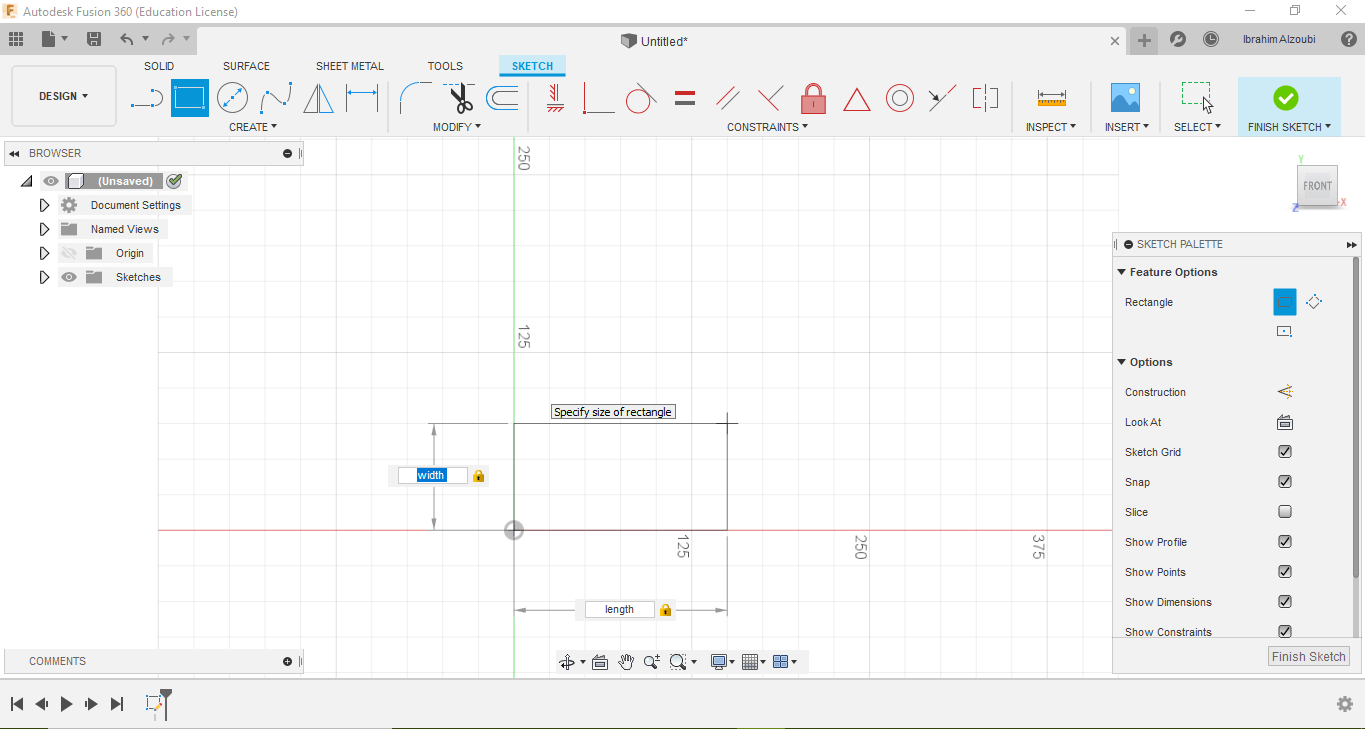
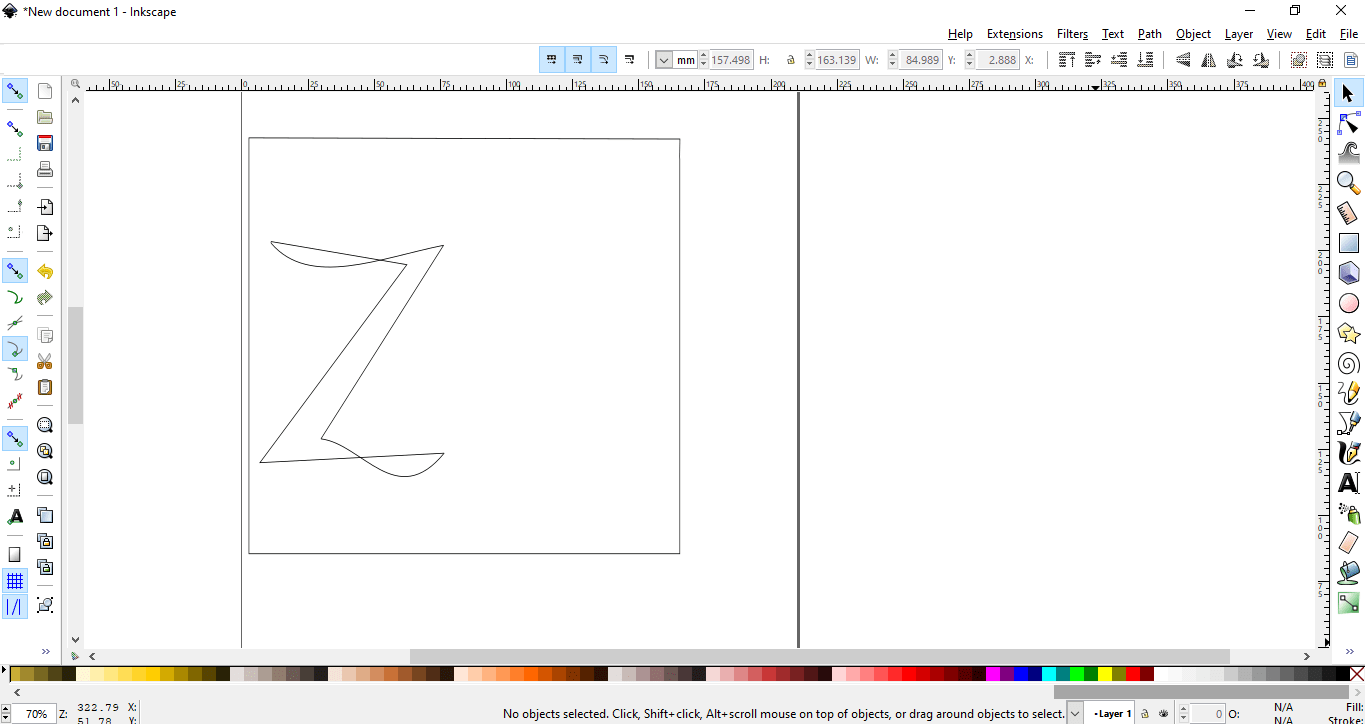
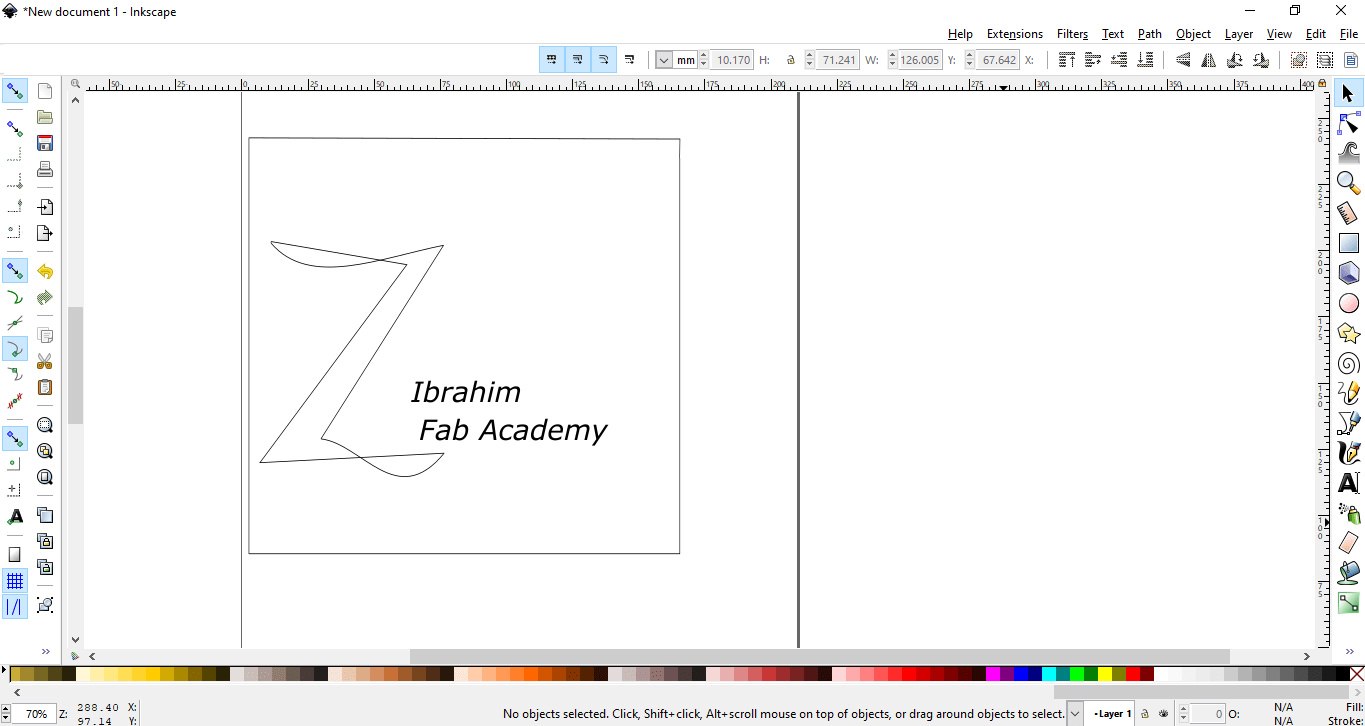
For this task I used the Fusion program to make my design
First I entered the values that my design will depend on to be my parametric design
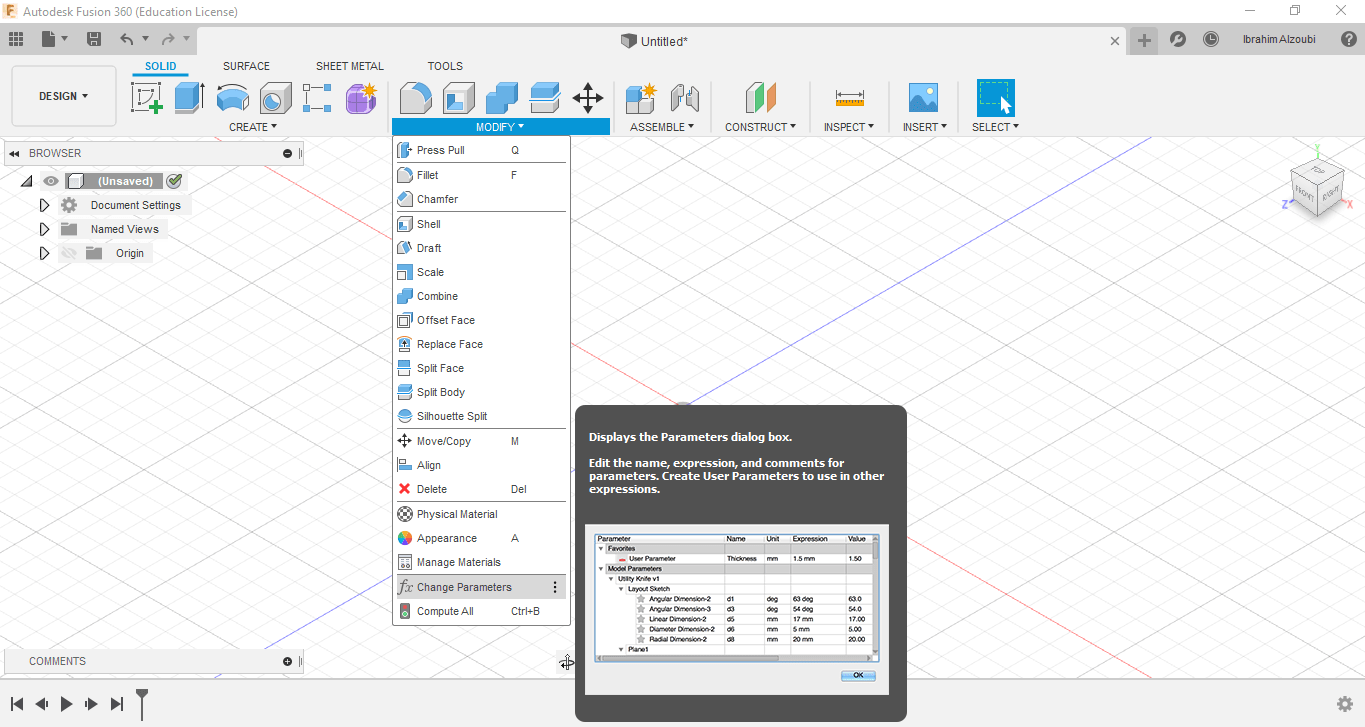
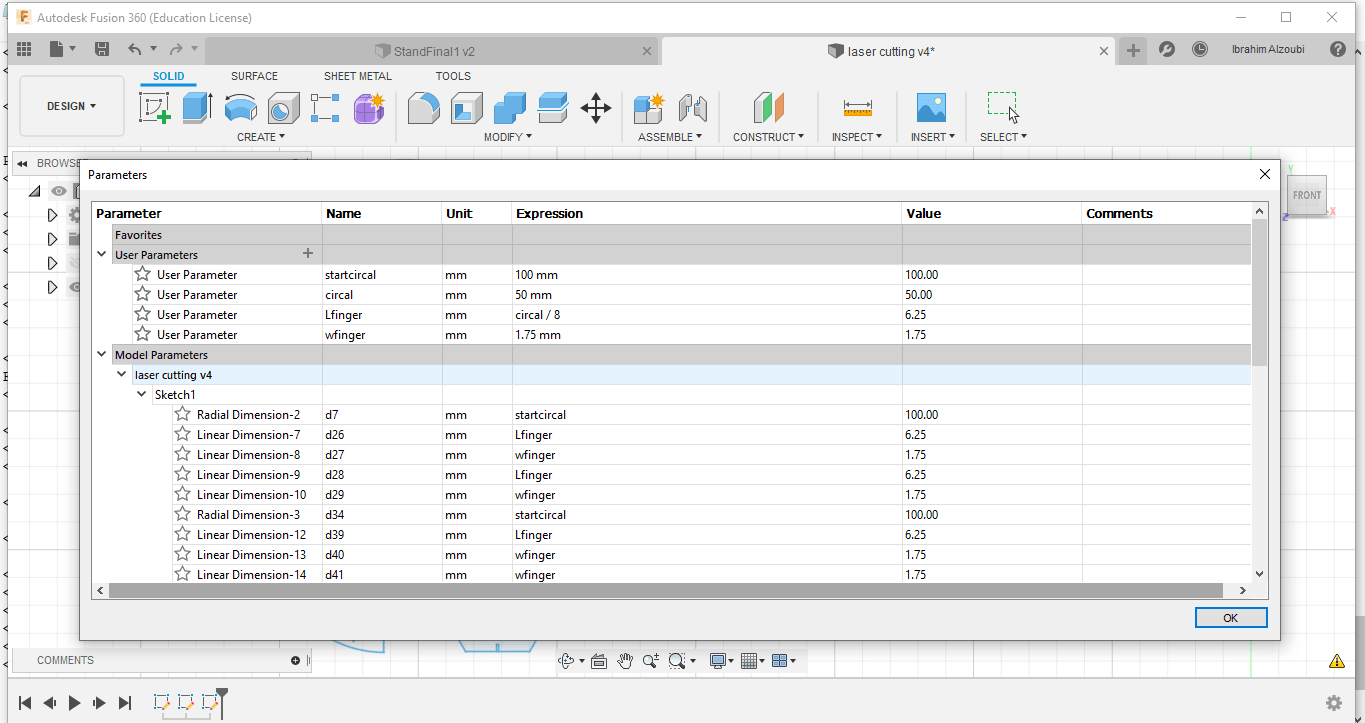
Begin drawing with parametric
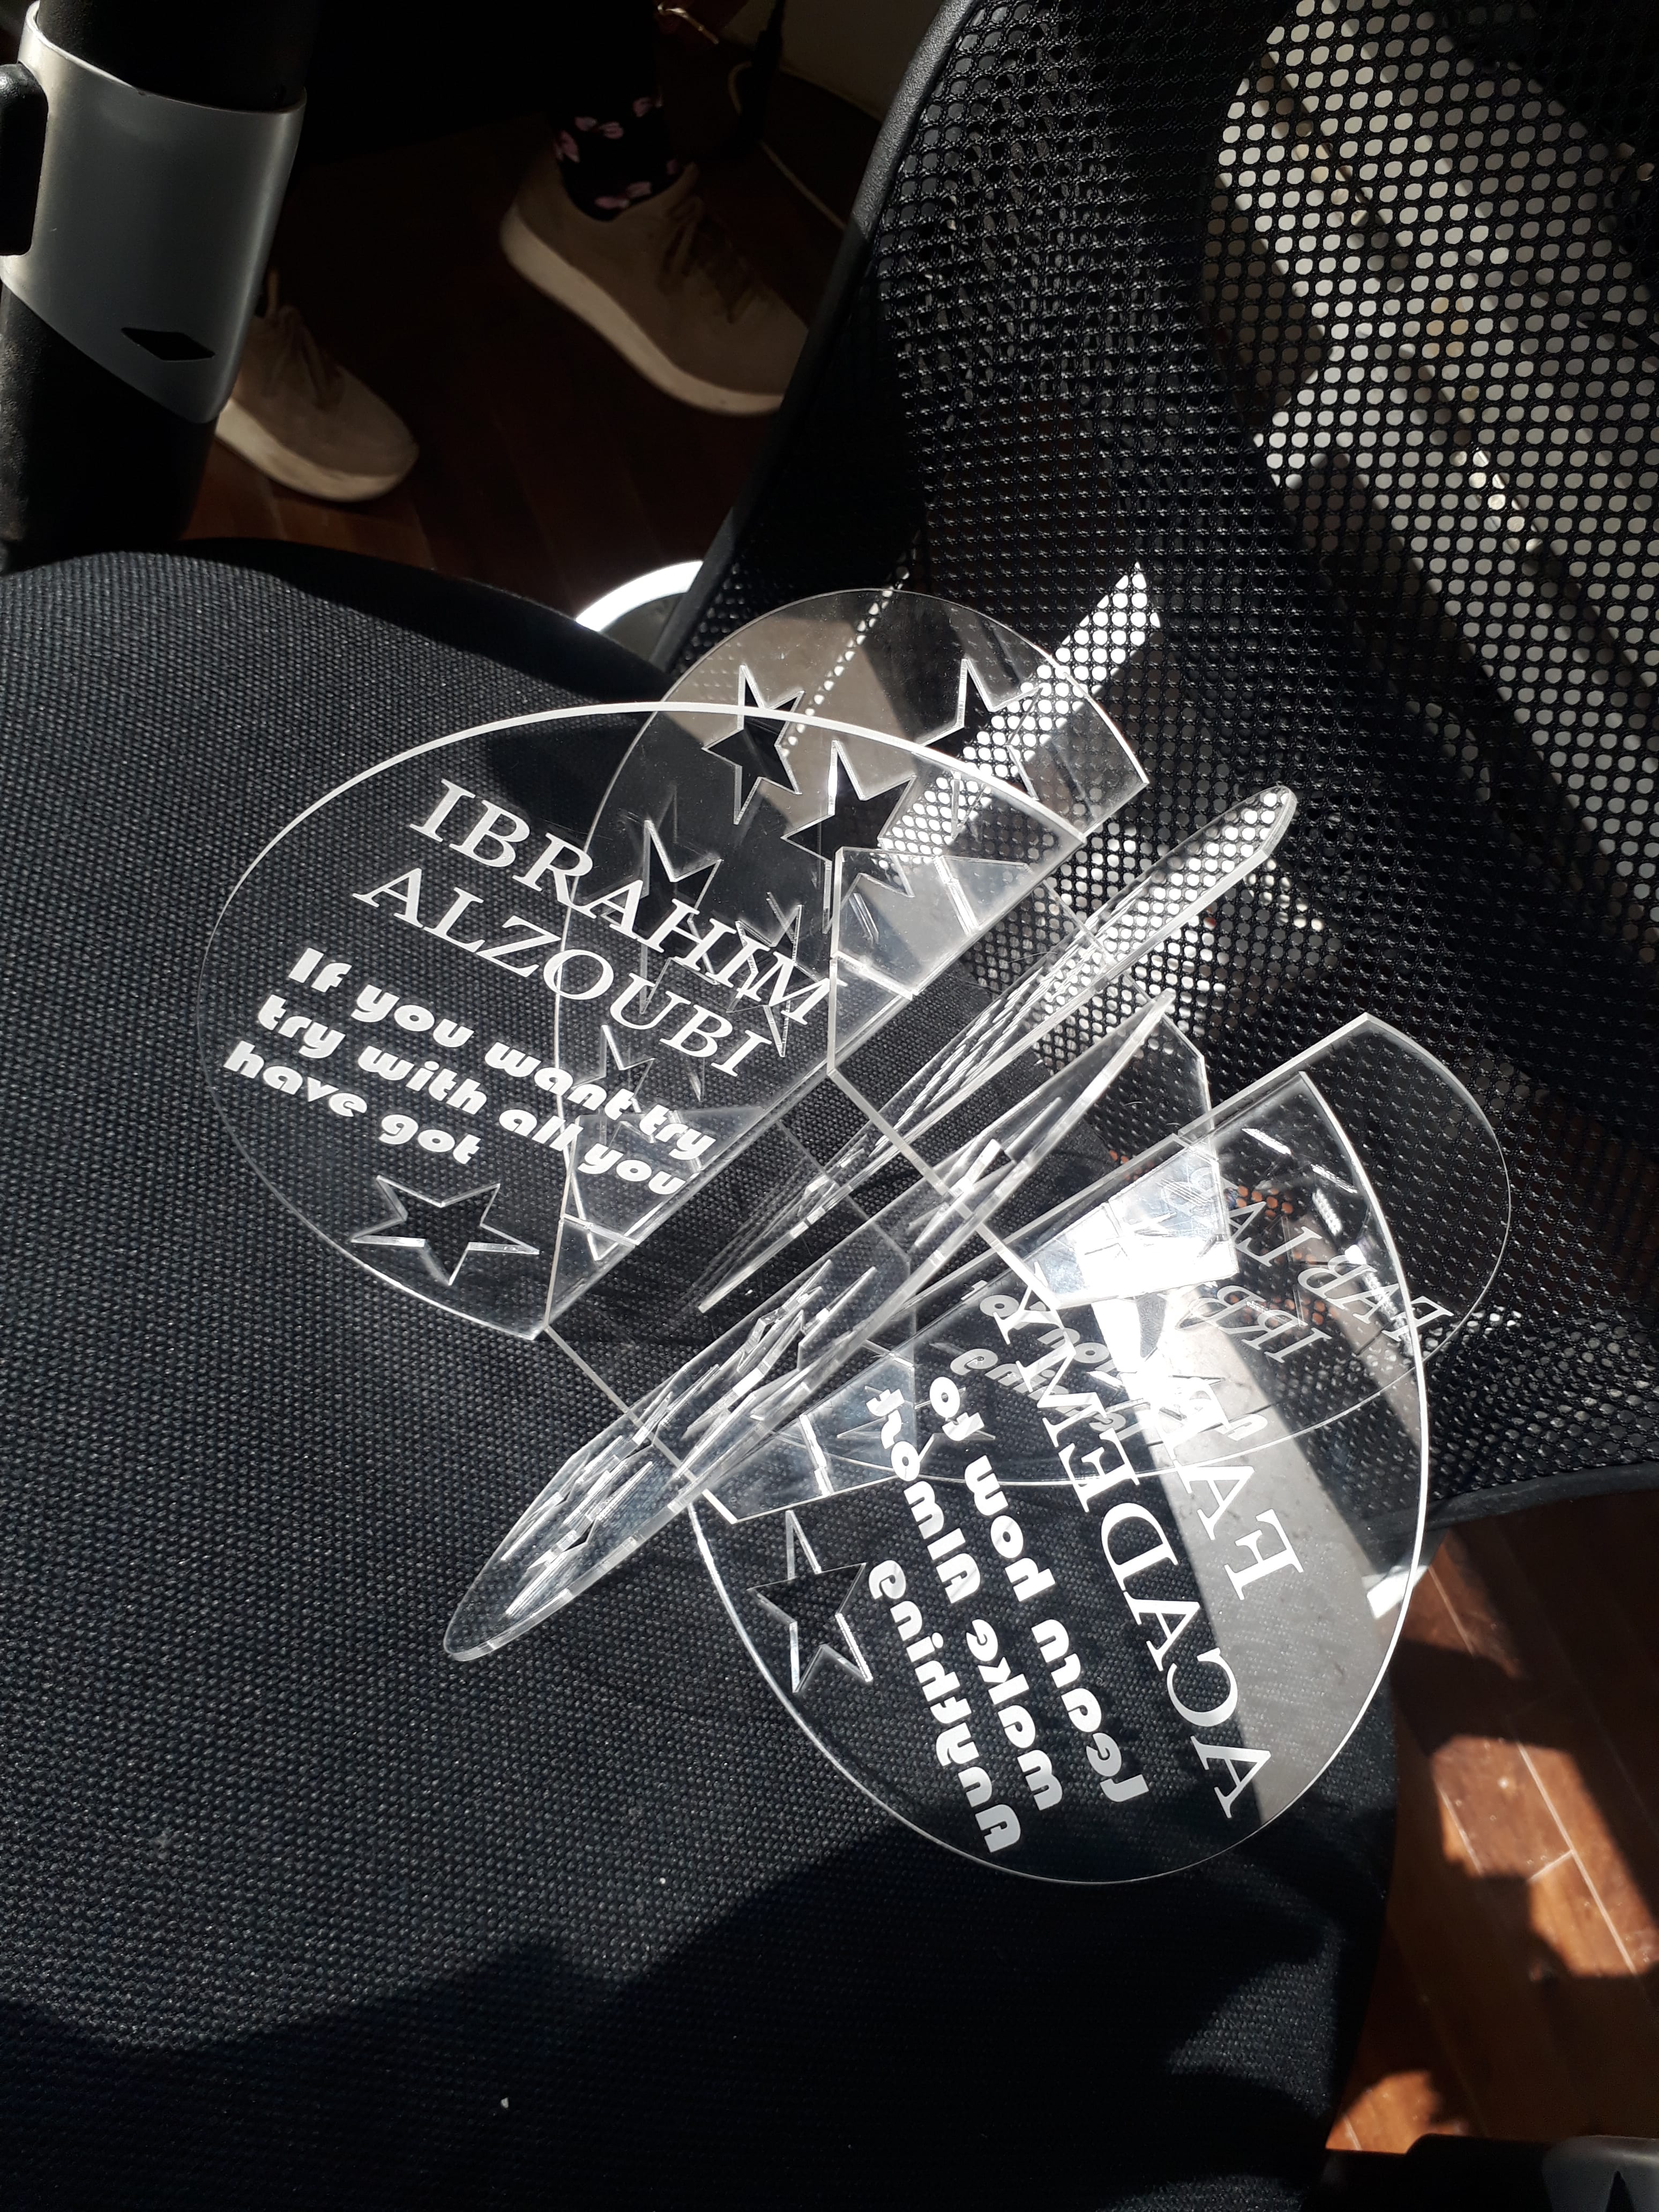
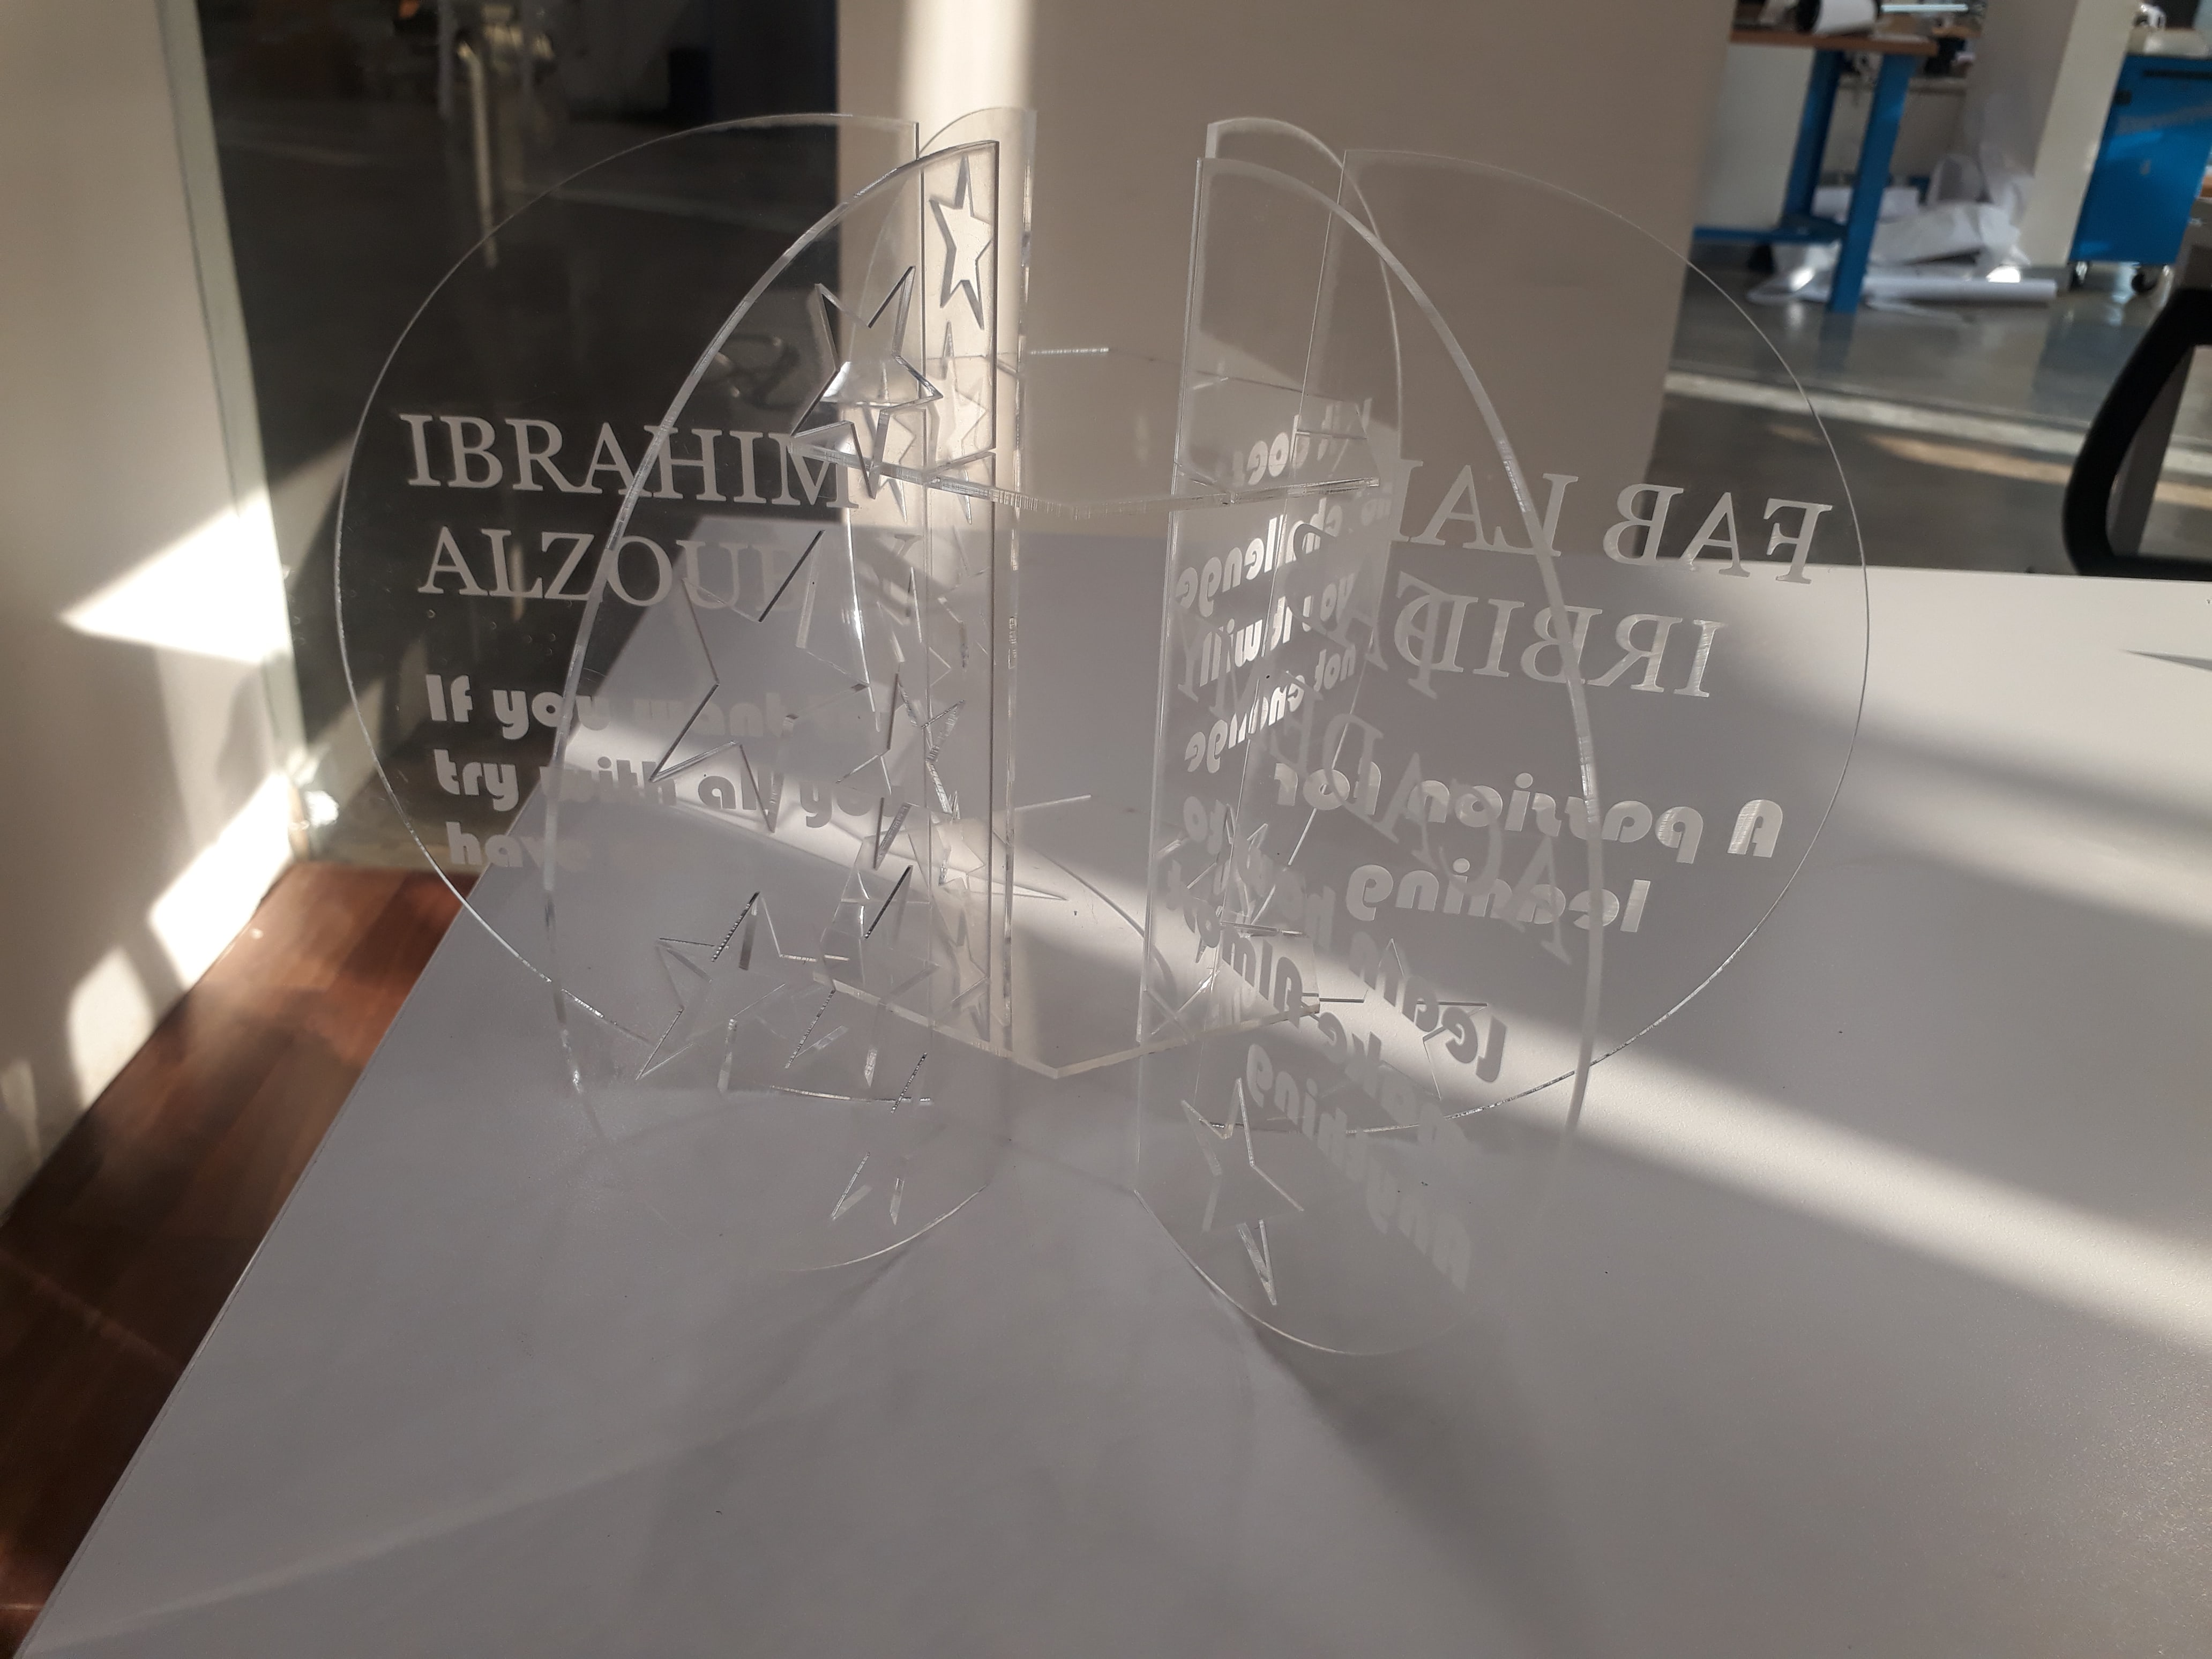
I did my first design, which is a masterpiece of transparent acrylic, on which I wrote some text that makes me feel motivated and happy to put it on my desk.
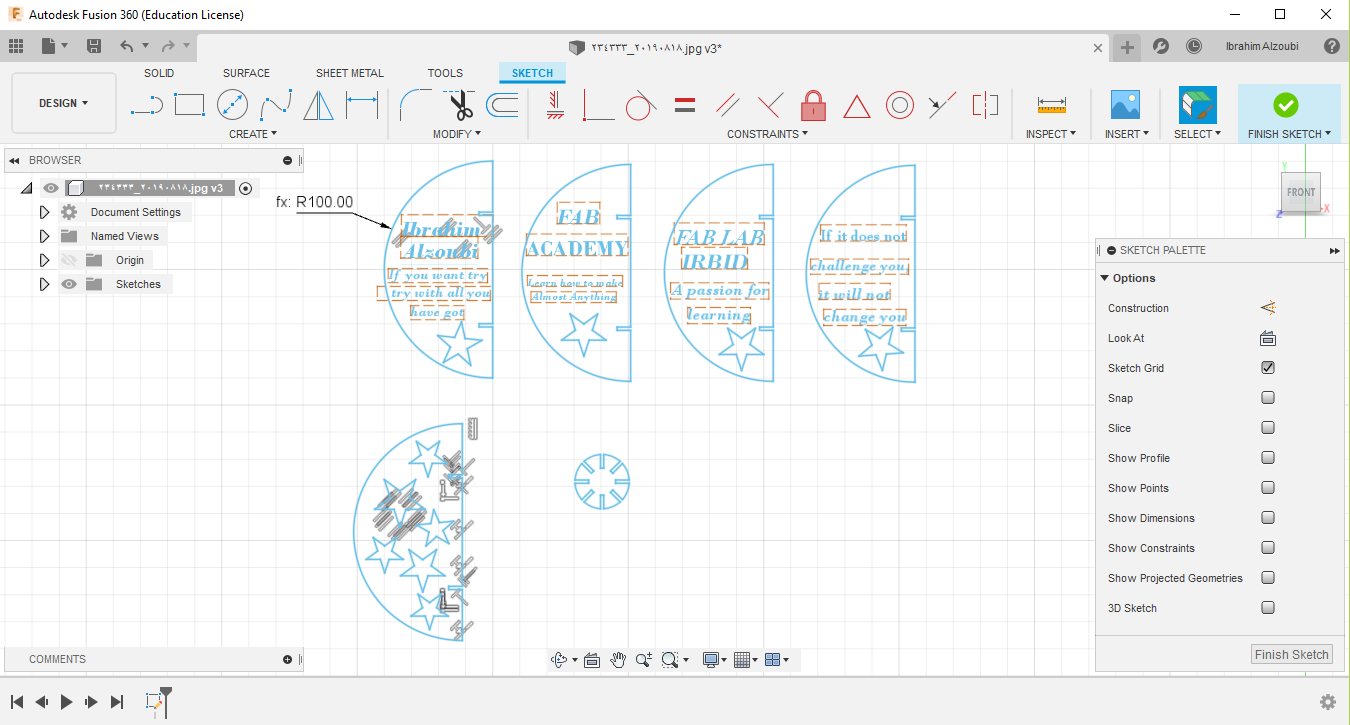
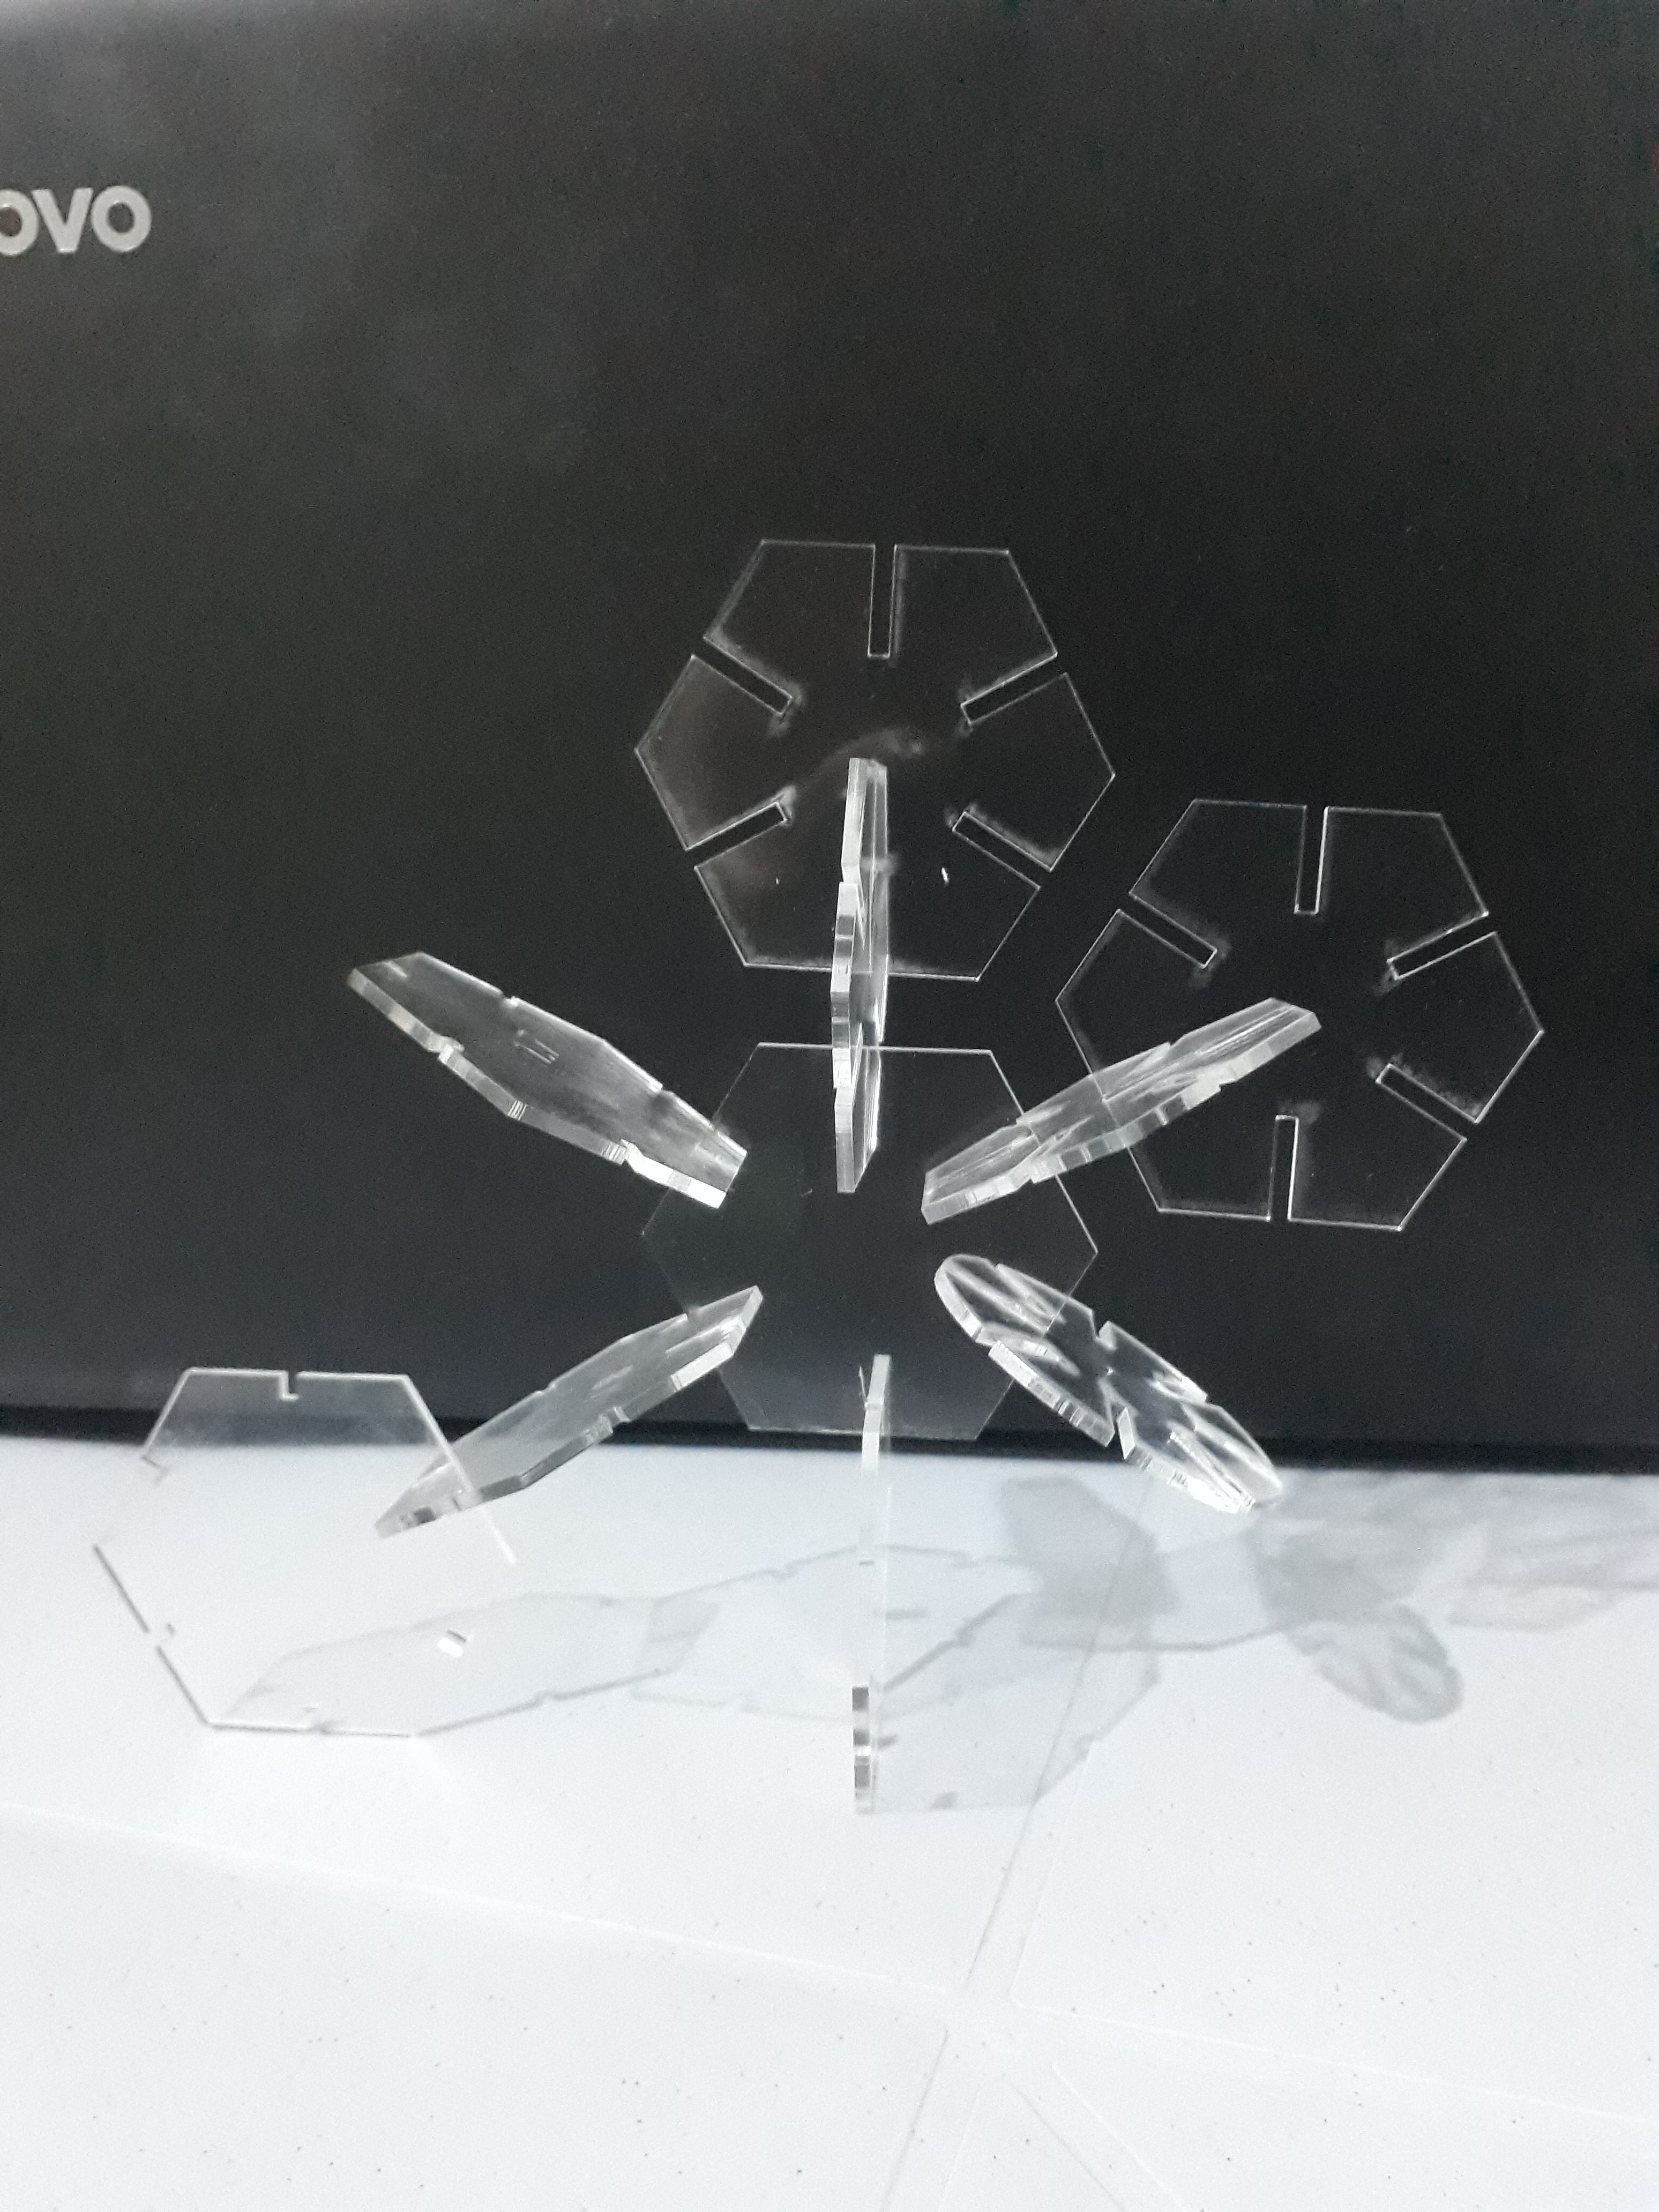
Also, here I made a simple plug-in design, but it is more like a puzzle. It depends on your ability to imagine and create different and beautiful shapes.
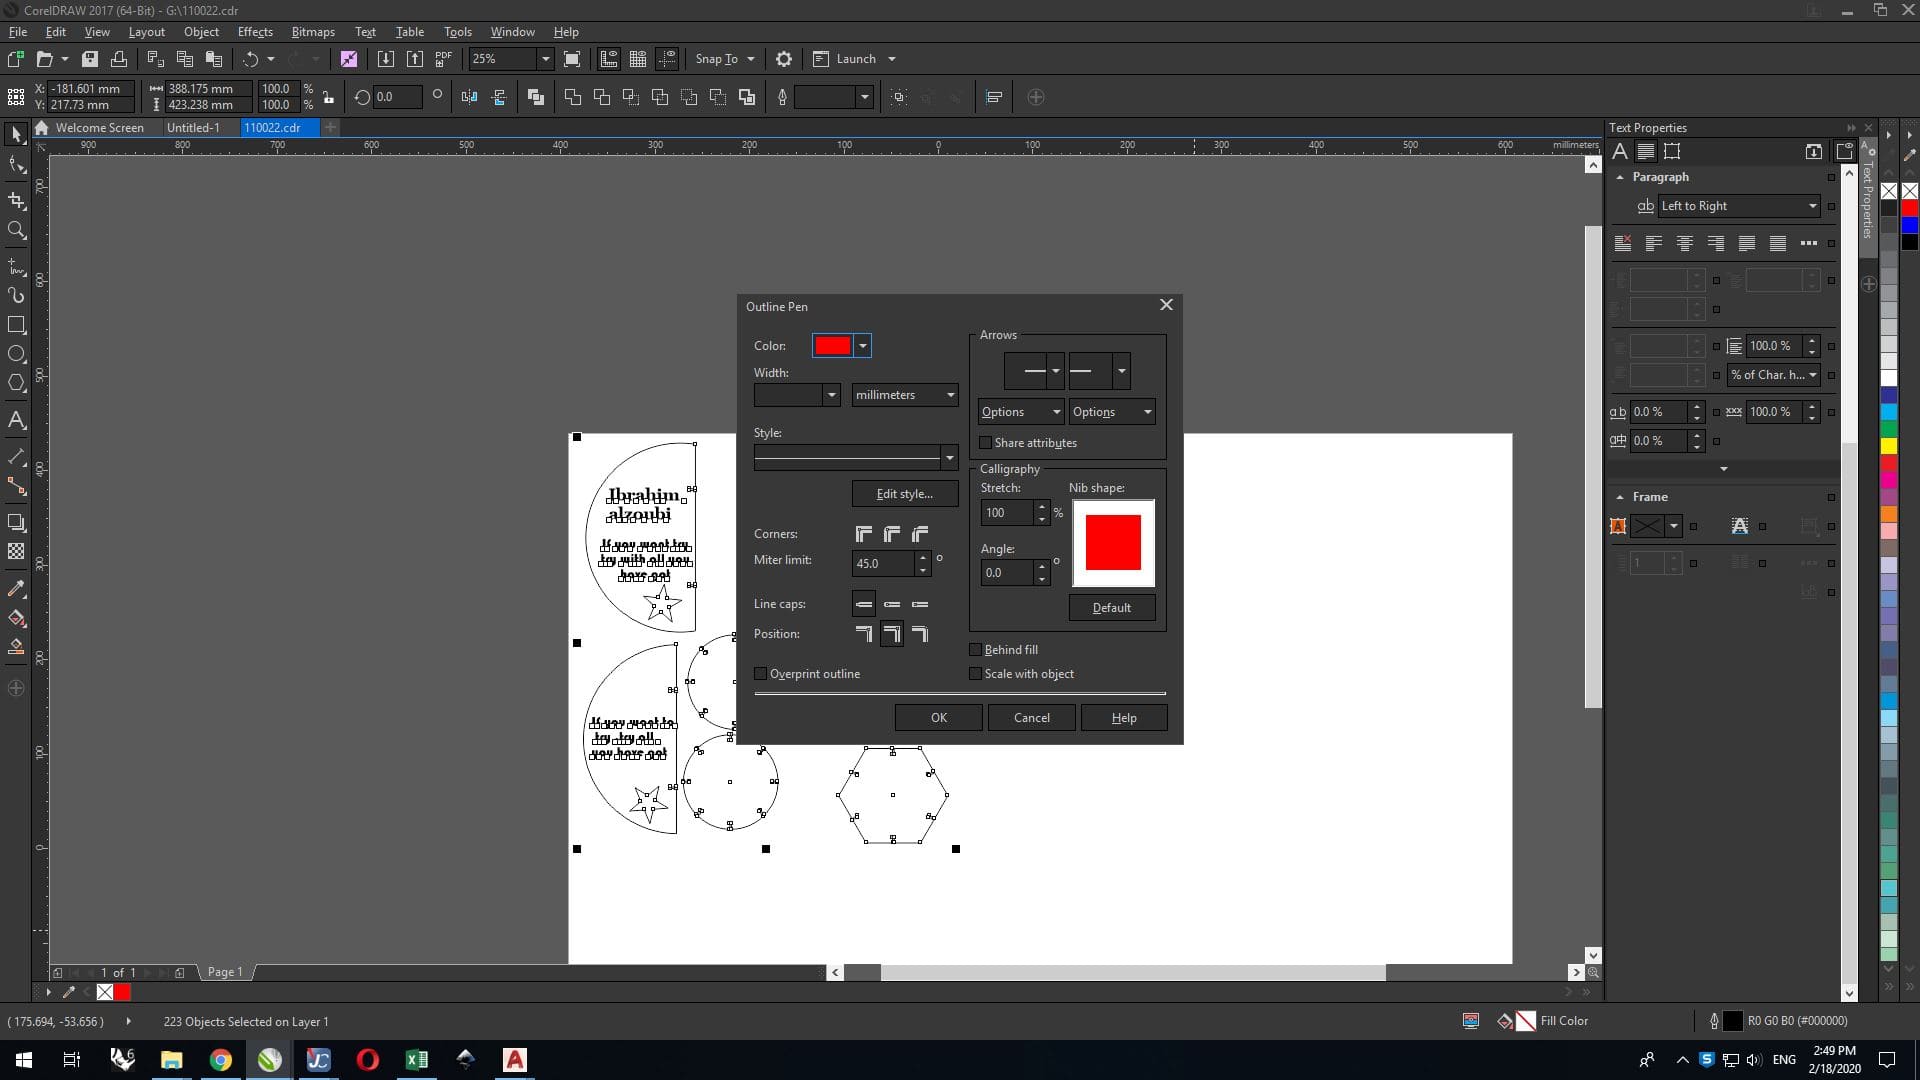
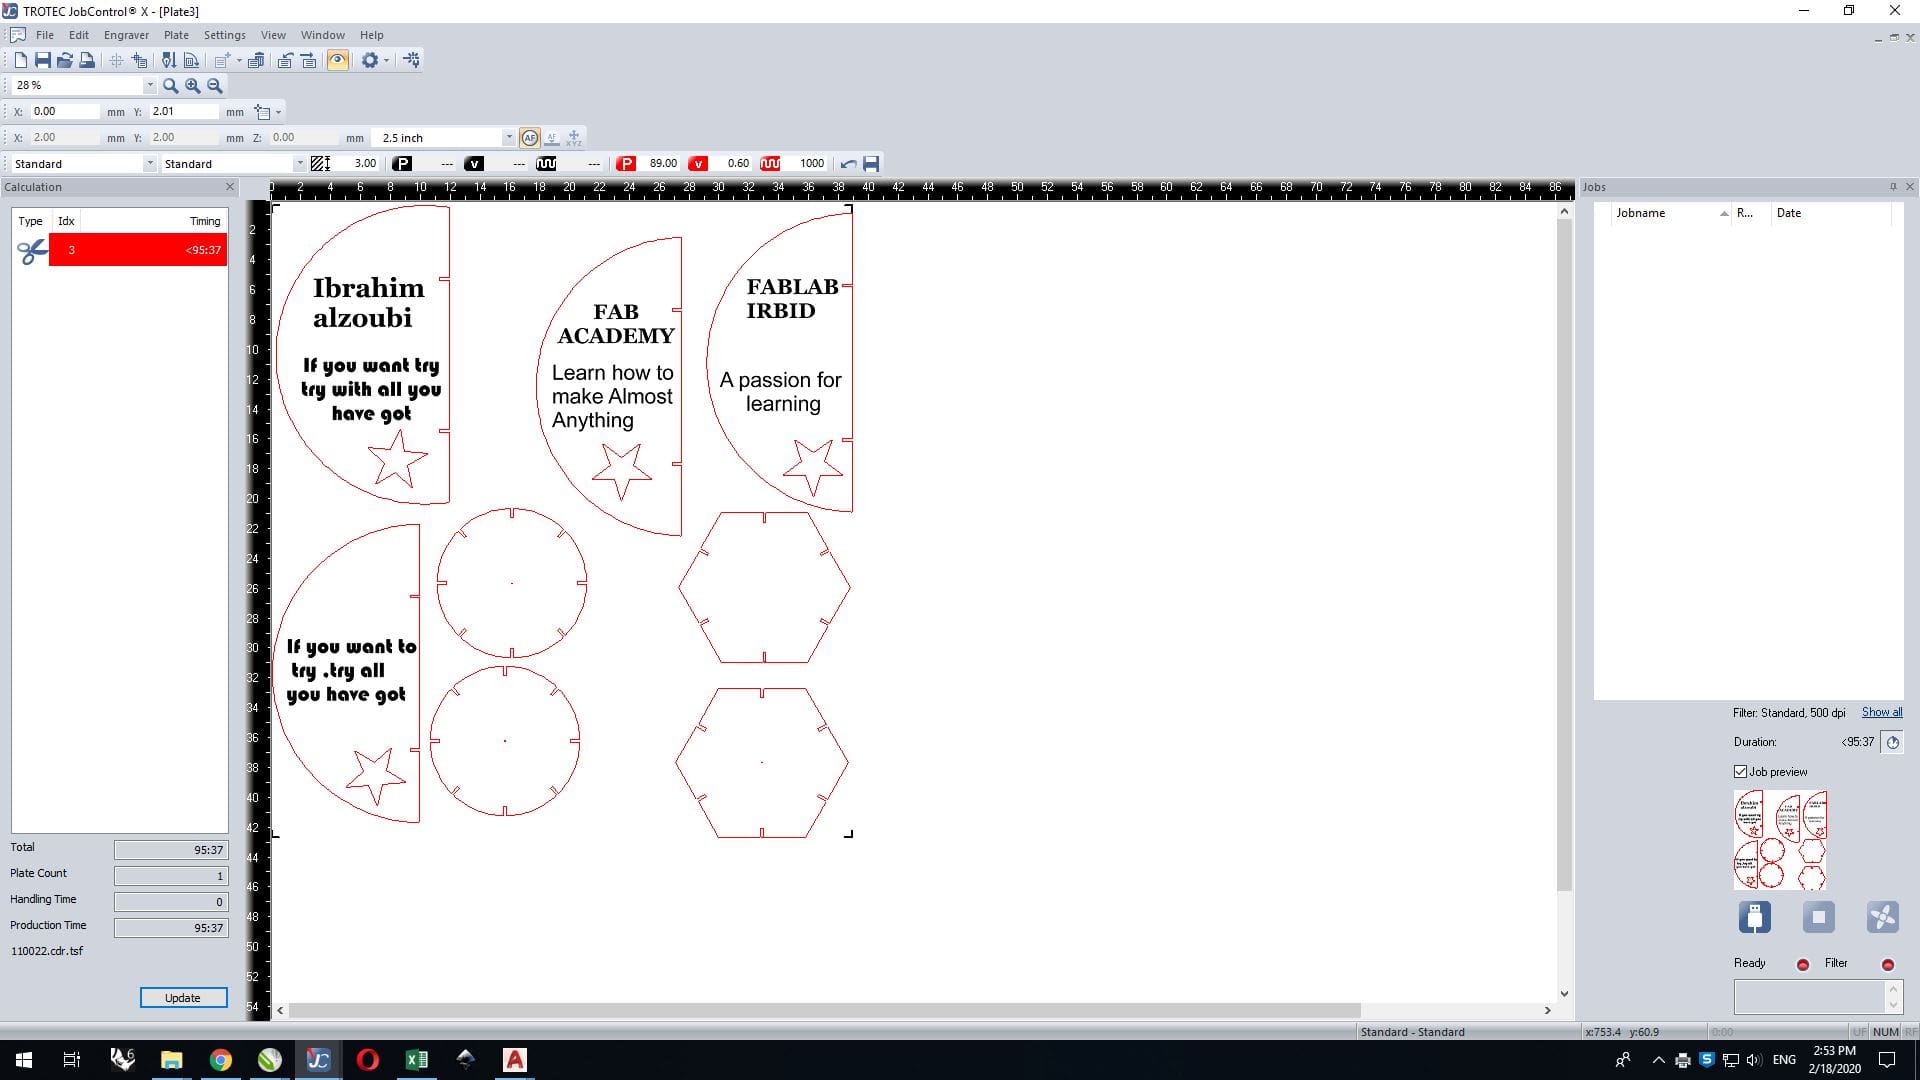
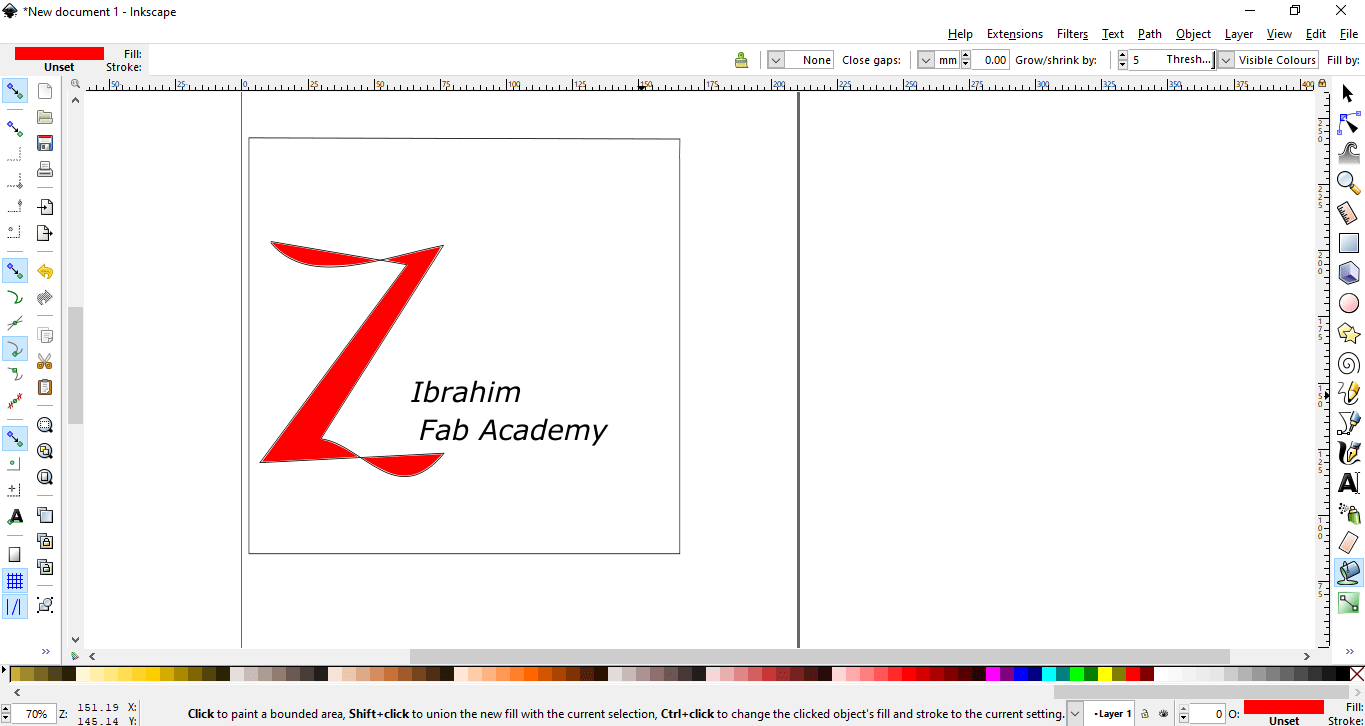
After completing the design, save it in dxf format and then open it on the CorelDRAW program to make settings, and determine the parts to be cut and the parts to be engraved They are as follows: the parts that must be cut, their color is red, and the parts that I want to engrave like writing are kept black
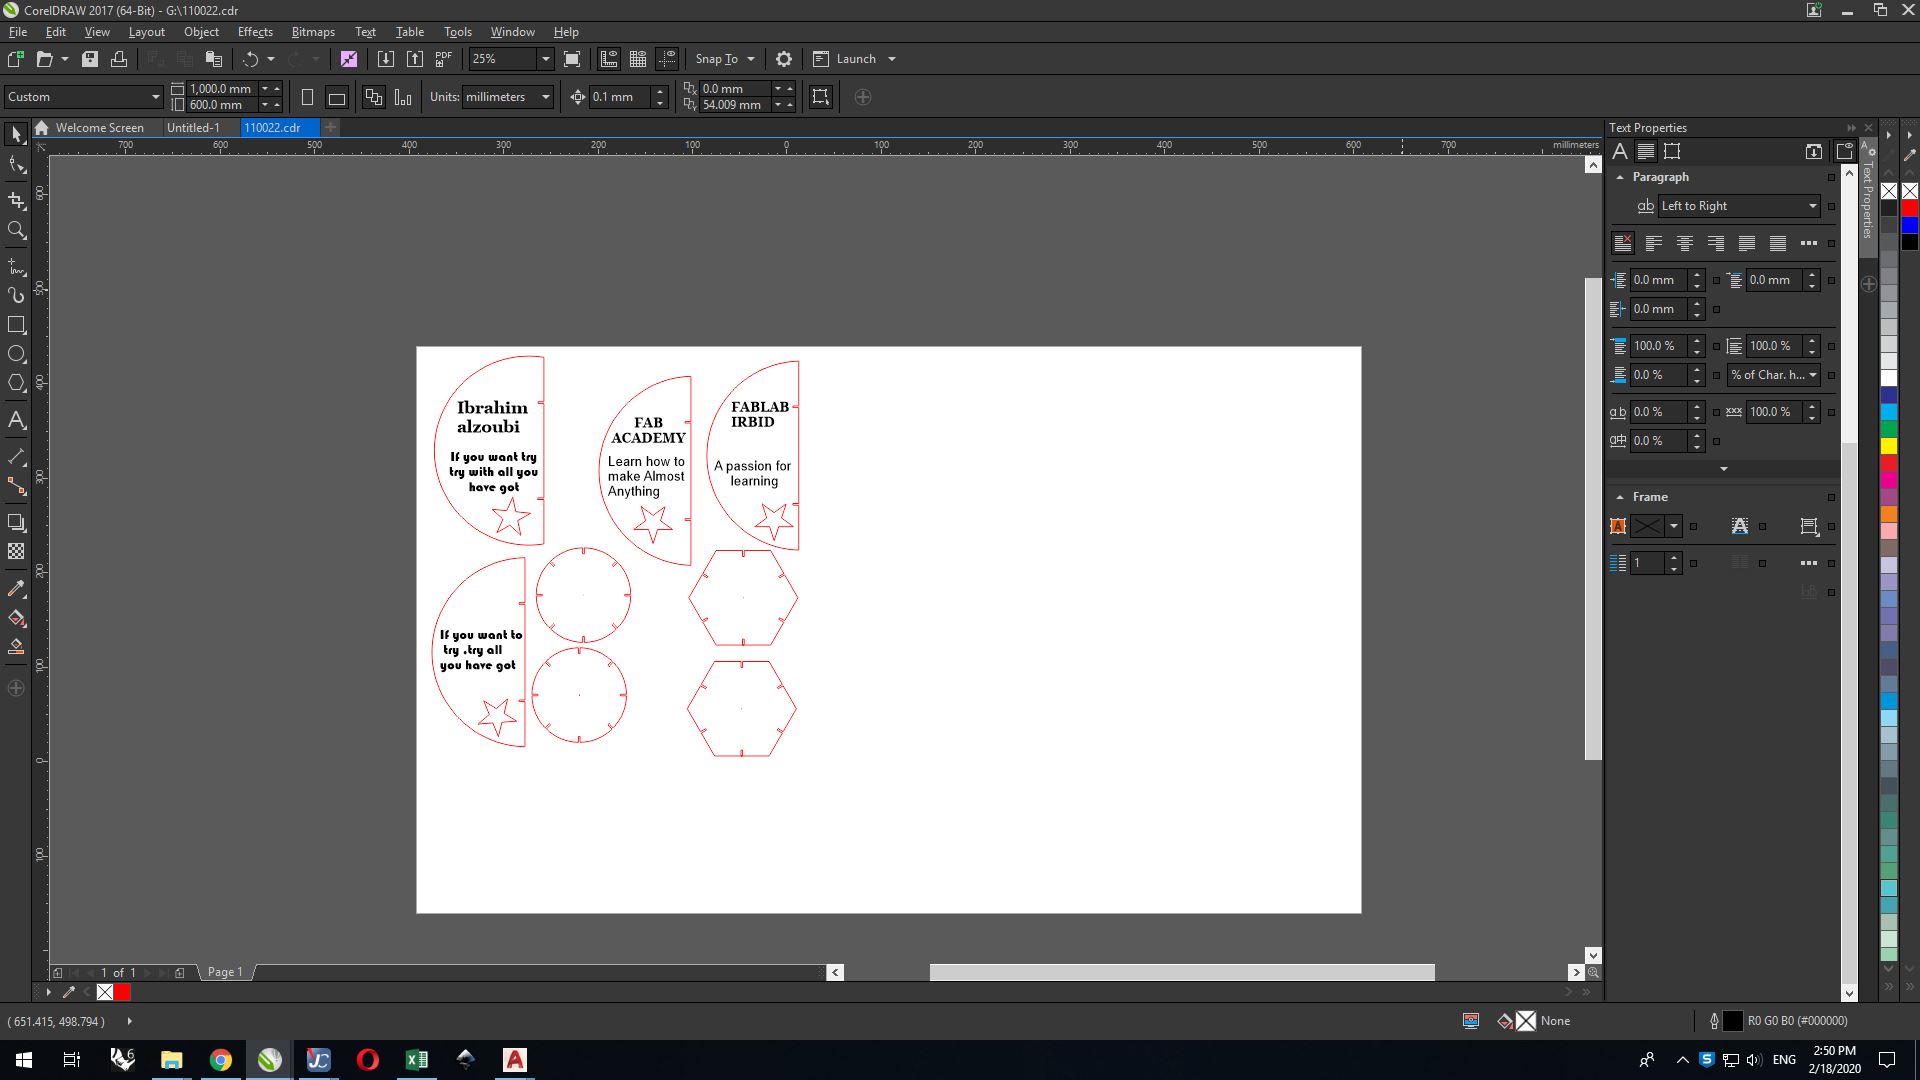
After preparing the design, selecting the parts, cutting and engraving, we select the entire design and press Ctrl + p
For give the cutting order to the machine,
After that, this window appears as in the picture, we choose an order selection then press Print

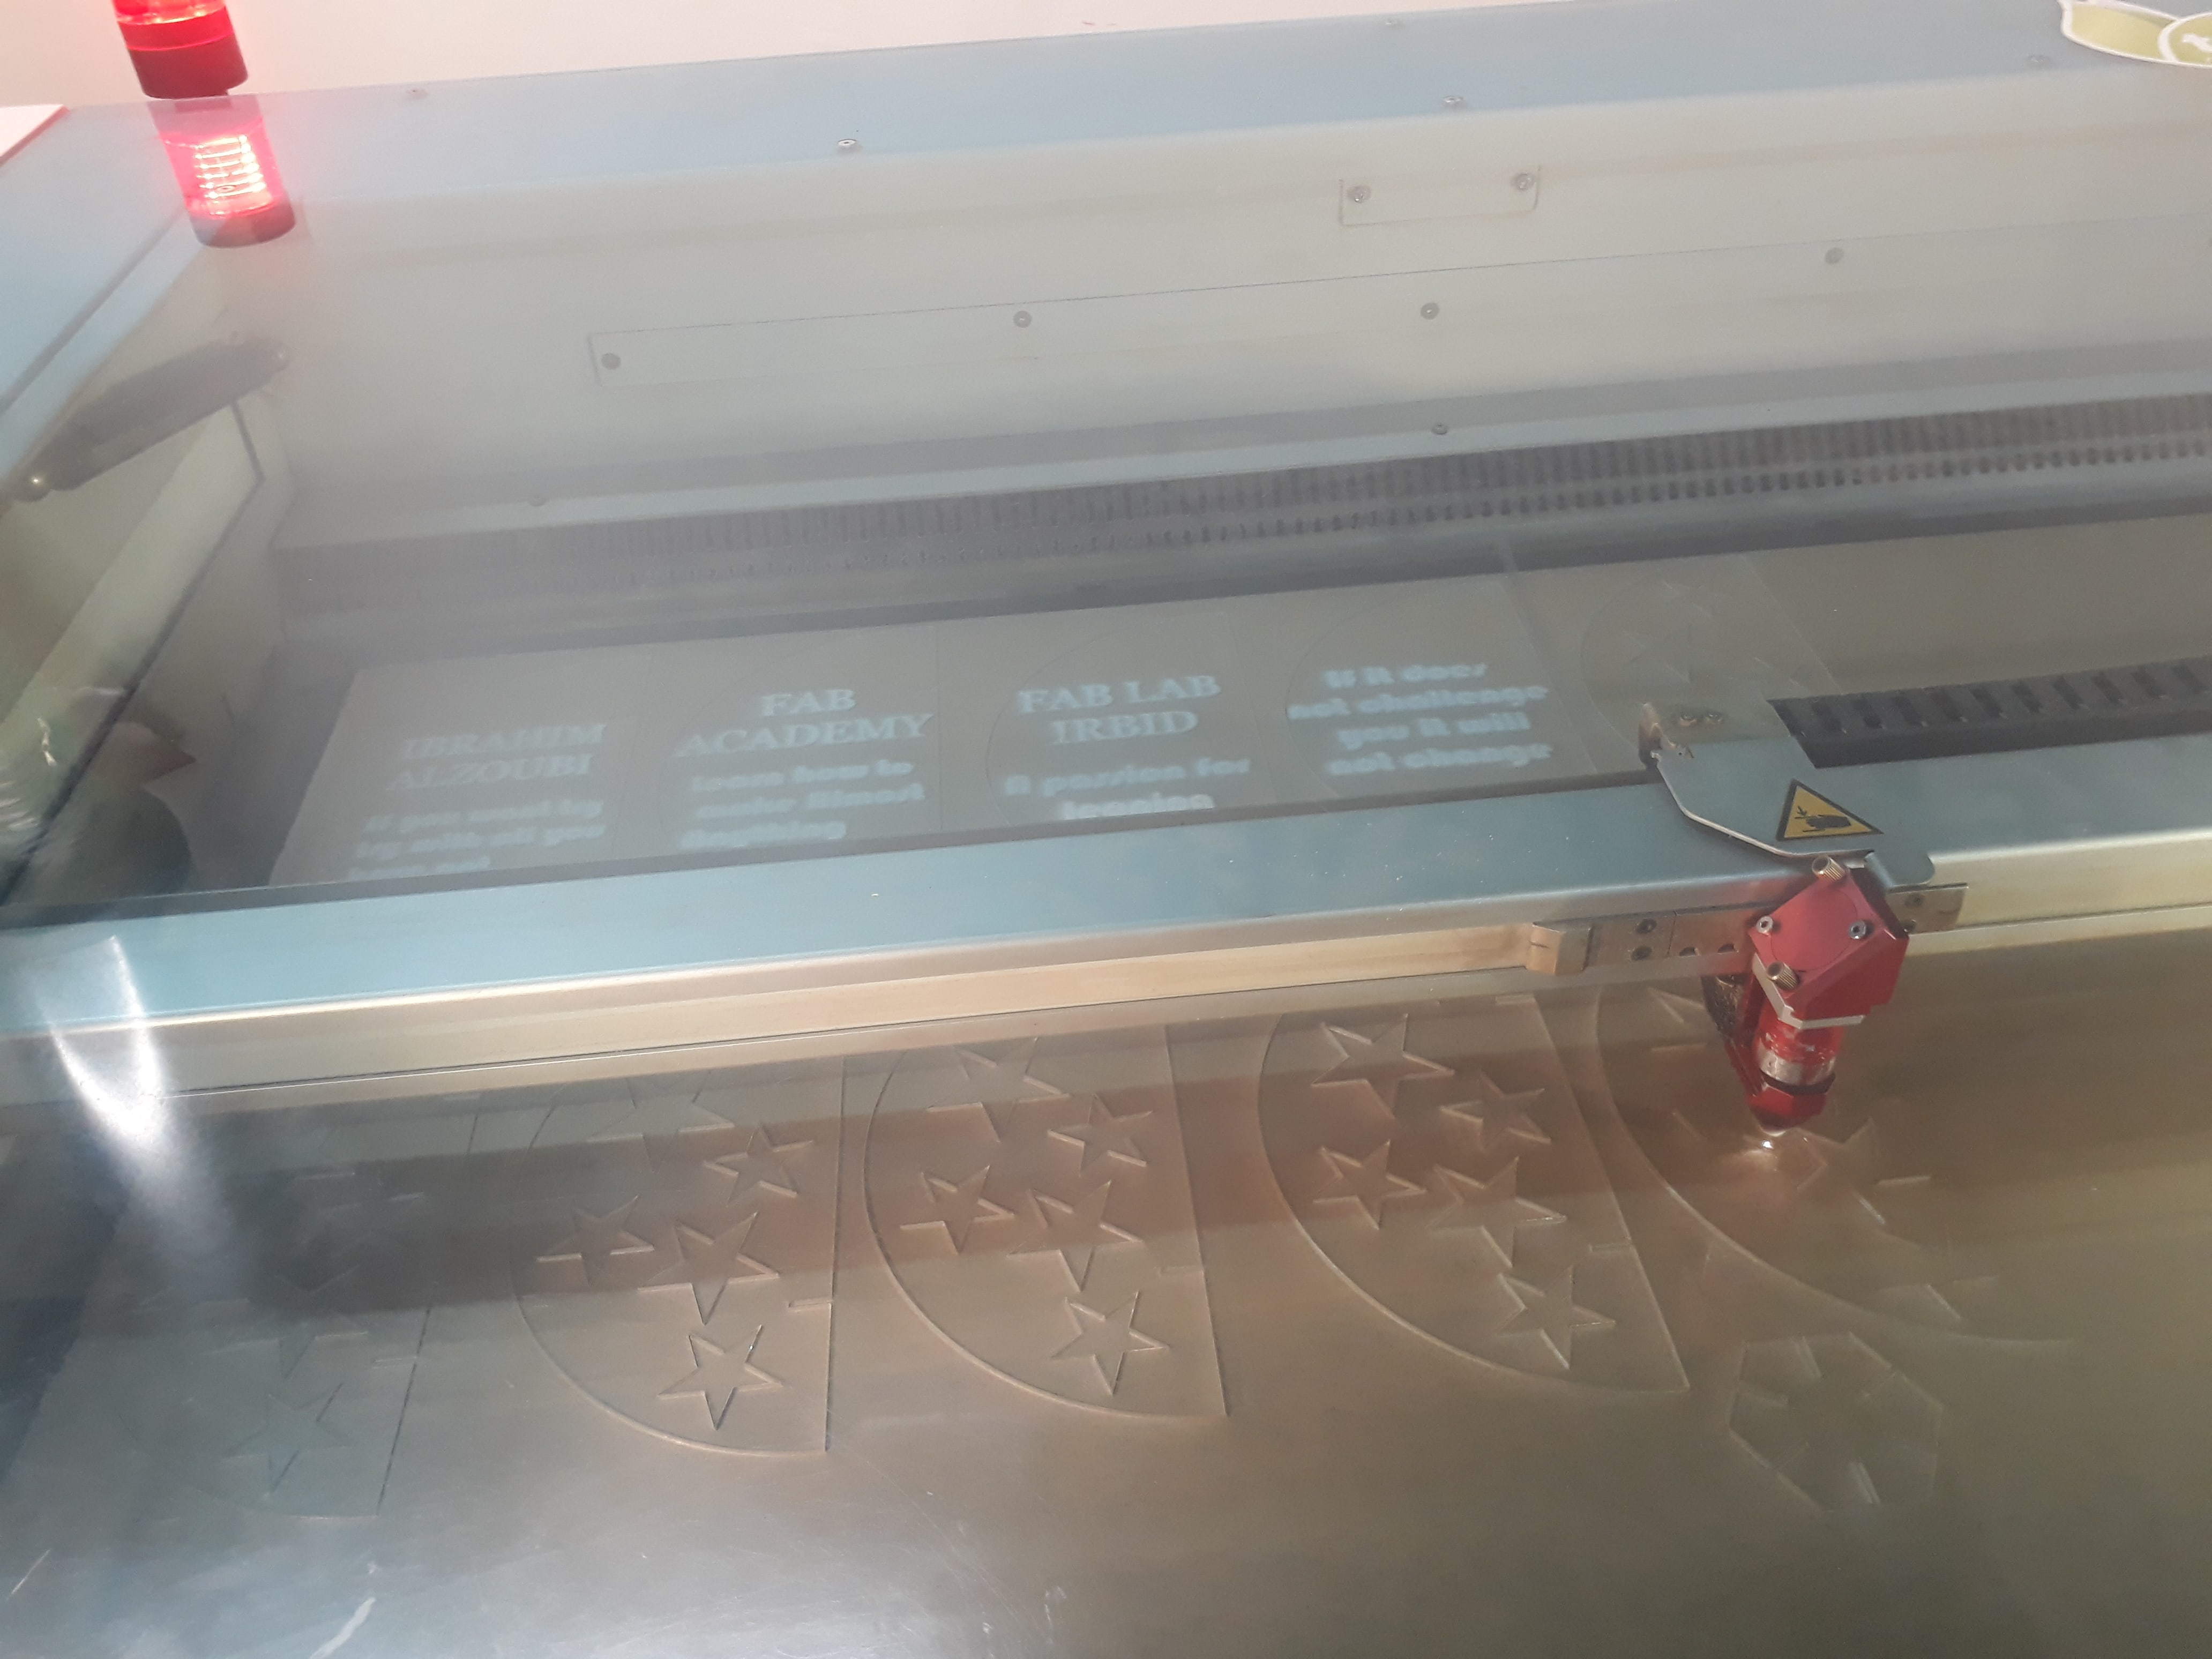
In the job control I dragged the file to the work space, From the group assignment, choose a 2.5mm acrylic setting, which was as shown below ,
When I started the cutting process, I faced a problem, which is that the engraving is ineffective because I did not remove the paper from the acrylic board before cutting.
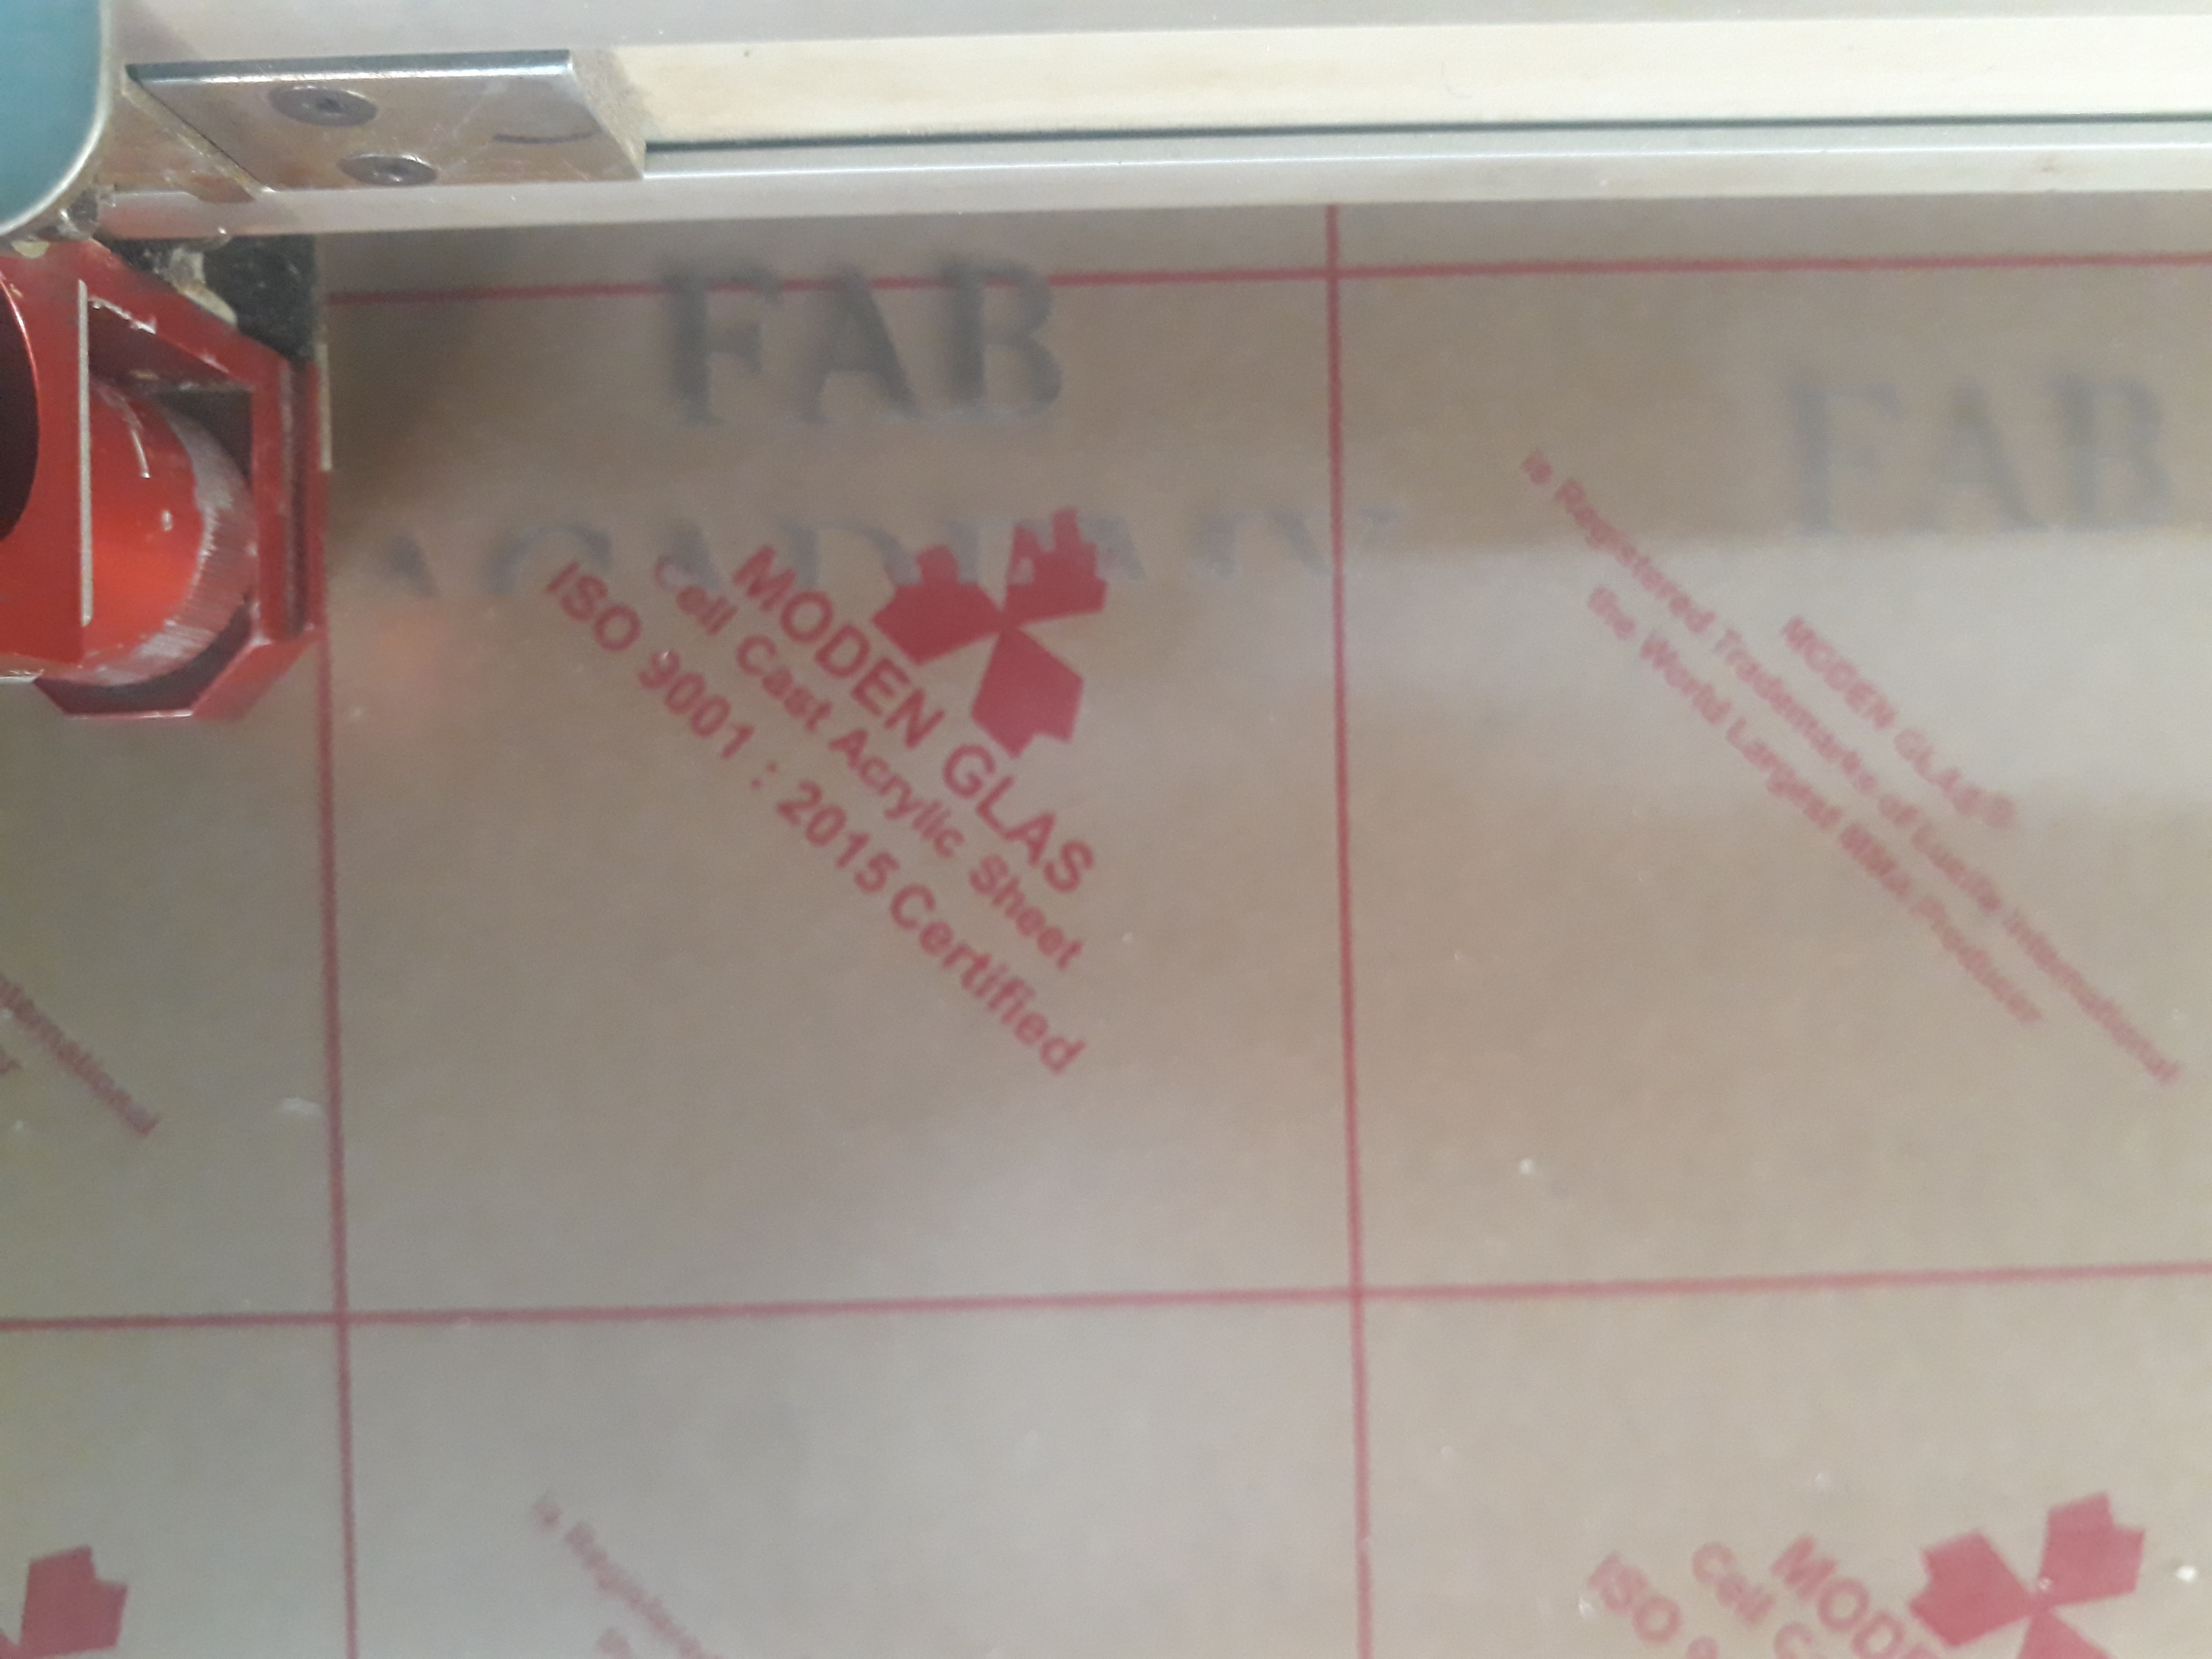
I stopped the cutting machine, removed the paper from the acrylic plate, and the cutting began nicely
And I learned that the engraving is ineffective without removing the paper from the plate of the material to be worked on
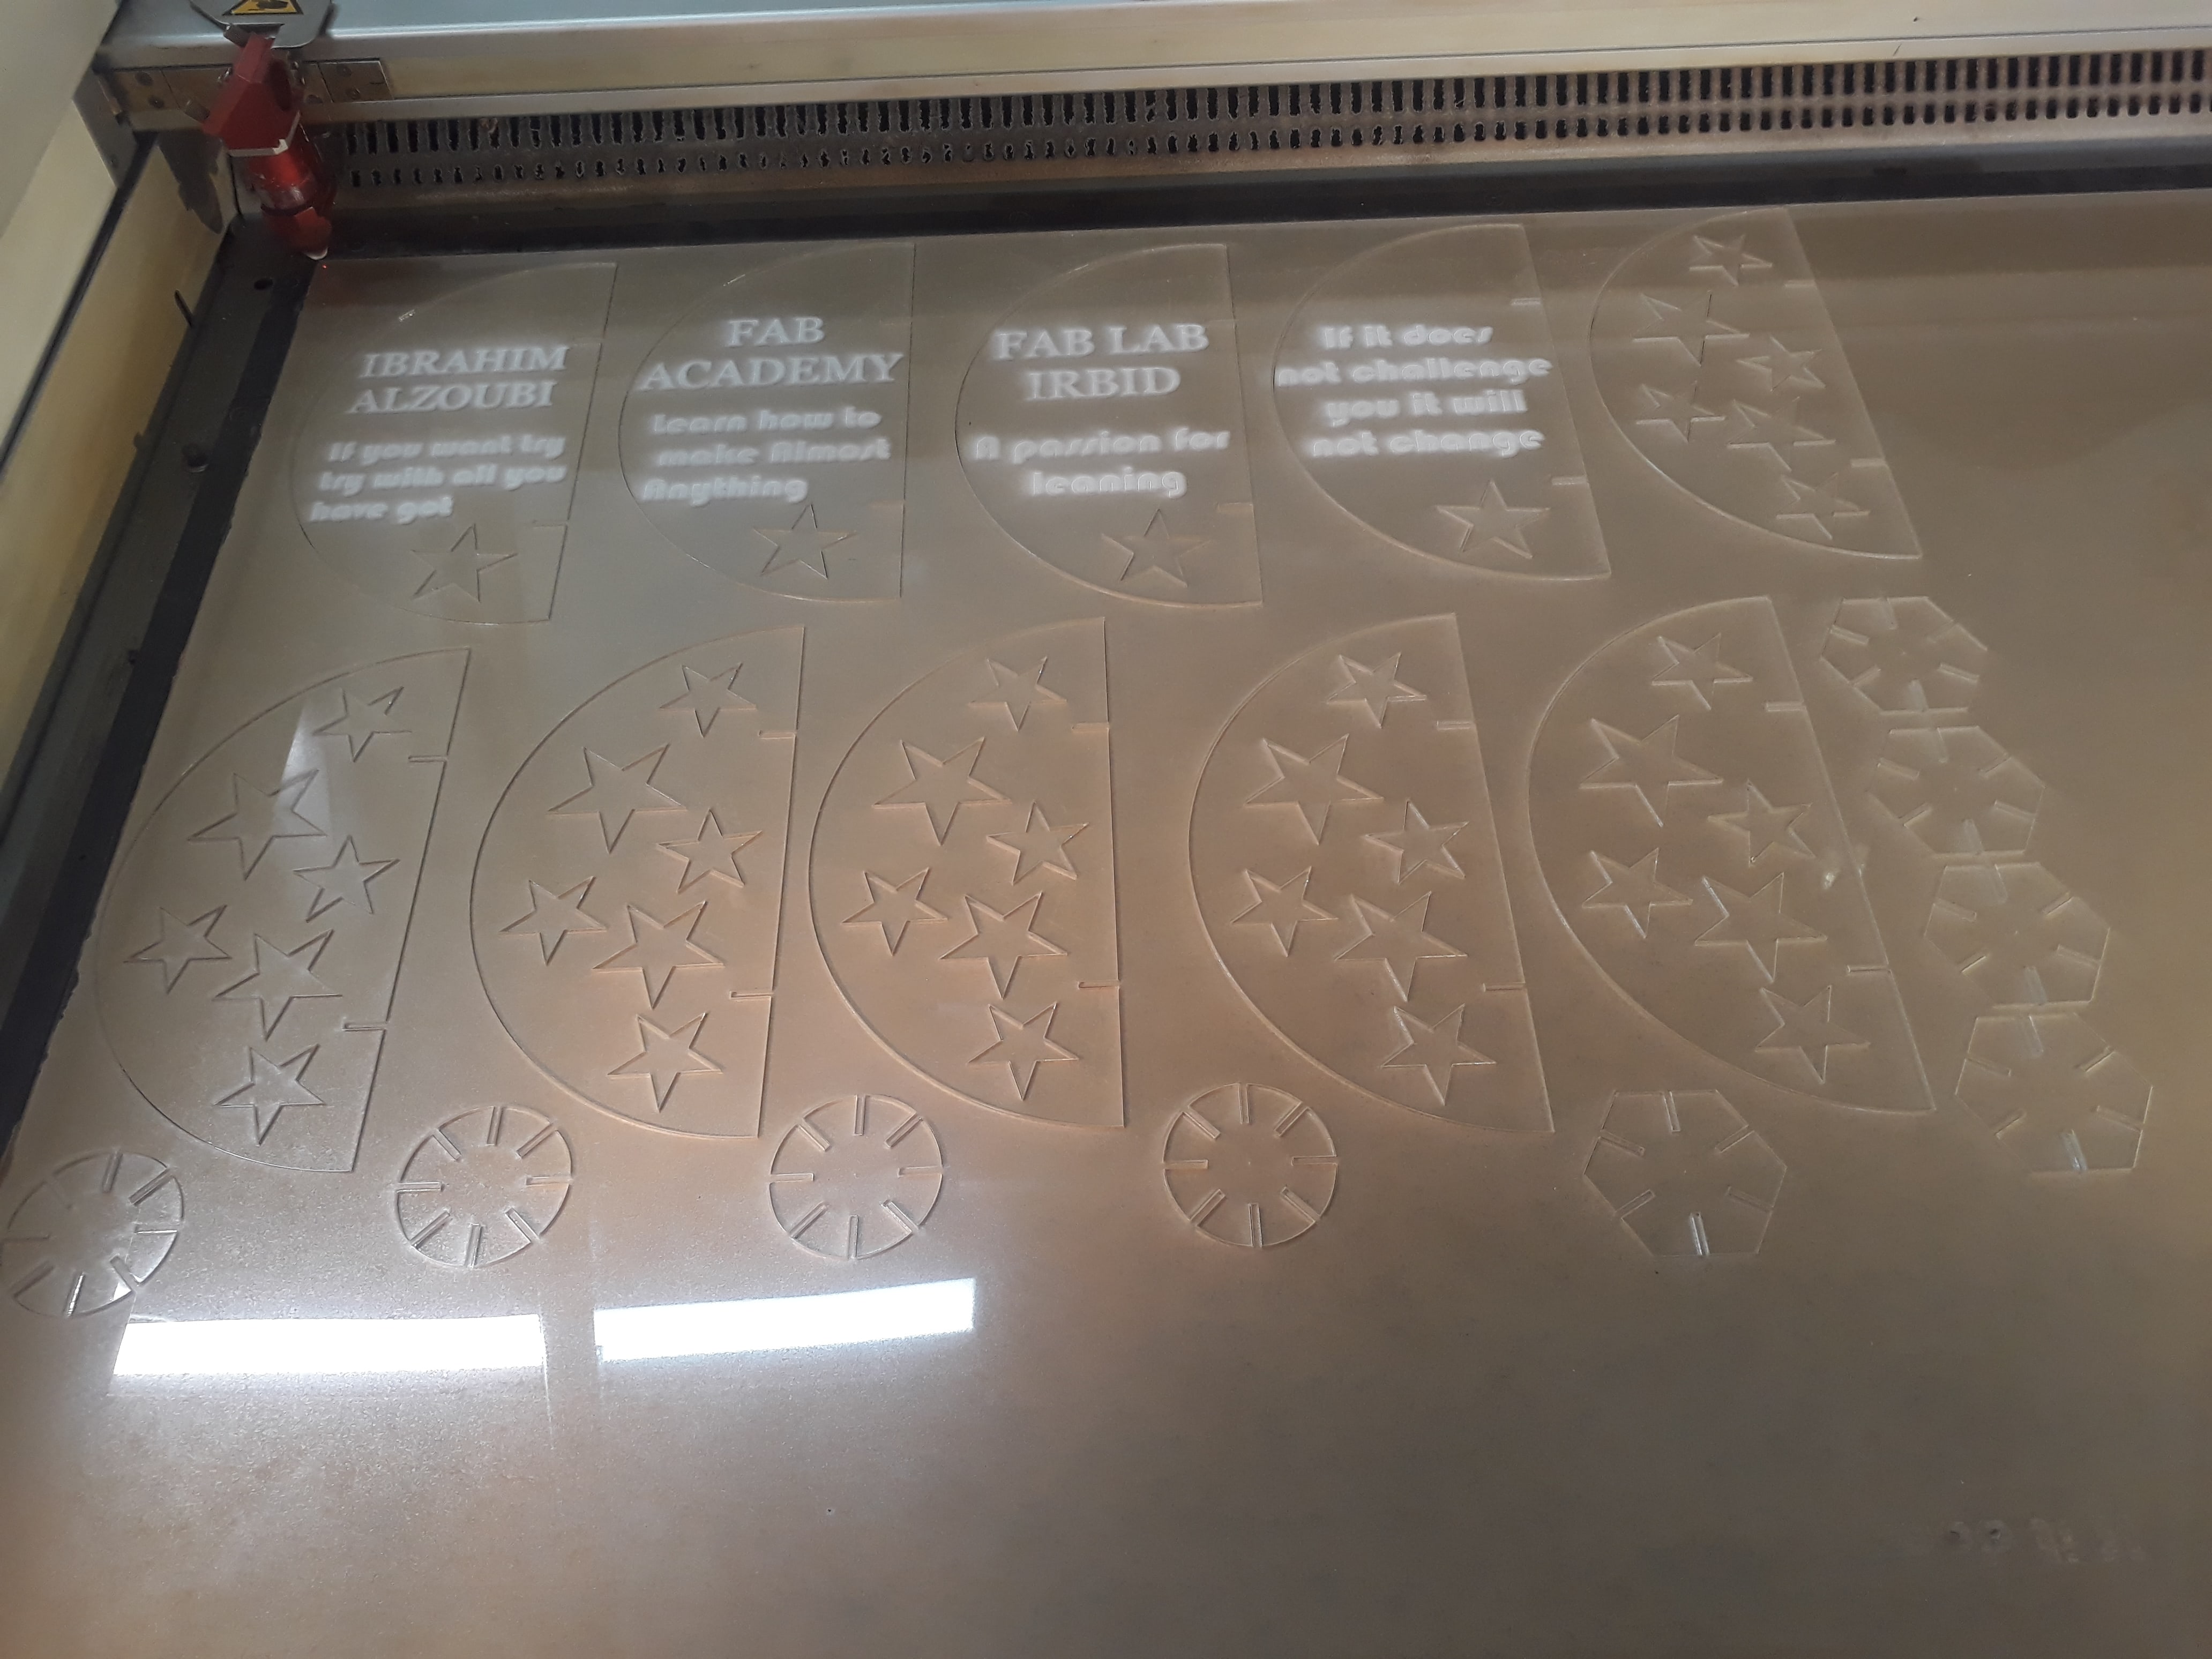
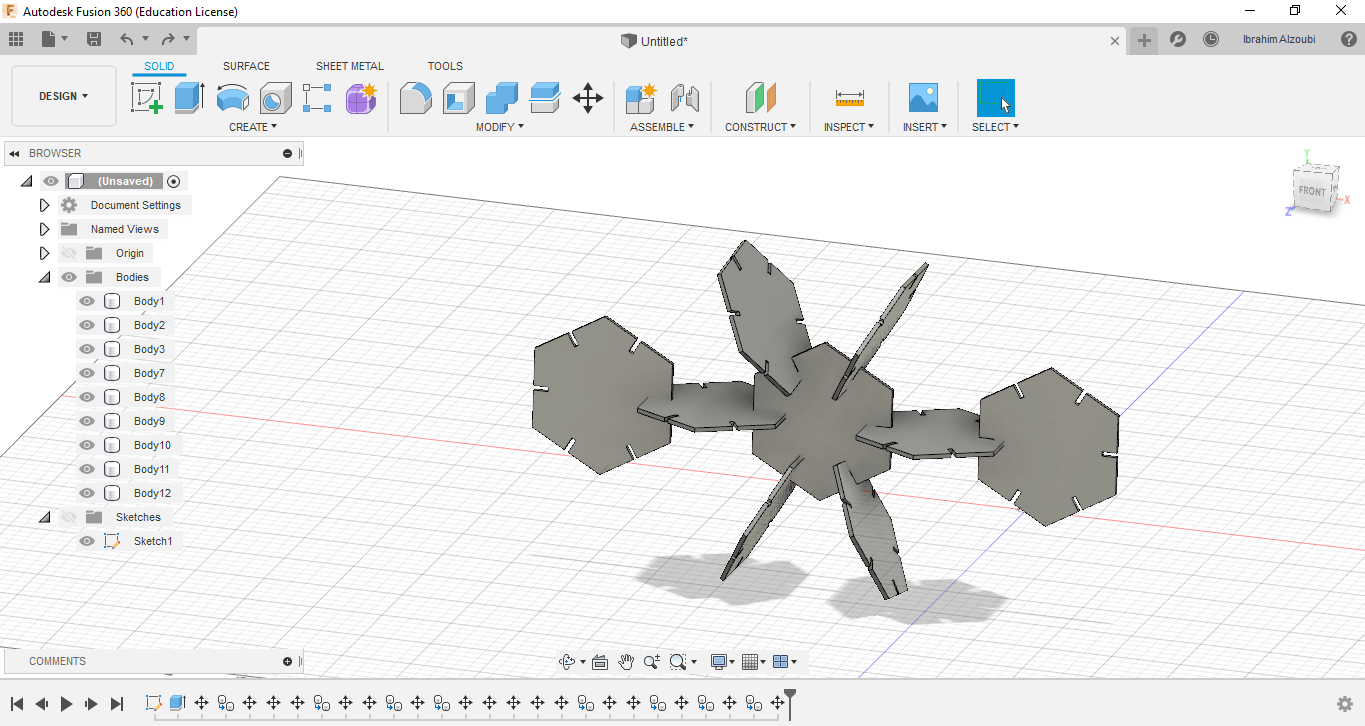
After finishing, I collected the pieces to produce the next masterpiece
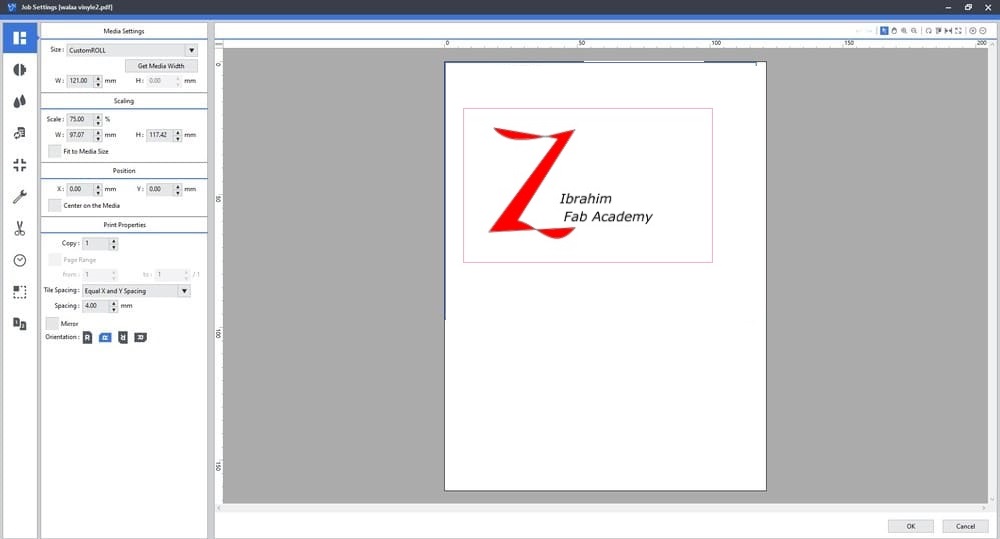
vinyl cutter
Individual assignment, first, I used the vinyl cutter to print and cut the personal logo I drawing for my laptop on inkscape sofetware, I saved it as pdf and opened it from vinyl cutter software, versa works
Now I started with Inkscape and made my own logo to stick it on laptop
After I finished the drawing I saved it as a pdf.
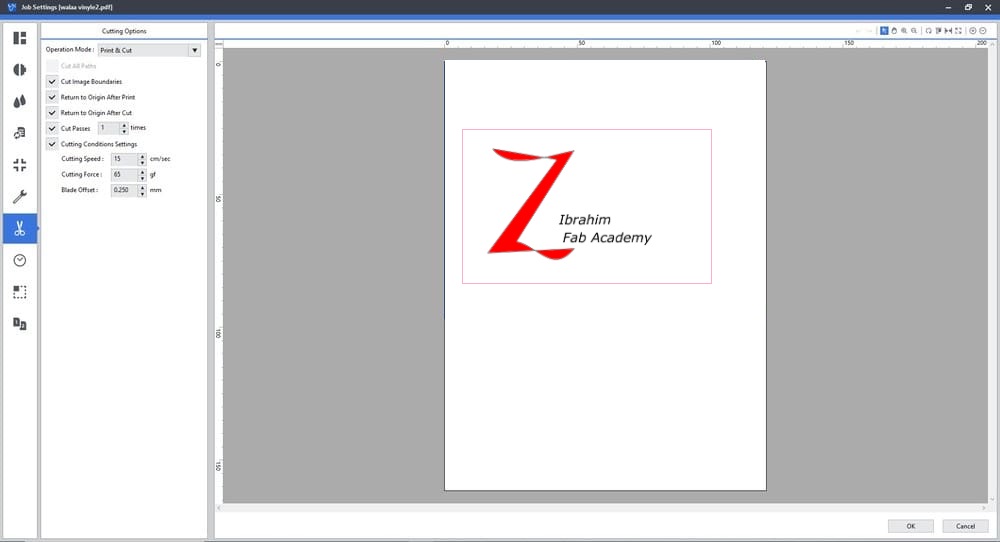
and moved to the versaworks software for the vinyl cutter
Layout: Configures the settings related to the printing area and job layout, Where you can specify the dimensions of the design and the number of copies you want
Cutting control:Controls the speed, strength, blade offset,and cut passes.
Here, you can specify the number of cuts and the cutting speed, choose the number of cuts one time and reduce the speed to ensure it is a perfect story the first time.
Then I printed it on the Roland BN-20 printer
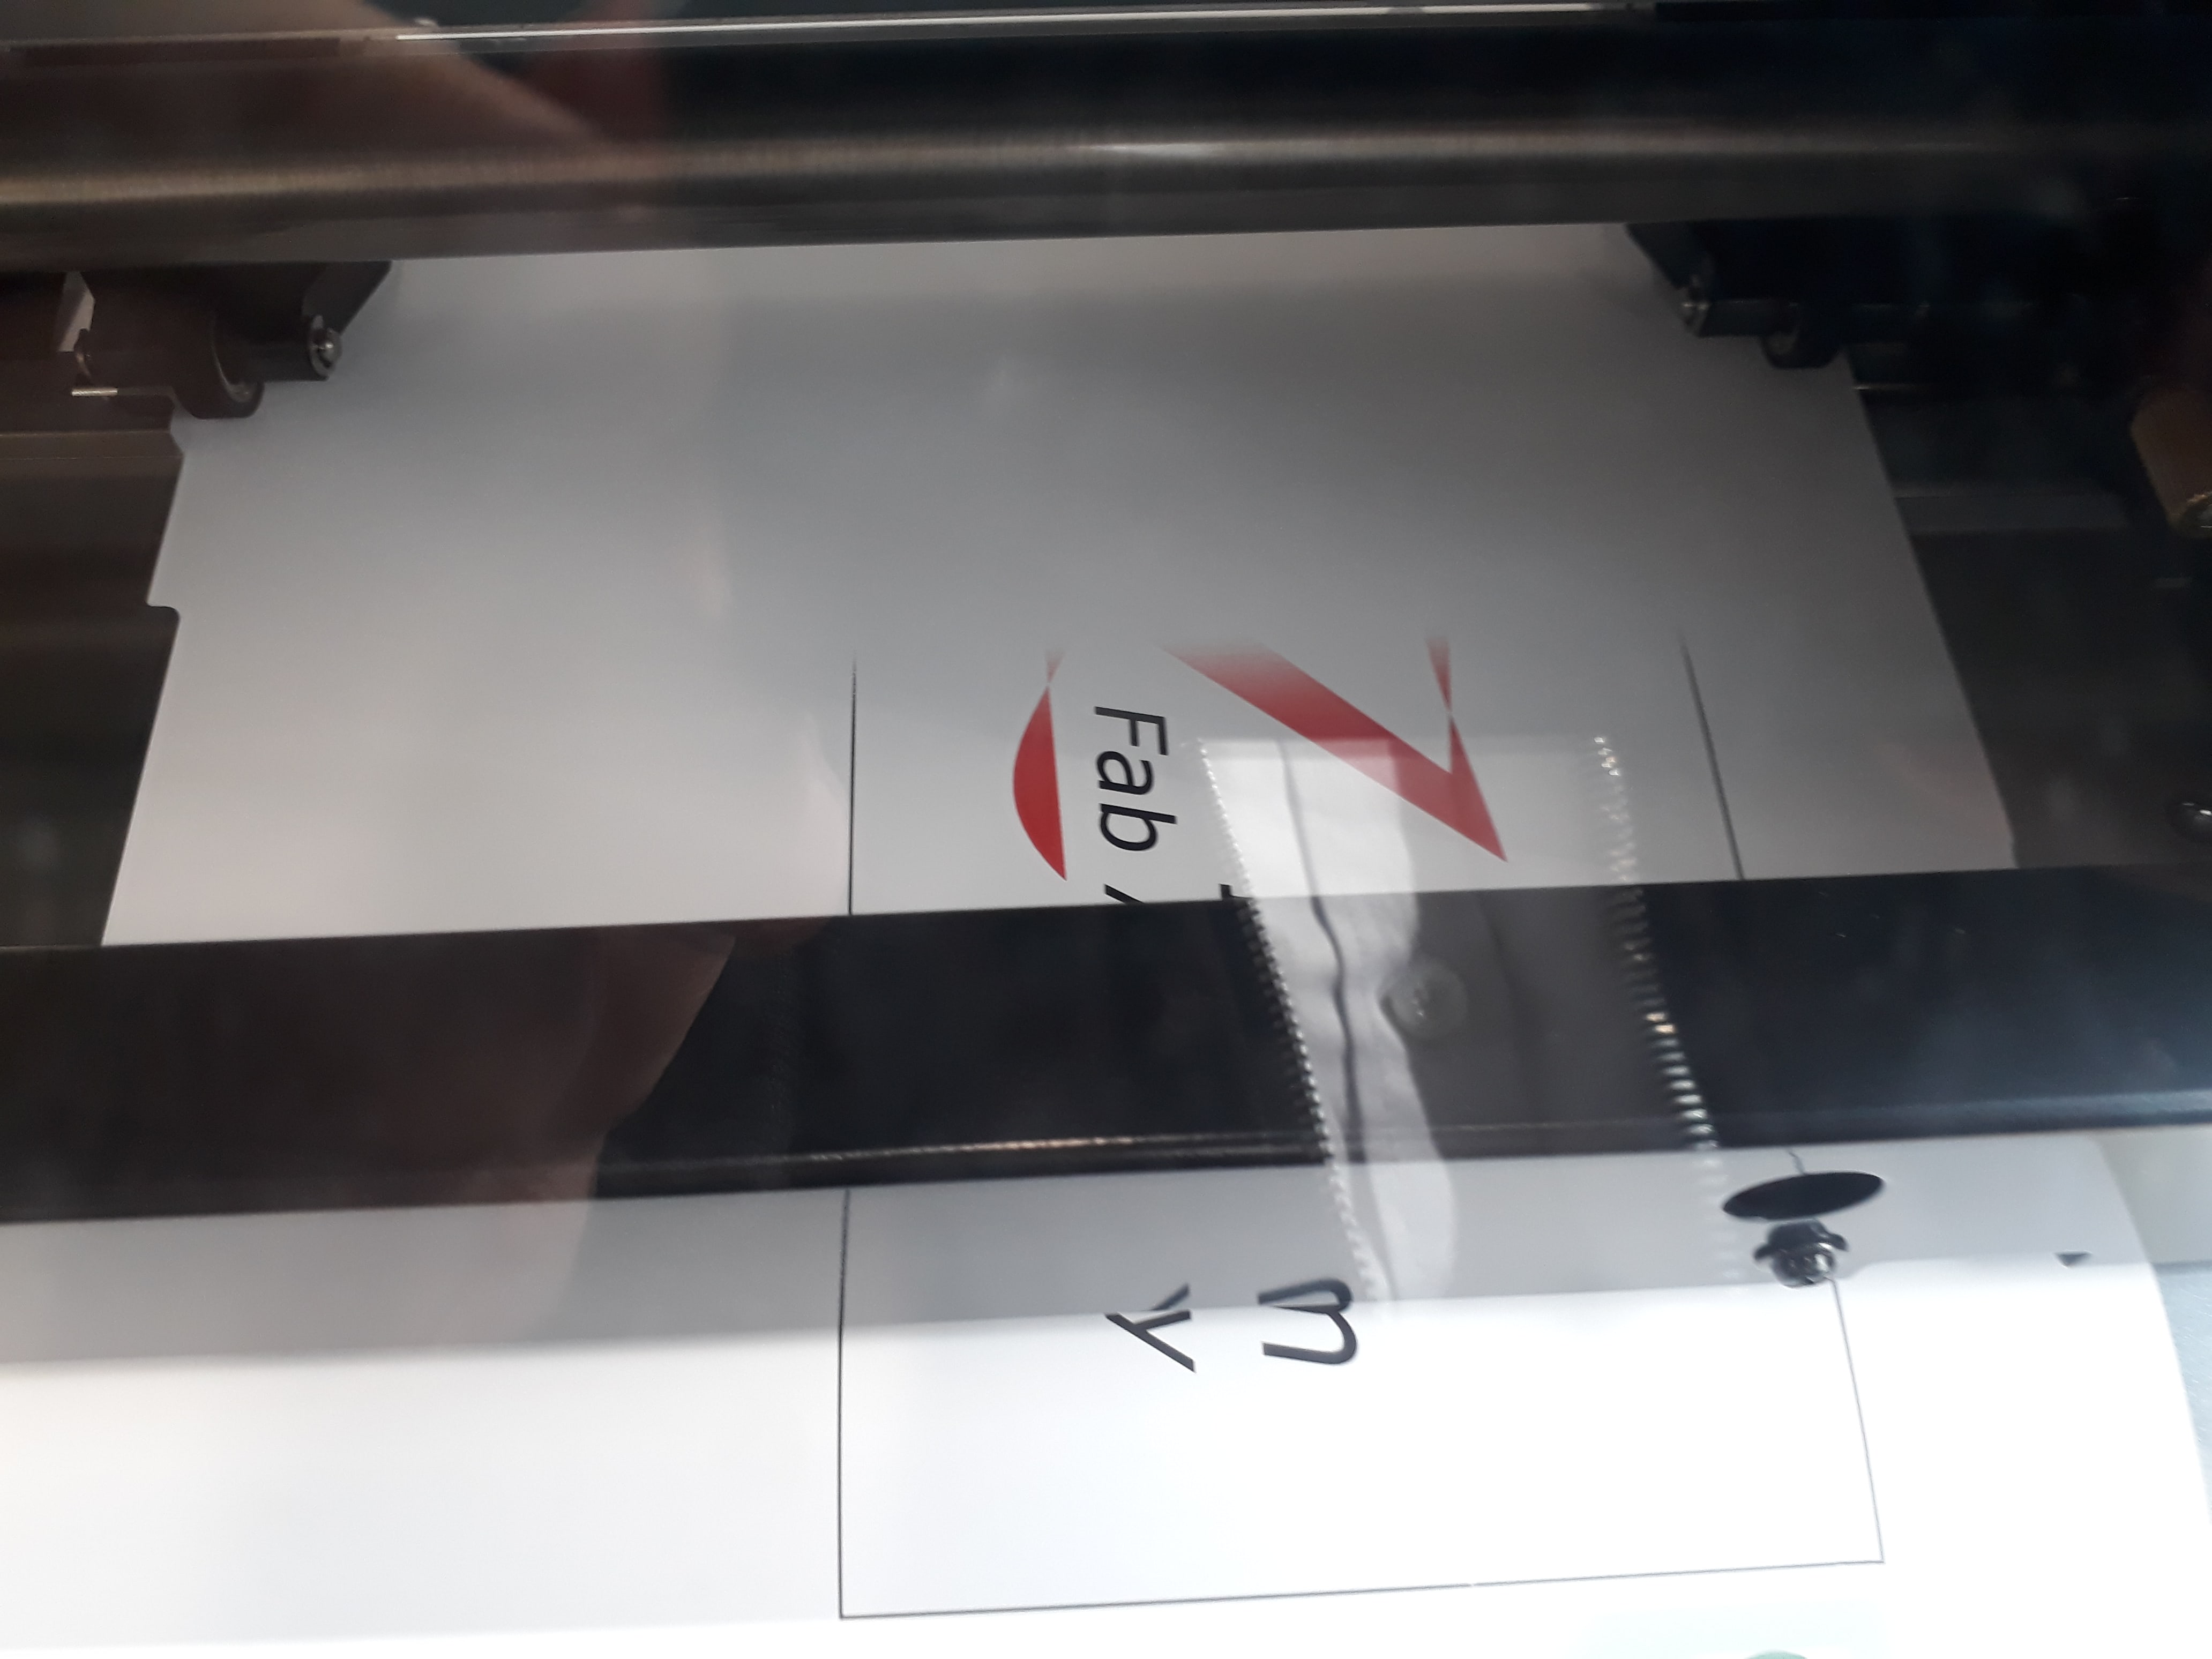
I am putting the logo on my laptop