01
Assignments
Individual Assignments (1)
-
Design and produce something with a digital fabrication process (incorporating computer-aided design and manufacturing) not covered in another assignment, documenting the requirements that your assignment meets, and including everything necessary to reproduce it. Possibilities include (but are not limited to):
- machines.
- robotics.
- electronics.
- folding.
- food.
- biotechnology.
- textiles.
- composites.
While I was investigating I found infinite information, however, I could not get a mental idea of how the theme of actuators working on pieces in two dimensions worked for sure. After so much surfing the web, I found these pages to be very interesting, inspiring and giving me a very good idea that I could develop taking into account the resource limitations in the Fab, time and the Covid-19 in its extended total quarantine. For the second time in Panama, here are the references:
After trying many times to design something, I found myself with the dilemma that there could only be vinyl thermal material in the Fab to manufacture my prototype and that the idea of design and product due to this, could not be realized. In view of the above, make the decision to play as test samples (visual and spatial intelligence) the actuators on objects (of the thermal type) found in:
I must clarify again that I feel very comfortable working for years with AutoCAD, I start it all by hand-vocaling directly to its 2D development in this software, take an internet image for practice and use it as an external reference (raster image):


As I put it, after many attempts I designed a hybrid between the things that I had already planned from the beginning and what I had investigated and a little… of inventiveness; ending with the following:
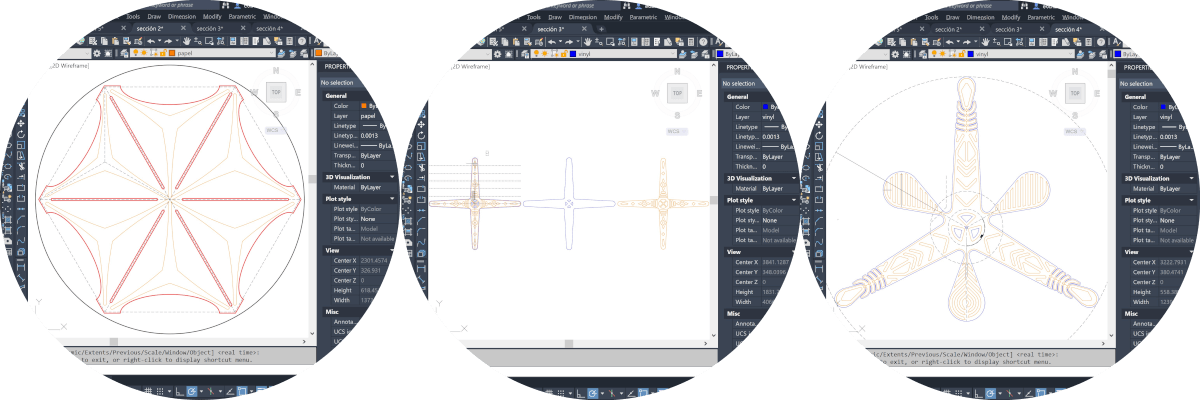

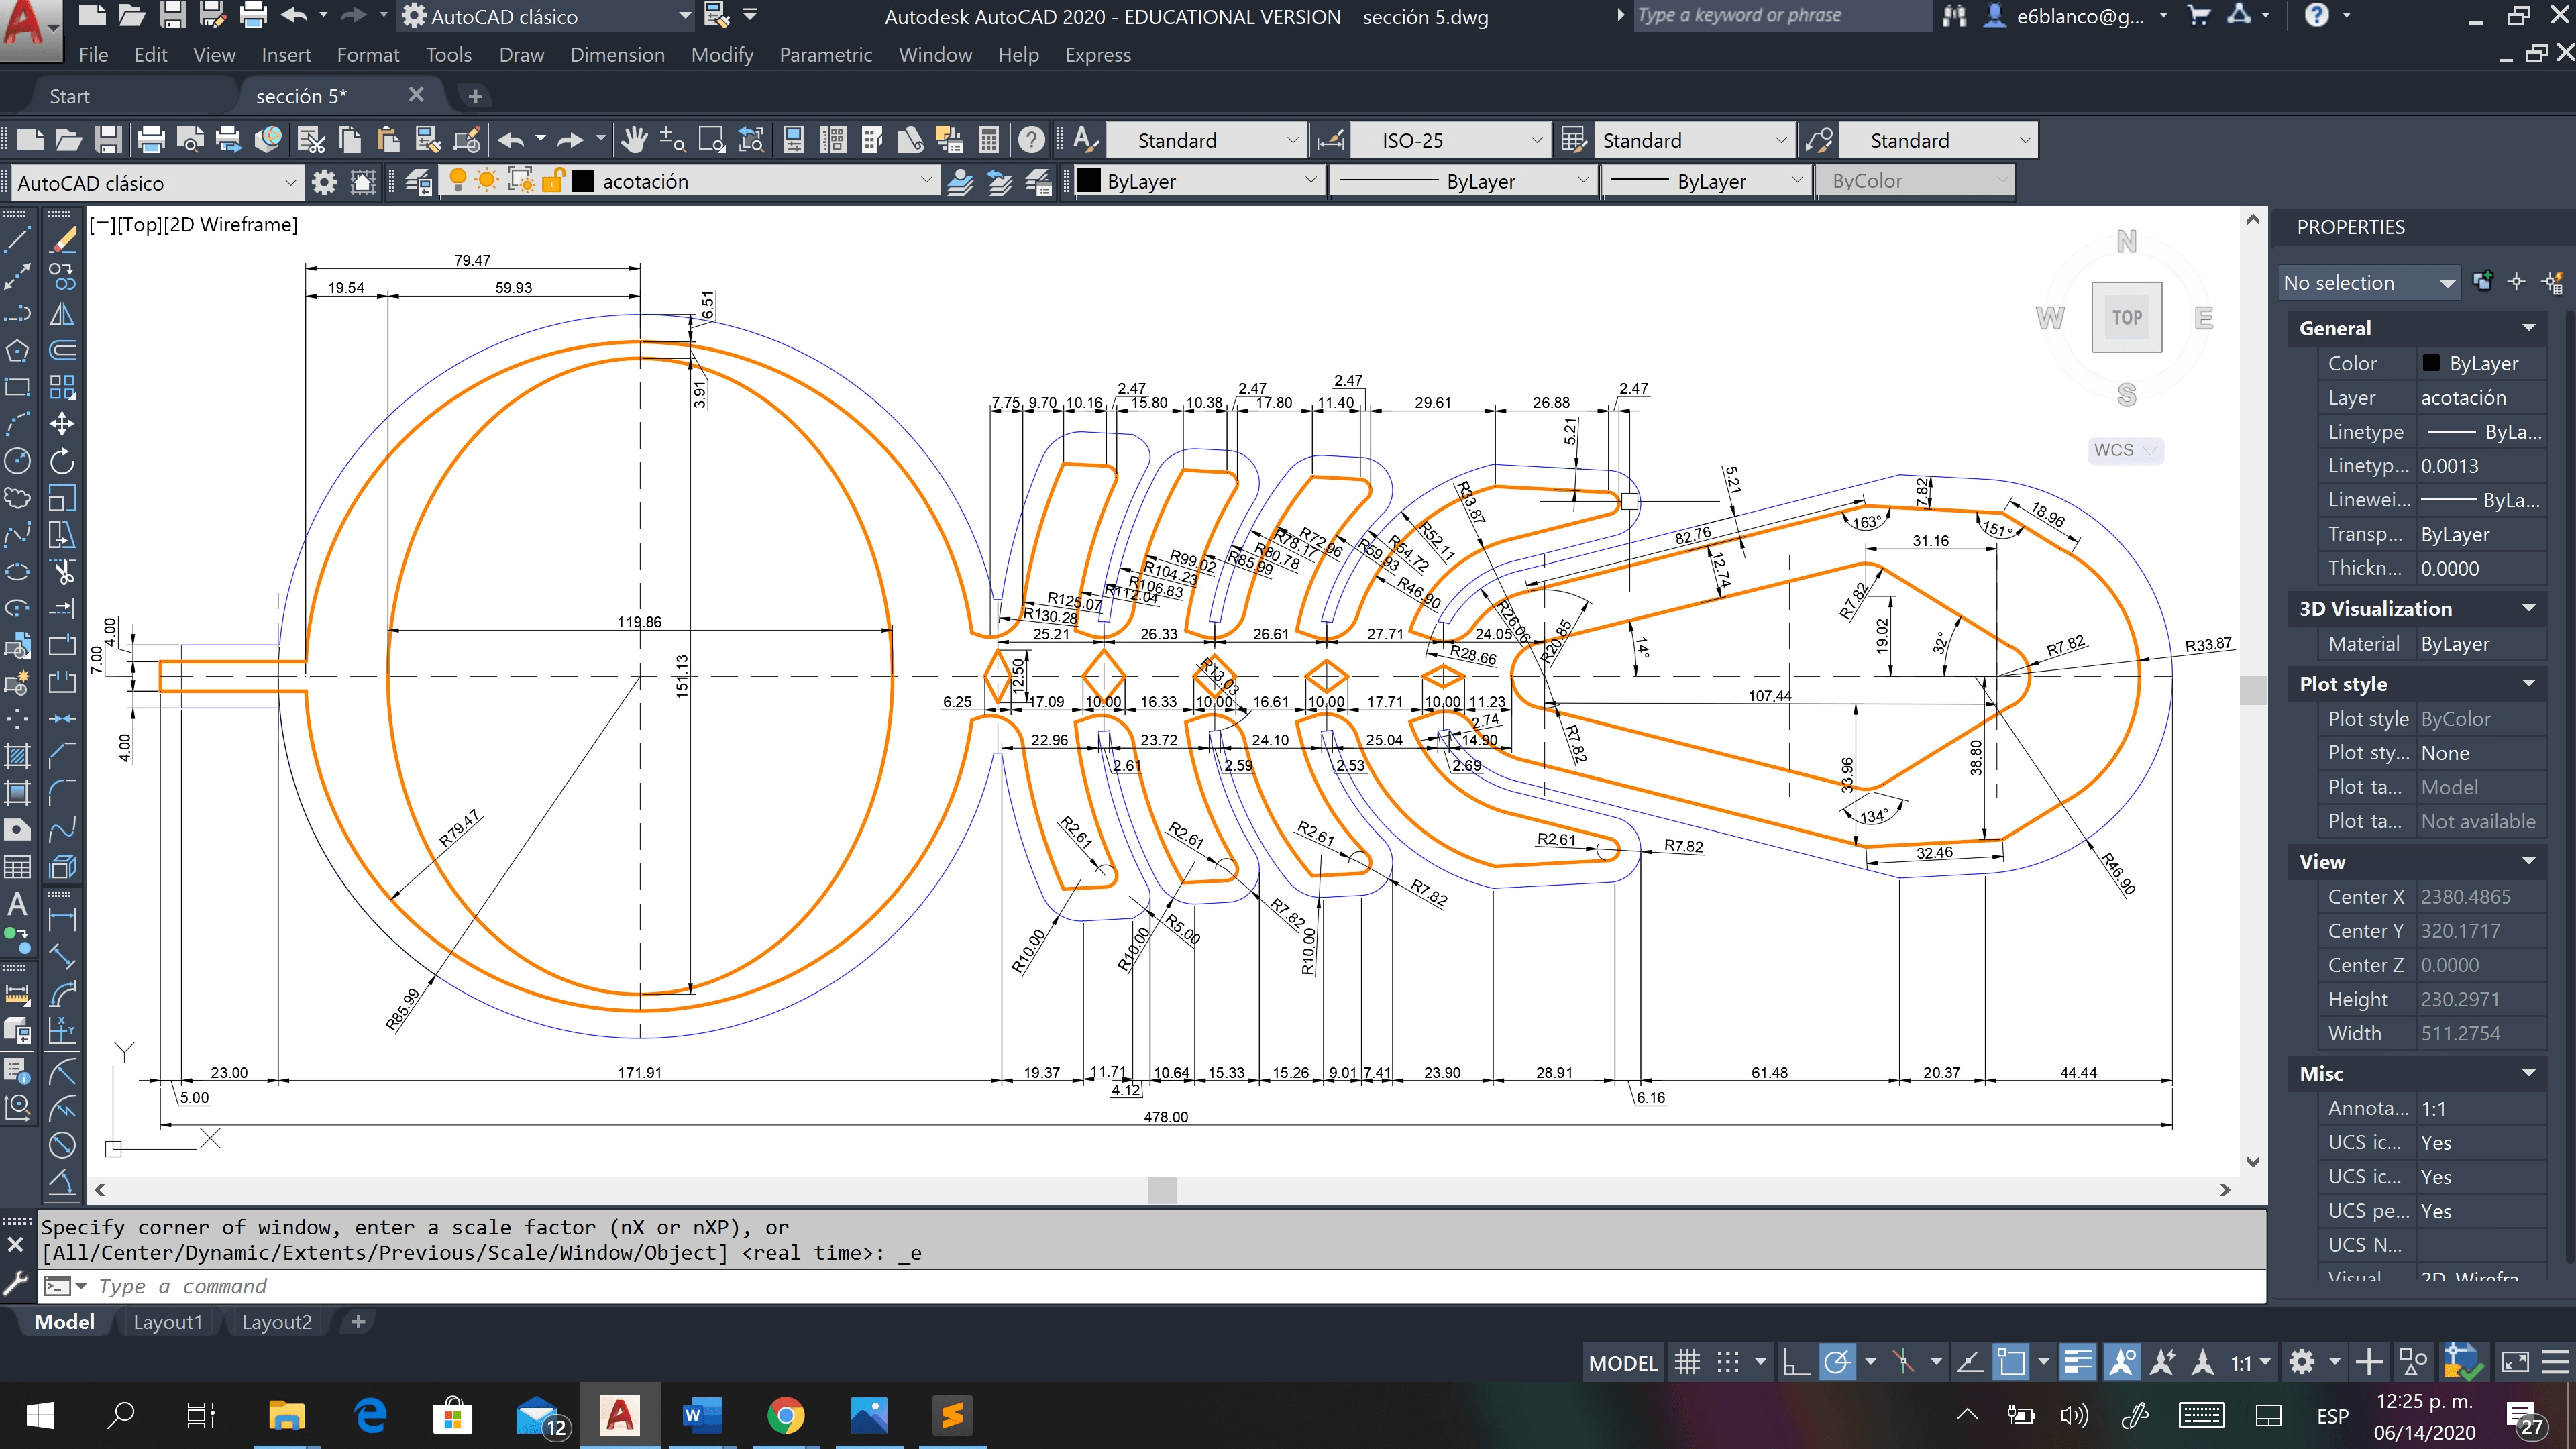
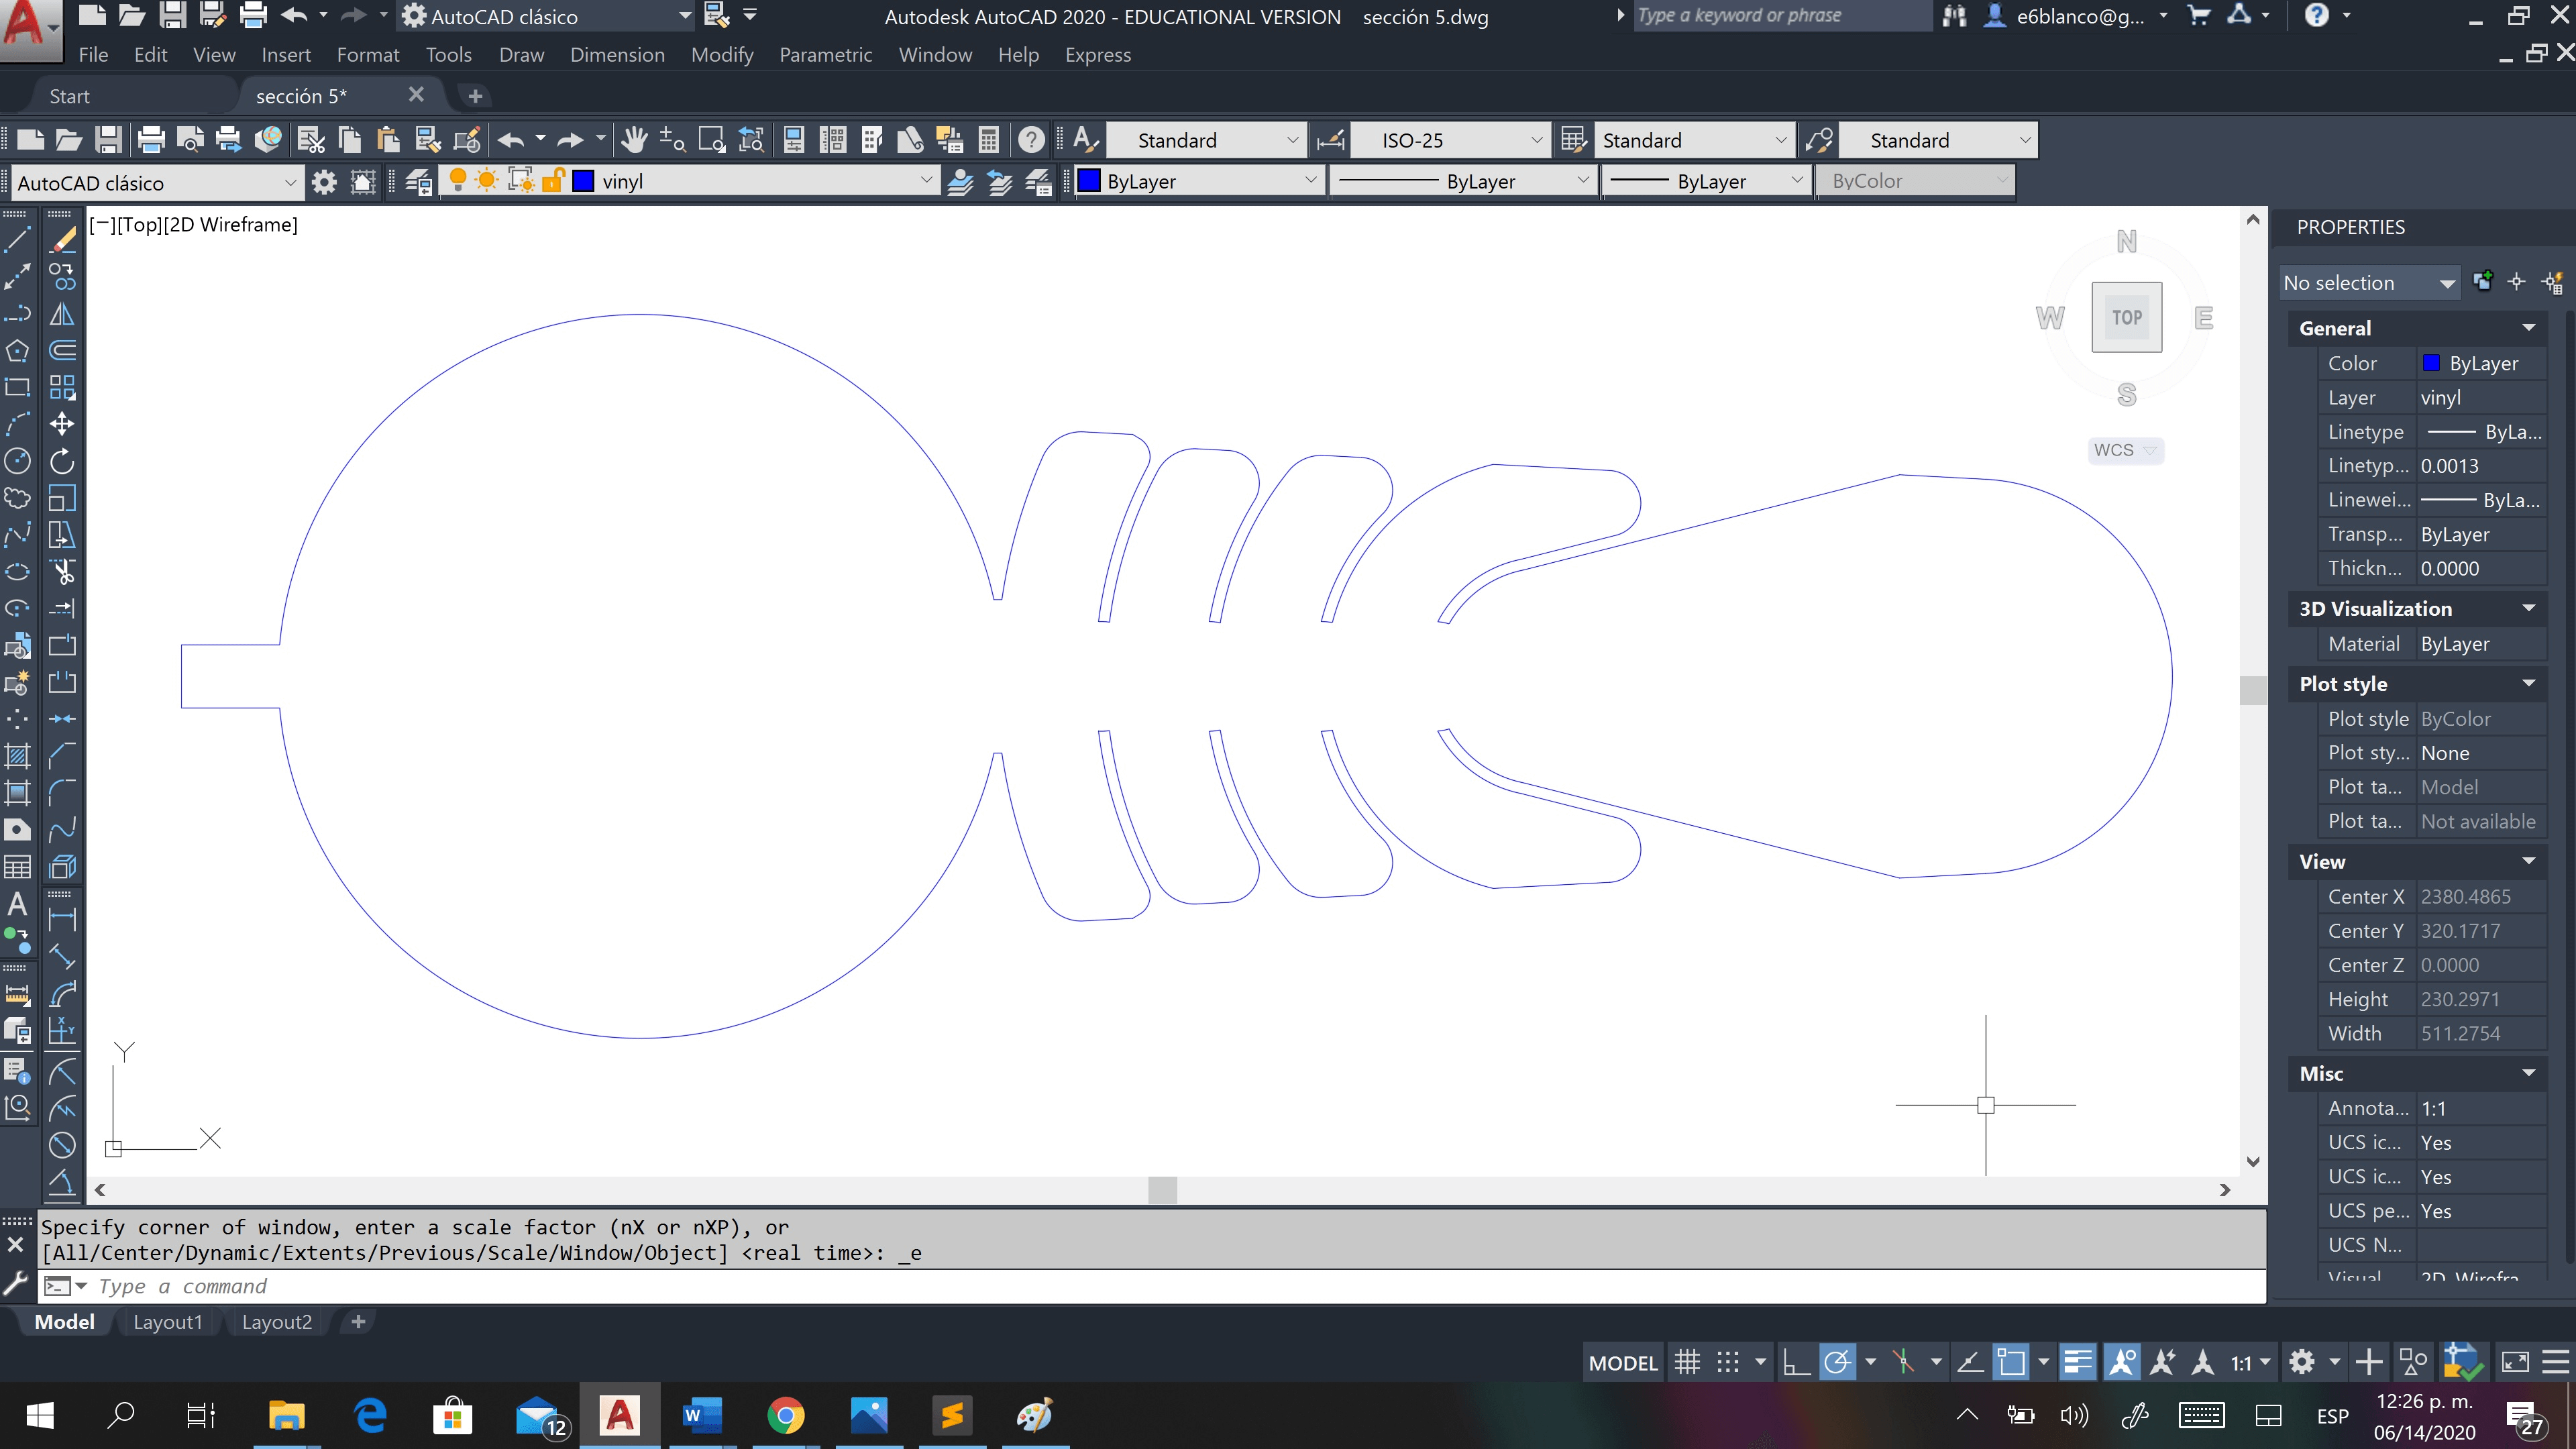
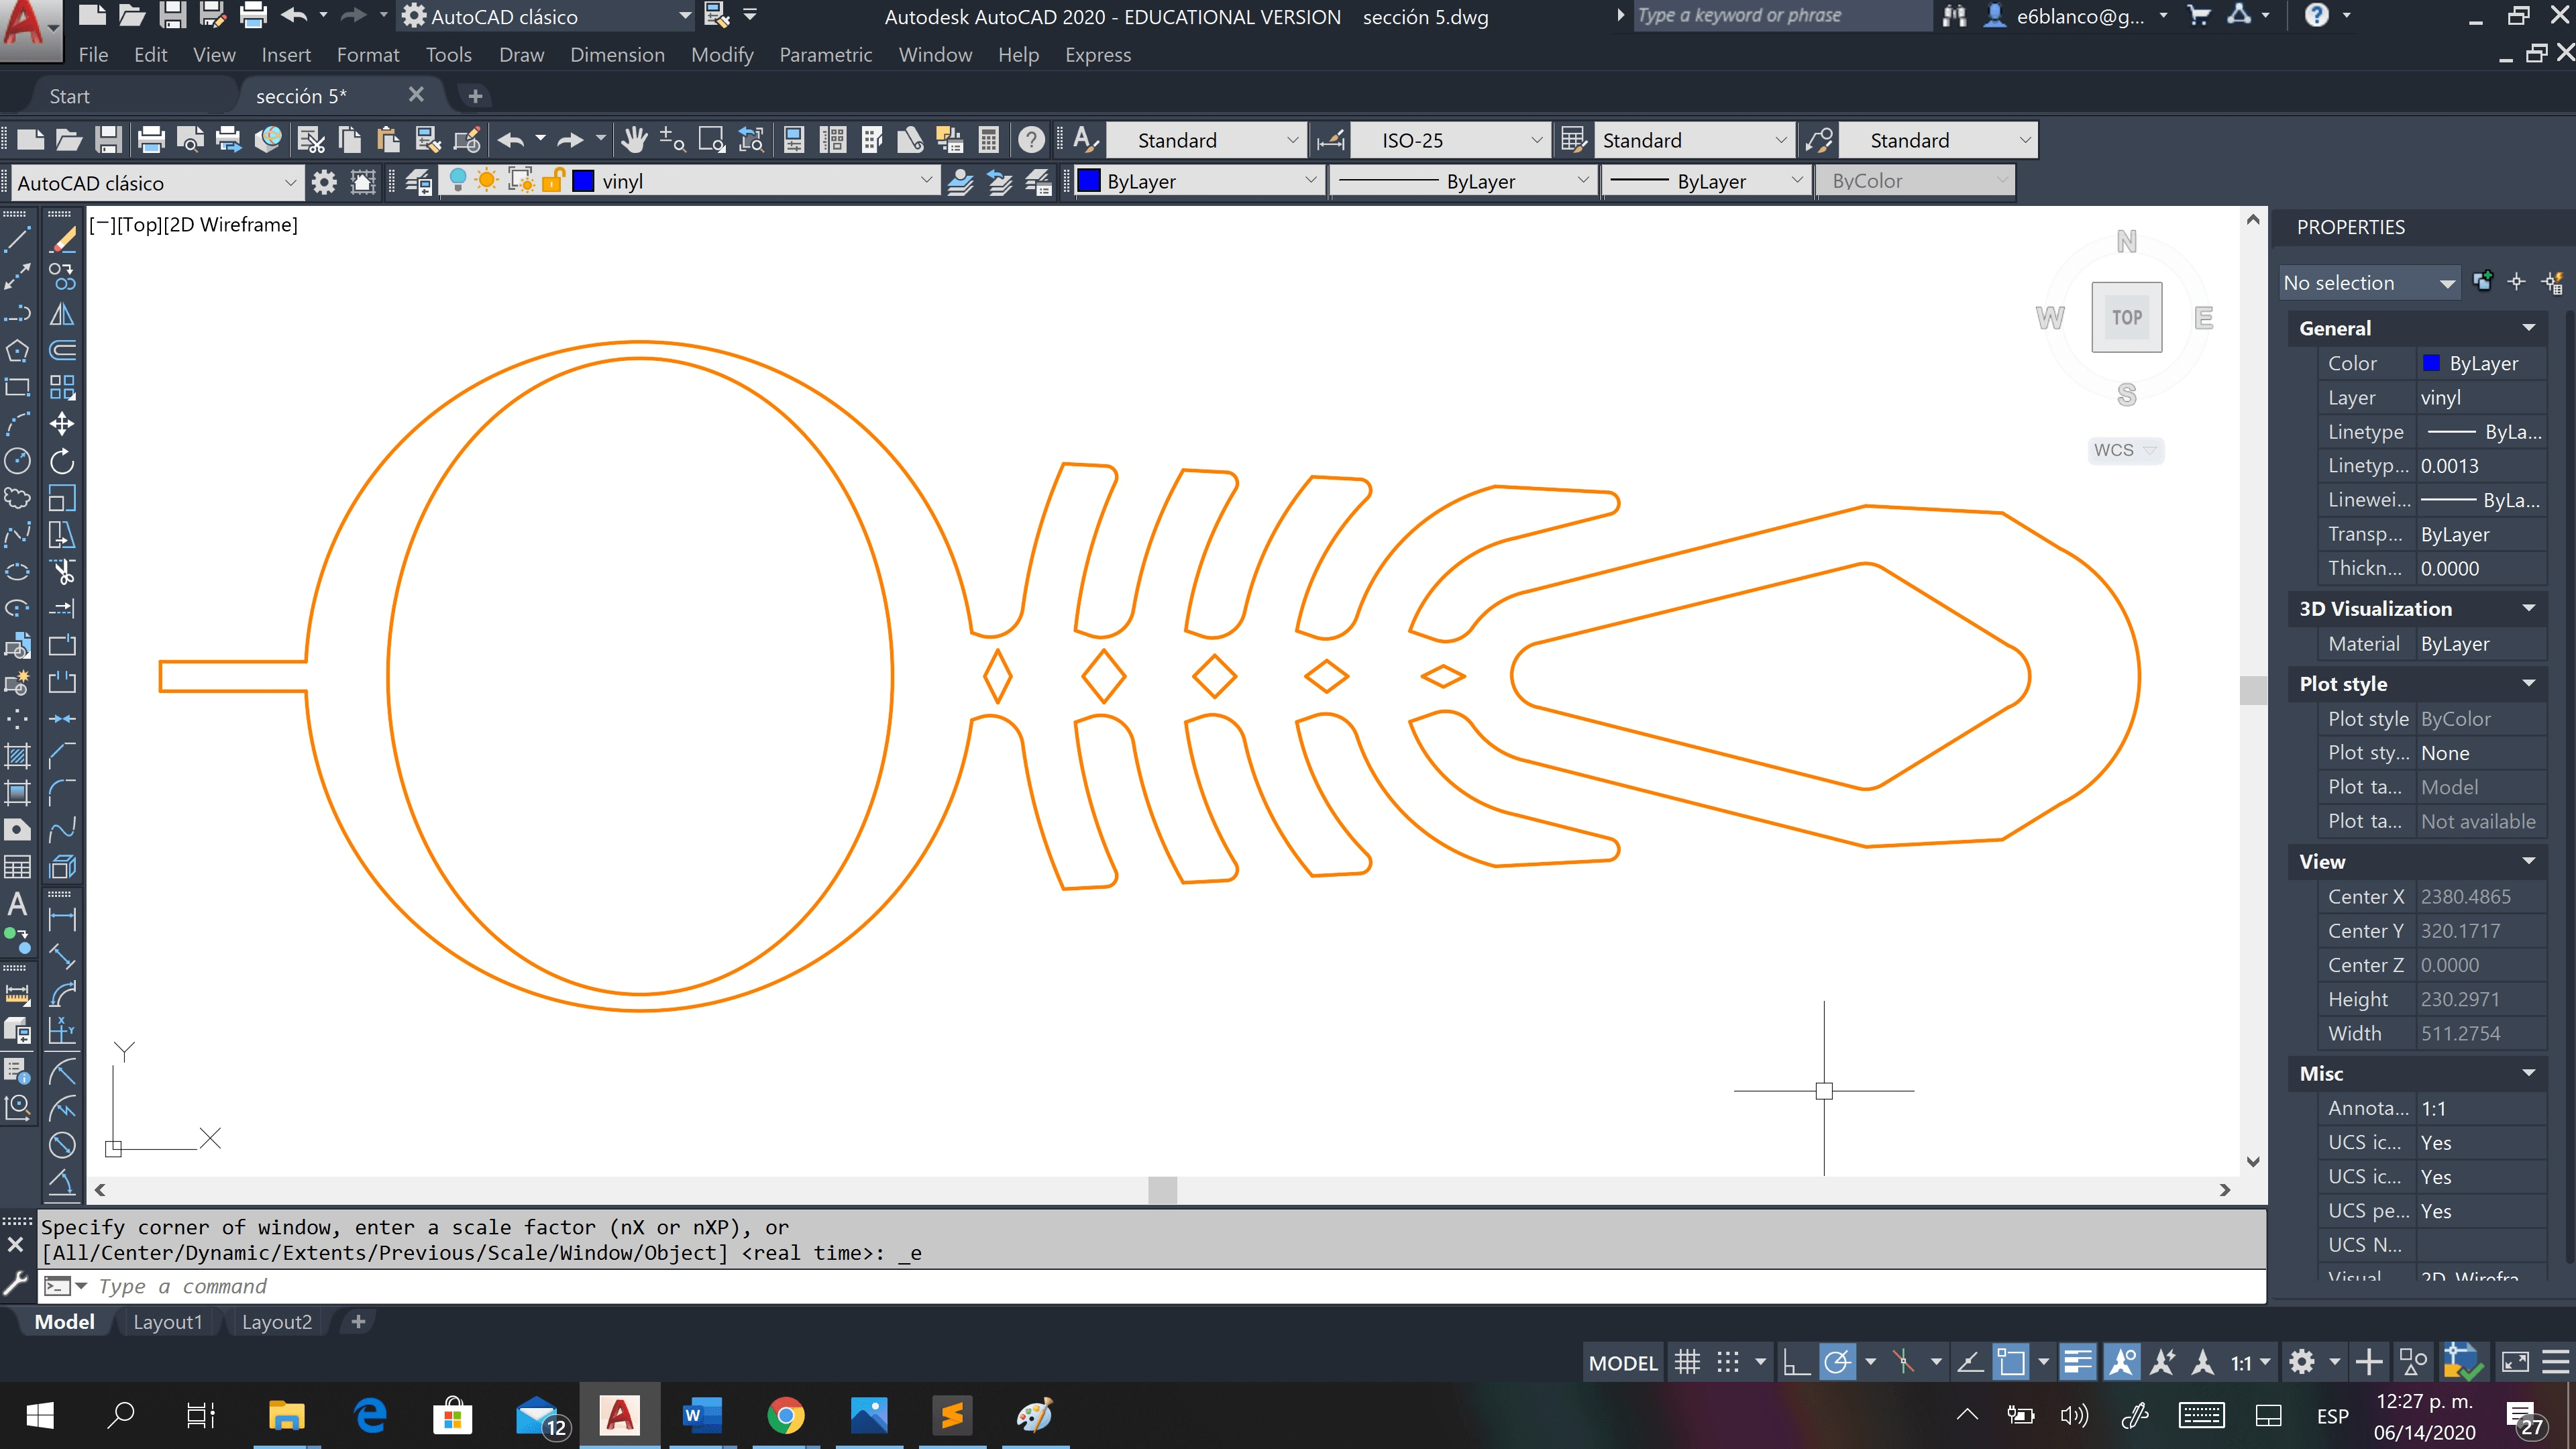
I must clarify again that I feel very comfortable working for years with AutoCAD, I start it all by hand-vocaling directly to its 2D development in this software, take an internet image for practice and use it as an external reference (raster image):
Fabrication process:
I have two options to carry out this assignment: the use of the Silhouette Cameo 3 or the use of the laser cnc, both equipment and procedures expressed in week 3.
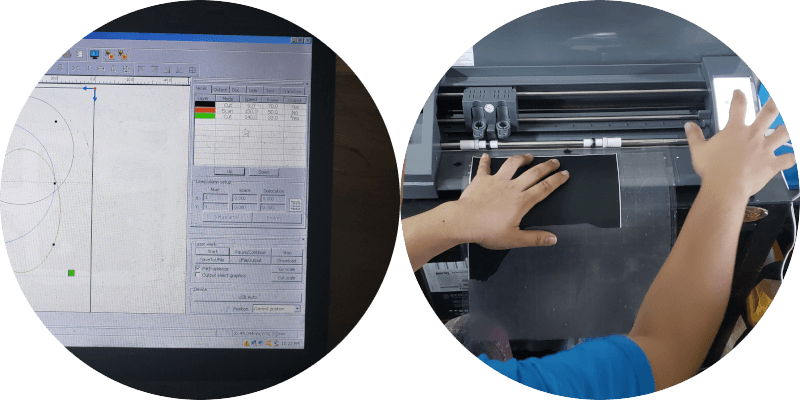
- For cutting thermal vinyl:
- Get 1 yd of thermal vinyl.
- Access the Cameo machine that was used in week 5 and use the Silhouette software.
- Save the file worked in AutoCAD from dwg format to dxf (mm). It is necessary to clarify that the file to work here is the one found under the layer vinyl (object outline), 2 identical pieces of this model must be made.
- Since the maximum size supported by the Silhouette Cameo 3 is 12 inch x 12 inch, I have to make 4 pieces, then arrange and glue them so that I have the 2 sets (bottom and top).
- Load the material into the machine.
- Adjust the parameters to:
- Depth: 8.
- Spedd: 5.
- Pessure: 10
- Pass: 1
- With everything configured, we click on send the job, wait a moment and download the product.
- For the Baking paper cut:
- Get 1 yd of this baking paper.
- Place the aforementioned material on the 12 ”x 12” plastic base of the Silhouette Cameo 3.
- Save the file worked in AutoCAD from dwg format to dxf (mm). It should be clarified that the file to work here is the one found under the paper layer (object outline), 2 identical pieces of this model must be made.
- Since the maximum size supported by the Silhouette Cameo 3 is 12 inch x 12 inch, I have to make 4 pieces, then arrange and glue them so that I have the 2 sets (bottom and top).
- Load the material into the machine.
- Adjust the parameters to:
- Depth: 8.
- Spedd: 5.
- Pessure: 10
- Pass: 1
- With everything configured, we click on send the job, wait a moment and download the product.
- To create the joined layers and have the product assembled:
- Place the first layer which is the thermal vinyl with the shiny side facing in and the plastic cover facing out.
- Place the bottom layer of baking paper.
- Place the top layer of baking paper.
- Lay the second layer of thermal vinyl with the shiny side facing out and the plastic cover facing in.
- We place a layer of baking paper as a base and cover between the surface of the griddle or machine and our product.
- We place the piece obtained from point 1 to 4.
- We remove the plastic cover from the piece and proceed to iron at a temperature of 120 grades for an approximate period of 15 minutes.
- We review the final result and if we find any irregularity, we proceed to technically pass a clothes iron over our product to consolidate the adhesion.
Inconveniences - Delays
Also track the InflatableDesigner software, it is shown in the presentation, but my efforts are not registered in my own account, nor by the request of support to the tutor nor in writing to the person who in theory could access this program in another Academy, as shown on their website. This had been an invaluable resource, each time combining 2D functionality with the physical behavior of the product; to be able to visualize the behavior of the model is priceless.
We have not yet been able to access the FabLab, nor the corresponding equipment to carry out the physical practices, which in my case are very necessary since it is not the same as simulating situations with characteristics given by default.
In addition to the above, we have been greatly affected by the quarantine decreed by COVID-19.