Project #1
In Quarantine
I did want to point out a few primary sources of inspiration. Years ago, I found Dinara Kasko's work on Ultimaker and then again on Instagram. Also, Tree Marie Soapwork's Youtube video was what motivated me to use soap as my casting substrate.
Since I knew this week was coming, I brought some Smooth On products with me as I was packing up from the lab. I have been excited about this week because I really dont like the versatility of mold making. The first thing I started to think about was what I wanted my final product to be like. I ended up liking the idea of have a mold master that I could use for a vareity of things... maybe even one for edible casts and another for non edible casts. From there, I decided to see what could be made with the materials and machines I have access to: somewhat functioning 3D Printer and two bottles of mold making stuff. After alof of googling, I decided it would be fun to try and make soap.
CAD Process
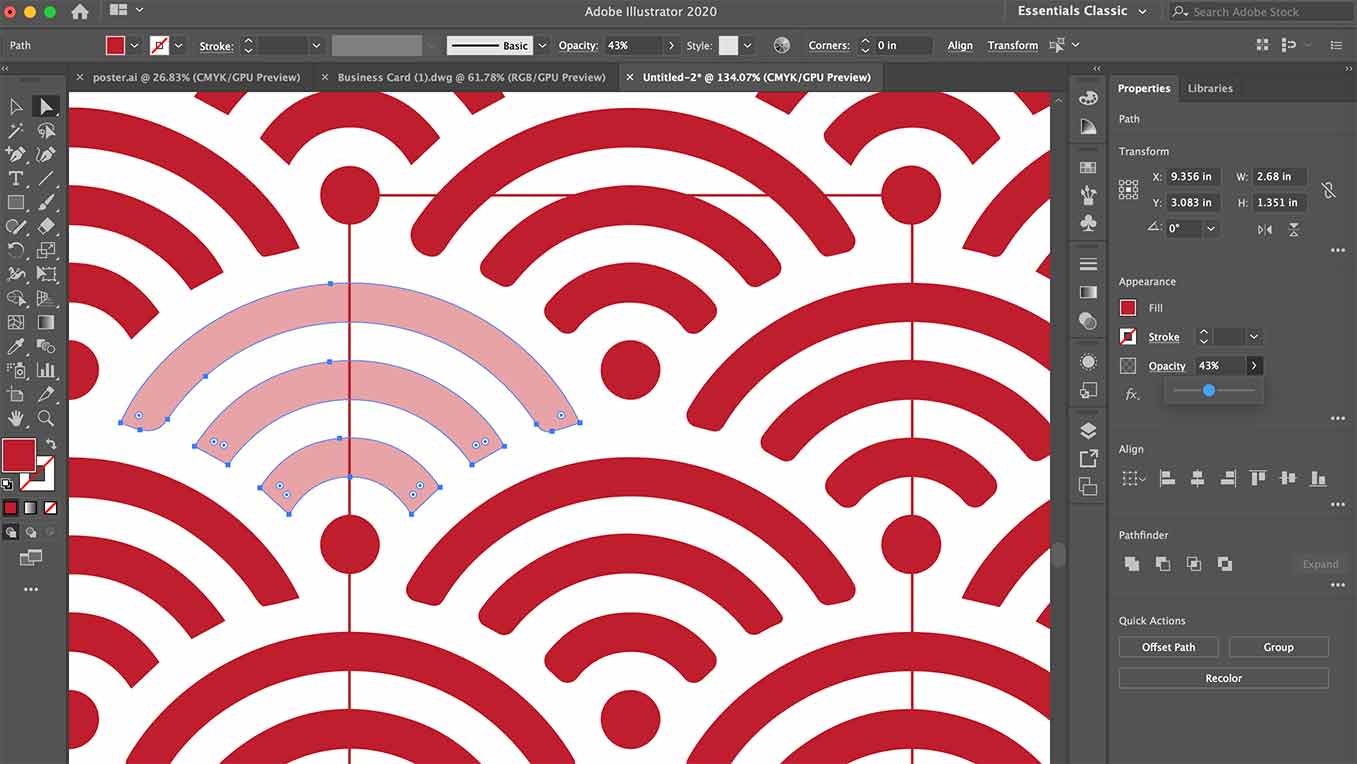
Seigaiha
I decided to use the Seigaiha pattern. I brough an existing jpeg into Ai and then did some line edting.
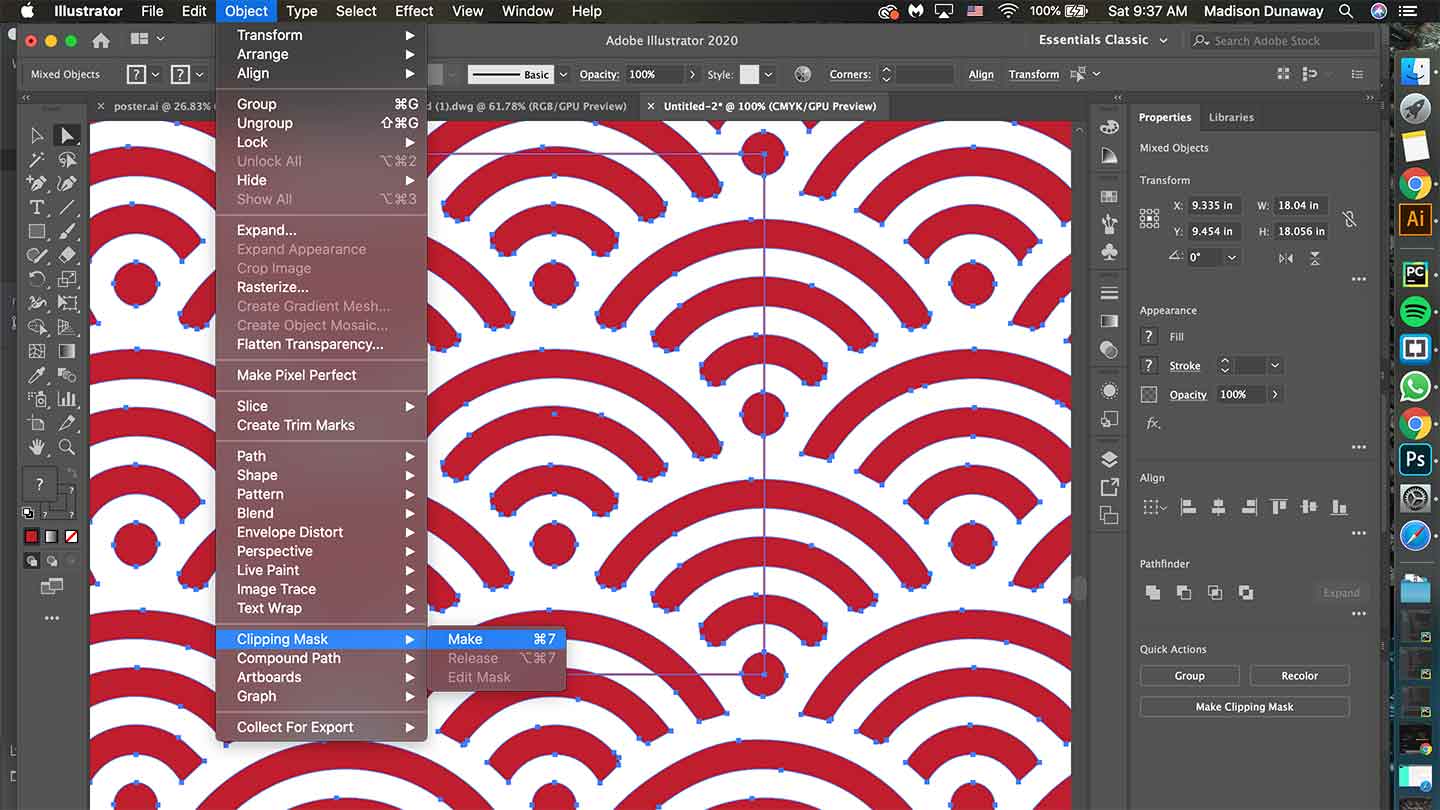
Making a Clipping Mask
This is the process of making this image into a swatch and then into a pattern I can kind of like a color. I will be able to apply it to other shapes.
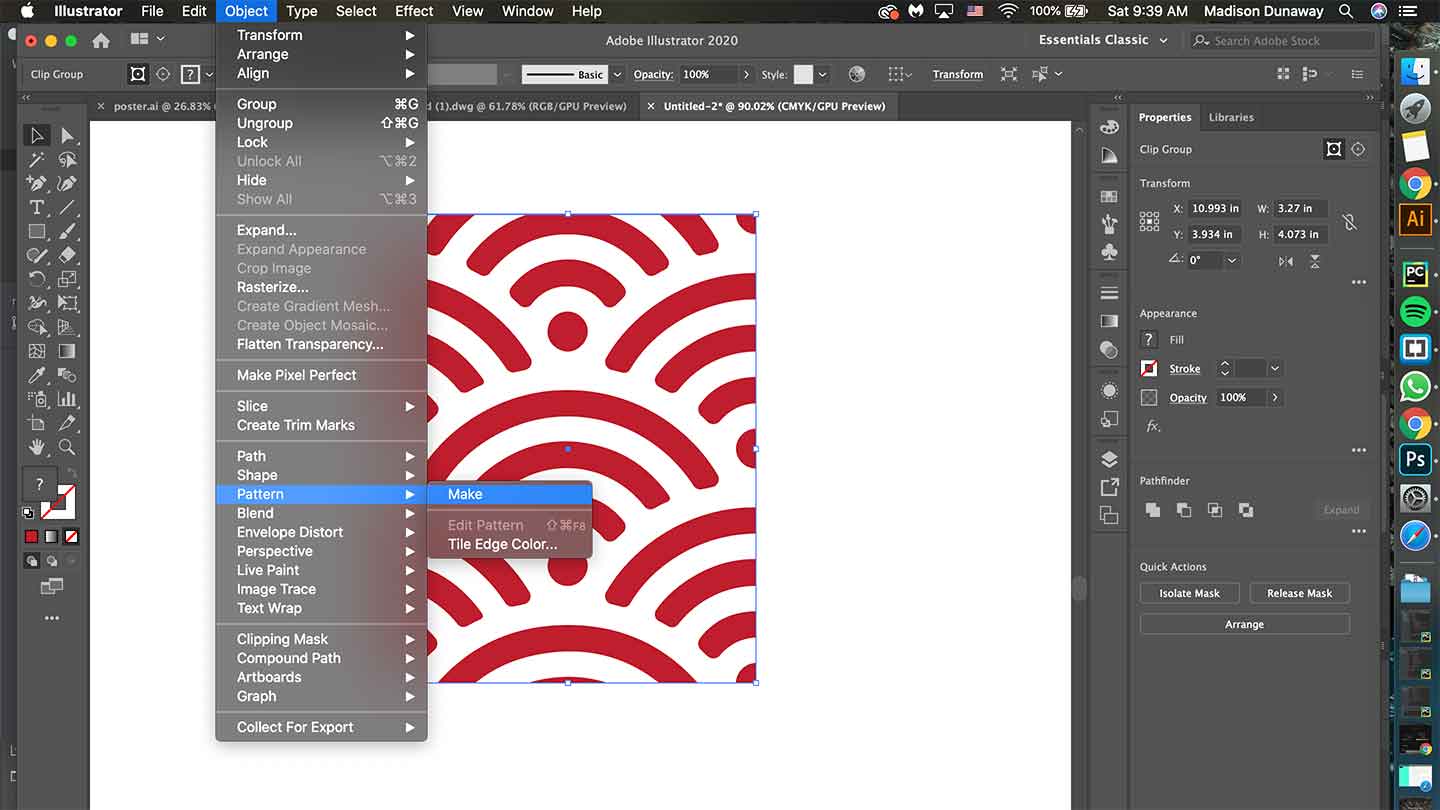
Making the Pattern
Now I am making the pattern.w3whas a good page about it.
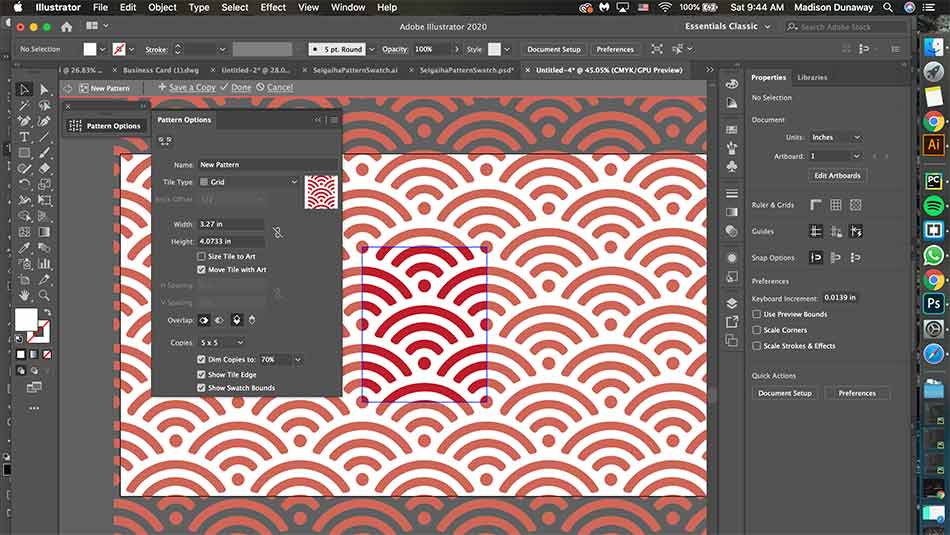
Pattern Swatch
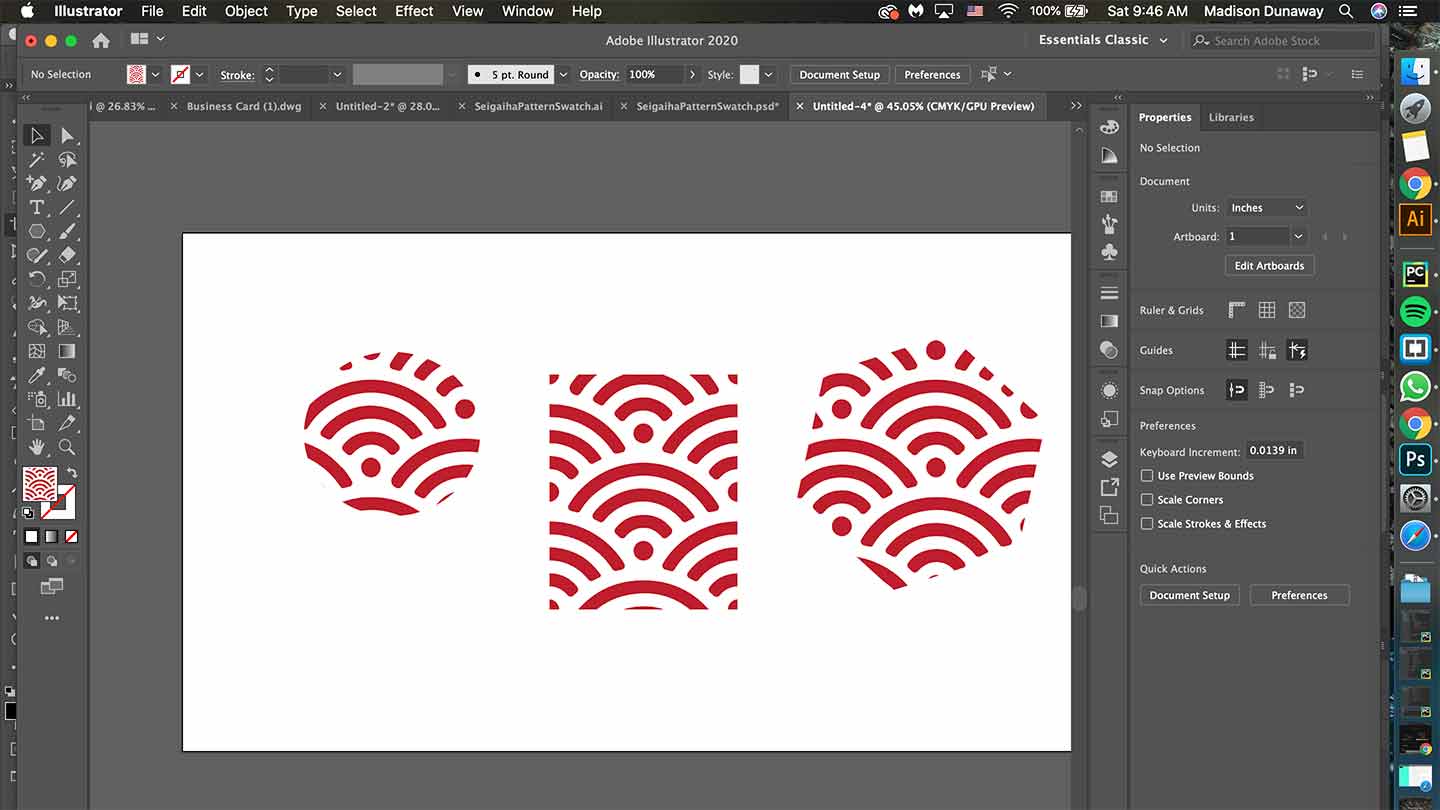
Apply to different shapes
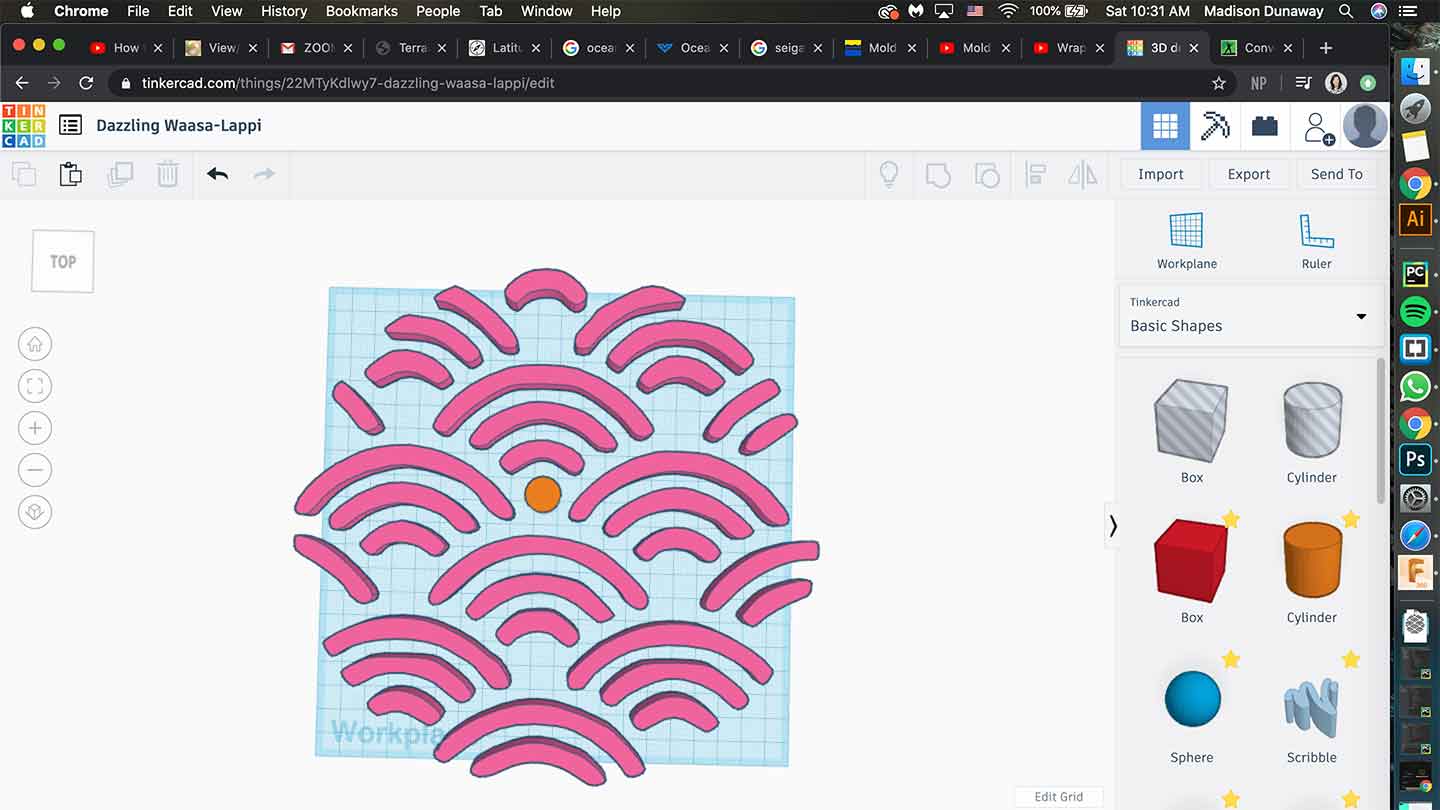
Import SVG to Tinkercad
For some reason, the dots did not import... so I just added them back.
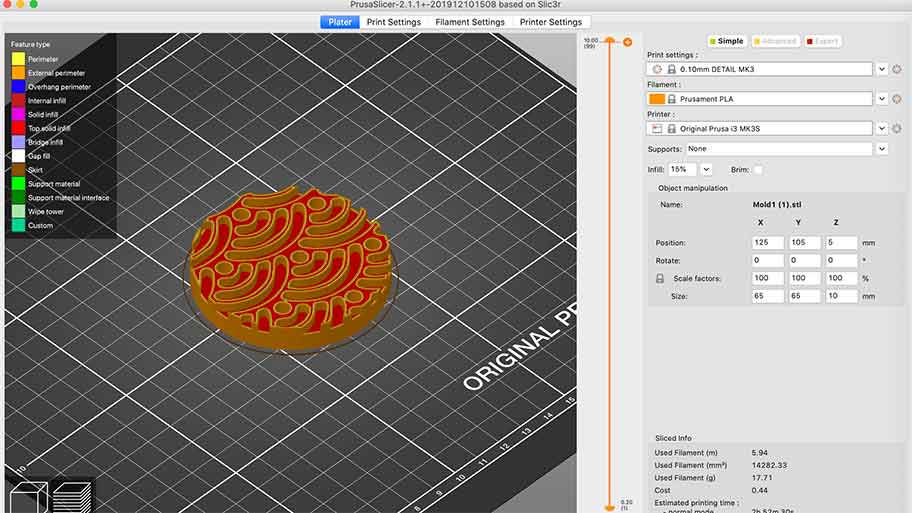
Prusa Slicr
I decided to use high detail since I don't want it to be very pourous. Not sure if it's worth the extra time, but we shall see!
Printing time...

I began the print and ended up having to adjust the model a few times.
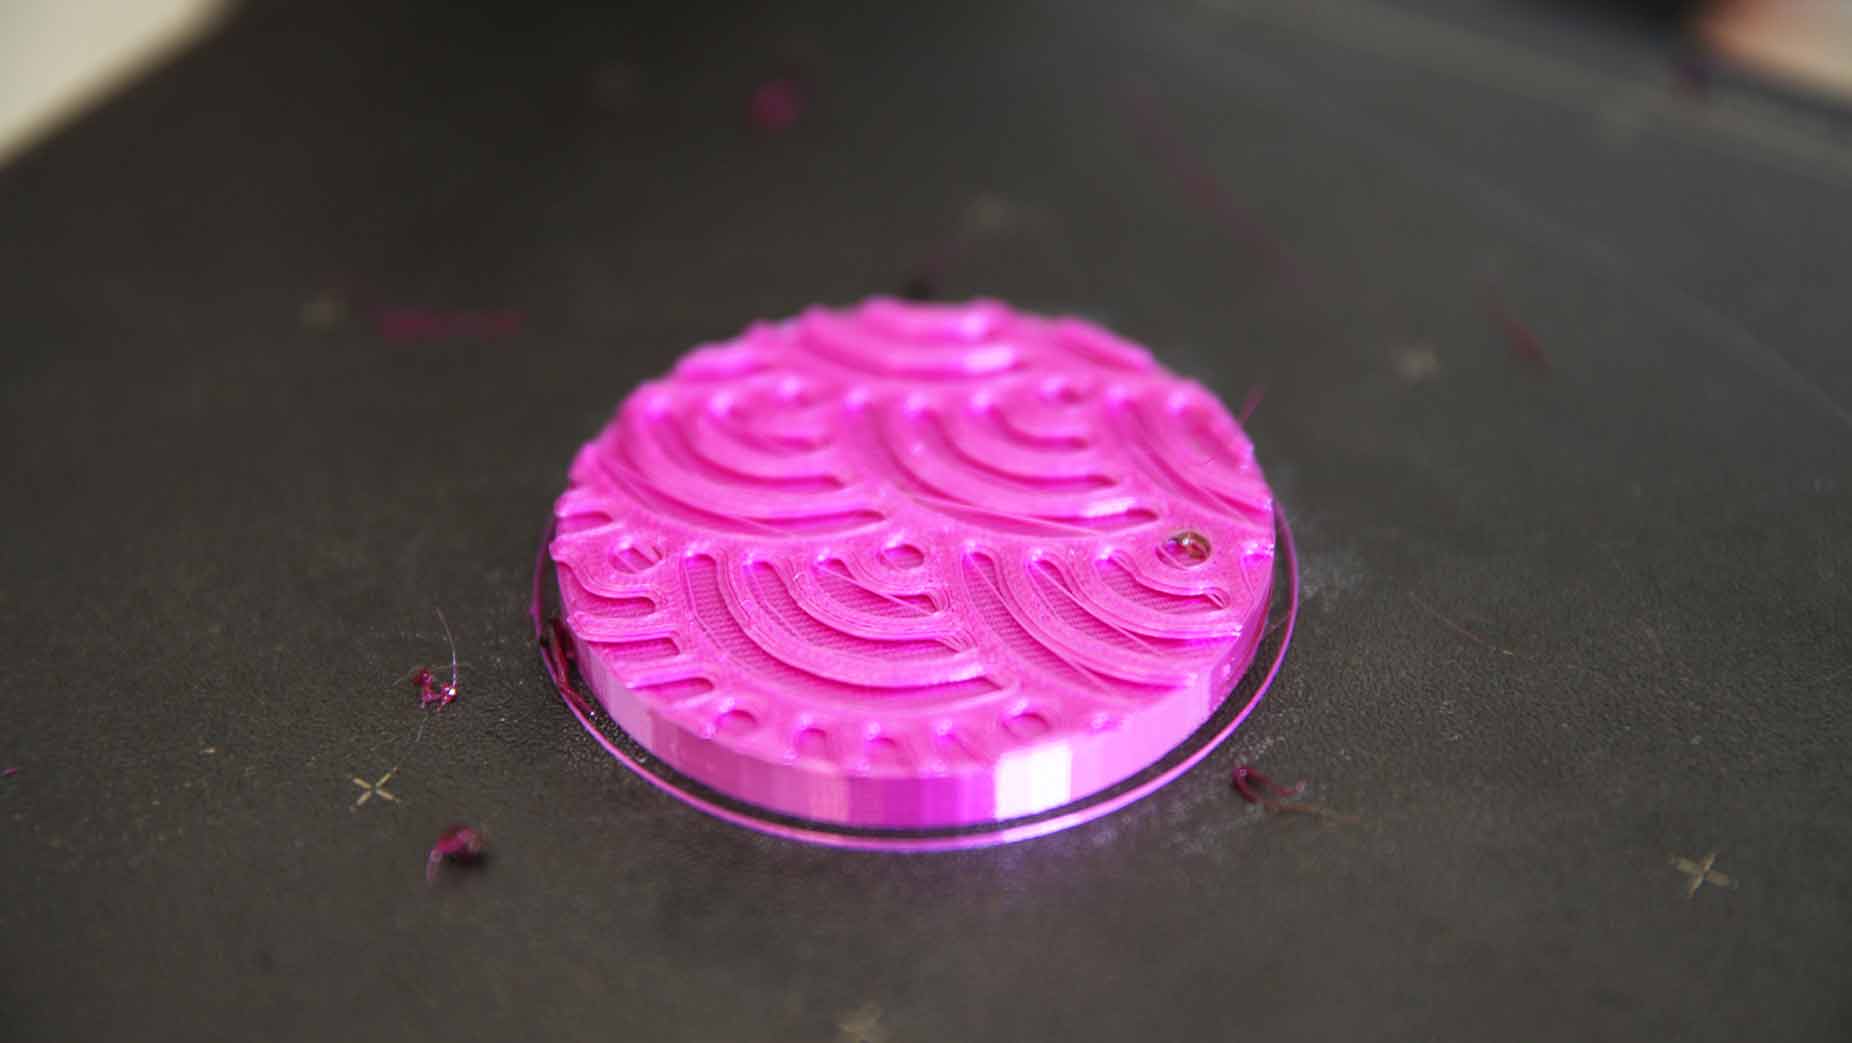
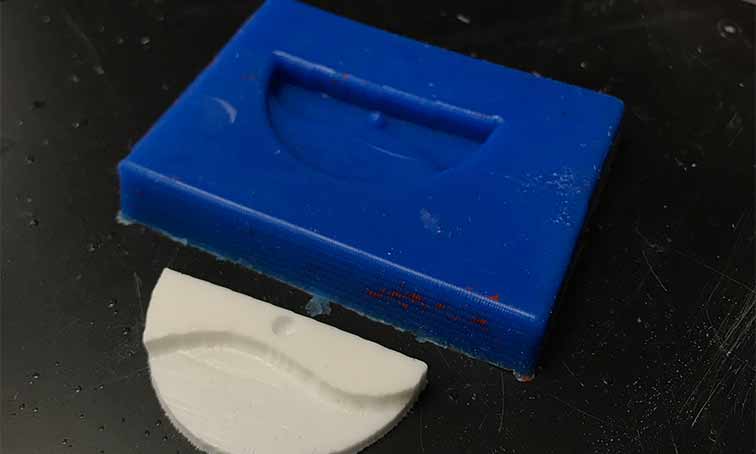
I ended up going with this version for my first test mold making process.
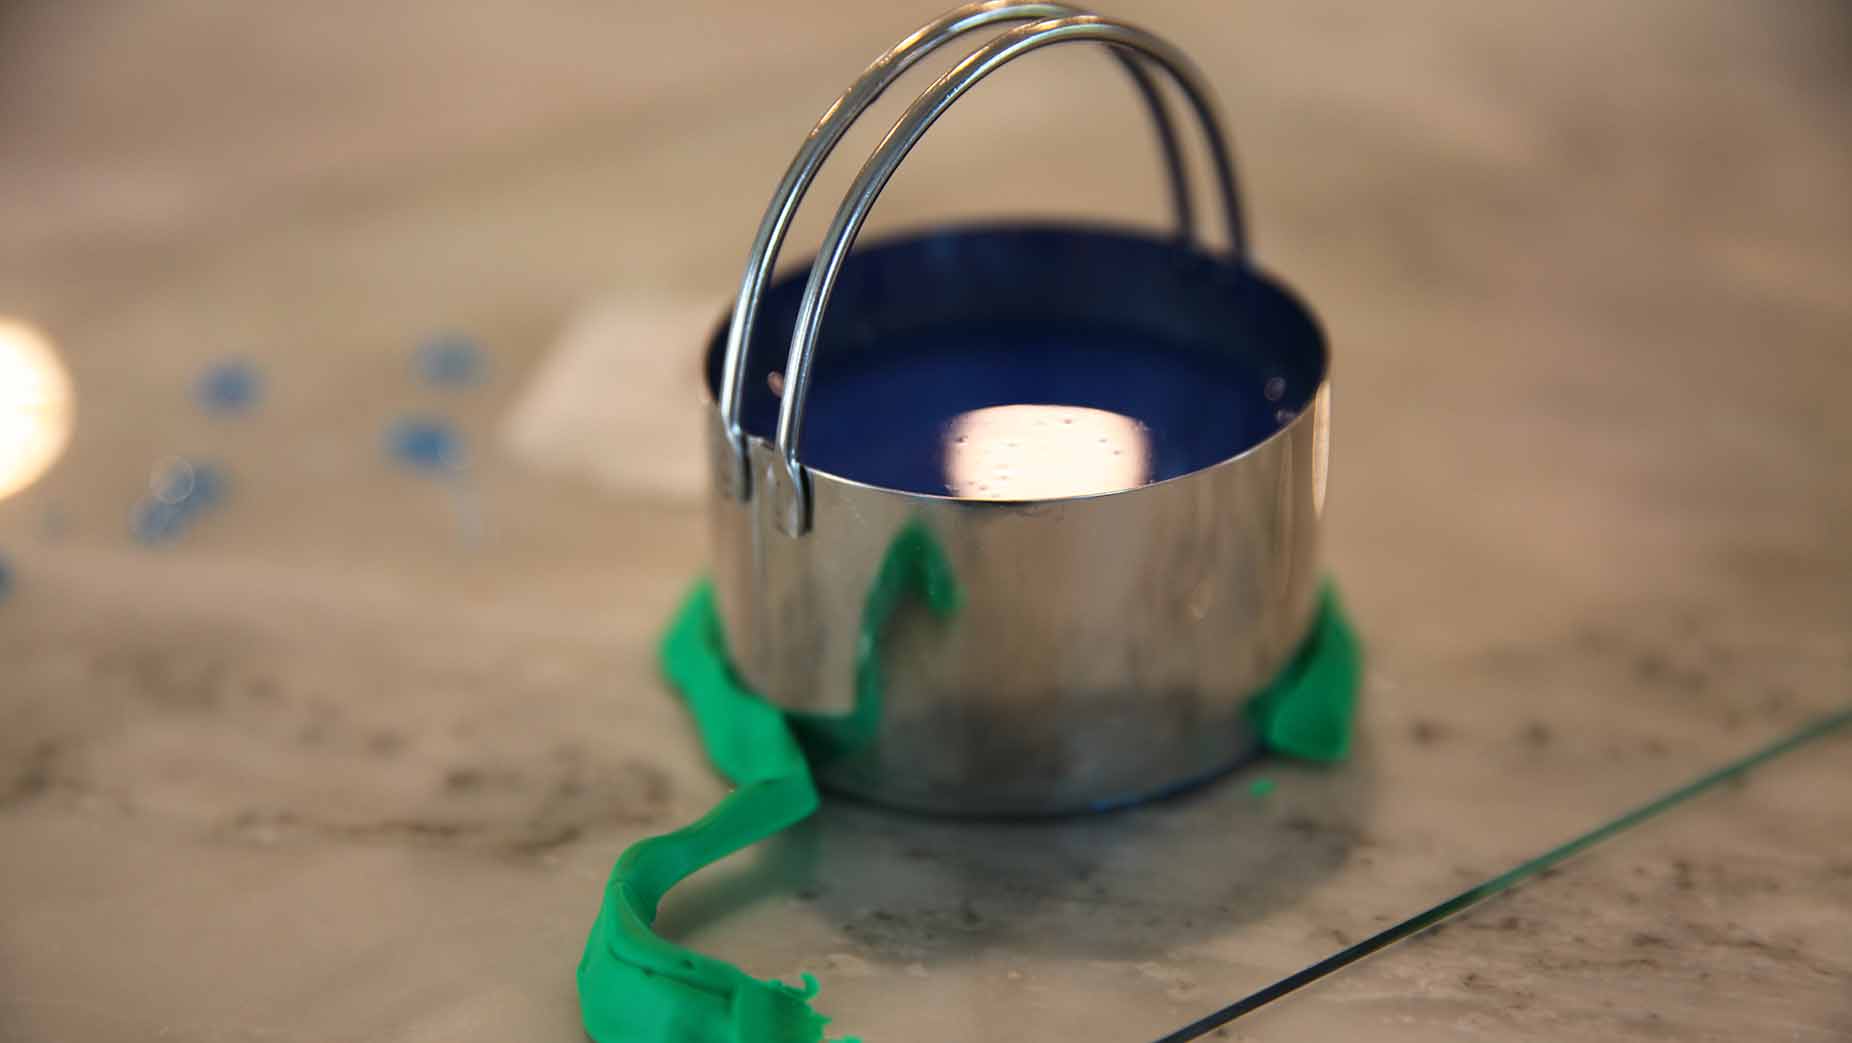
Setting up the mold
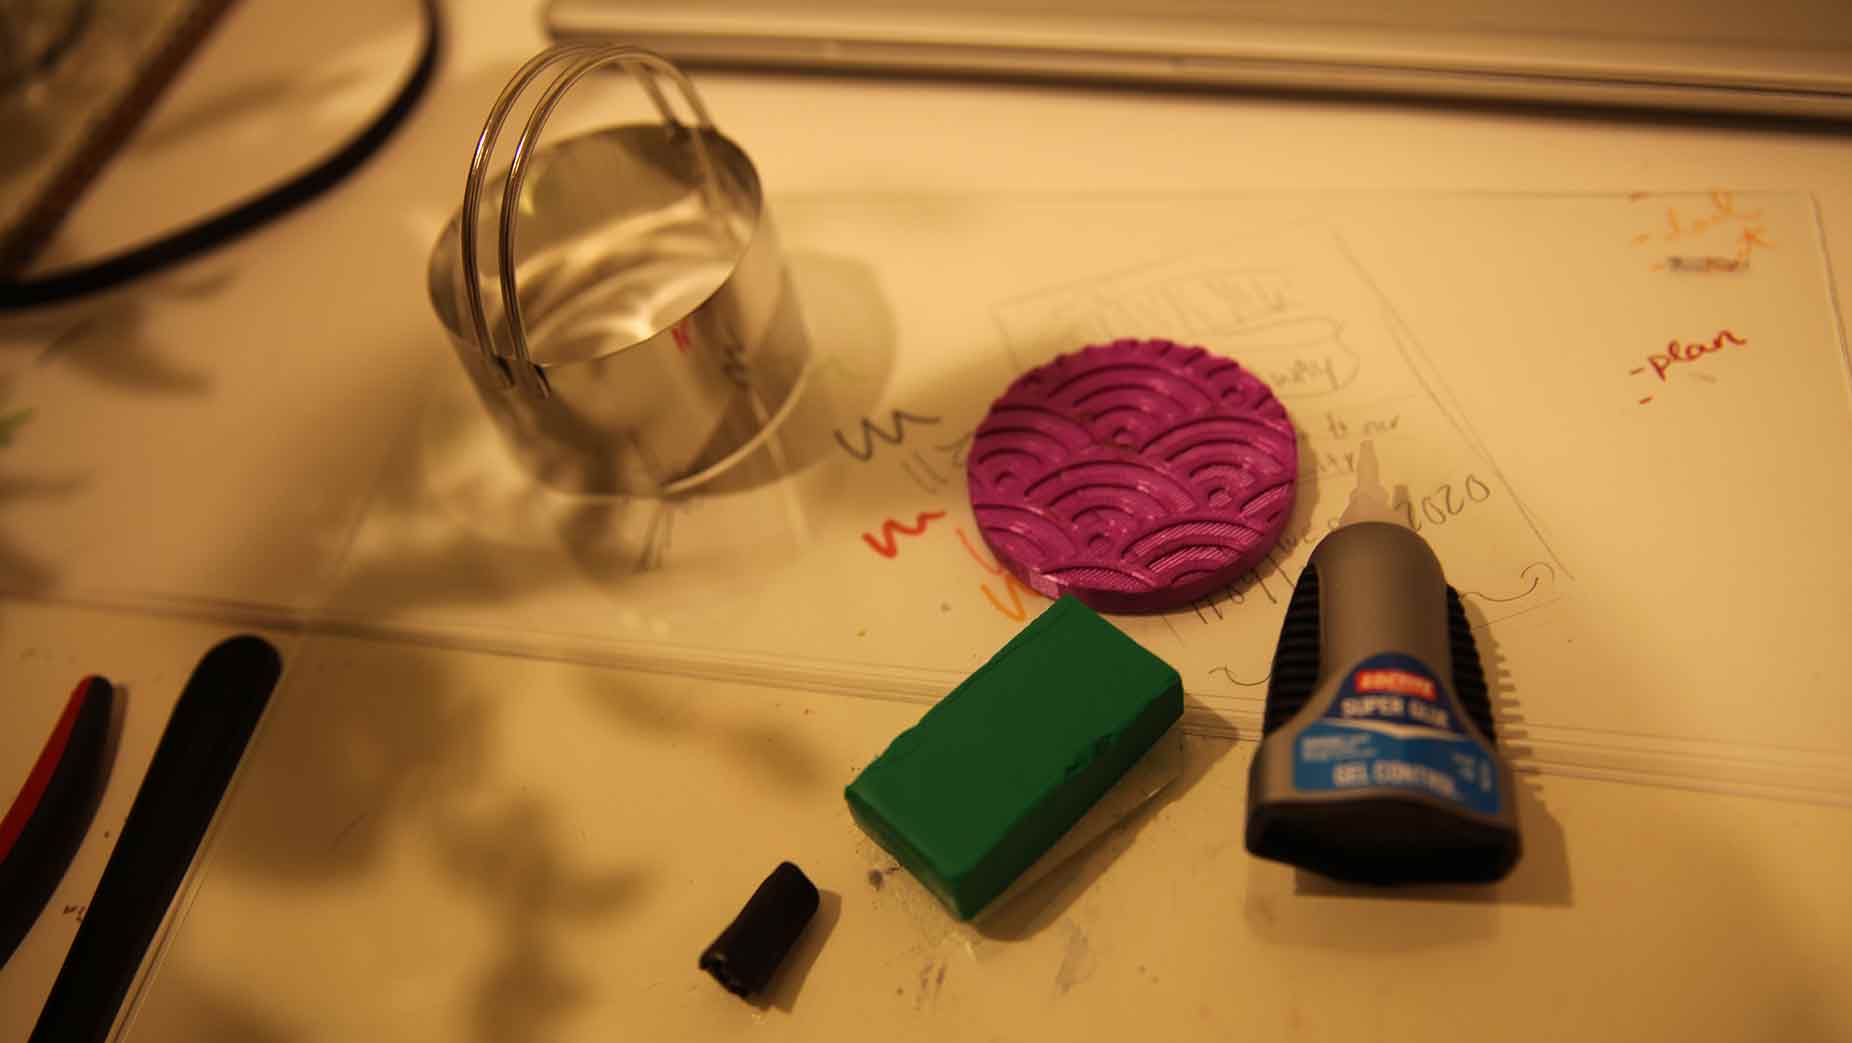
A few things to note. When I modeled the printed disk, I knew I would use the bisquit cutter to hold the silicone. Not sure what the proper terminology is. I also watched a few videos online where model clay is used to hold in the liquid silicone. I also used a scrap sheet of glass I found to be the "base" and superglued the disk to the glass.
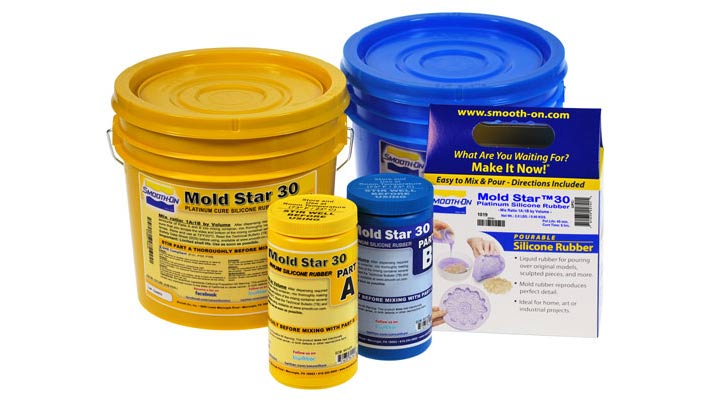
Then the mixing began! Mold Star 30 is what I had avaliable and it worked really well. Stir it well and slowly! I watched alot of Youtube videos in preparation about sitrring and pouring techniques.
Now the waiting began...
Then I made my mom cinnammon rolls for Mother's Day :D

After alot of wiggling and pulling, it realeased and it turned out really well!!
Next step...
Once I get the rest of my candle making supplies in, I hope to do one small test. I am waiting on the lye. Then I will wait until I have access to a CNC to do the final soap pour.
Psych!
A few key things... so you MUST use a subtractively created mold (the three-ish process version) for this week, so new idea folks! We're making some earrings.
Ideating + CAD
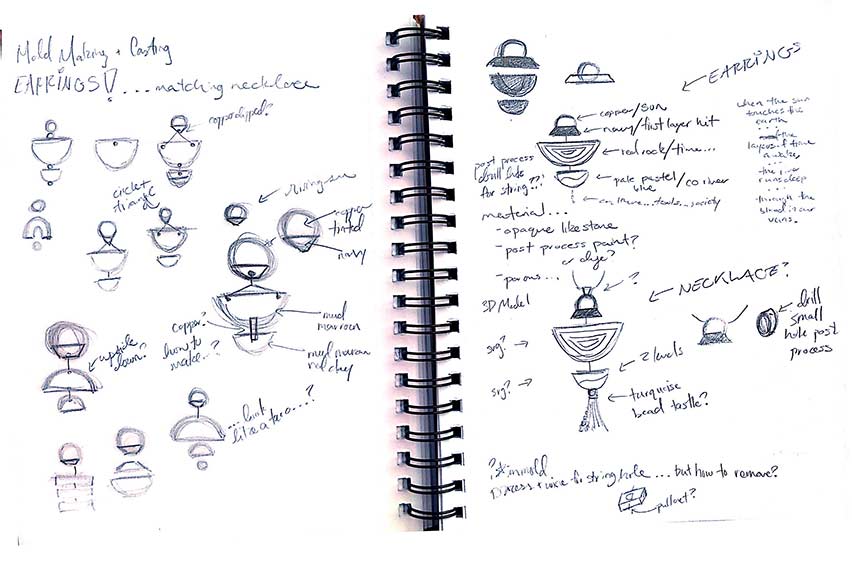
Some sketching and notes.
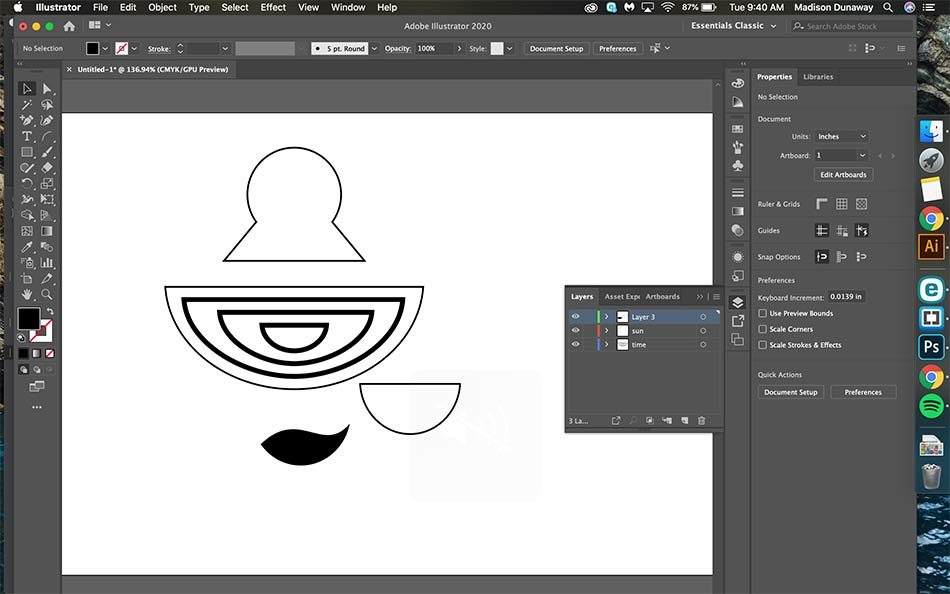
After getting the general idea down on paper, I designed it in Illustrator.
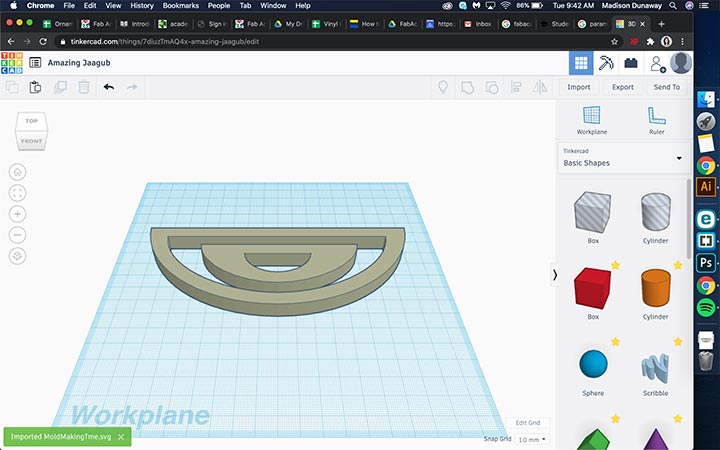
Then I started importing the Ai files as svg.'s into Tinkercad.
More 3D modeling...
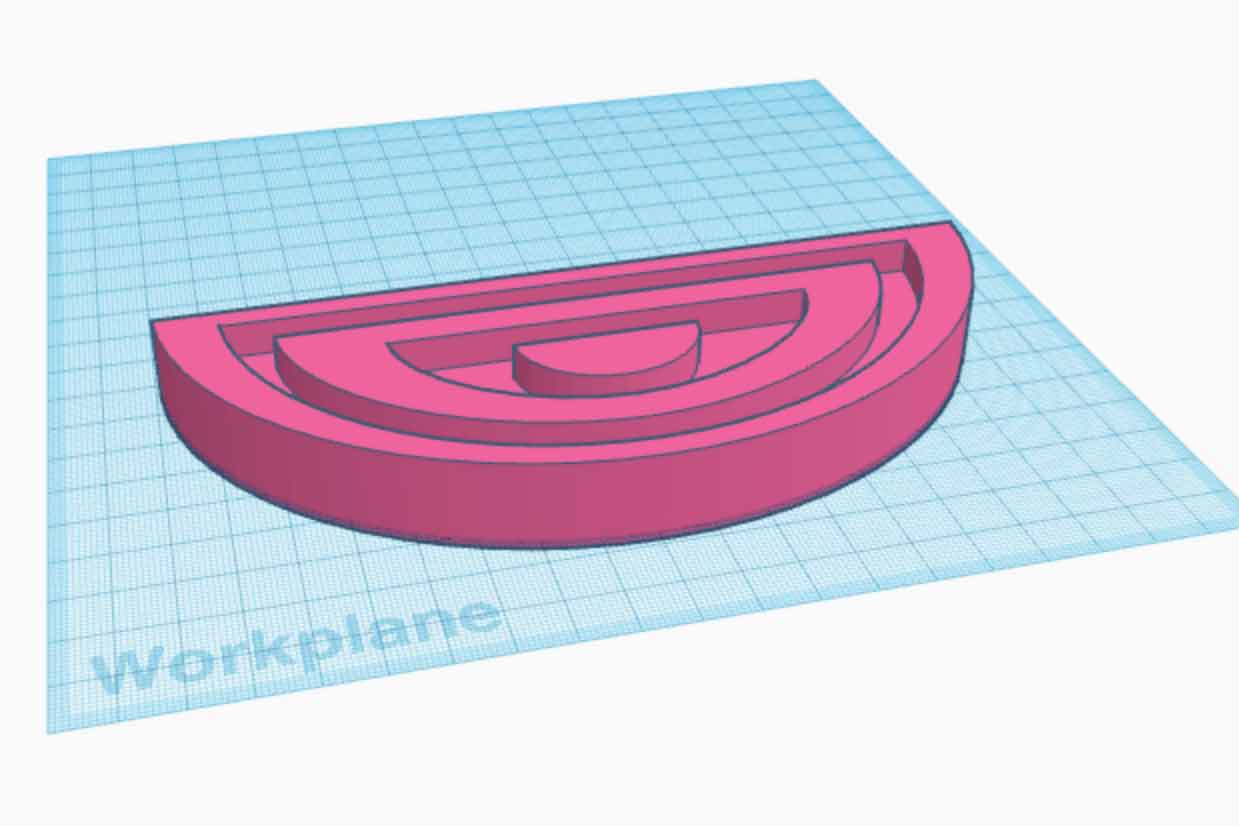
One component kinda done!
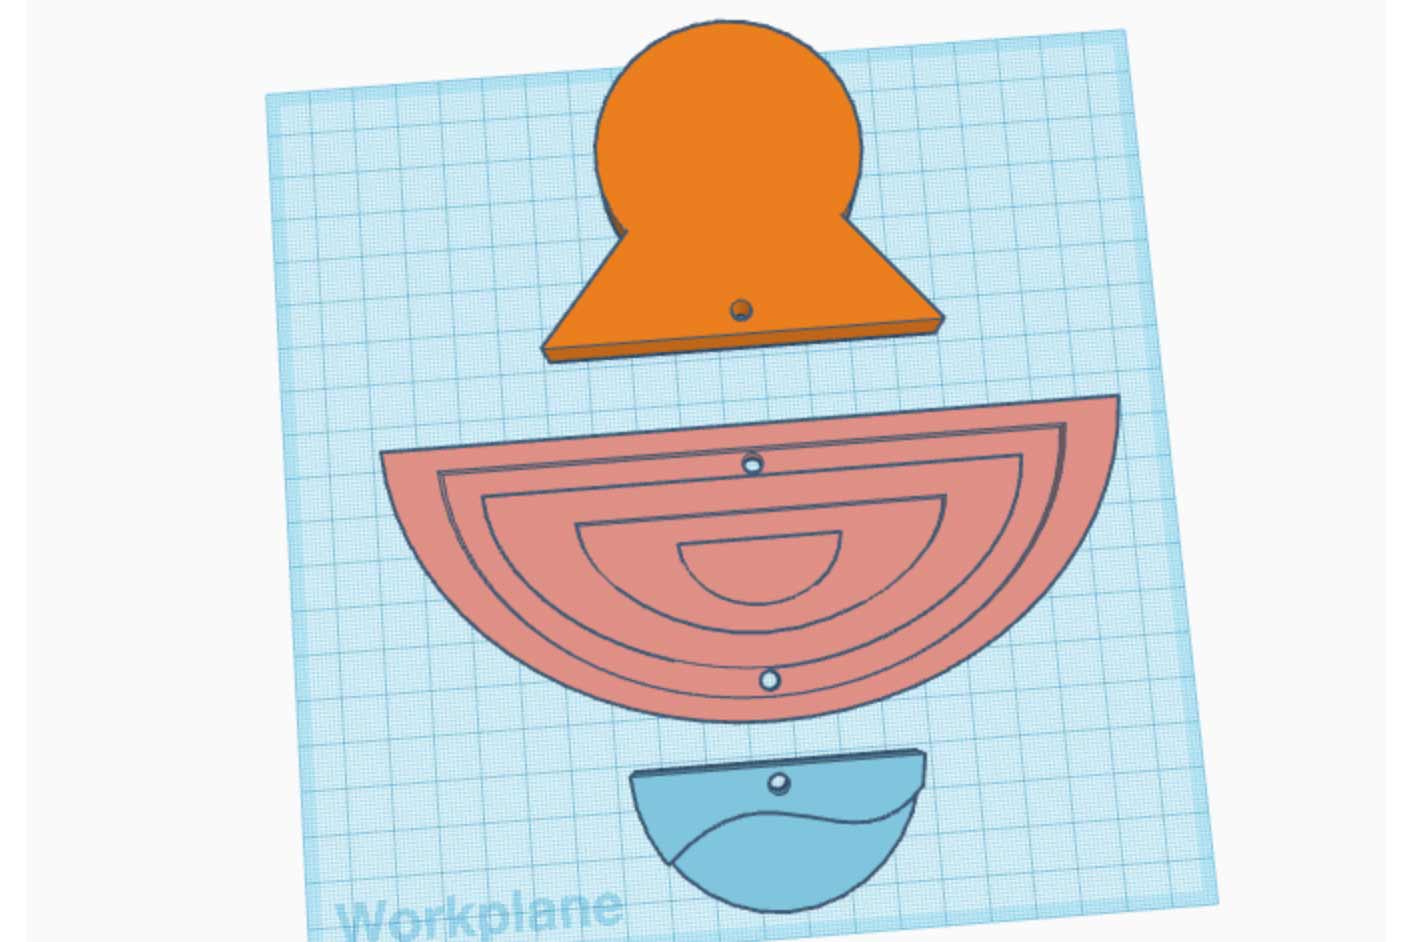
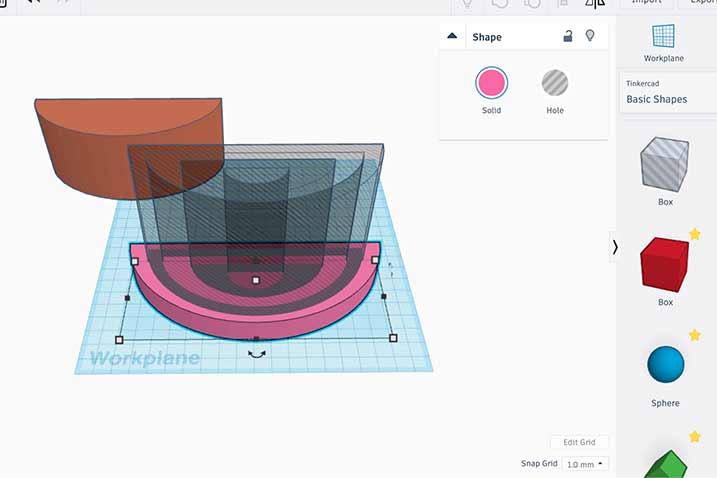
And the rest! With hopefully big enough holes for the wiring.
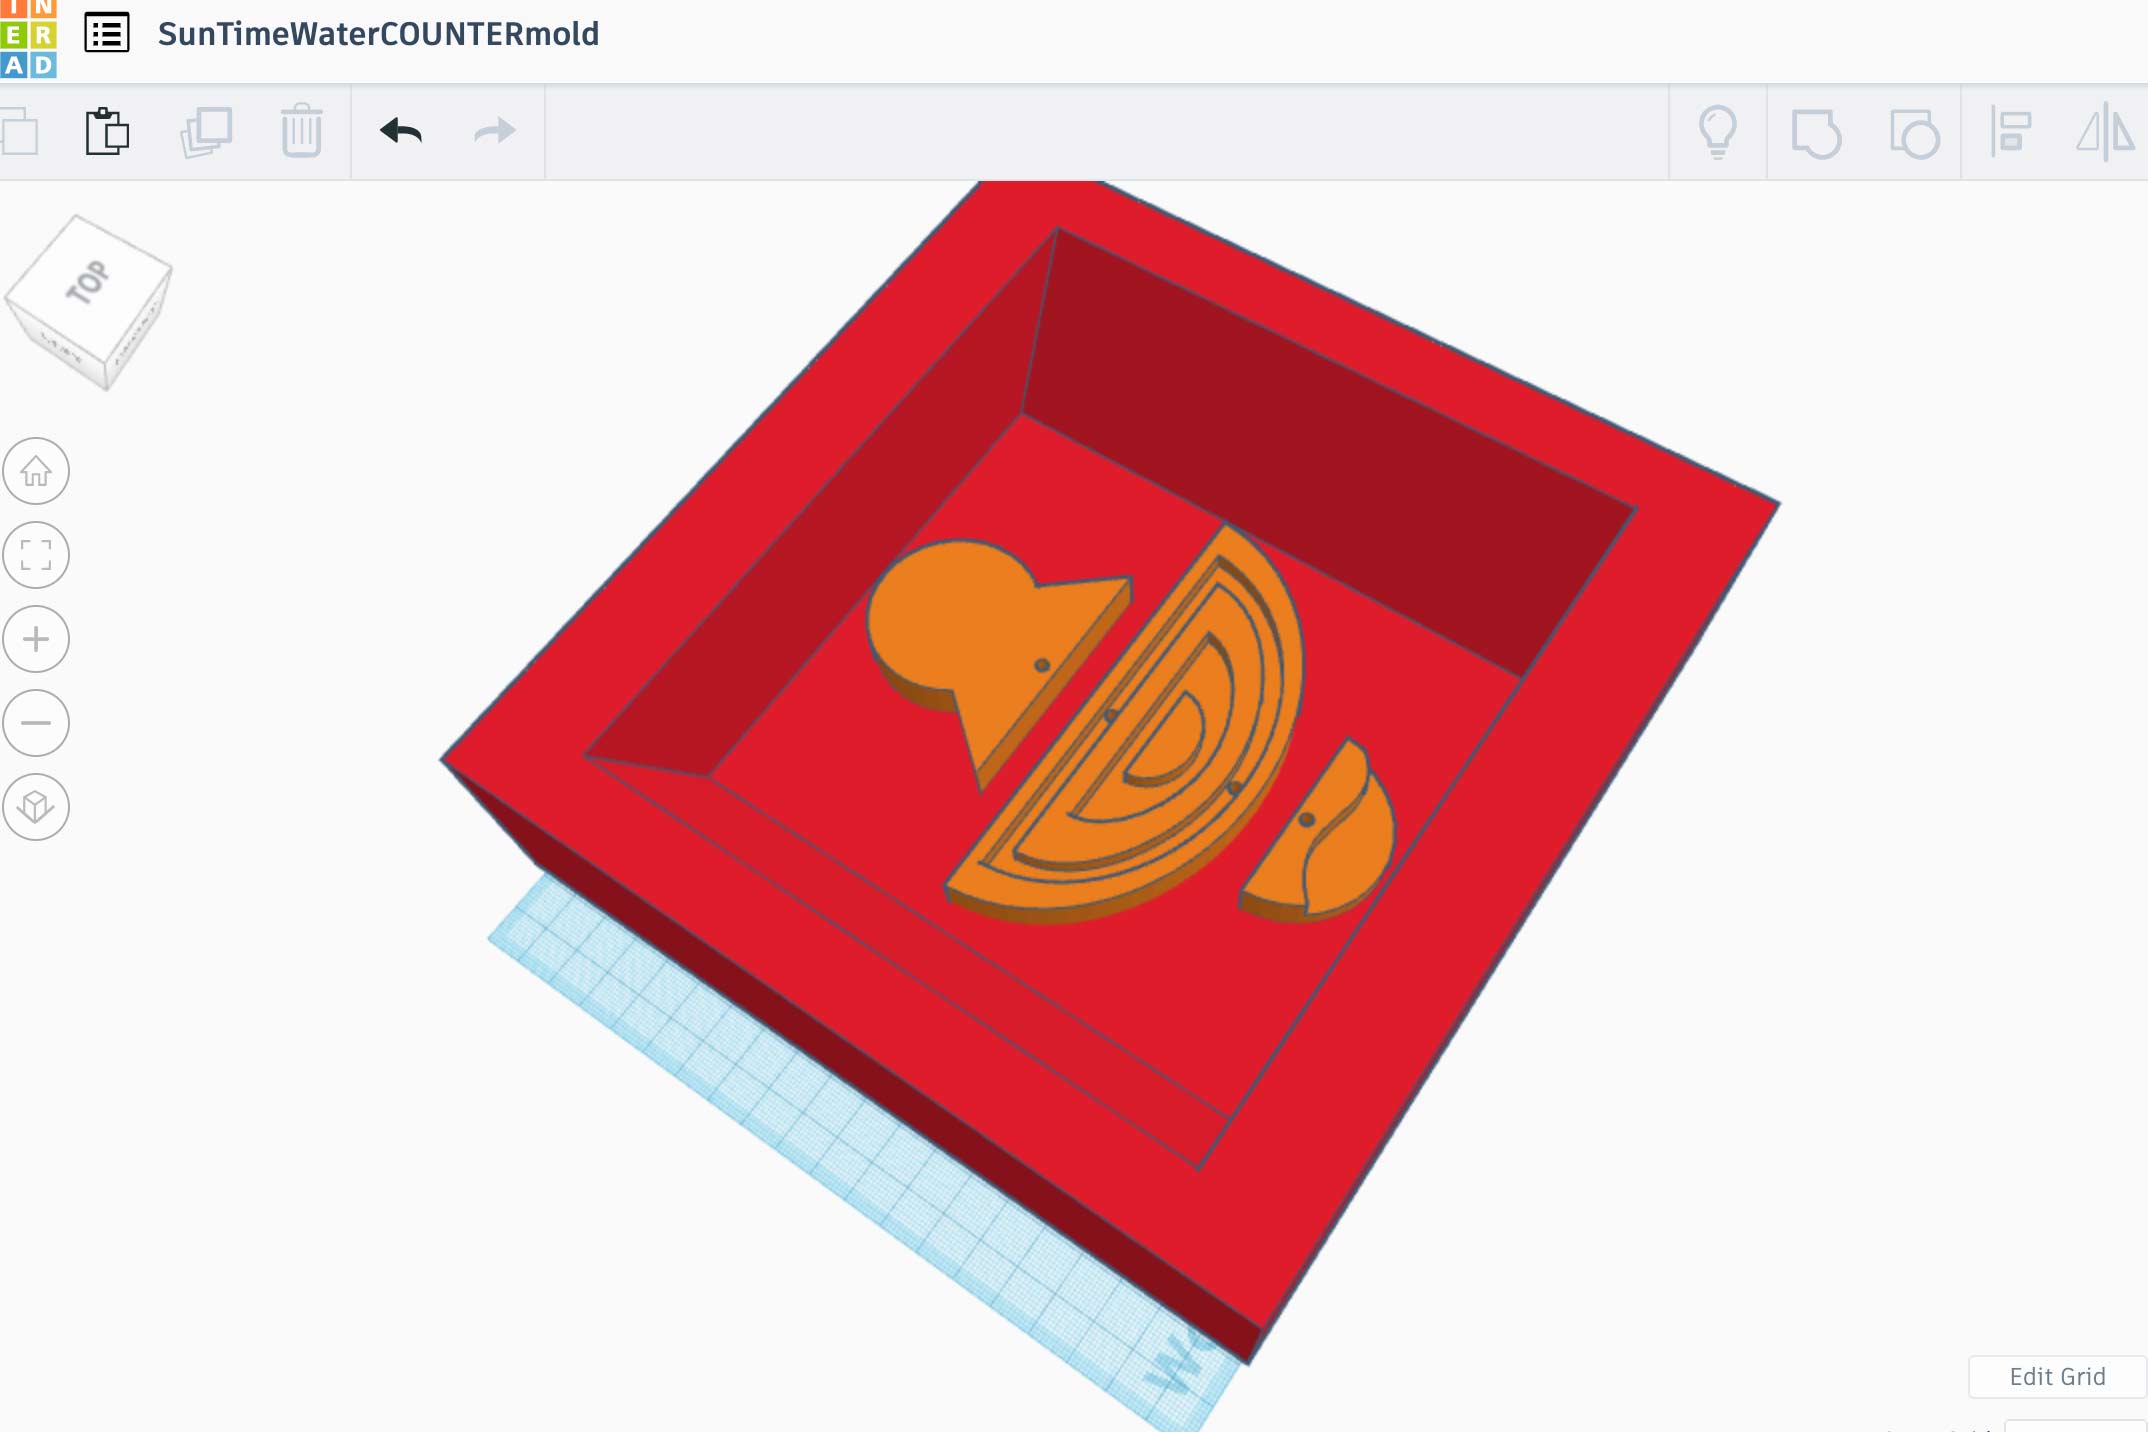
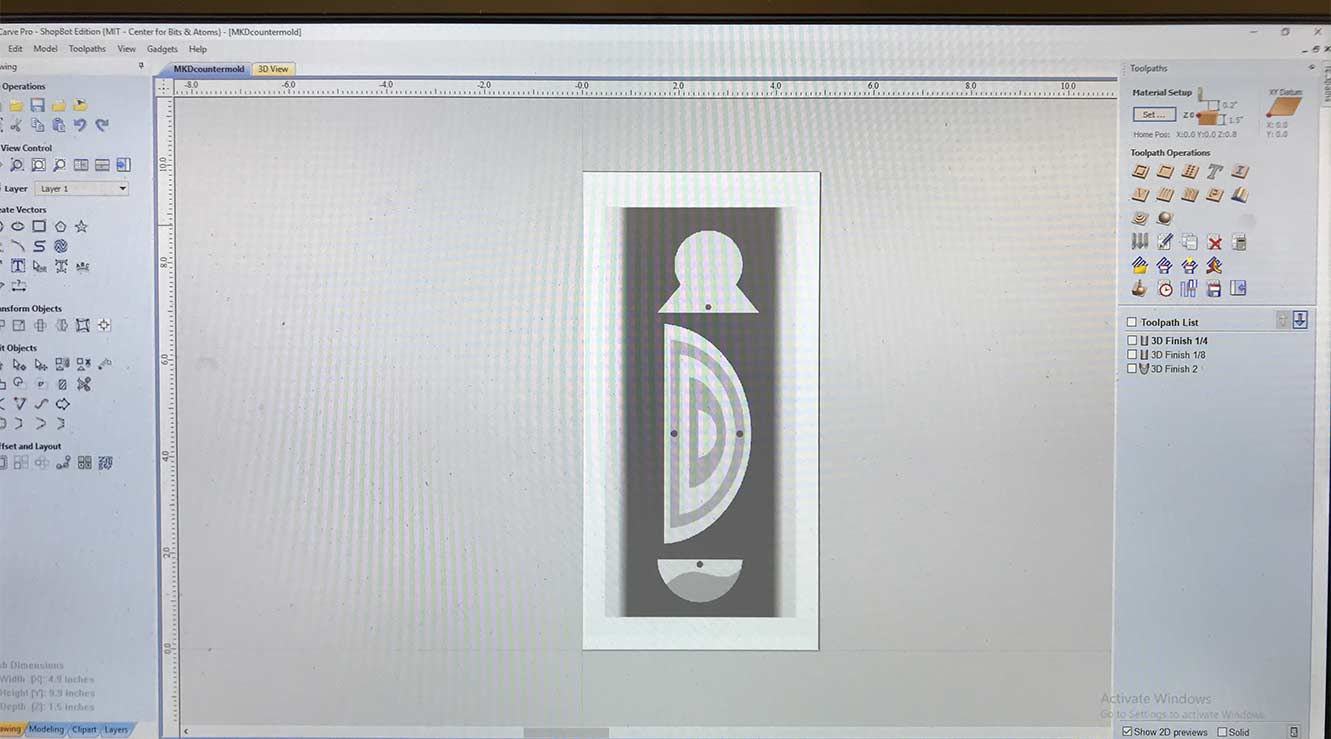
This is the counter mold.
I started trying to visualize how this wall all going to work out...
CAM

I looked into trying to do the CAM in Fusion 360... though I was unsure if that would work since I didn't model it there. Also, kinda bummed that Fusion 360 will no longer be free...
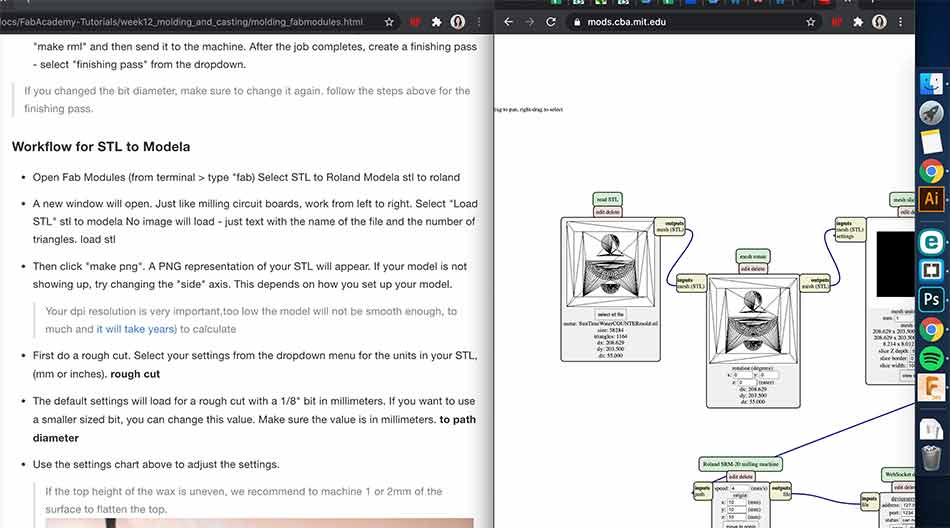
Then I checked out this tutorial and imported the .stl into Mods. This tutorial is very clear to not try and import an .STL but rather an .stl...
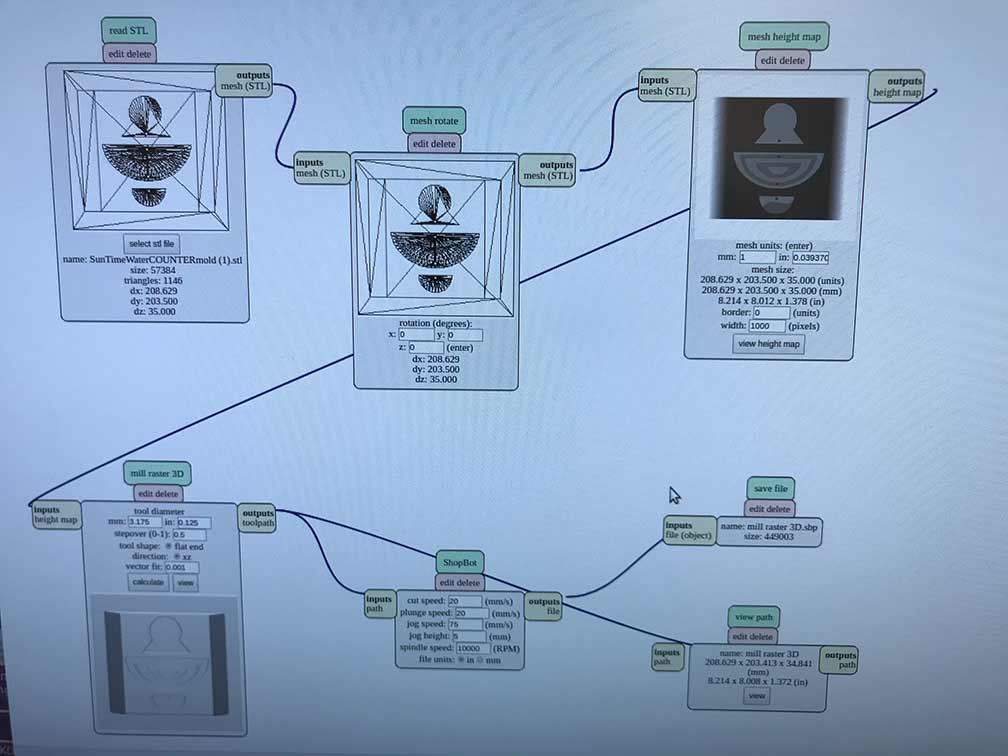
Mods being mods...
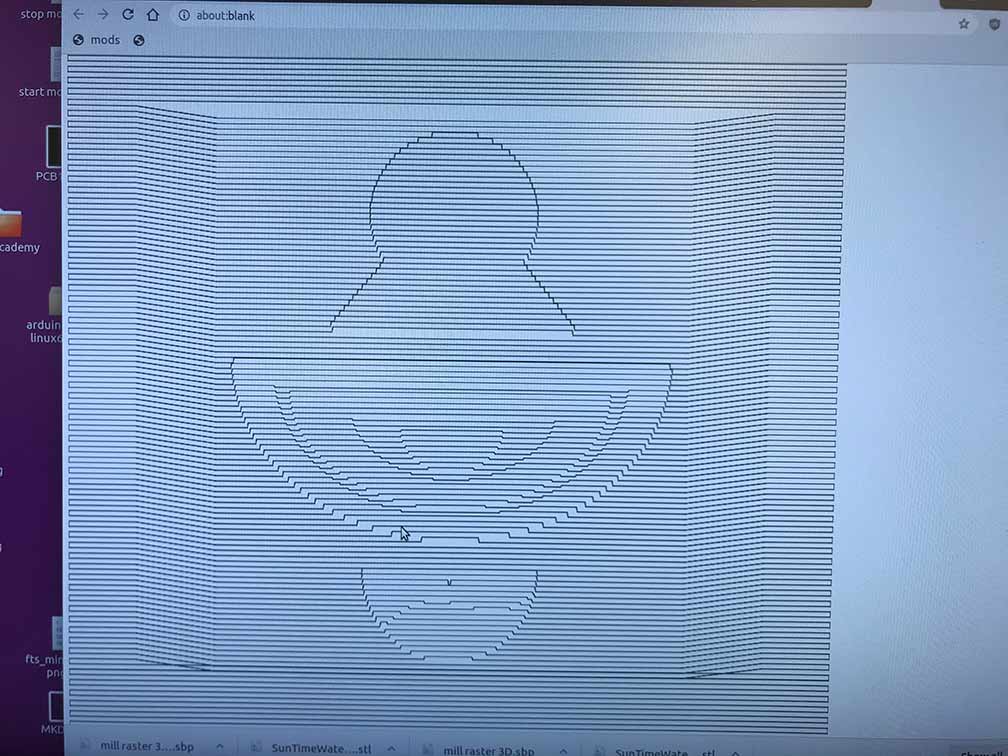
That looks reasonable?
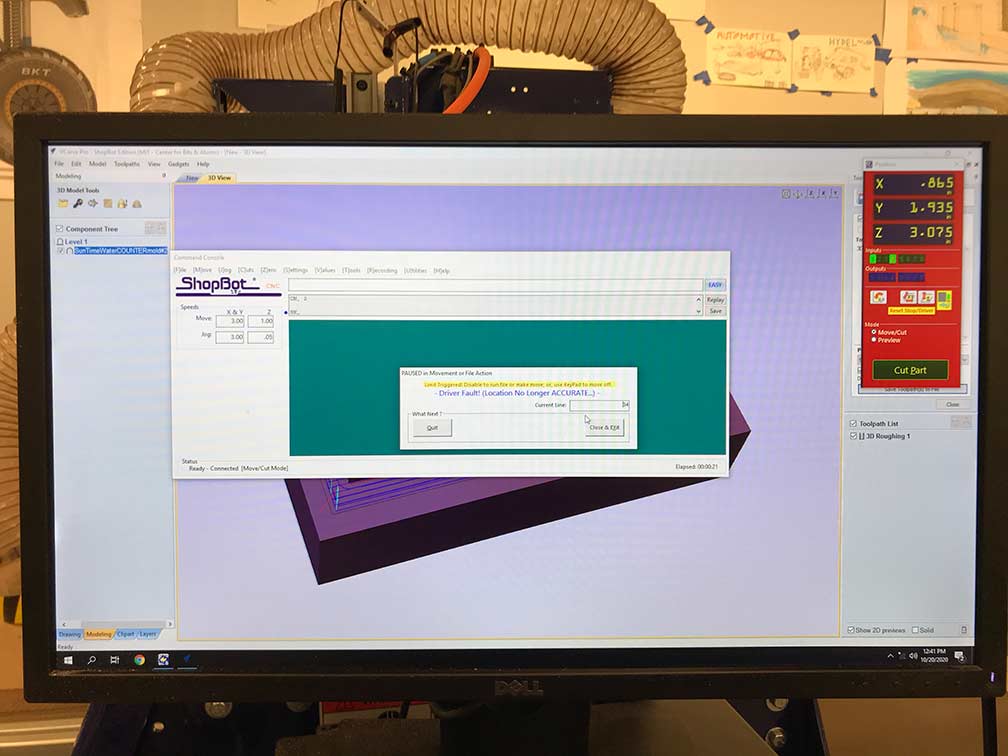
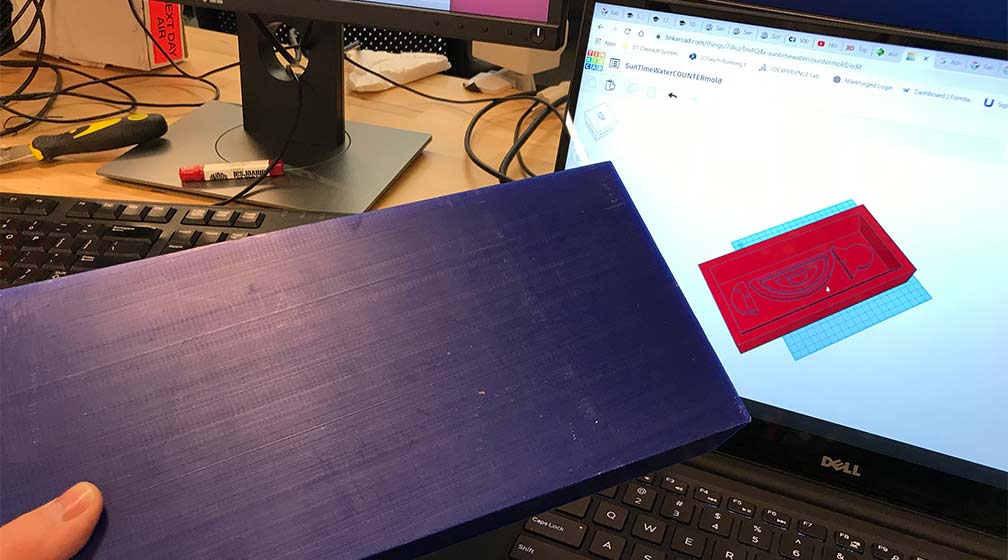
I decided to cut it on the ShopBot because the CAM was a bit easier and my block of machinable wax wouldn't fit in the Roland SRM20.
This is VCarve. You can easily import an STL... don't know why I didn't do this in the first place...
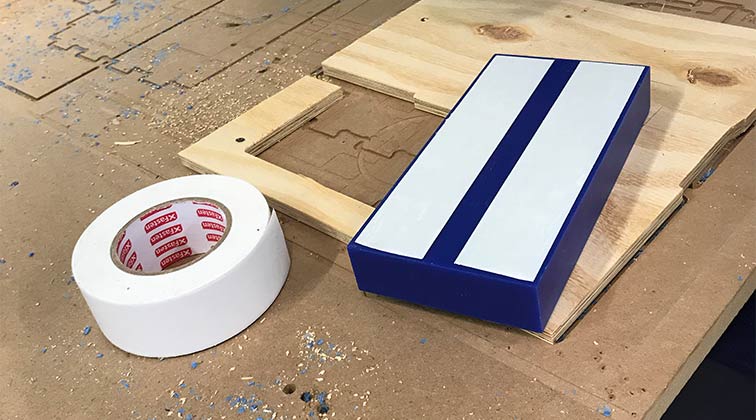
I used some scrap ply to make a cutout that my block could fit in so that the piece would be more secure. I then added double sided carpet tape. If there was suction applied to the CNC bed this wouldn't be neccessary but we don't have that set up yet.
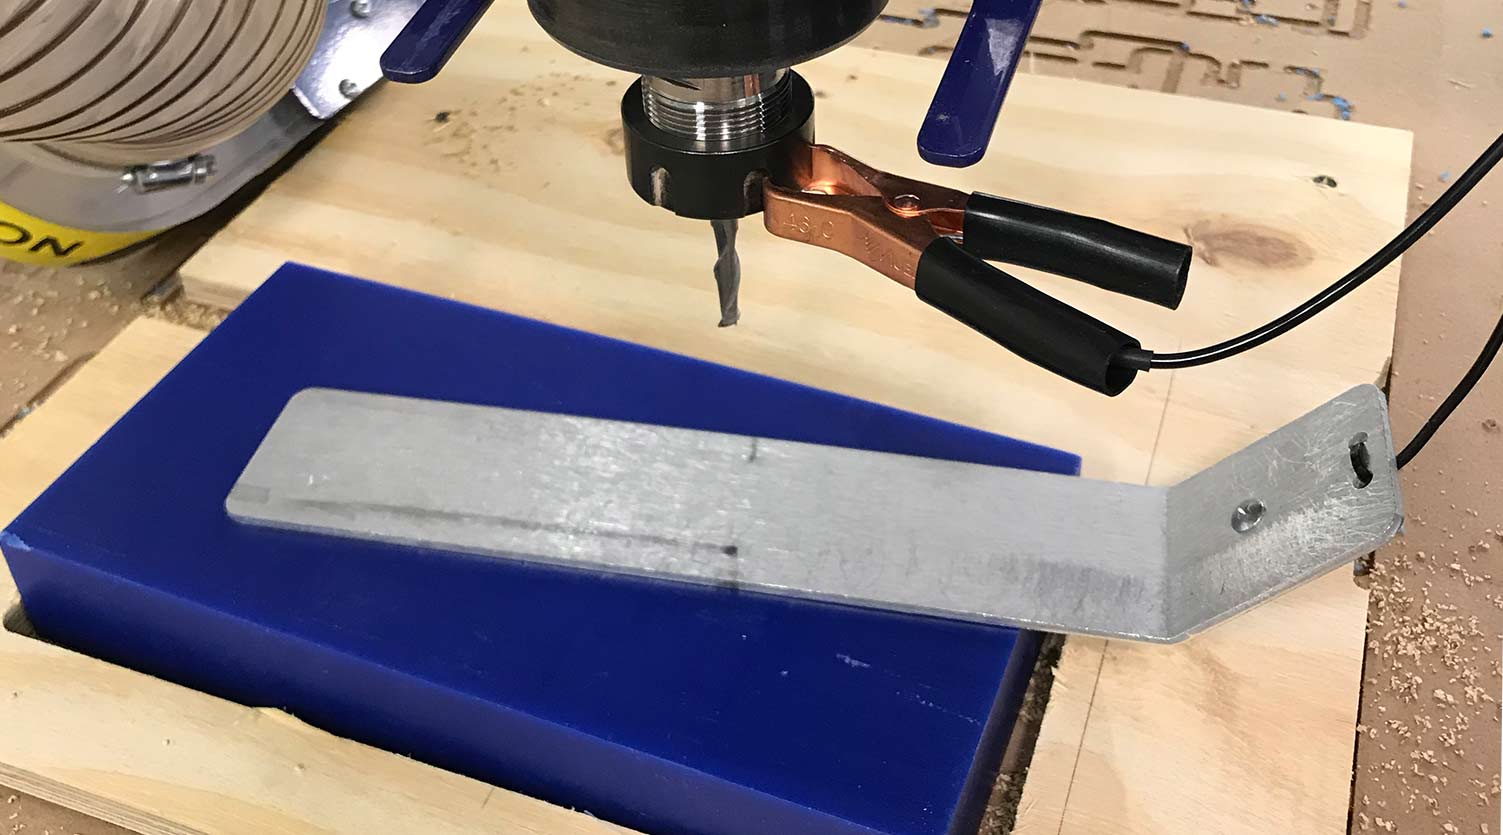
I then zeroed the Z axis.

D: So what happened here is after the first roughing and one hour into the final smoothing... the router head just dropped and dragged through the center... very odd and not really safe. I spoke with Greg and Spencer and ater some poking and proding, what we found is that when the Z upper limit was triggered the head dropped immediately... so this later happened many times when I was zero-ing the Z. This could be due to many things but one way to fix this would be to turn off the limits on the shopbot... though this isn't ideal since that means you could just crash the machine at any point. Needless to say... at about 8PM I lef the lab and regrouped.
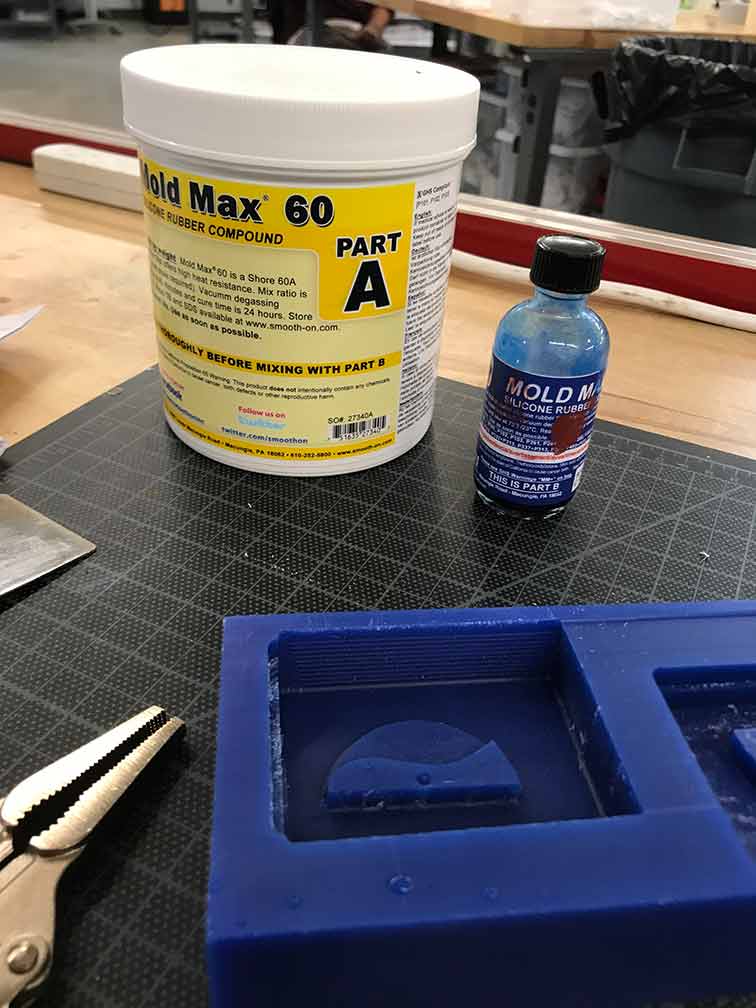
I decided to just do one of the original components and use a smaller block of wax. The machine actually did have the same error again... but you know what they! Third time is the charm... So, here we are. I decided to use the mold making material designed for high heat pours.
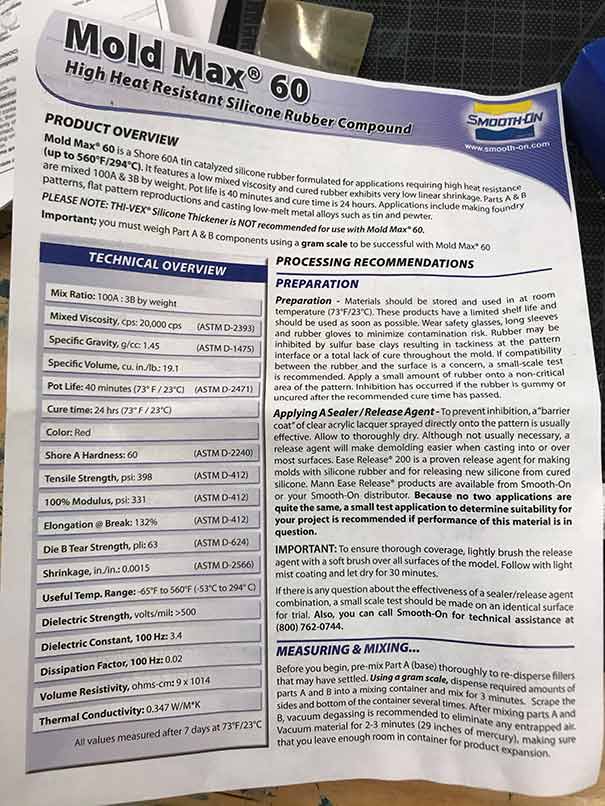
After mixing and doing an initial 2 minutes in the vacum chamber which helps to remove b
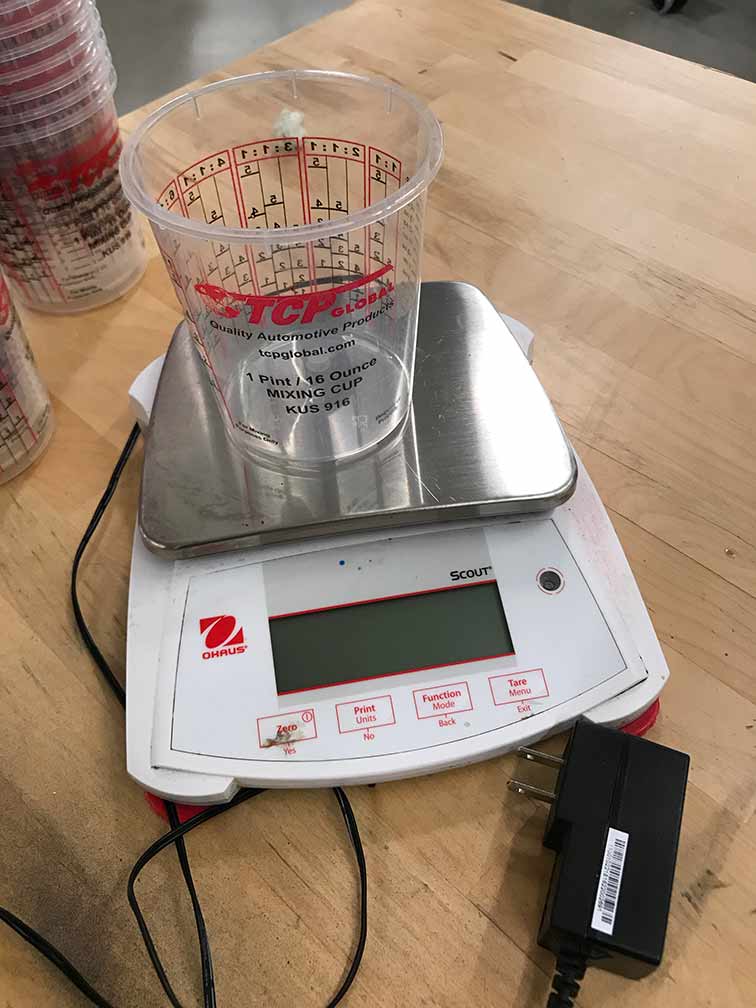
I started to gather the items I nedeed for measuring Part A and B.
Poured in the dangerous looking swampy stuff!
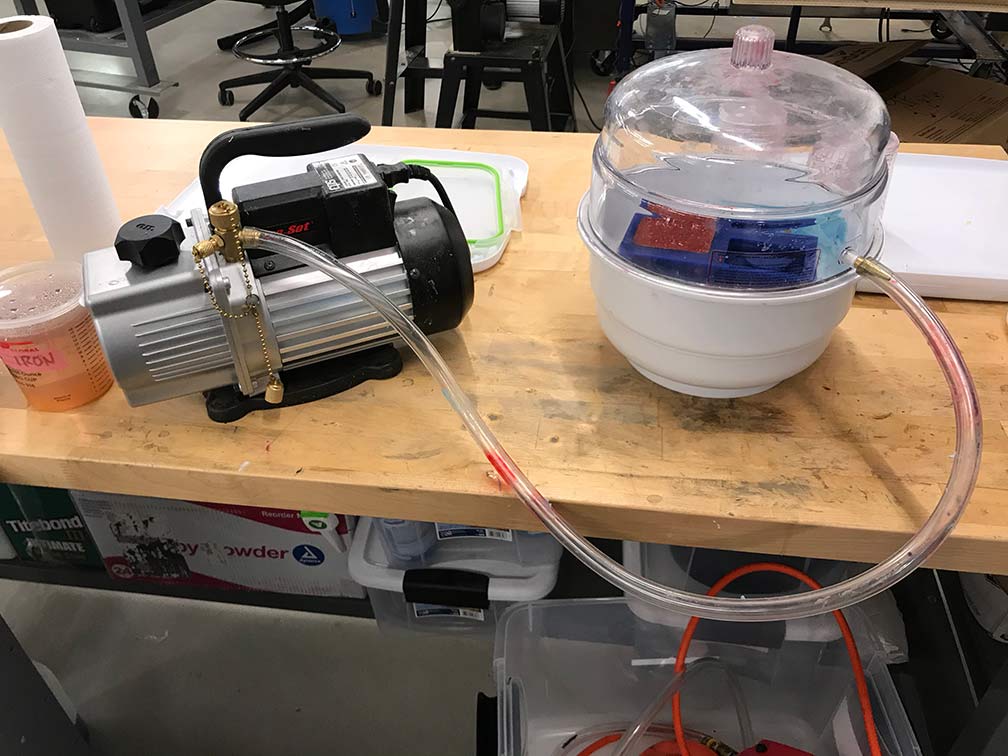
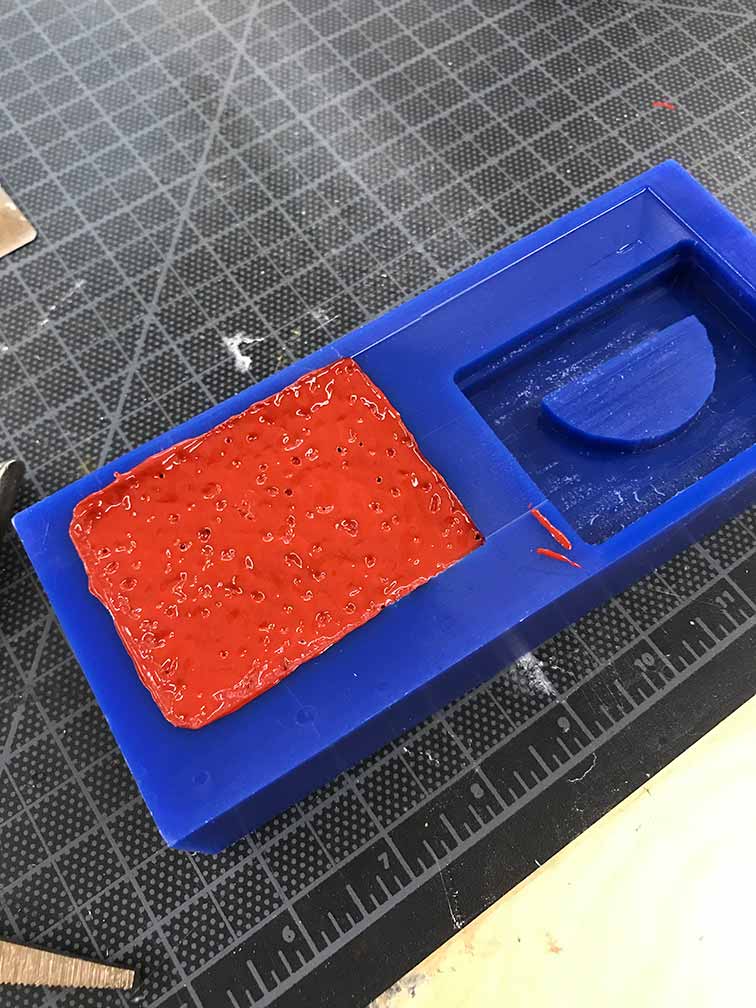
After mixing and doing an initial 2 minutes in the vacum chamber which helps to remove air bubbles. Then, I put the entire thing in there off and on for about 30 minutes.
Looks ok...
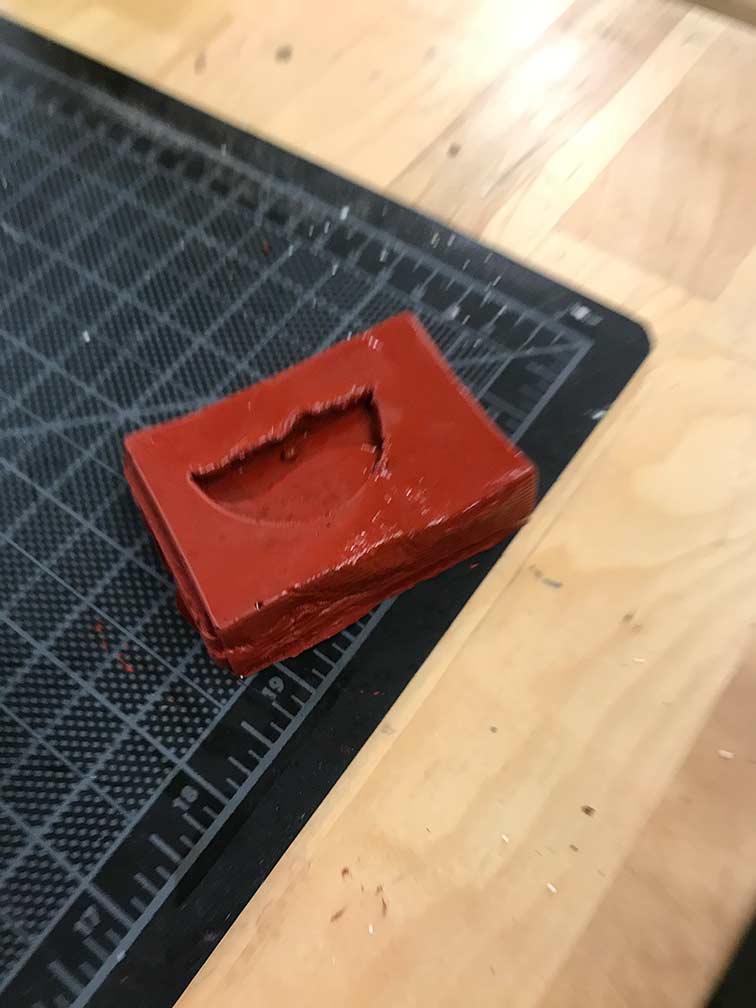
So that didn't work out. The pewter never got hot enough and then I put some silicone in it and it has always stayed gooey... haha. So! I used the existing wax counter mold and created a silcone mold and cast it in a white plastic.
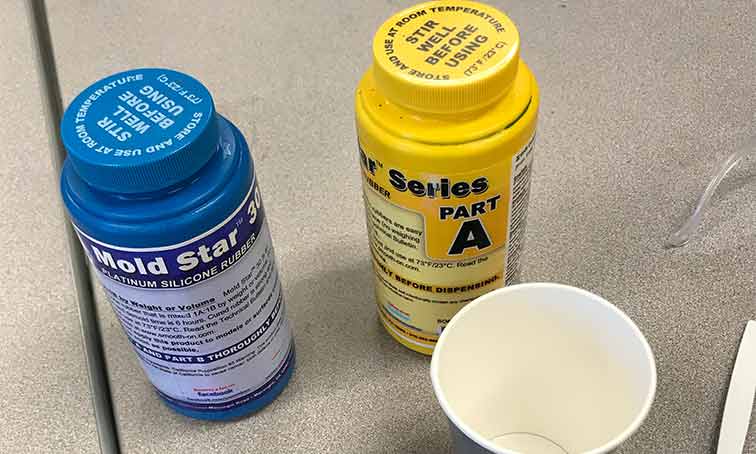
"Mold Star™ mold rubbers are easy to use platinum silicones which are mixed 1A:1B by volume (no weighing scale necessary). Mold Star™ silicones feature relatively low viscosities and vacuum degassing is not required for most applications. Mold Star™ 30 is a harder material, with a 30A Shore hardness." See product here.
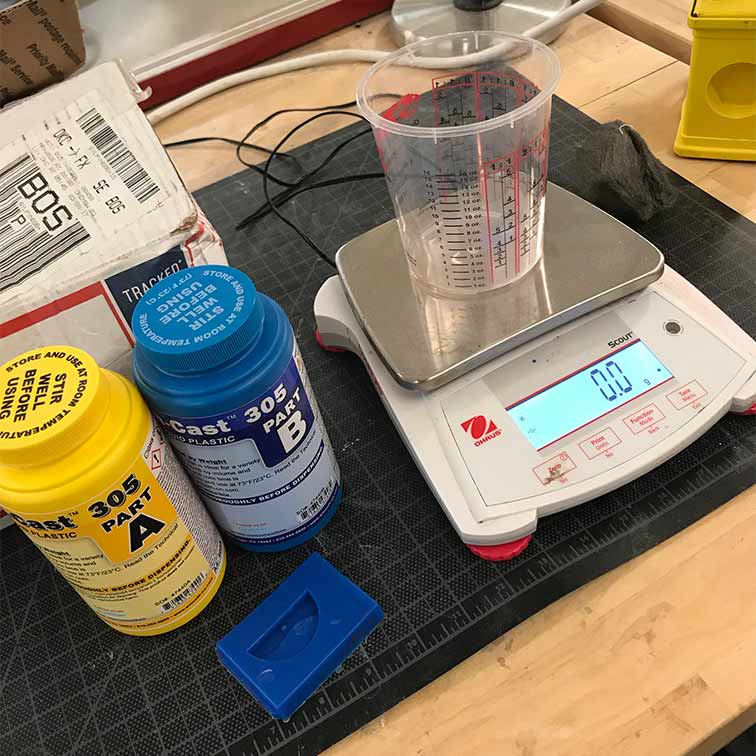
Some info on this casting product. "The Smooth-Cast™ 300 Series of liquid plastics are ultra-low viscosity casting resins that yield castings that are bright white and virtually bubble free. Vacuum degassing is not necessary. They offer the convenience of a 1A:1B by volume or 100A:90B by weight mix ratio. The differences between them are pot life and demold time. These resins readily accept fillers (such as URE-FIL™ 3 from Smooth-On) and can be colored with SO-Strong™ or Ignite™ color tints (Smooth-Cast™ 325 series accepts pigments better than the Smooth Cast™ 300 series). Fully cured castings are tough, durable, machinable and paintable. They resist moisture and mild solvents. Applications for Smooth-Cast™ 300 Series Liquid Plastics include reproducing small to medium size sculptures, making prototype models, special effect props and decorative jewelry."
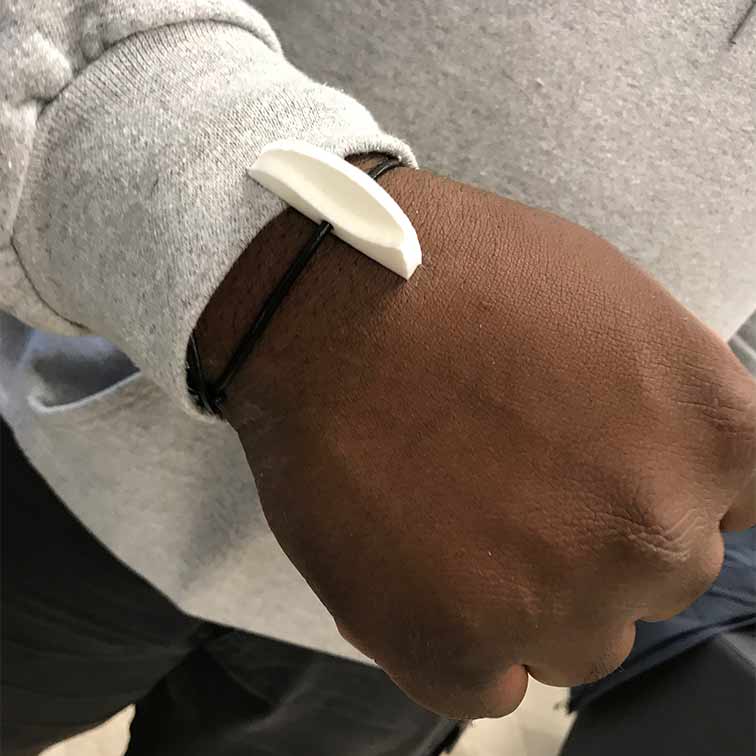
YAY!!!! At least one of the components of the 3 piece jewlery set it prototype :D
Group Assignment
See here.