Week 17: Mechanical design/Machine desing
group assignment
HERE You can see what the queretaro lab did on the fablabpse machine design week
make a machine from scratch
individual assignemnt
document your work on the group assignent
group assignment
Here you can see the whole machine documentation
individual assignment
this was a tough week because we were hurried to work as a team during the contingency.
fortunatly we have all the resources available to make the design and planing from home.
divide and conquer.
during this week had several meetings through microsoft Teams platform with all of the students in ciudad de mexico FabLab.
First thing that was on disussion was to decide what our machine was going to do. Found some interesting ideas.
ideas
at the end we decided to do a cam slider.
here we end up the first meeting and i made some paper scketches for my iedas.
hand sketches
and draw them on solidworks first as a draft.
first solidworks draft
Then on the second meeting we look at what resources we had at hand in our labs (ciudad de mexico and Queretaro).
and we concluded that we needed to use 1 stepper with a linear actuator and 1 regular stepper 2 stepper drivers one for each motor and a cnc shield integrated to an arduino uno to make it move.

version 2 without the dc motors with encoder
Then,We divide the machine in parts so we all could contibute in the best way.
So my contribution to the Fab-Lapse (that's the name we decided to go with) was the mechanical design for the first stage. An then work with the mechanical team of the second stage to define all of the CAM files.

version 3 without the timming belt and pulley system
in ciudad de mexico decided to go with a chassis made out of laser cutted cardboard.you can find the CAM files for that design in the group assignment page.

cardboard fab-lapse design
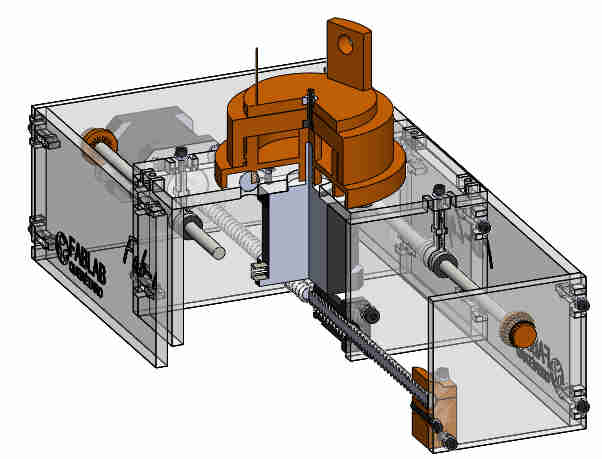
but i tought to make it a little more roubst and made a design out of 6 mm acrylic laser cutted as well.
acrylic fab-lapse design
then for the third meeting we talked about to take out the timming belt on the rotary stage and place the camera right on the shaft of the stepper using 3D printed parts.
timming belt and pulleys system that didn't make the final cut
and put instead a marble like bearing system we found some reference on a FabLeon 2019 machiune design week
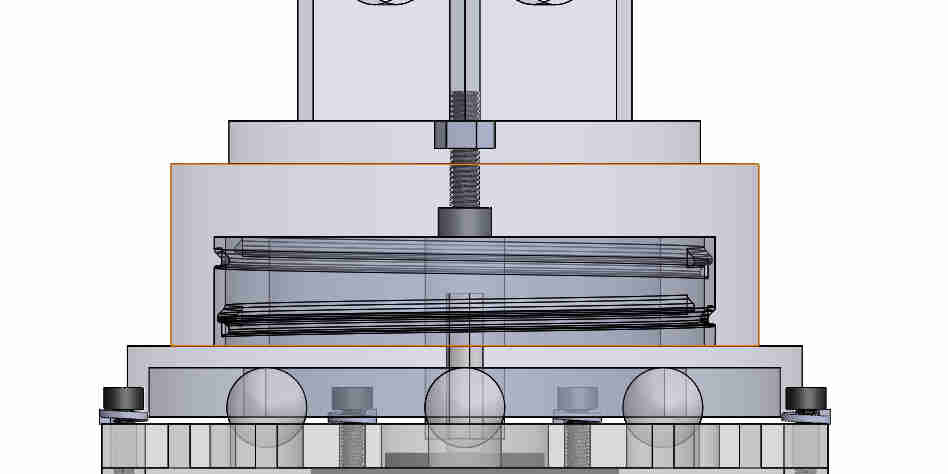
lazy susan with marble like bearings
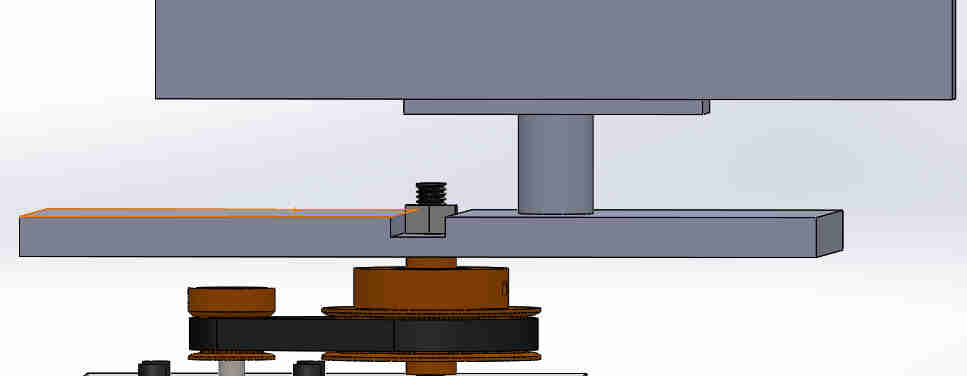
then i did a 3D printed Threaded base to place a profesional camera or a generic mount for a phone
section view of the assembly
then i modeled a 3D printable support for the shaft of the linear actuator

cross section of the linear actuator shaft support
in the "REFERENCES" section at the bottom you will find the original files for my final version before y toss it to the next team.
as well as some fabrication files i have done for when we could get back on the lab.
I uploaded the assembly into 3D content central from dassault sistemes page and pasted the cod into this page so you can view it and download it

this is a screenshot if the pieces we design here in queretaro

And this are the settings we used on those prints
taking the assignment from were jonathan,jorge javier and i left.

This is as far as the fablabqro got
printed some parts during covid quarantine
cutted the chassis as soon as we came back to work at the fablabqro
then assembled the machine to test the fittings

this is the final pictures of the machine fully assembled.
this is the first timelapse taken with the machine
REFERENCES
here i will link the documents on this week assignment and tutorials.
HERE i recomend you download this app to model all the fasteners.
HERE is the best catalog i know for 3D gears,sprockets and pulleys.
HERE is the second best.
HERE download the datasheet for the stepper with linear actuator 17LS19-0406E-300Y
HERE download the datasheet for the regular stepper motor 17HS19-1684S1
HERE download the datasheet for DC motor with encoder of the version 1 mod.
HERE download the original solidworks2019 and STL file for the stepper with linear actuator
HERE download the original solidworks2019 and STL file for the regular stepper
HERE download the file for the dc motor with encoder of the first version.
HERE download the orginal solidworks2019 files for the 6mm acrylic chassis
HERE download the original solidworks2019 files for the base os the second motor
HERE download the DXF file for lasser cutting all the pieces in 6mm acrylic
HERE download the STL files for 3D printing.
HERE hopefully i can push the remaining files of the assembly.
HERE 3D pdf file of the assembly (you'll need to activate this function on your machine in order to see it).
HERE For background this is a machine design week that did another cam slider called hello_dolly
HERE this is an idea that i worked the tab and fasteners features in the acrylic cut layout.
HERE this is a machine design that also includes that kind of tabs
HERE this is a machine design week page that gave me the idea of using screws in order to fix the bearing to the frame.
HERE here's an idea of the lazy susan bearing taken from falab leon in fabacademy 2019
HERE is a tutorial on how to view 3D parts in a web page (for solidworks as i know)
HERE you can see inspiration for this machine
HERE is anther video for a DIY cam slider