Week 16: Wildcard week
justification
For this week i decided to leave here documented what i prepared for an event in november of 2019 called "OPENDAY" where we gave a demostration of the robot movement using illustrator,Rhinoceros 3D 5,Grasshopper and kuka PRC i will explain a breaf summary of each software and what i did in there below as well as a list of usefull links at the end in the "REFERENCES" section
THE STEPS
this is the legit workflow i followed to do this
1.- Install Adobe Illustrator (link at the end)
2.- Go to the "make a doodle" section below
4.- Install rhinoceros 3D (Link at the end)
5.- Install Grashopper (link at the end)
6.- Install Kuka PRC (link at the end)
7.- Open Rhino
8.- Go to the "Rhino" section below
9.- Type "grashopper" in the Rhino command bar
10.- Go to the "programming" section below
Make a doodle
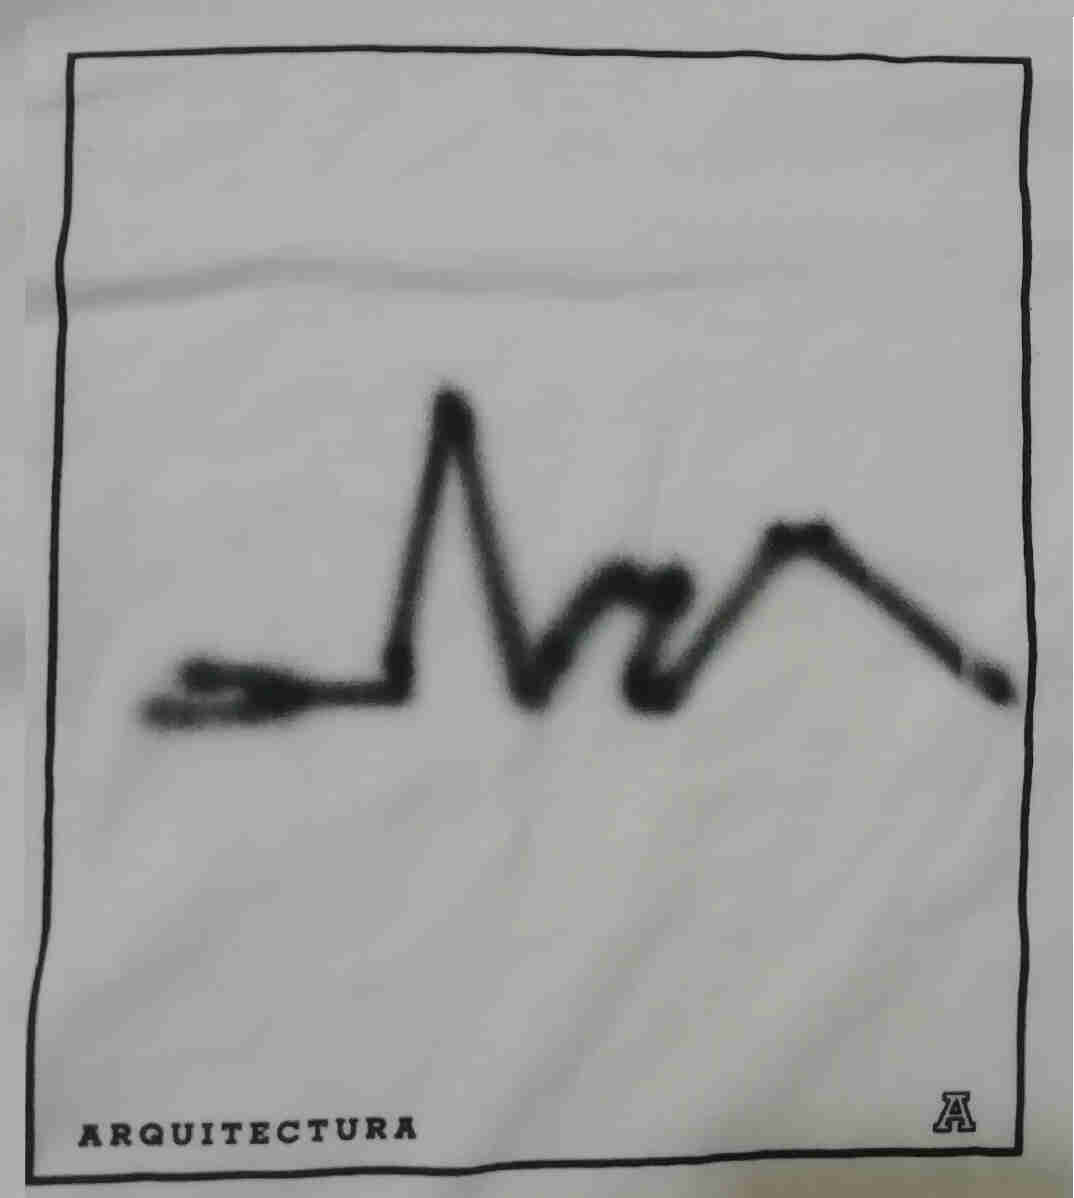
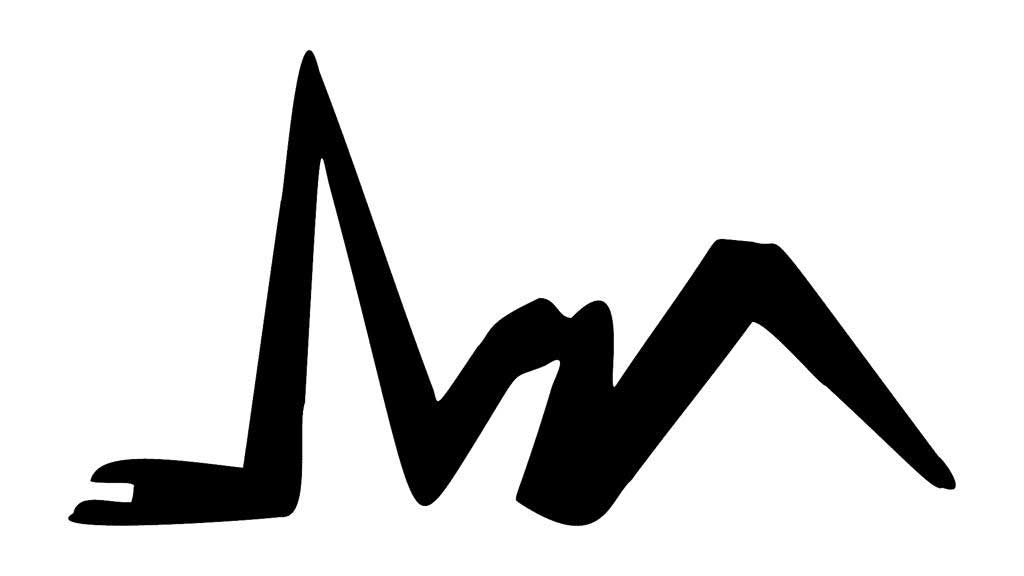
I used Adobe illustrator in order to draw the outline from an image i just grab from the web i is a sculpture called "The return of the snake" by Mathias Goeritz a famous architect.
 the return of the snake clip art
If you want to know more about Mathias's work in the reference section below you'll find some links. as well as the clip art i used.
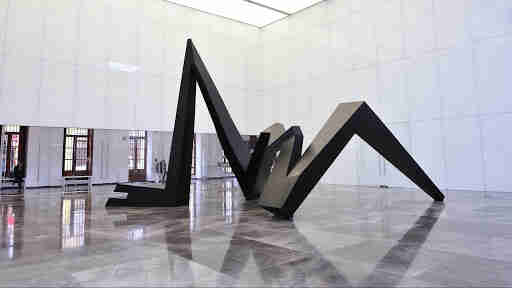 Picture of the orignal sculpture by Matiahs Goeritz
Anyway, you could use any 2D modeling tool you like as long as you export the finished file as DXF.
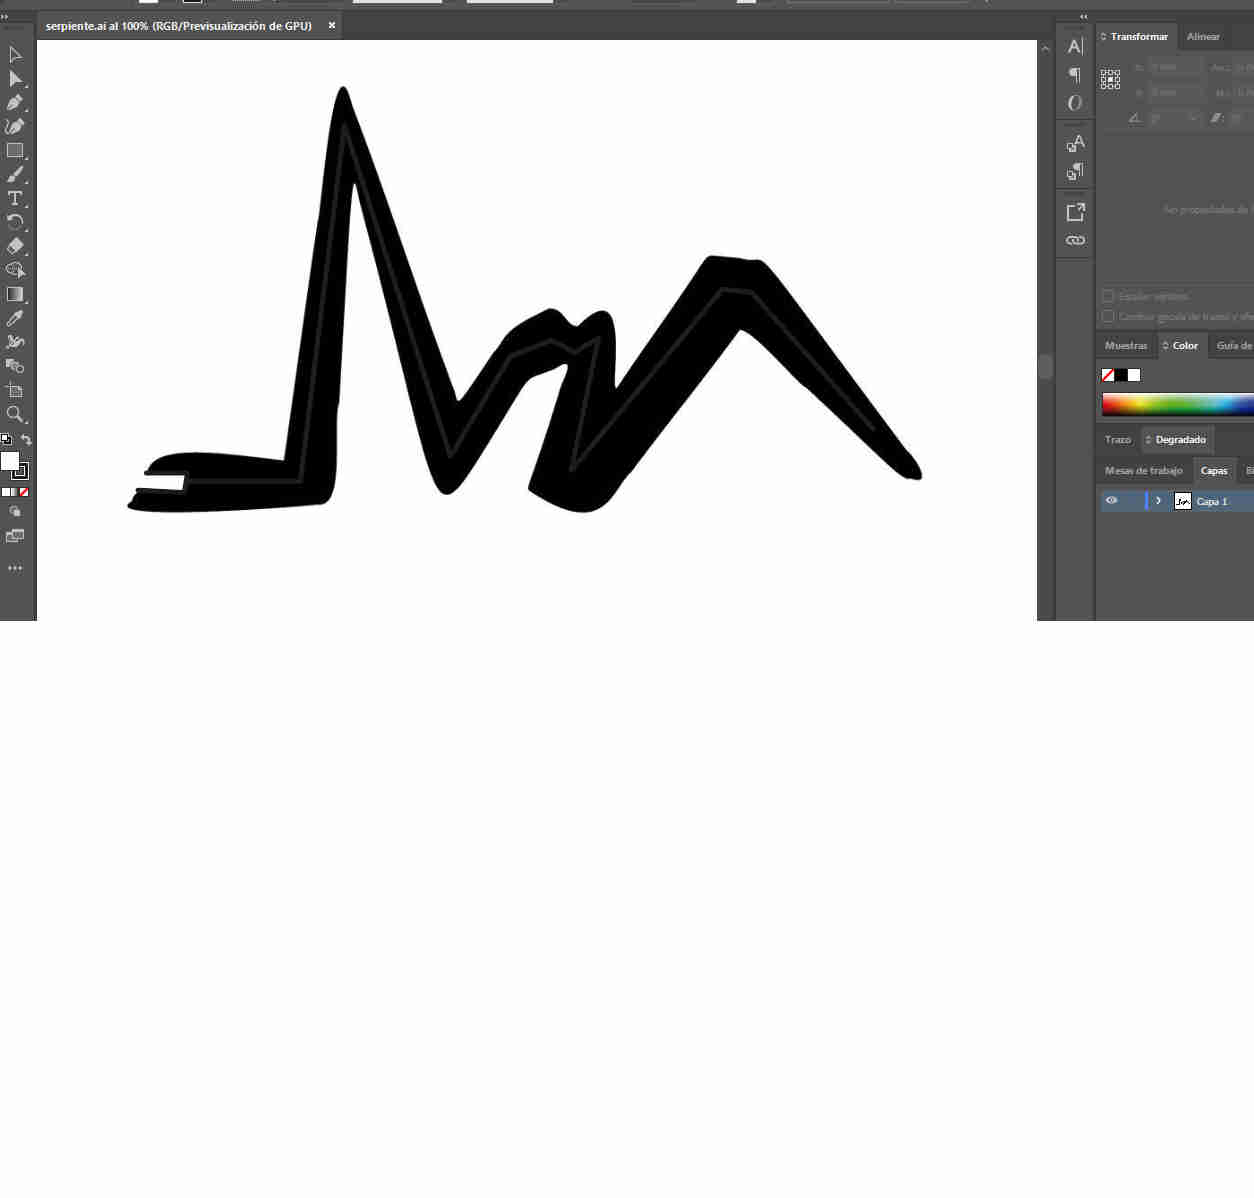 illustrator enviroment
Rhino
Here is where you want to layout the the workspace of the robot as well as its surroundings, in order to see if the robot is misbehaving or acting strange.
I will upload all the links you'll need in order to recreate this but every place should be diferent and you need to consider this.
We will be using a not common end efector so in order to simulate correctly the robot you should design your own airbrush and mounting base as well.
Also, will be uploading this in case you have the same airbrush as i did.
Then you will need a torso or a surface were to spray the paint.
I got some help with this and my friend got me a 3D CAD files of a male and female human torso.
After said all of this the only thing left is the logic of wath you need to program de motion.
LOGIC
In order to Simulate the movement wee need basicaly 3 Things.
1.- Grasshopper needs to orientate the doodle and use it to draw some lines.
2.- Grasshopper needs to recognize the custom end efector and place it on the robot
3.- Then need to define the position of the robot in place
Programming
At this point is were all of the logic has to take place.
I divided this programm into 3 sections.
1.- Doodle manipulation
2.- End effector
3.- Kuka PRC
Doodle manipulation
First you'll need to make grasshopper to recognize the doodle so i created a layer in rhino called "doodles", then i used a grasshopper block called geometry pipeline.
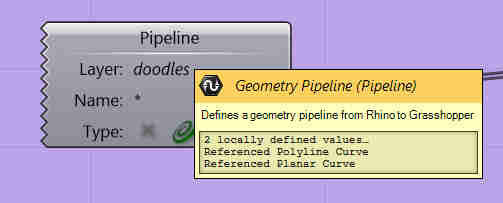 Geometry pipeline
then is a good practice to place a "scale" block in case you need to re size it to your canvas
and an "orient" where you need it in order to project it to the surface. a place it right between the robot and the torso.
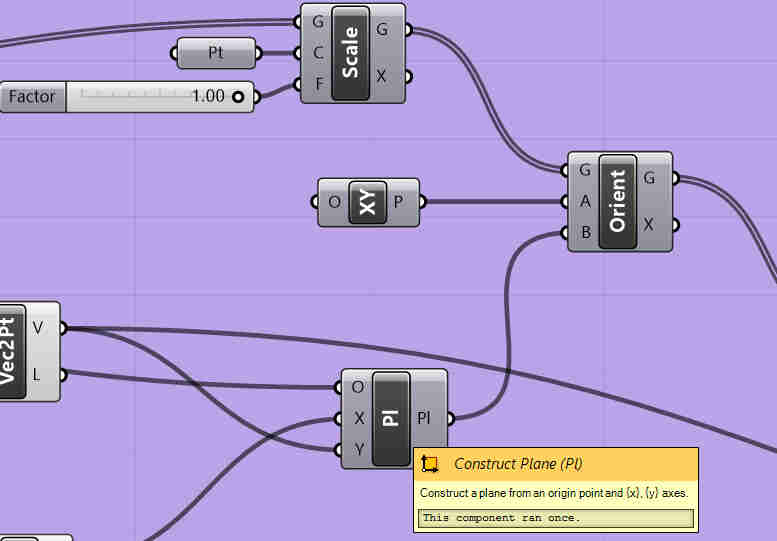 scale and orient blocks
but in order to orient it correclty you'll need to define excatly the place you want it to (construct plane)and the direction you'll want it to go (vector 2Pt)
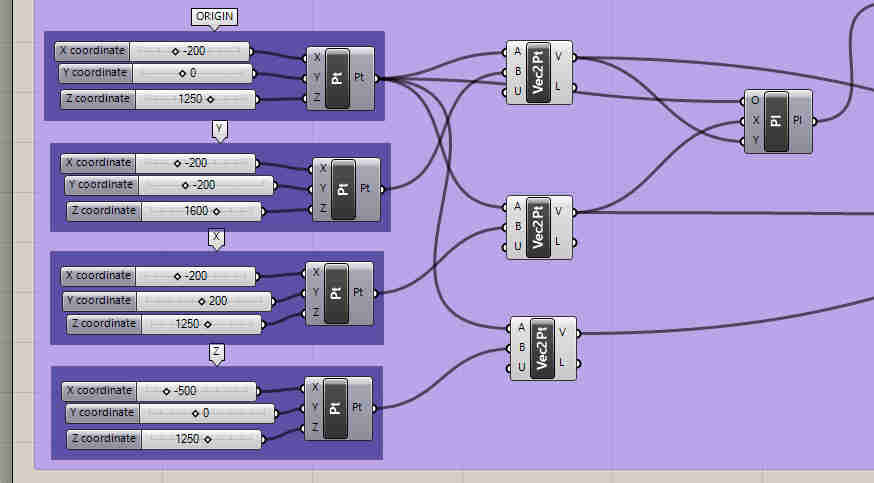 Coordinate points on grashopper
then you are ready to link them to the previously mentioned "orient block".
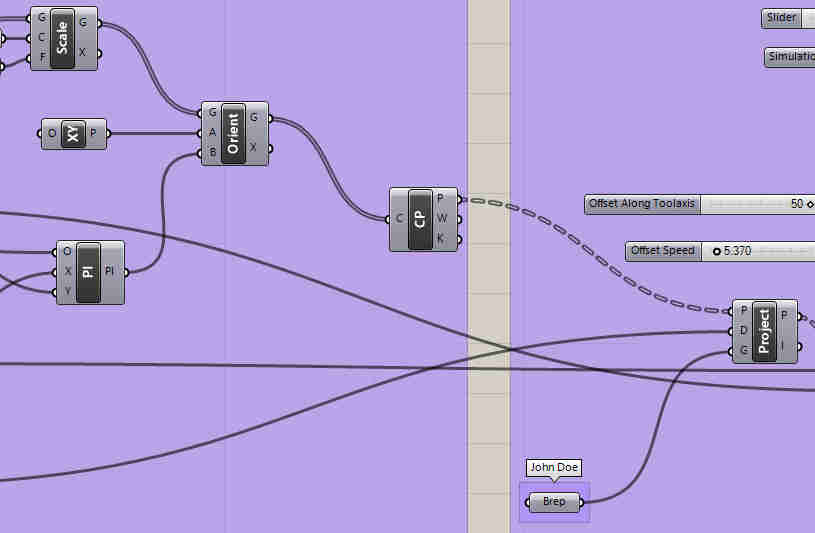 barrier between section 1 and section 3
this is all for now in the section 1.
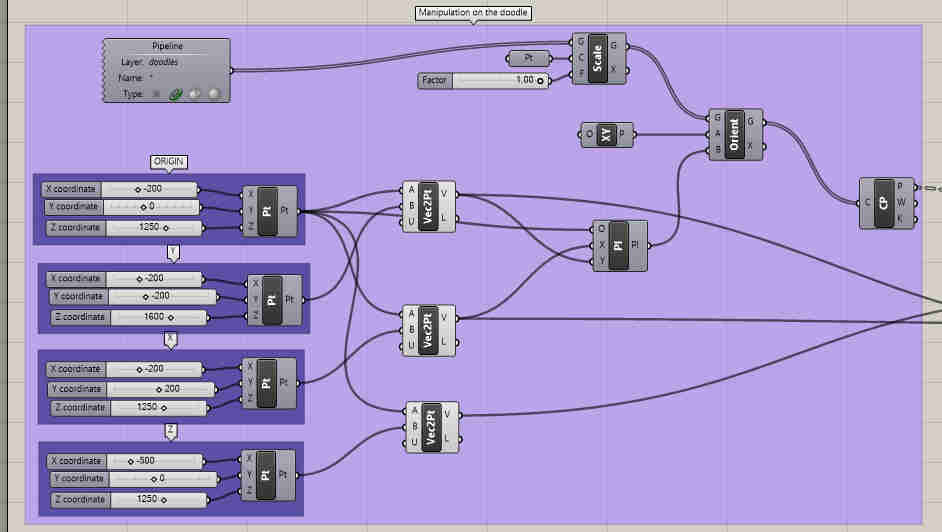 Section 1 "doodle manipulation"
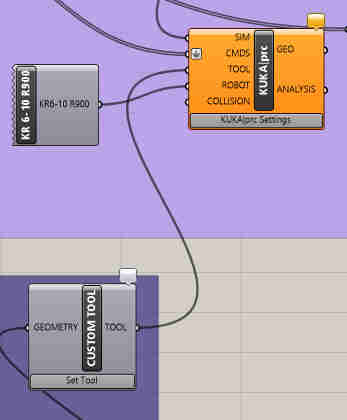
Let's move on section 2 called "end effector".
Here i imported the mex of the airbrush from rhino to grasshopper using a "container" block.
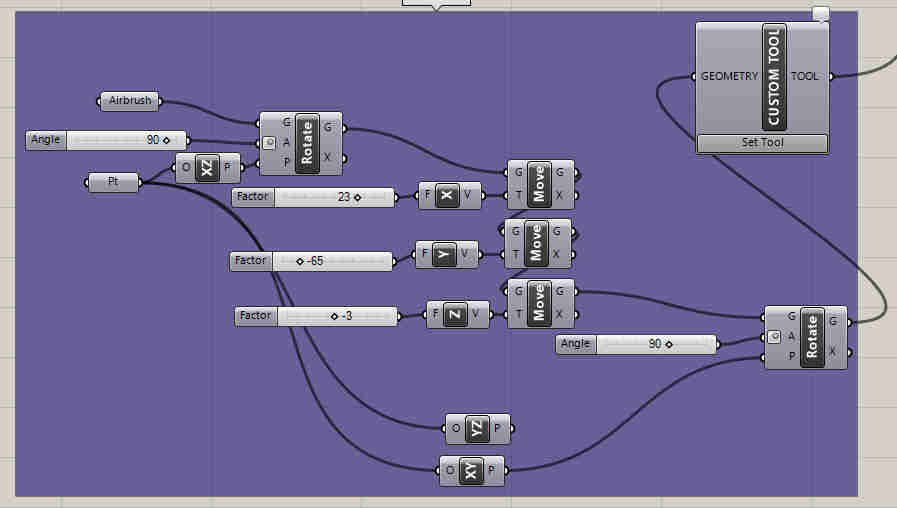 Section 2 "end effector"
then i used a "rotate" and a series of "move" blocks to place the base of the airbrush right in the center of the sixth axis of the robot.
and then just a "custom tool" from the kuka PRC library of blocks for grashoppper.
that's all about the second section
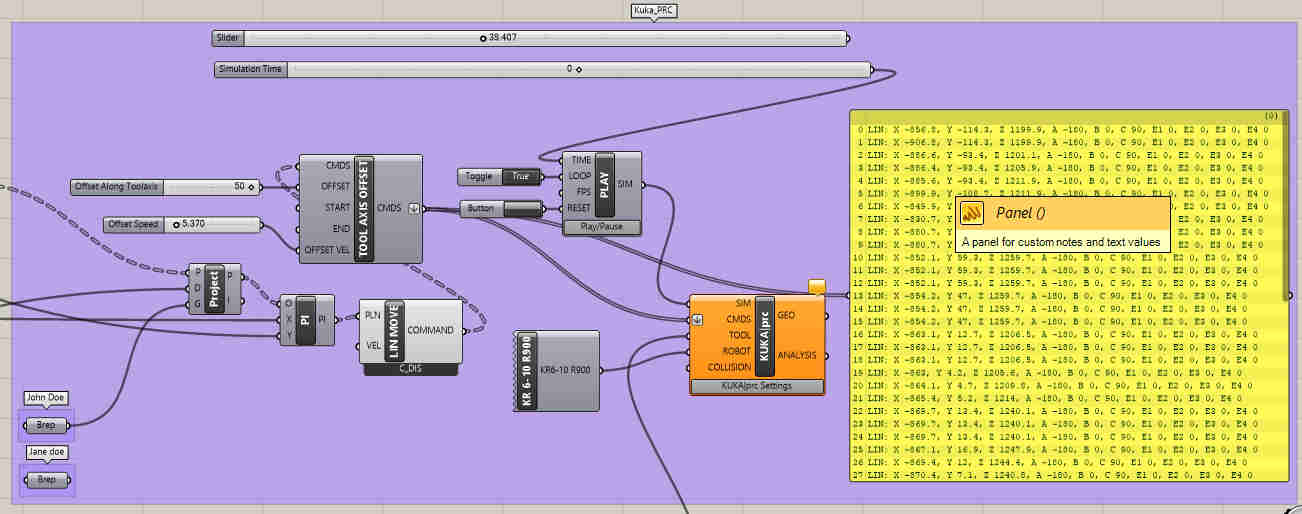 Section 3 "kuka prc"
this is were all of the translation to KRL (Kuka Robot Language) happens.
first youll need to place a "kuka CORE" block from the kuka prc library.
In this block you define things like the instructions you'll be giving to the roboto to perform, the tool it shall be using, the specific type of robot, and you can attatch a simulator to see the robot movement and see if it is doing what you need.
 Linking the section 2 with section 3
now let's link the section 1 and section 3.
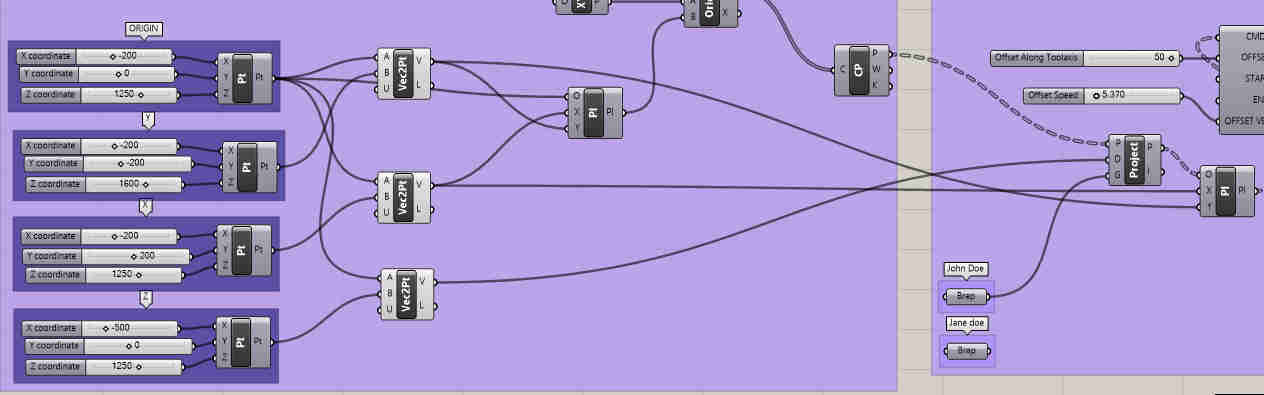 linking the section 1 with section 3
after orienting the curves of the doodle you need to convert it to points to project using "control points" block.
now you are ready to "project" the points into the surface.
i applied the same technique from the airbrush to the torsos and store them into diferent containers.
you can see in the "linking section 1 and 3" that i used the point called "origin" and "Z" to define a vector that goes into "project".
this is because you need to define a direction for the doodle to go to.
then the robot needs planes to create the paths so i used a "construct planes" and used the "project" block as an input to it.
also used "vector 2Pt" to define the orientation of those planes in order to make them parallel to the plane in front of the robot.
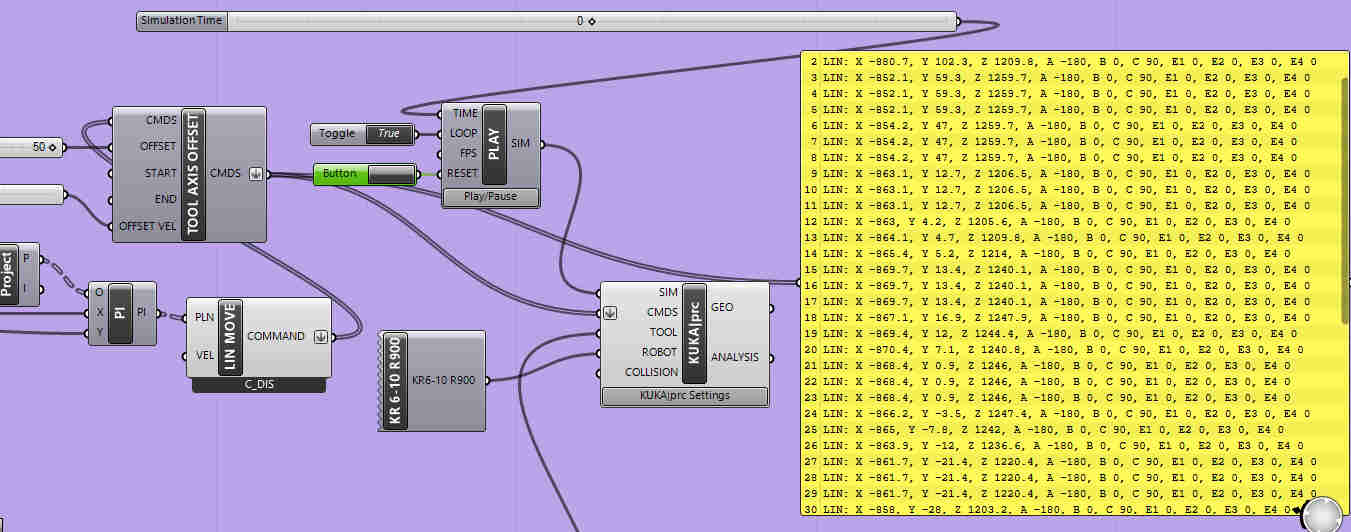 kuka core and play
finally the output of the "construct plane" is the input of "LINE_MOVE" PRC block.
then i placed a "tool axis offset" prc block to prevent the airbrush to collide with the canvas.
and that goes right to the CDMS input on the "core" block.
i also added a kuka "play" block to it in order to create the simulation with a "toogle button" to the reset, a "boolean button" to the loop, and a "slider" to the time input. in order to have a better control of the simulation.
as you can see in the right side of the image above i used a "panel" to show how the code will be writen on the robot once i exported it.
then i was just a matter to place it in a USB drive and plug it into the robot.
below you'll find a video recorded poorly on my phone back when i was testing the code.
fast cam on the painting done by the robotand after all of the debugging done.This was the final result.
 painted shirt
The video below is a tutorial on showing again haow to do this.
REFERENCES
here i will link the documents on this week assignment and tutorials i followed this week.
HERE download the clip art i used uncommpresed with GIMP
HERE download the file on the endeffector
HERE download the file of the first base
HERE download the file of the second base
HERE download the file of the base of the robot
HERE download the doodle from the Mathias goeritz sculpture
HERE download the file of the female torso(rhino 5 file)
HERE download the file of the male torso (rhino 5 file)
HERE download the file of the grasshopper program (for rhino 5) but it should work on rhino 6 as well.
HERE is just the layout i did on rhino 5
HERE here you can learn more about the return of the snake (article in spanish)
HERE this is another article on Mathias Goeritz work (in english)
HERE you can download a trial for rhino 5
HERE you can download Grashopper for rhino 5
HERE you can get KUKA PRC community edition
HERE from here came the inspiration for this application
HERE you can visit a youtube channel on great tutorials for Kuka PRC content creator karl sinlinge
HERE How to Pick and Place with a KUKA Robot and Grasshopper - PART 1 Tutorial
HERE How to Pick and Place with a KUKA Robot and Grasshopper - PART 2 Tutorial
HERE How to Draw or Engrave with Grasshopper and KUKA - Tutorial