Molding and Casting (WEEK 16)
Individual Assignment:
- Design a 3D mould around the stock and tooling that you'll be using, machine it, and use it to cast parts.
Group Assignment:
- Review the safety data sheets for each of your molding and casting materials, then make and compare test casts with each of them
IMPORTANT NOTE : ALL OF MY IMAGES ARE POP UP IMAGES , IF YOU HAVE ANY PROBLEM READINGS THOSE IMAGES , PLEASE CLICK ON THEM AND THEY WILL ENLARGE AUTOMATICALLY AND YOU CAN READ THEM EASILY
Individual Assignment
For this week i have something good in my mind , as main objective of this week was too design a CAD rawing then mill it and cast it into silicon as well as in epoxy
but as i am proffecient with Aluminium metal casting and sand moulding ,so first i thought i should try that too
Silicon Moulding and casting
Now back to our main topic that is Silicon moulding and casting
Some basics
If you are looking for a simple and good introduction to molding and casting i think this instructables page will help you a lot
Designig pattern in CAD
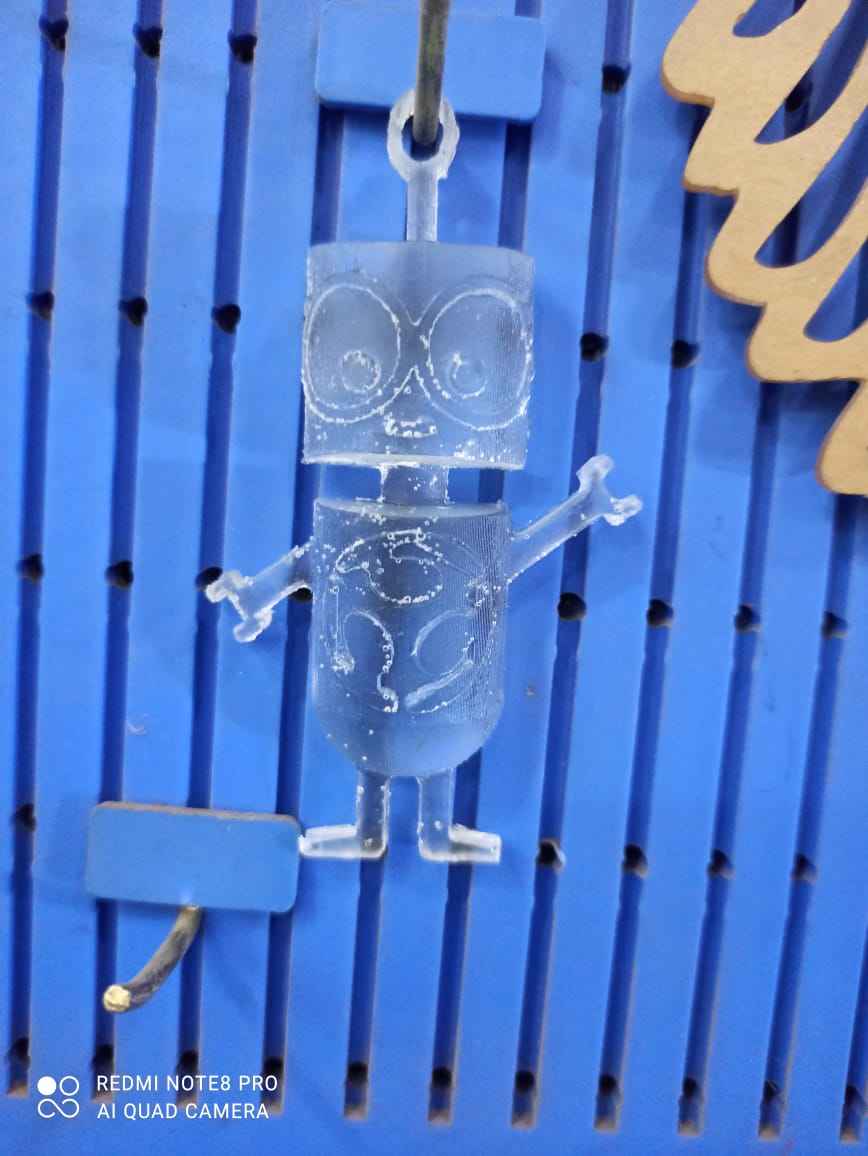
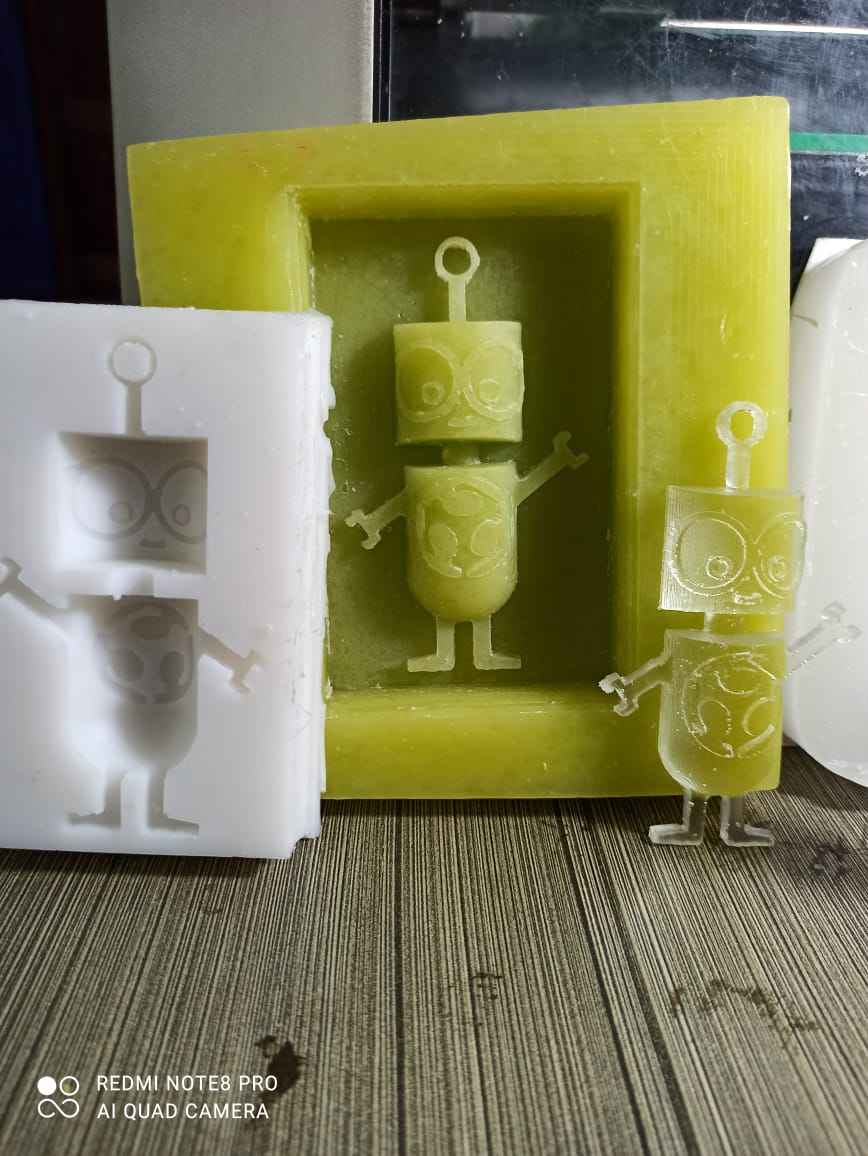
I decided to create a small keychain , so for that i was searching internet for any ideas or insiration i got stumble on this drawing

So i decided to recreat this picture in 3D in Solidworks
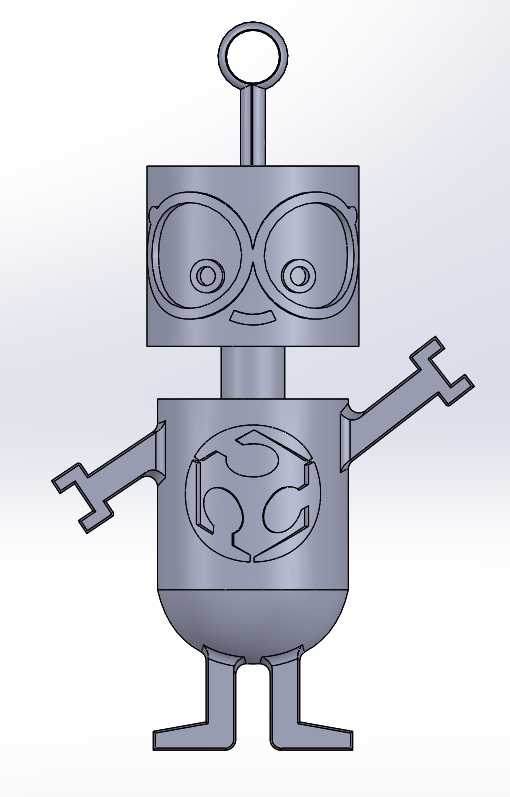
I tried to be as same as possible because i realy love this drawing

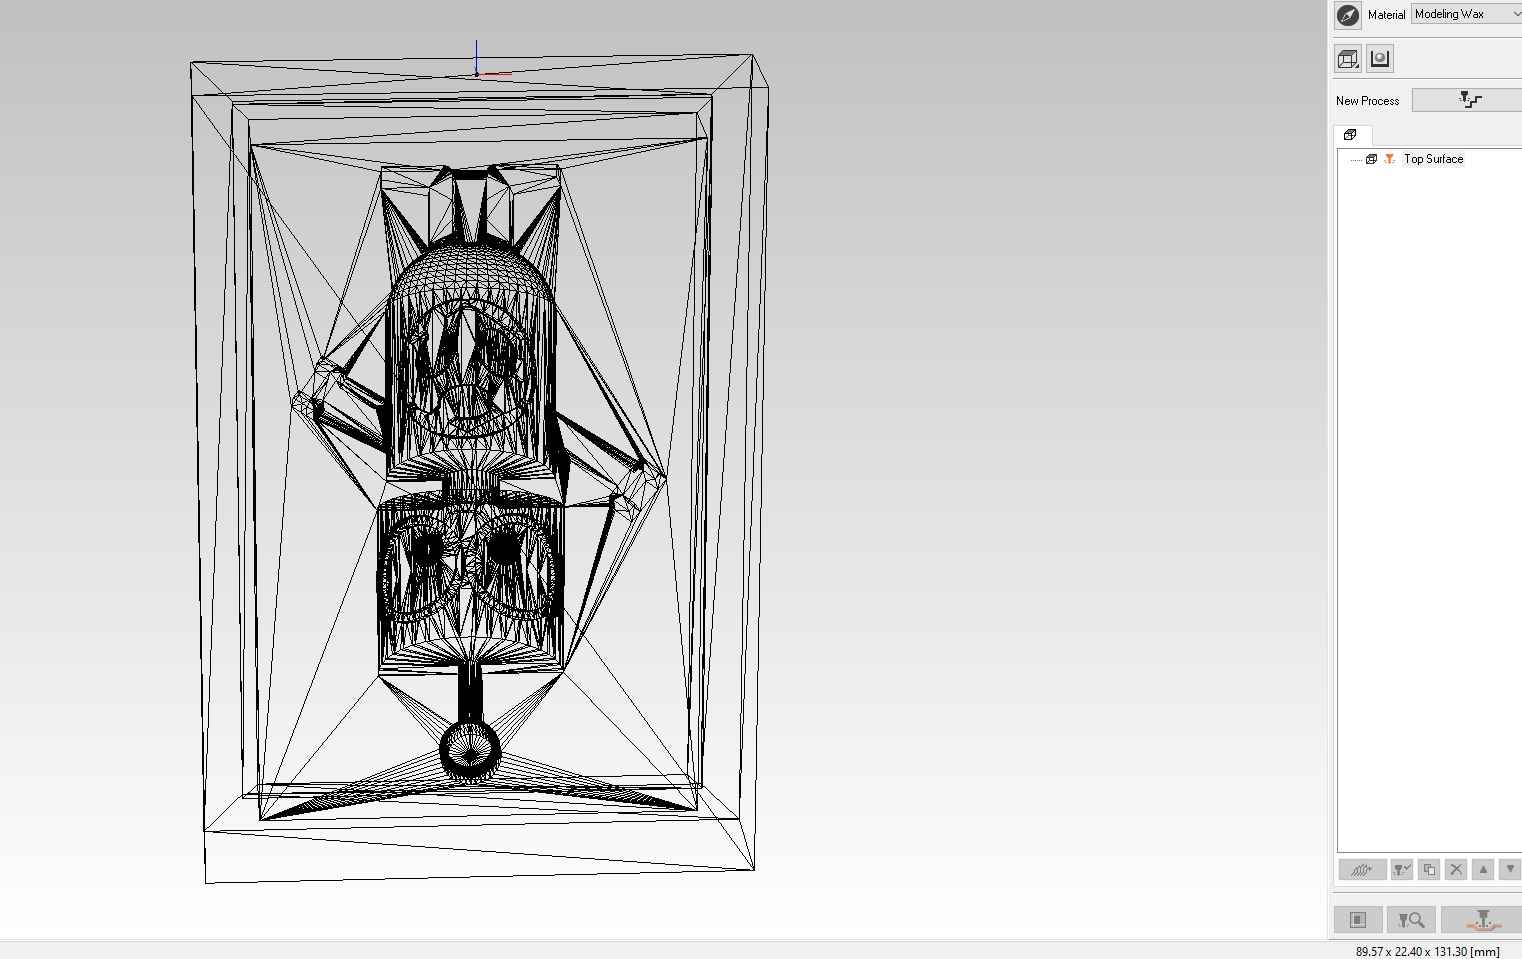
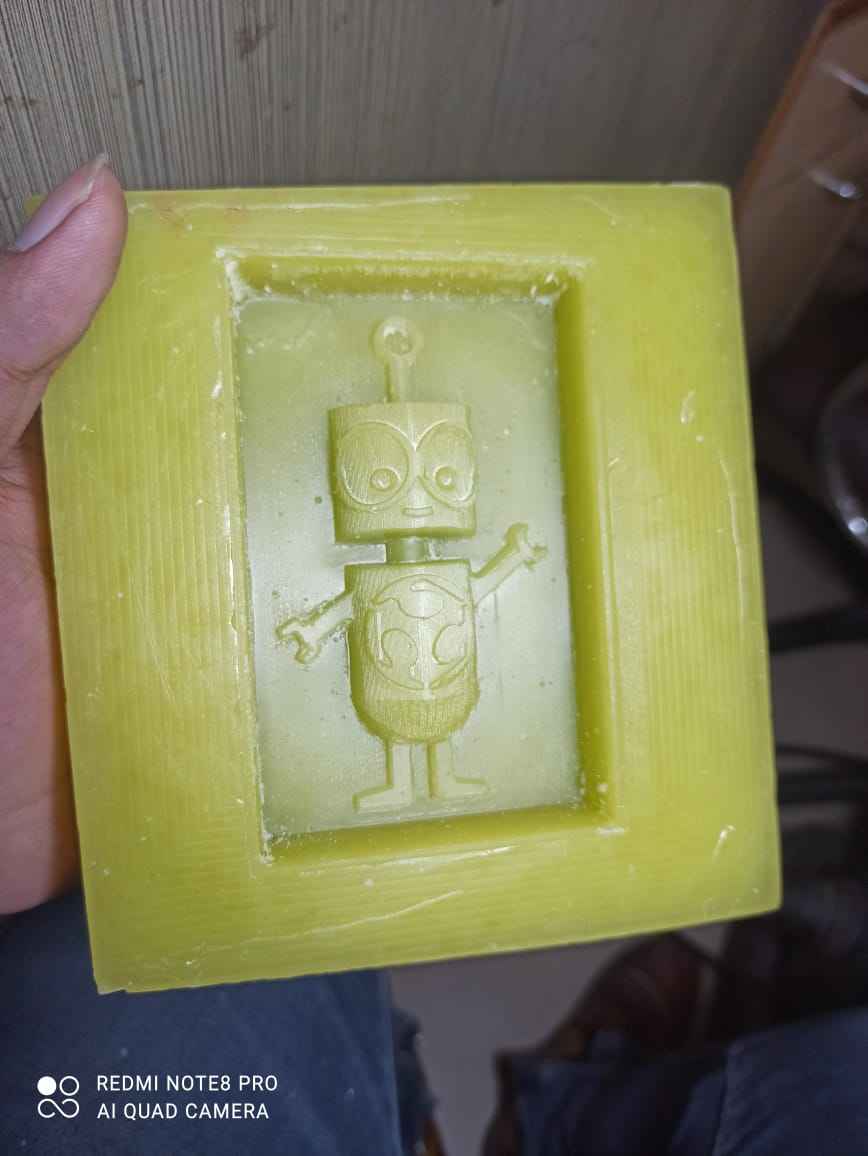
This is the final drawing with boundary
I have also made video of steps which were involved during Designing of the object
And if you want to download the CAD editable file or STL you can click on this link for that
FABOID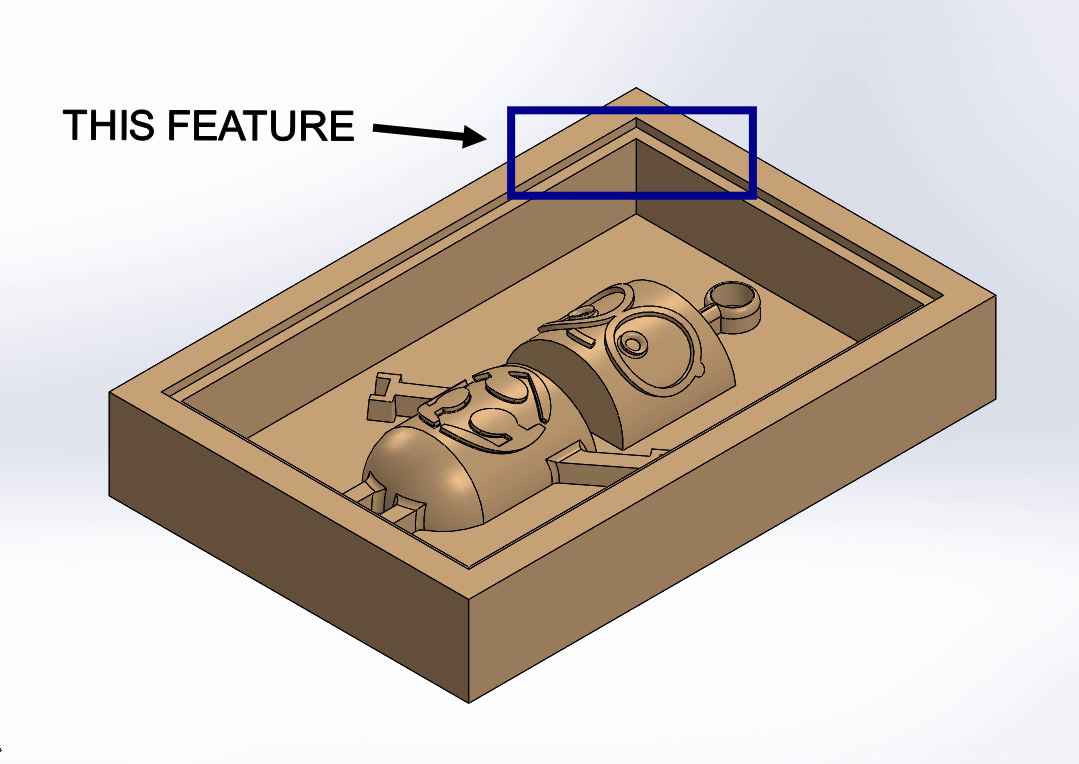
On Recommendation of my freind Adrián Torres from FAB LAB LEON i have added this feature at last moment , he told me that giving this feature will helm me when i try to remove silicon from mould
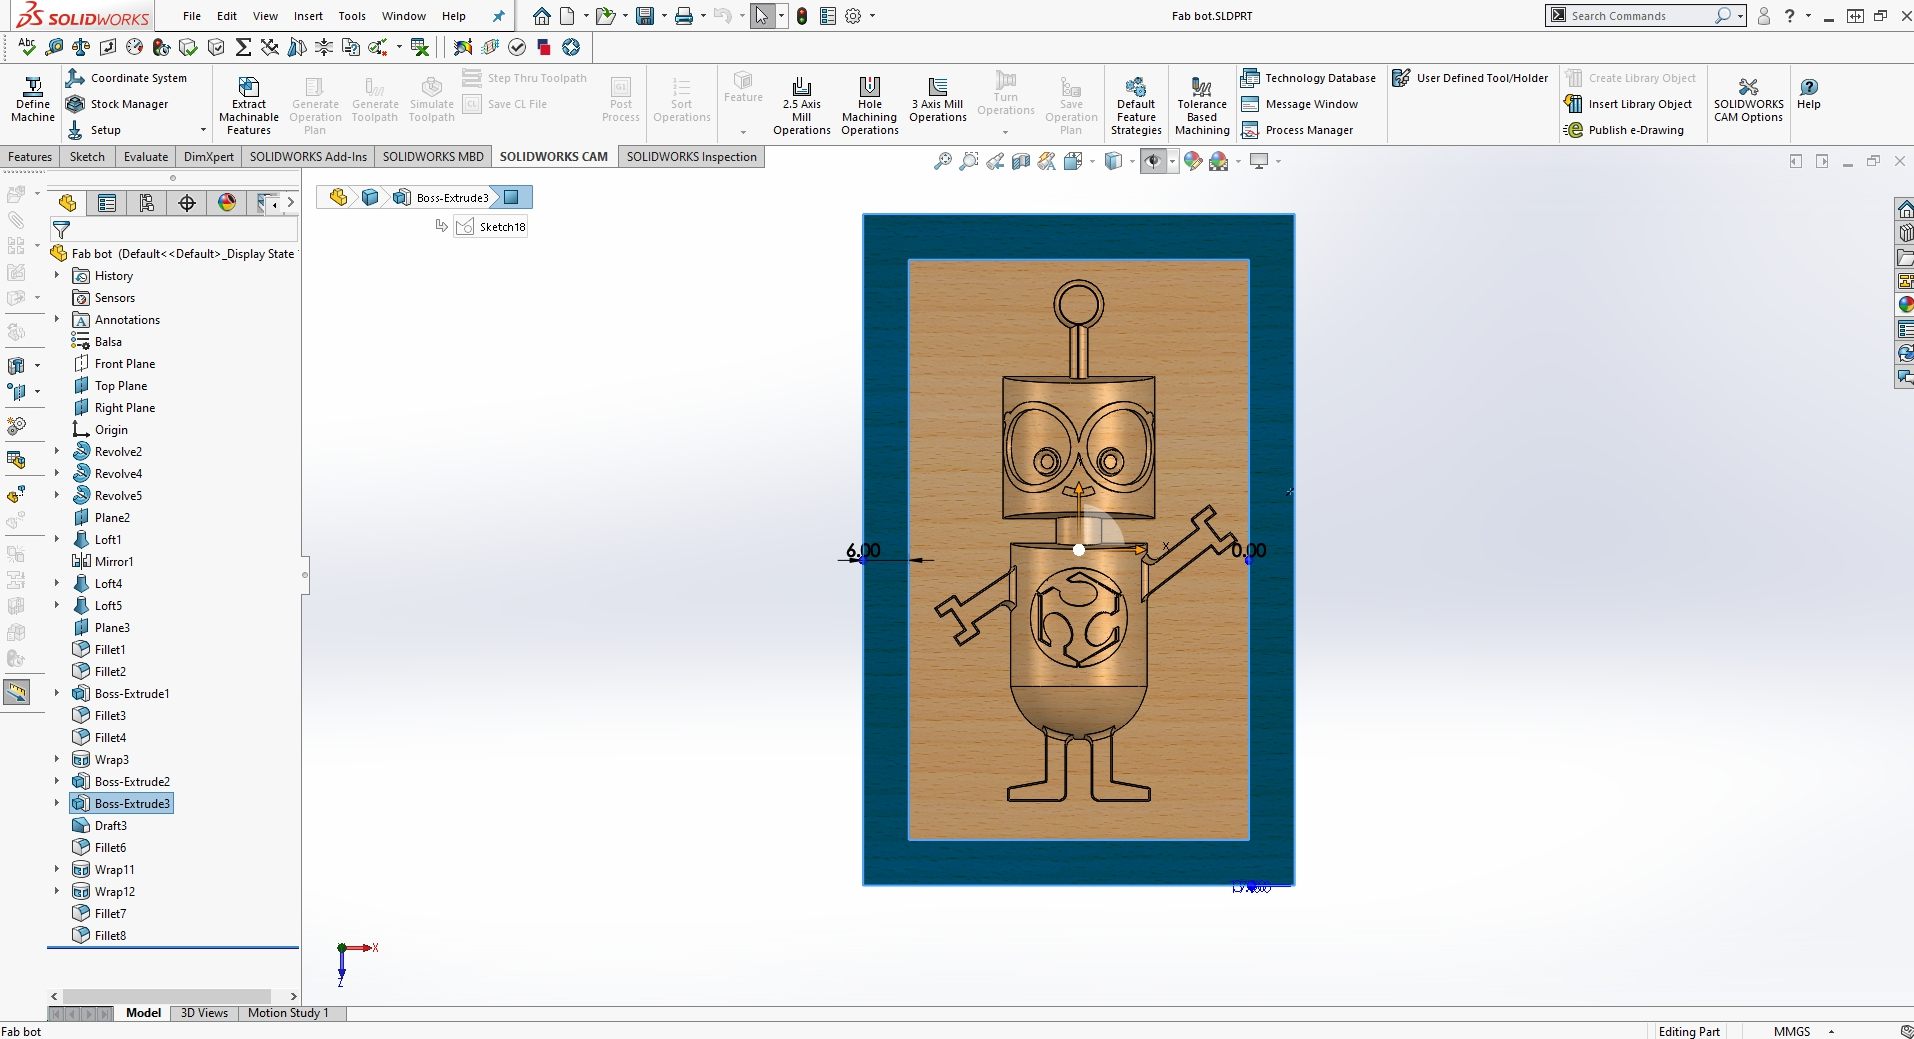
Creating Tool path
Modela player 4
For this purpose we use Modela player 4
You can the download the original software by clicking on this link and it will guide you to their official site from where you can easily download it
and it is recommended that you also downlaod
it will help you you preview the tool workingThere were some problems which we encountered when we starts working with software i have explained those problems and there solutions down below
After the installation is completed , you need to perform some system configuration changes , without that you will not able to work smoothly
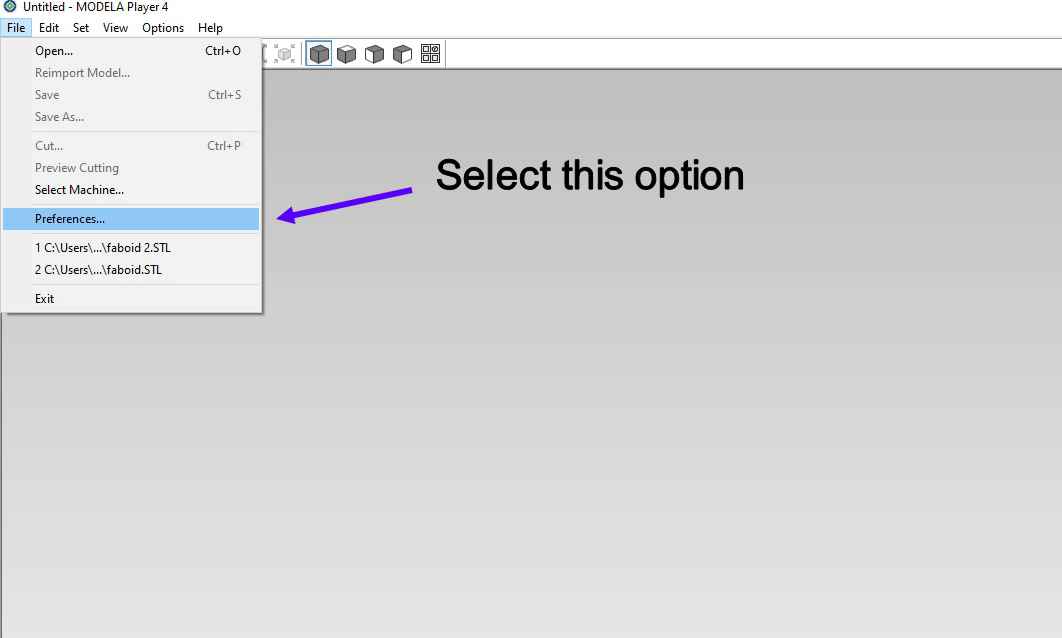
Step 1: You need to change the preerence unit in whihc you work , because by defualt the software works in INCHES and this can cuase problem when you try to make tool path , and everytime you works you need to convert the units
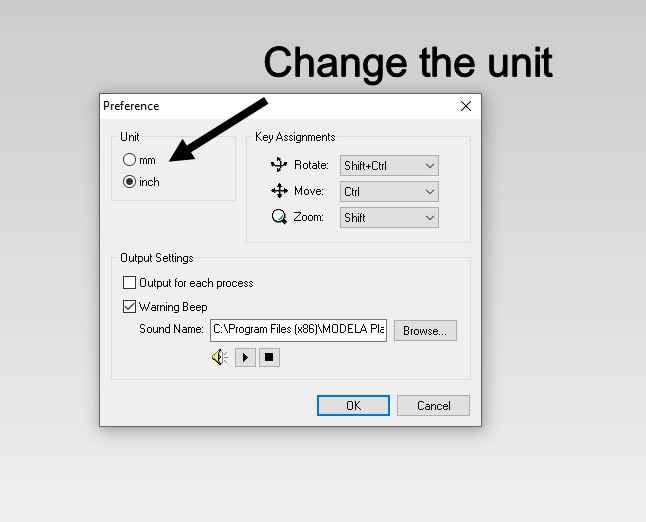
By clicking on FILE >> PREFERENCES >> UNIT change it from inch to mm
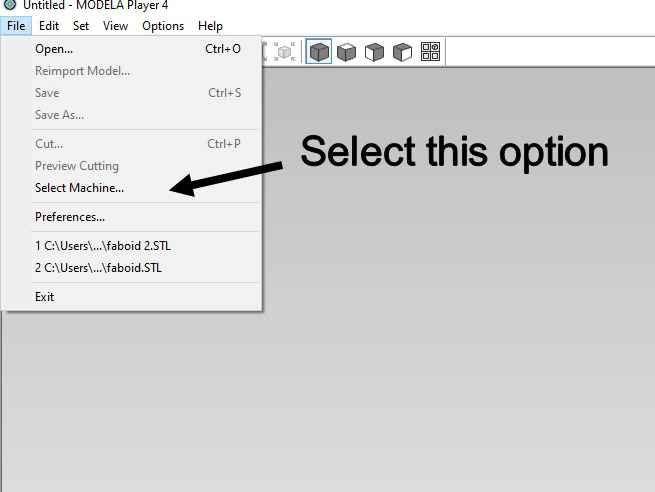
Step 2: This can me 1 of the most important change you require to do , initially when we started working on the software we have the problemof selecting the end mill because in the select machine option the correct
machine was not selected and the machine selected does not have 3mm end mill option for working and we only have that end mill at our lab after that we have 0.8mm or 0.4mm so we require the setting for 3mm end
mill for roughing
and after watching numerous videos we were not able to add a 3mm end mill to software nd the solution was so easy and we waste 3 days in that
Solution was that we never selected the machine in first place and the deafault machine selected does not support end mill higher then 2mm diameter ,this was realy emarrasing for us and when we knowwe need to change the machine for that we laughed on each other
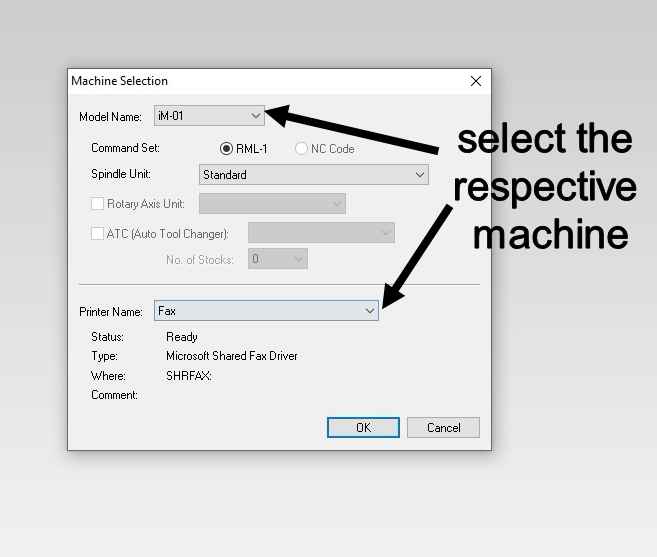
By clicking on FILE >> SELECT MACHINE >> MODEL NAME >> SRM 20 you can select the machine
Step 3: Changing the orientation of the part you are working
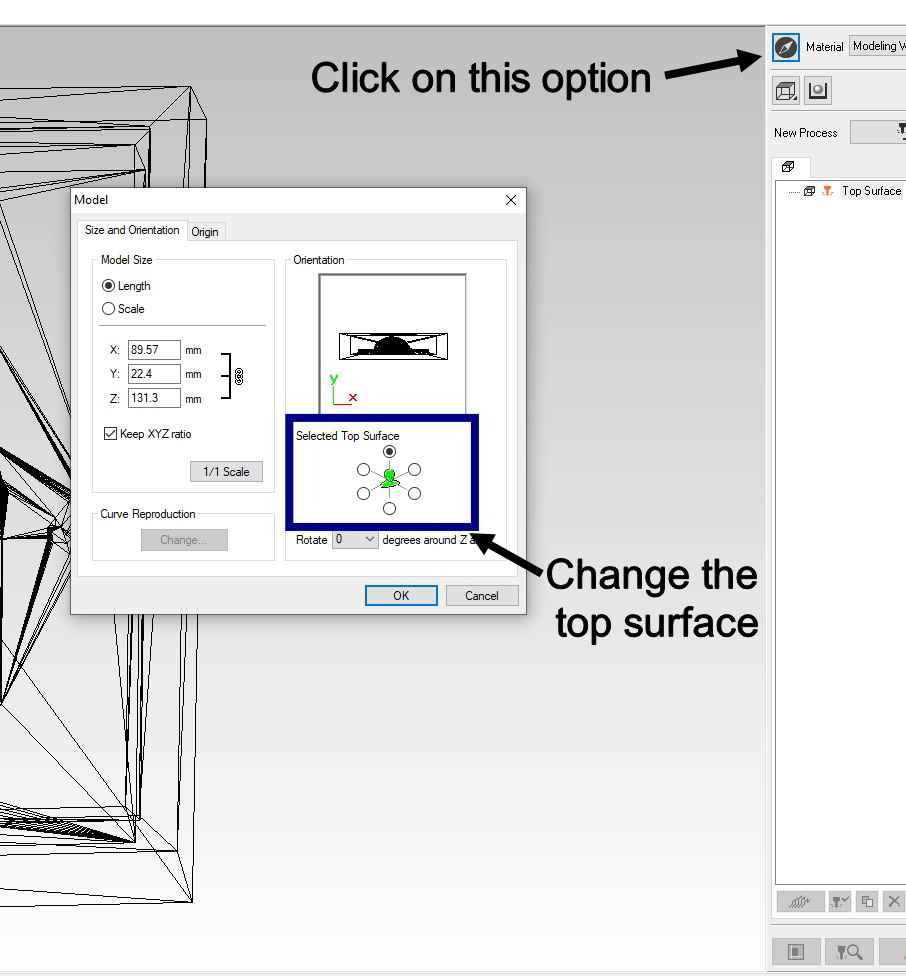
By clicking on MATERIAL > > CHANGE TOP SURFACE >> you can change the top surface which suits you
In this video you can see how i have created the tool path for working , i have been thourough in everey step
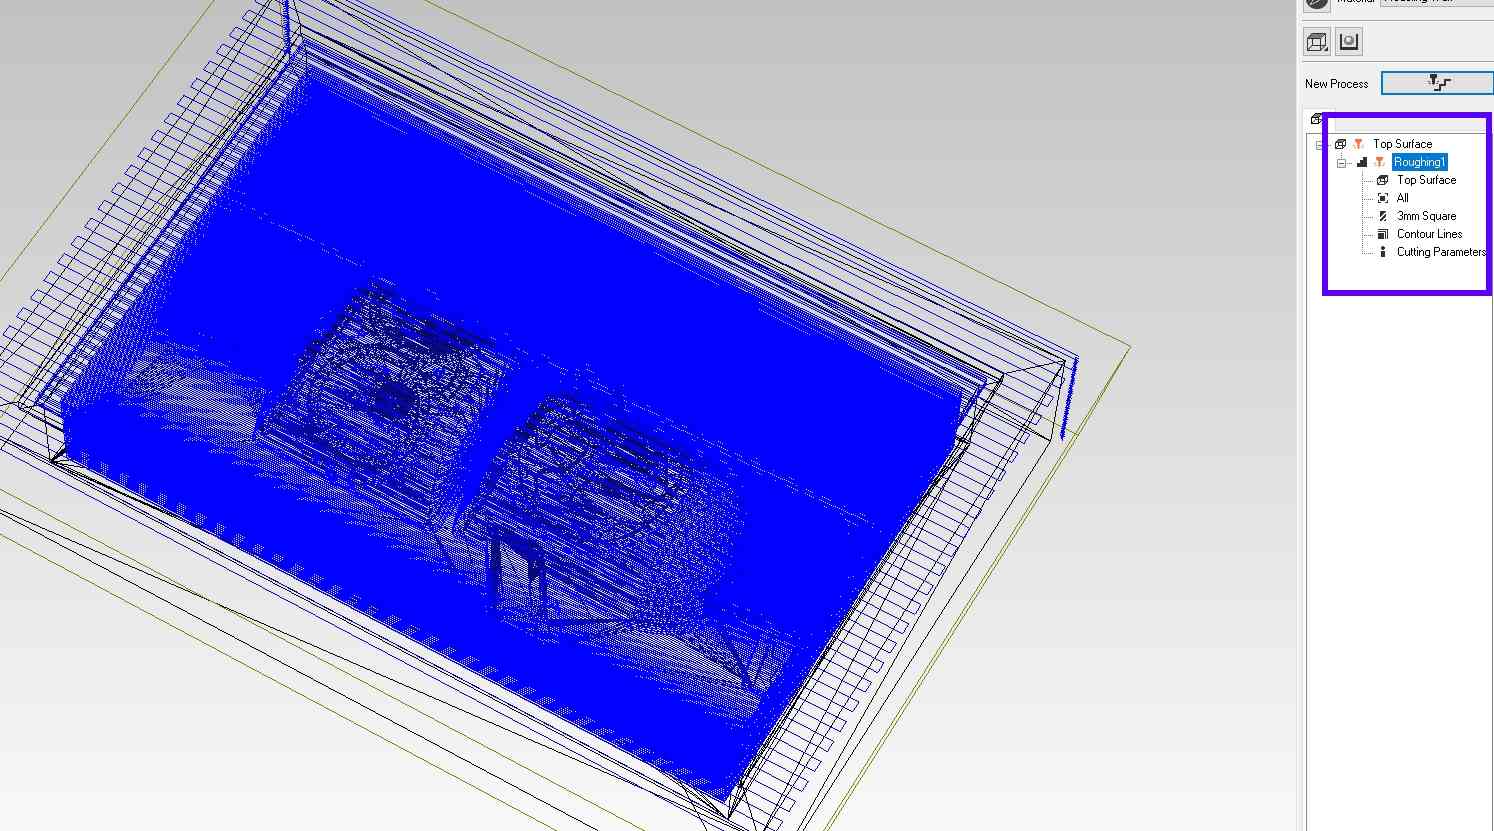
Tool path for roughing with 3 mmm end mill
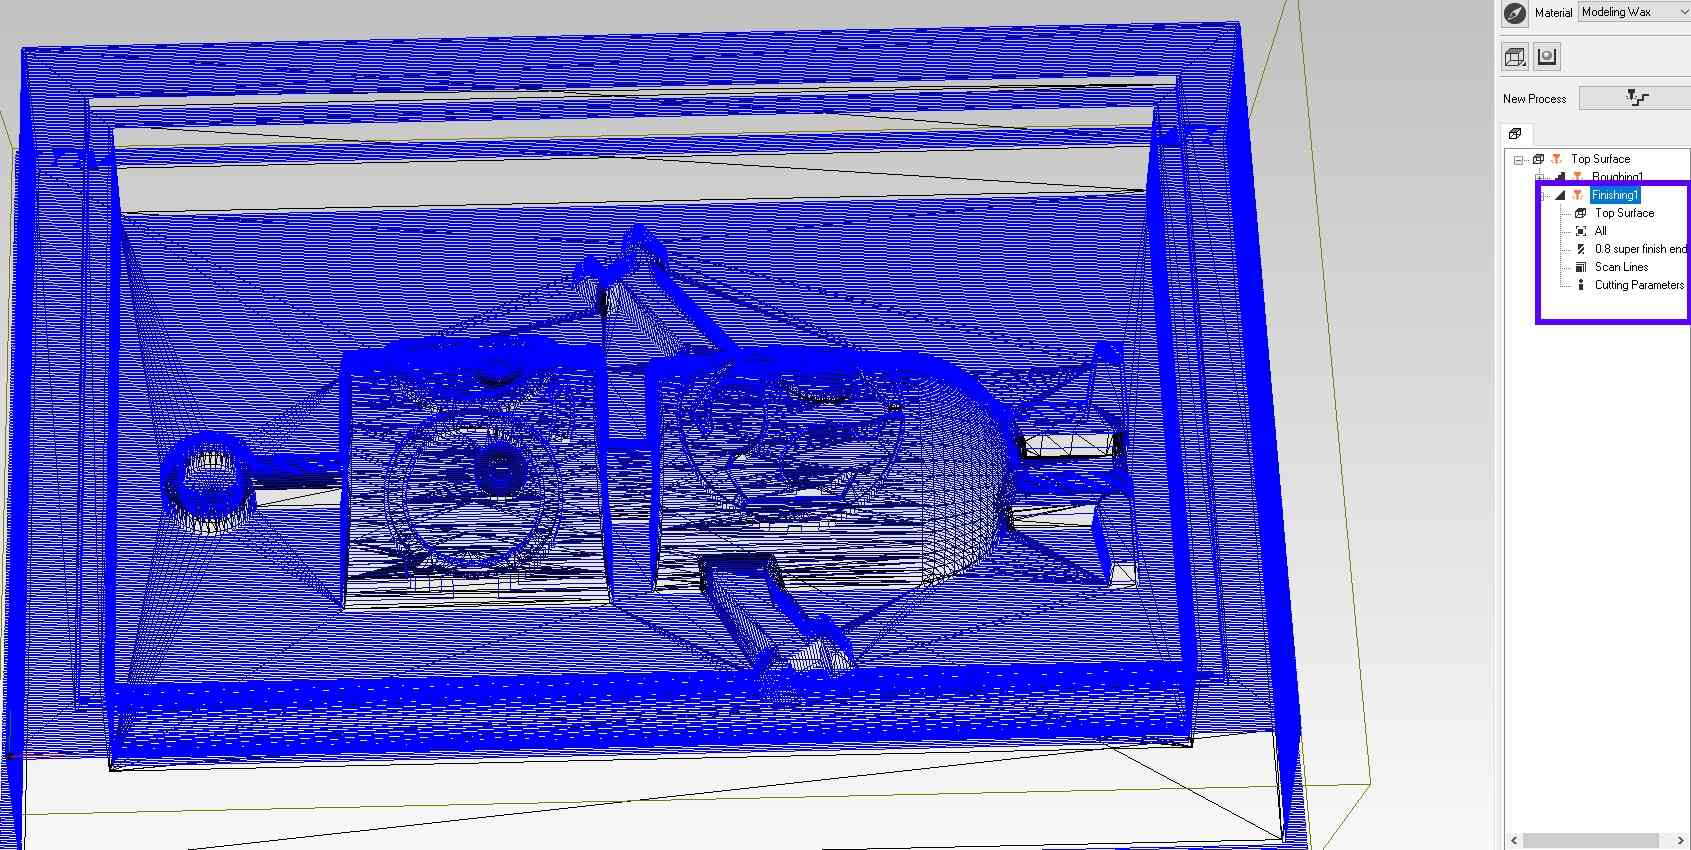
Tool path for finishing with 0.8mm end mill
And if you want to download the .prn file of this piece you can click on this link for that
fabiod tool pathCreating Machinable wax
As for this week we require to mill our design on wood or wax , but due to COVID 19 we didnt receive either of it so
we planned that we should prepare our own machinable wax
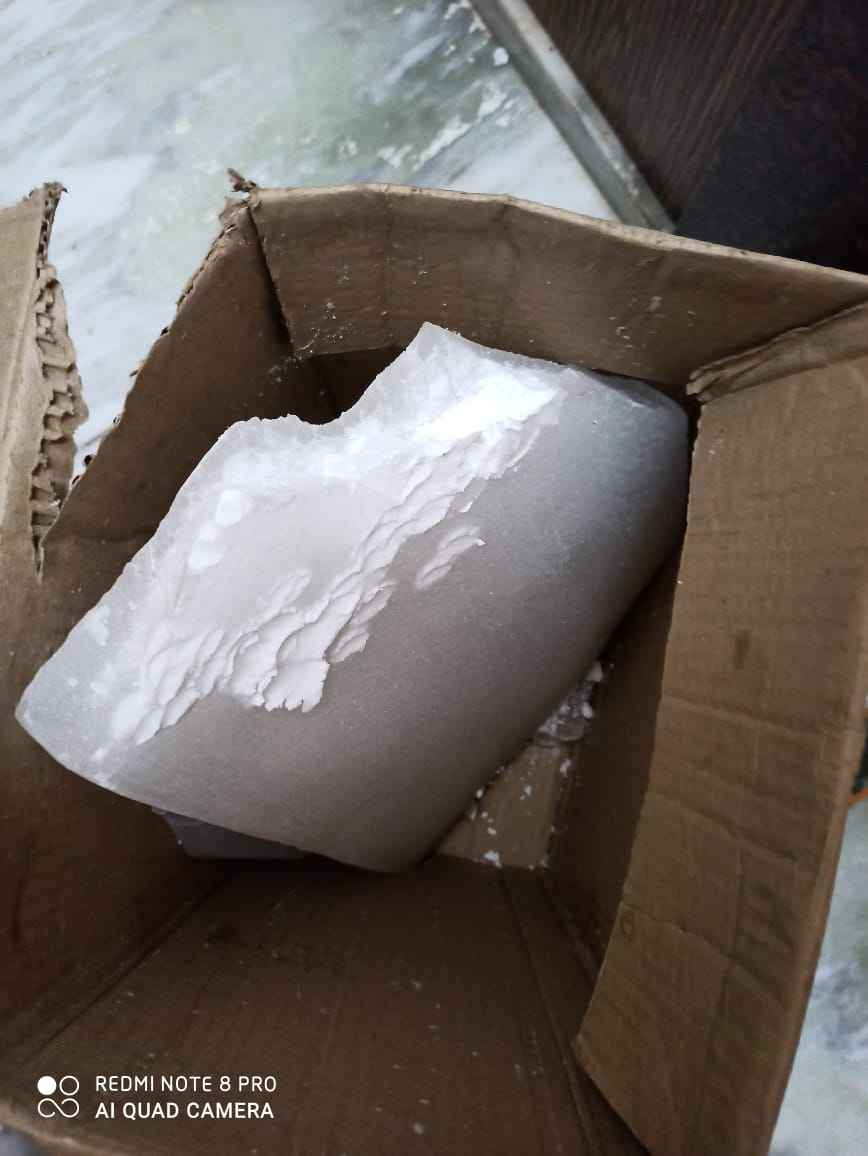
So for that purpose i bought 5 KG of Parafin wax (CANDLE WAX) from an industry near my home and it cost me Rs 140/Kg ($2/Kg)
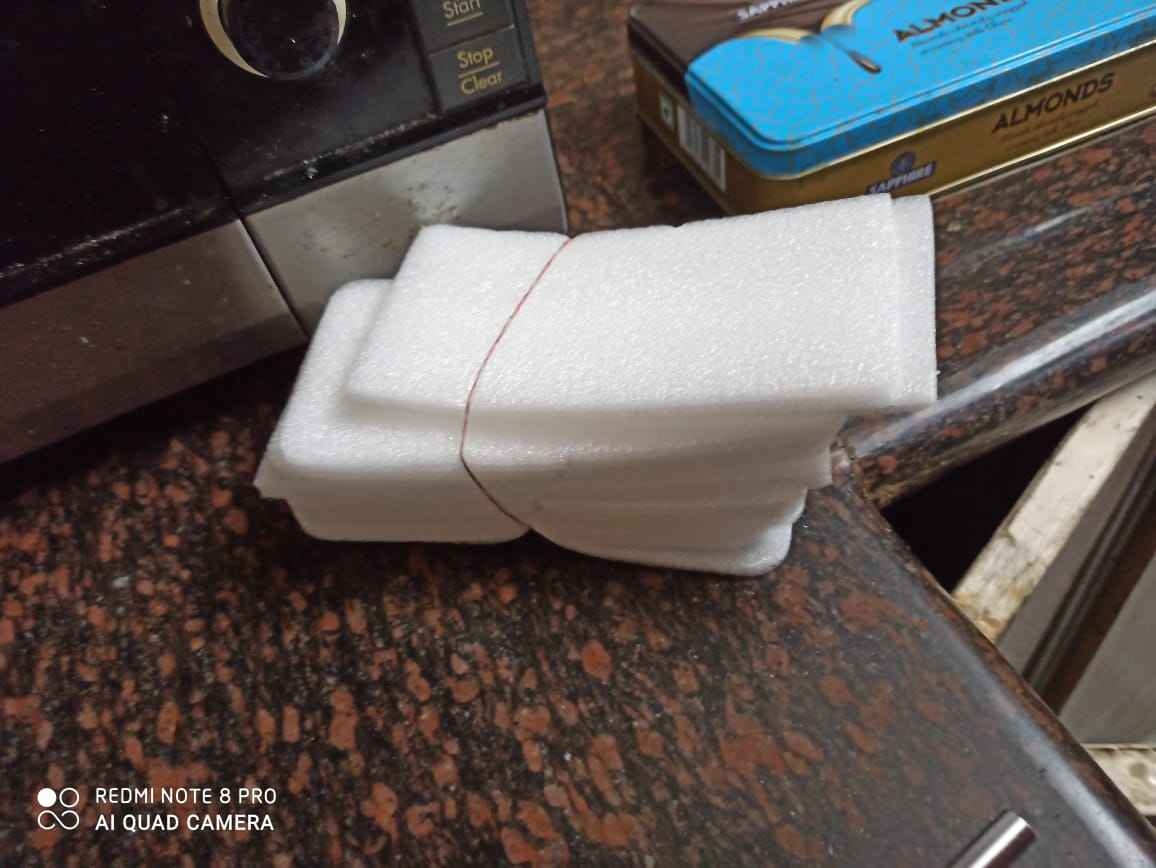
This is Polystyrene foam which is also commonly used as packing material , which i got without any chargw from local phone repair shop as it was waste material from them
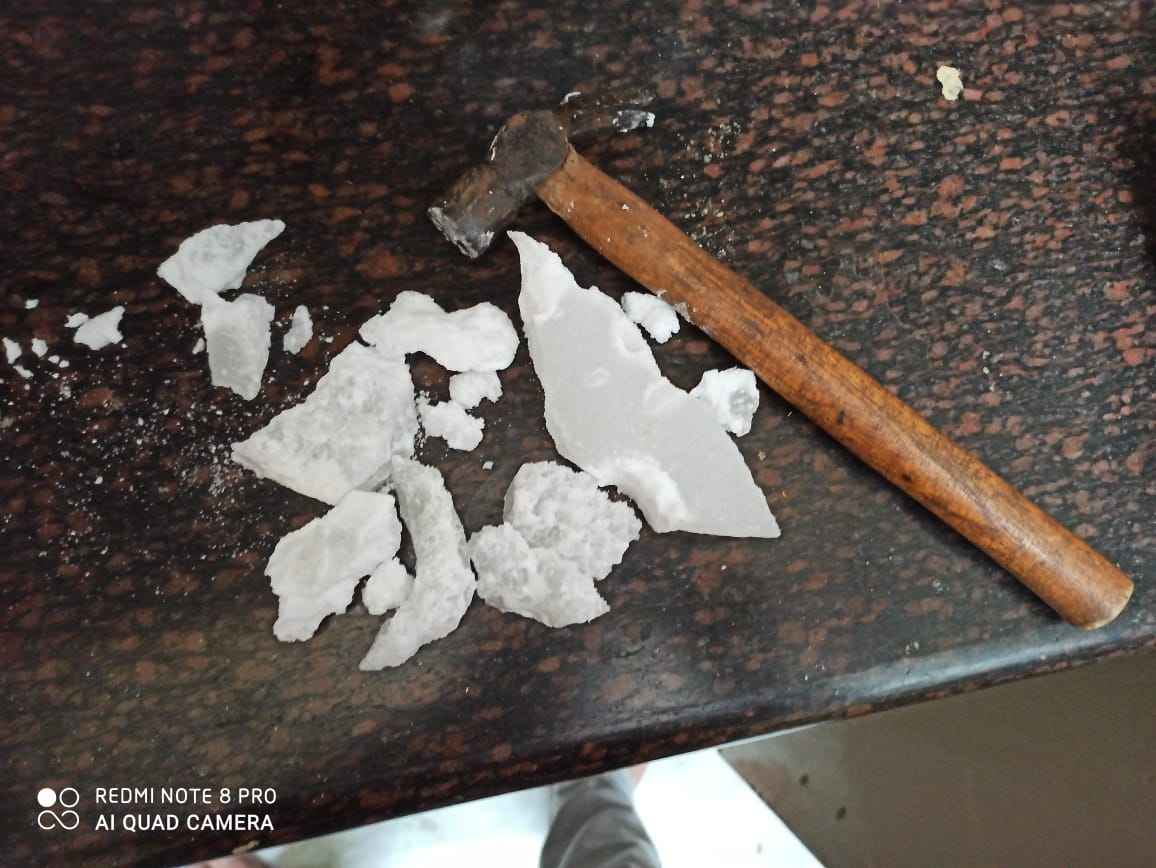
With the help of an hammer i break big chunk of wax into small pieces , so i can melt it
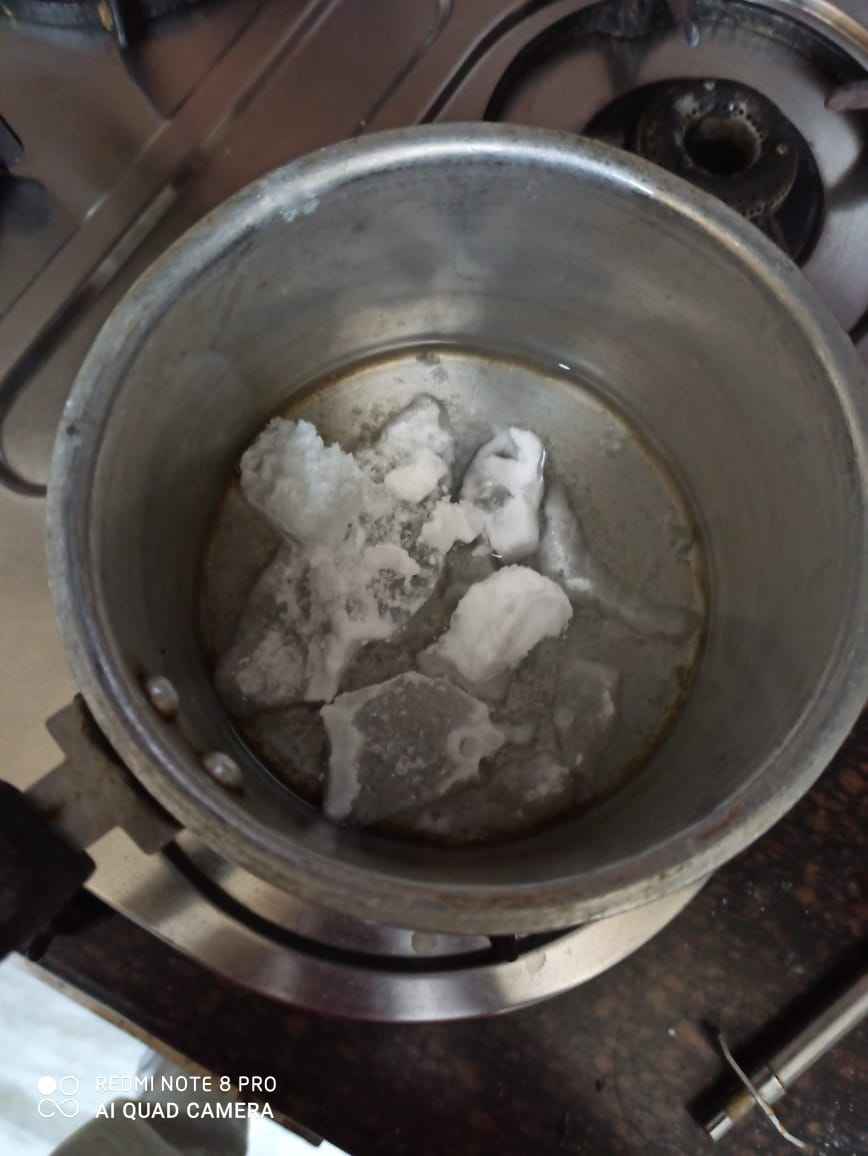
This was an aluminium pan which was not being used for any purpose , so i start melting wax at slow temperature
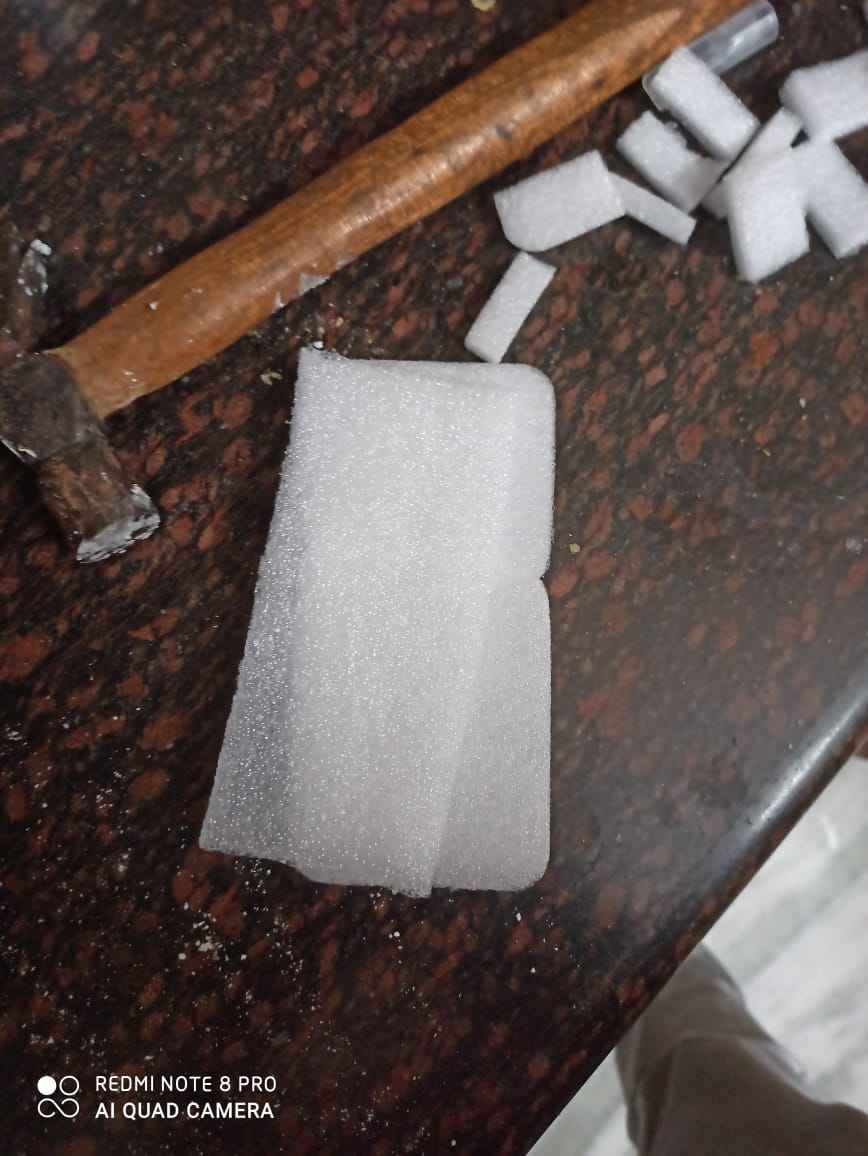
Until the wax is melted i cutted polystyrene foam into small pieces so it can easily melted and added to wax
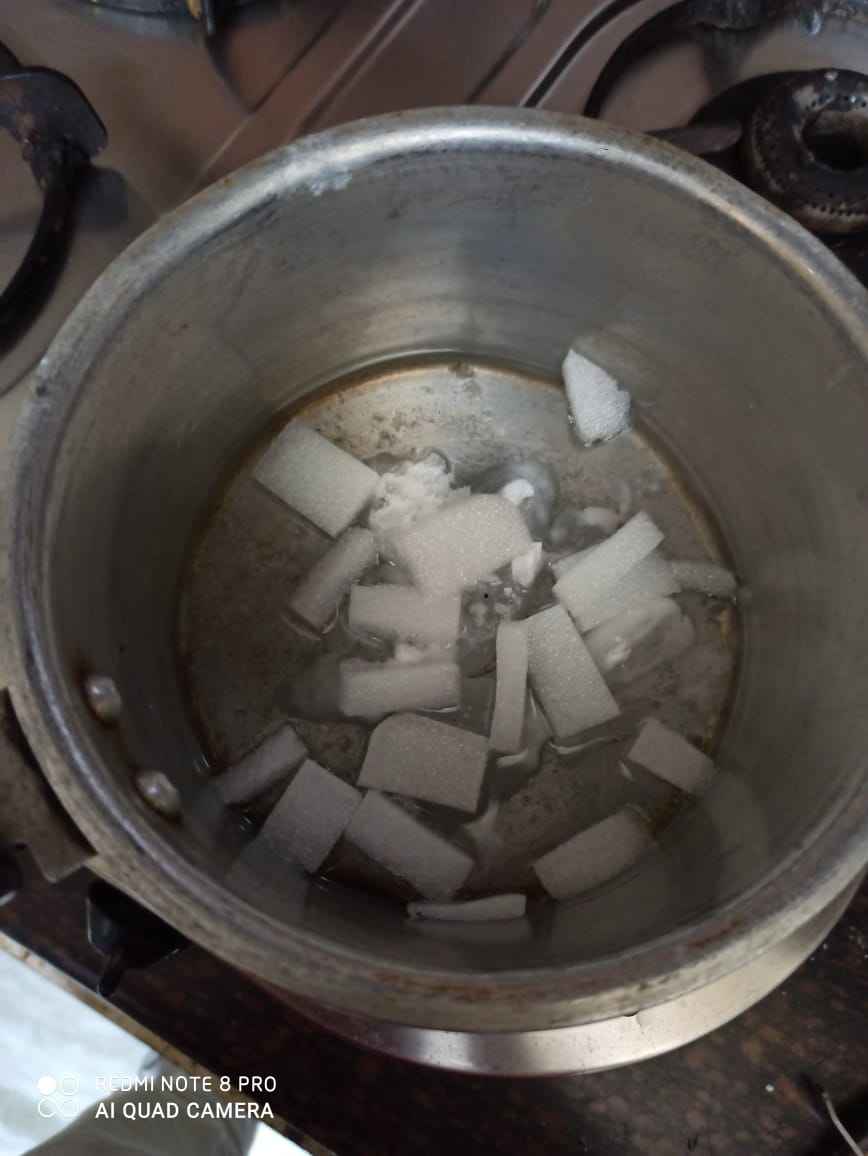
Then i added foam to pan and start stirring until it is properly melted
Stir it until both things are melted and mixed perfectly
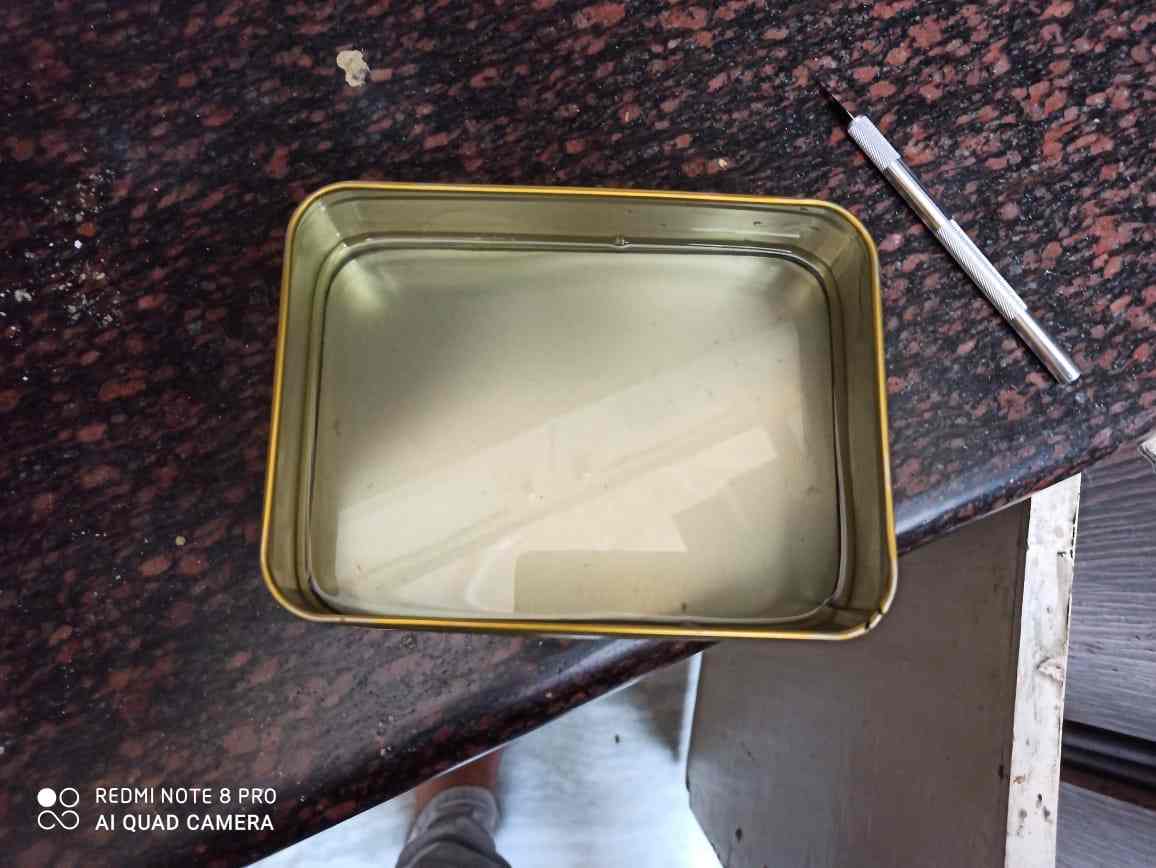
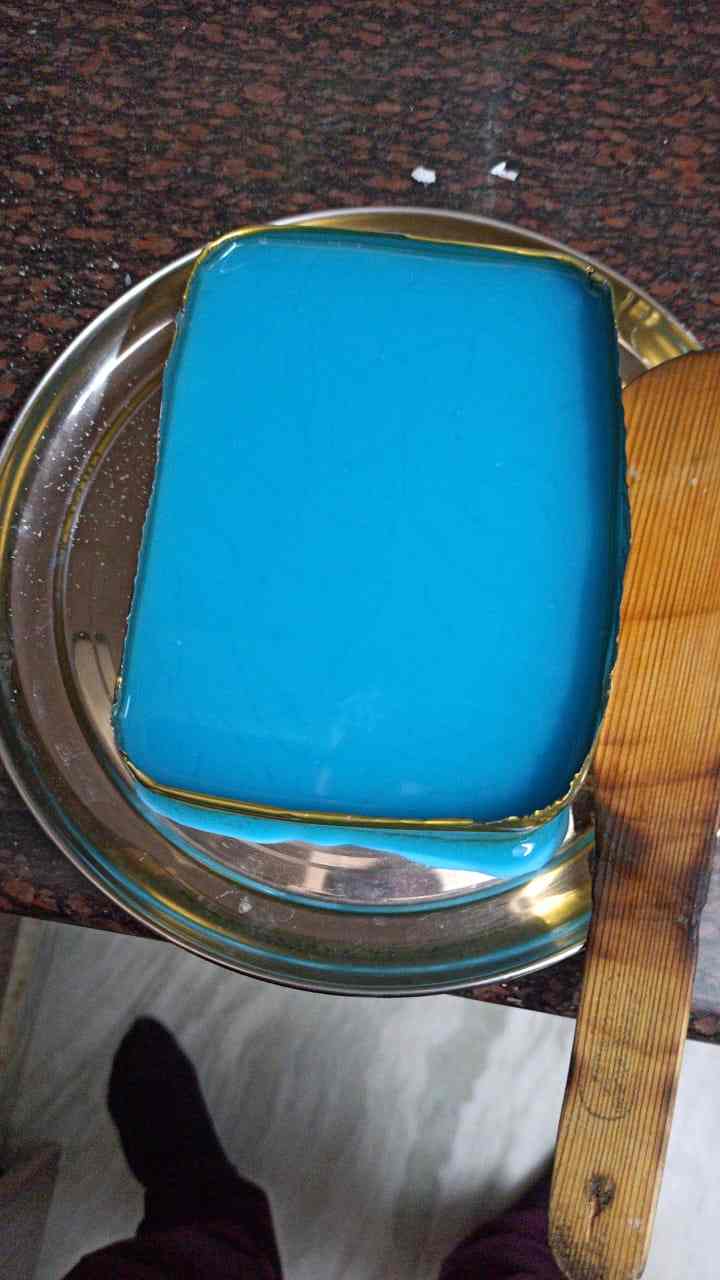
For giving wax a perfect shape , i used this metal rectangular container
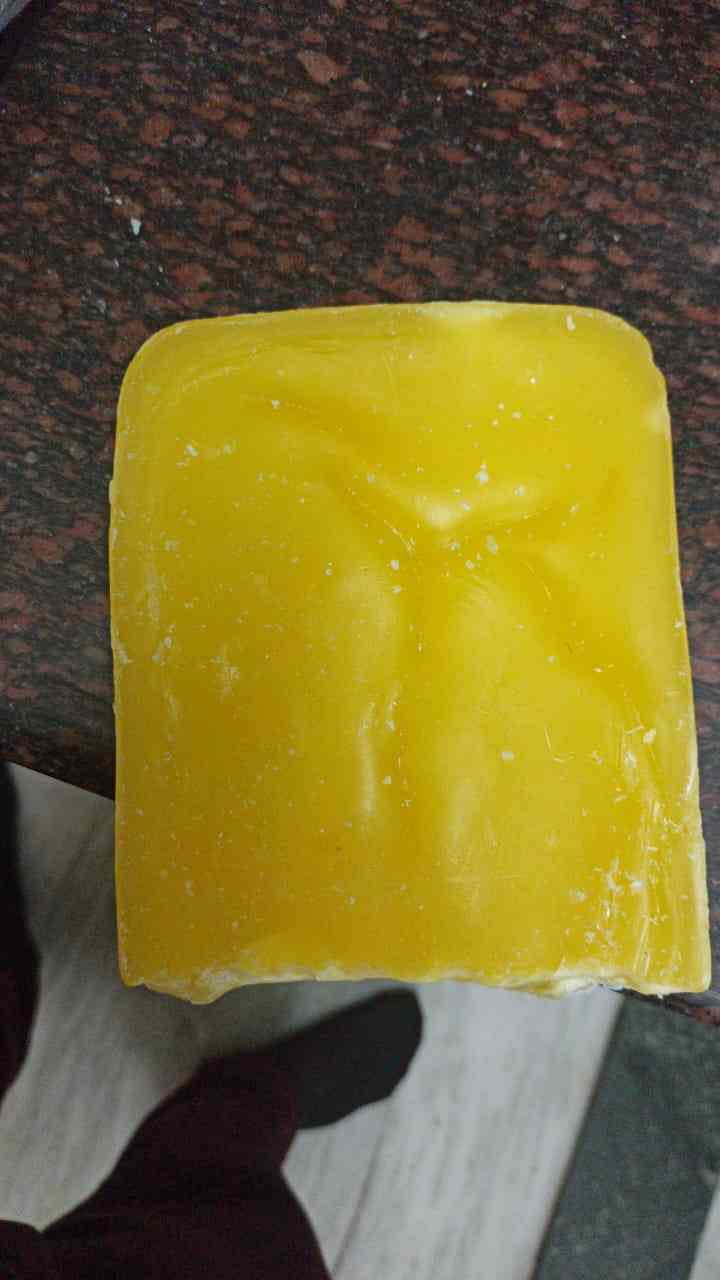
This is the final sample which we got after solidification of wax
Then i decided to make more samples , but i have observed a major problem i.e. uneven cooling causes cracks
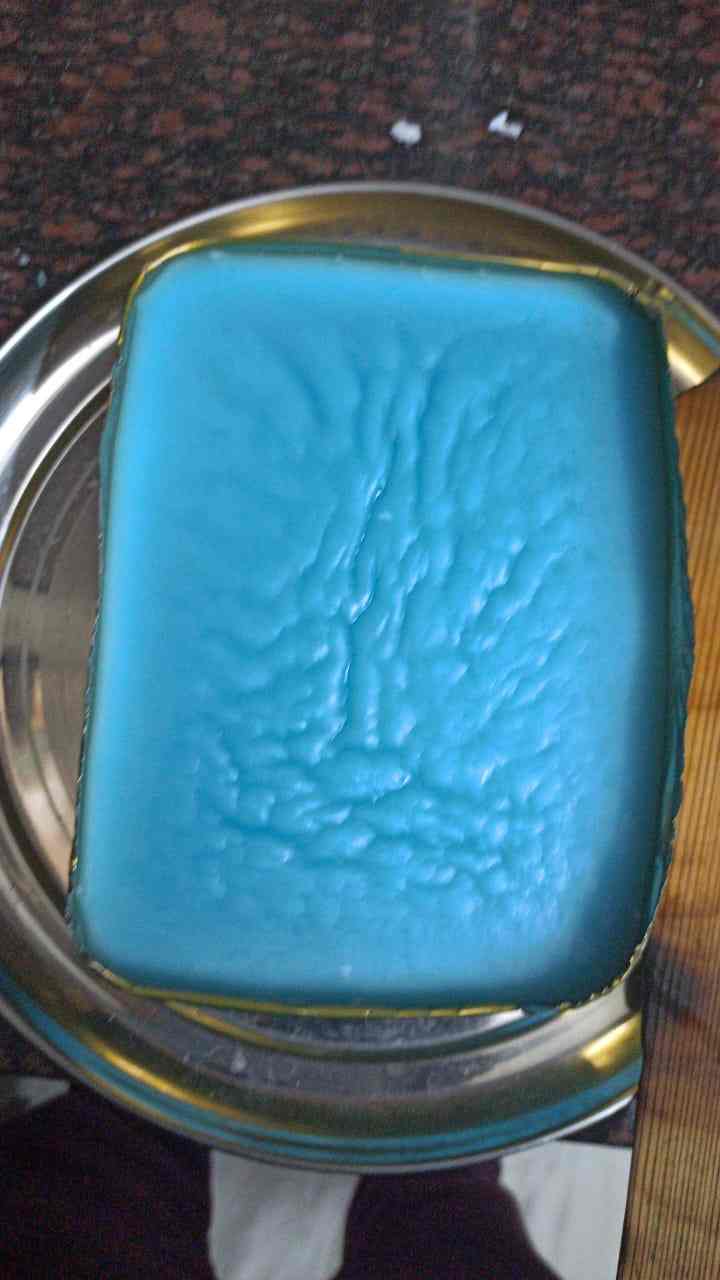
This is semi solid wax and you can see lvl of cracks
And sometimes these cracks are so deep that they could decrease the thickness of workpiece when it is leveled
And this is not restricted to one sample , this has same problem
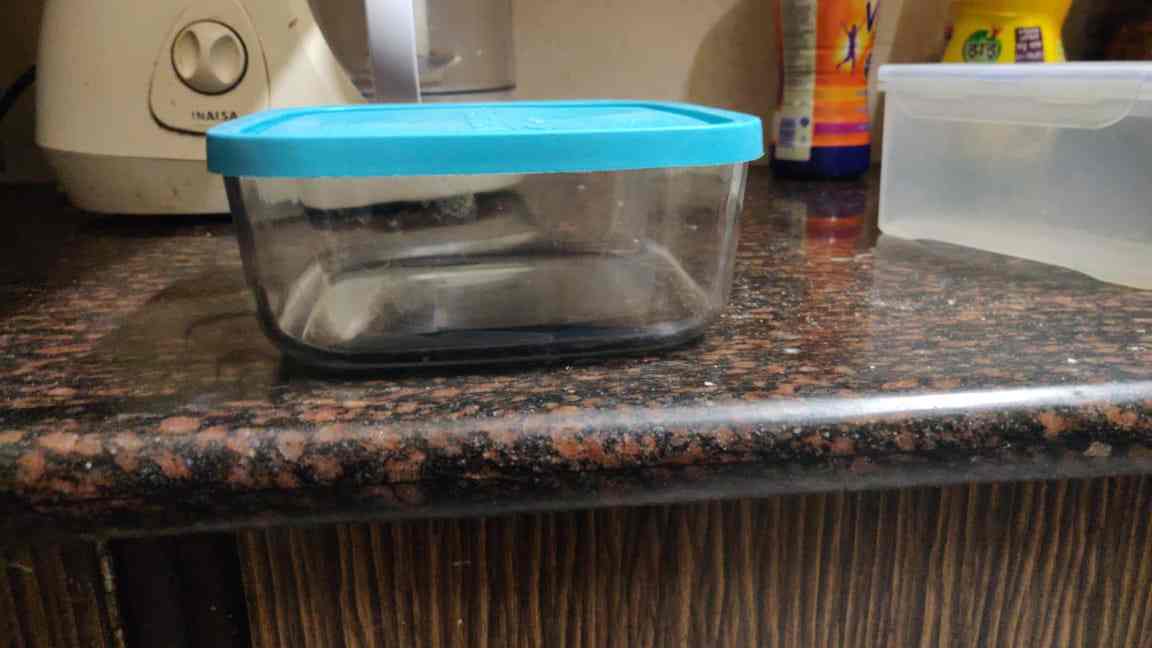
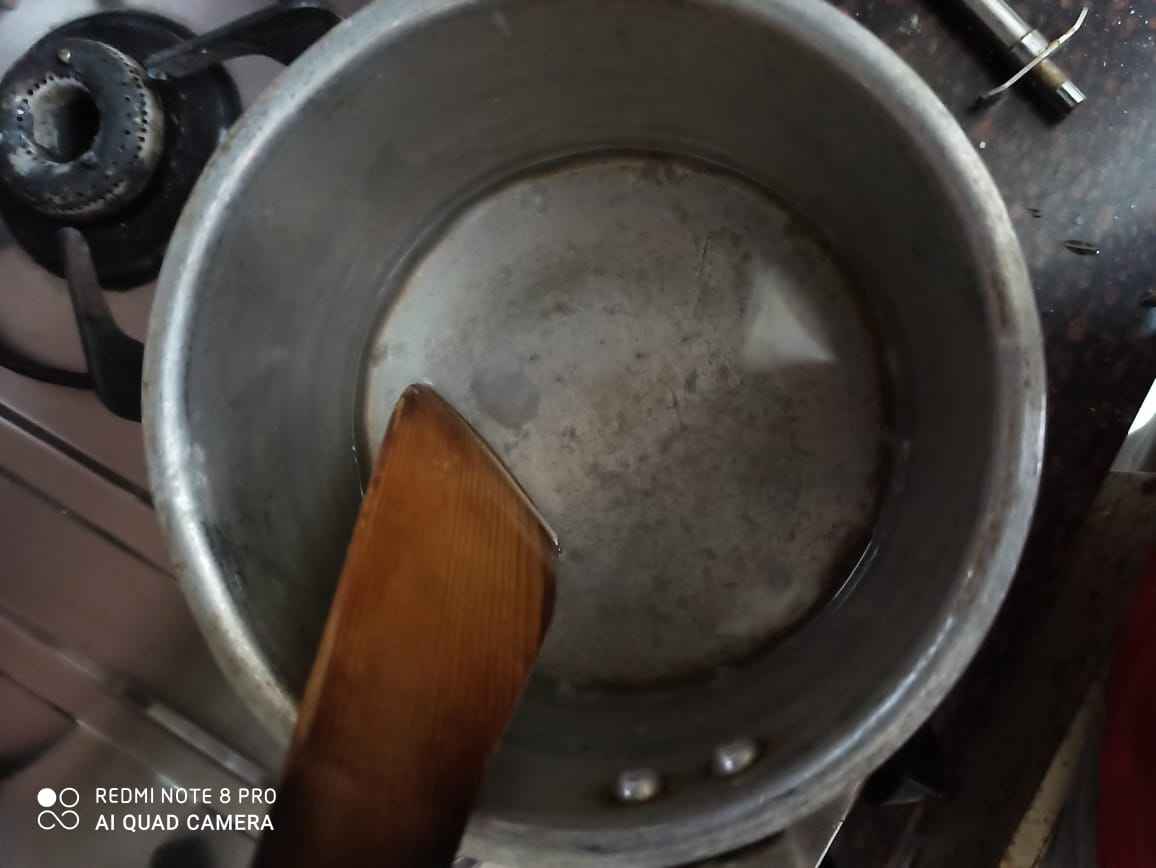
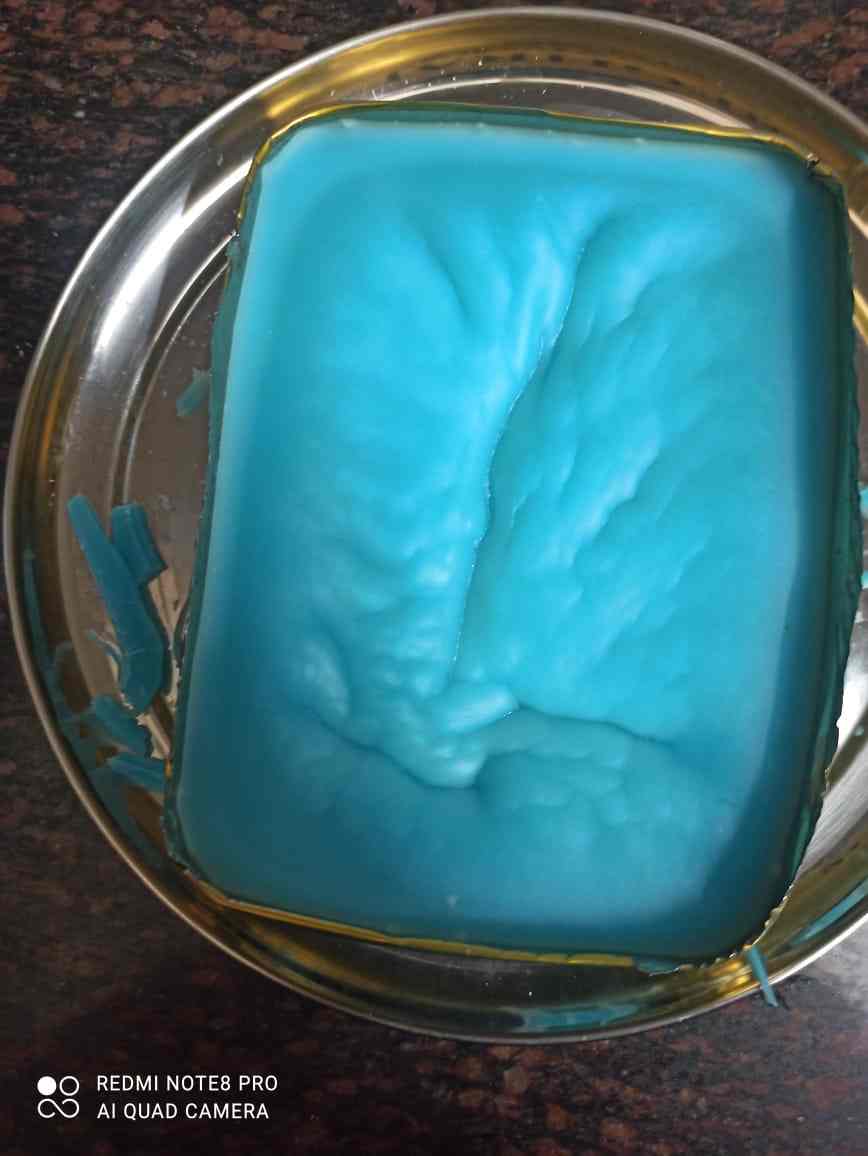
Solution for this problem is to reduce th rate of colling and you can do that using something different , in my case the solution was i used this borrosil tuperware bowl which can withsrtand high digree of temperature
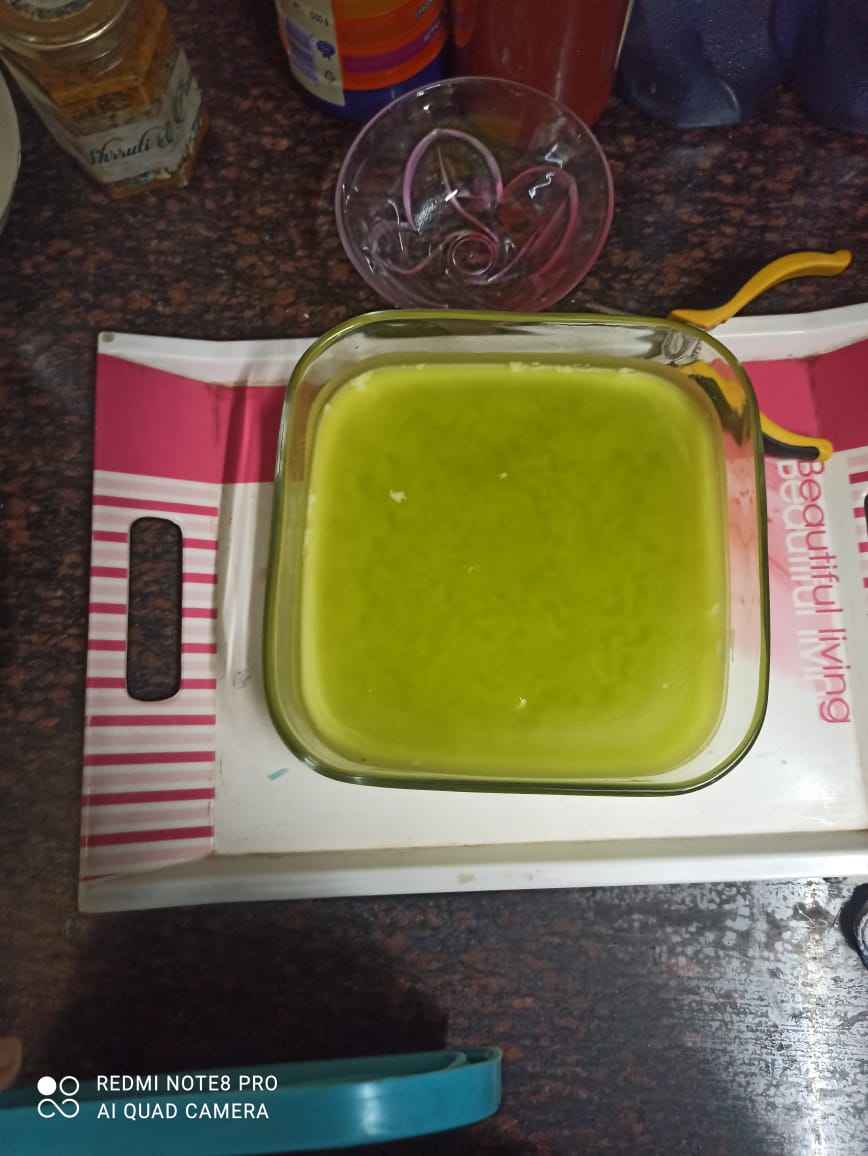
This time i get better result
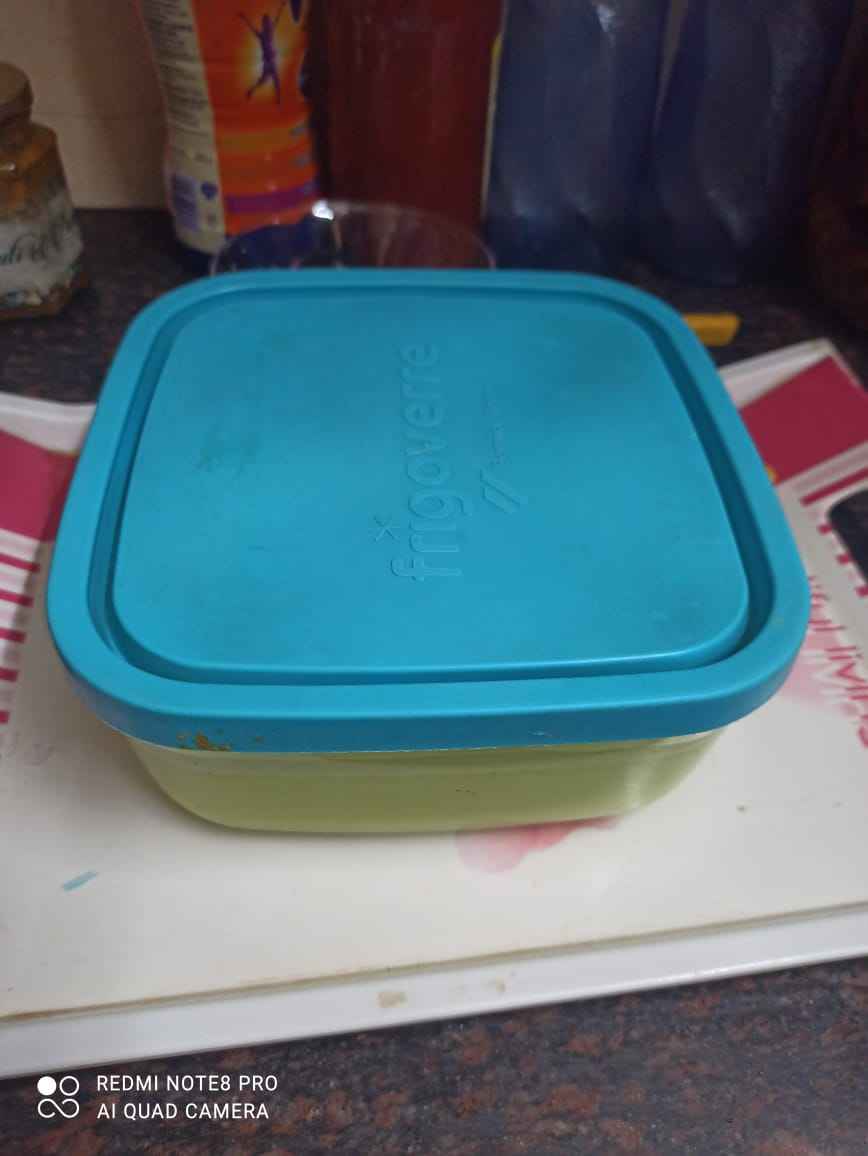
Because the lid which i but on th bowl reduces the rate of heat desipitation
You can see there are no cracks on surface and its even
Yeah one thing more remember to apply refined oil on the glass so wax dont stick on it and you dont need to do what i need to do
Leveling Machinable wax
First this you need to download the CLICK MILL software from rolan' s official site by clicking on this link
After downloading the software , pls open it
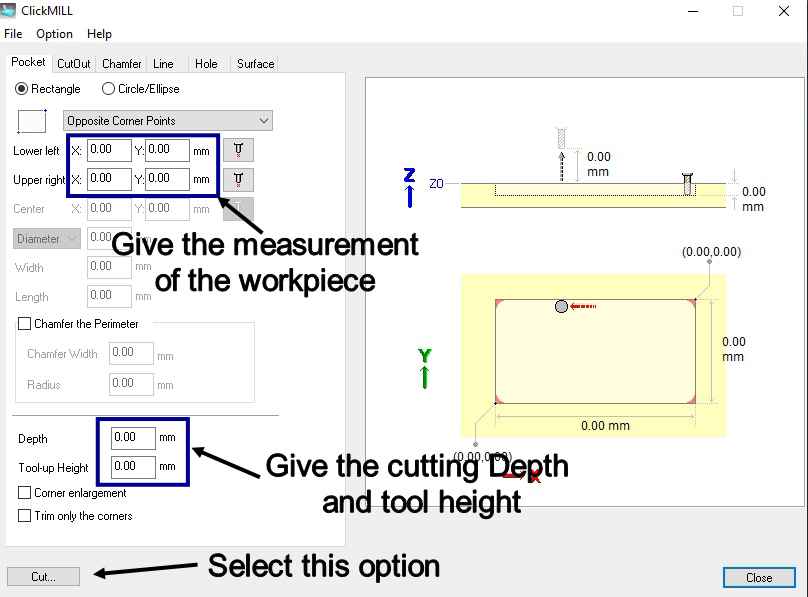
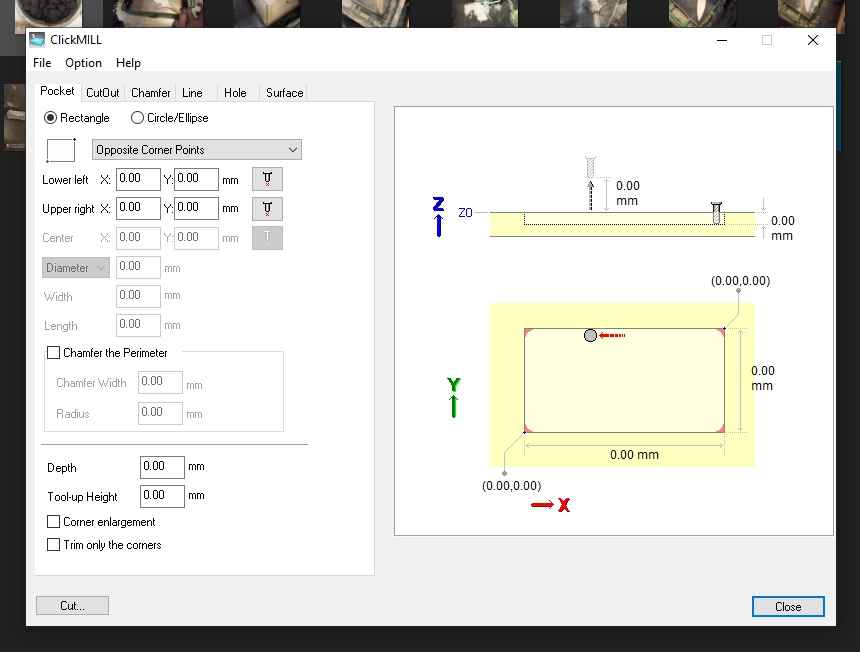
Give the size of workpiece you want to level and the how much depth you want machine to lvl (remeber it can vary according to workpiece to workpiece) and then click on on "CUT"
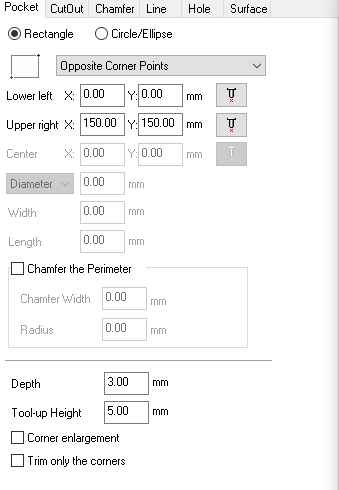
Then select the tool and type of material you are going to work on and system will provide you default value for it
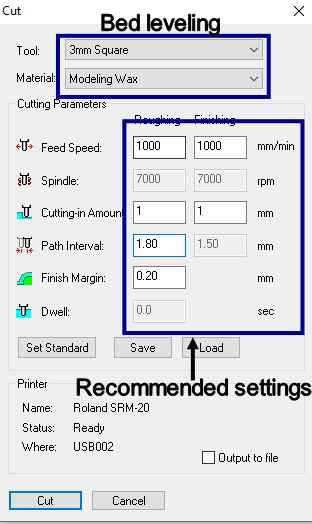
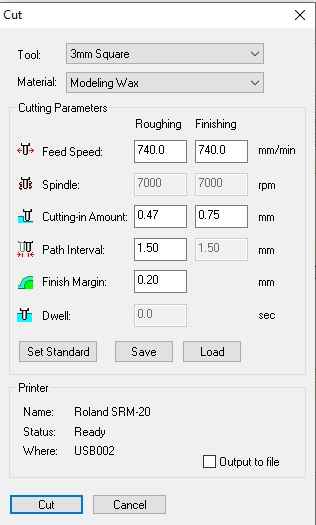
In my case these were the parameter which suits me , but this can vary person to person
Then just click on cut and it will generate .rml file and you can start machining
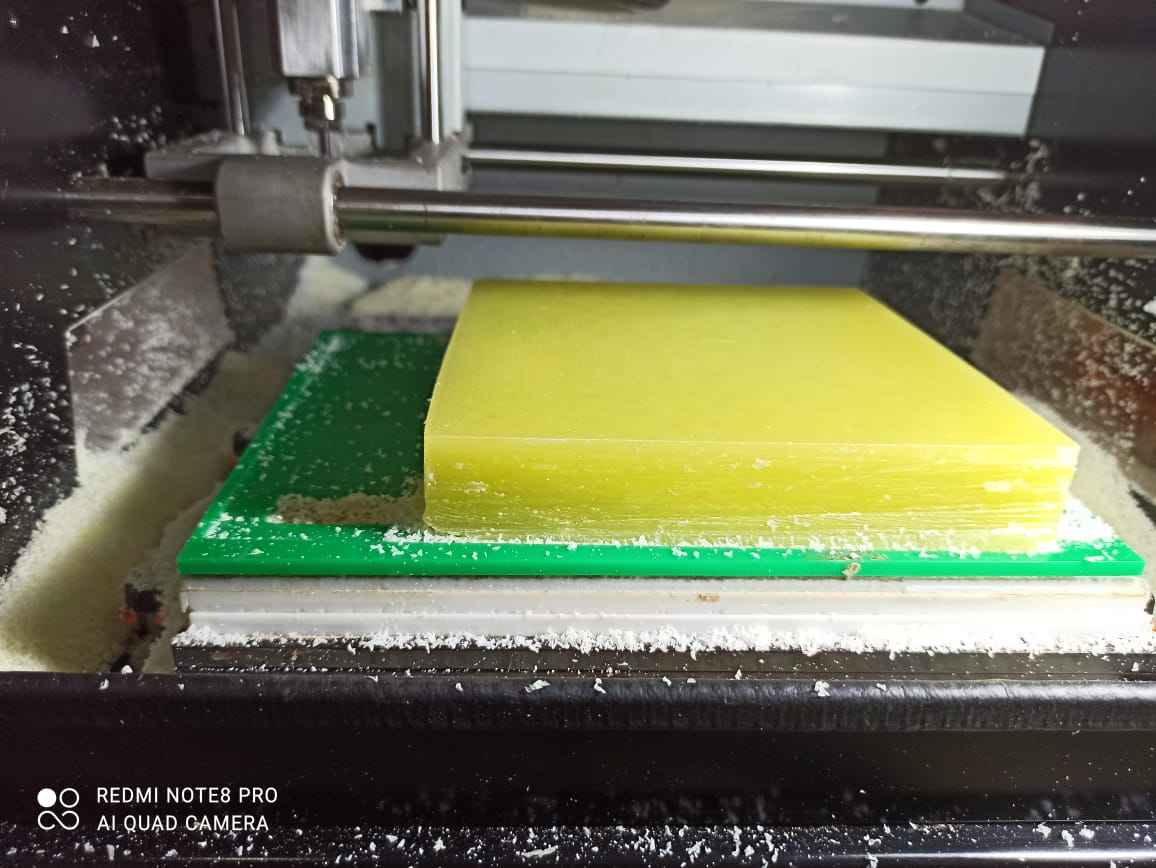
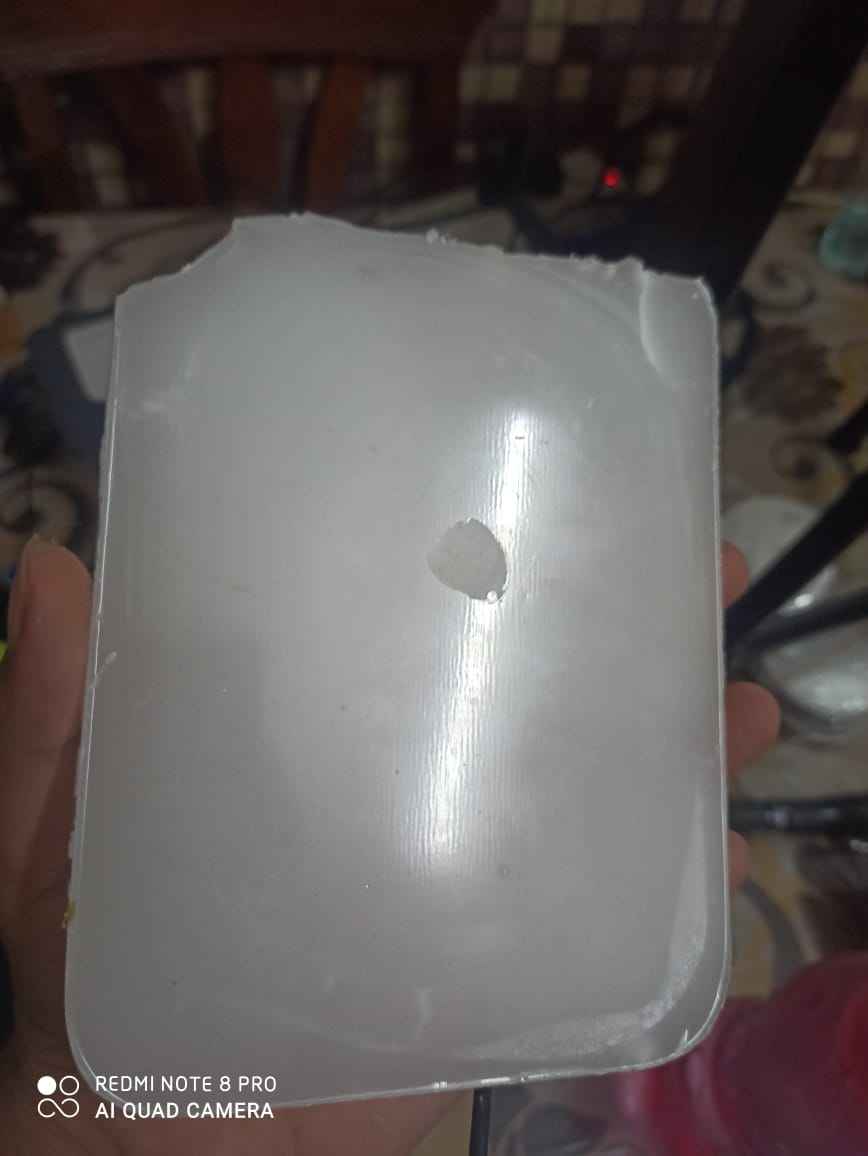
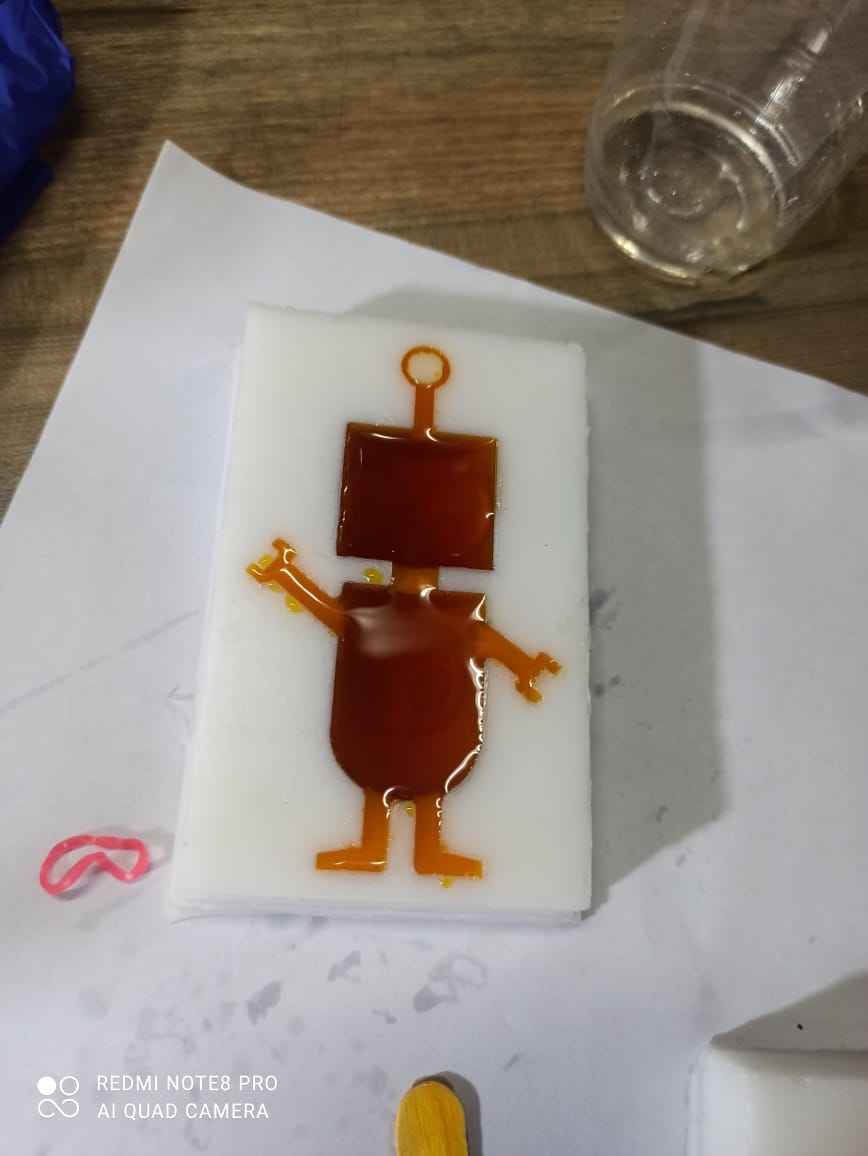
This is piece of leveled wax
Mlling Machinable wax
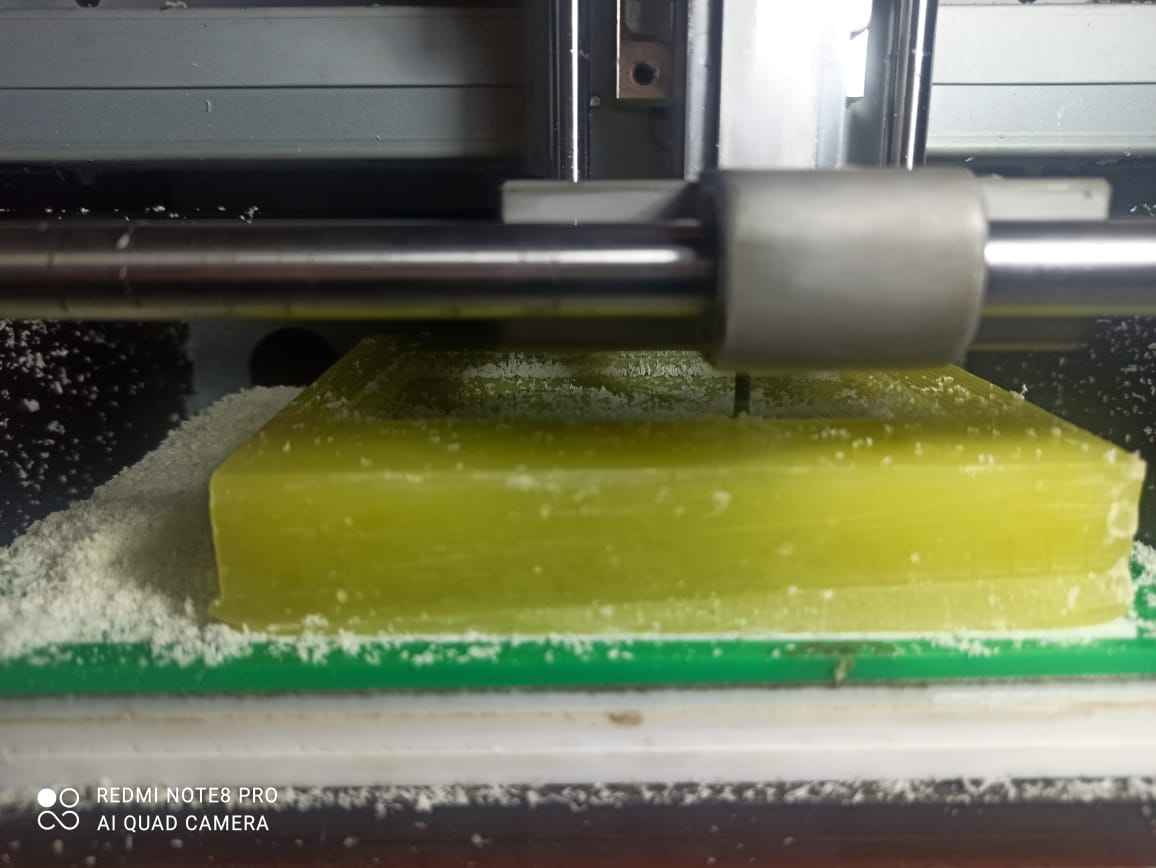
After i leveled the wax perfectly i have started milling my workpiece with 3mm Endmill for roughing
Remember to always have a vaccum cleaner available and use it in every 20 minute to clean the material so it dont stick on pattern
Now it started taking shape
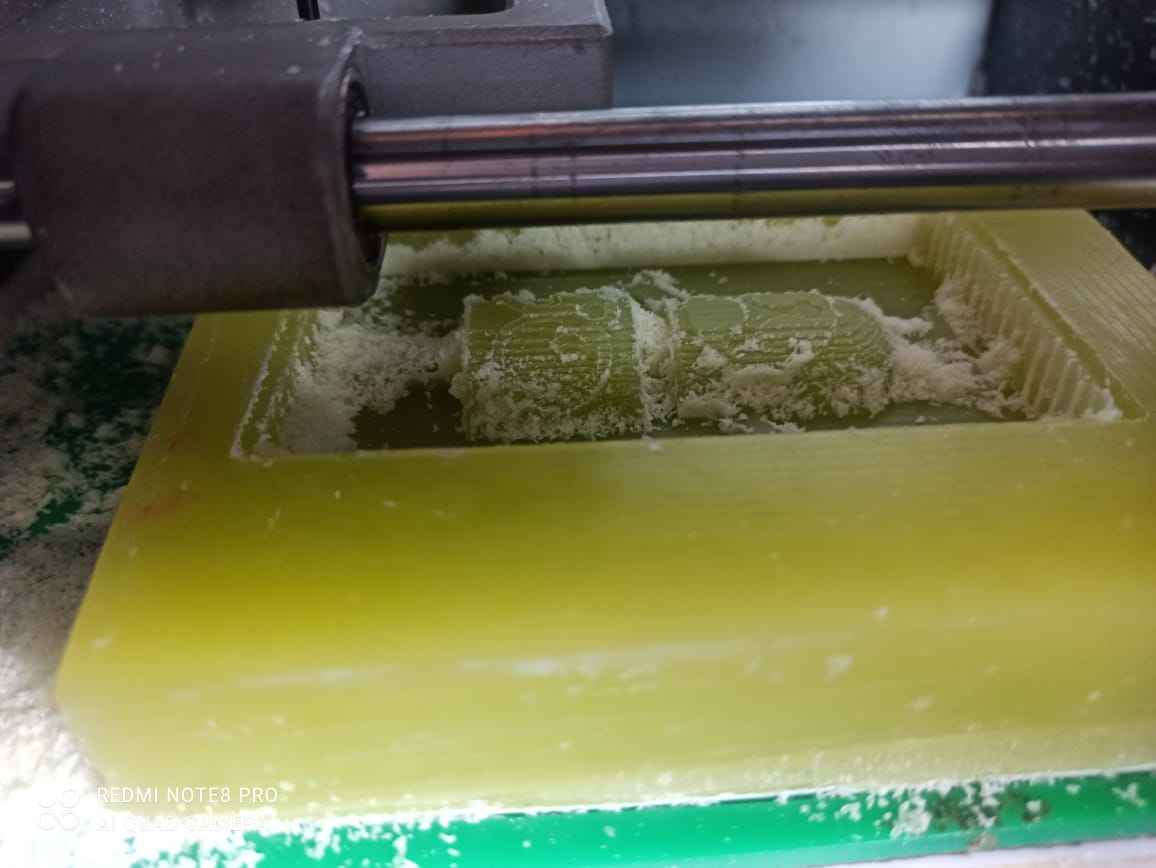
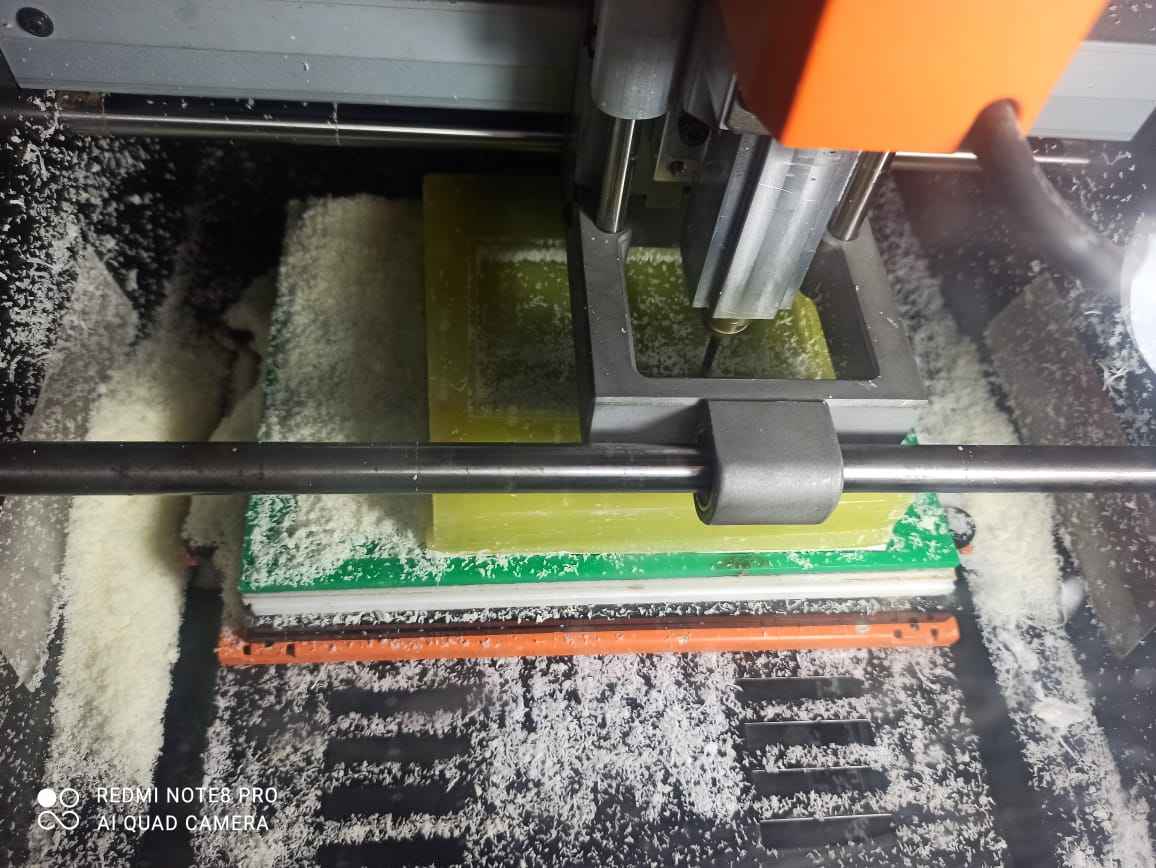
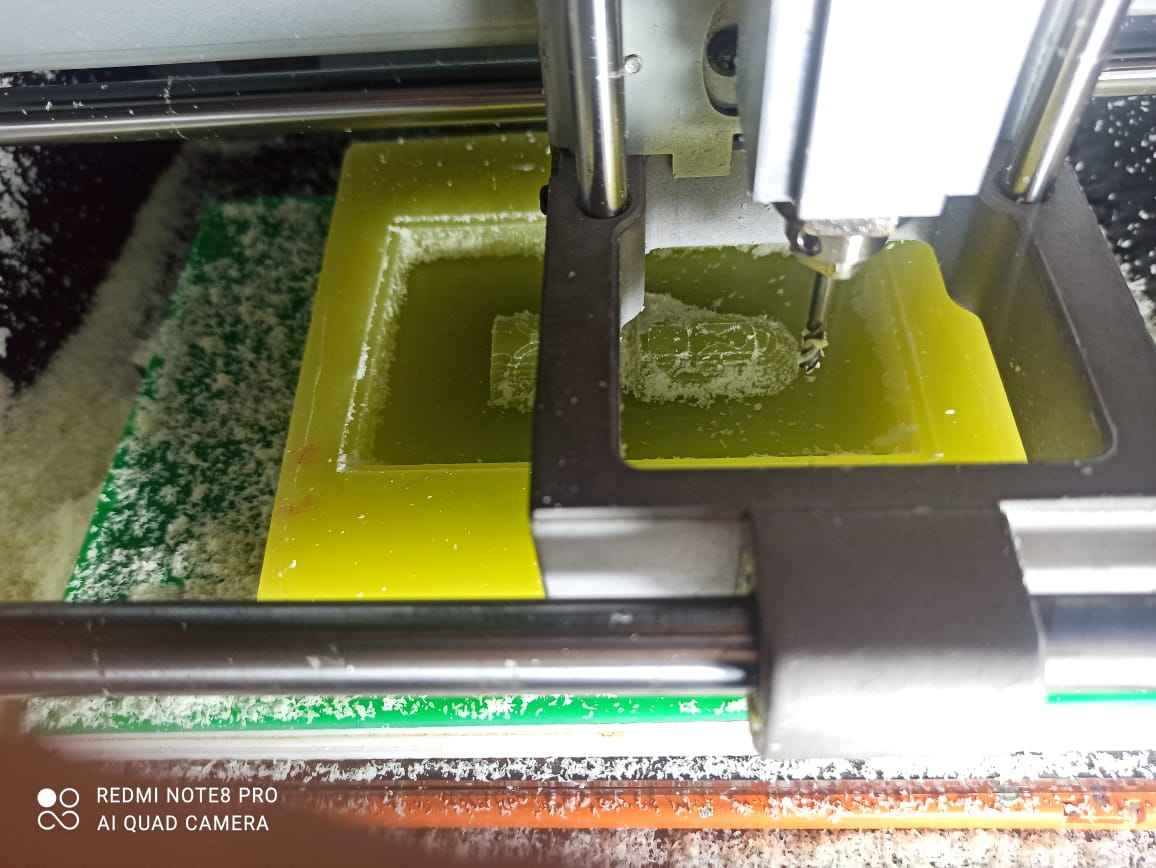
Roughing is completed , now time for finishing using 0.8mm (1/32 inch)
Finishing is completed now
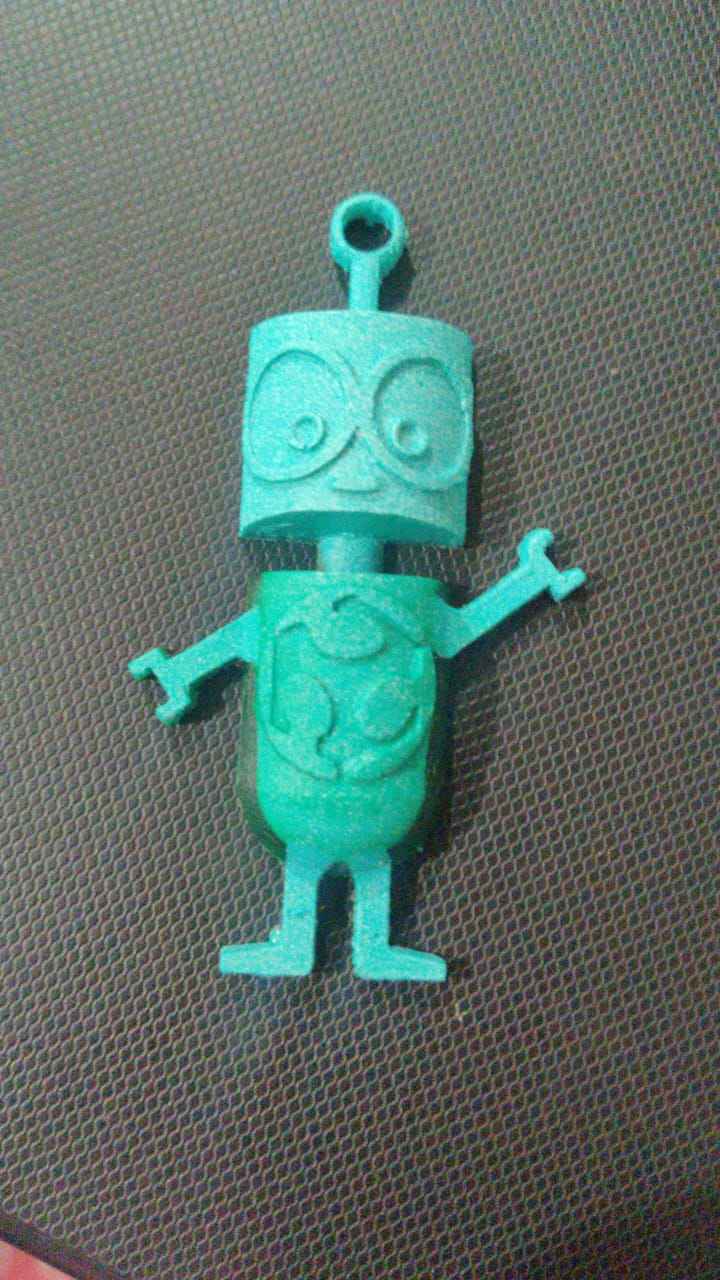
This is the final piece i got
Group Assignment
AIM- Review the safety data sheets for each of your molding and casting materials, then make and compare test casts with each of them
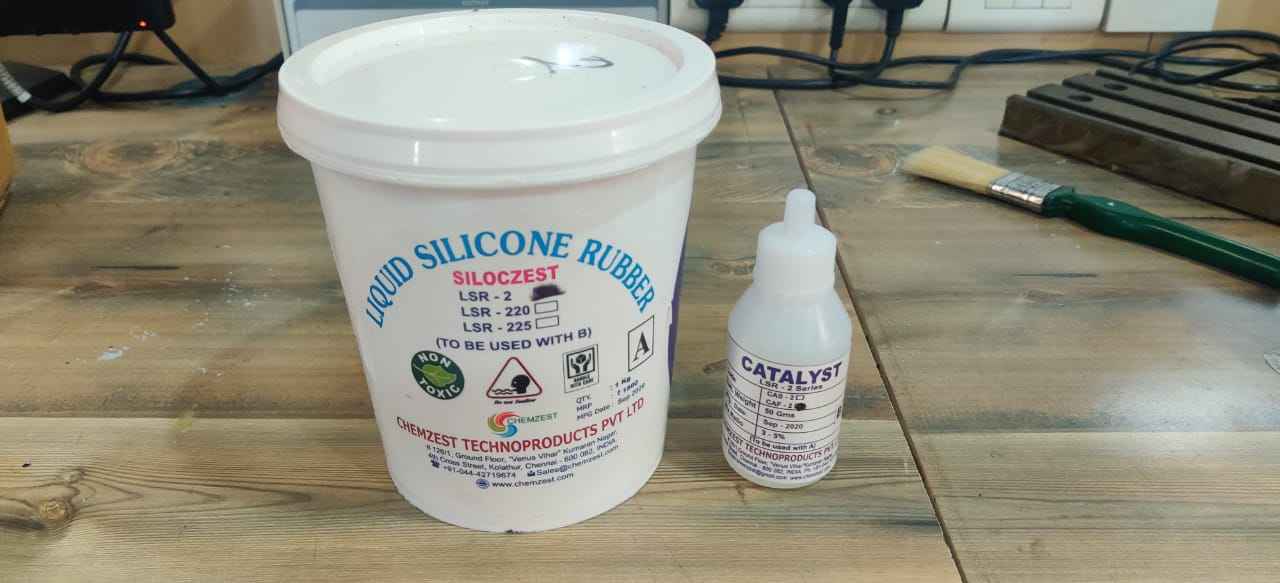
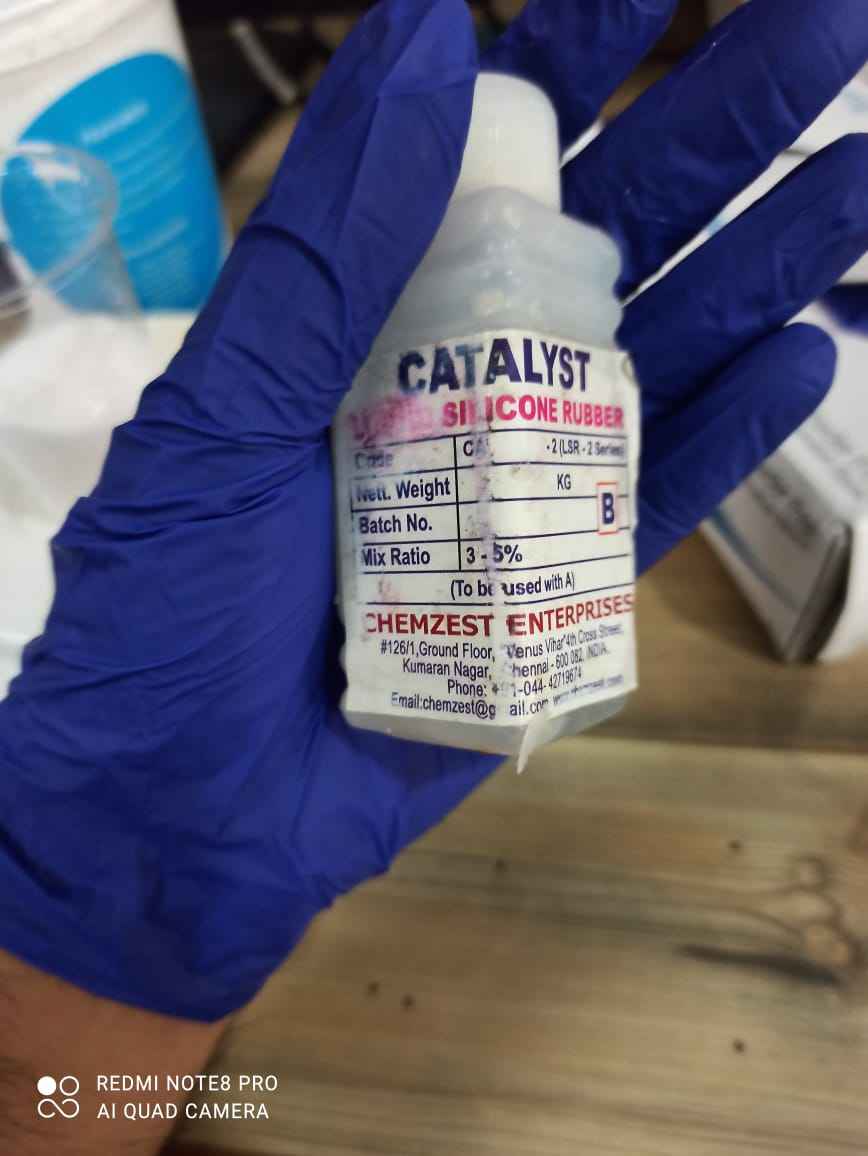
1. SILOCZEST Liquide Silicone rubber
FEATURES OF SILOCZEST Liquide Silicone rubber
1. Easy work ability process to make molds
2. No Special Machinery requires
3. Can get Fine details like Finger Print
4. Heat and Chemical Resistant
5. Available from shore hardness of 00A to 50 A
6. A Non Exothermic curing and Eco safe
Physical appearance : Low Viscous Liquid Colour-
Base : Milky White
Catalyst : Light yellow
Mixing Ratio : 3-5 %
Curing time : 2-4hr
for more information you can browse there website
2. Aditya Clear Cast Epoxy 33

FEATURES OF Aditya Clear Cast Epoxy 33
1. Transparent
2. It’s like water so flows into each and every corner of mould.
3. No grinding or sanding after casting.
4. Easy Part A 100 parts : Part B 50 parts mixing ratio.
5. Non-Yellowing
Physical appearance :Part A having 3000cP and Part B having 2000Cp
Shore hardness : 80 A
Part A: Transparent
Part B: Transparent
Mixing Ratio : Part A 5:3 Part B
Working duration : 45min - 60min
Curing duration : 20hr - 2-4hr
for more information you can browse there website
Preparing Silicon mould
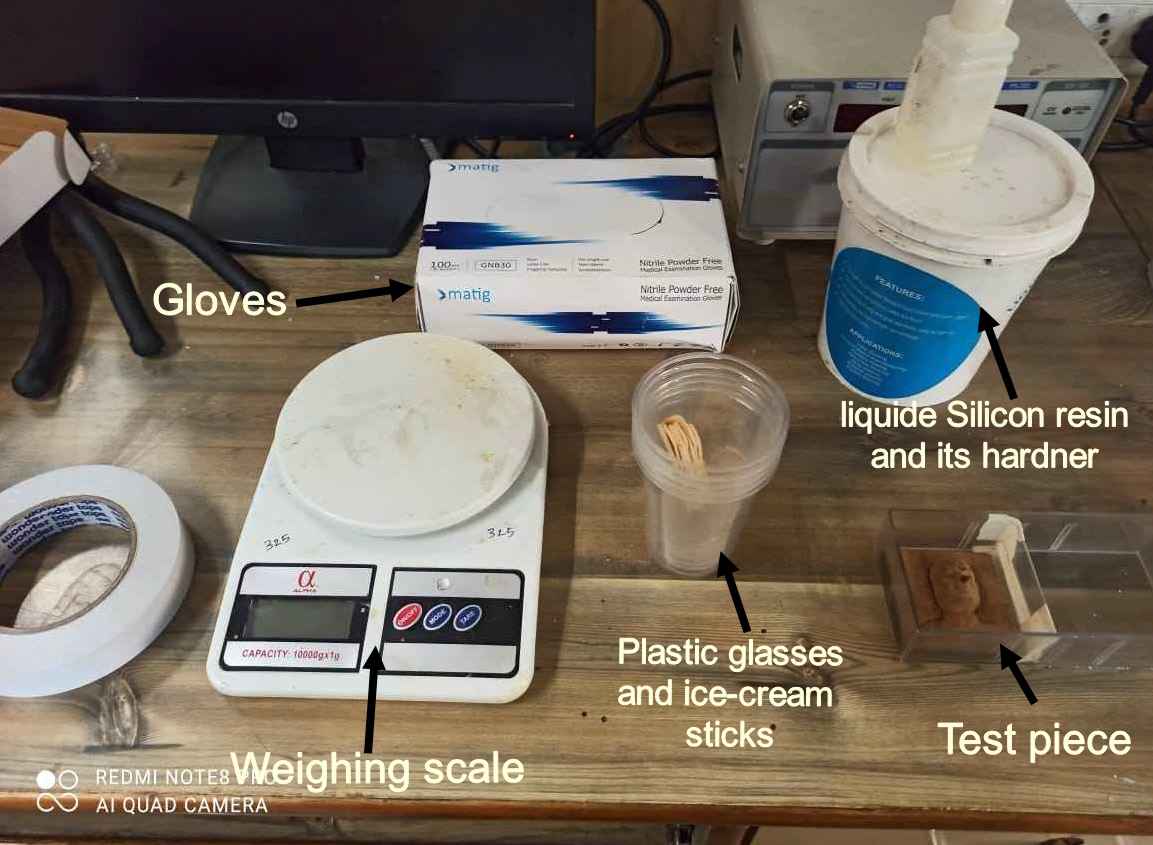
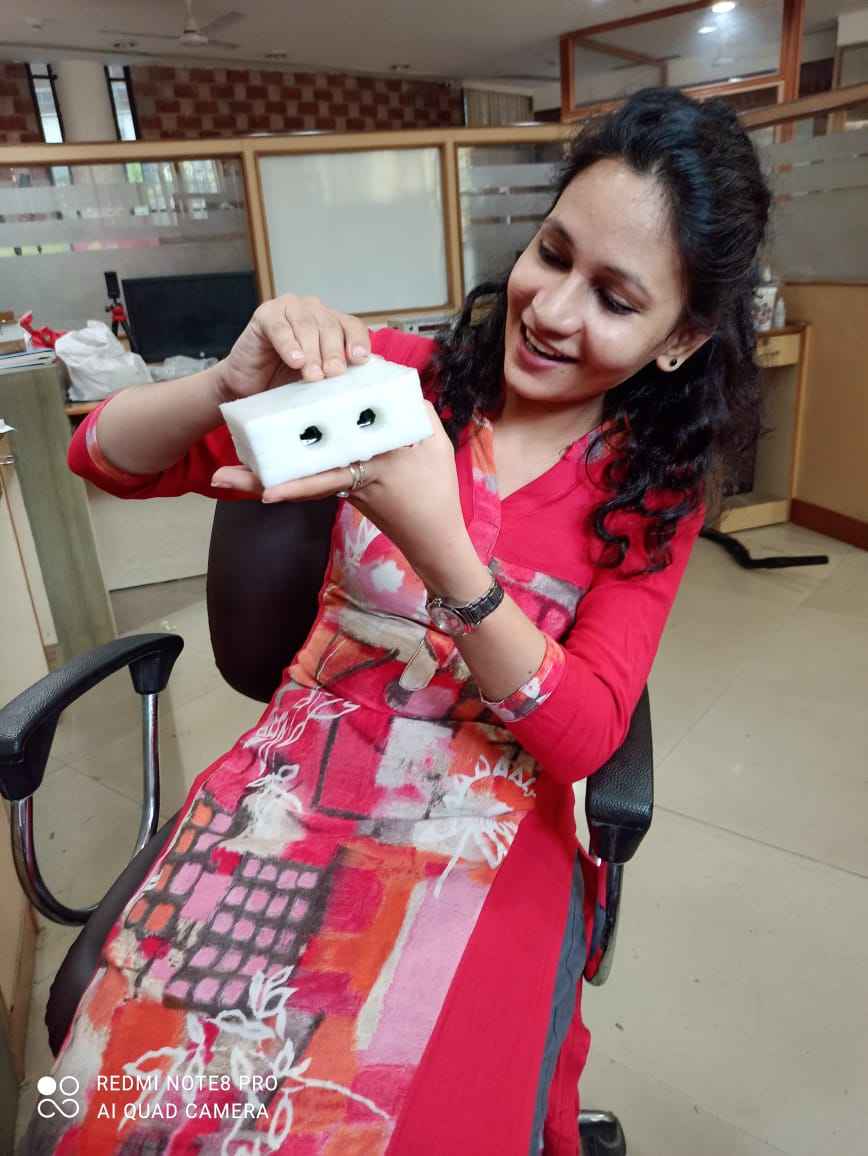
Before starting the work you required these things
1. Weighing scale
2. Gloves
3. Plastic glasses
4. Ice-Cream Sticks
5. Liquide Silicon resin and its hardner
6. Dropper
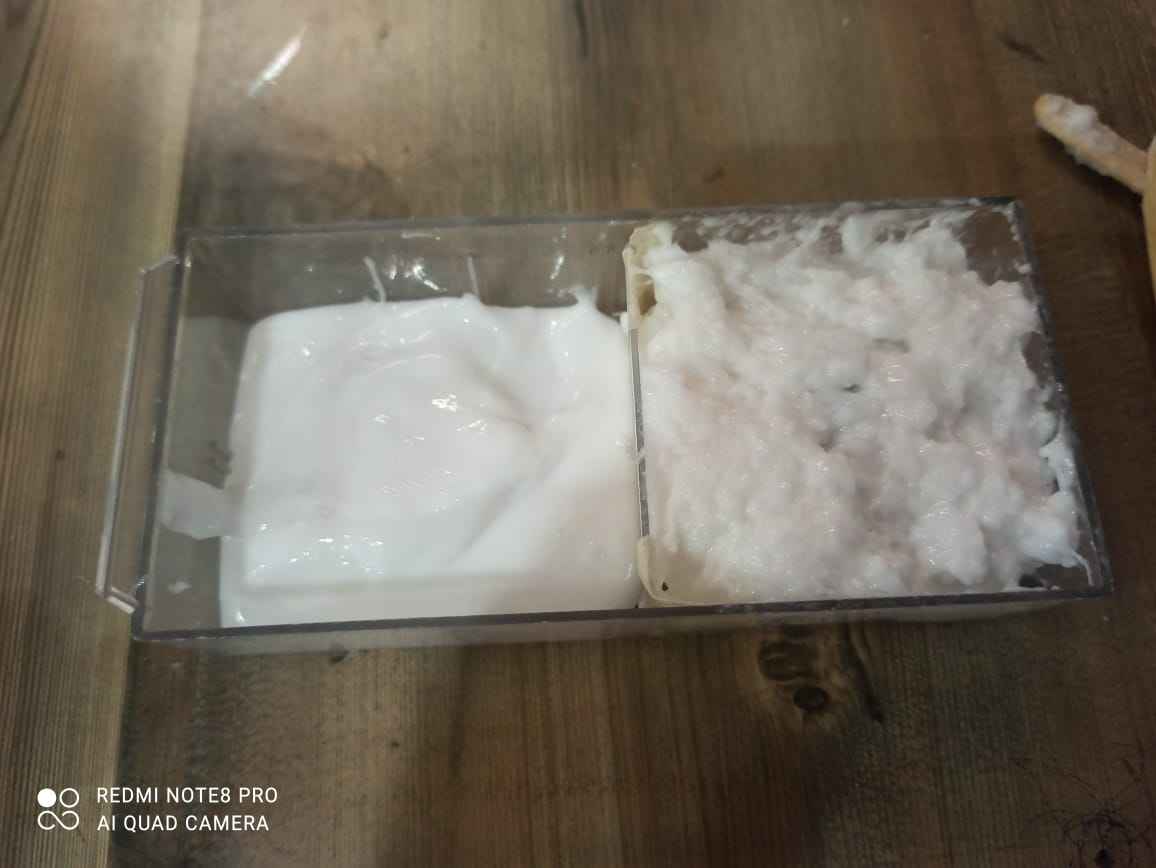
None of us have ever worked with silicon so we thought to first try how it works , so we used 1 of the last years milled part present in the lab
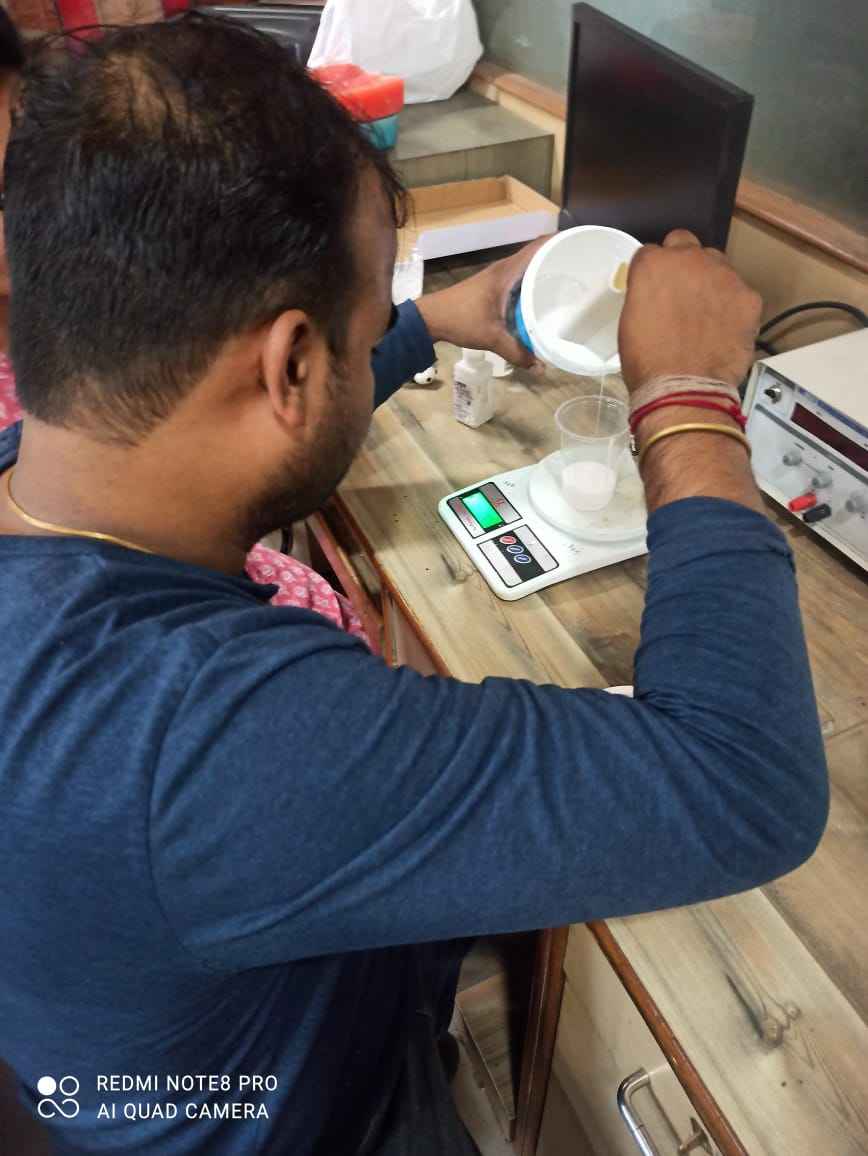
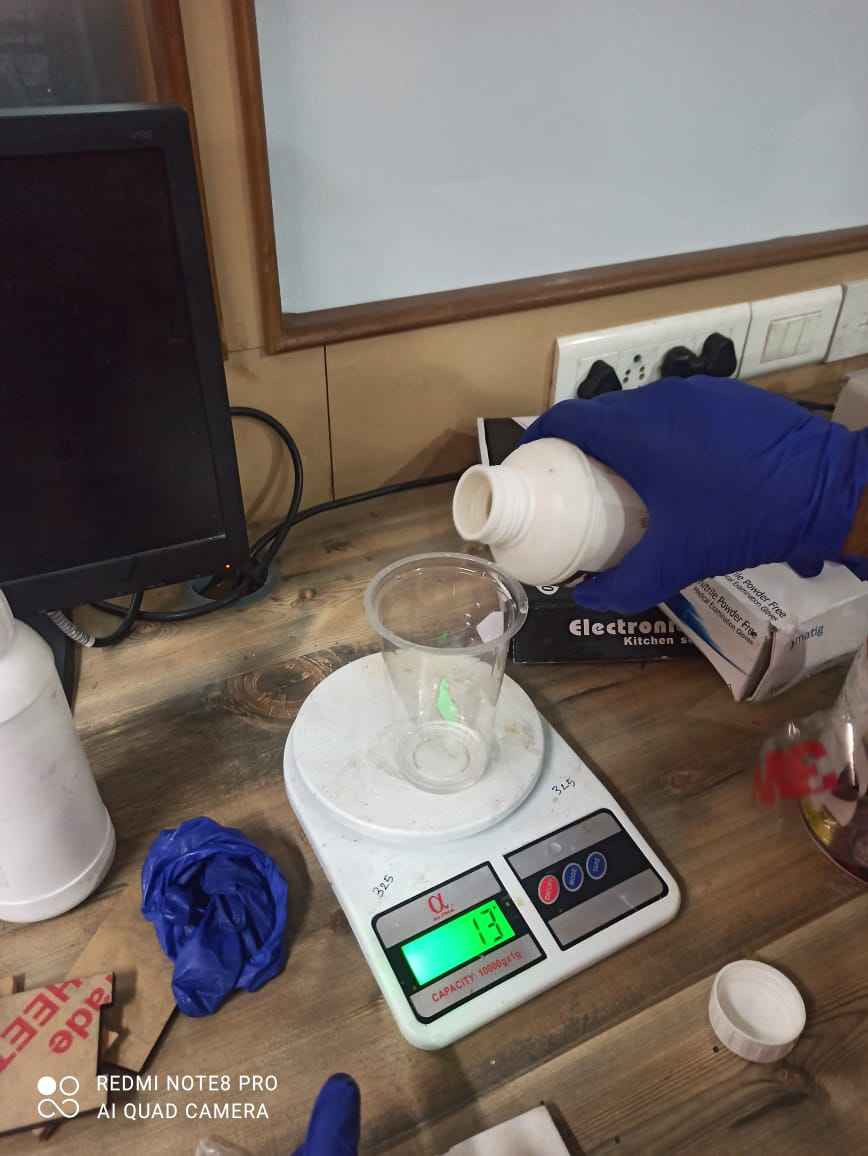
First step is to add water in the mould cavity to get idea of how much resin is require to make silicon mould
Then transfer the water in a glass for weighing
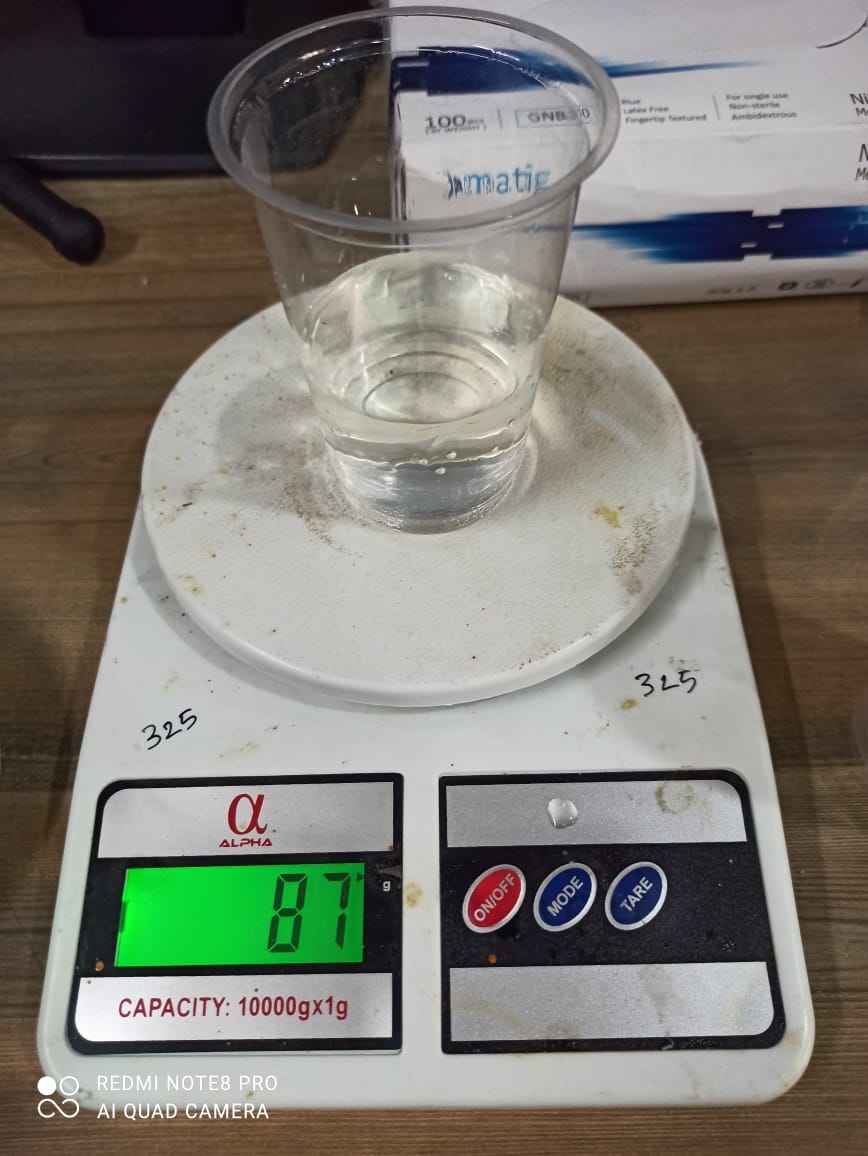
It is almost 87 gm
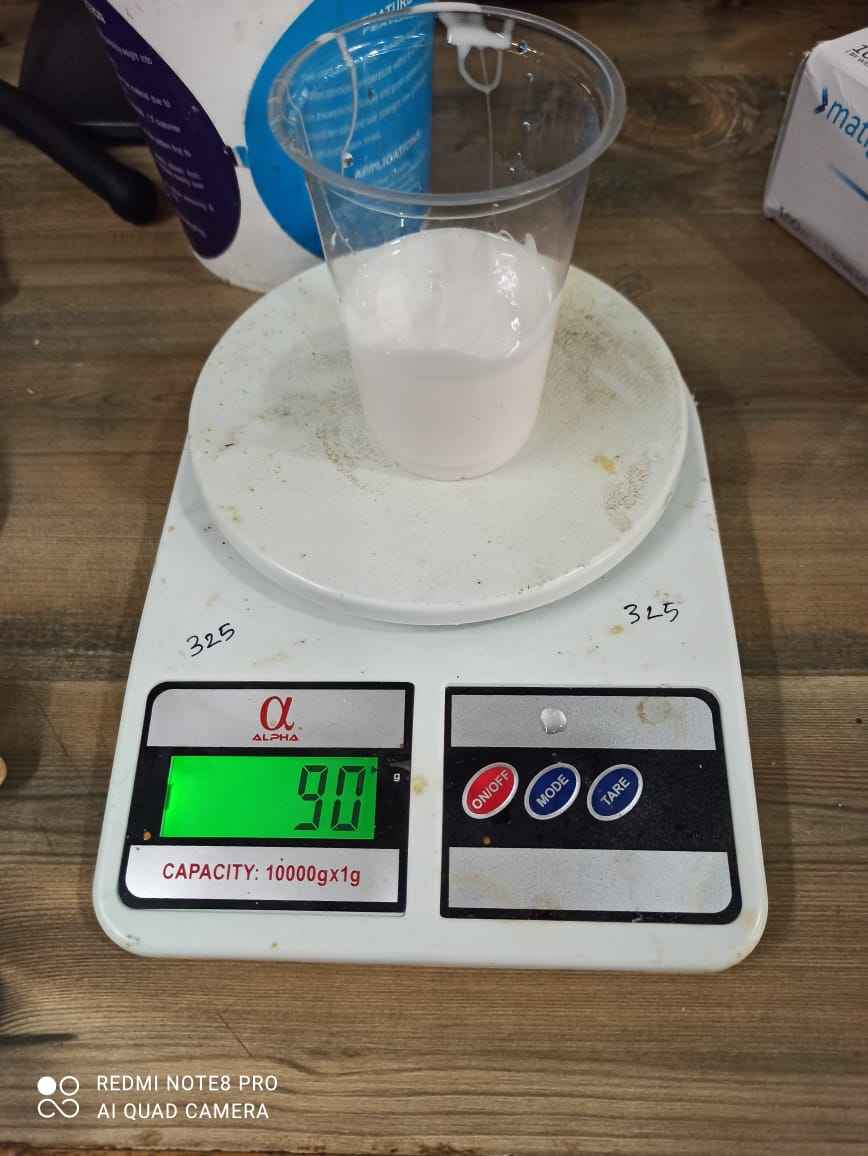
So we added 90 gm of silicon ( remember you need to add a little bit more in case some will be left in glass)
Now its time to add catalyst
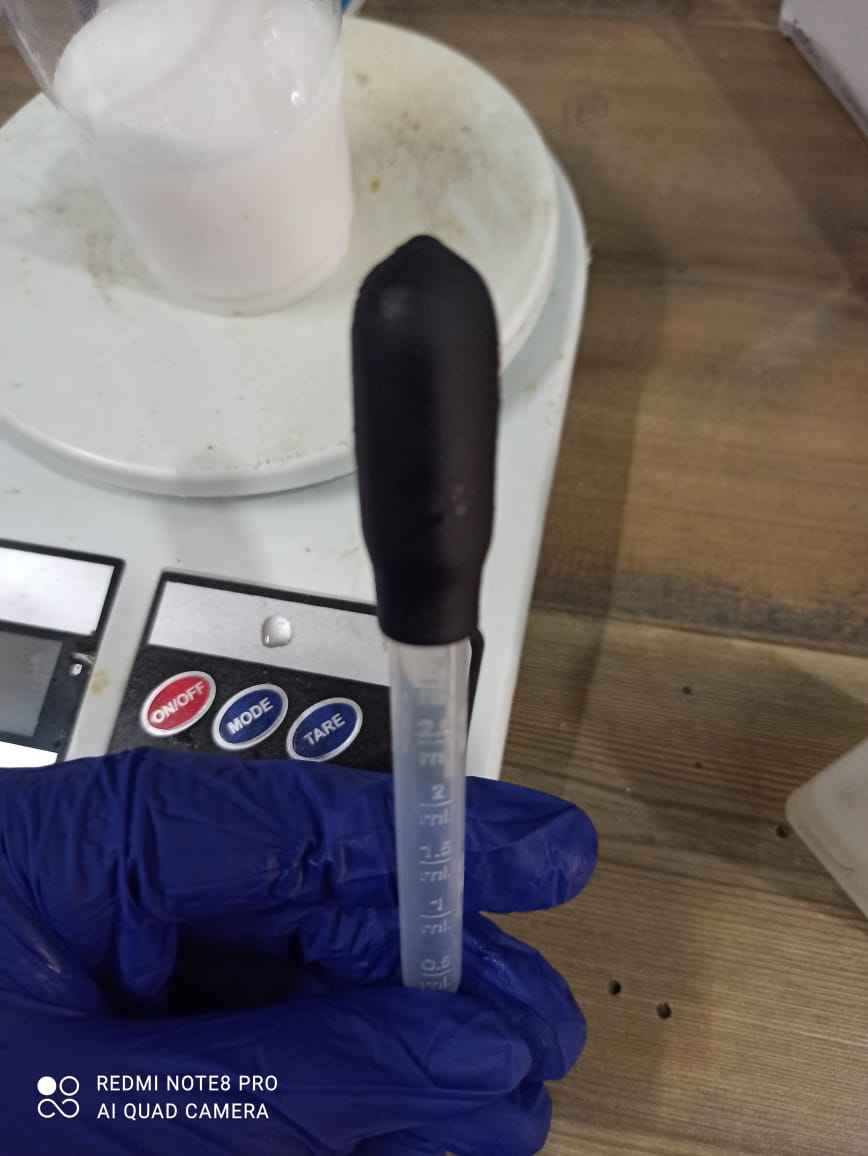
we used droper to add , because it will be precise and we cant screw the percentage
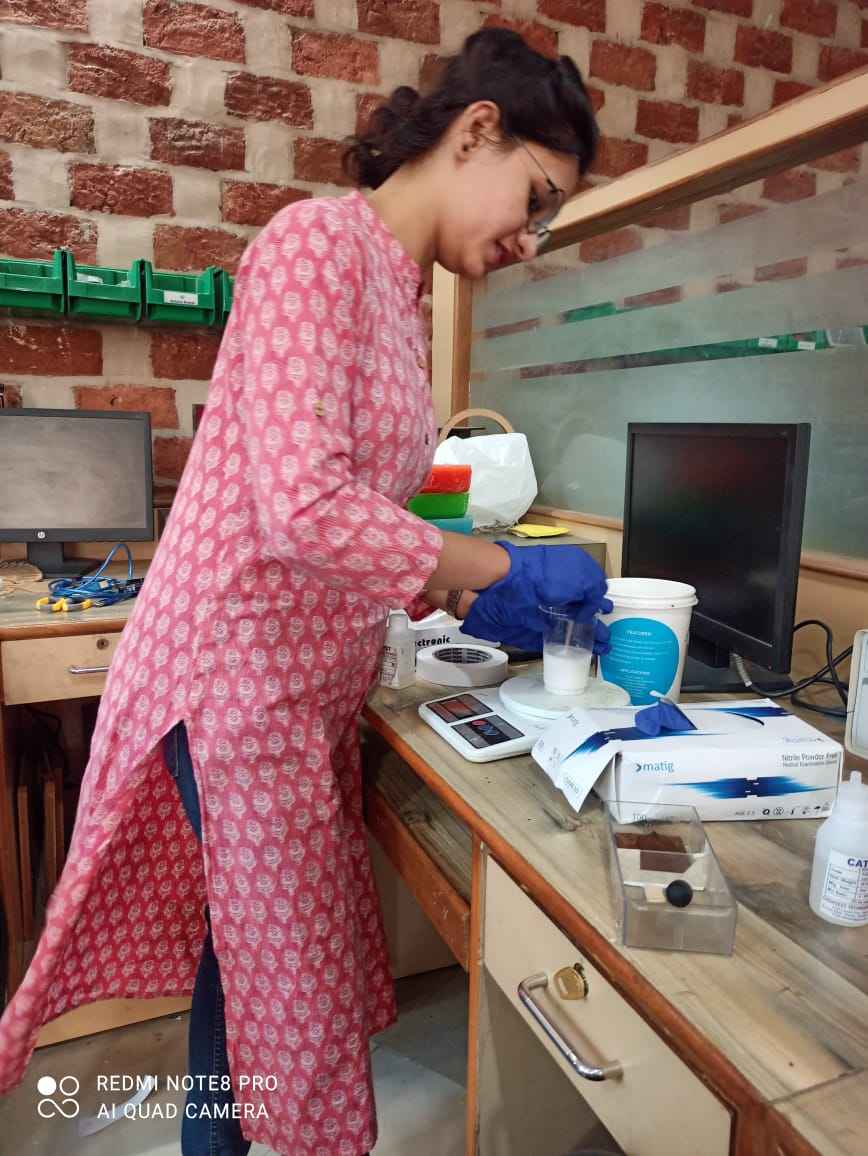
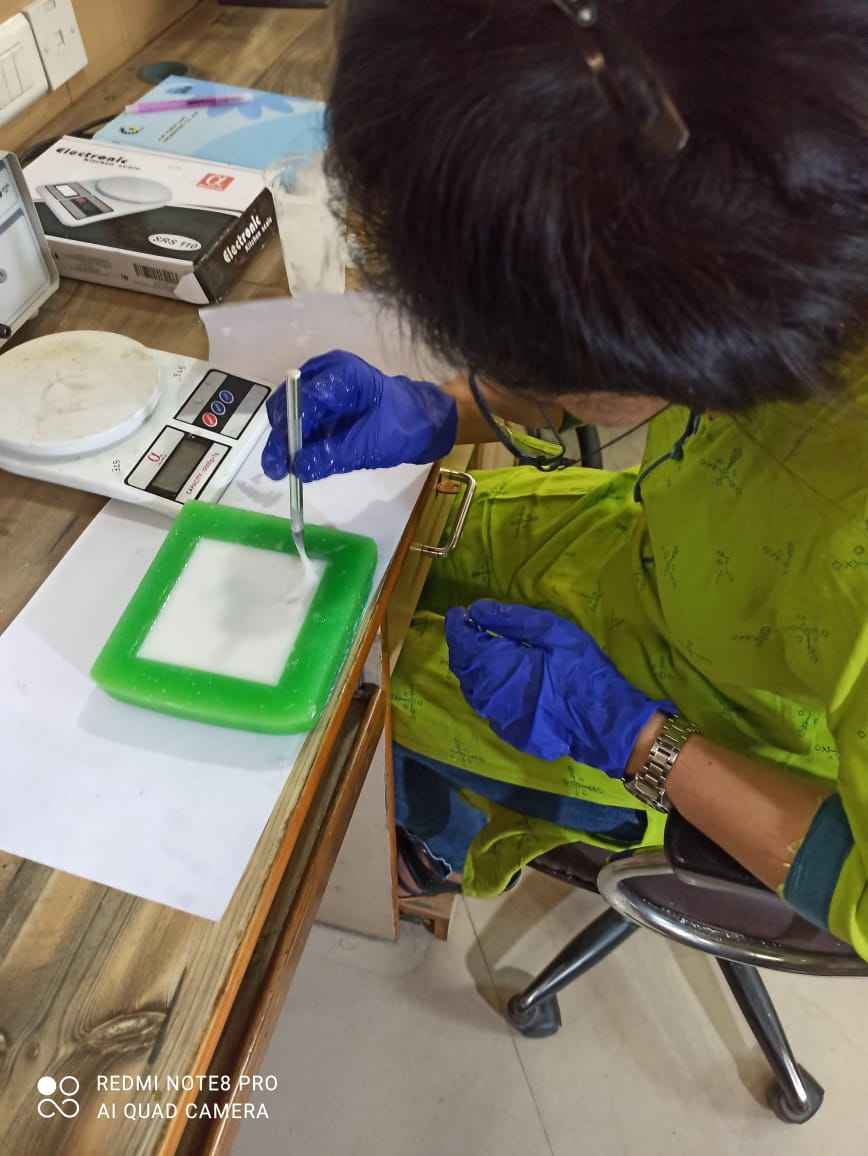
Mam starts stirring it
In the datasheet it was written that we can add 3-5% of curing agent but i accdently added 4% agent which results in rapid cring ansd this blab was formed instantly , this mistake was performed by me and Afsha mam so Neeraj sir laughed at us as much as he can.
This time Neeraj sir said "i will show you guyz how to do things right"
And it comes perfectly as we really screwed the percentage of catalyst
Right one is the one i and mam screwed and left one was the correctly done by neeraj sir
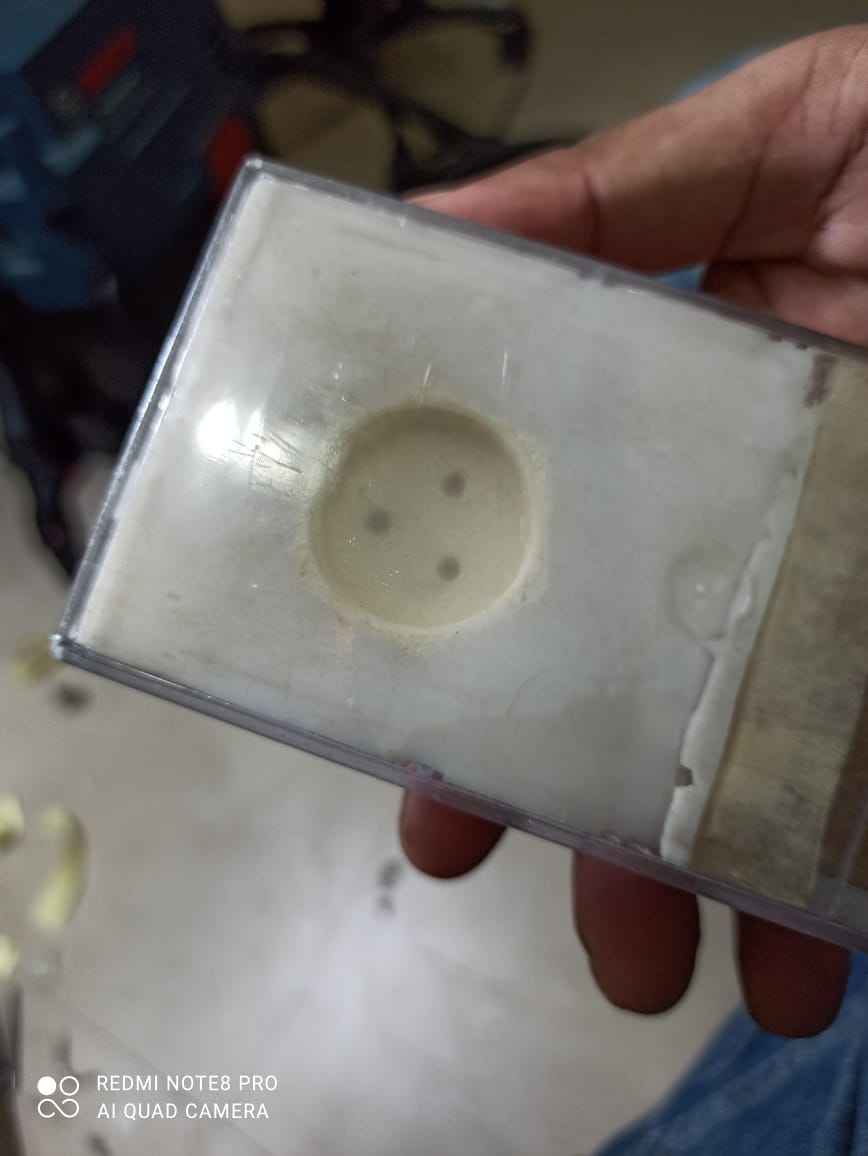
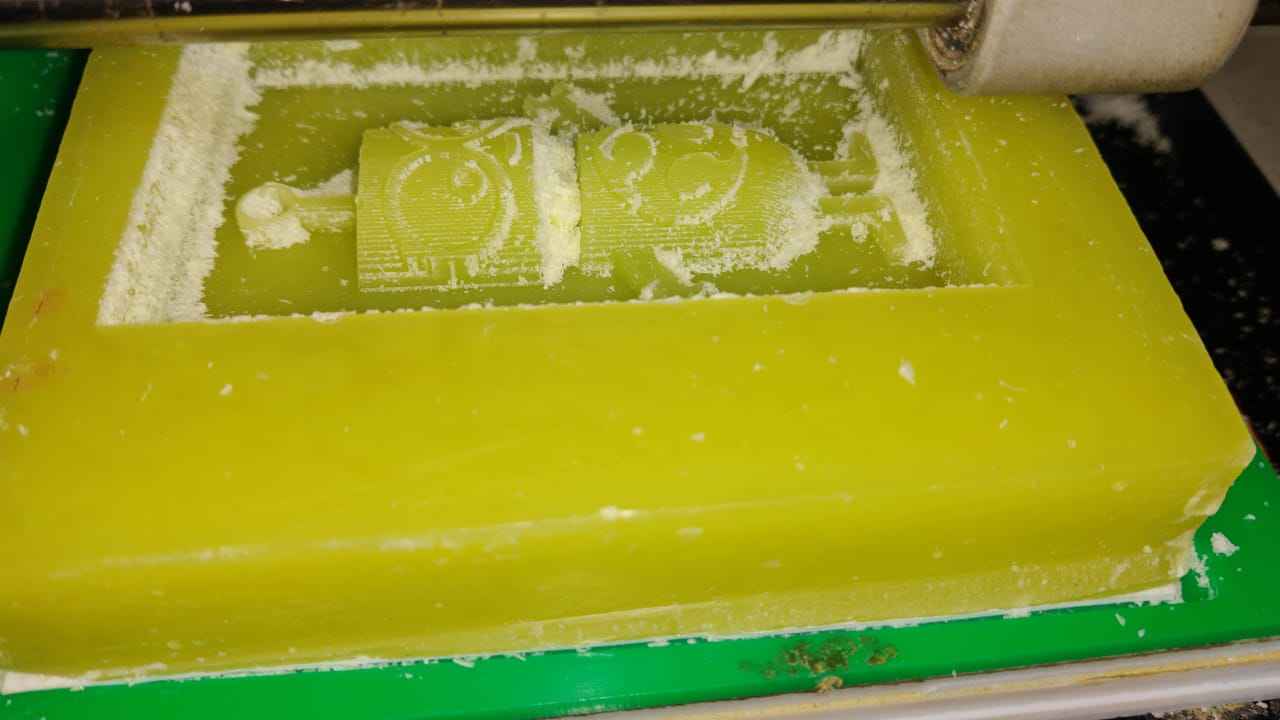
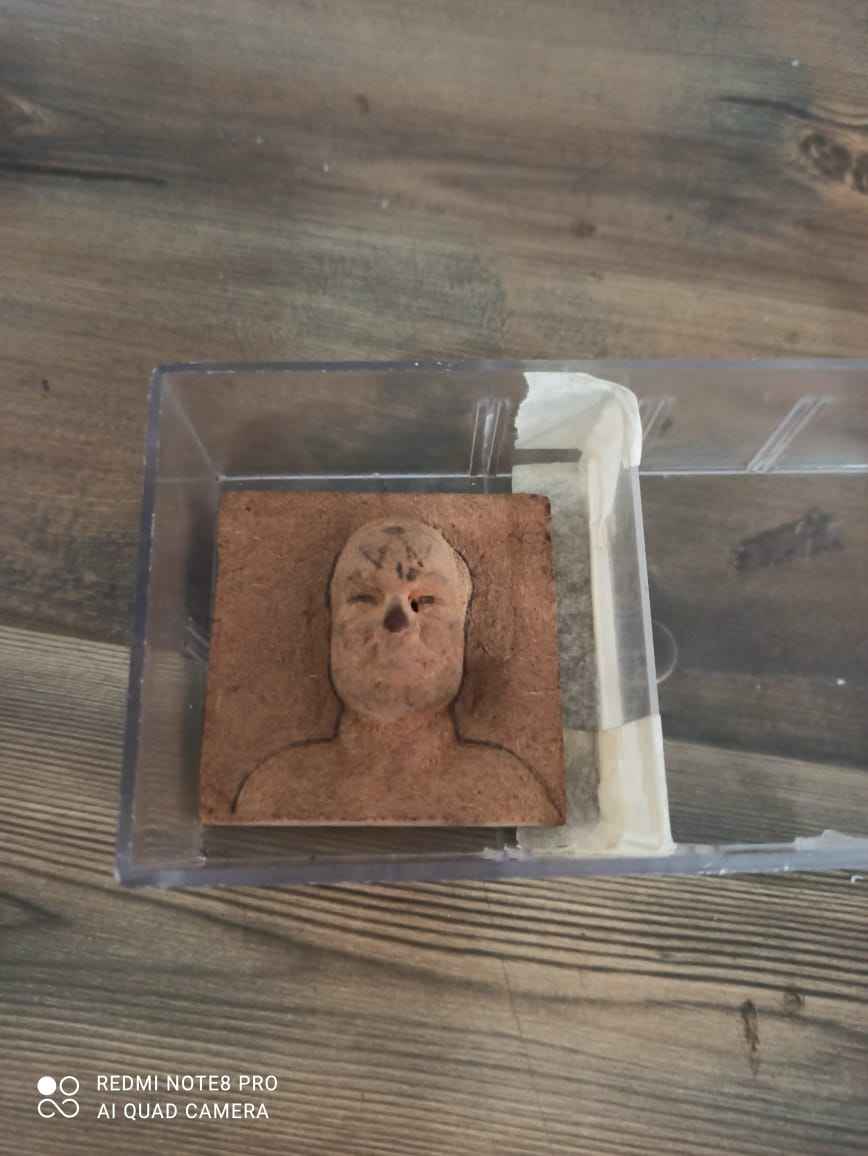
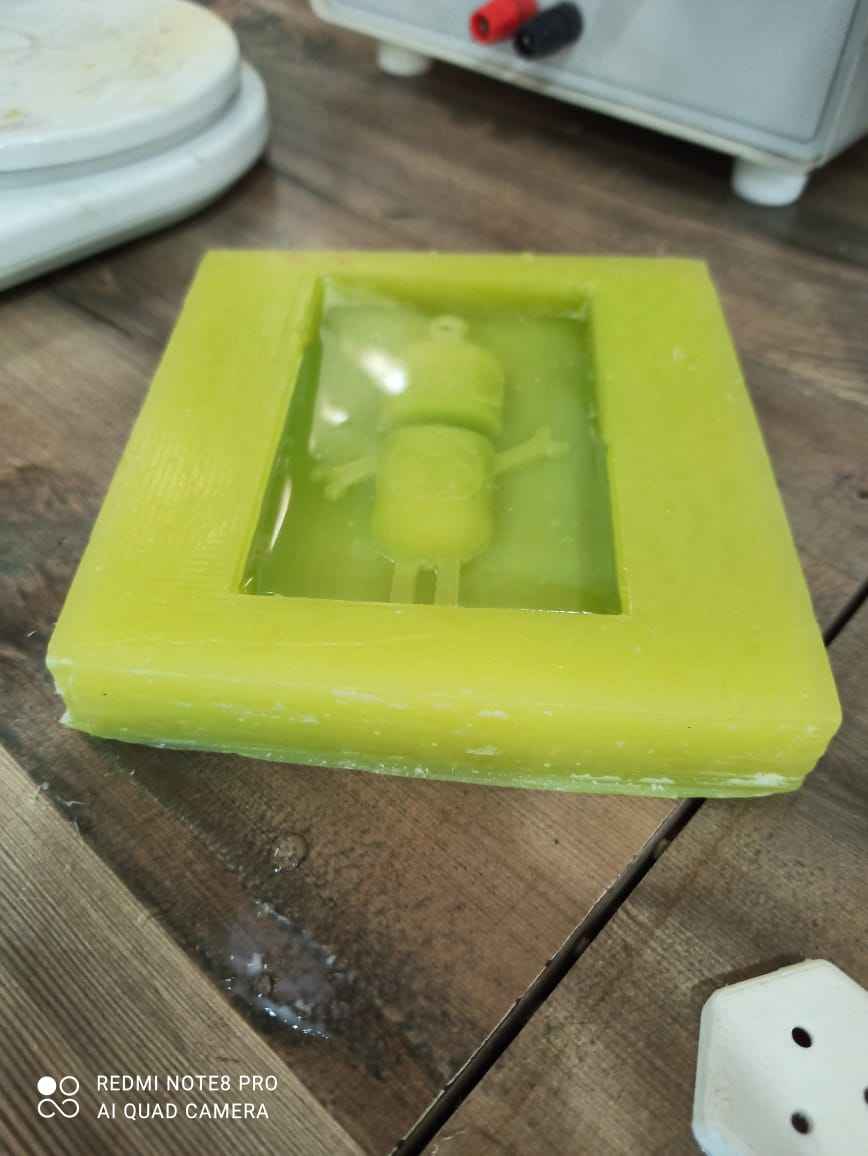
I removed the piece from mould but i saw some resistance in removing it
Now its time for my milled mould but this time to overcome the removing problem , i used vaeline petroleum jelly an applied a thin coat on the mould so silicon dont stick on it
Looks smooth
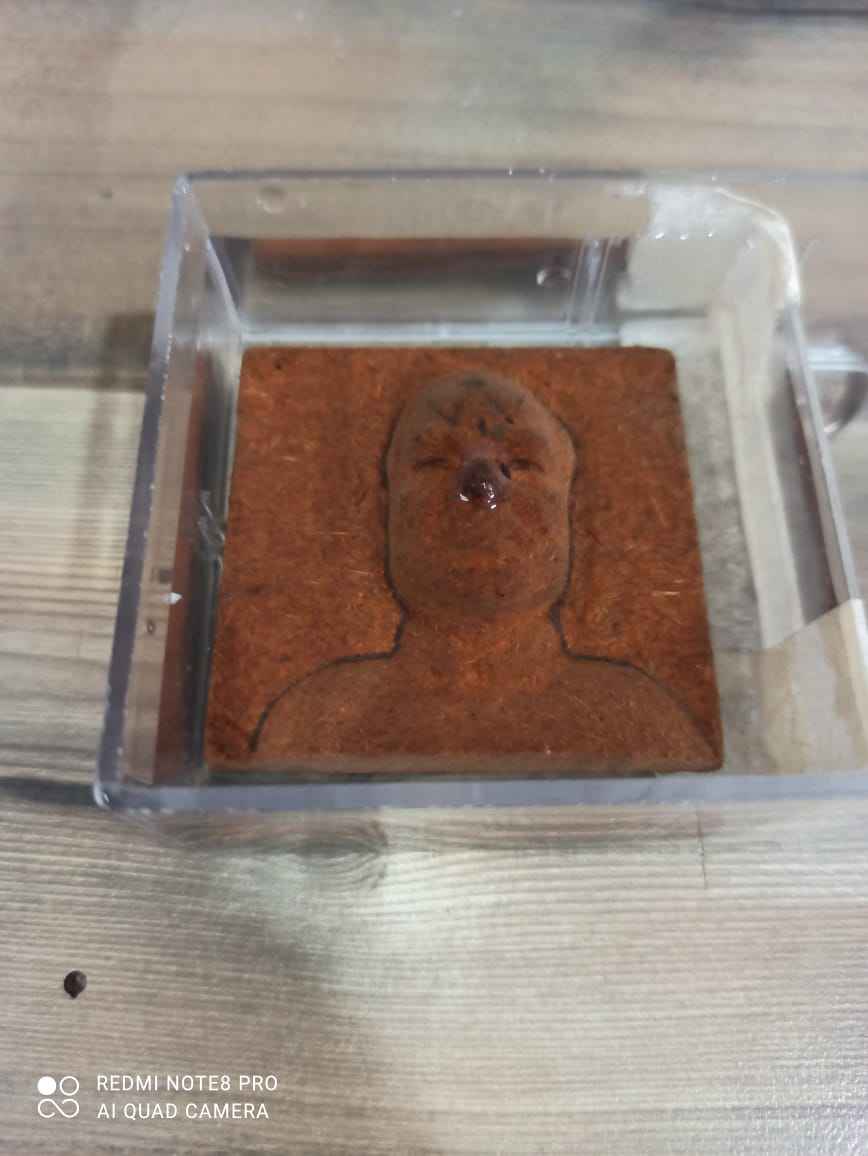
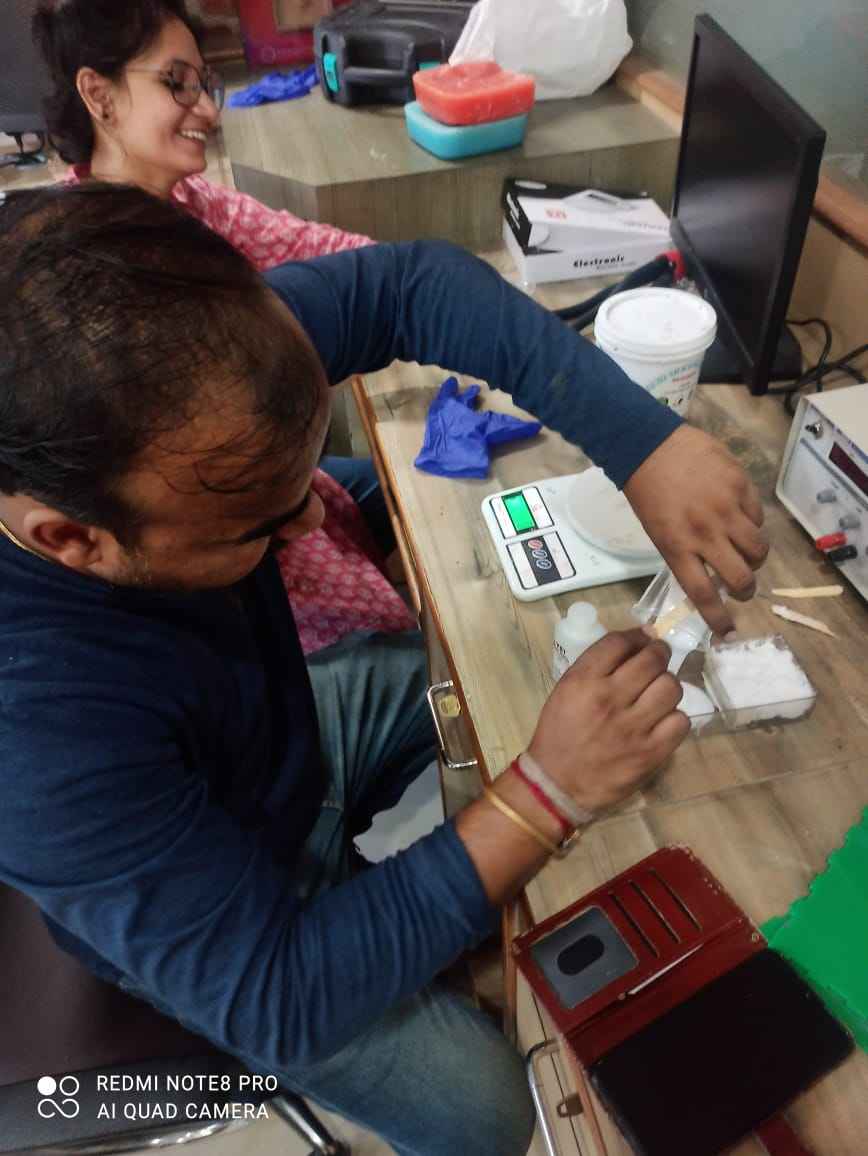
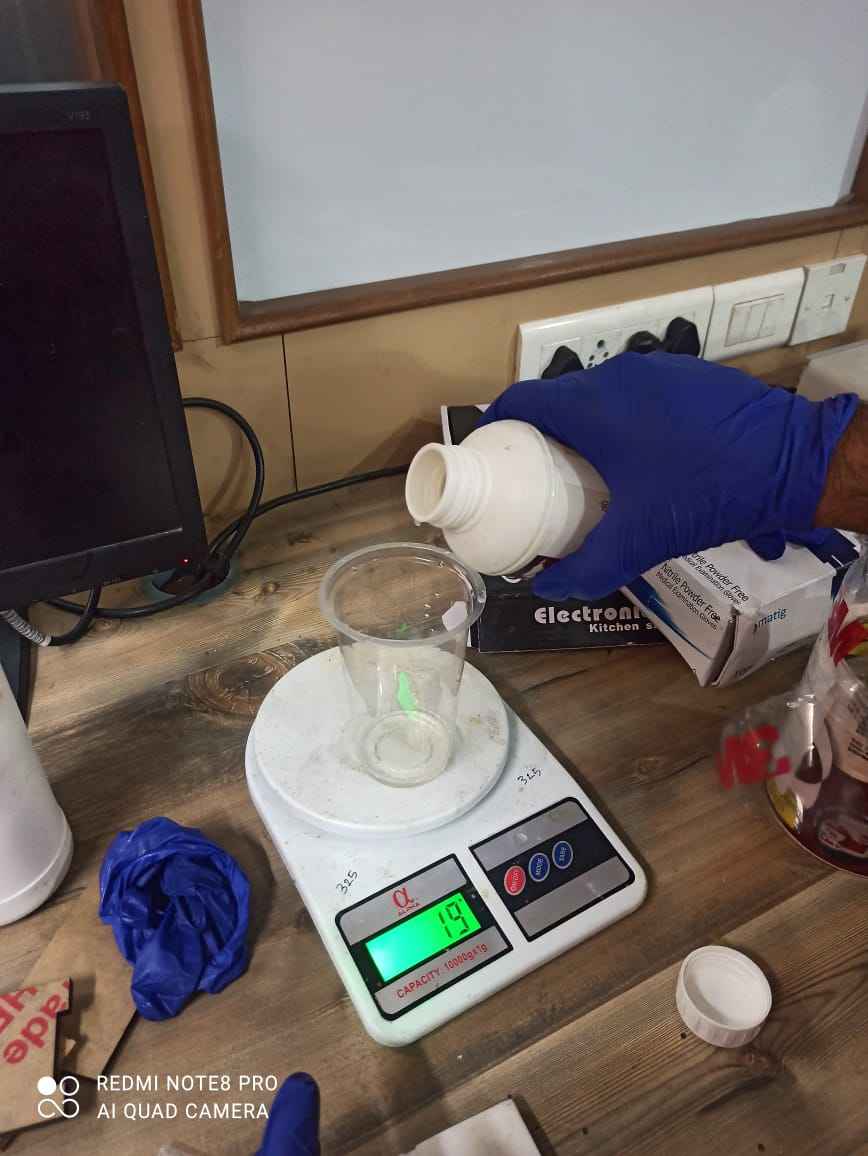
I again added water to get the quantity of silicon resin required
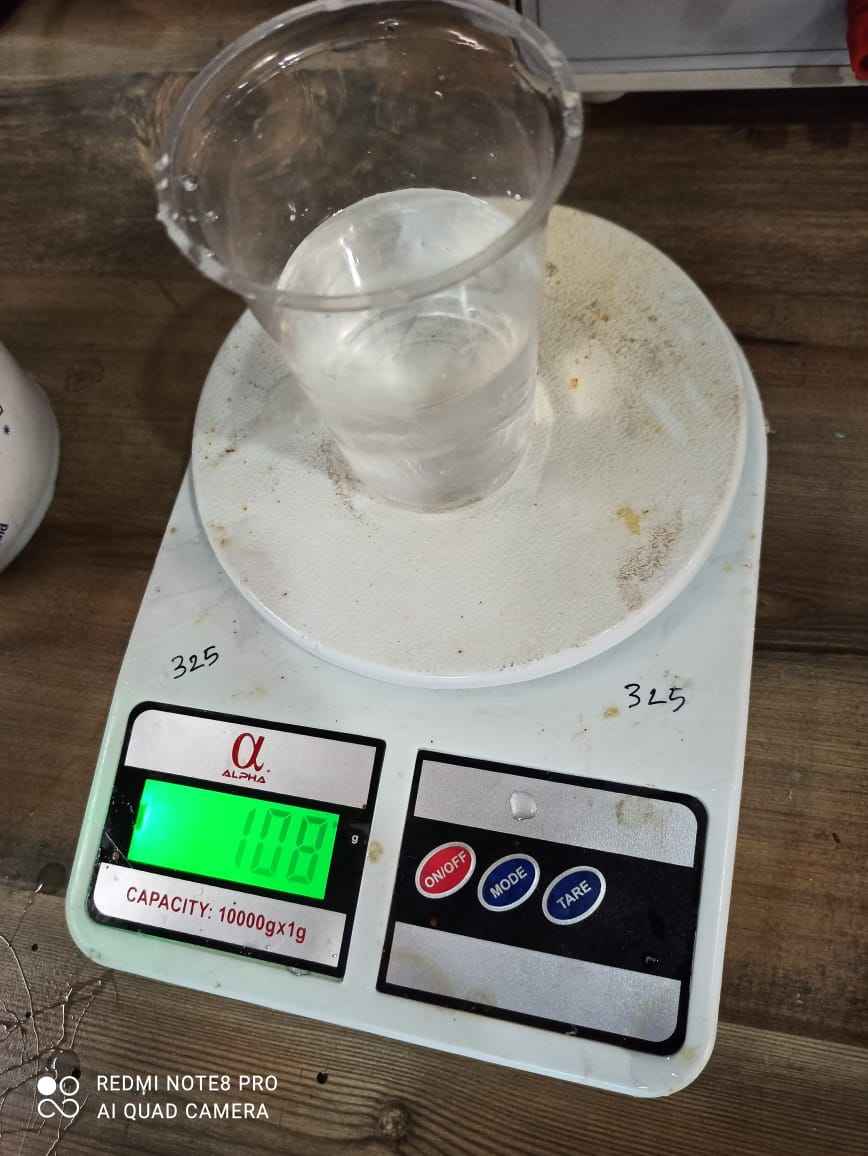
It came 108 gm lmost
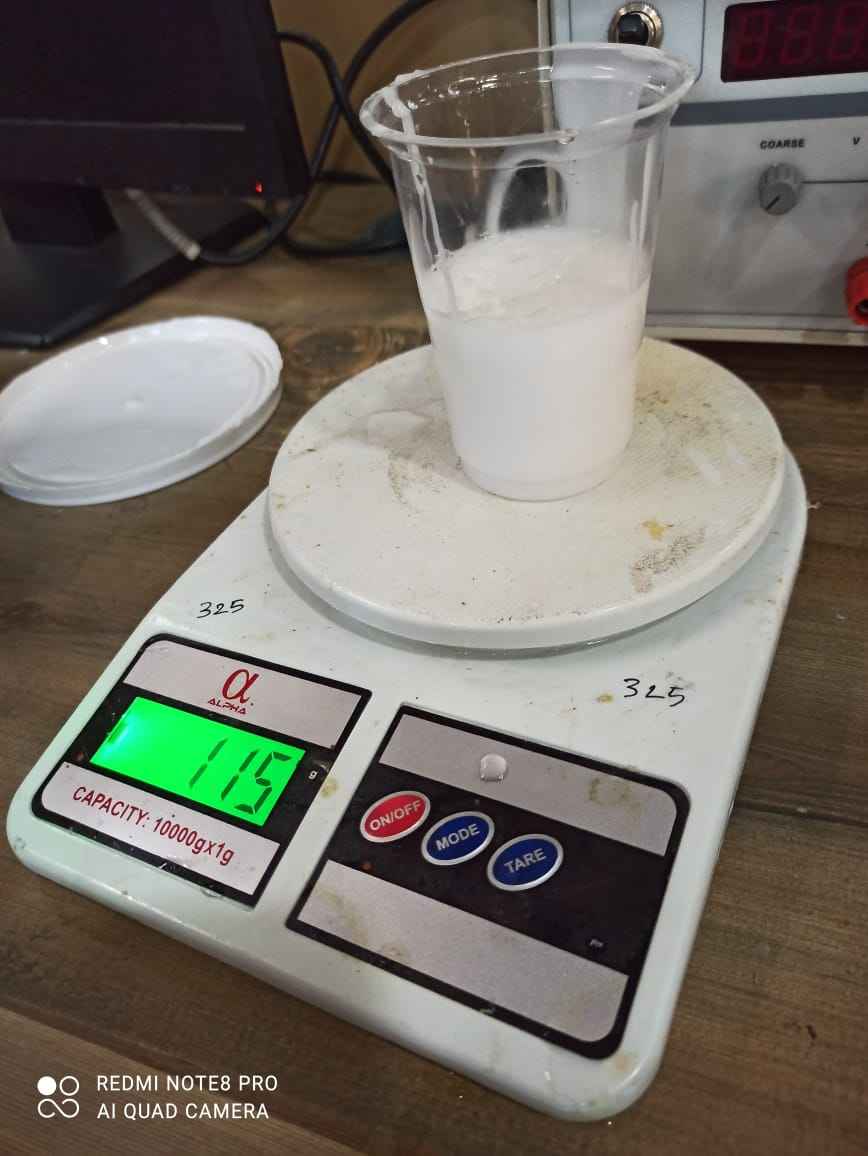
so i added 115gm silicon in it and and 3.5gm of curing agent (3% of total silicon)

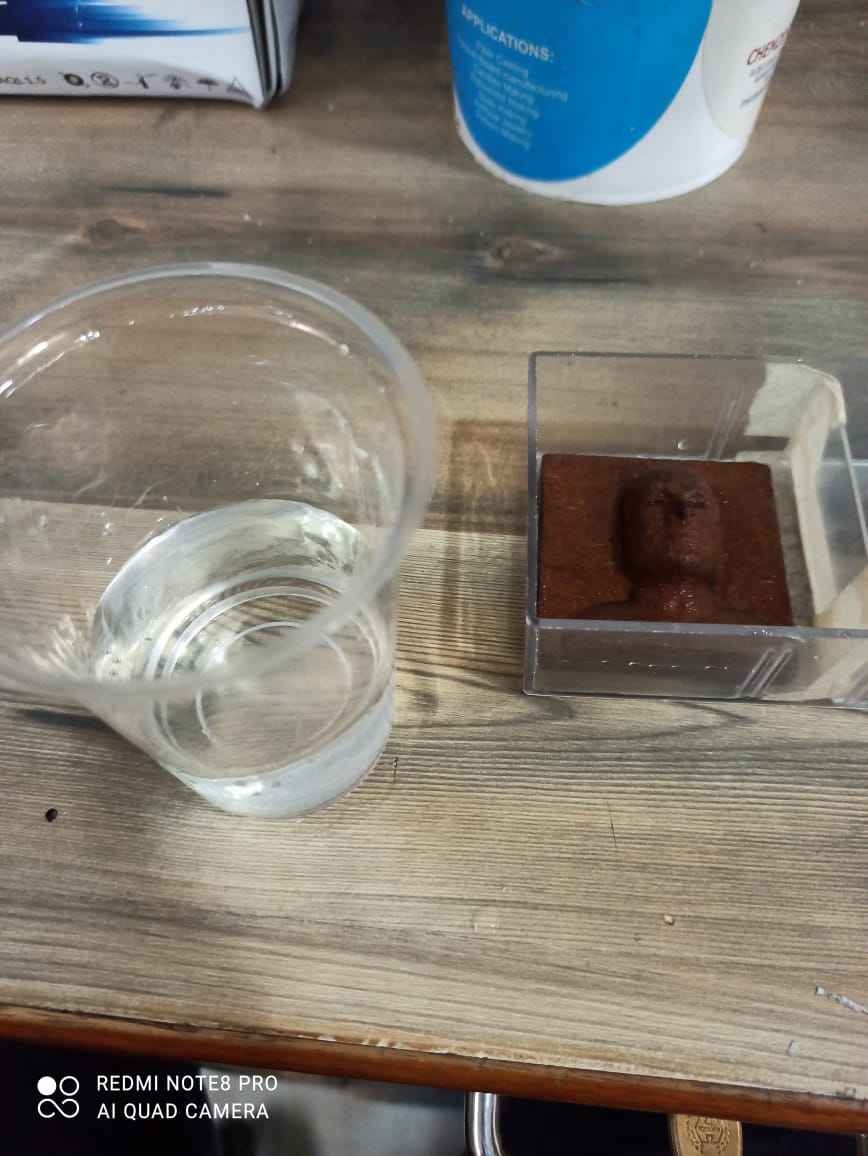
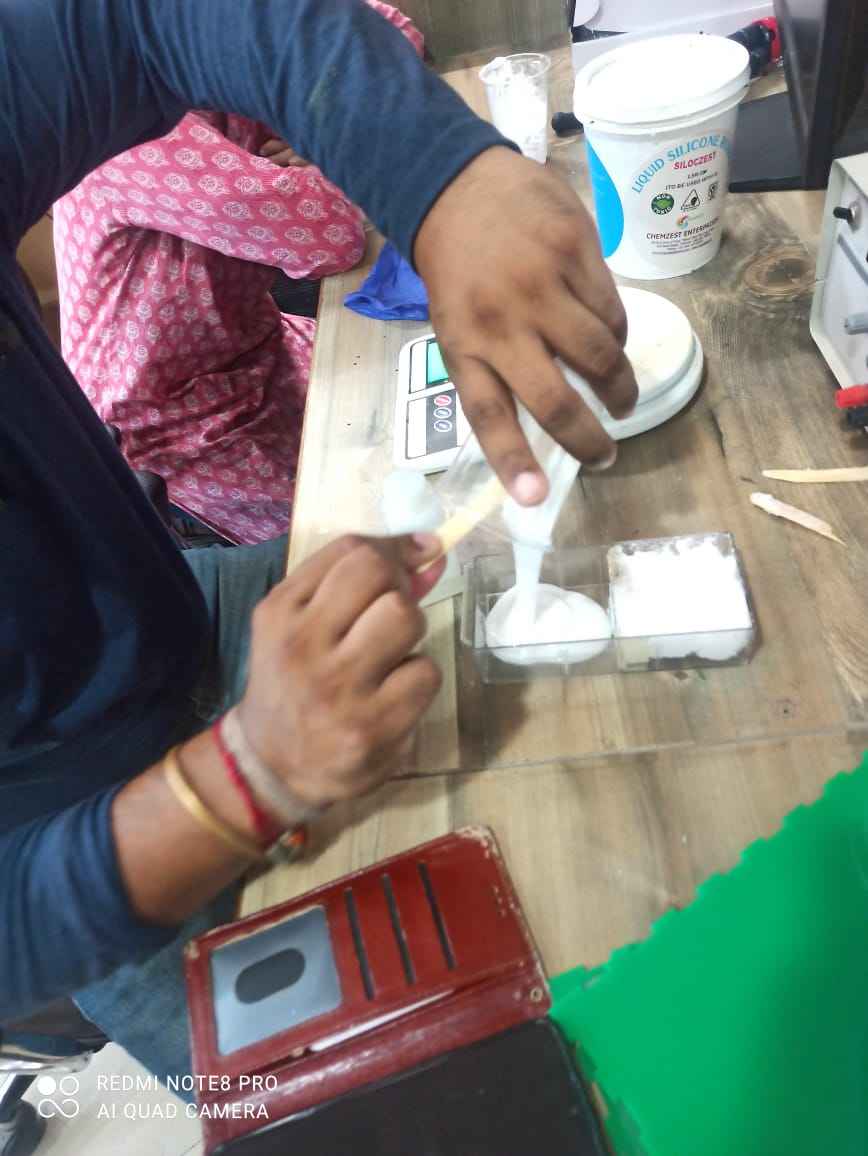
After pouring i let it set for approx 4 hours

I again screwed it , in mixing , i didnt thoughrly mixed both so at some parts it didint mixed properly and features were screwed
Then i made it again and this time thourough with mixing
In this picture Afsha mam is agitating the silicon i just added to remove the air bubble
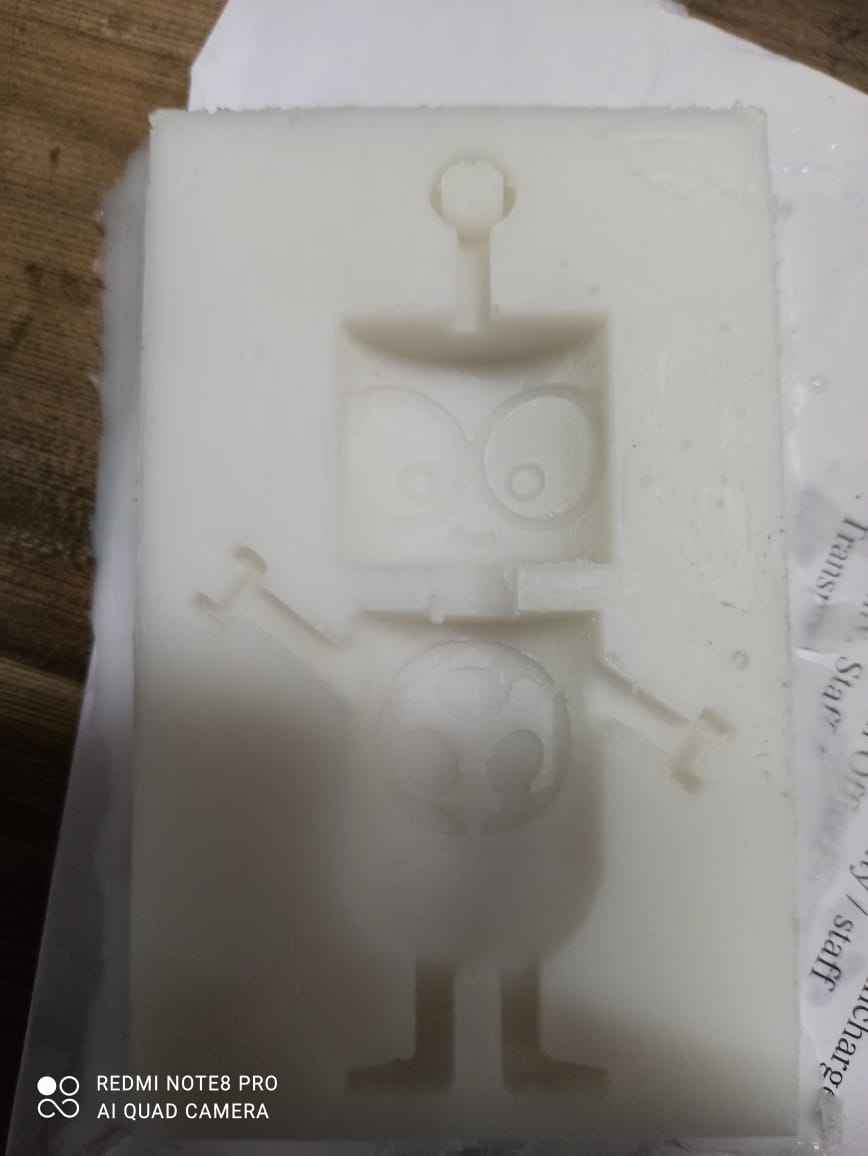
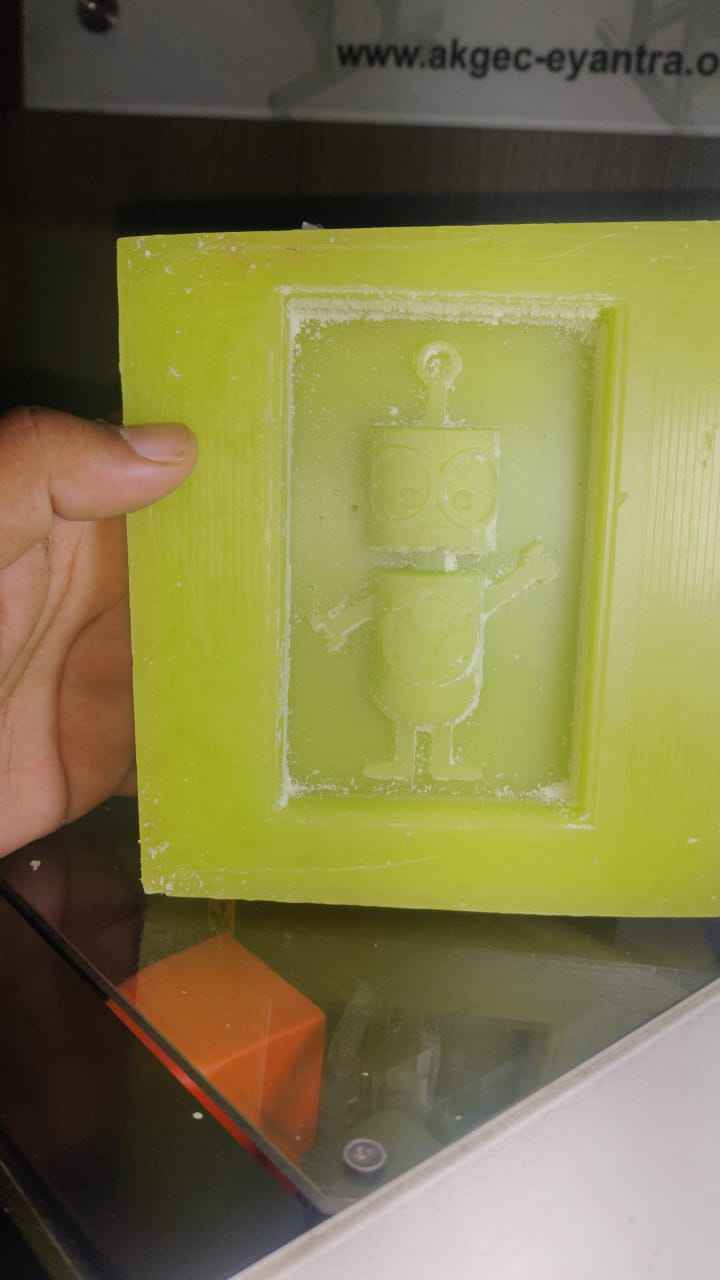
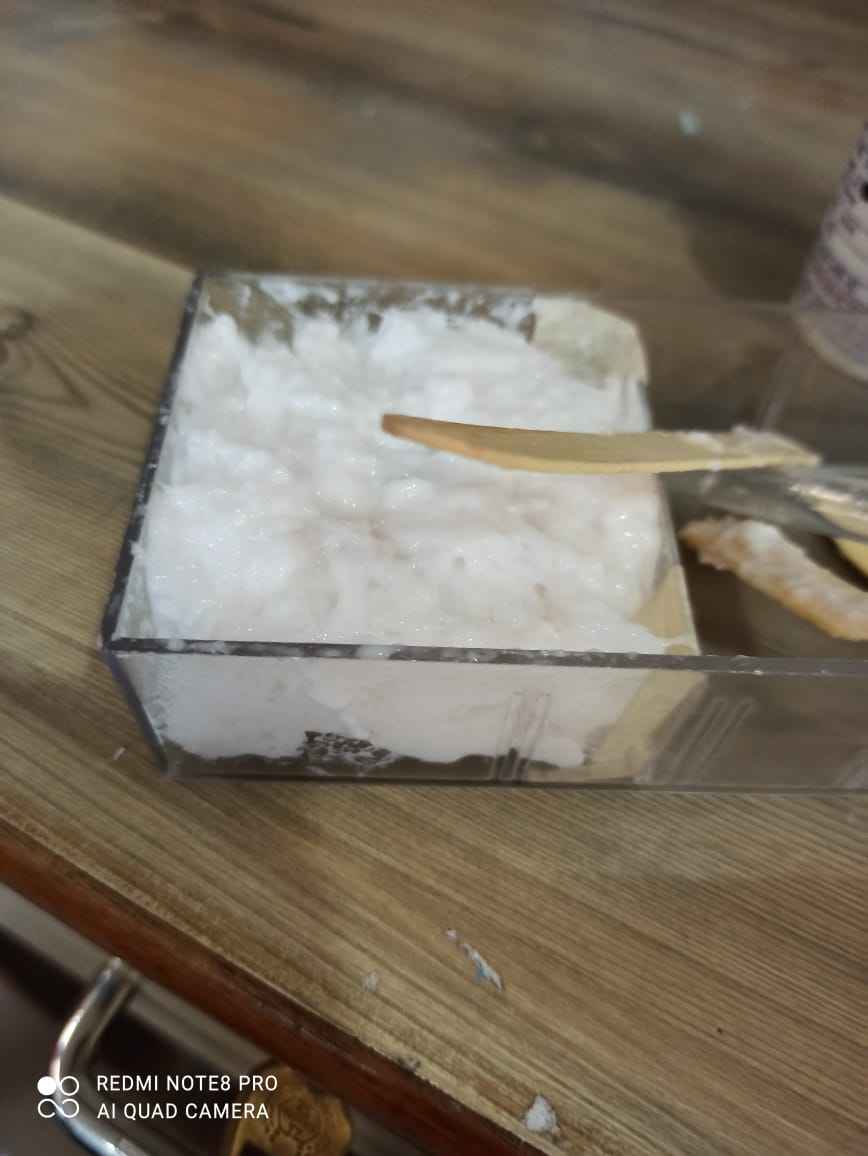
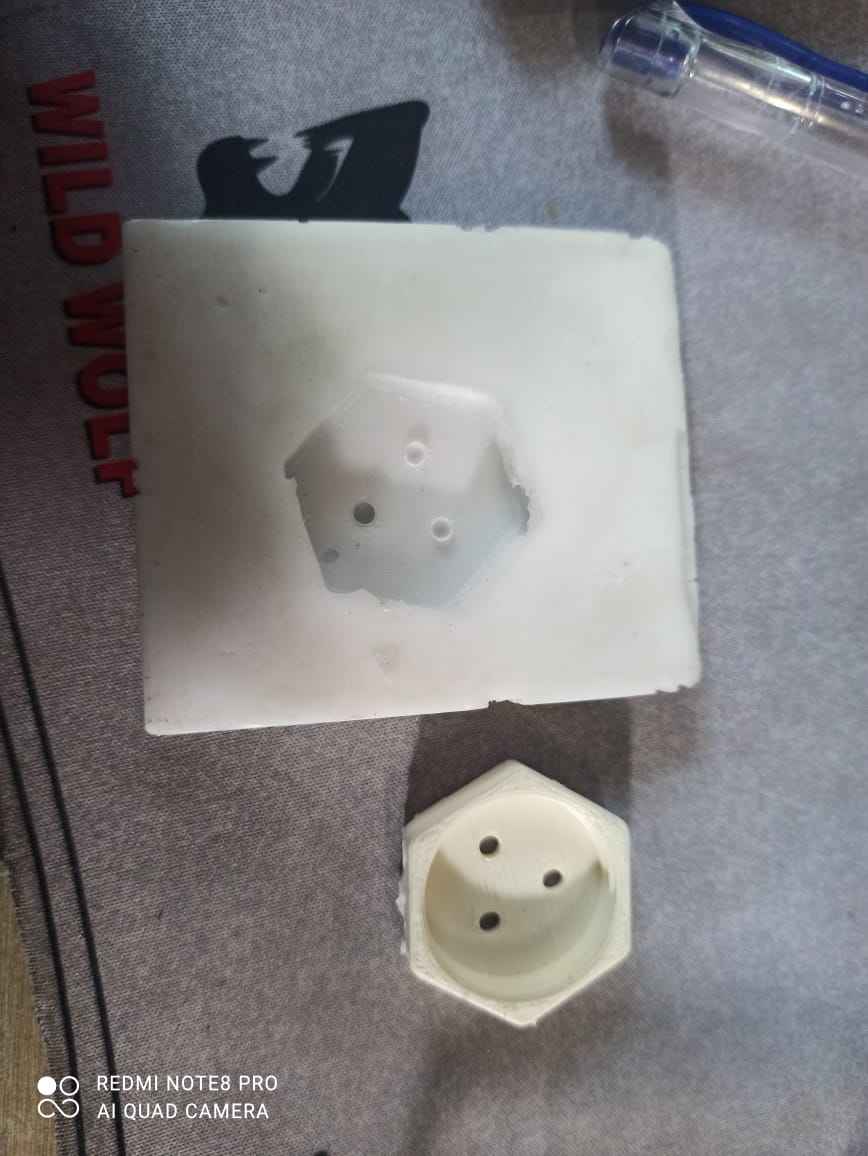
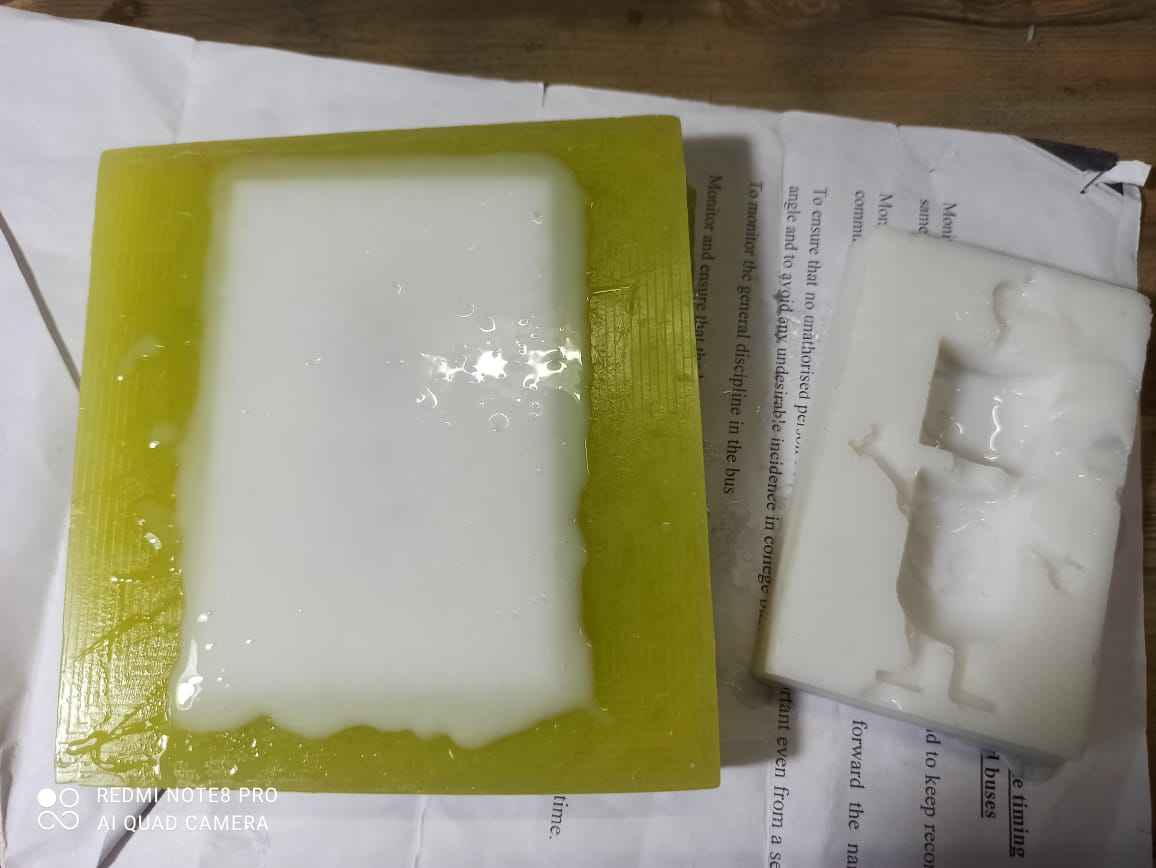
Now i finnaly got the perfect mould
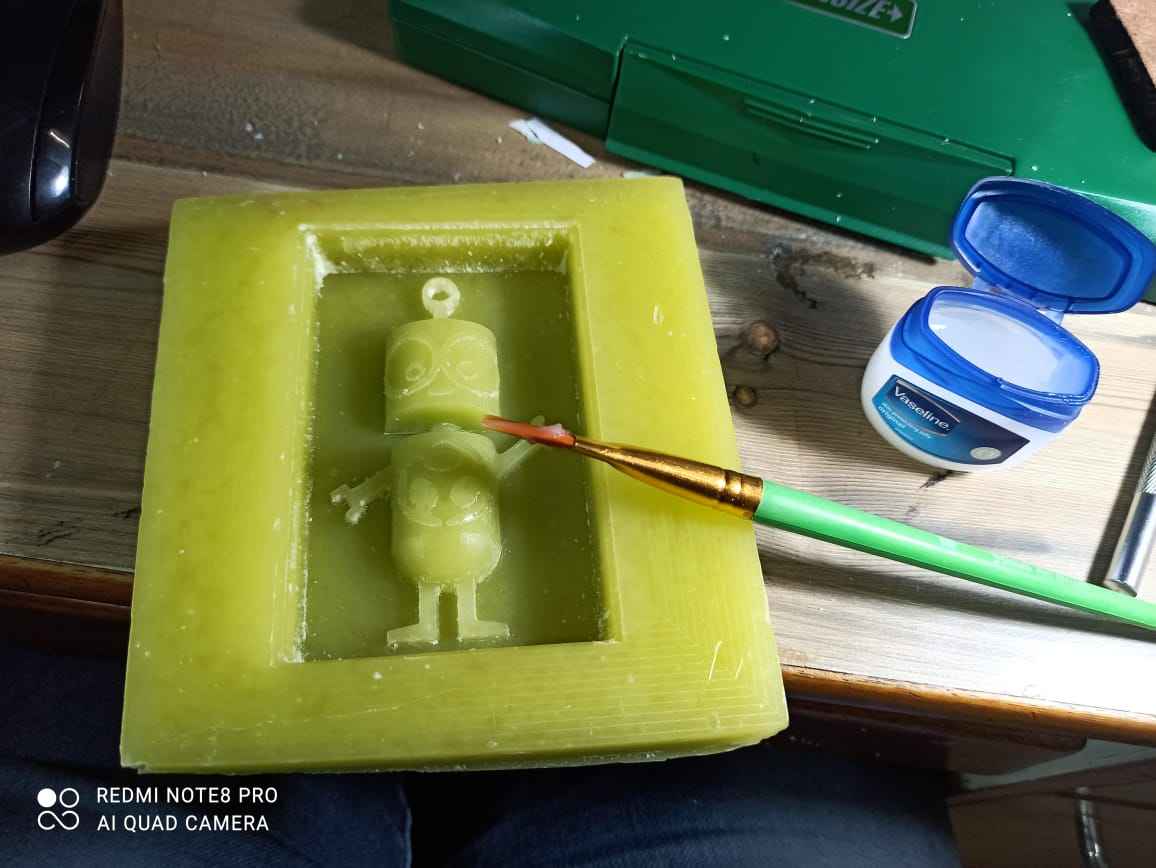
Working with Epoxy resin
Once the mould is fully ready the next step is to make cast and for that we require to work with eopxy resin
As previously stated that we only have "Aditya Clear Cast Epoxy 33" at our lab and we require to work with it
Well working procedure for liquide silicon and epoxy are almost same , there is just difference in mixing ratio and curing time
With some testing we came to know that vaseline jelly works almost same for epoxy and it is realy good releasing agent , so i applied a thin coat to the mould also
After taking measurement , i came to know that my cast require a mixture of epoxy of 18 gm and so i take a round figure of 20 gm
For calculating the quantity of part A you just require to multiply the toatal amount with 5/8 because the ratio prescribed is 5:3 so i added 12.5 gm of part A
And by multiplying 3/8 by 20 you will get the amount of Part B you require to add well in my case 7.5 gm but there is a simple way you need to add Part B until you reach the amount you required , in my case its 20 gm

Initially we didint know that if we dont have vaccum chamber we required to stir the mixture slowly and thoughrly and we experienced some bubbles in cast , but our freind adrian from Fab lab leon told us to stir slowly so bubles build up is reduced
Please watch this video it is very helpfull
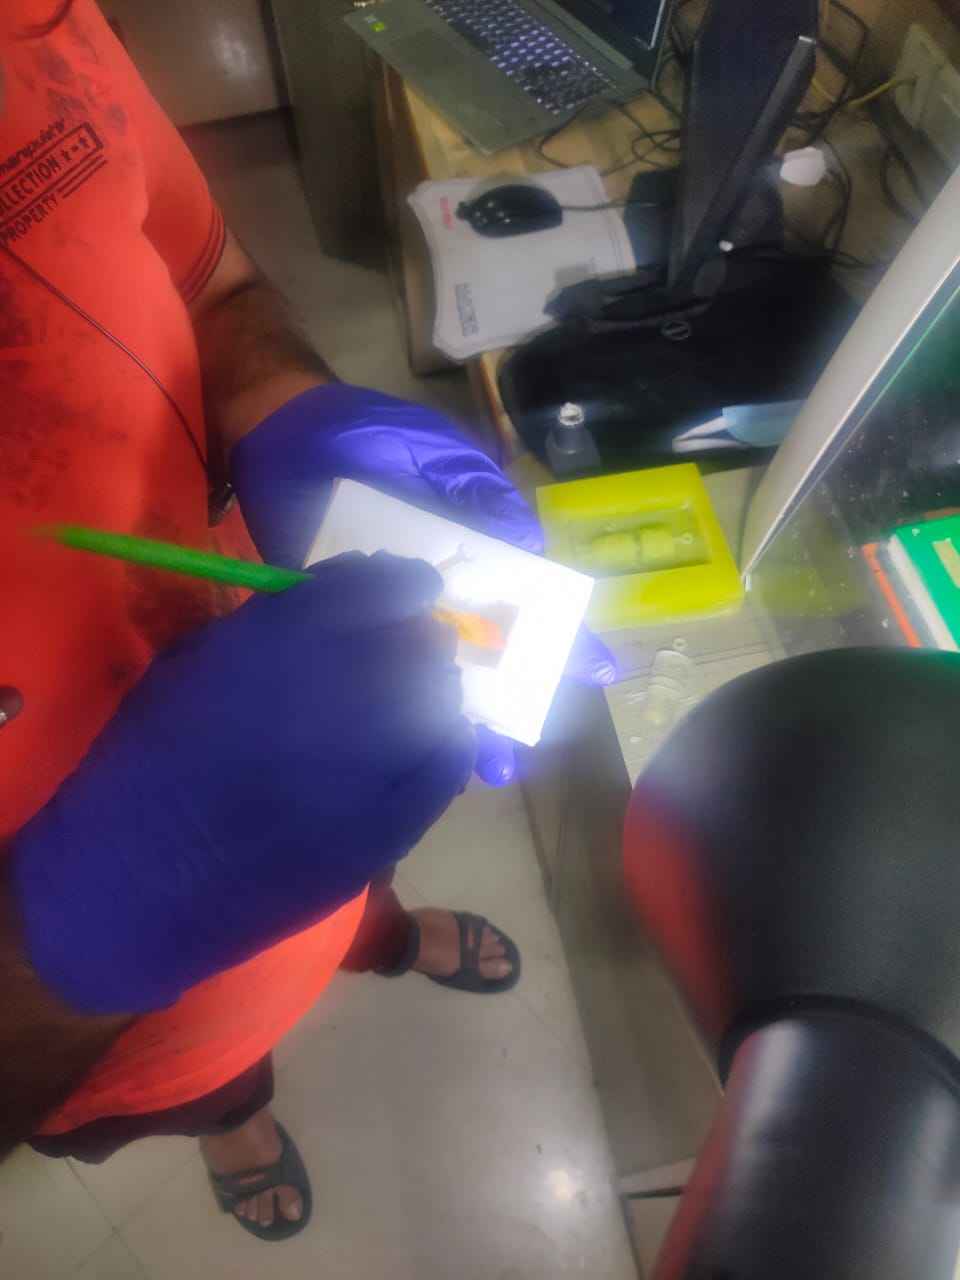
Afsha mam was the daring one which first opened her mould to inspect cast , because this was first time working with epoxy and we dont know should we open our mould or not , but she was the first one to take the risk , you can see how she is also making faces while opening the mould
Finally she got succes and by seeing her cast we also opened our mould's
It looks awesome
This will be my hero shot
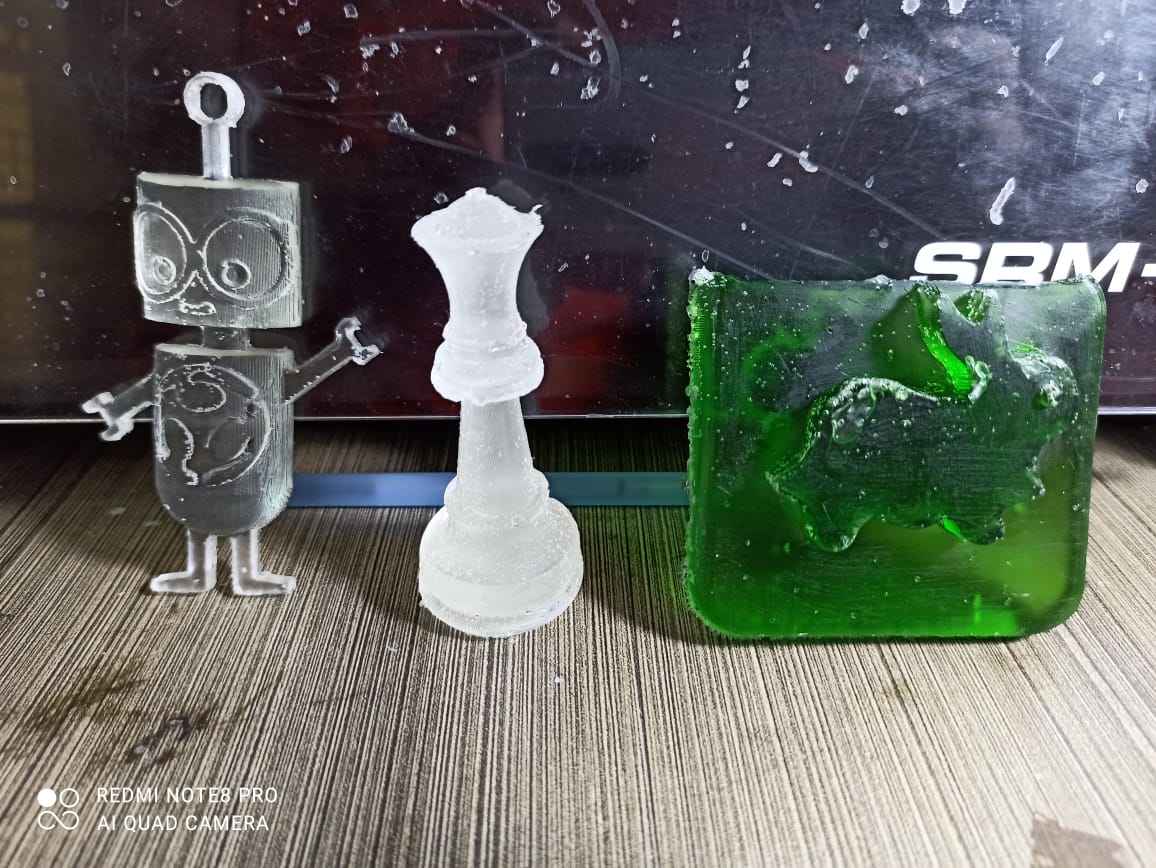
all of our cast
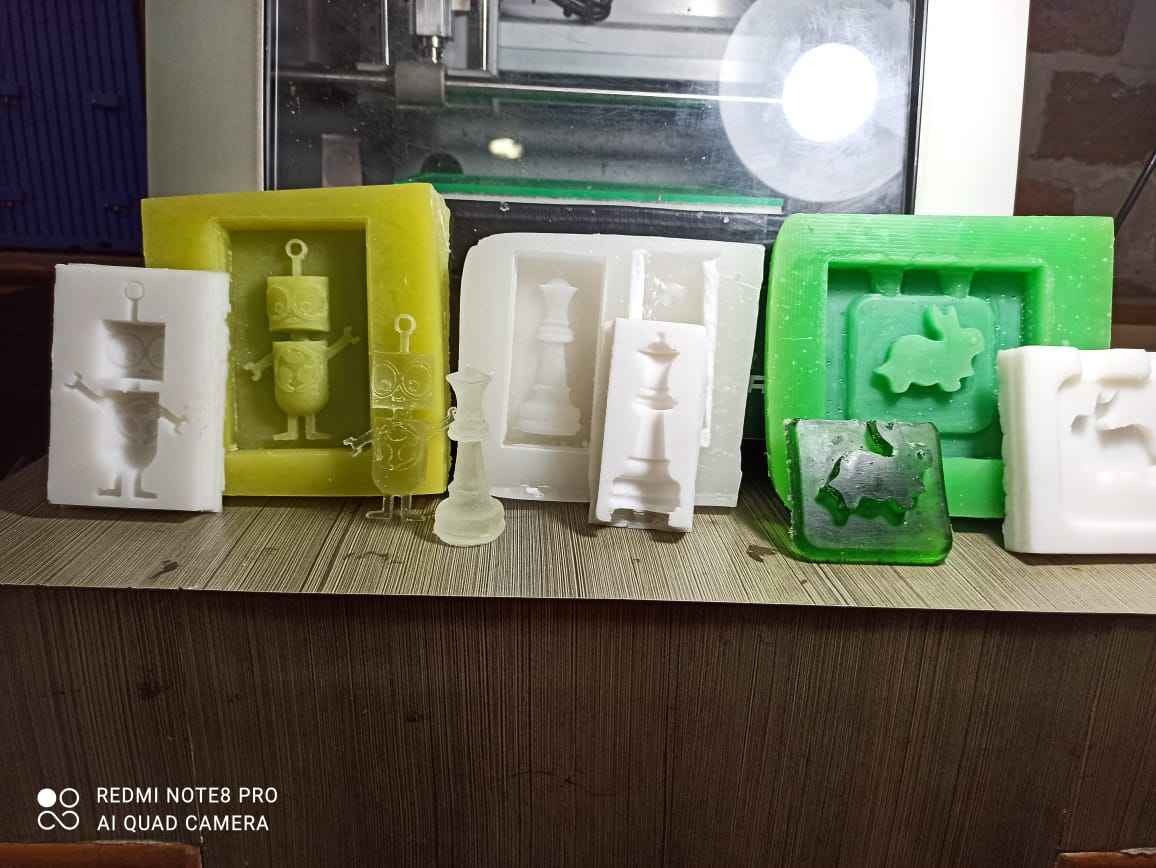
Team's hero shot
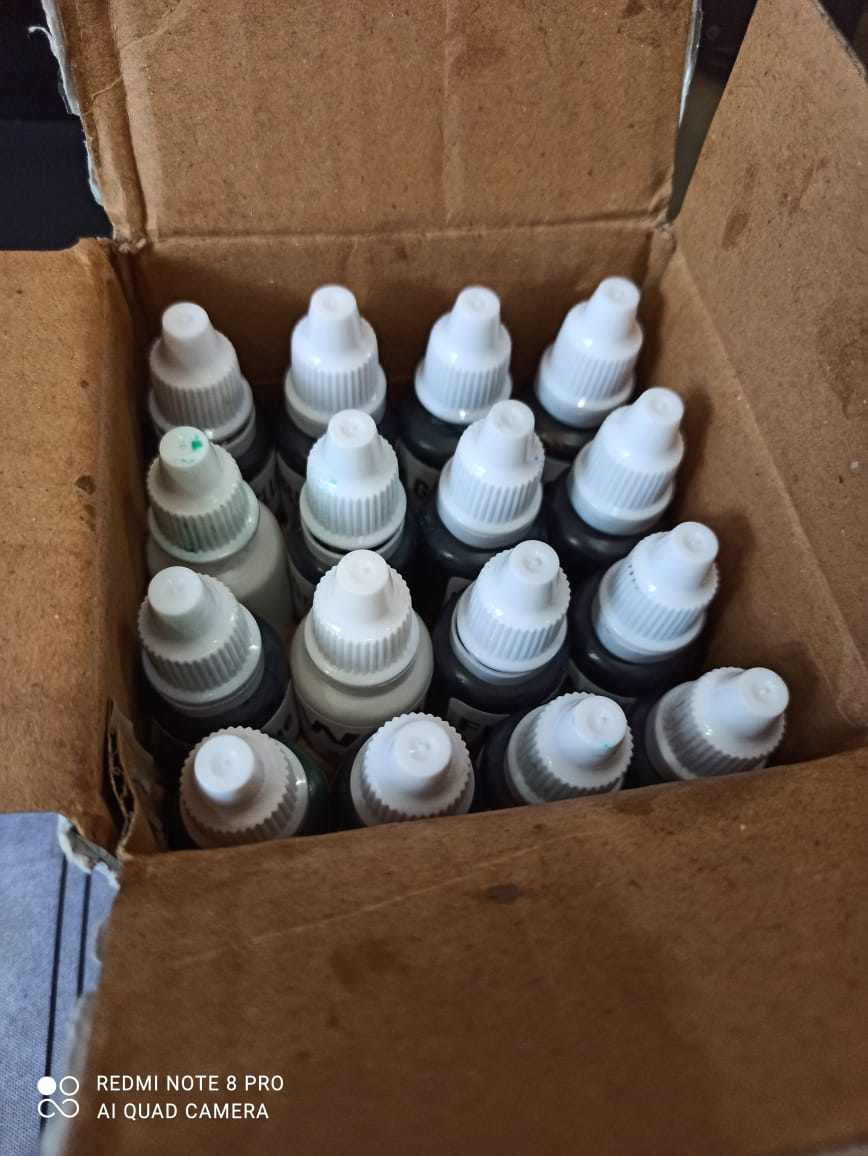
We also bought epoxy colouring
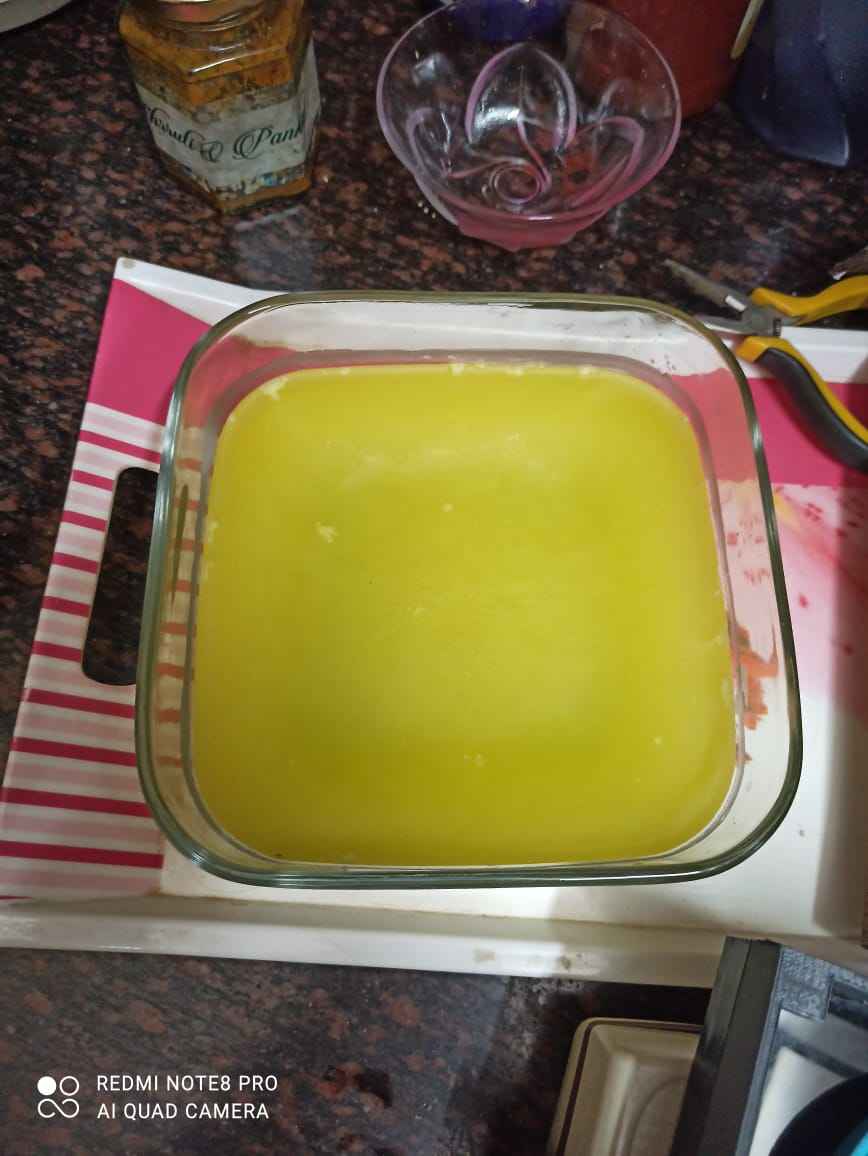
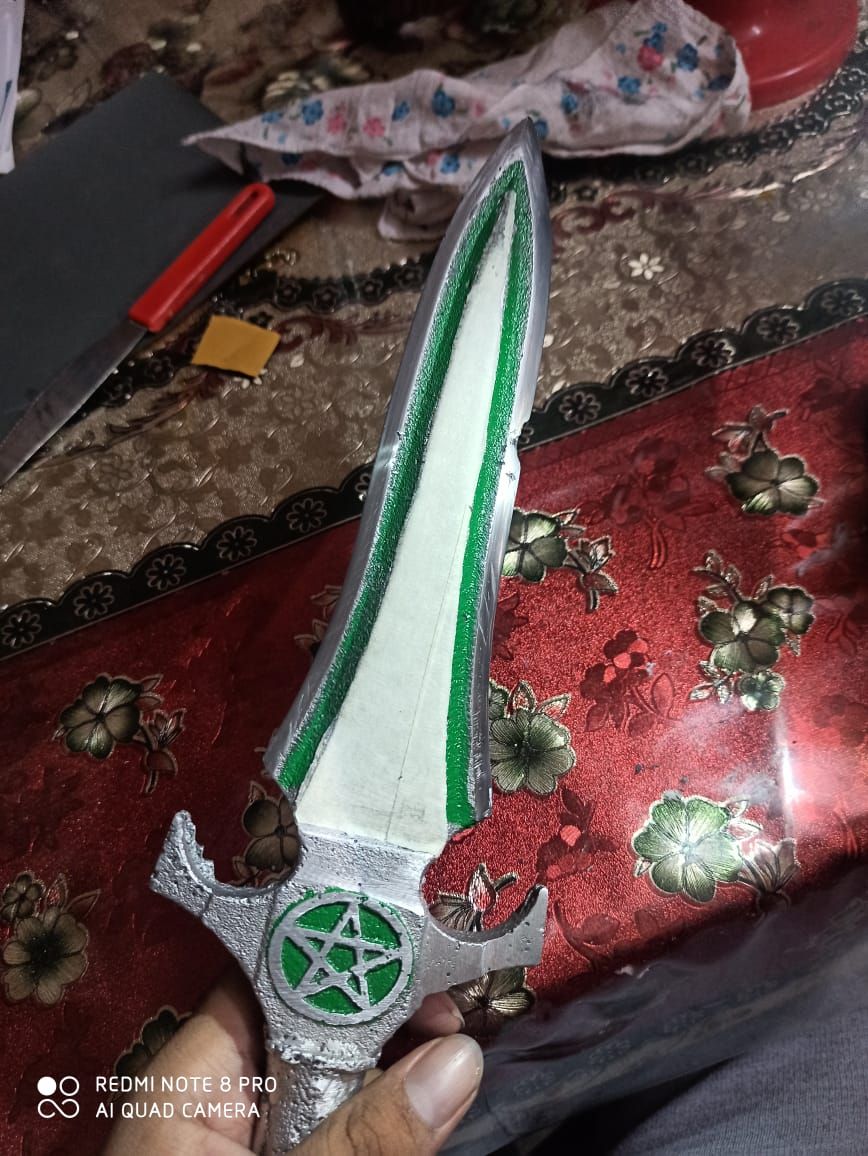
This time i added colouring to my epoxy misc after thouroughly mixing both parts and the colour i choose is Golden yellow
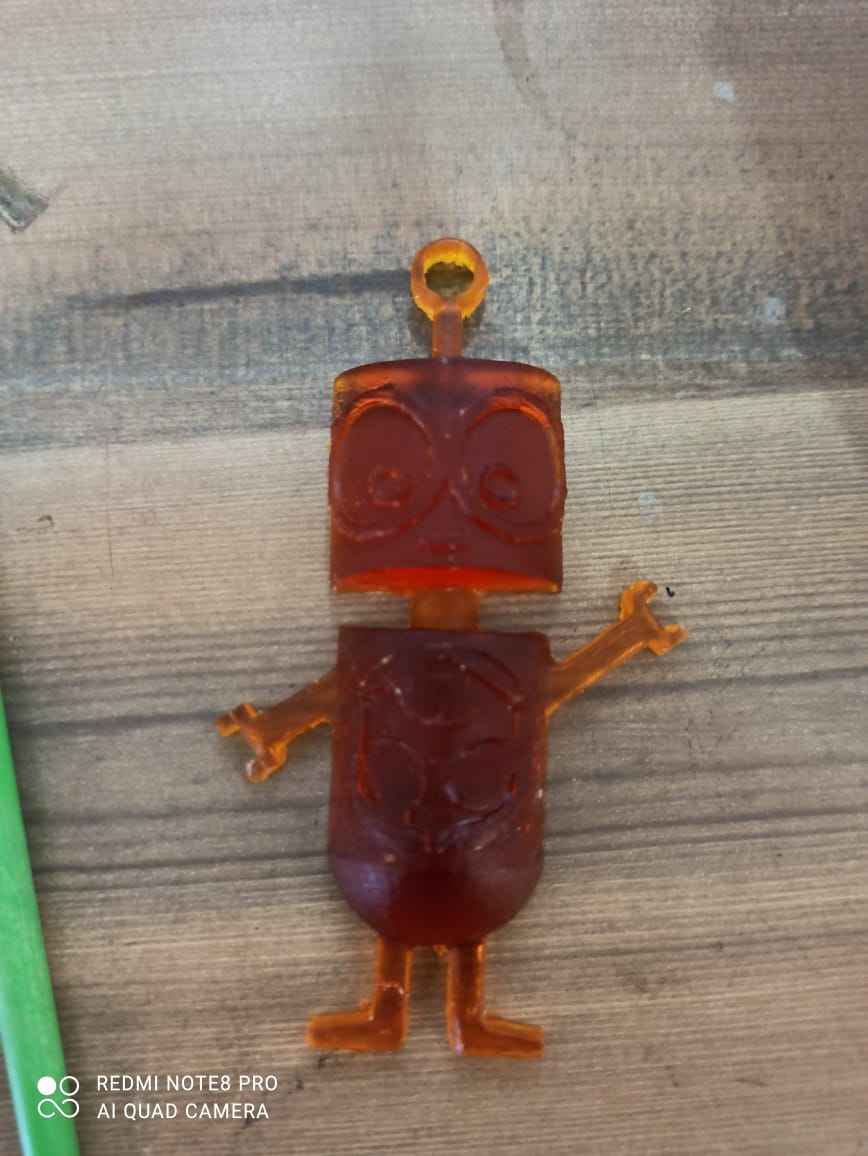
Thats how it looks
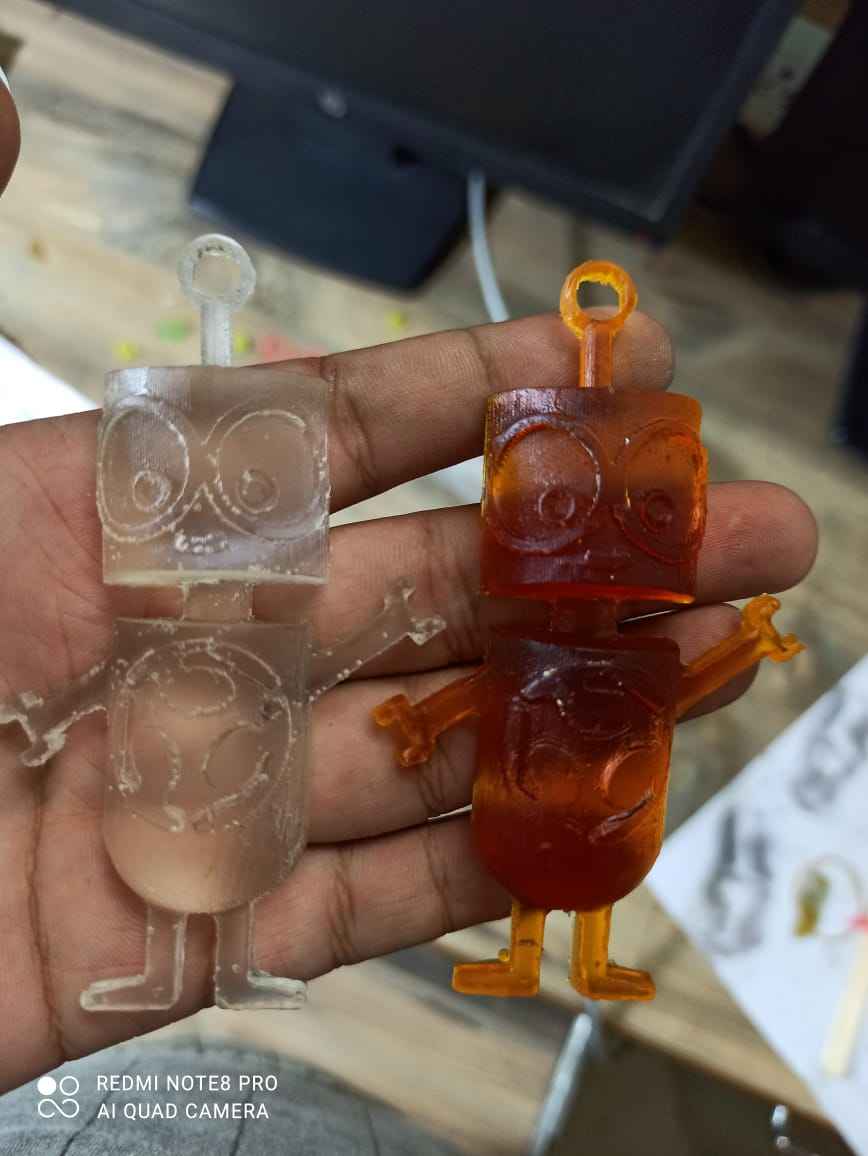
Both brother looks awesome
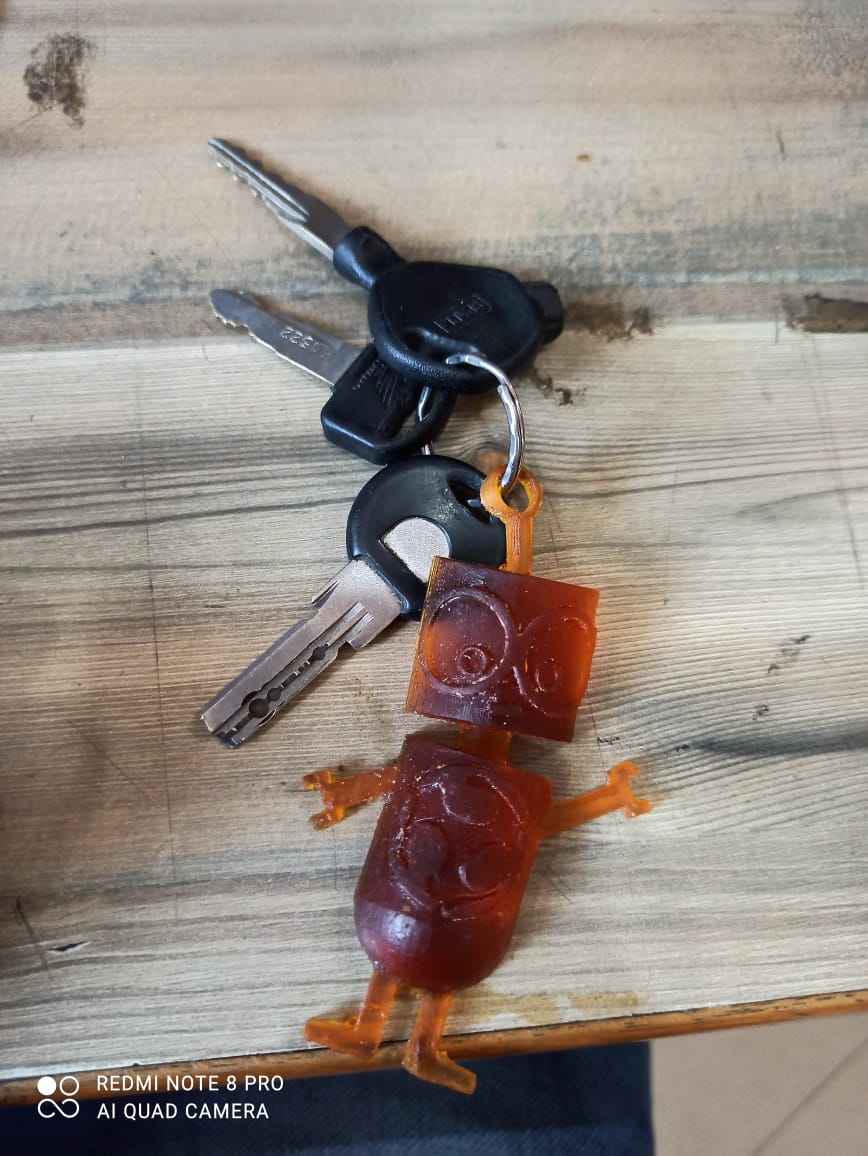
I added 1 to my keychain

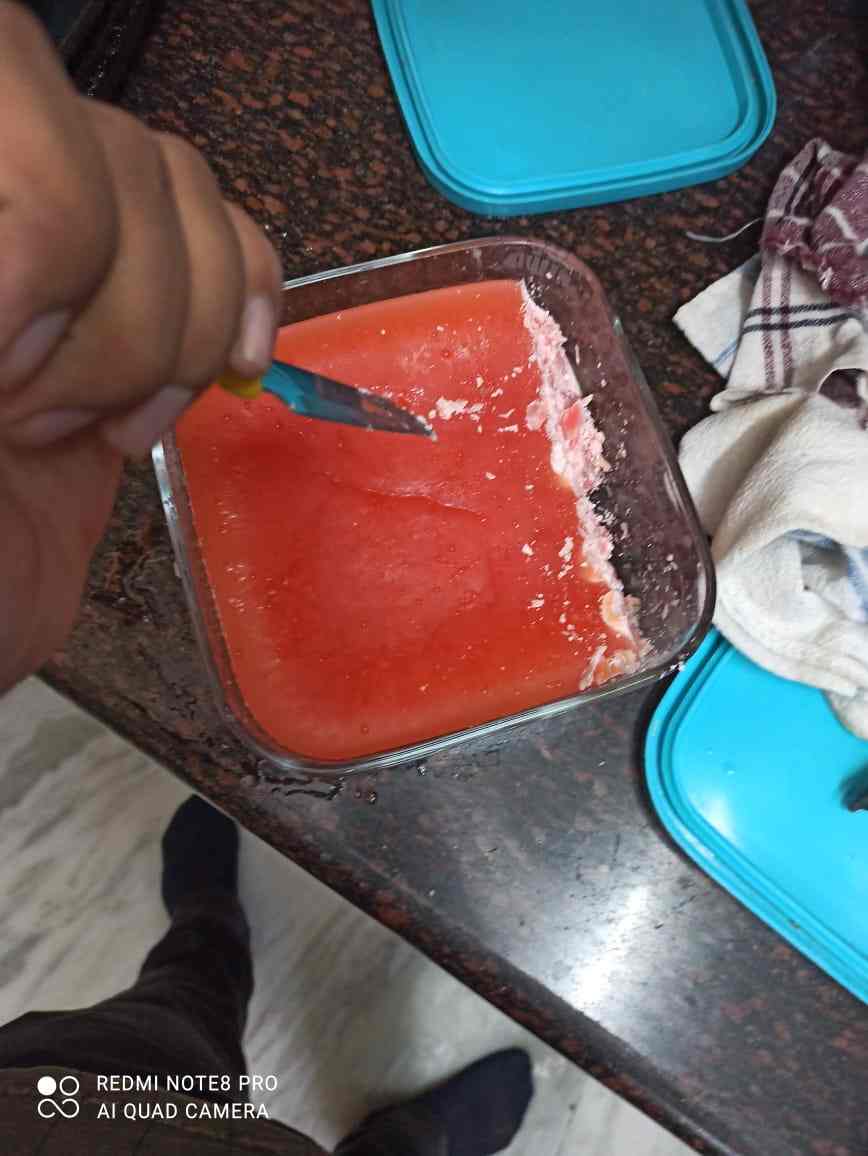
Now i tried to make something multi coloured
This is one of the best as i can see all the features
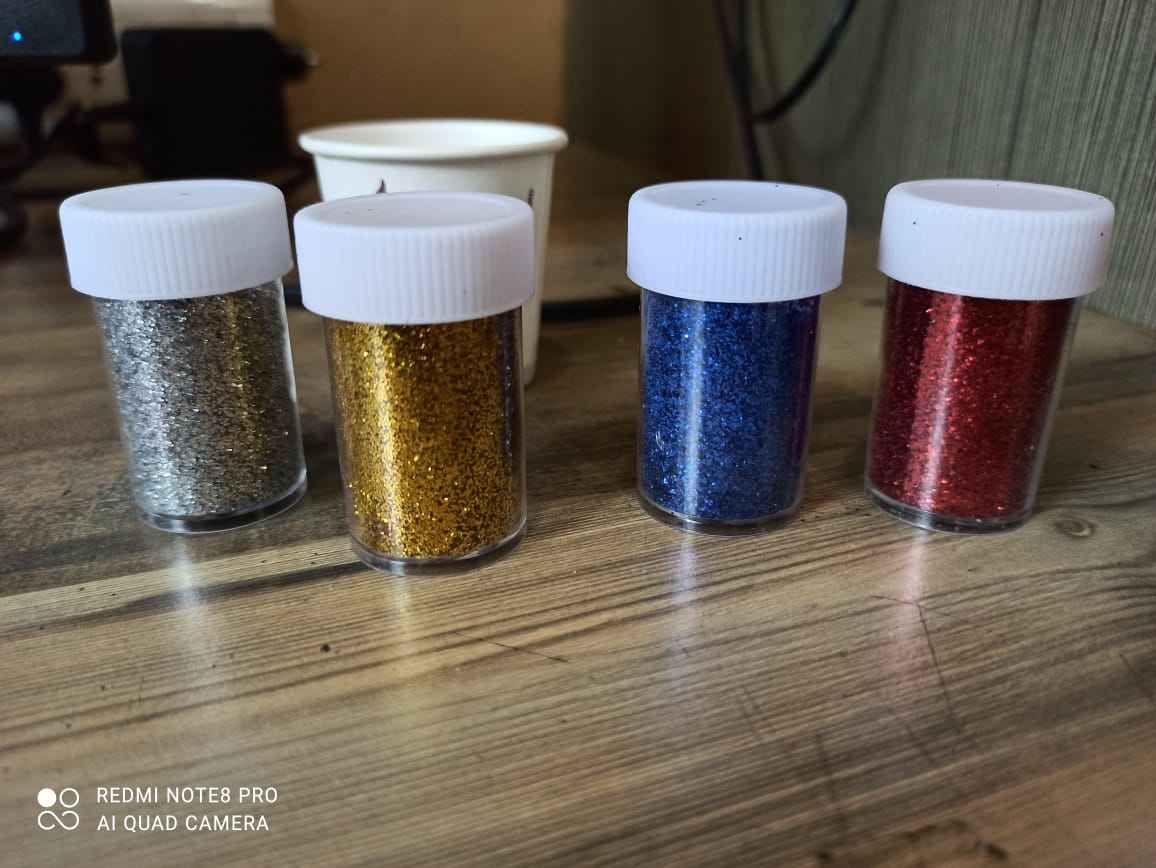
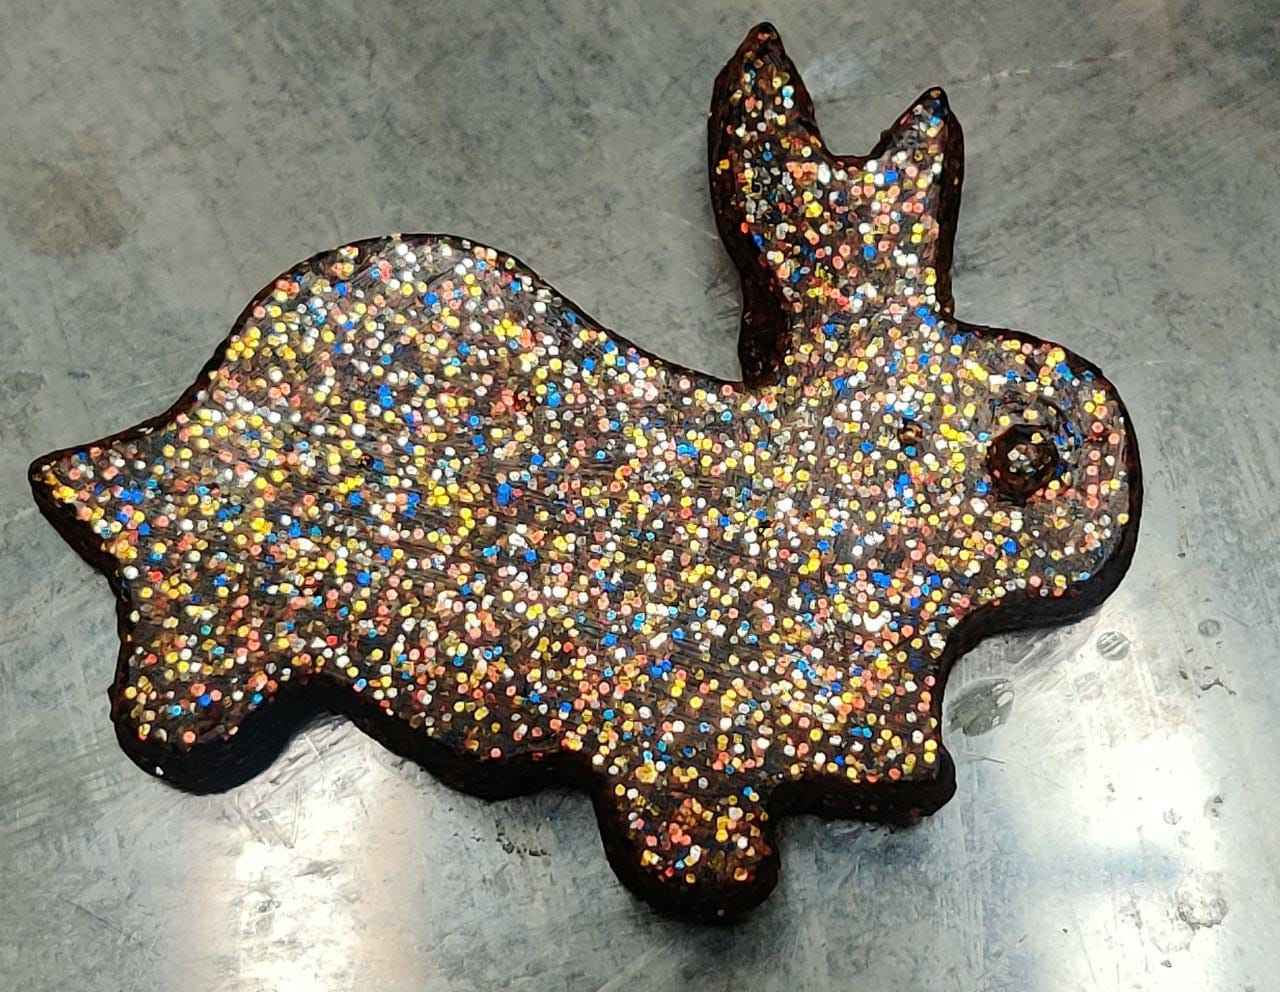
Now i thought to make something with gliters and bought these fine GLiters from nearesrt stationary
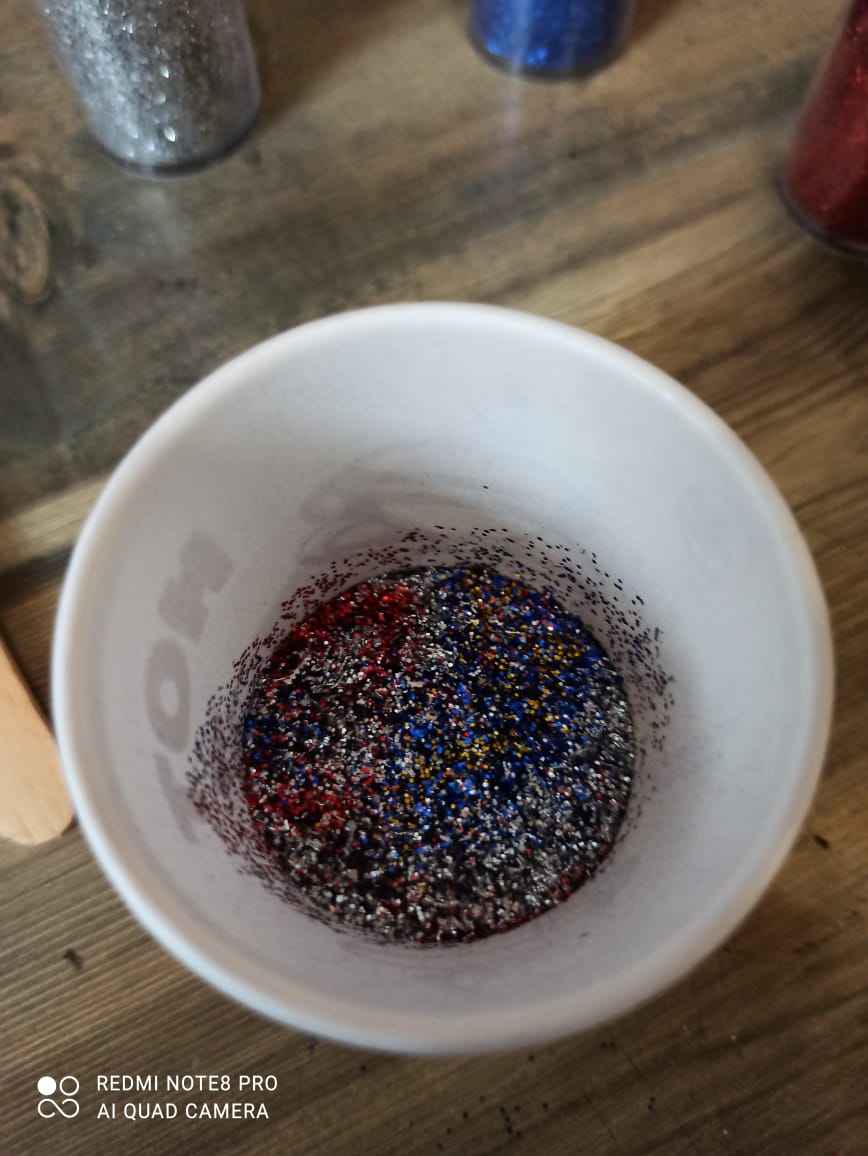
Mixed them together in equal praportion
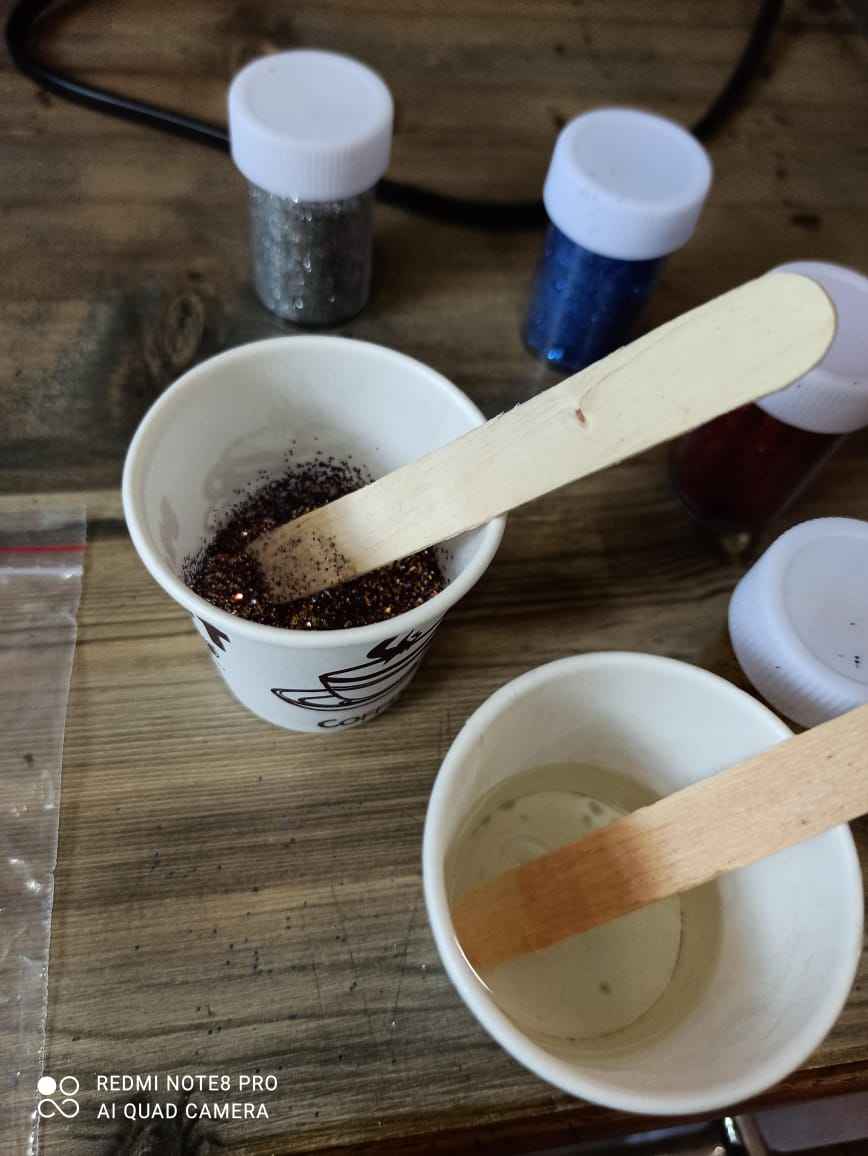
Prepared epoxy for casting
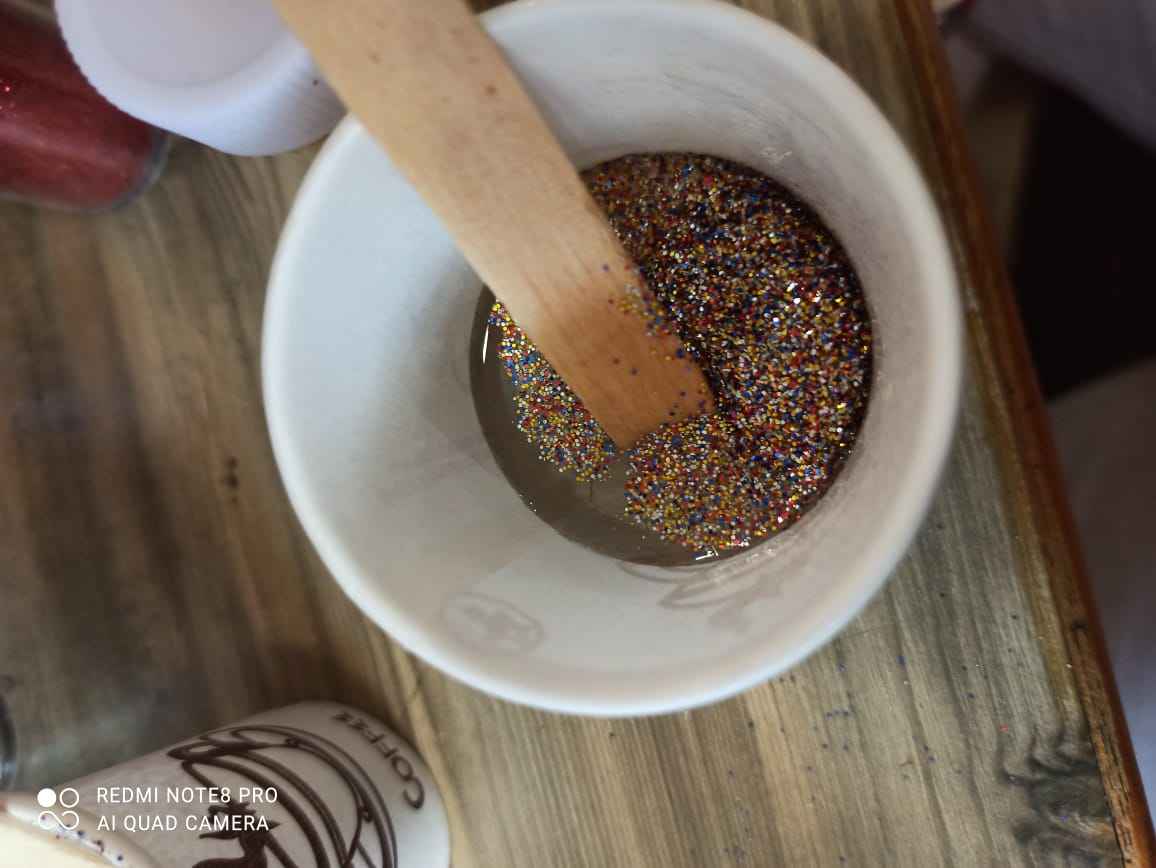
Mixed epoxy and gliters together and mixed it to get uniform constitency
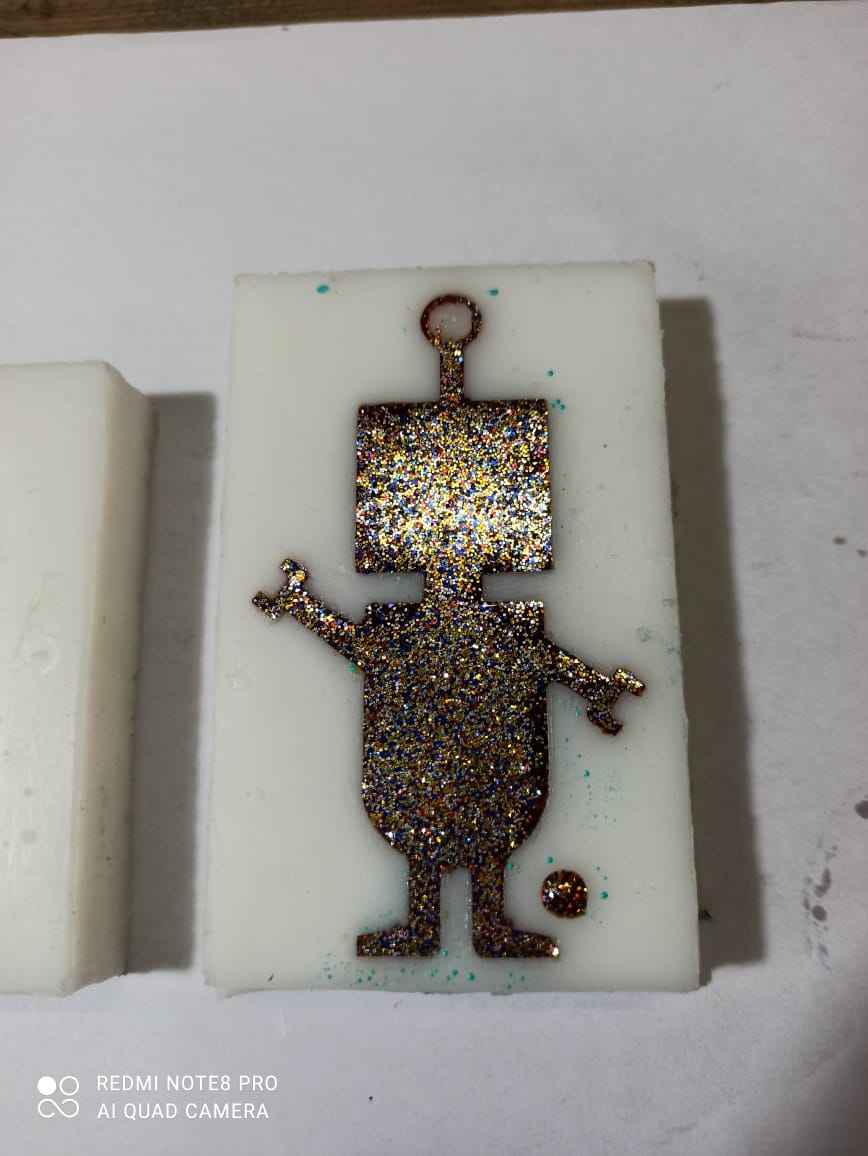
Added to mix to the mould

A little bit of mix was left so added it to Afsha mam's mould
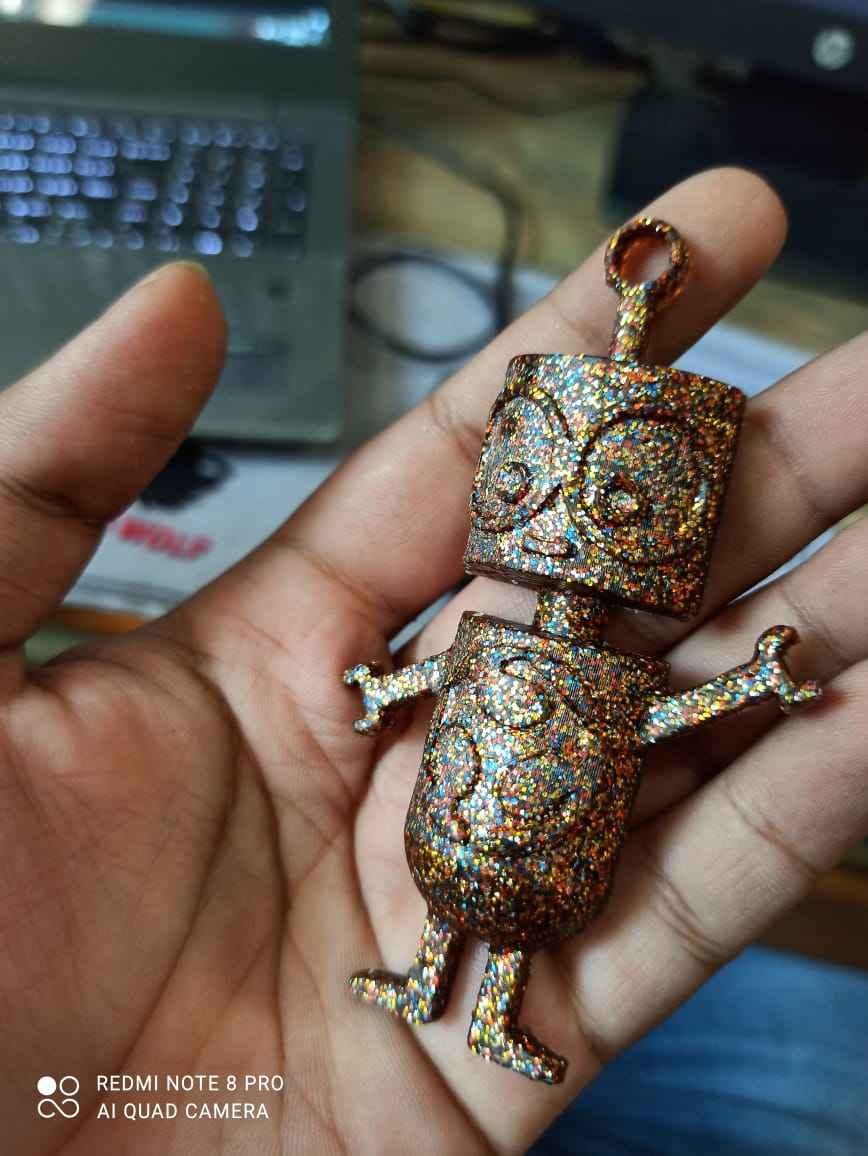
The result really looks awesome , but gliters dominate the cast and it is difficult to see features
But one the other hand Afsha mam's one look more better than mine , as her mould has less feature
Sand Moulding and Aluminium casting
Designing pattern
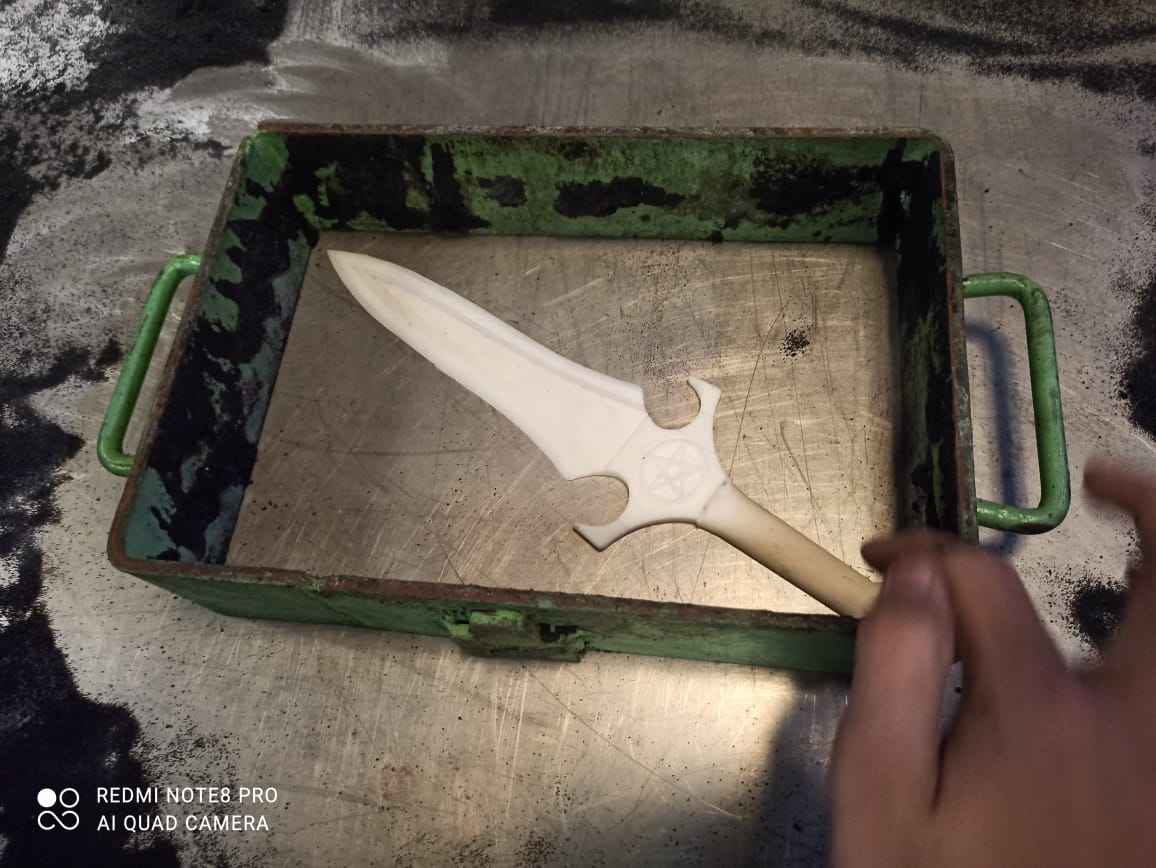
Metal-sand-casting is a little bit different then the Silicon casting and rather then having a mould of wood or wax we require something 3D printed , so i designed this dagger just before FAB ACADEMYbegin and i thought to Print and metal caste it now.
I used Solidworks to design this dagger and this is my originl design
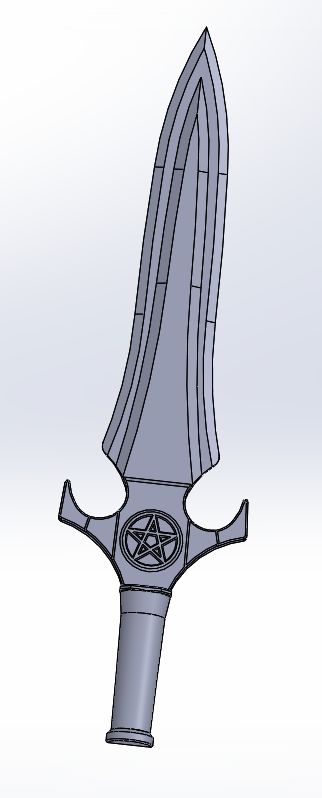
This is an split pattern mould i.e. it has 2 mirrored pieces rather then having one whole piece
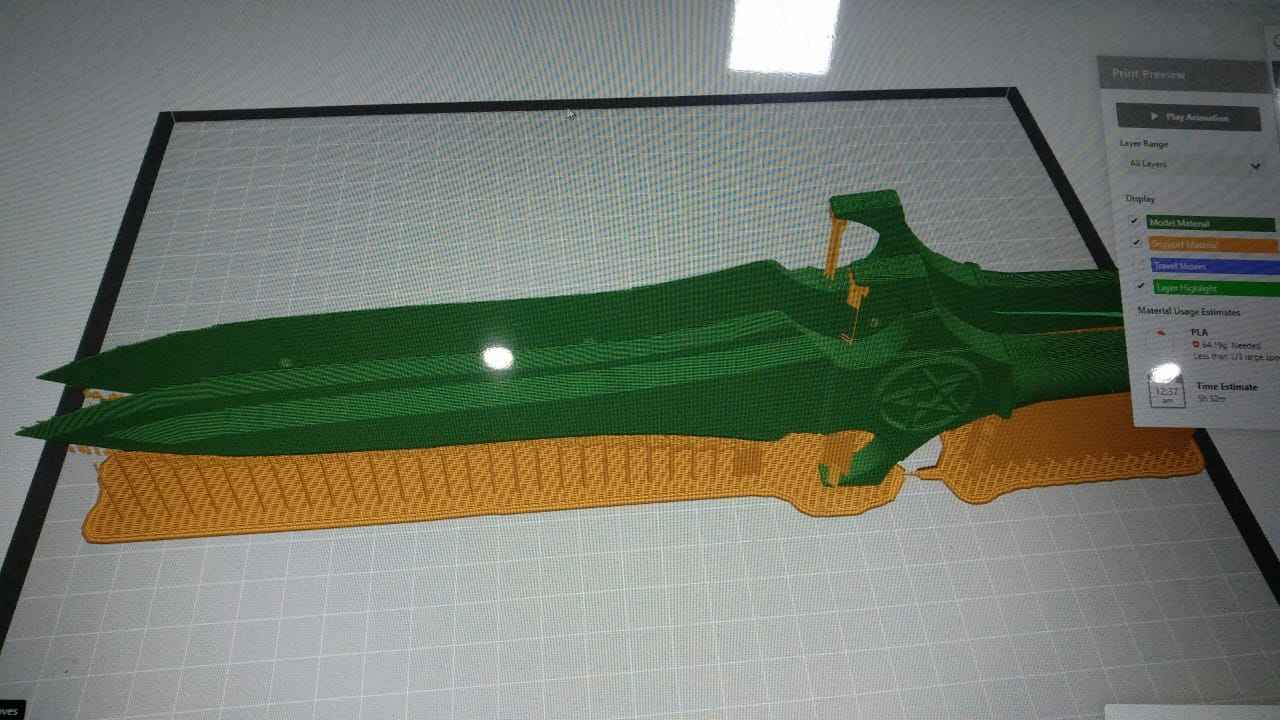
Printing parrameters
Printing material : ASA
Infill : 20%
Layer height: 0.0100 in
temp :215 C
Support : QSR soluble support
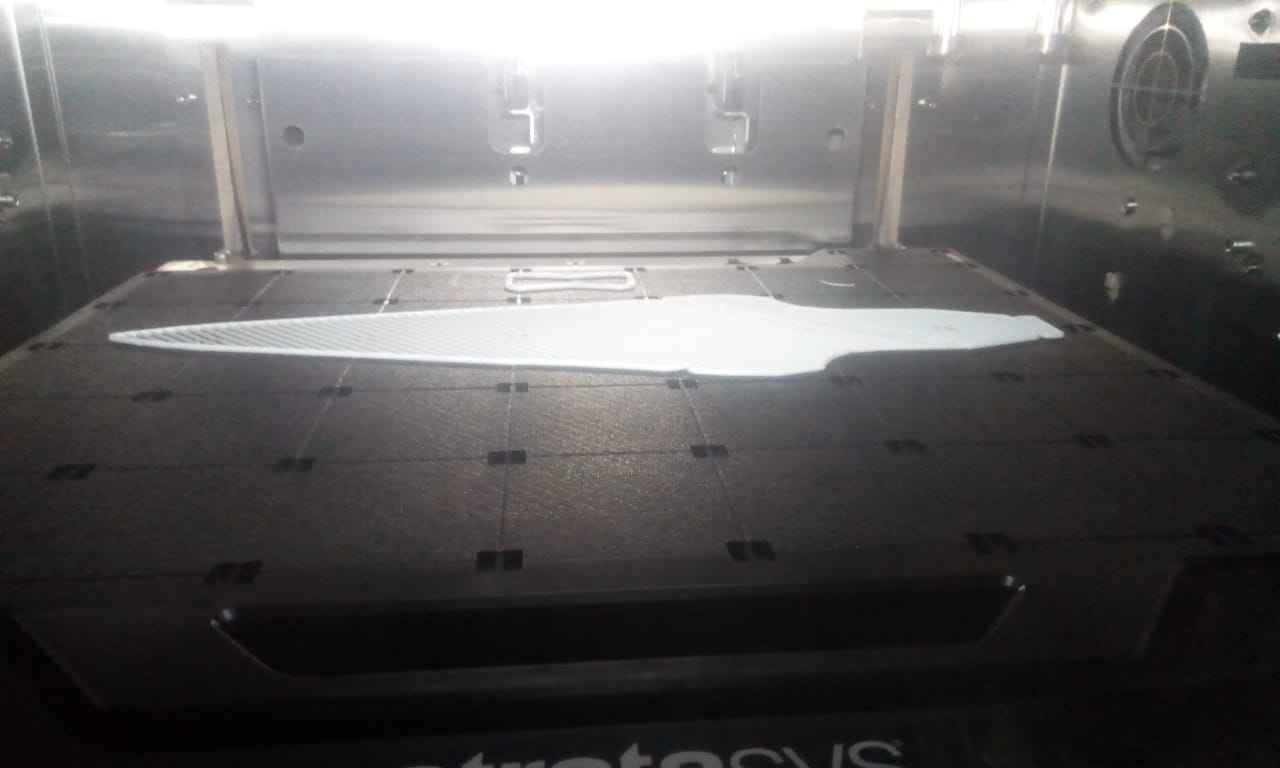
For high finish i used F370 Stratasys as it has soluble support feature which provide very high finish to my mould
And if you want to download the CAD editable file you can click on this link for that
DAGGER ONEPreparing sand for moulding
For this type of moulding we uses black moulding sand with Molases (Byproduct of sugarcane) as the binder for sand
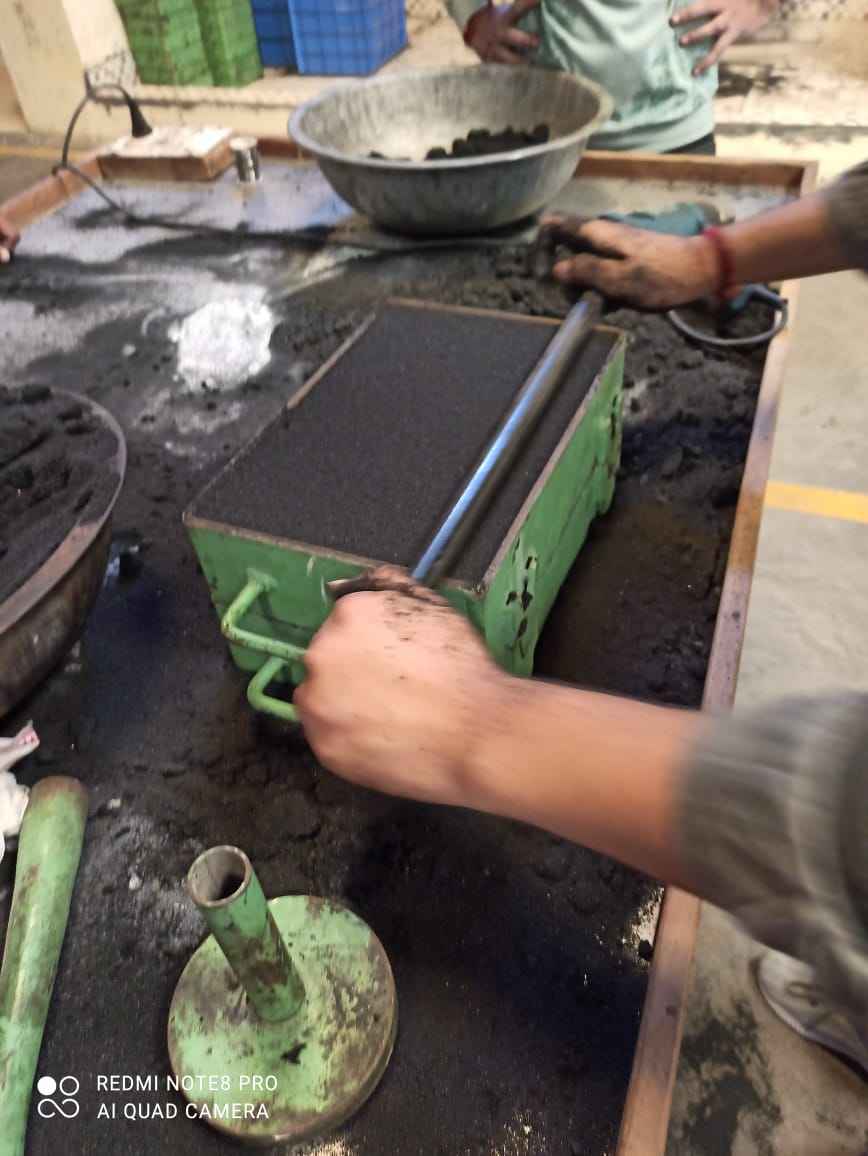
So the first process is to crush the sand into small pieces as it tends to get solid , when kept in open for long time,
so we used industrial grade sand mixer and crusher present at our lab for 30 minutes to get an fine sand ,
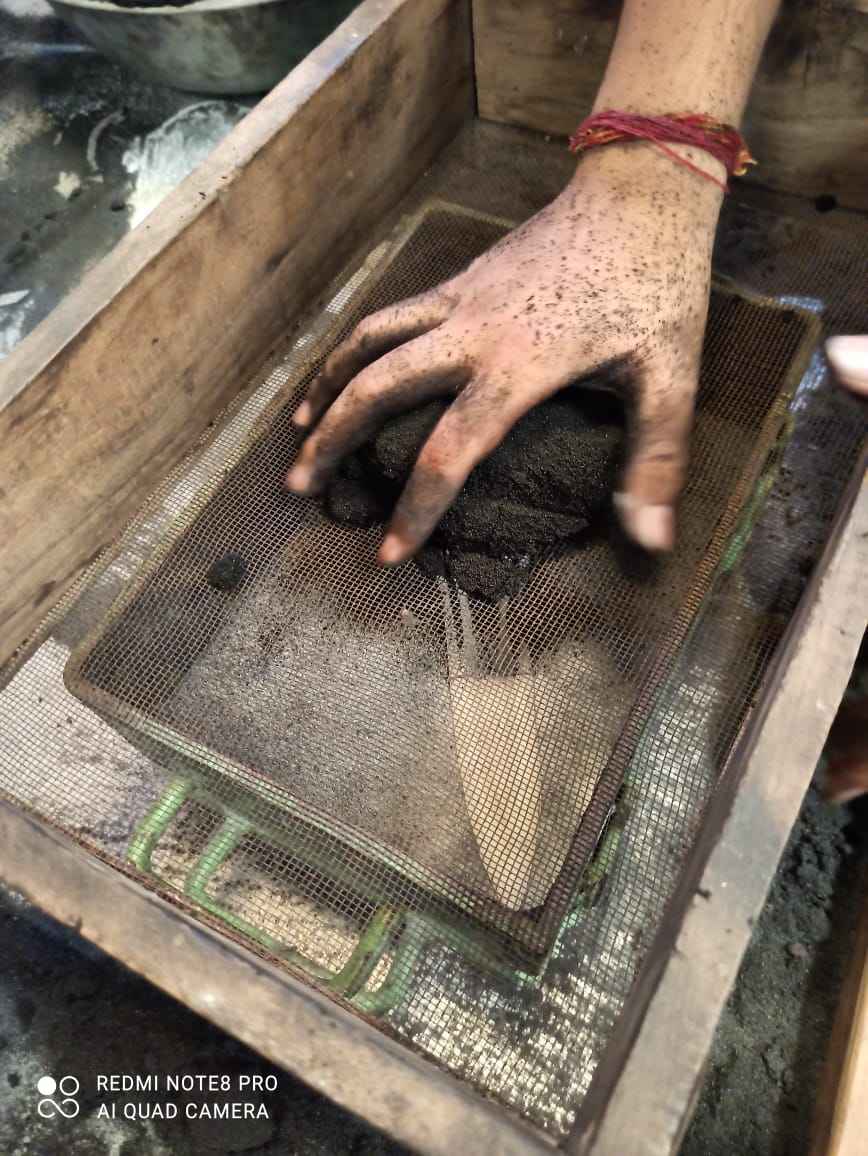
and after the sand is crushed we uses fine ridle (chalni) for separating the fine sand from big lump of uncrushed sand and collected that fine sand into bins for use
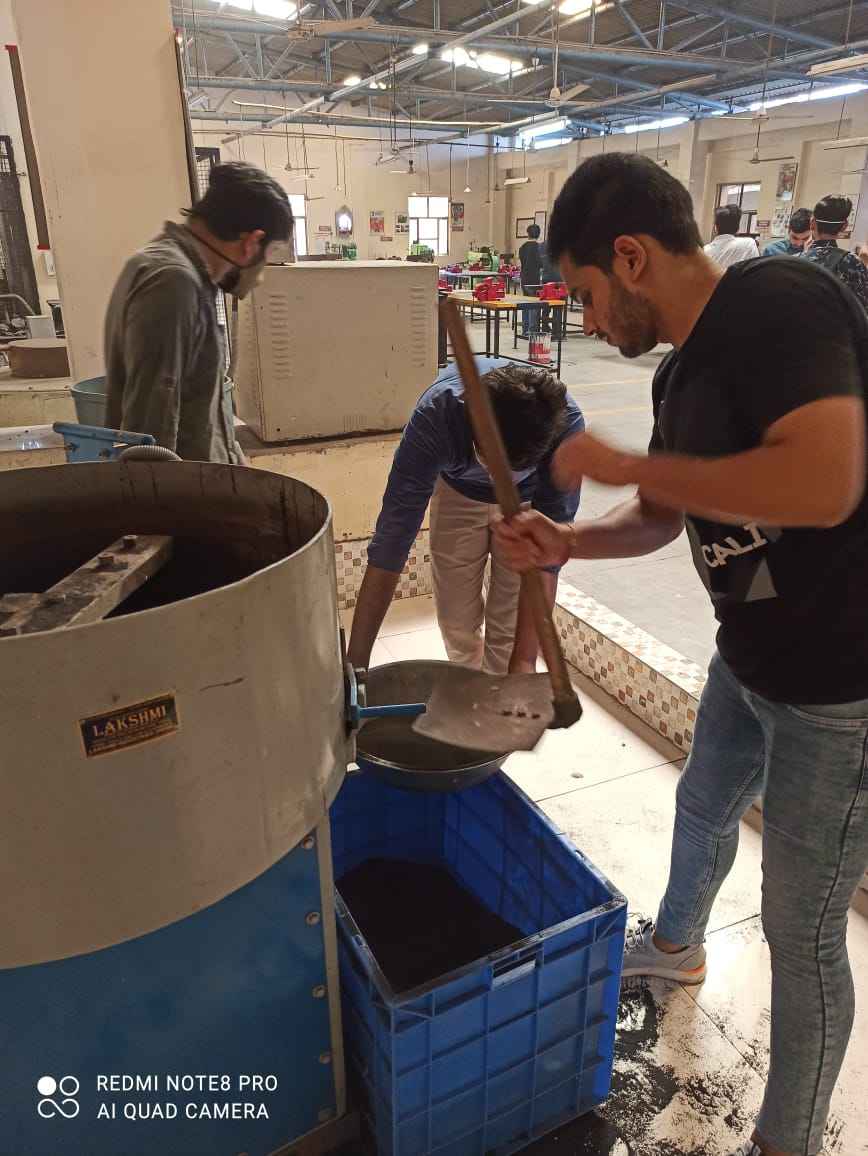
Once we got the fine sand ,after cleaning the mixer we again add add the fine sand to it and switch on the mixer , and we added Molases which is the binder agent for this sand to it and again let it to mix for 30 minutes or until binder is perfectly binded with sand
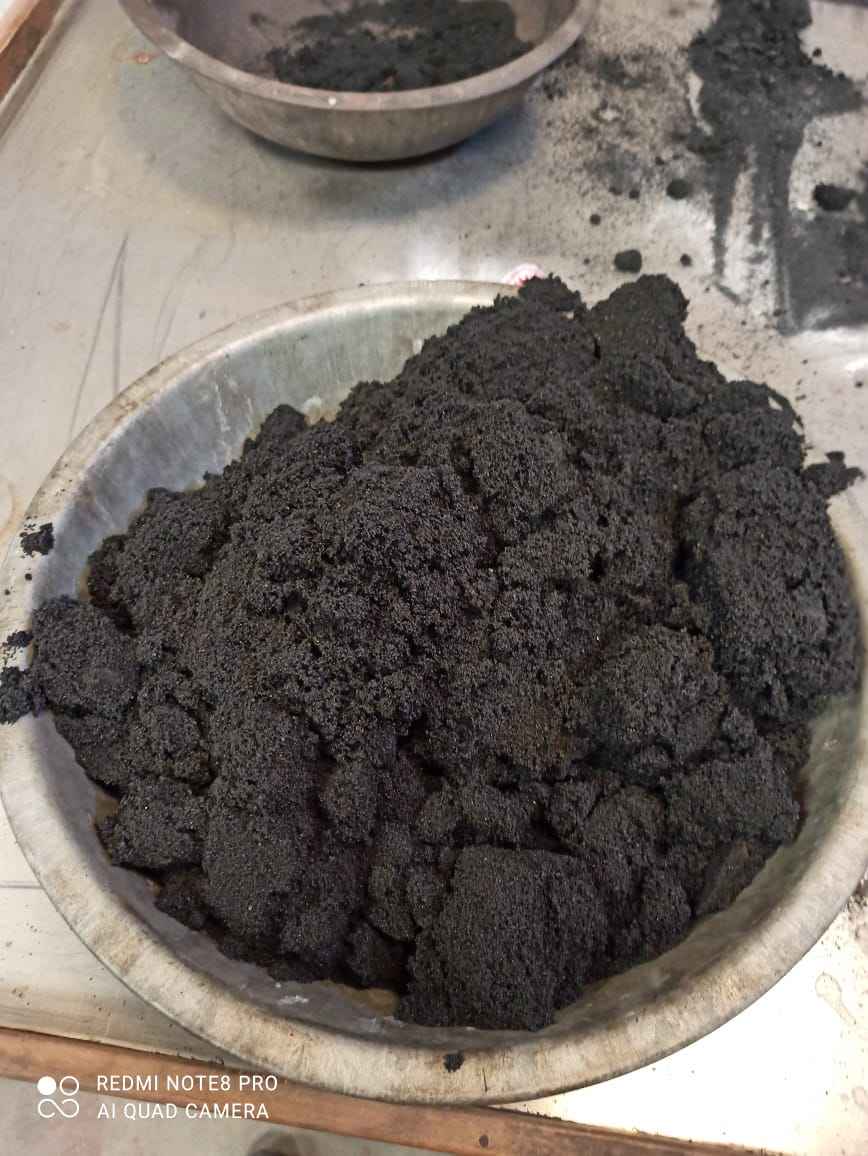
Now binded sand should looks something like this
Time to prepare Moulding
* I placed the 1 side of pattern diagonaly in drag (In foundry work, the terms cope and drag refer respectively to the top and bottom parts of a two-part casting flask, used in sand casting. The flask is a wood or metal frame, which contains the molding sand, providing support to the sand as the metal is poured into the mold. In flaskless molding, the same terms are used, cope for the top or upper piece and drag for the bottom or lower piece) to start casting.
Then added parting sand (it is just a white fine powder used to restrict the pattern sticking with sand) on it
Then for first layer i used a medium size ridle (chalni) so i can get est detail as possible for first layer as it is the main layer which has the impression of pattern
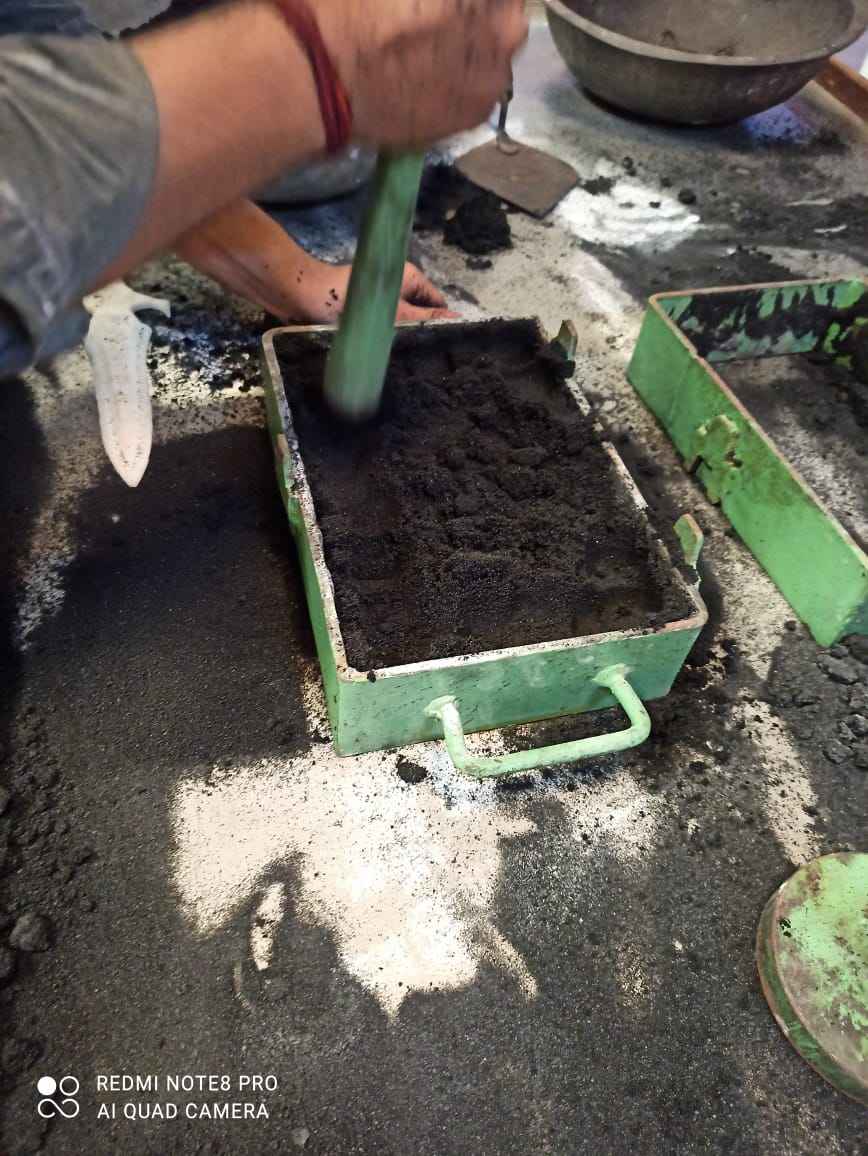
Then i added the sand freely on the part as now we dont require any details on the base and ram it properly so sand can bind strongly
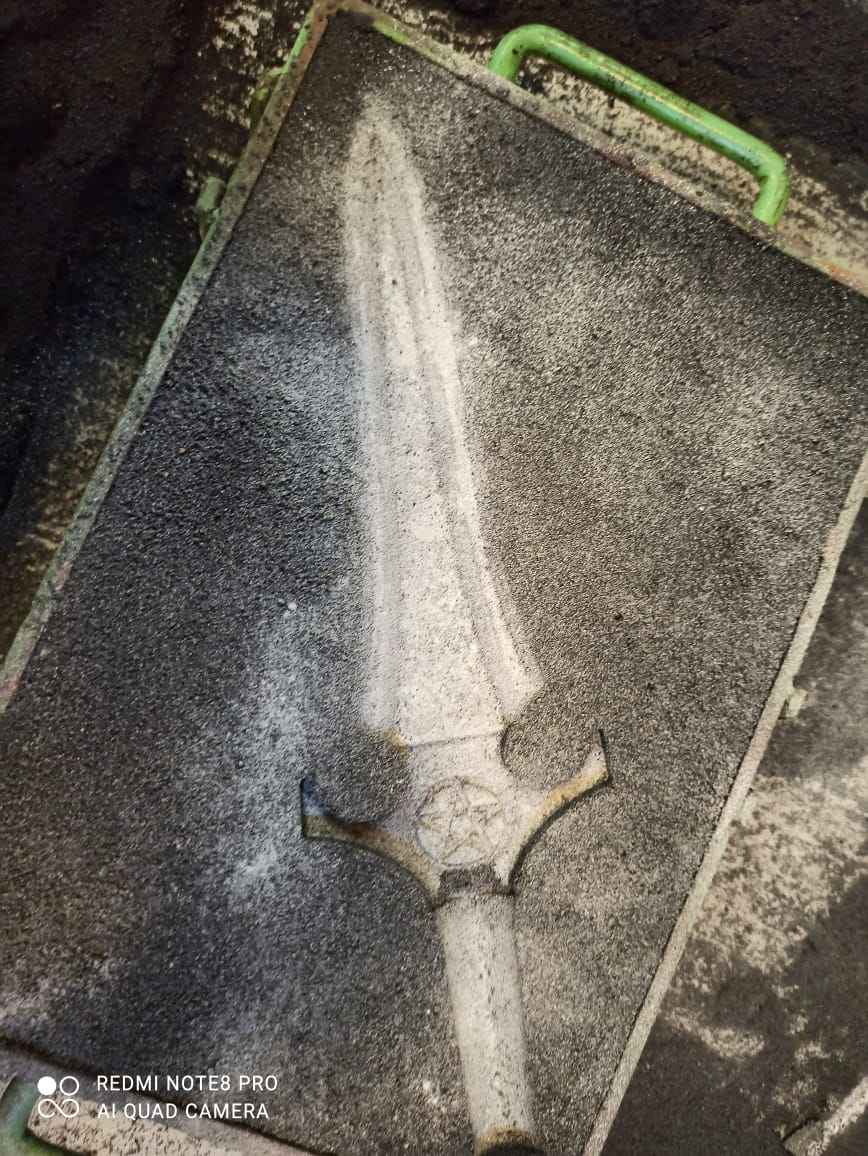
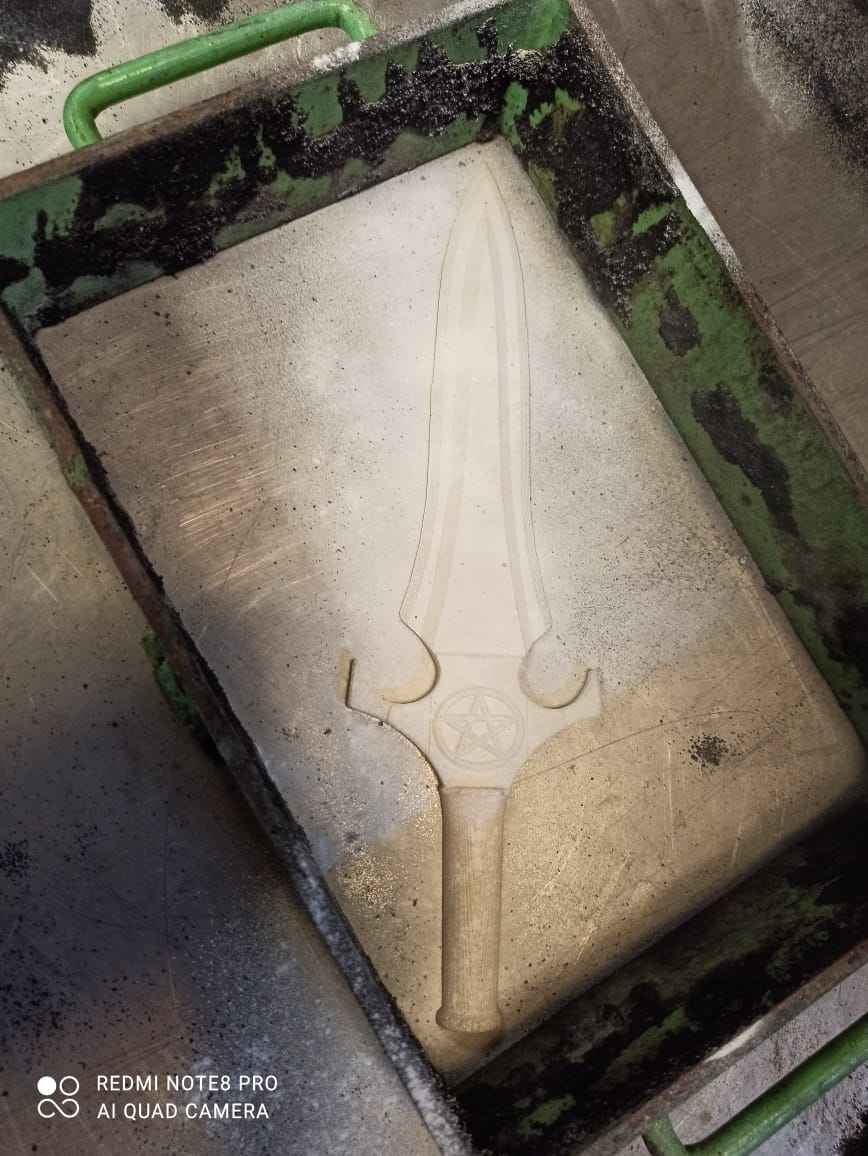
Once the sdrag is filled properly we turn it upside own to see if we got the perfect impression or not and yes we got the perfect impression from the patter

Now we need to get the other side correctly so i placed the dagger part back with attaching other side on it
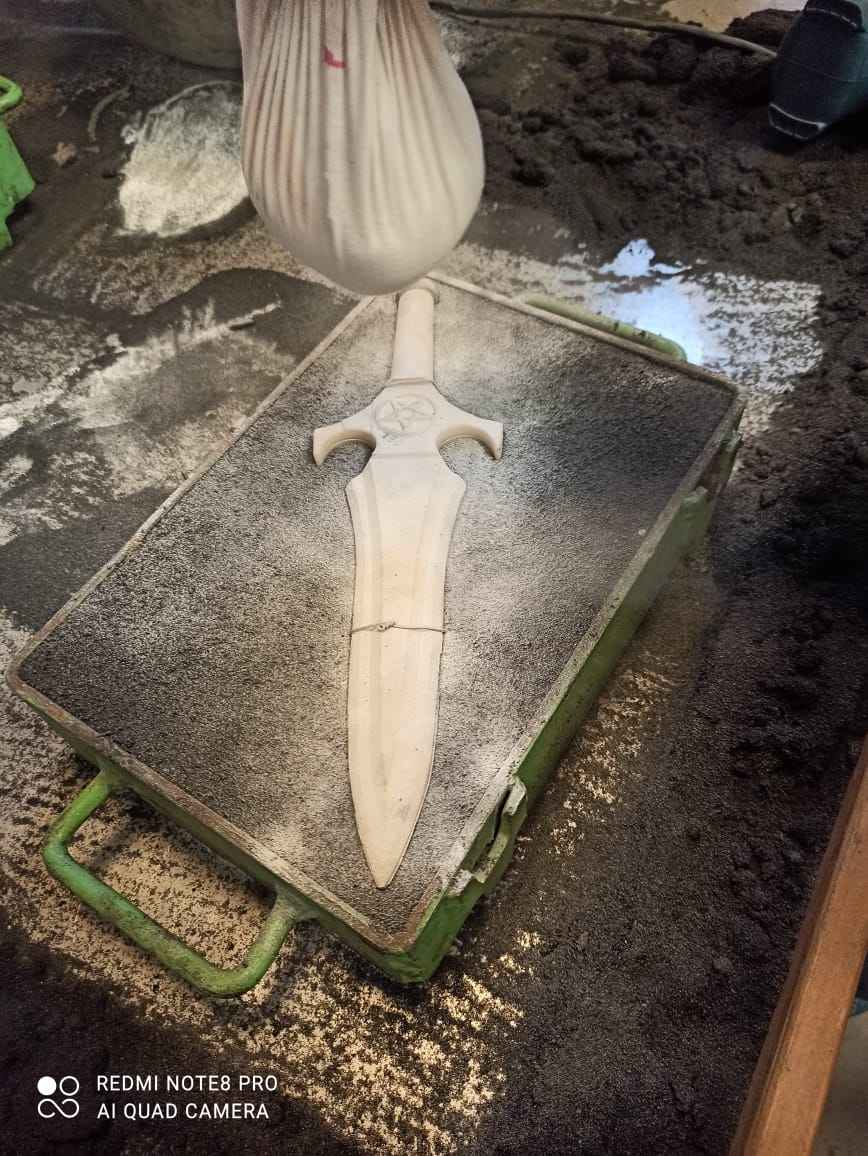
Like first time i added parting sand on it so sand dont stick on the patter , itis very crucial as it can destroy the pattern if sand sticks on the pattern
Then like last time we filled the cope with sand ram it properly and then flatten the surface
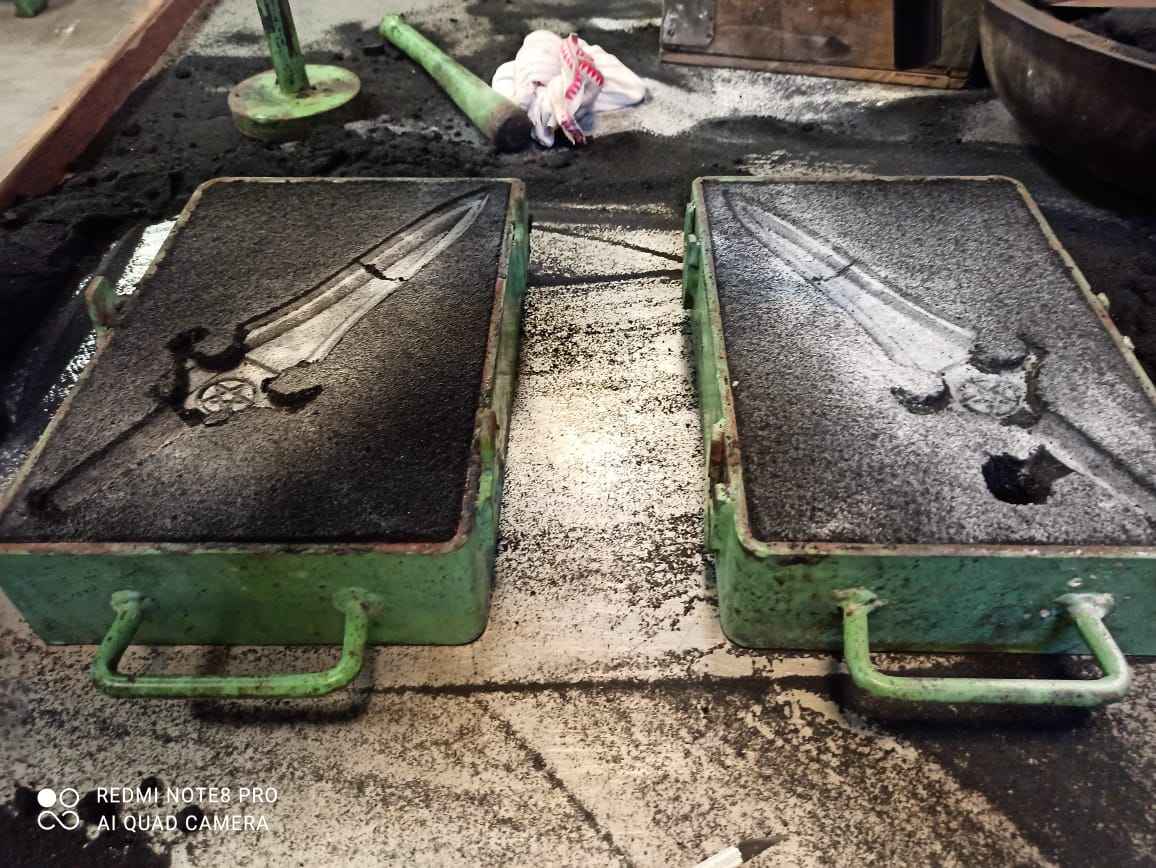
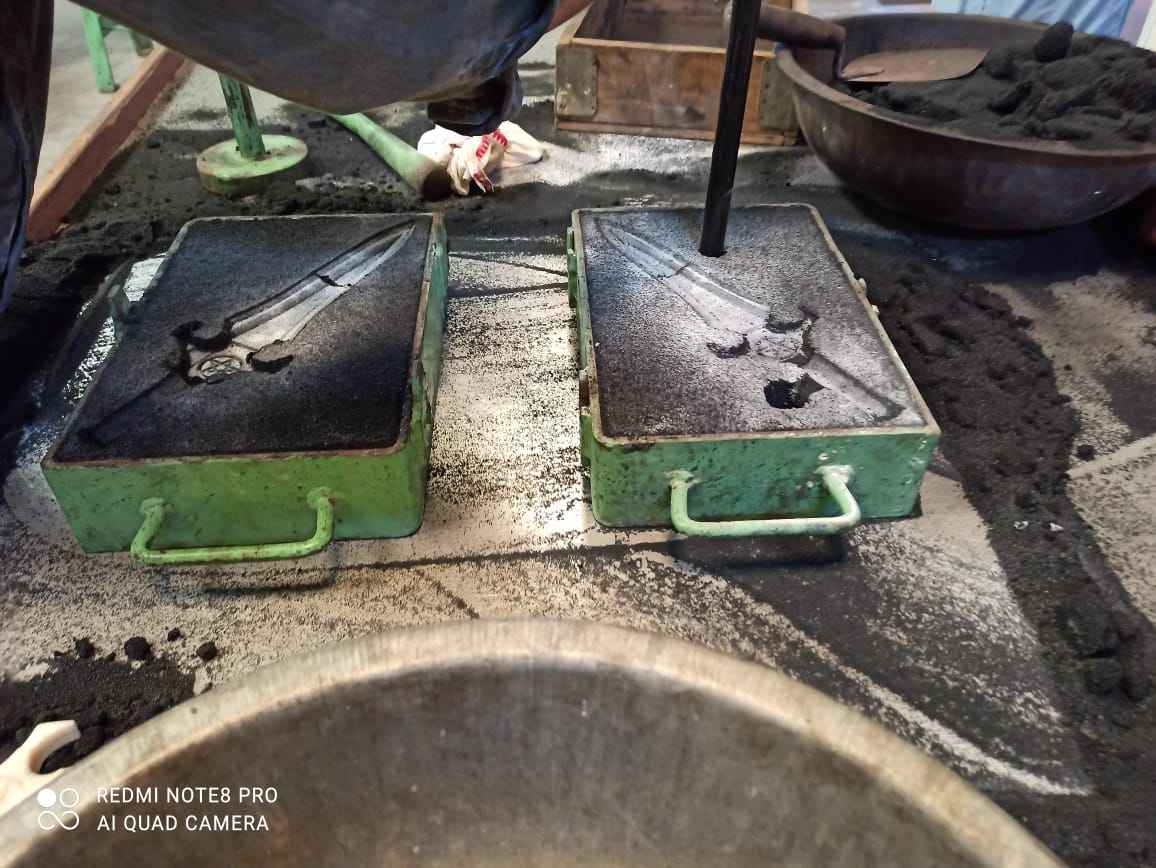
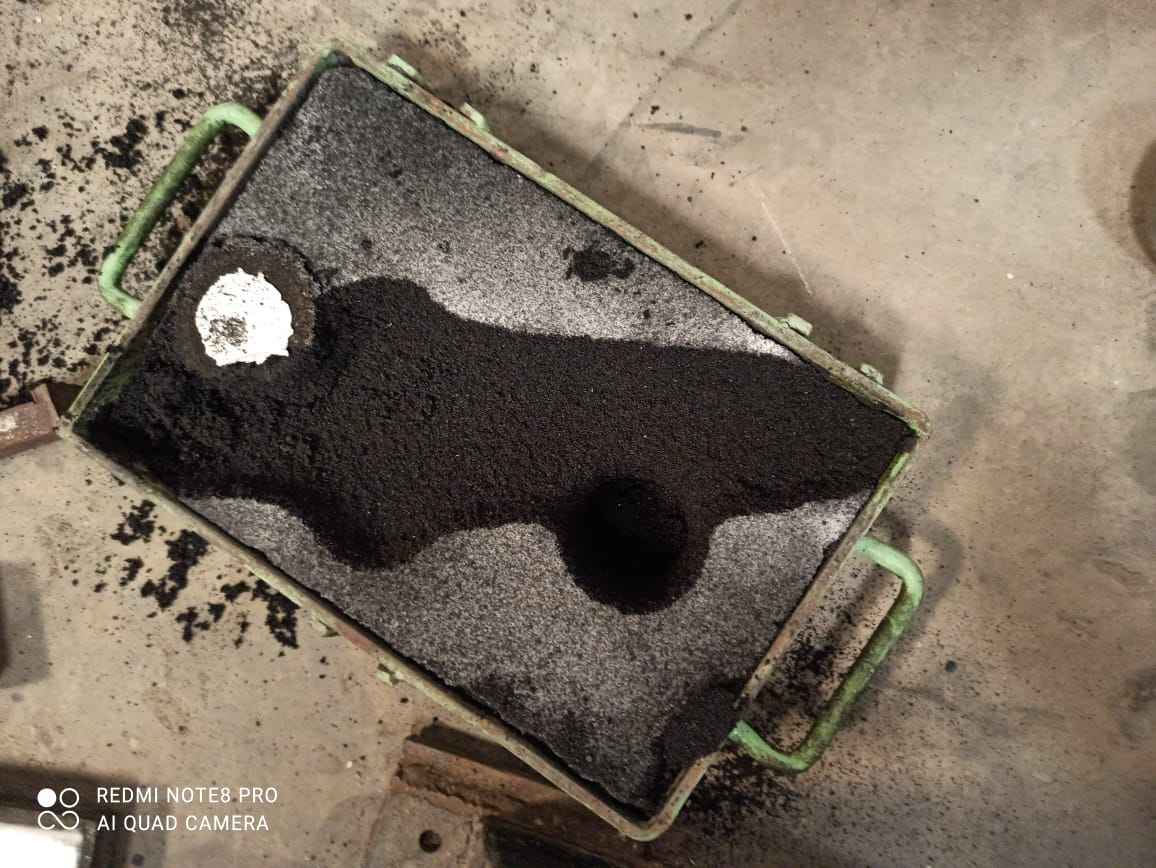
This is the final result of making pattern and you can see they look so awesome
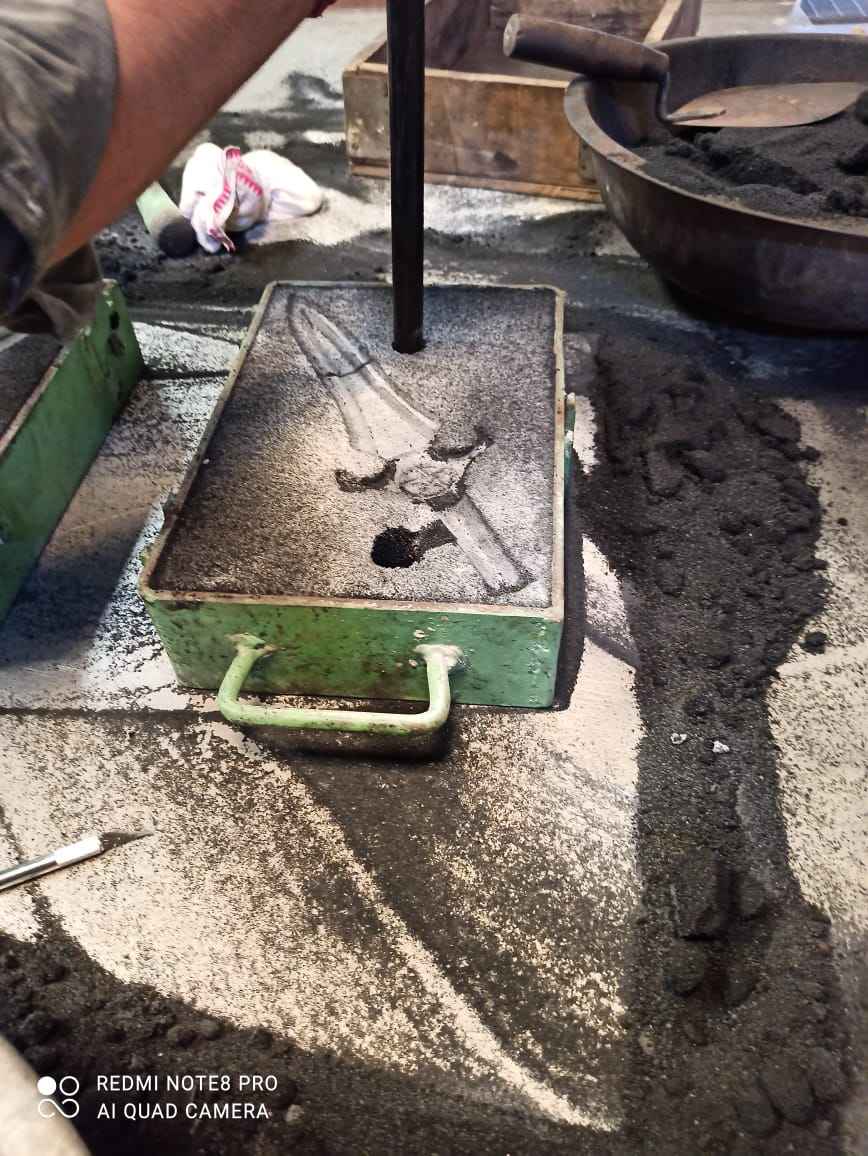
So now last thing which is left was to make runner-riser so metal can easily flow in , so we made that using an hollow rod
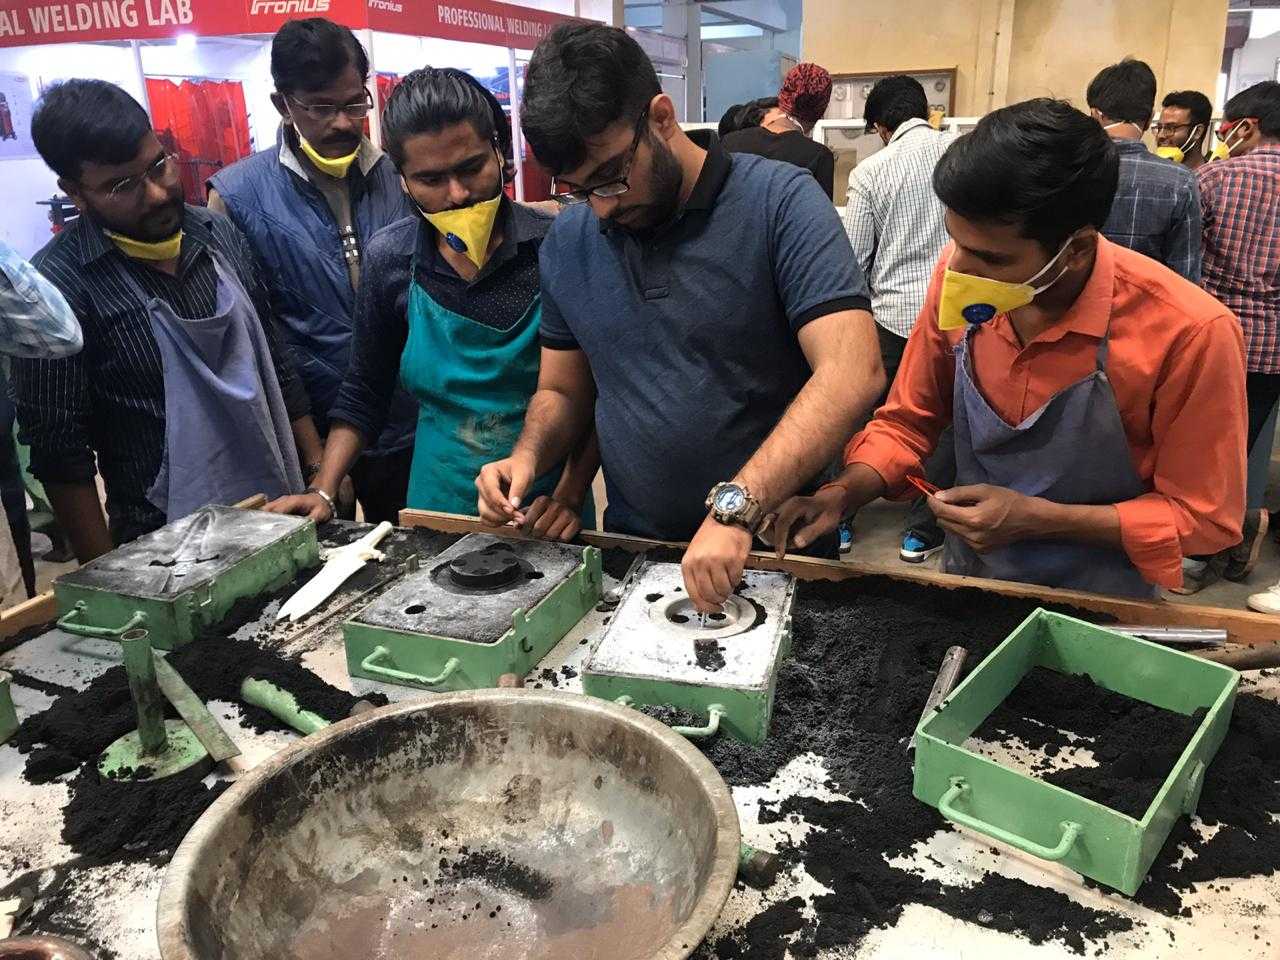
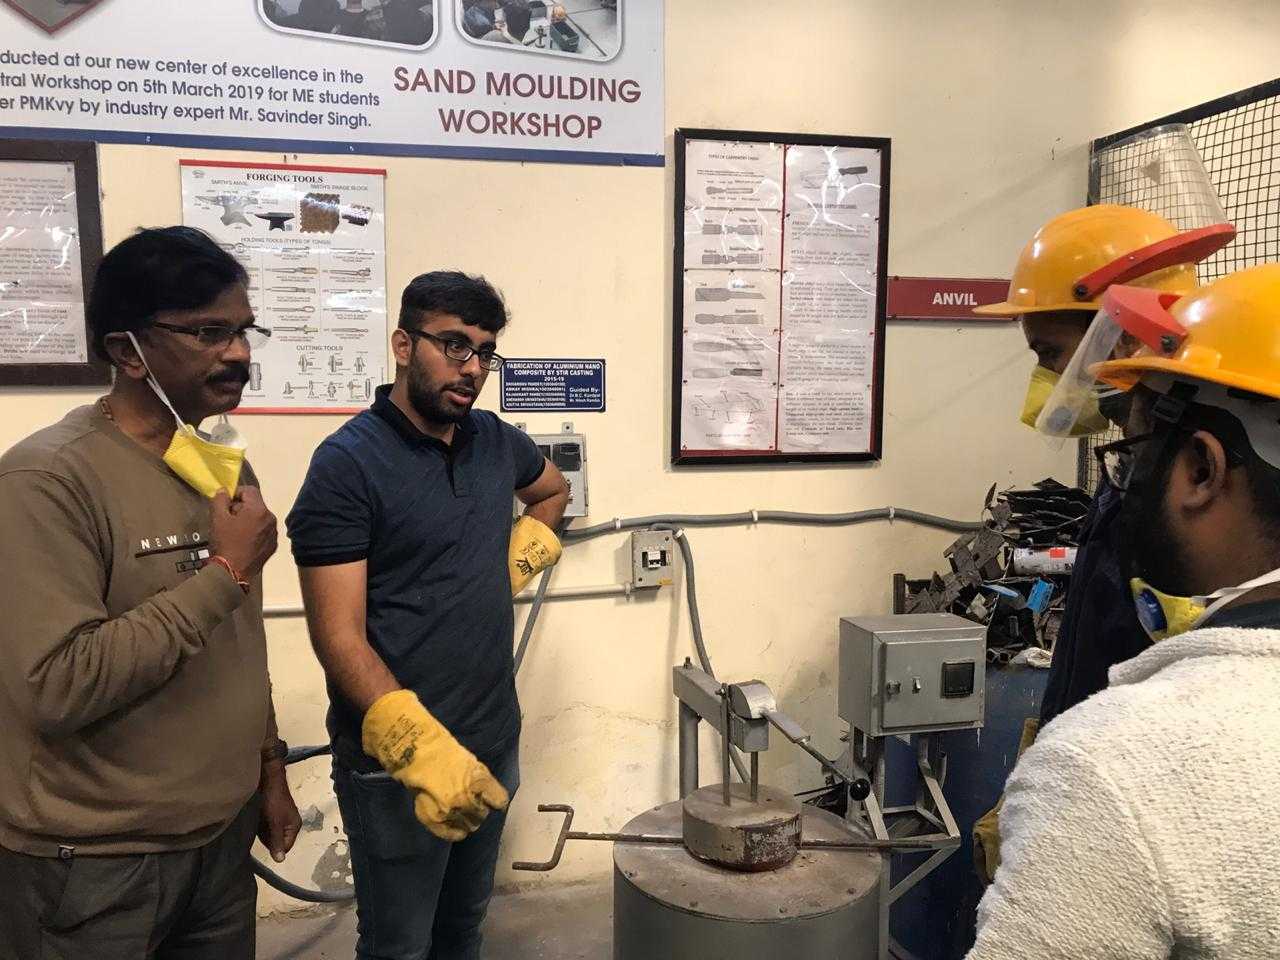
Now i am explaining my junior basics of how metal casting like temp of aluminum and danger hazarts of casting

Time to pour hot metal into mould
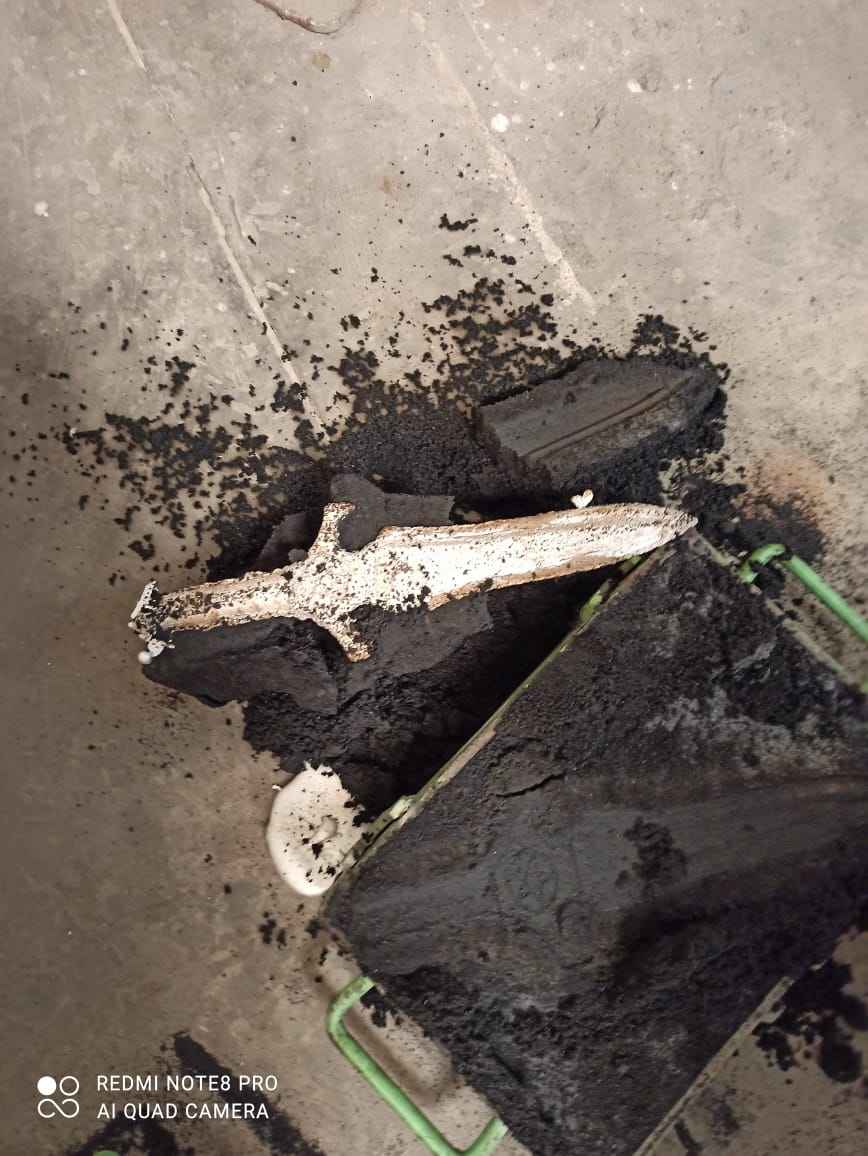
Casted aluminium dagger
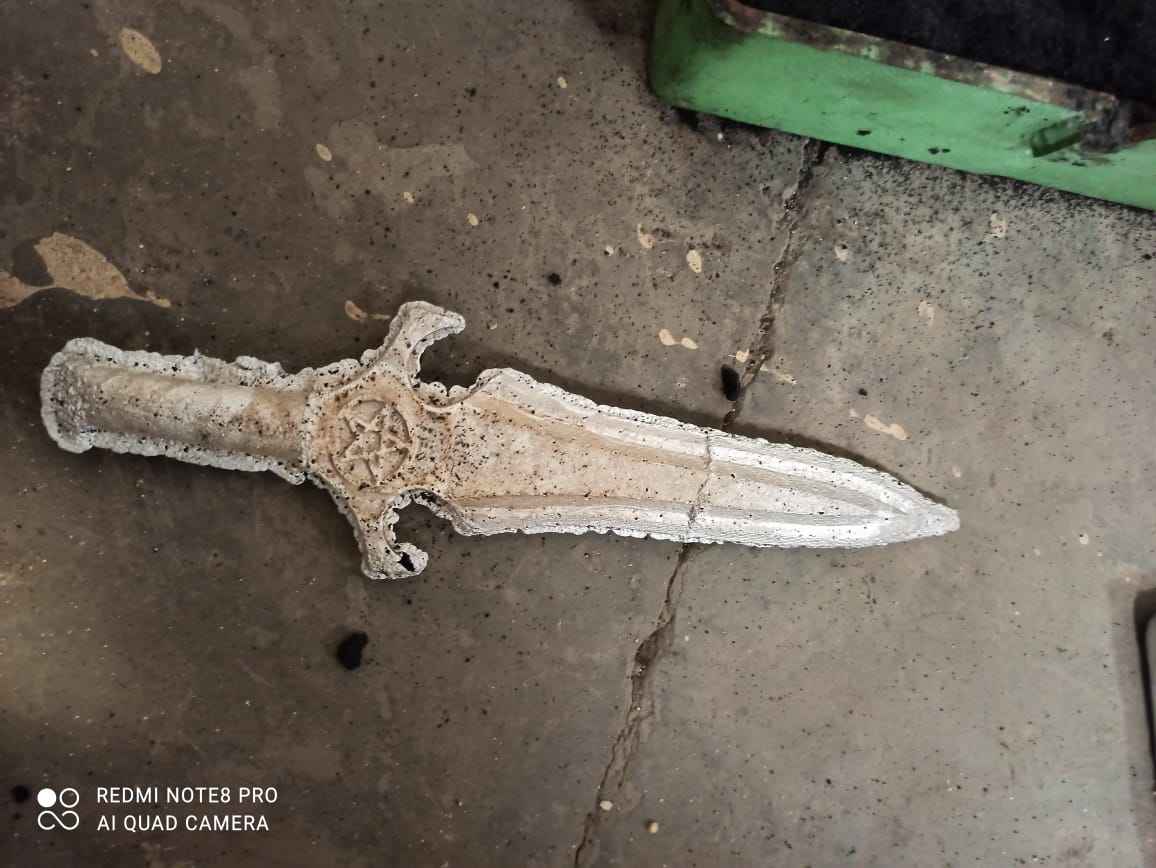
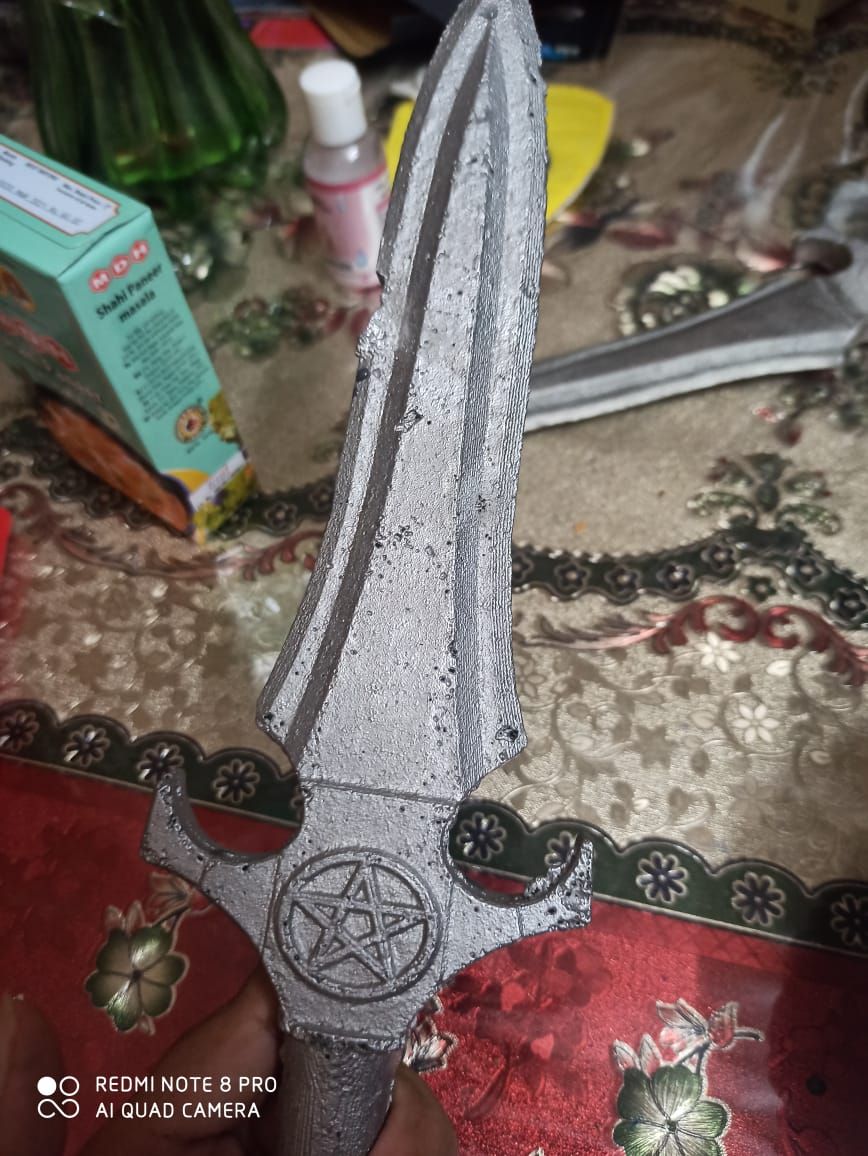
Time to finish the aluminium casted pieces , so i used variouse grit of sand paper ranging from 180 grit to 1500 and polish it manually
This is the final workpiece which i got after sanding