Project Management
Git Github and Gitlab
Git is a free and open source distributed version control system designed to handle everything from small to very large projects with speed and efficiency.
The task which was assigned to us was to go through a GIT tutorial.
Initially I thought that this is a thing which is important for the WEB development as I have
very less knowledge about the software tools, coming from mechanical engineering
background. I was trying to understand it with respect to web development software. I did not even know about the editors
like ATOM, SUBLIME TEXT and Visual Studio Code
But soon I realised that GIT is a wonderful tool for project management. If there are employees working at different location and working on the same project then the employees or team member can upload to a remote server and it can be accessed by any other employee or team member.
Firstly I installed and learnt about git using this video I had earlier seen more videos on git but they were mostly about talking about the theorotical aspects of git.
After going through the videos then I installed git and practised on it for a day where I learnt how to initialise,
add, commit, push and pull. This is very new to me as i found that i can work with different terminals at different locations and can
have access to all info about the project.
Git has some commands which if understood properly and practised will help in project management.
These are the steps followed and some mistakes I committed:
Step 1 : Install GIT
The installation process is easy. You can download the configuration from link Opening of the page automatically downloads the required configuration GIT.
Step 2: Configure Git
We need to configure Git by using these commands
$git config --global user.name "Neeraj"
$ git config --global user.email "guptaneeraj@akgec.ac.in"
if you have not
configured then you will not be able to commit and push. And it is important that you learn
these commands well because they have to be used
several times during the project.
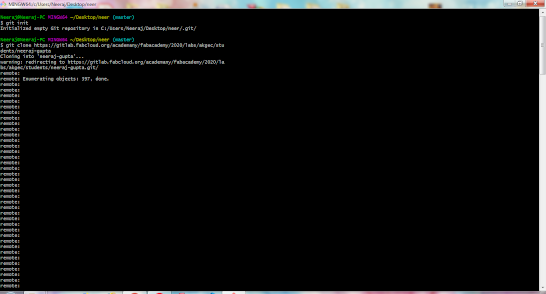
Step 3: git Init
On gitlab page it was asked to install SSH key to push and pull but i was able to clone and push also with HTML link also. But then after some time during transition from MKDocs to Html page. SSH key was required and i had to generate it.
Step 4: git clone https://gitlab.fabcloud.org/academany/fabacademy/2020/labs/akgec/students/neeraj-gupta
The files in the remote repository gets downloaded to the local server using clone command. I found this feature to be very fascinating as it will copy all the documents related to your project from the remote server to the local server. and this local server can be anything. Now i think that i donot need to carry a pandrive with me all the time.
Step 5: USE OF CD AND LS
ls is the command which shows the files inside a folder. if you miss even a space it will show an error message adding to your frustration of using something new. So i did it many times like"cd/c" instead of "cd /c" which showed an error many times.
Step 6 : Checking Status
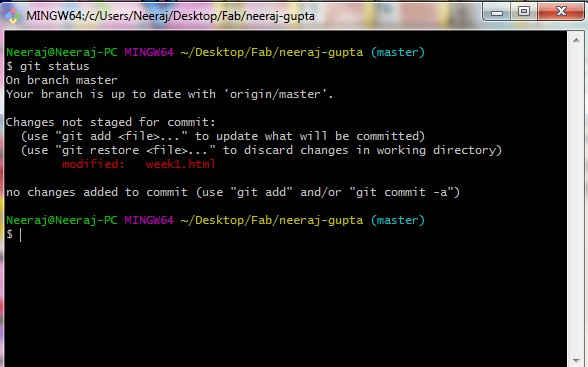
The files modification if done, can be checked through this command. It shows about the untracked files and how many files have been through modifications. The untracked files are those which have been added to the folder but not added to git.
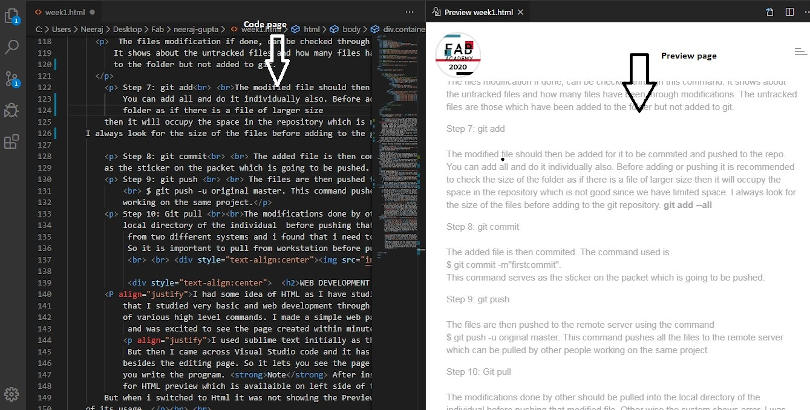
Step 7: git add
The modified file should then be added for it to be commited and pushed to the repo.You can add all and do it individually also. Before adding or pushing it is recommended to check the size of the folder as if there is a file of larger size then it will occupy the space in the repository which is not good since we have limited space.

I always look for the size of the files before adding to the git repository. git add --all
Step 8: git commit
The added file is then commited. The command used is
$ git commit -m"firstcommit".
This command serves
as the sticker on the packet which is going to be pushed.

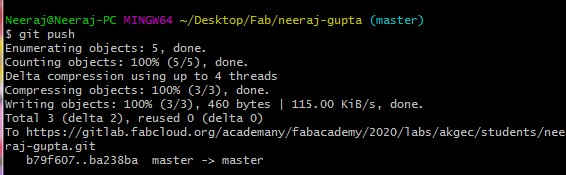
Step 9: git push
The files are then pushed to the remote server using the command
$ git push -u original master. This command pushes all the files to the remote server which can be pulled by other people working on the same project.
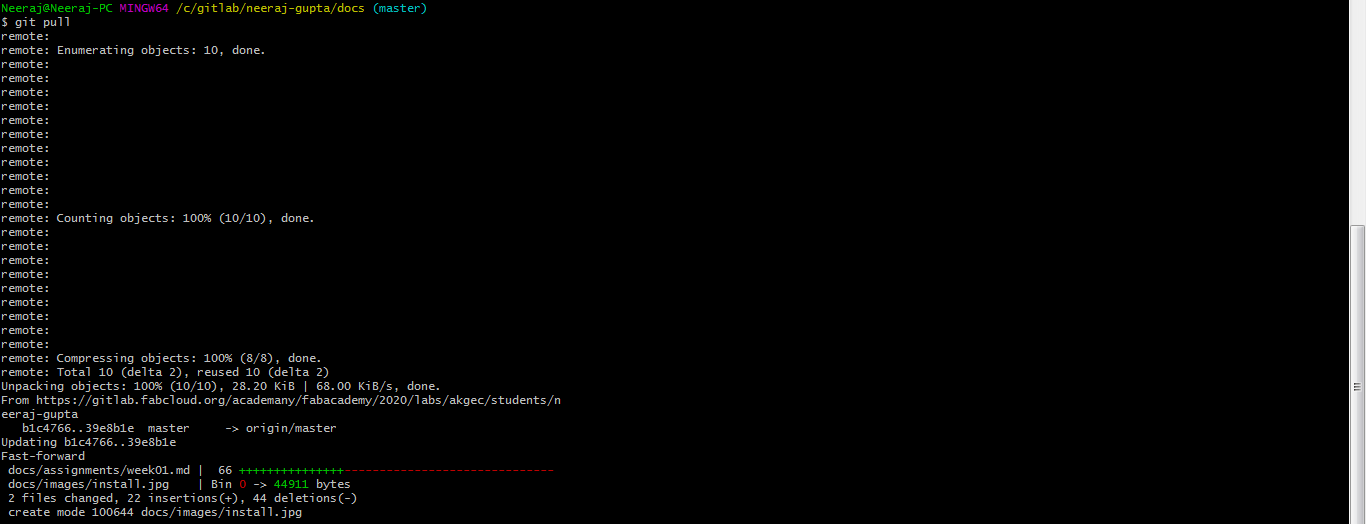
Step 10: Git pull
The modifications done by other should be pulled into the
local directory of the individual before pushing that modified file. Other wise the system shows error. I was doing the modifications
from two different systems and i found that i need to pull the changes which i made from my laptop before pushing other changes form my workstation.
So it is important to pull from workstation before pushing from some other workstation.
WEB DEVELOPMENT AND WORKING ON HTML
I had some idea of HTML as I have studied it in my primary level but soon I realised that I studied very basic and web development through HTML will ask for the knowledge of various high level commands. I made a simple web page initially through some commands and was excited to see the page created within minutes.
I used sublime text initially as the editor and it was very simple to use like a notepad.
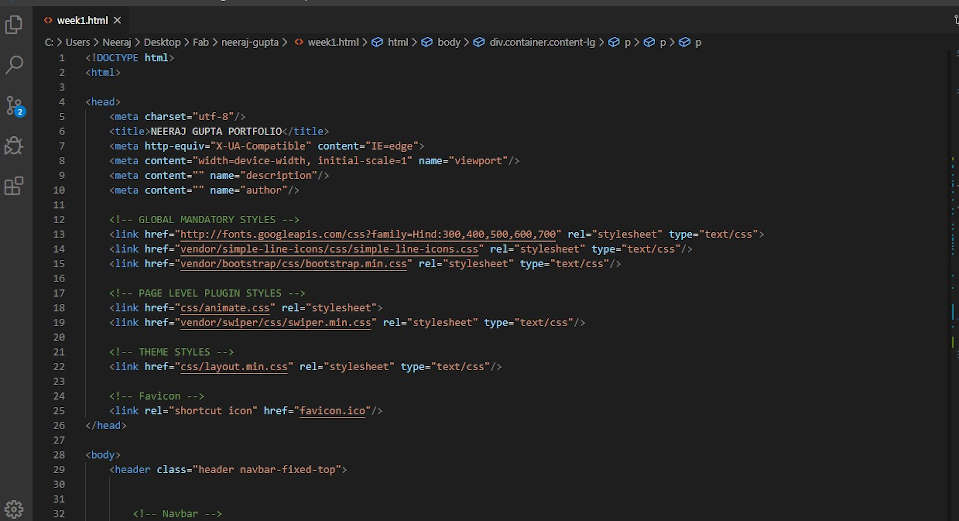
But then I came across Visual Studio code and it has a specialty of having a preview page
besides the editing page. So it lets you see the page in the web format simultaneously as
you write the program.
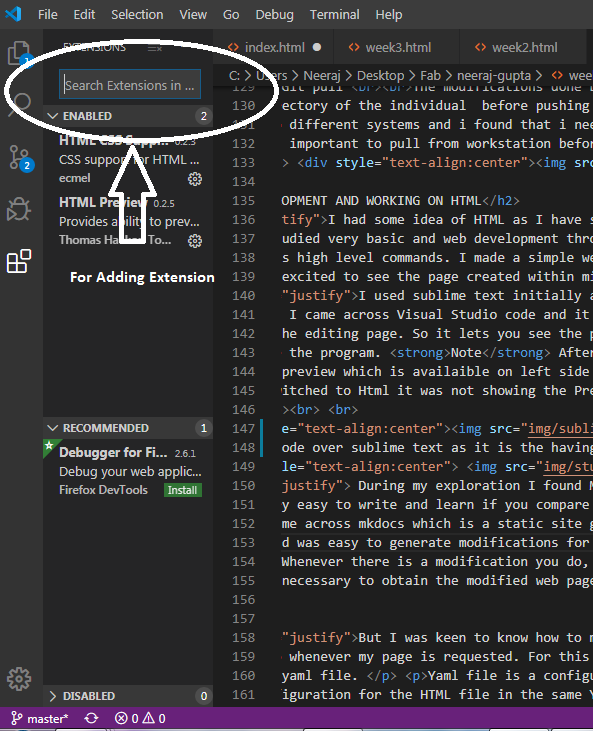
Note After installing the visual studio code it is important to install the extension
for HTML preview which is availaible on left side of the Visual studio interface. Initailly I was working with markdown on MKDocs using the visual code editor.
But when i switched to Html it was not showing the Preview page. I then enquired about this and my colleague Afsha asked me to install the extensions which served the purpose
of its usage.
It was wasy working with both the editors but i prefer Visual Studio code over sublime text as it is the having the facility of Live Preview.
You can download the sublime text from this link
.
During my exploration I found Markdown as very easy to use. The commands on Markdown were very easy to write and learn if you compare it with conventional HTML language. Then I came across mkdocs which is a static site generator. I easily changed the command lines and was easy to generate modifications for my webpage.
You can download the visual studio code from this link.
Note: Whenever there is a modification you do, you have to push it over the remote server, which is necessary to obtain the modified web page. So it is important to get thorough with the basics of GIT commands.
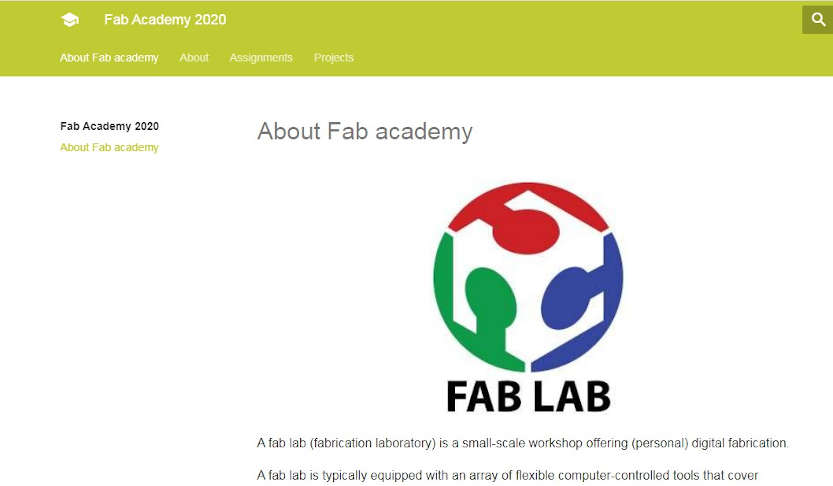
But I was keen to know how to make a page on HTML and push it over the remote server and it opens up whenever my page is requested. I also ended up making my webpage using the HTML template.
For this i downloaded a template from the HTML5 Webpage.HTML was a bit hard to understand at first; however, the provided explanation and the extra tutorials from w3schools proved to be excellent guidelines to start creating my website.
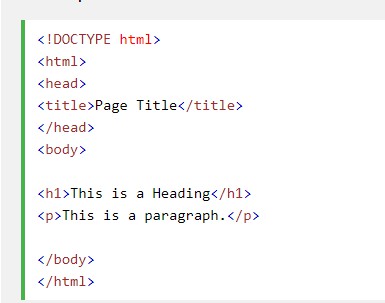
These are the some basic commands which are required in HTML
1. This is the common flow of commands which shold be present. It has the title, the body and inside the body you write the paragraphs and insert pictures and other required objects.
2. The different commands which are used in the html pages very frequently are those of inserting images and giving links to
various sites. The commands for them are:

this command is used to specify the link from which it is taken.


This command is used to specify the height and wisth of the image
But i had to move from Mkdocs to HTML page since pushing the page to the remote server was not taking the HTML page. So i started exploring and used this tutorial to learn about the yaml file
For this I was introduced to CI/CO configuration where I found yaml file.
Yaml file is a configuration file it had mkdocs initially in it and then I copied the configuration for the HTML file in the same YAML thaN I could see that my HTML page which I uploaded was easily seen file.
But when i changed the yaml file configuration while pushing my html file for web development, it did not recognised my file. The mistake i did was that i did not keep the html file outside of the folder so the configuration file was not able to read it. Then i pushed the index file keeping it outside the main folder. the earlier repository was also deleted since it was having mkdocs file also which was of no use since new HTML page is created. so the old repo is flushed and new files are entered with a new yml file. it is easy to create a Yaml file from the CI/CO configuration. Now my repo has the webpage created with the HTML template.
Jekyll and Mkdocs
My instrutor wanted me to use Jekyll also so i learnt about the statis site generators which include Mkdocs also.
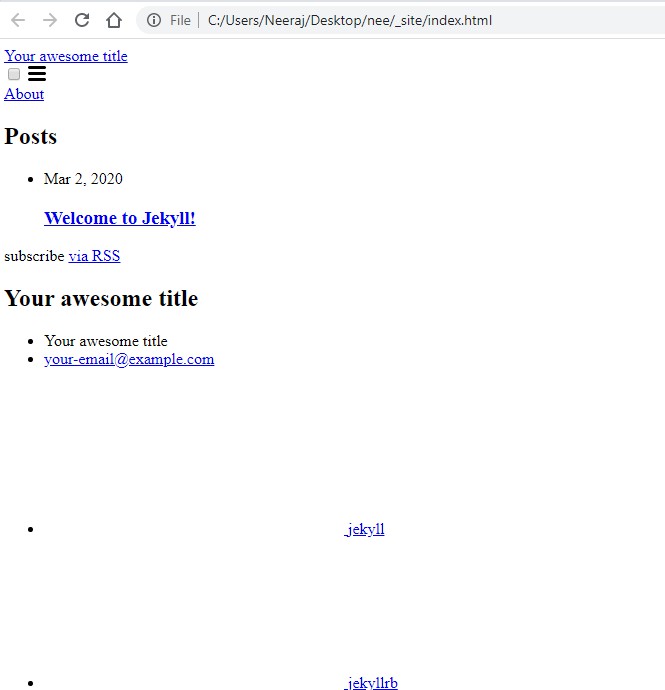
Jekyll and Mkdocs are static site generator. Static websites do not use a database to store information; instead, all information to be displayed on each webpage is already contained in an HTML file for that webpage. The HTML pages that make up a static site can be completely written by hand, or you can offload some of this work using something like Jekyll.
Mkdocs is a statis site generator and it was availaible as a default webpage in the gitlab. it is very easy to use and the best part is that you can use Markdown which is very easy to write and understand. But i wanted to have a good looking webpage so i moved to HTML web page.
Jekyll is software that helps you “generate” or create a static website . Jekyll takes page templates—those things like main menus and footers that you’d like shared across all the web pages on your site, where manually writing the HTML to include them on every webpage would be time-consuming. These templates are combined with other files with specific information to generate full HTML pages for website visitors to see. Jekyll doesn’t need to do anything like querying a database and creating a new HTML page (or filling in a partial one) when you visit a webpage; it’s already got the HTML pages fully formed, and it just updates them when/if they ever change.
Since i am using Windows system, i found out that i have to download Ruby installer and Ruby to download install Jekyll.
As i said that i do not have much knowledge abut various interfaces, the installation of jekyll introduced me to command Prompt application. I learnt about command prompt form this tutorial.
The installation process for windows was very tricky. i used this videoto install jekyll to my system.
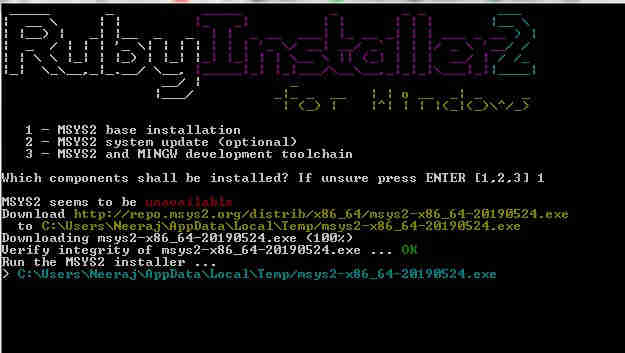
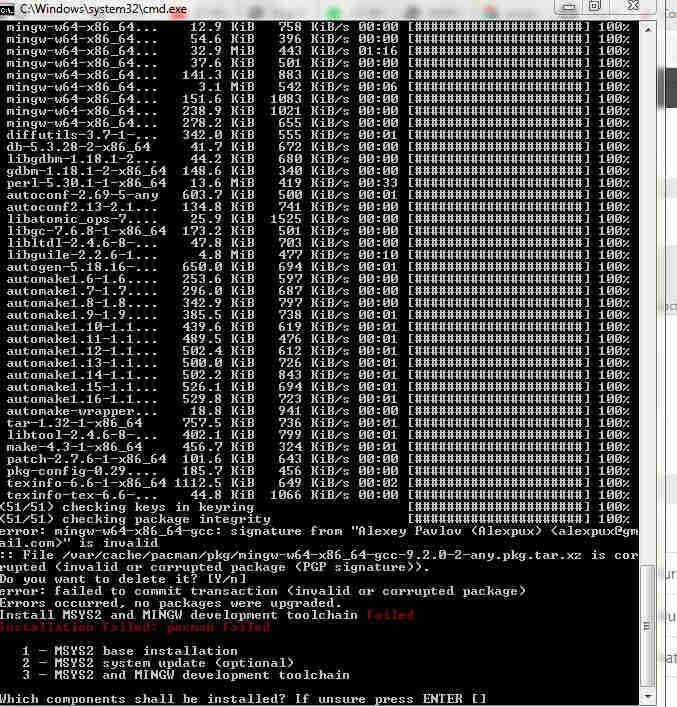
The command prompt was showing somekind of error, but i saw the pages, they were upto the mark.
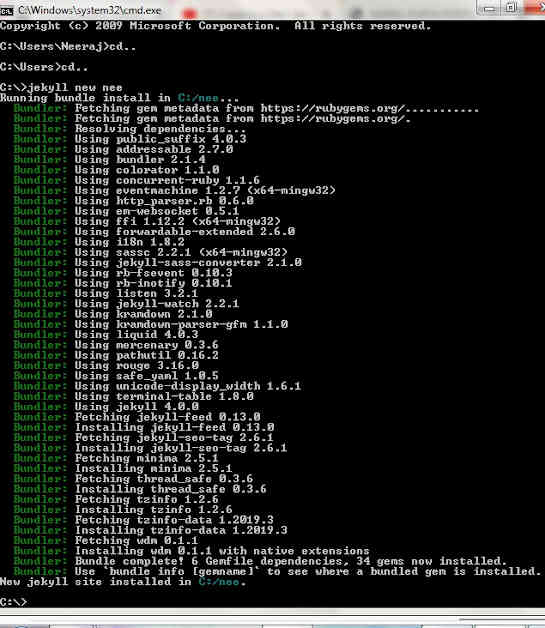
Since i am working with Html pages and jekyll pages are also somewhere similar to mkdocs so i decided to move ahead with HTML templates itself.
Concusion
I learnt about the GIT AND GIT LAB and HTML templates and how to modify the pages of html using the basic html codes. The text editors like Sublime Text, Visual studio code , Notepad and Atom are also practised on. It is not very difficult to to build a webpage by using the templates but if you are not using templates then it can take months for you to learn building it. Jekyll and mkdocs are static site generators that allows for building webpages as there are prebuilt pages in them and you just need tomake modification to those pages. Go with a fancy webpage and start exploring. I have used the HTML tempalte forTML commands as well.
Exercise to improve Documentation
It is an observation by our instructors and evaluators that we are not able to document our work properly. We are somewhere lacking behind in showing the steps and the mistakes done by us during our practicals in documentation.
We started with an activity which was done to to understand each other about our skills, competence and how we can work in a team. So everyone of us introduced ourselves with the skill sets and competence level and then and we made some lines on the chart paper which suggested that a person is interested in the work and skill set of the other person. We made a line to the name of the other person even if we like a sentence whatever he said. It was not limited to skill sets and competence but the behaviour and attitude of the other person also. We realised that there are a lot of common things which we share and there are a lot of Technologies and competencies which we can learn and share which now will be beneficial for our group assignments.
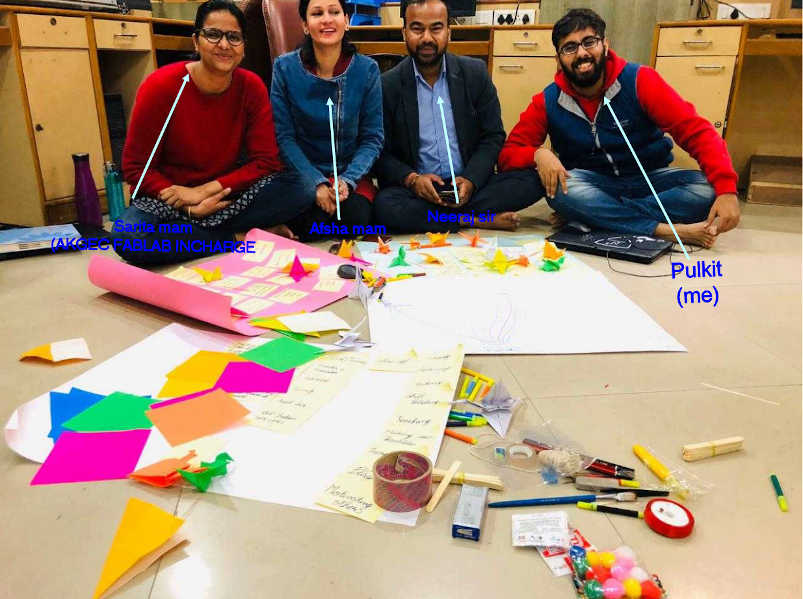
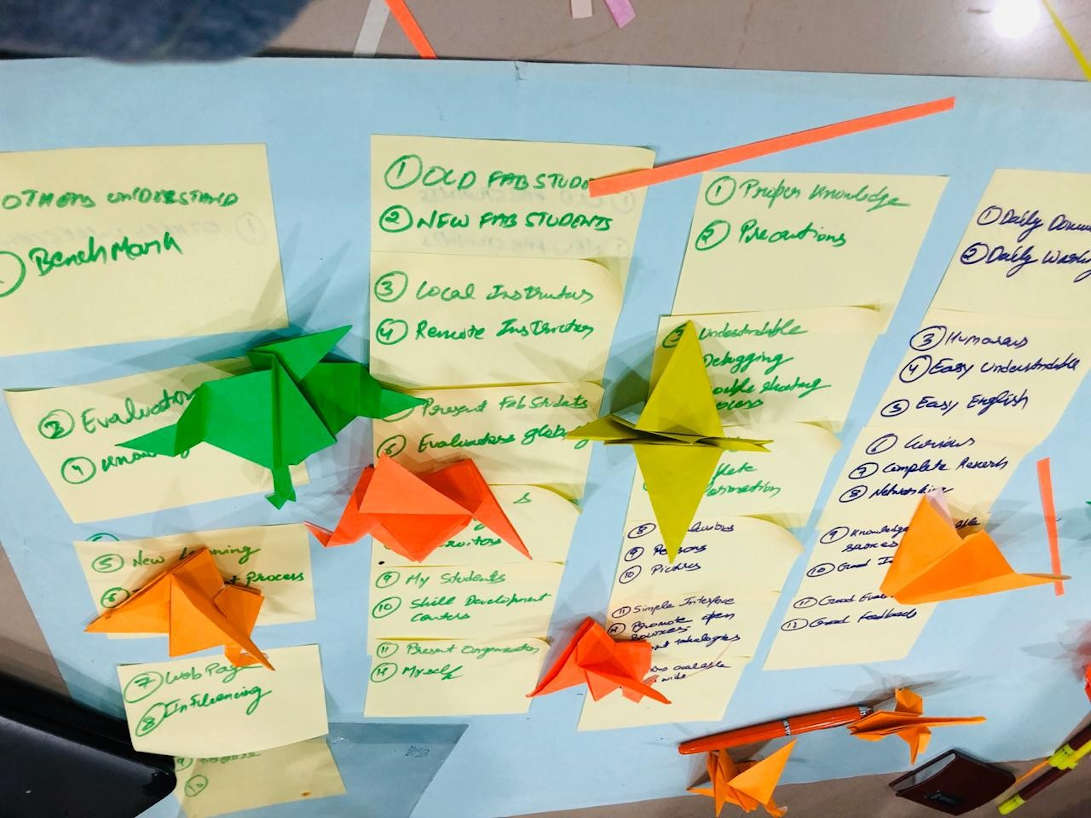
We then started with exercise where he asked all of us some questions. The question word that why are we documenting, how are we documenting, who are the people who are going to read, how many lives we are going to touch without documentation, how many people are going to be benefited by documentation, how the documentation should look like. So we had a chart paper with us and some notes we started taking the notes after writing all the points on the chart paper. We did a lot of brainstorming that who are the people who are going to read about our documentation what are documentation should have how should it look like. And we came up with some points which we were not considering while documenting our own FabAcademy work. Now we can look back at the charts and the points written over them whenever there is confusion of documentation.
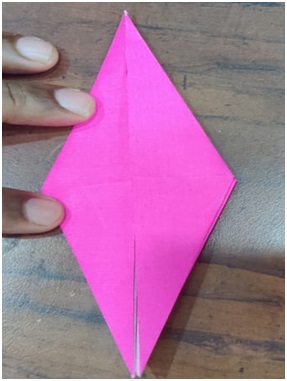
Then we did an activity where we have to make shapes using oregami paper. The motive was to document the steps in such was that a person reading the documentation could make it just by reading the documentation. We made two shapes, the dragon and the paper crane. The documentation was made and was mailed to out instrutor to see if the documentation we did is upto the mark or not. Mr. Rahul, fortunately for me, was happy with the documentation.
The steps are
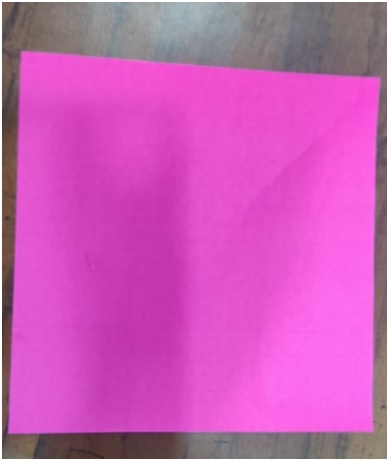
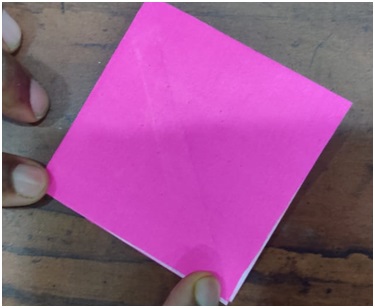
• Step 1 Take a square origami sheet
• Step 2: Hold it from diagonals and from the middle and then open i so that the creases are easily visible.

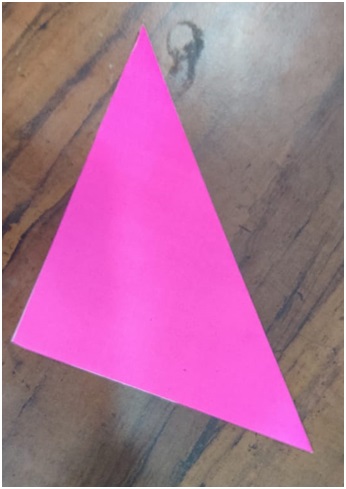
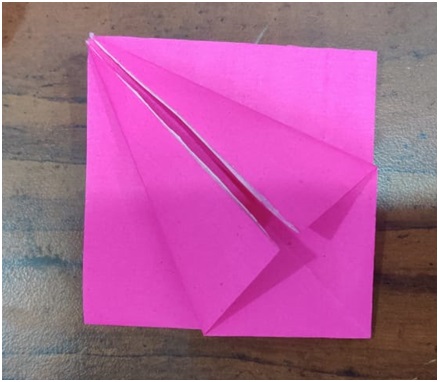
• Step 3 fold the origami paper from middle crease and push it towards each other so that a square shape comes over it.
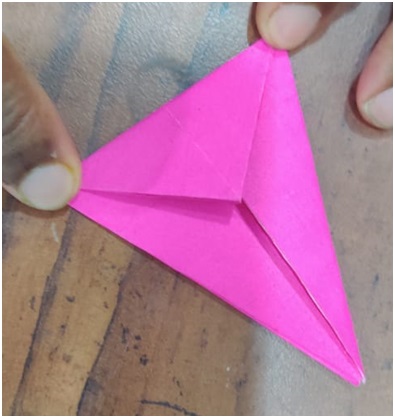
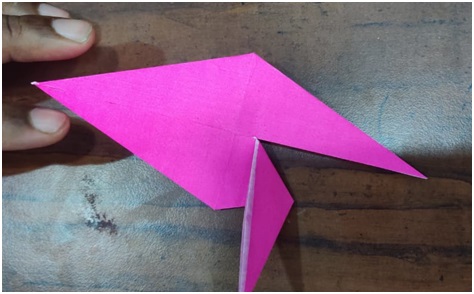
• Step 4 fold the corners to the middle crease from both the sides and it will look like a tetrahedron.
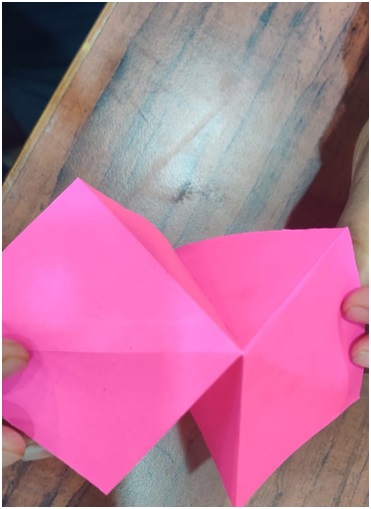
• Step 5 open the triangle shape and make it as shown in figure and do it for both the sides

• Step 6 Now the distributed Triangles in the bottom will work as legs.
• Step 7 fold the legs at equal angles on both the sides and tie the folded part in between the gap.

• Step 8 Make a crease for the head and hold it over and in between. The bottom will act as tail and the upper part will work as the head.
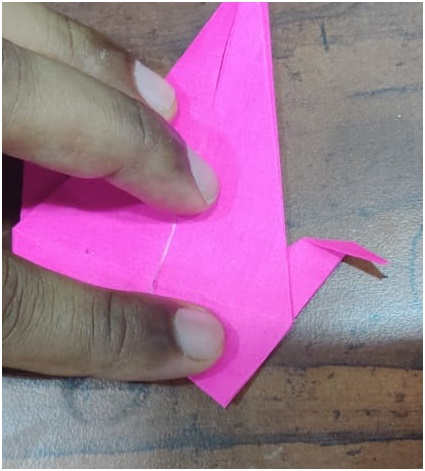
• Step 9 Hold the triangular parts so that the creases are perfect.
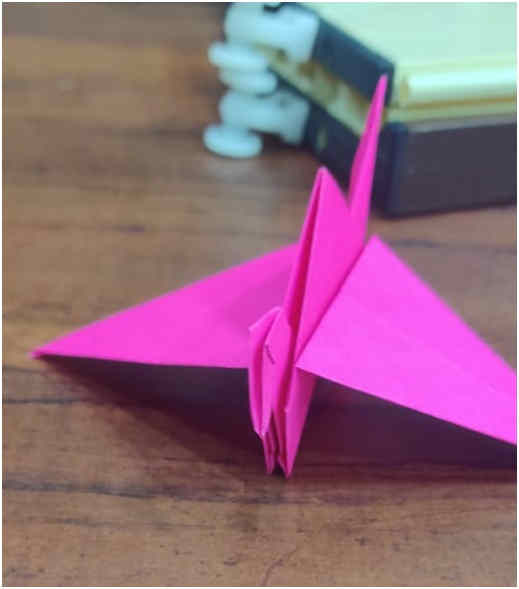
• Our Crane is ready as documented
• For more clearity , you can also watch link
.