3D Scanning and Printing
Hi and welcome all to a 3D scanned and 3D printed week..This week was really great in terms of both creativity and practical approach, It involved designing a 3D model using a design tool and then producing it using a 3D printer then scan an object and printing the same.
How the 3D printer works basically: 3D printing is the process of making three-dimensional solid objects from a digital model and is developed using computer software such as Blender, 123D, SKETCHUP, Inventor, SolidWorks, Grasshopper, Rhino, FreeCAD, OpenSCAD, Antimony, VTK, GeoMagic etc. which then sends it to a 3D printer
by converting the file into formats understood by the 3D printer i.e SterioLithoGraphy, AMF, OBJ, VRML, X3D, FREP, BREP.. for output of the final object.
3D printing is starting to find its way into the commercial printing marketplace. Starting as a fast way to build prototypes, 3D printing has exploded and is now being used to create products and instant prototypes in the medical, engineering, art, fashion, automotive and manufacturing industries. This new style of printing helps
businesses get products to market much faster than ever before by giving them the ability to rapid prototype their in-house project needs. 3D printing helps lower costs for prototyping, allows the production of parts without capital investments and creates new opportunities for innovations
that were previously limited only to technology firms..
If one`s wondering the various applications of 3D printing in the real world: 3D printing takes the efficiencies of digital design to the production stage. By combining oral scanning, CAD/CAM design and 3D printing, dental labs can accurately and rapidly produce crowns,bridges, stone models and a range of orthodontic appliances.
With a 3D printer doing the hard work, dental labs eliminate the bottleneck of manual modeling and let the business grow.
The beauty of 3D printing is that one can produce absolutely anything anytime or replicate objects within a considerate amount of time.I used Blender in designing of the speed boat due to its simplicity and handy interface.Check more below
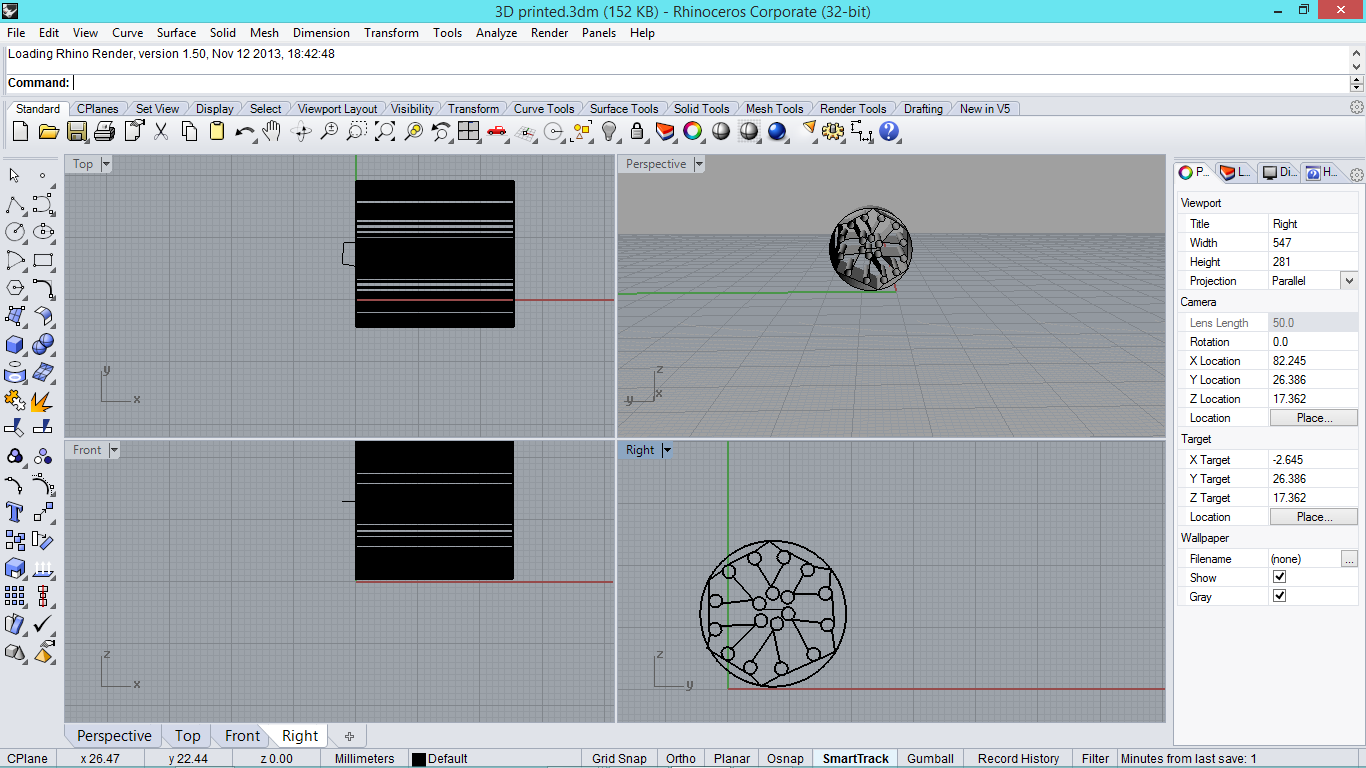
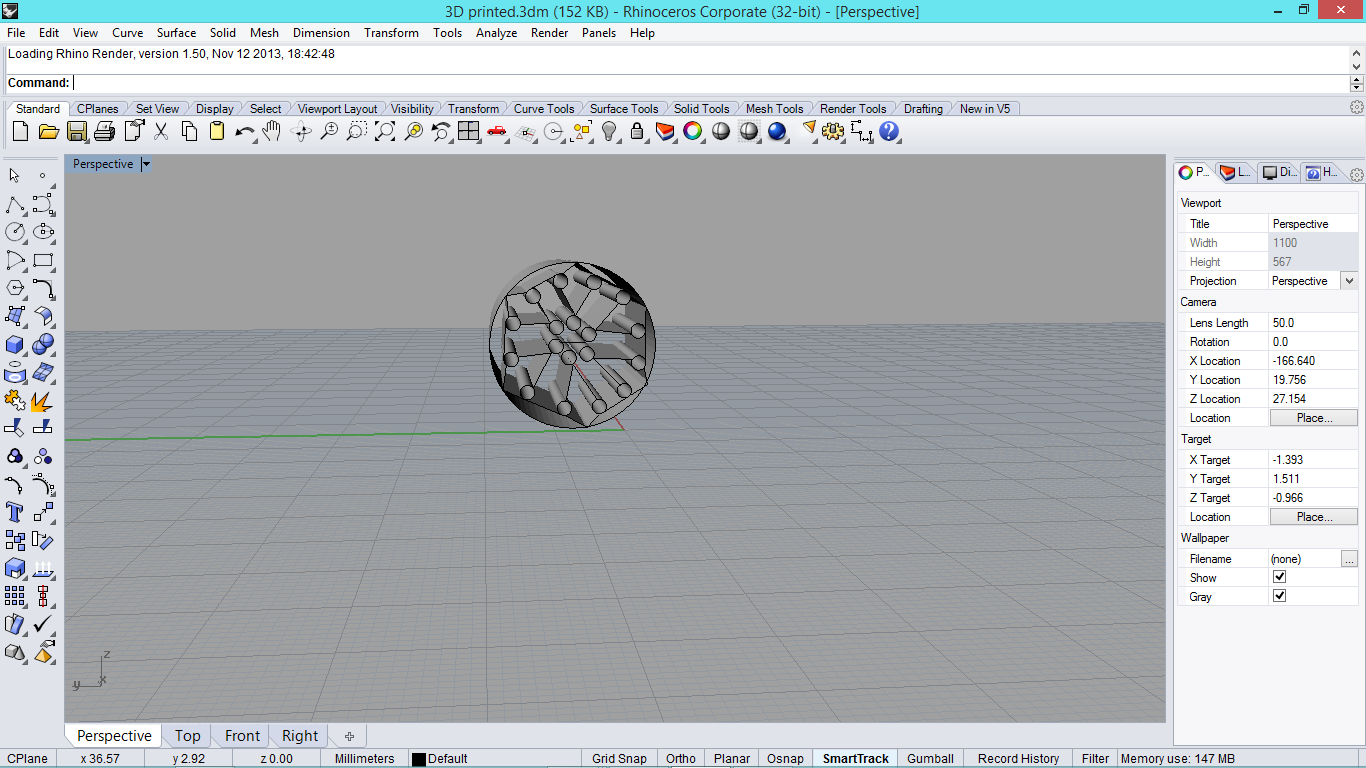
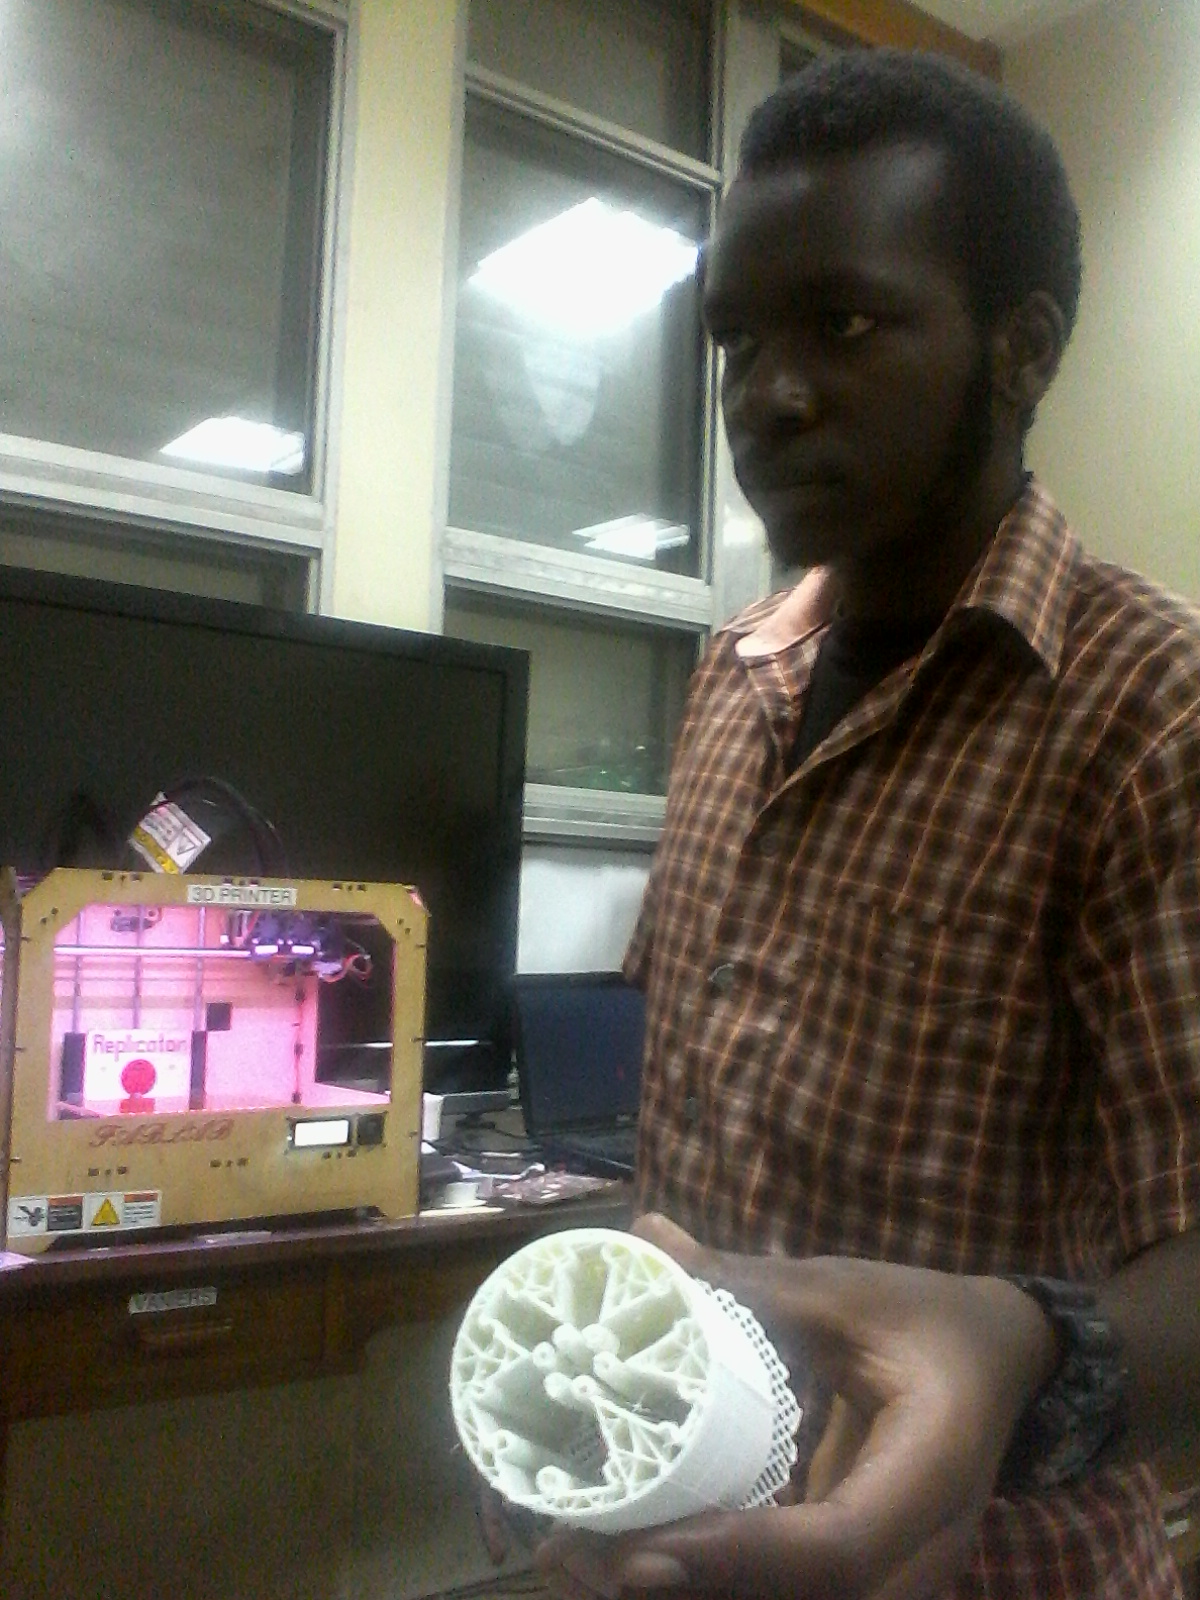
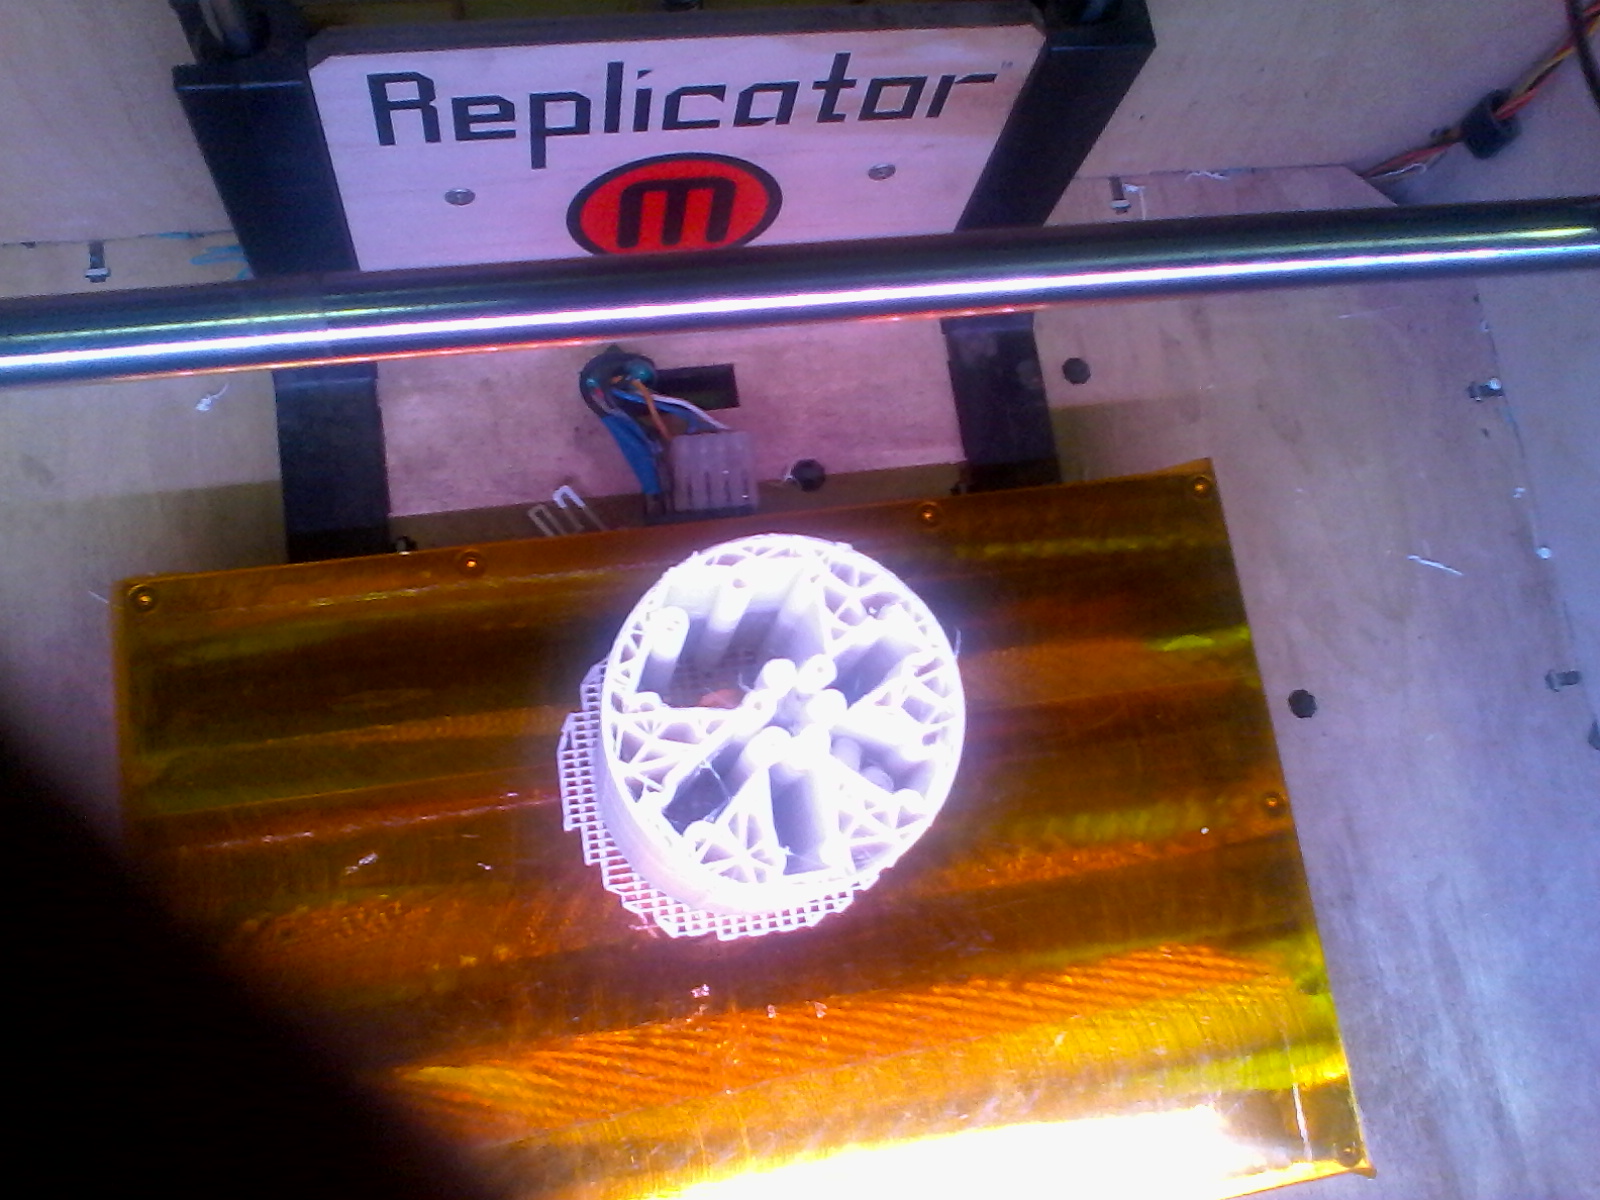
Ok personally I thought of printing a dozen components to show competence but skill was of the essence so I printed a cylindrical stator disk in form of a keyholder.. I used Rhino in designing the model and even tried simulating in ANSYS...hahaha...
Easy right there pal,, here are the Original Design Files ready for download and 3D printing after checking mine out:..
>>> Download the original 3D print Design File created in Rhinoas per the assignment.
>>> Download the original STL files I createdto enable sending into the 3D printer.
>>> Download the original Generated Codes(gcode)which were produced by Replicator G software after loading the STL(steriolithography) files.
Ok proceed
What followed is I converted the Rhino model into SterioLithography format which is understood by the 3D printer,,,then using 3G Replicator sent the data into the Printer.
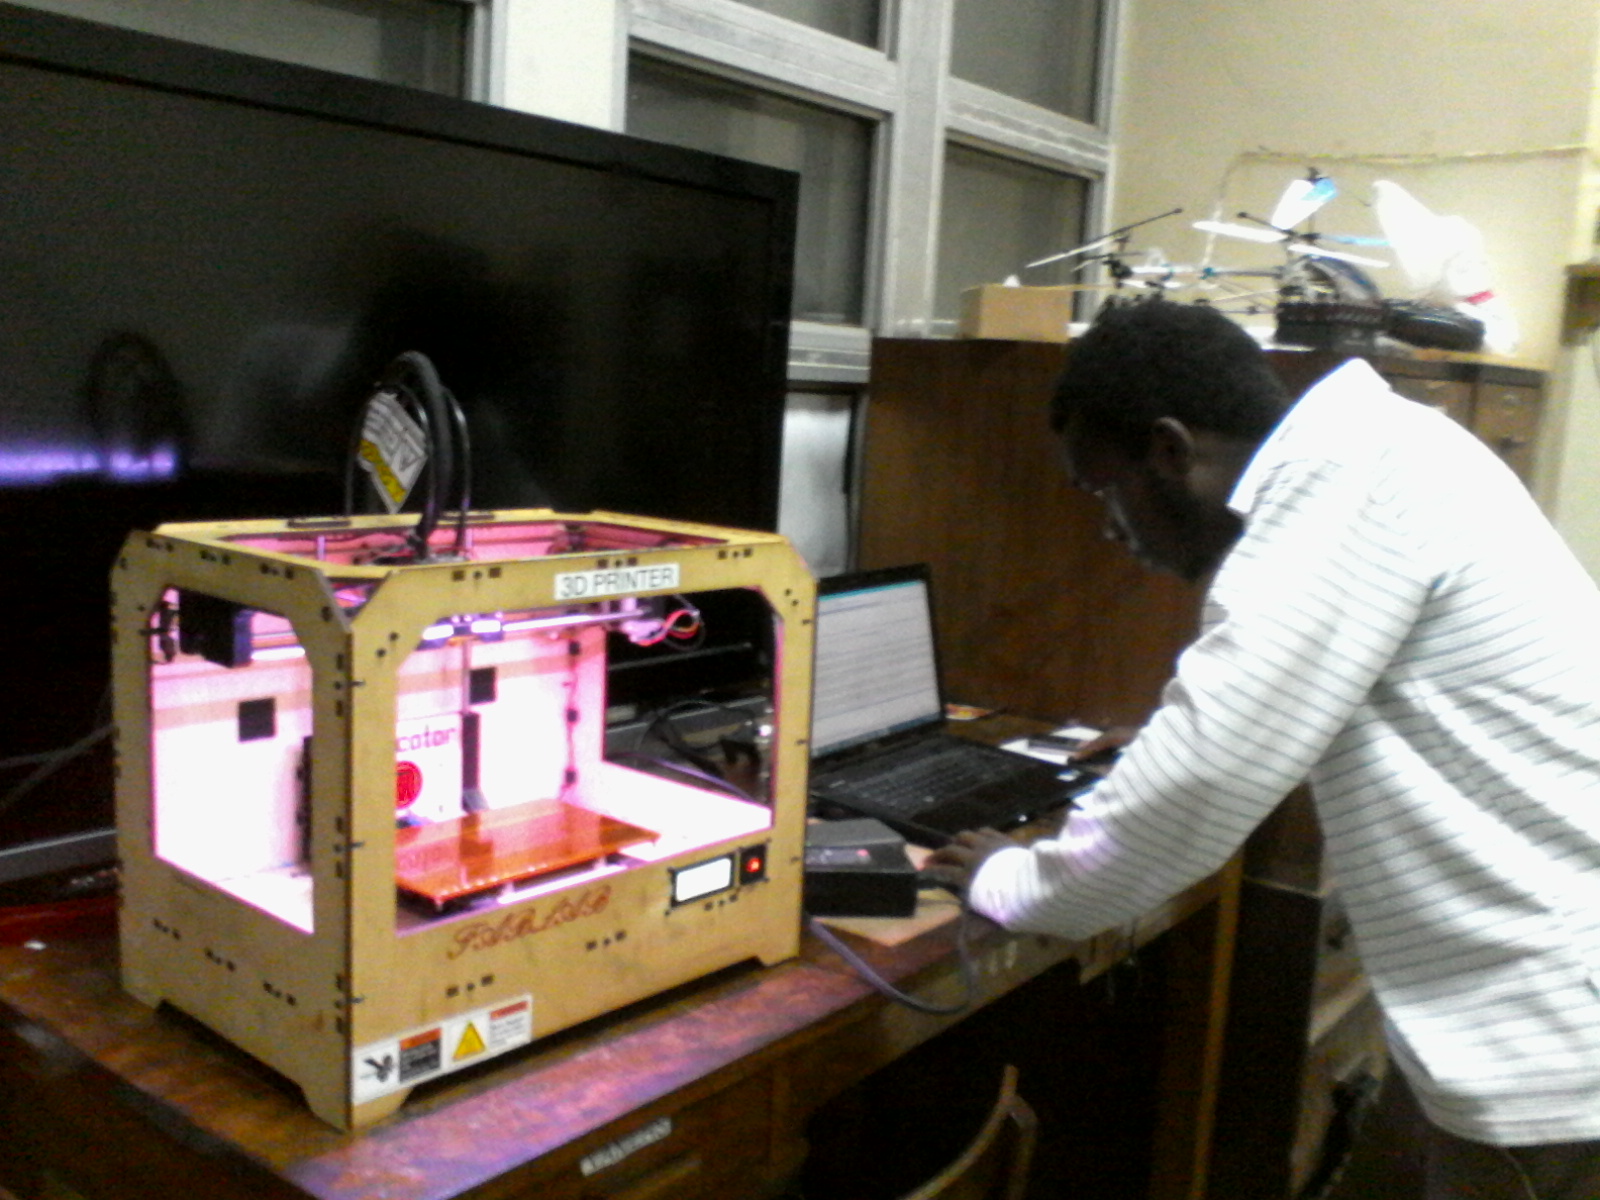
First I configured the MakerBot 3D Printer with my laptop as in installing 3G Replicator and the pre-requisites drivers: Arduino LLC uberports, MakerBot Industries etc..
 What followed was checking the Ports compatibility,,choosing the Replicator Dual and selecting the most convenient serial port for communication..Next is to press the Connect from replicator G menu so as to prepare the process.
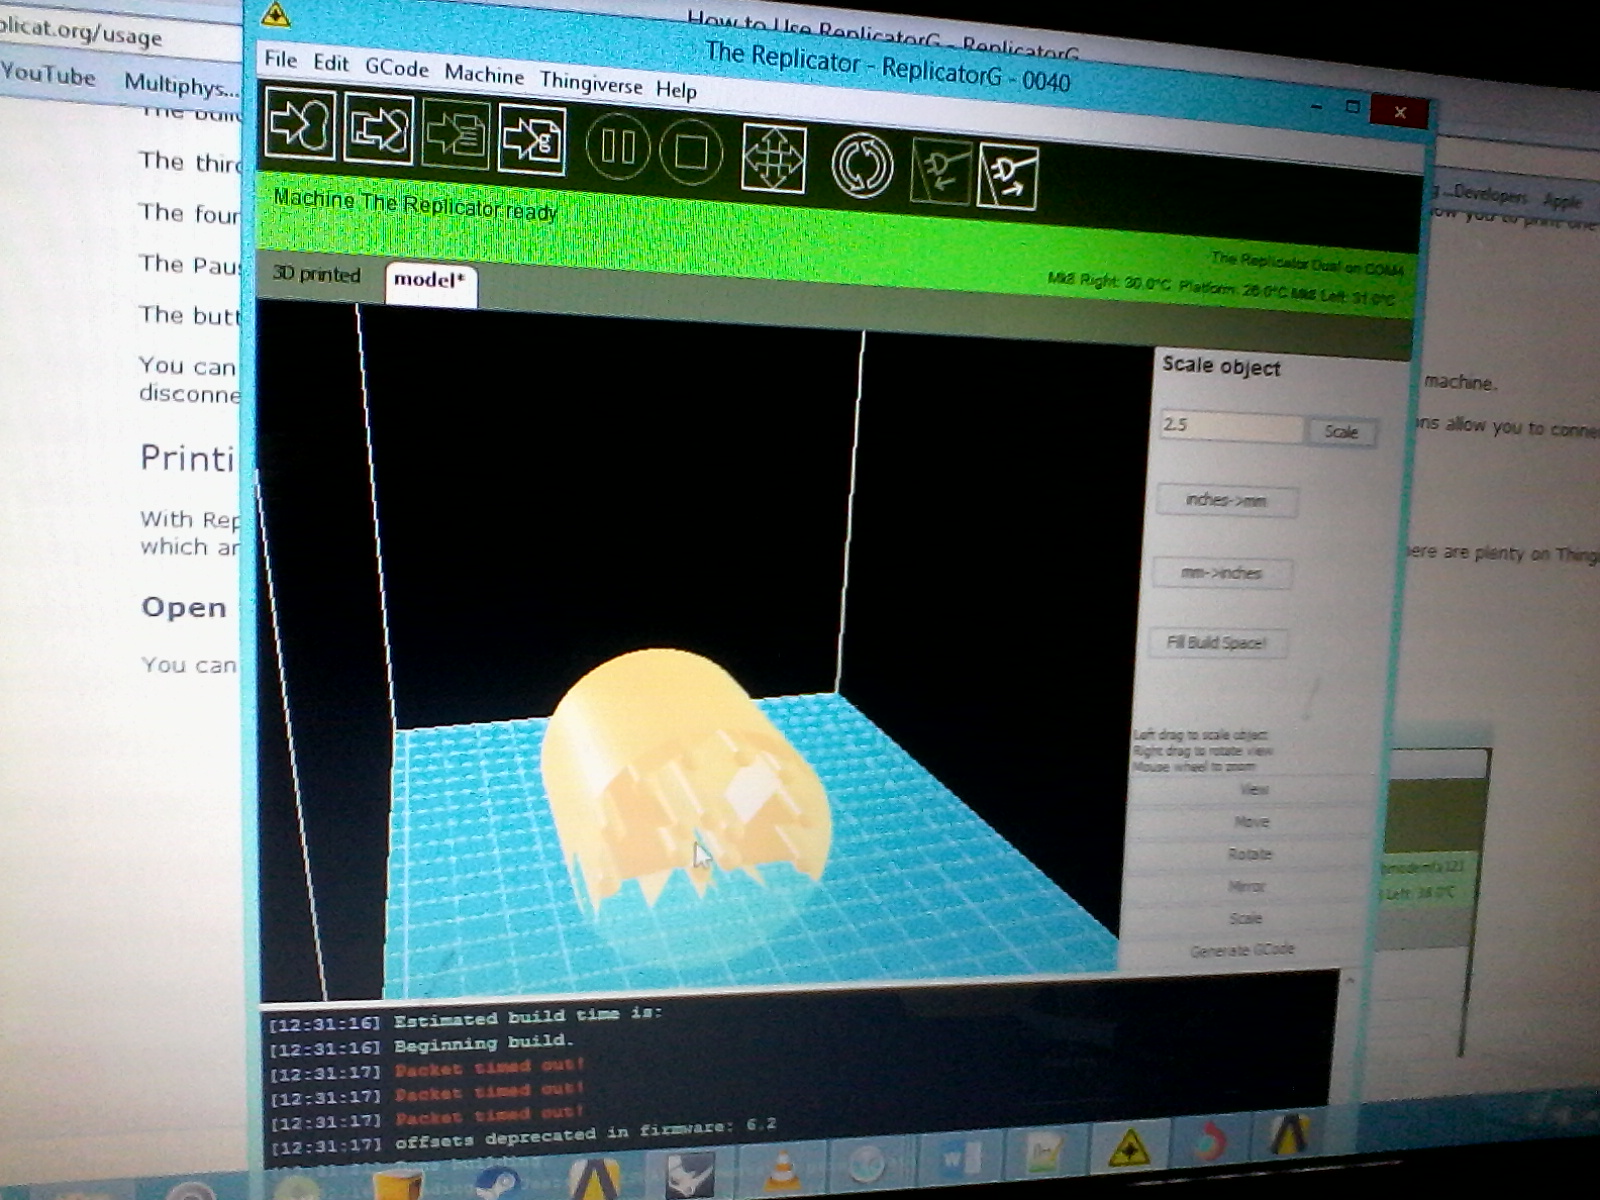
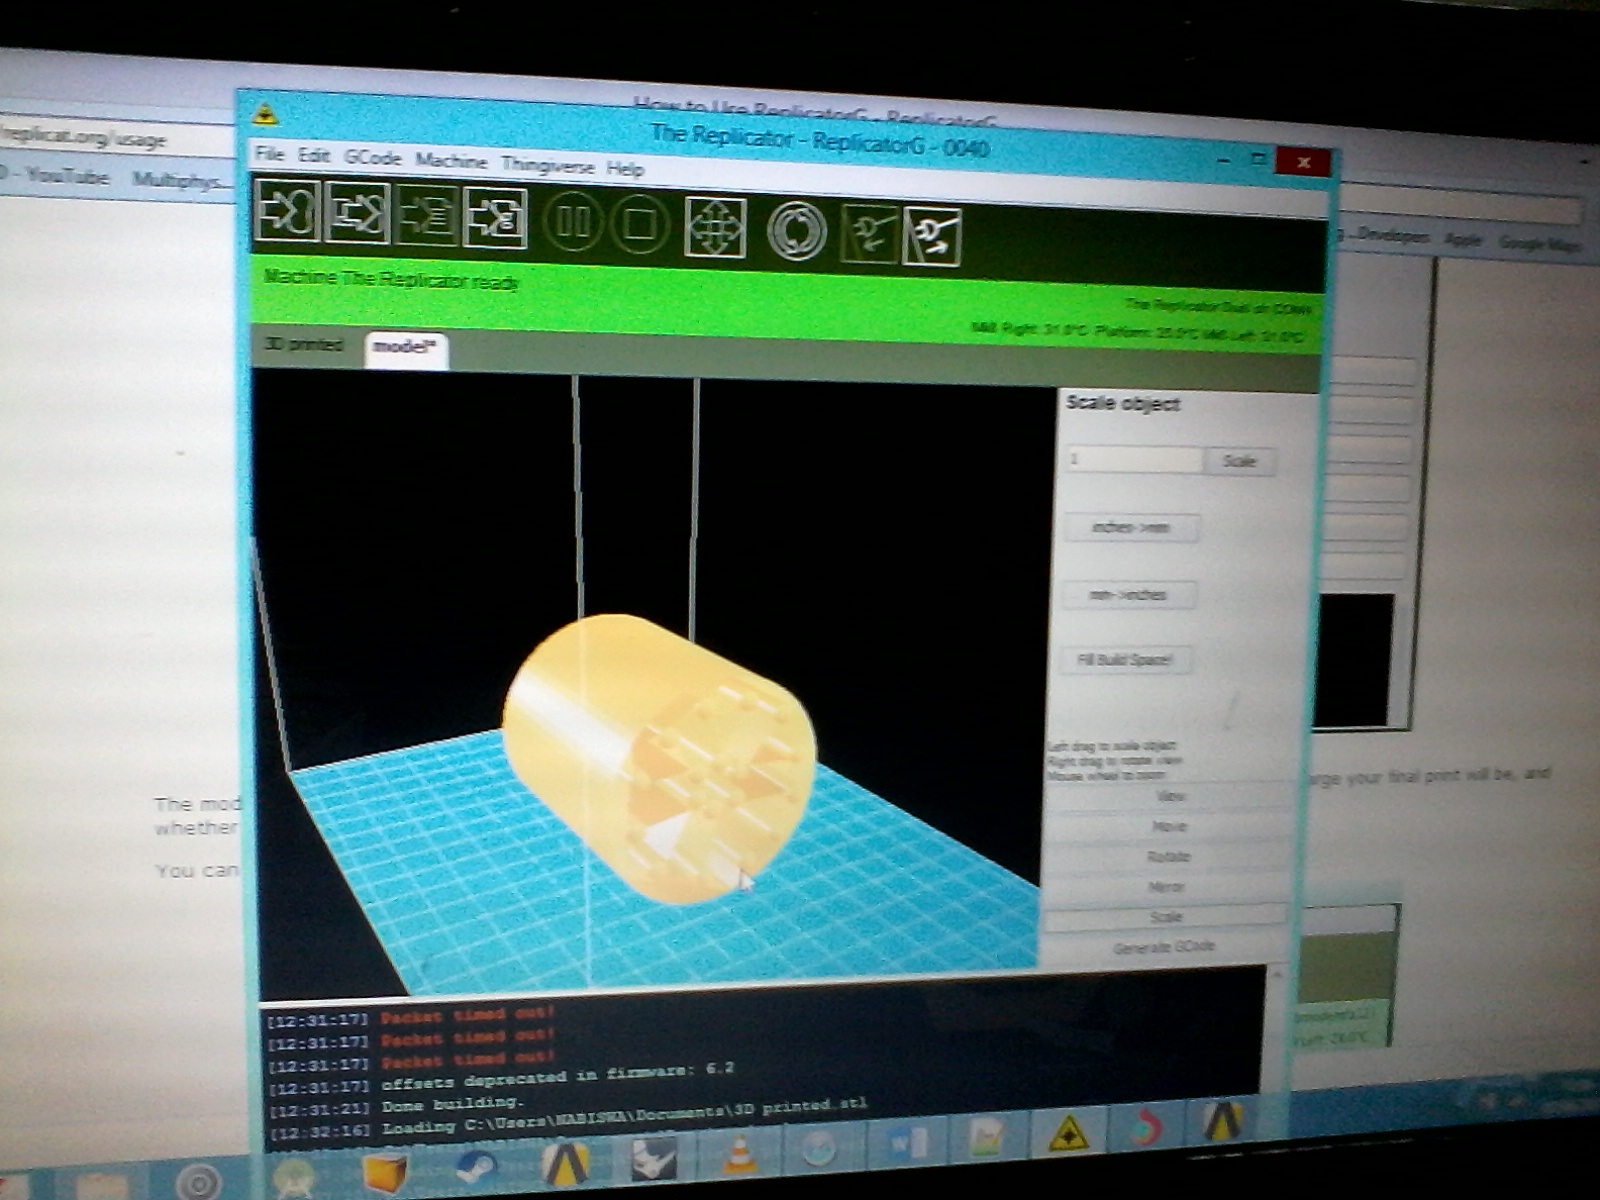
The file can be fetched from an SD card: Build from SD... will pull file from your card and after selection "Build to File" will GCode into s3g and save...But if like Me you`ve got STL file click on Open Menu to bring up dialog,,choose file
If correct the model will be displayed in a virtual box depicting the real 3D Printer allowing to duly set, rotate, zoom, mirror and adjust the model accordingly as it is on the platform...I went ahead to set the Scale and move around the model...After Finishing all My editing...
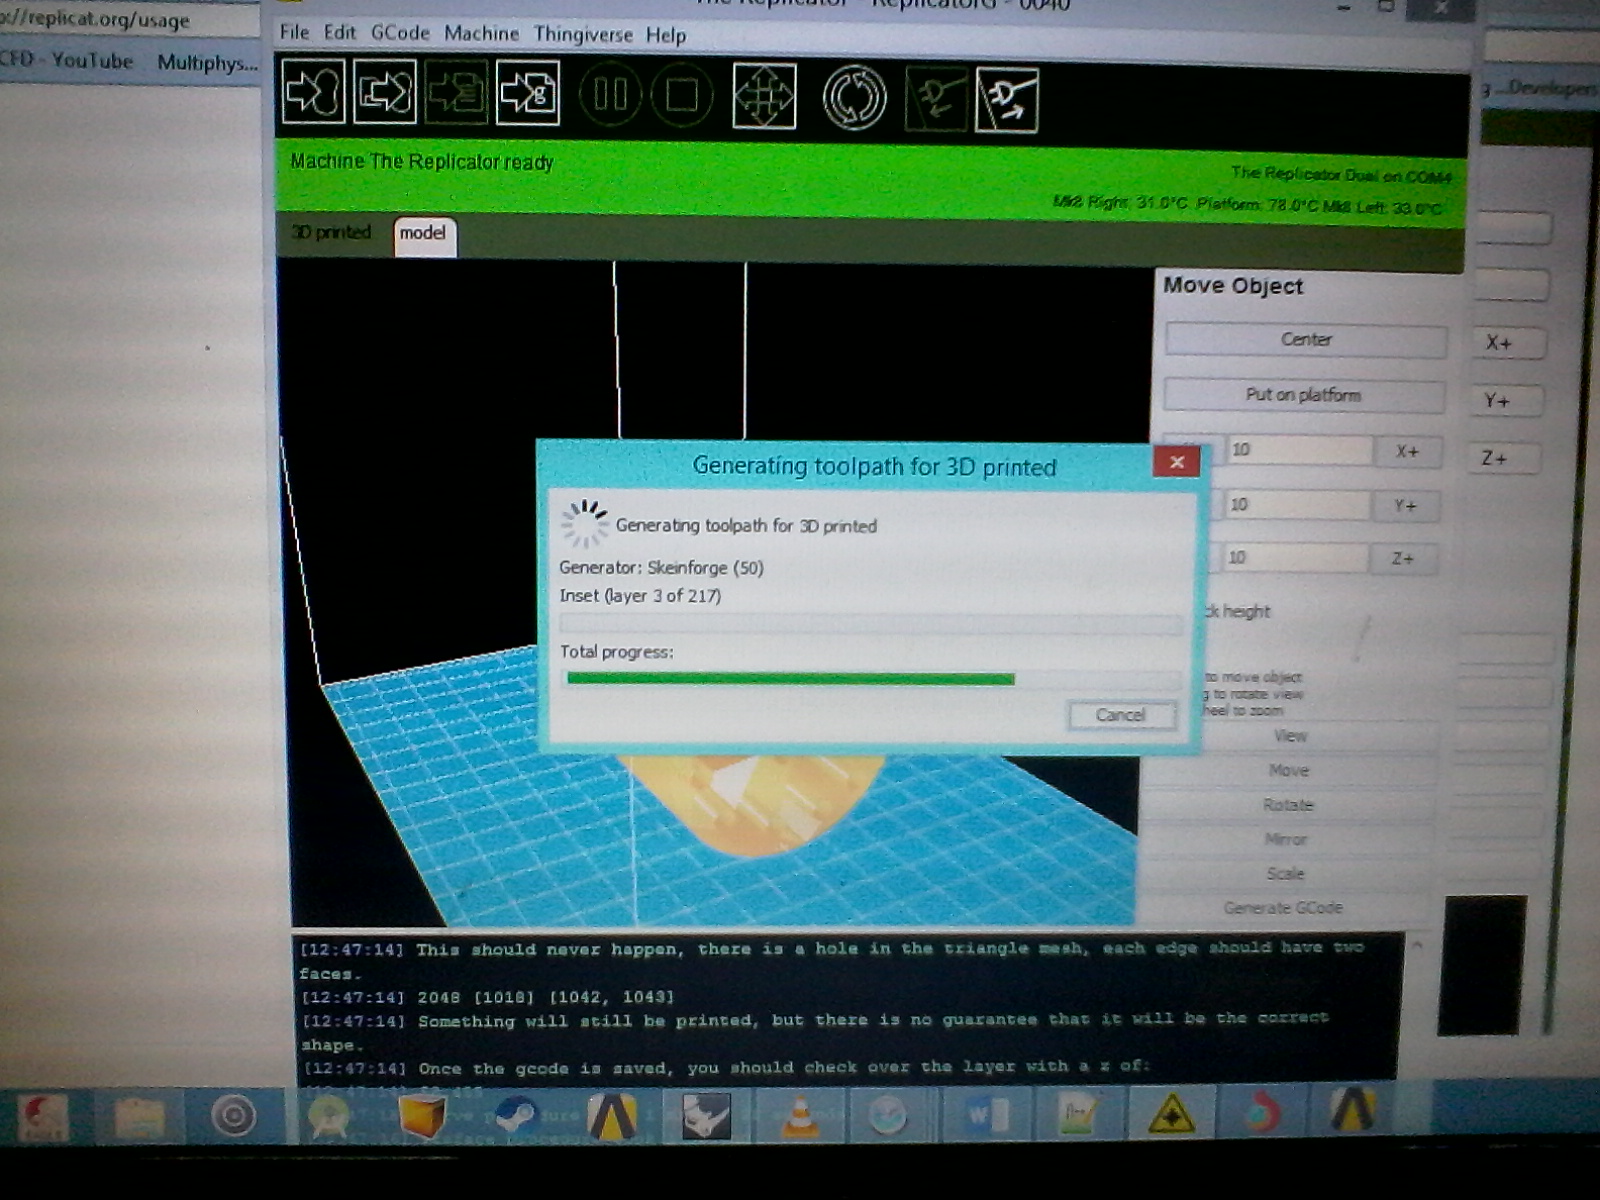 ..
.. Now I generated the Toolpath so as to build the file ready for action...Skinforge was usually used but replicatorG simplified its functionalities...You adjust can set the settings to suit your Printer.
Finally I set the MakerBot to utilize the left extruder and allowed it to preheat..usually upto 110 degrees.
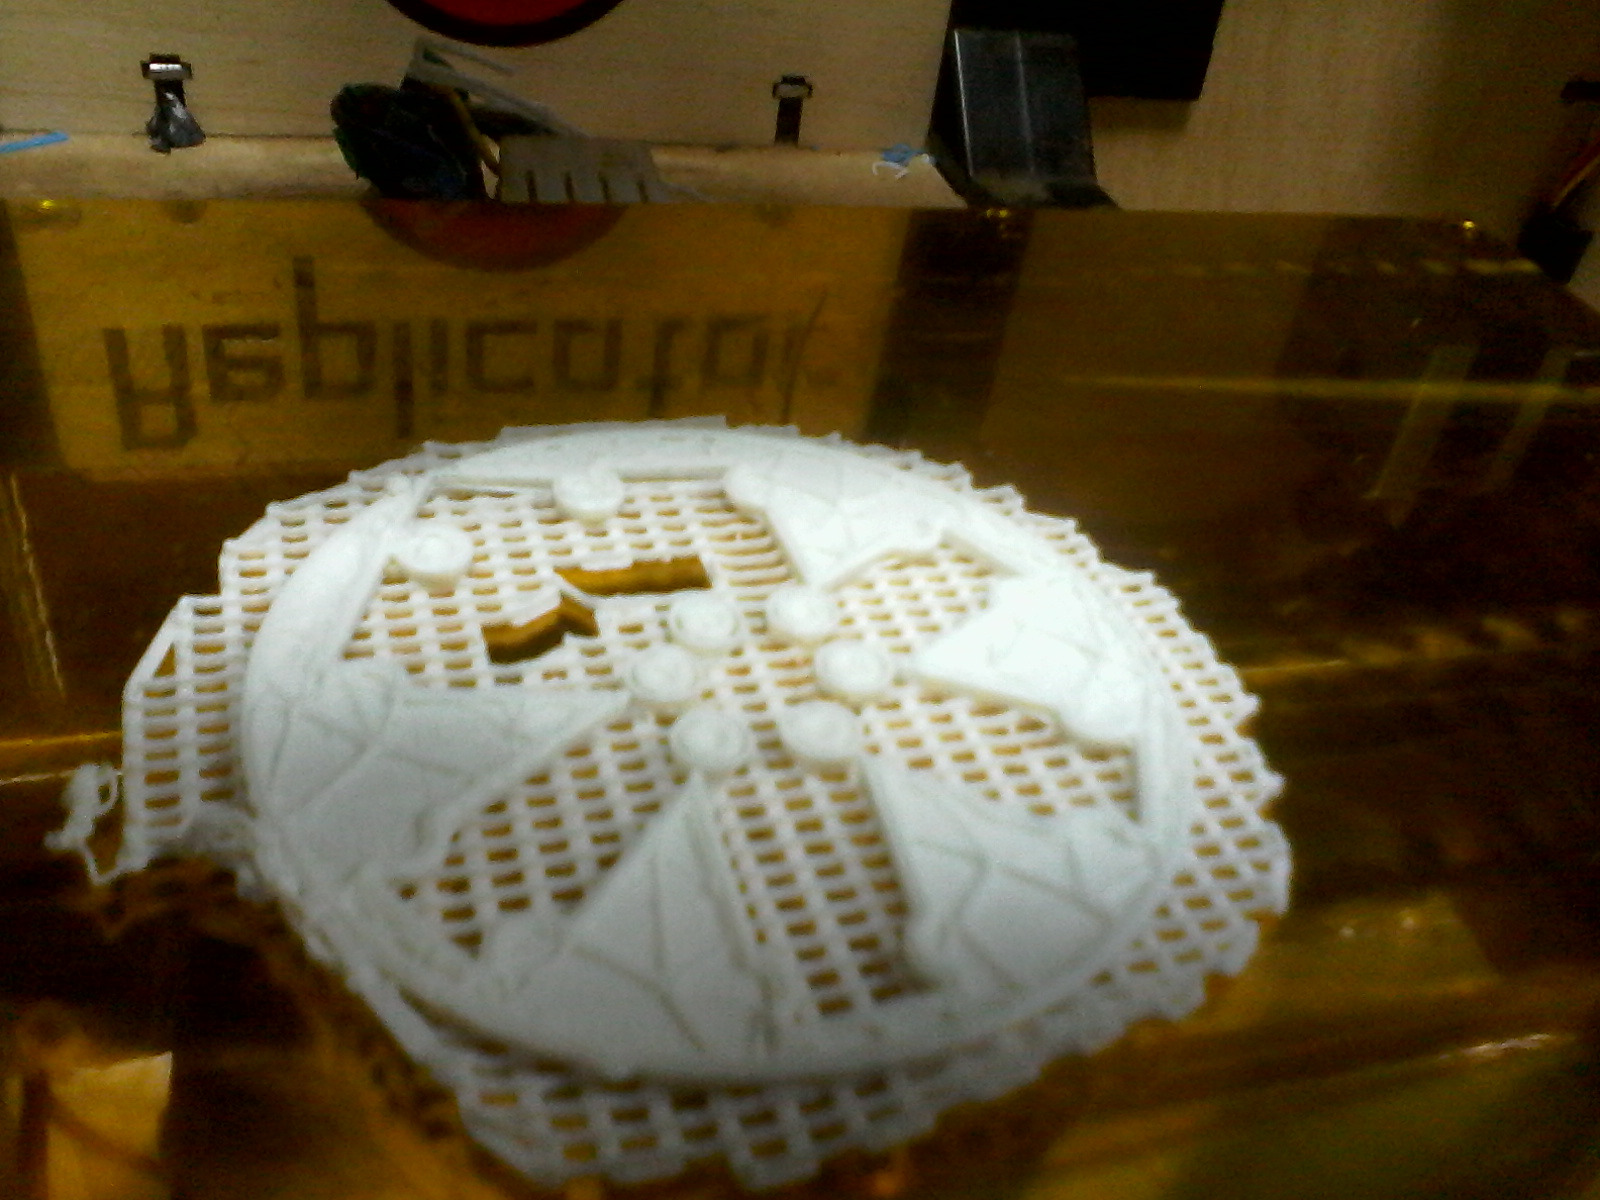
After a build time of 3hrs 30min..the 3D scan was done...
Challenges
But as they say there`s no smooth ride in the jungle..I encountered several errors some minor others strange atleast not fatal...:
First is the error "Couldn`t find a port to use"..this wasn`t an easy ride as I was using windows which led to numerous rescanning installing uninstalling and troubleshooting drivers etc..It was a positive experience since it revolved around Arduino related issues.
Second was the filament refusing to melt from the nozzle prompting me to countercheck the thermal barrier which was an uphill task as it deformed quickly due to pressure, reinstall the fans..careless burns were encountered in the process while trying repair immediately from printing
The strange & almost fatal I encountered was the point I`m almost done printing suddenly "Input/Output error in WriteArray"..frustration would be an understatement...after several efforts I landed on a mighty blog with a simple solution directing to reset the printer, unplug the usb and Alas!! here we are..
sample result is such:
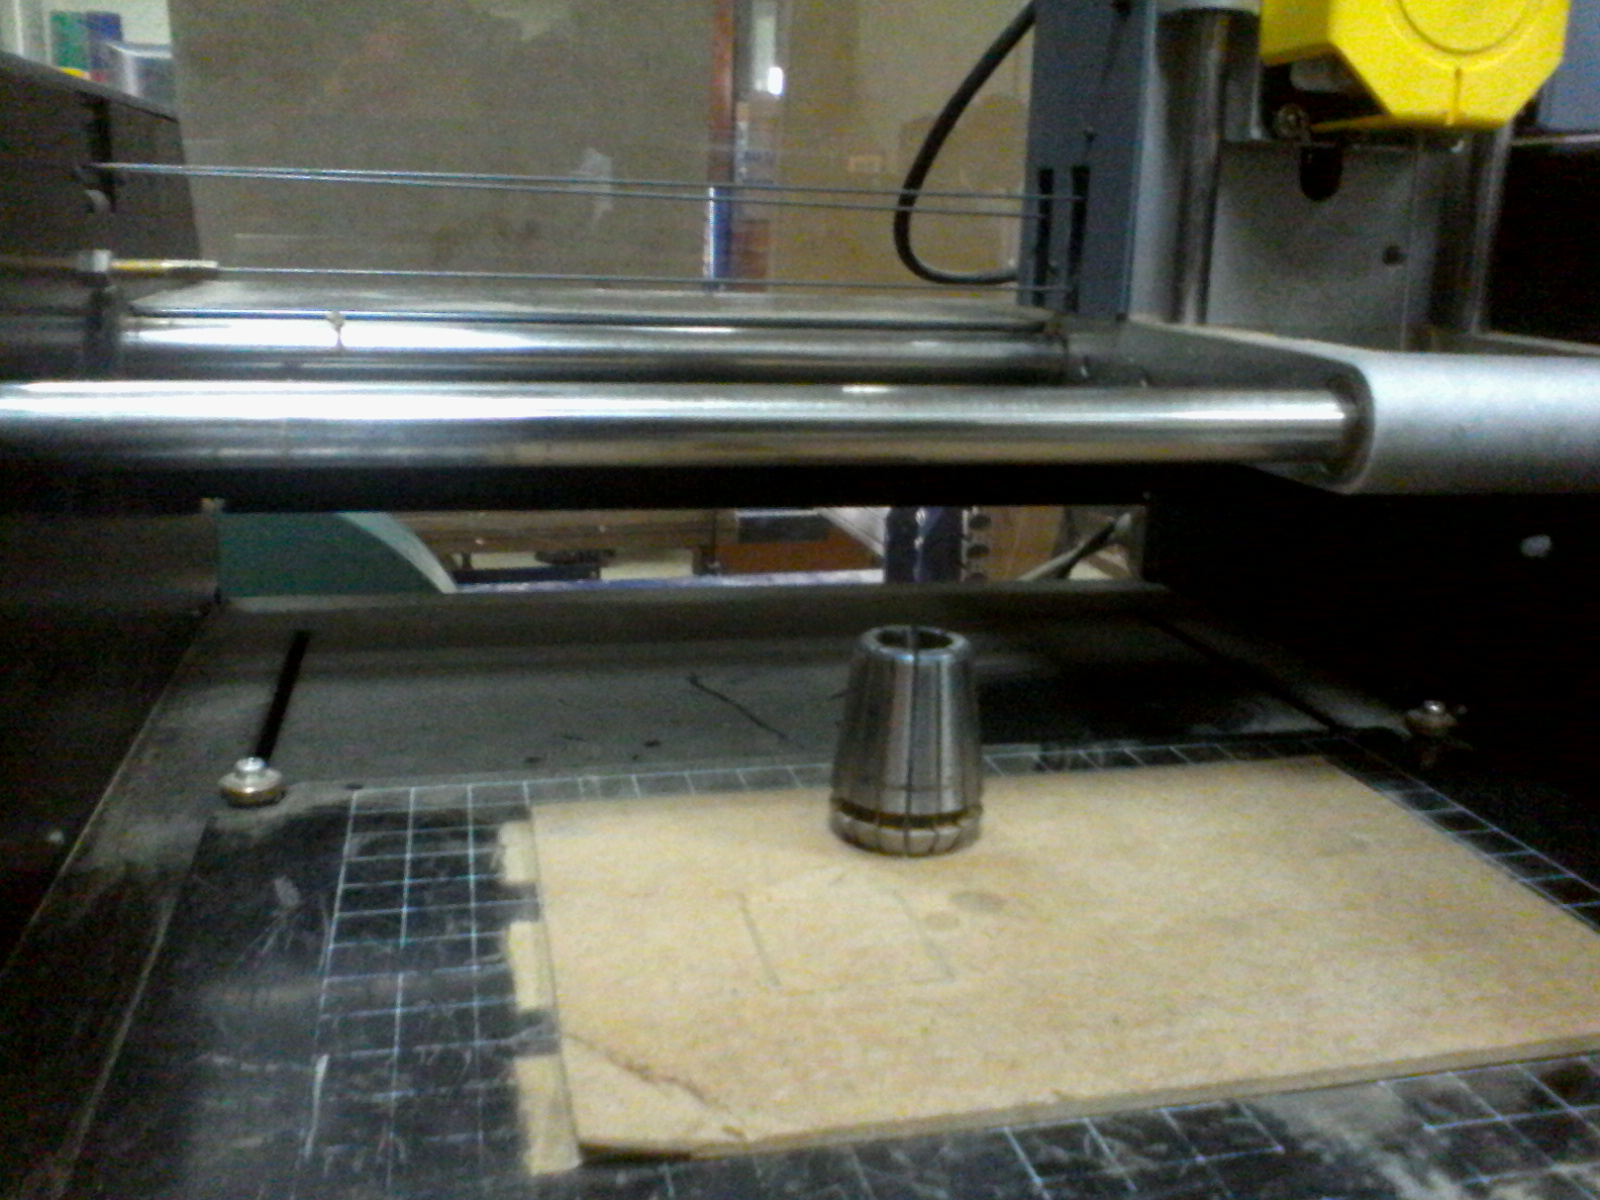
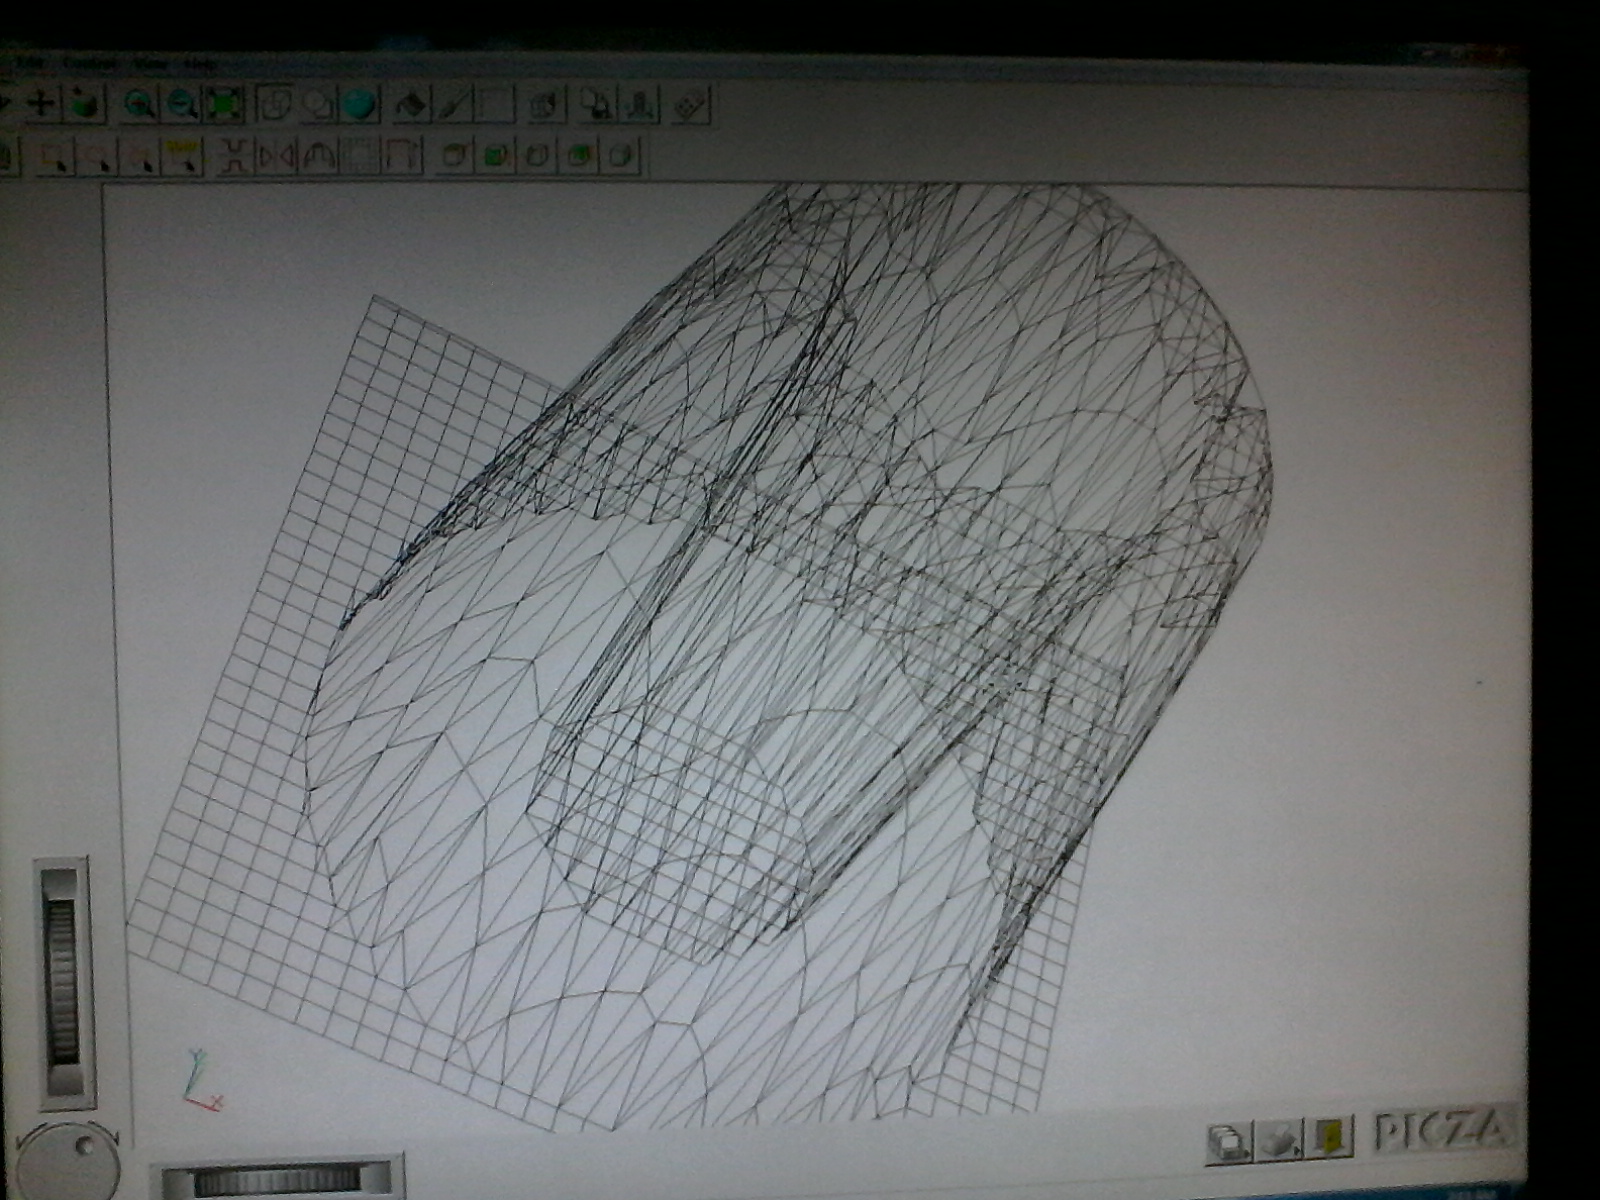
I also scanned an object which happened to be the CNC nozzle bit...First I setup the scanner using PICZA and configured it with the PC...:
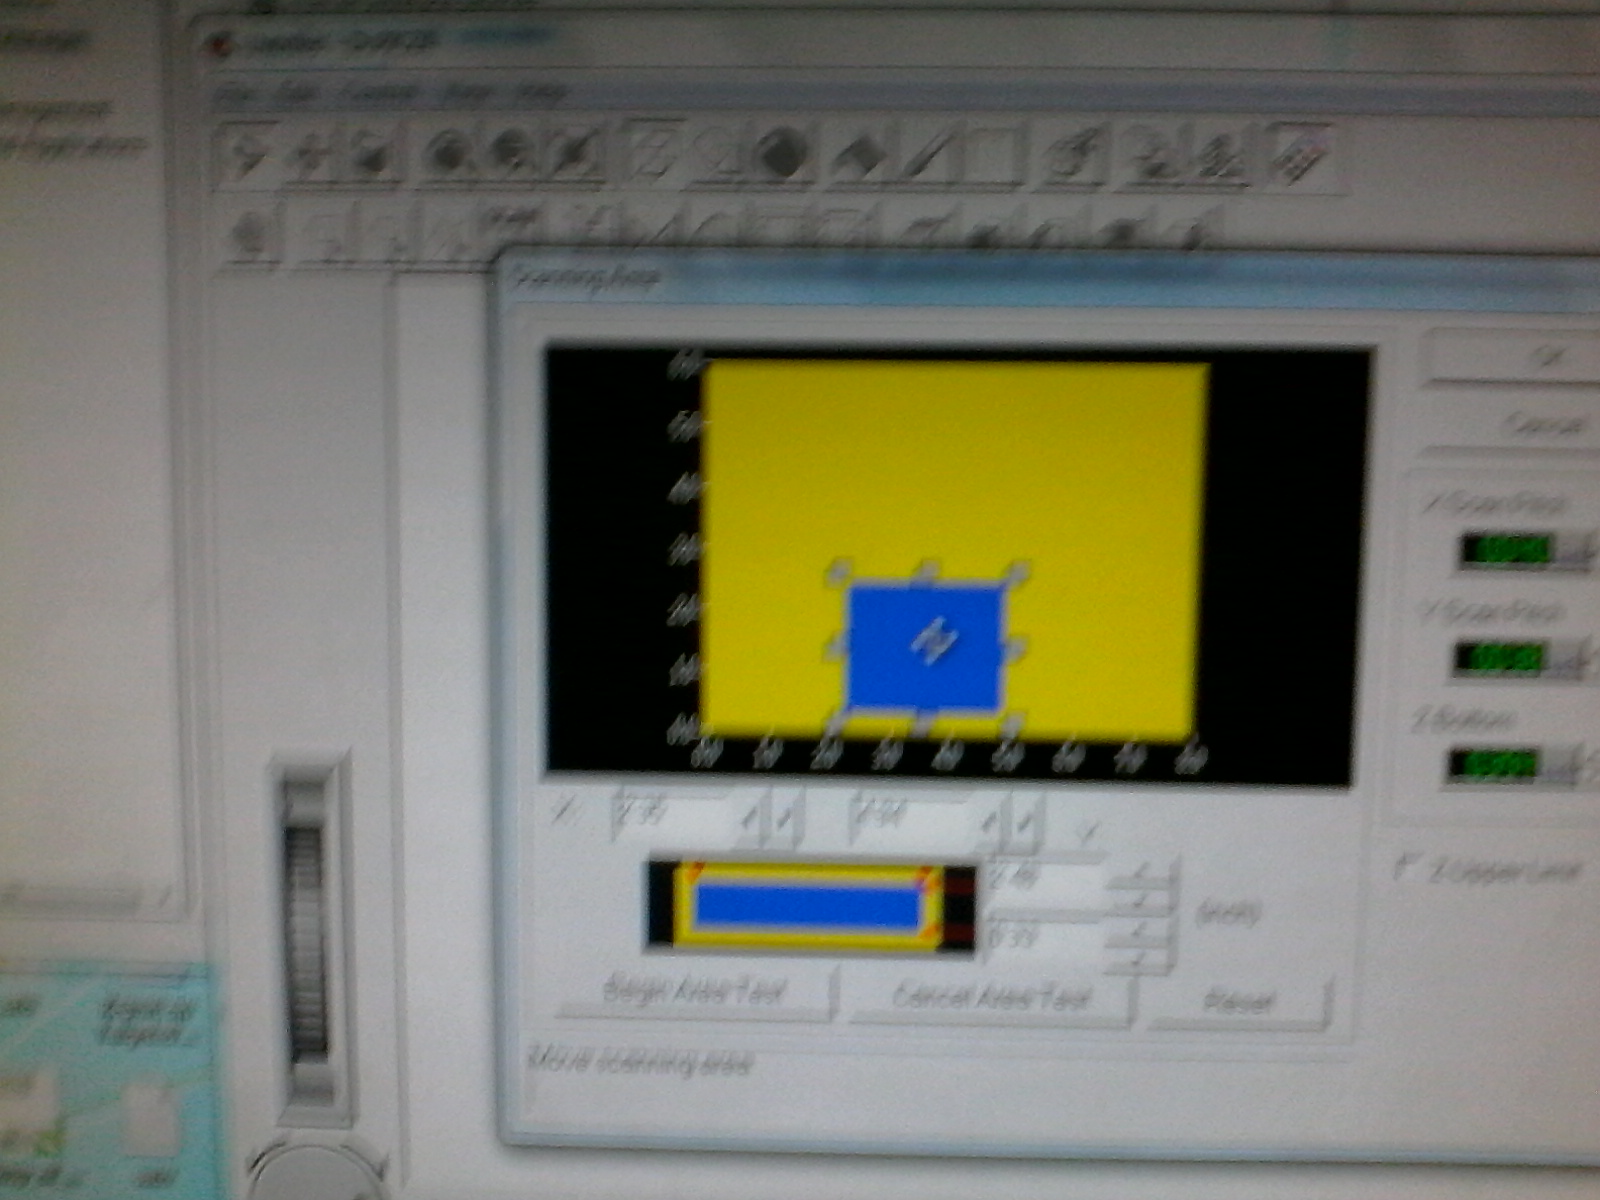
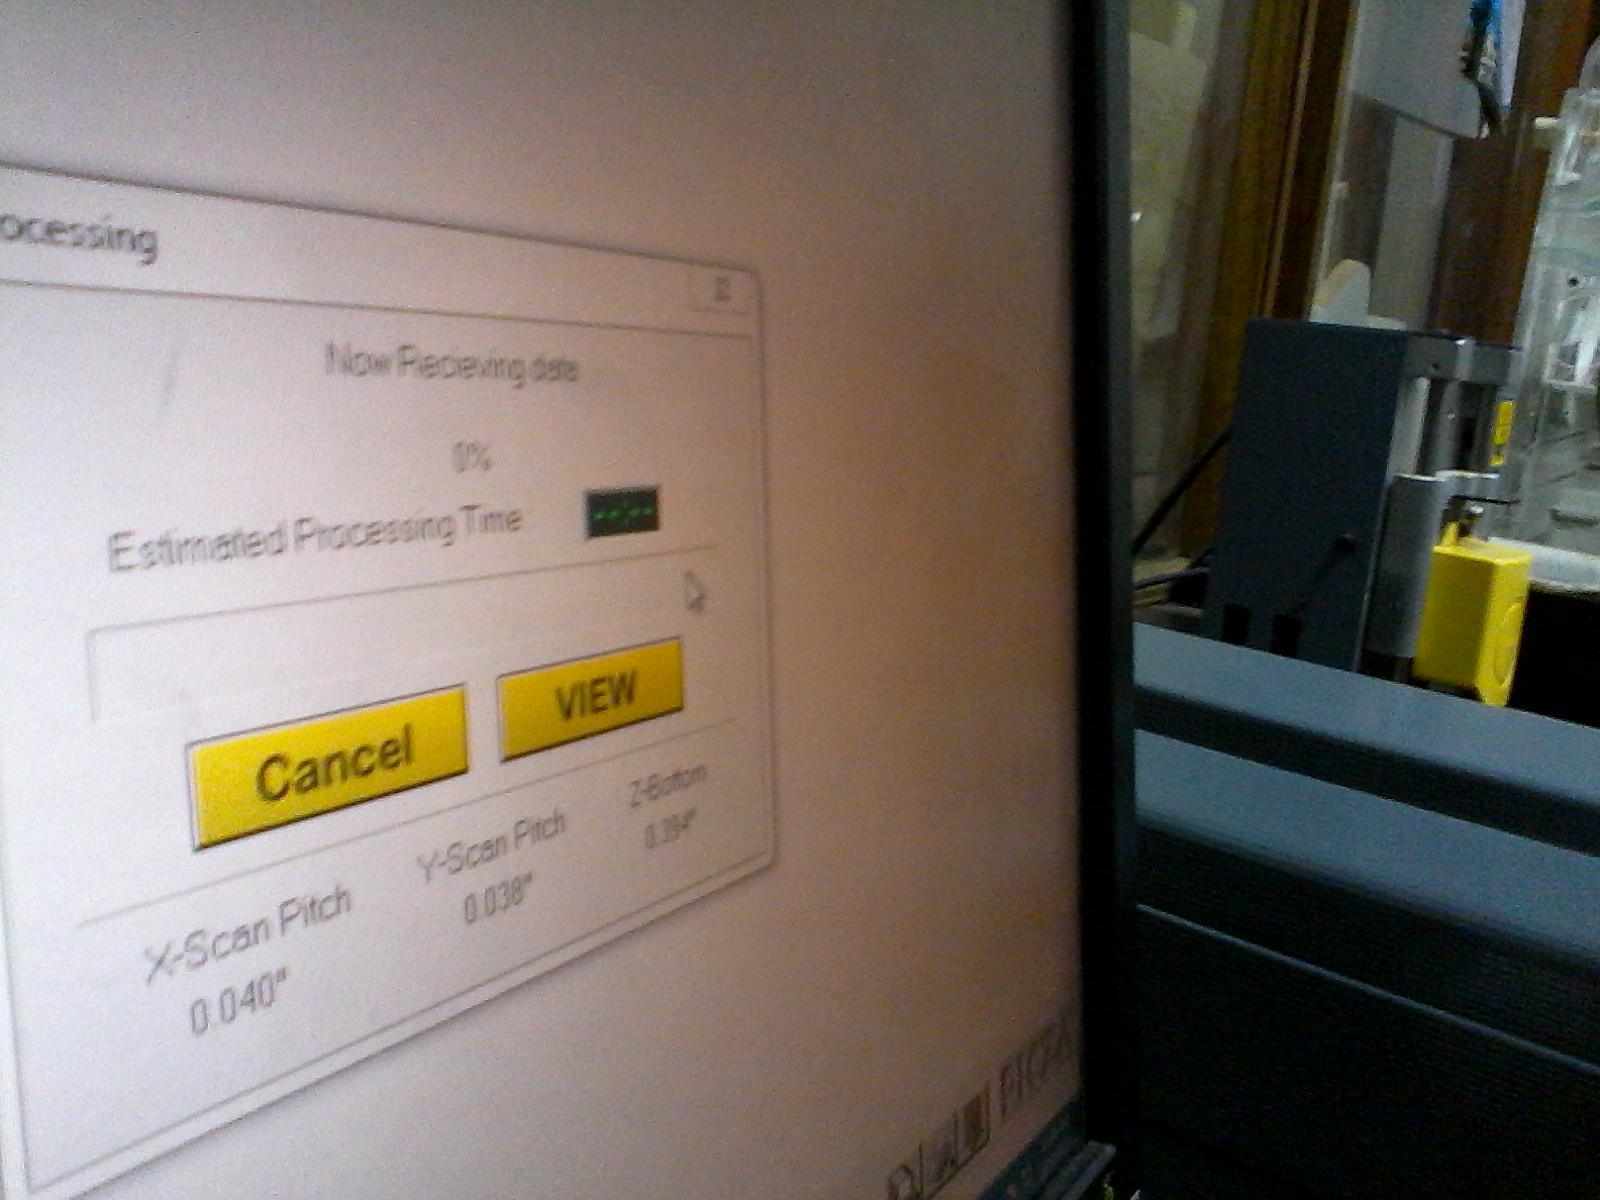
It took approximately 2hrs 30min to completely finish the scanning...after which a mesh was generated..
Till next week pals...Cheers.
 WELCOME TO MY
  WEEK 5