Week 2. Project management
2. Project management
Assingment
Build a personal site describing you and your final project.
Upload it to the class archive.
Work through a git tutorial.
Further details on:http://fabacademy.org/2019/docs/FabAcademy-Assessment/project_management.html
Files
Software
Git
Gitlab
SSH
Jekyll
brew
ruby
Git and Gitlab
I have been using versioncontrol software since 2005 and Git since (about) 2010. So I have basic experience with creating, pulling, pushing, commits, and most important braking and fixing repository trees. I recently created a Git quickstart guide with a student of my for our Gitlab environment at the Amsterdam University of Applied Sciences.
Setup repository
This quickstart guide can also be used for the Gitlab environment of the fabacademy. The difference is changing the gitlab.fdmci.hva.nl names and repository url to the name and url of the fabcloud gitlab.
I noticed Henk used a slightly different approach for the SSH key.
However this approach did not fully work on OSX.
We encountered some problems, the main problem was the config of the default server location in the ssh config.
When we tested the config provided by henk with example command ssh -T git@gitlab.fabcloud.com , it did not work.
But using the alias defined in config ssh -T git@git did work. git is the alias defined in the config, so it is good that it works,
but it should also work with the url.
I have no idea why the url did not work and did not found out why it did not work unfortunately.
I helped the team with getting everything setup on the OSX computers.
I modified Henk is tutorial to now also work with OSX as can be read in the section “Steps wwith SSH for OSX”
Steps with SSH for OSX
Install git
You do not have to install Git on OSX, this is allready on your computer.
Generate ssh-key
CLI way to generate a key for gitlab.
It is reacomment to use a separate keys for each host/server.
It makes it easier to delete a key after a project is finished, without breaking all your SSH connections.
In this example a “fabacademy-gitlab” key pair is created:
Go to your .ssh directory, located in your HOME directory:
cd ~/.ssh
Create a file for you ssh key to be stored in.
touch fabacademy-gitlab
Now change the accessright so that you only are allowed to see and edit the file:
sudo chmod 700 fabacademy-gitlab
Generate a new SSH key
ssh-keygen -t rsa -b 4096 -C "your@mailaddr.ess"
Runnig the command generates output like this:
Generating public/private rsa key pair.
Enter file in which to save the key (/Users/*your user name*/.ssh/id_rsa): /Users/*your user name*/.ssh/fabacademy-gitlab
/Users/*your user name*/.ssh/fabacademy-gitlab already exists.
Overwrite (y/n)? y
Enter passphrase (empty for no passphrase):
Enter same passphrase again:
Your identification has been saved in /Users/*your user name*/.ssh/fabacademy-gitlab.
Your public key has been saved in /Users/*your user name*/.ssh/fabacademy-gitlab.pub.
The key fingerprint is:
SHA256:x+Psdc+tCgggggggUzi40penIuytdrDtxTbLeZQ "your@mailaddr.ess"
The key's randomart image is:
+---[RSA 4096]----+
|                 |
|                 |
|               ..|
|         .    . *|
|        S + .  B+|
|       +++*=*+*X |
|         o+B+O++*|
|         .=o+.o==|
+----[SHA256]-----+
Add your SSH key to the fabacademy git.
Copy your ssh public key using the command:
pbcopy < ~/.ssh/fabacademy-gitlab.pub
Go to your gitlab user ssh configuration: https://gitlab.fabcloud.org/profile/keys
Paste your public key in the “key” field
Provide a name for the key like: “your@mailaddr.ess fabacademy public key”
And select “Add key”
ssh-config
Edit you ssh config file with your favorite text editor.
It’s located in ~/.ssh/config
At the end of the file insert:
#Fabacademy git account
Host gitlab.fabcloud.org
HostName gitlab.fabcloud.org
User git
Identityfile ~/.ssh/fabacademy-gitlab
IdentitiesOnly yes
Git global setup
 git config --global user.name "your name"
 git config --global user.email "your@mailaddr.ess"
Create a new repository
git clone git@gitlab.fabcloud.org:academany/fabacademy/2019/labs/*yourlab*/students/*your-name*.git
cd your-name
touch README.md
git add README.md
git commit -m "add README"
git push -u origin master
Using an existing repository
cd existing_folder
git init
git remote add origin git@gitlab.fabcloud.org:academany/fabacademy/2019/labs/*yourlab*/students/*your-name*.git
git pull origin master
touch README.md
git add README.md
git commit -m "add README"
git push -u origin master
Adding and commiting changes to gitlab
When you have setup your git repository you can start submitting your new files and changes. From the root of your git repository you can use the following commands:
git pull (pulls the lastest changes from the gitlab repository)
git add . (Always run this command when you want to commit new files)
git commit . (Run commit to commit your changes, and provide a short but clear description)
git push ( this pushes the changes or additions to the gitlab repository)
Git submodules
As stated I know my basic Git for years, still there is always something left to learn, and this time it is to integrate to completely different git repositories into one while retaining the history. First before discussing how to do this, you should ask IF you NEED to do this. In most situations separate repositories represent separate filosofies and separate licencies. Merging this in one repoistory can cause licencing issues, and will probably cause update issues in the future (due to the difference in the trees). If you can at all avoid merging two separate repositories, please do. For example, one repository can use the other repository as a library. In this case however I was not allowed to have multiple Git repositories on the Gitlab fabcloud server, so I had to merge the two repositories into one. There are many ways to merge two repositories, each with their own advantages and thisadvantages. I searched the git documentation and stackoverflow discussions untill I found an approach I found the most elegant for my situation. I had the following requirements:
- preserve both history
- being able to retain different licencies of the two modules
- being able to merge changes from the original repository
- use one existing repository as a base
This sounds all very complex, but fortunately Git supports this out of the box via submodules. Basically a submodule is a separate Git repository in another Git repository. More details are explained on the official Git site. A submodule can be added to the originial repository via the command
git submodule [--quiet] add [<options>] [--] <repository> [<path>]
In my case it looked like this
git submodule add https://github.com/lucasmbraz/lucasmbraz.github.io
Jekyll
I haven’t worked with Jekyll before, so my assingment for this week is to learn (by using) Jekyll. Jekyll is a framework on top of Ruby that allows you to create a website(with HTML/CSS and JavaScript) from Markdown and some config files. It has a vast library of themes, with very diverse functions: e.g. website, presentation, ect. My approach for learning Jekyll was:
- Install Jekyll
- Install a theme I like
- Modify theme and generate personal website
Install Jekyll
The Jekyll website has a tutorial for installing Jekyll How to install Jekyll and the prerequires for OSX https://jekyllrb.com/docs/installation/macos/ For the installation you need the Xcode command-line tools to be installed. I allready had them on my computer, so I could continue to the next step. As explained on the official site, Jekyll runs on Ruby, it is allready on my OSX version. Jekyll recommends to have at least Ruby v 2.2.5 I checked my version with command:
ruby -v
My version is: ruby 2.0.0p648 (2015-12-16 revision 53162) [universal.x86_64-darwin16] To old, so time to update. The tutorial explains that with rbenv you can manage multiple versions of Ruby. I am currently not using Ruby, so I chose not to use rbenv, but just the default lastest install served from Homebrew.
brew install ruby
Ofcourse Homebrew did not updated my Ruby, but installed a new version next to the default OSX version. The lasy fix is to change the default path of Ruby to the new location. To not break things I changed the config path to new Ruby location
export PATH=/usr/local/opt/ruby/bin:$PATH
Checked correct config and versions with
gem env
ruby -v
Using all the correct paths (from user directory) and new Ruby version is: ruby 2.6.0p0 (2018-12-25 revision 66547) [x86_64-darwin16]
Having Ruby setup, its time to install Jekyll using the page How to install Jekyll
gem install bundler jekyll
To test if Jekyll worked as expected I created a temporary folder and in that folder created a new Jekyll site.
jekyll new myblog
Navigated into the new blog, and try to build the site with command:
bundle exec jekyll serve
Which gave the error
Traceback (most recent call last):
	2: from /usr/local/opt/ruby/bin/bundle:23:in `<main>'
	1: from /usr/local/Cellar/ruby/2.6.0_1/lib/ruby/2.6.0/rubygems.rb:302:in `activate_bin_path'
/usr/local/Cellar/ruby/2.6.0_1/lib/ruby/2.6.0/rubygems.rb:283:in `find_spec_for_exe': Could not find 'bundler' (1.17.2) required by your /Users/biejh/Documents/HvA/Waag Cursus 2019/week2/myblog/Gemfile.lock. (Gem::GemNotFoundException)
To update to the latest version installed on your system, run `bundle update --bundler`.
To install the missing version, run `gem install bundler:1.17.2`
I am confused by the error, since gem installed the latest version of bundler (bundler-2.0.1.gem) and jekyll. The Jekyll install did not specify a specific bundle version. I checked with Micky and she also installed the bunlder 2.0 version but did not got the error. Only difference I can think about is the difference in OSX version. I am running Sierra, Micky High Sierra. Fortunately my problem was easily fixed by installing the older bundler version.
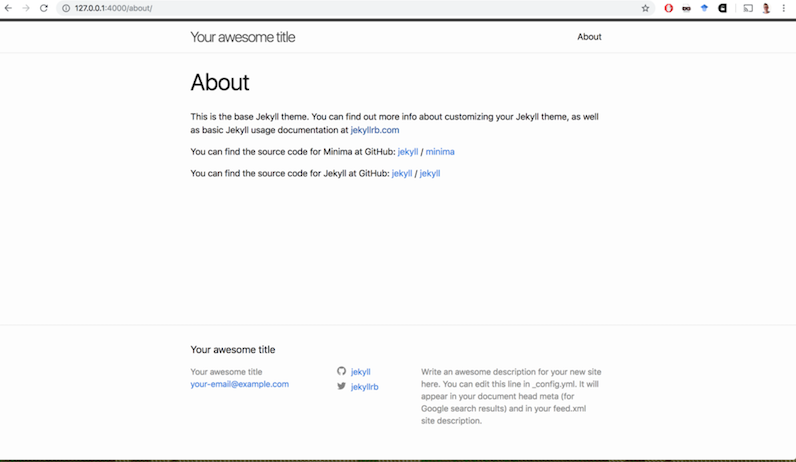
After succesfully installing Jekyll I hereby present my first Jekyll test page. Found on http://127.0.0.1:4000/
Install a Theme I like
Next, select a nice theme. After reading the url https://jekyllrb.com/docs/themes/ I still did not understand how to install and use a theme I found in the theme repository. I understand themes are gems, or could be gems, but how to install and use that gem is still unclear. Heidi and Micky told me to use the following steps:
- Download a theme
- Go into the folder
- Use jekyll build && jekyll serve
- It works! Magic!
While these steps work indeed for the first theme I downloaded. I still am not fully understanding Jekyll. After discussing with Henk, Micky and Heidi, I still don’t understand the structure of Jekyll.
Reading in the theme folder found that there is a structure most themes use, with folders as _post ect.
Also everything of the theme is defined in the _config.yml.
Information for the config can be found on this page https://jekyllrb.com/docs/configuration/default/
Yes! I finally start to understand.
Tried out theme Hyde.
Build failed because Jekyll was missing gems as paginate.
And I could not install them using the default “gem install …”
When looking in the gem folder paginate was present.
After some thinking found that my terminal was reverted to the old version of Rubys 2.0
Exported the path again to the new version and the missing gems was solved (almost).
Installed the missing gems and tried to build.
Turned out the theme was outdated and there wasn’t a quick fix since the used gems do not all work on my version of Jekyll 2.6.
It is unfortunate Jekyll does not support settings for themes to define for witch version of jekyll and gems it is designed.
Onwarts to find a new theme for my version of Jekyll…
Looked through the issues of the Jekyll Git and found many people having the same issues.
Many issues have to do with dependencies and deprications. Fortunately a jekyll expert forked the theme and made a gem version of the Hide theme.
This means all the dependencies are included and using bundle I can easily install the theme.
I downloaded the fork from: https://github.com/yyyc514/hyde/
And used the following command to build the theme:
bundle exec jekyll serve
Having succefully tried out a theme, it is now time to chose the final theme.
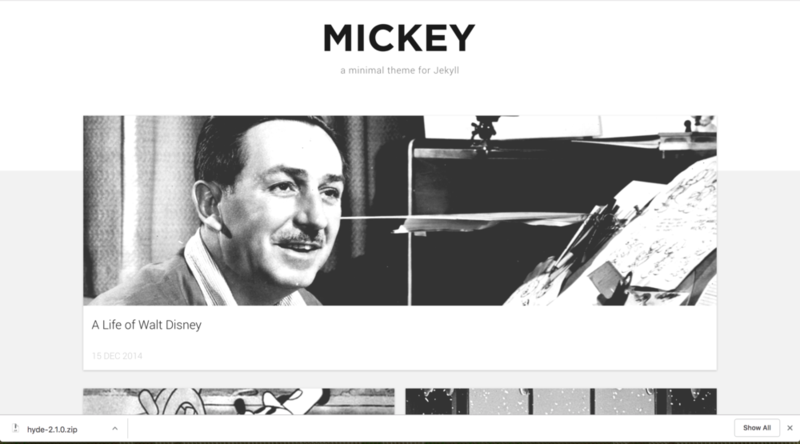
I found a nice fork of Hyde called Mickey.
Unfortantely Mickey also is not available as a gem, and after trieng uses outdated libraries, making it impossible to use with Jekyll 3 and up.
Fortunately it was forked by git user lucasmbraz and made compatible with Jekyll 3
It still wasn’t a gem,
so I had to build it using the following commands
  jekyll build
  jekyll server
Fortunately through all my trying with other themes I installed many different Jekyll modules resulting in a succefull build out of the box.
And voila a working version of theMickey theme for Jekyll
Important pitfalls:
Jekyll does not have a variable that theme builders can use to indicate for which version of Jekyll and modules it is made. This makes it very difficult for (new) users to select a team that is compatible with their build, or to create a build that is compatible with the theme.
This problem apperently does not occur when a theme is presented as a gem, but unfortunately the majority of themes presented on the Jekyll page appear to not be gems.
=
Modify theme and generate personal website for my actual FabAcademy repository
After having selected a working theme I had to integrate the theme in my allready existing FabAcademy(fabcloud) repository.
I started by inporting the Git repository of the them in my fabcloud repository. How I did this is explained in the section of git submodules.
Next I modified the theme to use my original markdown files and docs folder
Followed by customisiation of the layout and colors.
And last I modified the Gitlab config to serve my new website.
I explain the details in the following sections.
Using the original markdown files and docs folder
Symbolic links
To keep on working in the docs folder from the template, I created symbolic links from the folders to the Jekyll theme.
  ln -s ../docs/assignments/ _drafts
  ln -s ../docs/about/ about
  ln -s ../docs/images/ assets/images/posts
Unfortunately Jekyll does not allow symoblic links in the assets folder.
jekyll 3.8.5 | Error: No such file or directory @ rb_sysopen - .../lucasmbraz.github.io/assets/images/posts
I tried to fix this by building Jekyll in production mode. According to the website this should work.
Unfortuntately this also did not work, Jekyll gave the same error.
As I was running out of time, I had to create a quick fix.
For now I will be copying the images by hand using the command:
cp -Rp ../docs/images/ assets/images/posts
To prevent the Git from duplicating the images, I put a Git ignore on the posts folder.
Collections
I wanted to use markdown files without dates that are needed for the posts markdown files.
The Jekyll documentation recommends to use pages. It was unclear to me how to implement, so I searched for help online, but found that collections or drafts are more common sollutions.
Collections are what is says, a collection of pages within a certain topic.
Again I read the collections doc page, but could not understand how to use this.
I found this help online and followed its advice.
Copied contents of doc file to the theme folder in the folder _pages.
Modified my config file with the following code:
  safe:					false
  include:				["_pages"]
  collections:
    pages:
      output:				true
      permalink:			/:collection/:path/
Unfortunately that did not work. Nothing was visible.
Drafts
So I went to my last resort: drafts.
Copied everything in the _drafts folder and build jekyll with
jekyll serve --drafts
And it worked!

Making it pretty
To make the theme more me, I changed the name, images and colors to something that I normally also used.
And added my avatar.
Most changes could be made in the _config.yml and the main.css in the assets folder.
Also added a hidden feature, to only show posts that are finished.
In the top config of a markdown I can now write
hidden: true
And with the code
        \{\% if post.hidden != true \%\}
        ....
        \{\% endif \%\}
I filter out the pages on the main index.html and in the navigation menu html page.
Gitlab config for Jekyll
Last I had to tell Gitlab to use the newly generated theme in the CI module.
As explained by Henk the CI module is configures using the yml config file in the root of your repository .gitlab-ci.yml
I replaced the file contents with the following code:
  # This file is a template, and might need editing before it works on your project.
  # Full project: https://gitlab.com/pages/plain-html
  pages:
    stage: deploy
    script:
    - mkdir .public
    - cp -r * .public
    - mv .public public
    artifacts:
      paths:
      - public
    only:
    - master
The structure of the config file is explained at the gitlab pages site. and how to use it here.
It basically copies the site folder “public” to the correct location.
I had to make a few modifications to make everything work.
First of, I was working in a different branch than the ‘master’ branch, so I changed the ‘only’ parameter to my current branch ‘jekylltheme’.
Also it specified in the Config->CI/CD->General Pipeline Settings to use the ‘jekylltheme’ branch instead of the ‘master’ branch.
The last change I made was tot he Jekyll theme config. I specified the output to the folder ‘public’ in the root of my repository with the setting:
  # Server
  destination:      	 ../public
After committing the code, the pages job got activated and my page was visible on:
http://fab.academany.org/2019/labs/waag/students/josephus-vanderbie/
Unfortunately I could not get the permalinks to work correctly, so verything needs to be ‘hardcoded’ to the correct URL.
It still needed some tweeks to the config for specified sitepath:
  site:                'http://fab.academany.org/2019/labs/waag/students/josephus-vanderbie/'
  baseurl:             'http://fab.academany.org/2019/labs/waag/students/josephus-vanderbie/'
  permalink:           /:title.html
And in all the pages that reference the main page, change the references to the main index.html hardcoded to
http://fab.academany.org/2019/labs/waag/students/josephus-vanderbie//index.html
And then everthing seems to be working!

Proper Jekyll config
I found the config that works with gitlab and configured it for my repo. Unfortunately this still does not work because of the submodule structure I use.
image: ruby:2.6

pages:
  script:
  - gem install jekyll
  - jekyll build -s custommickeytheme -d public/
  artifacts:
    paths:
    - public
  only:
  - jekylltheme
Markdown
While writing this page I again got familier with Markdown. Markdown is a simple notation langauge to quickly write readable documents.
The great thing is that these notations are both readable for humans as computers, and easy to learn.
I have been using Markdown for a while now, only I am not a power user. I mostly use the following notations: headings, code, URLs and images.
Headings can be created using the #. The more ### the further down your heading is. So one # is heading level 1, while 2 ## is heading level 2, ect.
Code can be written using 3 ``` then some code and end again with 3 ```
URLs using [here goes your text](here goes your URL)
And images are almost identical to URLs, only with a !, 
A breakline you make by using two spaces “ “
Then last of my commonly used notations, I use the escape, which is a \. It allows you to escape the Markdown notations and use the characters as is.
Reflection
While I certainly learned alot about Jekyll, I would not recommend this tool to anyone.
You can only use Jekyll in exactly the form as it is designed, if you want to modify its structure, you are on your own.
While you can create nice themes, the switch to gems makes that there is a lot of outdated material around.
You can compare