For this week we had to programm our board made in week 7. As you can remember, I already made that with an arduino uno and the Arduino IDE. It was very easy and I already knew how to do that. It is the reason why I decided to make a different kind of code, because it was a LED glowing depending of how much light there was; instead I decided to convert that analogread into a digitalwrite which mean that depending of the amount of light, the LED was turned on and off. This has been made using PlatformIO, the Arduino IDE and C++ With AVRDUDE and for uploading our lovely FABISP.
")
For the Arduino Code, I once again used an analogRead for the INPUT.
This function transform the difference of voltaje that is read by the microcontroller to a number between 0 to 1023 in this case because the Attiny44 has a 10 bit resolution.
In case you need more resolution you could use analogreadresolution to change it in the Arduino IDE.
After that, I ask to the LED to switch on when there is less light than 200 (you calculate this value, the experimental way) and in the else, I ask it to switch off the light.
In this way I converted an analog signal to digital. Obviously there is cheaper ways to do that with even cheaper chips and a potentiometer to regulate this "200value".
Download Code

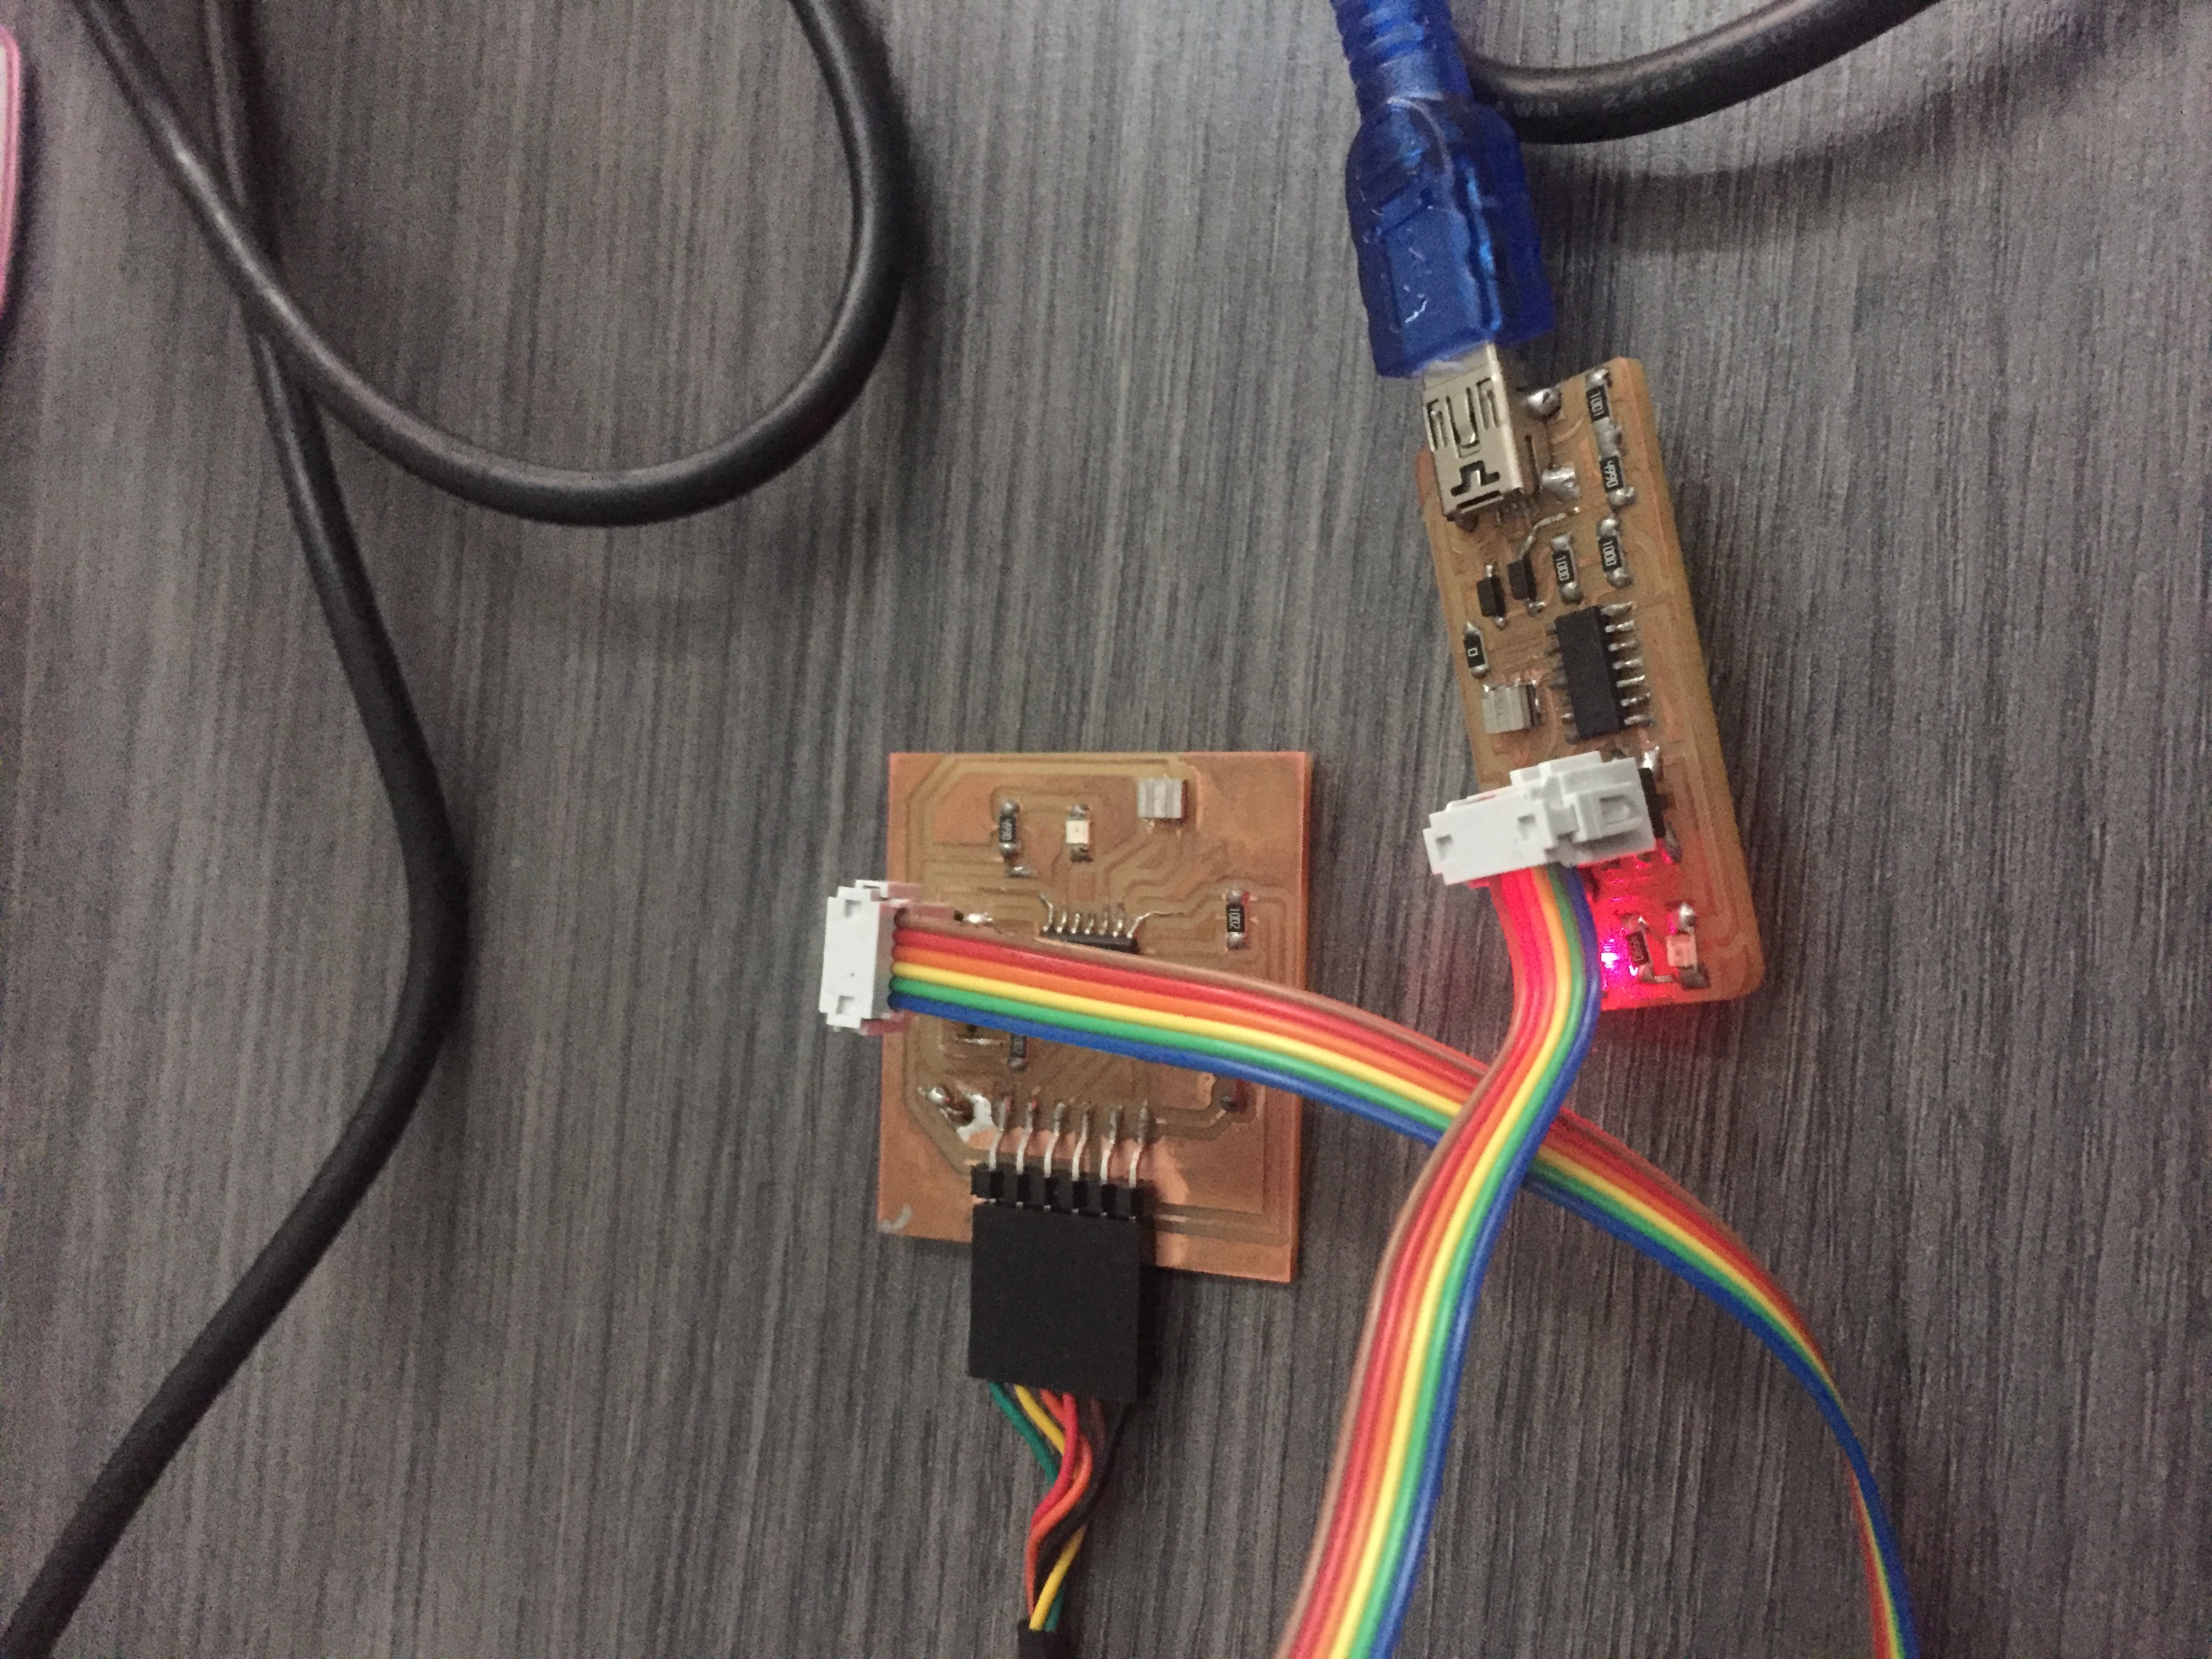
This part is very easy and well explained on week 7, the only difference is that I am now using my FABISP so, you have to choose as programer the USBtinyUSB. The port is not important, the one that you see selected here is the chipset of my ftdi connector but in this case it is only used to power our board, so if nothing appears here, don't worry. Depending on your board, you could choose as me an external 20 MHz clock or the internal 8MHz if you didn't install a resonator or oscillator.
")
Platform IO, is as its name says a Platform to program in many frameworks (languages, logic, etc..). In this case I will use Arduino because the logic that it uses is very user friendly. But you will probably ask what is the difference with the Arduino IDE. Well the first one is that it is written in C++ code and invoking the Arduino library. The second one, is that if you make mistakes, it is not like in the Arduino IDE where it corrects you nearly everything; so you can better program very fast. And finally the other important detail, is that it already have hundreds of boards installed so you just have to select it and start to program. Finally, as in the Arduino IDE, you can compile and upload your code. An important detail is that you can use it in Atom or Visual Code, so yes, it has a much better look and feel than the Arduino IDE.

This part of the process, is very easy, you choose your project name, the board that you are going to use and the Framework. With that, it will automatically generate a config file. In case you are not sure, you can download mine some steps above.

In Platform IO, I had some difficulties in this case with the Attiny44. I don't really understand the pinout include here.
You have to take care because if you are using a pin that can be digital or analog, when you declare it, you have to put A# in case it is an analog one or only # if it is a digital one.
But not only that, don't forget to say if it is an input or Output because it will not work if you forget one of that things.
You are probably, asking me, why I don't understand the pinout, and the reason is that I have not been able to use Pin 7 that could also be used as a digital Pin, instead of a PWM (which is a Digital Pin in reality switching on and off very fast).
But don't worry if you are using a more common "comercial" board, because it works very well.
How I resolved that? Well, for some reason in PlatformIO, the analogwrite, I think has a very small resolution as default (I tried to change it but without success) so the difference between having light or not is nearly converting the PWM signal into a digital Signal.
Download Code

Well this is my config file, nothing very important here, you could have chosen to increase the board frequency but it is by default the max, however it is not possible yet to use the external resonator with PlatformIO for the ATTiny44.
You can find some documentation above the ATTiny44 here . One more advice, is to include the programer that you are going to use, in this case, I used the usbtiny but here you have the list .
Download Code

For the "Pure C++" code, I basically made that the LED switch ON, when the Analogread was smaller than 1020 and that the LED switch OFF in the other cases.
In case you don't understand, it is basically a program where I read the Analog Input from the fotores with the read_adc() function and return it as a variable called read that I had to declare at the beginning of the code.
Download Code

When I was learning how to upload code to my board, a friend of mine told me that it could be smart to create a shell script to make this repetitive process more automatic.
This first code that you are looking at, makes you able to compile your code and check for any kind of warnings (or not because they doesn't look great :) ) but obviously to see if there is any fatal error.
Here you can see a $1 which is the first and in this case only argument that you have to give to the function and in this case it has to be the name of you file.
Please take care to be in the directory where your .sh file is and where your cpp is to be able to create the hex file in the same directory without any problem.
The commands that you have to use are those:
chmod +x compile.sh (one time only)
./compile.sh(always)
Download Code

The upload script is once again basically an AVRDUDE Command. Here we precise which kind of programmer we have, and the kind of Microcontroller that we are going to use.
Finally we upload the main.hex file that we have created in the previous step with the compile.
The commands are:
./upload.sh
Download Code

The program script is basically both, the compile and program together.
In this case, we can pass an argument to the function or not and with the if statement that you see here, we can determine that if you don't pass an argument,
it is because we want to compile and program the main.cpp file that is in this directory, otherwise if we pass an argument like "test.cpp",
it will compile and program this file. Don't worry if you have never see a "fi", it is basically the end of the if.
Download Code

This is my Terminal window, where you can see some important step. The first one is an ls command, to verify that all my files are present in my actual directory. Once I have done that, I make an lsusb to see that my FABISP is connected correctly to my computer. Finally I make an ./program.sh without any argument because my code is the main.cpp and that's it. If for some reason you have an error saying that it is a wrong device signature. Please verify two things; in your programer, check if you removed the 0 ohm resistor connected to the reset pin, because it happened to me, and finally if it doesn't work, reinstall avrdude with brew if you are using a mac, and it should work.

And because two times is always better than once, here you have again the pinout of our lovely ATTiny44, because we always use it. In the case that you are programming with the Arduino IDE, the pinout that you have to follow is the brown one. Please have care, that if you are using PlatformIO, it is different to call the A1 than the 1 pin. Even if they are in reality the same pin.
My experience using the micro:bit, has been incredible. The micro:bit is a Arm Cortex®-M0 that is so easy to program from Nordic Semiconductor. You can program it using your phone, and send the code with a bluetooth connexion.
But that is not all, you can simulate your program in their web interface, you don't need to install drivers to send the code to it, just plug it in, and drag and drop the code.
It has been a pleasure to work with such a board.
The included gyroscope and LED Matrix gives you a very good user interface but most of all, some good tools to learn how to program a microcontroller,
without having to be aware of a complicated electronics. Micro:bit also gives you the option to program it with python, but I had never program things with a GUI, so I decided to try and I am very happy of this first experience.
I am not sure that a microcontroller like an attiny44 or an Atmel 328p could handle all those options and work that fast, so in general, I am convinced that an ARM processor is really more powerful.
Another very good detail about it is that you can use it for a final prototype because you can use a socket like the one that a RAM memory use in your PCB, and it can look very professional, which is a very complicated result to obtain with an arduino
even is you make a shield.

For a lot of time, I thought that a microcontroller was not able to store data, so I always used micro SD modules to keep the data for my projects, but after reading the datasheet, and understanding that well how the EEPROM works, it has been very easy for me to create a simple code that could be able to write something in the EEPROM using the Arduino IDE, and being able to read it later. What is really important to keep from this page of the datasheet, is that you have to take care of the address where you are keeping your data and that basically you can read or write 100000 times from it. However, it is also specified later, how to define the adress, and the process is very simple, you have to define the initial one (EEAR-page20), and imagine it is 0, the next adress, has to be 0+the size of you variable type. In case you are working with an integer for example, it will probably be 4 because its weight is between 2 and 4 bits. In the case of the Arduino, you can use the EEPROM.h library, here you can find my code.
This is the test uploading the code from the Arduino IDE, Platform IO and AVR Dude.
Please Contact Me For Any Collaborative Project