Week 10: Molding and casting
03/26/2019 - Stéphane Muller
Group assignment: review the safety data sheets for each of our molding and casting materials, then make and compare test casts with each of them. Individual assignment: design a 3D mold around the stock and tooling that we'll be using, mill it, and use it to cast parts.
Research
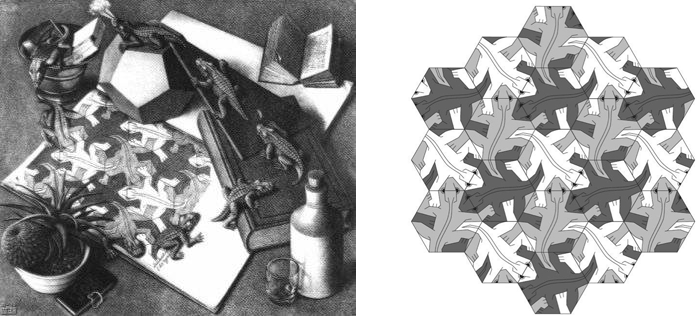
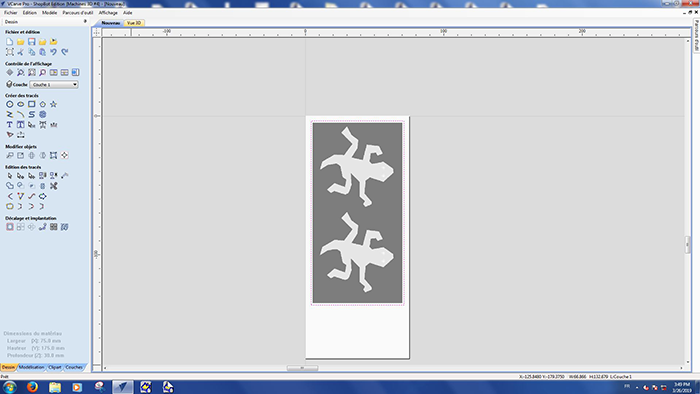
The point of molding and casting is to be able to cast the same part over and over again. So my idea was to make some kind of a building block or a piece of a repeating pattern. My research led me to M.C. Escher. I love this artist, he did some amazing pieces... his love for mathematics, gemoetry, paradoxes and the concept of infinity speaks to me on some level.
I found this pattern very interesting and decided to model it! I would be able to cast the same piece in a lot of different materials, even print it and machine it in wood later, and all the tiles would fit together.
Planning and list of tasks
- Group assignment
- Modeling the piece in 3D
- Milling it in wax
- Making the mold in silicone
- Casting the piece in different materials
Step by step
Group assignment
Check out our group documentation.
A little glossary taken from this wonderful resource.
| Pot life | The point at which it the mix becomes so thick that it is no longer free-flowing or self-leveling |
| Demold time | The point at which it is sufficiently cross-linked to be safe to remove from the master |
| Indentation hardness | This parameter is measured using an ad hoc scale known as "Shore A", named so after its inventor. The test involves pressing a flat-tipped 0.8 mm needle into a sample with a modest force (800 gf). Deflection of 2.5 mm or more corresponds to 0 on the scale, while no deflection whatsoever is denoted with the value of 100. Compositions around 20-40A are fairly stretchy and squishy, similar to a rubber band. Silicones around 60-80A are still flexible, but begin to resemble a pencil eraser or a tire - you can flex them, but you won't stretch them easily. |
| Tensile strength | In essence, tensile strength tells you the stress (force divided by the area of cross-section) that causes the material to either snap, or to develop a localized defect known as necking. |
| Elongation | Elongation at break, on the other hand, describes the extent to which a standardized specimen can be stretched before breaking apart. |
| Tear strength | Tear strength of at least around 15-20 kN/m, as per ASTM method, is highly desirable (the value corresponds to force divided by the thickness of the sample; 1 kN/m = 5.7 ppi). Formulations up to 30 kN/m are available on the market, and are certainly not a waste of money. It's best to stay away from products where the advertised tear strength less than 12 kN/m or so. |
| Viscosity | Formulations with lower dynamic viscosity are generally easier to mix, pour, and degas - and will be more inclined to conform to complex shapes without the aid of vacuum or pressure. All other things being roughly equal, go with the system with the lowest viscosity. Products below 50,000 mPa*s are advisable, but not strictly a must. |
| Shrinkage | Addition cure silicones used for moldmaking purposes should have no measurable shrinkage. Some manufacturers simply say "none", while others say "less than 0.1%" or so. Seeing a higher value in the datasheet is a warning sign; shrinkages between 0.2% and 0.6% are commonly seen in condensation cure silicones, and should be avoided in precision work. |
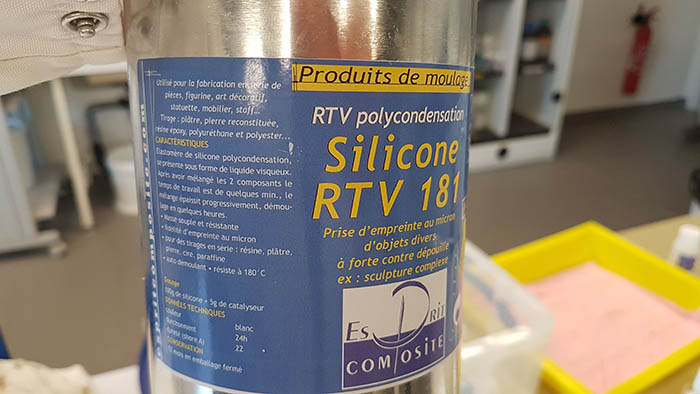
| Material | Food safe silicone RTV 3428 (data sheet / safety data sheet) |
| Pot life | 90 minutes at 23°C |
| Demold time | 16 hours at 23°C |
| Color | Translucent (part B is white) |
| Mixing ratio | Part A: 100g / part B: 10g |
| Indentation hardness | 28 Shore A |
| Tensile strength | 7.5 MPa |
| Elongation | 600% |
| Tear strength | 20 KN/m |
| Viscosity | 25 000 mPa |
| Shrinkage | 0.1% |
| Safety precautions | The product has not been classified as hazardous according to the legislation in force. It's chemically stable. |
| Solubility | Practically insoluble |

| Material | Epoxy (safety data sheet part A safety datasheet part B) |
| Conservation | 12 months |
| Cure time | 24 hours at 20°C |
| Color | Part A is transparent (colorless) and part B is blue |
| Mixing ratio | Part A: 100g / part B: 50g |
| Safety precautions | This product is quite toxic and should be handled with care and appropriate safety equipment (gloves, mask, safety glasses and clothes). |
| Solubility | Insoluble |
The datasheet released by the manufacturer (Esprit Composite) is not very detailed unfortunately...
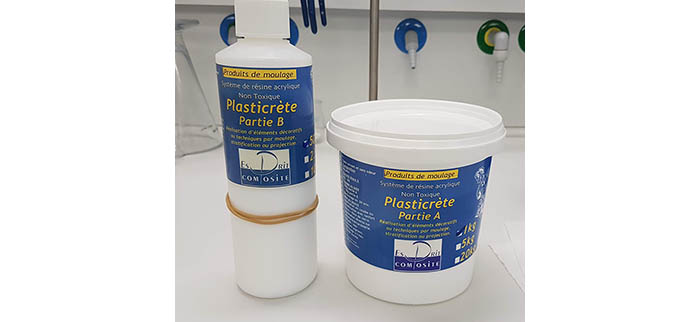
| Material | Plasticrète (non toxic acrylic resin) (data sheet) |
| Conservation | Chemically stable |
| Cure time | 3 hours at 20°C |
| Color | White |
| Mixing ratio | Part A: 100g / part B: 50g |
| Indentation hardness | 82-86 Shore A |
| Safety precautions | No particular precautions since it's non toxic |
| Solubility | Water |
Modeling the piece in 3D
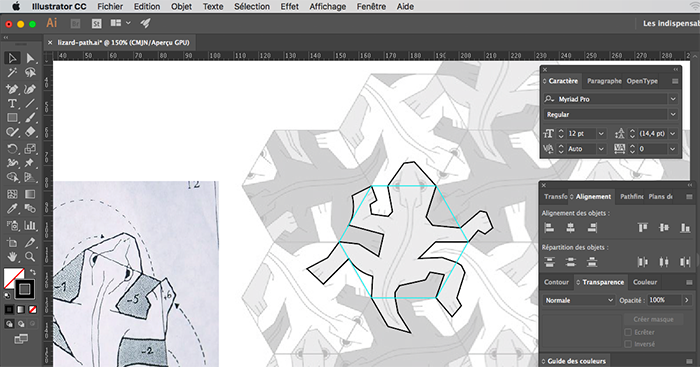
First I needed to redraw the piece in 2D, so I used Illustrator. The drawing needs to be very precise, in order for the pieces to fit in each other. So I first drew a hexagon and used it as a guide. Then I drew each part that was outside the hexagon and rotated them precisely for the interior of the hexagon. Finally, I did a small offset of 1% to make sure the pieces fit easily together.
To do the modeling I used Blender. I had already used Blender a while ago and thought I would give it another try. My initial idea here was to use Blender's sculpt mode. Unfortunately, this tool needs some getting used to... and I didn't have that much time to practice.
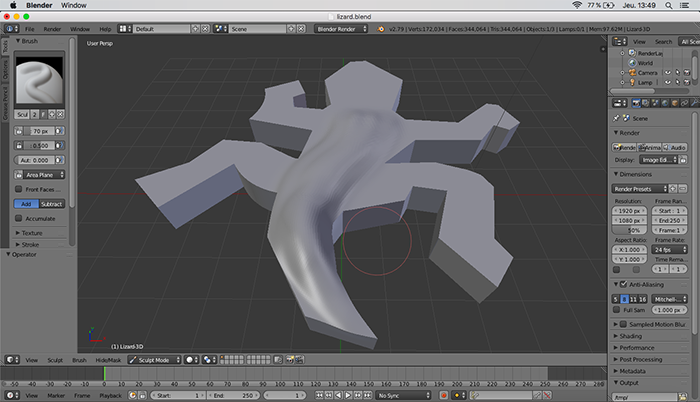
Then I thought I would give it a simple pyramidal extrusion and to do that I needed to play with meshes and Blender was still my best option. I was going to add a spine to the lizard and create the faces of the mesh one by one.
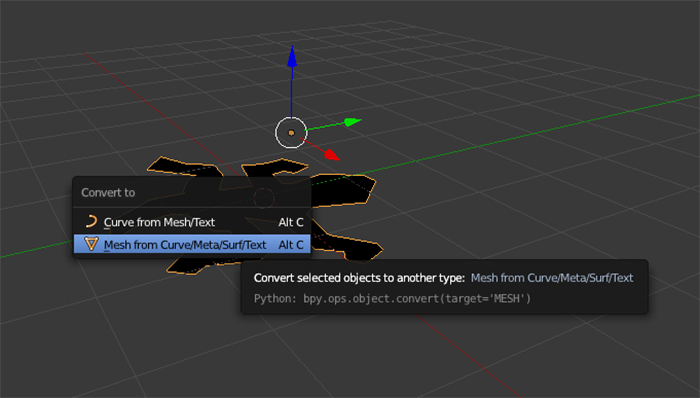
First, import the SVG model.
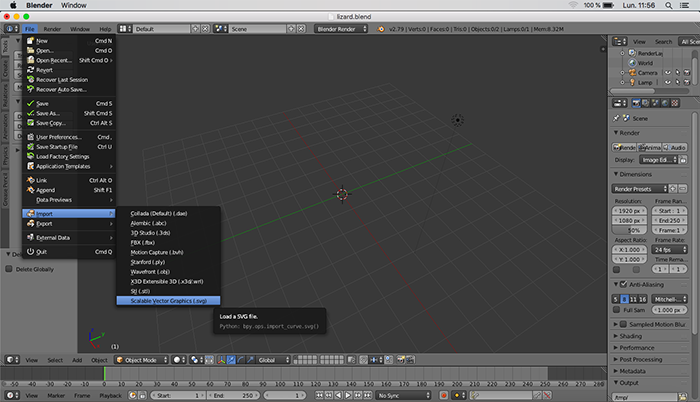
Convert the curve into a mesh with Alt + C.
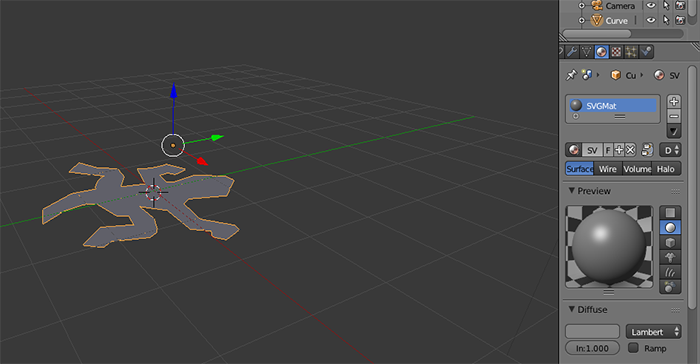
Change the color of the object (to see a bit more clearly).
Go into Edit mode, and start adding vertices. To do that, select a vertex with a right click and add an extruded vertex by using CTRL + left click.
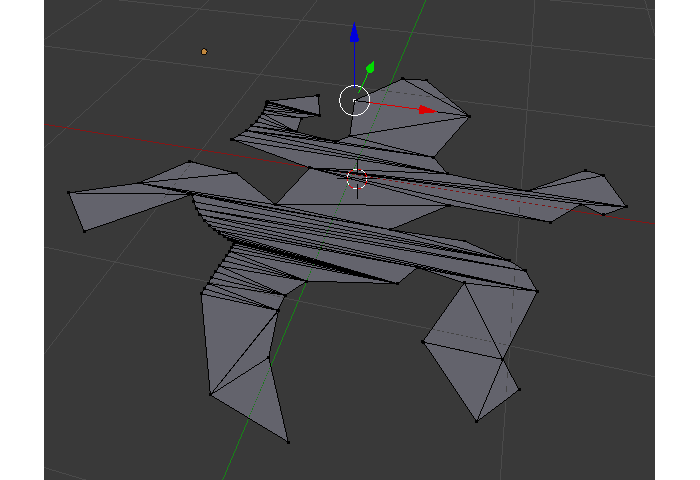
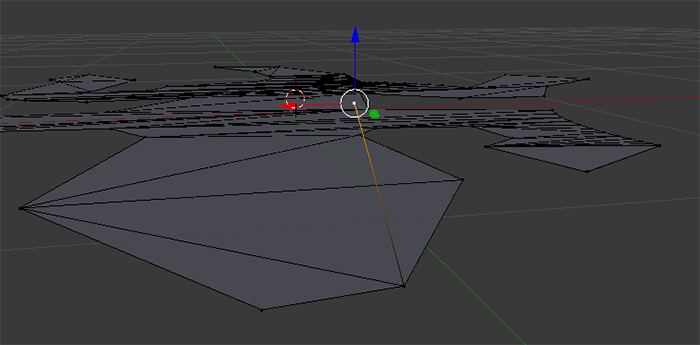
Then select 3 or 4 vertices and create a face with the F key.
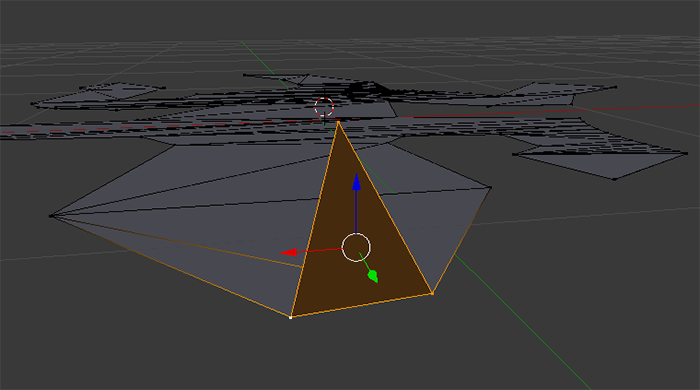
If your faces have a weird color or something looks off, you might need to recalculate your normals. To do that, select all the models vertices with the lassoCTRL + Band then doCTRL + N.
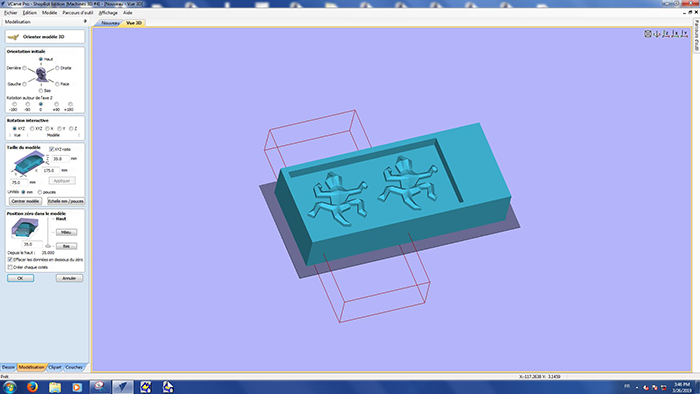
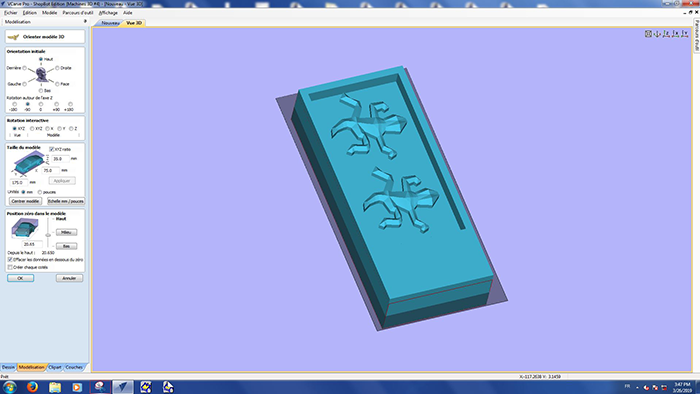
After a lot of tweaking, here is the final 3D model.
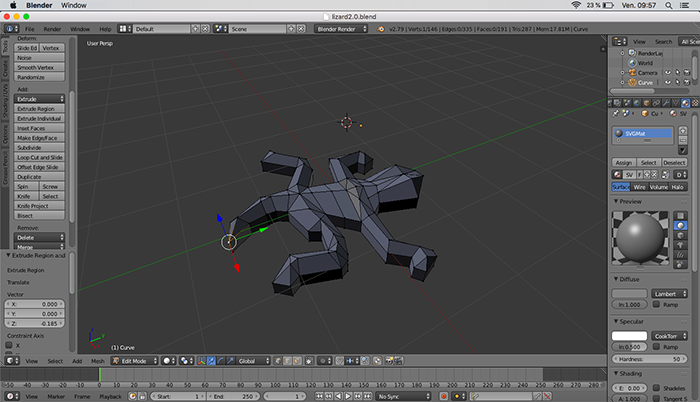
Once the model is ready, I still needed to put it in a box for the milling step so to do that I just created a box the size of my wax block and did a couple of boolean operations.
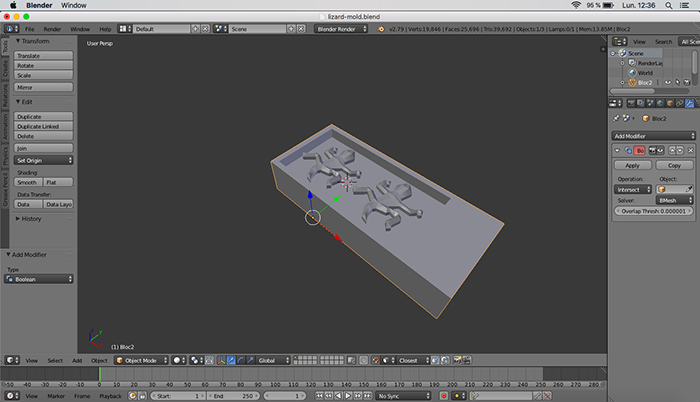
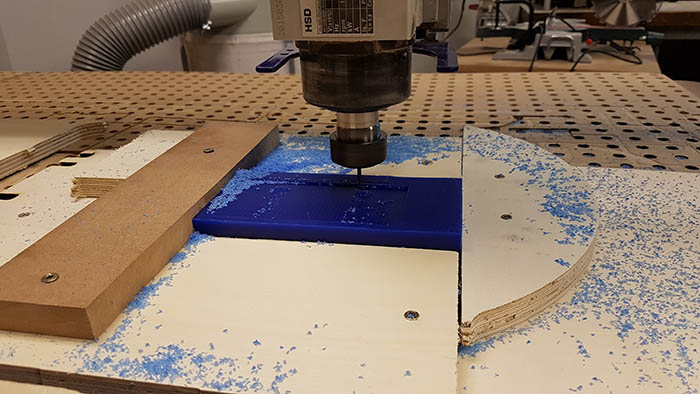
Milling the mold in wax
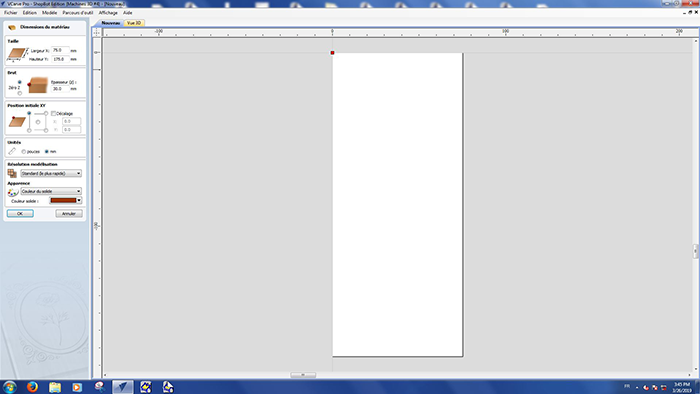
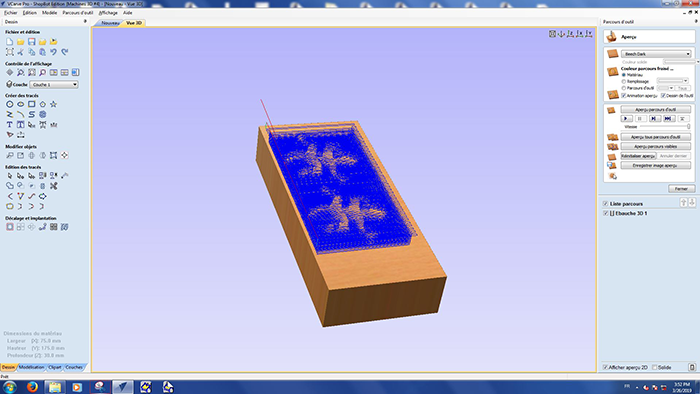
The process for milling in 2.5D in VCarve is quite similar to what we saw when milling in 2D. I set up the dimensions for my block of wax (17.5 cm x 8.5 cm x 5 cm), imported my STL file from Blender and created the toolpaths.
Initially the toolpaths were too long and went too far for my needs. As you can see on the screenshot below, the paths goes where there is nothing to mill.
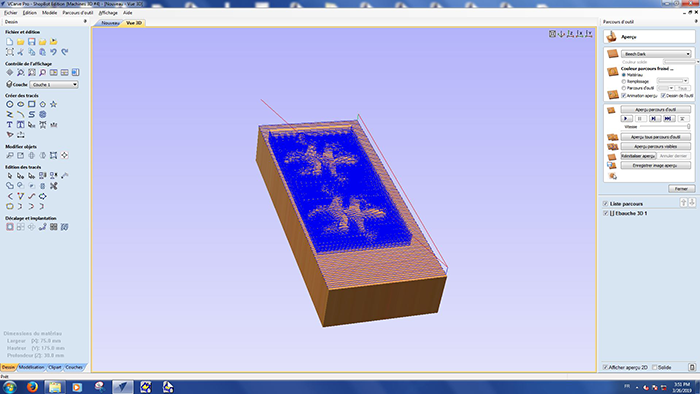
To avoid unnecessary machining, I had to create a rectangle in the 2D drawing view and then tell the software to bind the toolpath to that rectangle.

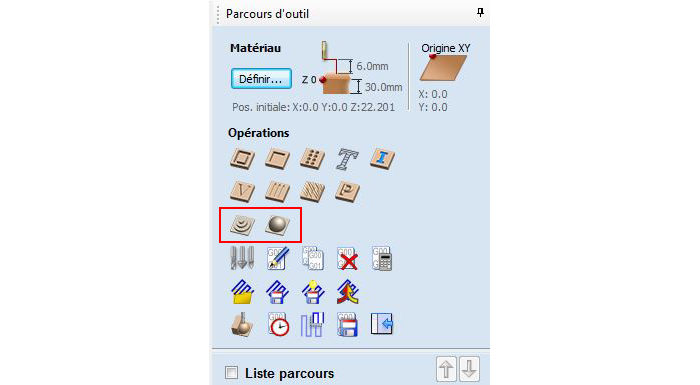
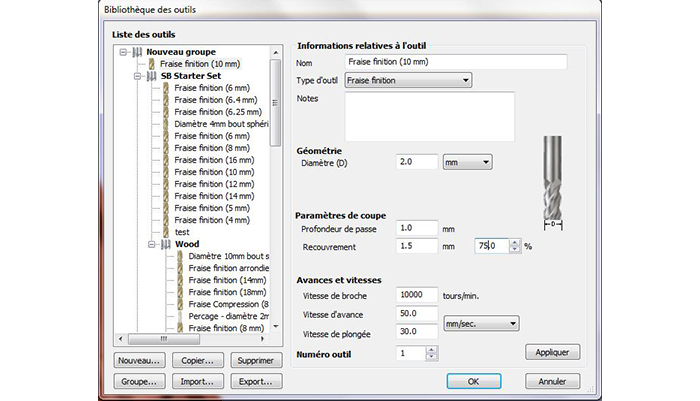
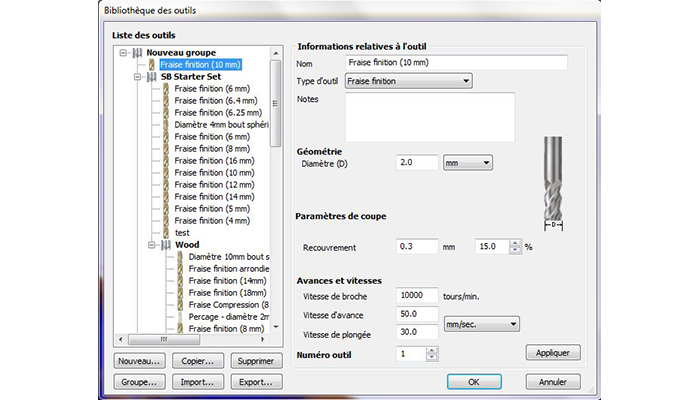
Then I set up the roughing and the finishing paths. I used a 2 mm end mill at 50 mm/sec and 10,000 RPM for both. For the rough mill I used a 75% stepover and 15% for the finish.
Here is the setup I used to keep the block of wax in place. I also added double sided tape underneath to be sure because during our tests for the group assignment the mill failed twice because the block wasn't properly kept in place.
The rest of the procedure (XYZ origins, safety measures...) is the same as what I listed in week 8. The mill lasted for about 2 hours.
Do NOT use the computer driving the shopbot during the mill! A colleague used it to prepare his VCarve files during my machining and it crashed... fortunately, it the mill stopped right at the end of the last roughing path! I just had to launch the finishing path.
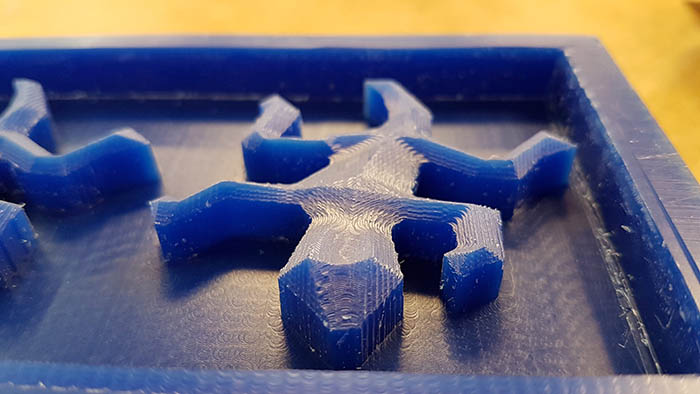
Here you can see the difference between the roughing and the finishing.
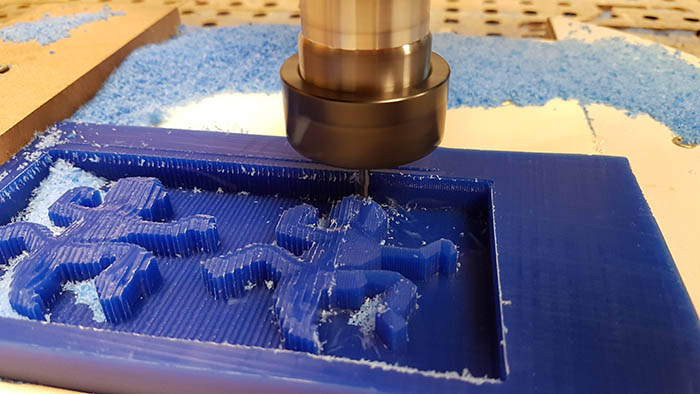
The finished product is nice but you can still see some striations. My 15% stepover was not enough, 10% stepover with a ball endmill could probably have done the trick. An offset cut might have given better results as well. I found a lot of good advice on this page to improve this process for next time.
Making the mold in silicone
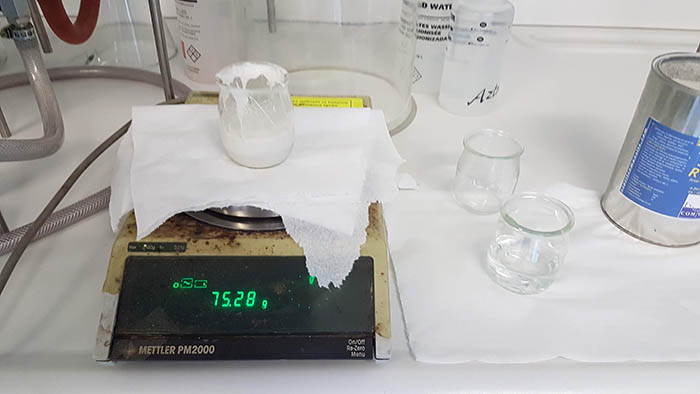
First thing we need to do is get an idea of the volume of silicone we'll need to make to fill our mold. So I poured water into the block of wax and transfered it in a container. Then, in a similar container, I poured the same quantity of silicone.
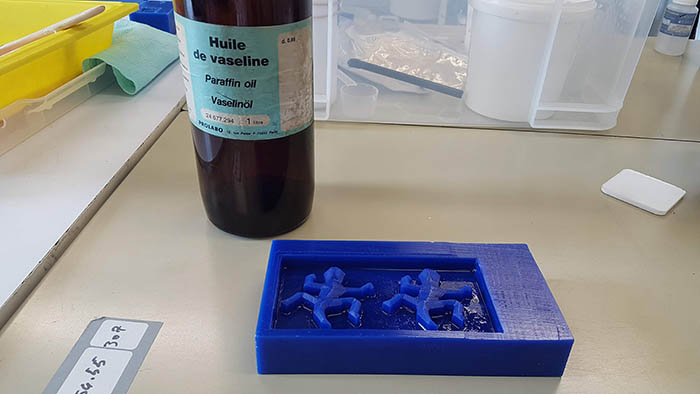
Before I go on with the silicone, I poured a little bit of paraffin oil in my mold so that the silicone is easier to get out afterwards.
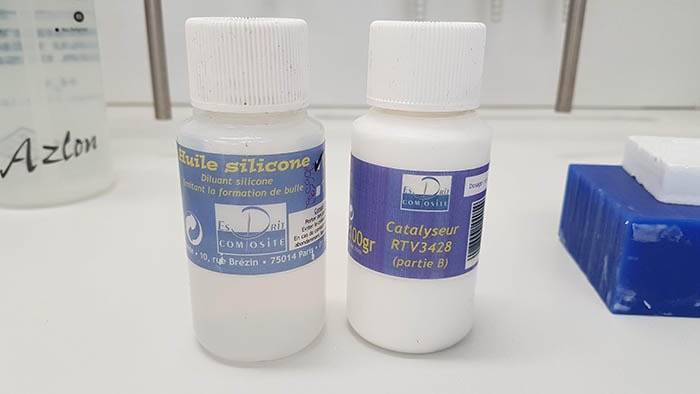
Then I add the catalyst and some silicone oil to prevent bubbles. The catalyser is 10g for every 100g of silicone.
I stir for 5 minutes and slowly pour the silicone in the mold. Making sure the silicone gets in every corner is not easy. The vaseline is not helping at this point and the silicone is quite thick.
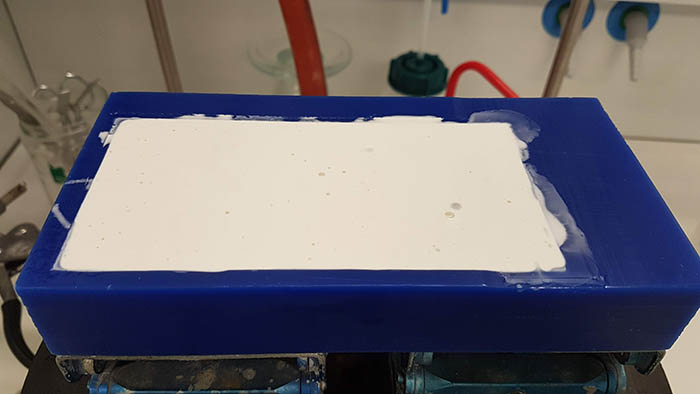
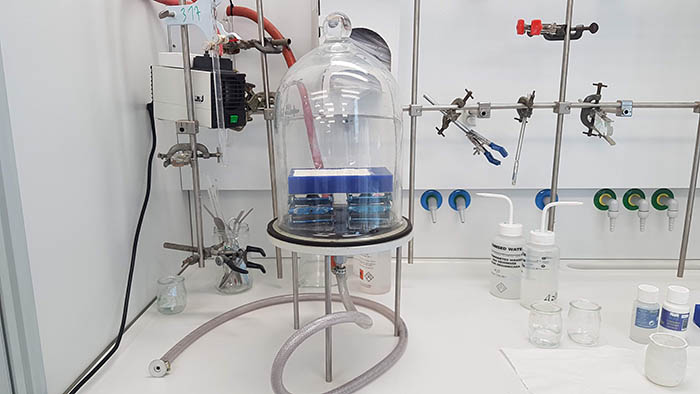
Then I used a vacuum chamber to remove the bubbles. As you can see, the liquid expands with vacuum and we can see the bubbles on the surface.
Releasing the vacuum several times improves the degassing.
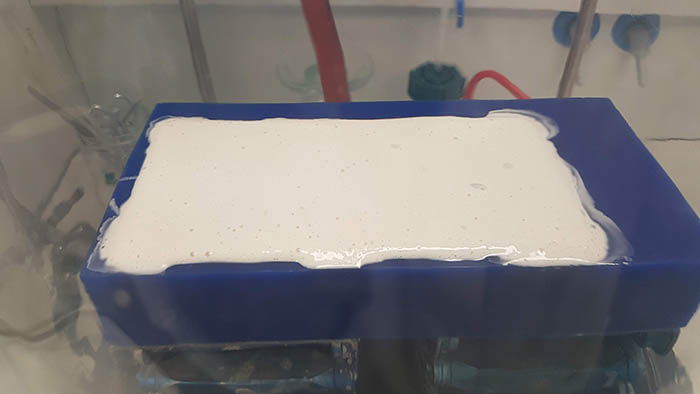
Now we wait 24 hours... and it didn't work. The silicone didn't cure at all, it was still as liquid as yesterday. As it turns out I didn't use the right catalyser...
So first I had to remove all the silicone. That was a real pain. Silicone is thick and sticky, and regular dissolvants like acetone or white spirit don't do anything. If anything it makes it worse. Fortunately we had some silicone oil left, which is a diluent. Adding the oil helped a lot, but it was still a pain to remove every single bit of silicone from the edges. But after an hour my piece was clean and I could start the whole process again, with the right products this time.
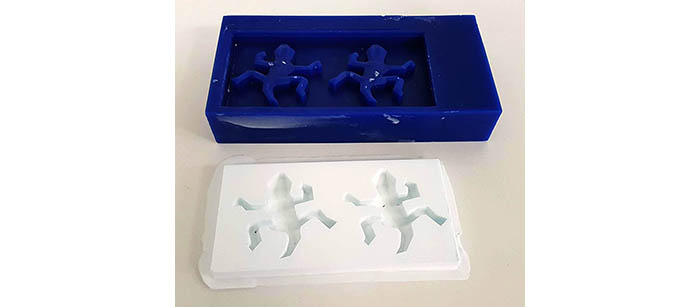
I didn't take any pictures of this because I had my gloves on and it was too much of a hassle to take them off at each stage. But here is the end result! The mold is ready!!
Casting the piece in different materials
First I will cast my piece in an acrylic resin called "plasticrète". The main advantage is that it cures quite quickly (3 hours).
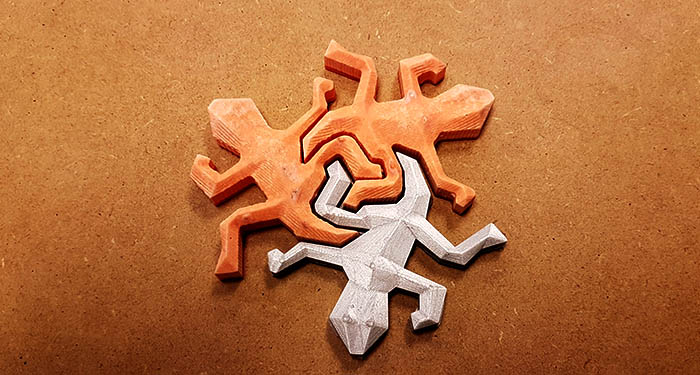
I mixed the 2 parts according to the specifications, just like for the silicone. Because plasticrete is white, I thought I would try adding a touch of color so I added a couple of drops of food colorant, as a test.

I let it cure for 3 hours and uncast them! Most of the food colorant moved to the surface, but enough remained to give it a nice orange tint. It looks a little bit like candy actually!

And the final result, along side a 3D printed version of the model! I love it! The offset is bigger than I anticipated, but it still looks cool. I will cast it and mill it in other materials to extend my little collection. I'll post the new versions here.
Conclusion
I learned to mill in 2.5D and some chemistry this week! Handling chemicals is not my cup of tea I'm afraid. Chemistry was never my strong suit in school. But having a mold to cast the same piece over and over with perfect precision is very useful. I'll think twice before choosing 3D printing now.