This week, I learned more about embedded programming and embedded system. Below is a small summary I read from the internet:
An Embedded System is any computer that is a component in a larger system and that relies on its own microprocessor. Basically, an embedded System is a computer system in which hardware and software are tightly integrated. For example, washing machine, where microcontrollers, motors, switches etc. are the hardware parts and inside the microcontroller (it's just like a small CPU along with some peripheral components like timer, counter,etc. or in layman’s language a tiny computer) a program is embedded that tells when to rotate motor, what operation should be performed after pressing this switch, how much quantity of washing powder, water should be taken, etc.
The basic properties of an embedded system are:
1. They should be real time systems meaning your output should come in real time meaning the time at which you want your output.
2. They are dedicated systems. Taking example of washing machine as discussed above you can see that you can use that system for washing purposes only, you can’t use it for any other application.
Now, Embedded system programming is programming an embedded system considering real time constraints using languages like assembly, C, etc. Then finally the program written in these languages is converted to hex code before uploading it to the microcontroller.
What is a Datasheet?
A datasheet lists out all the features of the product including both technical and nontechnical details and explains them in an easily understandable language. It is your complete encyclopedia on a part. A good datasheet will tell you everything you need to know about it. Use this information. Most design errors are due to (deliberately or not) overlooking certain specifications in the datasheet. It should give you the information you need to create a working and reliable product.
During the Electronics Design week, I designed the echo hello-world board. This week I will read and study it’s microcontroller (ATtiny45) datasheet and the program it. You can find the ATtiny45 datasheet Here.

Power is supplied to VCC and GND pins.
PB on PB5-PB0 pin stand for Port B is a 6-bit bi-directional I/O port with internal pull-up resistors. Port B also serves the functions of various special features of the ATtiny45.
Reset input pin can be used as a (weak) I/O pin, but mostly is used to program the chip with th In-System Programming.
Reading and understing the datasheet has helped me to program the microcontroller.
For this assignement, I chose Arduino as the programming language. I first downloaded and installed Arduino IDE to program the board.
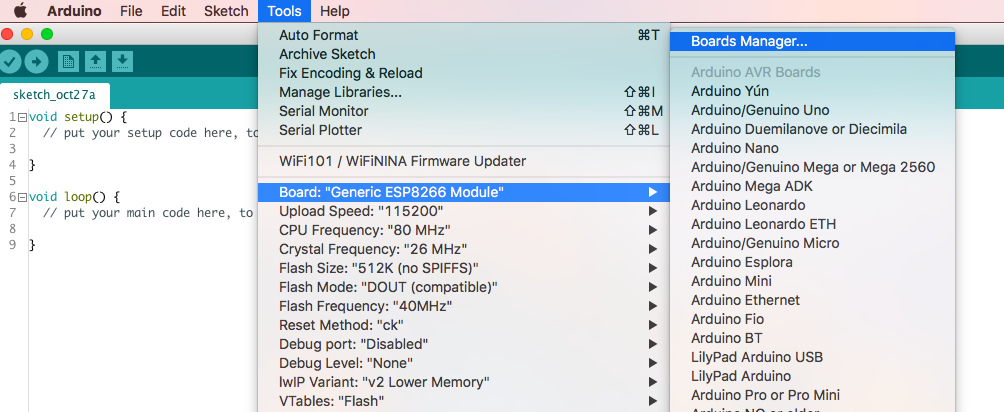
Before starting programming, I have to add the ATtiny45 board for Arduino IDE to recognize it. I click Tools>Board>Boards Manager, to add it from an external library.
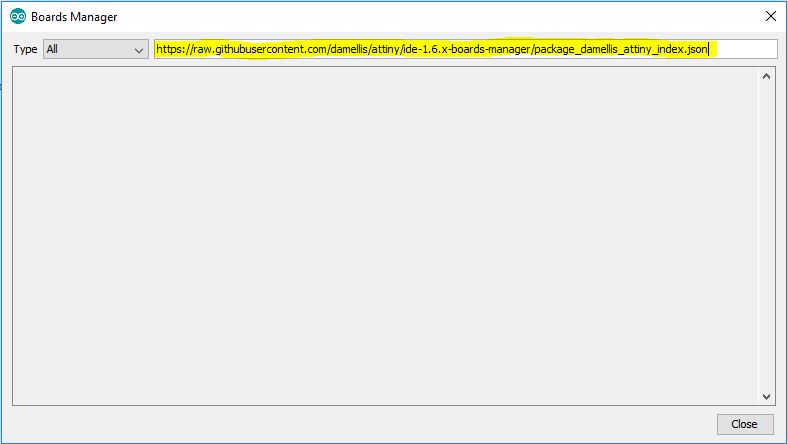
Next, I copied this link of ATtiny library to the boards manager window: https://raw.githubusercontent.com/damellis/attiny/ide-1.6.x-boards-manager/package_damellis_attiny_index.json
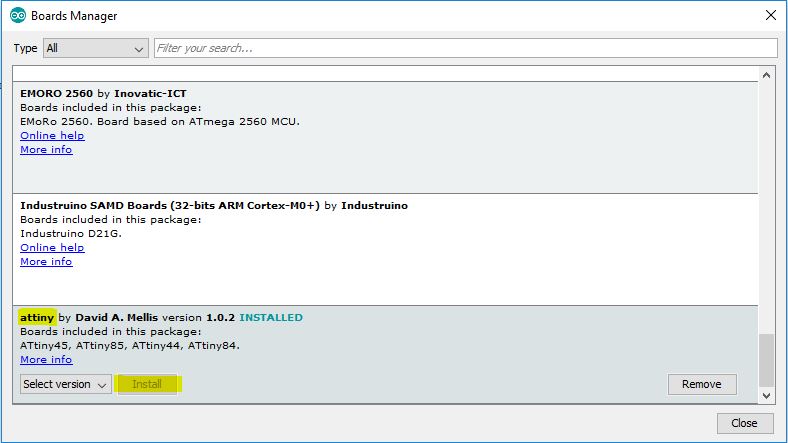
Next, I selected the ATTiny board library, and installed it.
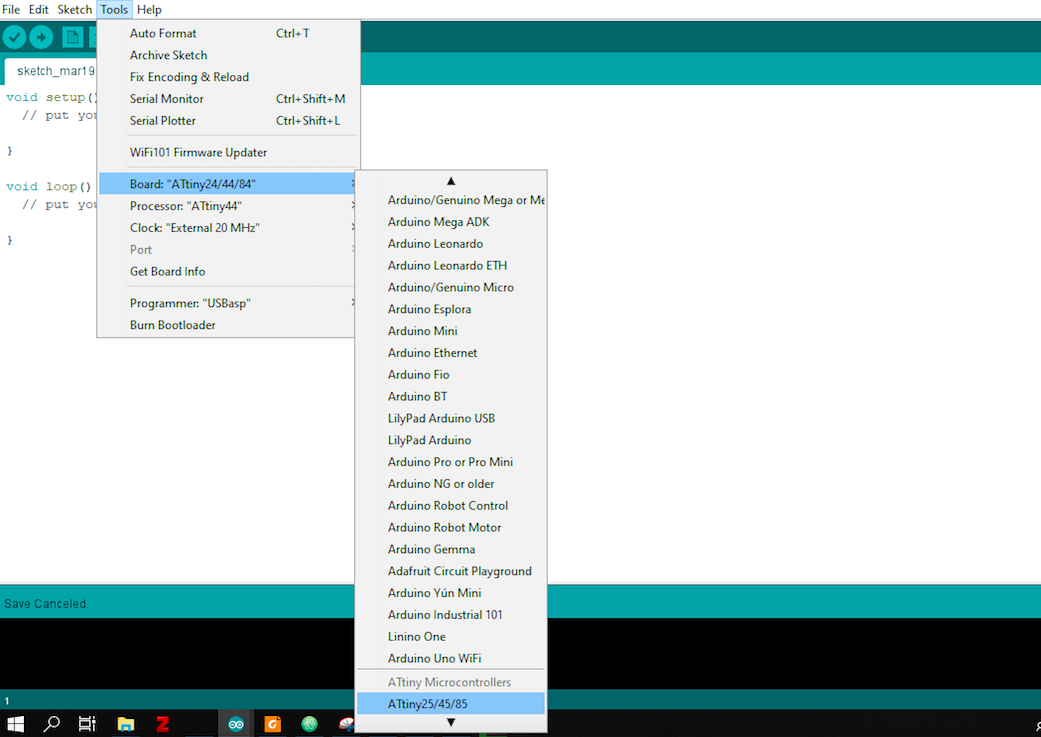
Now, I can easily go to tools>>>boards and select ATtiny45 from the bottom of the list.
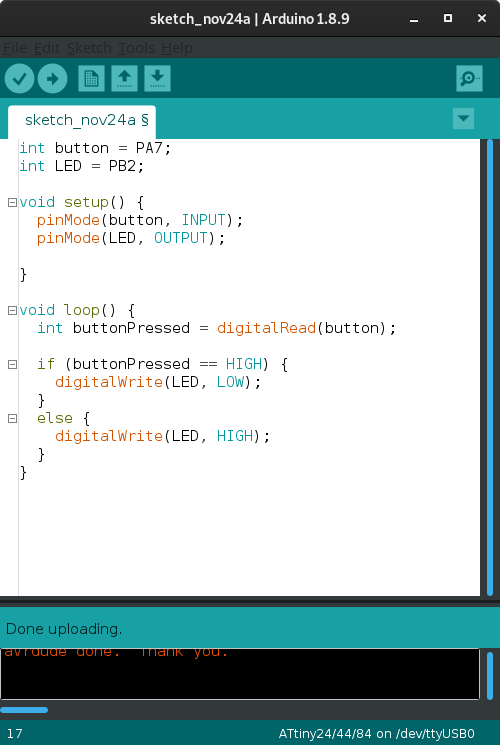
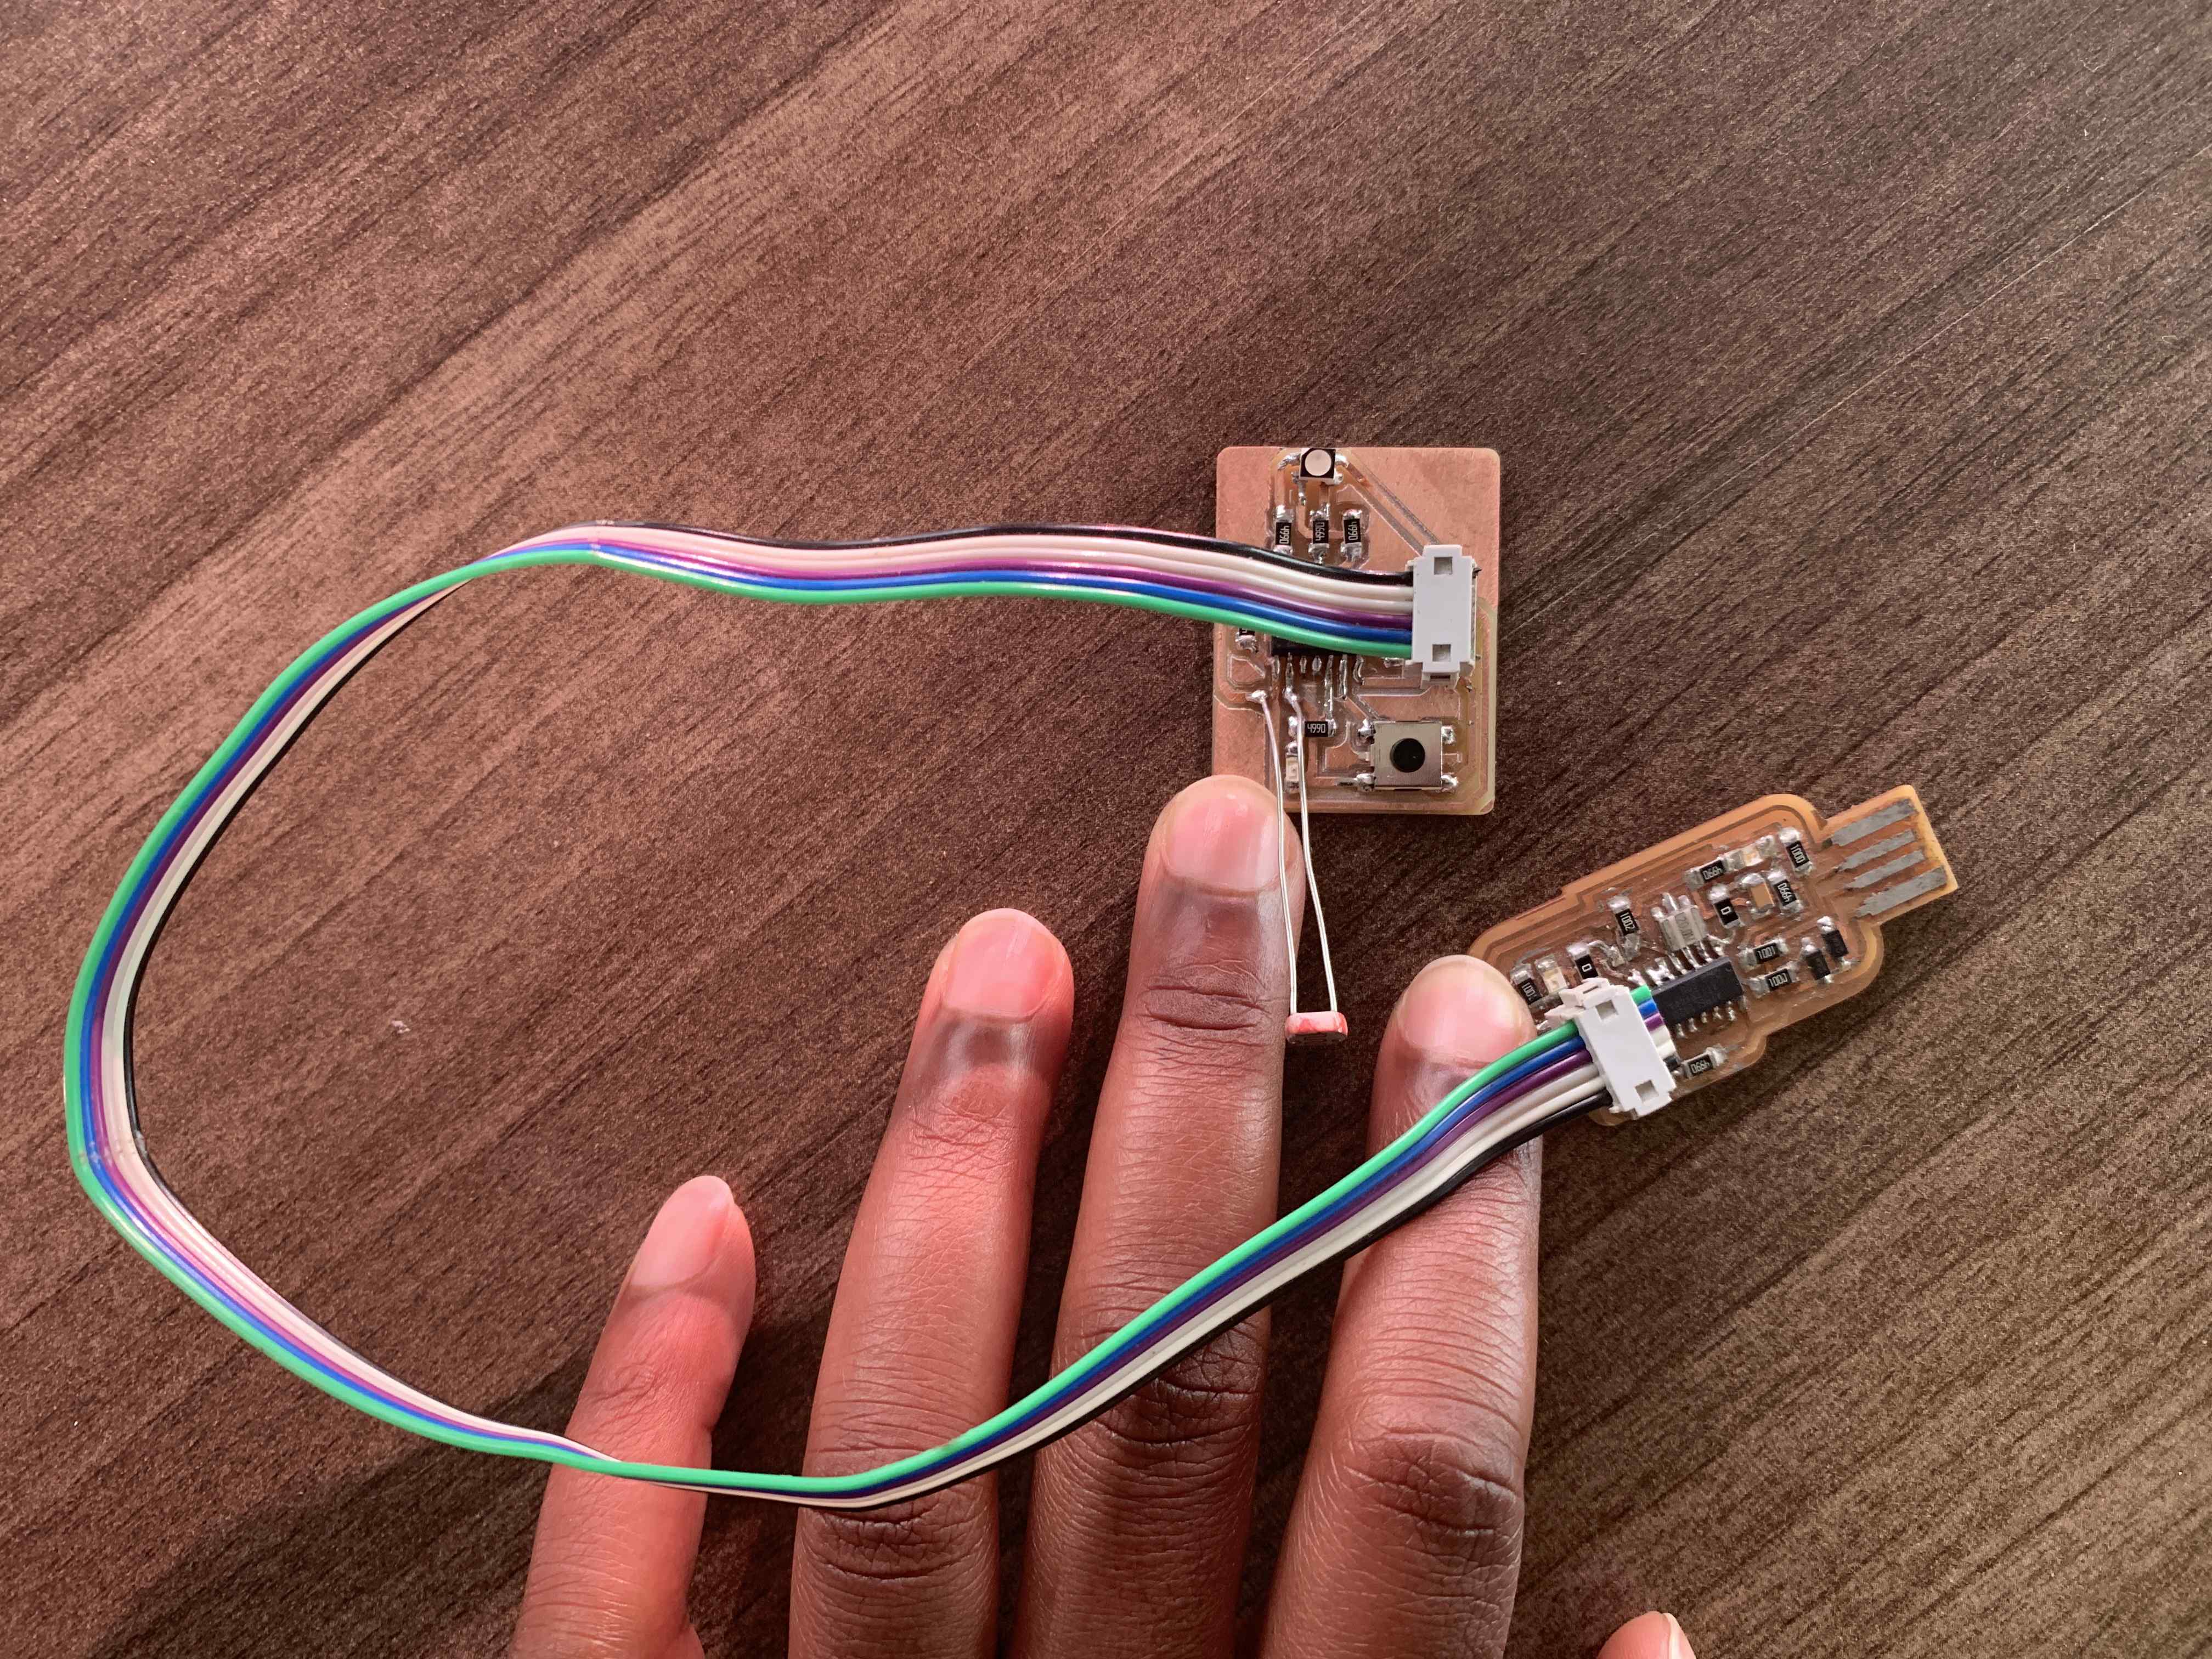
Next, I uploaded the button blink program to the Microcontroller:
File: