Computer-Aided-Design
2D and 3D designs
Computer-aided design is possibly one of few Fabacademy modules that I have background in. In spite of that, it's probably the one I was worried about the most as it can get really frustrating. I have had experience in using Rhino and Fusion 360 in college, about 4 yeas ago. 2D design, however, is something I work with on a daily basis.
2D CAD
Starting with 2D computer-aided design, I decided to draw a flower, using an image as a reference.

I added the image on a locked layer, and added to it 3 layers: Neutral, Shadows, and Highlights. This is the best way I've been using to reproduce a picture in the form of illustration, and it makes sure as many details as possible are illustrated.

I first created the neutral layer - just a flat layer defining the borders.

Using the image, shadows are defined.

Added to the shadows are the highlights. This shows both layers.

When the neutral layer is shown, the flower appears complete.

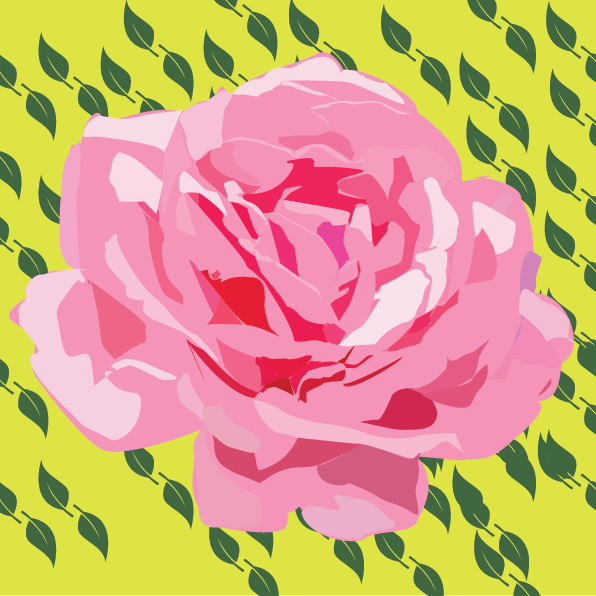
I decided to add leaves to the background of the illustration.

and this is how it looked eventually. Below is the image exported as PNG:

3D CAD
For the 3D part, I decided to go for a couple of drawings.
I started with a water bottle.

First, I inserted an image of a water bottle through Insert -> Attached canvas.

Next, I sketched a line in the middle of the bottle and marked it as a construction lines through the sketch palette.

I used Sketch -> Spline to sketch the bottle. I only sketched half of it.

Using the offset command, the drawn sketch is duplicated at a 3 mm offset.

Using the revolve command, I revolved both sketched around the construction line in the middle, at 360 degrees.

Resulting in this final product.
Next, I decided to design a decore bowl:

I started with the first quarter of the base.

I mirrored it vertically.

and then mirrored it horizontally.

I extruded the base at 25 degrees.

I use command "Shell" at 9 mm to get the final product.
Files
2D CAD:flower.ai
3D CAD:
Bottle.stl
Bowl.stl