Week assignments
Group assignment
- Characterize your lasercutter, making test part(s) that vary cutting settings and dimensions
Individual assignments
- Design, lasercut, and document a parametric press-fit construction kit,
- accounting for the lasercutter kerf,
- which can be assembled in multiple ways.
- Cut something on the vinylcutter
Lasercutter characterization
You can find documentation about our group assignement on our group page.
Our lasercutter is a RS-1060L with a 90W CO2 tube. It is by far the most used machine in the fablab and we perform a regular maintenance on it. Despite this fact, our tests allowed me to learn a lot on our machine.First test
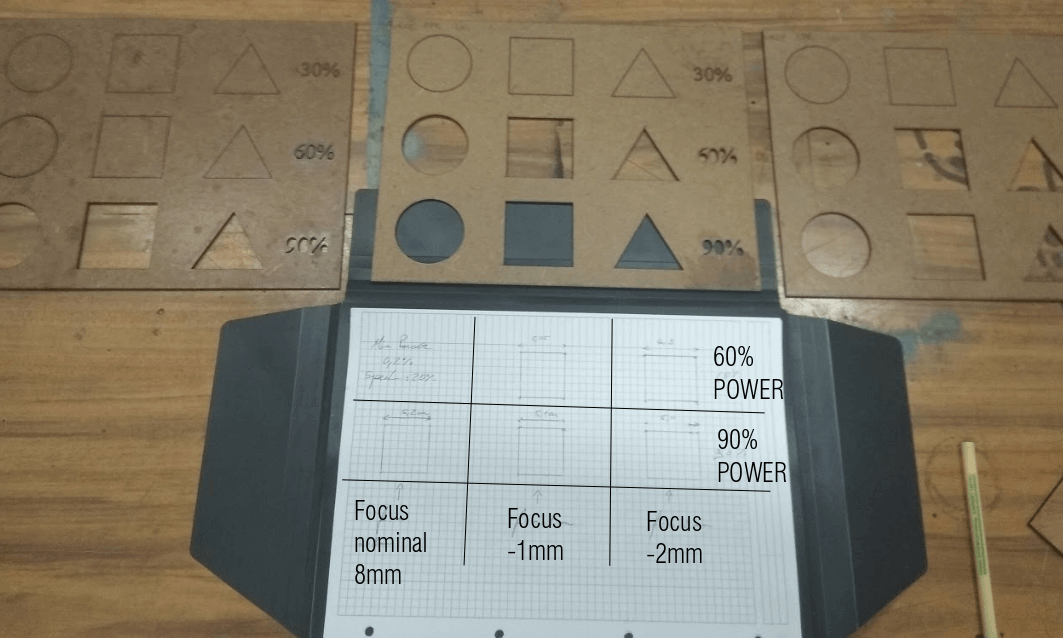
As a first characterization test we cutted circles, squares and triangles at different powers and focus.
The test material is mdf-like and around 2.3mm thick.
I measured the outside square width and forgot (I take the responsibility of the group for it) to measure the inside square width. So we had to perform another test.
Anyway, the first test gave us the oppurtunity to witness that the best focus is at 6mm.
Indeed, the best cut and the best square precision (outside square width=5.0mm) is for 90% at a focus of 6mm.
Here is the svg file.
Second test
On the second test we cutted only squares at different powers and focus.
On the picture below, rows 1, 2 and 3 are the cutted part of rows 4, 5 and 6.
The green square indicate the focus of the rows and the blue square indicate the power of the columns.
Figures with the double arrow are the measured values of width of inside and outisde parts.
Figures underlined in red are the calculated values of the laser kerf.
Here is the svg file.
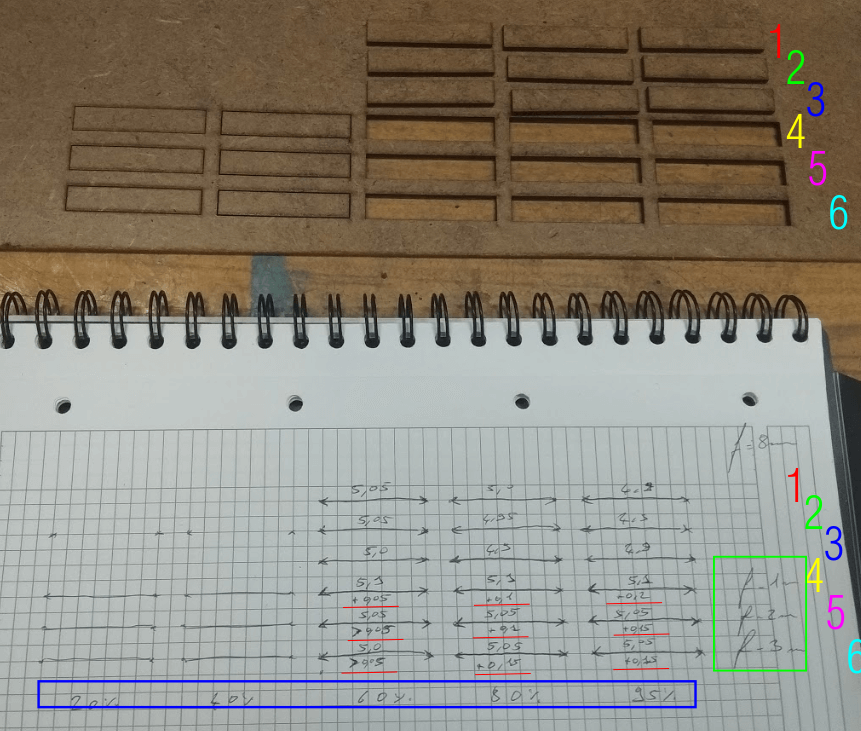
We found the laser kerf to be less than 0.05mm at 60% power with a 6mm focus.
We used a caliper to do our measurements and it may have introduce some deviations.
Third test
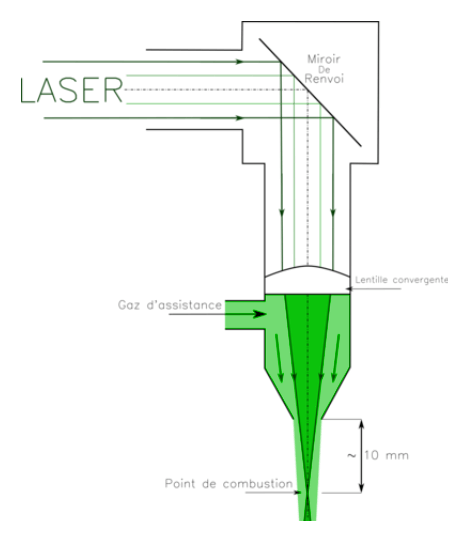
Our intructor was still puzzled of the results and performances of the machine. By performing the regular maintenance he realized that the curved size of the lens was turned down. By checking the documentation, we realized that it was upside down as we can see on the picture below.
Therefore we relaunched our tests and get to the conclusion that the best focus is, as adviced by the manufacturer, at 8mm. Our results about the laserkerf stayed at 0.05mm at 60% power.
My press-fit construction kit
Step 1: The concept
We have to design a pressfit construction kit that can be assemble in different ways. Staying in the world of chess, I can design chesspieces. To fit the assignement I will use a chess rule called "promotion". It requires a pawn that reaches its eighth rank to be immediately replaced by the player's choice of a queen, knight, rook, or bishop. Usually, a player will choose a queen.
==> I want to be able to transform the pawn to a queen.
Step 2: The parametric design
We have to account for the laser kerf in our design and I want to be able to switch my material in my design, therefore I created 2 parameters as shown in the picture below:
- Material thickness
- Laser kerf

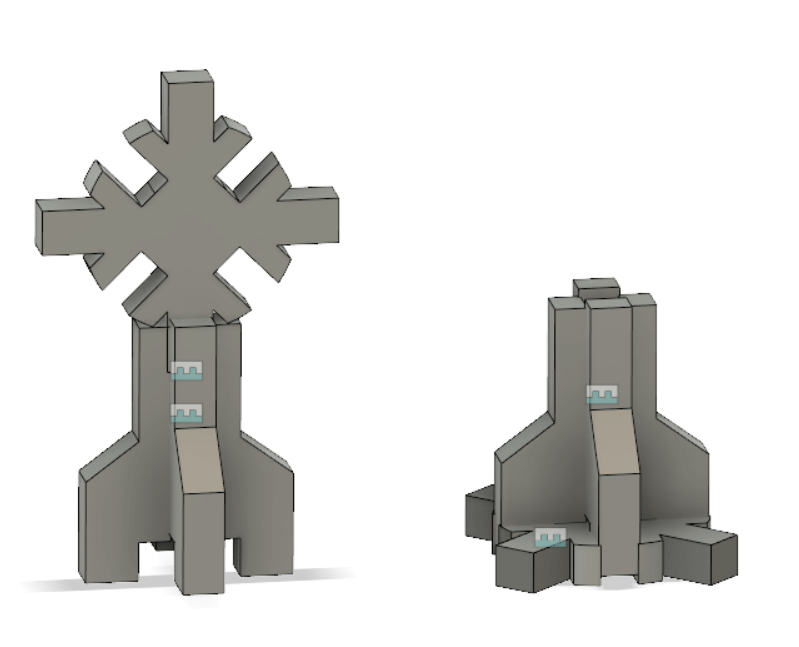
My pawn and queen will be in three parts. The pawn base will transform into the queen’s head. Here is a screenshot of my sketch.
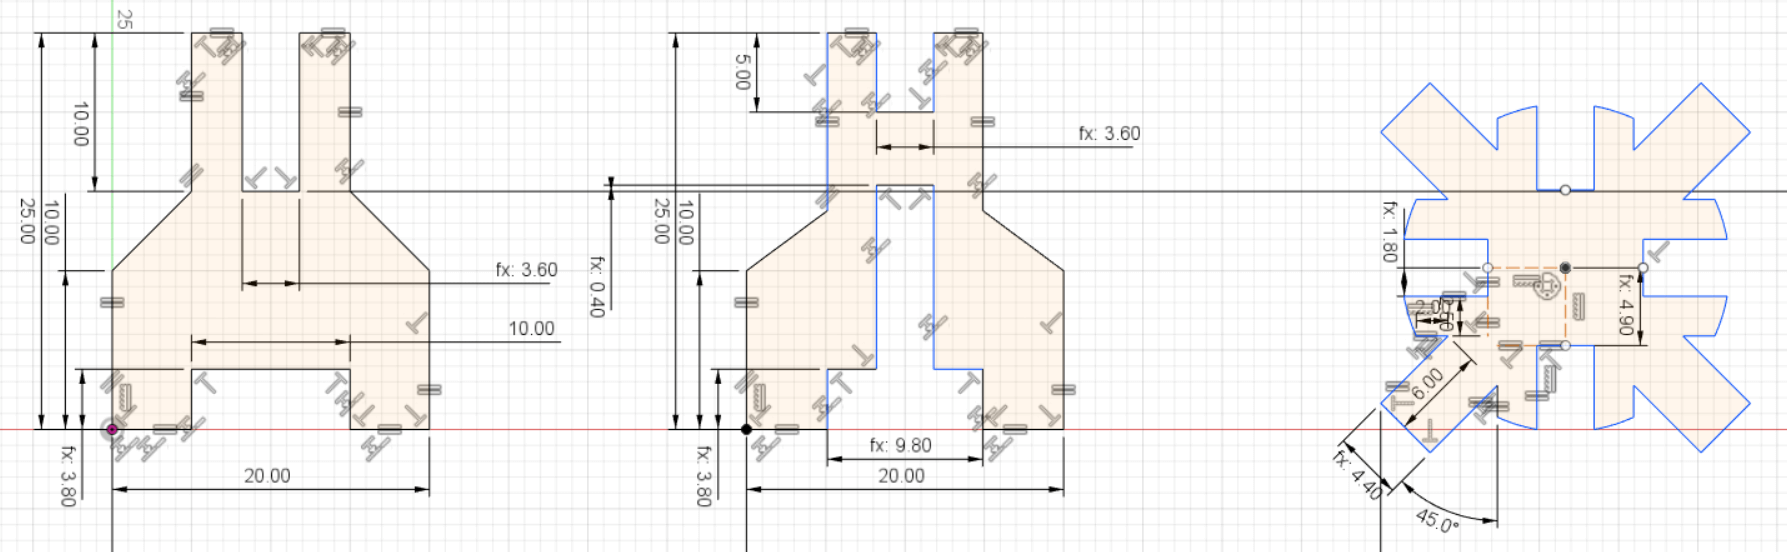
Every dimension that begin by "fx:" is a parametric dimension to account for the kerf and the material thickness. If it is a female part the formula is "Mt-2*Lk". If it is a male part, the formula is "Mt+2*Lk".
Then I can extrude my sketch and assemble the bodies to validate my design.
Step 3: Setting up the lasercutter parameters
Once my svg file is ready I send it to visicut to setup the laser power, the laser speed and the laser focus.
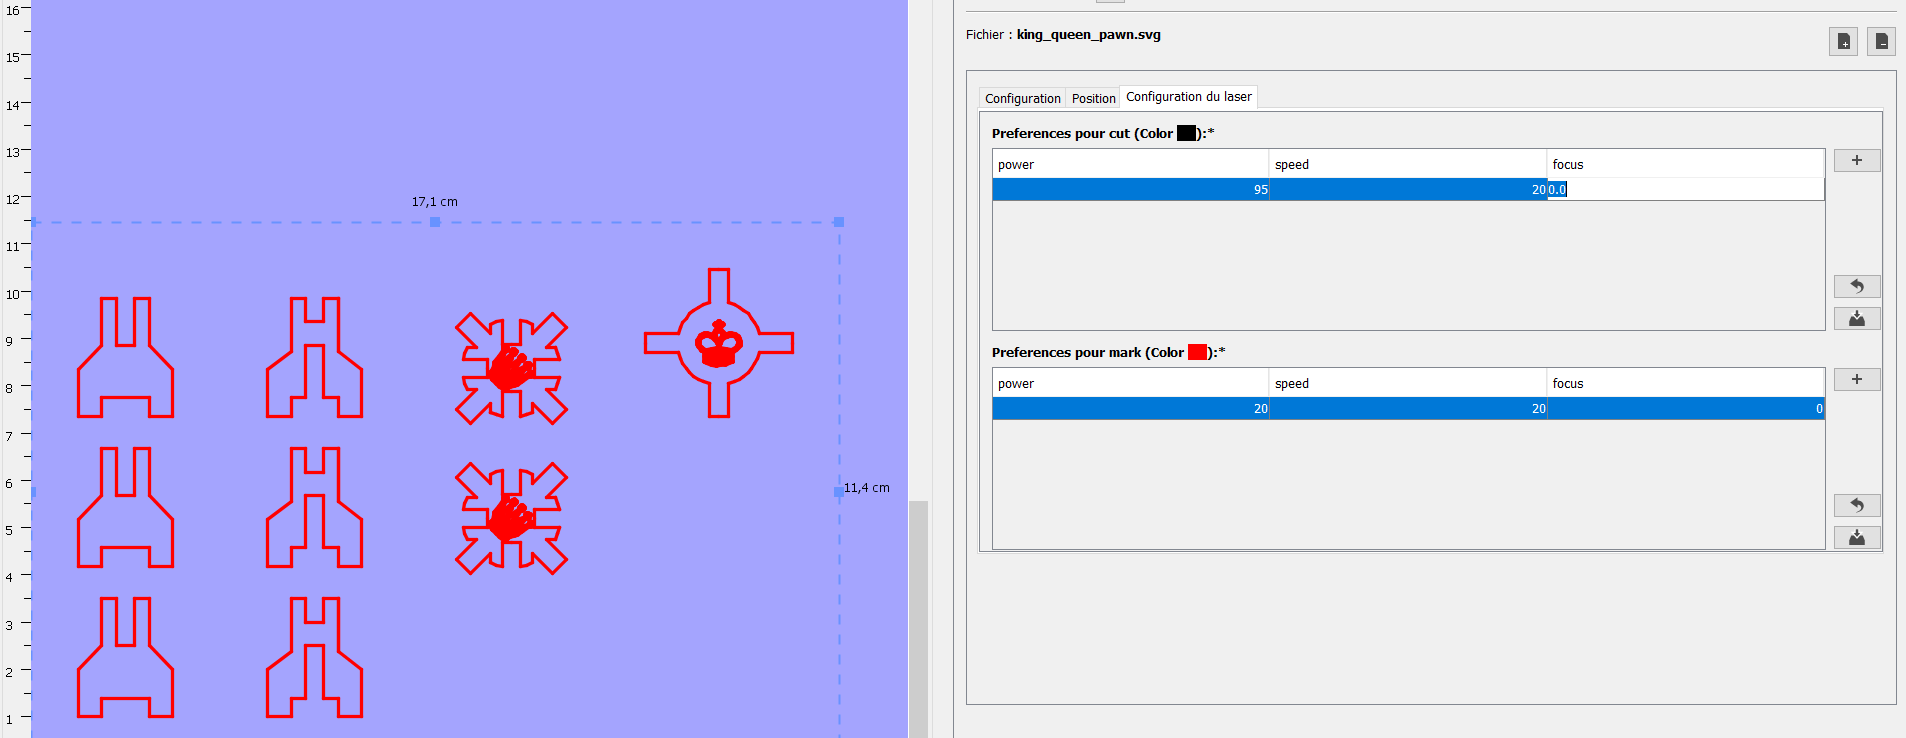
I am using plywood for the chesspiece. I cutted it using 95% of power and 20% of speed.
Step 4: Cut the pieces
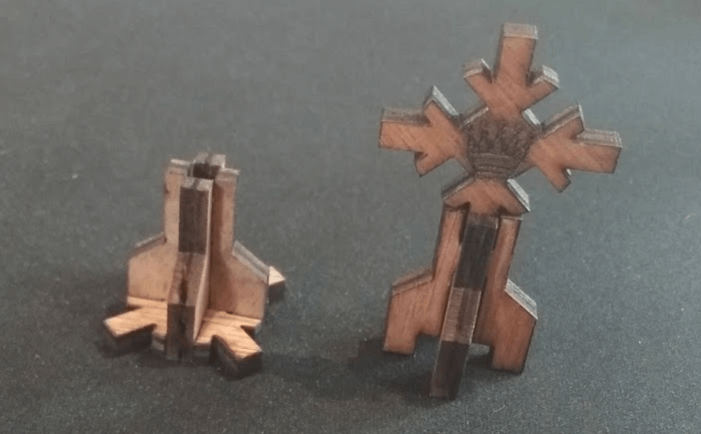
I first used 0.05mm for the laser kerf parameter but the pieces were not holding well together. I tried to move it to 0.2mm and the fitting was better.
The picture below shows the parts at the end. The pawn base can be used as the queen's head.
Files
My works on the vynilcutter
My Big Bang Theory sticker
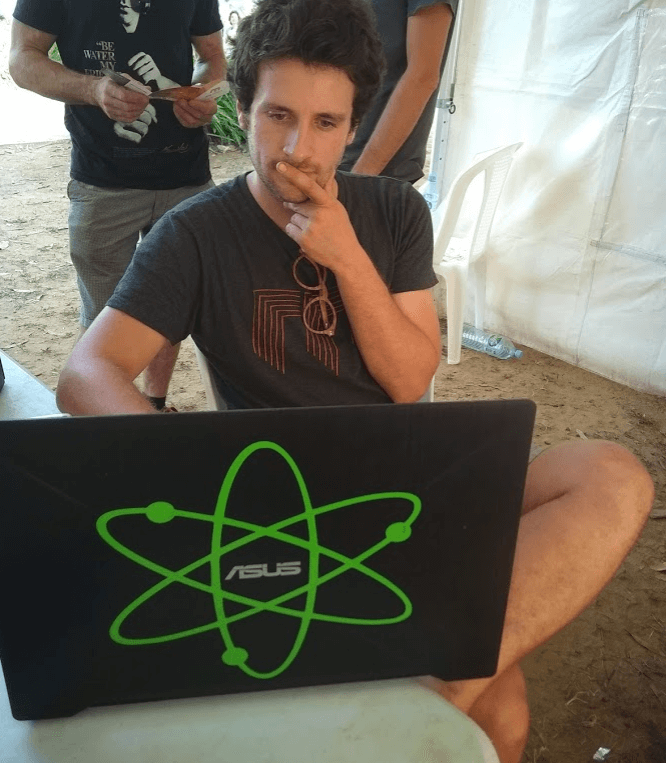
I really like the big bang theory TV show. This is why I decided to cut the logo of the show. I found this image on internet. I have to resize it and modify it. Since I want to still be able to see the brand of my computer, I had to delete the point at the middle and find the good dimensions for the lines not to cross the brand.
![]()
Working in Incskape
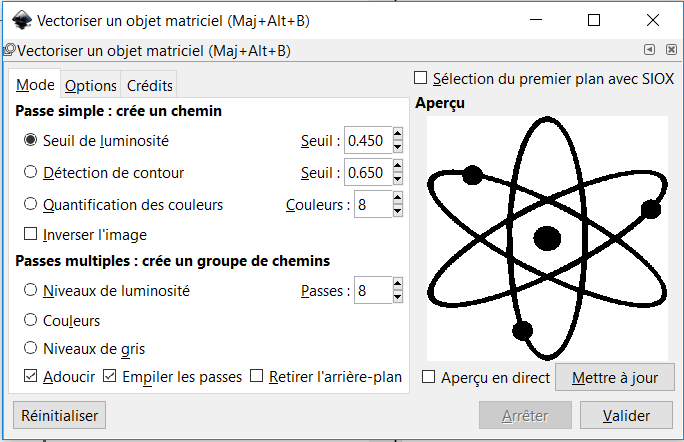
First I had to vectorize the picture:
Then I had to separate the different elements to be able to remove the central point.
![]()
And finaly I resized the logo that you can find here.
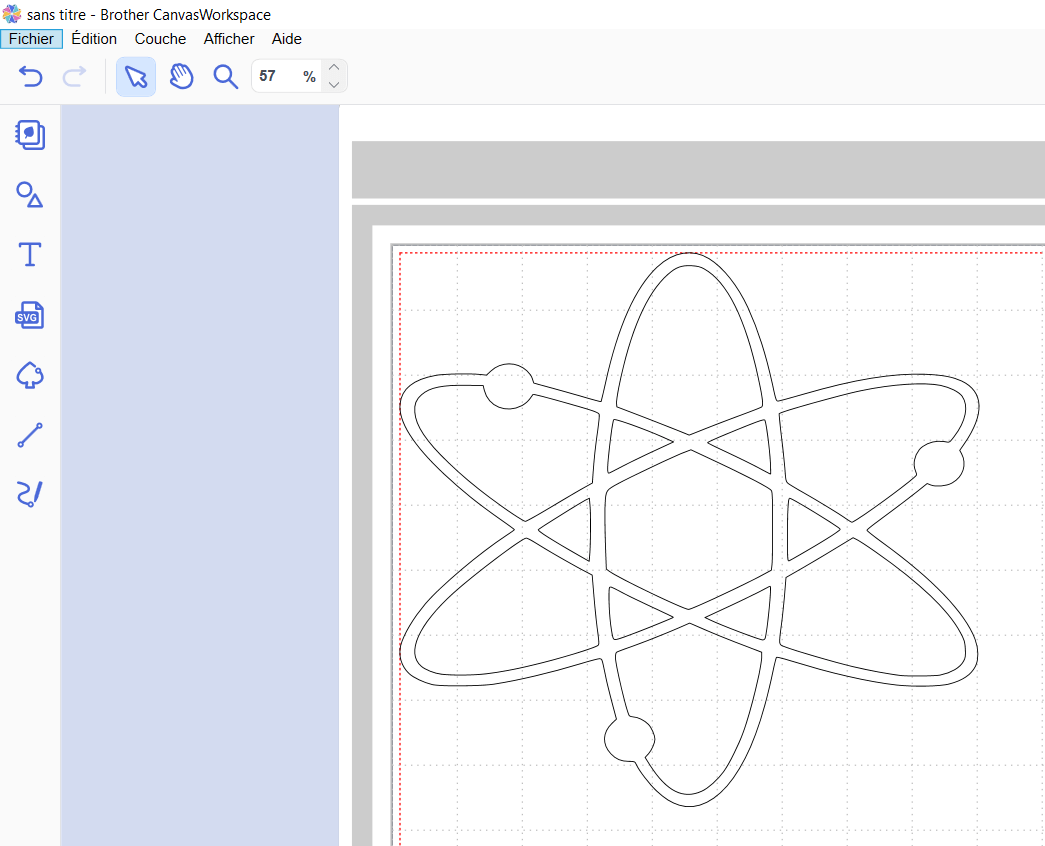
Working in Brother Canvas Workspace
The next step is to import the svg file into the Brother Canvas Workspace software. I just had to check my dimensions into this software and then I exported it into a fcm file that you can download here.
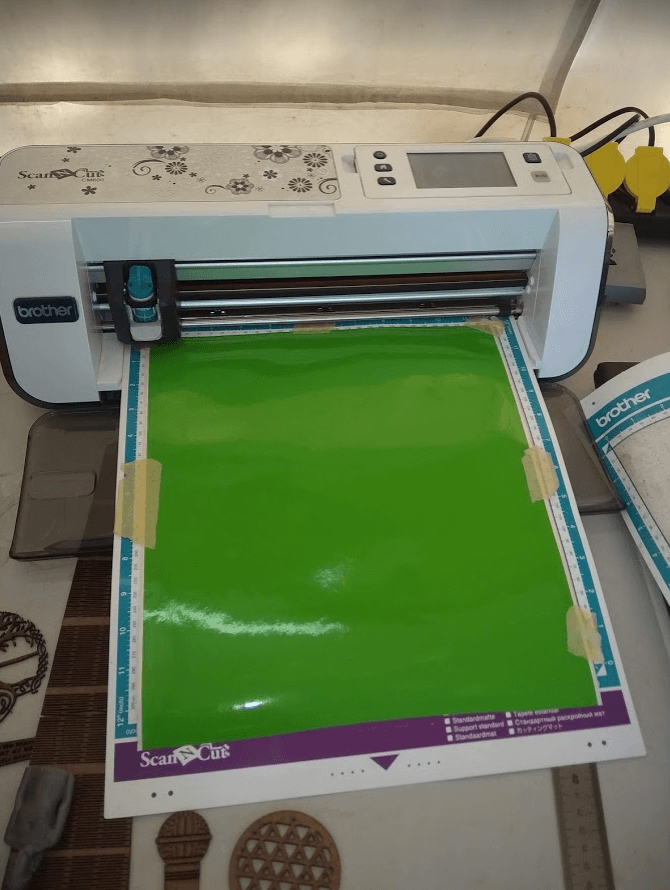
Cutting the file and applying it on the computer
First I attached the vynil on the workspace with tape.
After the cut I had to remove unused part with tweezers.
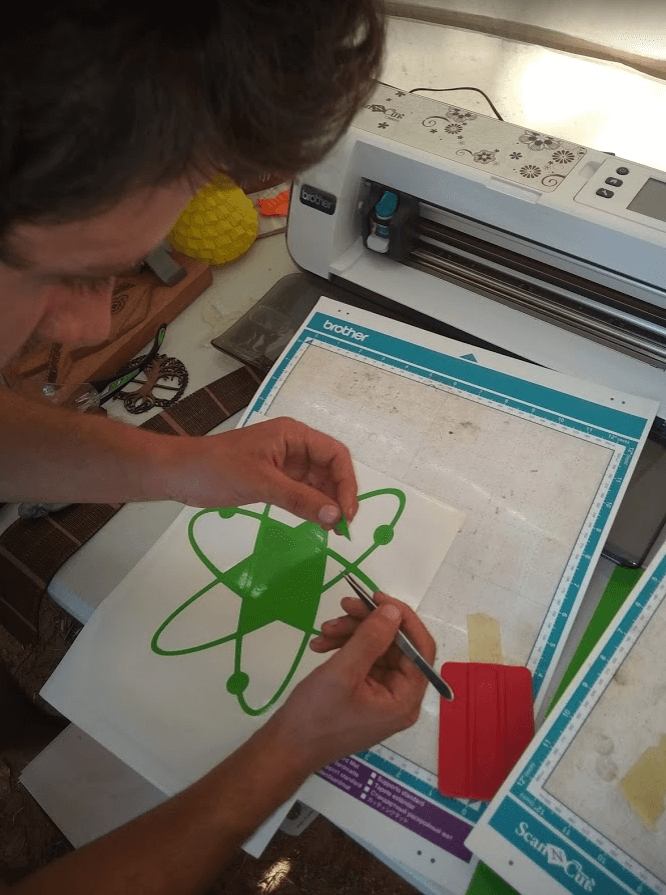
Then I used a tranfer film to tranfer the vynil from the paper to the computer.
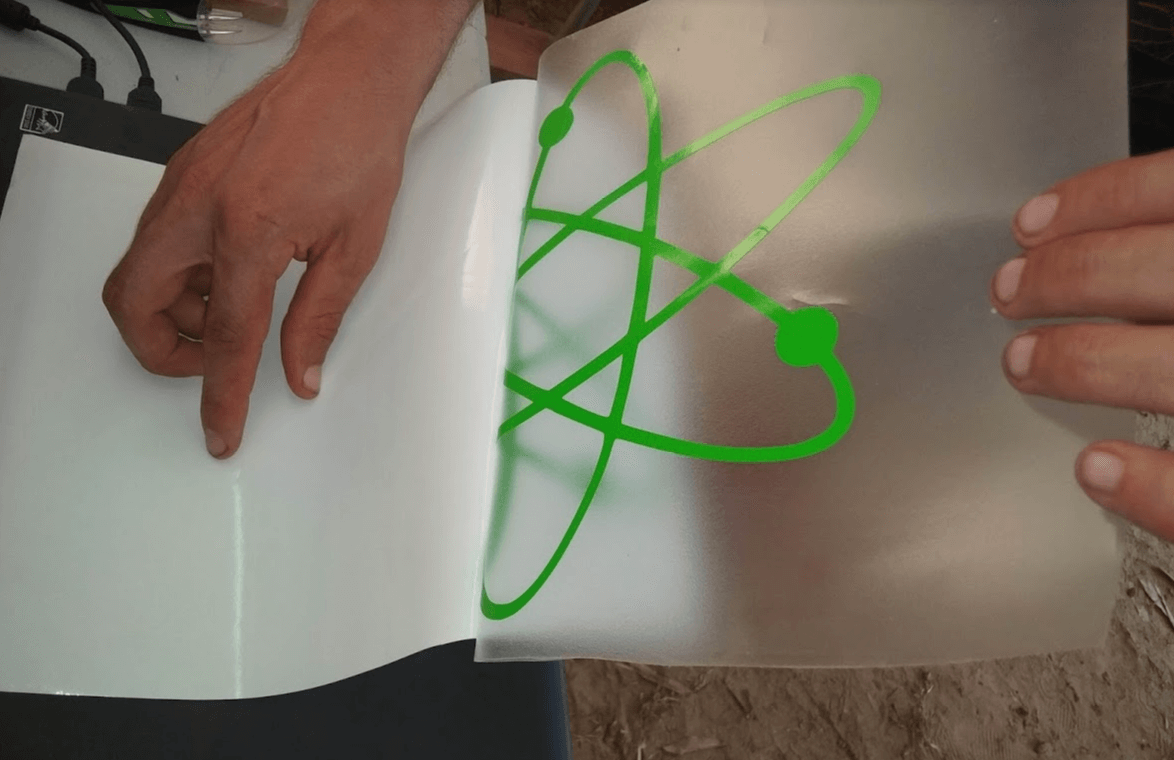
I eventually transfered the logo to the computer.
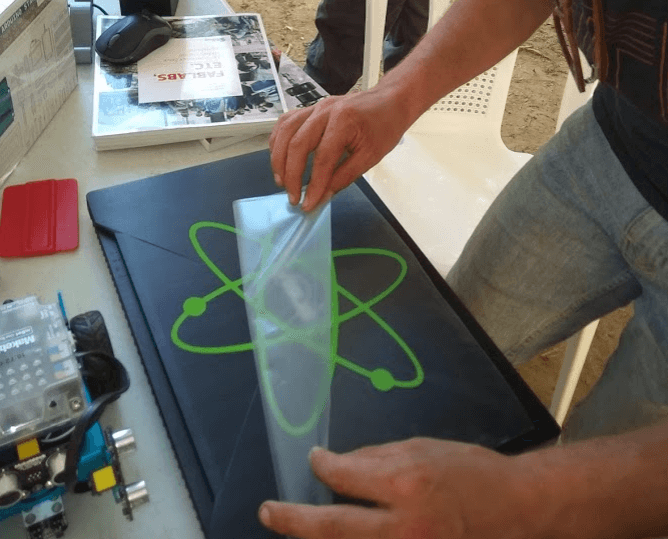
And here is the final result.
The scan and cut capability
I choosed to use the scan and cut function of our vynilcutter. I slightly changed the NGO logo of our fablab to try how the cutter would cut rounded parts.
The vynilcutter is able to detect the external parts of a scan and vectorize it.
I only applied a 1mm offset which is a built-in function and it cutted the logo properly as you can see on the picture below.
Here is the svg file.
![]()
Remaining work
On the lasercutter
- I started to work on the other chesspieces but I encoutered some trouble to get my parametric design ok. I over-constrained my sketch and I only realized it when I tried to change the laser kerf parameter because the software returned me some errors.
- I still have to finish the design of the chessboard and cut it.
On the vynilcutter
I would like to cut different materials to create tickers or magnet for my fablab. I may have to make some tests on the pressure parameter and the cutter lenght.