Assignment
Design and 3D print an object (small, few cm)that could not be made subtractively
3D scan an object (and optionally print it)
Group assignment : Test the design rules for your 3D printer
What I did
- Learned the Basics of 3D printing
- Learned how to set up and troubleshoot the machine
- Designed 2 models in Fusion 360
- Sliced and generated Gcode in Cura
- 3D printed it in Ultimaker 2+
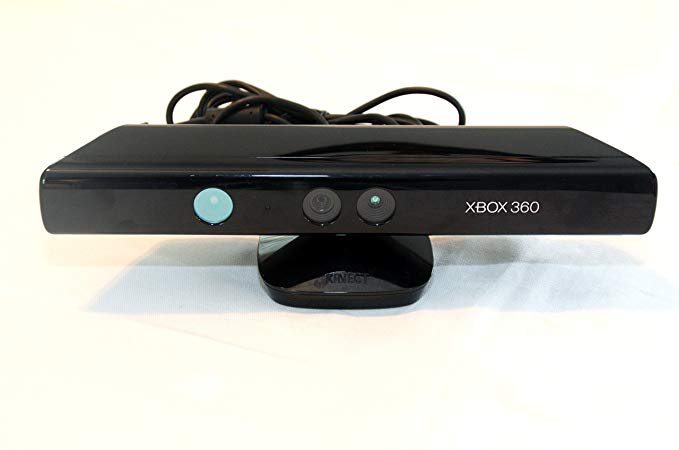
- Scanned two objects using Kinect Xbox 360
- 3D printed the scanned object
3D PRINTING
3D Printing is an additive manufacturing process that creates a physical object from a digital design. There are different 3D printing technologies and materials you can print with, but all are based on the same principle: a digital model is turned into a solid three-dimensional physical object by adding material layer by layer. In an additive process an object is created by laying down successive layers of material until the object is created. Each of these layers can be seen as a thinly sliced horizontal cross-section of the eventual object.(Source :- https://www.3dhubs.com)

Stereolithography(SLA)
This process that converts liquid plastic into solid objects.

These 3D printing technologies are also available in desktop 3D printers. Materials are limited to resins, but new varieties have appeared recently providing strength or flexibility to the final objects.SLA and DLP 3D printers produce highly accurate parts with smooth surface finishes and are commonly used for highly detailed sculptures, jewelry molds, and prototypes. Because of their relatively small size, they are not recommended for printing large objects.(Source :-https://www.3dhubs.com)
Fused-deposition molding (FDM)
This process that converts liquid plastic into solid objects.

The FDM printing process starts with a string of solid material called the filament. This line of filament is guided from a reel attached to the 3D printer to a heated nozzle inside of the 3D printer that melts the material. Once in a melted state, the material can be extruded on a specific and predetermined path created by the software on the computer. As the material is extruded as a layer of the object on this path, it instantly cools down and solidifies – providing the foundation for the next layer of material until the entire object is manufactured.(Source :-https://www.3dhubs.com)
Material Jetting (PolyJet and MultiJet Modeling)

The FDM printing process starts with a string of solid material called the filament. This line of filament is guided from a reel attached to the 3D printer to a heated nozzle inside of the 3D printer that melts the material. Once in a melted state, the material can be extruded on a specific and predetermined path created by the software on the computer. As the material is extruded as a layer of the object on this path, it instantly cools down and solidifies – providing the foundation for the next layer of material until the entire object is manufactured.(Source :-https://www.3dhubs.com)
Selective Laser Sintering (SLS)

Selective Laser Sintering (SLS) uses a laser to melt and solidify layers of powdered material into finished objects.
Printing Materials
The material used will affect the mechanical properties and accuracy of the printed part, but also its price.Table of materials used in an FDM printer is given below:

Ultimaker 2+

In Our Lab We have the Ultimaker 2+. Their product line includes the Ultimaker 3 family, Ultimaker 2 family and the Ultimaker Original. The company started out as an open-source printer company.Ultimaker 2 is the successor to the Ultimaker Original and was released in September 2013. MAKE magazine classified the Ultimaker 2 as the "best open-architecture 3D printer of 2014" and named it runner-up in the category "Prosumer FFF".
Parts of Ultimaker

(Source :-https://ultimaker.com/)

(Source :-https://ultimaker.com/)

Specifications of Ultimaker
Designing in fusion 360

I used Fusion 360 to design my file for 3d printing. I'm still learning basics of 3d designing.

I want to make something complex and interesting.
This shape is a bit complicated to design.
Once the design is finished. Right click the body and select 'save as stl'.
Stl file format is used for 3d printing.

The 3D file has to be sliced using some software. 'Cura' is an open sorce software by ultimaker for slicing 3D drawings.

There different parameters that can be changed manualy. The layer thickness can directy proportional to printing time. Nomally 20% infill is enough for most of the applications. Add more infill if it is necessary.

After slicing save the file to Memmory card and put the card in ultimaker.

The controller in Ultimaker is very simle. There is only one rotary switch an it is very easy to guide through the menu.

I used black PLA for my 3D print.

this is the image before removing support material. Since my shape is very complex and smal. I had to be very careful while remove support.
Download design file from here
Download f3d file here here

Hero shot

This printer is made by my classmate Akhil joseph
Group assignment
Design rules

Different 3D printing processes have different capabilities and different design restrictions. In this article we will talk about key design considerations that apply to all 3D printing processes.
I got a set of tests for checking the design rules. Luckly I find a full set of test from Thingiverse

We had help from the thingverse file. So we set the parameters according to it. We set the printing settings as below:
- Rafts:
- - Yes
- Supports:
- - No
- Resolution:
- -0.1mm or higher
- Infill:
- 30%

Parameters

The most important thing to remember while designing for 3D printing is the fact that your digital design will become a physical object. In the digital design environment, there are no laws of physics to adhere to, such as gravity.Each 3D printing process has its own limitations. Here are the most important design considerations that apply to all of them that you should keep in mind:
Overhangs

Wall thickness

warping

Level of detail

3D scanning using microsoft kinect

Kinect is a line of motion sensing input devices produced by Microsoft. Based around a webcam-style add-on peripheral, it enabled users to control and interact with their console/computer without the need for a game controller, through a natural user interface using gestures and spoken commands.

- Step 1 : Open KSCAN
- Step 2 : Create a new project
- Step 3 : Create a new project
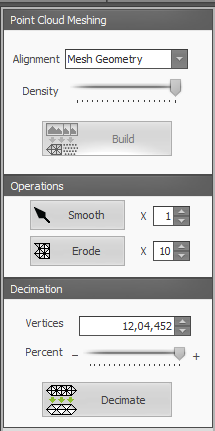
- Step 4 : Change the Generate type to MESH
- Step 5 : Change the Alignment type to MESH GEOMETRY
- Step 5 : Enable Batch Scanning and Change the Number of Scans to your preferance
- Step 6 : Click on Scan Button and rotate the object little bit after each sacn
- Step 7 : After scanning, delete any scan shots if you wanted and Select all the scaned shots
- Step 8 : Click on Combine button to combine all the shots.
- Step 9 : After Combining. Check the 3D mesh of the object is OK for you
- Step 10 : Then click Finalize button to finalize the output
- Step 11 : Export the file as STL or any other file you needed to a specific location you can remember

I used Export option and exported into .stl file format. I used Cura to slice my image for genrating G-code for printing.

For 3D scanning I used 'KSCAN' software. I used Kinect for scanning. kscan will automatically detect kinect.
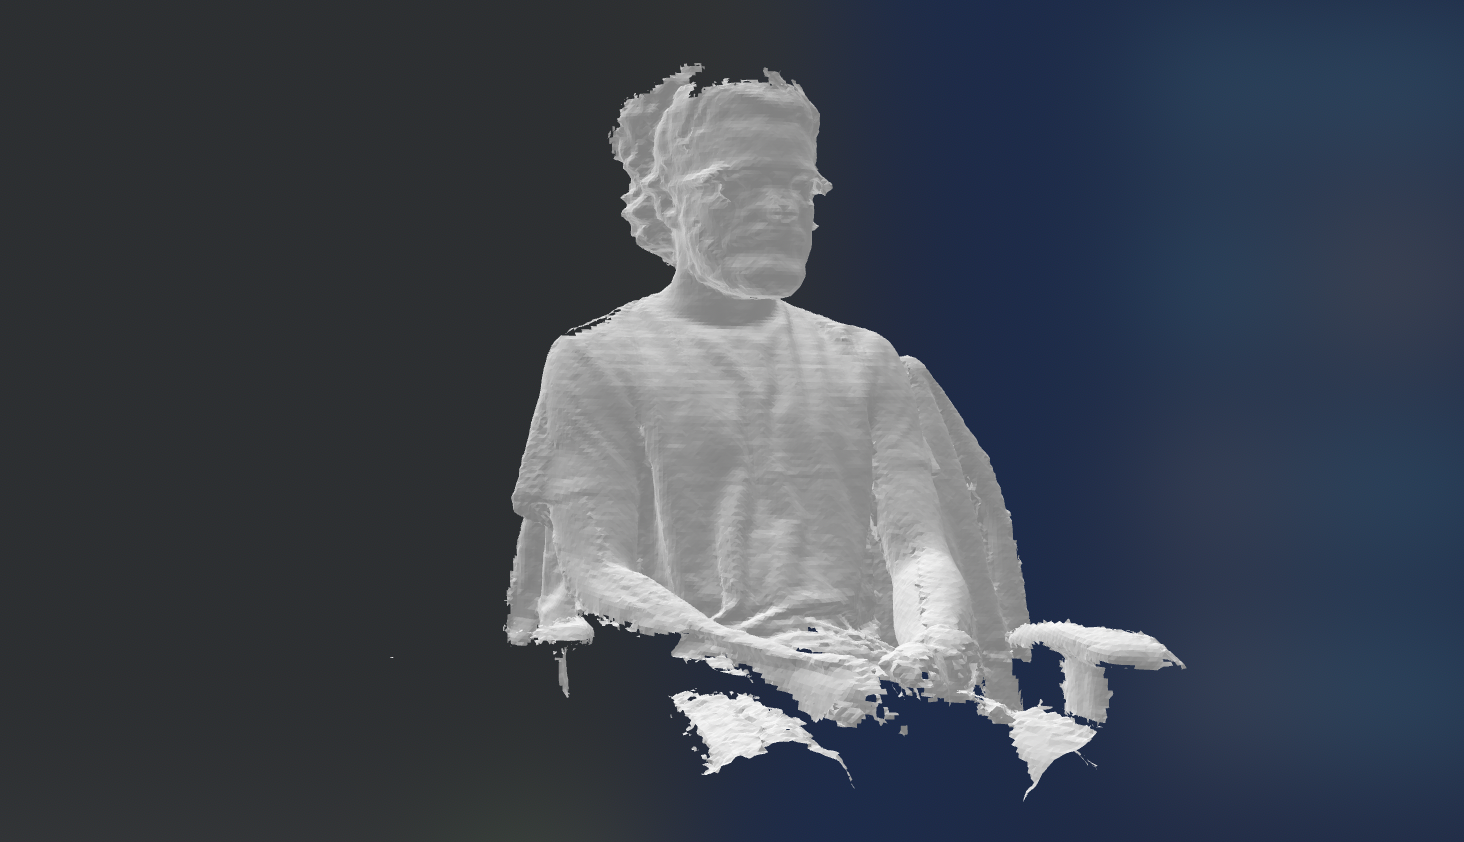
I don't have the stl file this particular 3d scan so I scanned myself again.

Download the 3d file here