Assignment
INDIVIDUAL ASSIGNMENT:
Design, build, and connect wired or wireless node(s) with network or bus addresses
GROUP ASSIGNMENT:
Send a message between two projects
Networking & Communications
In this week I have make communication between atleast two microcontroller boards and comminicate each other. In Wired communication, there are I2C, UART,SPI are the common type of methods that are using to make a network between the boards In wireless communication, commonly used, Bluetooth,WiFi,NFC,RF etc are used.What I did
- Connected 3 boards
- Combined 3 boards
Serial communication
In telecommunication and data transmission, serial communication is the process of sending data one bit at a time, sequentially, over a communication channel or computer bus. This is in contrast to parallel communication, where several bits are sent as a whole, on a link with several parallel channels.
UART(Universal Asynchronous Receiver/Transmitter)
In UART communication, two UARTs communicate directly with each other. The transmitting UART converts parallel data from a controlling device like a CPU into serial form, transmits it in serial to the receiving UART, which then converts the serial data back into parallel data for the receiving device. Only two wires are needed to transmit data between two UARTs. Data flows from the Tx pin of the transmitting UART to the Rx pin of the receiving UART:
When the receiving UART detects a start bit, it starts to read the incoming bits at a specific frequency known as the baud rate. Baud rate is a measure of the speed of data transfer, expressed in bits per second (bps). Both UARTs must operate at about the same baud rate. The baud rate between the transmitting and receiving UARTs can only differ by about 10% before the timing of bits gets too far off.
SourceI2C
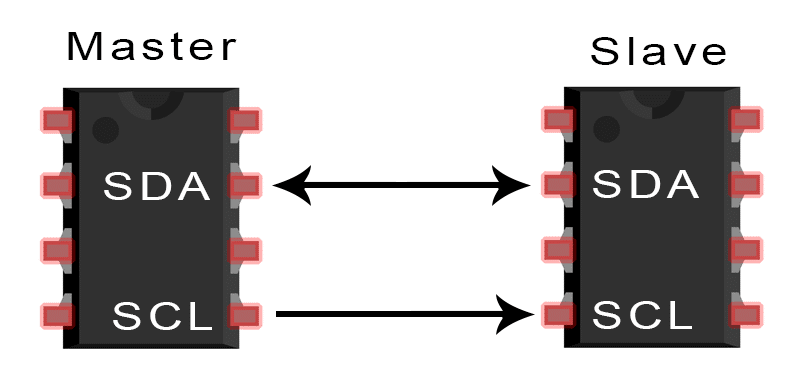
I2C combines the best features of SPI and UARTs. With I2C, you can connect multiple slaves to a single master (like SPI) and you can have multiple masters controlling single, or multiple slaves. This is really useful when you want to have more than one microcontroller logging data to a single memory card or displaying text to a single LCD. Like UART communication, I2C only uses two wires to transmit data between devices:
To know more about i2C
SourceSoftware UART
A software universal asynchronous receiver and transmitter (UART) provides the flexibility of asynchronous serial communication between devices with minimal external hardware. ... A software implementation of a UART allows increased system functionality without increasing hardware costs. So ifa microcontroller does not have a Hardware UART feature. The SoftwareSerial library has been developed by arduino to allow serial communication on other digital pins of the Arduino and other AVR microcontrollers using software to replicate the functionality of Serial communication.
Know more about SoftwareSerial LibraryPCB designing and milling
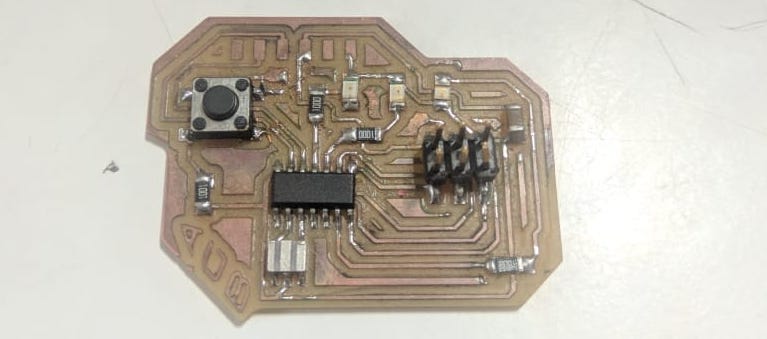
We got much infirmations about I2C. Now lets built some PCBs to communicate each other through I2C bus.
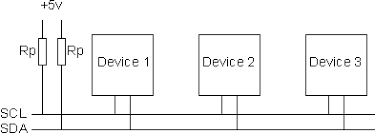
I choosed Attiny44 as the microcontroller. I found ICSP pins MOSI and SCK are I2c pins. I did this week's assignment with my friend Akhil joseph.I used my Electronics design week's pcb. We have added a pullup resistance in I2C. So Akhil designed a board with icsp pin headers and Pullup resistors
PCB LAYOUT
AFTER SOLDERING
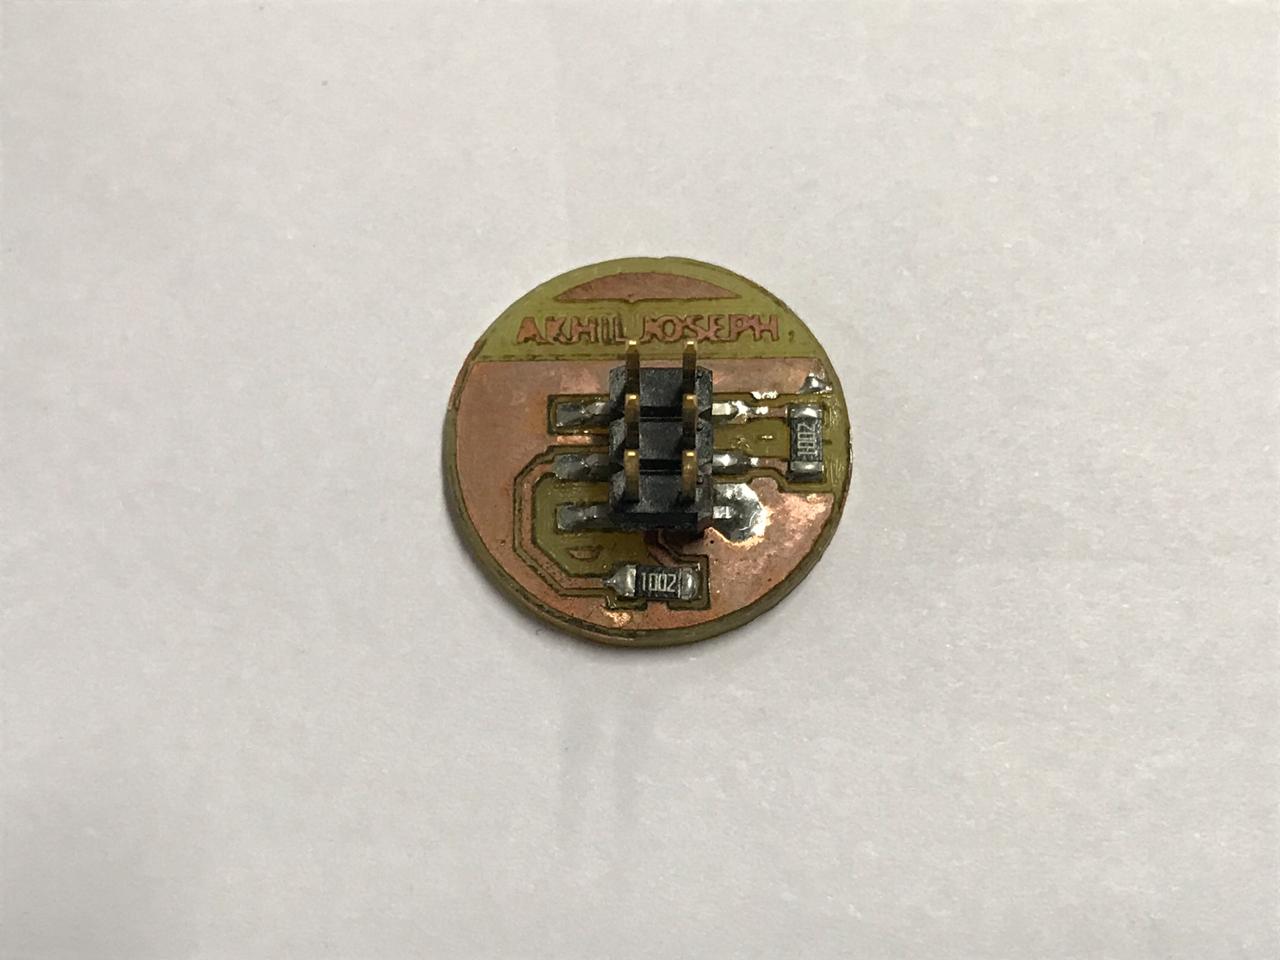
This board is only for pullup, it have 2 resistors. One pullup for both SDA and SCL. We attached this to an i2c chanel, both SDA and SCL channel will be pullup.
I am using 3 boards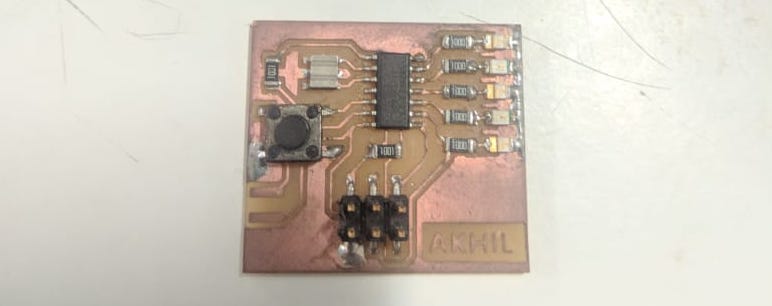
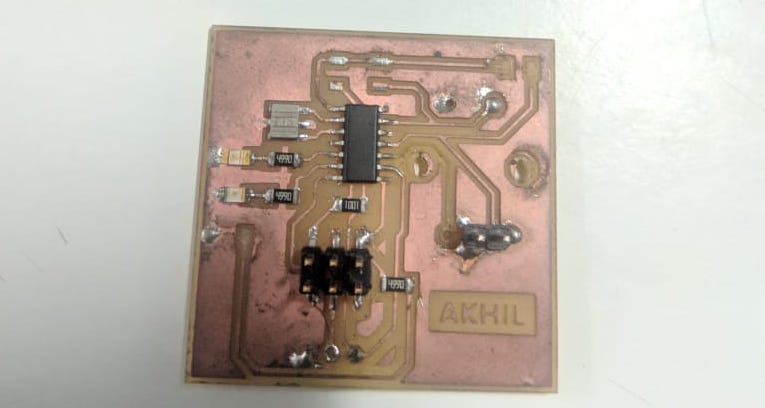
Refer Akhil Joseph's documentation for design files.
Embedded Programing
First we tried the 'Wire.h' library that is given by the Arduino. When compailing the wire.h library we got some error.
Googled and saw some answers from arduino forum that wire.h library which says it won't work with attiny45 microcontrollers.
As expected it happened.
Searched for alternative arduino libaries that especially build for attiny microcontrollers.
Found TinyWire.h library for arduino. The TinyWire.h library is build a for attiny microcontrollers.
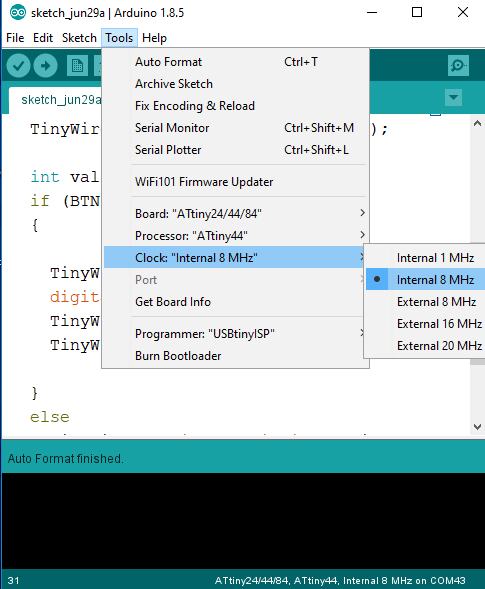
The library almost replicate the wire.h but stil faced some problems, so we tried to edit library files. we edit some values in library.
Now its working with 8MHZ internal crystal. We have used 20Mhz oscilator in my boards, it is not working in that frequency range. We coudn't find know why?
Programing Master board
                                                    #include <PinButton.h>
                                                       #include <TinyWireM.h>
                                                       #define device (1)
                                                       #define device2 (2)
                                                       PinButton myButton(8);
                                                       #define LED 1
                                                       #define LED2 2

                                                       void setup() {
                                                         pinMode(BTN, INPUT);
                                                         pinMode(LED, OUTPUT);
                                                         pinMode(LED2, OUTPUT);
                                                         TinyWireM.begin();

                                                       }
                                                       void loop() {
                                                         myButton.update();
                                                         if (myButton.isSingleClick()) {
                                                           TinyWireM.beginTransmission(device);
                                                           digitalWrite(LED, HIGH);
                                                           TinyWireM.send(1);
                                                           TinyWireM.endTransmission();
                                                         }
                                                         else
                                                         {
                                                           TinyWireM.beginTransmission(device);
                                                           digitalWrite(LED, LOW);
                                                           TinyWireM.send(0);
                                                           TinyWireM.endTransmission();
                                                         }
                                                         if (myButton.isDoubleClick()) {
                                                           TinyWireM.beginTransmission(device2); //device 2
                                                           digitalWrite(LED2, HIGH);
                                                           TinyWireM.send(1);
                                                           TinyWireM.endTransmission();
                                                         }
                                                         else{
                                                            TinyWireM.beginTransmission(device2); // device 2
                                                           digitalWrite(LED2, LOW);
                                                           TinyWireM.send(0);
                                                           TinyWireM.endTransmission();
                                                         }
                                                       }
Download arduino sketch here
Programing Slave board
                            #include <TinyWireS.h>
                                                               #define LED 3
                                                               #define I2C_SLAVE_ADDR (1)
                                                               void setup() {

                                                                   TinyWireS.begin(I2C_SLAVE_ADDR);
                                                                   pinMode(LED, OUTPUT);
                                                                   }

                                                                   void loop() {
                                                                       if (TinyWireS.available())
                                                                       byte data = TinyWireS.receive();
                                                                       if (data == 1)
                                                                       digitalWrite(LED, HIGH);
                                                                       else if (data == 0)
                                                                       digitalWrite(LED, LOW);

                                                                       }
Download arduino sketch here
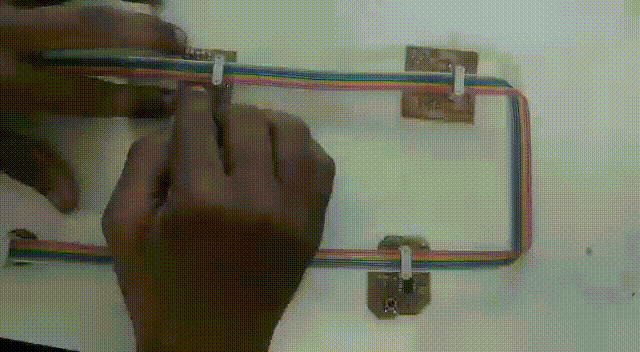
Working Demo
Group assignment
My friend Joel Made a Wi-Fi board using ESP8266. So I would like to make somthing interesting. Full PCB files Avialable in Joel's Page
Programing ESP8266 Alexa
                                                                             #include <ESP8266WiFi.h>

                                                                             #include "WemoSwitch.h"
                                                                             #include "WemoManager.h"
                                                                             #include "CallbackFunction.h"

                                                                             boolean connectWifi();

                                                                             void lightOn();
                                                                             void lightOff();
                                                                             void secondOn();
                                                                             void secondOff();
                                                                             char ssid[] = "Wi-Fi Username";
                                                                             char password[] = "Wi-Fi Password";
                                                                             WemoManager wemoManager;
                                                                             WemoSwitch *light = NULL;
                                                                             const int ledPin = 13;
                                                                             void setup()
                                                                             {
                                                                               Serial.begin(115200);
                                                                               WiFi.mode(WIFI_STA);
                                                                               WiFi.disconnect();
                                                                               delay(100);
                                                                               Serial.print("Connecting Wifi: ");
                                                                               Serial.println(ssid);
                                                                               WiFi.begin(ssid, password);
                                                                               while (WiFi.status() != WL_CONNECTED) {
                                                                                 Serial.print(".");
                                                                                 delay(500);
                                                                               }
                                                                               Serial.println("");
                                                                               Serial.println("WiFi connected");
                                                                               Serial.println("IP address: ");
                                                                               IPAddress ip = WiFi.localIP();
                                                                               Serial.println(ip);
                                                                               wemoManager.begin();
                                                                               light = new WemoSwitch("light", 80, lightOn, lightOff);
                                                                               wemoManager.addDevice(*light);
                                                                               pinMode(ledPin, OUTPUT);
                                                                               delay(10);
                                                                               digitalWrite(ledPin, HIGH);
                                                                             }
                                                                             void loop()
                                                                             {
                                                                               wemoManager.serverLoop();
                                                                             }
                                                                             void lightOn() {
                                                                                 Serial.print("Switch 1 turn on ...");
                                                                                 digitalWrite(ledPin, HIGH);
                                                                             }
                                                                             void lightOff() {
                                                                                 Serial.print("Switch 1 turn off ...");
                                                                                 digitalWrite(ledPin, LOW);
                                                                             }


                                       Alexa Working DEMO
Download arduino code here