This weeks Assignment I had to do a 3D scan using the sense 3D-scanner. Also I had to create a 3D-model and print it afterwards. I created a model in Fusion360. The special point of this model is, that it can't be produced with a lasercutter or a mill.
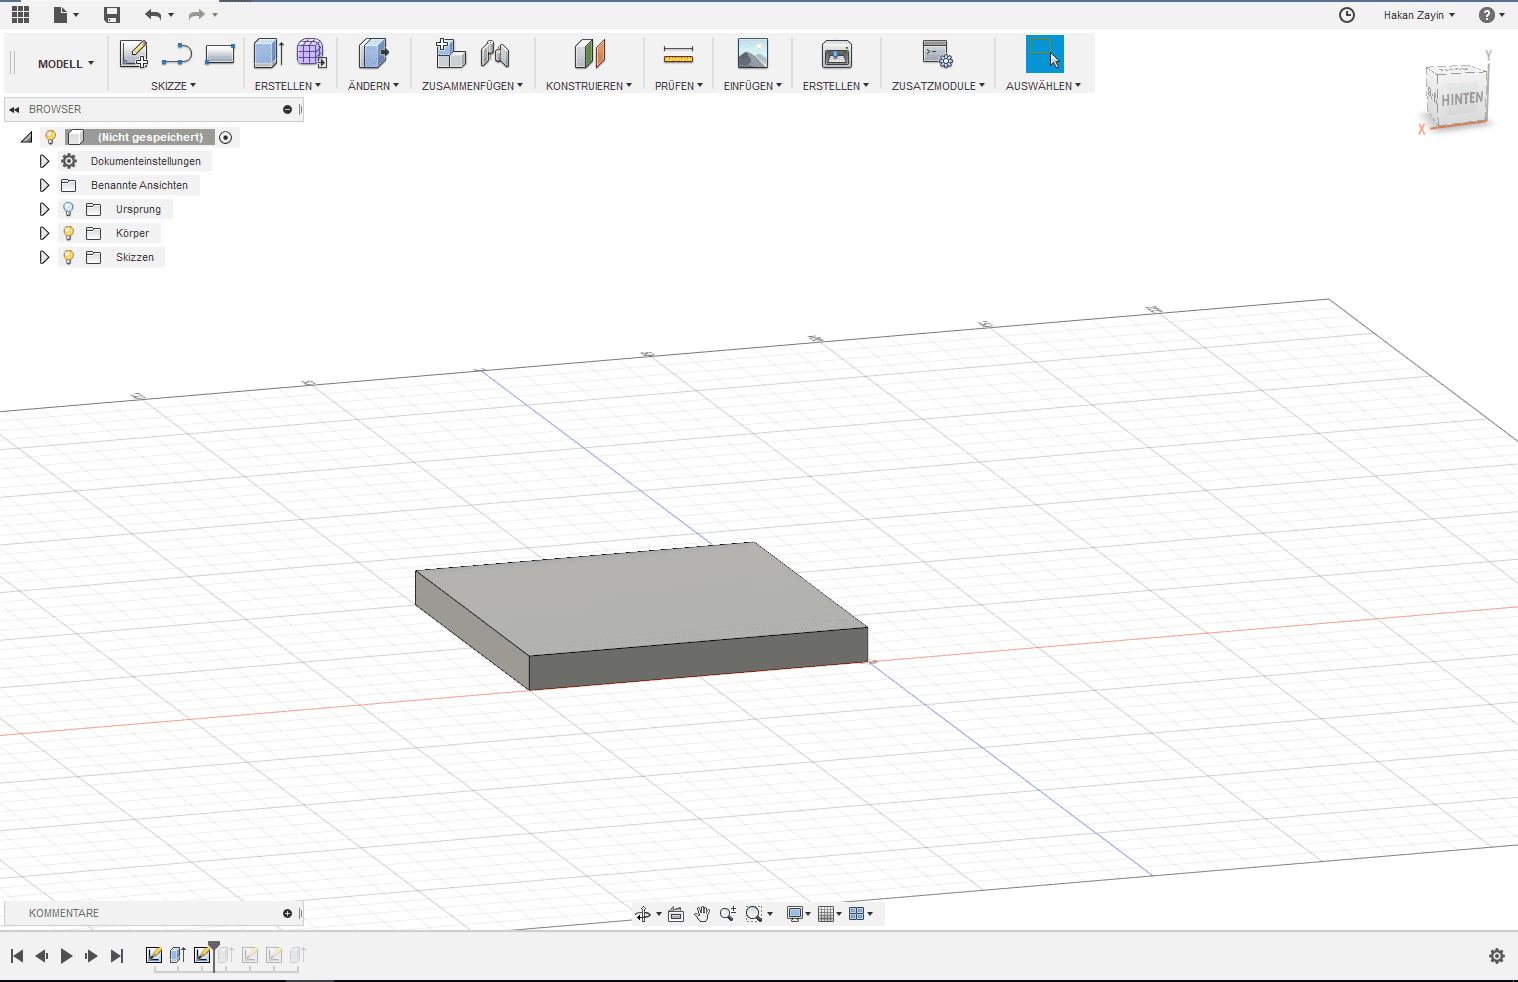
I have simply created a plate with 50mm length using the scetch tool first and then extruding the plate 20mm.
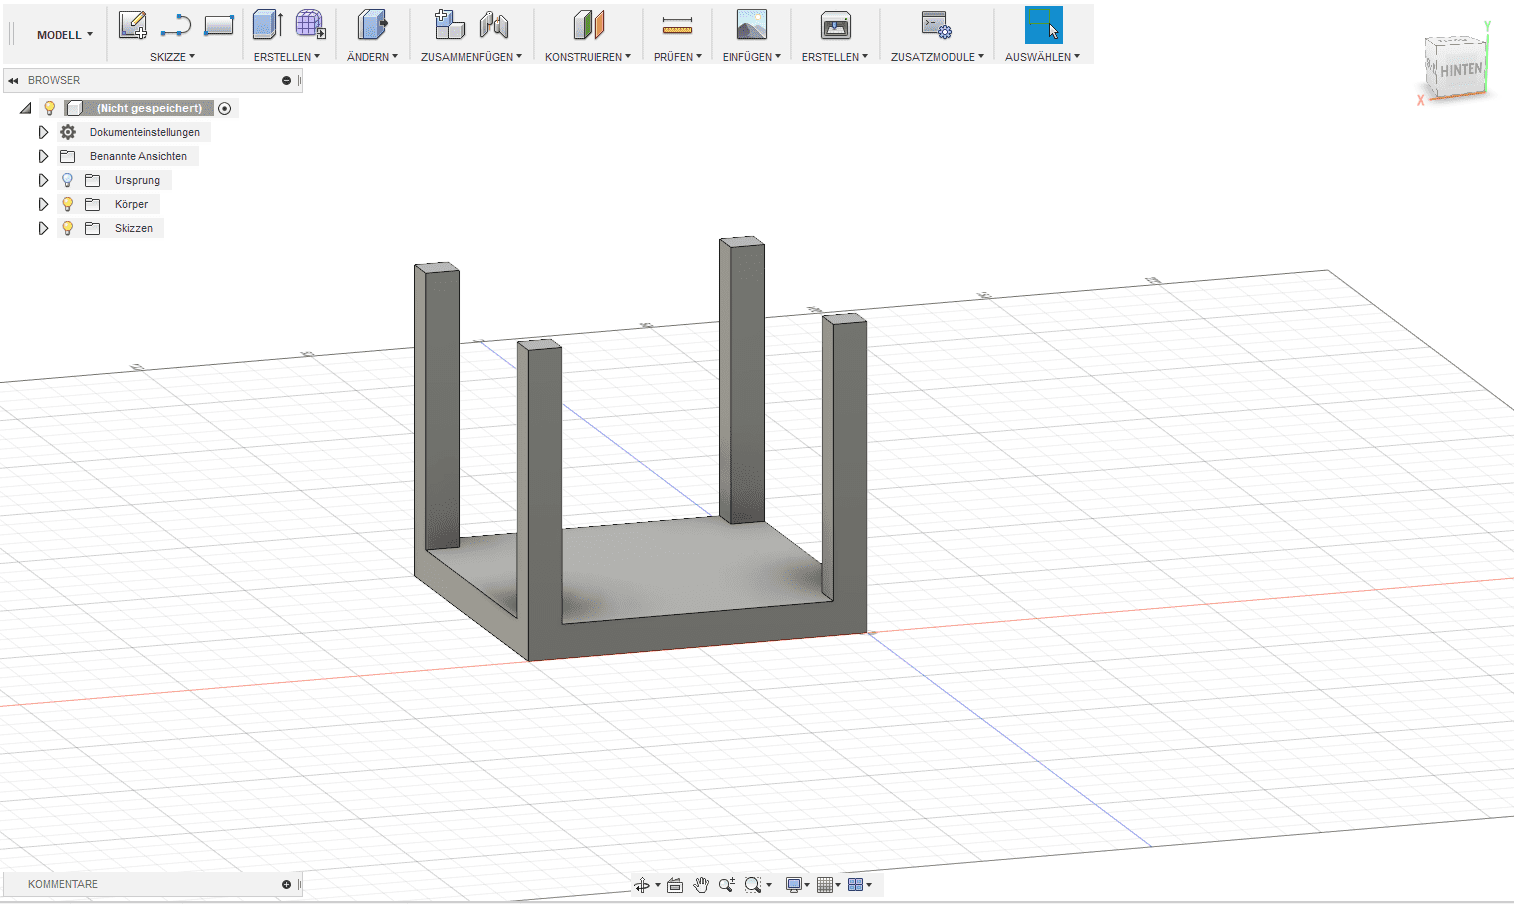
Now I just extruded a pillar from every edge. I have also used the skething tool to create lines for the pillars and then extruding them.
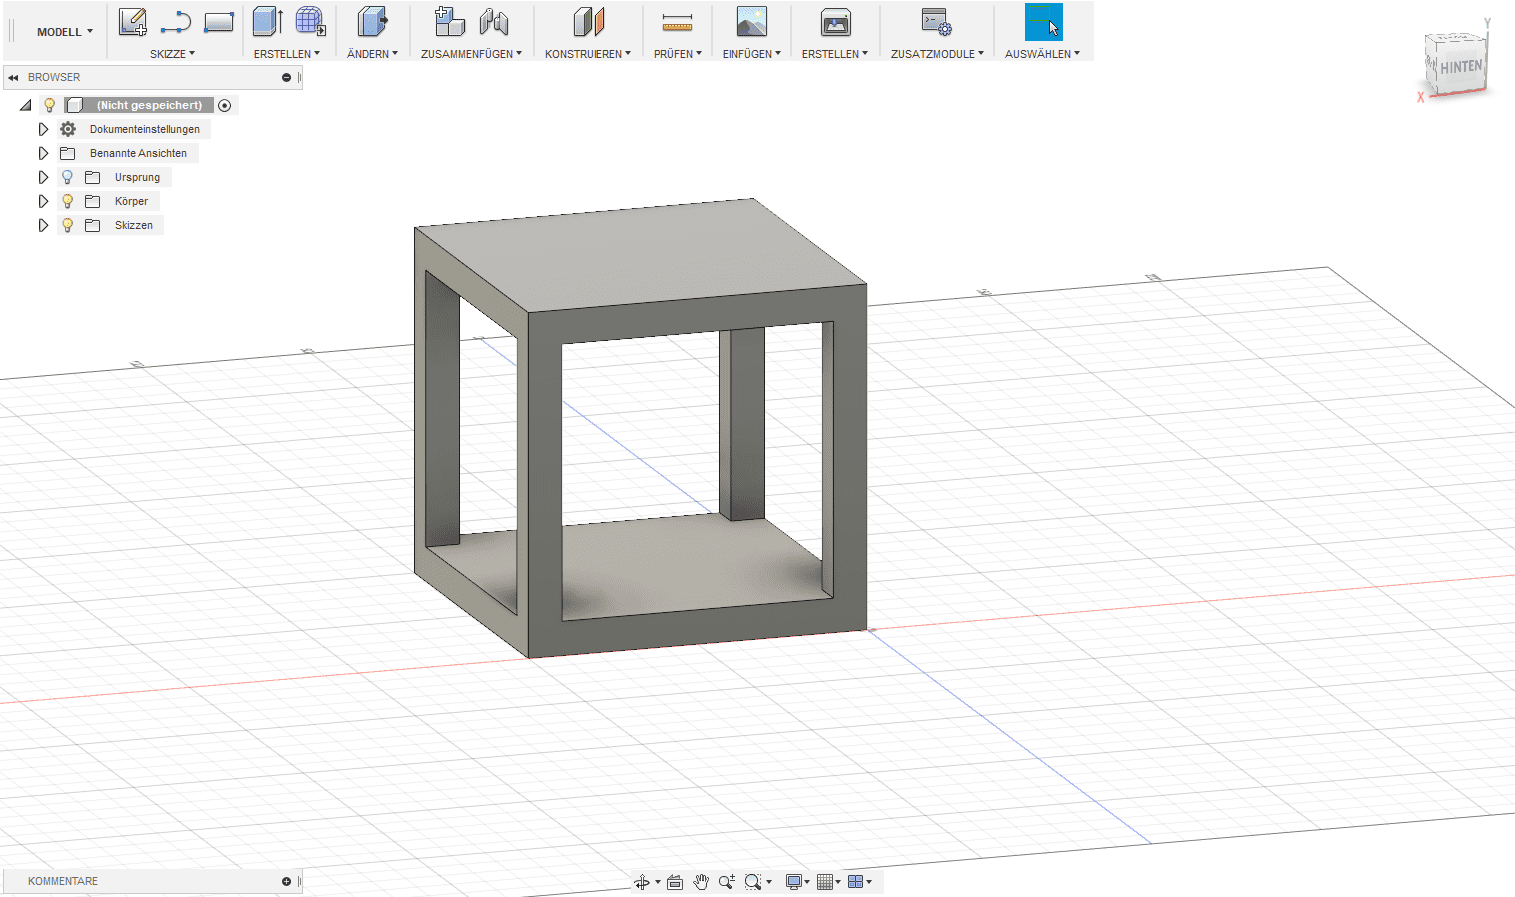
Then I closed the top of the cube. I let the top and bottom closed to make supporting walls that will hold the inner cube.
For the inner cube I simply have copied the cube, scaled it down a little bit and paste it inside the bigger cube.
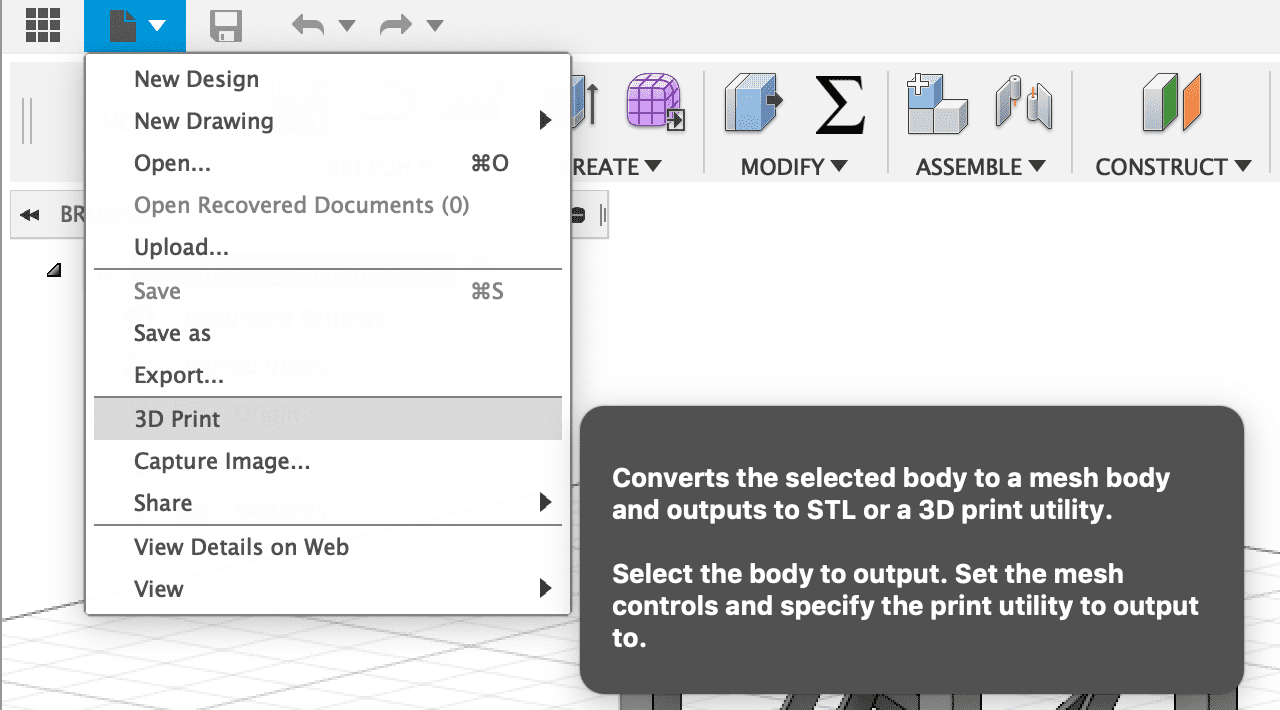
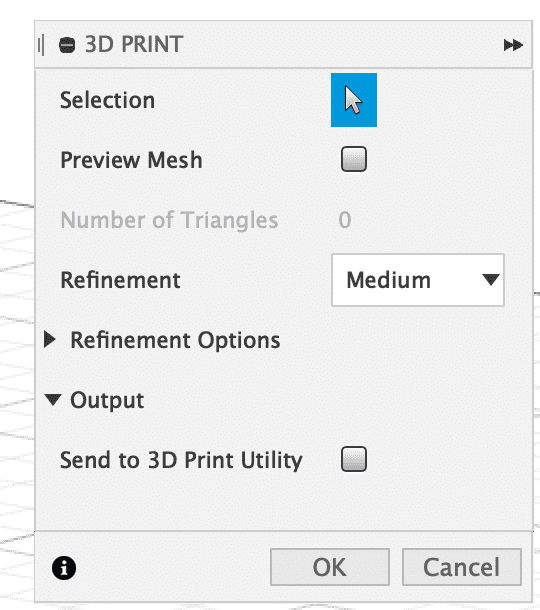
To print my 3dmodel I just select "3D Print" in the options, now a window pops up. In this window I had to select my model and uncheck the option "send to 3d utility".
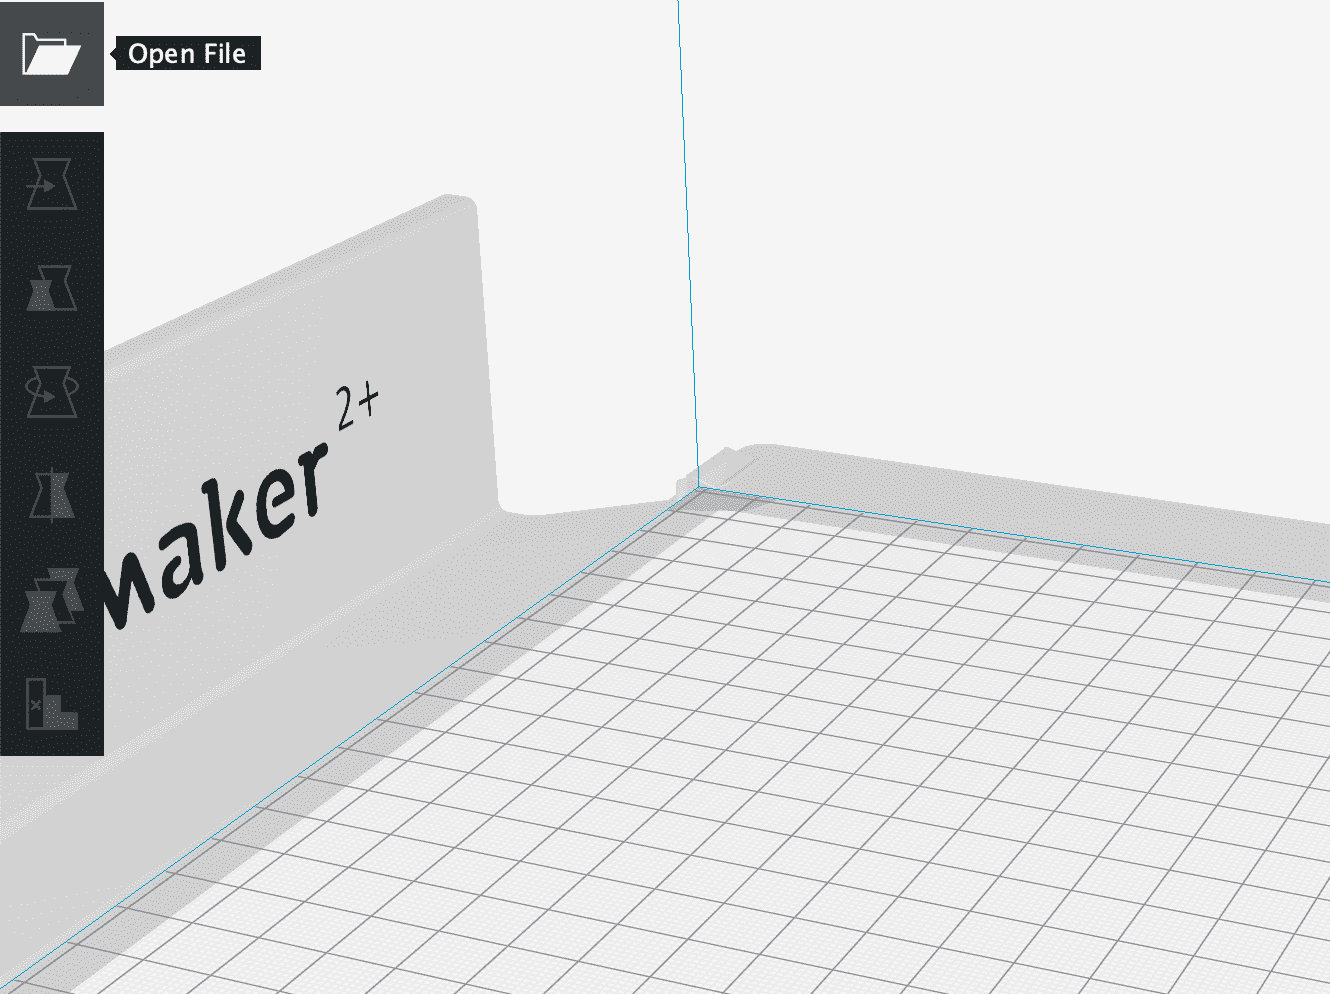
After these steps I was able to import my .stl file into cura.
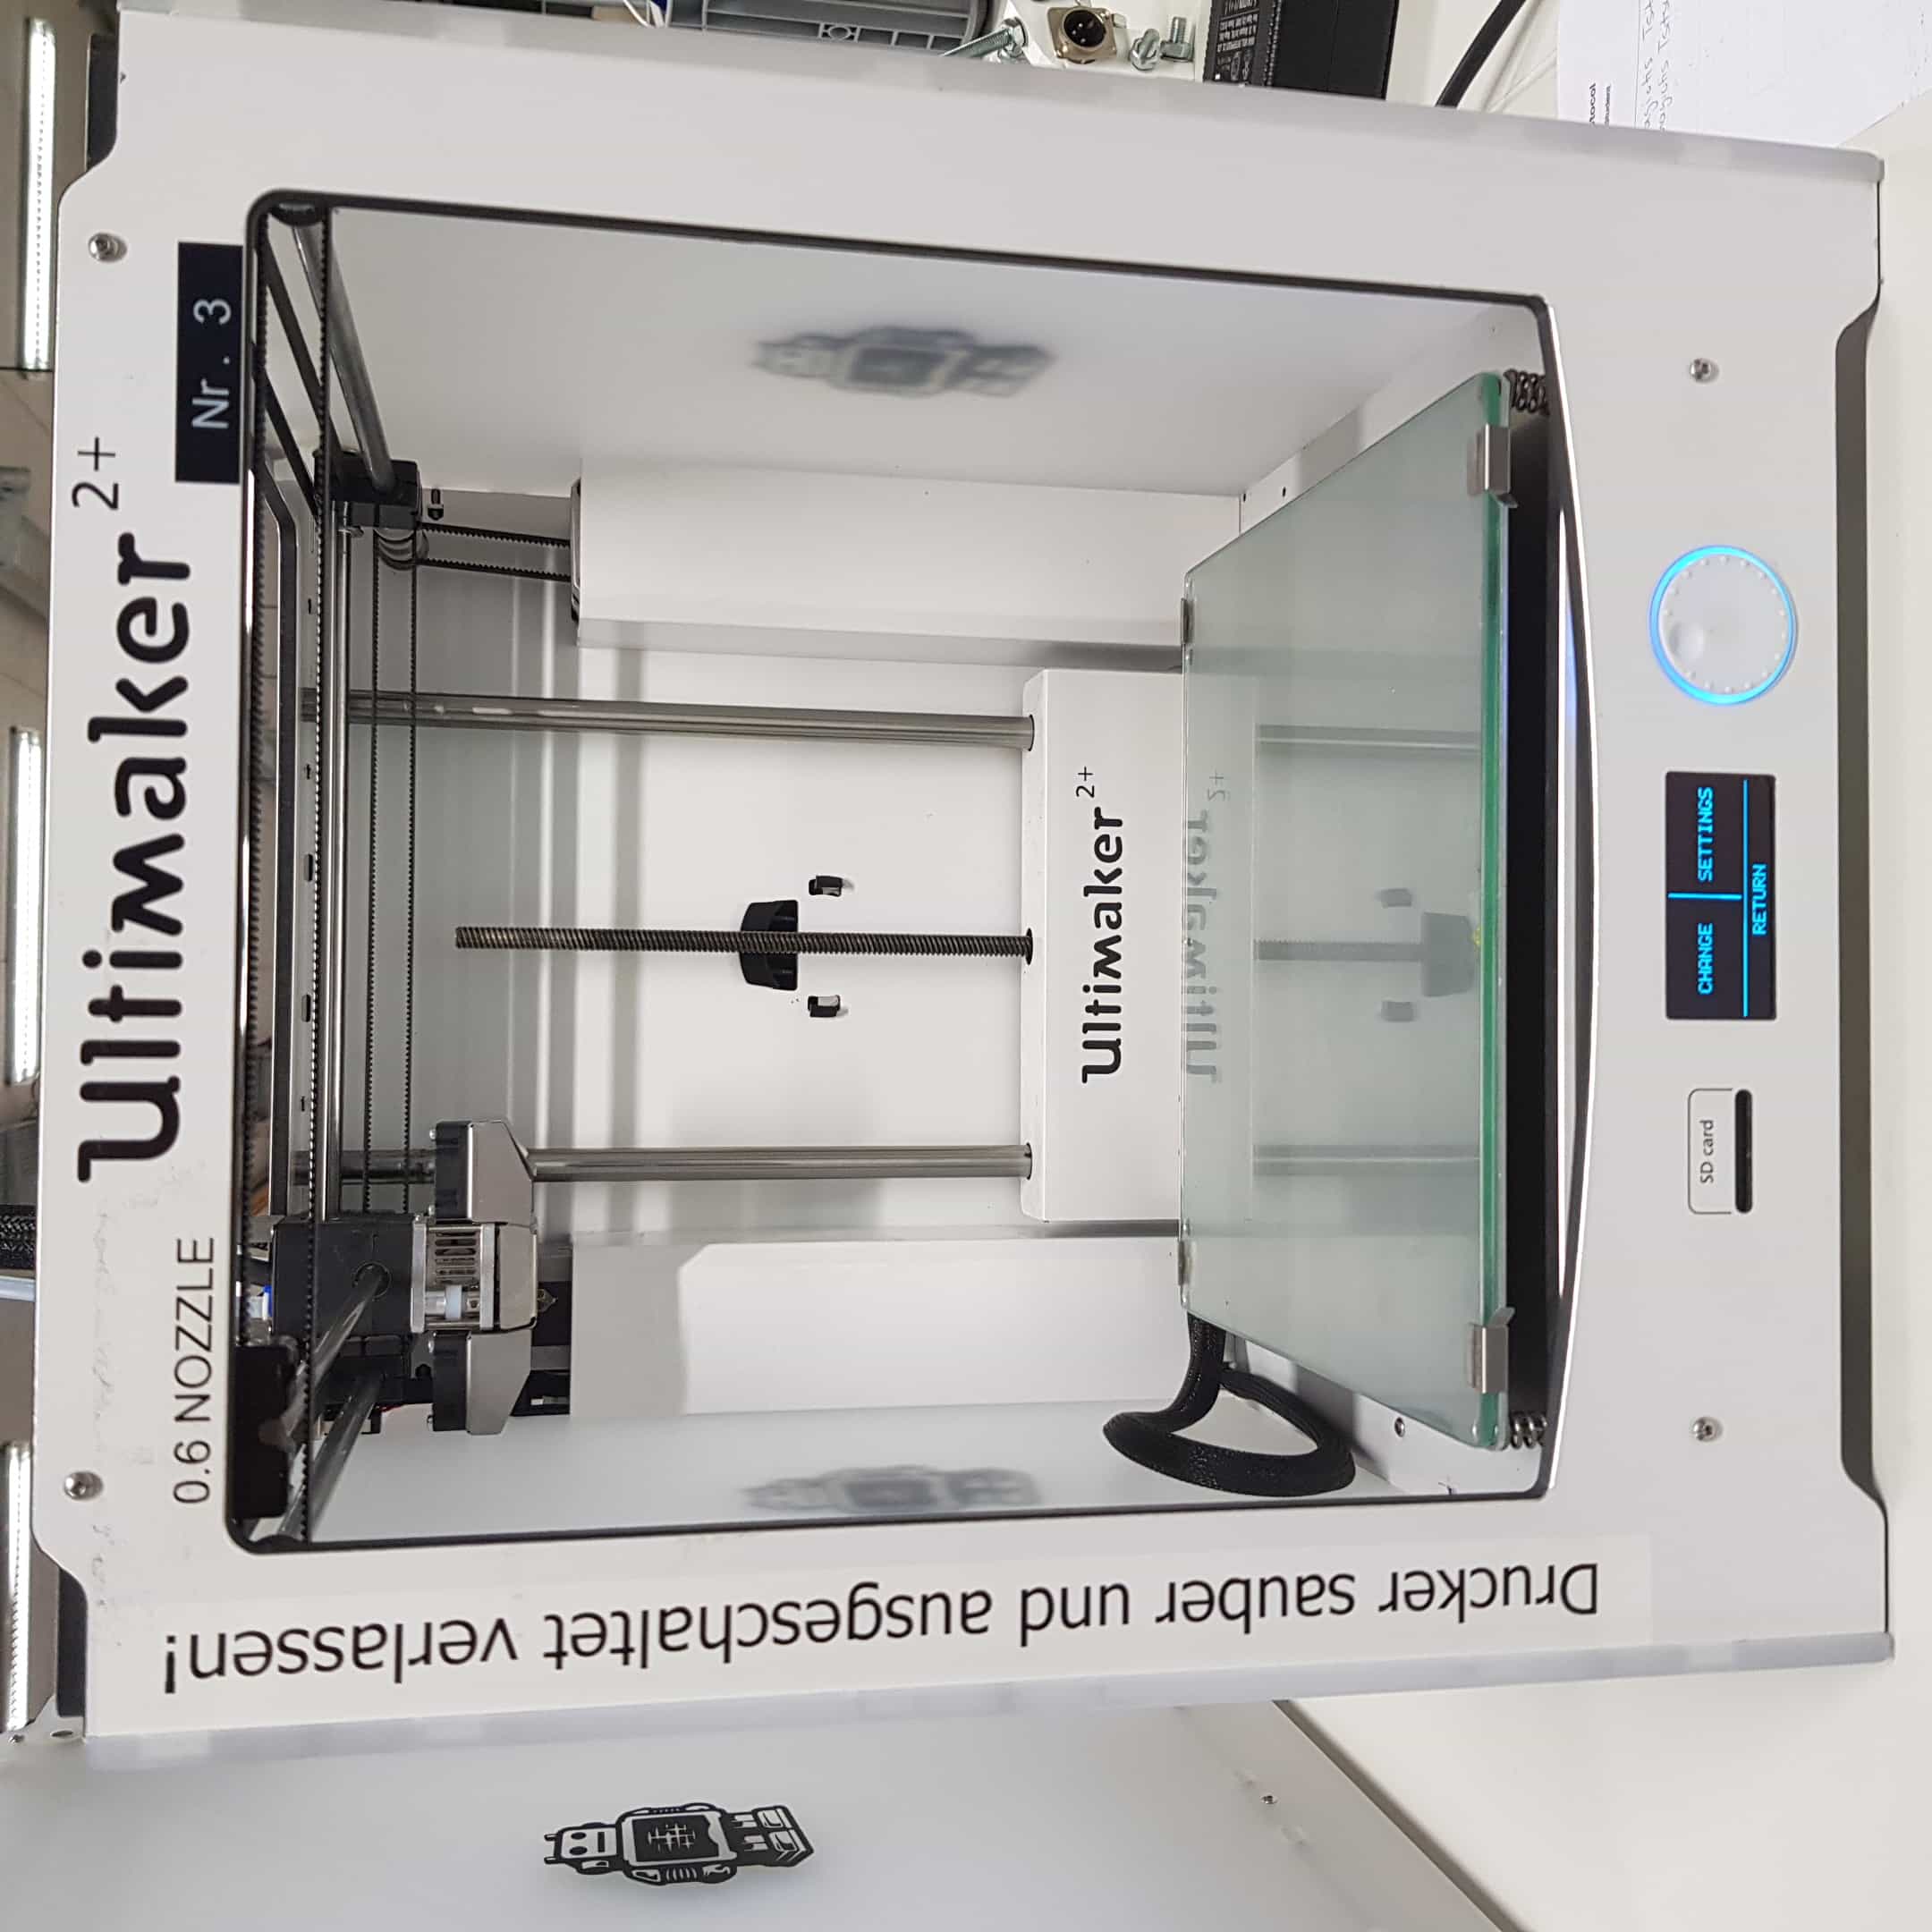
I have used a ultimaker 2+, other printers could have other software to use with!
I just pressed on the open file button at the top left.
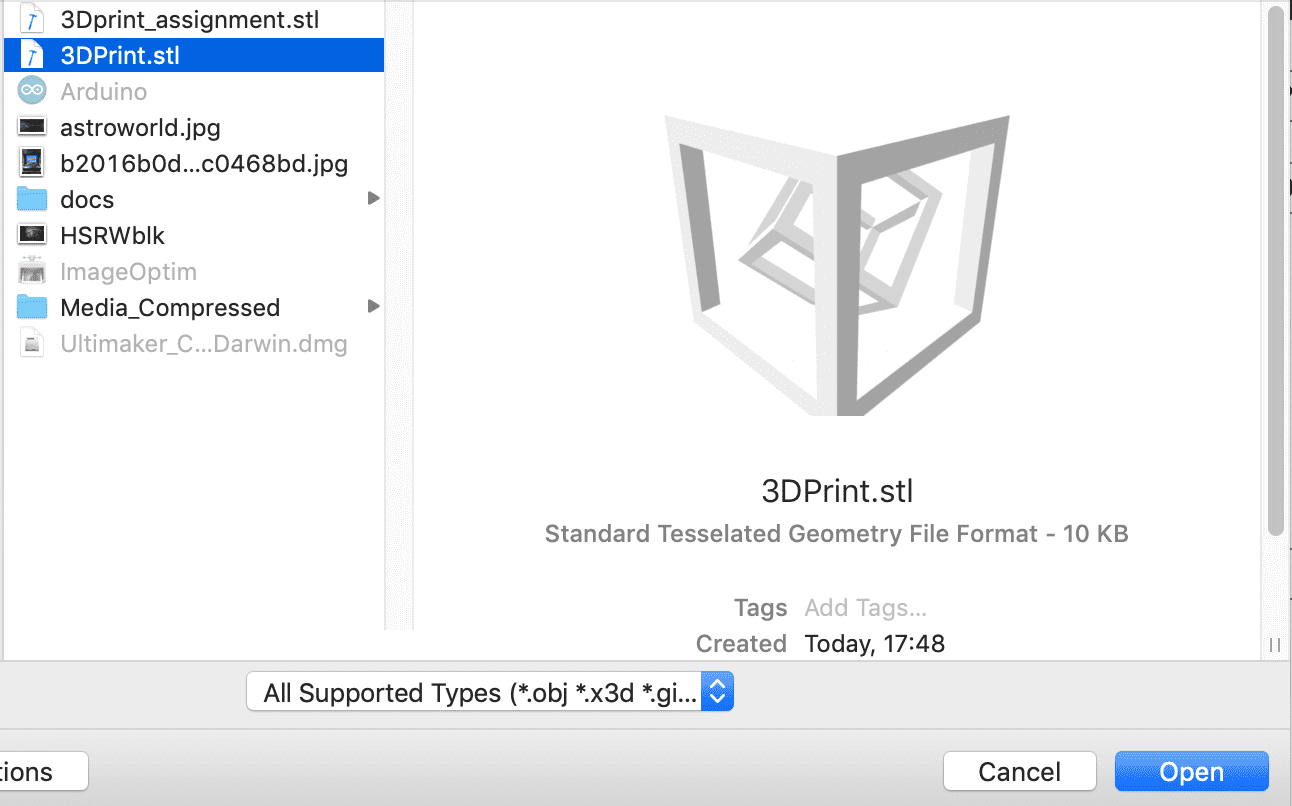
Selected my .stl file, that I have exported from Fusion360.
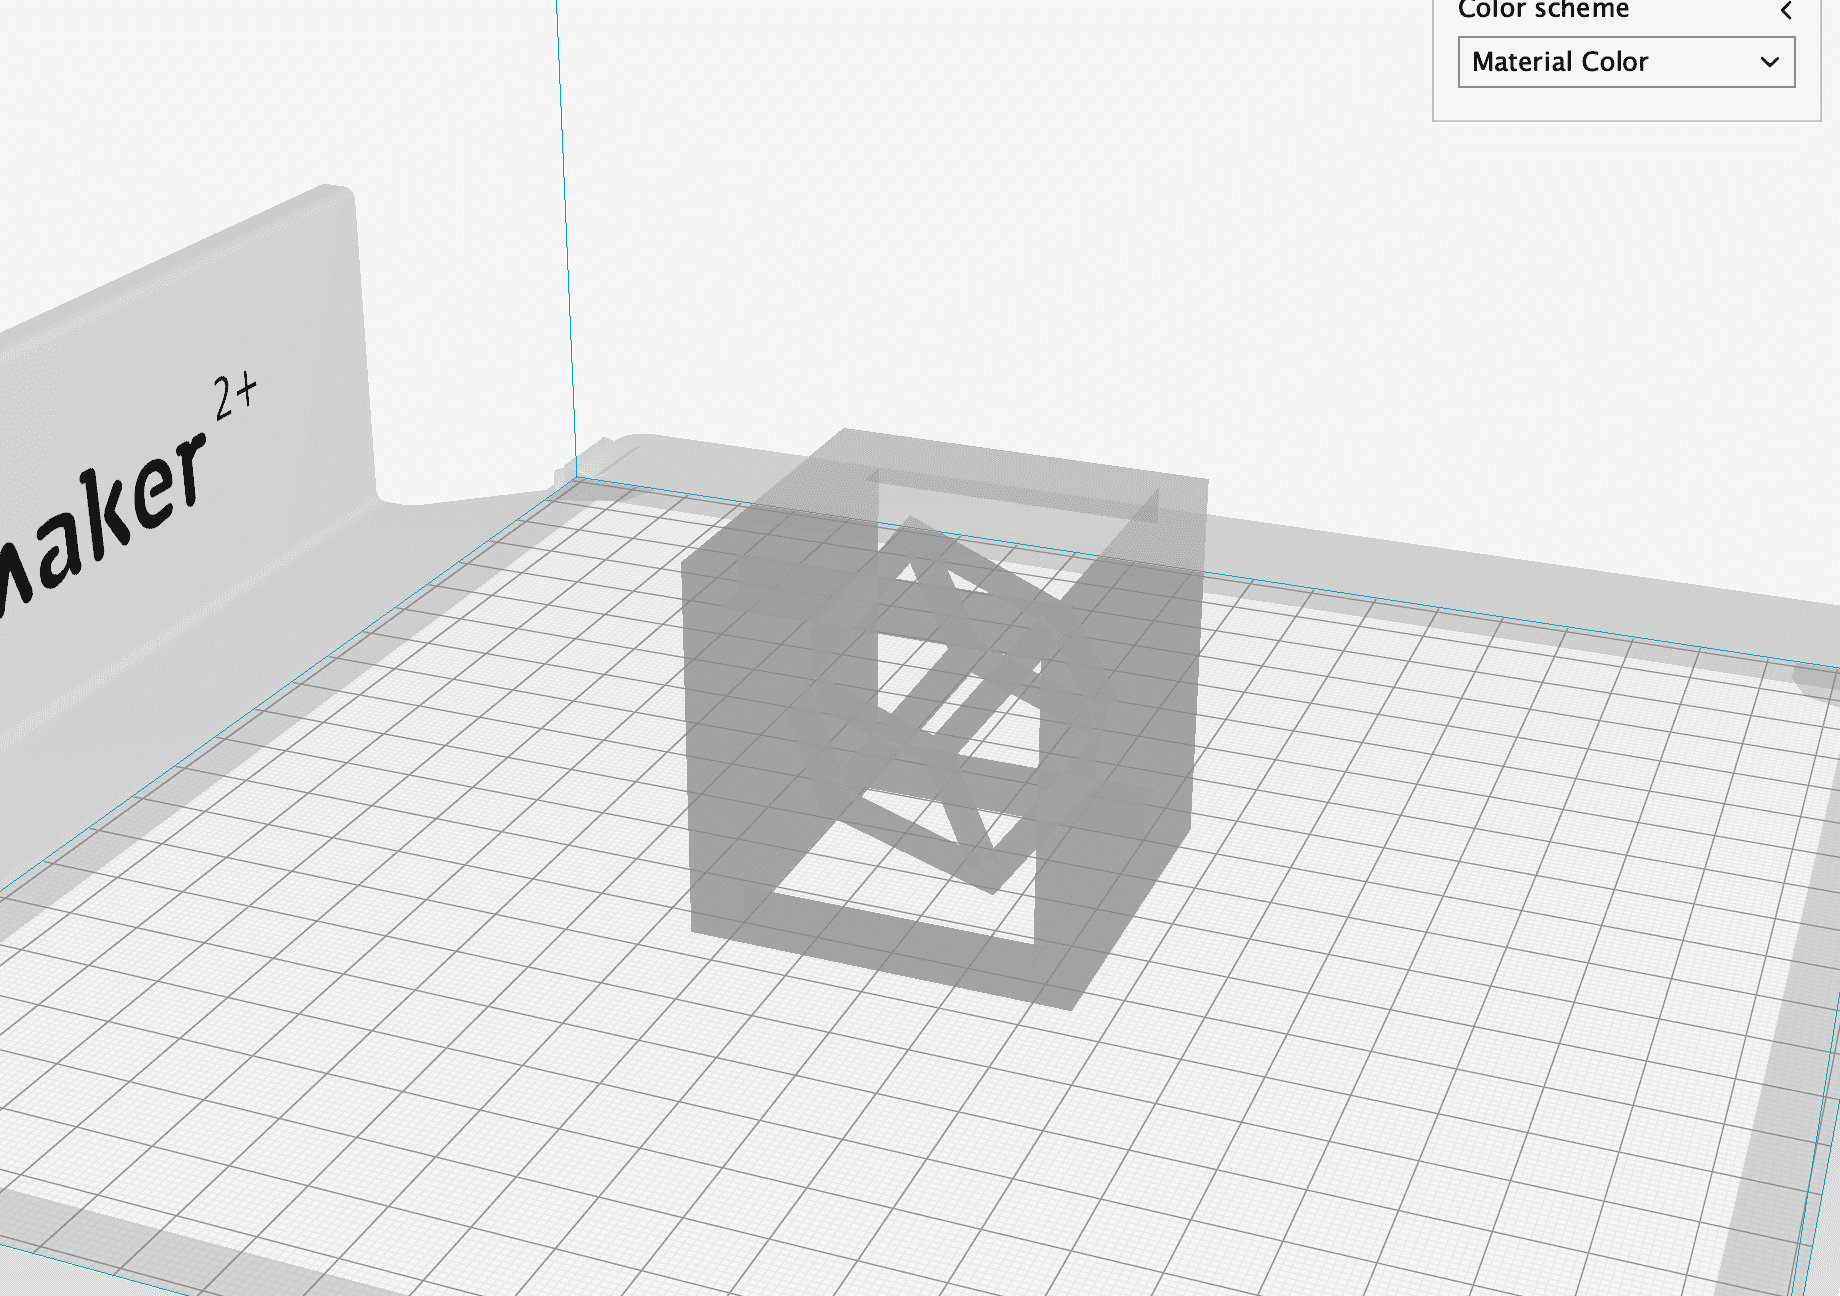
Now cura imports my model into the workingspace automatically. There is a chance that cura dont get the right position to print. In my case I flipped the cube so that there wont be any problems with printing the walls. Sometimes rotating your model can let you print your model without having any support, just make sure you use the best side.
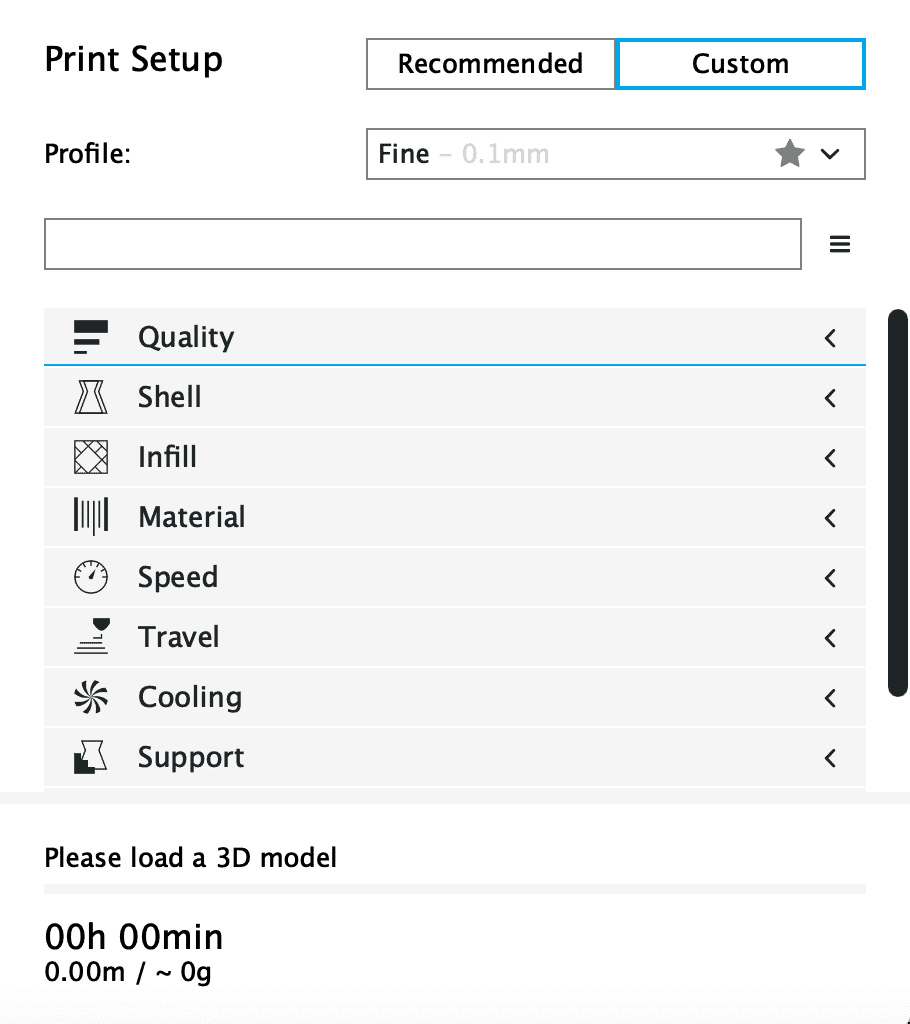
On the right side I can now change the print settings, according to my needs. When clicking on "Custom", I am able to change the settings one by one.
I started off by selecting the printer I will use a "Ultimaker 2+" and the nozzle which is attached to the printhead. In my case it's 0.4mm, but it changes from printer to printer.
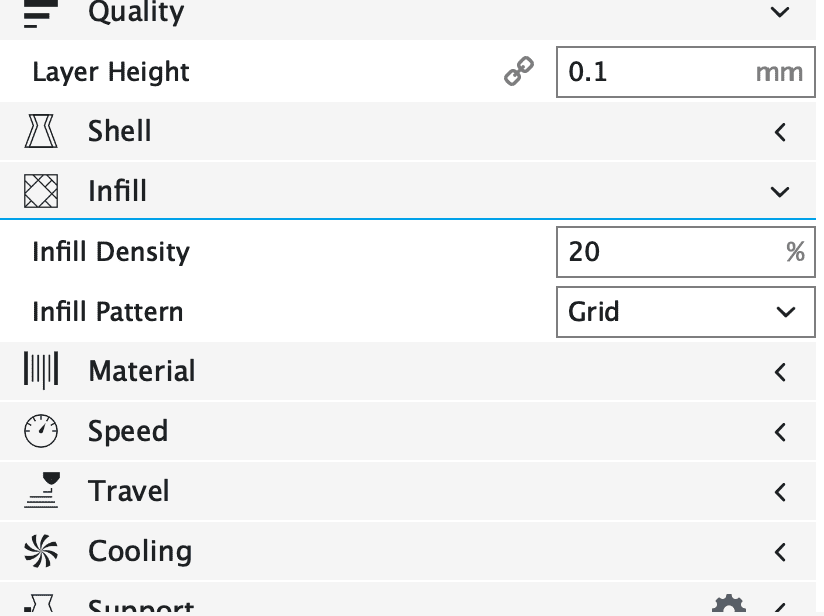
I've set the layer height to 0.1mm and the infill density to 20%. The layer height represents how high every layer will be. When choosing a very high number the model wont be very detailed, but the printing time will be shorter. If you have a very detailed model the layer height should be lower, not much detailed models will look the same with a higher layer height.
One of the most important things is, wether you would like to generate support or not. In my case I need support because I have overhanging parts, which cant just be printed in the air and need support.
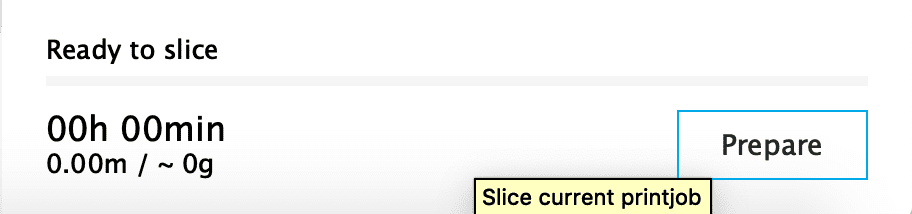
After I did all of my settings, I am now able to prepare the printing job by pressing on the "prepare" button.
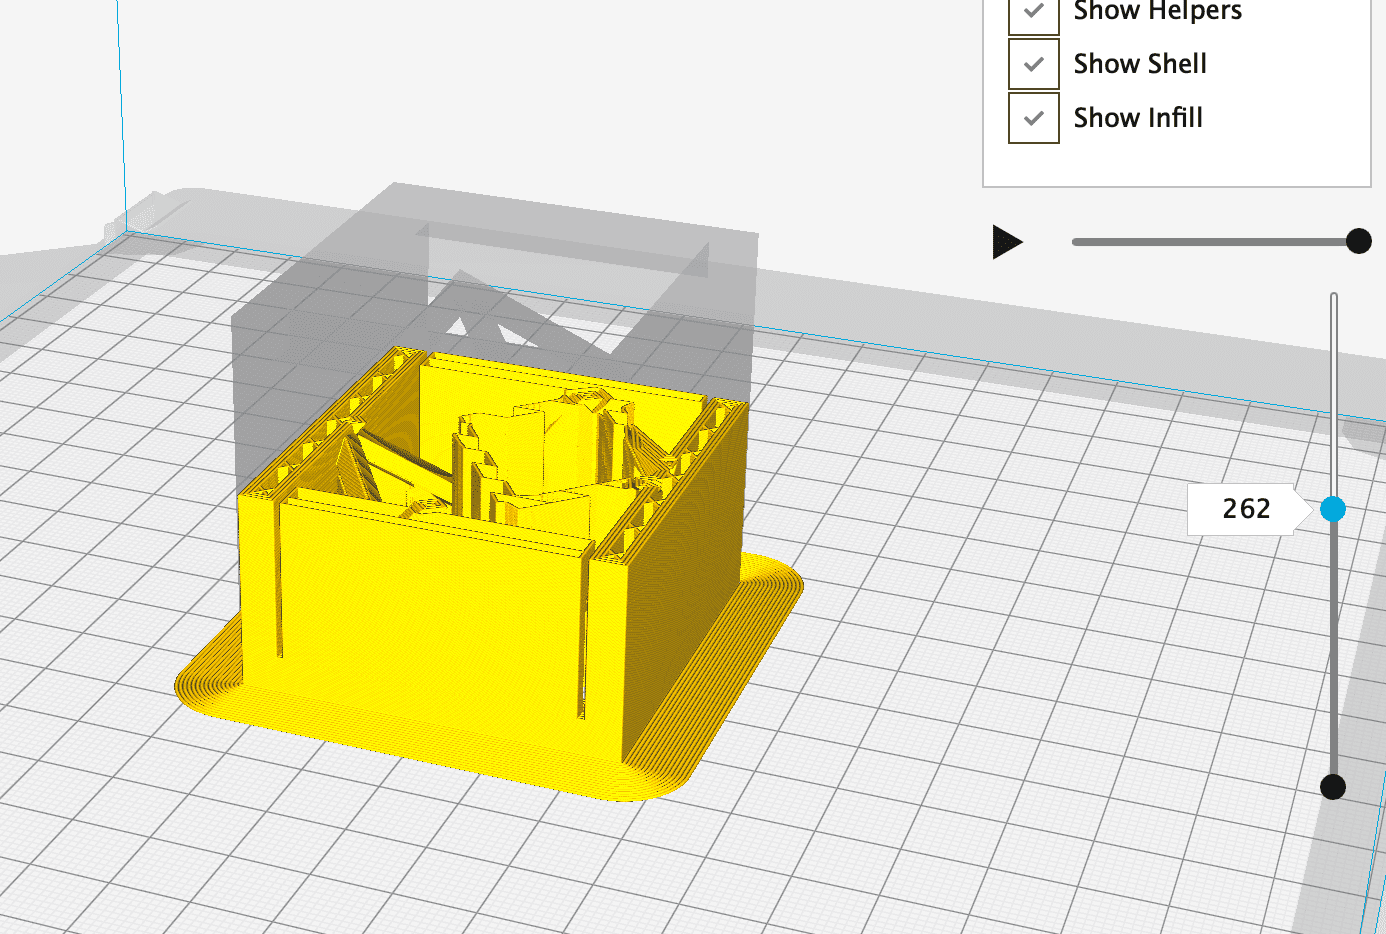
Now I can see the printing time and and the weight of my print. Also I can check wether the print will be according to my requirements, using the layer view in the top right side. Changing the view, will give us different informations about the print.
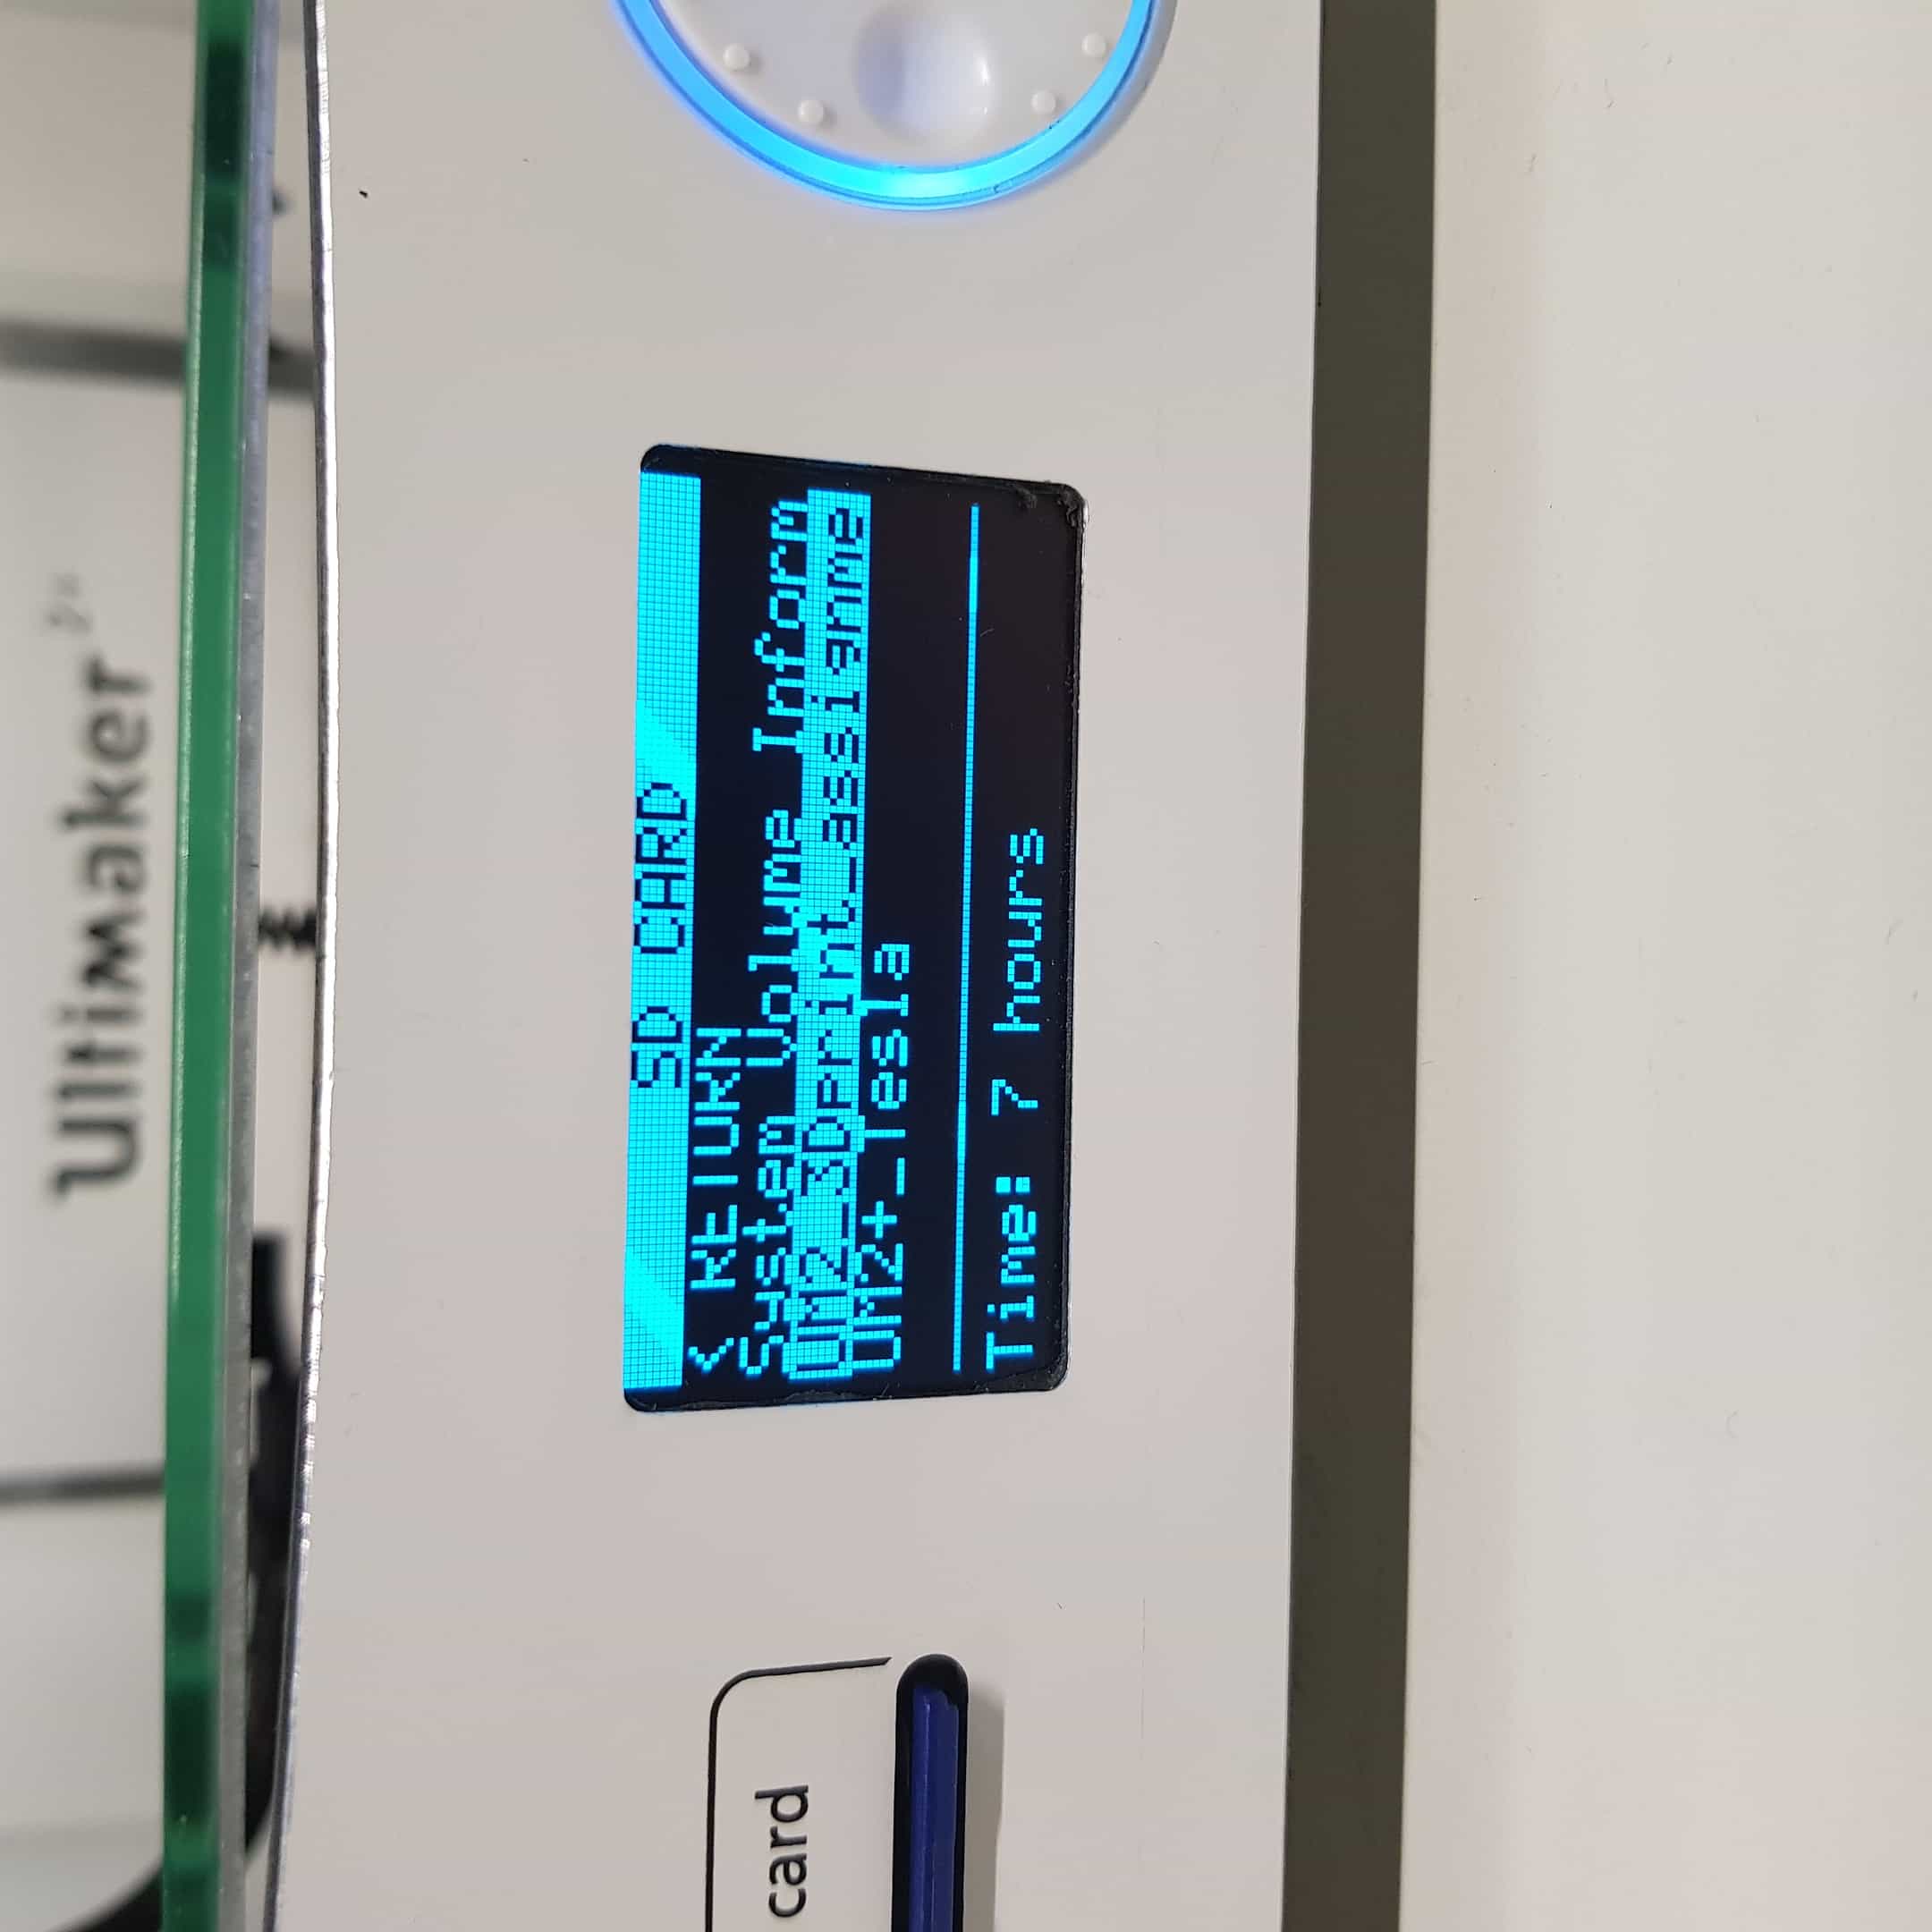
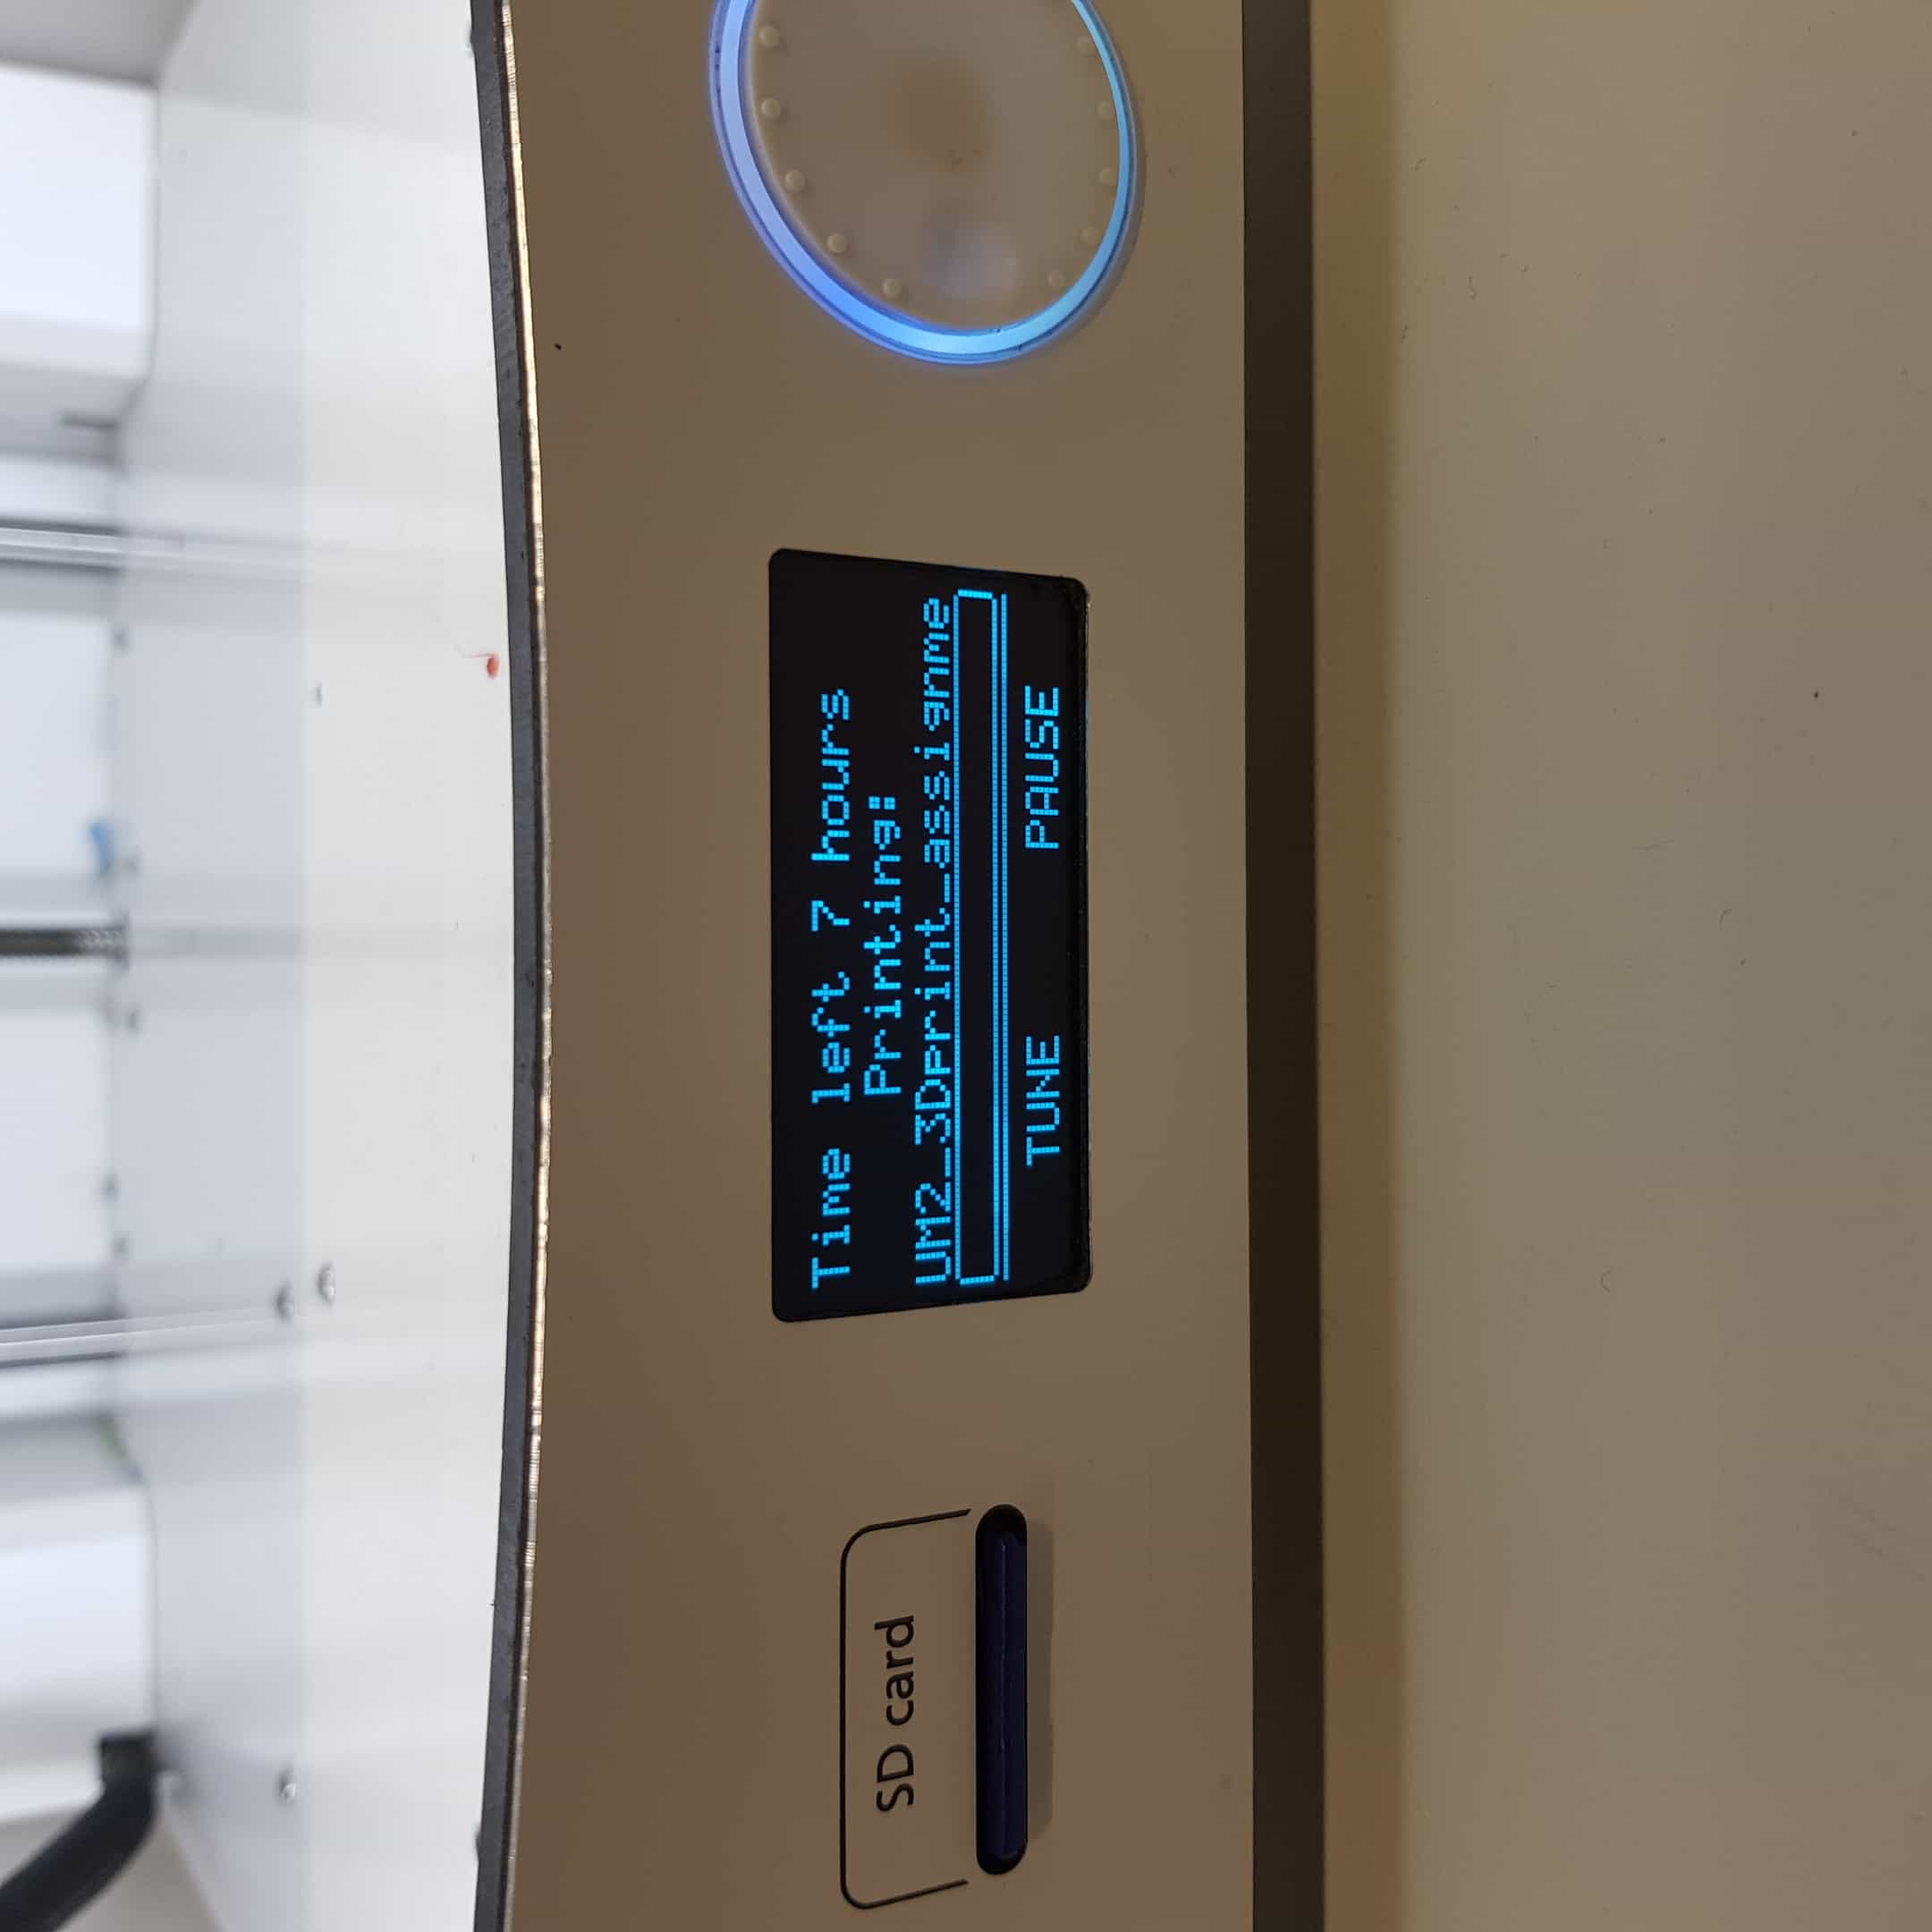
The last thing to do is to put the gcode onto a sd-card and put the sd card into the card slot of the 3d printer
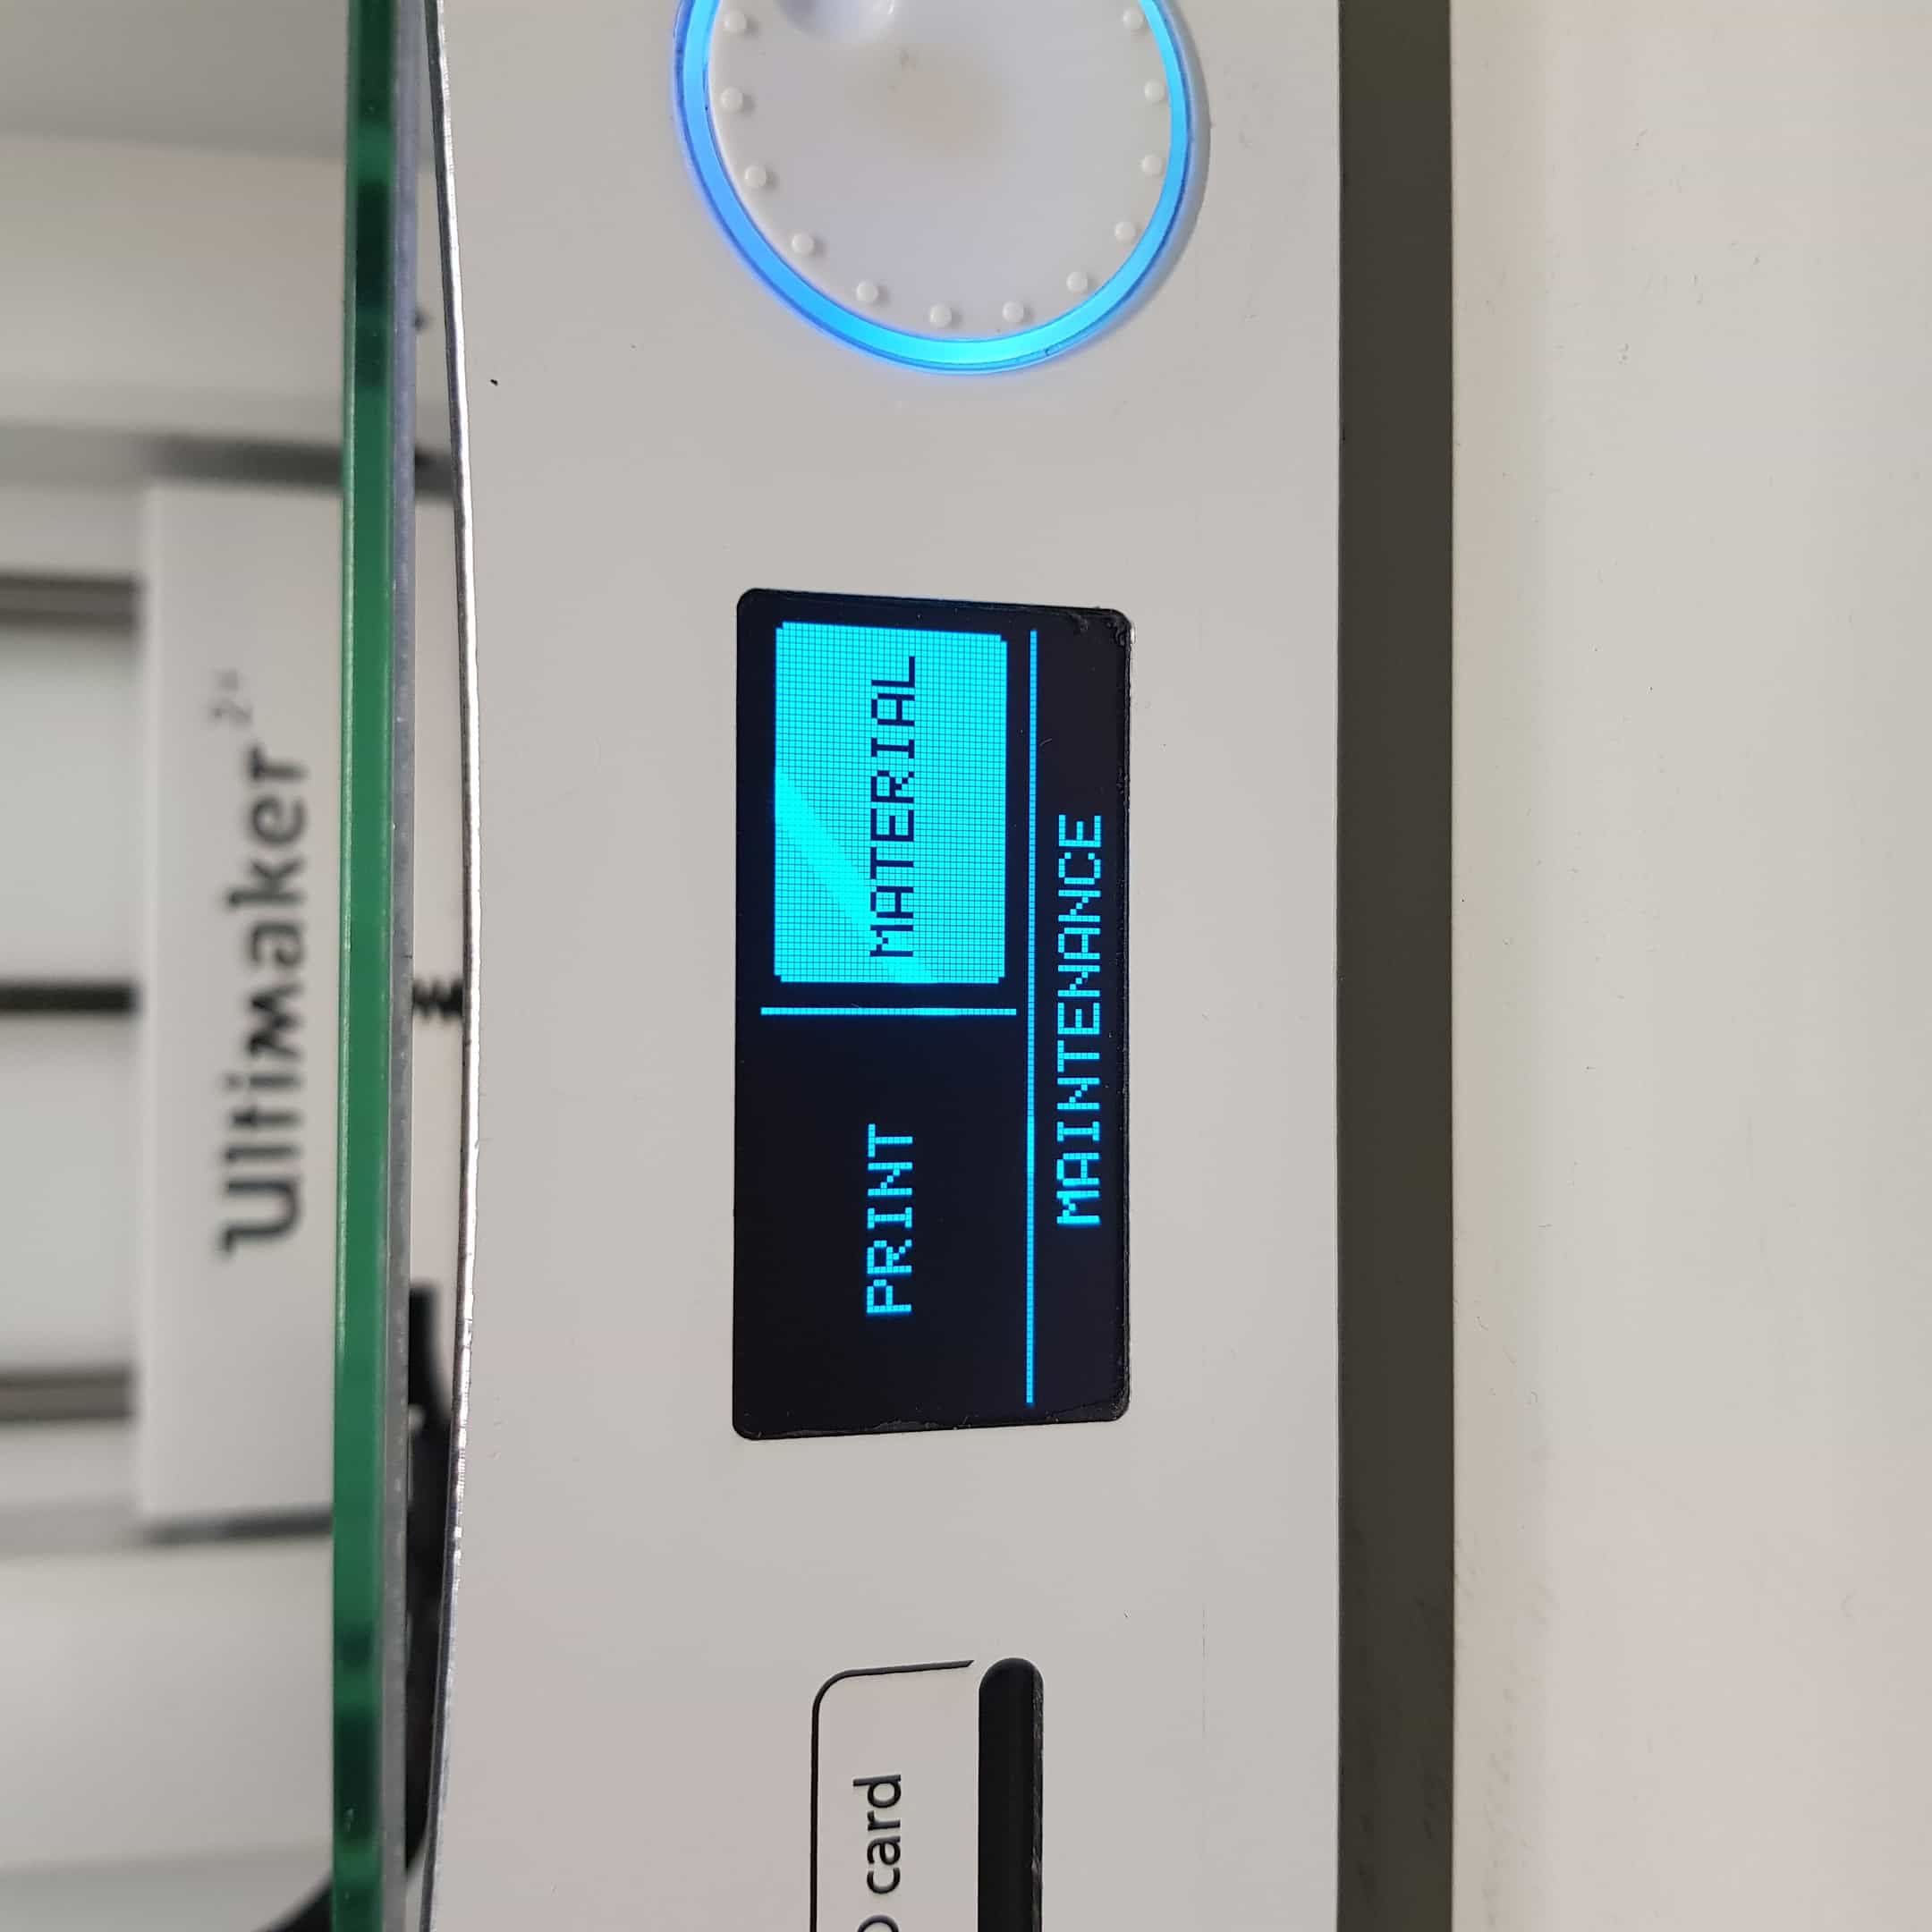
Before I can start printing I had to check if there is filiament inserted in the printer. To change/insert the filiament, I had to select the material setting on the printer. Now the printer start extruding material inside of the printer. If there isn't material in the printer it will extrude nothing.
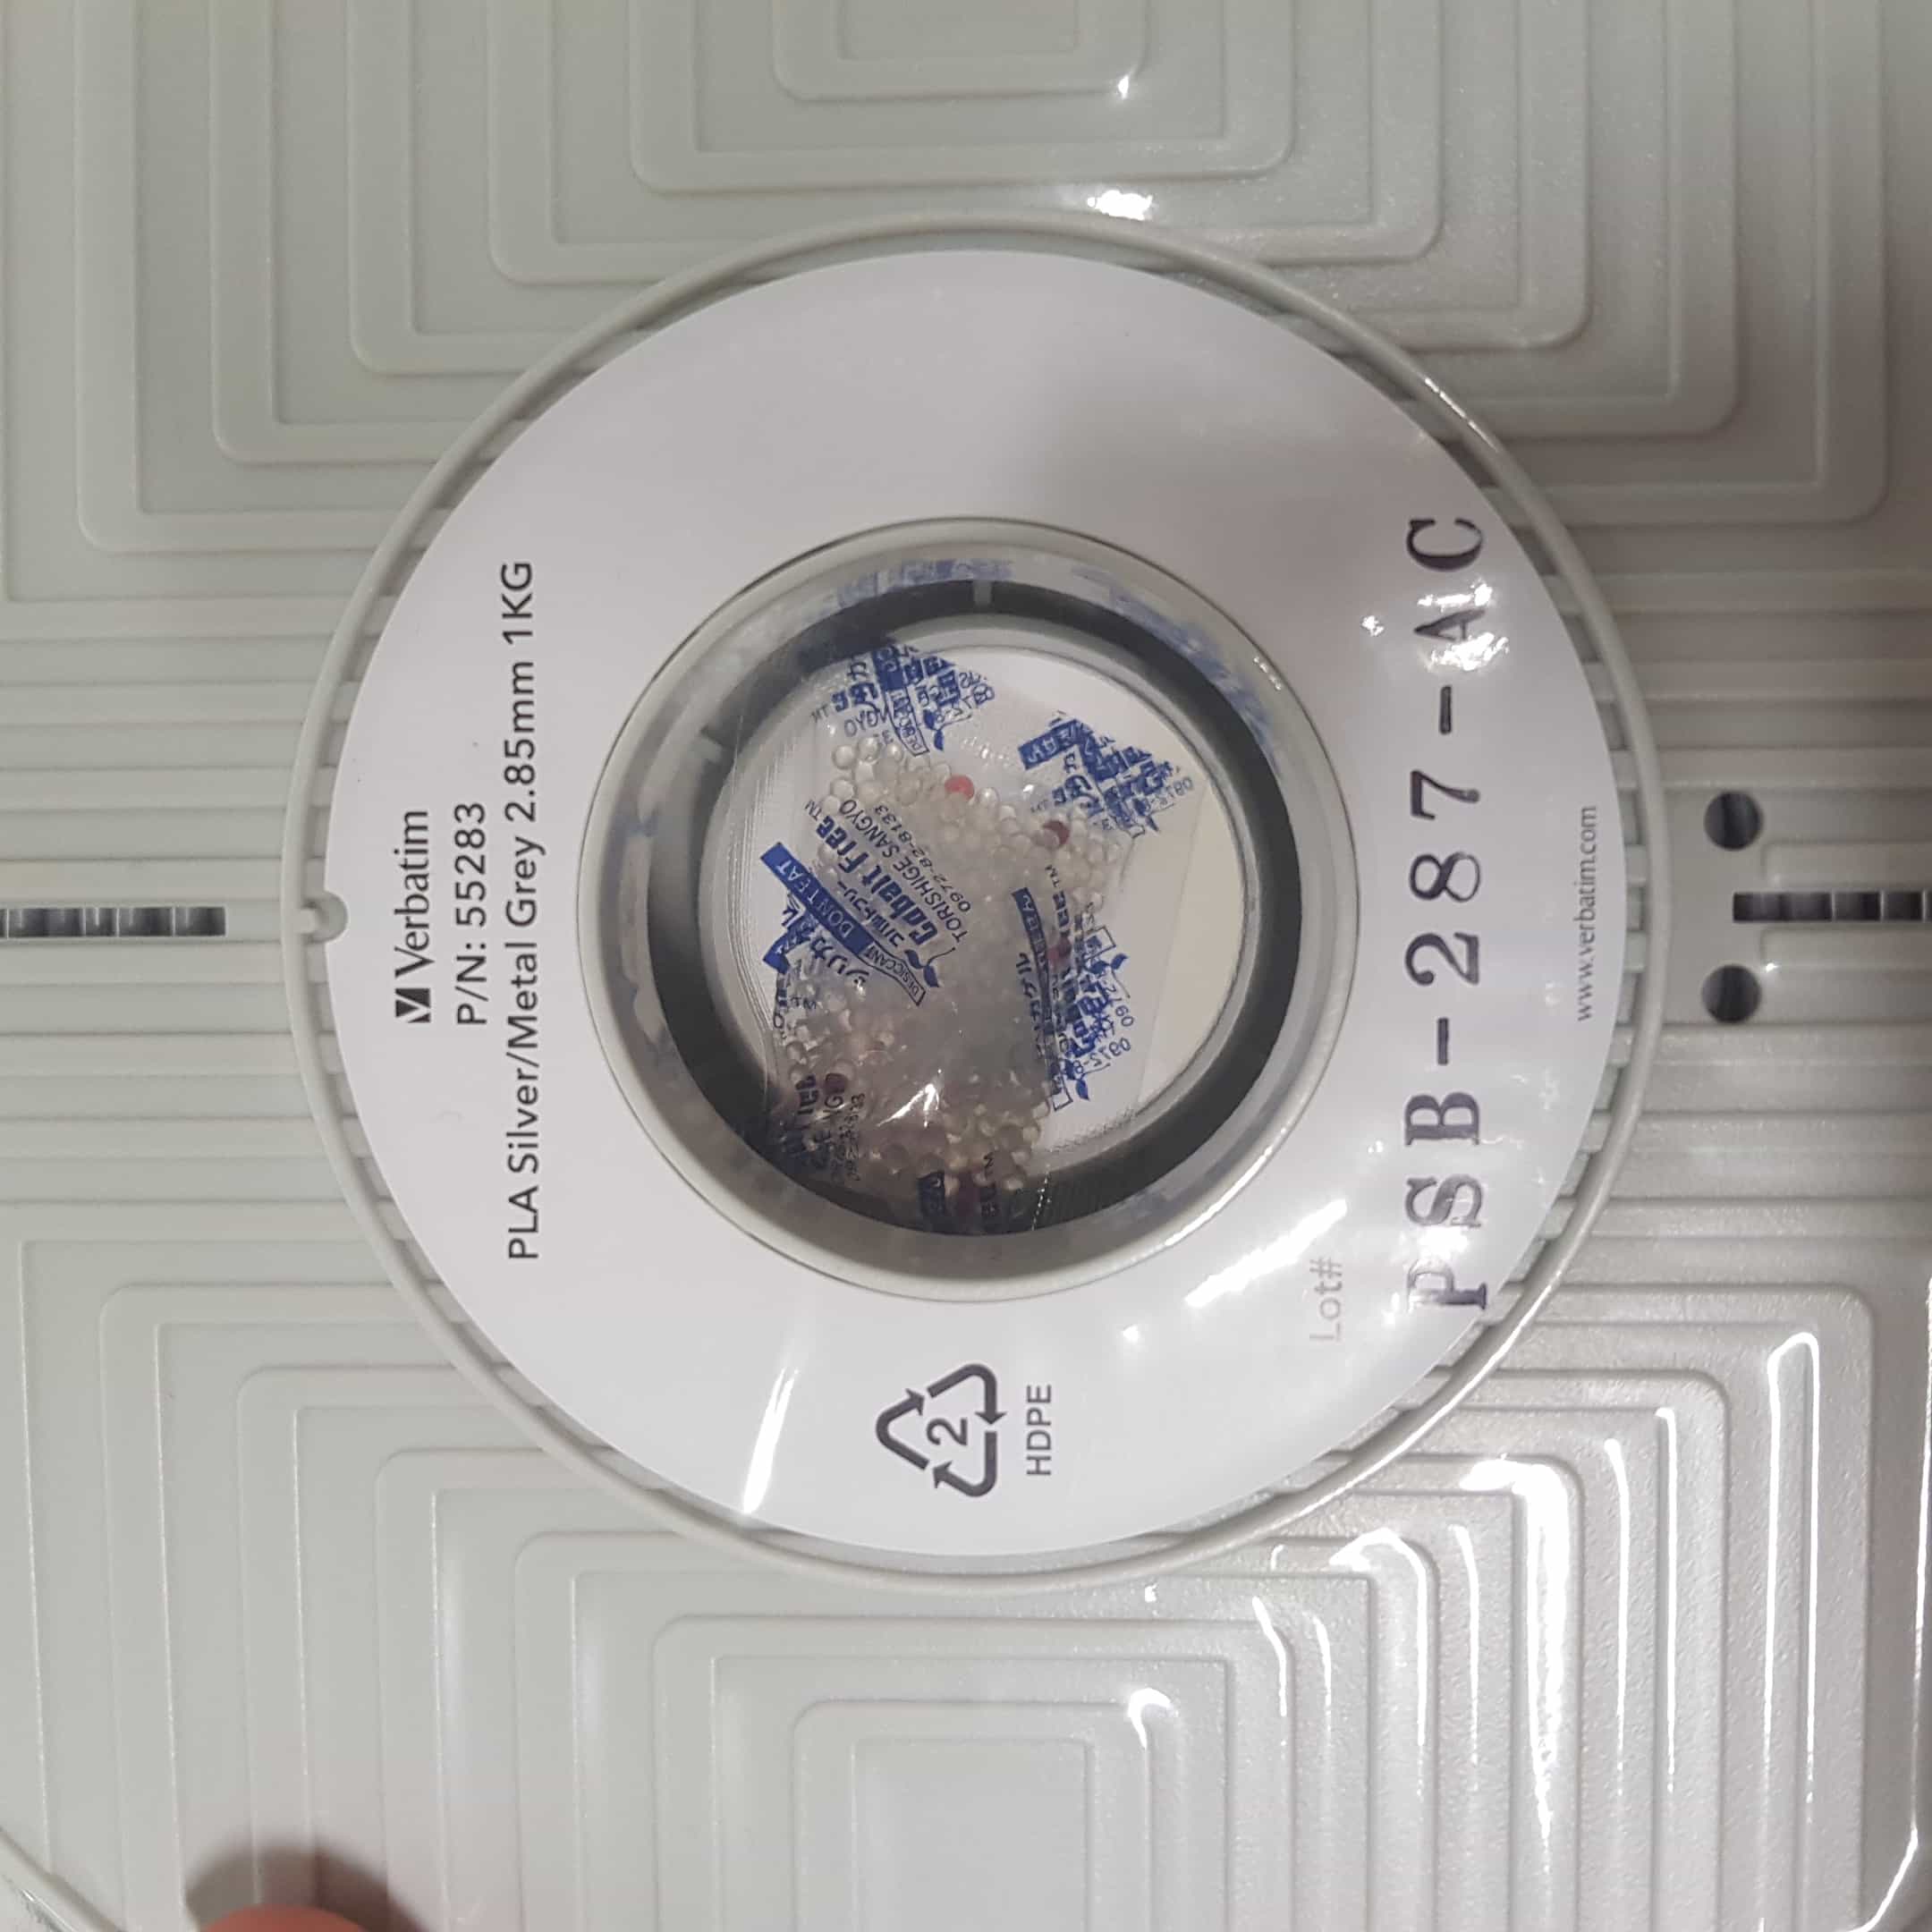
Now I had to pick the right Material, in my case 2,85mm thick PLA.
Attention: Every printer has different materials with different material thickness, check the required material before you start intruding material.
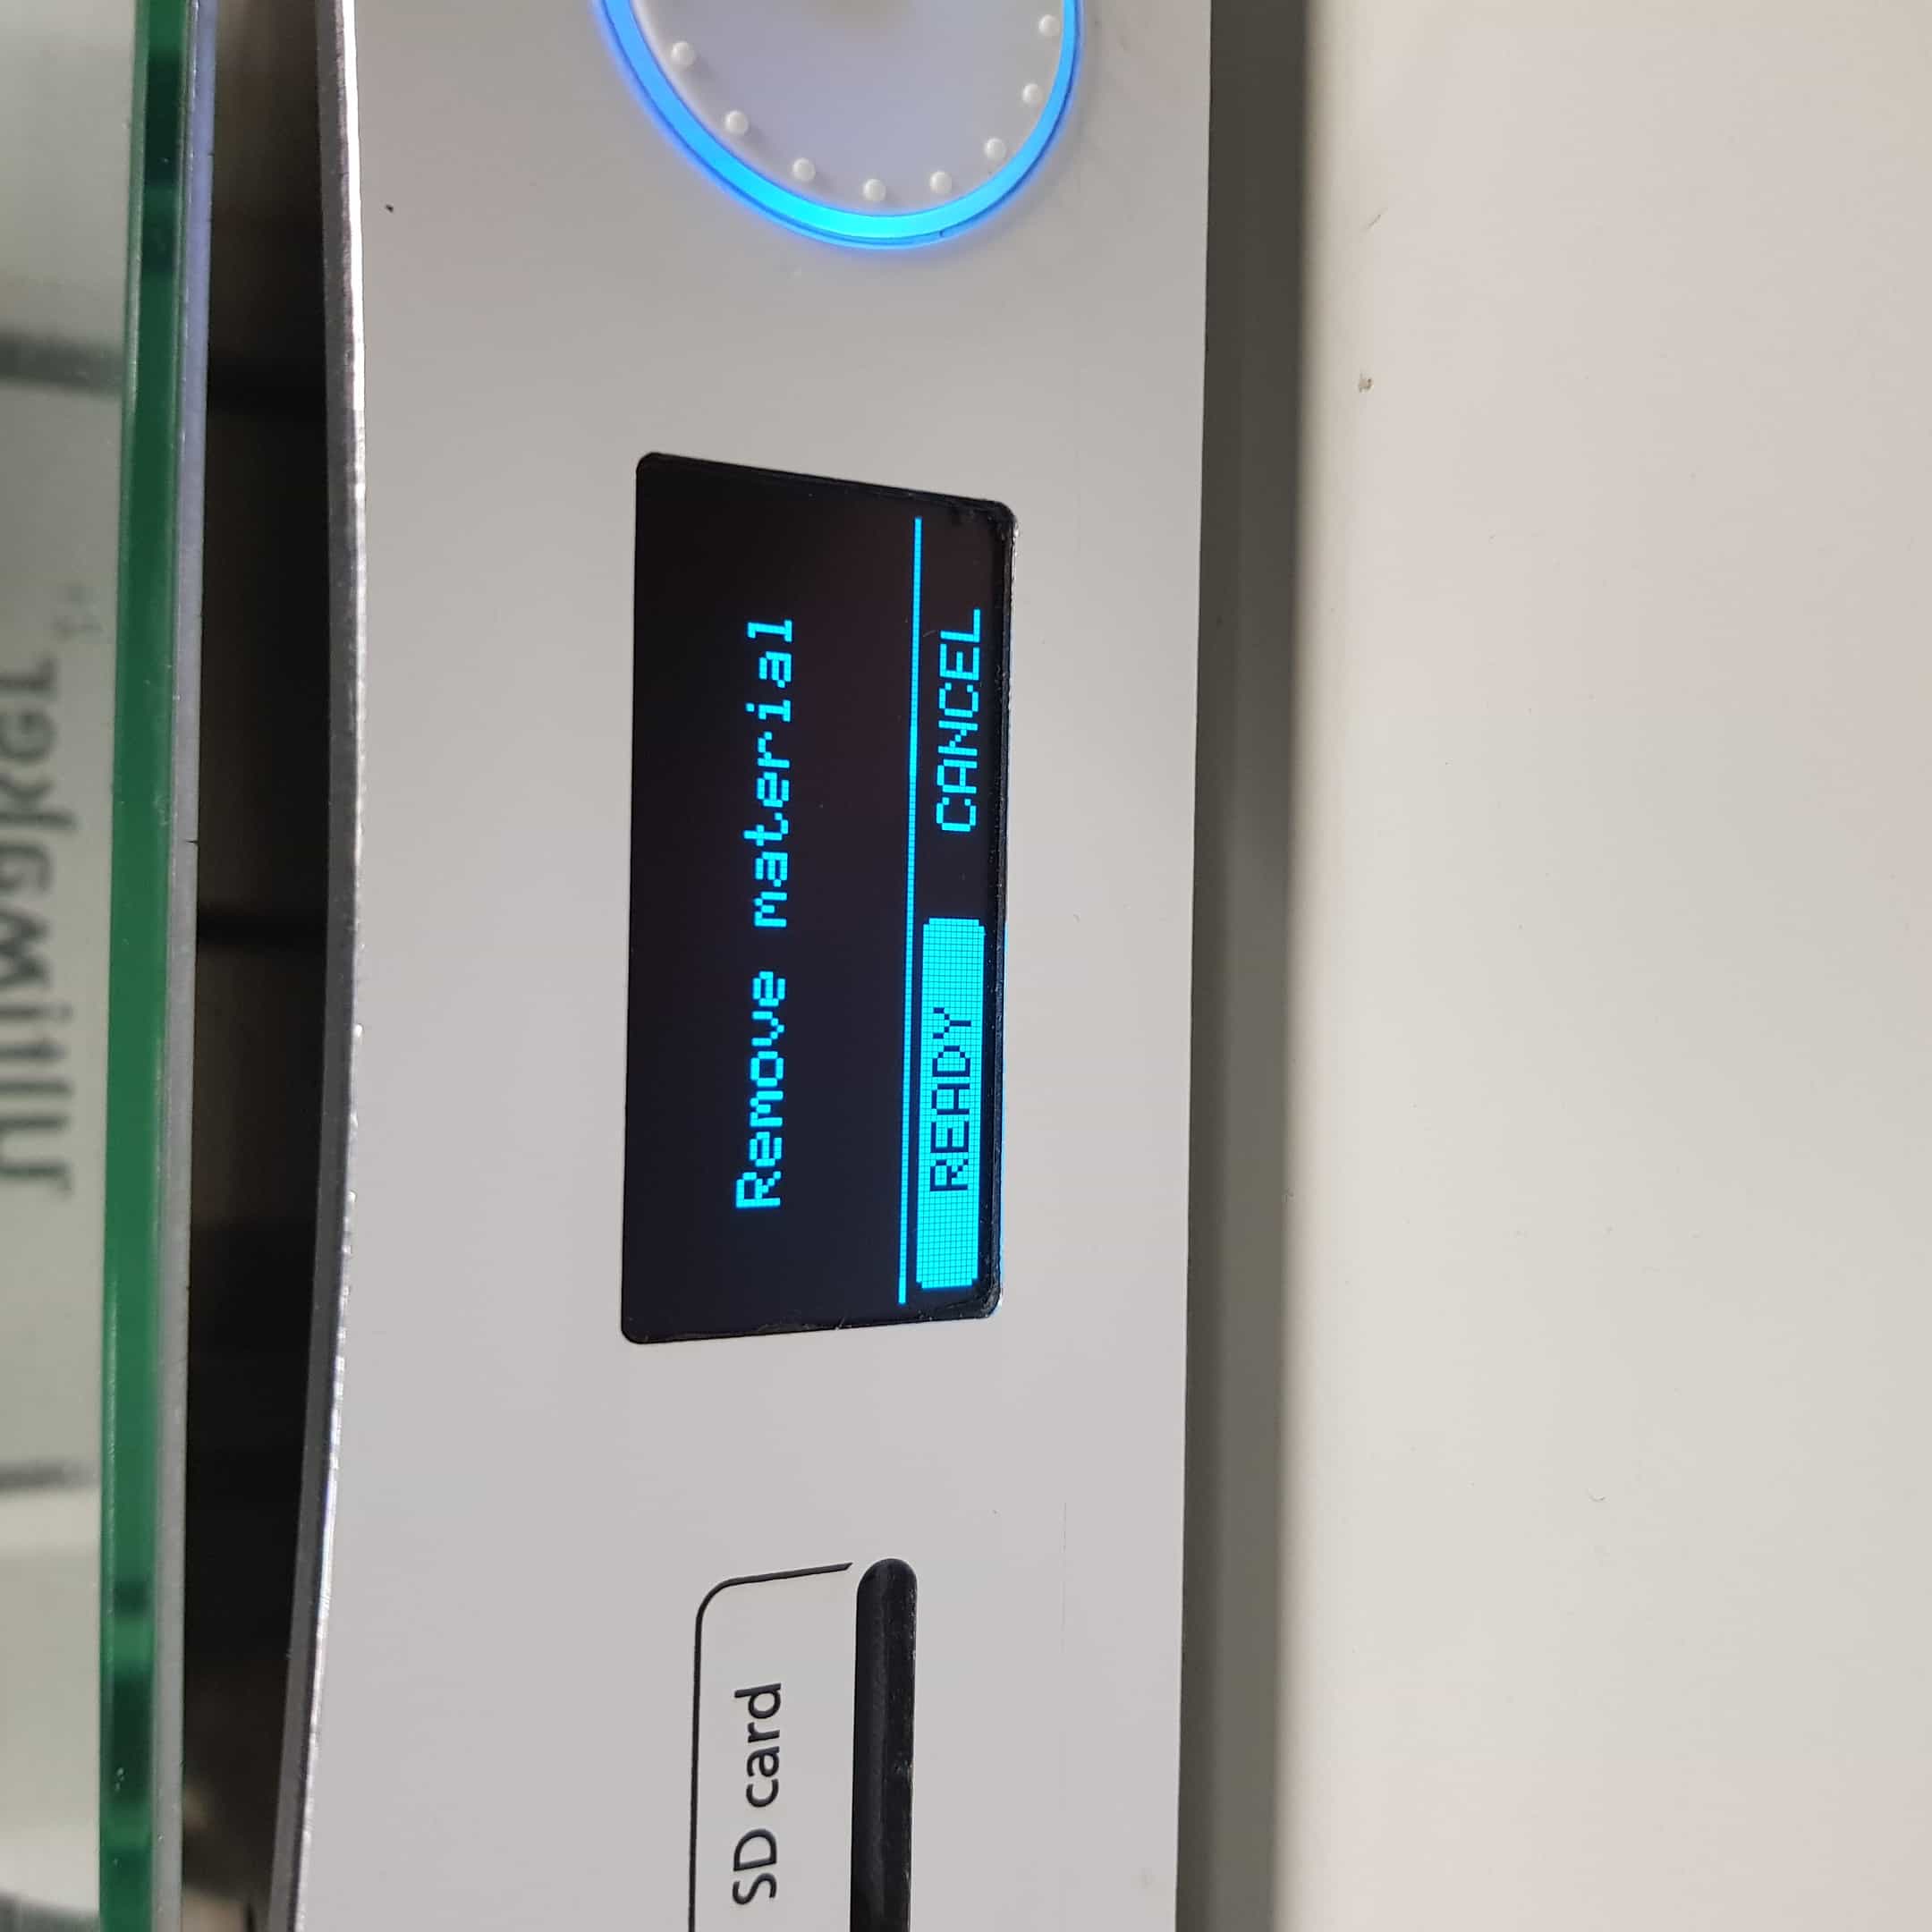
Now the printer says that I can remove the old material (if there is any)
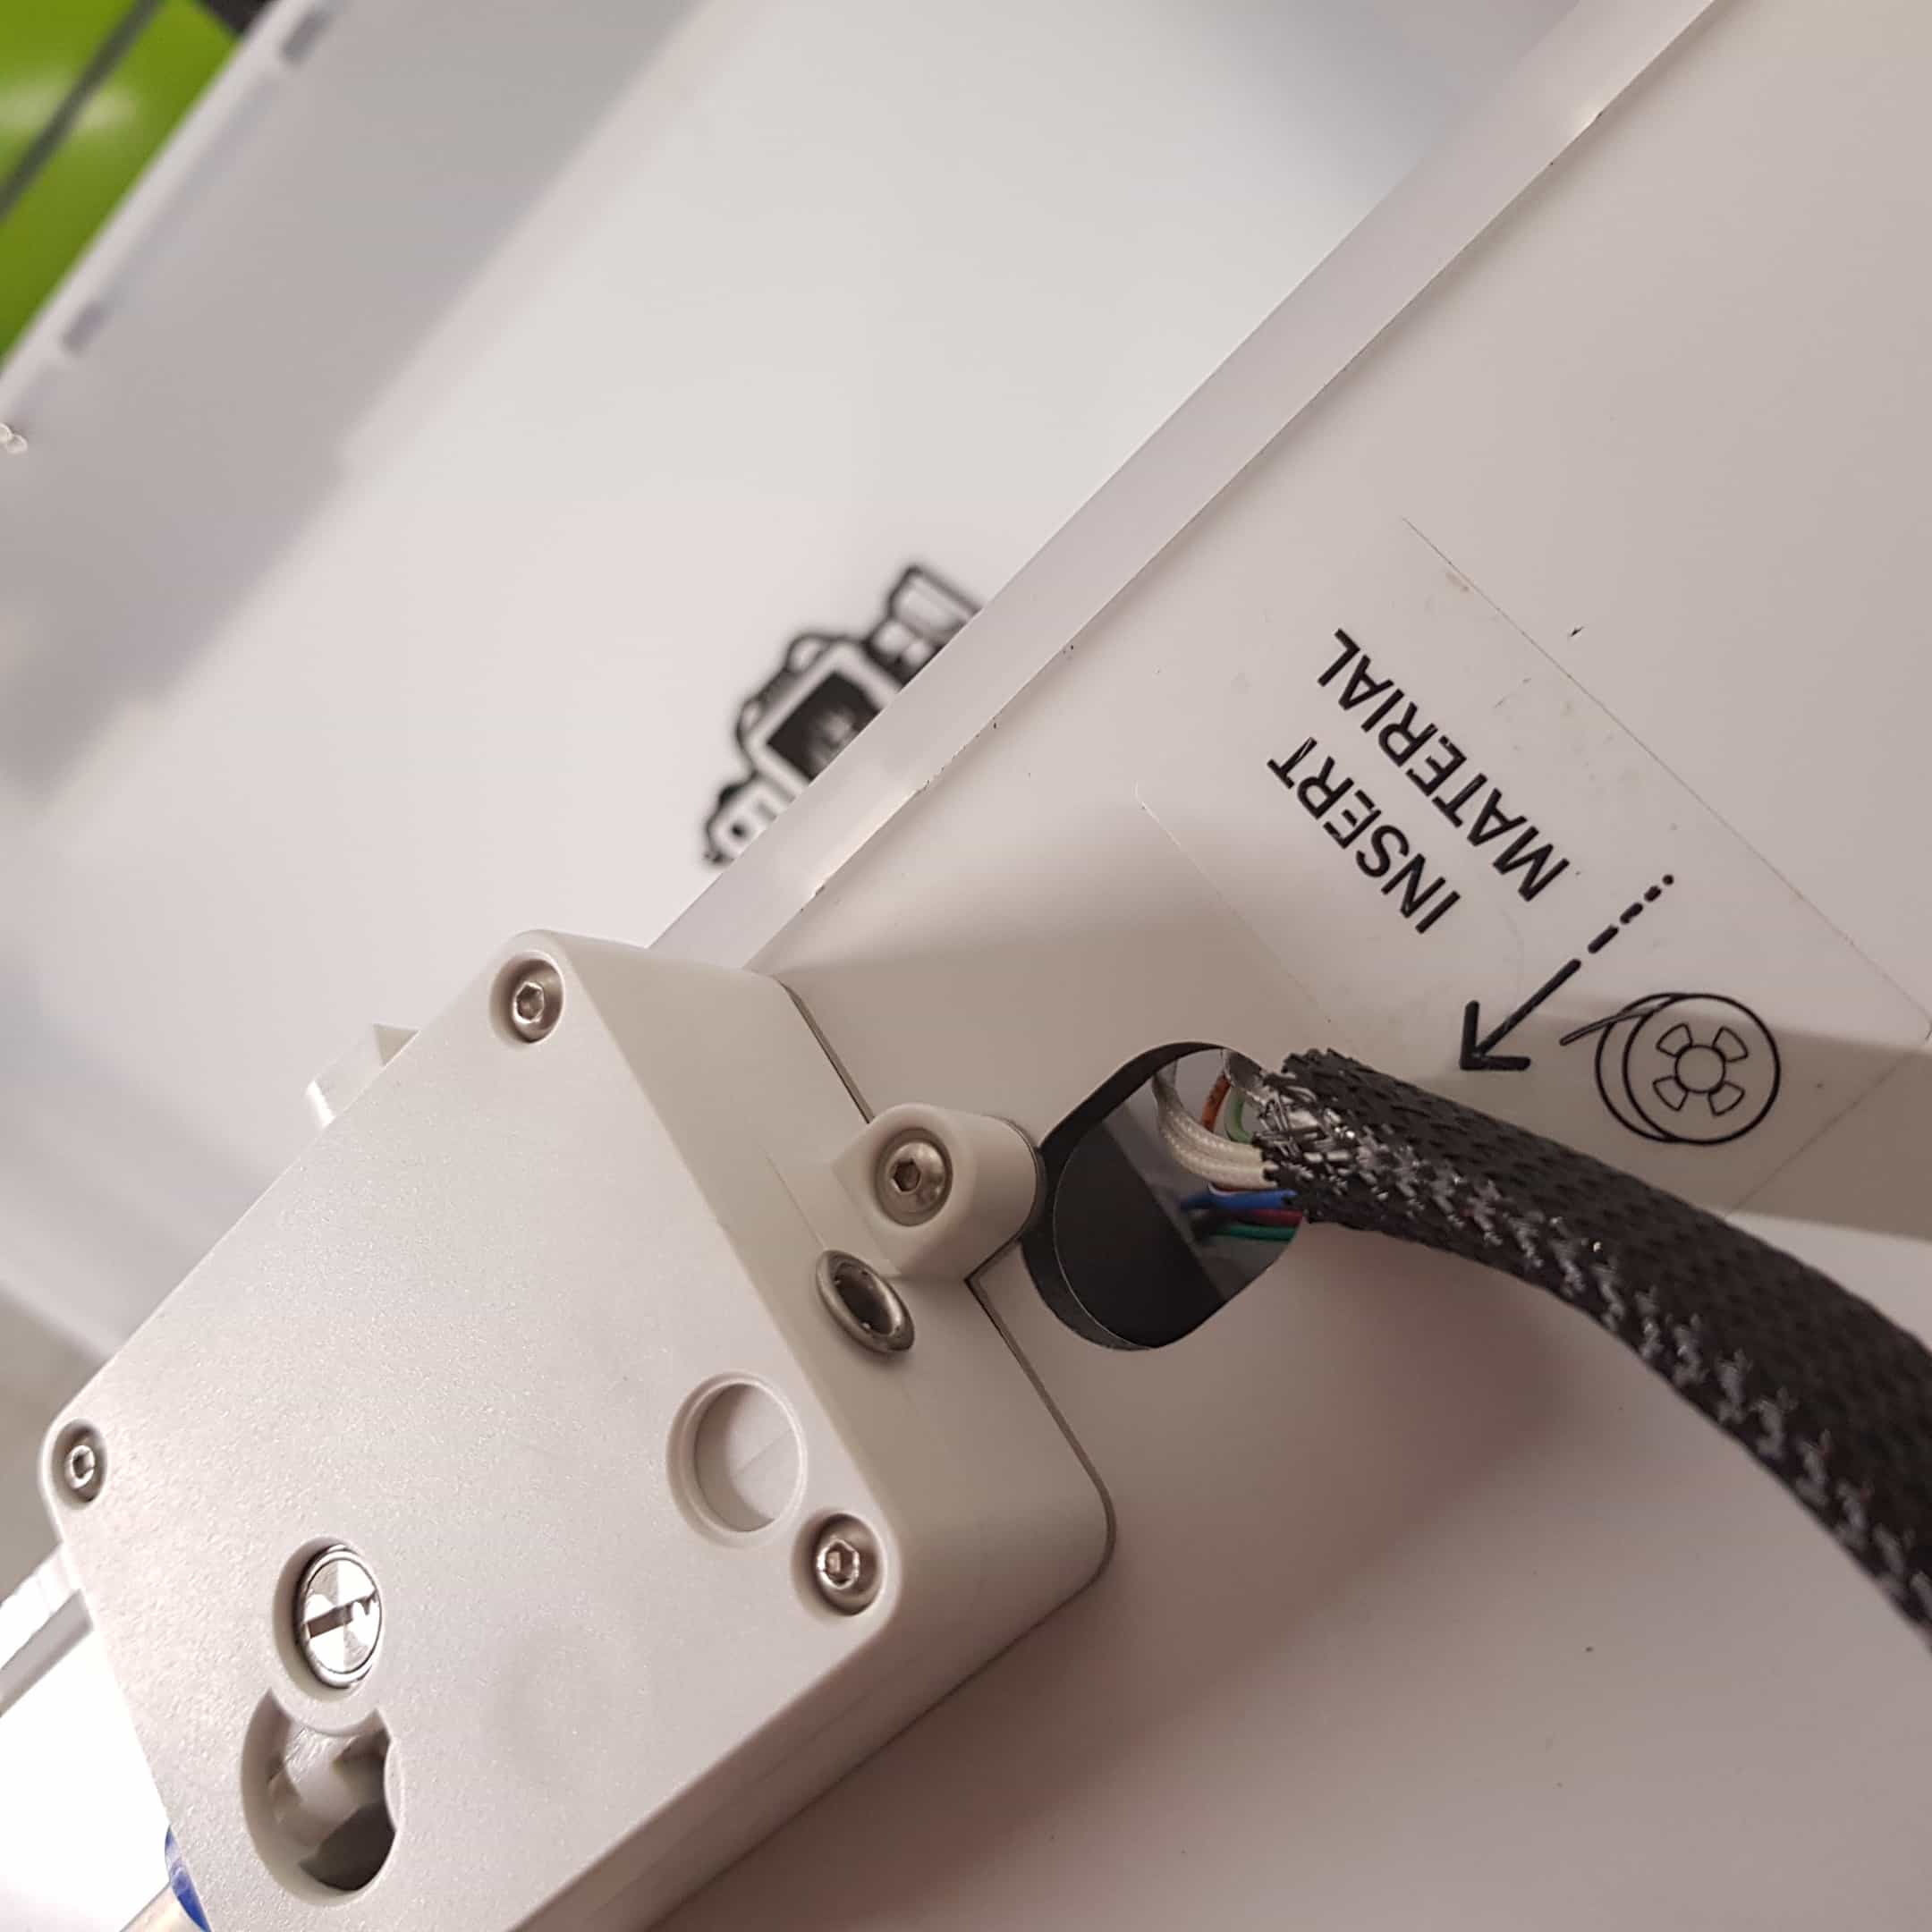
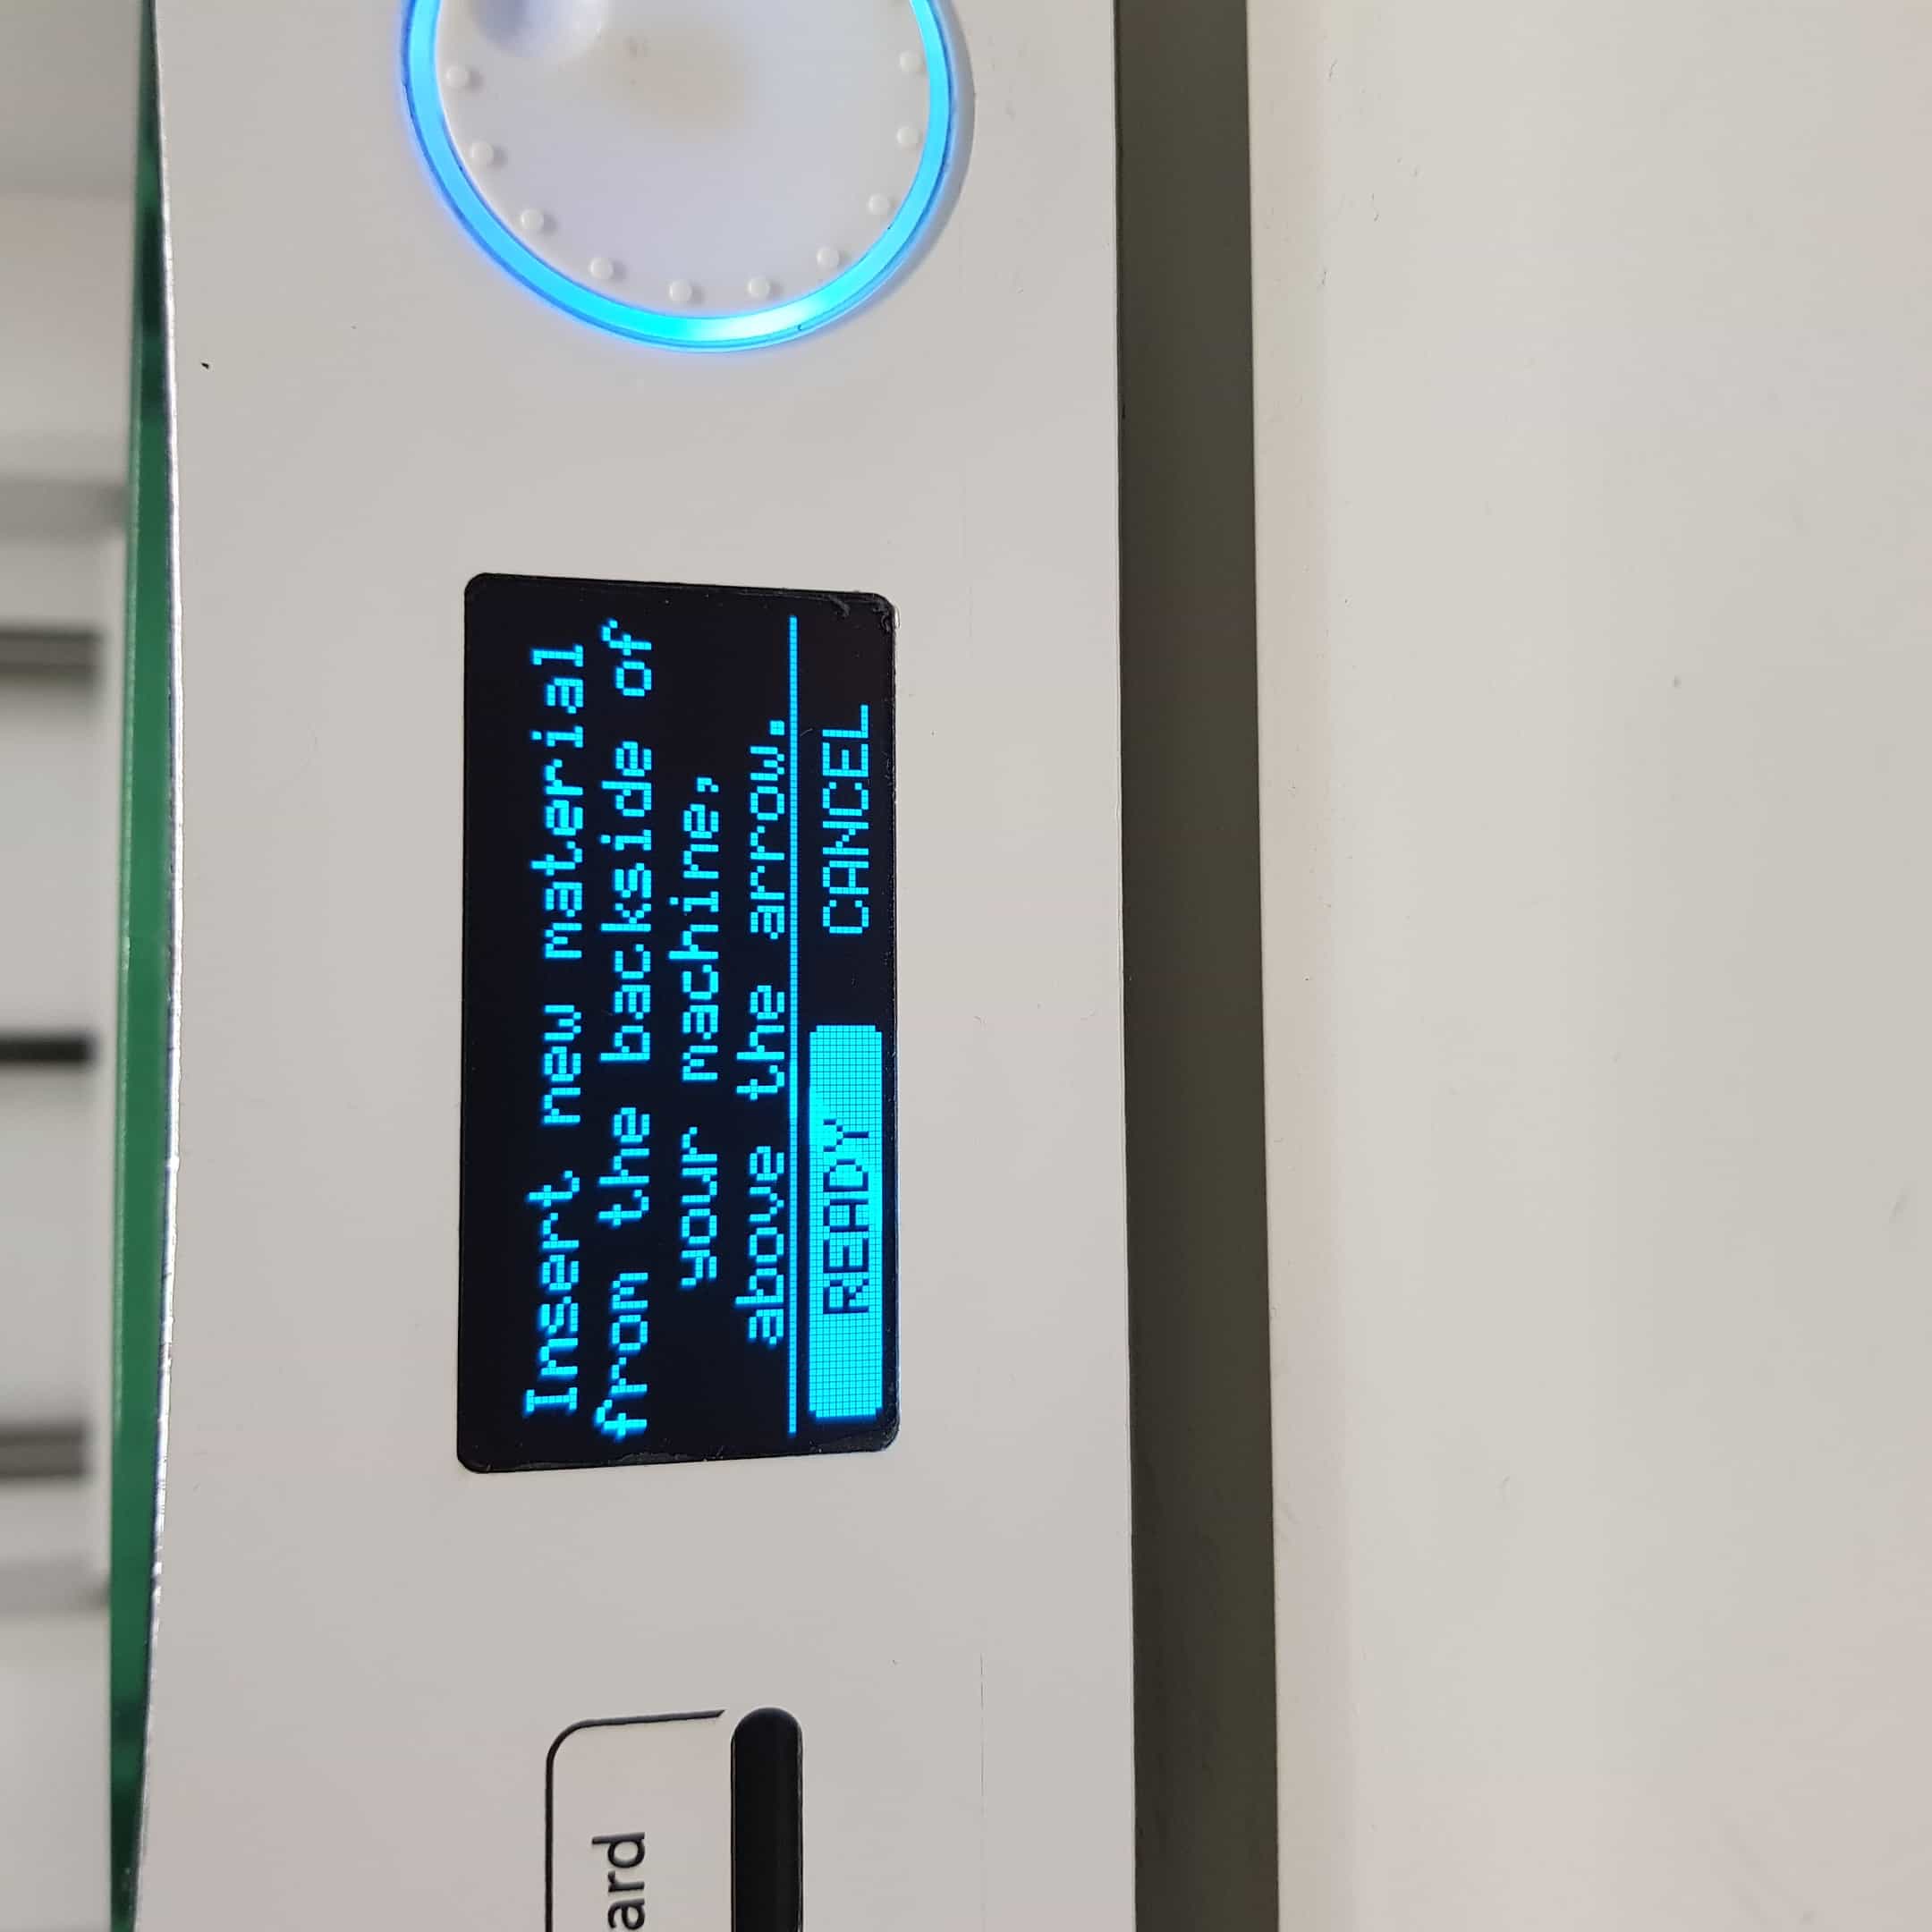
and put my material into the material hole at the backside of the printer.
the only thing left now is to press the ready button, the printer now start inserting the new material. Just wait until the material comes out of the nozzle. When material comes out your are ready to start the print.
Navigate to "print", select your file and the printer will start the print after heating up the printing plate. It is important to watch the printer doing the first few layers, because sometimes it could appear that the material don't stick to the heating plate and the whole print is wasted.
On the display you can see the time left, but this time changes according to the speed of the printer. The time given in cura will be the exact time the print will take.
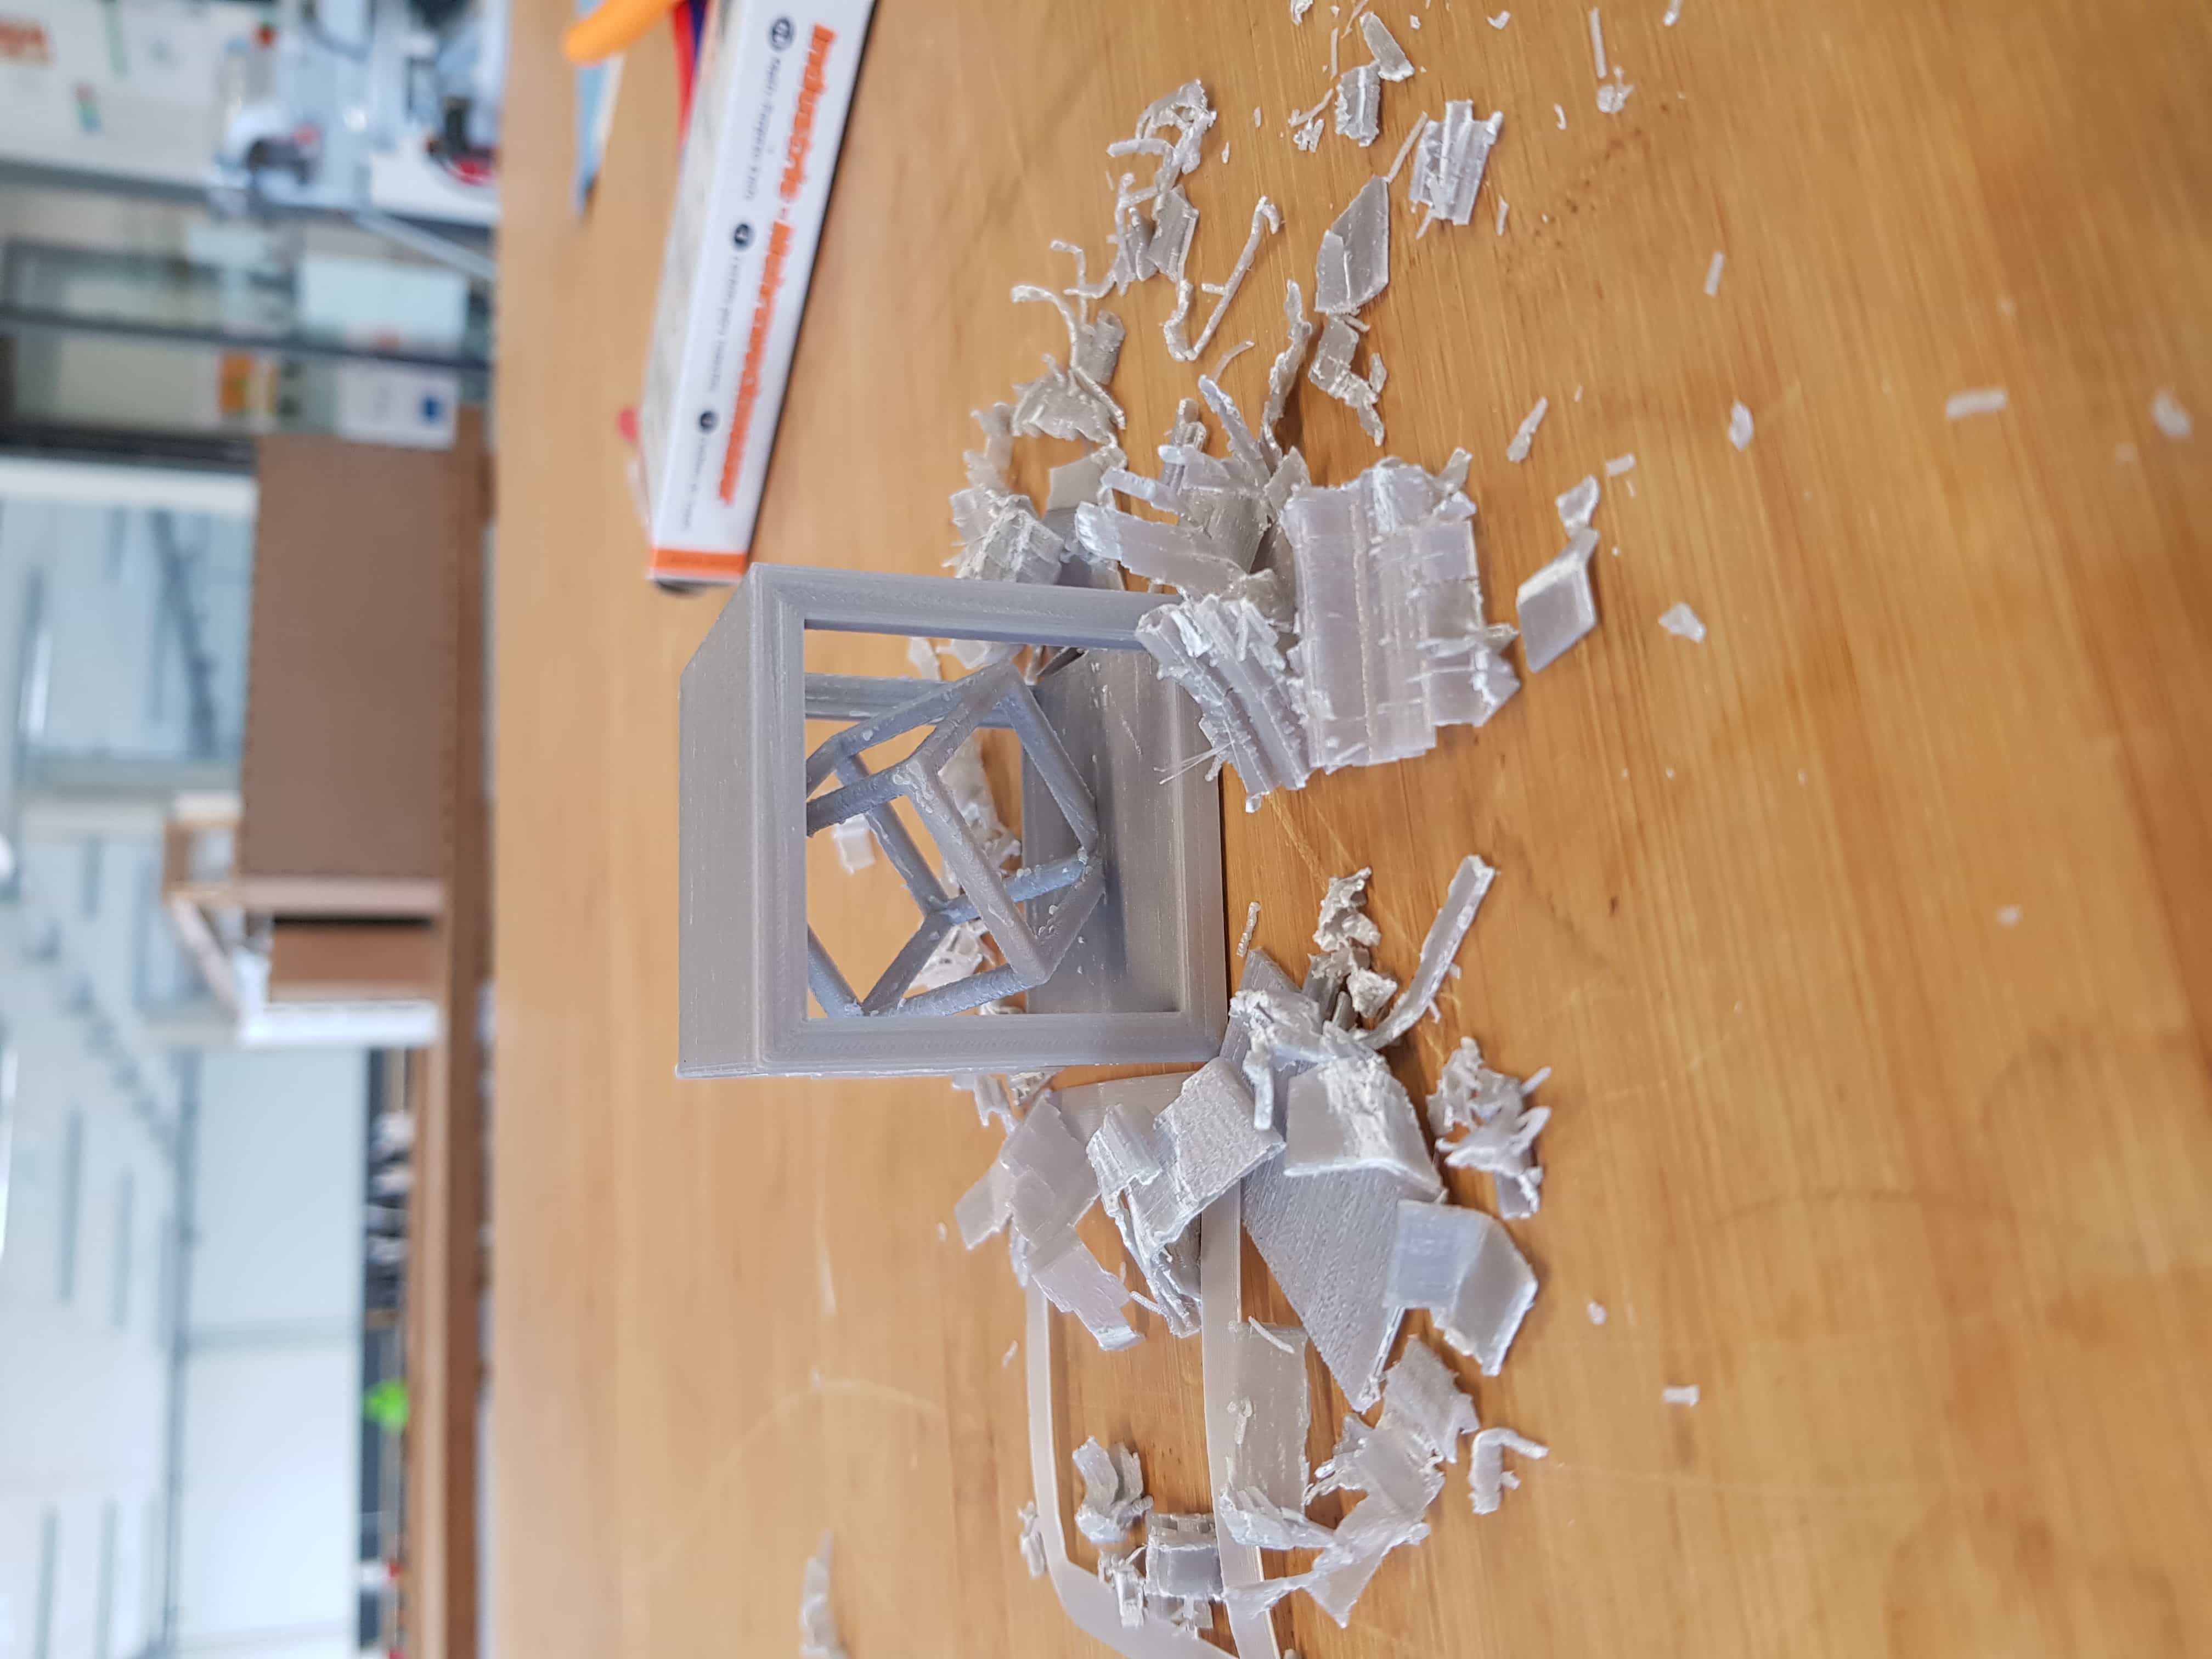
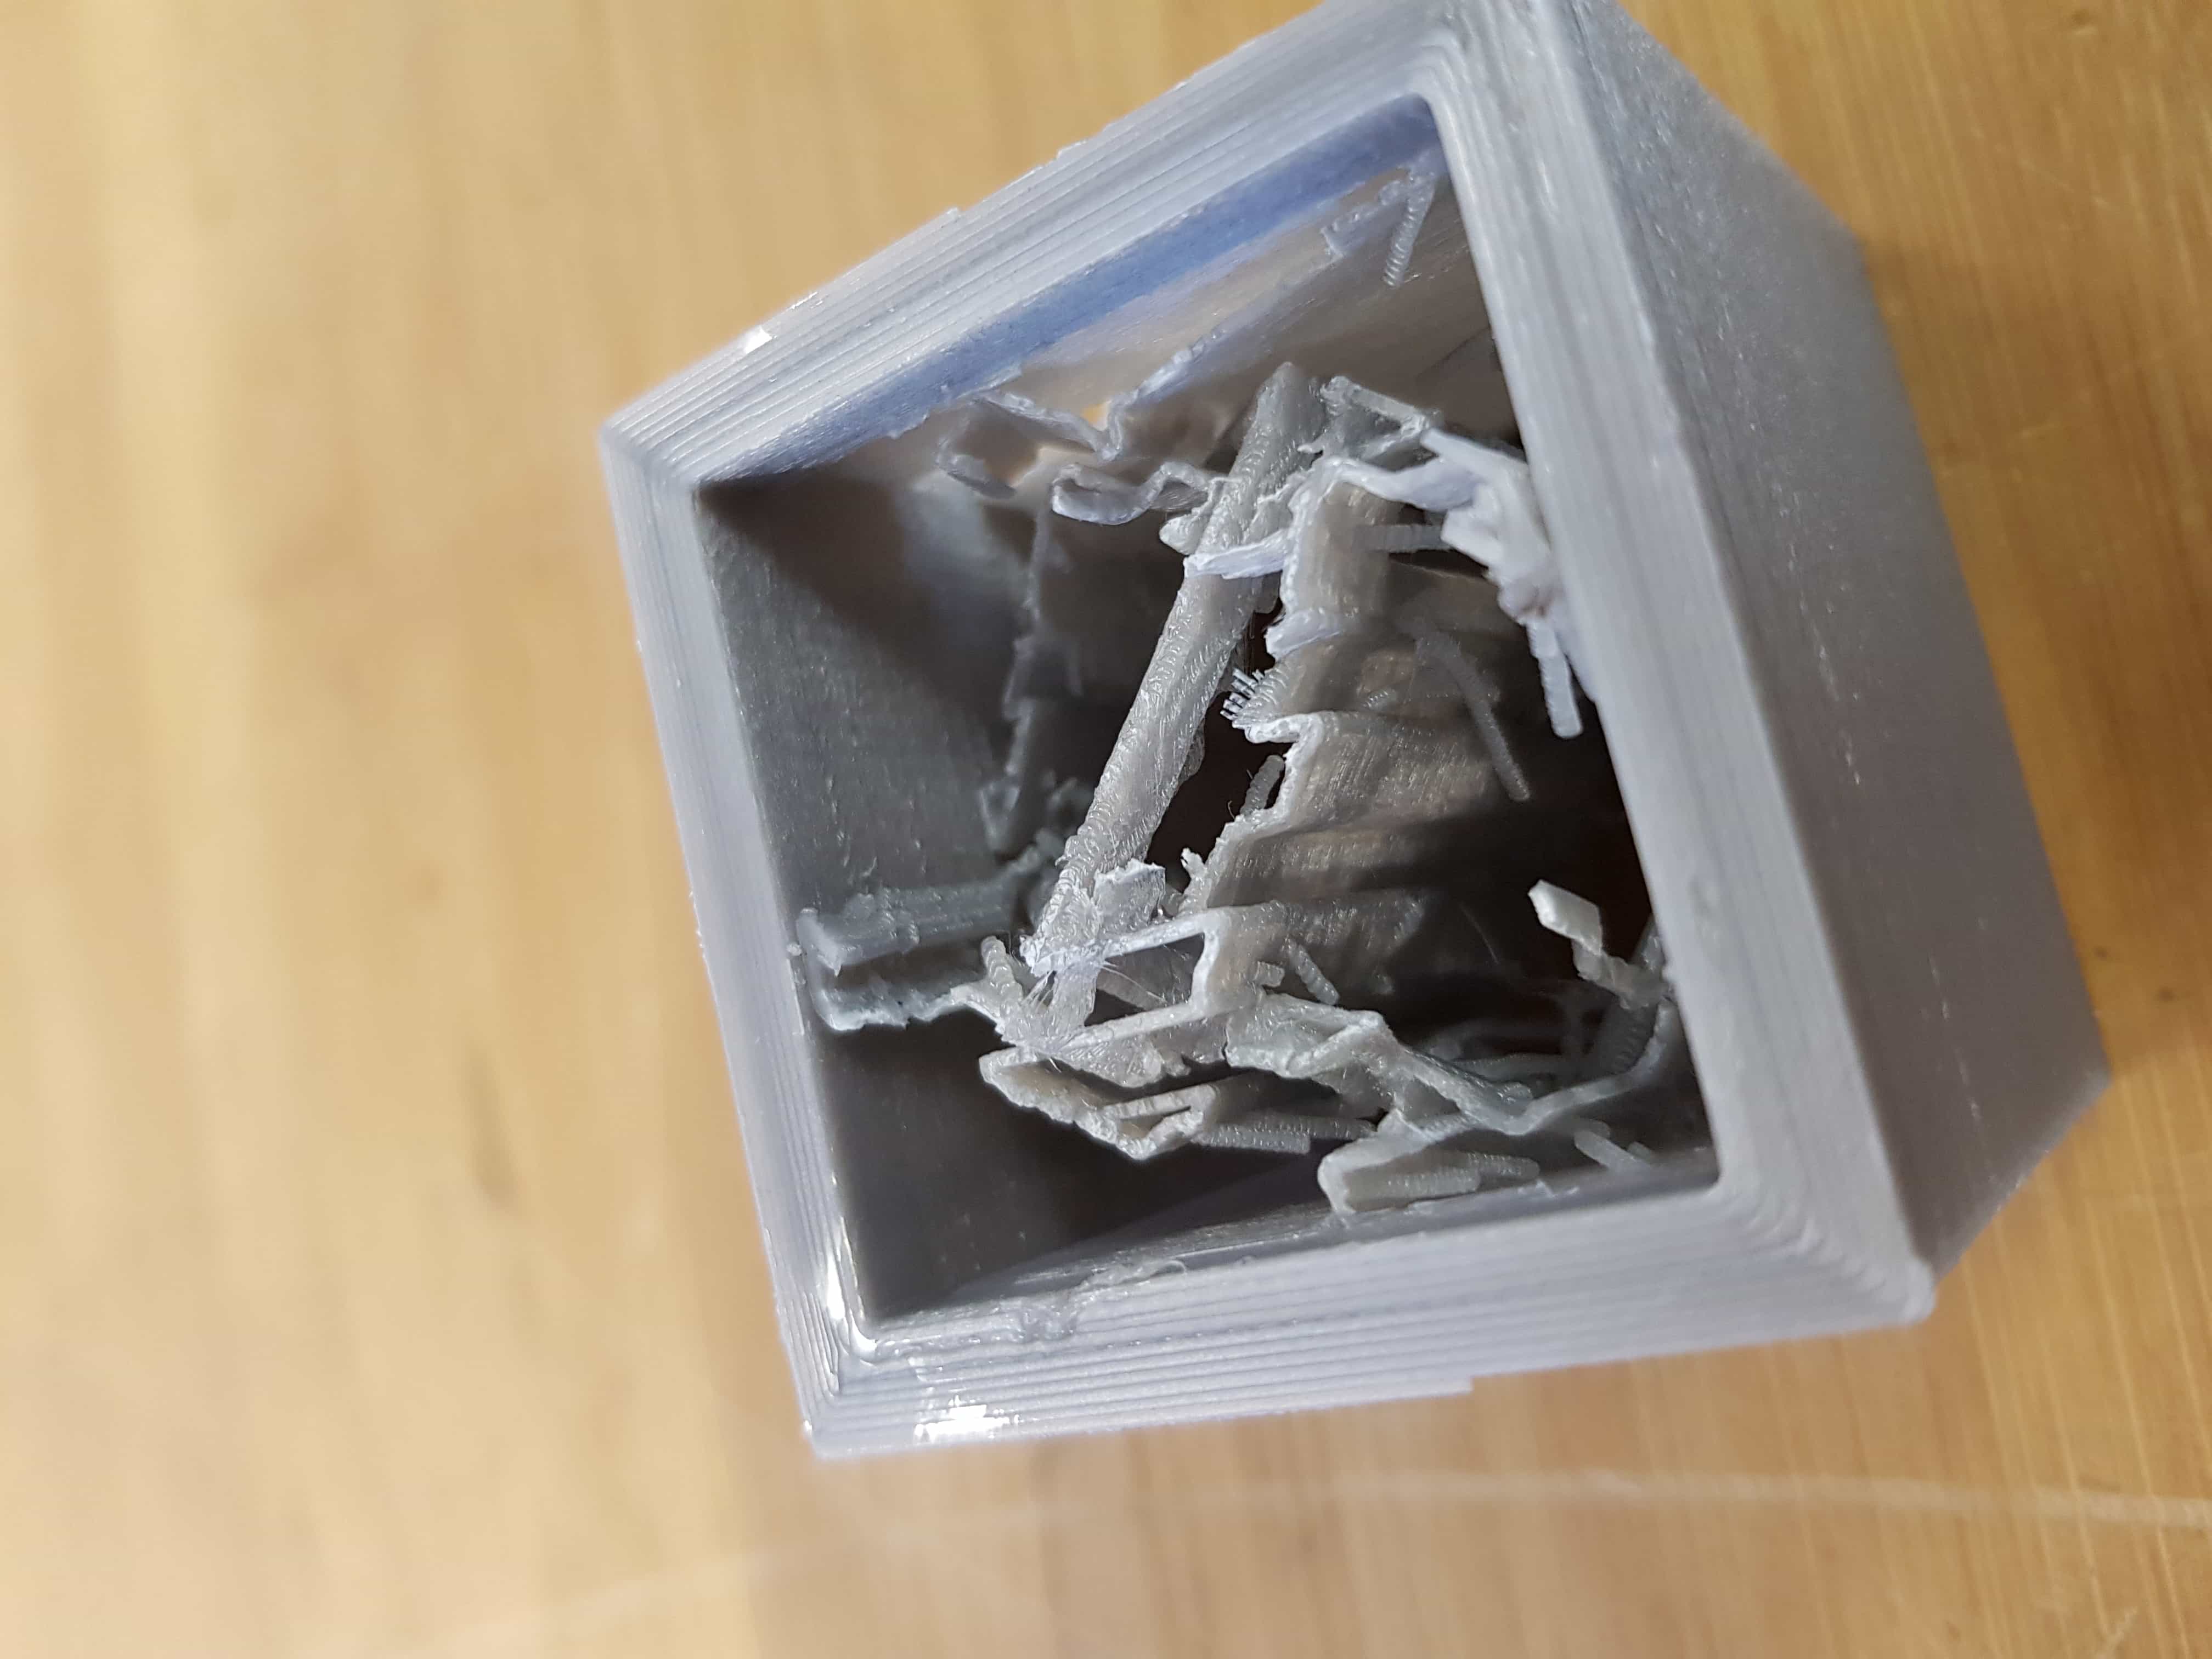
When the print is finished, the outcome will look like this. The only thing left now is to get rid of the support and clean it up a little.
The finished print looks like this.
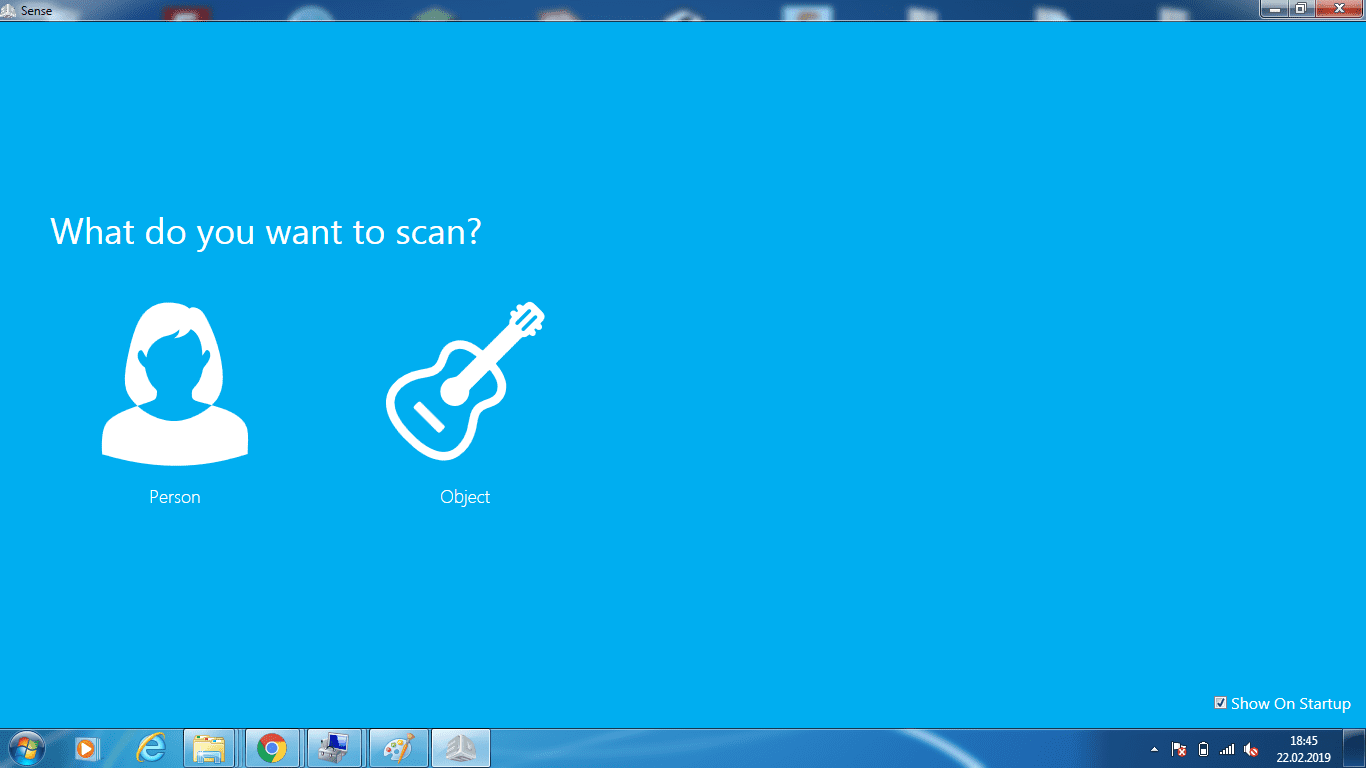
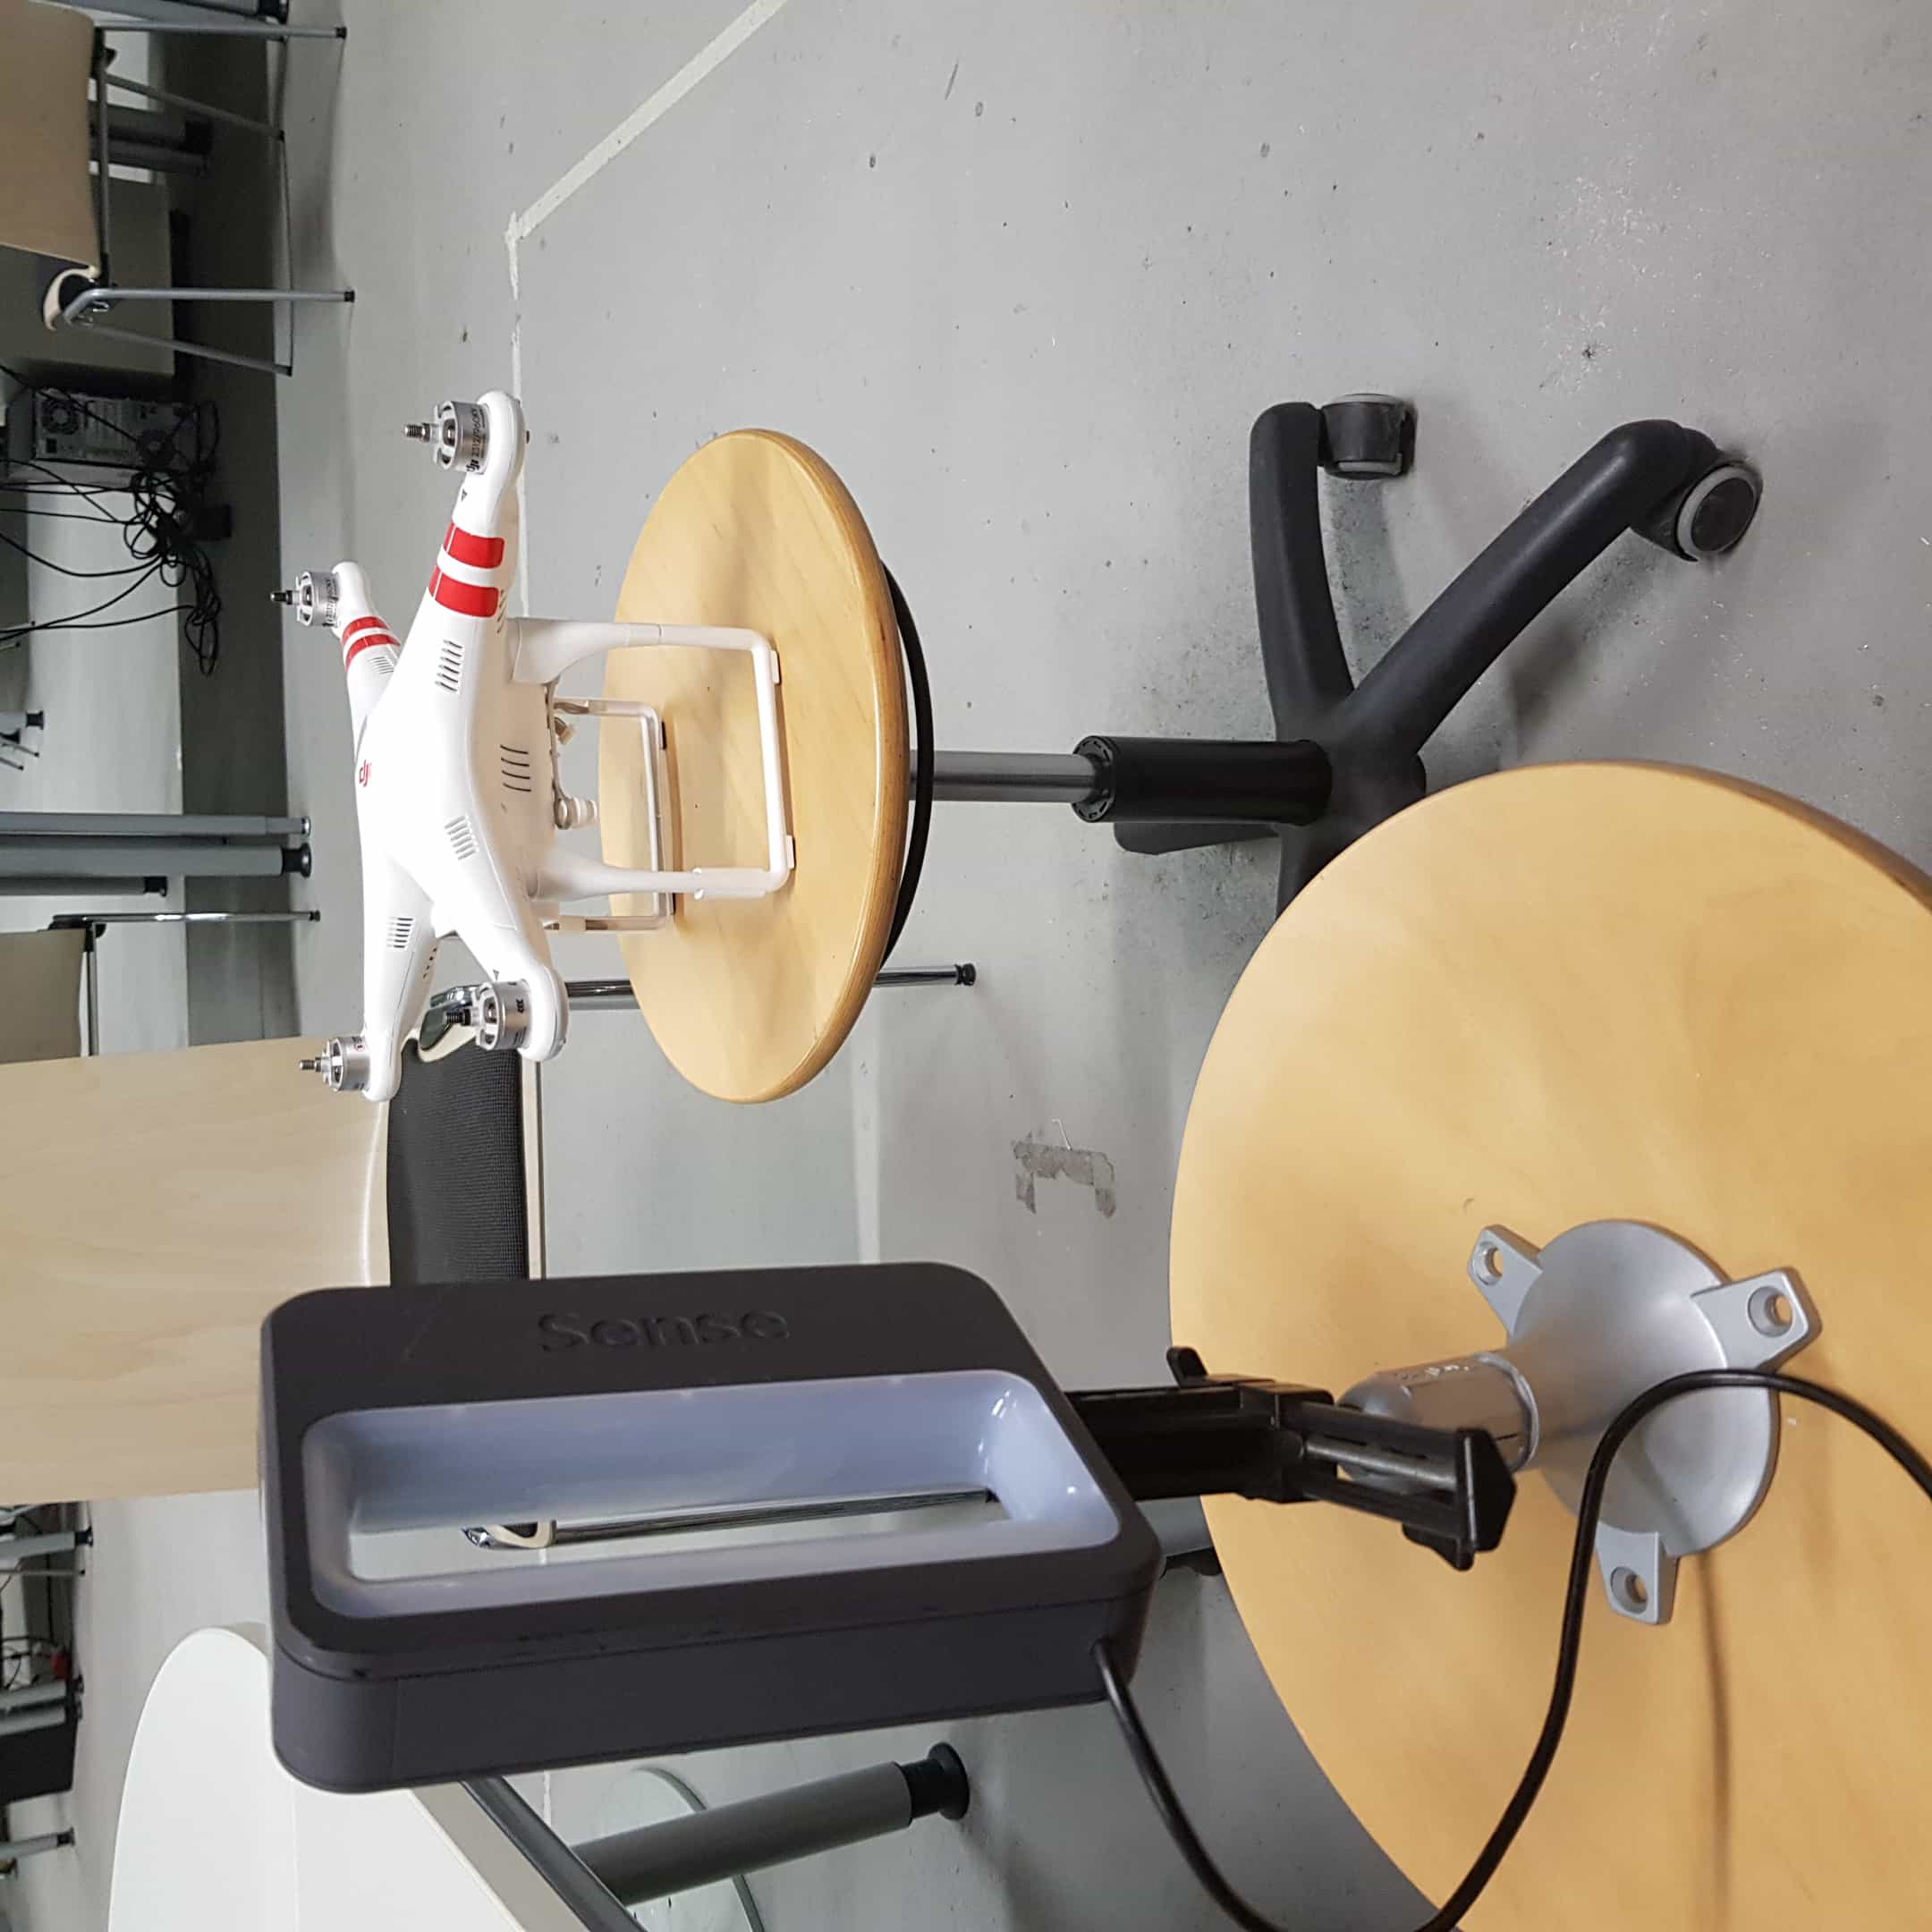
The second part of our assignment was to scan a object using a 3d-scanner. I have used the sense 3d-scanner. Scanning will require a computer with windows os. Starting the software is not possible without the scanner connected via usb. so i connected the scanner first and started the software
In the first window I had to select wether I would like to scan an object or a person.
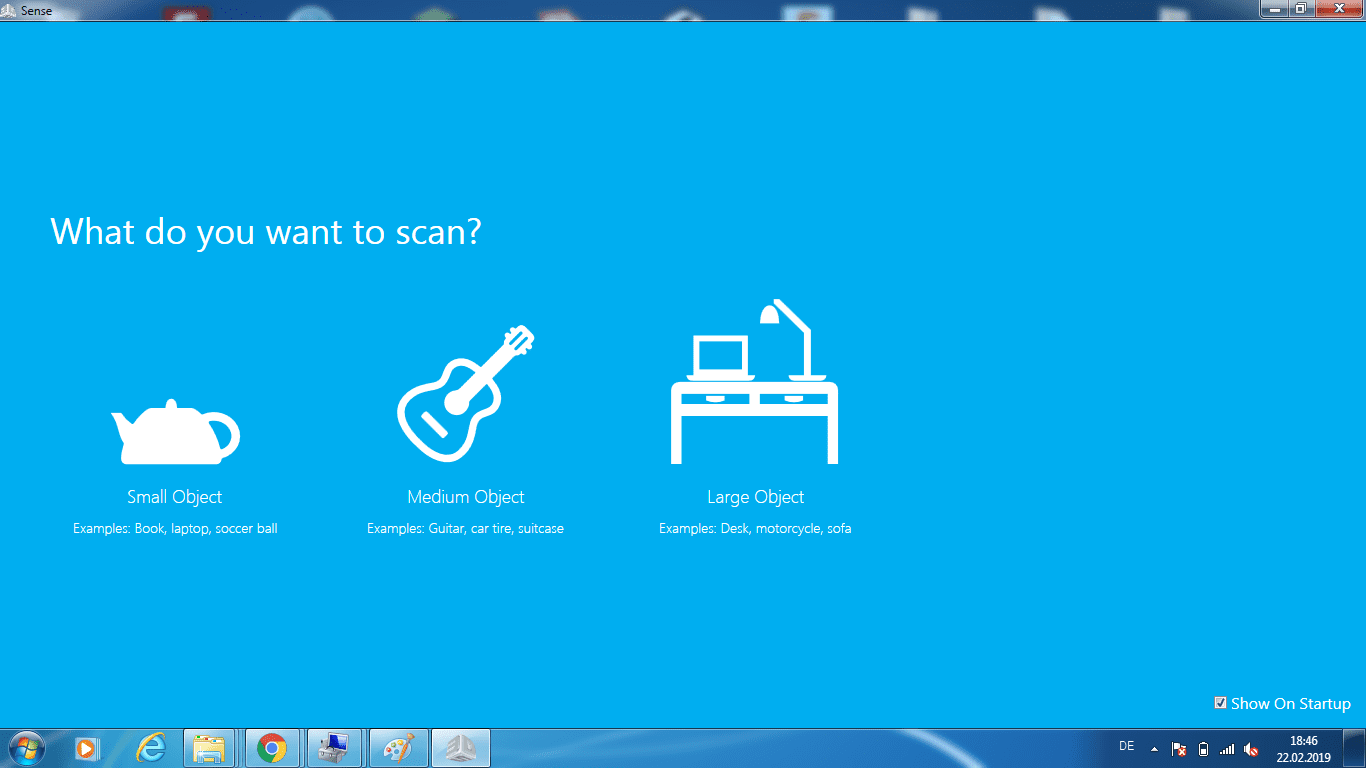
I selected an object, so I had to select the size of the object in the next window.
Now I was able to see what the scanner cameras see. In this part I had to put my object in front of the camera.
I personally build a a little rig to make the scan easier. It's just simply to chairs, that are same size and are able to turn. I have mounted the scanner on a stand and put the object on the other chair.
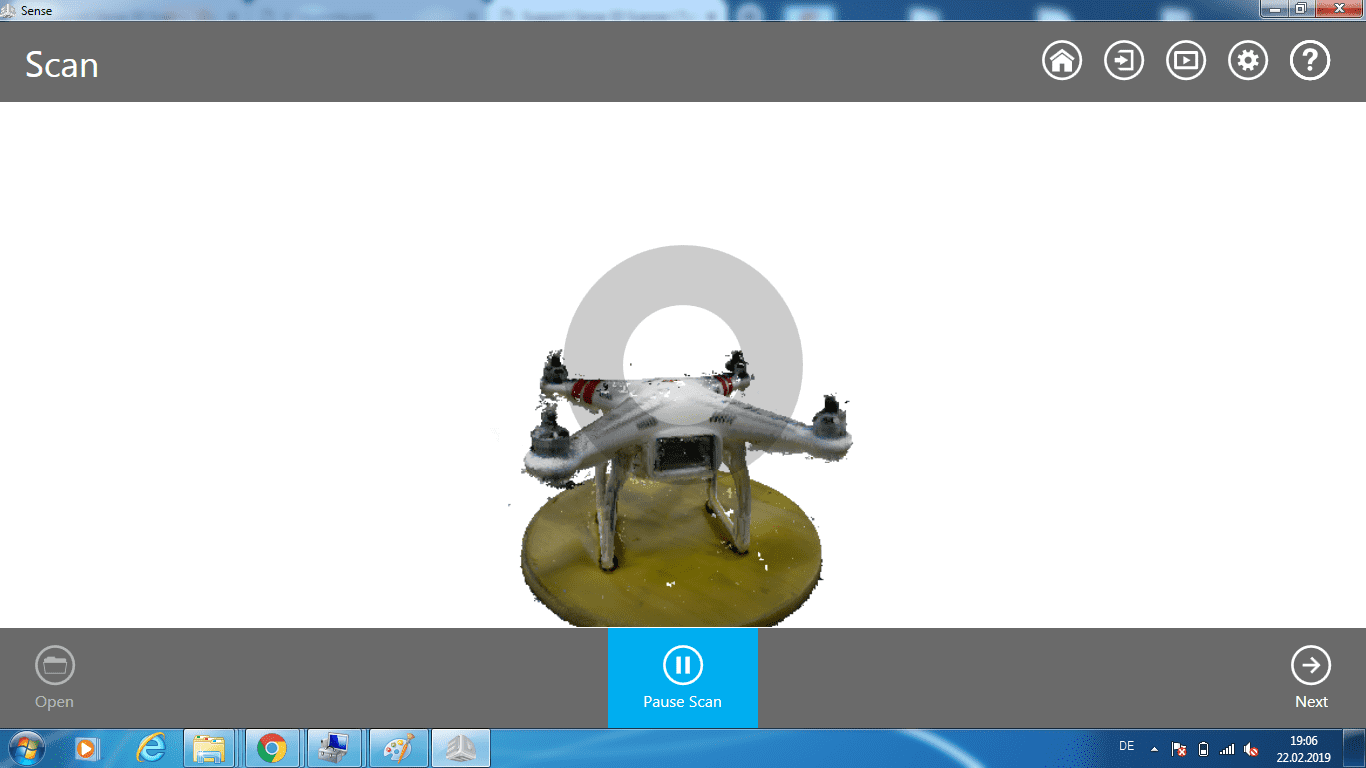
After I have arranged the object in the right position, I started the scan pressing the "start" button.I had to spin the object to get every side scanned.
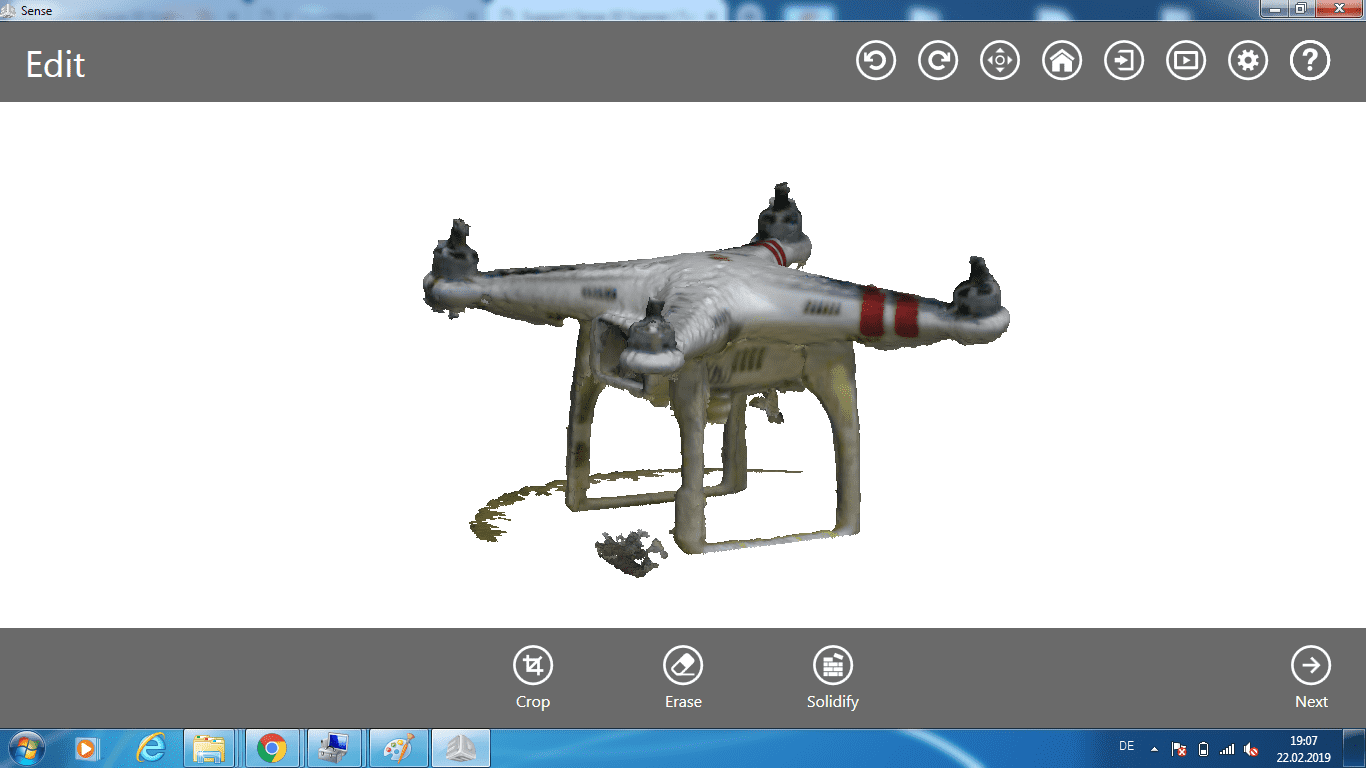
After that I clicked on the "next" button. On this window I have the chance to clean my object from unwanted parts, in my case the top of the chair.
Simply erase the parts that doesn't belong to the object.
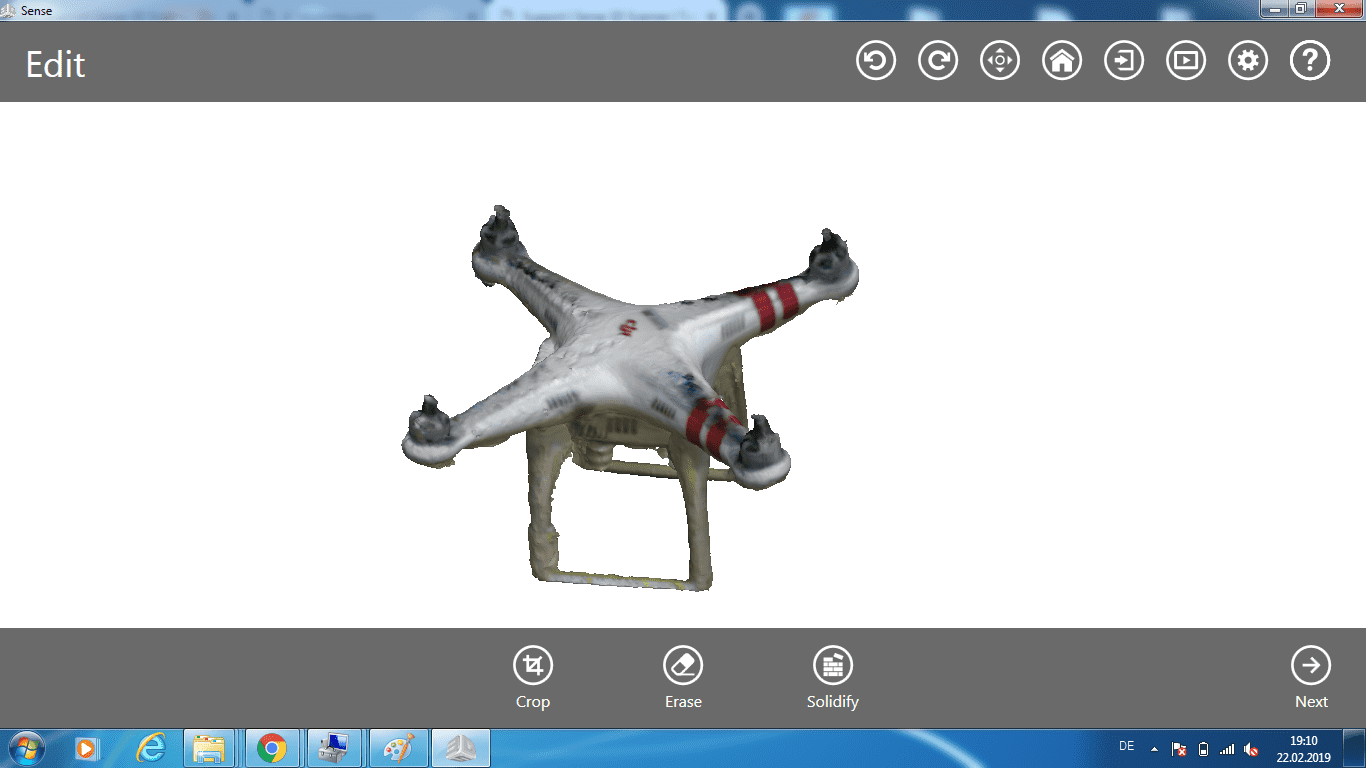
The final scan should look similar to this one.