


Getting started:
First of all, we selected the software we are going to use in the achieving our objective, which are Brackets (for coding and building the site) and Git Bash (to upload the code to the internet).

Coding with HTML
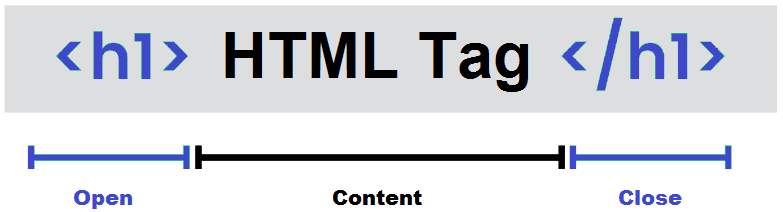
- At first, we learnt how to use simple tags; opening them by writing the tag name between brackets then closing it by placing / before the tag inside the brackets.
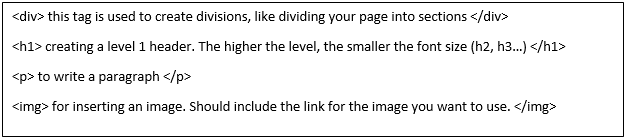
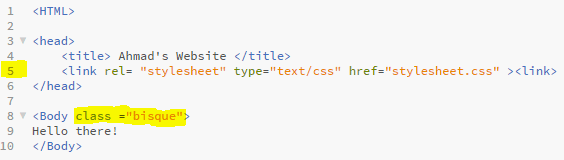
- After learning the important tags, we learn that a page needs a header and a body; Headers are used to create the page title, and to link the html code to external references (like stylesheets).

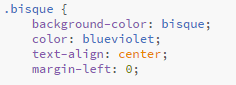
- Using Style Sheets: stylesheets with the extension .css are mainly used to control the view and style of the page. It is very important to use stylesheets in web development because the appearance of the page determines how easily viewers are going to interact with the page.
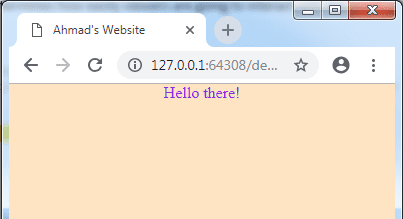
on the stylesheet, we add the following code:
and the result will look like this:
- Finally, we started studying examples of simple web pages. And we used to this site to help us in coding methods:

Steps for creating my website:

Uploading the page using Git Bash and Git Command
-- Git Bash --
1. On my Git Lab profile, I added a new file, selecting the template type as .gitlab-ci.yml then choosing HTML. After that, clicked "commit".

...
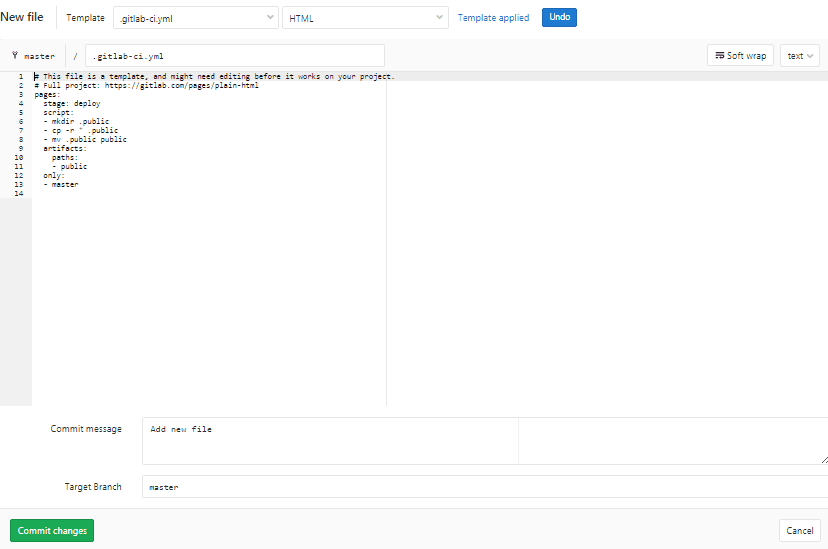
Following these steps, I have successfully created a blank web page on the academy's Gitlab site.
2. Moving to Git Bash, Start by writing the statements as shown in the following screenshot
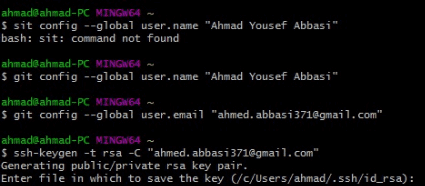
The fourth statement $ ssh-keygen -t rsa -C "ahmed.abbasi371@gmail.com" was for generating a key. Then the statement $ cat ~/.ssh/id_rsa.pub was used to get the key. After that the key was copied and added on my profile setting in Gitlab > SSH Key. With that, my computer is now connected to the website and is able to upload my site files.
3. I went to my profile on Gitlab and copied the URL given there to paste it in Git bash after the statement $ git clone. A folder named "ahmad abbasi" was created inside the selected folder. this will be used to put the website file inside it.
-- Git Command --
4. $ git rm docs -r to remove previous documents (this one is optional and not necessary if no data is previously uploaded.
5. $ git add -A to upload the files in the folder on my computer to the index.
6. $ git commit -m "enter a message" to commit my what I uploaded to the index (the message is used to help me recognize the commit order if I ever want to get back to it.)
7. $ git push to move the files from index to the remote site repository
* The final three steps will be used whenever a modification is applied on the webpage folder.
To check which directory we are in, use the command ls and it will show you the contents in the directory you're in.
