
Week
10: Molding and Casting
group assignment: review
the safety data sheets for each of your molding and casting materials, then
make and compare test casts with each of them. (Please refer to section ____in
______ website).
individual assignment: design
a mold around the stock and tooling that you'll be using, mill it (rough cut +
(at least) three-axis finish cut), and use it to cast parts.
This week we are using Larry model from week 8 as the mold template.
The mold creation necessary steps for this week
requirement were already covered during that week and you are invited to walk
through the “computer-controlled machining week” preamble for detail
information on the process we have used then.
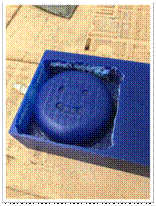
Silicon based mold is done by weighting equal amounts of
two reagents. One being the silicon itself (the base) and the other is the
curing reagent (the hardener). Upon mixing, the reaction is quite rapid and
need to be poured into the mold accordingly paying attention not to create any
bubbles while pouring. The results after X h is showed here:
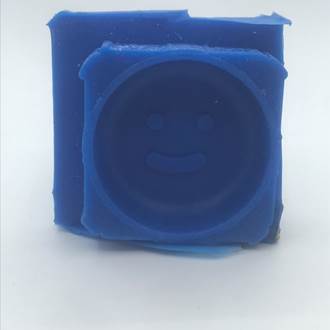
Having the mold ready , now all that’s
needed would be to cast something into it. I opted at first for wasted PLA we
keep in our lab from failed 3D Prints. Using an household oven, set at 170 F,
we place the unfused PLA and then let it melt for about 20 minutes, regularly
checkiing for the state of melting and adding unmelted material as the PLA
falls to the bottom of the mold. In this particuliar attempt, we used a left
over “bronze” colour filament available. The results are showned hereafter :