Molding and casting
Assignments
#1 - Design a 3D mold around the stock and tooling that you'll be using, mill it, and use it to cast parts
To start, I will design a 3D object (the top cover of my capstone project). Then I will mill a wax block and mold OOMO into. It will create a flexible mold I will cast Smooth-On into to get the final part.
References
Lecture
This week is about molding and casting:
- Create a 3D object using FreeCad Part Design workbench
- Prepare your model for milling using FreeCad Path workbench
- Mill a wax block using SRM-20
- Create a flexible mold using OOMO
- Cast the final part using Smooth-On
Recitation
This is about designing open source machines and making them real, idealy at a lower cost than commercial ones. Each new machine pushes the limits forward and open new possibilities, like creating clones of themselves or being dedicated to make specific parts of other machines.
Topics covered (course) Video recording (course) Video recording (recitation) Students and Labs My filesLearnings
Create a 3D object representing the top cover of my capstone project using FreeCad Part Design workbench
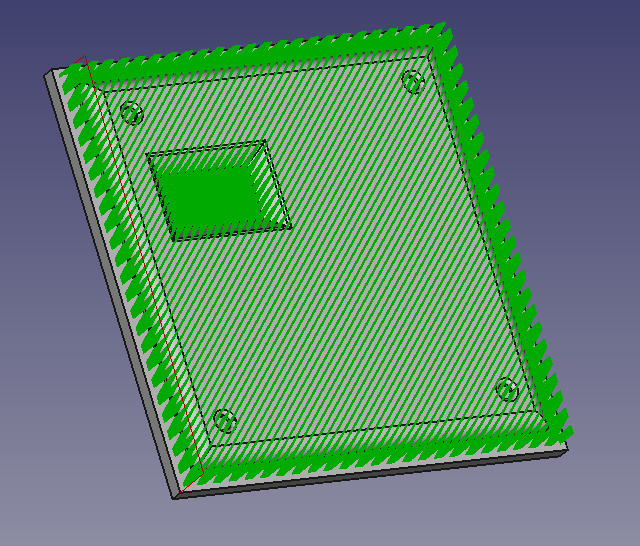
My intent is to design and cast the front part of my capstone project. I want to get the smoothest possible surface on the top of the object. There are 4 holes to hide screw caps and there is an opening for the OLED screen. I want also to chamfer the perimeter. I have to take into account the following limitations: the SRM is a 3 axis CNC, the wax block I found is only 12mm thick, tooling has a limited range (but this is not an issue for this project). Despite the fact that the object is almost as thick as the mold, I still need walls to contain the liquid OOMOO. Here are the steps for the CAD part (original file is here:

- Create the bottom pad. I assumed initialy I had to create a bottom pad to be able to mill the perimeter in the wax block. This is true when the CAM part is done later using FreeCad but not when you export your 3D object to Modela for the CAD part for example.
- On the top of the first layer, add another pad. This one is the part we want to cast.
- Add a pocket for the opening for the OLED screen
- Add 4 pockets for the screwheads
- Create a fillet around the perimeter
- Create a (smaller) filler around the screwheads holes
- And an even smaller around the top of the OLED chamfered opening


Prepare the 3D object for milling using FreeCad Path workbench
There is a ton of new concepts and it is hard to find your way with the Path workbench. Here are some important things to take into account

Here are the steps for the CAM part:
- Setup your tools: I provisionned a 1/8 flat end mill and 3 ball end mills (1/8, 1/16 and 1/32)
- Add a leveling operation to .. level the top of the entire surface (my intent was to get a better surface but I could not remove a lot since the total margin was less than 2 mm with the wax block I had
- Add another operation to mill the lowest surface (i.e the perimeter)
- And a last milling operation to dig the opening for the OLED
- Then we need 4 profiles: around the entire perimeter, on the bottom of the screwseats, on the border of the screwheads and around the OLED opening


Anf then it went wrong... Here is the PROBLEM of the week: the RML created by the post-processor does not make a lot of sense (as it appears to me)

When I tried to use the RML output on the SRM-20, it ended up with a crash and an emergency stop (hopefully it works..). The problem is the fact that the X/Y/Z are multiplied by 40. Why ????
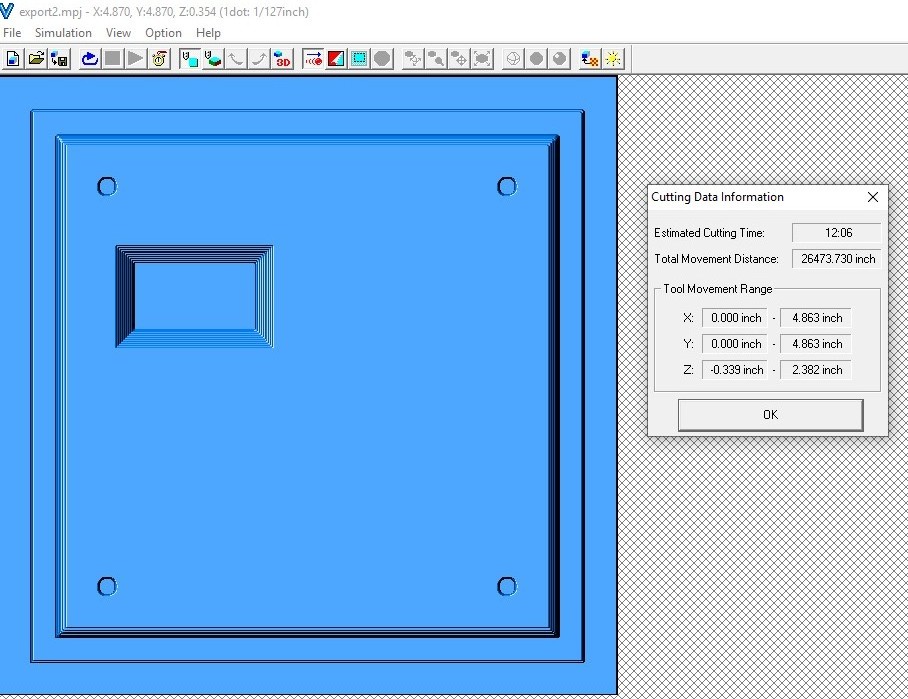
I needed a plan B and hopefully I could export the model in STL format and use it in Modela (the SW provided along with the SRM-20). The UI and the sequence are different but the concepts remain the same: leveling, first pass for a rough cut, second pass for the finishing

I found out on Bantam web site this very usefull information regarding feed and speed on wax material. SRM-20 hax a max speed of 8000 RPM but it is not that far

Mill the 3D object into machinable wax on the SRM-20
In Modela, there is a view where you can figure out how much time it will take to mill.. and it was quite a suprise to me to discover that the first pass would take .. 14 hours ! It means... 14 hours stuck in my Windows boot partition...
The first step is to ensure the wax block is properly attached. I used double-side tape AND some hot glue to secure it to the support.
I used a refurbished wax block and there is room for improvement. The material is not smooth, something went wrong (maybe the temperature) and there are residues and bubbles

Then we can go with the leveling process, to ensure that what looks flat is really flat.

Once it is done, we can go with the first pass. The first picture is what should happen (according to the simulator) and the second one is the reality

And then the second pass, with a smaller tool (1/16 ball mill). Do NOT forget to reset your Z-origin !


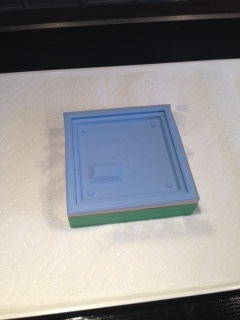
Create a flexible mold using OOMOO
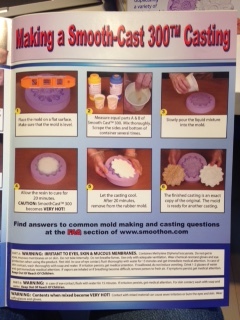
The kit comes with detailed instructions (a 2 pages procedure, a booklet with much more details and different scenarios and a DVD)


The first step is to prepare the workbench (clean and ventilated area, all the items you need (plastic cups, wooden dowel, ..) ready to be used, ..) and yourself (gloves, safety glasses, long sleeves). I (tried) to read all the security warnings, like the ones on this label (btw, how do they proceed when the label is too small ? )


My model is quite simple and there were no issue with bubbles but I would like to build a vaccum chamber later using the following simple tutorial

There are two chemicals: one to seal your original and the second one to help to release the casted object from the mold. Since we are using wax, I deiced to let it go with the first one (why should I seal the wax , maybe I'm wrong here ? ) but .. do NOT forget the release agent !


Cast the final part using Smooth-On
This is a quick and easy step, just mix the A and B components (from the Smooth-On box, NOT the OOMO one !) at equal part and pour it into the flexible mold. I followed this procedure:
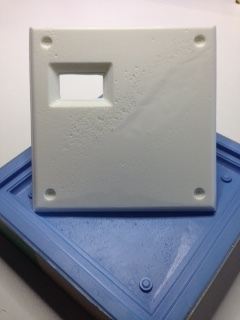
Here is what happens very quickly, after 5, 10 and 20 minutes and the final result. This is not perfect and mainly due to the quality of the wax but I'm still proud of it.


One last thing... I found out some procedure on how to reuse machinable wax chips. I will give it a try next time

Achievements
#1 -Review the safety data sheets for each of your molding and casting materials, then make and compare test casts with each of them
In a nutshell: do not eat or drink any chemicals, do not eat or drink anything else while you work. Work in a clean and well ventilated area. Do not put your nose over chemicals just to see what it is.. Use safety glasses and gloves. To not use your fingers for anything else :-) than the job you are supposed to do. Use clean cups and dowels. Throw our any waste and pay attention to the chemicals (mix them before throwing them away. Obviously, this is not a place for children. Nothing wrong happended to me. Smooth-On casting mixture becomes hot when curing. Pay attention where you put it and in what kind of container. Do not touch the chemicals with anything (like the dowels) already used
SmoothCast 300 - part A - safety datasheet
Capstone
#1 -Front panel of my capstone device
Here it is... and here is what I will work on for next version: a global better finish. Wax is part of the problems but there are other things I should do, like adding more finishing operations with a smaller mill. I will have a look on the possibilities regarding the color as well. It looks there are components I could add to the casting mixture to get other colors