Molding and casting

week 10
March 20, 2019
This week we have a project that has several steps. I have to design a part in a 3D design software, milling this piece in a block of wax to be able to make a mold later. Finally, I need to cast resin in my mold. A lot of work this week but I will show you each step as well as tips for you to understand the design steps.
Mold and cast something
Design my part in 3D
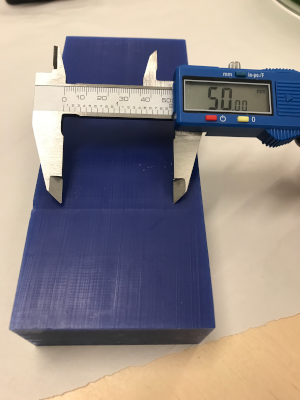
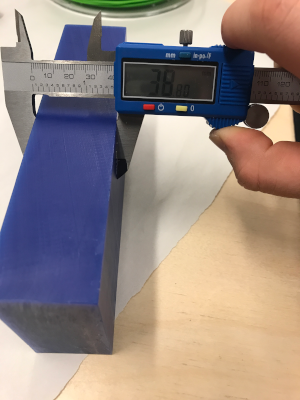
As always, I decided to use the fusion 360 software to be able to design my part in 3D. I was trying to find something related to my final project but I did not succeed because there were a lot of limitations. The first limitation was the length of the milling tool. I could not go deeper than 25 mm into the wax block. The second limitation was the size of the wax block.You see on the picture that the dimension of my part can not be very big. We must also think that we must leave a border around the room to hold the silicon of my mold. So I decided to make my piece with a maximum width of 50 mm and a maximum height of 25 mm.
All my potential parts of my project was too big for fit in the dimensions of the wax. I really wanted to make a 3D part to practice myself and not in 2.5D. I also wanted to practice the curves with the milling machine. I decided to make this piece that can be used to hold a spherical object.
An object in 2.5D is an object that is a 2D design cut into a 3D material. As in the week of make something big, I made a shelf that was only a 2D design that I milled in boards. A 3D object will need the Z axis to be able to be made. You will see in the design that I will do.
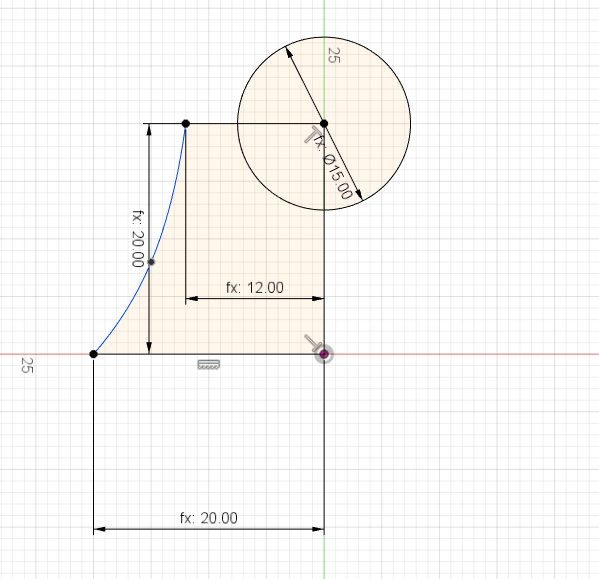
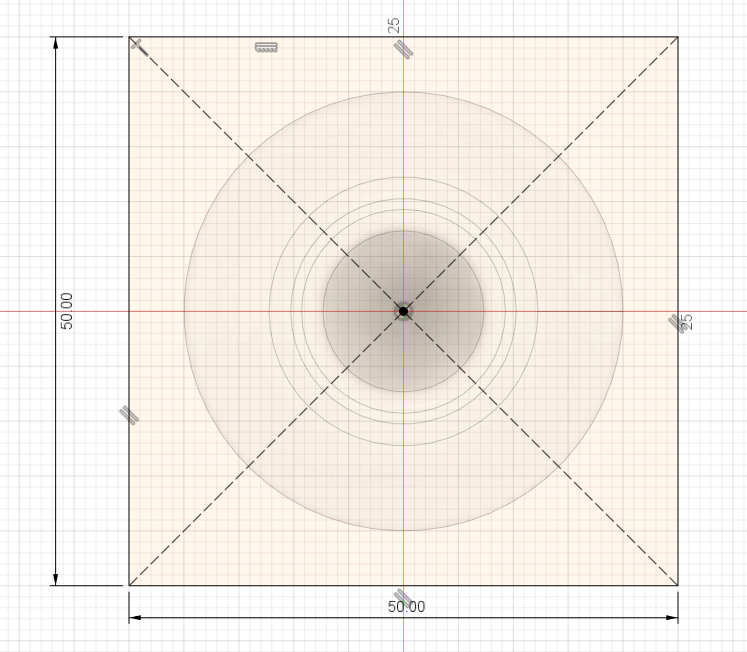
The first thing to do is to design half of the profile of our shape.
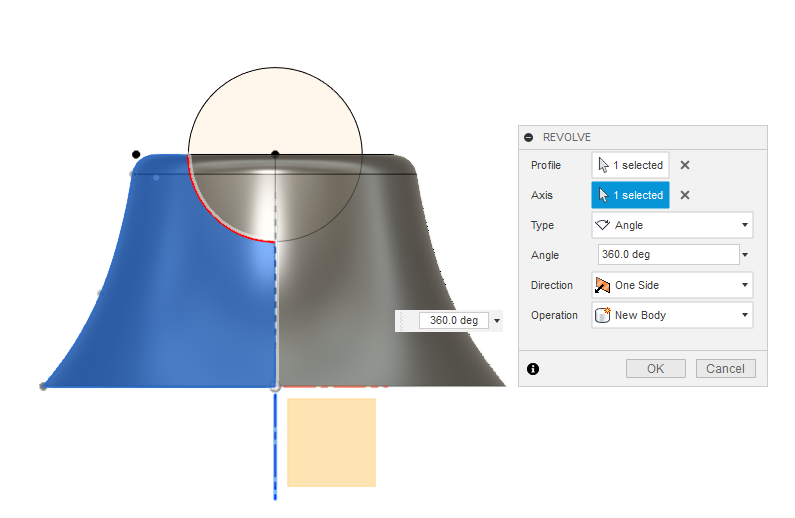
Now, I use a tool that I love that is revolve. This tool turns your sketch relative to an axis and forms an interesting piece. It is still possible to see the sketch in blue.
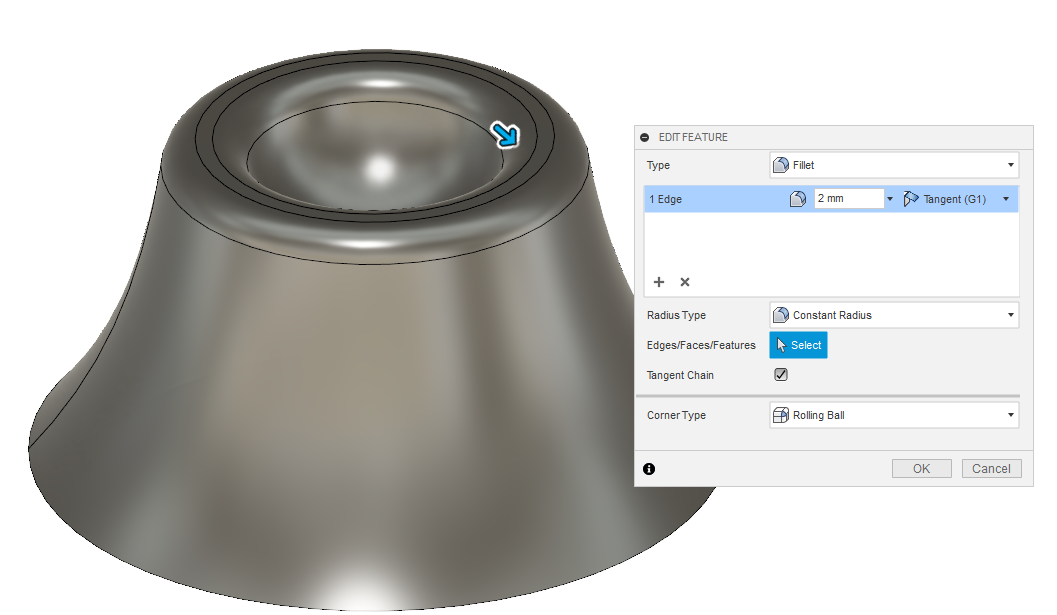
Here is the final part that I add filets to make the part smoother.
Now it's time to make the outer outline of our room to be able to make a mold. For that, it is necessary to make the part in negative in a cube of material then to make the external contour pousitive of our part.
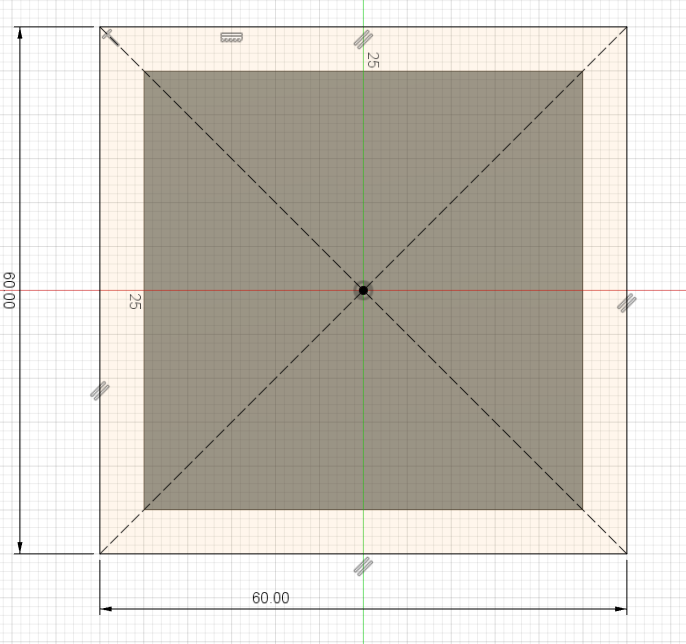
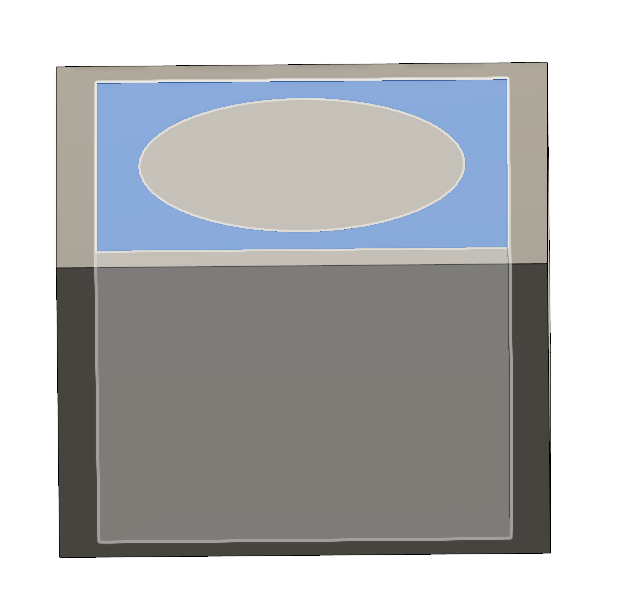
I'm starting to make a bigger rectangle under my part.
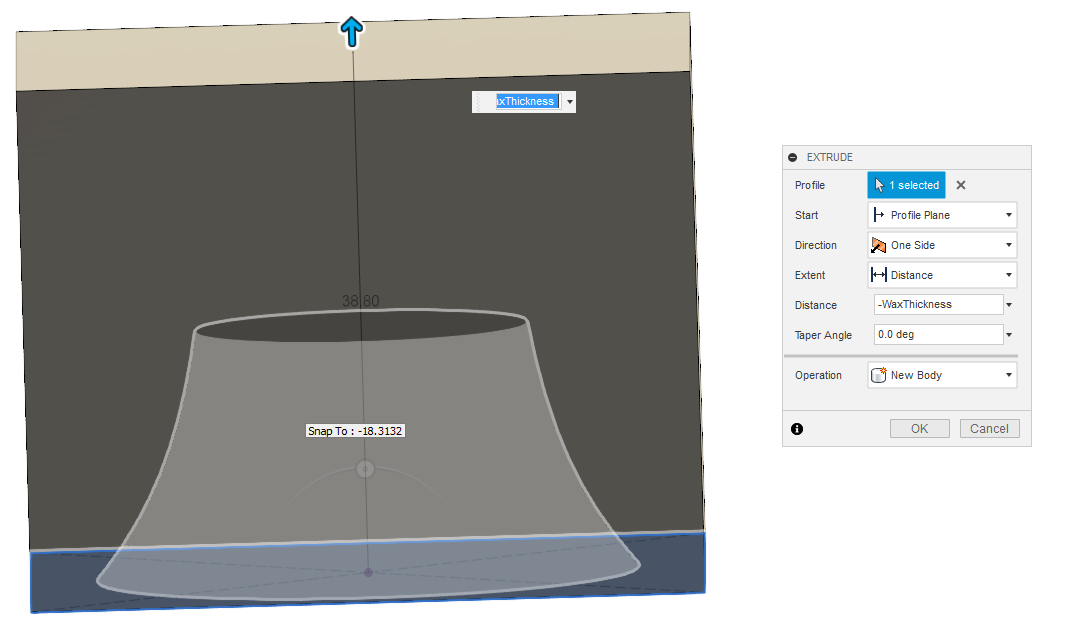
Now, I extrude the rectangle to put my part in a cube. You can see my orginal part in the cube.
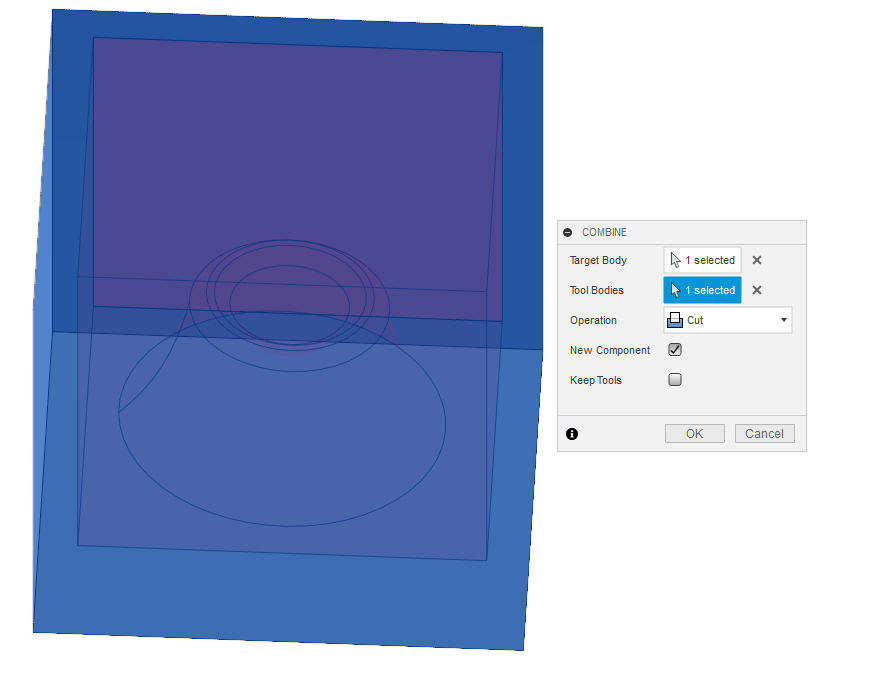
We have to combine our part with my cube with the cut option. This option will subtract my original part with the cube.

Here is the result of my mold. I made the mistake of milling this mold in the milling section but it is not a mold that we want for the moment. This is the outside part of our room that will be used to make a mold.

We redo the same sequence for some that we just created so I redid a larger rectangle.
We extrude the rectangle to be able to make another cube around our pieces. We can see the inside part in blue.
I combine and cut to subtract the part to the new cube.
Here is the final result to make the mold outside of my original piece.
Create the milling machine toolpath.
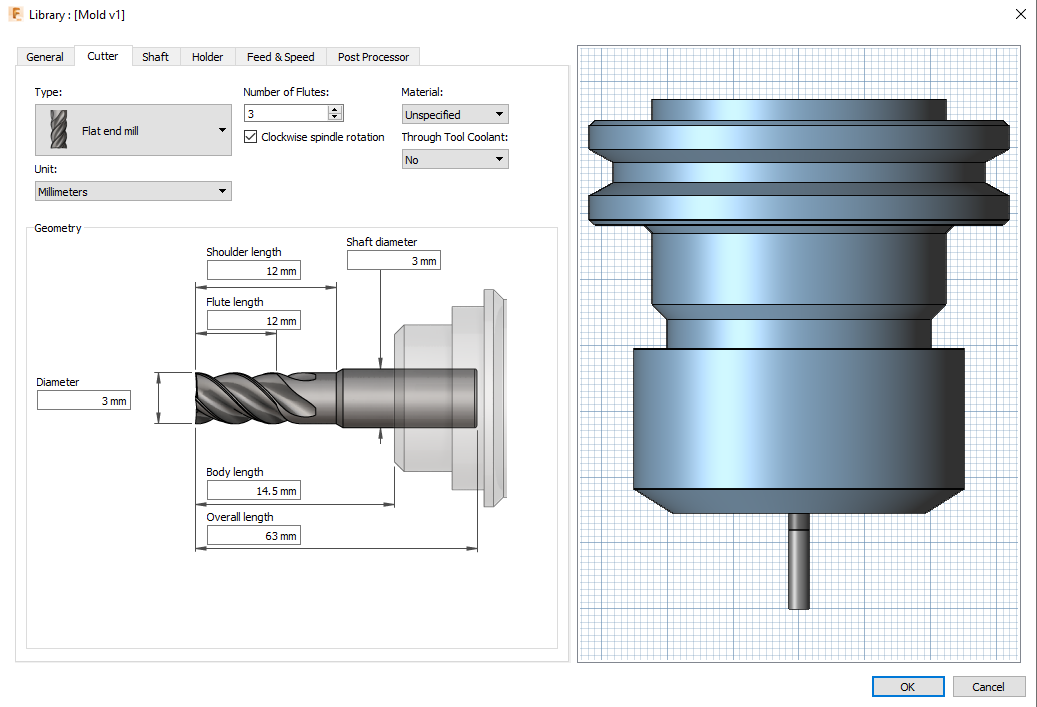
The first thing I do is create my two tools with the right dimension.For the rough, I decide to use a 3 mm (~1/8) flat endmill.
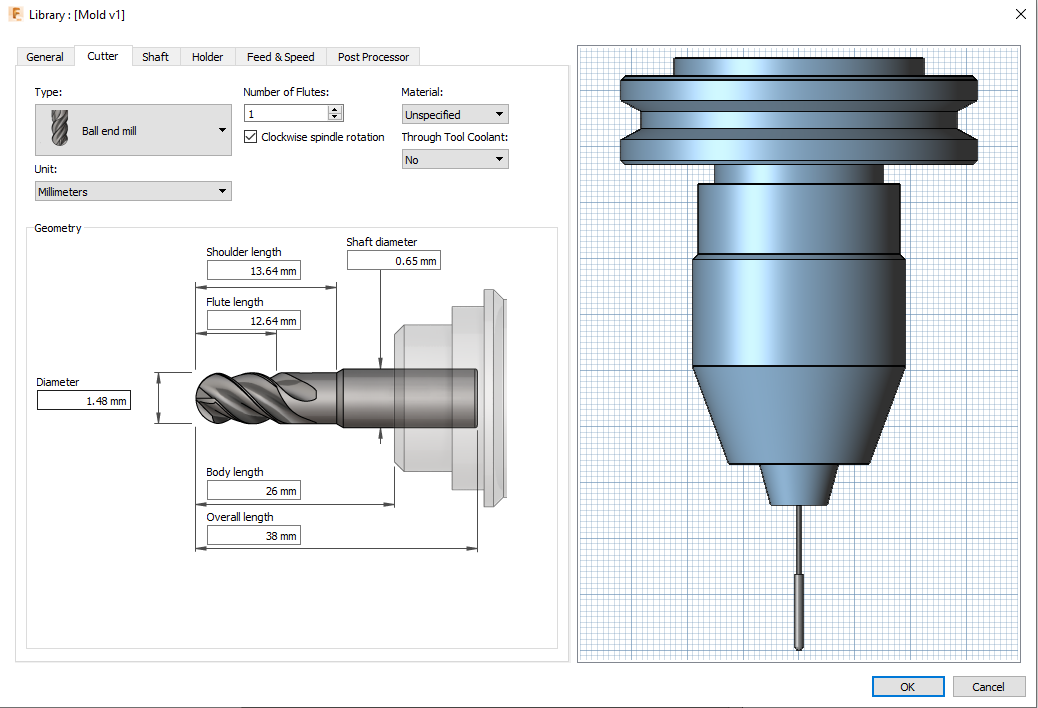
For the finition, I decide to use a 1,48 mm (~1/16) ball endmill.
Now I have to setup my game. I decided to position my origin on the top corner of my part because it's easier to position the origin of the milling machine when it's in the upper corner. It is necessary that the axis be positioned in this way and especially the Z axis upwards.
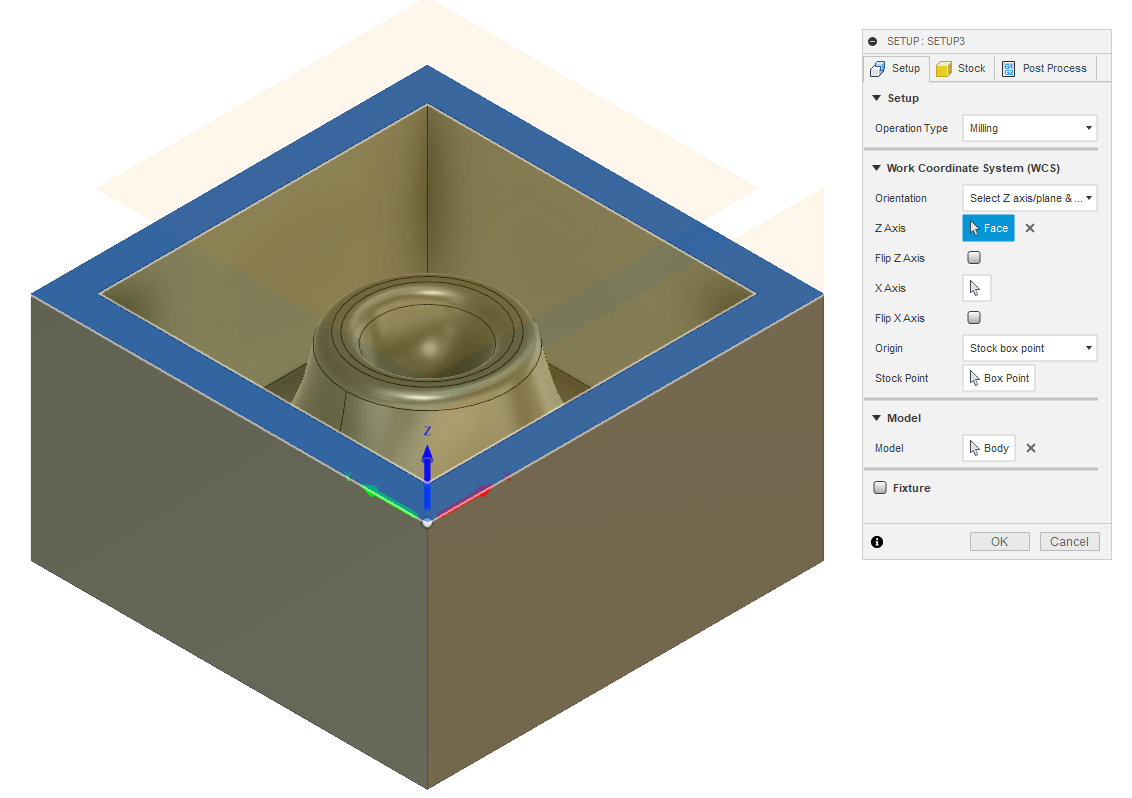
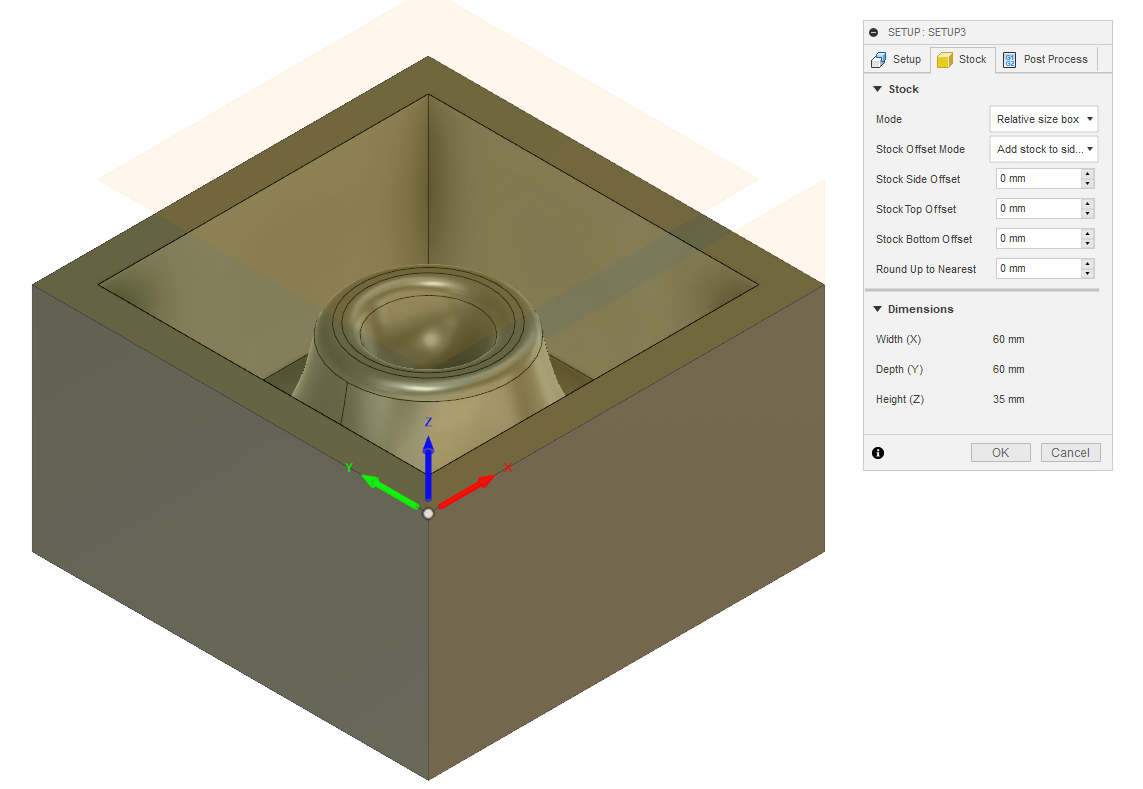
I remove all the stock around my part because I don't want offset for my origin.
I have to configure the two paths the rough and the finish. I'm going to explain them in parallel so the left images are going to be rough and right the finish.
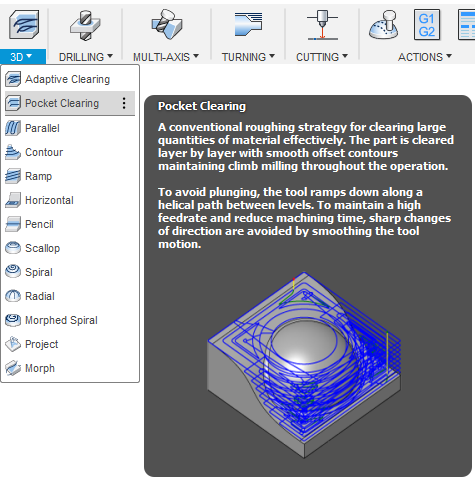
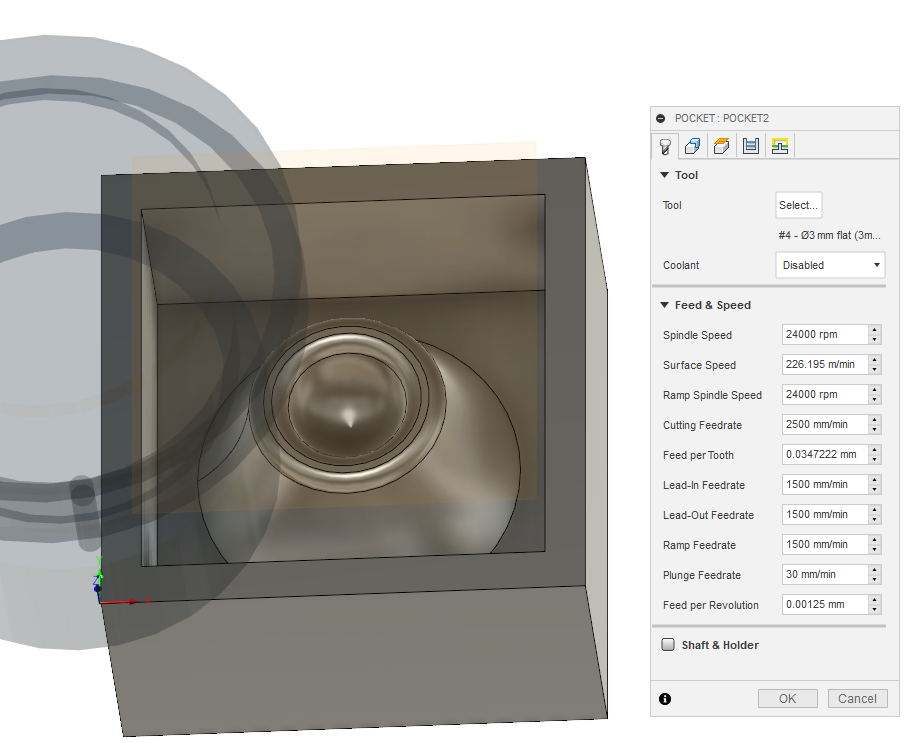
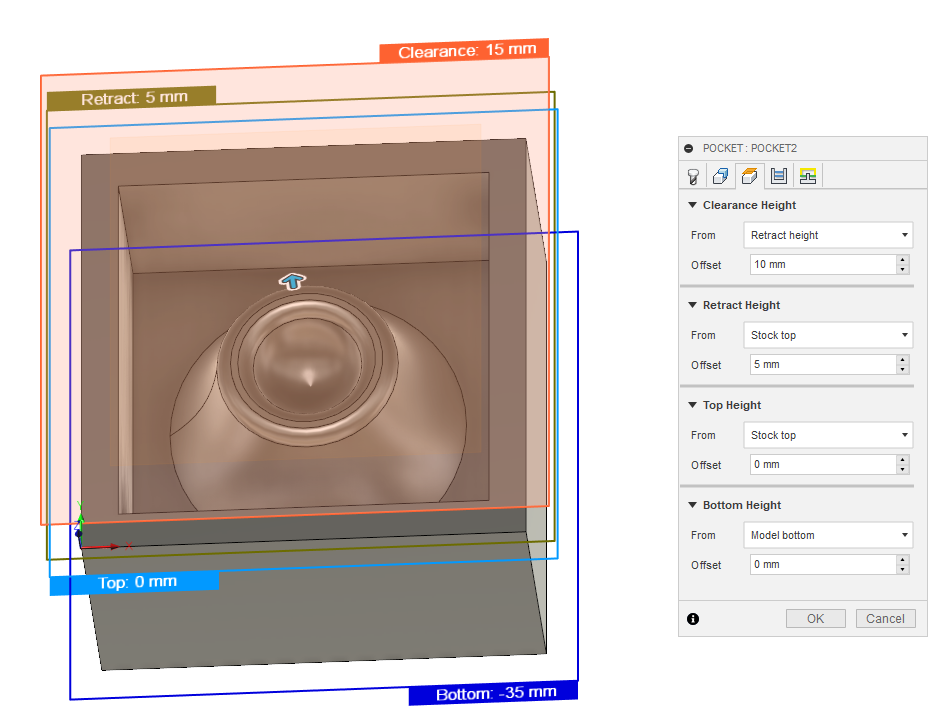
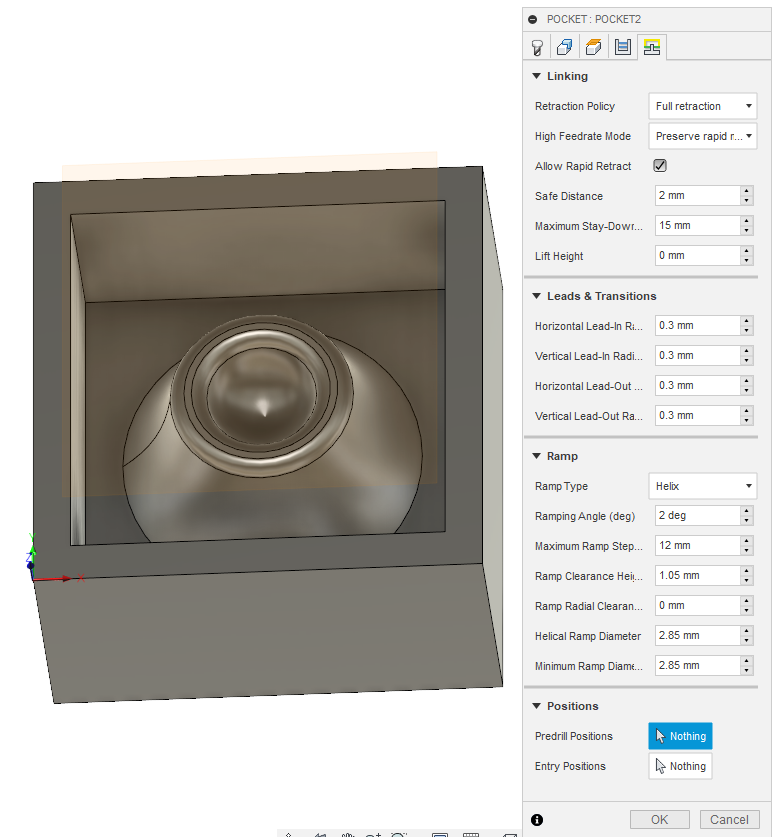
(Left picture) I chose the pocket clearing toolpath to make the rough of my milling. According to the description and simulation it seemed like a good option.
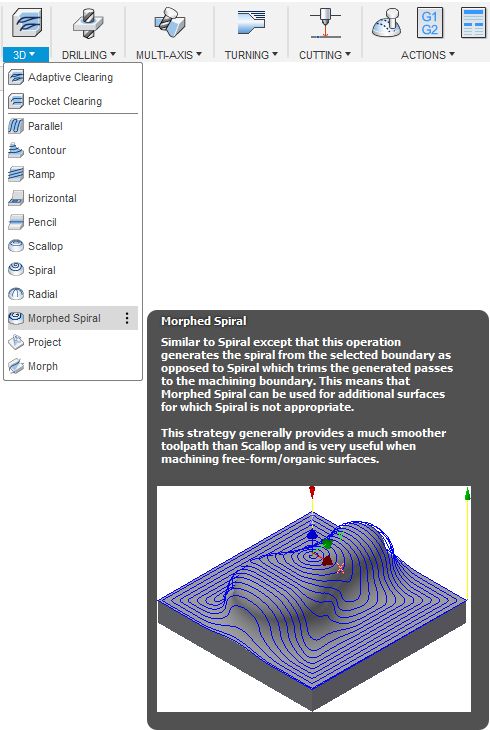
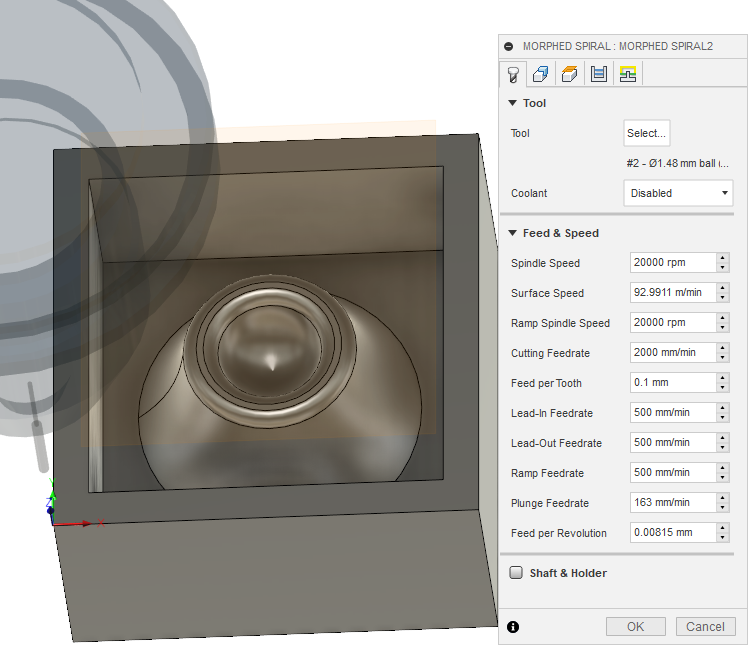
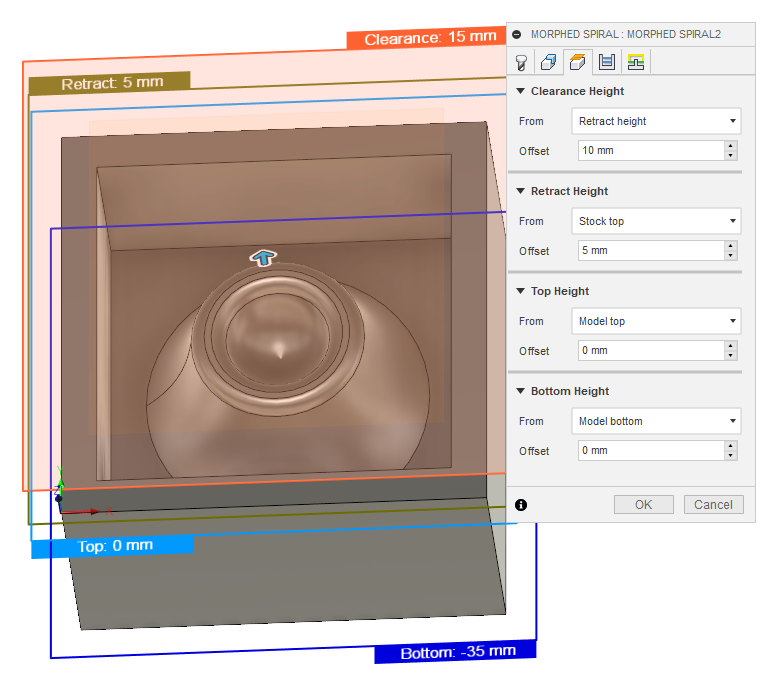
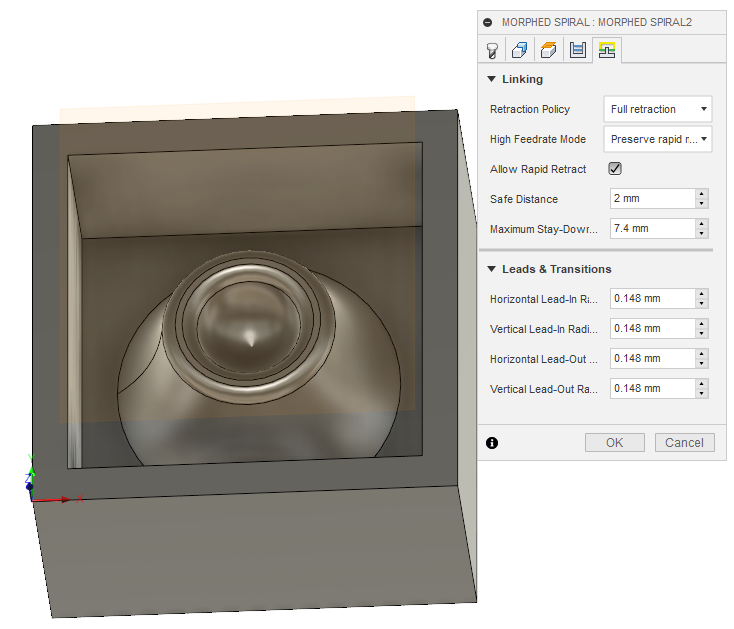
(Right picture) I chose the Mirphed Spiral toolpath to make the finition of my milling. According to the description and simulation it seemed like a good option.
(Left picture) I select the 3 mm tool and I set the same parameters since the begining so I set the spindle speed to 24 000 rpm and a cutting feedrate to 2500 mm/min.
(Right picture) I select the 1,48 mm tool and for finishing I go a little slower because I do not want the wax melts. I remove less material with the small tools so it is good to slow down a little speed. I set the spindle speed to 20 000 rpm and a cutting feedrate to 2000 mm/min.
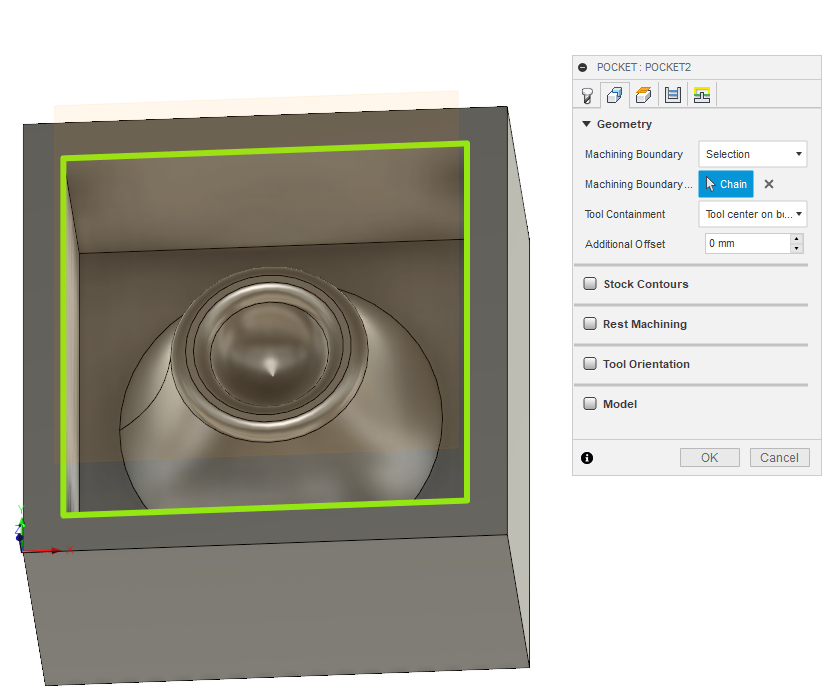
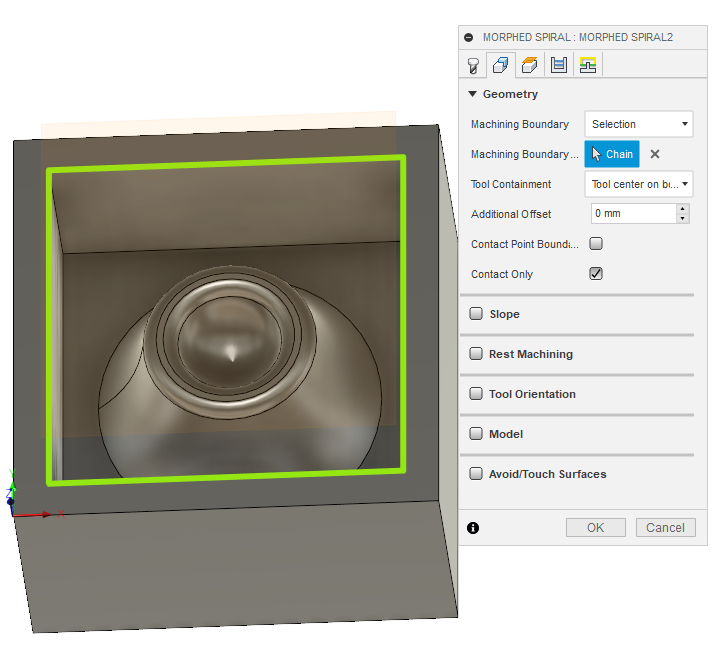
(Both pictures) In geometry section, I only select my part for both toolpath
(Both pictures) In clearence section, I only change the top height section and I choose Model Top for both toolpath.
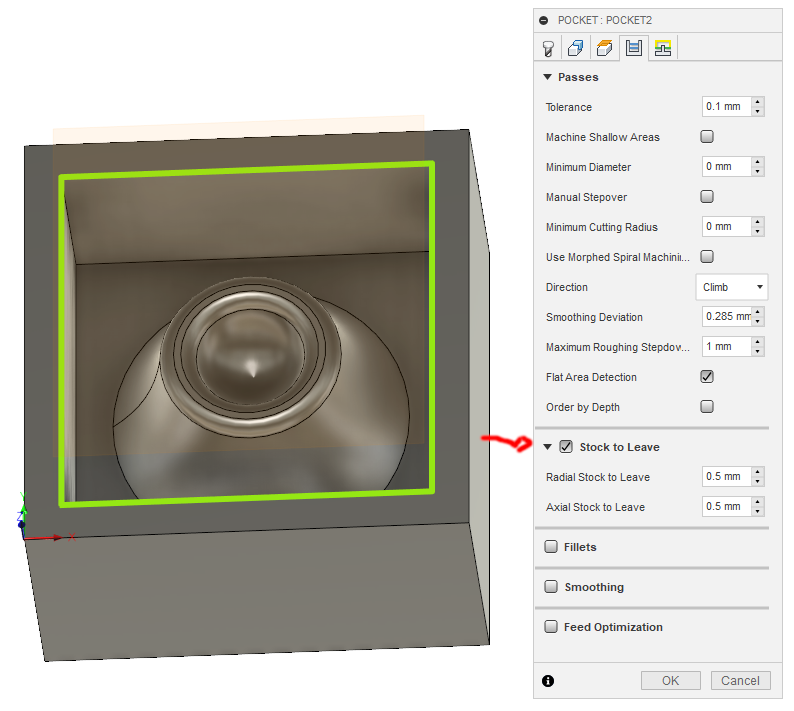
(Left picture) Because I use a flat endmill for the rough, I leave a space of 0.5mm to let the finishing tools remove the material on the outline. Flat endemil is not good for making curved objects.
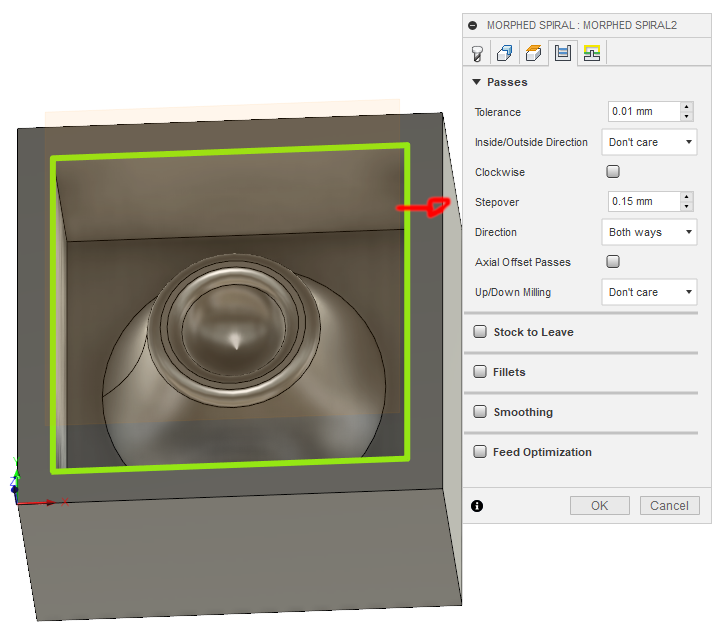
(Right picture) For finishing, I put a stepover of 10% of the tools to have a beautiful smooth surface that is to say 0.15 mm.
(Both pictures) In linking section, I don't change anything.
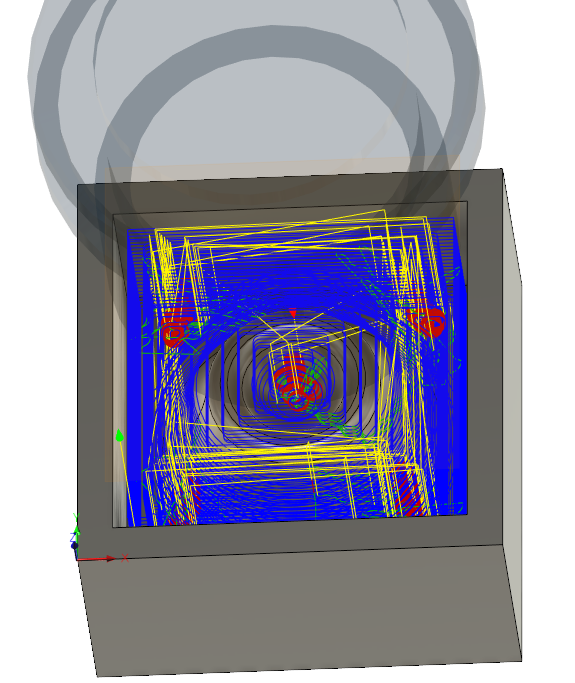
(Both pictures) Here is an overview of the toolpath before putting it on the milling machine.

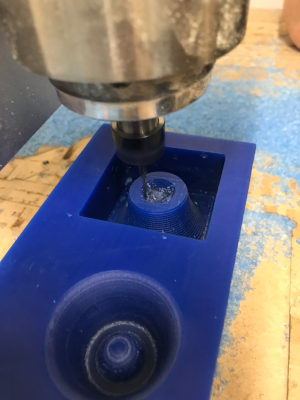
Milling the wax
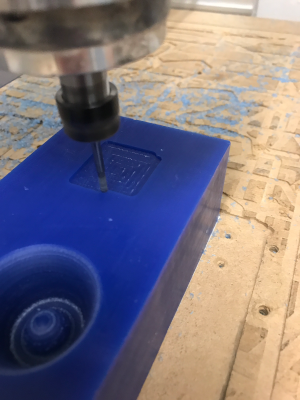
For milling, I used two different tools that I explained a little higher. I set the origin of the tools directly on the wax in the same place as I did in Fusion 360.Here is the first try I missed because I made the mold instead of the outer outline of my part. We can see that the first pass was harder and we can see the finishing pass.

Here are some pictures during rough milling.
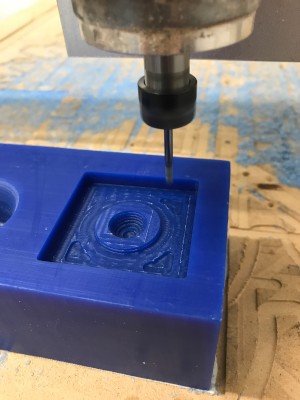
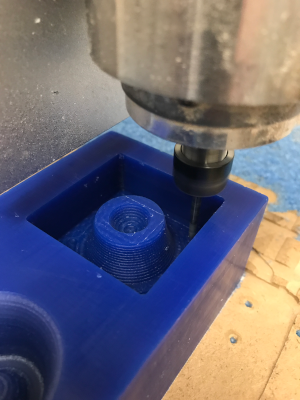
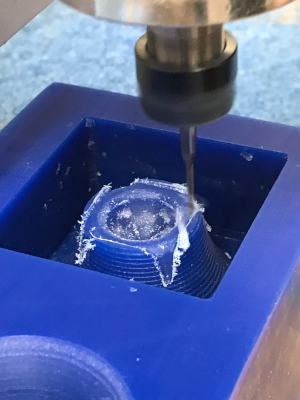
Here are some pictures during finish milling.
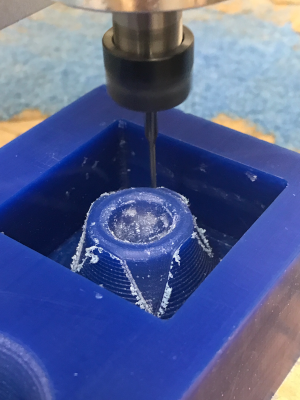
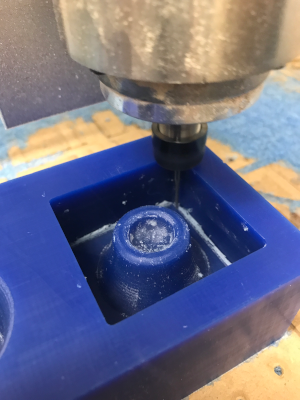
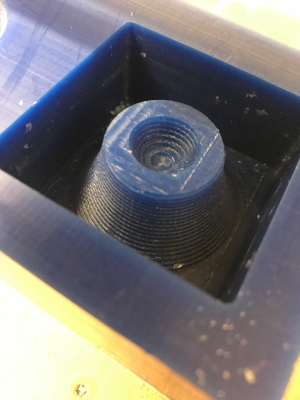
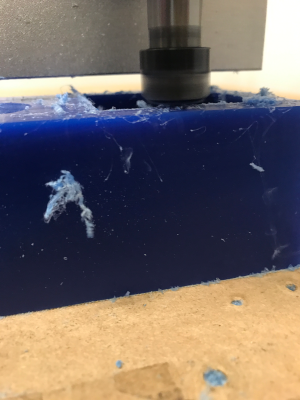
I like going to the maximum of machines and we can say that I could not go deeper than 25 mm.
Make the mold
The first step before pouring the silicon is to thoroughly clean the wax residue. I used a small piece of wood and an air compressor to clean the whole thing.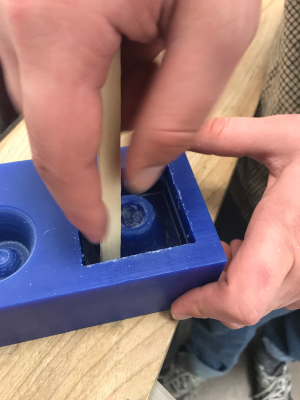

I noticed that the bottom of my mold would be very thin. So I had the tip to add tape to increase the height of the bottom of my mold.

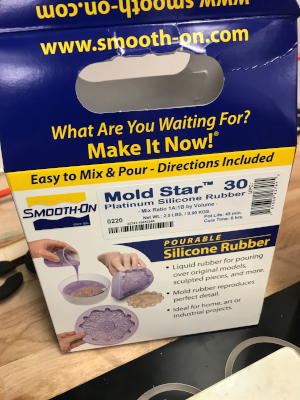
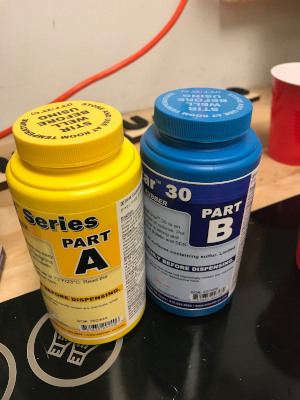
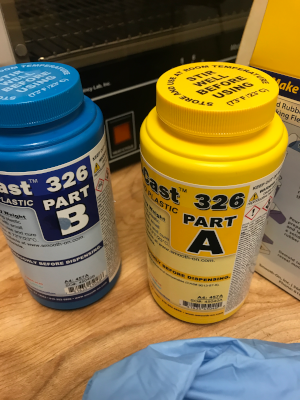
Here are the products used to make the mold. Here is the link of the silicon.
It is very important with the manipulations to wear glasses and gloves to protect themselves well. It is important to have a place with ventilation.

Mixing the silicone is a mixture 1 for 1 so I start by putting 60g of the solution A. I then add the solution B in the solution A to get 120g in total. It is important to respect the order of B in A. From this time, we have less than 45 minutes to complete the manipulations.

It is necessary to mix delicately so as not to have an air bubble in the mixture. It must still mix a good 5 minutes for everything to be well mixed.

During pouring, it is advisable to put a 45 degree angle to the wax to allow the air bubble in the mixture and not to remain trapped in a place.

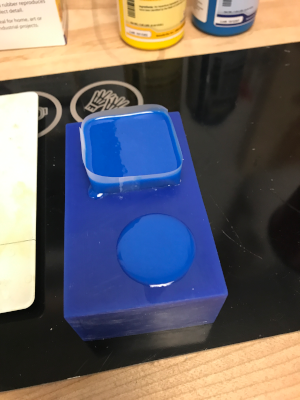
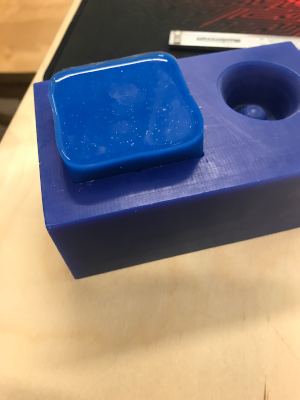
Here's what it gives when silicone is poured.
After waiting 6 hours for drying, I removed the tape to remove the mold from the wax and I gently pulled up by moving a little from right to left and the mold came out of the wax.
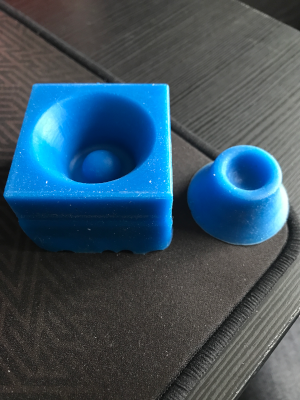
Here is my final mold and my silicone part.
Make the cast
Now, to make the resin it is the same principle as silicon. The mixture is 1:1, you need to have the same amount of product B as you pour into product A. You have to be quick because the resin dries very quickly. Mix everything together for one minute without making too much bubble in the mixture.Here is the link of the resin.
We found the rose powder in the lab to make a natural dye to our resin. So we decided to put it in our resin.
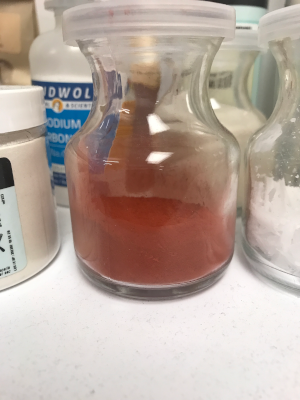
Here is the final result after pouring the resin into the mold.
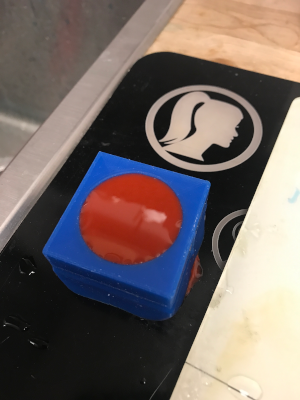
After about an hour, I removed my part from the mold.
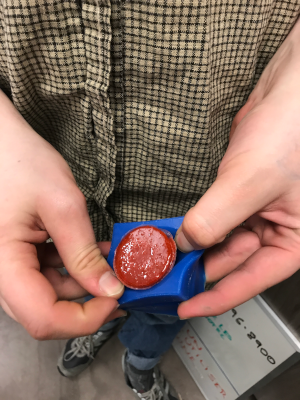 Here is the result of my casting. The result is really bad because you can notice bubbles in the part and also that the resin has expanded. I did a little research and found that the resin is very sensitive to moisture. The problem is that the rose powder we found was not perfectly dry. The resin then took the moisture from the powder and that's why bubbles appeared and the resin expanded.

Remake the cast
I decided to do my play again, but this time without rose powder. I repeated exactly the same steps mentioned above. Here is the result of the liquid resin in the mold.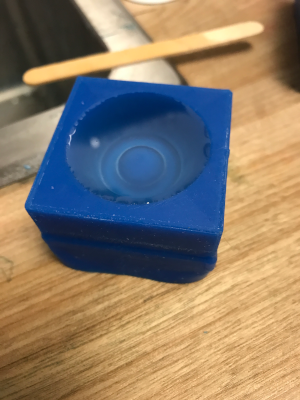
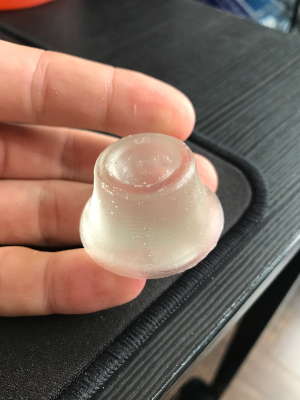
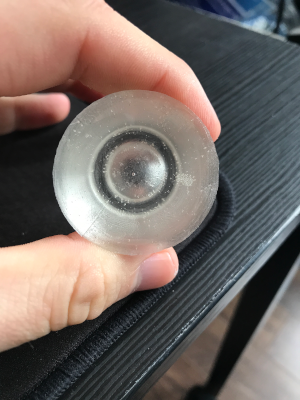
Here is the final result. We can notice that the resin did not expand as in my first try and that there is practically no bubble. So we can conclude that my part is a success.
Group asignement
The person who documents the group assignment this week is Chuma.Hero shot

You can download all the files of this week right here.