
Solar Tracker --- Արևին հետևող
Introduction --- Ներածություն
I finally decided what to make for my final project. It was really hard for me to choose what to make. But finally I decided to make a solar tracking system. It should be able to track sun's movement with two axis. I found this machine design assignment from fablabbccn fabacademy2017
Designing of the mechanics --- Մեխանիկական մասի նախագծում
At first I was trying to model CAD files with Freecad but at some point I realised it takes too much time to master it. So I switched to Fusion 360. I decided to have two worm gear transmission since it can lock the mechanism. I thought locking will be good because in case of a wind the system will turn back and forth.
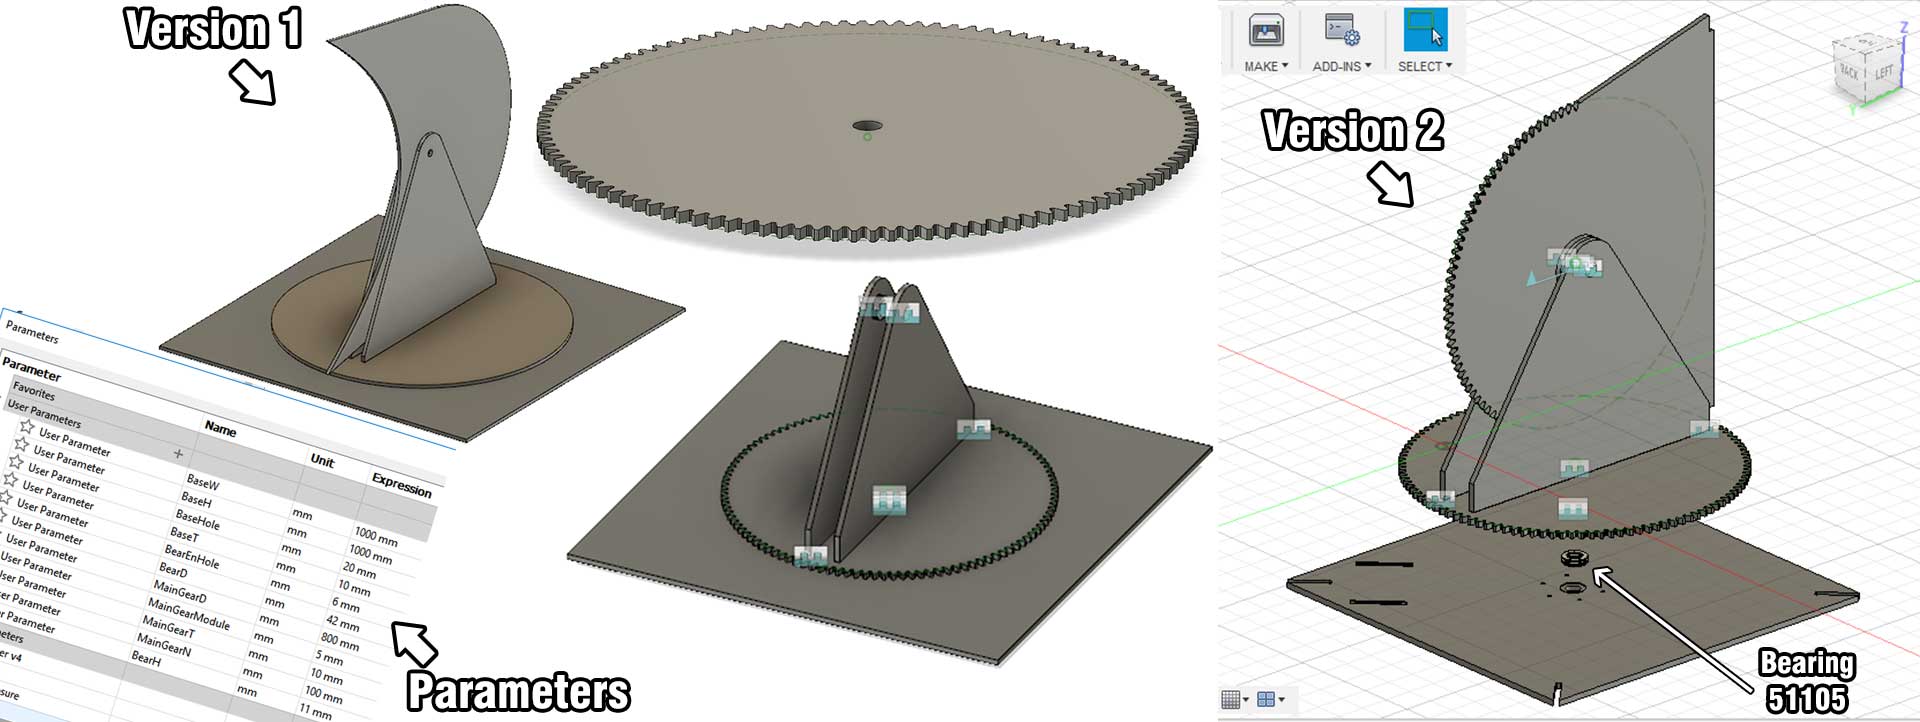
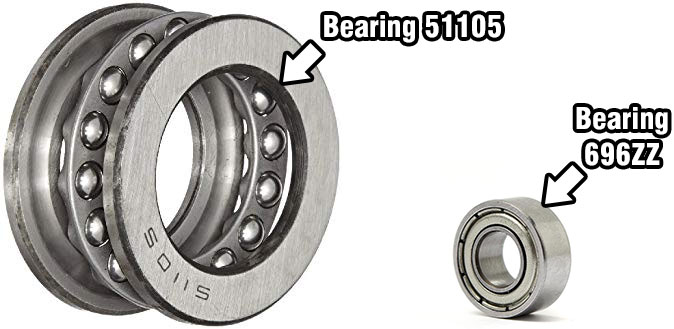
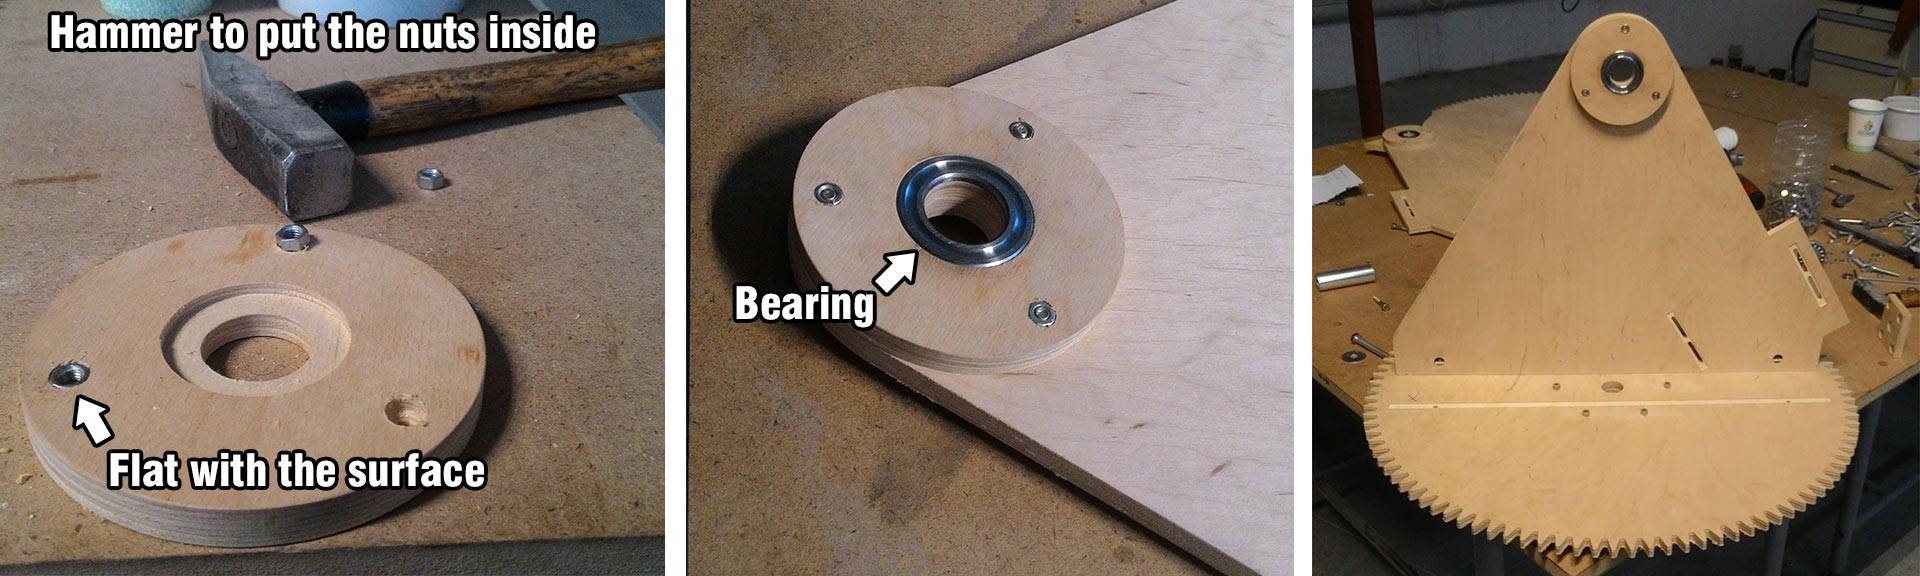
My system has two worm gear transmissions (a big gear and a worm gear). I decided to use Thrust Ball Bearings to attach big gears to base and supports because they handle high loads. If you want to learn more about types of bearings go here. I used:
Here are Fusion 360 files:
solartracker v2 v8.f3d
leg.f3d
base.f3d
base gear.f3d
base gear spacer.f3d
leg.f3d
supports.f3d
spacers.f3d
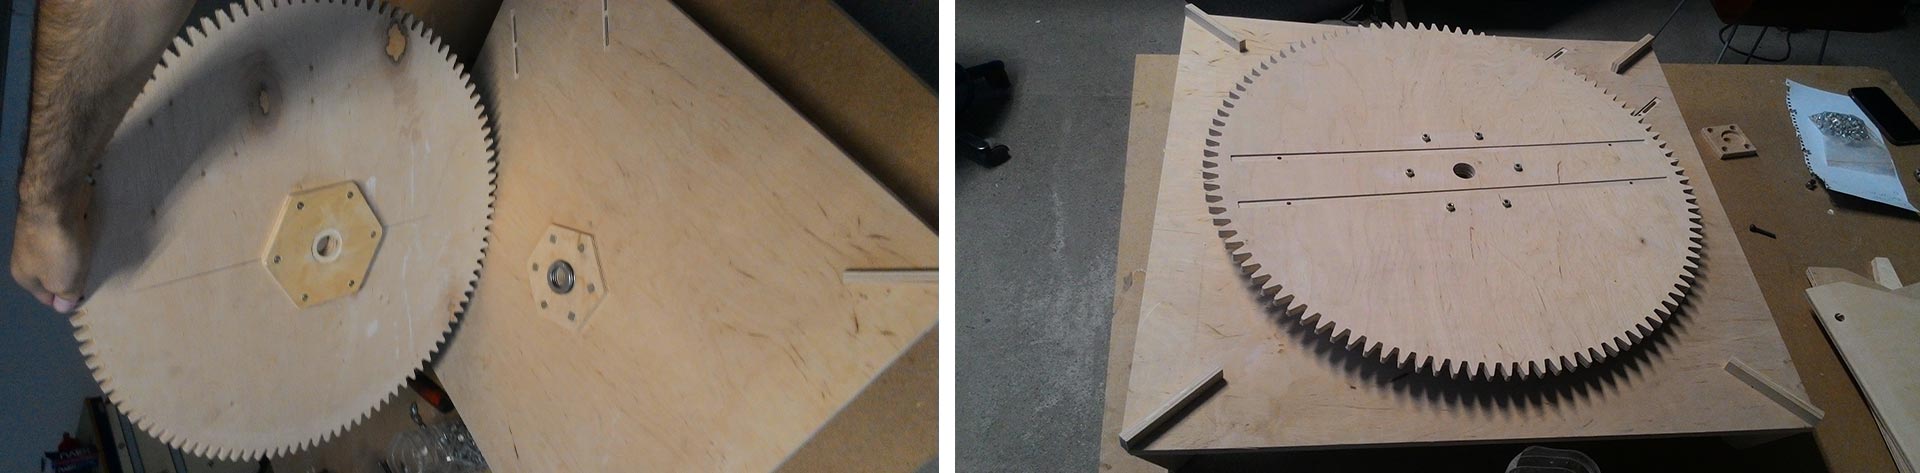
I used 1/8 downcut endmill and 1 sheet of 10mm plywood to cut my system.
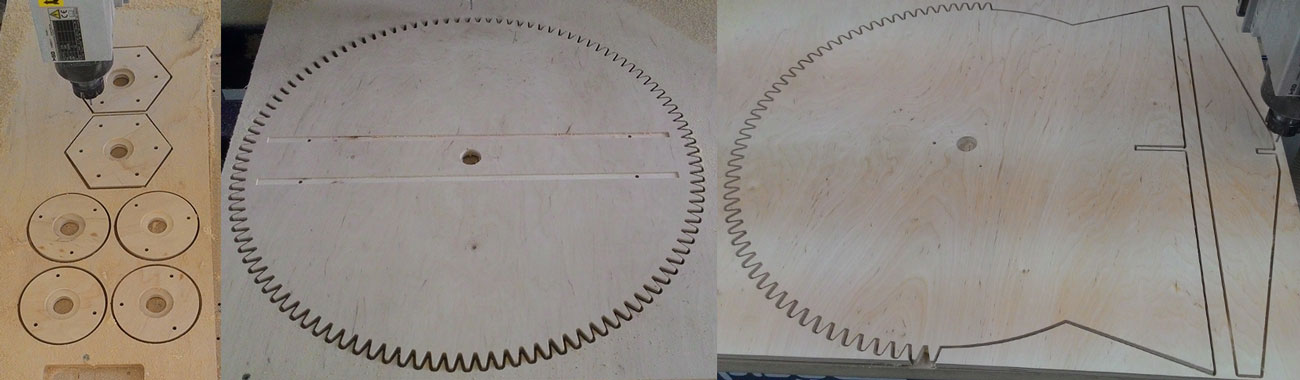
I searched the web and tried to draw a worm gear with both Freecad gear module and with Fusion 360 modules but the best option was available in Autodesk Inventer that has a great worm gear generator. Since Michael Aramyan had Inventer on his PC I used his computer. To see how easy it is to generate a worm gear with Inventer check thisout. Then I imported the worm gear into Fusion 360 and added the motor mount and a small shaft for bearing.
Here is the worm gear file: worm.f3d
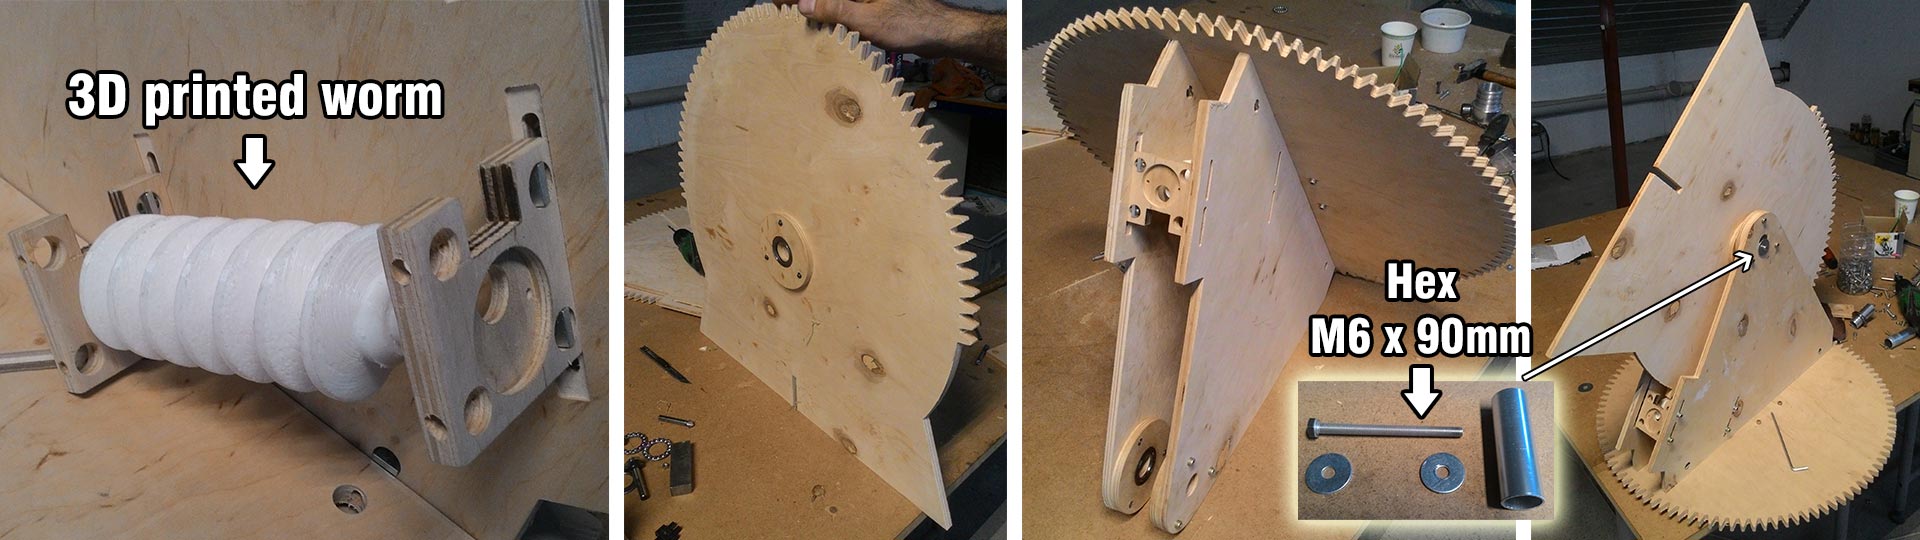
I 3D printed the worm with supports and it came out fantastic!

Assembling --- Հավաքում
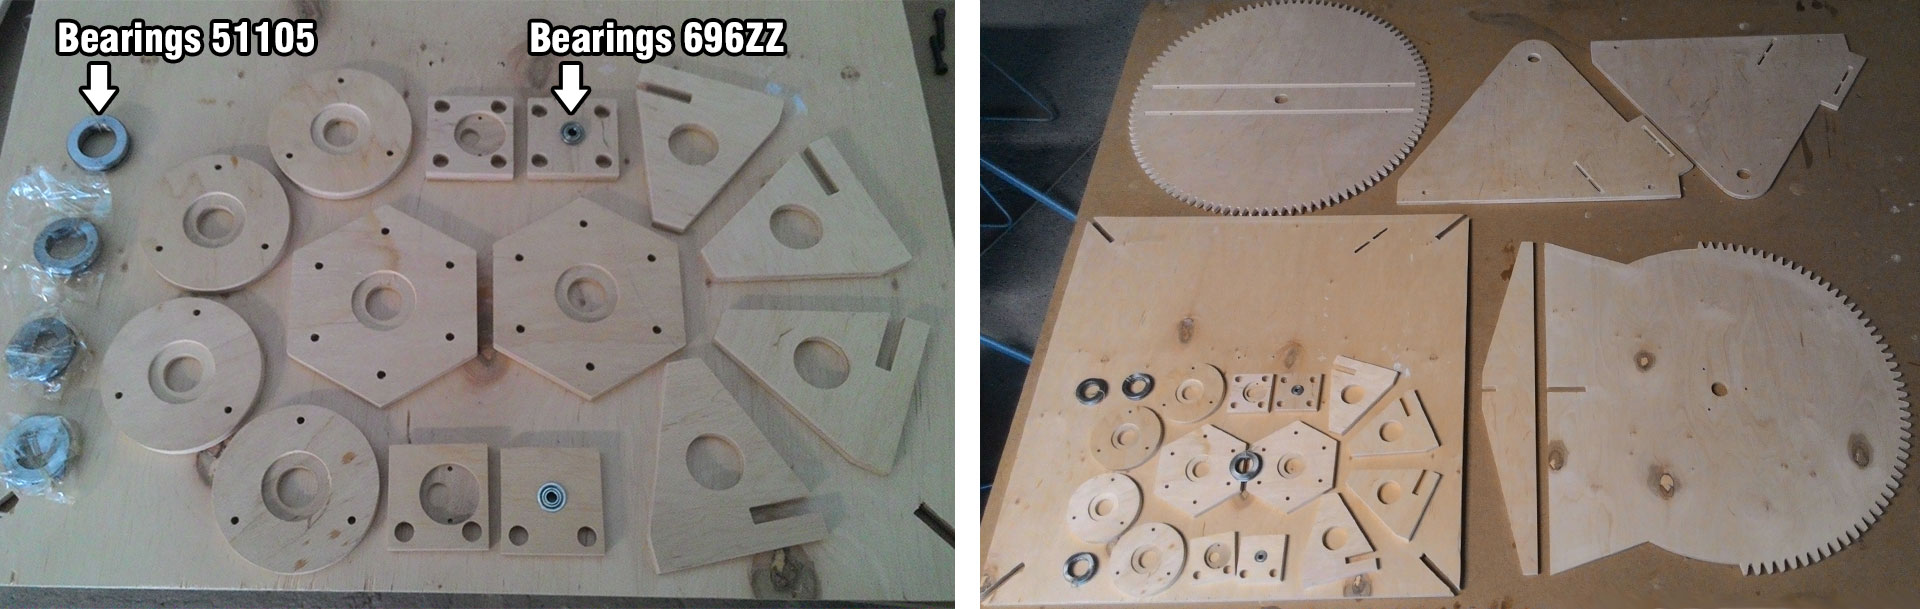
I started the assembling process by making sure everything is there and ready. I sanded the edges clean.
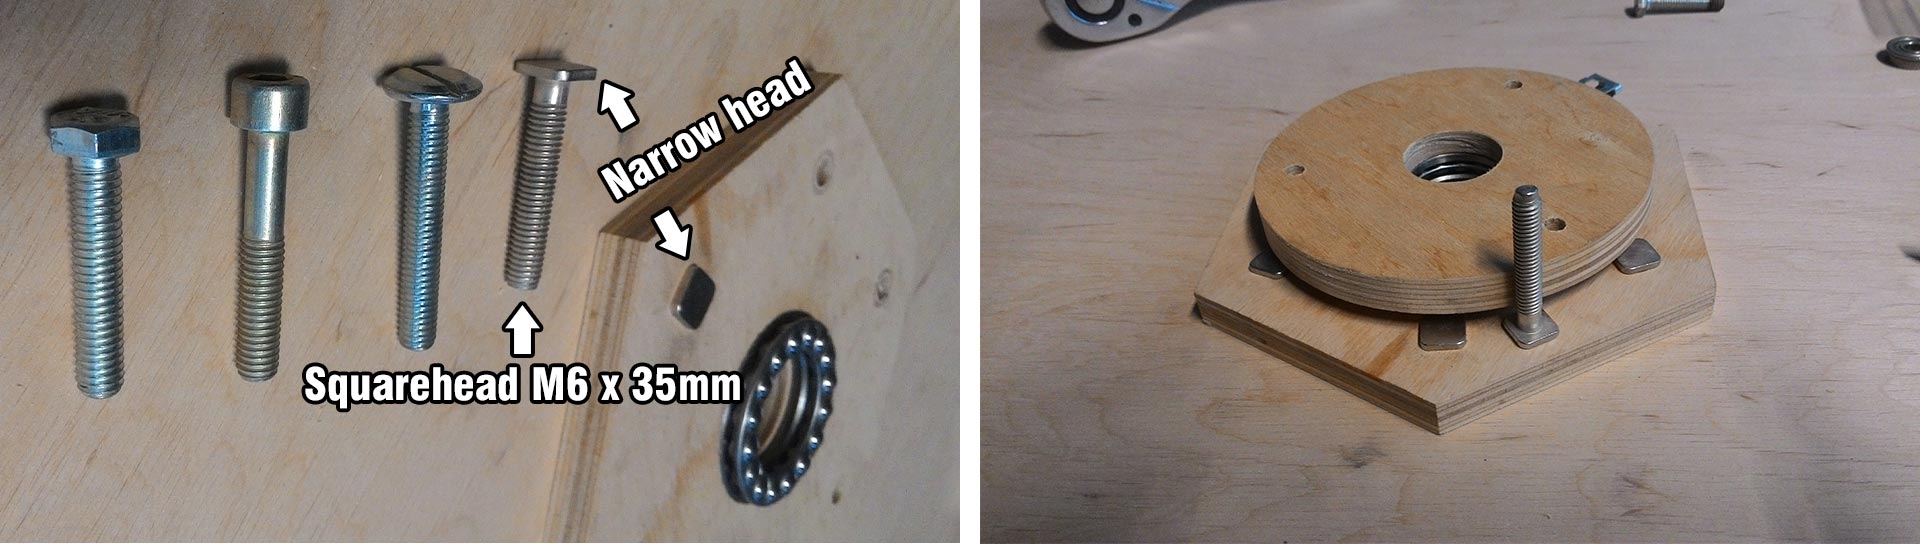
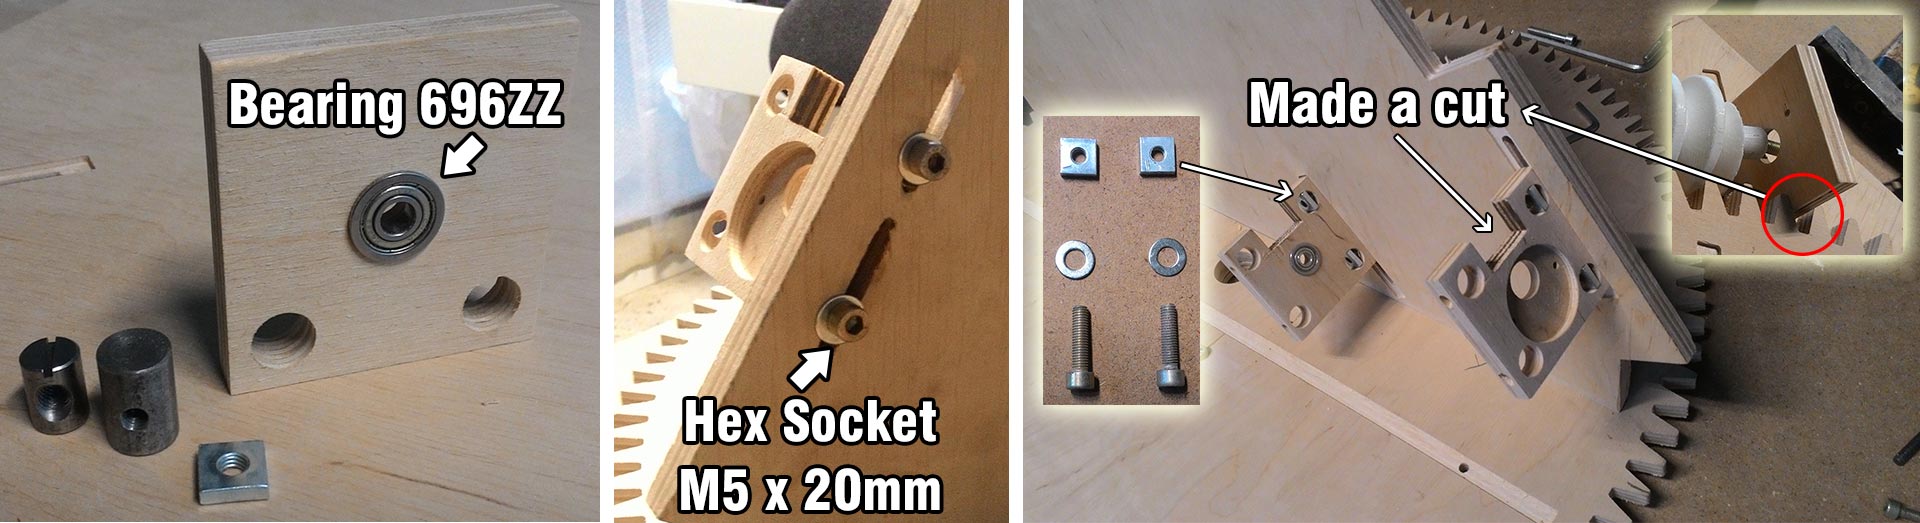
I attached the legs to the base using hammer. Then I took M6 Hex Socket bolts and nuts to attach the base spacer to the base.

It turned out that the heads of the bolts were too high and were preventing the other spacer to turn freely. So I tried some other bolts until I found the best for me.
The Electronics --- Էլեկտրոնիկա
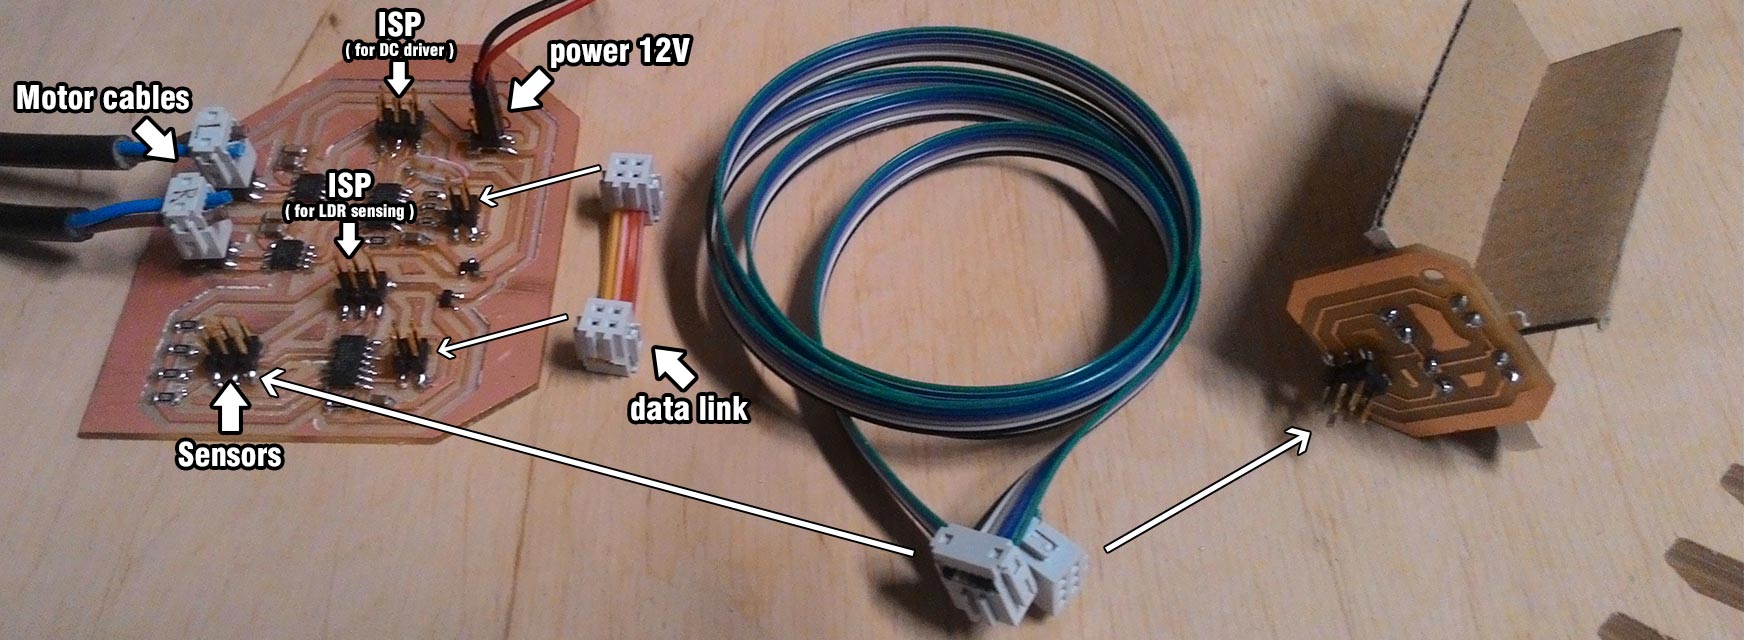
At first I was thinking of using stepper motors to better understand how they work and how to use them, but then I realised that with one bipolar stepper driver I can drive two DC motors, so I changed my mind. At first glance my board may appear busy and complicated, but in reality it's very simple.

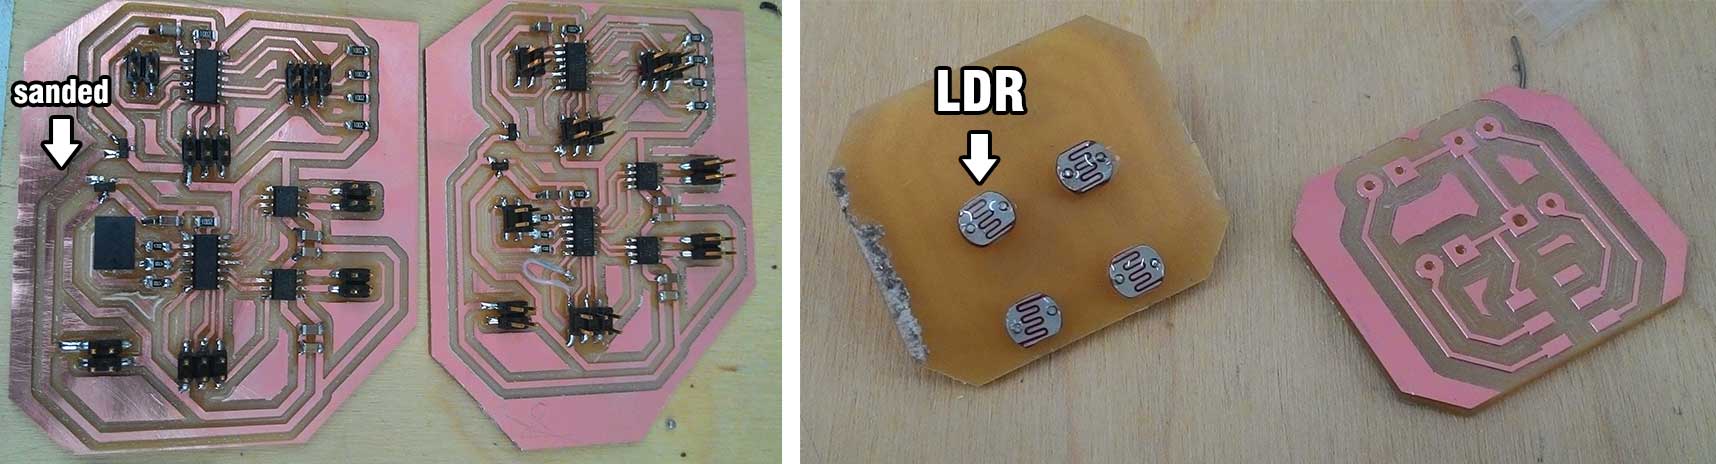
It turned out that one ATtiny44 could do all the job, but I realised this too late. My system has 4 inputs (analog readings from LDRs) and 2 pairs of outputs for two DC motors. I thought driving DC motors require analog pins but in reality it needs PWMs. It has two ATtiny44 microcontrollers one for measuring LDR inputs and the other one for driving DC motors. The first ATTiny44's PA0 and PA1 are connected to other ATtiny44's PA0 and PA1 respectively with 500ohm resistors between them. This is done in order to drive DC motors based on LDRs data.
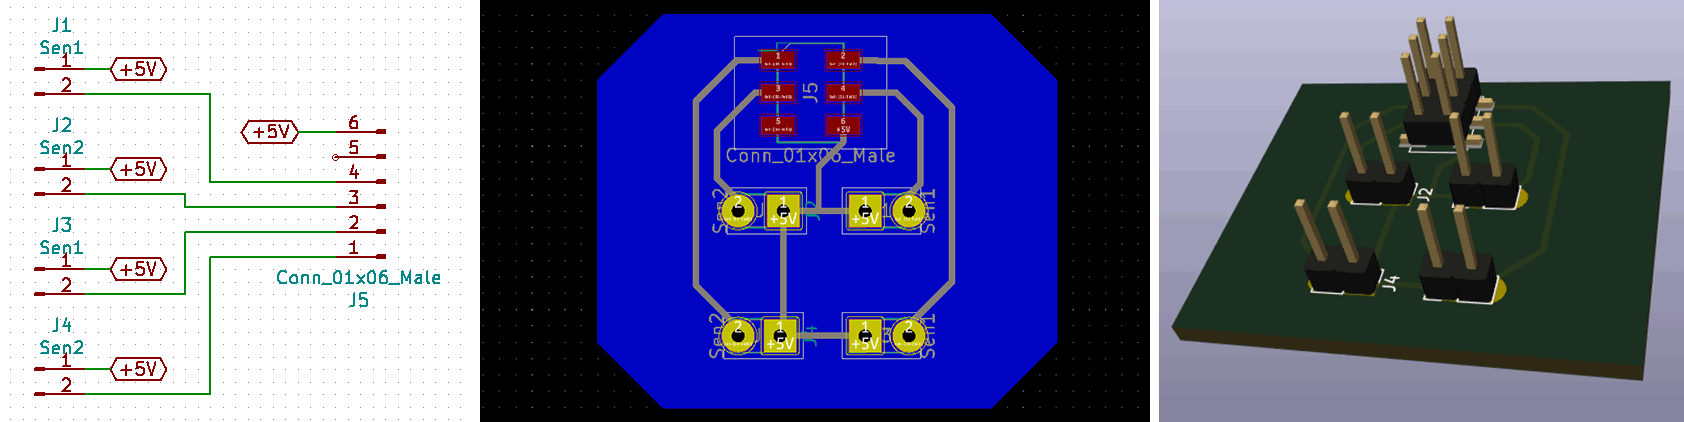
Here are the Kicad PCB files:
solar_v1 kicad.zip
sensors kicad.zip
Here are png files of the PCBs:
pcbs png.zip
Visit my Embedded programming assignment to see the software documentation.
Here are the c codes and make files:
sun.44.zip For light sensing
dc.44.zip For DC driver
BOM
Total 38431 AMD 80.3$ rate (1$=478AMD 30/06/2019)
2 DC Motor Jameco 253471 15296AMD (32$)
1 sheet of 150x150x10mm polished plywood 5800AMD (12.1$)
2 M6x90mm bolts(400AMD)+ 10 M6x35mm bolts(1000AMD) + 13 M6 nuts(500AMD) + 23 M5x20mm bolts(2300AMD) + 31 M5 nuts(465AMD)=4665AMD (9.7$)
5 female 2x2 2.54mm (320AMD)+ 5 male 2x2 2.54mm (250AMD)+ 2 female 2x3 2.54mm (320AMD)+ 3 male 2x3 2.54mm (250AMD)=4240AMD (8.87$) ?
4 thrust ball bearings 51105 3000AMD (6.2$)
2 ATtiny44 microcontrollers 1400AMD (2.9$)
2 LM3480IM3-5.0v regulator 800AMD (1.7$)
2 A4953 full bridge 760AMD (1.6$)
2m copper cable 500amd (1.1$)
9 smd resistors(45AMD) + 6 smd capacitors(30AMD) + 4 LDR 5528 Q5(400AMD)=475AMD (1$)
1m ribbon cable 478AMD (1$)
2 696ZZ ball bearings 300AMD (0.6$)
1 FR1 PCB board 717AMD 1.5$