Raster and Vector
Let's learn what is the difference between them
We are going to use Inkscape
It's nice to have a last name that indicates something striking, I would like to refer in this assignment my family´s name "last name" where it shows a beautiful bird named "hoopoe". So, I chose a picture that was sketched for Hoopoe and I was happy when I learned in the past years during my work in FABLAB Dhahran that it is possible to trace bitmap to most of images from pixels or raster to vector.
Open Inkscape
Go to file > Import the image that you would like to convert it form pixel to vector as shwoing in the pictuer down ... I'm trying to import hoopoe image
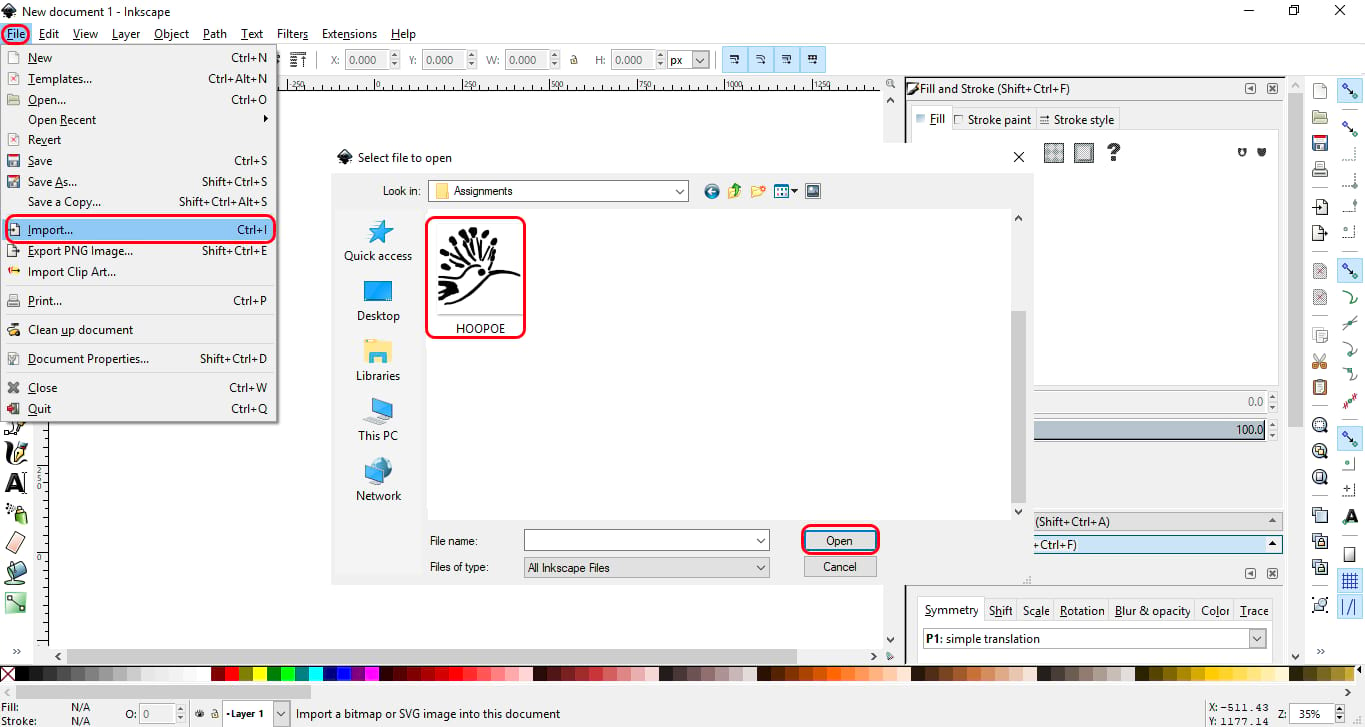
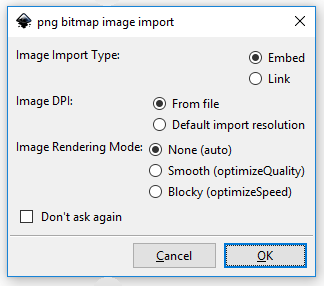
Once I did select the image that I want they asked me for some preference so just click OK and don't change anything in this step.
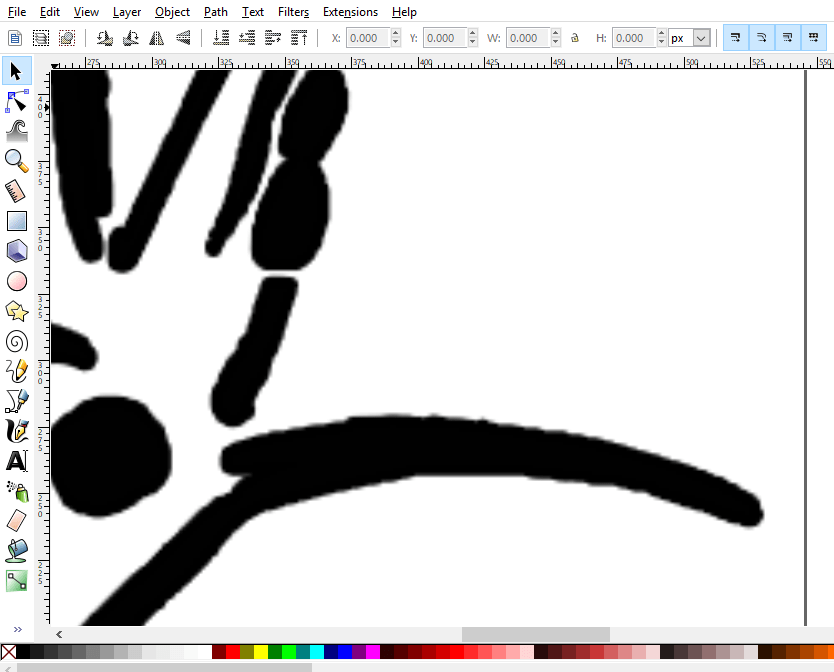
when I did zoom-in the image I notice it's not clear enough and it's pixelated
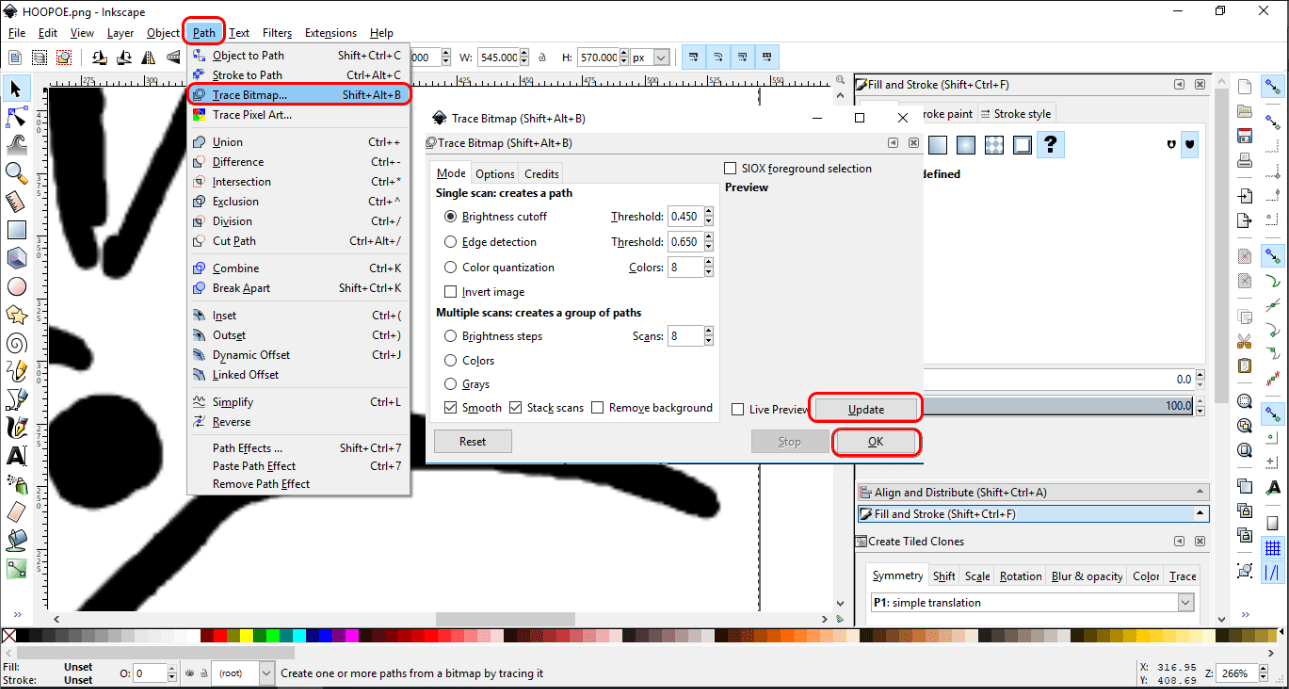
So, what I did is selecting the image and then I went to > Path > Trace Bitmape > Update > Ok .. to convert the image from pixel to victor
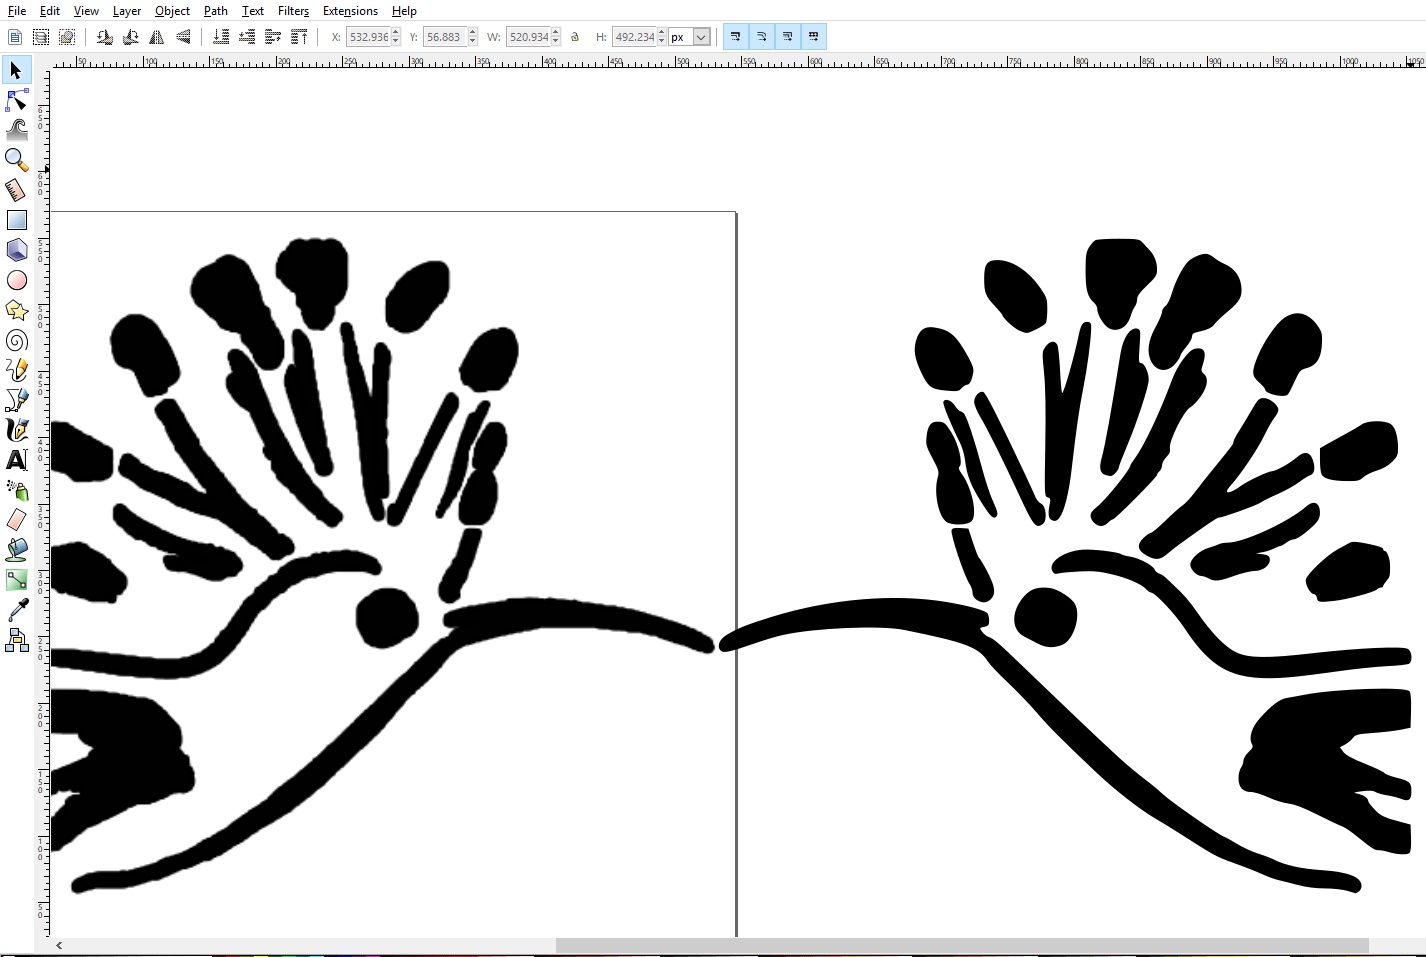
Now when I zoom in, I notice that the image on the left is pixelated which is the original image and on the right, the image is a vector for what I did in the trace bitmap.
To open or download file
Back to Top
Onshape
How could be design 2d and 3d in one way using Onshape
What's I learned in Onshape
I have used 2D design more than 3D design as I did not initially accept to learn 3D design for feeling the difficulty of programs in this field or dissatisfaction with the software interface. Until the moment that my friend and colleague Abdulla Al-Dar, who was an expert in 3D design and his obsession in this field, managed to persuade me to learn using TinckCAD and Blinder but I could not cope with them. Abdullah did not give up and move from one program to another until he settled to Onshape. Through the program I was able to teach the basics of simple design during two sessions and then started self-learning. I learned from my colleague Abdullah how to define variables and linked to design.
First, we will review the basics that I learned from Abdullah about Onshape that contributed to the development of its use in multiple fields.
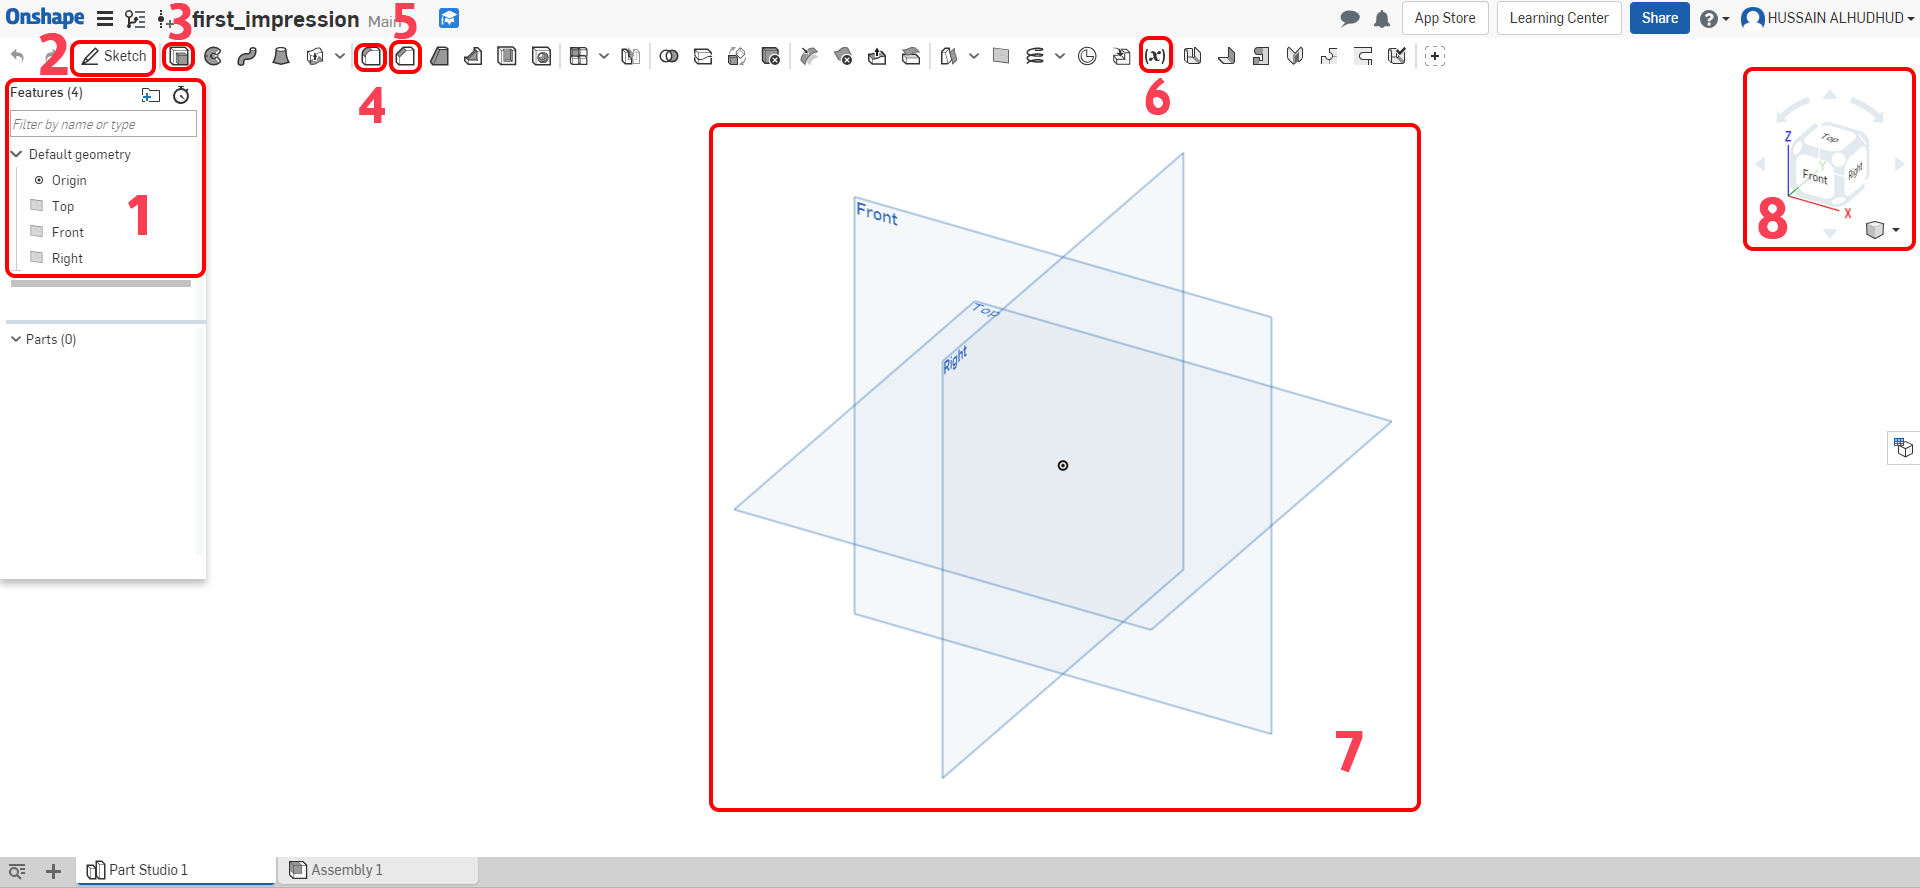
For each number above, you can find the explanation below
- 1: Shows the features which including the default geometry, where you are selecting the origin to do the sketch or design.
- 2: To start a sketch.
- 3: Extrude the object or the shape already designed. It also gives you a lot of options like (add, remove, intersect) either solid object or surface.
- 4: Create constraint or variable fillets with circular, conic or curvature continuous cross-sections.
- 5: Create beveled edges on selected edges or faces.
- 6: Variable: assign a variable that is visible inside this Part Studio.
- 7 & 8: It's the origin where you can view all the sides.
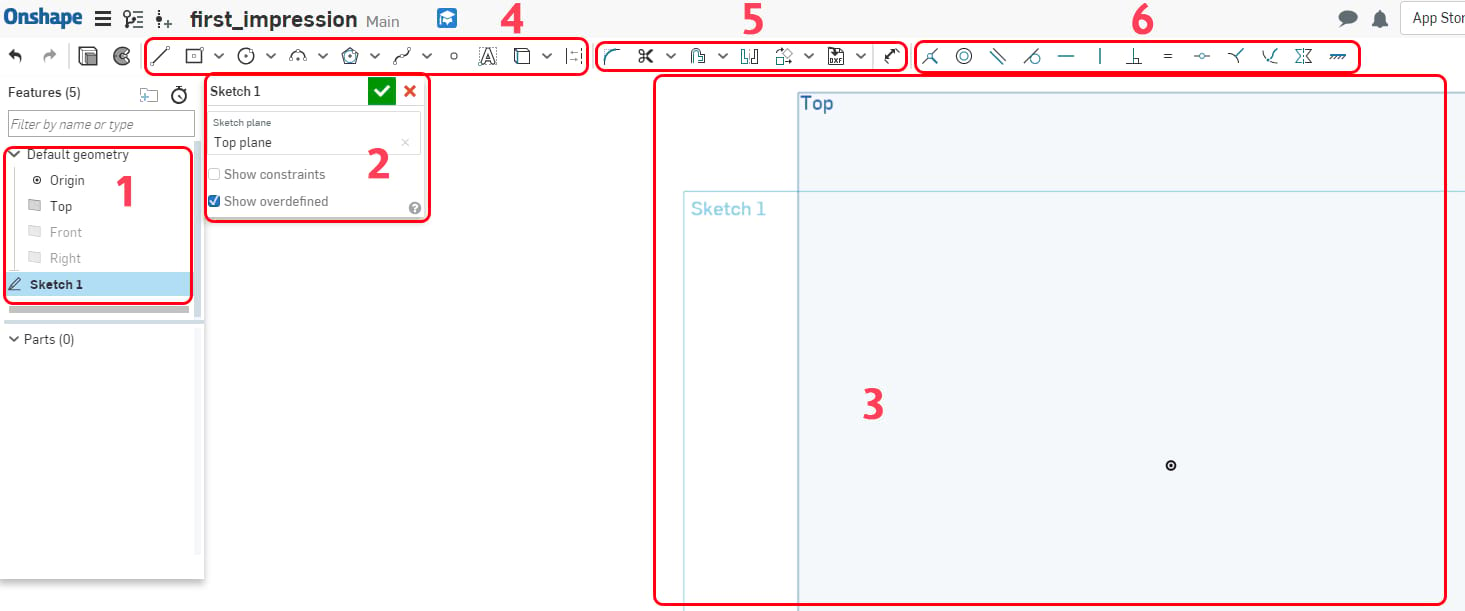
For each number above, you can find the explanation below
- 1: First of all, to get better sketch and do not feel confused haid other origin that not you are goin to use at the moment.
- 2 & 3: Click sketch and then select the origin to start the sketch.
- 4: Basic drawing tools you need to use for sketch.
- 5: Editing tools that are used over the sketch.
- 6: It's a constrains tools to control the sketch.
On the following video it is the first lesson I learned on Onshape and I have converted one of the designs that I designed with an Inkscape. The goal was to be able for editing the design if you change the material like thickness and it can be also assembled in a different way.
If the video it doesn't work
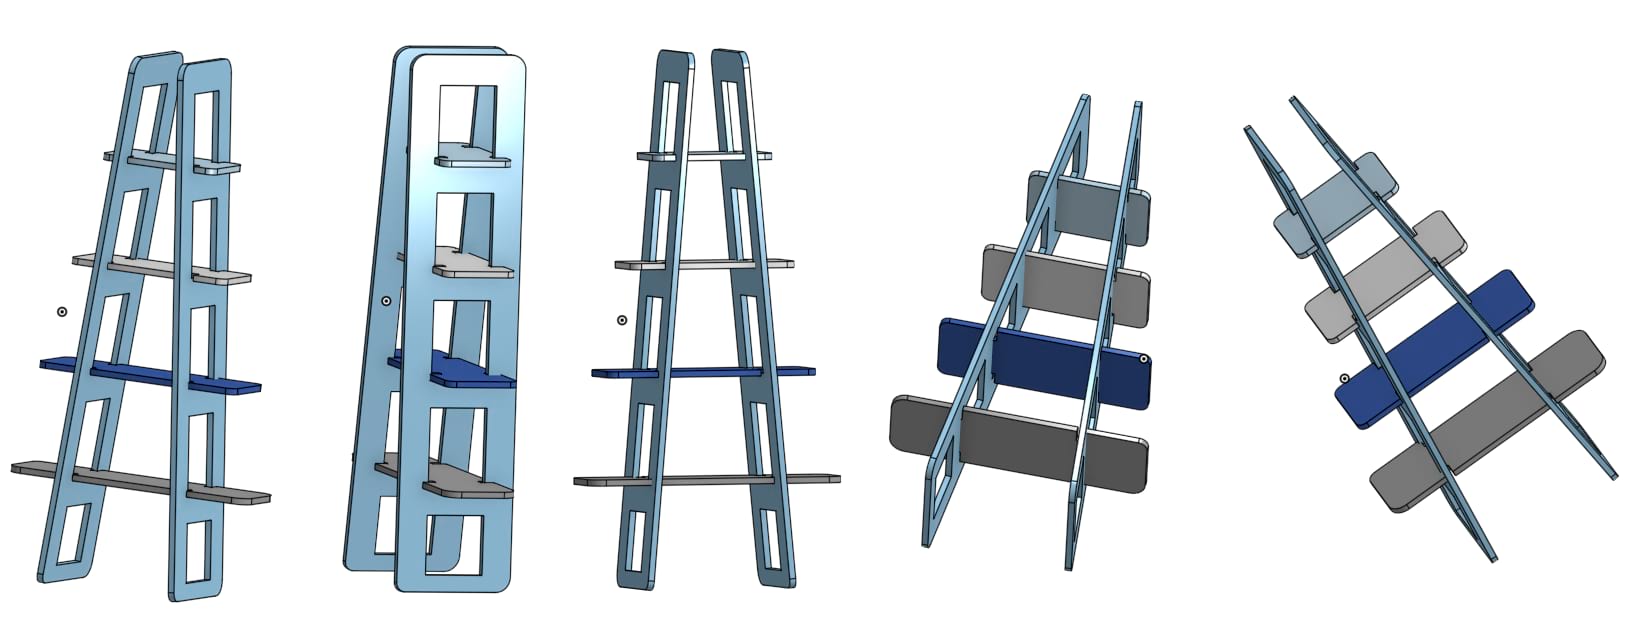
Final Results
To access design via Onshape
To Download the Original File
To Download File as STL format