Embedded Programming
read and program board
Arduino
On this week assignment, we are going to reprogram echo hello-world board after we did redraw microcontroller PCB circuit. I will use the Arduino as ISP Module since I have a background on how to program it. It's a great challenge to program PCB circuit for the first time. And I believe it's easy to teach the fundamentals Arduino to anyone as I did with my son who is 8 years old. However, this assignment gets few challenges for who did not work before in the electronics parts and programming
Challenges I have faced:
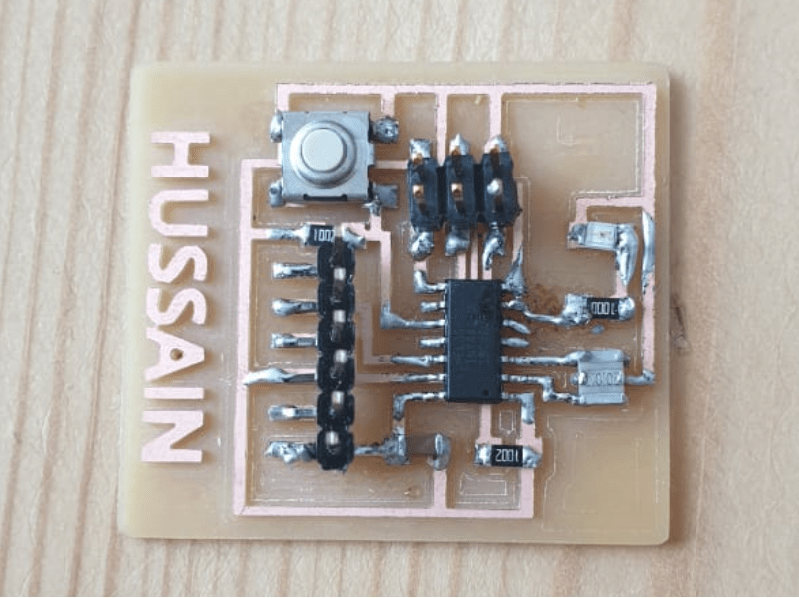
- I noticed that the circuit get several miss connections while I did the milling.
- The microcontroller does not get 5V because of one of the pins that energize the circuit is not well soldered. So, I re-soldered that again and test the voltage test again, I got 5V!
- The LED was not connected to the pin 6.
Yousef helped me in this assignment since he is having a bachelor’s degree in communication and control system. What a nice lecturer that Yousef represent and explain the embedded programming . Yousef started explaining the microcontroller and embedded systems as a small computer that takes set of commands and instructions and process them together and make actions as outputs accordingly. What we are going to use is 8-bit microcontroller. The system will be programmed using Arduino (as ISP) to make a communication link between the computer (code) and my circuit.
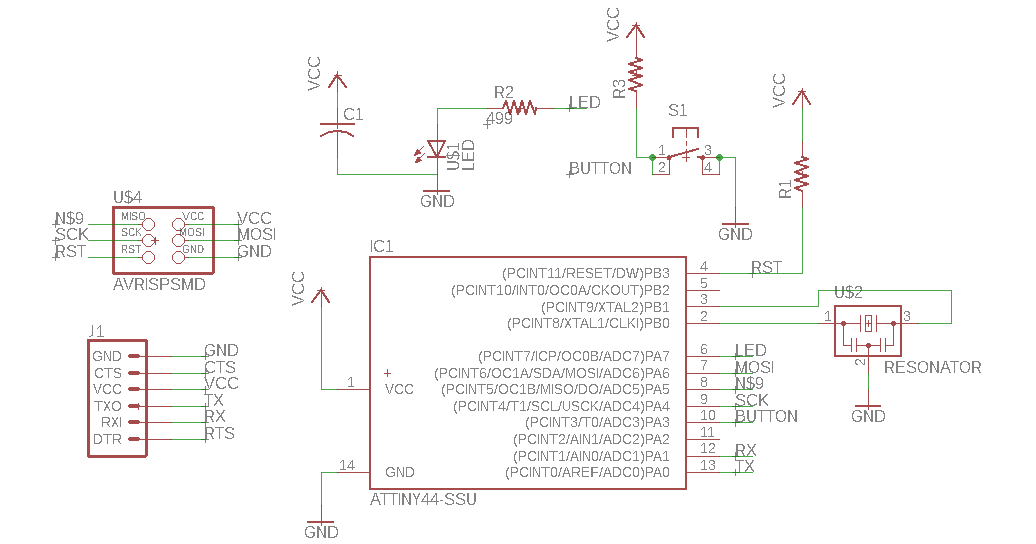
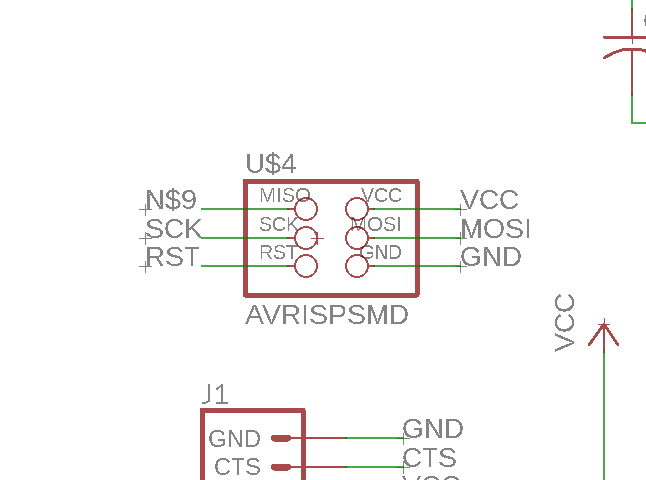
schematic diagram regarding hello board
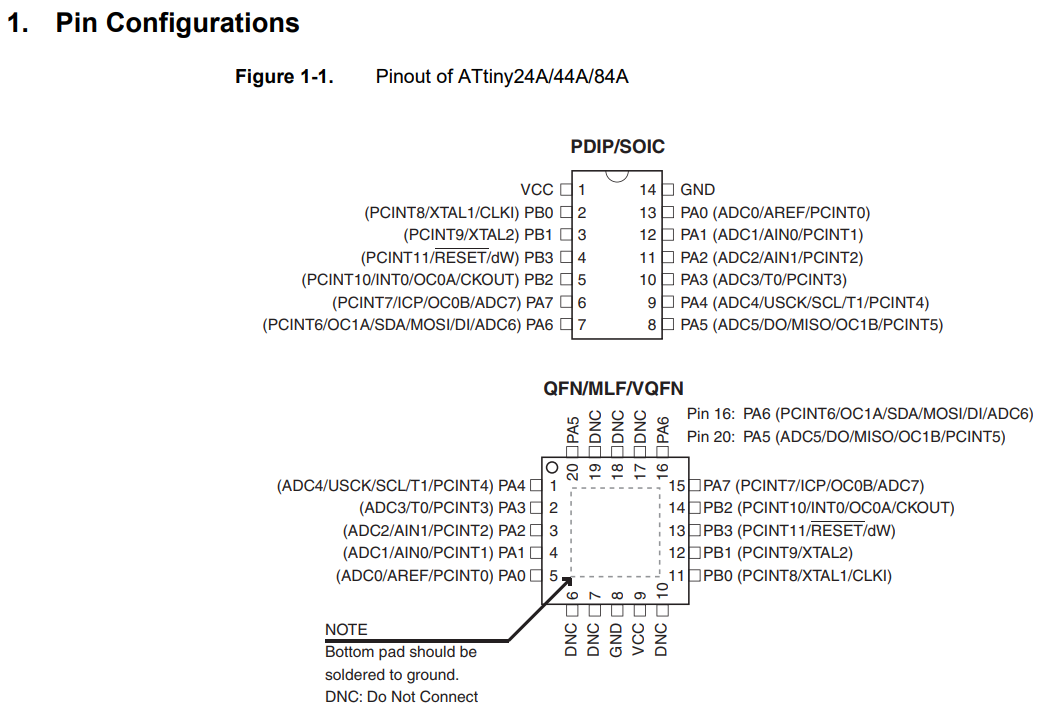
Reading the microcontroller data sheet
Connection diagram pins to be able to programme the circuit
a step before program it
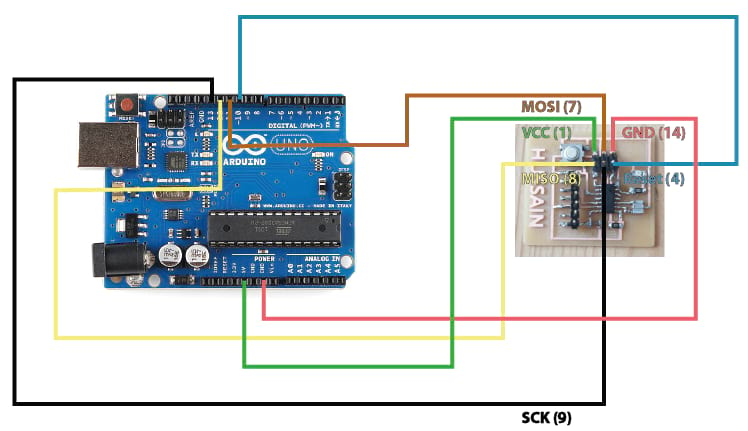
After obtaining the microcontroller pin diagram and checking the Arduino pins, I connected two boards together as the following:
Arduino Pins |
Attiny44 Pins |
5v |
1 (VCC) |
GND |
14 (GND) |
10 (digital pin) |
4 (Reset) |
11 (digital pin) |
7 (MOSI) |
12 (digital pin) |
8 (MISO) |
13 (digital pin) |
9 (SCK) |
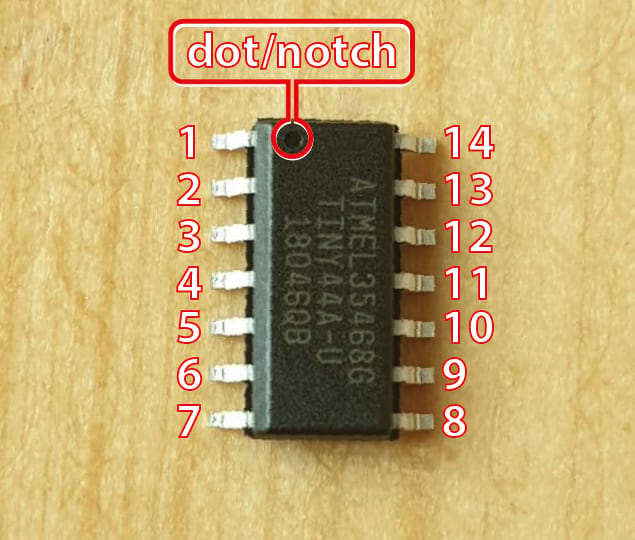
Note: to determine the microcontroller pins, you have to see the dot or notch (in Attiny44 there is a dot) and you can count the pins as shown below:
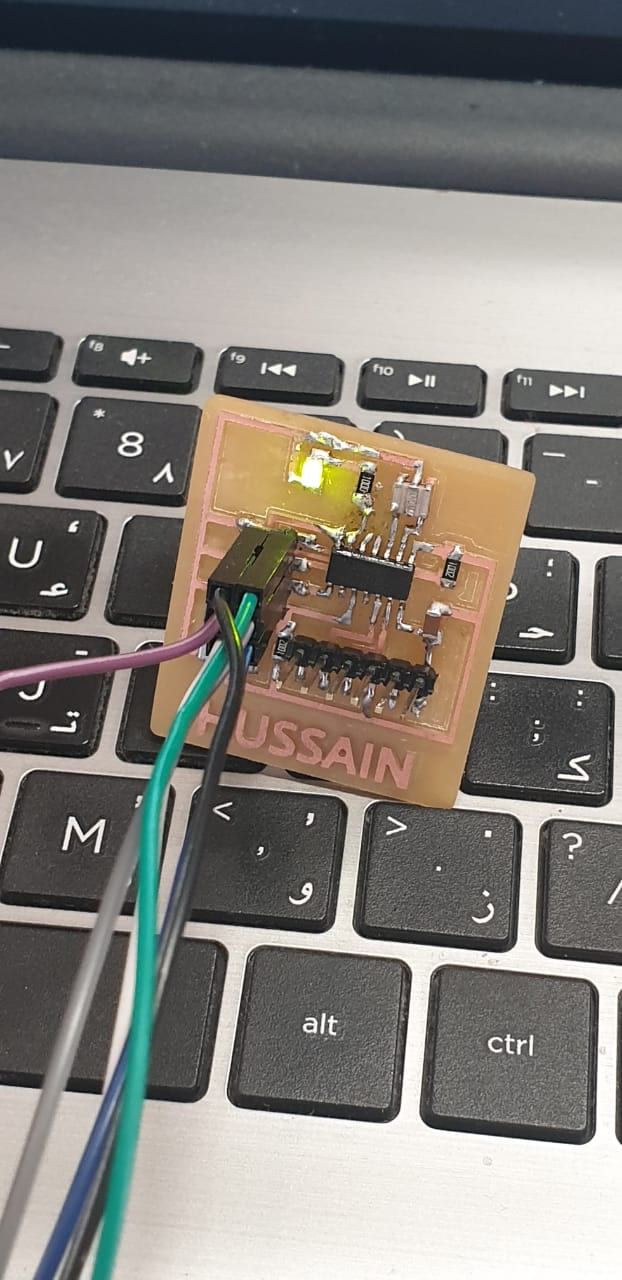
I’m going to use jumper wires (male to female) to connect the boards as I mentioned above and as the diagram that I have done:
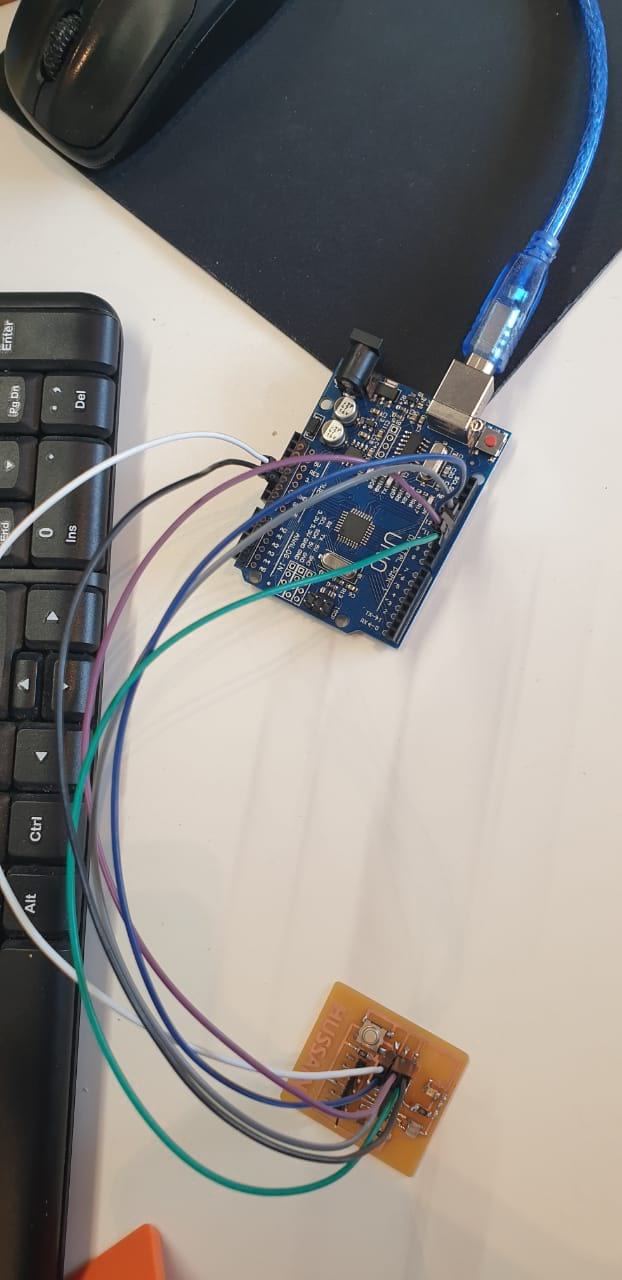
The circuit after doing the connection using jumper wires:
Then, and before connecting the circuit to the laptop to do the programming, I have to check the IDE program that I have if the Attiny boards are defined or not. I checked by clicking on Tools>>Boards but it’s not installed. To do that, I copied the following link:
https://raw.githubusercontent.com/damellis/attiny/ide-1.6.x-boards-manager/package_damellis_attiny_index.json
And I clicked on file>>preferences
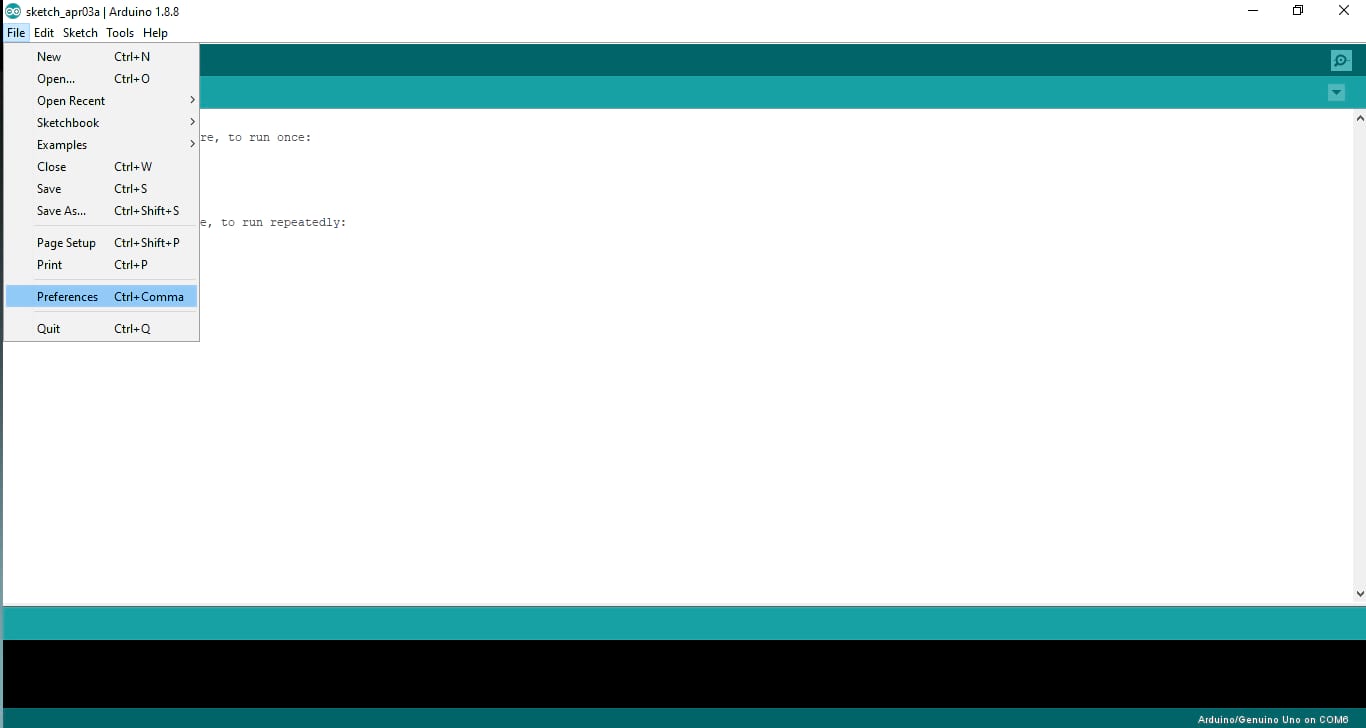
And paste the link there to define the boards packages from the link
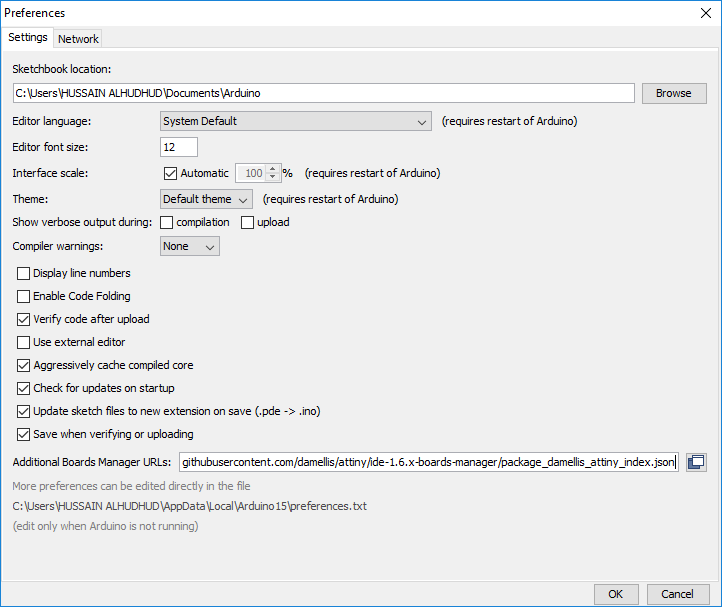
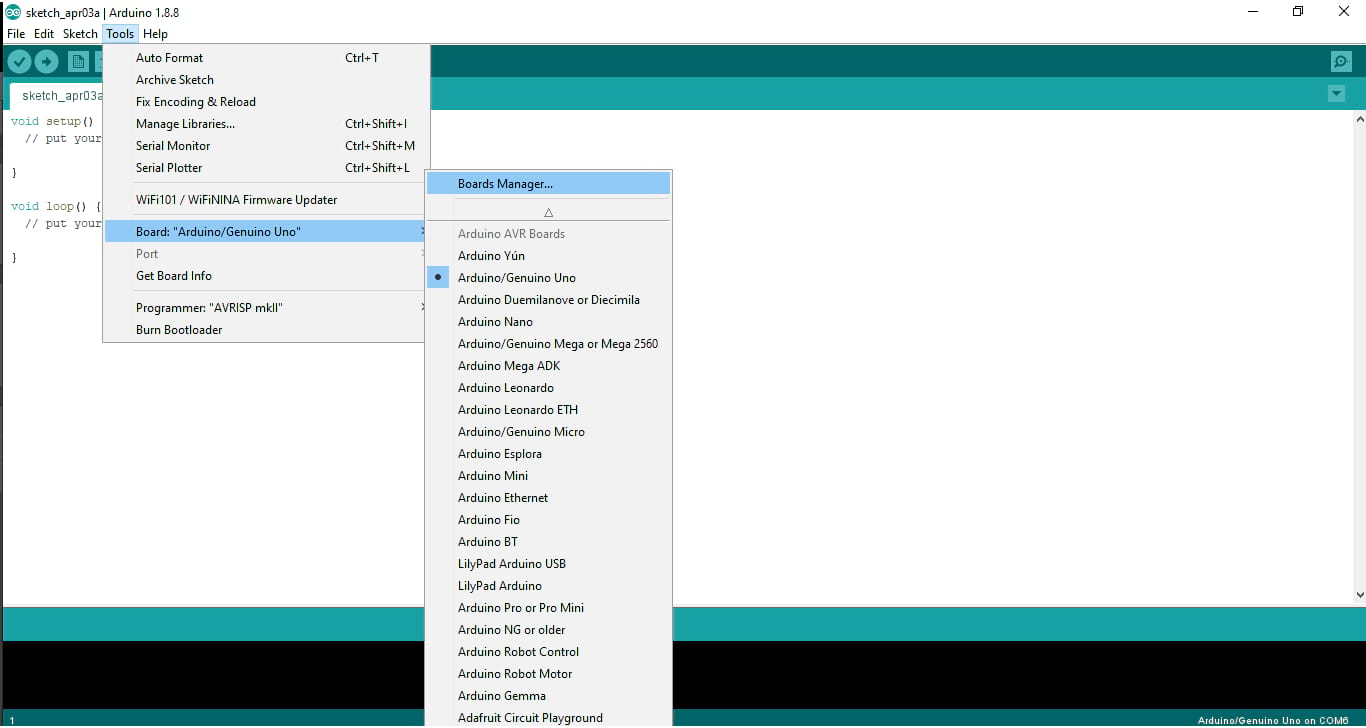
Clicking OK. I closed the program and run it once again to check the updates. Now, I should install the boards packages called Attiny. To install it, I selected Tools>>Boards>>Boards Manager
I searched using the word Attiny, it’s only one package to install, I clicked on install
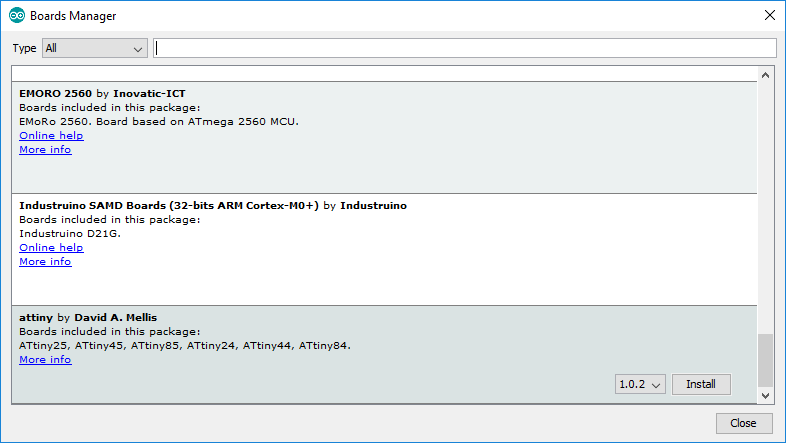
And I saw “installed”. Now I closed the program one more time and I checked the boards once again, It’s there
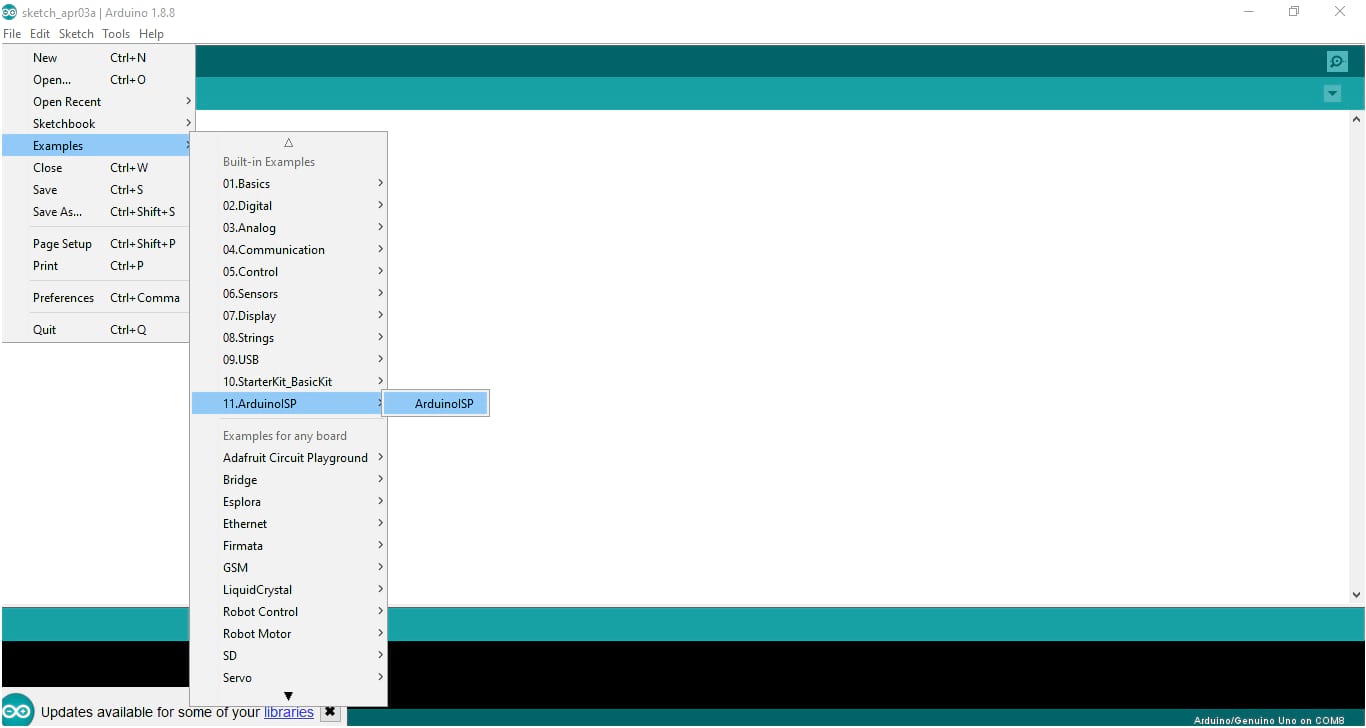
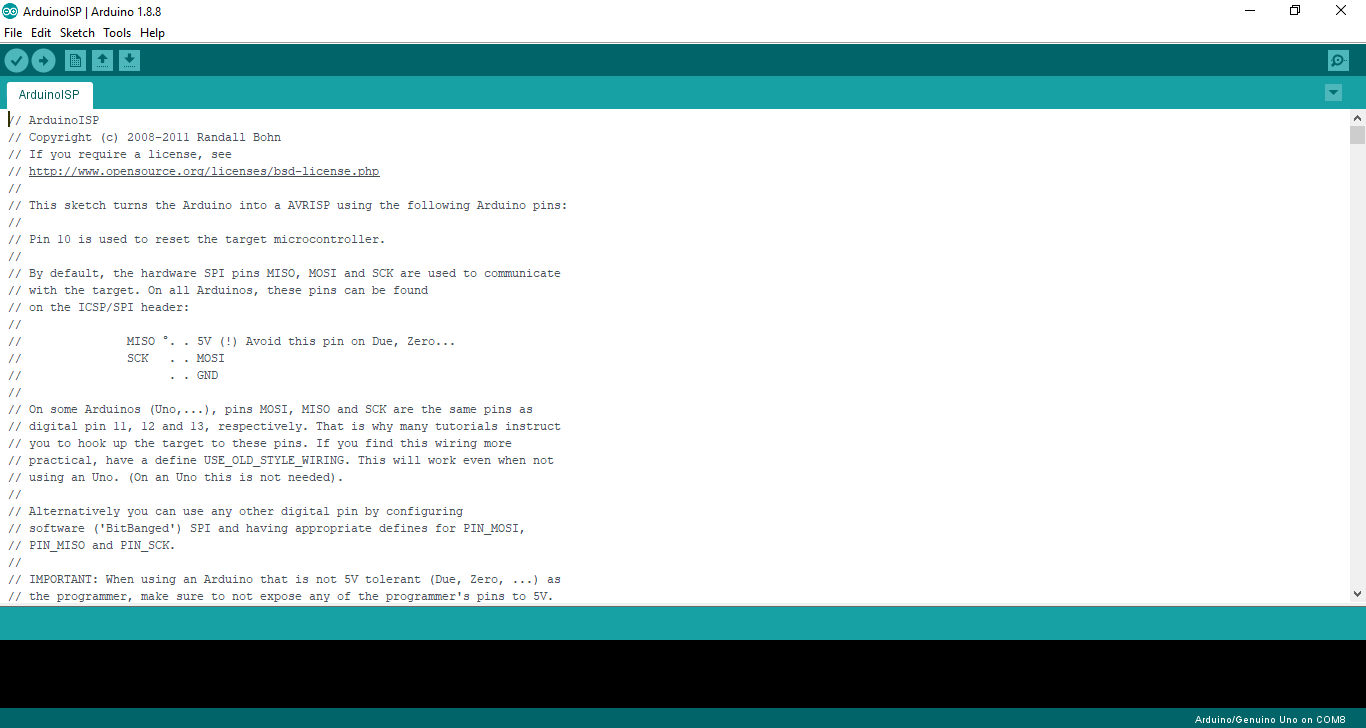
As I planned to use the Arduino Uno as ISP, I have to upload the code that makes the Arduino ready to transfer the upcoming codes to my microcontroller board. I selected the board Uno from Tools>>Boards. Then selecting the code that already exists on the same program from File>>Examples>>ArduinoISP>>ArduinoISP
I opened the code, and finally before I upload the code check the port from Tools as well. It should be defined and marked as one of the com’s
To upload any code, I can verify it at first by clicking on the icon True ![]() , to make sure the code is correct before uploading it. I uploaded it by clicking on the icon right arrow
, to make sure the code is correct before uploading it. I uploaded it by clicking on the icon right arrow ![]()
I can see now uploaded successfully. I noticed nothing but this notification. But now the arduino is ready to transfer the code to the board that I made a couple of weeks ago.
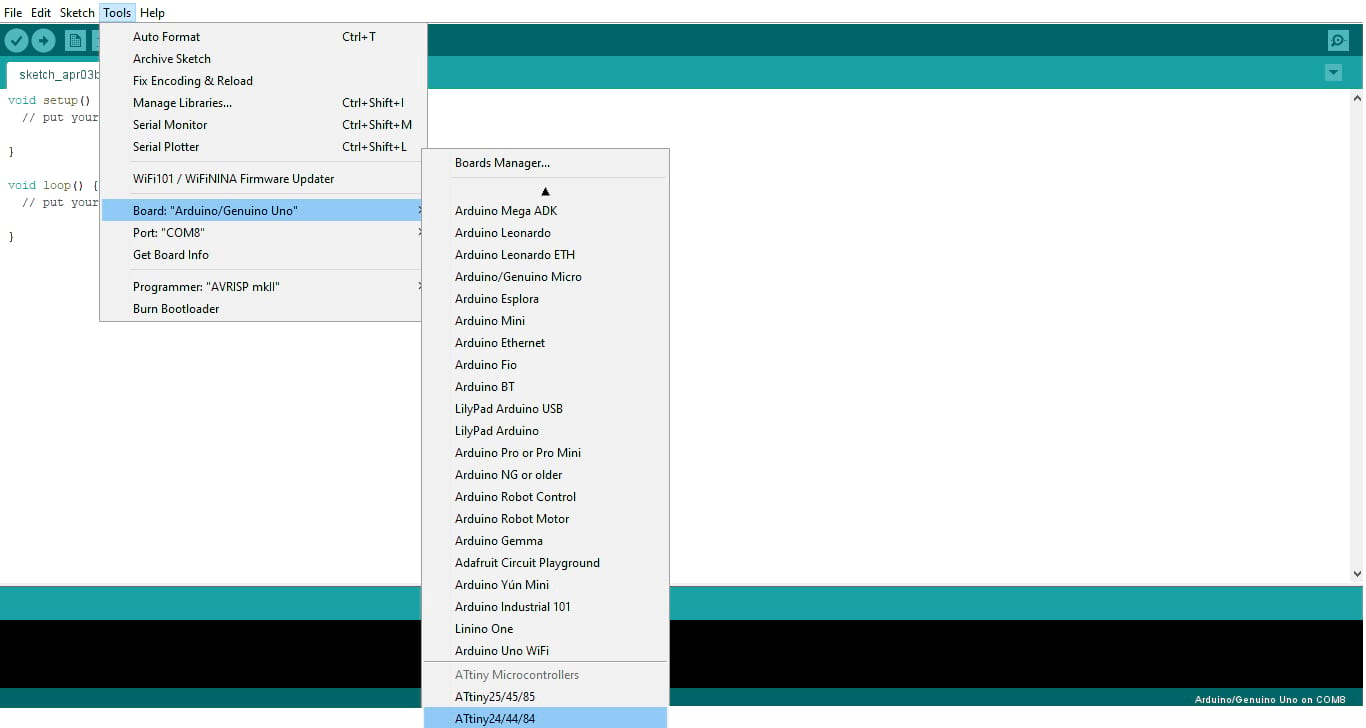
Now, I have to change the board as I’m going to program the board (Attiny44 microcontroller). I started by selecting the board that I installed from Tools>>boards>>Attiny 24/44/84
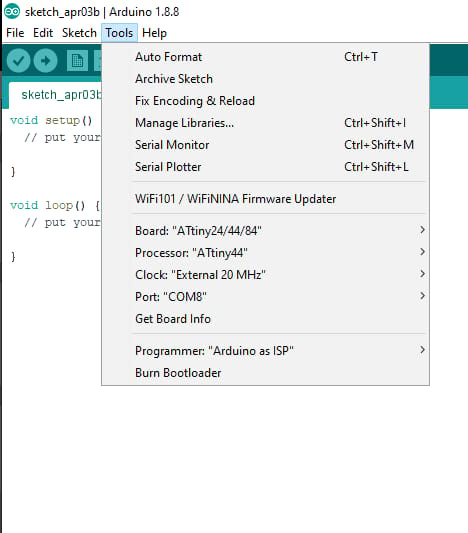
Now I checked the rest settings, as I used Attiny44 and 20 MHz crystal. In this case and as I mentioned the Arduino acted as programmer, in other words it acts as ISP. So, I selected the programmer from Tools>>Programmer>> Arduino as ISP
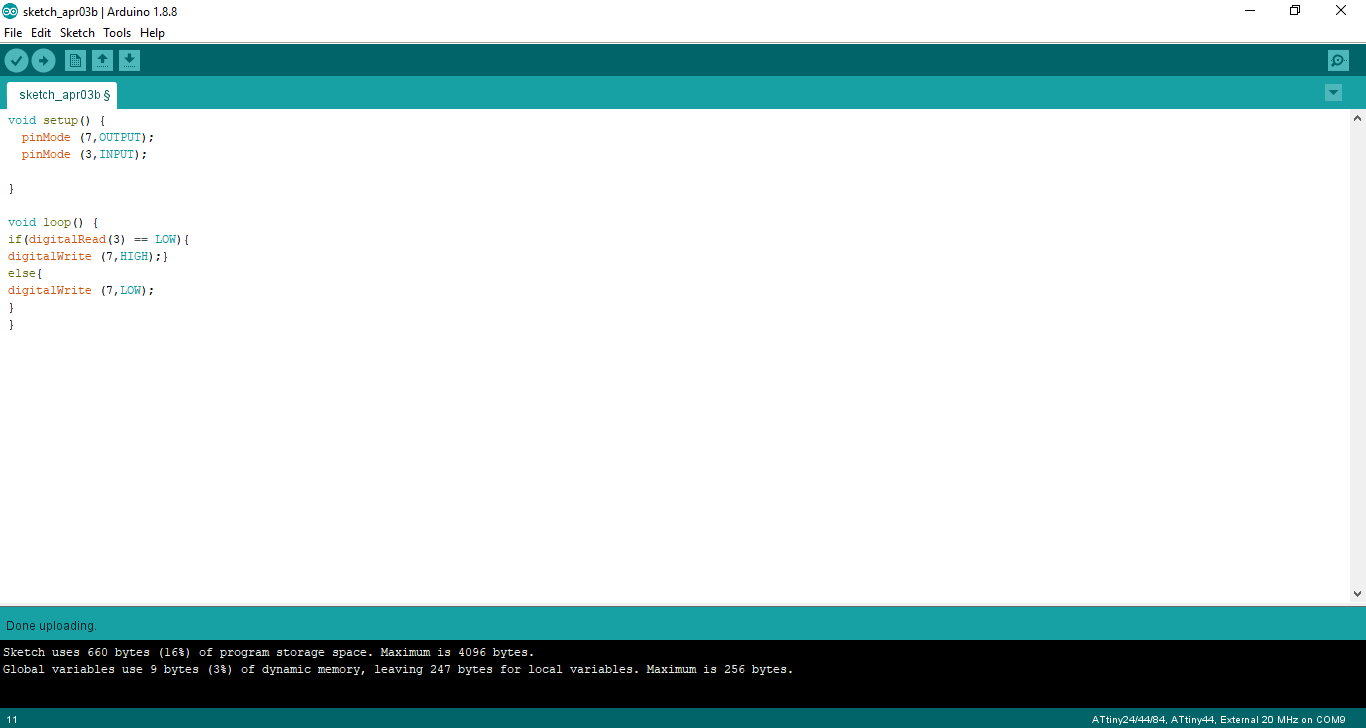
Now, everything is ready in terms of the program preparation to start uploading the codes through the Arduino Uno board to the Attiny44 hello board. Looking back to the Attiny44 data sheet and to the board that I have made, the Resistor and LED connected to Attiny44 pin 6 but this pin is called 7 in terms of programming if I wish to call or communicate it as mentioned in the pin diagram.

So, I prepared the code to turn on the LED only, by defining the pin the the void setup and turning it on in the void loop
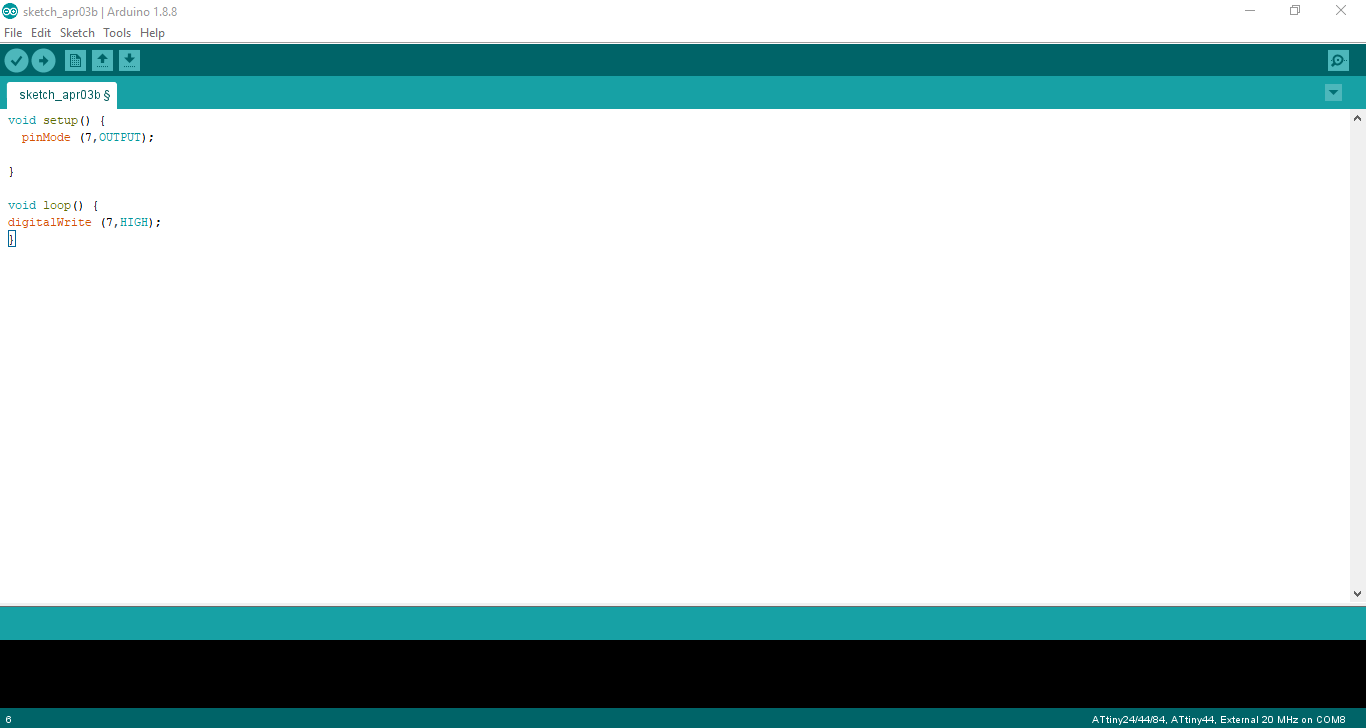
Note: The arduino programming language is C-based and I have two main loops, the first one called void setup (to identify any input/output pins and do initialization for some parts) the second one is called void loop (to do anything and it will run continuously repeating)
To upload the code, I clicked on the Sketch>>Upload using Programmer
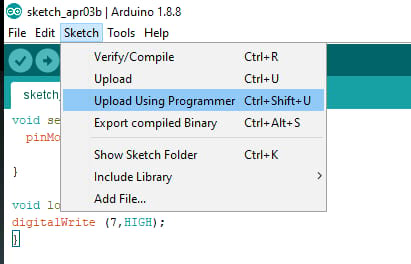
I saw the notification done uploading. And the LED has turning on.
I tried to make blinking by using delay function, as the following code
So, it’s mainly 4 commands the first one to turn the LED on, the second one is to wait for 10 ms, the third one is to turn the LED off, and the last one is to delay once again. These commands will be repeating all the time acting as blinking
Another way by using Ardublockly to program the Hello World
I will use the Ardublockly program that we are using to teach students to program the arduino, which is an interactive interface that is easy for anyone to learn quickly without learning the programming language from the very first moment. You can download the Ardublockly from GitHub.

The program interface contains two parts as shown in the image above. Where the first part is on the left and contains blocks through which you can build the code. On the left hand side, you can see what you've built on the left side of a programming language on the right
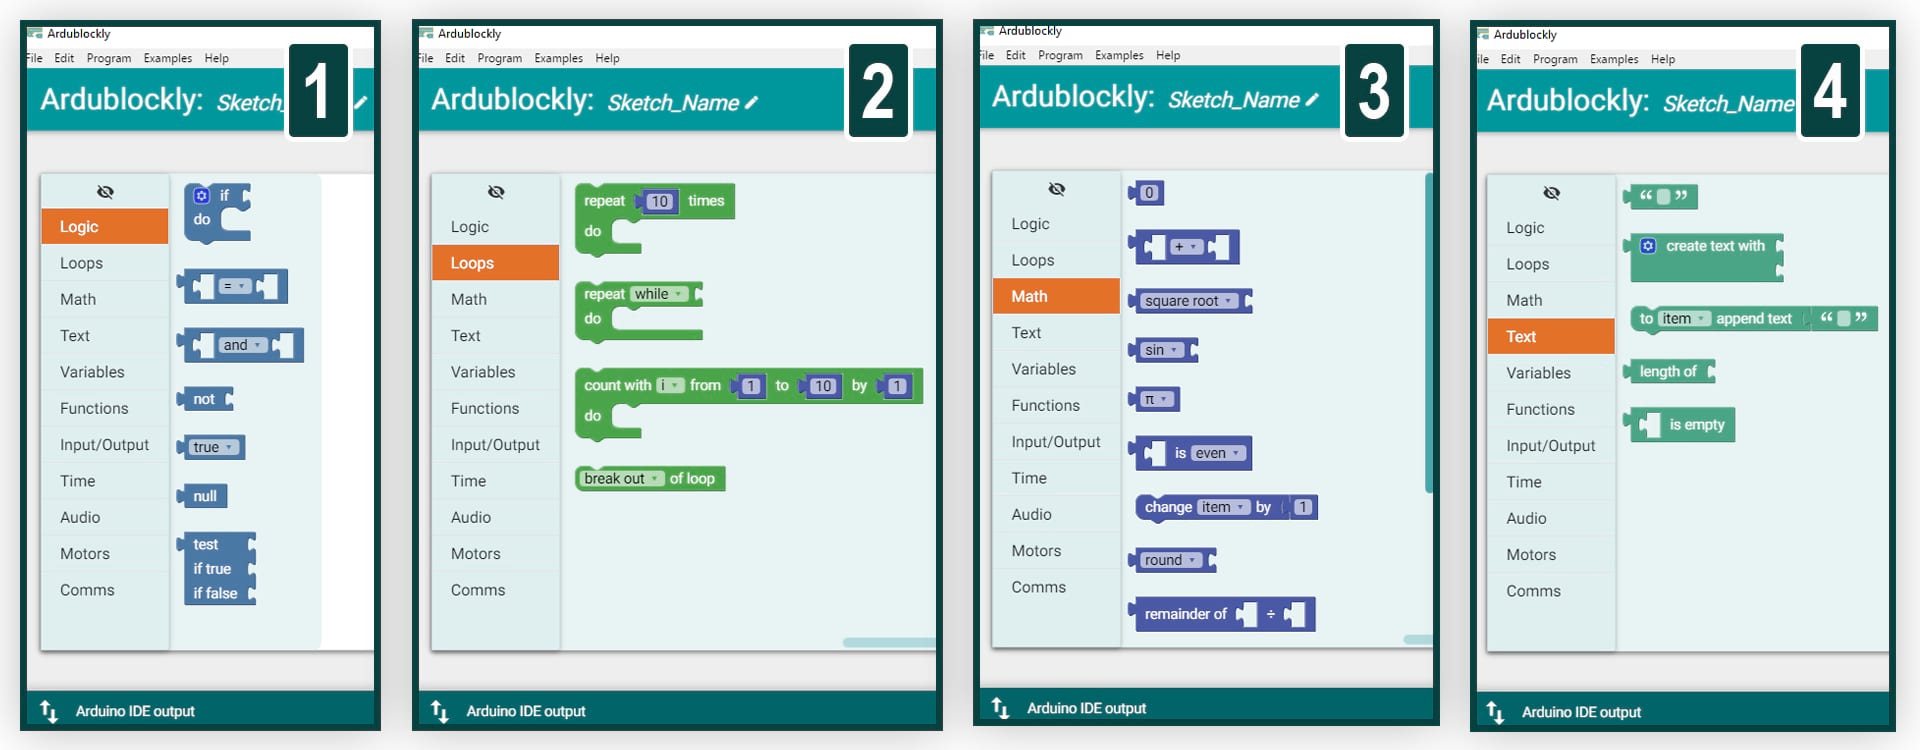
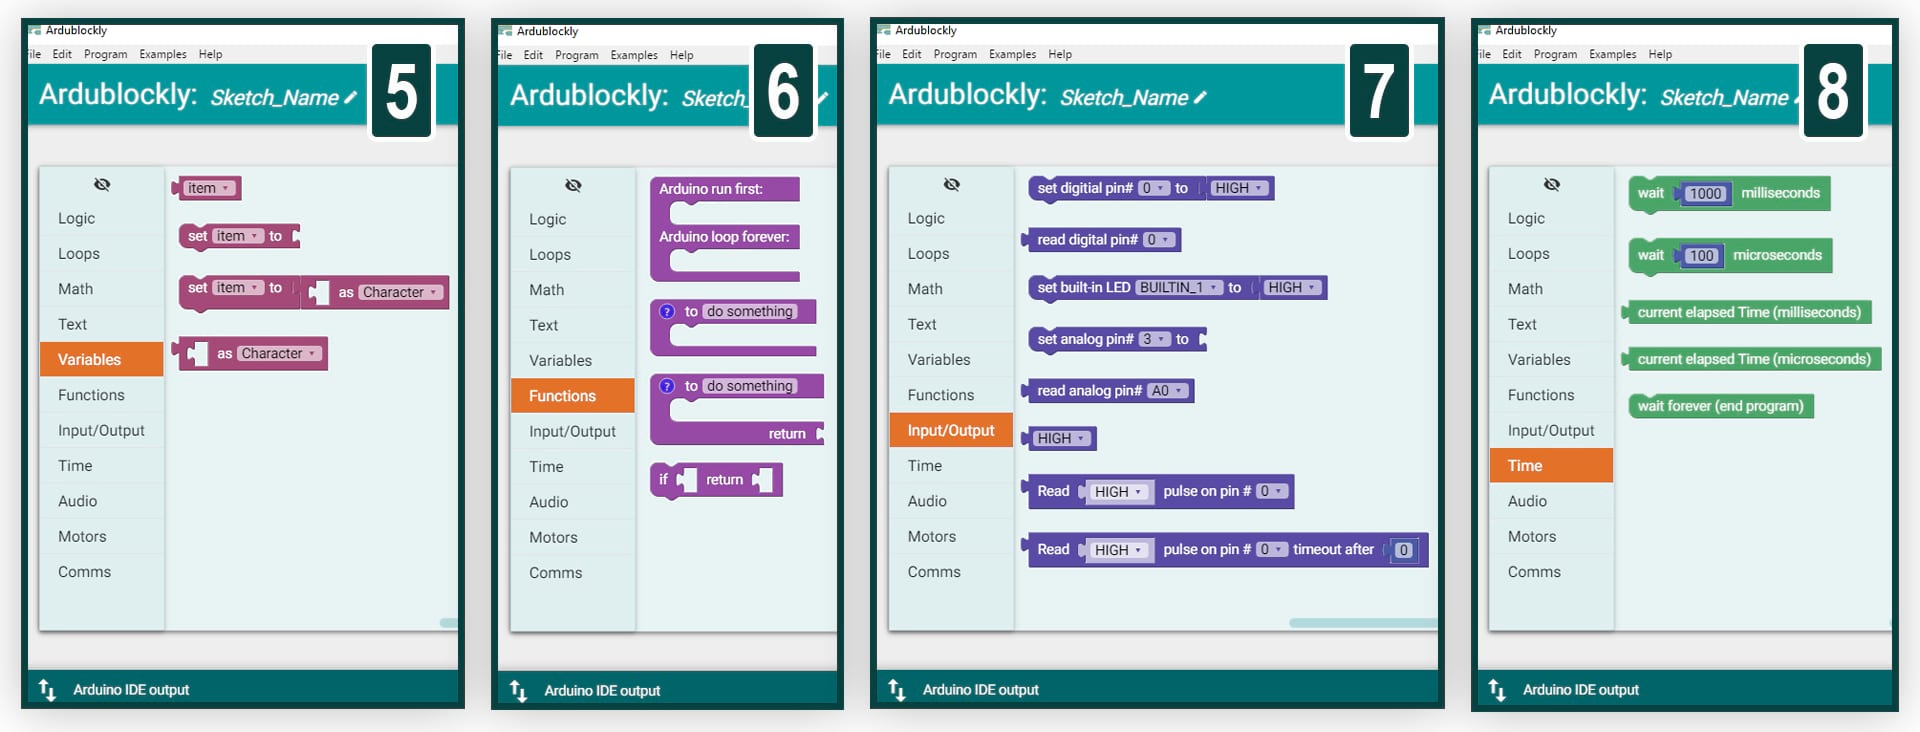
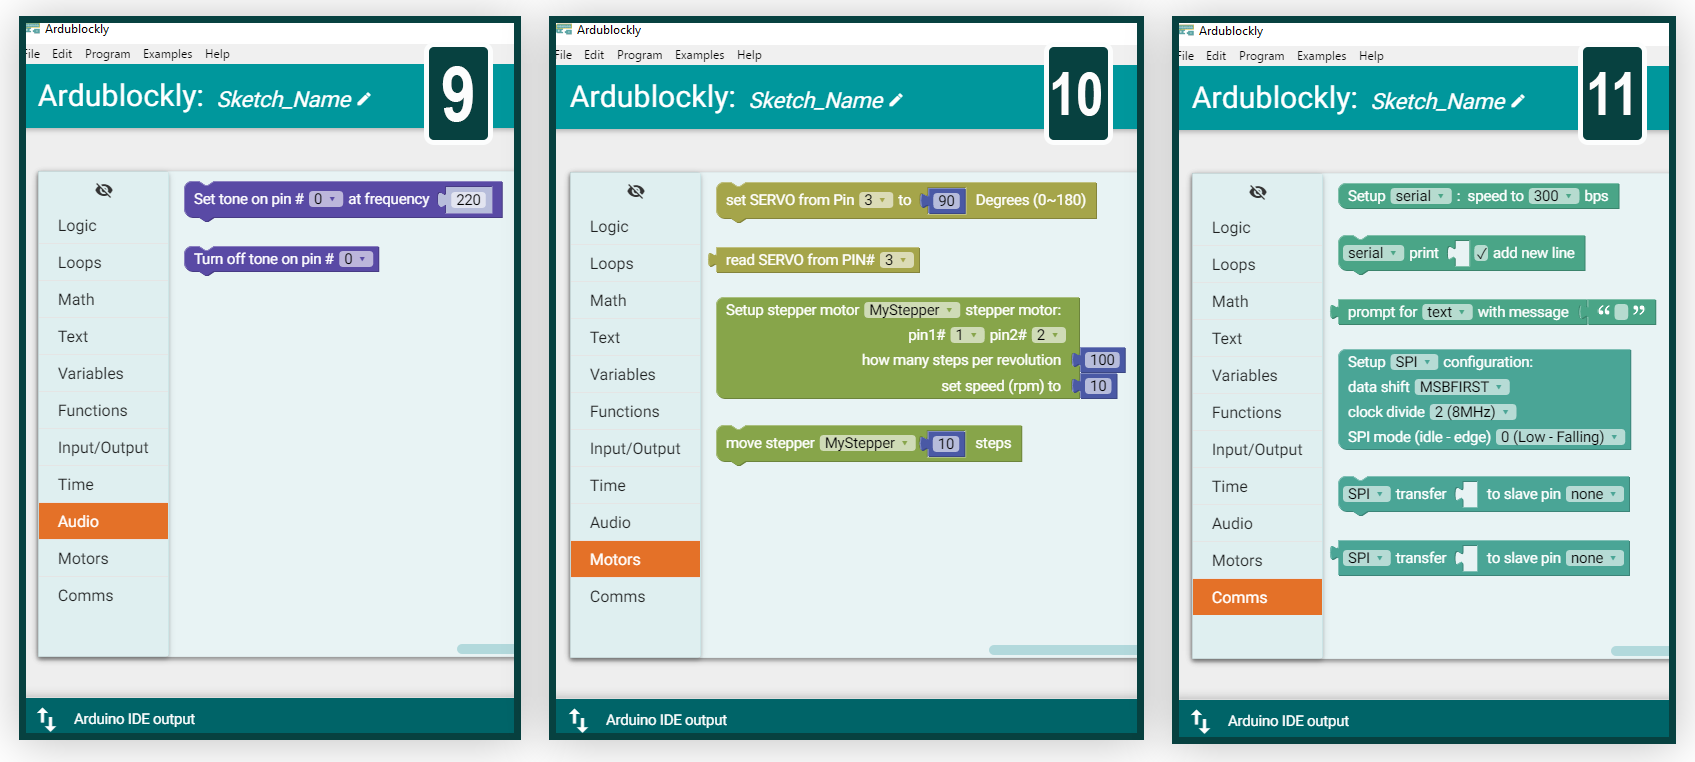
The program contains many blocks for most programming and simplified skills between operations, logic, math, input, output etc as shown in the above images.
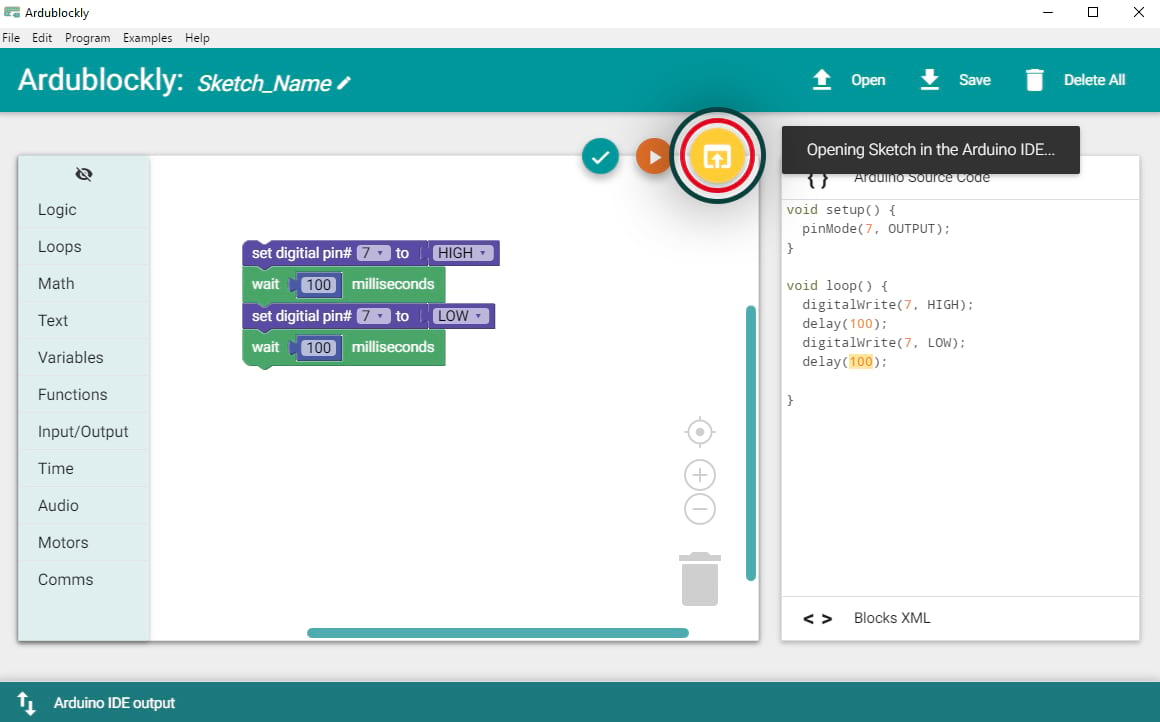
I started building the code through Blocks for Hello World programming as I did using the Arduino. Then I clicked the download button, which in turn opened the Arduino and reviewed the code that I have built and then uploaded to the board
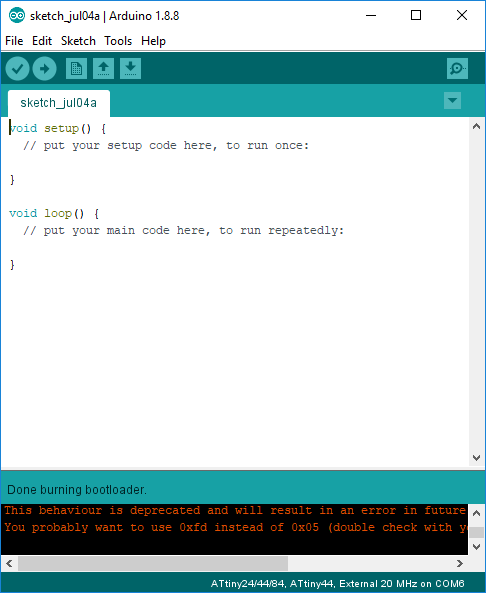
Another way by using C language to program the Hello World
First of all burn the bootloader so the delay will work very well
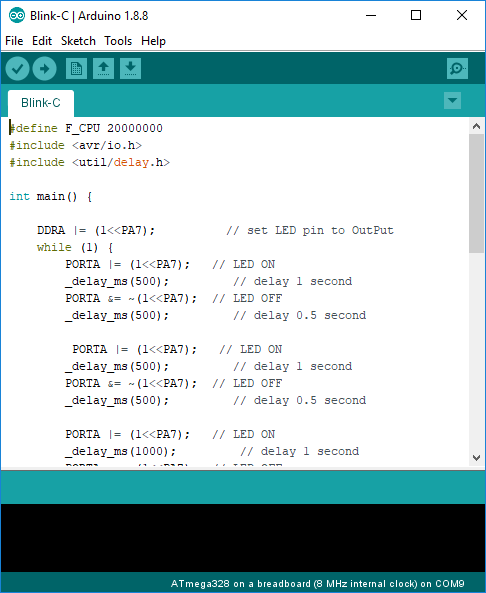
the simple code of C language
result of multi blinking of ELD
Using Notepad++ with C Language
"Notepad++ is a free (as in "free speech" and also as in "free beer") source code editor and Notepad replacement that supports several languages. Running in the MS Windows environment, its use is governed by GPL License."
"Based on the powerful editing component Scintilla, Notepad++ is written in C++ and uses pure Win32 API and STL which ensures a higher execution speed and smaller program size. By optimizing as many routines as possible without losing user friendliness, Notepad++ is trying to reduce the world carbon dioxide emissions. When using less CPU power, the PC can throttle down and reduce power consumption, resulting in a greener environment." Resource

I rewrite the code agin on the notepad++
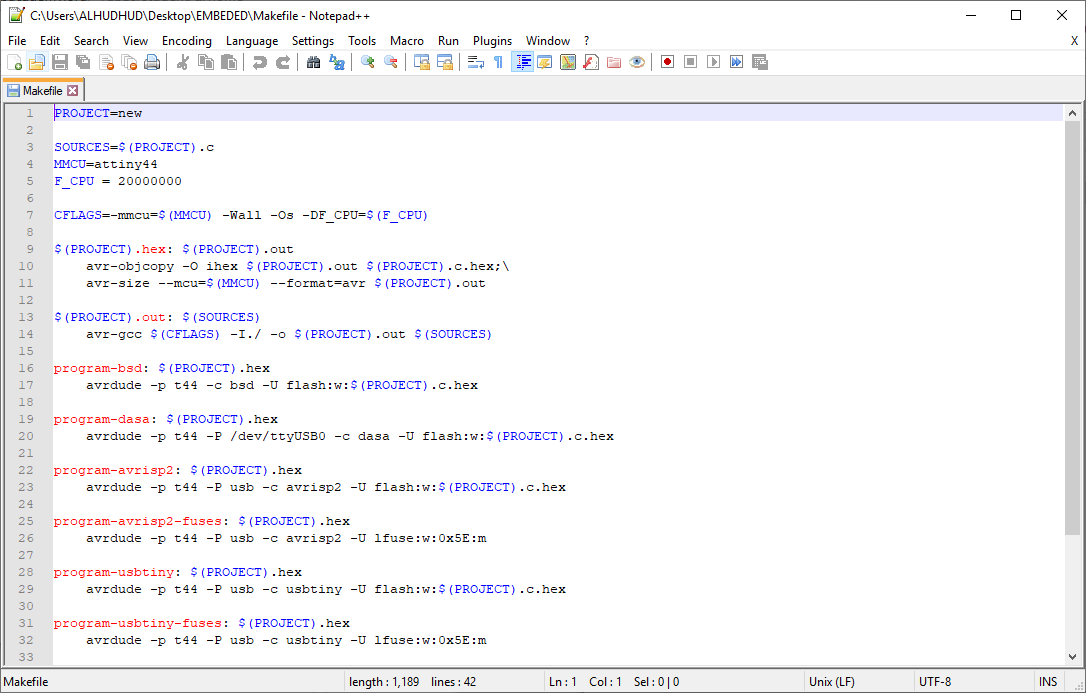
I used makefile to program my board using arduino as ISP. on the make file I changed com port to be as the one checked in the arduino
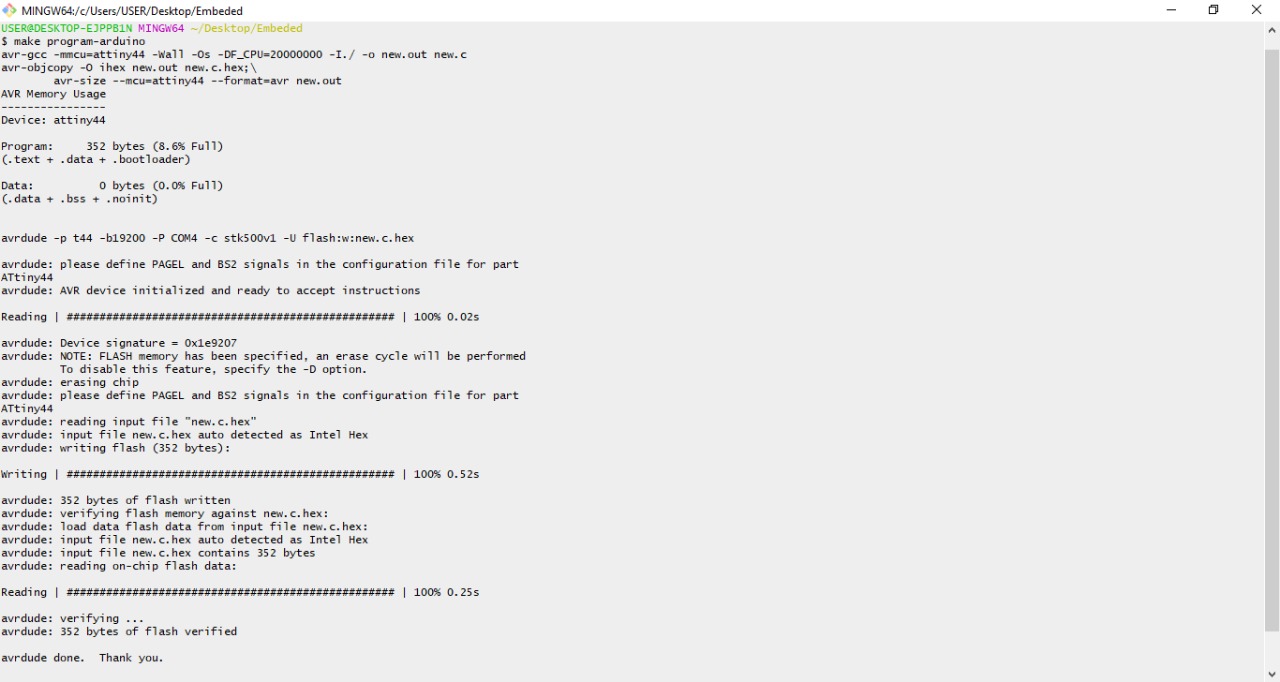
then in git bash I wrote down "make program-arduion" to upload the code
To download file
new file (C) and makefile: Click Here!