2 - Computer-aided Design
Model something in 2D an 3D
The assignment for this week was to try the most softwares we can design in 2D or 3D. Also, we did some classes here in the FabLabBCN with our tutors about Vector vs Raster images, Fusion 360, Rinoh and Grasshopper, Blender and Openscad. They were all very interesting, you have to try as many as softwares as possible, but it is difficult to learn how to manage all of them in only one week, so I tried a few ones, but I want to learn much more in other ones.
2D Design - Inkscape
I started with the 2D design softwares. In this case I decided to go for Inkscape as it's Open Source, and because I find vector designs much more useful for digital fabrication as it gives you the exact path for the machine. You can download it from this website.
Learning it was easy at the beginning using YouTube tutorials, it is full of videos showing the basic tools, how to work on it and where to find everything. But after using it with some draft I realized it is not that easy, but with some practice it turns a very good option for 2D drawing and design.
 What I wanted to design this week was a logo for my website as I was using the one from the HTML template and I wanted to be a more personal logo. The first thing I tried was to design a little logo with my initials on it, so I decided to use Bezier lines and a polygon to make it. I drew the letters by hand because I didn't want to use an existing font, but the result was not what I expected, I think it's better for me to work with numbers than drawing... After some attempts, I realized it was not the best way and I didn't want to lose my time, so I change my mind about the logo.
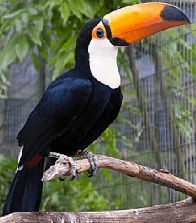
After my failed attempt I decided to design a Tucan made of a mesh of triangles and color it. Maybe you are asking why a Tucan? I don't know it either, but I love animals and it was the first thing that comes to my mind in that moment, so why not? During that process I learned the most important rule, always work with layers! The process was easy but as long as it can be difficult to join all the lines because Inkscape doesn't let you join 3 lines in one node so you have to do it by hand. The first thing I did was getting an image from the internet to get a model an import it to Inkscape. Then, in a new layer, I draw all the triangle's lines by line to get a polygon Tucan. Finally, with some color and the final adjustments I get the final design.

3D Design - Fusion 360
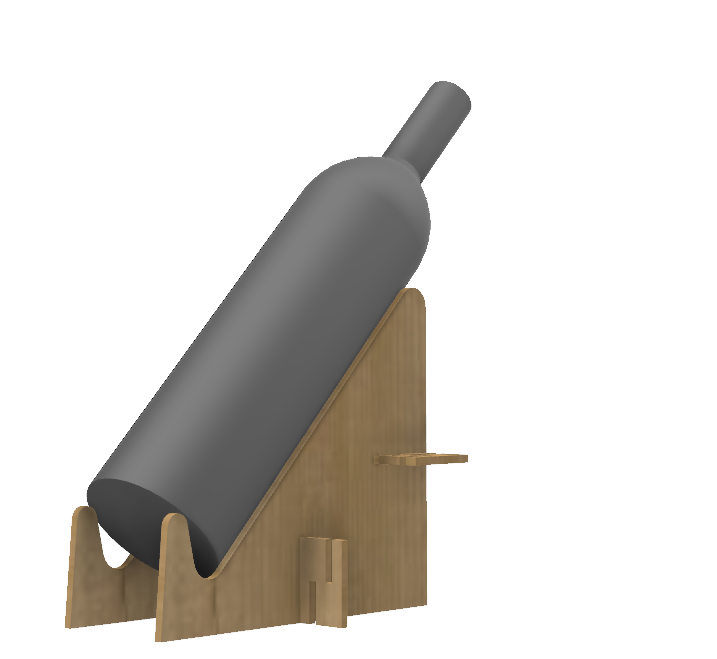
After designing my logo the next step was to design something in 3D. I come from a winery family and my uncle asked me if I can make something for him to hold the bottles in a 45º position to show better the bottle in fairs and congresses. The first idea was to create 2 wood holders that can be cut by laser and a nerve that fix the distance between them to use it for different bottle sizes. Once the initial ideas were defined, I decided to go with Fusion 360 to create the geometry.
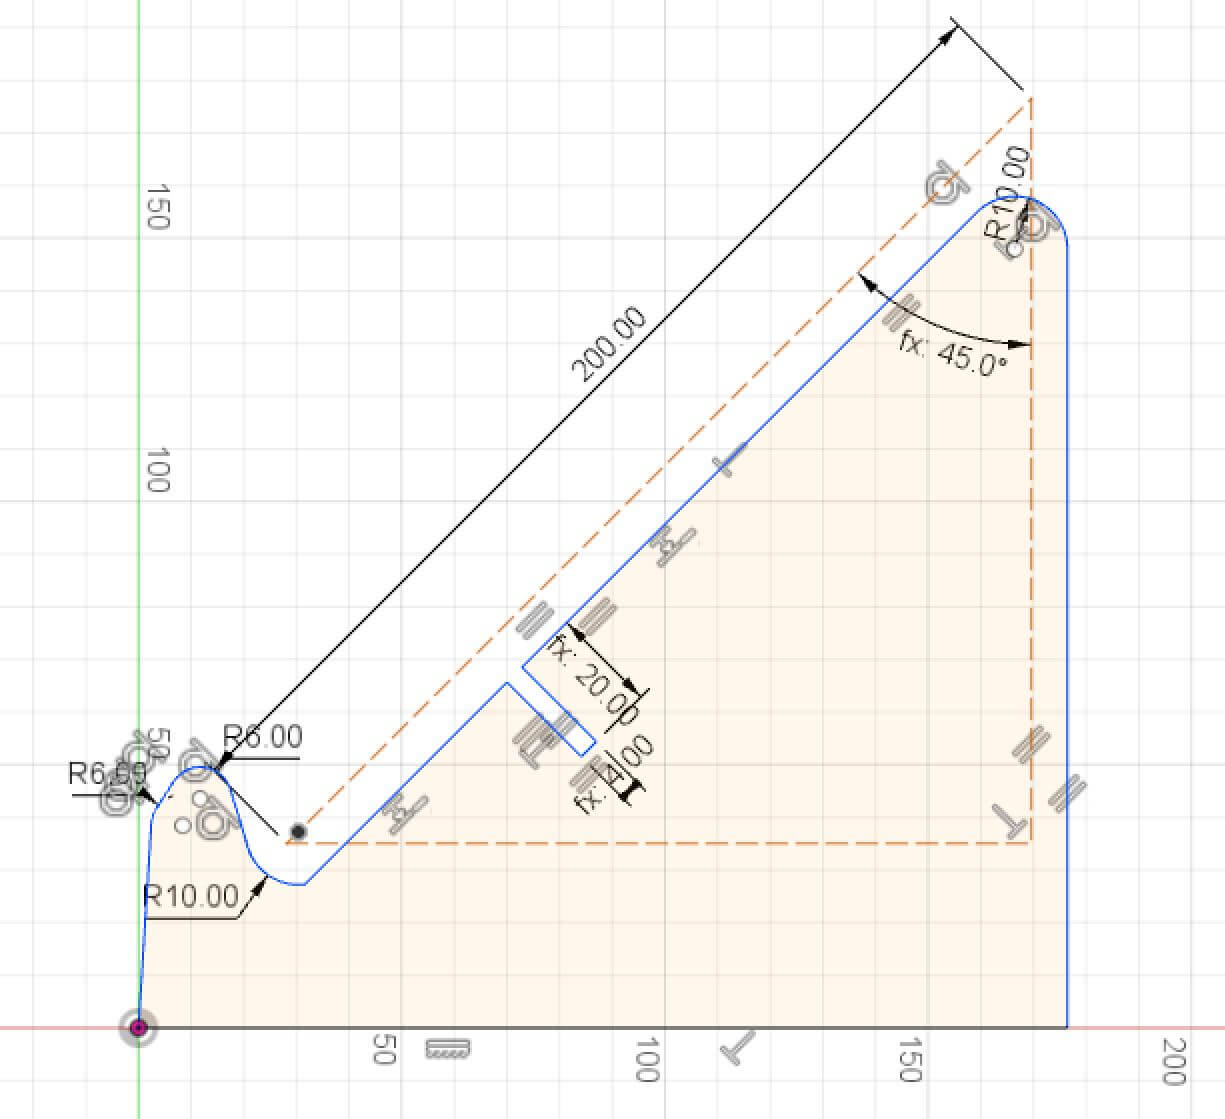
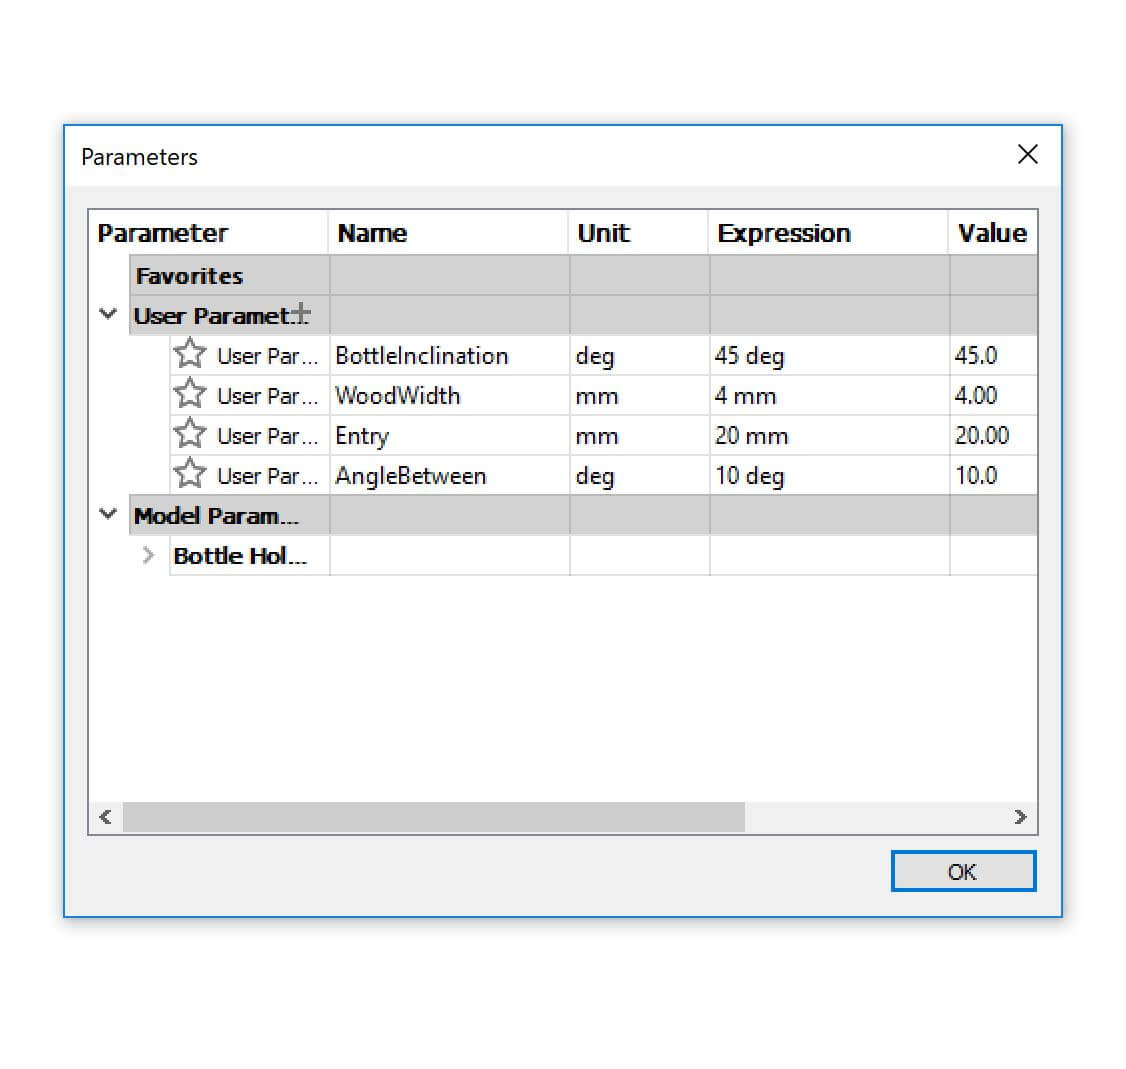
I was used to use SolidWorks, so I change to Fusion 360 to lear about new softwares. They are pretty similar, but maybe fusion is a little bit easier and more clear, so I totally recommend it to anyone, not only for the CAD designer but also for all the other amazing features it has. The first thing to create in Fusion 360 is a sketch. I sketched the geometry of my holder in the right pane and then extrude it and duplicate it. The requirements were that the bottle must be 45º and it needs some support at the end to hold correctly the bottle. Because I didn't have the exact specifications of the bottles I decided to do a parametric design, where I define some variables that can now be easily changed to get a new design. Those variables where the Wood Widht, the Bottle Inclination Angle, the Lenght of the bottle in contact with the support and the dimension of the join between the holders and the pice that fix them together called Entry.
With the first sketch done, the next step was to extrude it. I extrude it using the Wood Width dimension to automatically change it depending on the parameter dimension. After extracting it, I cloned the body to make the second spot.
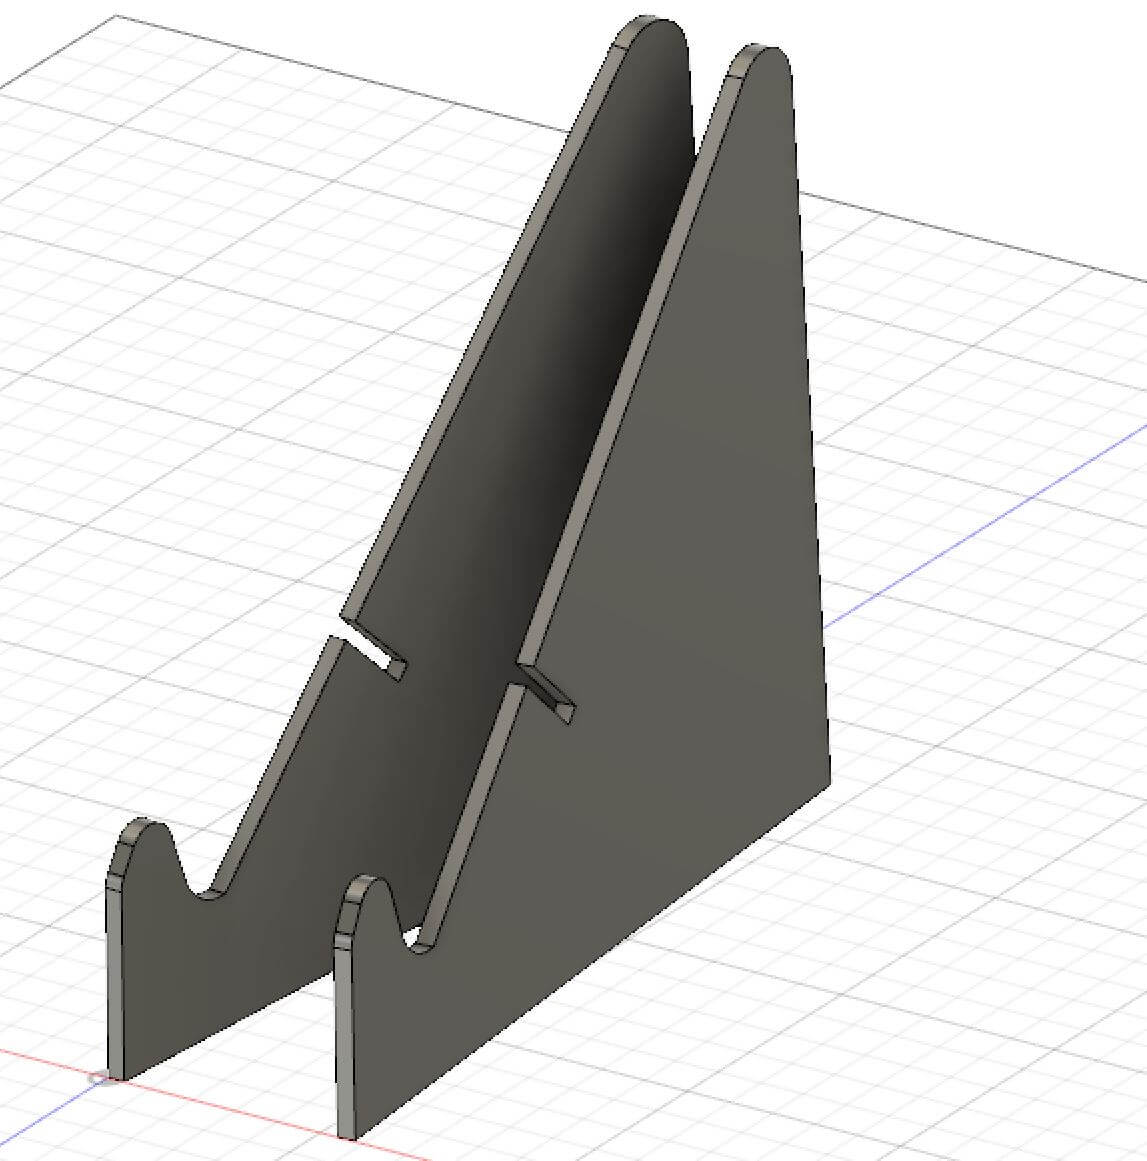
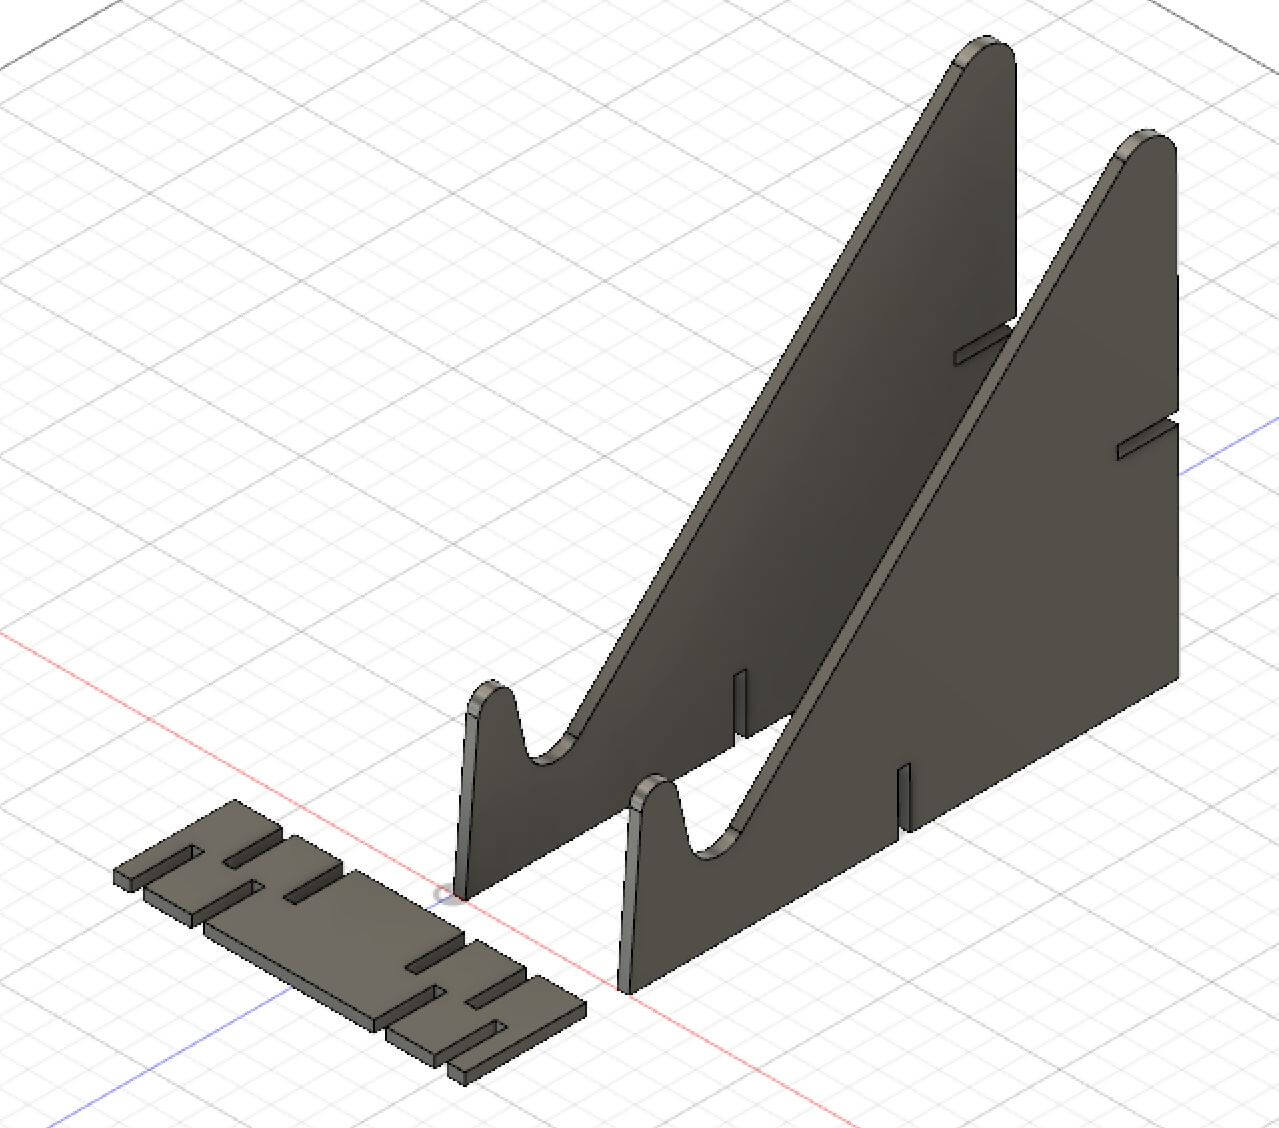
Here were when the problems came. My idea was to have an angle between the supports, but then I realized that if it was like this I could not fix them both with a single flatten the piece because the two guns were not in the same plane. After thinking in different solutions I went for the easy one, fix the supports parallel between them with two pieces, one in the back part and one in the bottom. To do it, I had to go back to sketch and insert the new joins, and create a new component that will join the two supports. Doing more joins in this piece we can control the distance between the supports. To do so, I made gains in the 2 faces of the piece to enforce the piece.
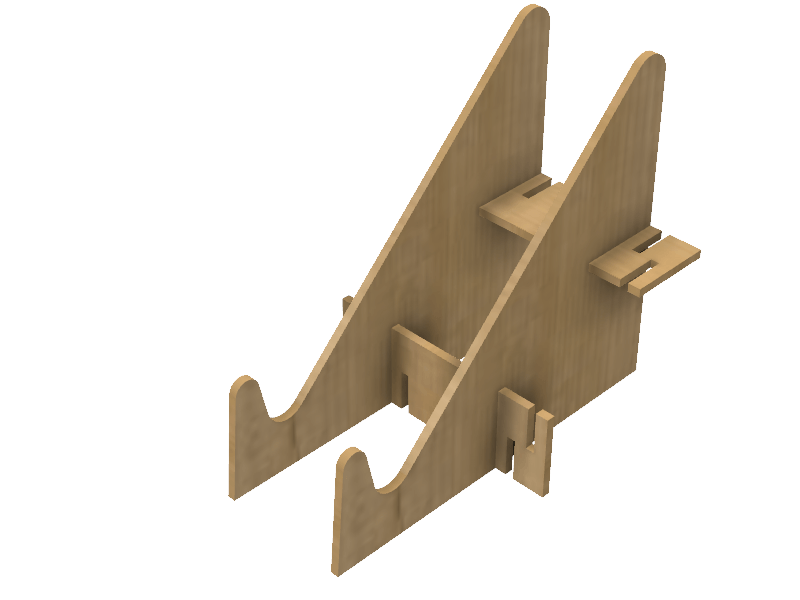
Once the design was finished, I did the assembly of the full product using the Joint function. It was a little bit tricky to do it first, but if you try to position the object where it has to be it works fine. Afterwards, using the Render functions from Fusion 360 I simulate the full design in wood.
3D Design - GrassHopper
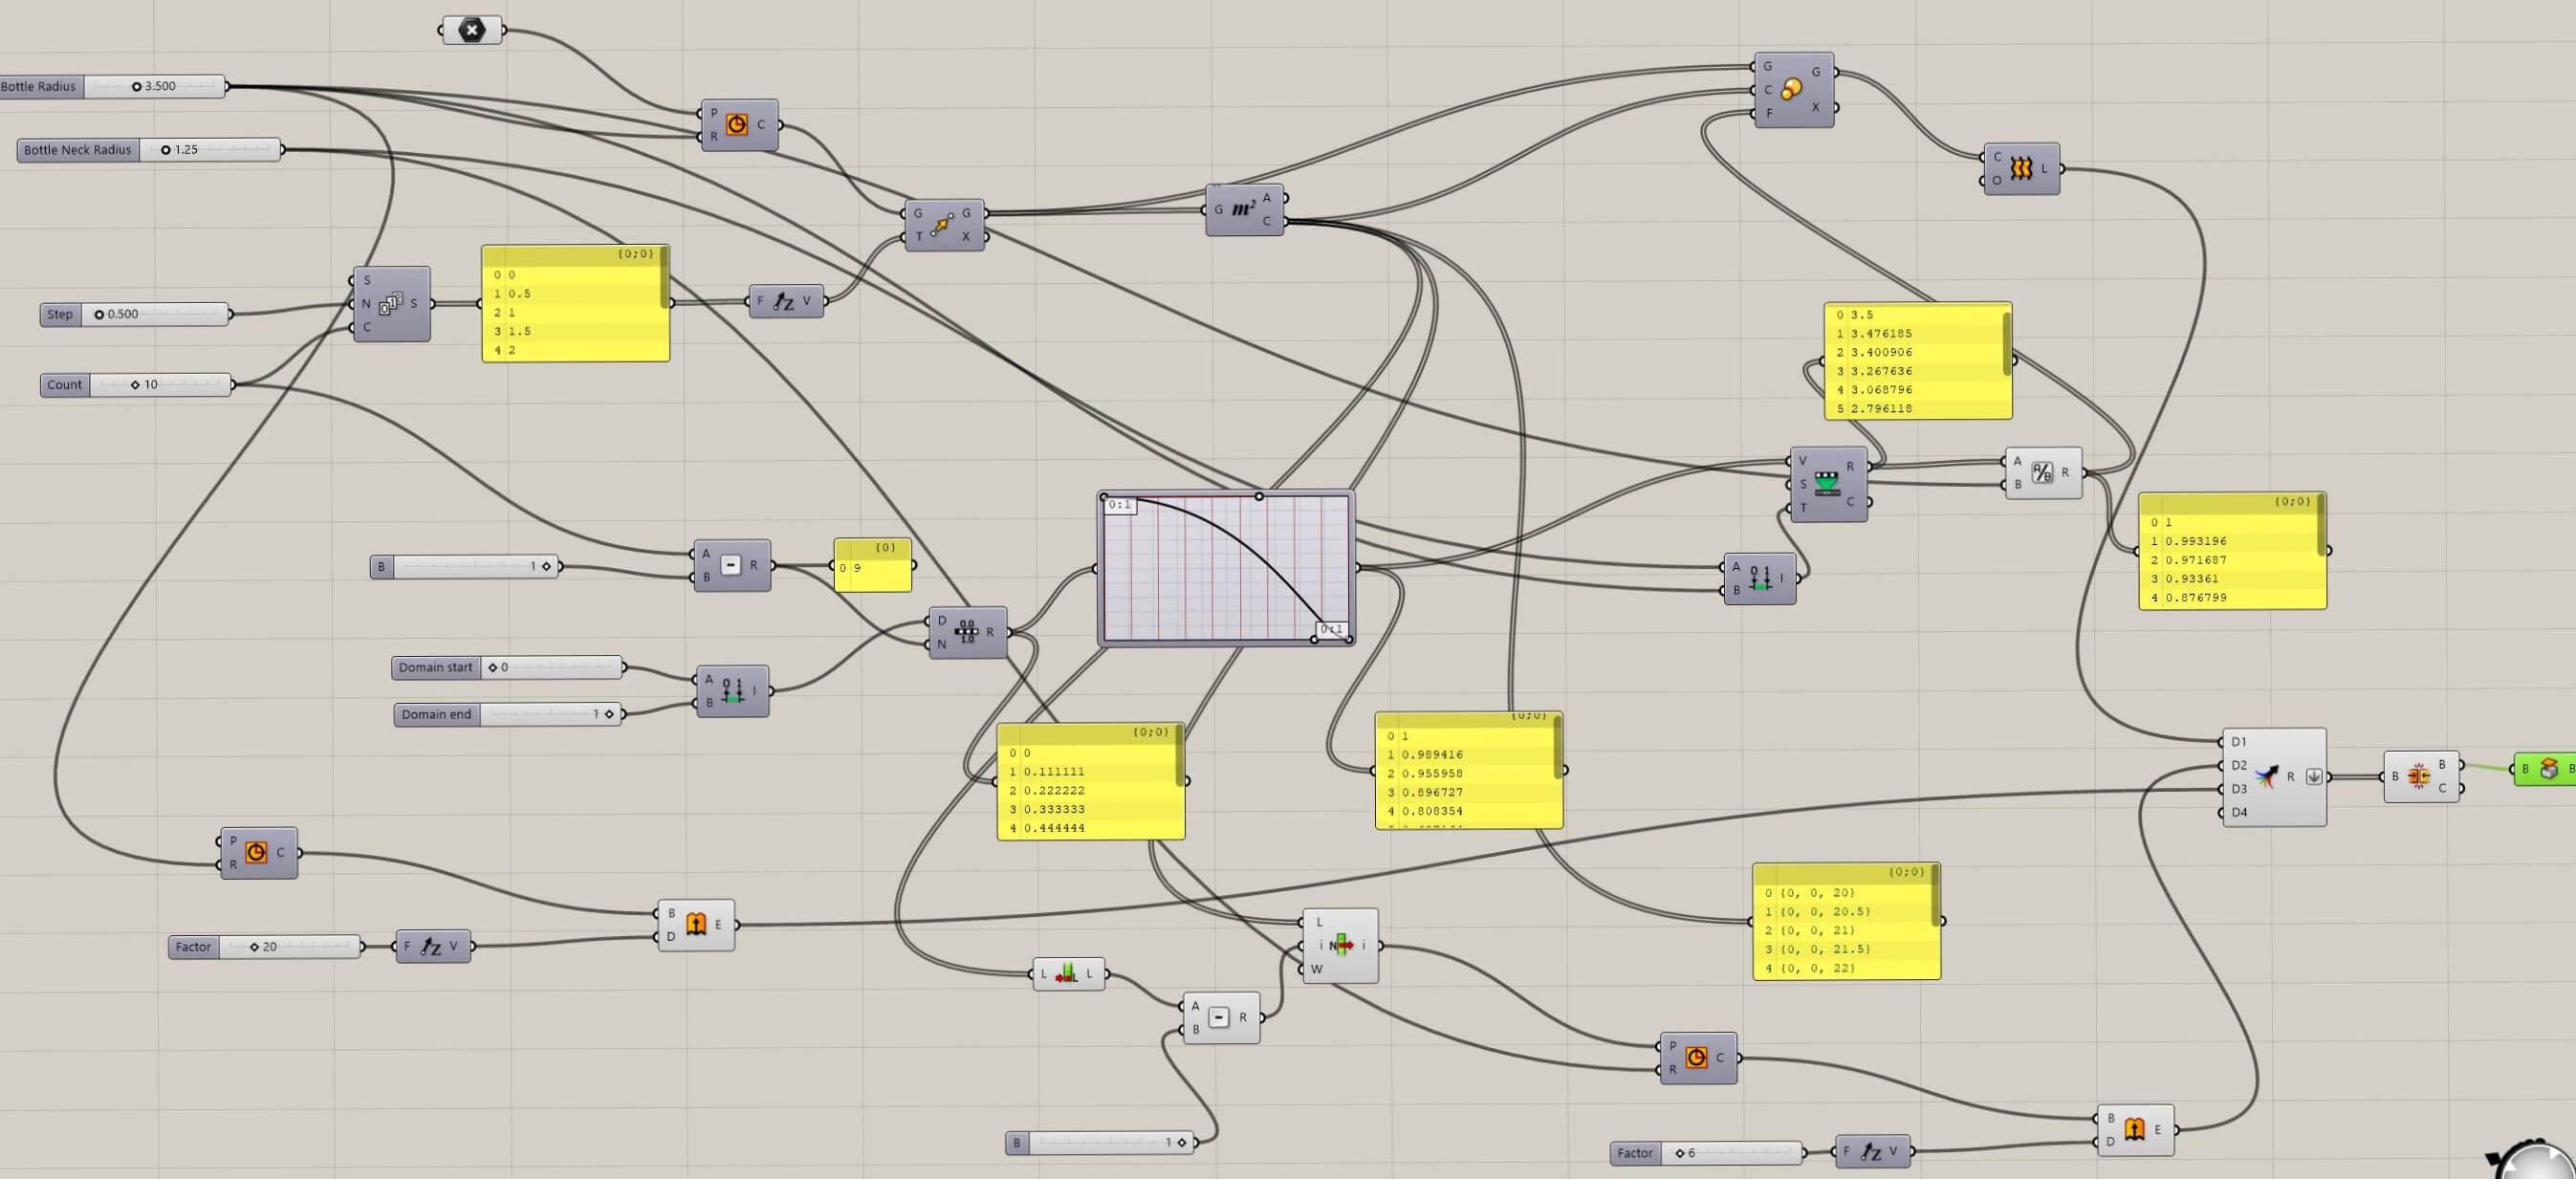
With the design of the supports I decided to model a bottle with Grashopper to lear new softwares and work in a different way. Grasshopper is an extension of Rhino and I did download the trial version, so I have 90 days to design with it. download it from here. Eduardo Chamorro, an instructor from FabLab BCN, gave us a class about Grashopper showing us the workflow and how to create objects, the basic operations and where to find everything. It may seem a complicate program with all the "spaghetti" workflows, but if you get used to it I am sure it is an amazing tool. I didn't have much time, but I manage to get a first design of the bottle after some time investigating and some headaches. You can see here the final flow:
To make the model from Grasshopper to Rhino, you have to use the option Bake 🍳 to create the 3D object:
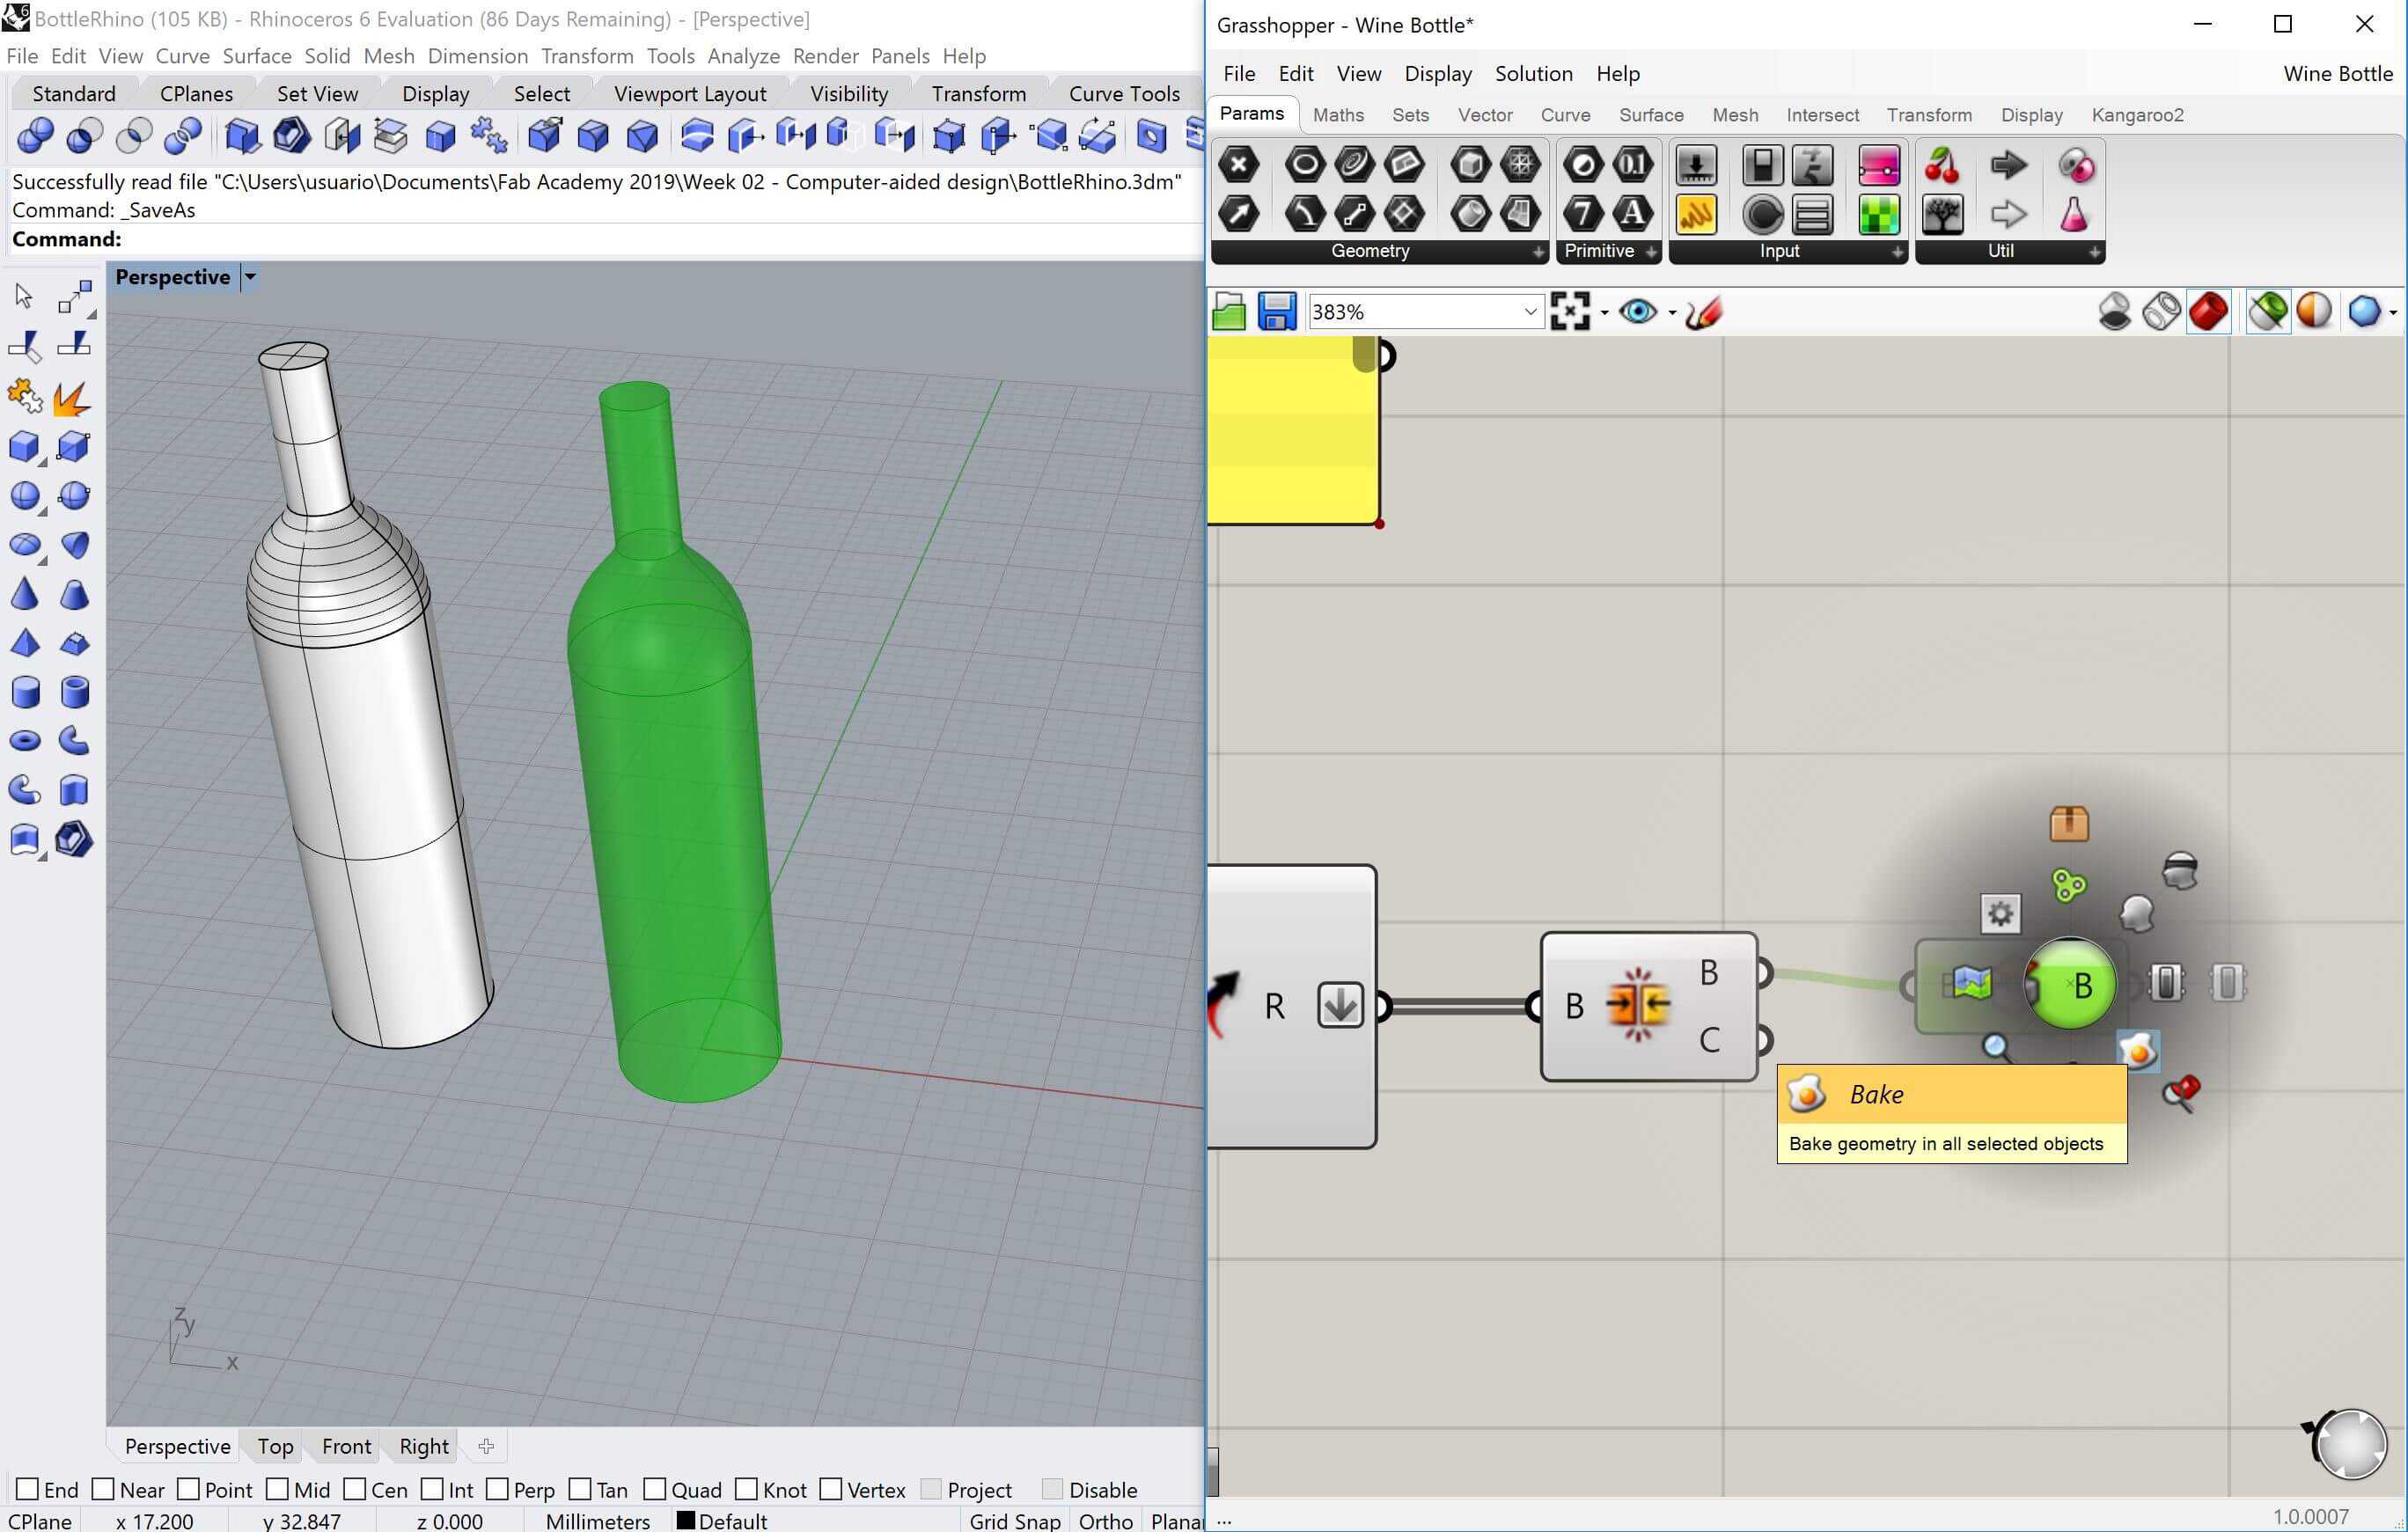
With the final 3D object, I saved as a .3dm file and then imported to Fusion 360 to create the final render with the bottle. Also, I decided to create a little animation with an explosion of the components to see how it works in Fusion 360 an that was the result:
3D - OpenSCAD
Once the bottle holder was finished it was time to play! After a nice class done by Xavi Dominguez, we learned the basics of OpenSCAD , an Open Source design software that, unlike the common programs, all the design is done by writting code. It is a fun software to play with, but it can be really difficult to model complex surfaces. I mainly use cubes, spheres and boolean operations. The best thing of OpenSCAD is that it is really easy to do parametric designs and it is why I decided to model a dice based only in one parameter, the size of the dice side. This is a screenshot of the program where you can see the code editor at the left side, the model in the right side and the console at the bottom.
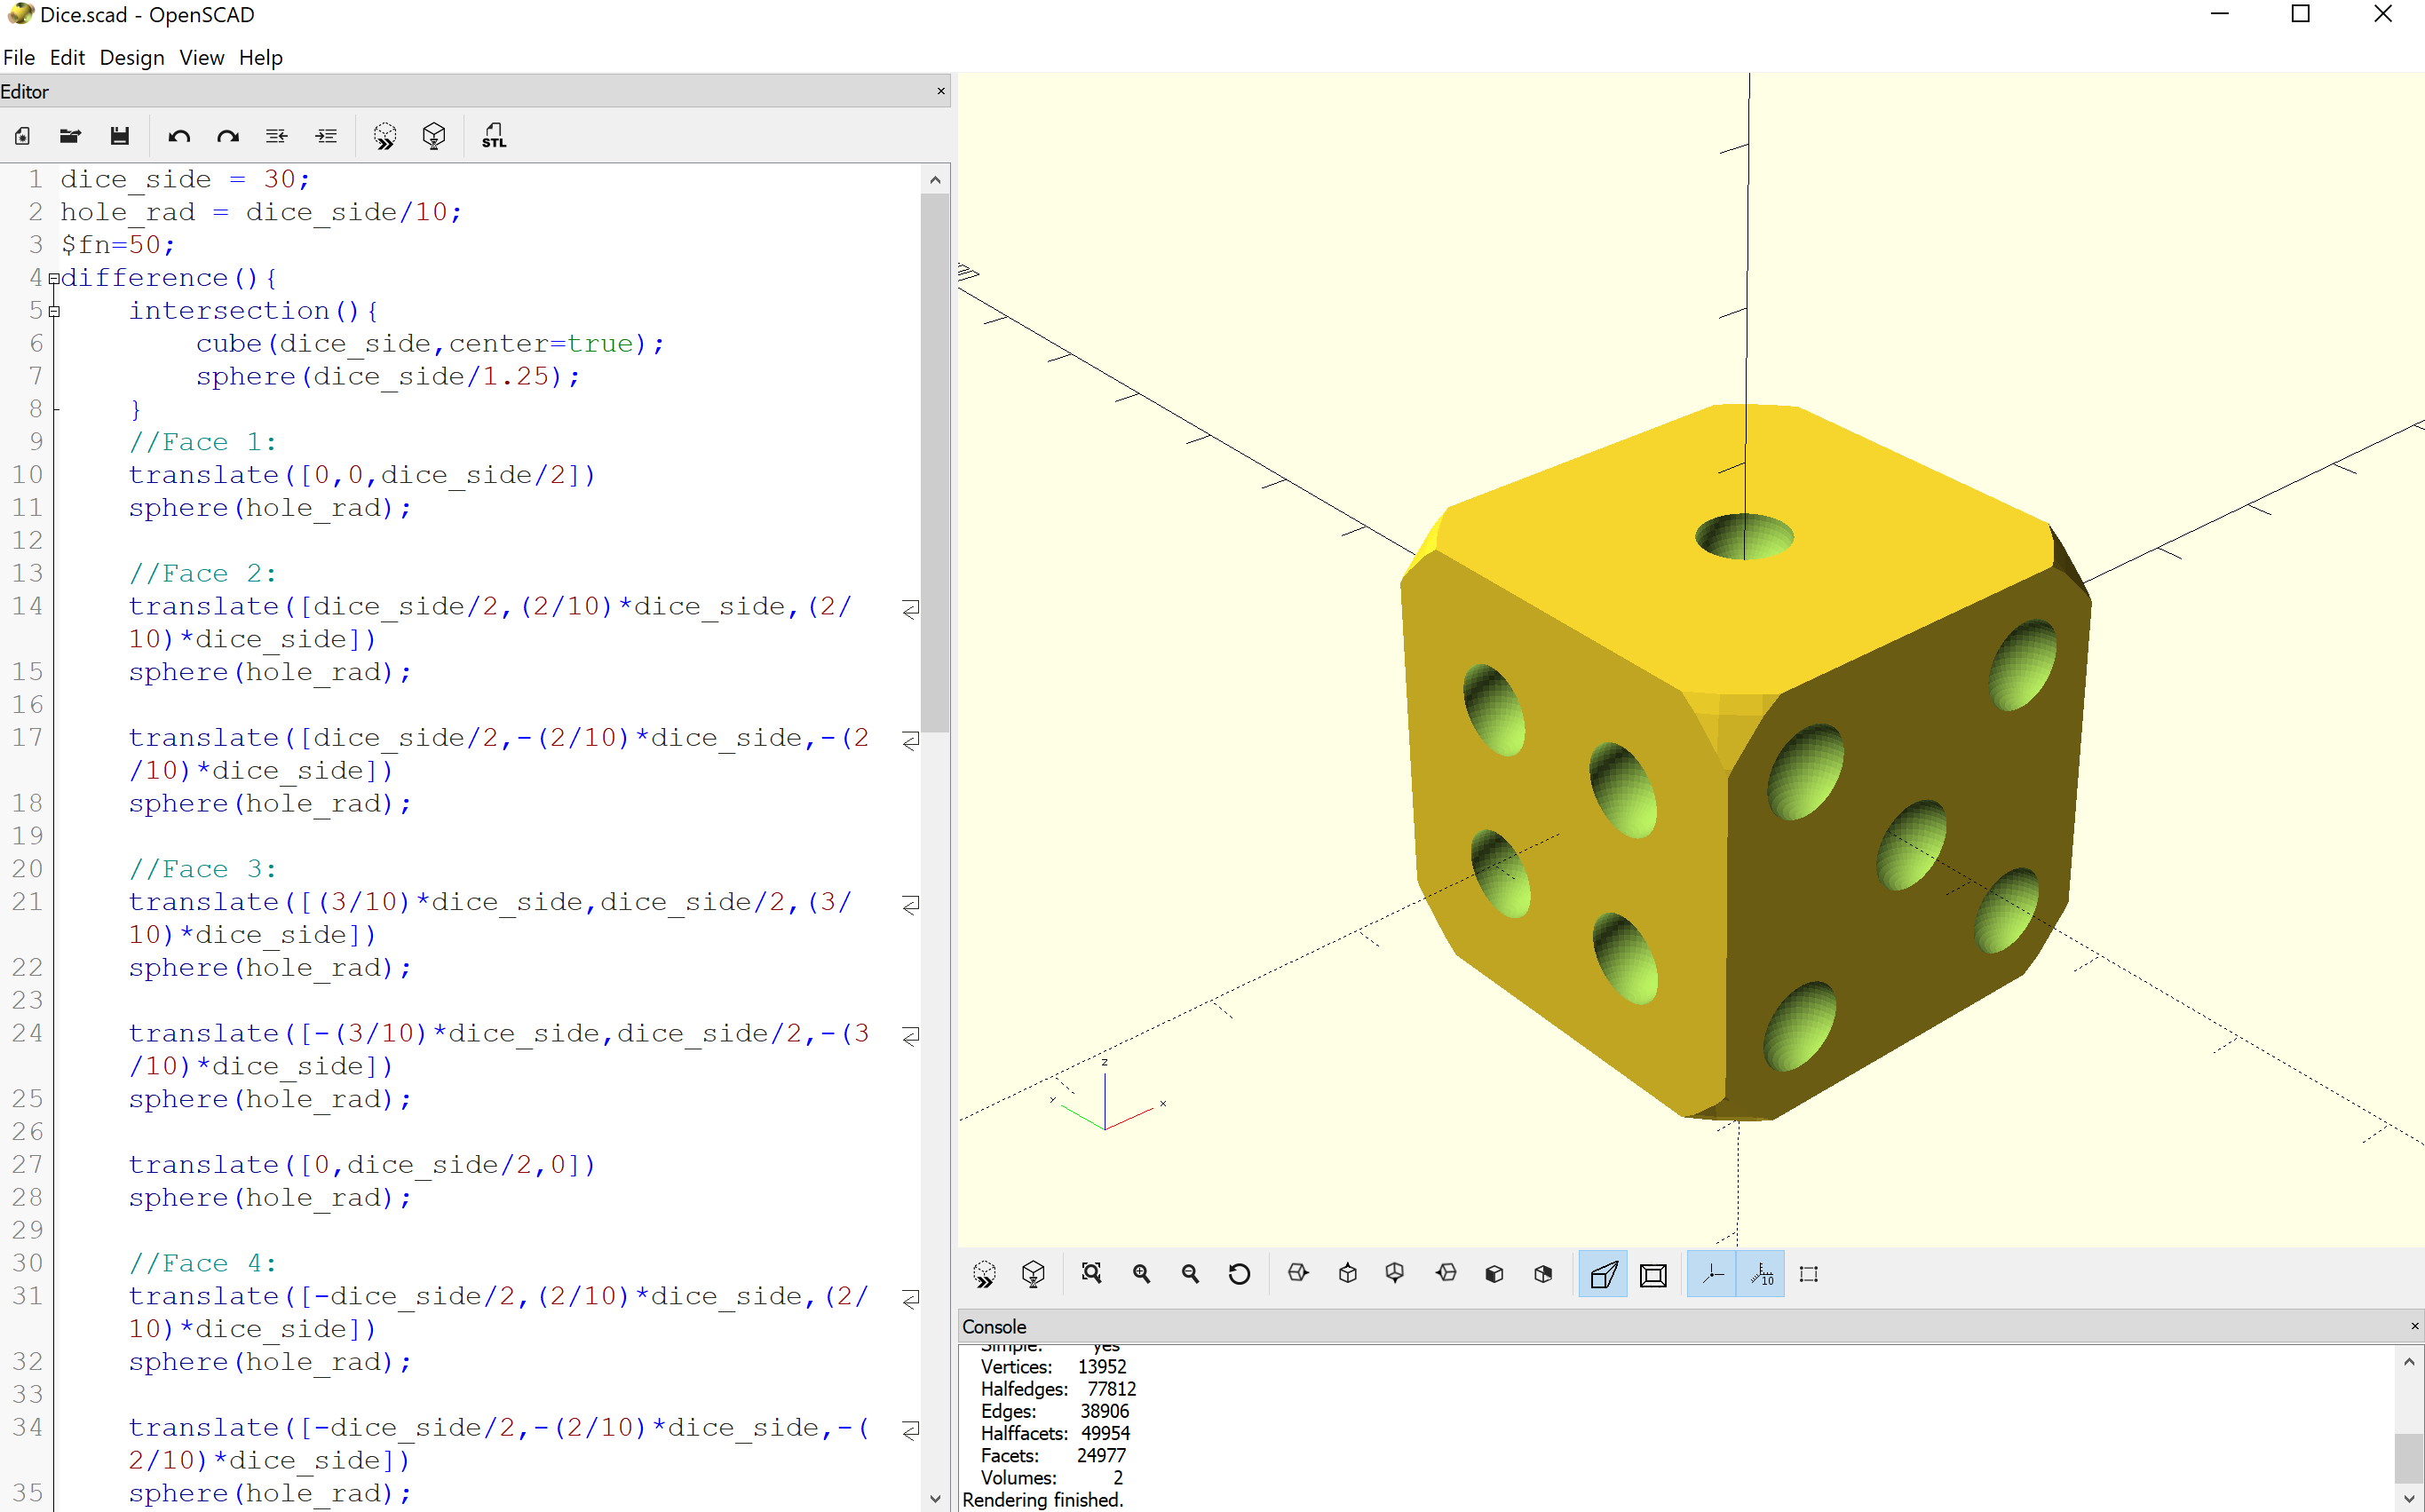
Using OpenSCAD I faced a huge problem, the graphic card on my computer is not powerful enough to show a right preview of the design, so I have to render the result to see how it looks. This doesn't seem a problem, but when the design starts getting bigger with new bodies the render time increases a lot, so it is not easy to work with. My design with a good resolution (using the command $fn=50, they recommend not to use more than 100) it gets around 2 minutes to render the dice. For this reason I discard OpenSCAD for the moment, but I will try more things with it in the future.
3D - Sculptris
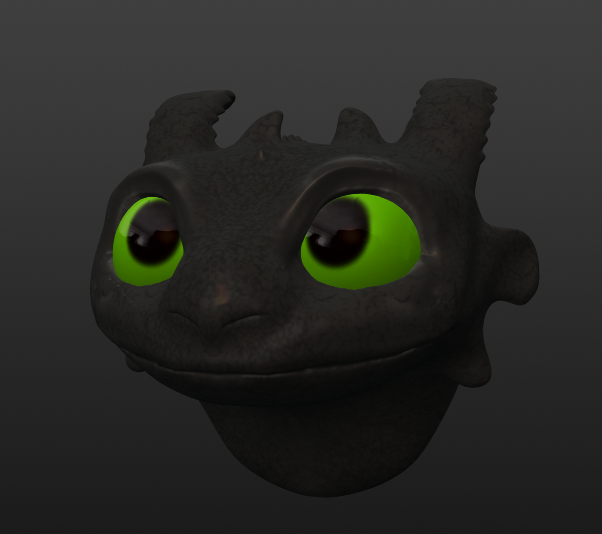
I also wanted to try some sculpting software and looking for an Open Source I find Sculptris. It is a software created by Pixelogic, the same creators as Z-Brush and it allows you to sculpt a clay sphere into whatever you want. I decided to sculpt a 3D head of Toothless, the main character from the film How to train your dragon because it was a cartoon and it seems easy to replicate. It was really fun, I didn't ad time to learn all the features but using the Grab tool you can model almost anything! Also, I used to new spheres for the eyes and that helped me later to paint it.
After finishing the model, the next step was painting and texturizeing it. To do it, I downloaded a customized folder with brushes, find it here. I had a lot of trouble to do it because the program crashes if you import a lot of brushes, so I had to import them one by one, but finally, I only use one. After spending a lot of time in the internet, I fins the command H+LMB to hide an object and with that I finally get to use different materials for the head and the eyes. This was the final result.
Conclusions
This week was intended to be used to test as many softwares as possible. I have definitely tried new software that I didn't know, I explored new forms of design and I have been able to see the differences between the different methods. I finally chose to use Inkscape for 2D design and Fusion360 for 3D, thanks to its versatility and good integration with other software. Also, I would try to use Sculptris to model something for the project. Apart from these programs, I have been left with the desire to learn more about others such as Blender or Unity, but I will try to learn to integrate them later in the project.